

Braun 7-760 User Manual
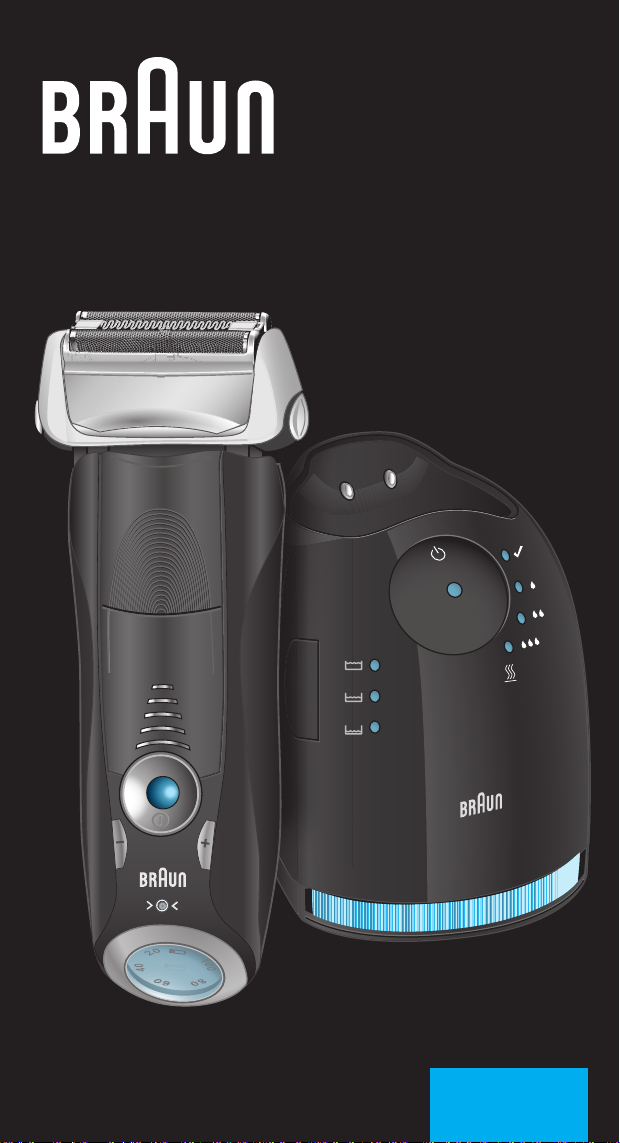
Series 7
Stapled booklet, 110x200 mm, 102 p (incl. 6 p cover), 2/2c = black + HKS43N
Series 7 Series 7
Series 7
trimmer
trimmer
trimmer
Type 5693
www.braun.com
760 cc-4
Braun Infolines
English 4
Français 11
Polski 19
âesk˘ 28
Slovensk˘ 36
Magyar 44
Hrvatski 52
Slovenski 59
Türkçe 66
кЫТТНЛИ 73
ì͇ªÌҸ͇ 83
101
UK 0800 783 7010
IE 1 800 509 448
FR 0 800 944 802
BE 0 800 14 592
PL 801 127 286
801 1 BRAUN
CZ 221 804 335
SK 02/5710 1135
HU (06-1) 451-1256
HR 01/6690 330
SI 080 2822
TR 0 800 261 63 65
RU 8 800 200 20 20
UA + 38 044 428 65 05
HK 852-25249377
(Audio Supplies Company Ltd.)
Braun GmbH
Frankfurter Straße 145
61476 Kronberg/Germany
www.braun.com
92058655/IX-11
UK/FR/PL/CZ/SK/HU/HR/SL/TR/
RU/UA/Arab
www.service.braun.com
Series 7
3
t
r
imme
r
t
r
i
mme
r
t
r
i
m
m
e
r
Ser
i
e
s
7
Se
r
i
e
s
7
S
e
r
i
e
s 7
4
Series 7
Series 7
8
9
10
5
11
2
1
6
trimmer
trimmer
trimmer
trimmer
trimmer
trimmer
on
on
ff
o
off
12
13
14
15
7
16
17
20
18
19

English
STOP
Our products are designed to meet the highest
standards of quality, functionality and design.
We hope you enjoy your new Braun Shaver.
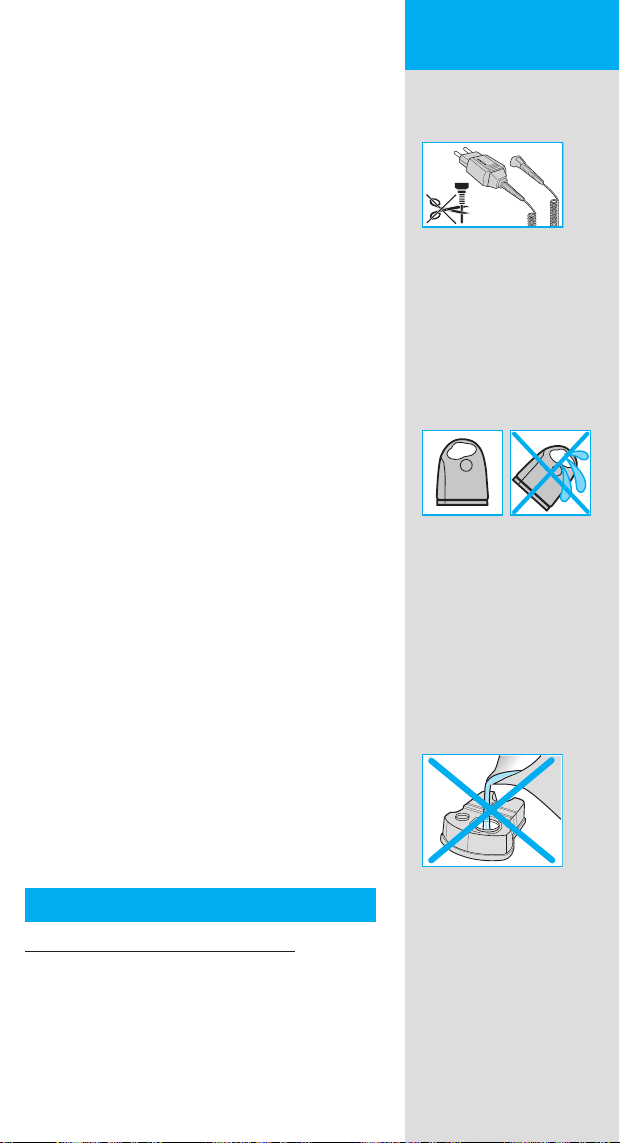
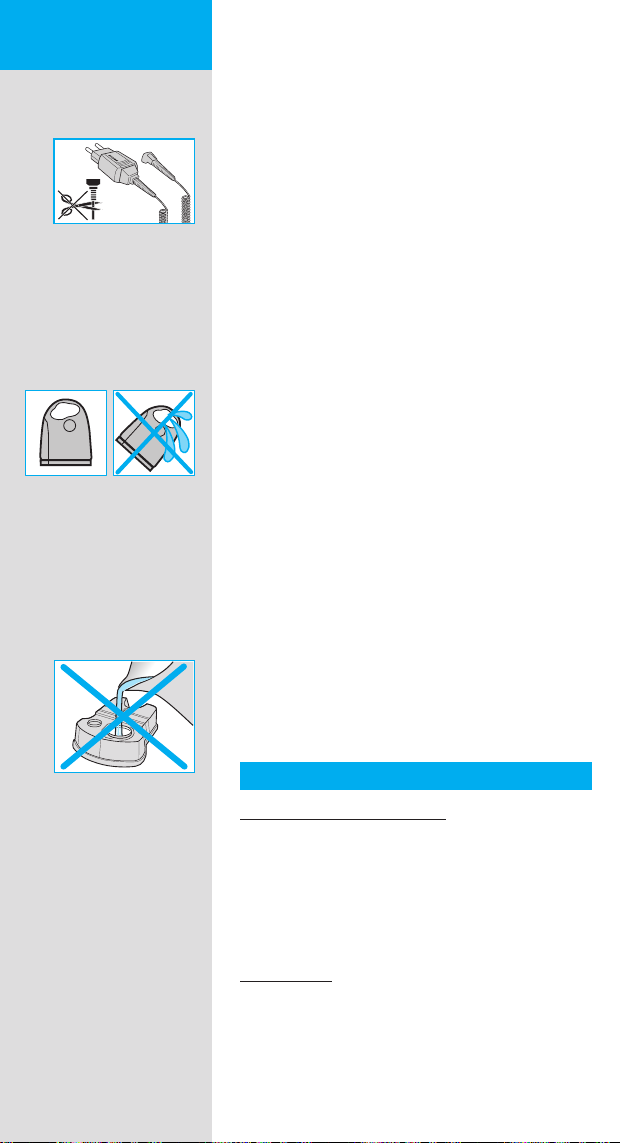
Warning
Your shaving system is provided with a special
cord set, which has an integrated Safety Extra
Low Voltage power supply. Do not exchange or
tamper with any part of it, otherwise there is risk
of an electric shock.
This appliance is not intended for use by children
or persons with reduced physical, sensory or
mental capabilities, unless they are supervised
by a person responsible for their safety. In
general, we recommend that you keep the
appliance out of reach of children. Children
should be supervised to ensure that they do not
play with the appliance.
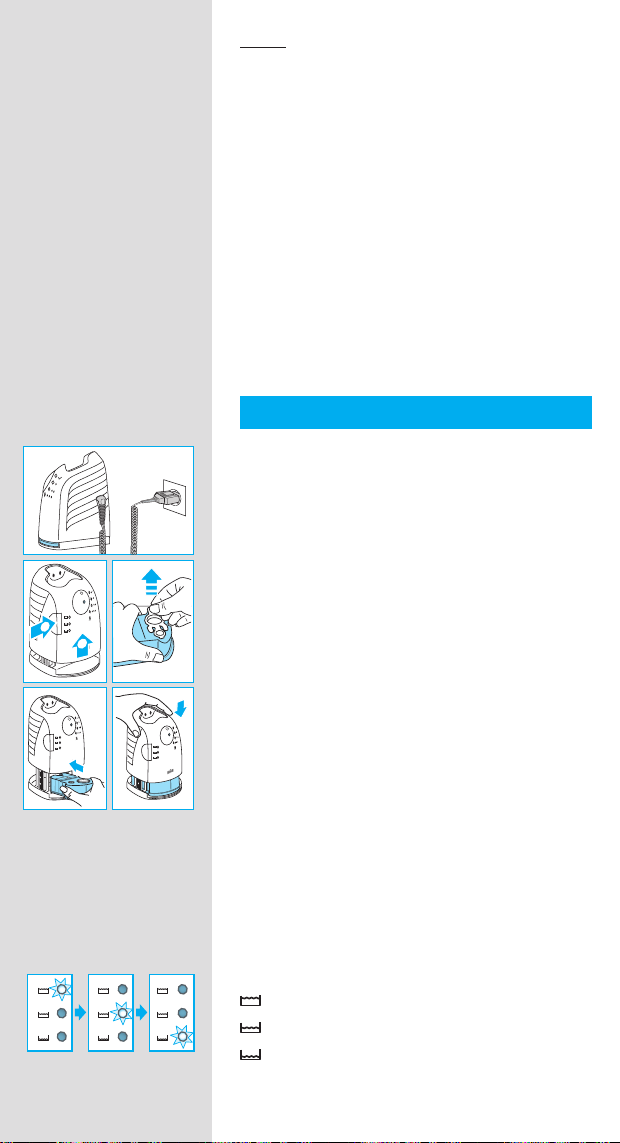
To prevent the cleaning fl uid from leaking, ensure
that the Clean&Renew station is placed on a fl at
surface. When a cleaning cartridge is installed,
do not tip, move suddenly or transport the
station in any way as cleaning fl uid might spill
out of the cartridge. Do not place the station
inside a mirror cabinet, nor over a radiator, nor
place it on a polished or lacquered surface.
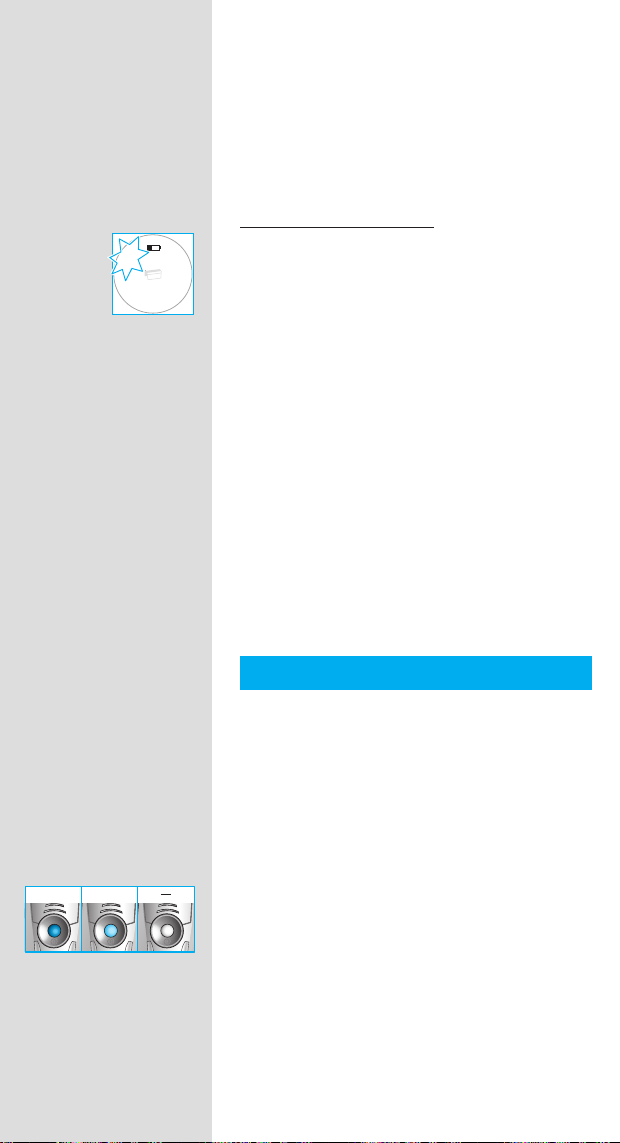
The cleaning cartridge contains a highly
fl ammable liquid so keep it away from sources of
ignition. Do not smoke near the station. Do not
expose to direct sunlight for long periods of time.
Do not refi ll the cartridge and use only original
Braun refi ll cartridges.
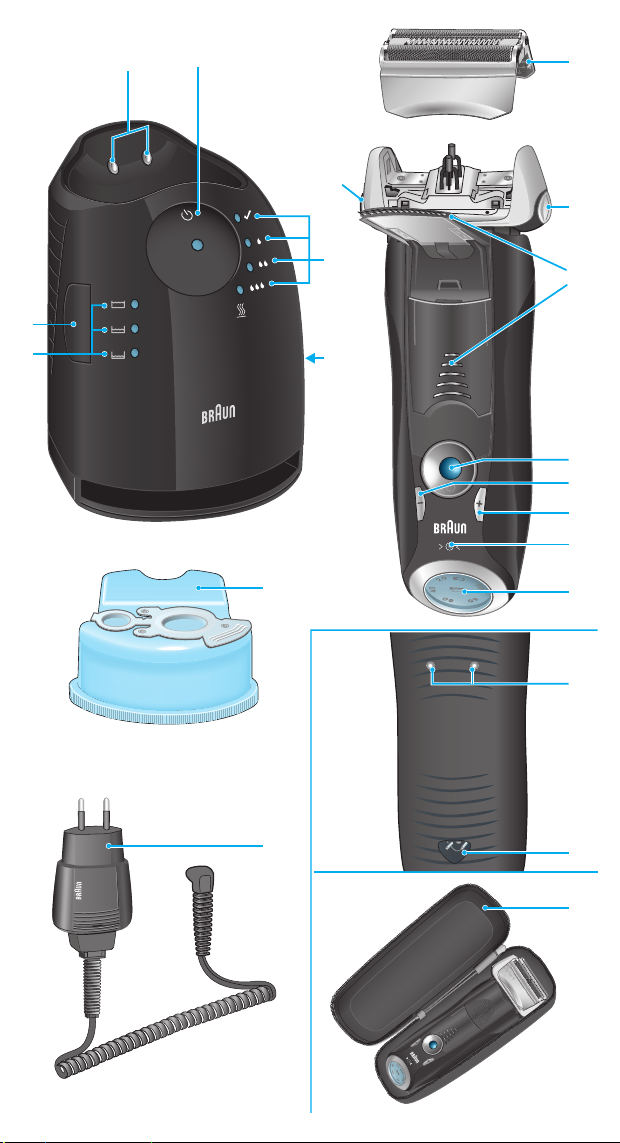
Description
Clean&Renew station
1 Cleaning fl uid display
2 Lift button for cartridge exchange
3 Station-to-shaver contacts
4 Start button
5 Cleaning program indicators
6 Station power socket
7 Cleaning cartridge
Shaver
8 Foil & Cutter cassette
9 Cassette «release» button
0 Shaver head «lock» switch
q Pop-out long hair trimmer
4
w On/off switch
trim
mer
e (–) setting button (sensitive)
r (+) setting button (intensive)
t Reset button
z Shaver display
u Shaver-to-station contacts
i Shaver power socket
o Travel case
p Special cord set
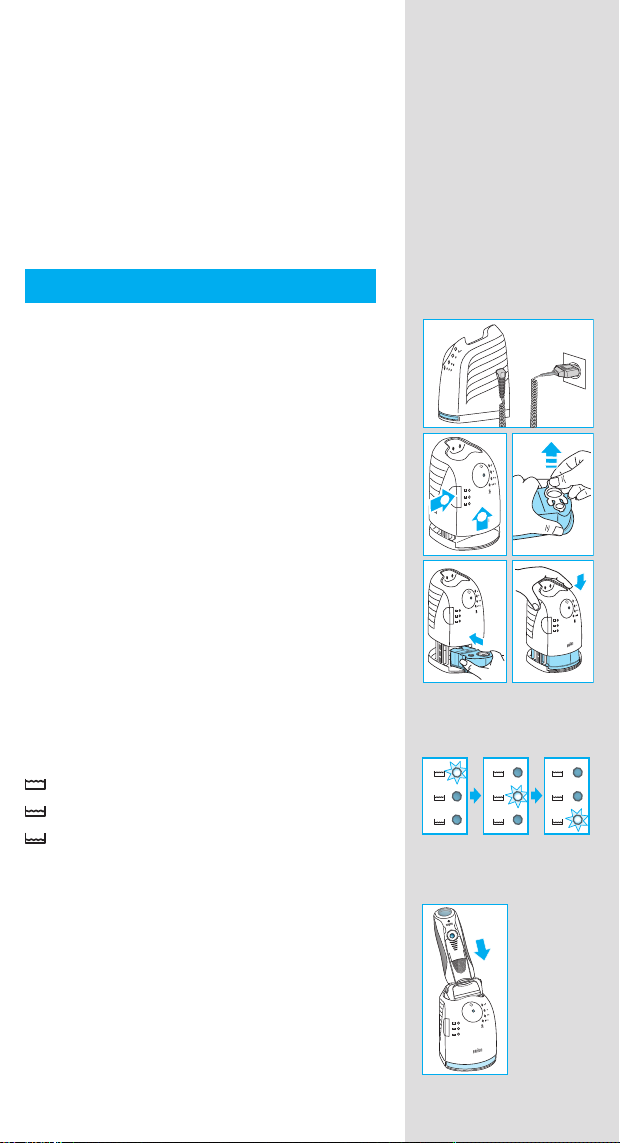
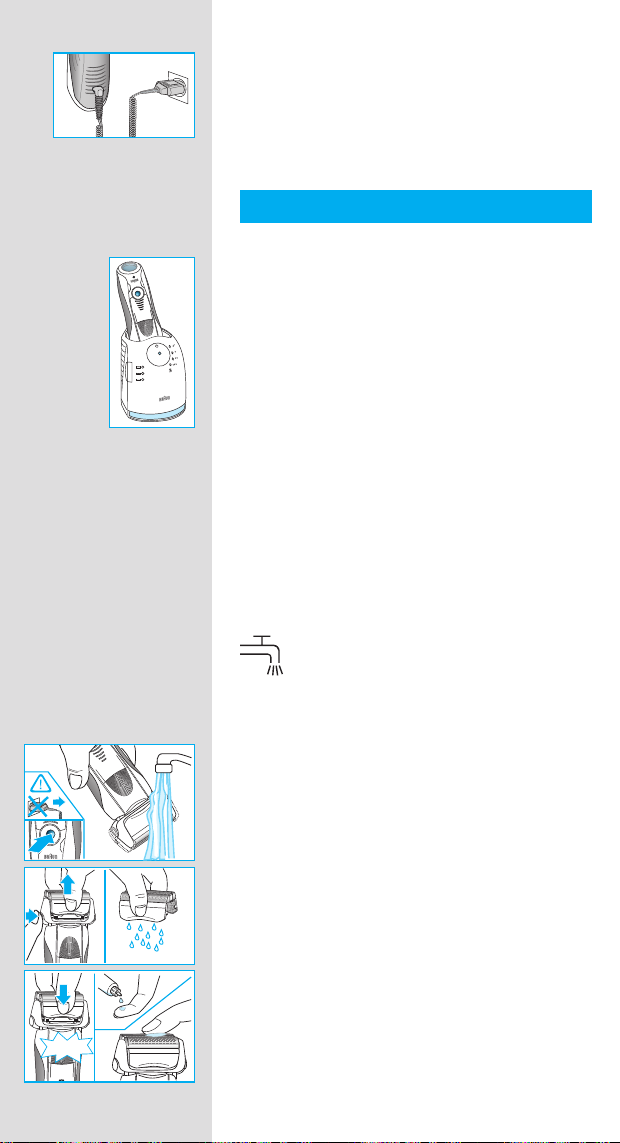
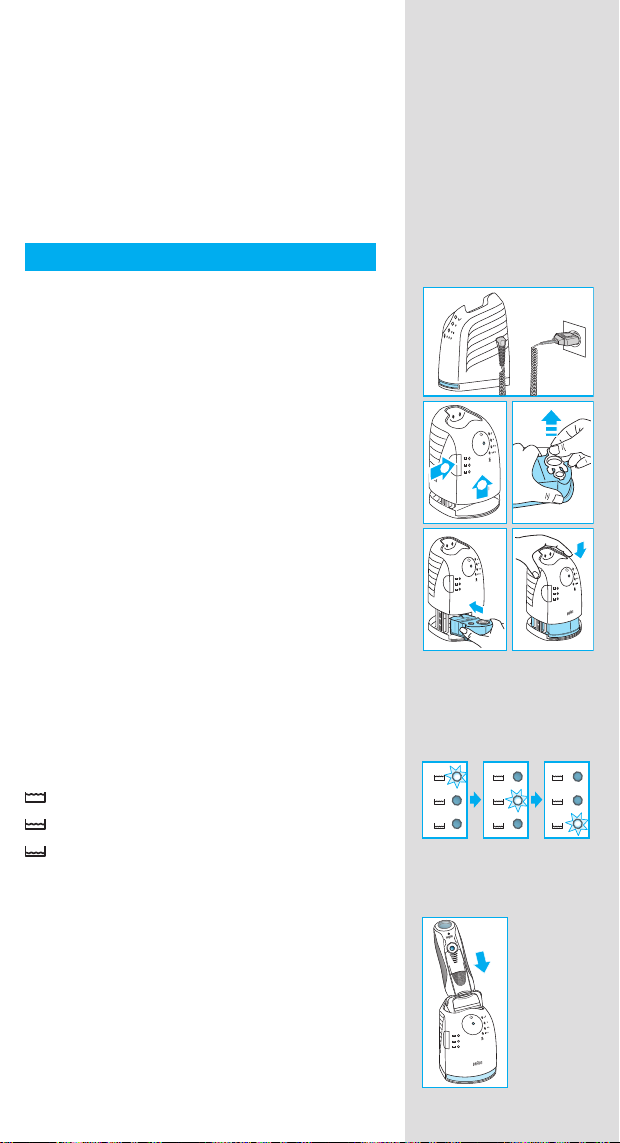
Before shaving
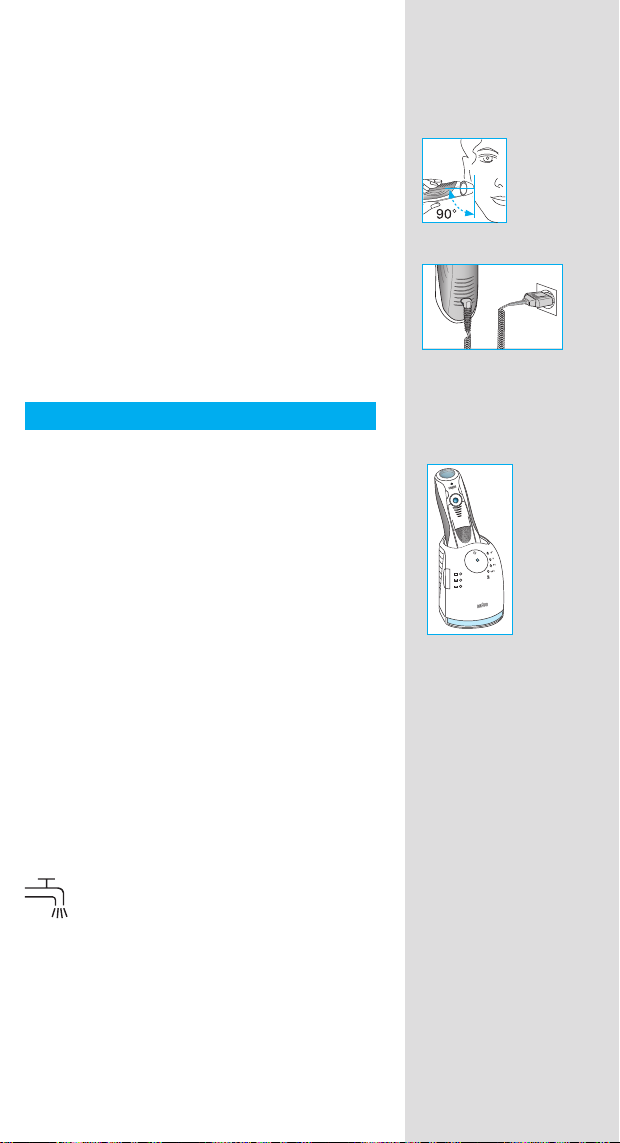
Prior to fi rst use you must connect the shaver to
an electrical outlet using the special cord set p
or alternatively proceed as below.
Installing the Clean&Renew station
• Using the special cord set p, connect the
station power socket 6 to an electrical outlet.
• Press the lift button 2 to open the housing.
• Hold the cleaning cartridge 7 down on a fl at,
stable surface (e.g. table).
• Carefully remove the lid from the cartridge.
• Slide the cartridge into the base of the station
as far as it will go.
• Slowly close the housing by pushing it down
until it locks.
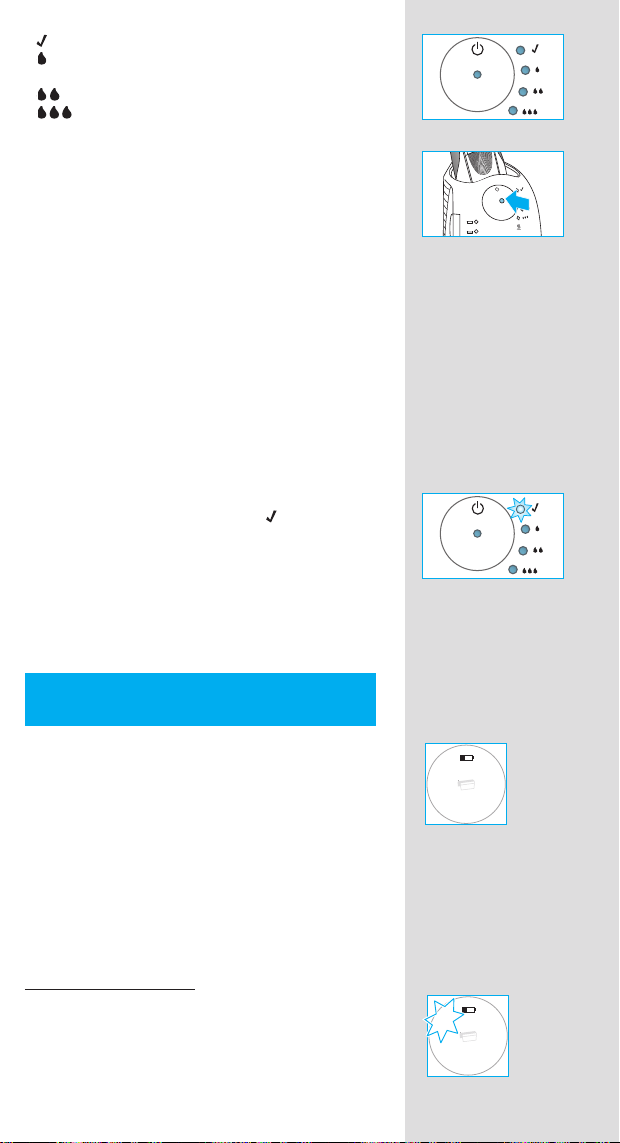
The cleaning fl uid display 1 will show how much
fl uid is in the cartridge:
up to 30 cleaning cycles available
up to 7 cleaning cycles remaining
new cartridge required
Charging and cleaning the shaver
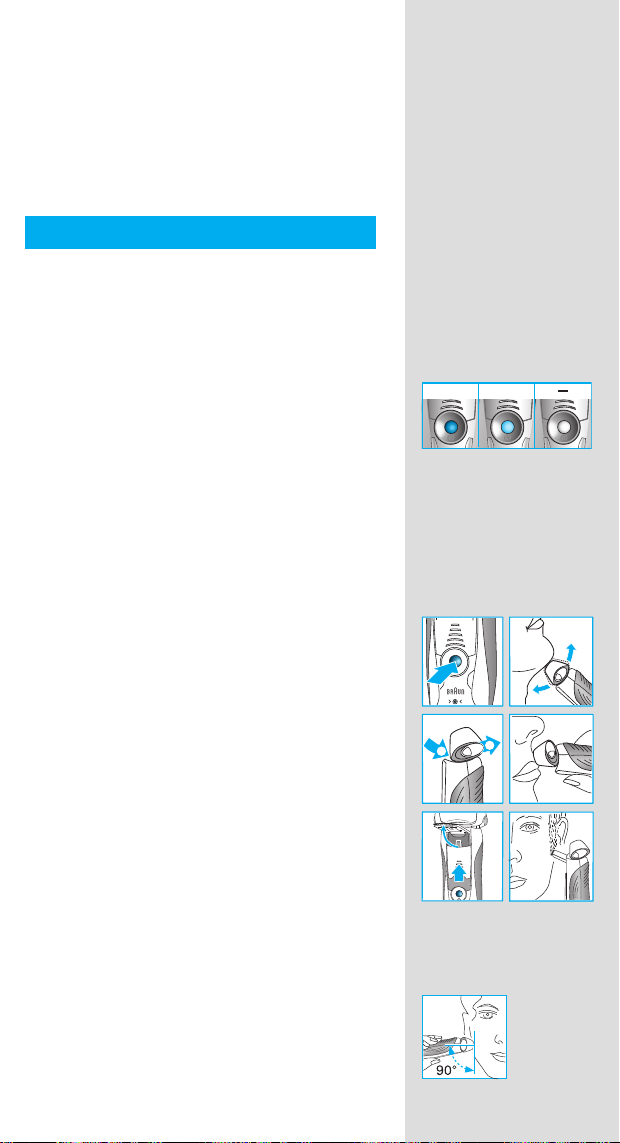
Insert the shaver head down into the cleaning
station. (The contacts u on the back of the
shaver will align with the contacts 3 in the
cleaning station).
If required, the Clean&Renew station will automatically charge the shaver. The hygiene status
of the shaver will also be analyzed and one of
the following cleaning program indicators 5 will
light up:
1
2
n
a
f
e
l
a
c
s
t
n
a
f
e
l
a
c
s
t
Series 7
new
5
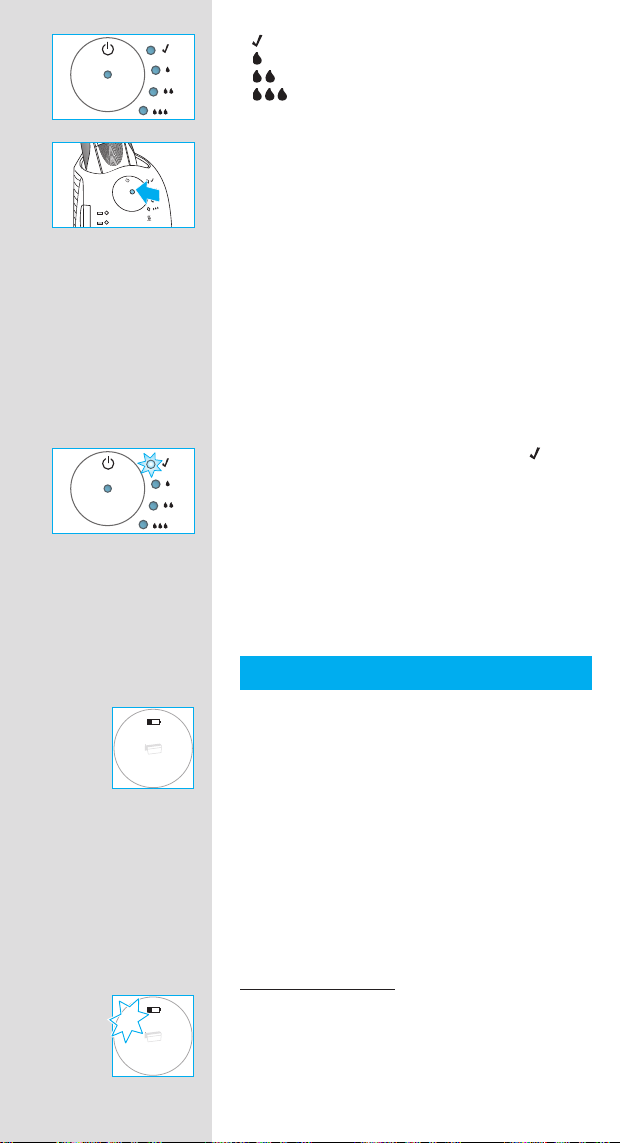
« » shaver is clean
« » short economical cleaning required
« » normal level of cleaning required
« » high intensive cleaning required
If the station selects one of the required cleaning
programs, it will not start unless you press the
start button 4. For best shaving results, we
recommend cleaning after each shave.
Whilst cleaning is in progress, the respective
cleaning program indicator will blink. Each
cleaning program consists of several cycles,
where cleaning fl uid is fl ushed through the
shaver head and a heat drying process dries
the shaver. Depending on the program selected
the total cleaning time will range from 32 to 43
minutes.
The cleaning programs should not be interrupted. Please note that whilst the shaver is
drying, the shaving head may be hot and wet.
When the program is fi nished, the blue «
»
indicator will light up. Your shaver is now clean
and ready for use.
Stand-by mode
10 minutes after completing the charging or
cleaning session, the Clean&Renew station
switches to the stand-by mode: The indicators
of the Clean&Renew station turn off.
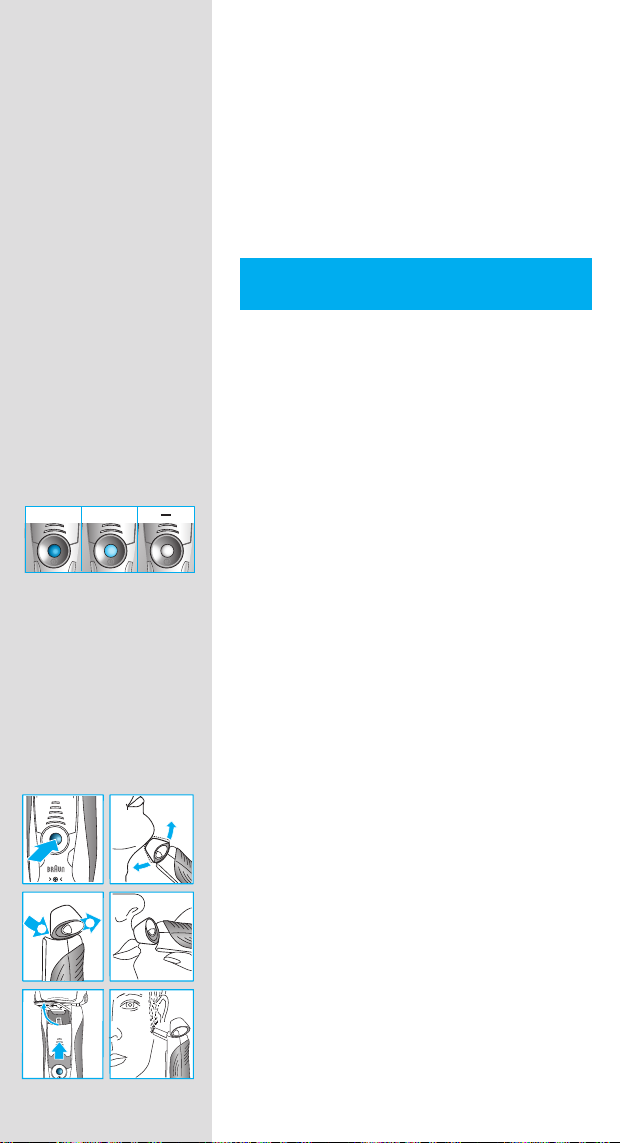
Shaver display
1
0
0
2
0
0
8
4
0
0
6
1
0
0
2
0
0
8
4
0
0
6
6
The shaver display z shows the charge status
of the battery. During charging or when using the
shaver, the respective green charge status will
blink. When the battery is fully charged the green
charge status will light up continously, provided
the shaver is switched on or connected to an
electrical outlet.
Stand-by mode
(Shaver is switched off but connected to the
mains)
Some minutes after completing the charging, the
shaver switches to the stand-by-mode:
The display turns off.
Low charge indicator:
The red low charge indicator blinks to
indicate that the charge has dropped below
20%, provided the shaver is switched on.
The remaining battery capacity is suffi cient
for 2 to 3 shaves.
Charging information
r
release
• A full charge provides up to 50 minutes
of cordless shaving time. This may vary
according to your beard growth.
• The best environmental temperature for
charging is between 5 °C to 35 °C. Do not
expose the shaver to temperatures higher than
50 °C for extended periods of time.
Personalizing your shaver
Personalizing your shaver
With the (–) e and (+) r buttons you can choose
the best setting for shaving different areas of
your face and as per your specifi c needs.
The different settings are indicated by the pilot
light incorporated in the on/off switch w:
• dark blue (powerful shave)
• light blue (normal)
• white (for a thorough comfortable shave in
sensitive areas of your face such as neck)
For a thorough and fast shave we recommend
the «+» setting.
When switching on next time, the last used
setting will be activated.
normal
+
How to use
Press the on/off switch w to operate the shaver:
• The pivoting shaver head and fl oating foils
automatically adjust to every contour of your
face.
• To shave hard to reach areas (e.g. under the
nose) slide the shaver head «lock» switch 0 to
the back position to lock the pivoting head at
an angle.
• To trim sideburns, moustache or beard, slide
the pop-out long hair trimmer upwards.
Tips for the perfect shave
For best shaving results, Braun recommends you
follow 3 simple steps:
1. Always shave before washing your face.
2. At all times, hold the shaver at right angles
(90°) to your skin.
3. Stretch your skin and shave against the
direction of your beard growth.
t
+
2
lock
1
trimmer
lock
lock
lock
7
Shaving with the cord
trimmer
re
le
a
s
e
If the shaver has run out of power (discharged),
and you do not have the time to recharge it in the
Clean&Renew station, you may also shave with
the shaver connected to an electrical outlet via
the special cord set.
Cleaning
Automatic cleaning
After each shave, return the shaver to the
Clean&Renew station and proceed as described
above in the section «Before shaving».
All charging and cleaning needs are then
automatically taken care of. With daily use, a
cleaning cartridge should be suffi cient for about
30 cleaning cycles.
The hygienic cleaning cartridge contains alcohol,
which once opened will naturally evaporate
slowly into the surrounding air. Each cartridge,
if not used daily, should be replaced after
approximately 8 weeks.
The cleaning cartridge also contains lubricants,
which may leave residual marks on the outer foil
frame after cleaning. However, these marks can
be removed easily by wiping gently with a cloth
or soft tissue paper.
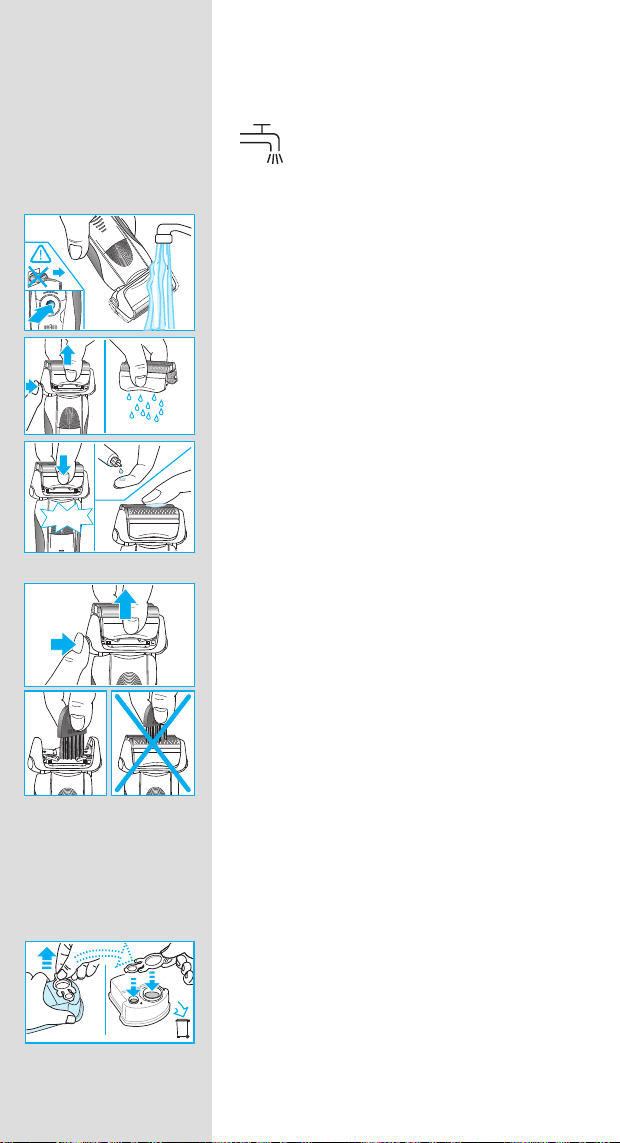
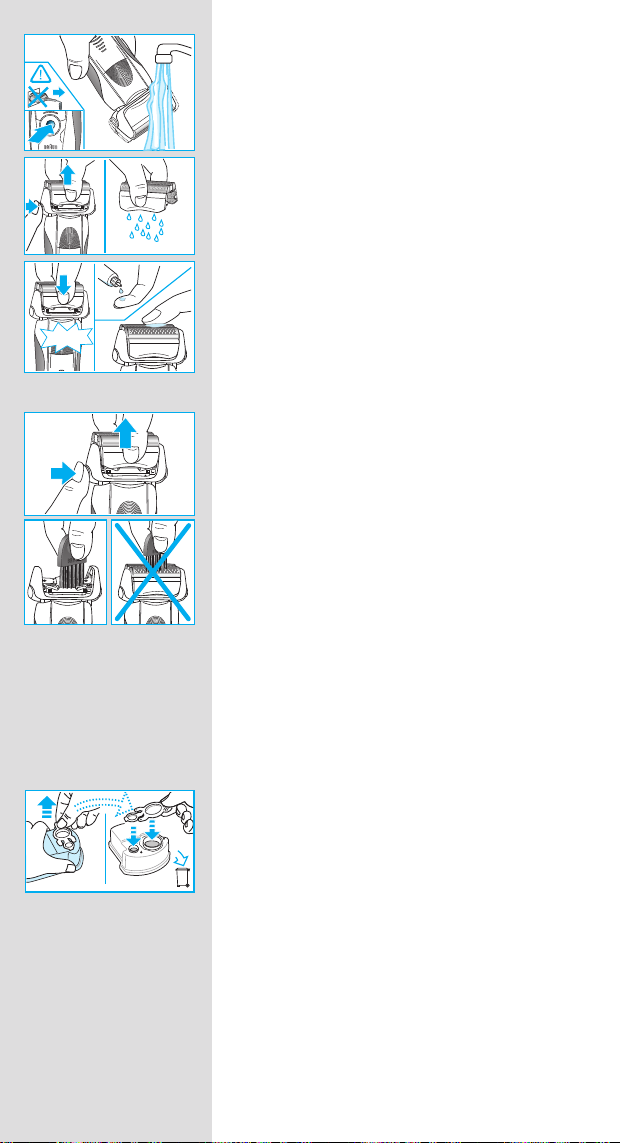
Manual cleaning
The shaver head is suitable for cleaning
under running tap water.
Warning: Detach the shaver from the
power supply before cleaning the shaver
head in water.
trim
mer
Rinsing the shaving head under running water
is an alternative way to keep the shaver clean,
especially when travelling:
• Switch the shaver on (cordless) and rinse the
shaving head under hot running water.
You may use liquid soap without abrasive
substances. Rinse off all foam and let the
Series
re
le
a
s
e
Series 7
re
le
a
s
e
click!
trimmer
8
Series
er
oil
Series 7
shaver run for a few more seconds.
• Next, switch off the shaver, press the «release»
button 9 to remove the Foil & Cutter cassette
8 and let it dry.
• If you regularly clean the shaver under
water, then once a week apply a drop of
light machine oil on top of the Foil & Cutter
cassette.
Alternatively, you may clean the shaver using the
brush provided:
• Switch off the shaver. Remove the Foil & Cutter
cassette
8 and tap it out on a fl at surface.
Using the brush, clean the inner area of the
pivoting head. However, do not clean the
cassette with the brush as this may damage it.
Series 7
re
le
a
s
e
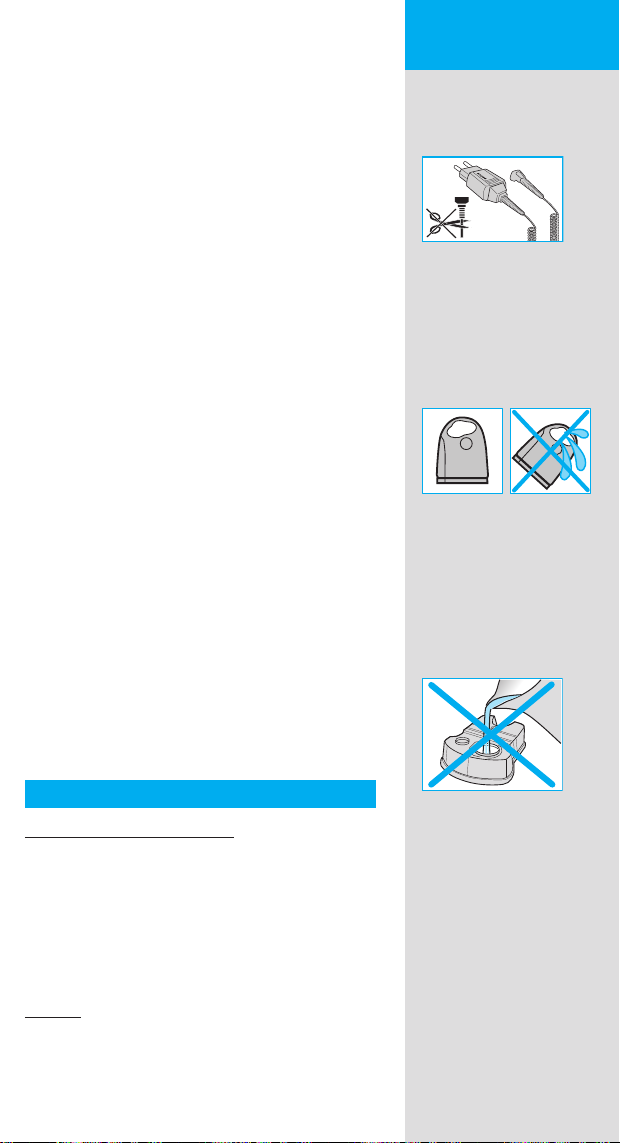
Cleaning the housing
From time to time clean the housing of the
shaver and the Clean&Renew station with a
damp cloth, especially inside the cleaning
chamber where the shaver rests.
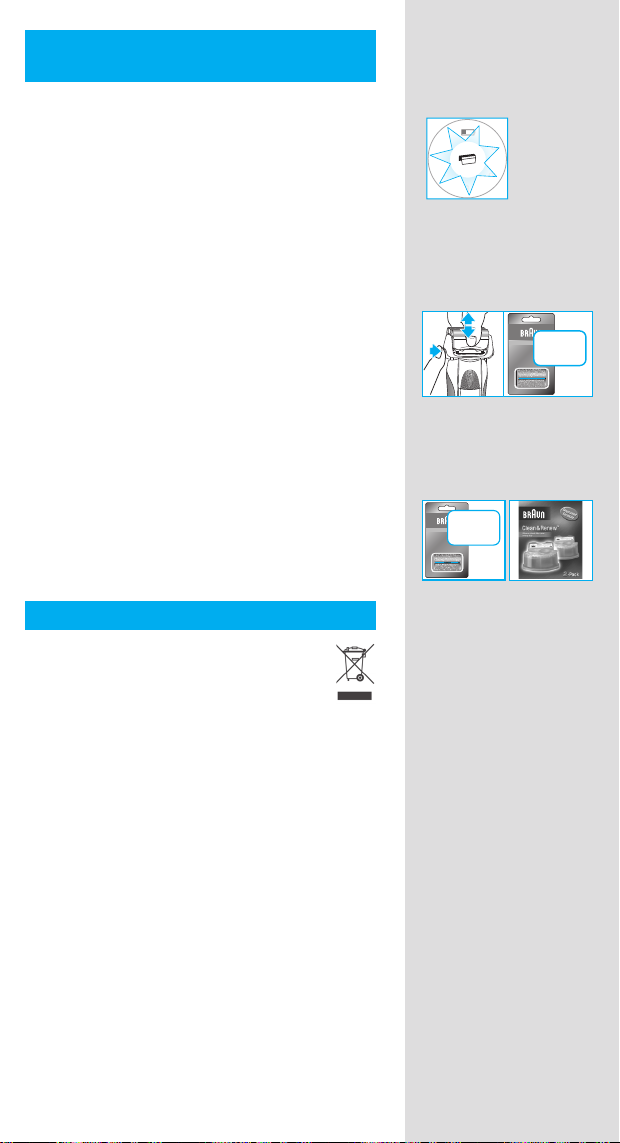
Replacing the cleaning cartridge
After having pressed the lift button
2 to open the
housing, wait for a few seconds before removing
the used cartridge to avoid any dripping.
Before discarding the used cartridge, make sure
to close the openings using the lid of the new
cartridge, since the used cartridge will contain
contaminated cleaning solution.
Keeping your shaver in top shape
Replacing the Foil & Cutter cassette / reset
To maintain 100% shaving performance, replace the Foil & Cutter cassette 8, when the
replacement symbol lights up on the shaver
display z (after about 18 months) or when
cassette is worn.
The replacement symbol will remind you during
the next 7 shaves to replace the Foil & Cutter
cassette. Then the shaver will automatically reset
the display.
re
le
a
s
e
new
0
2
0
4
0
6
Series 7
re
le
a
s
e
old
1
0
0
8
0
After you have replaced the Foil & Cutter
cassette, use a ball-pen to push the reset button
t for at least 3 seconds to reset the counter.
While doing so, the replacement light blinks and
goes off when the reset is complete. The manual
reset can be done at any time.
Accessories
Available at your dealer or Braun Service
Centres:
• Foil & Cutter cassette 70S
• Cleaning cartridge Clean&Renew CCR
re
le
a
s
e
Series 7
er
70S
70S
9

Environmental notice
This product contains rechargeable
batteries. In the interest of protecting the
environment, please do not dispose of the
product in household waste at the end of
its useful life. Disposal can take place at a
Braun Service Centre or at appropriate
collection points provided in your country.
The cleaning cartridge can be disposed with
regular household waste.
Subject to change without notice.
For electric specifi cations, see printing on the
special cord set.
Guarantee
We grant a 2 year guarantee on the product
commencing on the date of purchase. Within the
guarantee period we will eliminate any defects in
the appliance resulting from faults in materials or
workmanship, free of charge either by repairing
or replacing the complete appliance at our
discretion.
This guarantee extends to every country where
this appliance is supplied by Braun or its
appointed distributor.
10
This guarantee does not cover: damage due to
improper use, normal wear and tear (e.g. shaver
foil or cutter block) as well as defects that have
a negligible effect on the value or operation of
the appliance. The guarantee becomes void if
repairs are undertaken by unauthorised persons
and if original Braun parts are not used.
To obtain service within the guarantee period,
hand in or send the complete appliance with
your sales receipt to an authorised Braun
Customer Service Centre (address information
available online at www.service.braun.com).
For UK only:
This guarantee in no way affects your rights
under statutory law.
Nos produits sont conçus pour répondre aux
normes les plus élevées en matière de qualité,
fonctionnalité et design. Nous espérons que
vous apprécierez votre nouveau rasoir Braun.
Attention
Votre système de rasage est livré avec
un cordon d’alimentation qui intègre une
prise transformateur basse tension. Vous
ne devez remplacer ou modifi er aucun de
ses composants, afi n d’éviter tout risque
d’électrocution.
Cet appareil n’est pas destiné à des enfants
ou à des personnes aux capacités mentales,
sensorielles et physiques réduites à moins
qu’elles ne soient sous la surveillance d’un
adulte responsable de leur sécurité. Il convient
de surveiller les enfants pour s’assurer qu’ils ne
jouent pas avec l’appareil. Conserver hors de
portée des enfants.
Afi n d’éviter toute fuite du liquide de nettoyage,
placez le système autonettoyant Clean&Renew
sur une surface plane et stable. Lorsqu’une
cartouche de liquide nettoyant est installée, ne
pas incliner, ne pas manipuler brusquement
ou transporter le système autonettoyant pour
éviter de renverser le liquide de nettoyage de
la cartouche. Veuillez ne pas mettre le système
dans une armoire de toilette, au dessus d’un
radiateur, ni le placer sur une surface polie ou
vernie.
Français
STOP
La cartouche de liquide nettoyant contient du
liquide hautement infl ammable, gardez-la à
l’écart des sources d’ignition. Ne fumez pas à
proximité. Ne l’exposez pas directement à la
lumière du soleil pendant une longue période.
Ne remplissez pas la cartouche et utilisez
uniquement les cartouches de nettoyage
d’origine Braun.
Description
Système autonettoyant Clean&Renew
1 Indicateur du niveau de liquide de nettoyage
2 Bouton poussoir pour remplacer la cartouche
3 Contacts station-rasoir
4 Bouton de démarrage du nettoyage
5 Témoins lumineux du cycle de nettoyage
6 Prise d’alimentation de la station
7 Cartouche de liquide nettoyant
11
Rasoir
8 Cassette de rasage
9 Bouton d’éjection de la cassette
0 Verrouillage de la tête du rasoir
q Tondeuse rétractable pour poils longs
w Interrupteur marche/arrêt
e (–) bouton de réglage sensible
r (+) bouton de réglage intensif
t Bouton de réinitialisation
z Ecran d’affi chage du rasoir
u Contacts rasoir-station
i Prise d’alimentation du rasoir
o Trousse de voyage
p Cordon d’alimentation
Avant le rasage
Avant la première utilisation, branchez le rasoir
à une prise électrique en utilisant le cordon
d’alimentation p, procéder comme suit :
Installation du système autonettoyant
Clean&Renew
• En utilisant le cordon d’alimentation p, raccordez la prise d’alimentation 6 du système à
1
2
n
a
f
e
l
a
c
s
t
new
une prise de courant.
• Appuyez sur le bouton curseur 2 pour ouvrir le
boîtier.
• Posez la cartouche de liquide nettoyant 7
à plat sur une surface stable et plane (par
exemple une table).
12
n
a
f
e
l
a
c
s
t
cartouche.
• Introduisez la cartouche dans la base de la
station aussi loin que possible.
• Fermez doucement en abaissant le boîtier
jusqu’à son verrouillage.
L’indicateur du niveau de liquide de nettoyage 1
indique la quantité de liquide dans la cartouche :
Jusqu’à 30 cycles de nettoyage disponibles
Jusqu’à 7 cycles de nettoyage restants
Une nouvelle cartouche de nettoyage est
nécessaire
• Retirez délicatement l’opercule de la

Mise en charge et nettoyage du rasoir
trim
mer
Mettre la tête de rasage du rasoir dans le
système autonettoyant. (Les contacts
u au dos
du rasoir s’aligneront avec les contacts 3 du
système autonettoyant.)
Si nécessaire, le système Clean&Renew
rechargera automatiquement le rasoir. Le niveau
de propreté du rasoir sera également analysé et
un des témoins lumineux du cycle de nettoyage
5 suivants s’allumera :
« » Le rasoir est propre
« » Un rapide nettoyage économique est
« » Un nettoyage de niveau normal est
« » Un nettoyage intensif est nécessaire
Une fois que le système a déterminé le programme de nettoyage le mieux adapté, appuyez
sur le bouton de démarrage du nettoyage 4.
Pour de meilleurs résultats de rasage, nous
recommandons un nettoyage après chaque
rasage.
Pendant le nettoyage, le voyant lumineux du
cycle de nettoyage en cours clignotera. Chaque
cycle de nettoyage a plusieurs phases, au cours
desquelles le liquide nettoyant lave la tête du
rasoir puis un système de chauffage sèche la
tête du rasoir. Selon le programme sélectionné,
la durée totale du cycle de nettoyage varie entre
32 et 43 minutes.
nécessaire
nécessaire
Series 7
Le cycle de nettoyage ne doit pas être interrompu. Pendant la phase de séchage, la tête du
rasoir peut être chaude et humide.
Lorsque le programme est terminé, le voyant
lumineux bleu « » s’allume. Votre rasoir est
désormais propre et prêt à être utilisé.
Mode stand-by
10 minutes après la fi n de la charge ou du
nettoyage, la système Clean&Renew passe en
mode stand-by : les voyants lumineux de la
station Clean&Renew s’éteignent.
Ecran d’affi chage du rasoir
L‘écran du rasoir z affi che l‘état de charge de
la batterie. Lors de la mise en charge ou de
l‘utilisation du rasoir, le voyant vert du niveau
de charge correspondant clignotera. Lorsque la
batterie est complètement chargée, le voyant
1
0
0
2
0
0
8
4
0
0
6
13
vert du niveau de charge est allumé en continu
quand le rasoir fonctionne ou qu’il est branché
sur une prise de courant.
Mode stand-by
(le rasoir est arrêté mais branché sur le secteur)
Quelques minutes après la fi n de charge, le
rasoir passe en mode stand-by : l’affi chage
s’éteint.
Indicateur de faible charge:
1
0
0
2
0
0
8
4
0
0
6
Le voyant de faible charge rouge clignote quand
le rasoir fonctionne pour indiquer que la charge
restante est inférieure à 20 %.
La capacité restante de la batterie est suffi sante
pour 2 à 3 rasages.
Informations sur la charge
• Une charge complète procure jusqu’à 50
minutes de temps de rasage sans fi l. Cela peut
varier selon la densité, la dureté et la longueur
de votre barbe.
• La température ambiante idéale pour charger
le rasoir est comprise entre 5 °C et 35 °C.
N’exposez pas votre rasoir à des températures
supérieures à 50 °C pendant une période
prolongée.
14
Personnalisez votre rasoir
Personnalisez votre rasoir
A l’aide des boutons de réglage sensible (–) e
et intensif (+) r, vous pouvez sélectionner le
meilleur réglage pour raser les différentes zones
de votre visage et pour répondre à vos besoins
spécifi ques.
Les différents réglages sont indiqués par
le voyant lumineux intégré à l’interrupteur
marche / arrêt w :
normal
+
• bleu foncé (rasage puissant)
• bleu clair (normal
• blanc (pour un rasage doux, complet et
agréable des zones sensibles du visage ou du
cou)
Pour un rasage complet et rapide, nous
recommandons le réglage «+».
Lors de la prochaine mise en marche, le dernier
réglage utilisé sera sélectionné.
Utilisation
r
release
trimmer
Appuyez sur l’interrupteur marche/arrêt
w pour
mettre en marche le rasoir :
• La tête pivotante du rasoir et les grilles
fl exibles s'adaptent automatiquement aux
contours de votre visage.
• Pour raser les zones diffi ciles à atteindre
(ex. : sous le nez), faites glisser le de verrouillage de la tête du rasoir
0 vers l’arrière
pour bloquer la tête pivotante en position
inclinée.
• Pour tailler les pattes, moustache et barbe,
faites coulisser la tondeuse rétractable pour
poils longs vers le haut.
Conseils pour un rasage parfait
Pour des résultats de rasage optimaux, Braun
vous invite à suivre les 3 recommandations
suivantes :
1. Rasez-vous toujours avant de vous laver le
visage.
2. Tenez toujours le rasoir à angle droit (90°) par
rapport à votre peau.
3. Tendez la peau et rasez la barbe dans le sens
inverse de la pousse du poil.
Rasage avec cordon d’alimentation
Si le rasoir est déchargé, et que vous n’avez
pas le temps de le recharger dans la station
Clean&Renew, vous pouvez également vous
raser avec le rasoir branché à une prise de
courant via le cordon d’alimentation.
t
+
2
lock
1
trimmer
lock
lock
lock
Nettoyage
Nettoyage automatique
Après chaque utilisation mettre le rasoir dans
la station Clean&Renew et procédez comme
décrit ci-dessus dans la rubrique « Avant le
rasage ». La mise en charge et le nettoyage sont
automatiques. Pour une utilisation quotidienne,
une cartouche de liquide nettoyant sera suffi sante pour environ 30 cycles de nettoyage.
Une fois ouverte la cartouche de liquide de
nettoyage contenant de l’alcool dont une
partie, s’évaporera naturellement et lentement
dans l’air ambiant. Si elle n’est pas utilisée
quotidiennement, chaque cartouche doit être
remplacée toutes les 8 semaines environ.
La cartouche de liquide nettoyant contient
également des lubrifi ants, qui peuvent laisser
des traces sur le châssis plastique de la grille en
15
fi n de nettoyage. Ces traces peuvent s’enlever
re
le
a
s
e
facilement à l’aide d’un tissu ou d’un papier de
soie doux.
Nettoyage manuel
La tête du rasoir peut passer sous le
robinet d’eau courante.
Attention : Débranchez le rasoir avant de
le nettoyer à l’eau.
re
le
a
re
le
a
s
e
s
e
re
le
a
s
e
Series 7
click!
trim
mer
Une autre façon de nettoyer la tête du rasoir, tout
particulièrement lorsque vous voyagez, est de la
rincer sous l’eau courante :
• Mettez le rasoir en marche (sans cordon
d'alimentation) et rincez la tête du rasoir
sous le robinet. Il est possible d'utiliser du
savon liquide ne contenant pas de substance
Series
Series
er
oil
abrasive. Rincez toute la mousse et laissez le
rasoir en marche pendant quelques secondes.
• Ensuite, arrêtez le rasoir, appuyez sur le
bouton d'éjection de la cassette 9 pour retirer
la cassette de rasage 8 et laissez-la sécher.
• Si vous nettoyez régulièrement le rasoir sous
trimmer
Series 7
l'eau, appliquez ensuite une fois par semaine
une goutte d'huile fl uide de machine à coudre
sur le haut de la cassette de rasage.
Vous pouvez aussi nettoyer le rasoir à sec avec
la brosse fournie :
Series 7
re
le
a
s
e
• Arrêtez le rasoir. Retirez la cassette de
rasage 8 et tapotez-la sur une surface plane.
Nettoyez l'intérieur de la tête pivotante à l'aide
de la brosse. Toutefois, ne nettoyez pas la
cassette avec la brosse car cela risque de
l'endommager.
Series 7
re
le
a
s
e
Nettoyage du boîtier
Nettoyez le boîtier du rasoir et la station
Clean&Renew de temps en temps à l’aide d’un
linge humide, en particulier à l’intérieur du bac
de nettoyage dans lequel se place la tête de
rasage.
Remplacement de la cartouche de liquide
nettoyant
Après avoir appuyé sur le bouton poussoir
2 pour ouvrir le boîtier, attendez quelques
secondes avant de retirer la cartouche usagée
pour éviter qu’elle ne goutte.
new
16
old
Avant de jeter la cartouche usagée contenant
le reste du liquide de nettoyage souillé, refermer
ses ouvertures à l’aide de l’opercule de la
nouvelle cartouche.

Gardez votre rasoir en bon état
Remplacement de la cassette de rasage /
réinitialisation
Pour conserver une performance de rasage
effi cace à 100 %, remplacez la cassette de
rasage 8 lorsque le symbole s’allume sur l’écran
du rasoir z (au bout de 18 mois environ) ou
lorsque la cassette est usée.
Le symbole de remplacement vous rappellera
durant les 7 prochains rasages de remplacer la
cassette de rasage. Le rasoir réinitialisera ensuite
automatiquement l’écran.
Après le remplacement de la cassette de rasage,
utilisez un stylo pour presser le bouton de
réinitialisation
t pendant au moins 3 secondes
afi n de réinitialiser le compteur.
Le témoin lumineux de remplacement clignote et
s’éteint lorsque la réinitialisation est terminée. Il
est possible de faire une réinitialisation manuelle
à tout moment.
Accessoires
Disponibles chez votre vendeur ou dans les
centres de service Braun :
• Cassette de rasage 70S
• Cartouche de liquide nettoyant
Clean&Renew CCR
1
0
0
2
0
0
8
4
0
0
6
Series 7
re
le
a
s
e
er
70S
70S
Informations relatives à l’environnement
Ce produit contient des batteries
rechargeables. Dans un souci de
protection de l’environnement, veuillez
ne pas jeter le produit avec les ordures
ménagères au terme de son cycle de vie.
Vous pouvez remettre ce produit au centre
de service Braun ou aux points de collecte
dans votre pays.
La cartouche de nettoyage peut être jetée dans
la poubelle ménagère.
Susceptible d’être modifi é sans préavis.
Pour les spécifi cations électriques, se référer aux
inscriptions sur l’adaptateur basse tension.
17

Garantie
Nous accordons une garantie de 2 ans sur ce
produit, à partir de la date d‘achat.
Pendant la durée de la garantie, Braun prendra
gratuitement à sa charge la réparation des vices
de fabrication ou de matière en se réservant
le droit de décider si certaines pièces doivent
être réparées ou si l‘appareil lui-même doit être
échangé.
Cette garantie s‘étend à tous les pays où cet
appareil est commercialisé par Braun ou son
distributeur exclusif.
Cette garantie ne couvre pas : les dommages
occasionnés par une utilisation inadéquate,
l’usure normale (par exemple, grille et bloccouteaux) ainsi que les défauts d’usures qui ont
un effet négligeable sur la valeur ou l’utilisation
de l’appareil. Cette garantie devient caduque
si des réparations ont été effectuées par des
personnes non agréées par Braun et si des
pièces de rechange ne provenant pas de Braun
ont été utilisées.
Pour toute réclamation intervenant pendant la
période de garantie, retournez ou rapportez
l‘appareil ainsi que l‘attestation de garantie à
votre revendeur ou à un Centre Service Agréé
Braun.
Se référez à www.service.braun.com ou appelez
08.10.30.97.80 pour connaitre le Centre Service
Agrée Braun le plus proche de chez vous.
18
Clause spéciale pour la France
Outre la garantie contractuelle exposée cidessus, nos clients bénéfi cient de la garantie
légale des vices cachés prévue aux articles
1641 et suivants du Code civil.
Nasze produkty zostały zaprojektowane tak,
aby sprostać najwyższym standardom jakości,
funkcjonalności oraz zaprezentować najlepszy
design. Mamy nadzieję, że jesteście zadowoleni
z nowej golarki marki BRAUN.
Ostrzeżenia
Twój system golący posiada specjalny przewód
zasilania o niskim napięciu (SELV). Nie wymieniaj na własną rękę żadnej z jego części, gdyż
grozi to porażeniem prądem.
Urzàdzenie to nie mo˝e byç u˝ywane przez
dzieci lub osoby fi zycznie lub umys∏owo
upoÊledzone, jeÊli nie znajdujà si´ one pod
nadzorem osoby odpowiedzialnej za ich
bezpieczeƒstwo. Zalecamy przechowywaç
urzàdzenie w miejscu niedost´pnym dla dzieci.
Dzieci powinny być nadzorowane podczas
używania urządzenia w celu zapewnienia
odpowiedniego bezpieczeństwa.
Aby zabezpieczyć płyn czyszczący przed
wyciekaniem upewnij się, że baza czyszcząco –
ładująca jest położona na płaskiej powierzchni.
Gdy wkład czyszczący jest zainstalowany
w bazie, nie przechylaj jej, nie poruszaj
gwałtownie gdyż ciecz czyszcząca mogłaby
wylać się z pojemnika. Nie ustawiaj bazy
wewnątrz lustrzanych gablotek, na grzejnikach,
ani na wypolerowanych lub polakierowanych
powierzchniach.
Wkład czyszczący zawiera łatwopalną ciecz,
dlatego trzymaj go z dala od źródeł zapłonu.
Nie pal obok bazy. Nie wystawiaj na długotrwałą
ekspozycję na słońcu.
Nie uzupełniaj wkładów czyszczących na
własną rękę, lecz używaj jedynie oryginalnie
napełnionych wkładów Braun.
Polski
STOP
Opis
Baza Czyszcząco – Ładująca
1 Wskaźnik zawartości płynu czyszczącego
2 Przycisk unoszący obudowę (pozwalający na
wymianę wkładu)
3 Punkty styku pomiędzy bazą a golarką
4 Przycisk start czyszczenia
5 Wskaźniki programu czyszczącego
6 Gniazdko zasilające
7 Wkład czyszczący
Golarka
8 Blok ostrzy tnących i folii golącej
9 Przycisk zwalniający blok
0 Przycisk blokujący głowicę golarki «lock»
19
q Wysuwany trymer
trim
m
er
w Przycisk włacznik/wỳłacznik «on/off»
e (–) Przycisk programu golenia wrażliwych
miejsc
r (+) Przycisk programu golenia intensywnego
t Przycisk resetujący
z Wskaźniki naładowania i czystości golarki
u Punkty styku pomiędzy bazą a golarką
i Gniazdko zasilające golarkę
o Pudełko podróżne
p Specjalny przewód zasilający
Przed goleniem
Przed pierwszym użyciem musisz podłączyć
golarkę do kontaktu używając specjalnego
przewodu zasilającego p lub zrób jak podano
poniżej.
Instalowanie Bazy Czyszcząco – Ładującej
• Używając specjalnego kabla zasilającego p,
podłącz bazę 6 do zewnętrznego źródła prądu.
1
2
n
a
f
e
l
a
c
s
t
new
• Włącz przycisk unoszący obudowę 2 aby
otworzyć pokrywę.
• Połóż wkład czyszczący 7 na płaskiej, stabilnej
powierzchni.
20
• Ostrożnie zdejmij pokrywkę wkładu.
• Wsuń wkład do bazy, tak daleko jak to możliwe.
n
a
f
e
l
a
c
s
t
• Powoli zamknij obudowę wciskając ją, aż do
momentu zablokowania.
Wyświetlacz zawartości płynu czyszczącego 1
pokaże Ci, jak dużo płynu pozostało w cartrigu:
aż do 30 cyklów czyszczenia
do 7 cyklów czyszczenia
potrzebny nowy cartrige
Ładowanie i czyszczenie golarki
Umieść golarkę do góry nogami w bazie
czyszczącej. (Styki u z tyłu golarki ustawią się
naprzeciwko styków 3 bazy czyszczącej).
Series 7
Baza Czyszcząco – Ładująca automatycznie
naładuje golarkę. Status oczyszczenia
golarki będzie także analizowany, a jeden
z następujących wyświetlaczy 5 zaświeci się:
« » golarka jest czysta
« » krótkie ekonomiczne czyszczenie
zalecane
« » zalecane zwykłe czyszczenie
« » zalecane czyszczenie o wysokim
poziomie intensywności
Jeśli baza wybierze jeden z zalecanych
programów czyszczenia, proces nie rozpocznie
się dopóki nie naciśniesz przycisku start 4.
Aby osiągać najlepsze rezultaty golenia,
rekomendujemy czyszczenie po każdym
goleniu.
Podczas trwania czyszczenia właściwy
wyświetlacz programu czyszczącego będzie
migał. Każdy program czyszczenia składa się z
kilku cykli, podczas których płyn czyszczący jest
wypłukiwany z golarki przez jej głowicę, a proces
gorącego suszenia osusza golarkę. W zależności
od wybranego programu łączny czas czyszczenia
trwa od 32 do 43 minut.
Programów czyszczenia nie powinno się
przerywać. Prosimy pamiętać, że podczas
suszenia golarki, głowica może być gorąca i
mokra.
Po zakończeniu programu czyszczenia zaświeci
się niebieski przycisk wskaźnika «
» (czysto).
Teraz golarka jest czysta i gotowa do użycia.
Stan stand-by
10 minut po zakończeniu procesu ładowania
lub czyszczenia Baza Czyszcząco – Ładująca
przejdzie w stan stand-by. Wyświetlacze bazy
wyłączą się.
Wskaźniki naładowania i czystości
golarki
Wskaźnik naladowania i czystości golarki z
obrazuje poziom zużycia baterii. Podczas
używania golarki odpowiedni zielony wskaźnik
będzie mrugał.
Gdy bateria jest pełna, a golarka włączona lub
podłączona do źródła zasilania, zielony wskaźnik
zużycia będzie stale zapalony.
Tryb gotowości
(golarka jest wyłączona ale podłączona do sieci)
Kilka minut po zakończeniu ładowania golarka
przełącza się w tryb gotowości. Wyświetlacz
wyłącza się.
Niski wskaźnik zasilania
TGdy golarka jest włączona, a poziom naładowania baterii spada poniżej 20%, czerwony
wskaźnik zasilania oznaczony jako «low»
zaczyna mrugać. Pozostała bateria wystarczy na
2 do 3 goleń.
1
0
0
2
0
0
8
4
0
0
6
1
0
0
2
0
0
8
4
0
0
6
21
Informacje dotyczące ładowania
r
• Całkowite naładowanie umożliwia golenie
bezprzewodowe do 50 minut. Może się to
zmieniać w zależności od długości zarostu.
• Najlepsza dla ładowania temperatura powietrza
to od 5 °C do 35 °C. Nie należy wystawiać
golarki na dłuższe działanie temperatury
powyżej 50 °C.
Dostosuj golarkę do własnych
potrzeb
Dostosuj golarkę do własnych potrzeb
Za pomocą przycisków programów golenia
wrażliwych miejsc (–) e i golenia intensywnego
(+) r możesz wybrać najlepsze ustawienie do
golenia różnych obszarów twarzy zgodnie z
własnymi potrzebami. Ustawienia wskazywane
są za pomocą światła
włącznikiem «on/off»
na pilocie uruchamianym
w:
normal
+
• granatowy (golenie o dużej mocy)
• niebieski (normal)
• biały (dokładne, a jednocześnie bezpieczne
golenie wrażliwych fragmentów twarzy jak
szyja)
Dla dokładnego i szybkiego golenia polecane jest
ustawienie programu intensywnego (+) golenia.
Przy kolejnym uruchomieniu golarki,
automatycznie włączą się ostatnio używane
ustawienia.
t
Sposób użycia
Aby uruchomić golarkę naciśnij przycisk
«on/off» w:
+
lock
• Ruchoma głowica oraz sprężyste folie golące
automatycznie dostosowują się do każdego
kształtu twarzy.
2
lock
1
lock
• Aby ogolić trudnodostępne miejsca (na przy-
kład obszar pod nosem) należy ustawić głowicę
golarki pod odpowiednim kątem, a następnie
unieruchomić ją przyciskiem blokującym 0.
• Aby przyciąć bokobrody, wąsy lub brodę należy
ustawić trymer do długich włosów ku górze.
trimmer
lock
22
Wskazówki dotyczące perfekcyjnego golenia
release
trimmer
Aby osiągnąć doskonałe efekty golenia, marka
Braun zaleca stosowanie się do trzech prostych
zasad:
1. Zawsze gol się przed umyciem twarzy.
2. Przez cały czas trzymaj golarkę pod
odpowiednim kątem (90°).
3. Napnij skórę i przeciągaj golarkę pod włos.
Golenie z kablem
Jeśli golarka się rozładowała, a Ty nie masz
czasu naładować jej w Bazie Czyszcząco –
Ładującej, możesz ogolić się golarką podłączoną
do prądu za pomocą specjalnego zestawu kabli.
Czyszczenie
Czyszczenie Automatyczne
Po każdym goleniu należy odłożyć golarkę do
Bazy Czyszcząco – Ładujacej i postępować
zgodnie z opisem z części «Przed goleniem».
Wszystkie potrzeby dotyczące czyszczenia są
nadzorowane automatycznie. Przy codziennym
użyciu, wkład czyszczący wystarcza na około
30 cykli.
Higieniczny wkład czyszczący zawiera alkohol,
a raz otwarty będzie naturalnie i powoli wyparowywał do otoczenia. Każdy wkład, jeśli nie jest
używany codziennie, powinien być wymieniony
po około 8 tygodniach.
Wkład czyszczący zawiera także olej, który po
oczyszczaniu może pozostawiać niewielkie ślady
na ramach folii. Ślady te można jednak łatwo
usunąć poprzez delikatne wycieranie tkaniną lub
miękką bibułką.
Oczyszczanie ręczne
Głowica golarki nadaje się do mycia pod
bieżącą wodą.
Ostrzeżenie: Przed zanurzeniem głowicy
w wodzie należy odłączyć golarkę od
źródła zasilania.
23
re
re
le
a
s
e
le
a
s
e
re
le
a
s
e
Series 7
click!
trimm
er
Przemywanie głowicy pod wodą jest alternatywnym sposobem utrzymania golarki w czystości,
zwłaszcza w czasie podróży:
• Włącz golarkę (bez kabla) i przemywaj głowicę
pod ciepłą, bieżącą wodą. Możesz użyć mydła
w płynie nie zawierającego chropowatych
substancji. Spłucz całą pianę i pozostaw
Series
Series
golarkę włączoną przez kilka kolejnych sekund.
• Następnie wyłącz golarkę, naciśnij przycisk
er
oil
zwalniający 9 aby zdjąć blok z ostrzami i folią
golącą 8 i pozostaw do wyschnięcia.
• Jeśli regularnie czyścisz golarkę pod wodą,
raz w tygodniu nanoś kroplę lekkiego oleju do
trimmer
Series 7
maszyn na zewnętrzną część bloku z ostrzami
i folią golącą.
Zamiennie można także czyścić golarkę za
pomocą pędzla:
Series 7
re
le
a
s
e
• Wyłącz golarkę. Zdejmij blok z ostrzami oraz
folią golącą 8 i pozostaw go na płaskiej
powierzchni. Użyj pędzelka i wyczyść
wewnętrzne obrotowej głowicy. Nie czyść
nakładki pędzlem, który mógłby ją zniszczyć.
re
le
a
s
e
Series 7
re
le
a
s
e
Czyszczenie otoczenia
Marka BRAUN rekomenduje, aby od czasu do
czasu wytrzeć miejsce, w którym przechowywana
jest golarka oraz Baza Czyszcząco – Ładująca,
przy pomocy wilgotnej szmatki. Zaleca sie także
czyszczenie samej bazy.
Wymiana wkładu czyszczącego
Po naciśnięciu przycisku unoszącego obudowę
2 odczekaj kilka sekund zanim wyjmiesz uży-
wany wkład. Dzięki temu wyciągnięte urządzenie
nie będzie wilgotne.
new
24
old
Zamknięcie z nowego wkładu słuzy jako
zabezpieczenie dla starego. Przed wyrzuceniem
zużytego wkładu koniecznie, upewnij się czy nic
nie wycieka, gdyż znajdujący się we wkładzie
płyn jest trujący.
Utrzymanie golarki w najlepszej
kondycji
Wymiana bloku z ostrzami i folią golacą
Aby utrzymać 100% wydajność golenia, należy
wymieniać blok gdy zaświeci się symbol wymiany
z (po około 18 miesiącach) lub gdy folia oraz
ostrza się zużyją.
Symbol wymiany będzie przypominał o zmianie
nakładki przez 7 kolejnych goleń. Następnie
golarka automatycznie wyłączy wyświetlanie
przypomnienia.
Po wymianie bloku użyj długopisu aby wcisnąć
na około 3 sekundy przycisk resetujący
t dzięki
czemu licznik będzie liczył liczbę goleń od nowa.
Podczas wykonywania tej czynności, światełko
zmiany będzie mrugało, a następnie całkiem się
wyłączy. Ręczne resetowanie można wykonać
w dowolnym momencie.
Akcesoria
Dostępne w każdym sklepie AGD/RTV lub
w serwisach marki BRAUN:
• Kaseta z ostrzami i folią golacą 70S
• Wkład czyszczący CCR
Uwagi dotyczàce ochrony Êrodowiska
re
0
2
0
le
a
s
e
4
0
Series 7
70S
1
0
0
8
0
6
70S
er
Urzàdzenie to wyposa˝one jest w baterie
przystosowane do wielokrotnego
∏adowania. Aby zapobiec zanieczyszczaniu Êrodowiska, pod koniec okresu
eksploatacji produktu nie wyrzucaj go do
kosza na Êmieci. Mo˝esz pozostawiç go
w punkcie serwisowym marki Braun lub
jednym ze specjalnych punktów zajmujàcych
si´ zbiórkà zu˝ytych produktów w wybranych
miejscach na terenie kraju.
Wk∏ad po p∏ynie czyszczàcym mo˝na wyrzuciç
do zwyk∏ego kosza na Êmieci.
Powy˝sze informacje mogà ulec zmianie bez
uprzedniego powiadomienia.
Specyfi kacje elektryczne zosta∏y wydrukowane
na specjalnym kablu sieciowym.
25

Warunki gwarancji
1. Procter & Gamble International Operations
SA z siedzibą w Route de St-Georges 47,
1213 Petit Lancy 1 w Szwajcarii, gwarantuje sprawne działanie sprzętu w okresie 24
miesięcy od daty jego wydania Kupującemu.
Ujawnione w tym okresie wady będą
usuwane bezpłatnie, przez autoryzowany
punkt serwisowy, w terminie 14 dni od daty
dostarczenia sprzętu do autoryzowanego
punktu serwisowego.
2. Kupujący może wysłać sprzęt do naprawy
do najbliżej znajdującego się autoryzowanego punktu serwisowego lub skorzystać
z pośrednictwa sklepu, w którym dokonał
zakupu sprzętu. W takim wypadku termin
naprawy ulegnie wydłużeniu o czas
niezbędny do dostarczenia i odbioru sprzętu.
3. Kupujący powinien dostarczyć sprzęt w
opakowaniu należycie zabezpieczonym
przed uszkodzeniem. Uszkodzenia
spowodowane niedostatecznym
zabezpieczeniem sprzętu nie podlegają
naprawom gwarancyjnym. Naprawom
gwarancyjnym nie podlegają także inne
uszkodzenia powstałe w następstwie
okoliczności, za które Gwarant nie ponosi
odpowiedzialności, w szczególności
zawinione przez Pocztę Polską lub fi rmy
kurierskie.
4. Niniejsza gwarancja jest ważna jedynie z
dokumentem zakupu i obowiązuje wyłącznie
na terytorium Rzeczypospolitej Polskiej.
5. Okres gwarancji przedłuża się o czas od
zgłoszenia wady lub uszkodzenia do
naprawy sprzętu i zwrotnego postawienia
go do dyspozycji Kupującego.
6. Naprawa gwarancyjna nie obejmuje
czynności przewidzianych w instrukcji, do
wykonania, których Kupujący zobowiązany
jest we własnym zakresie i na własny koszt.
7. Ewentualne oczyszczenie sprzętu
dokonywane jest na koszt Kupującego
według cennika danego autoryzowanego
punktu serwisowego i nie będzie
traktowane jako naprawa gwarancyjna,
chyba, że oczyszczenie jest niezbędne
do usunięcia wady w ramach świadczeń
objętych niniejszą gwarancją i nie stanowi
czynności, o których mowa w p. 6.
8. Gwarancją nie są objęte:
a) mechaniczne uszkodzenia sprzętu
spowodowane w czasie jego użytkowania
lub w czasie dostarczania sprzętu do
naprawy;
b) uszkodzenia i wady wynikłe na skutek:
– używania sprzętu do celów innych niż
osobisty użytek;
26

– niewłaściwego lub niezgodnego z instrukcją
użytkowania, konserwacji, przechowywania
lub instalacji;
– używania niewłaściwych materiałów
eksploatacyjnych;
– napraw dokonywanych przez nieuprawnione
osoby; stwierdzenie faktu takiej naprawy lub
samowolnego otwarcia plomb lub innych
zabezpieczeń sprzętu powoduje utratę
gwarancji;
– przeróbek, zmian konstrukcyjnych lub
używania do napraw nieoryginalnych części
zamiennych;
c) części szklane, żarówki, oświetlenia;
d) ostrza i folie do golarek oraz materiały
eksploatacyjne.
9. Bez nazwy, modelu sprzętu i daty jego
zakupu potwierdzonej pieczątką i
podpisem sprzedawcy albo paragonu lub
faktury zakupu z nazwą i modelem sprzętu,
karta gwarancyjna jest nieważna.
10. Niniejsza gwarancja na sprzedany towar
konsumpcyjny nie wyłącza, nie ogranicza
ani nie zawiesza uprawnień Kupującego
wynikających z niezgodności towaru z
umową.
27
âesk˘
STOP
Naše výrobky jsou vyrobeny tak, aby splňovaly
nejvyšší nároky na kvalitu, funkčnost a design.
Doufáme, že budete se svým novým holicím
strojkem Braun spokojeni.
Upozornění
Váš holicí systém je vybaven speciálním síťovým
přívodem s integrovaným bezpečnostním síťovým adaptérem. Nevyměňujte ani nerozebírejte
žádnou z jeho částí, jinak by mohlo dojít k úrazu
elektrickým proudem.
Pfiístoj nesmí pouÏívat dûti ani osoby se
sníÏen˘mi fyzick˘mi nebo psychick˘mi
schopnostmi bez dohledu osoby, která je
zodpovûdná za jejich bezpeãnost. Obecnû je
doporuãeno uchovávat pfiístroj mimo dosah dûtí.
Děti by měly být pod dozorem, aby se zajistilo,
že nebudou spotřebič používat na hraní.
Ujistěte se, že jste umístili čisticí stanici
Clean&Renew na rovný povrch, aby nedocházelo
k úniku čisticí kapaliny. Po instalaci čisticí kazety
stanici nenahýbejte, nijak s ní nepohybujte ani ji
nepřemísťujte, protože by z ní mohla při manipulaci vytéct čisticí kapalina. Stanici neumísťujte do
zrcadlové skříňky, ani ji nepokládejte na leštěné
či lakované povrchy.
Čisticí kazeta obsahuje vysoce hořlavou
kapalinu, proto ji uchovávejte mimo možné
zdroje vznícení. Nevystavujte ji přímému slunci
a cigaretovému dýmu. Uchovávejte mimo dosah
dětí.
28
Použitou čisticí kazetu nedoplňujte a používejte
pouze originální náplň čisticí kazety Braun.
Popis
Čisticí stanice Clean&Renew
1 Ukazatel stavu náplně
2 Uvolňovací tlačítko pro výměnu kazety
3 Kontakty čisticí stanice – holicí strojek
4 Tlačítko pro zahájení čištění
5 Indikátory čisticího programu
6 Síťová zásuvka čisticí stanice
7 Čisticí kazeta
Holicí strojek
8 Kazeta s holicí planžetou a břitovým blokem
9 Uvolňovací tlačítko kazety
0 Tlačítko «lock» (uzamčení) holicí hlavy
q Výsuvný zastřihovač dlouhých vousů
w Spínač zapnutí/vypnutí «on/off»
e (–) Spínač režimu sensitivní
trim
mer
r (+) Spínač režimu intenzivní
t Tlačítko pro vynulování «reset»
z Displej holicího strojku
u Kontakty holicí strojek – čisticí stanice
i Síťová zásuvka holicího strojku
o Cestovní pouzdro
p Speciální síťový přívod
Před holením
Před prvním použitím musíte připojit holicí strojek
k síti za použití speciálního síťového přívodu p
nebo postupujte podle níže uvedeného návodu.
Instalace čisticí stanice «Clean&Renew»
• Pomocí speciálního síťového přívodu p
zapojte zástrčku základny čisticí stanice 6 do
elektrické zásuvky.
• Stiskněte uvolňovací tlačítko 2 a otevřete kryt
čisticí stanice.
• Čisticí kazetu 7 položte na rovnou a stabilní
plochu (např. na stůl).
• Z kazety opatrně odstraňte uzávěr.
1
2
n
a
f
e
l
a
c
s
t
new
• Kazetu zasuňte co možná nejhlouběji do
spodní části základny čisticí stanice.
• Kryt opatrně zavřete pomalým stlačováním
dolů, dokud se nezavře.
Ukazatel stavu náplně 1 indikuje množství
tekutiny v čisticí kazetě:
až na 30 čisticích cyklů
až na 7 čisticích cyklů
nutnost výměny kazety za novou
Nabíjení a čištění holicího strojku
Vložte hlavu holicího strojku do základny čisticí
stanice. (Kontakty u na zadní straně holicího
strojku se spojí s kontakty 3 v čisticí stanici.)
V případě potřeby může čisticí stanice
Clean&Renew nabít holicí strojek automaticky.
Provede také analýzu hygienického stavu strojku
a rozsvítí se jedna z těchto svítících diod čisticího
programu 5:
n
a
f
e
l
a
c
s
t
Series 7
29

« » holicí strojek je čistý
« » nutno provést krátké úsporné čištění
« » nutno provést standardní čištění
« » nutno provést intenzivní čištění
Když čisticí stanice vybere jeden z programů
čištění, ten se nespustí, pokud nestisknete
tlačítko zahájení čištění 4. Pro dosažení
nejlepších výsledků oholení doporučujeme
strojek vyčistit po každém holení.
V průběhu čištění bude příslušná kontrolka
čisticího programu blikat. Každý čisticí program
se skládá z několika cyklů, kdy se holicí hlava
strojku proplachuje čisticí tekutinou a strojek
se vysuší pomocí teplého vzduchu. V závislosti
na zvoleném programu se celková doba čištění
pohybuje od 32 až 43 minut.
Čisticí program by se neměl přerušovat.
Nezapomínejte, že v průběhu sušení holicího
strojku může být holicí hlava horká a vlhká.
Po ukončení čisticího programu se rozsvítí modrá
kontrolka «
» . Nyní je váš holicí strojek čistý a
připravený k dalšímu použití.
Pohotovostní režim
10 minut po ukončení nabíjení nebo čištění se
čisticí stanice Clean&Renew vypne a přejde
do pohotovostního režimu: svítící diody čisticí
stanice Clean&Renew se vypnou.
30
Displej holicího strojku
1
0
0
2
0
0
8
4
0
0
6
1
0
0
2
0
0
8
4
0
0
6
Displej holicího strojku z ukazuje úroveň nabití
baterie. V průběhu nabíjení nebo při použití
holicího strojku bude příslušná zelená kontrolka
úrovně nabití blikat. Při plném nabití budou
všechny zelené kontrolky svítit nepřetržitě za
předpokladu, že holicí strojek je zapnutý nebo
zapojen do sítě.
Pohotovostní režim
(holicí strojek je vypnutý, ale připojený do
elektrické sítě)
Několik minut po dokončení nabíjení se holicí
strojek přepne do pohotovostního režimu: displej
zhasne.
Indikátor nízkého nabití baterie:
Poklesne-li kapacita baterie pod 20%, začne
dílek, indikující nízké nabití baterie «low» blikat,
za předpokladu, že holicí strojek je zapnutý.
Zbývající kapacita baterie pak postačí na 2 až 3
oholení.
 Loading...