

Bras QUARK 1, QUARK 2, QUARK 3 Operator's Manual

QUARK
MANUALE D’ISTRUZIONI
OPERATOR’S MANUAL
CARNET D’INSTRUCTIONS
GEBRAUCHSANWEISUNG
MANUAL DE INSTRUCCIONES

11
1 ELECTRICAL SAFETY INSTRUCTIONS
1
Before connecting the dispenser to the mains, check that
the voltage shown on the rating plate matches your electricity
su pply. C onnec t the dispense r to a sing le-phase supply
through an earthed socket as required by current regulations. If
the dispenser is to be disconnected from the power supply
using a single pole switch, the gap between the contacts on this
switch must be sufficiently wide to guarantee full disconnection
under category III overload conditions.?
2 Do not use extension cables to connect the appliance.
3 To avoid any risks, if the power cable is damaged, it must
be replaced by the manufacturer, by an authorised technician
or by a similarly qualified person.
4 The dispenser is not suitable for outdoor use.
5 The dispenser must be installed in the upright position.
6 Before cleaning, always disconnect the dispenser by
removing the plug from the socket.
7 Always disconnect the dispenser before removing any of
the panels for cleaning or maintenance work.
8 Do not use a water jet to clean the dispenser.
9 This appliance must not be operated by children.
10 Do not let children play with the appliance.
11 This appliance must not be used by persons with reduced
physi cal , sen sory or me nta l cap abilities or with a lack of
experience and knowledge unless they have supervision or
have been trained regarding the safe use of the appliance and
understand the risks involved.
12 Only persons who know and have practical experience of
the appliance are permitted access to the inner components of
the dispenser, especially when dealing with issues regarding
safety and hygiene.
2 HYGIENIC SAFETY INSTRUCTIONS
1
This appliance is intended exclusively for domestic and
similar use.
2 For the appliance to operate correctly, room temperature
must be between +5° and +32°C.
3 Use the appliance to cool the indicated liquids only.
4 Do not introduce dangerous or toxic liquids to the appliance.
3 TECHNICAL CHARACTERISTICS
The electric diagram of the dispenser is located in the inner
part of the dispensing side panel.
Specifications are subject to change without notice.
4 INTRODUCTION
It is necessary to read all sections of this manual thoroughly to
familiarize yourself with all aspects of the unit.
Like all mechanical products, this machine will require cleaning
an d maintenance. Be si de s, di sp en se r working can be
compromised by operator’s mistakes during disassembly and
cleaning. It is strongly recommended that personnel in charge to
the equipment’s daily operations, disasse mbly, cleaning,
sanitizing and assembly, go through these procedures in order
t o be p r oper l y trai n e d and t o make s u re th a t no
misunderstandings exist.
5 INSTALLATION
1
Remove the corrugate container and packing materials and
keep them for possible future use.
Transparent removable bowls n 1 2 3
Capacity of each bowl, approx. l 6 6 6
Dimensions:
width cm 18 36 54
depth cm 47 47 47
height cm 65 65 65
Net weight, approx. kg 22 36 48
Gross weight, approx. kg 24 39 51
Adjustable thermostats n 1 2 3
Hermetic compressor
Air-cooled condenser
Overload protector
Noise level lower than 70 dB (A)
IMPORTANT
Read electrical ratings written on the data plate of the
individual units; the data plate is adhered on the dispensing side panel of the unit, just behind the drip tray (the
right side drip tray in multiple bowl models). The serial
number of the unit (preceded by the symbol #) is adhered
inside the left switch box. In the ETC model the serial
numbers are located underneath the machine or on the
evaporator holder level when the side panels are removed. Data plate specifications will always supersede the
information in this manual.
IMPORTANT
When handling the machine never grasp it by the bowls
or by the evaporator cylinders. The manufacturer refuses
all responsibilities for possible damages which may
occur through incorrect handling.
QUARK 2
QUARK 1
QUARK 3
Q U A R K
E NG LI S H
12
2 Inspect the uncrated unit for any possible damage. If
damage is found, call the delivering carrier immediately to file a
claim.
3 Install the unit on a counter top that will support the
combined weight of dispenser and product bearing in mind
wh at i s st at ed i n th e pr ec eding point 1 IMPORTA NT
warning.
4 A minimum of 15 cm (6”) of free air space all around the unit
should be allowed to guarantee adequate ventilation.
5 Ensure that the legs are screwed tightly into the base of the
machine.
Replace the standard legs originally installed with the 100 mm
(4”) legs whenever they are provided with the unit.
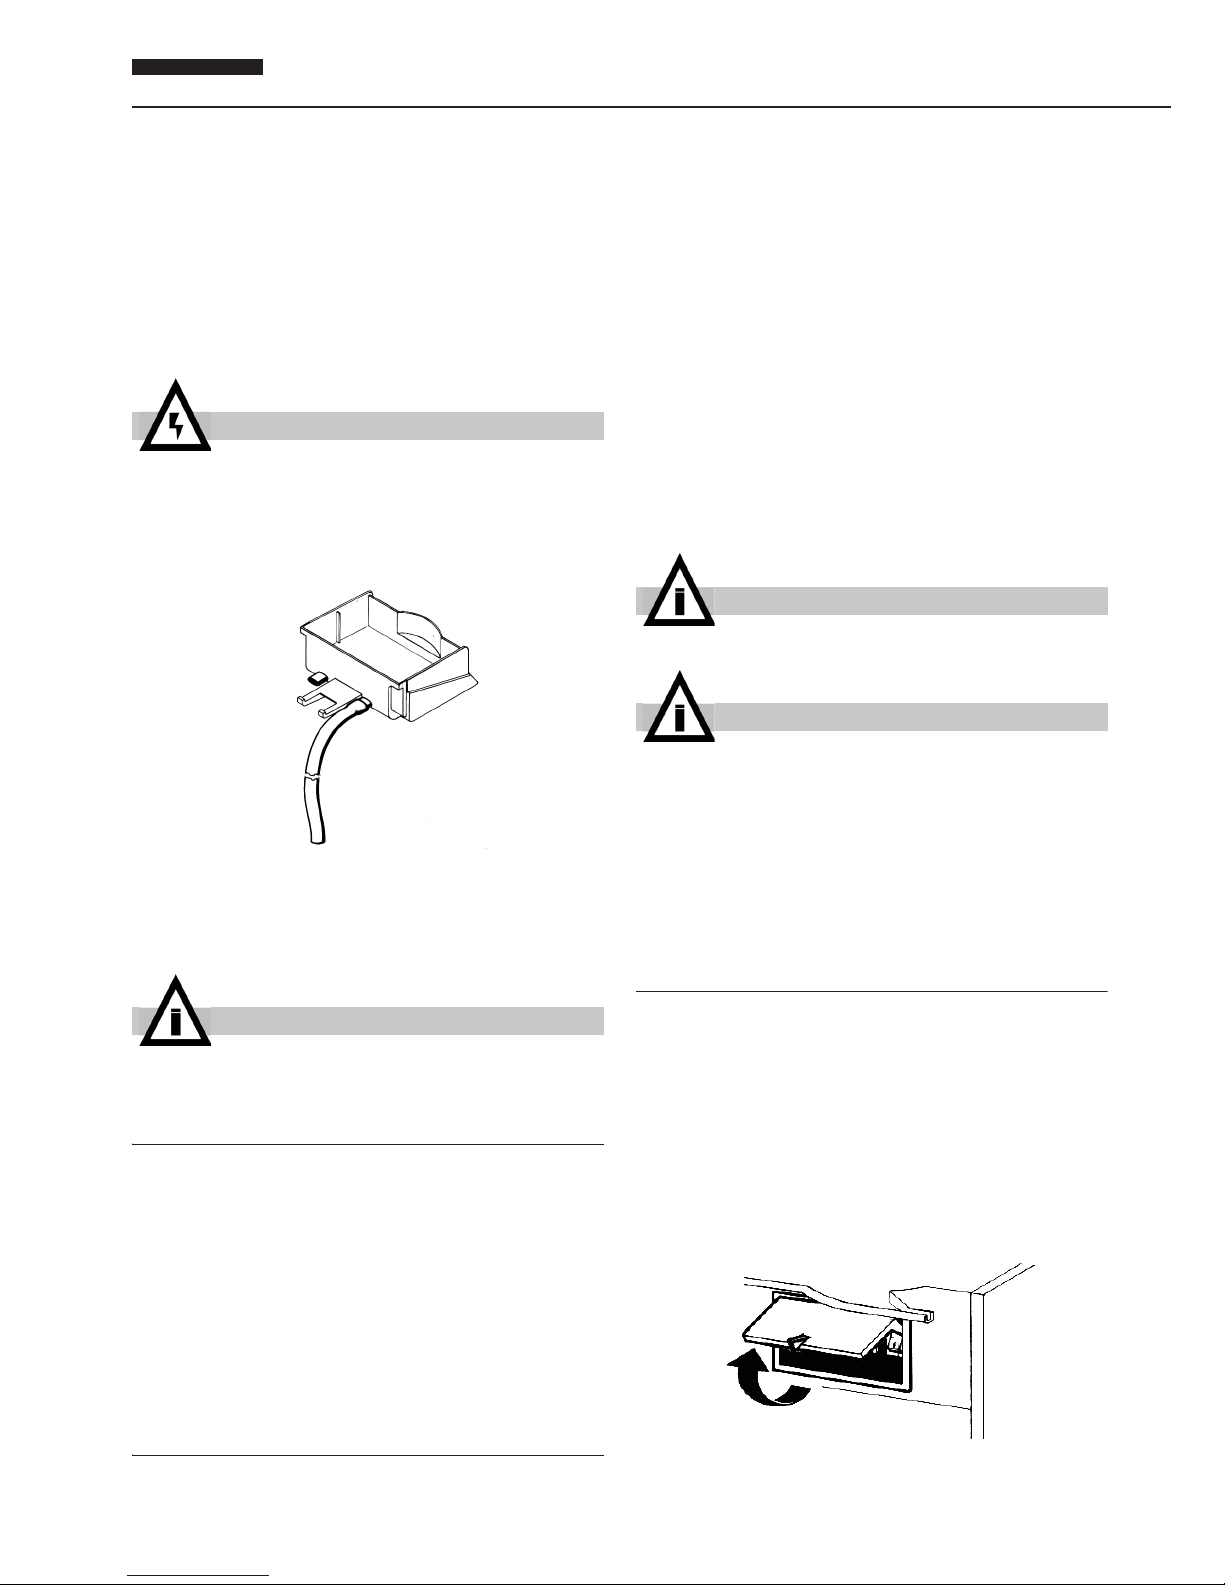
6 Each drip tray has two diaphragm plugs: if a continuous
drain is needed, perforate one of the drain plugs and connect it
to a flexible drain line (see figure 1).
figure 1
7 The unit doesn’t come presanitized from the factory. Before
se rving pro ducts, th e dispens er m ust be disa ssemble d,
cleaned and sanitized according to this handbook instructions
(chapter 5.3 CLEANING AND SANITAZING PROCEDURES).
6 TO OPERATE PROPERLY AND SAFELY
1
Do not operate the dispenser without reading this
operator’s manual.
2 Do not operate the dispenser unless it is properly
grounded.
3 Do not operate the dispenser unless all panels are
restrained with screws.
4 Do not put objects or fingers in panels louvers and faucet
outlet.
5 Do not remove bowls, augers and panels for cleaning or
routine maintenance unless the dispenser is disconnected from
its power source.
6 The cover must be always closed.
7 OPERATING PROCEDURES
1 Clean and sanitize the unit according to the instructions in
this manual. See chapter 5.3 CLEANING AND SANITIZING
PROCEDURES.
2 Fill the bowls with product to the maximum level mark. Do
not overfill.
The exact quantity of product (expressed as liters and gallons)
is shown by marks on the bowl.
3 In case of products to be diluted with water, pour water into
bowl first, then add correct quantity of product . In case of
natural squashes, it is advisable to strain them, in order to
prevent pulps from obstructing the faucet outlet.
4 To obtain the best performance and result, use bases
designed to be run in Granita freezers. Such bases have a
sugar content of 34 degrees B aum é correspondin g to 64
degrees Brix .
For soft drinks the bases are to be diluted with more water, on a
1 plus 5/5.5 basis.
In any case follow the syrup manufacturer’s instructions for
both Granita and soft drink recipes.
If natural juices (e.g. lemon, o range) as well as s ugarless
products (e.g. coffee) are used, dissolve 150 - 200 grams of
sugar per liter.
5 Set the control switches as shown in chapter
5.1 DESCRIPTION OF CONTROLS.
6 Always leave the dispenser on, as the refrigeration stops
automatically when Granita reaches the proper thickness. The
mixers will continue to turn.
7. 1 DESCRIPTION OF CONTROLS
The dispenser is equipped with a power switch. In addition each
bowl is individually operated by a mixer/refrigeration switch. In
fact it is possible to dispense both soft drinks and Granita.
When a bowl is in Soft Drink mode the beverage temperature is
controlled by the corresponding thermostat.
When a bowl is in Granita mode the mix viscosity is controlled
by the corresponding adjustment screw located in the rear wall
of each container (for temperature and viscosity setting make
reference to chapter 5.2 OPERATION HELPFUL HINTS).
All the switches are located on the faucet side of the dispenser
in switch panels protected by switch covers (see figure 2).
figure 2
With reference to figure 3 dispenser controls functions are as
ATTENTION
Failure to provide proper electrical ground according to
applicable electrical codes could result in serious shock
hazard.
IMPORTANT
Install the dispenser so that the plug is easily accessible.
IMPORTANT
Operate the dispenser with food products only.
IMPORTANT
However Granita mix may be done, its Brix (sugar percent content) must be at least 13.
 Loading...