

BRANDT AD228WC1, AD229BE1, AD229DE1, AD229WN1, AD236WN1 User Manual
...
User Guide
Trapeze Hood
99628071_GB_A.qxd 21/01/03 13:46 Page 1
2
Contents
I
ntroduction
Dear Customer,
Thank you for choosing the BRANDT hood.
Our design staff have produced a new generation of kitchen equipment,
to make everyday cooking a pleasure.
The modern, attractive design of your new Brandt hood will blend
smoothly into your kitchen installation, providing an optimum combination
of easy use and performance.
The Brandt range also includes a huge choice of fitted cooking hobs,
ovens, dish-washers and refrigerators, that will match your new Brandt
hood.
Of course, we make every effort to ensure that our products meet all your
requirements, and our Customer Relations department is at your disposal,
to answer all your questions and to listen to all your suggestions (see
back cover of manual).
Brandt has always been a leader in the development of new products,
thus enhancing the quality of everyday life by providing increasingly efficient products, that are easy to use, respect the environment, and are
attractive and reliable.
The BRANDT name.
Introduction P.2
Know the various parts of your hood P.3
Safety recommendations P.3
Installation conditions P.4
Installing your hood P.5-8
Connecting your hood P.9
Using your hood P.9
Changing a bulb P.9
Cleaning your hood P.10
How to contact us ? P.11
Throughout this manual,
indicates safety recommendations,
indicates advice to help you make the
best use of your duct
99628071_GB_A.qxd 21/01/03 13:46 Page 2
S
afety recommendations
Please become familiar with the safety recommendations, before installing and
using your hood.
This hood is designed for normal household use. This hood contains no asbestos.
- Do not allow naked flames to burn beneath the duct, i.e. do not cook " flambé " dishes
or allow a gas ring to burn with no receptacle placed on it (extracted flames could damage the duct).
- Frying under the duct should be constantly monitored.
- Repair work should only be carried out by an approved specialist.
- The metal filters should be regularly cleaned.
- The hood must not be installed or used over a fuel burning (wood, coal, etc.) stove.
To obtain optimum efficiency from your hood:
- You should preferably use the rear cooking rings on your cooker. We recommend that the
hood should be switched on from the beginning of the cooking and, in certain cases, may be
allowed to run for a few minutes after the end of the cooking.
Note :
- When a cooking hood is used simultaneously with other equipment burning gas or similar fuels, the room must be adequately ventilated.
When the duct is running at max. power, the air in a kitchen is entirely evacuated, and thus
replaced, in a few minutes.
IMPORTANT
- In the case of a kitchen heated by equipment connected to a chimney (e.g. a stove, etc.), the
hood must be installed in recirculating mode.
- Do not use the hood without the metal filters.
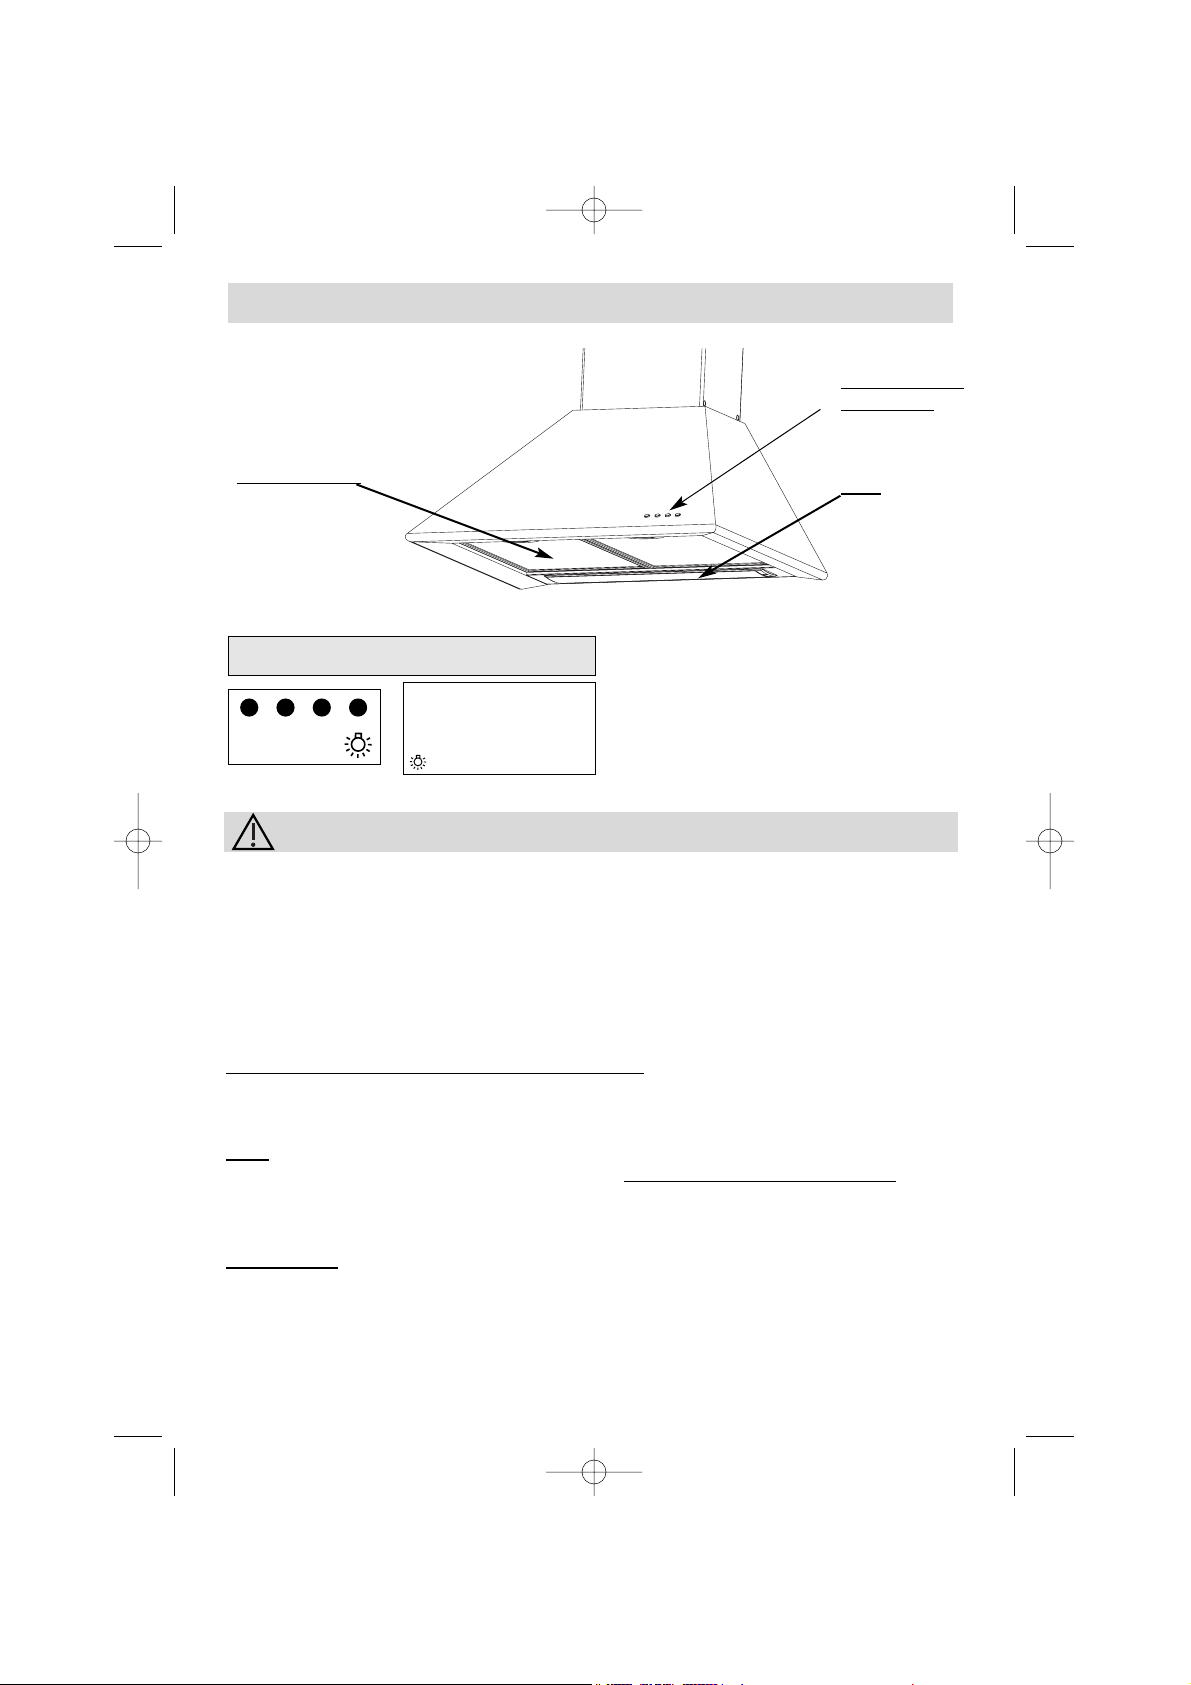
Know the various parts of your Hood ?
Filter Cartridge
Light
Control buttons
(see below)
3-speed model
I Slow speed
II Medium speed
III Fast speed
Lighting
Note: If more than one speed button has
been depressed, the hood operates at the
fastest.
The hood stops working when no
buttons are depressed.
3
I II III
99628071_GB_A.qxd 21/01/03 13:46 Page 3
4
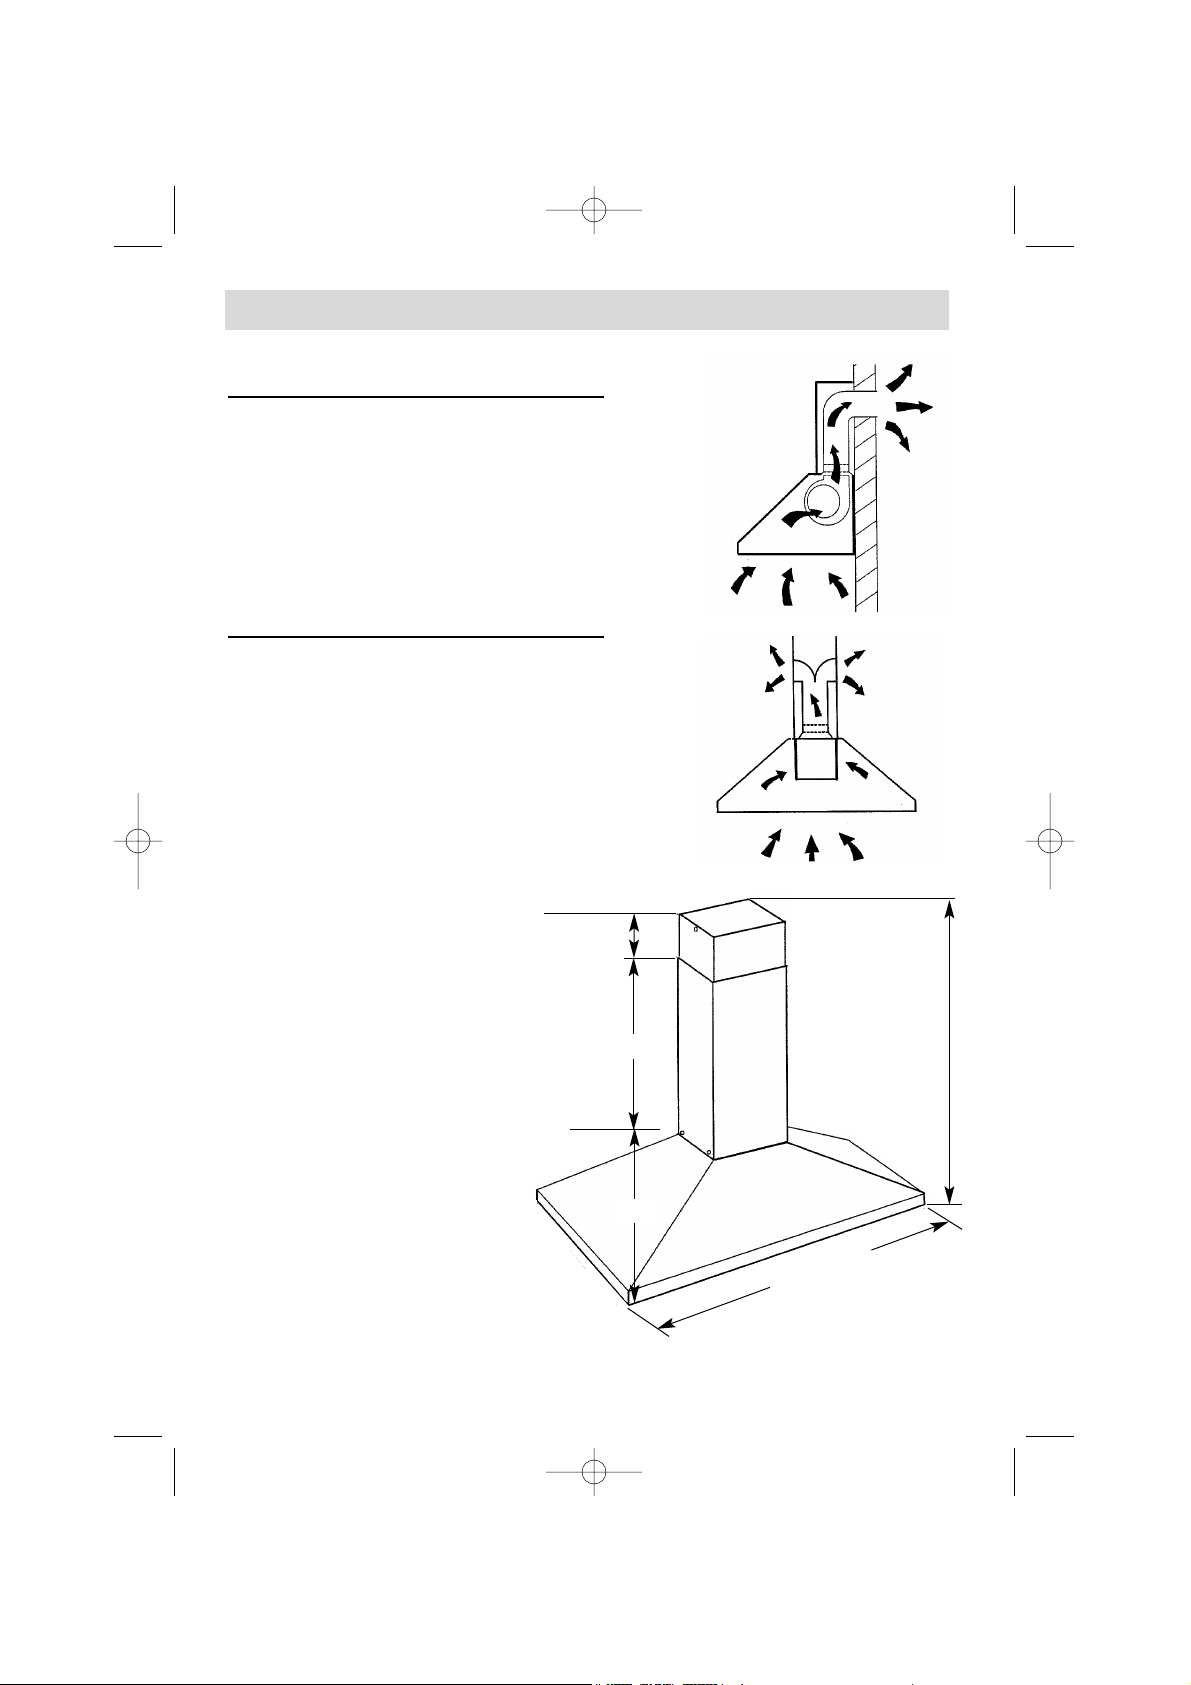
Installation conditions
If you have an air outlet to outdoors:
Your hood can be connected to this outlet through an
evacuation duct (enamel finished, in aluminium, flexihose or other non-inflammable material), with internal
diameter 150 mm (
not supplied
).
Otherwise, an adapter may be used to connect your
hood to an evacuation duct with internal diameter 125
mm (supplied with your hood).
If you have no air outlet to outdoors:
All our units can be used in recirculating mode (
with
no outlet to outdoors
).
In this case, an active carbon filter should be installed, to eliminate smells.
Width:
600 or 900 mm Depending on
model
Depth:
500 mm
Overall height under
conduit:
285 mm
Overall height:
820 /1235
Outlet outer diameter:
150 mm (with non-return valve)
or 125 mm.
500
minimum 820 - maximum 1235
70 mm
minimum for
ventilator shaft
600 or 900
285
99628071_GB_A.qxd 21/01/03 13:46 Page 4
 Loading...