

Brandt CH800CE Installation And Use Instructions Manual

Instructions for installing
and using
your vitroceramic hob
CH800CE
hob
reference HNH 25 B1E
P AR T 2 FOR THE USER
HOW TO USE THE ZONES P. 7
SAFETY P. 8
QUESTIONS AND ANSWERS P. 8
HOW TO CLEAN YOUR COOKING HOB P. 9
PRECAUTIONS FOR USE P. 10
COOKING TIPS AND GUIDE P. 11-12
VOTRE T ABLE DE CUISSON EST LIVRÉE
PREREGLEE POUR LE GAZ DE RESEAU ( GAZ NA TUREL)
P AR T 1 FOR THE INSTALLER
WHAT YOUR HOB LOOKS LIKE P. 3
HOW A VITRO
-CERAMIC HOB WORKS P. 3
GENERAL INFORMATIONS P.4
FITTING INTO A UNIT P. 4
CHOOSING YOUR INSTALLATION P. 5
CHARACTERISTICS P
. 6
HOW TO CONNECT YOUR COOKING HOB P. 6
These hobs have been designed for private use in the home.
Please read these instructions before installing and using your hob.
With a view to the constant improvement of our products, we reserve the right to make any changes in their
technical, functional or aesthetic characteristics as a result of technical evolution.
These hobs are designed exclusively for the cooking of drinks and foodstuffs.
These products do not contain any asbestos-based component parts.
-2-
Look out for
tips
warnings
things to read
contacts
You have just bought a new cooking hob; thank you for choosing Brandt.
All our hobs have been designed for years of use in your kitchen and to give you full satisfaction. Our
priorities are ease of use, aesthetic appearance and reliability.
Nowadays, more than ever, whatever your demands and your tastes, you will find that Brandt
provides you with household appliances which will make your life easier and more beautiful every day
for years to come.
Your interest in our products is our strongest motivation. For you, Brandt must remain a synonym for
quality, economy and performance. That is why we want to stay close to you and encourage
dialogue.
Listening to you, informing you, advising you - that's what our consumer service is all about.
Thank you for putting your trust in us.
Our reward will be your satisfaction, which will fully justify our slogan:
"Brandt innovations you need".
.
Brandt
4571
-3-
PPPPrrrreeeesssseeeennnnttttaaaattttiiiioooonn
nn
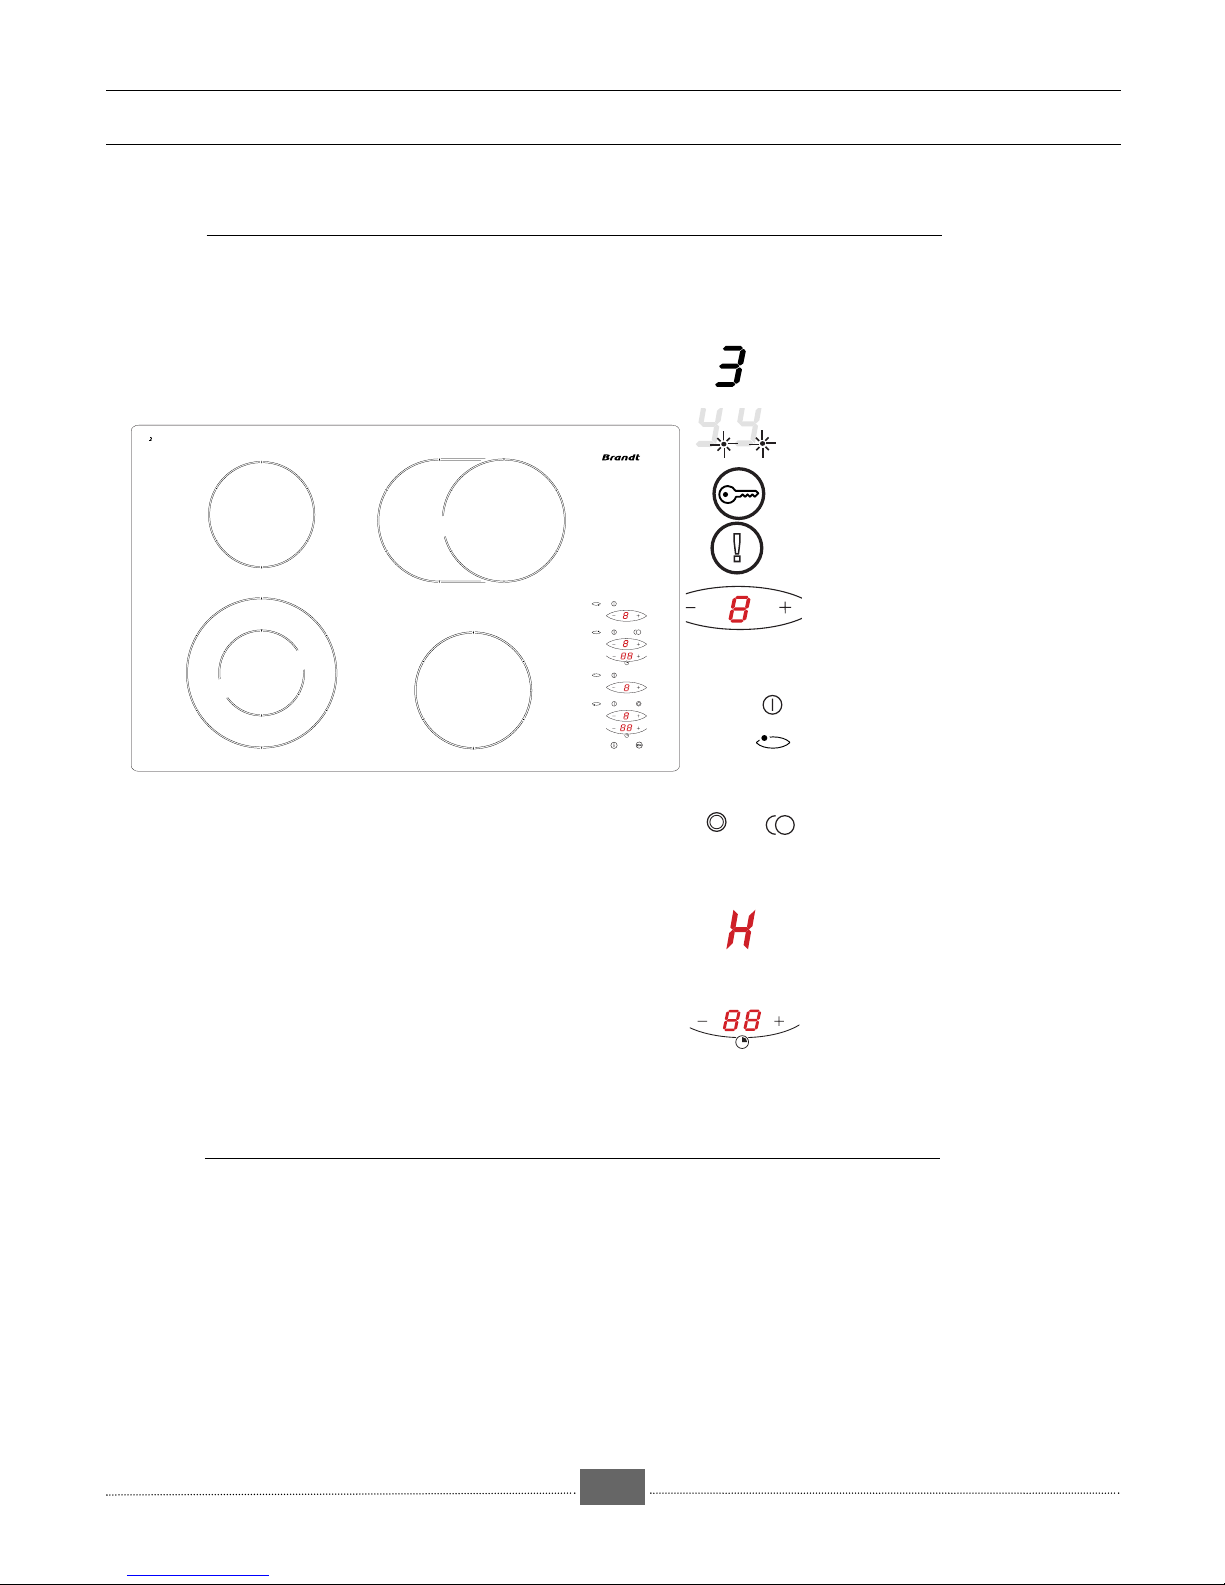
WWHHAATT YYOOUURR HHOOBB LLOOOOKKSS LLIIKKEE
●●
Indicator (1 to 9) of power required for
each heating zone.
Lock indicator
Lock key
general stop key
Adjustment of power (+ or -) for each
heating zone.
On/off control for each heating zone.
Symbol indicating the heating zone on
the hob.
start key for the additional zone
Residual heat indicator
1400 W
1200 W
750/2200 W
The FAST RADIANT rings are comprised of a ribbon heating element fitted with a temperature limiter.
These rings transmit heat by conduction to the vitro-ceramic glass, to the pan, and then to the food.
HHOOWW AA VVIITTRROO--CCEERRAAMMIICC HHOOBB WWOORRKKSS
●●
1400/2200 W
Timer setting button
Please keep to the following points most carefully :
PPPPaaaarrrrtttt 1111:::: FFFFoooorrrr tttthhhheeee iiiinnnnssssttttaaaalllllllleeeerr
rr
•
The hob should not be fitted above a washing
machine, a fridge or a freezer.
•
Wall surfaces above the work surface and in
the immediate vicinity of the cooking hob must be
heat resistant.
•
Laminated surfaces and the adhesive used
for fixing them must be heat resistant in order to
avoid any damage.
•
Protection of cut-outs:
The chipboard used for work surfaces swells
relatively quickly when in contact with dampness.
Apply a varnish or a special glue to the edges of the
cut-out to protect them from dampness or
condensation which may occur underneath the work
surface underneath the table.
Protection against overheating - type Y -
to CEI 335-2-6.
•
Cut a hole in the work surface to the required
size. The measurement of at least 40 mm should be
measured from the wall and the sides (rear and/or
sides).
•
The cooking hob should be fitted into the top
surface of a unit at least 3 cm thick, in heat-resistant
material or surfaced with heat-resistant material.
•
To fix the hob, use the fasteners which you will find
in the wallet .
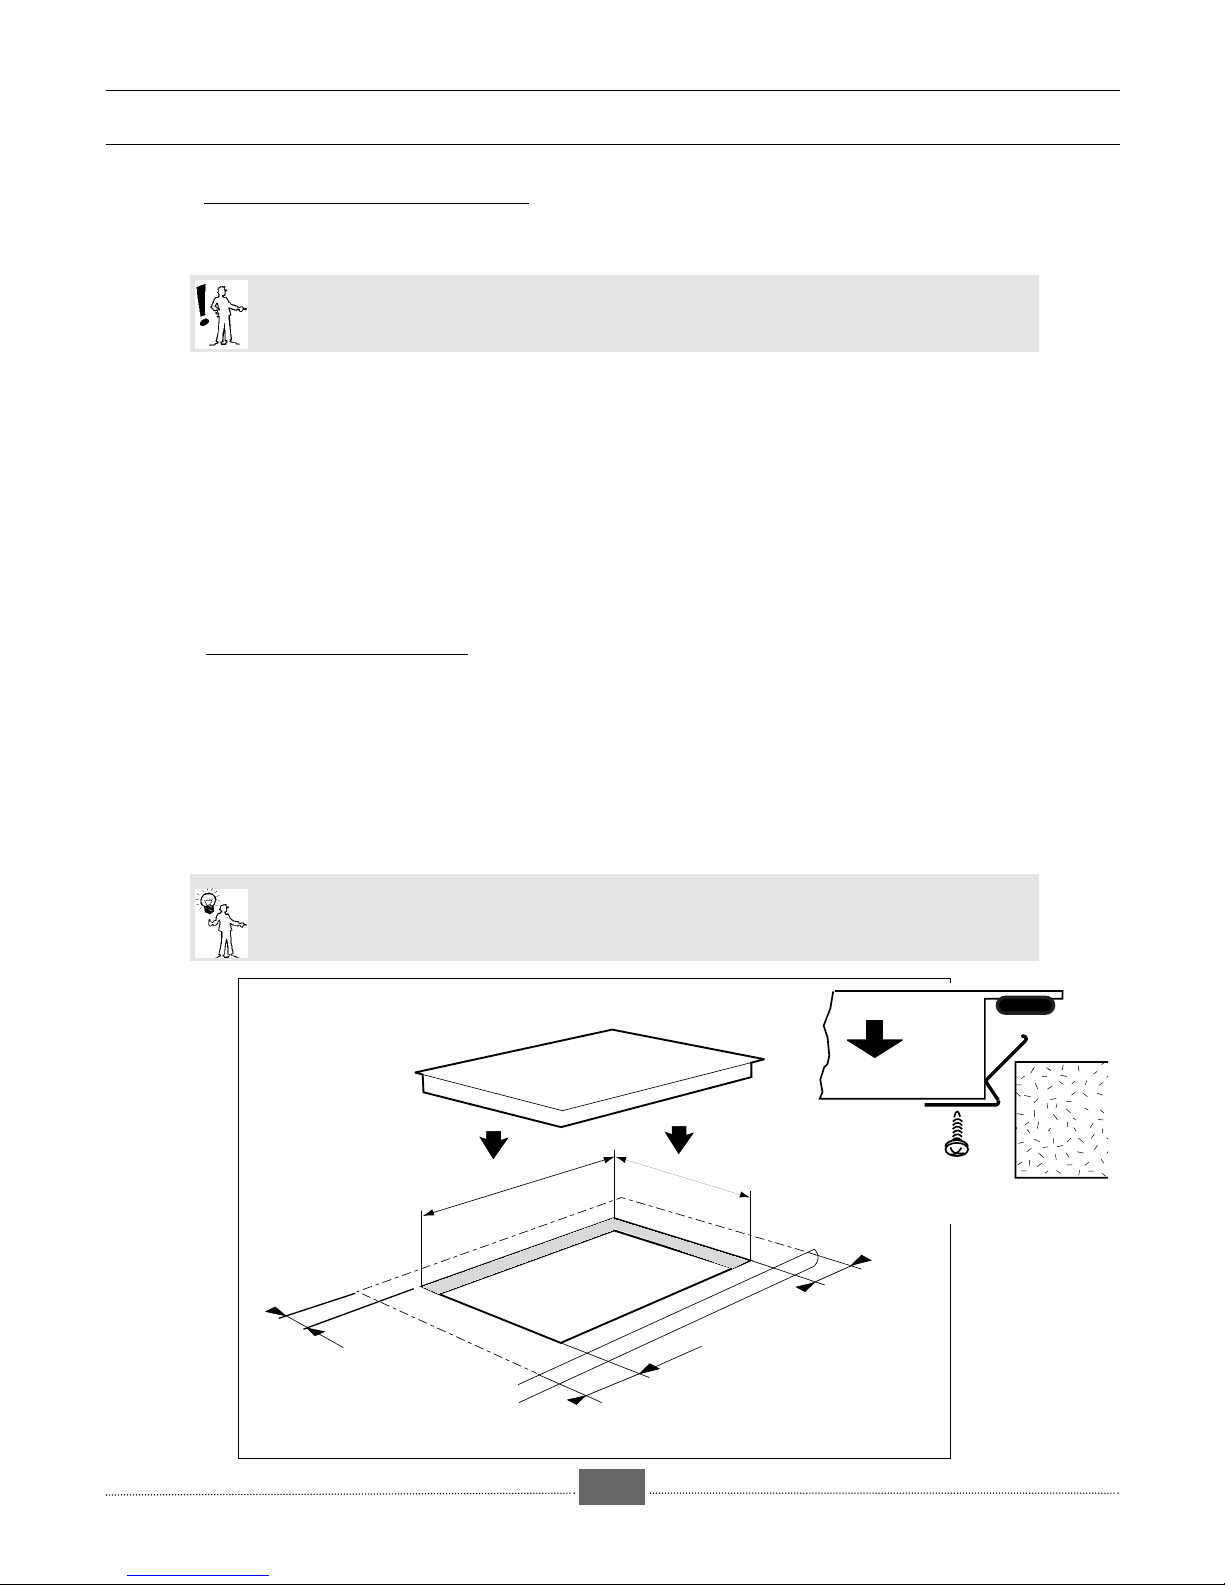
•
Stick the seal under the hob to ensure a watertight
seal between the hob and the work surface (see
fig. below).
-4-
FITTING SHOULD NORMALLY ONL Y BE CARRIED OUT BY A QUALIFIED FITTER OR TECHNICIAN.
GGEENNEERRAALL IINNFFOORRMMAATTIIOONN
●●
FFIITTTTIINNGG IINNTTOO AA UUNNIITT
4 cm mini
56 / 75 cm
49 cm
4 cm mini
4 cm mini
●●
So that cooking utensils can be used easily, there should be no unit or vertical surface within 30 cm of the
cooking hob.
 Loading...