

Page 1

Trūper Operator Manual
Color Scanner
Part Number S006830 Rev. B
Page 2

Böwe Bell + Howell Scanners
Please read this manual for information about the proper installation, operation and
maintenance of the scanner. Keep this documentation in a safe place for future re ferenc e.
Disclaimer
The instructions and descriptions contained in this document were accurate at the time of pub lishing.
However, succeed ing product s and do cument s are subject to chang e without notice. The refore, Bowe Bell
+ Howell Scanners, L.L.C. assumes no liability for damages incurred directly or indirectly from errors,
omissions, or discrepancies between the product and this document.
© 2005 Bowe Bell + Howell Scanners, L.L.C. All rights reserved. All material in this publication is
confidential and is to be used by and distributed to authorized personnel of the purchaser only. All
intellectual property rights remain the property of Bowe Bell + Howell Scanners, L.L.C. No part of this
publication may be reproduced, distributed, modified, displayed, transmitted, stored in a retrieval system,
or translated into any human or computer language, in any form or by any means, electronic, mechanical,
magnetic, optical, chemical, manual, or otherwise, without the prior written permission of the copyright
owner, Bowe Bell + Howell Scanners, L.L.C., 760 South Wolf Road, Wheeling, IL 60090-6232, USA.
© Bowe Bell + Howell Scanners, L.L.C.
760 South Wolf Road
Wheeling, IL 60090-6232, USA
Corporate Offices: 1-847-675-7600
Sales: 1-800-SCAN-494
Technical Support: 1-800-SCAN-495
1-416-760-4499
FAX: 1-847-423-3047
TTY Line: 1-847-423-3032
Internet: www.bbhscanners.com
The information given in this manual is subject to change without notice. Please go to
www.bbhscanners.com
to download the most current manual.
www.bbhscanners.com 2 of 142
Page 3

In Europe
In Asia: China
International Offices
The Bowe House
The Sterling Centre - Bracknell
Berkshire RG12 2PW
United Kingdom
Telephone: +44-1344-462-103
Fax: +44-1344-462-101
Technical Support:
No. 2 room, 601 Tower W3, Oriental Plaza
No. 1 East Chang An Ave, Dong Cheng Dist.
Beijing, 100738
China (PRC)
Telephone +86-10-85181839
Fax +86-10-85181839
www.bbhscanners.com 3 of 142
Page 4

Trademark Acknowledgments
ENERGY STAR® and the ENERGY STAR certification mark are registered U.S. marks.
Windows
Windows
Microsoft
United States and/or other countries.
VirtualReScan
ISIS
Corporation.
Adobe
Pentium
USB™ is a registered trademark of the USB Implementers Forum.
Trūper™ is a registered trademark of Böwe Bell + Howell Scanners, L.L.C.
All other product names and logos mentioned herein are the property of their respective companies.
®
2000 is Microsoft® Windows® 2000 operating system.
®
XP is Microsoft® Windows® XP operating system.
®
and Windows® are either registered trademarks or trademarks of Microsoft Corporation in the
®
, Kofax® and ImageControls® are registered trademarks of Kofax Image Products.
®
and PixTools® are registered trademarks of Pixel Translations, a division of Captiva Software
®
, Acrobat® and Reader® are registered trademarks of Adobe Systems Incorporated.
®
is a registered trademark of Intel Corporation.
Web Site: www.bbhscanners.com
© 2005 Bowe Bell + Howell Scanners, L.L.C
www.bbhscanners.com 4 of 142
Page 5

Table of Contents
Trademark Acknowledgments . . . . . . . . . . . . . . . . . . . . . . . . . . . . . . . . . . . . . . . . . . . . . 4
Federal Communications Commission Requirements . . . . . . . . . . . . . . . . . . . . . . . . . . . .8
Thank You . . . . . . . . . . . . . . . . . . . . . . . . . . . . . . . . . . . . . . . . . . . . . . . . . . . . . . . . . . . . . 9
About Trūper . . . . . . . . . . . . . . . . . . . . . . . . . . . . . . . . . . . . . . . . . . . . . . . . . . . . . . . . . . . .9
About This Manual . . . . . . . . . . . . . . . . . . . . . . . . . . . . . . . . . . . . . . . . . . . . . . . . . . . . . . . .9
Specifications . . . . . . . . . . . . . . . . . . . . . . . . . . . . . . . . . . . . . . . . . . . . . . . . . . . . . . . . . 10
Scanner Unit . . . . . . . . . . . . . . . . . . . . . . . . . . . . . . . . . . . . . . . . . . . . . . . . . . . . . . . . . . .10
Advanced Features . . . . . . . . . . . . . . . . . . . . . . . . . . . . . . . . . . . . . . . . . . . . . . . . . . . . . 12
Consumable Parts and Accessories List . . . . . . . . . . . . . . . . . . . . . . . . . . . . . . . . . . . . . .13
Computer System Requirements . . . . . . . . . . . . . . . . . . . . . . . . . . . . . . . . . . . . . . . . . . .13
Component Identification . . . . . . . . . . . . . . . . . . . . . . . . . . . . . . . . . . . . . . . . . . . . . . . . . .15
Minimum Space Requirements . . . . . . . . . . . . . . . . . . . . . . . . . . . . . . . . . . . . . . . . . . . . . 17
Top View . . . . . . . . . . . . . . . . . . . . . . . . . . . . . . . . . . . . . . . . . . . . . . . . . . . . . . . . . . .17
Front View . . . . . . . . . . . . . . . . . . . . . . . . . . . . . . . . . . . . . . . . . . . . . . . . . . . . . . . . . .17
Safety Precautions for the Operating Environment . . . . . . . . . . . . . . . . . . . . . . . . . . . . . 18
The Scanner Unit . . . . . . . . . . . . . . . . . . . . . . . . . . . . . . . . . . . . . . . . . . . . . . . . . . . . . . . .18
Power Source . . . . . . . . . . . . . . . . . . . . . . . . . . . . . . . . . . . . . . . . . . . . . . . . . . . . . . . . . .21
Handling the CD-ROM . . . . . . . . . . . . . . . . . . . . . . . . . . . . . . . . . . . . . . . . . . . . . . . . . . . .21
Installing the Scanner . . . . . . . . . . . . . . . . . . . . . . . . . . . . . . . . . . . . . . . . . . . . . . . . . . . 23
Quick Installation Checklist . . . . . . . . . . . . . . . . . . . . . . . . . . . . . . . . . . . . . . . . . . . . . . . .23
Unpacking the Scanner . . . . . . . . . . . . . . . . . . . . . . . . . . . . . . . . . . . . . . . . . . . . . . . . . . .24
Attaching the Feeder Tray . . . . . . . . . . . . . . . . . . . . . . . . . . . . . . . . . . . . . . . . . . . . . . . . .25
Initial Setup and Installation . . . . . . . . . . . . . . . . . . . . . . . . . . . . . . . . . . . . . . . . . . . . . . . .26
Connecting the Scanner . . . . . . . . . . . . . . . . . . . . . . . . . . . . . . . . . . . . . . . . . . . . . . .26
Installing the Windows Scanner Driver . . . . . . . . . . . . . . . . . . . . . . . . . . . . . . . . . . . .27
Trūper Software Installation . . . . . . . . . . . . . . . . . . . . . . . . . . . . . . . . . . . . . . . . . . . . . . . .32
Installing the Software . . . . . . . . . . . . . . . . . . . . . . . . . . . . . . . . . . . . . . . . . . . . . . . . .32
View Manuals . . . . . . . . . . . . . . . . . . . . . . . . . . . . . . . . . . . . . . . . . . . . . . . . . . . . . . .48
Contents of the Installation Resource CD-ROM . . . . . . . . . . . . . . . . . . . . . . . . . . . . .48
Operating the Scanner . . . . . . . . . . . . . . . . . . . . . . . . . . . . . . . . . . . . . . . . . . . . . . . . . . 49
Turning on the Scanner . . . . . . . . . . . . . . . . . . . . . . . . . . . . . . . . . . . . . . . . . . . . . . . . . . . 49
LED Status Indicator . . . . . . . . . . . . . . . . . . . . . . . . . . . . . . . . . . . . . . . . . . . . . . . . . . . . .50
Document Preparation . . . . . . . . . . . . . . . . . . . . . . . . . . . . . . . . . . . . . . . . . . . . . . . . . . . .51
General Guidelines . . . . . . . . . . . . . . . . . . . . . . . . . . . . . . . . . . . . . . . . . . . . . . . . . . . 51
Guidelines for Using the ADF . . . . . . . . . . . . . . . . . . . . . . . . . . . . . . . . . . . . . . . . . . . 51
Types of Documents to Avoid in the ADF . . . . . . . . . . . . . . . . . . . . . . . . . . . . . . . . . .53
Using the Trūper ADF . . . . . . . . . . . . . . . . . . . . . . . . . . . . . . . . . . . . . . . . . . . . . . . . . . . .54
Clearing Paper Jams in the ADF . . . . . . . . . . . . . . . . . . . . . . . . . . . . . . . . . . . . . . . . . . . .58
Removing Paper Jams from the Document Feeder . . . . . . . . . . . . . . . . . . . . . . . . . . 58
Removing Paper Jams from the Exit Path . . . . . . . . . . . . . . . . . . . . . . . . . . . . . . . . .60
STOP/START Button Operation . . . . . . . . . . . . . . . . . . . . . . . . . . . . . . . . . . . . . . . . . . . .62
Feed Modes with the ADF . . . . . . . . . . . . . . . . . . . . . . . . . . . . . . . . . . . . . . . . . . . . . . . . .63
Manual Feed . . . . . . . . . . . . . . . . . . . . . . . . . . . . . . . . . . . . . . . . . . . . . . . . . . . . . . . .63
Wait for Start to Feed . . . . . . . . . . . . . . . . . . . . . . . . . . . . . . . . . . . . . . . . . . . . . . . . .64
Automatic Start to Feed . . . . . . . . . . . . . . . . . . . . . . . . . . . . . . . . . . . . . . . . . . . . . . .64
Scanner Manual Feed Setting . . . . . . . . . . . . . . . . . . . . . . . . . . . . . . . . . . . . . . . . . .65
Feeding Speed . . . . . . . . . . . . . . . . . . . . . . . . . . . . . . . . . . . . . . . . . . . . . . . . . . . . . . . . .66
Detect Double Feed . . . . . . . . . . . . . . . . . . . . . . . . . . . . . . . . . . . . . . . . . . . . . . . . . . . . . .67
Changing the Background Color . . . . . . . . . . . . . . . . . . . . . . . . . . . . . . . . . . . . . . . . . . . .69
www.bbhscanners.com 5 of 142
Page 6

Changing the Background Color Reference Plates . . . . . . . . . . . . . . . . . . . . . . . . . .69
Operator Maintenance . . . . . . . . . . . . . . . . . . . . . . . . . . . . . . . . . . . . . . . . . . . . . . . . . . 72
Cleaning the Outside of the Scanner . . . . . . . . . . . . . . . . . . . . . . . . . . . . . . . . . . . . . . . . .72
Cleaning Inside the Scanner . . . . . . . . . . . . . . . . . . . . . . . . . . . . . . . . . . . . . . . . . . . . . . .73
Roller Cleaning Paper . . . . . . . . . . . . . . . . . . . . . . . . . . . . . . . . . . . . . . . . . . . . . . . . .74
Cleaning the Paper Feed Roller, Separation Roller and Retard Roller . . . . . . . . . . . .75
Cleaning the Drive Rollers and Free Rollers in the ADF . . . . . . . . . . . . . . . . . . . . . . .77
Cleaning the Drive Rollers, Free Rollers and Exit Rollers in the Exit Door . . . . . . . . . 79
Cleaning the Background Color Reference Plat es and ADF Glass . . . . . . . . . . . . . .81
Cleaning the Paper Sensor, Waiting Sensors and Double Feed Detector . . . . . . . . .83
Cleaning the Starting, Skew and Ending Sensors . . . . . . . . . . . . . . . . . . . . . . . . . . .84
Replacing Consumables . . . . . . . . . . . . . . . . . . . . . . . . . . . . . . . . . . . . . . . . . . . . . . . . . 86
Replacing the Paper Feed Roller Module . . . . . . . . . . . . . . . . . . . . . . . . . . . . . . . . . . . . .86
Replacing the Retard Roller Module . . . . . . . . . . . . . . . . . . . . . . . . . . . . . . . . . . . . . . . . .89
Trūper User Utility . . . . . . . . . . . . . . . . . . . . . . . . . . . . . . . . . . . . . . . . . . . . . . . . . . . . . . 92
Starting the User Utility . . . . . . . . . . . . . . . . . . . . . . . . . . . . . . . . . . . . . . . . . . . . . . . . . . .92
Functions and Settings . . . . . . . . . . . . . . . . . . . . . . . . . . . . . . . . . . . . . . . . . . . . . . . . . . .93
User Utility Main Dialog Window . . . . . . . . . . . . . . . . . . . . . . . . . . . . . . . . . . . . . . . . .93
Restoring Shading to the Default . . . . . . . . . . . . . . . . . . . . . . . . . . . . . . . . . . . . . . . .97
Scanner Counter . . . . . . . . . . . . . . . . . . . . . . . . . . . . . . . . . . . . . . . . . . . . . . . . . . . . .98
Help . . . . . . . . . . . . . . . . . . . . . . . . . . . . . . . . . . . . . . . . . . . . . . . . . . . . . . . . . . . . . . .99
Select Scanner(X) . . . . . . . . . . . . . . . . . . . . . . . . . . . . . . . . . . . . . . . . . . . . . . . . . . . .99
Save Info . . . . . . . . . . . . . . . . . . . . . . . . . . . . . . . . . . . . . . . . . . . . . . . . . . . . . . . . . . .99
Close . . . . . . . . . . . . . . . . . . . . . . . . . . . . . . . . . . . . . . . . . . . . . . . . . . . . . . . . . . . . . .99
Check Version Information . . . . . . . . . . . . . . . . . . . . . . . . . . . . . . . . . . . . . . . . . . . .100
Troubleshooting . . . . . . . . . . . . . . . . . . . . . . . . . . . . . . . . . . . . . . . . . . . . . . . . . . . . . . 101
User Utility Error Codes . . . . . . . . . . . . . . . . . . . . . . . . . . . . . . . . . . . . . . . . . . . . . . . . . .101
Troubleshooting Scanner Operations . . . . . . . . . . . . . . . . . . . . . . . . . . . . . . . . . . . . . . .103
Repacking Instructions . . . . . . . . . . . . . . . . . . . . . . . . . . . . . . . . . . . . . . . . . . . . . . . . . 106
Glossary . . . . . . . . . . . . . . . . . . . . . . . . . . . . . . . . . . . . . . . . . . . . . . . . . . . . . . . . . . . . 107
Appendix 1—Front Page, Pre-Scan Imprinter Installation . . . . . . . . . . . . . . . . . . . . . . 109
Safety Precautions . . . . . . . . . . . . . . . . . . . . . . . . . . . . . . . . . . . . . . . . . . . . . . . . . . . . .109
Component Identification . . . . . . . . . . . . . . . . . . . . . . . . . . . . . . . . . . . . . . . . . . . . . . . . .110
Installing the Imprinter Unit . . . . . . . . . . . . . . . . . . . . . . . . . . . . . . . . . . . . . . . . . . . . . . .110
Ink Cartridge Installation and Printing Position . . . . . . . . . . . . . . . . . . . . . . . . . . . . . . . . 114
Safety Precautions . . . . . . . . . . . . . . . . . . . . . . . . . . . . . . . . . . . . . . . . . . . . . . . . . .114
Installing the Ink Cartridge . . . . . . . . . . . . . . . . . . . . . . . . . . . . . . . . . . . . . . . . . . . .114
Adjusting the Printing Position . . . . . . . . . . . . . . . . . . . . . . . . . . . . . . . . . . . . . . . . .116
Cleaning the Ink Cartridge . . . . . . . . . . . . . . . . . . . . . . . . . . . . . . . . . . . . . . . . . . . . . . . .118
Cleaning the Print Head with the User Utility . . . . . . . . . . . . . . . . . . . . . . . . . . . . . .118
Cleaning the Print Head Manually . . . . . . . . . . . . . . . . . . . . . . . . . . . . . . . . . . . . . . .118
Removing the Ink Cartridge . . . . . . . . . . . . . . . . . . . . . . . . . . . . . . . . . . . . . . . . . . . . . . .119
Ink Cartridge Specifications . . . . . . . . . . . . . . . . . . . . . . . . . . . . . . . . . . . . . . . . . . . . . . .120
Imprinter (Endorser) . . . . . . . . . . . . . . . . . . . . . . . . . . . . . . . . . . . . . . . . . . . . . . . . .121
Appendix 2—Multicolor Dropout (MCD) and Single Color Dropout . . . . . . . . . . . . . . . 123
Single Color Dropout . . . . . . . . . . . . . . . . . . . . . . . . . . . . . . . . . . . . . . . . . . . . . . . . . . . .123
Multicolor Dropout (MCD) . . . . . . . . . . . . . . . . . . . . . . . . . . . . . . . . . . . . . . . . . . . . . . . .124
How to Determine RGB Value . . . . . . . . . . . . . . . . . . . . . . . . . . . . . . . . . . . . . . . . . . . . .129
Appendix 3—Shading Adjustment . . . . . . . . . . . . . . . . . . . . . . . . . . . . . . . . . . . . . . . . 130
About Shading Adjustment . . . . . . . . . . . . . . . . . . . . . . . . . . . . . . . . . . . . . . . . . . . . . . . 130
What Is the Purpose of Shading Adjustment? . . . . . . . . . . . . . . . . . . . . . . . . . . . . . 130
www.bbhscanners.com 6 of 142
Page 7

When Is Shading Adjustment Required? . . . . . . . . . . . . . . . . . . . . . . . . . . . . . . . . . 130
Shading Adjustment Procedure . . . . . . . . . . . . . . . . . . . . . . . . . . . . . . . . . . . . . . . . . . . .130
Appendix 4—Adding Memory . . . . . . . . . . . . . . . . . . . . . . . . . . . . . . . . . . . . . . . . . . . . 131
Installing the DIMM Module . . . . . . . . . . . . . . . . . . . . . . . . . . . . . . . . . . . . . . . . . . . . . . .131
Removing the Interface Board . . . . . . . . . . . . . . . . . . . . . . . . . . . . . . . . . . . . . . . . .131
Installing a DIMM Module on the Interface Board . . . . . . . . . . . . . . . . . . . . . . . . . . .132
Re-installing the Interface Board . . . . . . . . . . . . . . . . . . . . . . . . . . . . . . . . . . . . . . . .133
Appendix 5 - Wire Frame Accessory . . . . . . . . . . . . . . . . . . . . . . . . . . . . . . . . . . . . . . 134
Attaching the Wire Frame Accessory . . . . . . . . . . . . . . . . . . . . . . . . . . . . . . . . . . . .134
Index . . . . . . . . . . . . . . . . . . . . . . . . . . . . . . . . . . . . . . . . . . . . . . . . . . . . . . . . . . . . . . . 137
Limited Use License Agreement . . . . . . . . . . . . . . . . . . . . . . . . . . . . . . . . . . . . . . . . . . 141
www.bbhscanners.com 7 of 142
Page 8

Federal Communications Commission Requirements
(For United States only)
This equipment has been tested and found to comply with the limits for a Class A digital device,
pursuant to part 15 of the FCC Rules. These limits are designed to provide reasonable protection
against harmful interference when the equipment is operated in a commercial environmen t. This
equipment generates, uses and can radiate radio frequency energy and, if not installed and used in
accordance with the instruction manual, m ay cause harmful interference to radio communications.
Operation of this equipment in a residential area is likely to cause har mful inter fer ence in which ca se
the user will be required to correct the interference at his own expense.
FCC Warning: To assure continued FCC compliance, the user must use only shielded interface
cable and the provided power supply cord. Also, any unauthorized changes or modifications to this
equipment would void the user’s authority to operate this device.
(For Canada)
THIS CLASS A DIGITAL APPARATUS COMPLIES WITH CANADIAN ICES-003.
CET APPAREIL NUMÉRIQUE DE LA CLASSE A EST CONFORME Á LA NORME NMB-003 DU
CANADA.
Warning
• TO PREVENT FIRE OR SHOCK HAZARD, DO NOT EXPOSE THIS PRODUCT TO RAIN OR
ANY TYPE OF MOISTURE.
• THE ELECTRICAL OUTLET MUST BE NEAR THIS EQUIPMENT AND MUST BE EASILY
ACCESSIBLE.
• THIS PRODUCT SHOULD BE USED ONLY WITH THE POWER CORD THAT IS SUPPLIED
WITH THE SCANNER OR WITH A POWER CORD THAT HAS BEEN APPROVED BY A
CERTIFIED ELECTRICAL CONTRACTOR.
As an ENERGY STAR Partner, Bowe Bell + Howell Scanners, L.L.C. has determined that this product
meets the ENERGY STAR guidelines for energy efficiency.
www.bbhscanners.com 8 of 142
Page 9

Thank You
Thank you for purchasing a Böwe Bell + Howell Trūper™ Color Scanner Model 3600. This is an
exceptional, fast-scanning and ready-for-duty scanner.
The Trūper bundle consists of everything you need to connect and operate the scanner. This includes the
scanner itself, a USB 2.0 cable and VirtualReScan (V RS) image enhancement software technology.
Trūper scanners are designed to be reliable, easy to connect and easy to maintain. They are also
designed to handle a variety of document sizes and types.
Please take a few minutes to review this manual. It contains the detailed information you need to get the
most out of your Trūper scanner.
Please register your new scanner . Registering serves as a verification of ownership and confirms your right
to protection under the terms and conditions of your warranty. Registration also helps us serve you better if
you need to call us about this product. Visit the warranty registration
return the warranty registration card that shipped with this product.
Your Trūper scanner offers the following features:
• Simplex and duplex scanning
• Ultrasonic multifeed detection
• Black and white, grayscale and color scanning
• Automatic document feeder that holds up to 200 sheets
• VRS technology for exceptional image quality
• USB 2.0 connectivity
page on our web site or complete and
About Trūper
About This Manual
This manual contains information about the inst allatio n, operation and ma intenance of the Trūper scanner.
Please read this manual before installing or operating the unit. Keep the enclosed Trūper Installation
Resource CD-ROM in the protective case and store it in a safe place for futu re refer ence. (For instructions
for handling the CD-ROM, see “
manual to alert you to important safety precautio ns and additional operating information:
Warning and Caution sections provide important information that you must be aware of to avoid
injury to yourself and to avoid damage to the scanner and its components.
The Do Not symbol alerts you to actions that must be avoided for your safety and to extend the life
of the scanner and its components.
Note paragraphs provide supplemental information about the features and use of the scanner, as
Â
well as tips for using the scanner effectively.
Handling the CD-ROM” on page 21.) The following symbols appear in the
www.bbhscanners.com 9 of 142
Page 10

Specifications
Scanner Unit
This table describes the features directly related to the T rūper scann er functionality. These features include
scanning speeds, document sizes, image quality and other hardware related characteristics.
Specification Trūper Specification
Scanning Mode Duplex
Scanning Method
Scanning Speed
Letter Size Portrait
Resolution Binary or Grayscale: 100-600 dpi (dots per inch)
Output Options Bitonal, Grayscale (8 bit) and Color (24 bit)
Image Enhancement Auto Cropping, Deskew, Auto Brightness,
Document Size Scanning size: Approx. 1.9 x 2.8 in. (48 x 70 mm) to
Paper Thickness 2.0 to 5.9 mils (0.05 to 0.15 mm)
Paper Weight
Feeder Capacity
Scanner Size 18.9 x 17.3 x 11.4 in. (480 x 439 x 289 mm)
Scanner Weight 47 lbs. (21 kg)
Interface USB 2.0 enhanced (cable included)
Power Requirements AC 100–120 V, 50/60 Hz AC 220–240 V, 50/60 Hz
Power Consumption Maximum (Scanning) 1.4 A 0.6 A
2
Binary 200 dpi Simplex 62 ppm (pages per minute)
Color 200 dpi Simplex 61 ppm
Minimum (Standby) 0.6 A 0.3 A
Sleep Mode 8 W 8 W
Direct CCD1 (charge coupled device), Xenon Lamps
Duplex 106 ipm (images per minute)
Duplex 102 ipm
Color (with VRS): 100-600 dpi
Optical: 600 dpi
Contrast Control
Auto Color Detect, Auto Rotation and Blank Page
Deletion, Bar Code Recognition
11.9 x 25 in. (302 x 635 mm)
Note: 1 mil = 1/1000 in.
10.6 to 34 lbs. (40 to 127 g/m2)
200 sheets of 17 lbs. (64 g/m2) paper
Note: When the Feeder Tray is in the upright position,
height is 20.5 in. (520 mm)
3
1. CCD components configured in a traditional CIS array.
2. The scanning speeds indicated in the specifications table were developed in a test environment. Actual speeds will vary depending on the computer memory, operating system and the
scanning or document management software application.
3. Auto Color Detect, Auto Rotation and Blank Pag e Delet ion , an d Bar Cod e Re cog n itio n ar e
VRS Plus features only.
www.bbhscanners.com 10 of 142
Page 11

Specification
Environment Operating Temperature
and Humidity
Storage Temperature
and Humidity
Daily Duty Cycle 10,000 pages
Additional Features End User Replaceable Feeder Rollers, Single and
Additional Contents Power Cord, USB Cable, Roller Cleaning Kit, CD-ROM
Bundled Software VCDemo, QuickScan Pro Demo Software
Consumables Options See the “Consumable Parts and Accessories List” on
Imprinter Options Pre-Scan, Front Page
Number of Characters VCDemo 62 characters
59°F to 86°F (15°C to 30°C), 30% to 80% RH
32°F to 95°F (0°C to 35°C), 10% to 80% RH
Multicolor Dropout (Red, Green, Blue), Switchable
Background, Ultrasonic Multifeed, Scan Time Bar Code
Recognition, Multistream
(Operator Manual, VRS, User Utility Software),
Printed Documents (Quick Installation Checklist),
Wire Frame for mixed document batches
page 13
The numbers of characters will vary according to the
scanning application
Trūper Specification
www.bbhscanners.com 11 of 142
Page 12

Advanced Features
The Trūper scanner boasts a broad feature set that complements a robust hardware platform. These
advanced features enhance the scanner's ability to provide clean, crisp images. Kofax VirtualReScan Plus
(VRS 4.0) enables many of these features. Other features are part of the scanner driver.
The following list provides a brief description of some of the more unique advanced features of Trūper.
Additional information about these featur es can be fou nd in oth er sect ion s of th is or othe r included
manuals on your Trūper Installation Resource CD-ROM.
Auto Color Detect - This feature automatically identifies color documents from bitonal documents while
scanning is in process. Auto Color Detect helps reduce document preparation of mixed batches that
contain both color and bitonal images. Please refer to the VRS manual on your Trūper Installation
Resource CD-ROM.
Auto Orientation - This feat ure automatically rot ates a page th at is scanned in a non-st andard or ientation.
There is no need to perform manual rota tion on each image af ter scanning. Auto Ori entatio n eliminates the
need to pre-sort batches of documents to ensure they are facing the same direction. Please refer to the
VRS manual on your Trūper Installation Resource CD-ROM.
Bar Code Recognition - This image filter recognizes the bar codes in the scanned images. Refer to the
application’s operating manual for how to use the bar code.
Blank Page Deletion - This feature detects and deletes blank pages based on content. Blank Page
Deletion is intended for batch scanning in Duplex mode. Please refer to the VRS manual on your Trūper
Installation Resource CD-ROM.
Background Saturation - Use this feature when scanning documents with color backgrounds. Saturating
or “smoothing” a document image changes th e docume nt background into one uniform color . “Smoothing”
refers to the automated process of creating a fixed, uniform background. This process removes both
scanning and paper non-uniformity and will allow the image to be compressed more effectively. Please
refer to the VRS manual on your Trūper Installation Resource CD-ROM.
Multicolor Dropout - This feature removes specific and multiple colors from an imag e. Multicol or Dropou t
can be used in simplex and duplex scanning with independent colors dropped out on either side. Please
refer to Appendix 2 - Multicolor Dropout (MCD) and Single Color Dropout sections of this manual (starting
on page 123
Double Feed Recovery - This feature detects the d ouble feeding of document s and allows th e operator to
correct the missfed documents without stopping the scanning application. Witho ut Double Feed Recovery,
the scanner operator may have to rescan the entire batch.
Â
).
Note
Auto Color Detect, Auto Orientation, and Blank Page Deletion are VRS Plus features only.
www.bbhscanners.com 12 of 142
Page 13

Consumable Parts and Accessories List
Consumable parts and accessories are available from the Böwe Bell + Howell Scanning Essentials online
store at http://webstore.bbhscanners.com
Part Number Description
S005504 Roller Cleaning Kit
S006043 Roller Exchange Kit
S006110 Memory Upgrade Kit
0123030 Imprinter Unit
S005506 Imprinter Ink Cartridge
S006083 Shading Paper (10 pack)
S006049 Blower Accessory
or from the reseller where you purchased the Trūper scanner.
Computer System Requirements
Item PC Requirements
CPU
Memory
OS
Display Resolution 1024 x 768 or more; 65,536 colors or more
Interface USB 2.0 (enhanced)
Note
Â
Please note the following recommendations and guidelines:
• Do not connect the scanner to a USB hub. A hub connection is not guaranteed to work.
• There must be 1 GB or more of free space on the hard drive.
Minimum: Pentium 4, 2.4 GHz
Recommended: Pentium 4, 3.0 GHz or higher
Black & white scanning:
Minimum: 256 MB
Recommended: 512 MB or higher for improved scanning speed
Color scanning:
Minimum: 512 MB
Recommended: 1 GB or higher for improved scanning speed
Windows
Windows
Windows XP Home Edition
2000
XP Professional
www.bbhscanners.com 13 of 142
Page 14

• Depending on the computer system and the sca nn in g or docum e nt m an ag e men t s oftware
application used, you may not be able to scan a large color image in high resolution.
• The scanning speed will vary depending on the computer memory, CPU operating system and
the scanning or document management software application used.
For additional system requirements, please consult the user manual fo r your scanning or document
management software application.
www.bbhscanners.com 14 of 142
Page 15
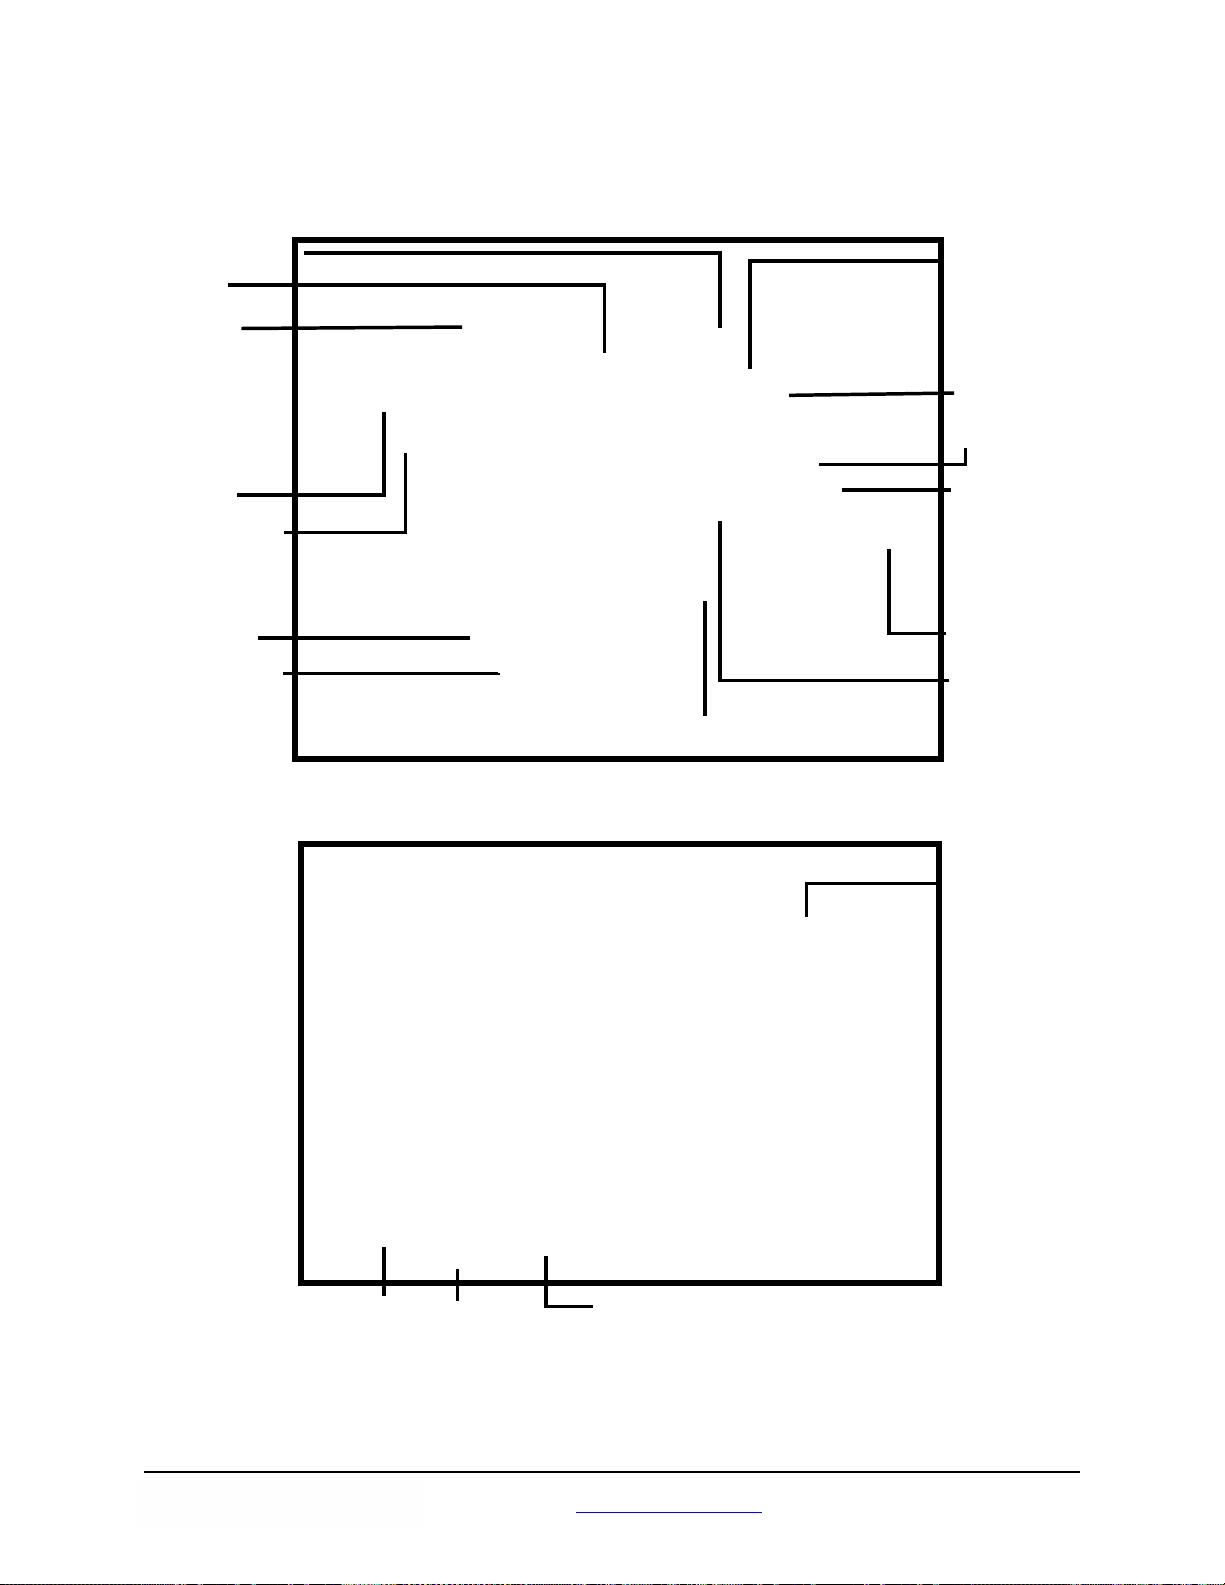
Component Identification
Document guide
Feeder
ADF door
ADF door
release
Auto or manual
feed selector
STOP/START
button
Power indicator
Feeder tray
Feeder
extension tray
Back stopper
Document
cover
Power button
Exit stopper
Exit tray
AC input
Fan exhaust
Imprinter
door
USB connector
www.bbhscanners.com 15 of 142
Page 16
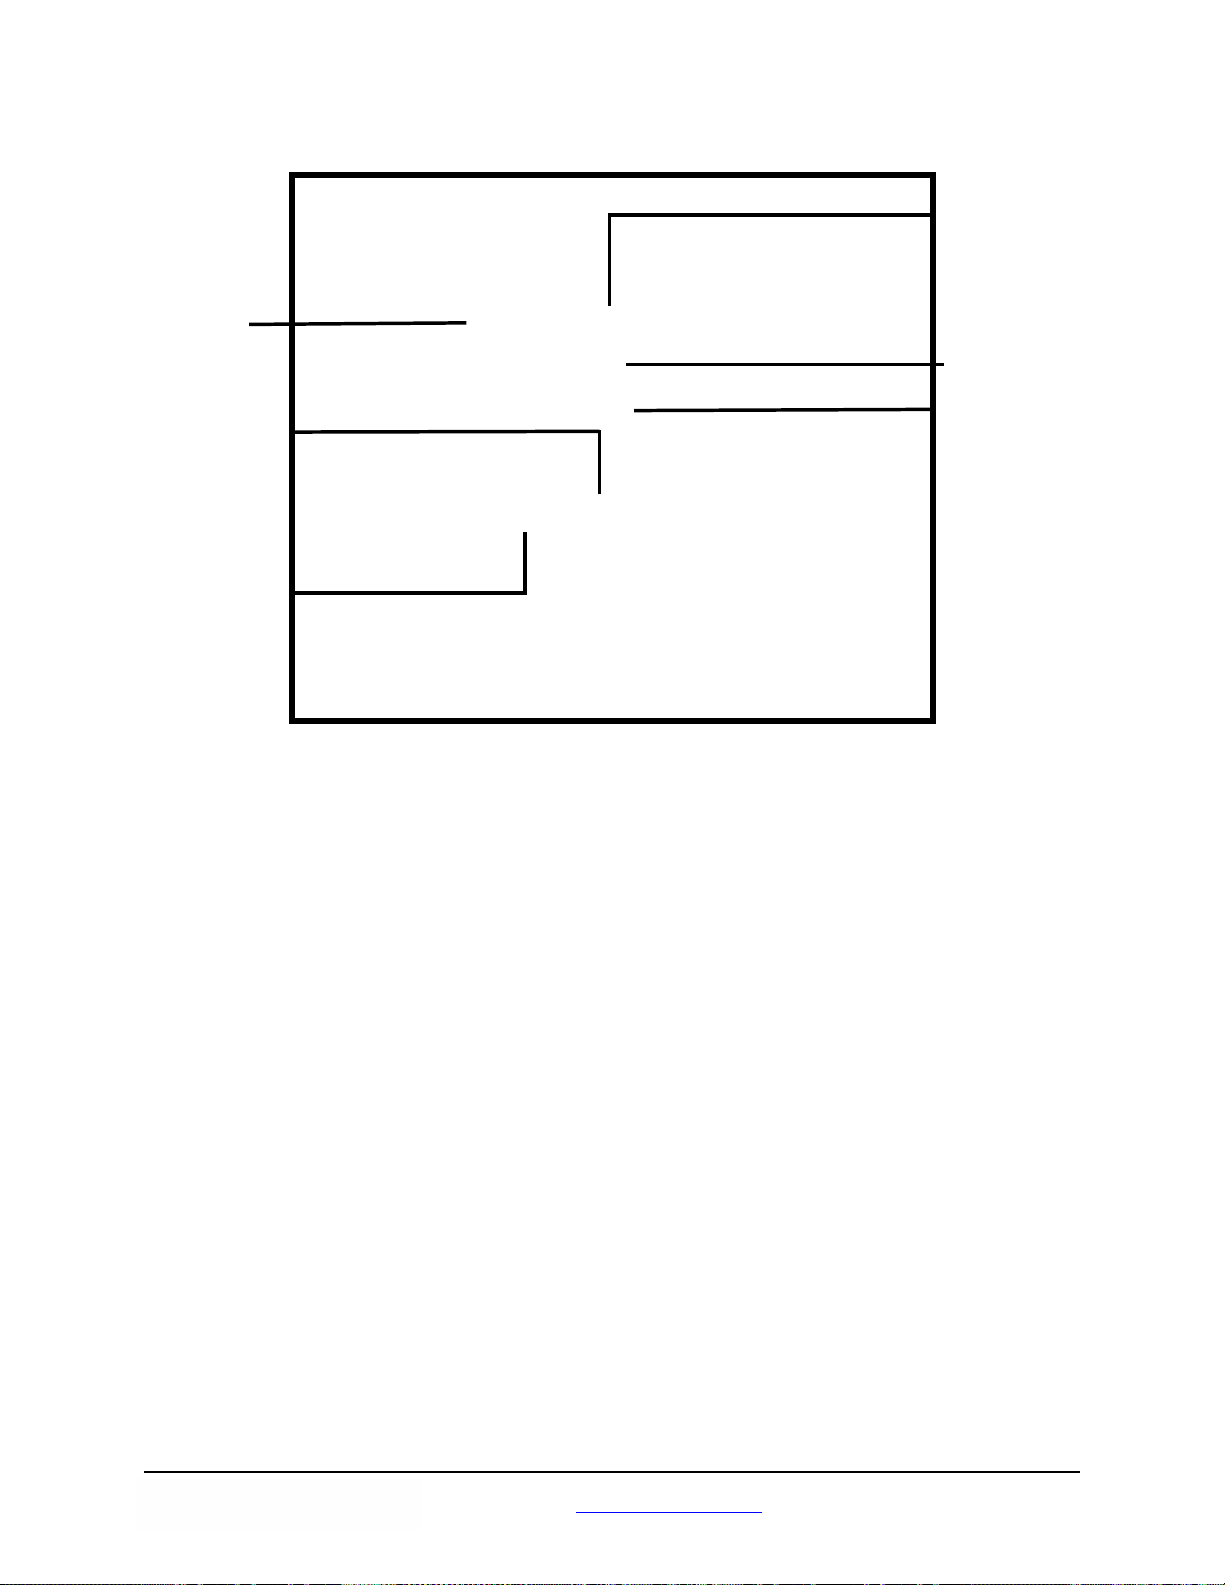
Exit door
Reference plate
ADF glass
Exit door
release
ADF glass
Reference
plate
www.bbhscanners.com 16 of 142
Page 17
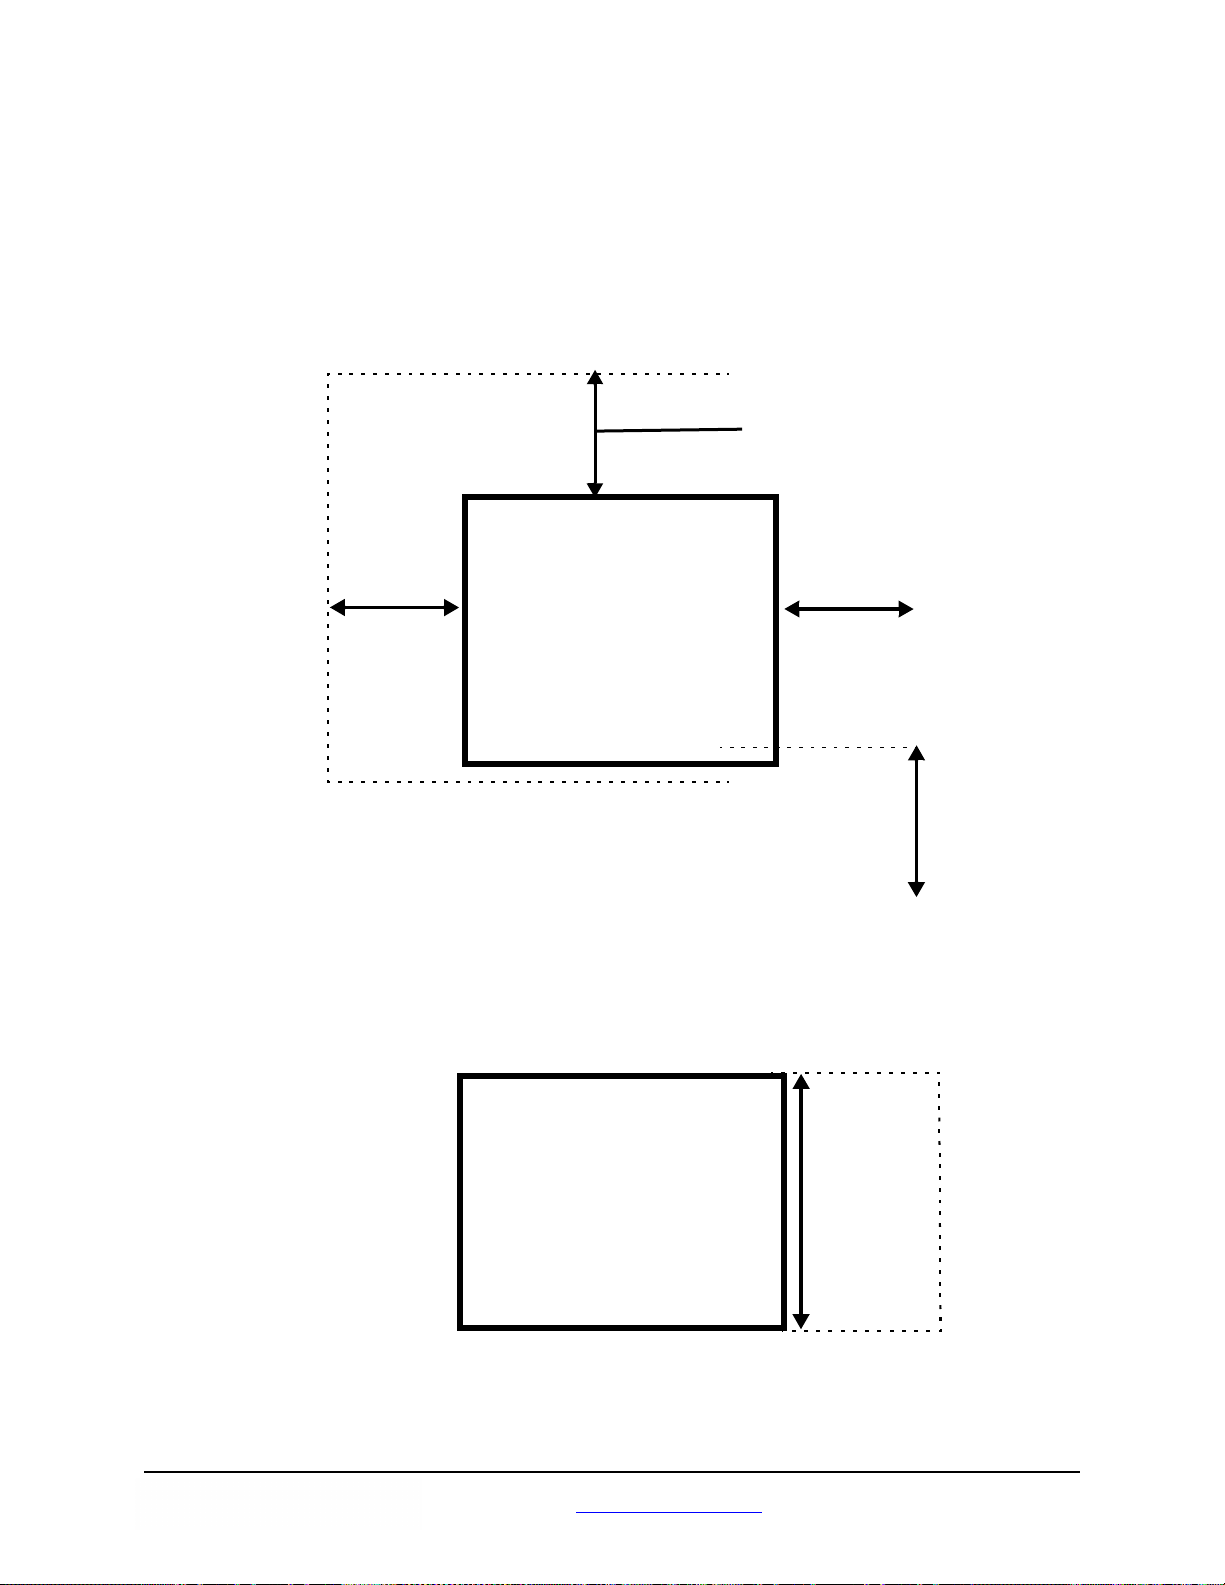
Minimum Space Requirements
Be sure to maintain the recommended area of open space around the top and sides of the scanner as
shown in the following diagrams. This will allow you to use all of the features of the scanner and will assure
that there is proper ventilation for the unit.
Top View
Clearance necessary to remove or
install the computer interface
board: 13.8 in. (350 mm)
Front View
7.9 in. (200 mm)
7.9 in. (200 mm)
Clearance needed to
pull the exit stopper
forward: 11.8 in
(300 mm)
Clearance necessary to
open the document cover:
27.6 in. (700mm)
www.bbhscanners.com 17 of 142
Page 18

Safety Precautions for the
Operating Environment
The Scanner Unit
The following safety precautions and proper handling in structions are recommended for your safety and to
extend the life of the scanner:
Caution
Prior to scanning with the Automatic Document Feeder (ADF), remove all staples and paper clips
from the sheets that you want to scan.
Do not disassemble the scanner.
This will void your warranty.
If there is a need to disassemble the
scanner, please contact an
authorized service provider.
Caution
Do not place any liquids near the
scanner. Accidental spillage of liquid
into the scanner may cause severe
damage. If this occurs, turn the
scanner off and unplug the power
cord. Please contact an authorized
service provider.
www.bbhscanners.com 18 of 142
Page 19

Do not place books, paper, or other
items on the scanner.
Do not place the scanner in an area
where there is a lot of smoke, dust,
chemical fumes or vibration.
Caution
Do not leave the power cord plugged into the AC outlet if the scanner is not used for an
extended period.
Do not place the scanner on an uneven or unstable surface.
Do not use the feeder tray as a handle.
At least two people should carry the scanner. They should lift and hold the scanner securely
with hands placed under the front and back sides.
www.bbhscanners.com 19 of 142
Page 20
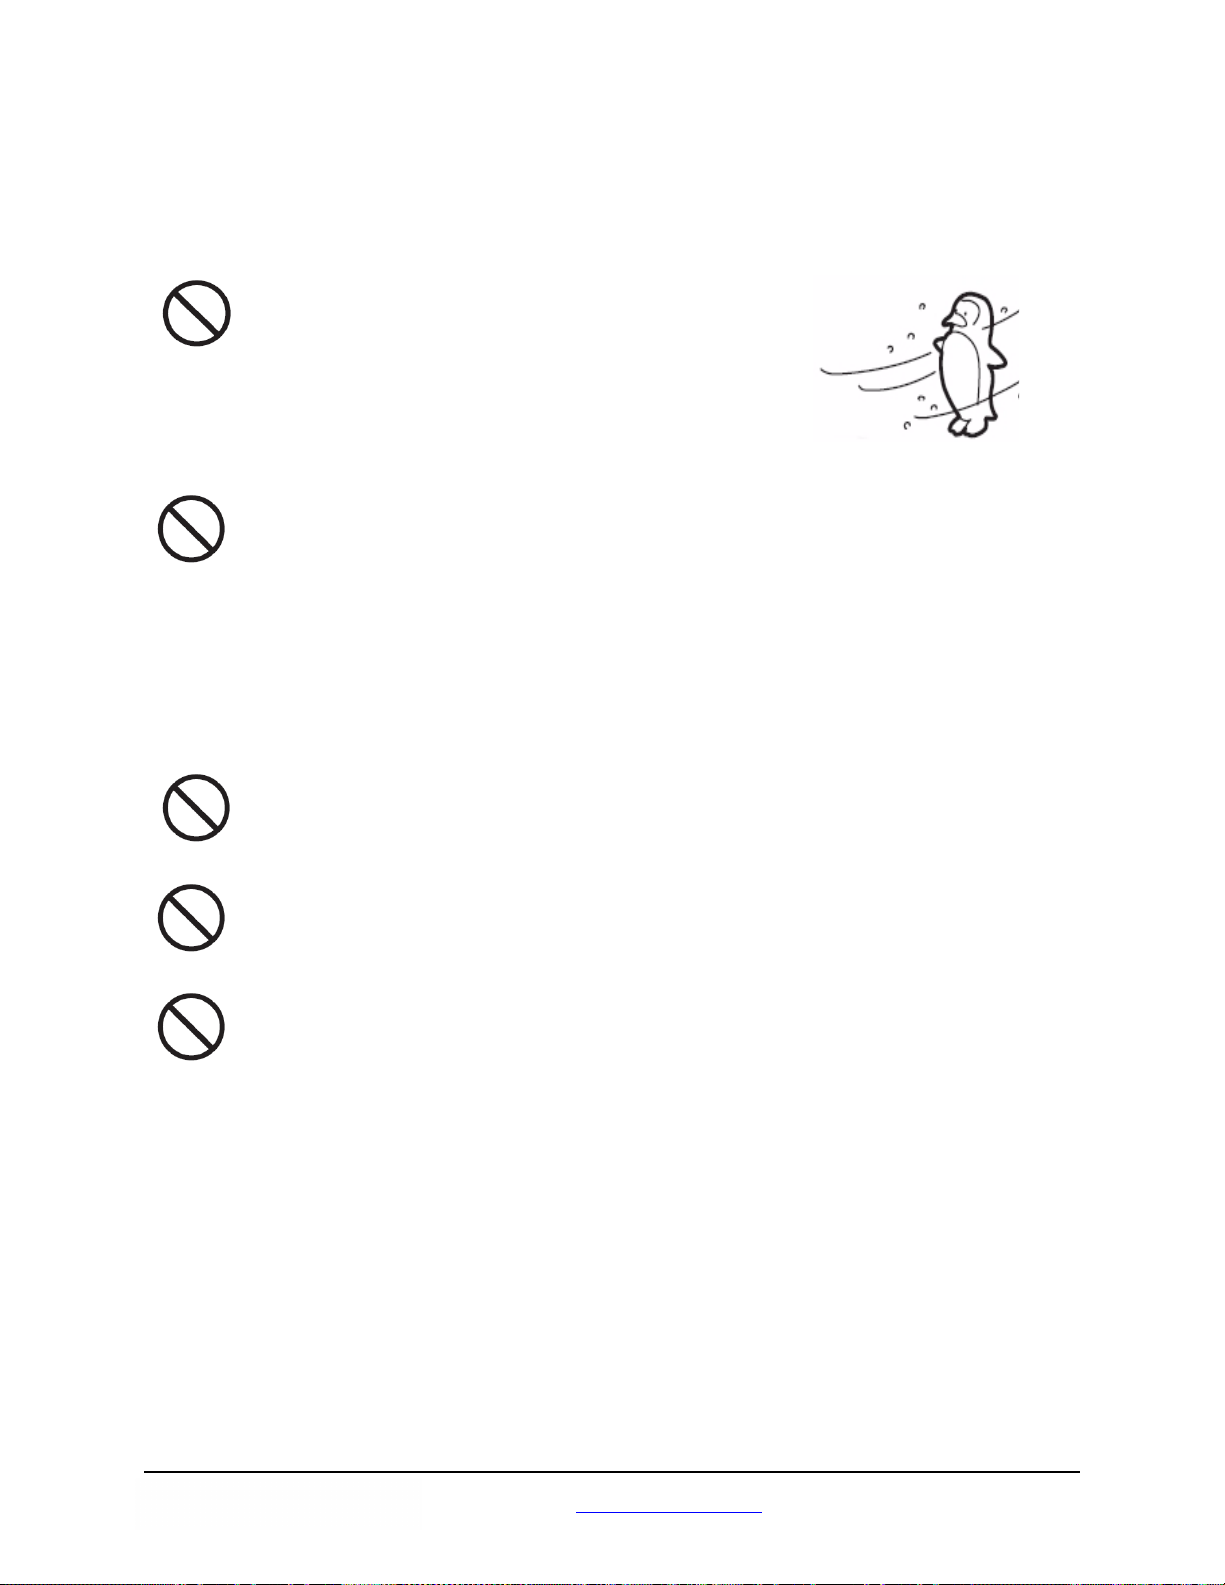
Caution
Do not place the scanner in direct
sunlight or in a cold draft.
Do not place the scanner in a vertical position. The scanner cannot function in this position.
Place the scanner only in a horizontal po sition.
Caution
Do not place the scanner near a heating appliance or air conditioning vent. Do not place the
scanner in a room with extremely high or low humidity.
Do not place the scanner near other appliances or near machinery that generates large
amounts of electro-magnetic interference (EMI).
Do not place the scanner on carpet. Static electricity can cause the scanner to malfunction.
www.bbhscanners.com 20 of 142
Page 21

Power Source
Caution
• Power requirements: Power outlet with AC 100–120 V, 50/60 Hz or AC 220–240, V 50/60 Hz.
• Use a voltage level that does not vary more than ±10% from the voltage level marked on the
scanner nameplate. The nameplate is located on the back side of the scanner.
• The scanner must be connected to a grounded outlet.
• The scanner should be used only with the power cord that is supplied wi th the scanner or with a
power cord that has been approved by a certified electrical contractor.
• Do not use an extension cord.
Handling the CD-ROM
To prevent accidental damage to CD-ROMs, handle them carefully as shown below:
• Do not touch or write on the surface of the disc.
• Do not leave the disc out of the protective case.
• Do not leave the disc in direct sunlight or near heat sources.
www.bbhscanners.com 21 of 142
Page 22

• Do not place heavy objects on the disc case or drop the case.
• To clean the disc, hold the disc by its edges and wipe it from the center to the edges with a dry,
soft cloth.
www.bbhscanners.com 22 of 142
Page 23

1
2
Installing the Scanner
Quick Installation Checklist
Read the Trūper Operator Manual located on the Trūper Installation Resource
CD-ROM.
Insert the CD-ROM into the appropriate drive on the computer. Microsoft Autoplay will start,
displaying the Select Your Language screen. Select your language and click OK. On the
CD-ROM main menu click the trūper 3600 scanner image, select View Manuals, then select
View Trūper Manual.
If Autoplay is disabled, go to the Windows taskbar, select Start, Run and type
D:\SETUP.EXE, where “D” is the CD-ROM drive. Click OK. Select your language and click
OK. Then locate the manual, as described above.
Verify the computer system requirements.
Refer to “
Computer System Requirements” on page 13.
3
4
5
6
Attach the feeder tray to the scanner.
Connect the scanner.
Refer to “
Install the software.
Refer to “
Manual from the Trūper User Utility. Click the Trūper User Utility icon on your Windows
desktop, then click Help.
You are now ready to scan.
Refer to the instructions for your scanning or document management software application.
Initial Setup and Installation” on page 26.
Initial Setup and Installation” on page 26. You can also access the Trūper Operator
www.bbhscanners.com 23 of 142
Page 24
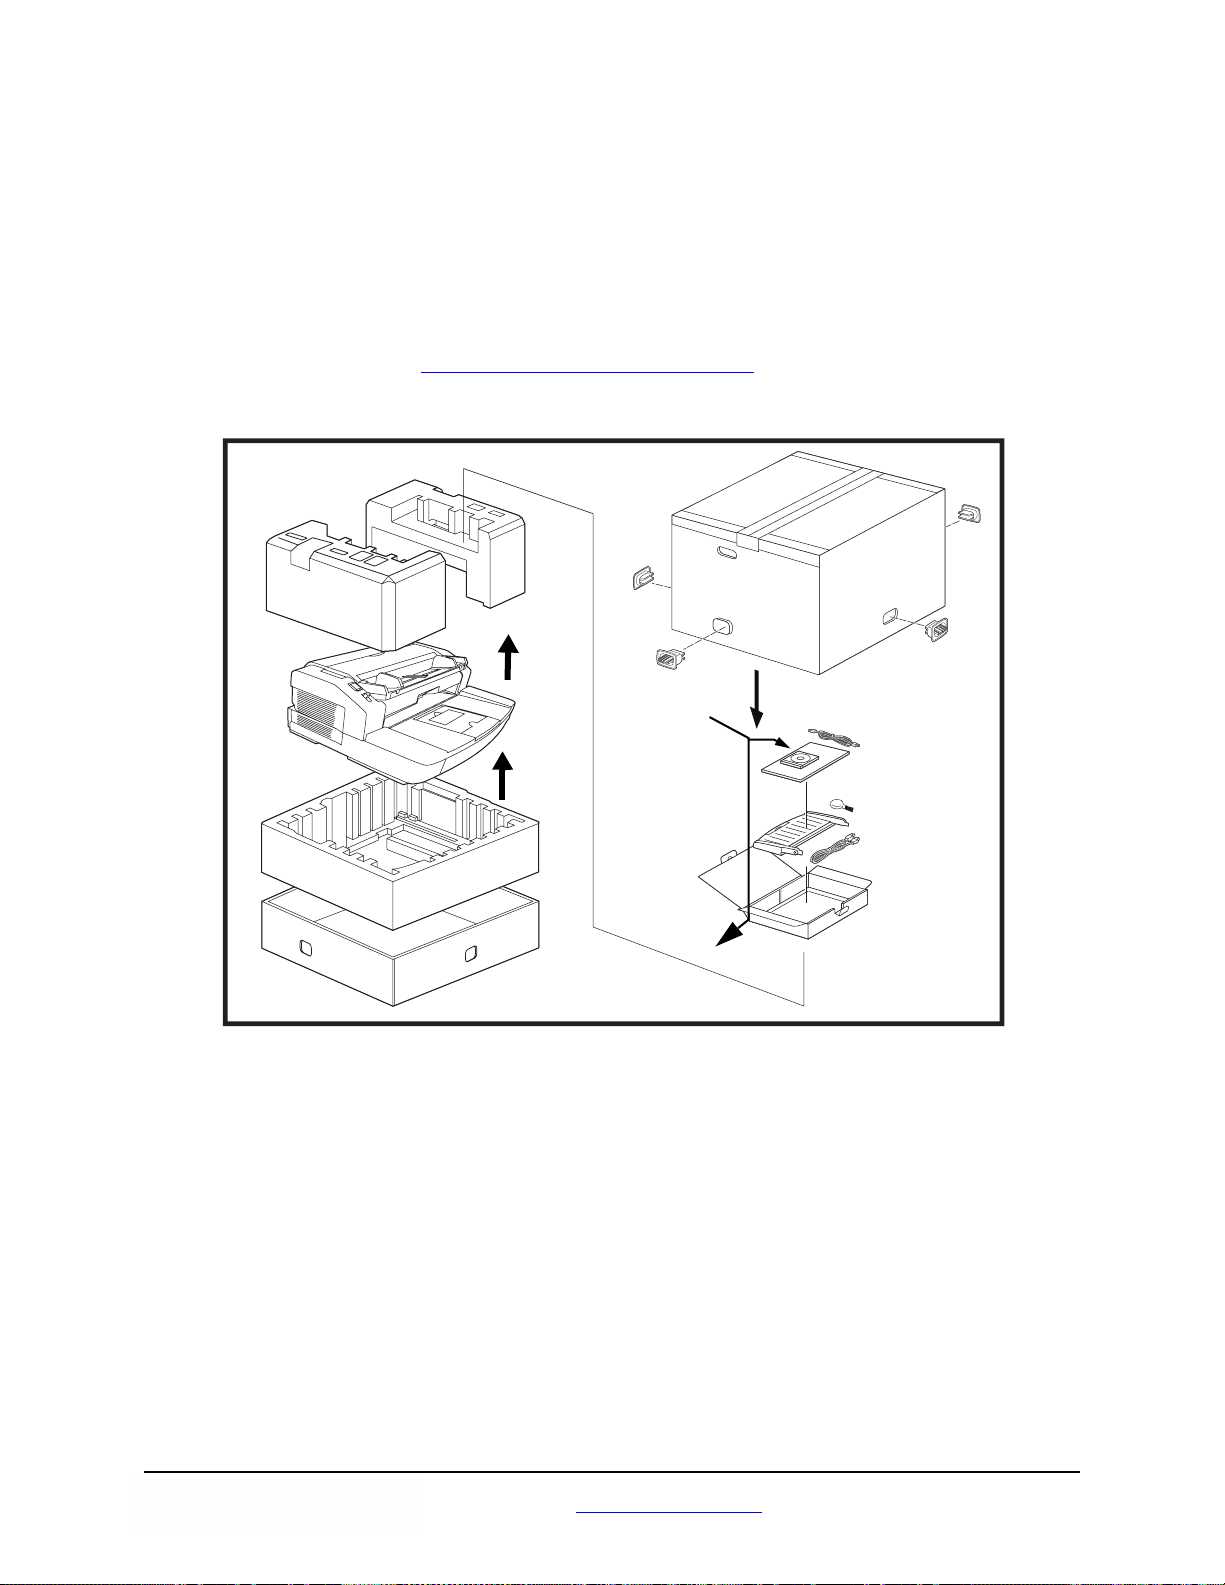
Unpacking the Scanner
Unpack the scanner unit and the included parts. Be sure that all parts are present before installing the
scanner. If there are any missing parts, please contact the reseller where you purchased the Trūper
scanner.
Note
Â
It is highly recommended that you keep the original carton and all the packing materials in case you
need them later. See the “
Repacking Instructions” on page 106.
USB 2.0 cable
CD-ROM with Operator
Manual, VRS and driver
software
Roller cleaning paper
(3 pieces)
Shading paper
Blower
Feeder tray
Power cord
www.bbhscanners.com 24 of 142
Page 25
1
Attaching the Feeder Tray
Install the left side of the feeder tray by inserting the pin located in the left side of the feeder into
the hole located on the left arm of the feeder tray.
2
Install the right side of the feeder tray by inserting the pin located in the right side of the feeder into
the hole located on the right arm of the feeder tray. A small amount of pressure will be required to
align the pin with the hole.
www.bbhscanners.com 25 of 142
Page 26

Connecting the Scanner
1
2
Turn off the power for the computer.
Plug the scanner power cord into the AC power input on the back of the scanne r and connect the
other end to a power outlet.
Connect the supplied USB cable to an available USB 2.0 port on the computer and connect the
other end to the USB connector on the scanner.
3
• Use the supplied USB cable.
• Do not connect the scanner to a USB hub. A hub connection is not guaranteed to work.
Initial Setup and Installation
AC input
USB connector
www.bbhscanners.com 26 of 142
Page 27
Installing the Windows Scanner Driver
Press the scanner button to the ON position.
1
• The LED will at first display a flashing orange light.
• The scanner is ready when the LED displays a steady green light.
LED
Turn on the power for the computer.
2
Power button
www.bbhscanners.com 27 of 142
Page 28

In Windows 2000 or Windows XP, log on with Administrator privileges. Windows will detect the
scanner and start the Found New Hardware Wizard. Follow the procedure described in the
3
following steps and diagrams:
1. Click Next.
2. Select Search for a suitable driver for my device, then click Next.
www.bbhscanners.com 28 of 142
Page 29

3. Select CD-ROM drives, then click Next.
4. Insert the Trūper Installation Resource CD-ROM into the appropriate drive on the computer.
5. When Windows finds the device driver, click Next.
www.bbhscanners.com 29 of 142
Page 30

6. If Windows cannot find the driver files, use the Browse option in the Files Needed dialog
box. Browse to the folder D:\minidriver, where “D” is the letter for the drive that contains the
Trūper CD-ROM. If there is no request for files needed, continue with the next step.
7. If the Windows XP compatibility message appears, click Continue Anyway.
www.bbhscanners.com 30 of 142
Page 31

8. The Found New Hardware Wizard will now complete the installation of the driver. When the
wizard has finished, click Finish to complete the installation.
9. Restart the computer.
www.bbhscanners.com 31 of 142
Page 32

Installing the Software
Insert the Trūper Installation Resource CD-ROM in the CD-ROM drive of th e computer.
1
• If Microsoft
next step.
• If the installation menu does not appear, select the Windows option Start, Run and type D:\
where “D” is the letter of drive that contains the Trūper CD-ROM. Locate the file setup.exe
on the CD-ROM and double click the file to open the installation menu.
Select your language from the language dialog box, then click OK.
Autoplay is active, the installation menu will appear and you can continue with the
2
Trūper Software Installation
Click the trūper 3600 scanner image from the Main Menu.
3
www.bbhscanners.com 32 of 142
Page 33

Click Install Software.
3
Click the Install Software steps sequentially, Step 1 to Step 4. In Windows 2000 or Windows XP, you
will need to log on to the computer with Administrator privileges in order to complete the installation.
Please refer to your Windows user manual or call your information technology department to fin d out
how to log on with Administrator privileges.
4
User Utility
1. Click Step 1 User Utility. The User Utility must be installed to properly operate the scanner.
www.bbhscanners.com 33 of 142
Page 34

2. Read the license agreement and click Yes to accept the agreement.
3. Click Next to select the default destination folder for the program files (recommended). To
install the files in a different folder, click Browse and select a different destination, then click
OK in the Choose Folder window.
www.bbhscanners.com 34 of 142
Page 35

4. Click Next to select the default folder for program icons.
The User Utility Setup is performing the installation.
www.bbhscanners.com 35 of 142
Page 36

5. When the setup is complete, click Finish.
The Trūper User Utility Help files will automatically install.
www.bbhscanners.com 36 of 142
Page 37

6. Click Next to continue.
7. When the setup is complete, click Finish.
www.bbhscanners.com 37 of 142
Page 38

5
ISIS Driver
1. Click Step 2 ISIS Driver. The Pixel Translations BBH 3600 ISIS driver must be installed to
properly operate the scanner.
2. Read the license agreement and click Yes to accept the agreement.
www.bbhscanners.com 38 of 142
Page 39

3. Close all other Windows programs, then click Next.
The ISIS Driver Setup is performing the installation.
www.bbhscanners.com 39 of 142
Page 40

4. When the setup is complete, select No, I will restart my computer later, then click Finish.
Note
Â
If you select the option to restart the computer, you will also need to restart the scanner. After you
restart the computer, log on with Administrator privileges, then select St art and Run on the taskbar.
In the Run dialog box type D:\setup.exe, where “D” is the letter for the drive th at co ntains the Trūper
CD-ROM. Then click OK to start the setup. Select your language, then select Install Software from
the installation Main Menu.
www.bbhscanners.com 40 of 142
Page 41

VirtualReScan
6
1. Click Step 3 VirtualReScan.
More detailed information about VRS installation is available in the V irtualReScan Installation
Guide on the Trūper Installation Resource CD-ROM. Select View Manuals on the inst allation
Main Menu.
2. The installation wizard is preparing to install VRS.
www.bbhscanners.com 41 of 142
Page 42

3. The Install VRS only option is selected by default. Click Next to continue.
4. Enter your name, company name and e-mail address for VRS product registration. If you do
not wish to be contacted with VRS product-related information, select the contact option
check box. Click Next to continue.
www.bbhscanners.com 42 of 142
Page 43

5. The Part Number, Serial Number and Product Code for VRS software is automatically
populated. Click Next to continue.
6. Click Next to select the default destination folder for the program files (recommended). To
install the files in a different folder, click Change and select a different destination, then click
OK.
www.bbhscanners.com 43 of 142
Page 44

7. Select BBH 3600 USB, then click Next to configure the scanner.
8. Click Install.
www.bbhscanners.com 44 of 142
Page 45

The installation wizard will perform the installation.
9. Please ign or e by click ing OK in the Sentinel dialog box. (Sentinel is a licensing utility for
VRS.)
www.bbhscanners.com 45 of 142
Page 46

10. When the installation is complete, click Finish.
11. Click Yes to restart the computer.
www.bbhscanners.com 46 of 142
Page 47

Driver Selection: Scanning Applications with VRS Connectivity
VirtualReScan is compatible with most scanning applications. When starting your scanning application,
you may be requested to select a scanner or a scanne r sour ce. Depend ing on your application, select one
of the following:
• For ImageControls applications, set Scanner Source to: Bowe Bell & Howell 3200-3600 with
SVRS.
• For ISIS applications, set Scanner Selection to: Kofax VRS Scanner. This is the certified ISIS
driver for this configuration. DO NOT select Bowe Bell and Howell 3200-3600.
• For TWAIN applications, set Scanner Selection to: Kofax Software VRS - TWAIN.
Contact your application reseller for more information.
Scanning Applications with Direct ISIS connectivity
Occasionally, an ISIS application based on PixTools may not support the recommended VRS-based ISIS
driver. Check with your application reseller to determine if your scanning application is compatible with
VRS or requires the use of a Direct ISIS driver. For Direct ISIS connectivity, select the following driver:
• ISIS Application Scanner Selection: Bowe Bell and Howell 3600. This is the certified ISIS driver
for direct connectivity.
www.bbhscanners.com 47 of 142
Page 48

View Manuals
The Trūper Operator Manual and VRS manuals are available on the Trūper Installation Resource
CD-ROM. To view the manuals you will need Adobe Acrobat Reader.
Insert the CD-ROM in the computer.
1
Click View Manuals from the Main Menu.
2
Select a manual from the list.
3
Contents of the Installation Resource CD-ROM
• Select Scanner
• Install Software
1. User Utility
2. ISIS Driver
3. VRS
4. Application (scanning application)
• View Manuals
Trūper Operator Manual
VRS Manuals
• Browse CD Contents
• View Our Website
• Register Now
• Contact Us
www.bbhscanners.com 48 of 142
Page 49
Operating the Scanner
Turn on the scanner.
1
• Press the power button to the ON position.
• The LED will at first display a flashing orange light.
• The scanner is ready for scanning when the LED displays a steady green light.
After the scanner’s LED light is green, turn on the computer.
2
Turning on the Scanner
Power button
LED
www.bbhscanners.com 49 of 142
Page 50

The color of the LED light indicates the status of the scanner:
LED Light Status
Green Ready to scan or scanning in process
Green (flashing) Sleep mode
Green/Orange (flashing) Multifeed Ignore function set
Orange Ready to scan or scanning with warning
Orange (flashing) Initializing -- or -- Sleeping with warning
Red An error occurred
2
1. The rollers need to be cleaned or replaced.
2. Check the status of the scanner using the Trūper User Utility included
on the CD-ROM or by clicking the icon on the computer desktop.
LED Status Indicator
1
2
www.bbhscanners.com 50 of 142
Page 51
Document Preparation
Prepare the documents you want to scan according to the guid elines and recommend ations in this section.
General Guidelines
Do not scan official documents or copyrighted material:
• Do NOT scan currency.
• Do NOT scan copyrighted material or the work of others except for private use or when
authorized by the copyright owner or owners.
• Do NOT scan certificates, licenses, passports, or official or private documents except when
such work is authorized.
Guidelines for Using the ADF
For best results, follow these guidelines for documents that will be scanned using the ADF (Automatic
Document Feeder):
Caution
Prior to scanning with the ADF, remove all staples and paper clips from sheets.
Recommended paper: Plain paper with a maximum sheet thickness of 2.0 to 5.9 mils (0.05 to 0.15 mm)
and weight of 10.6 to 34 pounds (40 to 127 grams/meter
paper represents the weight of 500 sheets in the “basic sheet size” of the paper, in this case 17 x 22 inches
(432 x 559 mm). The basic sheet size is not the same for all types of paper.
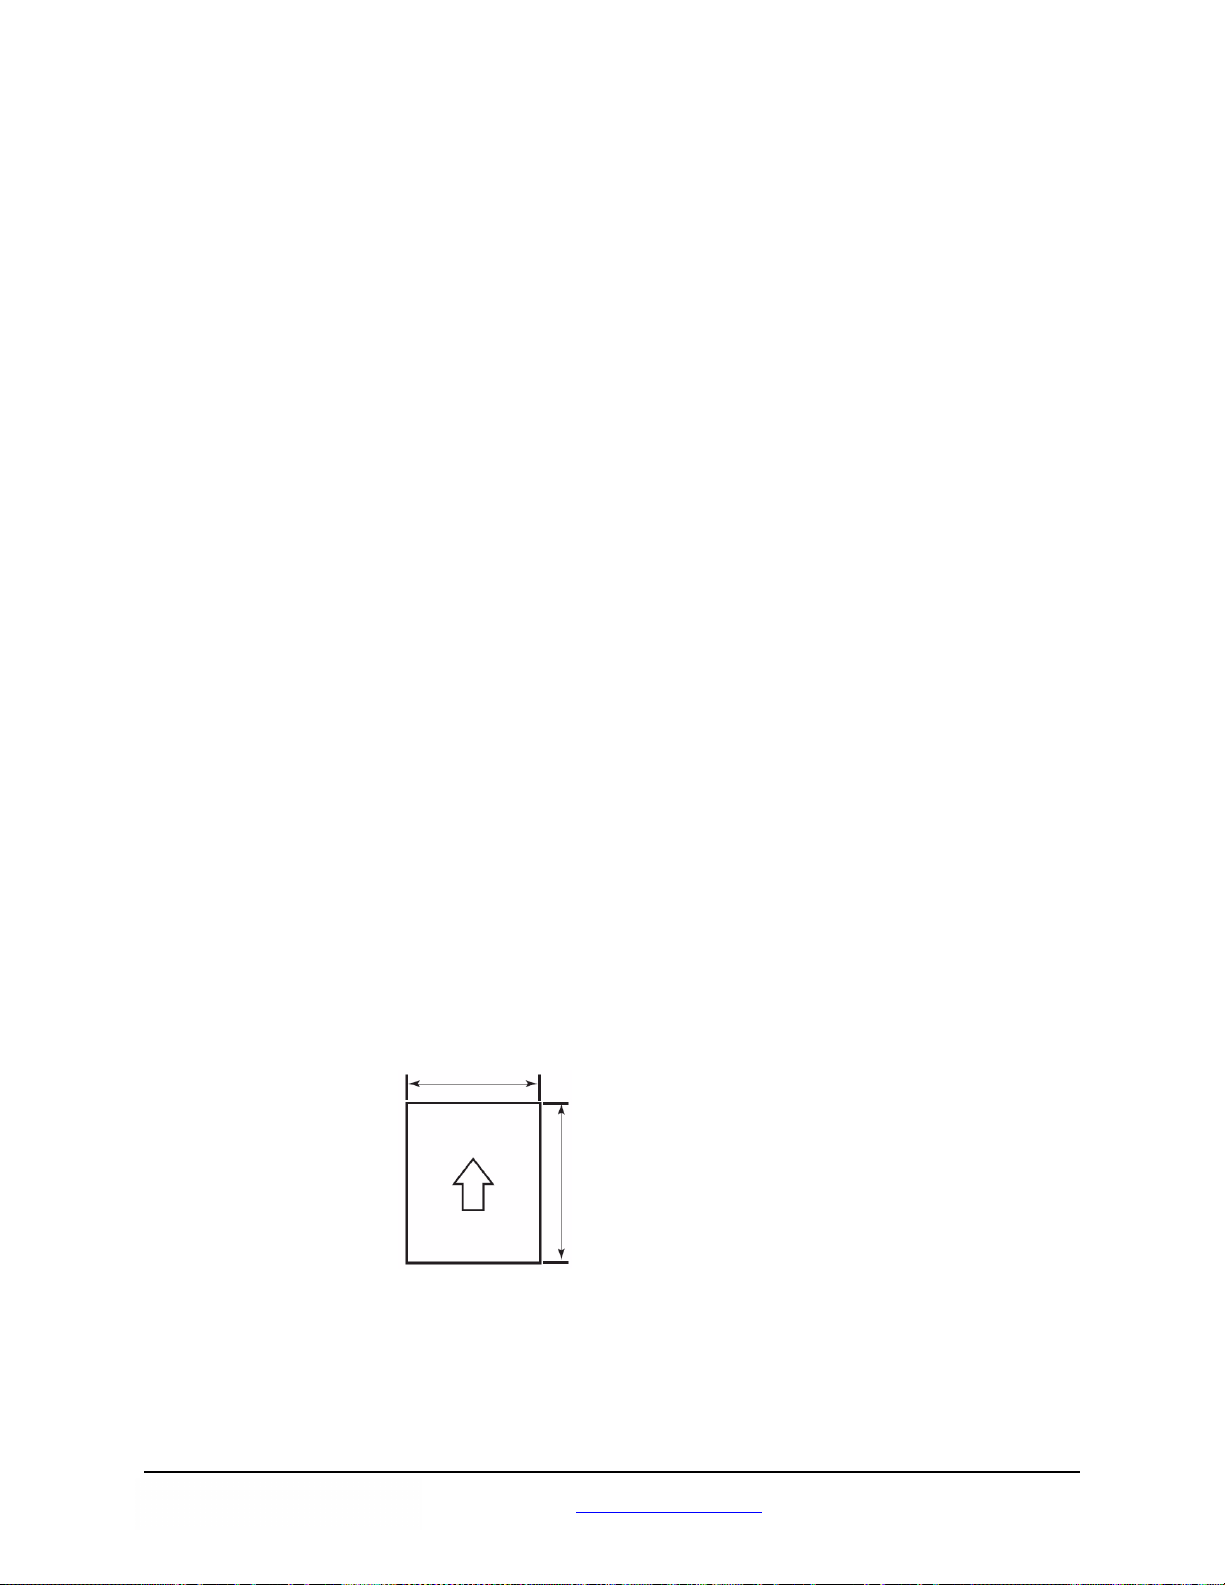
Acceptable document size for the ADF:
1.90 - 11.70 inches (40 - 297 mm)
Feeding
direction
2
). 1 mil = 1/1000 inch. The weight in pounds of
2.75 - 25.00 inches (70 - 635 mm)
www.bbhscanners.com 51 of 142
Page 52

Glued or curled documents may cause a paper jam or damage in the ADF unit.
The height of the documents placed in the feeder tray must not exceed the paper limit mark that
appears on the right side of the document guide. (See the diagram on page 57.
)
The following chart indicates the maximum number of sheets that can be loaded on the feeder tray:
Paper weight (pounds) 11 14 17 20 21 24 28 34
Paper weight (grams/meter2)
Maximum number of sheets 320 260 200 170 160 140 120 100
40 52 64 75 80 90 104 127
Sheets that are exceptionally thick or thin should be placed in the ADF manually, one sheet at a time.
Curled, wrinkled, or folded documents may not scan properly. Check the allowances for curl and fold
in the following diagram:
Feeding direction
Curl must be
less than 0.20
inches (5 mm)
Feeding direction
Fold must be
less than 0.20
inches (5 mm)
www.bbhscanners.com 52 of 142
Page 53

Types of Documents to Avoid in the ADF
The following types of documents may cause jams in the ADF or may cause the ADF to feed more than
one sheet at a time:
• Overhead projector sheets, other plastic films, cloths or metallic sheets
• Paper with irregularities such as tabs, staples, paste and similar items
• Documents with wet ink
• Thick or irregular documents such as envelopes or documents that are glued together
• Thermal or heat sensitive paper
• Tracing paper
• Copying paper such as carbon paper
• Damaged or wrinkled documents
• Photographs
• Coated paper
• Thick plastic cards such as credit cards or identification cards
• Torn sheets and documents with notches or holes, or punched or perforated sheets
• Extremely smooth or shiny paper
• Paper that is highly textured
• Paper with carbon sheets
• Carbonless (NCR) paper
If a jam occurs in the document feeder, reduce the number of sheets loaded on the feeder to about 20.
If a paper jam or feeding of more than one sheet occurs, clea n the rollers as described beginning on
page 75
If the document is not properly scanned, scan the documents b y feeding individual sheet s manually into
the ADF.
.
www.bbhscanners.com 53 of 142
Page 54

Using the Trūper ADF
The Trūper ADF (Automatic Documen t Feeder) enables multiple sh eet scanning. For the best result s when
scanning multiple sheets, follow the docu ment preparation re commendations and procedur es as described
in “
Document Preparation” on page51. To use the Multifeed Ignore feature, refer to page 62. To load
documents in the ADF, perform the following procedure:
Caution
Prior to scanning with the ADF, remove all staples and paper clips from sheets.
Separate documents that have been stapled or clipped together. Remove glued documents and
documents that are curled; these types of document may cause a paper jam and damage the unit.
1
1. Fan the stack of documents to
separate all the sheets. Be sure
the edges of the sheets do not
stick together.
2. Hold both edges of the sheets and
bend the documents.
3. To flatten the documents, hold
firmly then pull them apart.
Repeat these steps as necessary to be
sure the stack of documents is completely
separated.
Carefully align the documents.
2
www.bbhscanners.com 54 of 142
Page 55
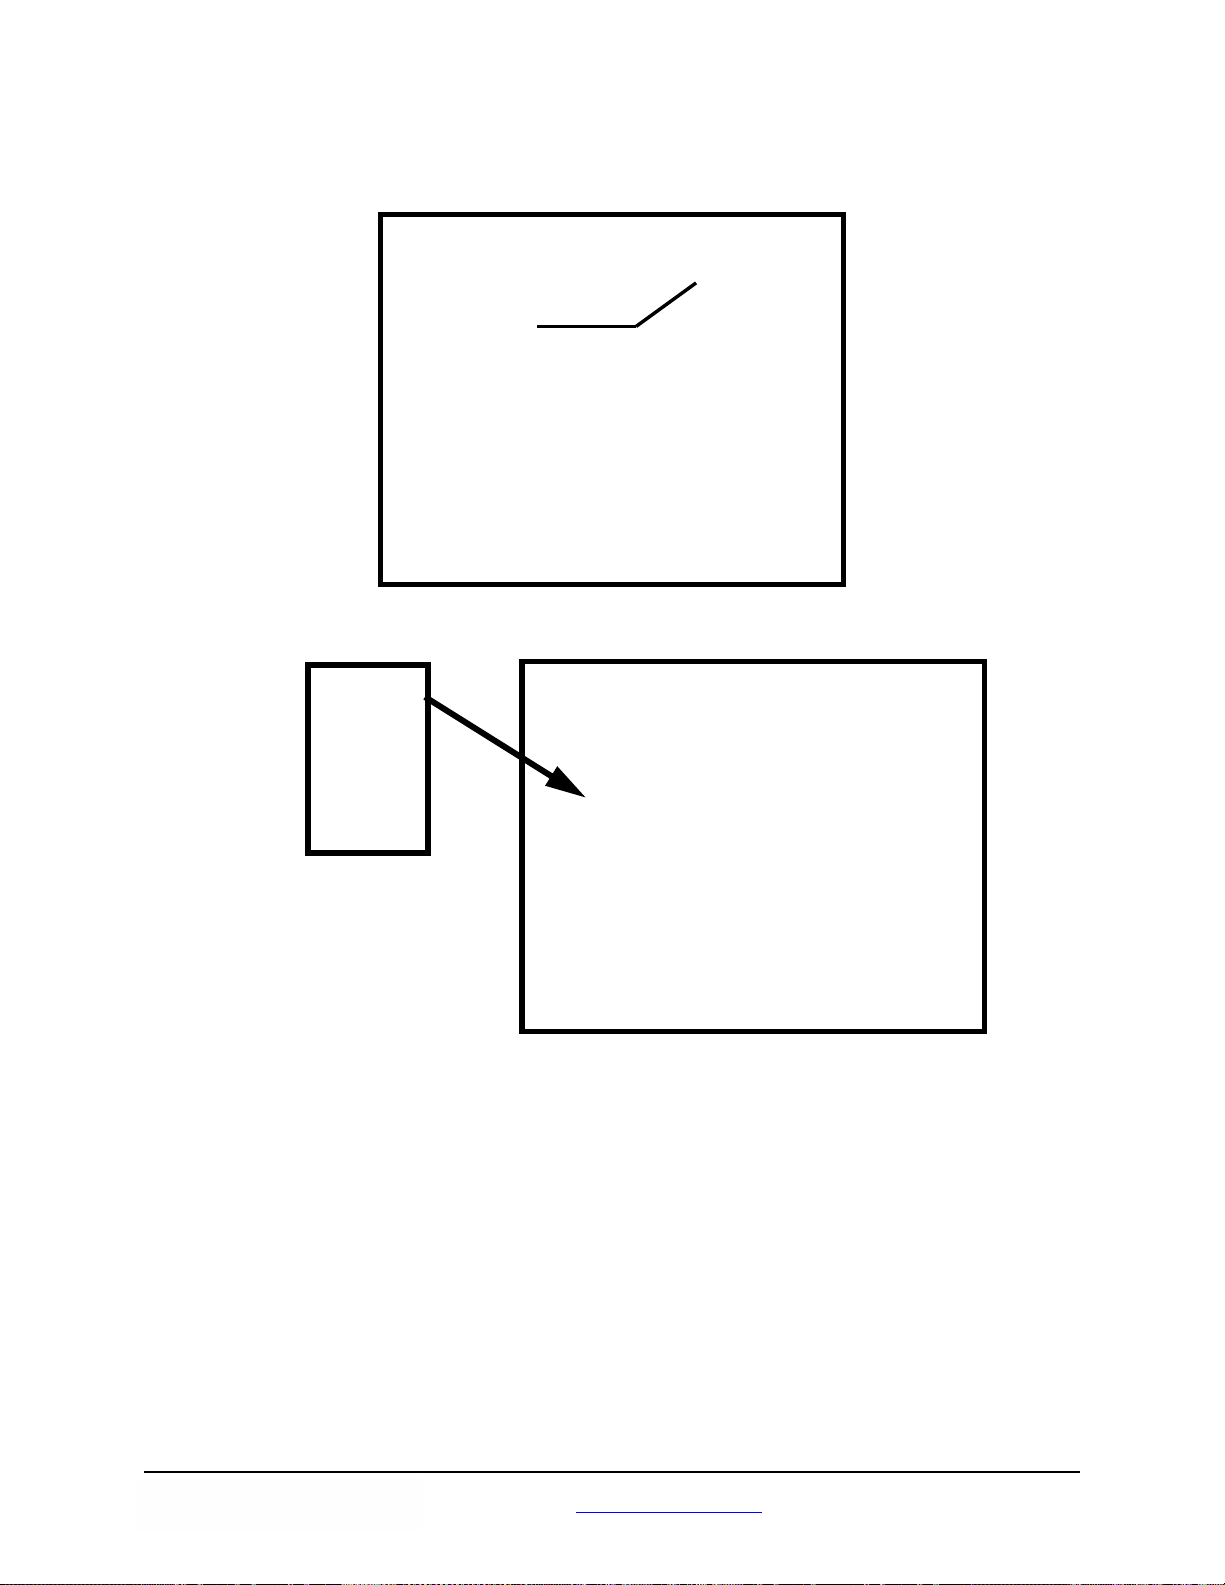
Adjust the document guides on the ADF so that they are slightly wider than the size of the
3
document.
Document guides
Set the feed selector switch to AUTO.
4
Feed selector
AUTO position
www.bbhscanners.com 55 of 142
Page 56

When scanning documents that are longer than the feeder tray, you can pull out the feeder
extension tray , which is located near the edge of the feeder tray. The extension tray will support
5
documents up to 15 inches (381 mm) long.
To handle longer paper in the exit tray, extend the exit stopper. Adjust the position of the exit
stopper so that it will accommodate the length of the documents. The exit stopper is adjustable to
17 inches (432 mm). When scanning a document longer than 17 inches (432 mm) or A3 size (420
mm), fold down the exit stopper so that the longer paper will fit in the exit tray.
Feeder tray
Exit stopper
Feeder extension tray
Load the documents on the feeder tray with the side to be scanned facing up. Note the directional
“Face Up” icon and the document sizing scale on the ADF door. Slowly push the sheets in the
6
direction of the arrow until they stop.
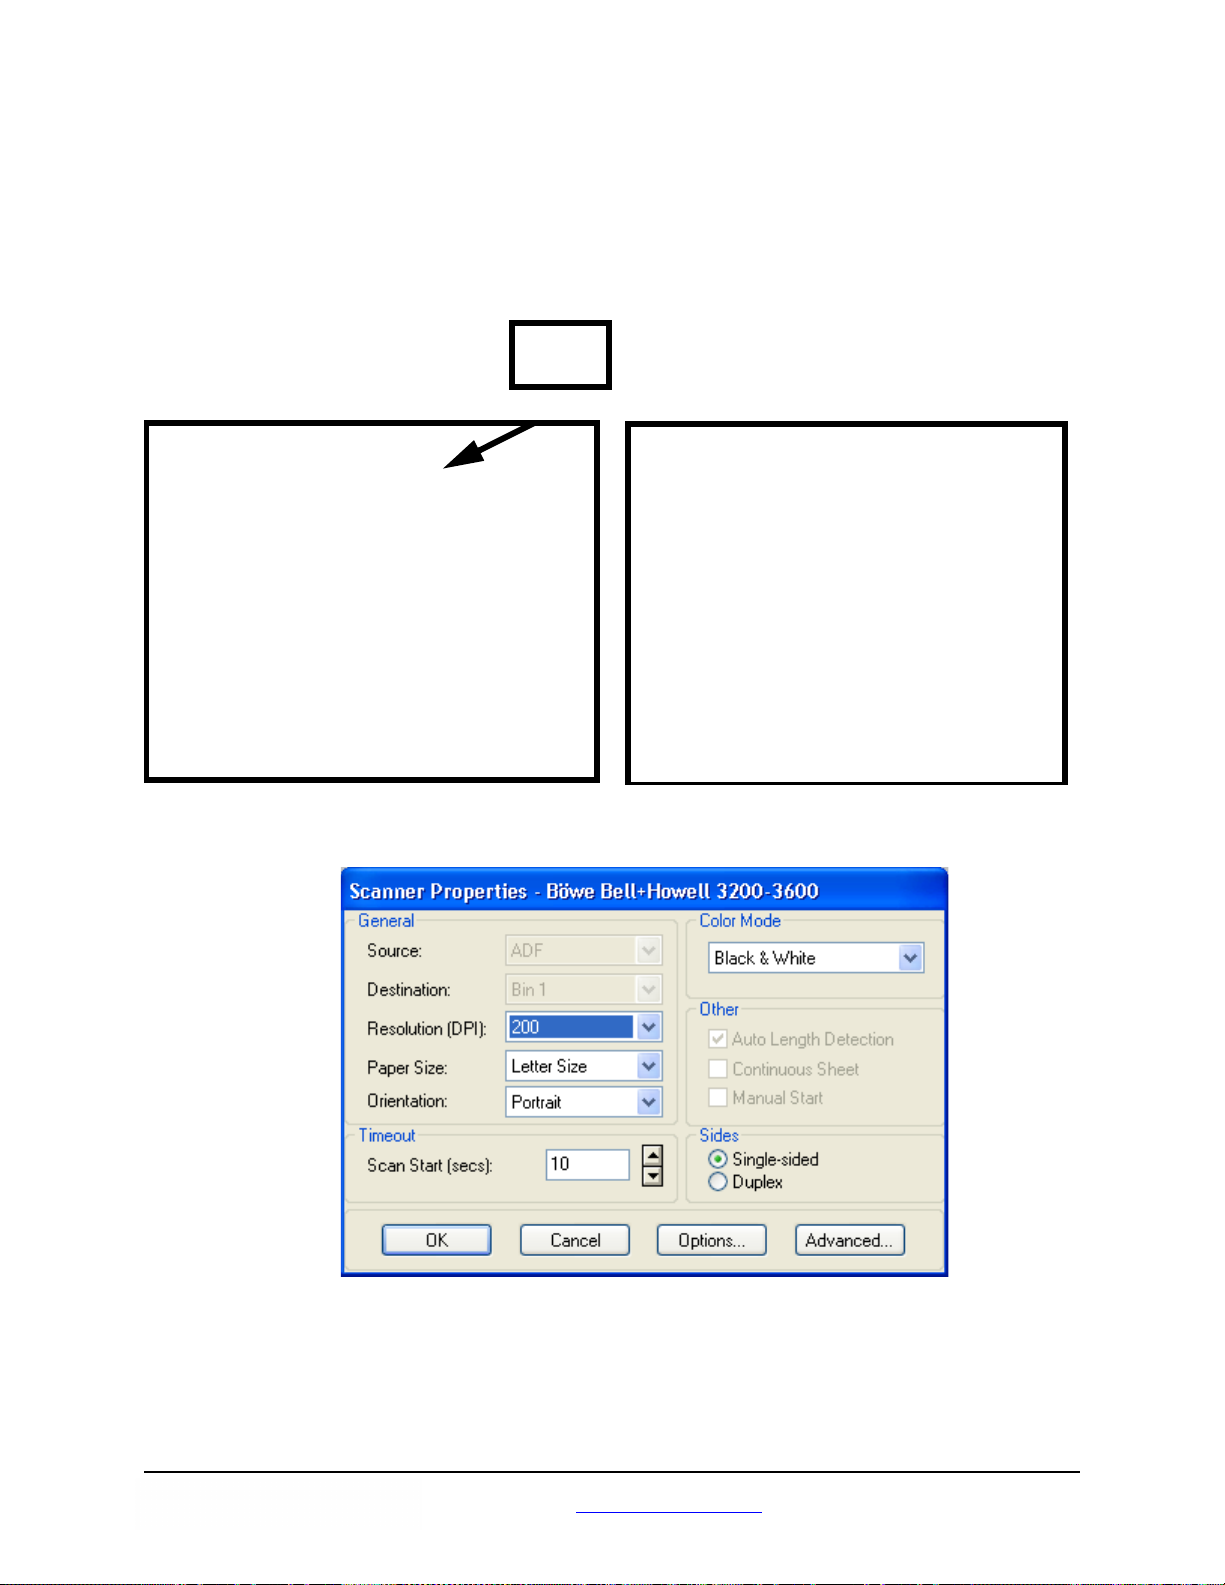
To scan in portrait mode, load the documents with the top edge going first into the feeder. To scan
in landscape mode, load the documents with the left edge going first into the fe ede r, as shown in
the following diagrams.
www.bbhscanners.com 56 of 142
Page 57
Caution
The height of the documents placed in the feeder tray must not exceed the paper limit mark that
appears on the right side of the document guide. Placing more sheets in the feeder tray may
cause a paper jam.
Loading LandscapeLoading Portrait
Paper limit mark
Open the Scanner Properties window.
7
You are now ready to scan. Refer to the instructions for your scanning or document management
software application.
www.bbhscanners.com 57 of 142
Page 58
Clearing Paper Jams in the ADF
If a paper jam occurs in the ADF (Automatic Document Feeder), the jam is often the result of loading torn
documents, documents with thin p aper, or documents that are creased o r curled on the edg e going into the
feeder. For information on how to prepare documents for scanning with the ADF, see “
Preparation” on page 51.
If a paper jam occurs, remove the jammed sheet or sheets using one or both of the following procedures:
Document
Removing Paper Jams from the Document Feeder
Caution
Do not attempt to pull out jammed paper with the ADF door closed. This action may damage the
document.
Push the ADF door release button to open the ADF door.
1
ADF door
ADF door
release button
www.bbhscanners.com 58 of 142
Page 59
Pull the jammed document out of the document feeder.
2
ADF door
When only the bottom end of jammed paper is visible with the ADF door open, keep the ADF door
open and also open the exit door. Carefully remove the jammed paper throug h either th e document
feeder or the exit path, as described in “
Removing Paper Jams from the Exit Path” on page 60.
Close the ADF door.
3
• When you close the ADF door, close it securely until the door is locked. Do not slam the ADF
door.
ADF door
If the jammed paper cannot be removed from the document feeder, remove it from the exit path as
described in “
Multifeed Ignore feature, refer to page 62
Removing Paper Jams from the Exit Path” on page 60. For information on using the
.
www.bbhscanners.com 59 of 142
Page 60
Removing Paper Jams from the Exit Path
Pull the exit stopper forward and raise the feeder tray in the direction of the arrow until the tray
clicks into place.
1
Exit stopper
Feeder tray
Pull the exit door release lever and open the exit door.
2
Exit door release
www.bbhscanners.com 60 of 142
Page 61
Pull out the jammed document from the exit area.
3
Exit door release
Exit door
Close the exit door.
4
• When you close the exit door, close it securely until the door is locked. Do not slam the exit
door.
If the jammed paper cannot be removed from the e xit d oor, remove it from the document feeder as
described in “
Removing Paper Jams from the Document Feeder” on pa ge58.
www.bbhscanners.com 61 of 142
Page 62

STOP/START Button Operation
The scanner STOP/START button has differ ent functions depending on the mode of operation.
Emergency Stop mode (default)
If the scanner is running and feeding paper, press the blue STOP/START button to immediately stop the
paper in the scanner. This is the default mode of operation.
Follow the
Multifeed Ignore
Multifeed Ignore enables you to allow a single page to go through the scanner without having the scanner
stop for a multifeed condition. Multifeed Ignore can be used with envelopes, documents with attached
Post-it notes, documents with photographs or any other document that is comprised of two overlapping
items. The Multifeed Ignore function works for only the top document in the scanned batch, once the
scanner has been set up for Multifeed Ignore. If you require multiple docu ment s to go throug h the scanner
that will trigger the scanner to stop because of a multifeed, consider modifying the multifeed settings. Refer
to “
Detect Double Feed” on page 67 for instructions on how to do this.
If a multifeed error occurs, remove the document from the ADF (Automatic Document Feeder) by opening
the ADF or by pressing the STOP/START button.
Press and hold the STOP/START button for 2 seconds until the LED light alternates between green and
orange. When this occurs, the scanner is in Multifeed Ignore mode. Re-insert the document in which you
wan to ignore the multifeed on top of the document stack and place on the ADF.
Either re-initiate the scan within your scanning software, or the scanner will automatically begin scanning
again.
Â
Clearing Paper Jams steps to remove the paper jammed in the scanner.
Note
The Multifeed Ignore function only works for one document at a time. Once a document goes
through, the scanner will stop if a new multifeed condition occurs.
To clear the Multifeed Ignore feature, open either the imprinter door , the top of the ADF or the bo ttom of the
ADF.
www.bbhscanners.com 62 of 142
Page 63

Feed Modes with the ADF
If the scanning application supports the Advanced Scanner Settings, the scanner can be configured in
either automatic, manual or wait for start feed modes via operator selection of the Advanced Settings -
Manual Feed Mode.
Note
Â
The Timeout indication is active in all Manual Feed Mode options except for “Off”. This feature sets
the time between the end of the scanned batch an d th e “o ut of paper” indica tio n. T he valu e is in
seconds, ranging from 1 to 300, with the default set to 30 seconds.
Automatic Document F eeding (Default Mode)
This is the standard mode of operation. In this mode , immediately after a batch has been scanned, the “out
of paper” indication appears.
• Select Off from the Manual Feed Mode drop-down list.
• Load the documents in the scanner and click the Start Batch button (or button with similar
name) in the scanning application to start scanning the batch of documents from the
application. The scanner paper feed rollers will automatically start and stop to feed the
documents in the scanner.
Manual Feed
Use this mode when feeding mixed document types that are difficult to separate and typically cause
multifeed problems. In this mode, the ADF tray is continuously raised and the feeder rollers are not
engaged until the document’s leading edge approaches the feeder roller.
1. Select On from the Manual Feed Mode drop-down list.
2. Click the Start Batch button (or button with similar name) in the scanning application and
start manually feeding the batch of documents one by one in the feed rollers. As the lead
edge of a document comes close to the feed rollers, the paper feed rollers will automatically
start and feed the document in the scanner.
3. To exit the Manual Feed Mode, press the scanner’s STOP/START key and cancel scanning
from the application.
www.bbhscanners.com 63 of 142
Page 64

Wait for Start to Feed
In this mode, the operator can manually control the start and stop of a batch using the STOP/START
button. To exit the feed mode, press the scanner’s STOP/START key and cancel scanning from the
application.
1. Select Start Button from the Manual Feed Mode drop-down list.
2. Click the Start Batch button (or button with similar name). The scanner will not start feeding
as it is waiting for the STOP/START button.
3. Load the document(s) under the paper feed roller.
4. Press the STOP/START button to begin scanning
The scanner will start scanning and will continue until the feeder is empty or the operator
presses the STOP/START button to stop the batch.
5. During the scan operation, press the STOP/START button to stop scanning. This is not an
emergency stop. The scanner will complete scanning of the document and then stop prior to
feeding the next document.
With this setting activated, the operator manually controls the scanner start and stop document
Feed selector
feed operation. Continue steps 2, 3 and 4 until you are ready to close your batch with the scanning
MANUAL position
application.
Automatic Start to Feed
Use this mode to drop the ADF tray between each batch and to restart scanning immediately.
1. Set the feed selector switch to AUTOMATIC. The feeder will adjust automatically to the
automatic feed position.
2. Click the Start Batch button (or button with similar name) in the scanning application. Place
your documents into the feede r tr ay. As the lead edge of the document batch comes close to
the feed rollers, the ADF tray will come up and the paper feed rollers will automatically feed
the batch of documents in the scanner.
www.bbhscanners.com 64 of 142
Page 65
Scanner Manual Feed Setting
You can use the ADF (Automatic Document Feeder) to scan a document one sheet at a time. This setting
is not recommended for multiple or batch feeding; the bottom feeder roller is dropped, making it easier to
scan thicker documents through the ADF.
To scan a single sheet manually, perform the following procedure:
Set the feed selector switch to MANUAL. The feeder will adjust automatically to the manual feed
position.
1
Adjust the document guides so that the space for the document is slightly wider th an the size of the
document.
2
Document guides
www.bbhscanners.com 65 of 142
Page 66
Insert one sheet of the document into the paper slot with the side to be scanned facing up.
3
• To scan in portrait mode, insert the sheet with the top edge going first into the paper slot.
• To scan in landscape mode, insert the sheet with the left edge going first into the paper slot.
• See also the document loading diagrams on page 57
.
Paper slot
Now that your scanner has been set for Manual Mode, you can adjust the ADF feeding mode by ch anging
the scanner settings as described on page 63
.
Exit stopper
Feeding Speed
When scanning thin paper, badly creased paper, fragile paper, etc. use the Slow mode. This speed slows
the documents that are fed through the ADF (Automatic Document Feeder) to about one- half the sp eed of
Normal mode. The image quality in the Slow mode is the same as in the Normal mode.
Note
Â
At a resolution above 300 dpi, the paper is fed at the same speed as in th e Normal mode even if the
Slow mode has been specified.
1. Navigate to your scanning application and select Settings.
2. Click the More button in the Settings dialog box.
www.bbhscanners.com 66 of 142
Page 67

3. Select a speed from the Feeding Speed drop-down list in the Advanced Settings dialog box.
Detect Double Feed
This function detects the feeding of more than one sheet at a time. If a doub le feed is detected, you can opt
to be notified. The default setting for this function is stop.
Note
Â
With this function, ultrasonic waves are aimed at the document to detect double feed by the level at
which the waves pass through the sheets. The function can detect double feed even when sheets
are superimposed exactly on top of each other, but it may not be detected properly with some paper
thicknesses and when creasing and other factors are present.
When important documents are to be scanned, ch eck the numb er of document sheets and the
number of scanned image sheets.
When scanning a document containing paper in different sizes, double feed can be detected when
this function is selected.
The default for Detect Double Feed is ON.
1. Navigate to your scanning application and select Settings.
2. Click the More button in the Settings dialog box.
3. Select the Detect Double Feed button in the Feeding Features section of the Advanced
Settings dialog box.
www.bbhscanners.com 67 of 142
Page 68

4. If the Detect Double Feed function operates incorrectly, adjust the sensitivity level by
selecting one of the levels in the Sensitivity drop-down list.
High
Normal
Low
Select this when feeding thin documents.
This is the standard sensitivity.
Select this when feeding thick documents.
5. Select one of the following from the Action drop-down list:
Beep Signal alert
Stop Scanning Stops the scanning process for operator attention. This
is the default setting.
If a Multifeed occurs, remove the documen t fro m the ADF (A ut om a tic Doc um e nt Feed er ). F or instructions
on removing papers jams, refer to “
Clearing Paper Jams in the ADF” on page 58. Either separate the
multifed pages and/or reinsert the document(s) into the ADF and press the ST OP/START button to resume
scanning.
www.bbhscanners.com 68 of 142
Page 69

Changing the Background Color
You can select the background reference color for the documents you scan. The background reference
color is the color of the plate that is behind the document. Depending the type of document b eing scanned
and the features of your scanning application, the background color is important because it may affect the
cropping quality of the scanned image. For example, when VRS is selected, crop filters may not work
properly if the black background is not selected. In addition, the white background color may af fect the use
of other scanning features that need to be resolved within the scanning applications feature settings.
The default background color has been set to black. You can set the background color to white or black. To
change the background color and then change the color reference plates to match the color selected with
the reference plates. Follow the procedures in the next two sections.
Changing the Background Color Reference Plates
Press the power button to the OFF position.
1
Pull the exit door release lever to open the exit door.
2
Exit door release
www.bbhscanners.com 69 of 142
Page 70
Locate reference plate (A). With your right index finger, press the bar inward. With the Reference
Plate still pressed into place, use your left hand to roll it forward until it is in the appropriate position.
3
Confirm that the reference plate has been turned over and is locked in position.
Push inward
Reference plate (A)
Roll forward
Locate reference plate (B). With your right index finger, press the bar inward. With the Reference
Plate still pressed into place, use your left hand to roll it forward until it is in the appropriate position.
4
ADF Glass
Confirm that the reference plate has been turned over and is locked in position.
ADF glass
Reference plate (B)
The color selected for reference plate (B) should now match the color selected for reference plate
(A).
www.bbhscanners.com 70 of 142
Page 71

Close the exit door.
5
• When you close the exit door, close it securely until the door is locked. Do not slam the exit
door.
www.bbhscanners.com 71 of 142
Page 72
Operator Maintenance
Cleaning the Outside of the Scanner
To main tain the sca nn er’s performance, clean th e ou tside of the un it at lea st once pe r month using the
following procedure:
Press the power button to the OFF position.
1
Power button
LED
Clean the exit tray, the feeder and feeder tray, ADF cover and other surfaces with a soft cloth.
2
The insertion and exit slots of the ADF can become soiled with dirt, grime and paper dust. Clean
these areas at least once per month or more often if there is an accumulation dust.
3
Use a brush to remove dirt and dust from the exhaust fan vent on the back side of the unit near the
power cord connection and from the two vents on the left and right sides of the ADF assembly.
4
www.bbhscanners.com 72 of 142
Page 73

Cleaning Inside the Scanner
If paper jamming, marking, or multiple-sheet feeding occurs frequently, clean the rollers, sensors and
double feed detector as described in this section. To maintain scanning quality, clean the scanner
components frequently: Clean inside the scanner at le ast once per week or af ter 20 ,000 sheet s ha ve been
scanned, whichever comes first.
To determine the number of sheets scanned, use the Trūper User Utility. (See “
page 92.)
The following guidelines are for cleaning inside the scanner:
• If the documents you scan are dirty, the scanner’s parts and components will also become dirty .
Be sure the documents you scan are as clean as possible.
• If black or white lines appear on the scanned images, clean the ADF glass areas and the
reference plates as described in “
Glass” on page 81.
• If paper jamming, marking, or double feeding occurs frequently even after cleaning, you may
need to change the rollers, as described in “
Also observe the warnings for use of the roller cleaning paper sh own in “
page 74.
Note
Â
For proper cleaning and maintenance, it is recommended that the following three roller cleaning
procedures be performed concurrently.
Cleaning the Background Color Reference Plates and ADF
Replacing Consumables” on page 86.
Roller Cleaning Paper” on
Trūper User Utility” on
www.bbhscanners.com 73 of 142
Page 74

Roller Cleaning Paper
Use the roller cleaning paper to clean inside the scanner.
Warning
Before using the roller cleaning paper, please read these instructions completely. Keep these
instructions for future reference.
• KEEP THE ROLLER CLEANING PAPER AWAY FROM FIRE.
• Do not use the roller cleaning paper near a heater or open flame.
• Do not drink or inhale the roller cleaning
paper fluid.
• The roller cleaning paper may be har mful to
your skin. Please use protective gloves
when working with the cleaning paper.
• Do not store the roller cleaning paper in
direct sunlight or in a place with temperature
over 104
• Use the roller cleaning paper only to clean the rollers and scanning area.
o
F (40oC).
• If you need more information about the roller cleaning paper, please refer to the Material Safety
Data Sheet (MSDS) available upon request from Böwe Bell + Howell Scanners
Preparation: Cut the roller cleaning paper bag on the dotted line and take out the roller cleaning paper.
Dotted line
Use the roller cleaning paper immediately af ter ope nin g the bag. If the bag remains open for a long period
of time, the alcohol cleaning solution will evaporate and the cleaning paper will not be effective.
Additional roller cleaning paper is available from the Böwe Bell + Howell Scanning Essentials online store
at http://webstore.bbhscanners.com
also the “
Consumable Parts and Accessories List” on page 13.
or from the reseller where you purchased the Trūper scanner. See
.
www.bbhscanners.com 74 of 142
Page 75
Cleaning the Paper Feed Roller, Separation Roller and Retard Roller
Press the power button to the OFF position.
1
Push the ADF door release button to open the ADF door.
2
ADF door
ADF door release
Use the roller cleaning paper to remove any dirt or grime from the surfaces of the paper feed roller
and separation roller.
3
Separation roller
Hold the roller to prevent it from rotating, then wipe the roller from one side to the other in the
direction of the arrows shown in the diagram. Turn the roller as you continue to wipe and clean all
the way around the roller.
Paper feed roller
www.bbhscanners.com 75 of 142
Page 76
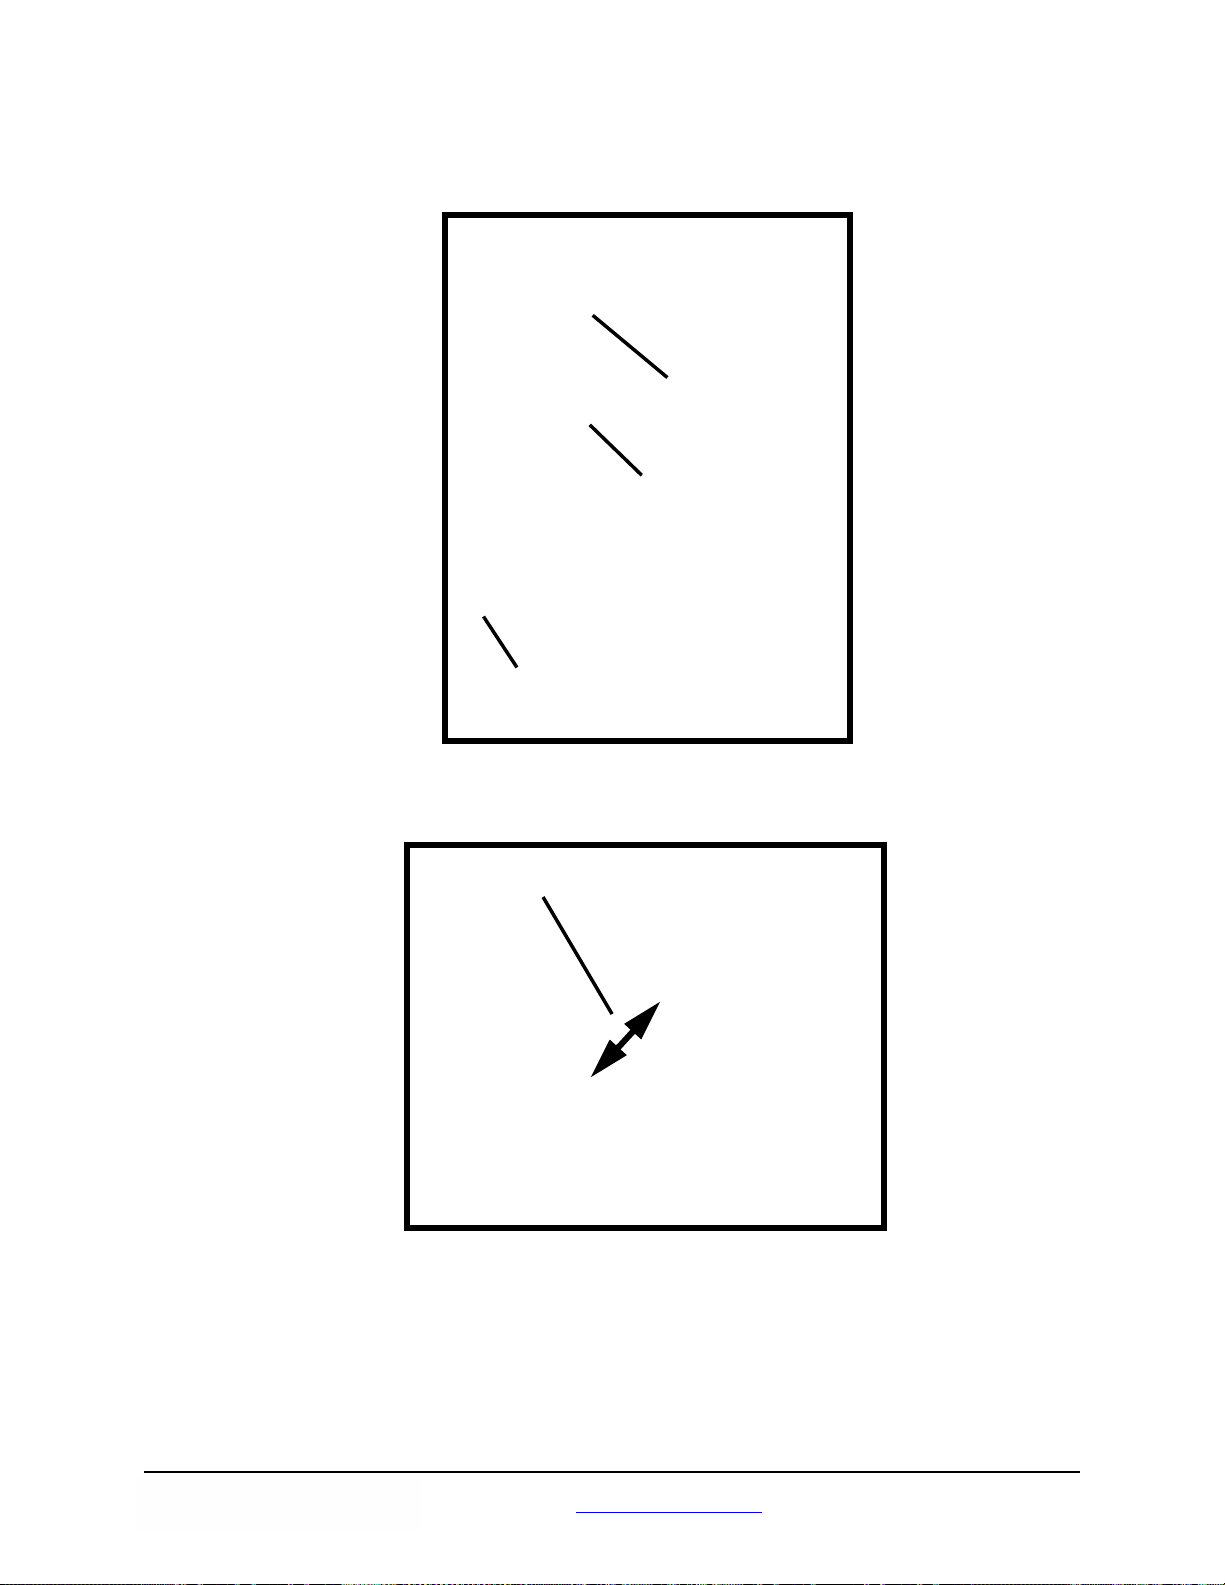
Open the retard cover in the direction of the arrow shown in the diagram by pulling up from the
indent on the right side.
4
Retard cover
Retard roller
Indent
Use the roller cleaning paper to remove the dirt from the surface of the retard roller.
5
Retard roller
Hold the roller to prevent it from rotating, then wipe the roller from one side to the other in the
direction of the arrows shown in the diagram. Turn the roller as you continue to wipe and clean all
the way around the roller.
www.bbhscanners.com 76 of 142
Page 77

Close the retard cover in the direction of the arrow as shown in the following diagram.
6
7
• When you close the retard cover, close it securely until the cover is locked. Do not slam the
retard cover.
Retard cover
Retard roller
Close the ADF door.
• When you close the ADF door, close it securely until the door is locked. Do not slam the ADF
door.
Proceed to the following section, “Cleaning the Drive Rollers and Free Rollers in the ADF”.
8
Cleaning the Drive Rollers and Free Rollers in the ADF
Press the power button to the OFF position.
1
Push the ADF door release button to open the ADF door.
2
www.bbhscanners.com 77 of 142
Page 78

Use the roller cleaning paper to remove the dirt from the surfaces of the four (4) drive rollers.
3
Drive rollers
Drive rollers
Hold the roller to prevent it from rotating, then wipe the roller from one side to the other in the
direction of the arrows shown in the diagram. Turn the roller as you continue to wipe and clean all
the way around the roller.
Use the roller cleaning paper to remove the dirt from the surfaces of the four (4) free rollers .
4
Free Rollers
Hold the roller to prevent it from rotating, then wipe the roller from one side to the other in the
direction of the arrows shown in the diagram. Turn the roller as you continue to wipe and clean all
the way around the roller.
Close the ADF door.
5
6
• When you close the ADF door, close it securely until the door is locked. Do not slam the ADF
door.
Proceed to the following section, “Cleaning the Drive Rollers, Free Rollers and Exit Rollers in the
Exit Door”.
www.bbhscanners.com 78 of 142
Page 79
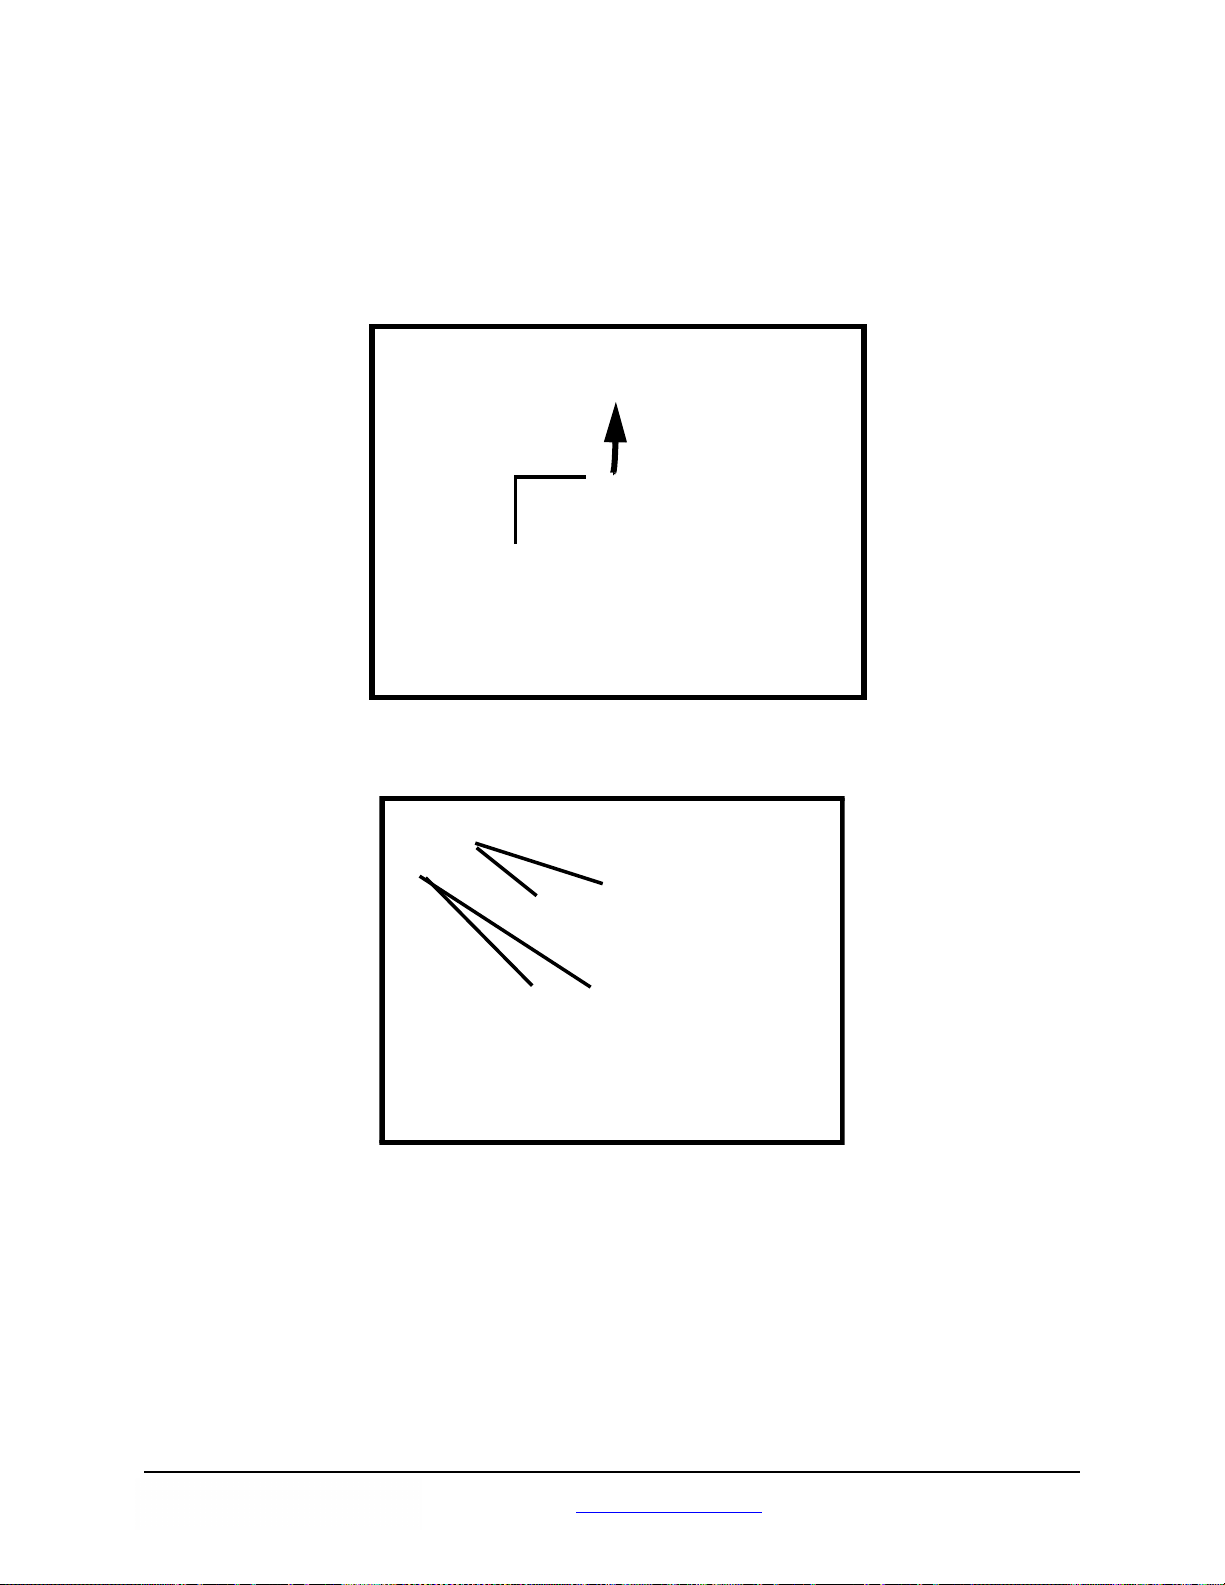
Cleaning the Drive Rollers, Free R ollers and Exit Rollers in the Exit Door
Press the power button to the OFF position.
1
Pull the exit door release lever to open the exit door.
2
Exit door release
Use the roller cleaning paper to remove the dirt from the surfaces of the four (4) drive rollers and
the two (2) exit rollers.
3
Exit rollers
Drive rollers
Drive rollers
Hold the roller to prevent it from rotating, then wipe the roller from one side to the other in the
direction of the arrows shown in the diagram. Turn the roller as you continue to wipe and clean all
the way around the roller.
www.bbhscanners.com 79 of 142
Page 80
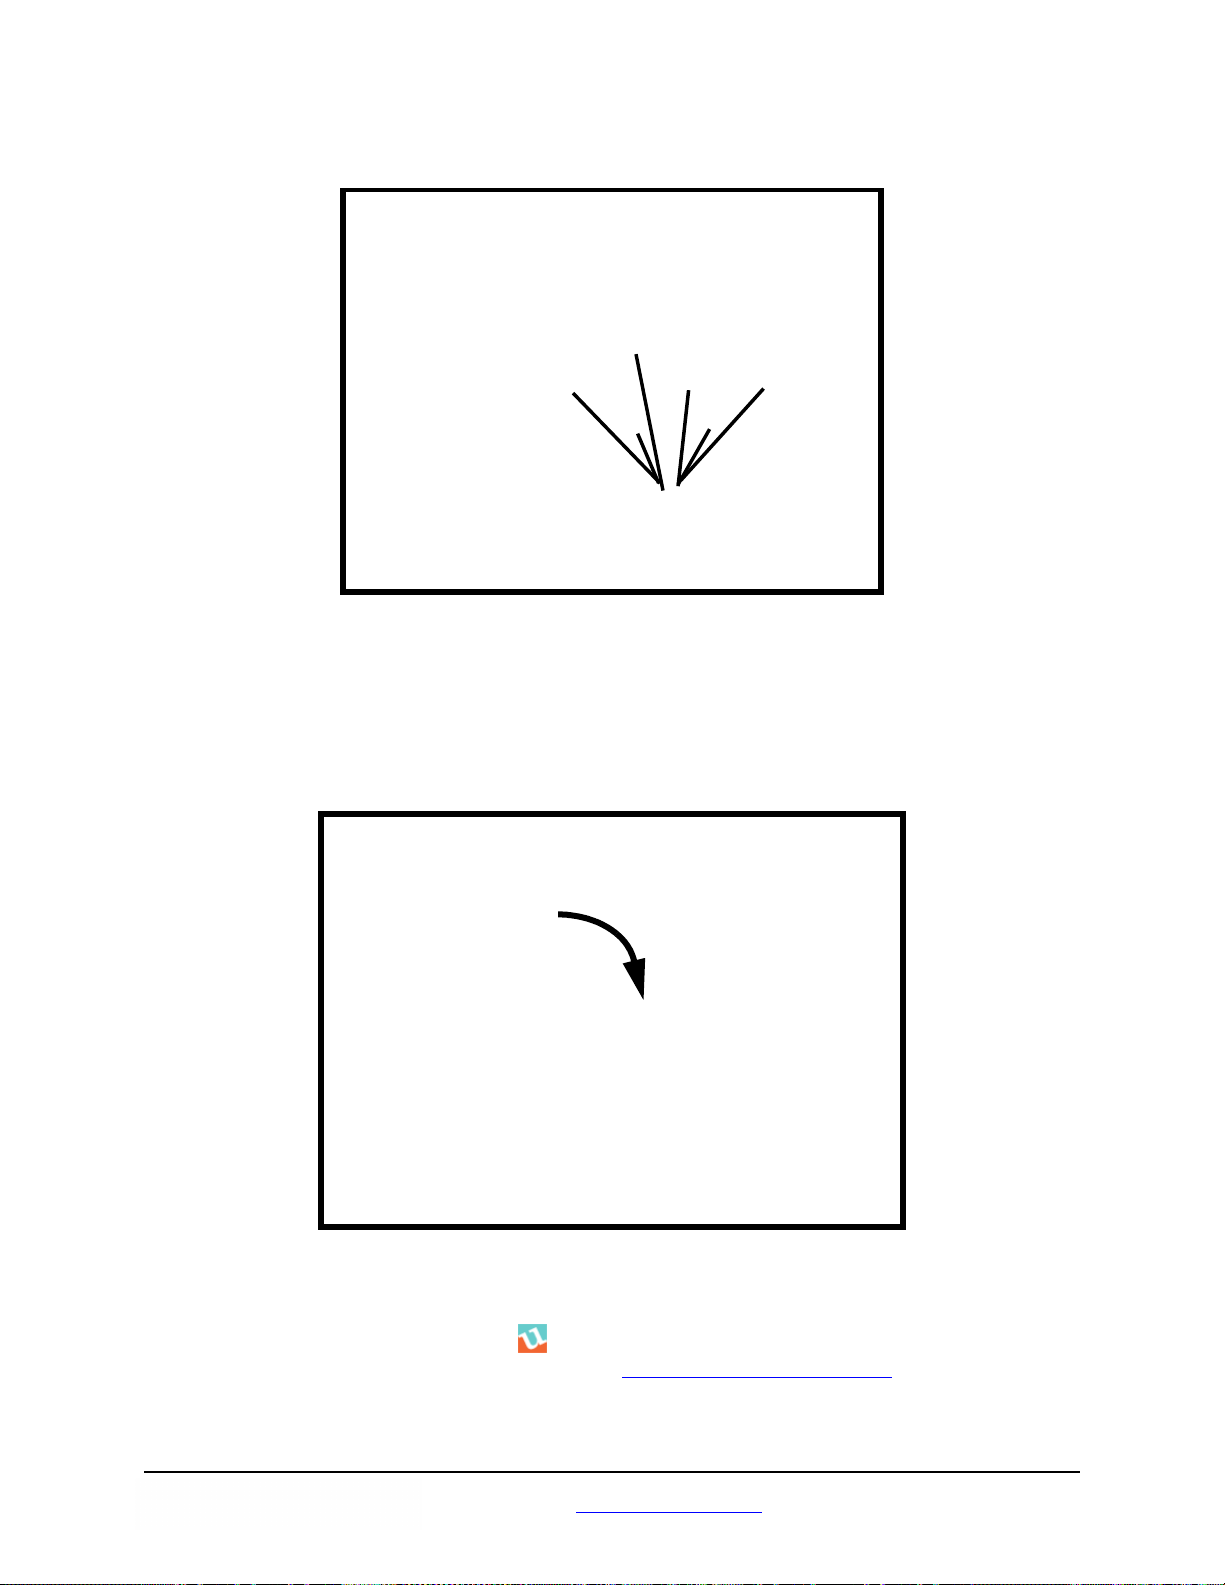
Use the roller cleaning paper to remove the dirt from the surfaces of the six (6) free rollers.
4
Free rollers
Hold the roller to prevent it from rotating, then wipe the roller from one side to the other in the
direction of the arrows shown in the diagram. Turn the roller as you continue to wipe and clean all
the way around the roller.
Close the exit door.
5
• When you close the exit door, close it securely until the door is locked. Do not slam the exit
door.
When finished, clear the clean roller counter as described in step 6.
After cleaning the rollers, click the icon to open the Trūper User Utility. Select the User Utility
6
option to clear the roller cleaning counter. See “
Scanner Counter” on page 98.
www.bbhscanners.com 80 of 142
Page 81

Cleaning the Background Color Reference Plates and ADF Glass
Press the power button to the OFF position.
1
Pull the exit door release lever to open the exit door.
2
In the scanner base assembly, clean the ADF glass (A) and reference plate (B) with the roller
cleaning paper.
3
ADF glass (A)
Reference plate (B)
www.bbhscanners.com 81 of 142
Page 82
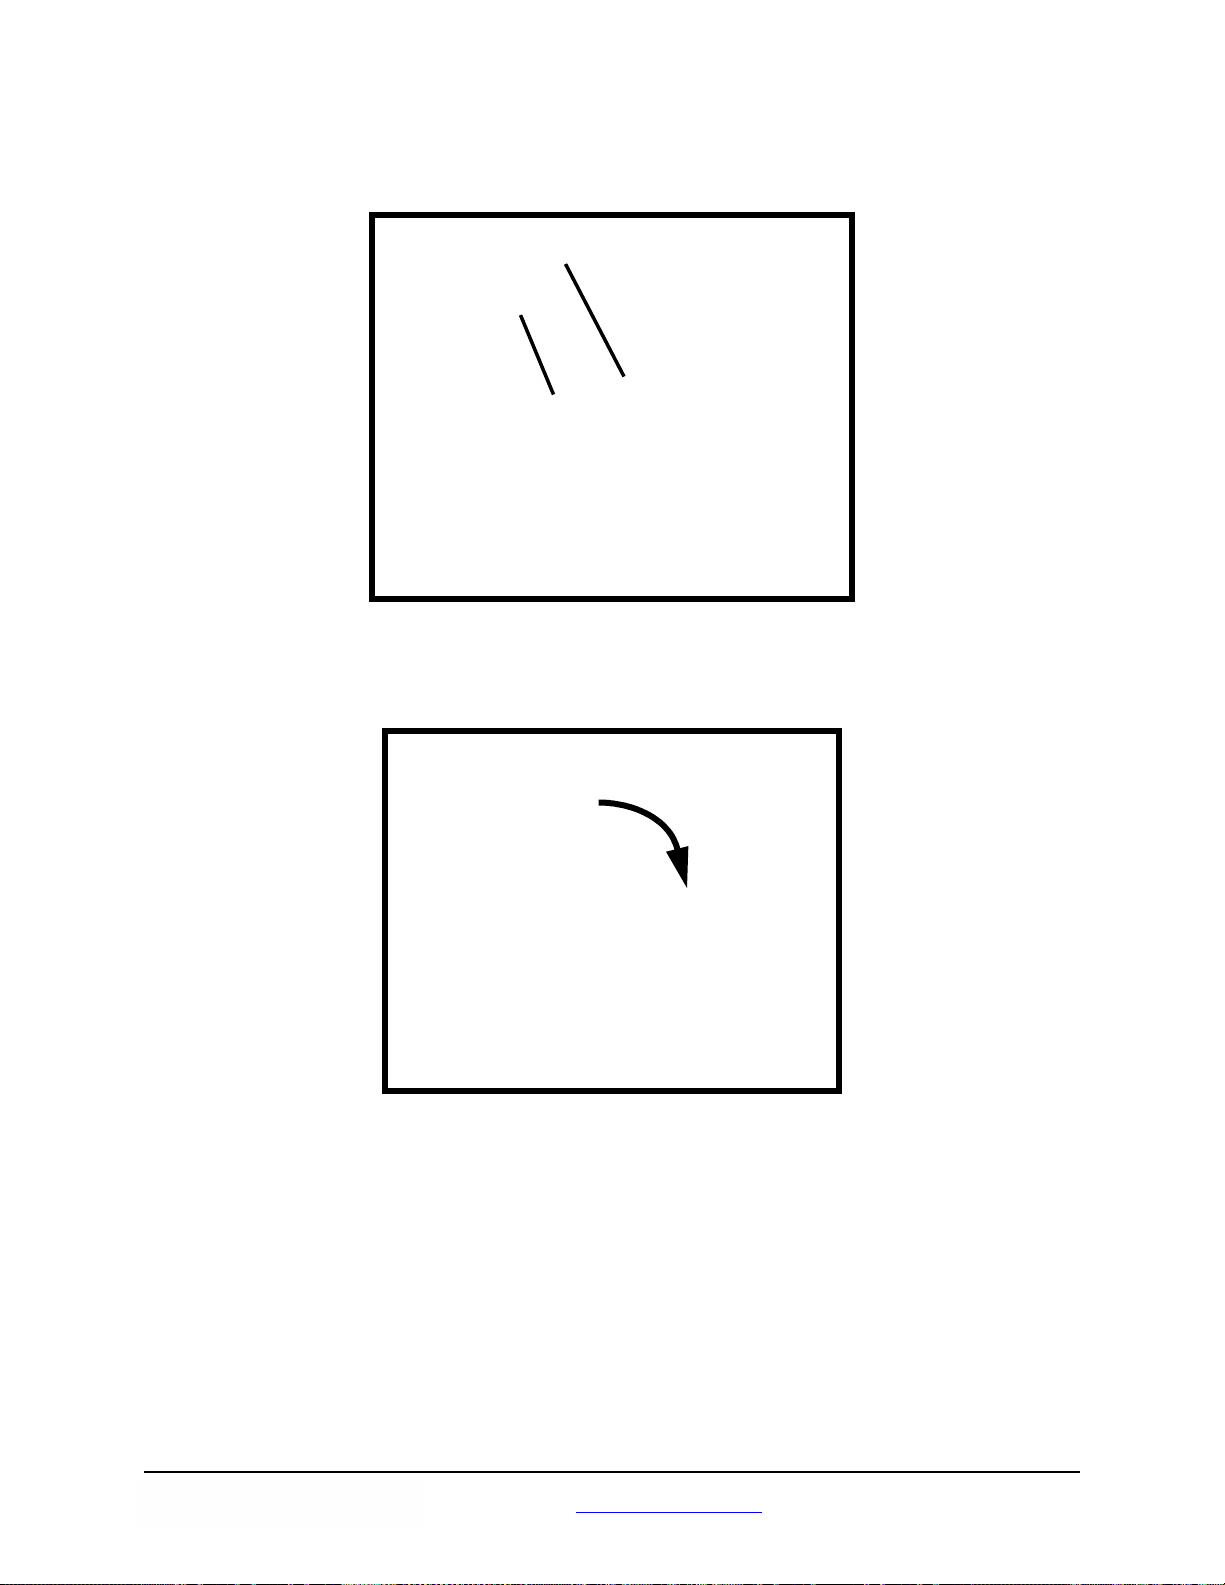
In the exit door assembly, clean the reference plate (C) and ADF glass (D) with the roller cleaning
paper.
4
ADF glass (D)
Reference plate (C)
Close the exit door.
5
• When you close the exit door, close it securely until the door is locked. Do not slam the exit
door.
www.bbhscanners.com 82 of 142
Page 83
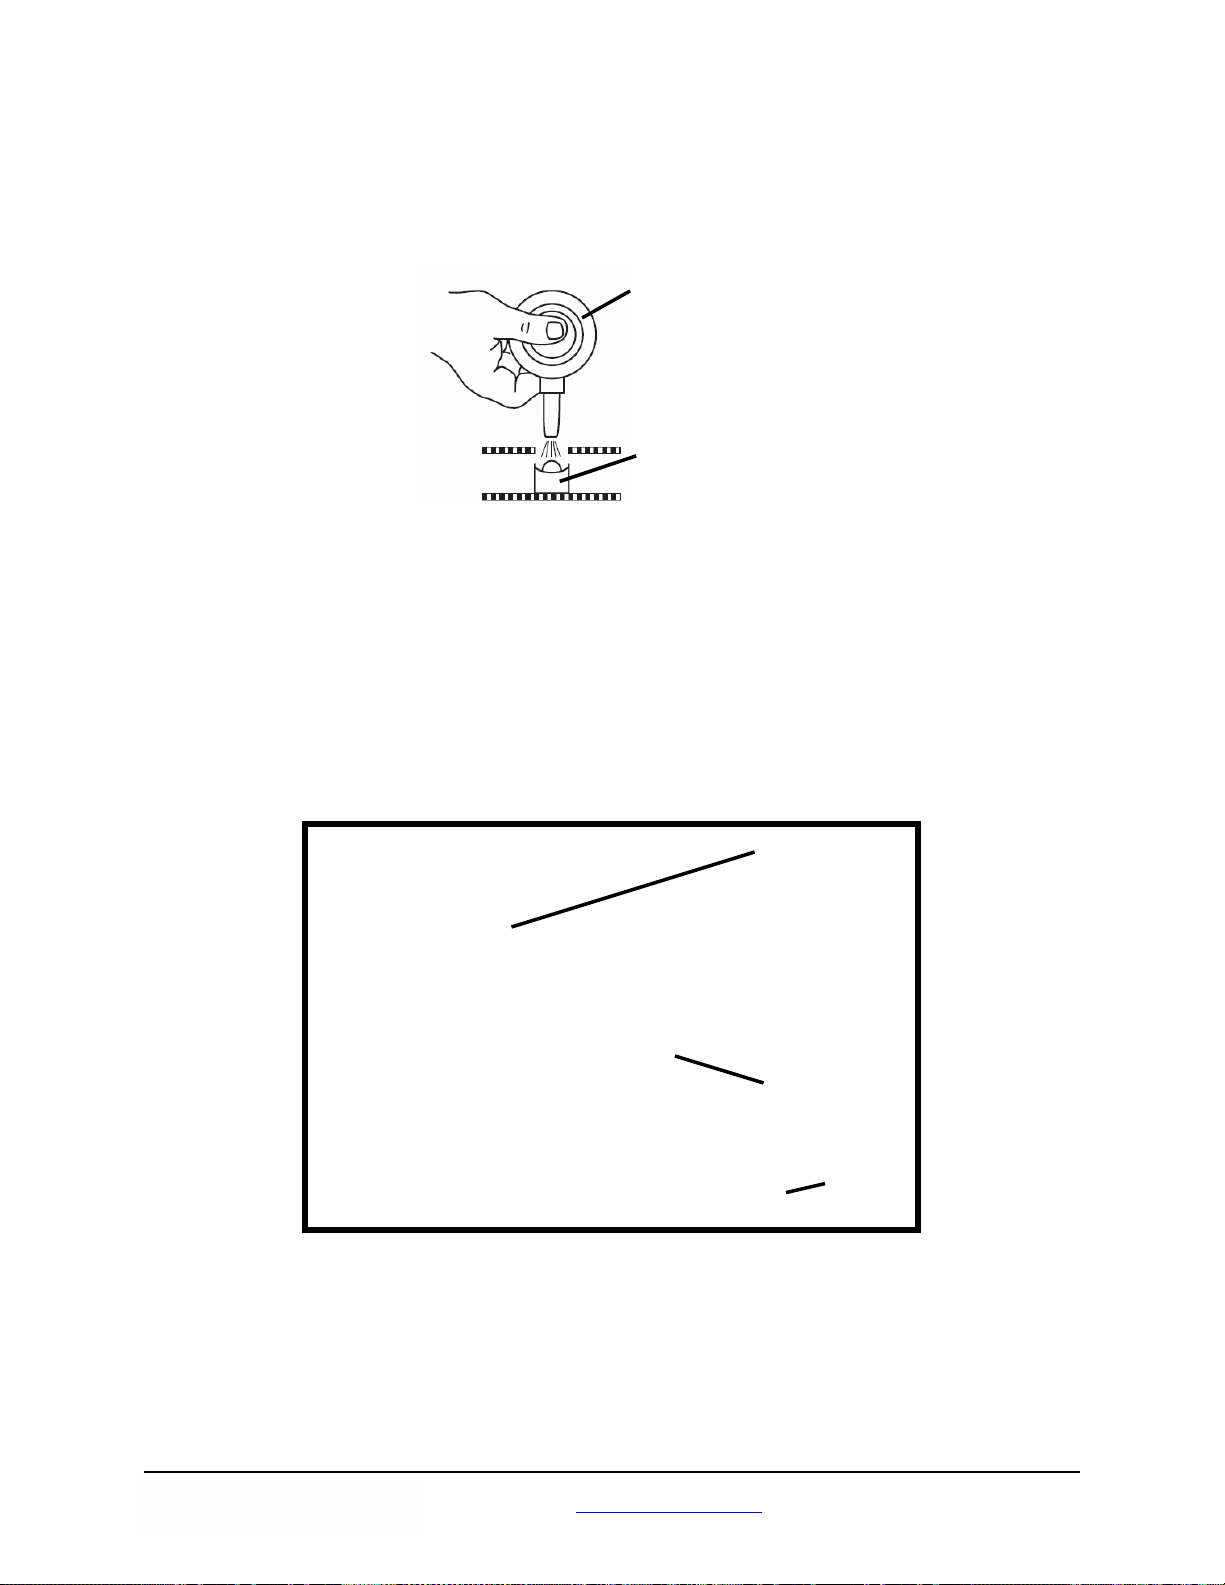
Cleaning the Paper Sensor, Waiting Sensors and Double Feed Detector
Preparation: Locate the blower accessory and remove the brush from the blower.
Blower accessory
Blower
Sensor or detector
Press the power button to the OFF position.
1
Push the ADF door release button to open the ADF door.
2
Use the blower accessory to blow off any dirt from the surfac e of th e paper sen so r an d waiting
sensor. Also, blow off any dirt from the surface of the metal reflector sheet used by the waiting
3
sensor.
Waiting sensor
Reflector sheet for
waiting sensor
Paper sensor
www.bbhscanners.com 83 of 142
Page 84
Use the blower accessory to blow off any dirt from the double feed detector (A) and double feed
detector (B).
4
Double feed
detector (A)
Close the ADF door.
5
Cleaning the Starting, Skew and Ending Sensors
Preparation: Locate the blower accessory and remove the brush from the blower.
• When you close the ADF door, close it securely until the door is locked. Do not slam the ADF
door.
Blower accessory
Reflector sheet for
ending sensor
Double feed detector (B)
Blower
Sensor or detector
Reflector sheet for
skew sensor (right)
Press the power button to the OFF position.
1
Pull the exit door release lever to open the exit door.
2
www.bbhscanners.com 84 of 142
Page 85
Use the blower accessory to blow off any dirt from the surface of the starting sensor, skew sensor
(left), skew sensor (right) and ending sensor.
3
Ending sensor
Skew sensor (right)
Use the blower accessory to blow off any dirt from the reflector sheets for the starting sensor, skew
sensor (left), skew sensor (right) and the ending sensor.
4
Reflector sheet for
skew sensor (left)
Starting sensor
Reflector sheet for
starting sensor
Skew sensor (left)
Close the exit door.
5
• When you close the exit door, close it securely until the door is locked. Do not slam the exit
door.
www.bbhscanners.com 85 of 142
Page 86

Replacing Consumables
Replacing the Paper Feed Roller Module
The Trūper scanner allows you to perform routine maintenance without calling a service technician. This
includes replacing a variety of parts that become worn as the scanner is used.
Replace both the feed roller module and the retard roller module after 300,000 scans. Replace the roller
modules more often if you find that cleaning inside the scanner no longer improves paper jamming,
slipping, multi-feeding, marking and similar feeding problems.
Preparation: Open the Roller Exchange Kit. Roller Exchange Kits are available from the Böwe Bell +
Howell Scanning Essentials online store at http://webstore.bbhscanners.com
you purchased the Trūper scanner. See also the “
Press the power button to the OFF position.
Consumable Parts and Accessories List” on page 13.
or from the reseller where
1
Push the ADF door release button to open the ADF door.
2
ADF door release
ADF door
www.bbhscanners.com 86 of 142
Page 87
Remove the paper feed roller module from the ADF door as shown in the following steps and
diagrams.
3
1. Place your fingers on the tabs on the sides of the roller module and pull down the roller
module in the direction of the arrow as shown in the diagram. The module will be released
from the magnets located in the ADF door assembly.
2. Disengage the shaft on the roller module from the brackets in the ADF door assembly as
shown in the diagram. Carefully disengage the gears on the roller module from the gears in
the ADF door assembly.
www.bbhscanners.com 87 of 142
Page 88

Open the Roller Exchange Kit and take out the new paper feed roller module.
4
Install the new paper feed roller mo dule as shown in the following steps and diagrams.
5
1. Carefully insert the shaft on the roller module into the brackets in the ADF door assembly.
2. Carefully match the gears on the roller module with the gears in the ADF door assembly.
3. Push up the roller module in the direction of the arrow shown in the diagram, so that it is
Close the ADF door.
6
• When you close the ADF door, close it securely until the door is locked. Do not slam the ADF
locked in place by the magnets located in the ADF door assembly.
door.
www.bbhscanners.com 88 of 142
Page 89

Replacing the Retard Roller Module
Replace both the feed roller module and the retard roller module after 300,000 scans. Replace the roller
modules more often if you find that cleaning inside the scanner no longer improves paper jamming,
slipping, multi-feeding, marking and similar feeding problems.
Preparation: Open the Roller Exchange Kit. Roller Exchange Kits are available from the Böwe Bell +
Howell Scanning Essentials online store at http://webstore.bbhscanners.com
you purchased the Trūper scanner. See also the “
Press the power button to the OFF position.
Consumable Parts and Accessories List” on page 13.
or from the reseller where
1
Push the ADF door release button to open the ADF door.
2
ADF door
ADF door release
Open the retard roller cover by pulling up the cover from the right side. Pull the cover in the
direction of the arrow marked next to the indented section on the cover.
3
Retard roller
Indent
Retard cover
www.bbhscanners.com 89 of 142
Page 90
Remove the retard roller from the metal brackets by holding the ends of the roller shaft and pulling
up the roller in the direction of the arrows, as shown in the following diagram.
4
Open the Roller Exchange Kit and take out the new retard roller.
5
Install the new retard roller as shown in the steps and diagram.
6
1. Hold the ends of the roller shaft and lower the roller into the metal brackets.
2. Match the groove on one side of the roller shaft with the metal bracket that fits the groove.
When the groove is matched with the bracket, the roller shaft slides into the bracket.
Groove
www.bbhscanners.com 90 of 142
Page 91

Close the retard roller cover.
7
8
• When you close the retard cover, close it securely until the cover is locked. Do not slam the
retard cover.
After replacing the paper feed and retard roller modules, click the icon to open the Trūper
User Utility. Select the User Utility option to clear the clean roller counter. See “
on page 98.
Close the ADF door.
• When you close the ADF door, close it securely until the door is locked. Do not slam the ADF
door.
Scanner Counter”
www.bbhscanners.com 91 of 142
Page 92

Trūper User Utility
The Trūper User Utility is a software program used to maintain and troubleshoot the Trūper 3600 scanner.
The User Utility is installed as part of the scanner’s software installation.
If you do not find the Trūper User Utility icon on the computer desktop, please see “
Installation” on page 32.
Trūper Software
Starting the User Utility
Click the Trūper User Utility icon on the computer desktop, or click the Start button on the Windows
taskbar and select Programs, BBH, and then Scanner Tools.
Note
Â
When starting the Trūper User Utility, the Select Scanner dialog box may appear. If this dialog box
appears, select the BBH 3600 USB scanner from the drop-down list.
www.bbhscanners.com 92 of 142
Page 93

Functions and Settings
User Utility Main Dialog Window
This window displays the scanner status, scanner information and the User Utility functions and settings
options.
Scanner Status and Error Code Display
This section displays the status of the connected scanner along with error codes. For information about the
messages and error codes, see “
Scanner Information
This section displays the following information:
• Model name and number
• Firmware Version
• Memory installed
• Interface, one of the following:
STI USB (HS) = USB 2.0 Hi-Speed (default configuration)
STI USB (FS) = USB 1.1 Full Speed
• Pre-Imprinter, enable or disable
User Utility Error Codes” on page 101.
www.bbhscanners.com 93 of 142
Page 94

Sleep Mode
To conserve energy and reduce operating costs, the scanner has a programmable power save feature.
The scanner’s factory setting is as follows: The power save feature is enabled with a waiting time of 15
minutes, so that the Sleep Mode goes into effect after 15 minutes after the last scanner operation. This
setting complies with ENERGY STAR requirements.
Click the Sleep Mode button to change the settings:
• When the Sleep Mode check box is selected, the Sleep Mode is enabled. To disable this
feature, clear the check box next to Sleep Mode, then click OK.
• To change the waiting time until the Sleep Mode goes into effect, be sure the Sleep Mode check
box is selected, adjust the minutes in the Waiting Time box, then click OK. (The waiting time
can be set from one to 60 minutes in one-minute incr em e nts.)
• If you do not want to change the settings, click Cancel.
Clean Imprinter
The Clean Imprinter button is enabled only when the imprinter is installed in the scanner. If the imprinter ink
cartridge is clogged, first close the imprinter door, then click the Clean Imprinter button to clean the
cartridge. The unit will perform an automatic cleaning function to improve the print quality.
Paper Mode/Buzzer Setting
The scanner can alert you with a buzzer when it detects a designated paper size. Click the Paper Mode/
Buzzer Setting button to change the settings:
• In the Paper Mode section, select the size of paper to be detected by the paper guides: A4 or
Letter size.
• In the Buzzer Setting section, select ON or OFF, then click OK.
• If you do not want to change the settings, click Cancel.
www.bbhscanners.com 94 of 142
Page 95

User Shading
The User Shading function provides adjustments to improve image quality. Perform shading adjustment if
the image quality has deteriorated and does not improve even after cleaning inside the scanner. To
perform shading adjustment, you will need a sheet of the special shading paper that is included with the
scanner. See also “
Appendix 3—Shading Adjustment” on page 130.
1. Click the User Shading button on the User Utility window.
2. Click the Start Shading button on the User Shading dialog box. The User Shading utility will
guide you through the necessary steps.
3. Clean the inside of the scanner, refer to “
Cleaning Inside the Scanner” on page 73. When
finished, click OK.
4. Turn over both the front and back reference pla tes to wh ite, refer to “
Changing the Background
Color” on page 69. When finished, click OK. (The “please reverse” message will not appear if
the reference plates are already set to white.)
www.bbhscanners.com 95 of 142
Page 96

5. Place the special shading paper in the feeder tray in the Landscape position, then click OK.
Note
Â
Use only shading paper that is in good condition. Do not use shading paper that is dirty or damaged
because this will cause the image quality to deteriorate.
Use only the shading paper supplied with the scanner. Using other types of paper for shading
adjustment will cause the image quality to deteriorate.
6. The scanner reads the shading paper and the shading adjustment sets the reference for the
white shading plate. Wait until the “Now Adjusting” message box is cleared from the screen.
7. Turn over both the front and back reference plates to the black side. When finished, click OK.
Note
Â
The shading paper is NOT used for the black reference shading.
www.bbhscanners.com 96 of 142
Page 97

The shading adjustment data with the black reference is created. Wait until the “Now Adjusting”
message box is cleared from the screen.
8. Click OK to complete shading adjustment.
Restoring Shading to the Default
Y ou can r estore shading adjustment d ata to the factory de fault setting. Use this function if the image qu ality
deteriorates or if it has not improved as a result of the shading adjustment process.
1. Click the User Shading button on the User Utility window.
2. Click the Restore Default option on the User Shading dialog box.
3. Click OK to confirm that you want to restore the factory setting.
www.bbhscanners.com 97 of 142
Page 98

4. Click OK to complete the Restore Default function.
Scanner Counter
The User Utility scanner counters can be used to keep records of the number of documents scanned. The
counters also provide a reminder for roller cleaning and parts replacement.
System
Displays the number of pages scanned in ADF mode after the last counter update.
After Clean Roller
Displays the number of pages scanned after the rollers were last cleaned. When the After Clean
Roller number is greater than the Warning number listed next to the counter, the rollers need to be
cleaned. (The Warning number indicates how man y pages can be scanned after roller cleaning
before the rollers will need to be cleaned again.)
After Replace Roller
Displays the number of pages scanned after the rollers were last replaced. When the After Replace
Roller number is greater than the Warning number listed next to the counter, the rollers need to be
replaced. (The Warning number in dicates how many pages can be scanned with a new set of rollers
before the rollers will need to be replaced.)
Update All Counter
Click the Update All Counter button to update the counter displays to the latest numbers. Document
scanning operations DO NOT automatically update the counter displays.
Clear Counter Buttons
There are two Clear Counter buttons, one to clea r th e After Clean Roller display and one to clear the
After Replace Roller display.
• After you clean the rollers, click the Clear Counter button for After Clean Roller and reset the
number to zero.
• After you replace the rollers, click the Clear Counter button for After Replace Roller and reset
the counter to zero.
www.bbhscanners.com 98 of 142
Page 99

Help
Click the Help button to open the Trūper Operator Manual documentation in PDF file format. The manual
contains information about scanner operations, cleani ng and ma intenance a nd information about the User
Utility messages and error codes.
Select Scanner(X)
The Select Scanner button opens the Select Scanner dialog box. If more than one scanner is connected to
the computer, you can use the Select Scanner dialog box to select a different scanner. The User Utility
functions and settings will then apply to the selected scanner. To select a different scanner:
1. Click the Select Scanner(X) button.
2. Click the drop-down list and select a different scanner, then click OK. If you do not want to
select a different scanner, click Cancel.
Save Info
The Save Info option allows you to save current scanner and computer system information to a log file.
1. Click the Save info button.
2. In the Save in drop-down list, browse to find a location to save the log file.
3. In the File name box, type a file name for the log file (the default file name is Scanner.log).
4. Click the Save button.
Close
Click the Close button to close the User Utility.
www.bbhscanners.com 99 of 142
Page 100

Check Version Information
To check the software version of the User Utility:
1. Open the User Utility and right click the title bar at the top of the display window.
2. Click the About option to view the version information.
www.bbhscanners.com 100 of 142
 Loading...