


OWNER’S MANUAL
The Basics
of Metal Detecting
Your Fast Tracker Metal Detector is a MOTION metal detector; movement over
an object is required in order for the machine to detect an object and emit a tone.
The Fast Tracker has eliminated the two most difficult aspects of detecting ground balancing and target tuning. Both of these functions are automatic. With
only two operating knobs, you are on the Fast Track to finding buried treasure!
CAUTION:
FOR OUTDOOR USE ONLY:
• If demonstrating indoors, beware of interference from electromagnetic
fields.
• If interference occurs, the detector will chatter or beep erratically.
• To avoid interference, turn the sensitivity down, turn off lights and
appliances, or use outdoors.
DO NOT TEST ON THE FLOOR
Most floors contain metal, which will interfere with the target’s signal.
USE 9 volt ALKALINE batteries ONLY.

2
FAST TRACKER FEATURES
Fast Tracker FEATURES
Interchangeable
Coil System
Headphone Jack
S-Rod
Handle System
Detector
Stand
7" Waterproof Coil
Comfort
Hand-grip
Padded
Armrest
Discriminate
Control
Sensitivity Control
3
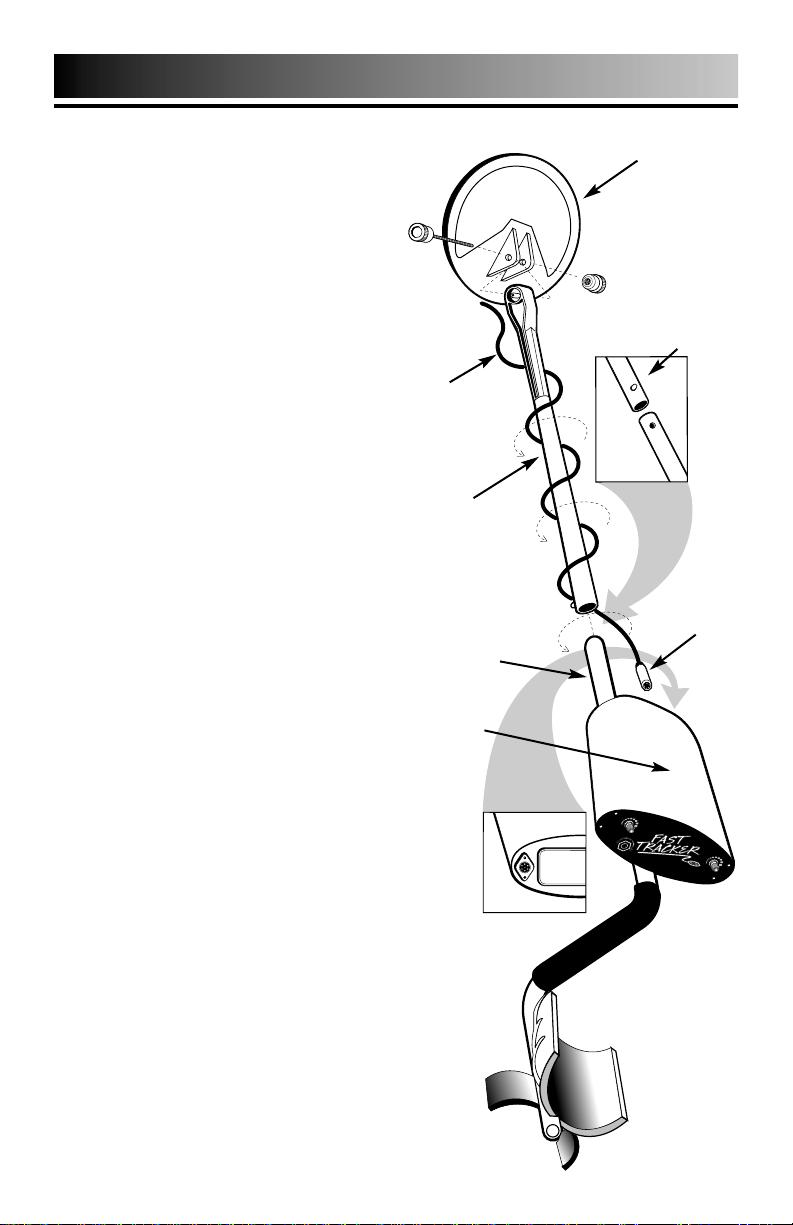
EASY ASSEMBLY
Search Coil
Search
Coil
Cable
Upper
Stem
Control
Housing
Plug
Lower
Stem
Assembling your Fast Tracker Metal
Detector is easy and requires no
tools. Just follow these steps:
●
1 Using the supplied bolt and
knurled knob, attach the
search coil to the lower stem.
●
2
Press the button on the upper end
of the lower stem and slide the
lower stem into the upper stem.
Adjust the stem to a length
that lets you maintain a comfortable upright posture, with
your arm relaxed at your
side. Maintain the search coil
about 1 inch above the
ground as you sweep.
●
3 Wind the search coil cable
around the stem. Leave
enough slack in the cable to let
you adjust the coil when you
are hunting on uneven
ground. Then tighten the knob
at the end of the search coil.
Note:
To adjust the coil,
simply loosen the knob.
●
4 Insert the coil’s plug into the
matching connector on the
control housing. Be sure the
holes and pins line up correctly.
Caution:
• Do not force the plug in.
Excess force will cause damage.
• To disconnect the cable, pull
out the plug. Do not pull on
the cable.
Bottom side
Lower
Stem
Upper
Stem
4
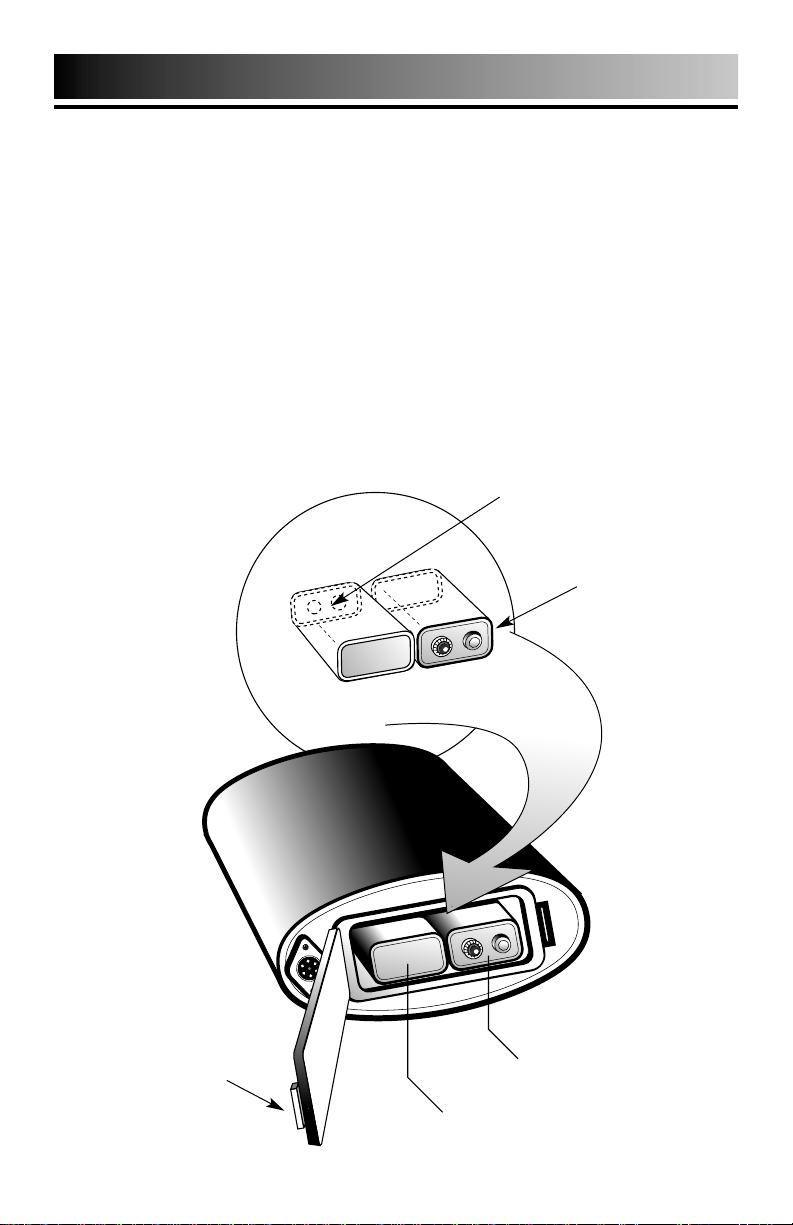
BATTERIES
Use ALKALINE batteries only.
Follow these steps to install the batteries.
●
1 Carefully remove the battery compartment door by pressing
the release clip on the right side of the door.
●
2 Snap one battery on to each of the terminals and place the
batteries inside the compartment.
The battery compartment is a tight fit. Insert one battery
with the terminals facing down, and the second battery with
the terminals facing outward. See illustration.
●
3
Replace the compartment door by first inserting the hinge on
the side opposite of the release clip.
●
4
Then, press down firmly on the clip side until the battery door
snaps into place.
First Battery
Second Battery
First Battery
terminals facing in
Second Battery
terminals
facing out
Release
Clip
 Loading...