

Page 1
CR55
CR65
CR75
CR85
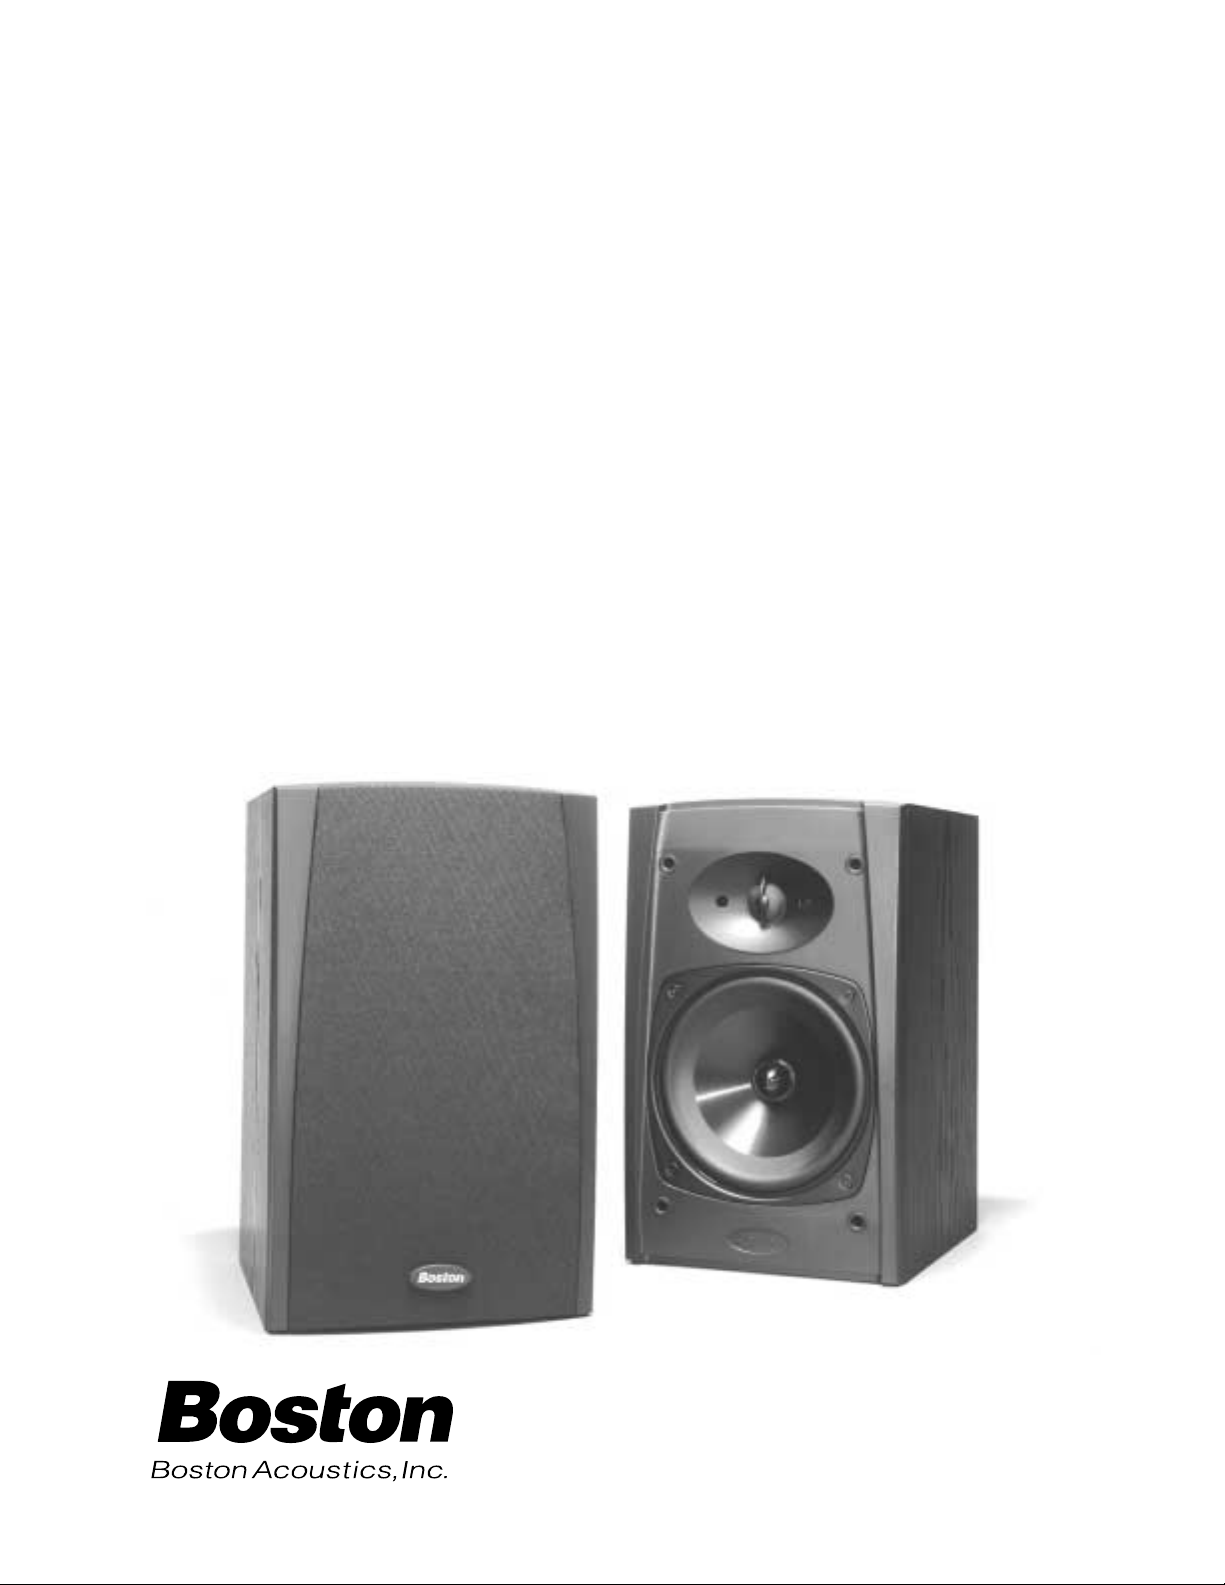
Boston Compact Speakers
Page 2

2
CR75 CR85
Frequency Response (±3dB) 52–20,000Hz 48–20,000Hz
Recommended Amplifier Power 15–100 watts 15–125 watts
Nominal Impedance 8 ohms 8 ohms
Sensitivity [1 watt (2.83v) at 1m] 89dB 90dB
Bass Unit 61⁄2
" (165mm) copolymer 7
" (180mm) DCD™ copolymer
Tweeter 1" (25mm) Kortec™ 1" (25mm) Kortec™
Crossover Frequency 2500Hz 2500Hz
Dimensions (HxWxD) 121⁄2 x 71⁄2 x 91⁄2" (318 x 191 x 241mm) 15 x 81⁄2 x 111⁄2" (381 x 216 x 292mm)
Weight 12 lbs (5.4kg) 163⁄4 lbs (7.6kg)
Specifications CR55 CR65
Frequency Response (±3dB) 80–20,000Hz 65–20,000Hz
Recommended Amplifier Power 10–85 watts 15–100 watts
Nominal Impedance 8 ohms 8 ohms
Sensitivity [1 watt (2.83v) at 1m] 88dB 88dB
Bass Unit 4 1⁄2" (115mm) copolymer 5 1⁄4" (135mm) copolymer
Tweeter
3
⁄4" (20mm) dome
3
⁄4" (20mm) dome
Crossover Frequency 4200Hz 4200Hz
Dimensions (HxWxD) 91⁄4 x 53⁄8 x 6" (235 x 143 x 152mm) 101⁄8 x 63⁄8 x 77⁄8" (257 x 162 x 200mm)
Weight 53⁄4 lbs (2.6kg) 9 lbs (4kg)
Page 3

3
Description
Continuing in the tradition of our critically acclaimed Compact Reference series, the second generation CR55, CR65,
CR75 and CR85 are compact, versatile, high performance bookshelf speakers designed to deliver accurate, natural
reproduction.
Special care has been taken to optimize the speakers’ components for maximum performance: The bass units utilize
phase plugs that conduct heat away from the voice coil, thus increasing power handling and maximizing output. The
woofer cones and surround geometry were designed and optimized with Boston’s Finite Element Analysis (FEA)
computer modeling technology, for strong bass and smooth midrange.
High frequencies in the CR75 and CR85 are handled by Boston’s exclusive 1-inch (25mm) Kortec tweeter mounted in an
innovative new wide dispersion projection tweeter baffle. This remarkable driver produces an extremely smooth, flat
response well beyond the audible range. An aluminum heatsink attached to the tweeter’s backplate dissipates heat
quickly and efficiently, assuring cool, trouble-free operation—even at very high power levels.
All the drive units are designed at Boston’s Peabody, Massachusetts facility using state-of-the-art computer-design
programs, and are built on Boston’s proprietary production lines to an incredible ±1dB—perhaps the industry’s tightest
tolerance. The CR65, CR75 and CR85 feature MagnaGuard
®
magnetic shielding for safe placement near any sized
television set.
The drivers are positioned very closely to each other for smooth, uniform radiation in both the horizontal and vertical
planes. Within the cabinets are specially tapered braces that lock the front and rear baffles together and provide
strength and rigidity, thus minimizing cabinet resonances. The rear-mounted vent is smoothly flared to reduce port
turbulence, and all speakers feature five-way binding posts, allowing wiring with virtually any cable.
Mounting options include placement on stands and shelves via the included rubber feet, flat attachment to walls with
the built-in keyhole bracket and angled, offset mounting to walls via the optional CRB bracket. The logo plate can be
easily rotated in 90° increments to maintain the speaker’s appearance when placing it on its side.
Page 4

4
How to Connect Your Speakers
Correctly wiring your speakers is important for achieving the best sound quality. Wiring should take just a few
minutes, but it’s important to do it carefully, since incorrect wiring (such as reversed connections) can result in a poor
soundstage and poor bass.
We recommend 18-gauge wire or thicker for runs up to 25 feet (8m), and 16-gauge wire or thicker for longer runs.
Separate the first few inches of the wire conductors. Strip off
1
⁄2" (12mm) of insulation from the ends of each speak-
er wire to expose the two conductors and tightly twist the wire strands.
WARNING: To prevent electrical shock hazard, always switch off the amplifier or receiver when making connections
to the speaker.
When making all connections, be sure to connect the + (red) on the speaker to the + (red) on the amplifier, and the
– (black) on the speaker to the – (black) on the amplifier.
IMPORTANT: Typically, one side of the wire is smooth.
Connect this side to the – (black) connection. The
other side has a rib or stripe. Connect this to the
+ (red) connection.
Using the five-way binding posts: The binding posts
permit easy connection to banana plugs, spade lugs,
and bare wire.
Insert the wire in the hole and tighten.
Page 5

5
STAND OR SHELF: Peel off the included rubber
feet from their adhesive backing and stick them on
to the four bottom corners of each speaker.
KEYHOLE BRACKET: Consult a knowledgeable
installer regarding the proper hardware to use on
your wall surface. A 1-inch (25mm) long wall anchor
is recommended for hollow walls. Regardless of the
type of wall fastener used, the screw head diameter
should be between
5
⁄16 and 3⁄8-inch (8 to 9.5 mm) to fit
properly inside the keyhole and slide down on to the
slot. When wall mounting your speakers with the
keyhole bracket, apply the rubber feet to the four
stand off pads on the rear of the speaker to prevent
any scratching or marring of the wall surface.
CRB BRACKET: This optional stand-off/swivel
bracket can be purchased from your dealer or
ordered directly from Boston Acoustics using the
included order form. The CRB attaches to the back
of the speaker using the four mounting holes located
at either side of the keyhole bracket. Instructions on
how to attach this bracket to the speaker and mount
the assembly to the wall are supplied in the CRB kit.
Stand off pads (4)
Keyhole bracket
CRB mounting
holes (4)
3
⁄8‘’(9.5mm) hole
Basic Hookup
1. Connect the speaker terminals to the amplifier speaker outputs.
2. When making all connections, be sure to connect + to + (red) and – to – (black).
Mounting Options
Your CR speakers have several convenient mounting options:
Page 6

6
Connecting the CR Speaker to Your Amplifier or Receiver
Checking the Speaker Connections
It is important that your speakers are hooked up with similar polarity or “in phase.” A simple listening test will tell
you if your speakers are connected properly. Place the speakers face to face, as closely together as possible. While
listening to music with your amplifier set to MONO, reverse the connections at one speaker only. You’ll hear a
dramatic change in sound. The connection that yields the fuller bass and louder sound is correct.
How to Place Your Speakers
Most people like to hear a realistic soundstage, as they would from a good seat in a concert hall. To achieve this
effect, place the speakers 6 to 12 feet (2–4m) apart, so they form a triangle with your favorite listening position.
The speakers should be at least 2 feet (0.6m) from the corners of the room. Putting the speakers too close to a corner
can produce an unnatural bass reinforcement that detracts from their balanced, uncolored sound. If a speaker must
be placed near a corner, move it away from the wall directly behind it to preserve its natural tonal balance.
Page 7

7
1. Remove the grille by gently pulling on the back of the top lip where it meets the front baffle. There are four
pegs on the back of the grille that will pop out of their respective sockets which are located in the baffle plate.
2. Turn the grille over and locate the two light gray plastic spring tabs at the bottom center of the grille.
3. Depress the tabs with the tips of your thumb and finger until they are flush with the round surface of the
surrounding boss. You should hear a slight “click”, indicating that the tabs are now unlocked.
4. Turn the grille over and rotate the logo plate 90° in either direction to orient it to your desired position. Press
the logo plate down until you hear the same “click” sound, thus locking it in place.
NOTE: Although it is possible to rotate the logo plate in increments other than 90°, it will not lock into position
unless it is set to one of the four 90° locations.
• Depress spring tabs down with thumb to release lock
• Rotate logo plate 90°
• Note position of tabs in relation to logo orientation
Spring tabs on back of grille
Logo plate on front of grille
Logo Rotation and Grille Removal
The logo plates on your CR speakers can be easily rotated in 90° increments to maintain the speaker’s
appearance when positioned on their sides.
Page 8

300 Jubilee Drive
Peabod y,
MA 01960 U.S.A.
978.538.5000
www.bostonacoustics.com
Kortec and DCD are trademarks and MagnaGuard, Boston, and
Boston Acoustics are registered trademarks of Boston Acoustics, Inc.
© 2001 Boston Acoustics, Inc. All rights reserved.
Specifications subject to change without notice
042-001287-2
Limited Warranty
For five years from the date of purchase, Boston Acoustics will repair for the original owner any defect in materials
or workmanship that occurs in normal use of the speakers, without charge for parts and labor.
Your responsibilities are to use the system according to the instructions supplied, to provide safe and secure
transportation to an authorized Boston Acoustics service representative, and to present proof of purchase in the
form of your sales slip when requesting service.
Excluded from this warranty is damage that results from abuse, misuse, accidents, shipping, or repairs or modifications by anyone other than an authorized Boston Acoustics service representative.
This warranty is void if the serial number has been removed or defaced.
This warranty gives you specific legal rights, and you may also have other rights which vary from state to state.
If Service Seems Necessary
First, contact the dealer from whom you purchased the speakers. If that is not possible, write to:
Boston Acoustics, Inc. 300 Jubilee Drive Peabody, MA 01960 U.S.A.
We will promptly advise you of what action to take. If it is necessary to return your speaker to the factory, please
ship it prepaid. After it has been repaired, we will return it freight prepaid in the U.S.A. and Canada.
 Loading...