

Page 1
70101337 13/06
BOSTITCH AIR TOOL SYSTEMS
BEFORE OPERATING THIS TOOL, ALL OPERATORS SHOULD STUDY THIS
MANUAL TO UNDERSTAND AND FOLLOW THE SAFETY WARNINGS AND
INSTRUCTIONS. KEEP THESE INSTRUCTIONS WITH THE TOOL FOR FUTURE
REFERENCE. IF YOU HAVE ANY QUESTIONS, CONTACT YOUR STANLEYBOSTITCH REPRESENTATIVE OR DISTRIBUTOR.
ANTES DE OPERAR ESTA HERRAMIENTA, TODOS LOS OPERADORES
DEBERÁN ESTUDIAR ESTE MANUAL PARA PODER COMPRENDER Y
SEGUIR LAS ADVERTENCIAS SOBRE SEGURIDAD Y LAS INSTRUCCIONES.
MANTENGA ESTAS INSTRUCCIONES CON LA HERRAMIENTA PARA
FUTURA REFERENCIA, SI TIENE ALGUNA DUDA, COMUNÍQUESE CON SU
REPRESENTANTE DE STANLEY-BOSTITCH O CON SU DISTRIBUIDOR.
LIRE ATTENTIVEMENT LE PRÉSENT MANUEL AVANT D’UTILISER L’APPAREIL.
PRÉTER UNE ATTENTION TOUTE PARTICULIÈRE AUX CONSIGNES DE
SÉCURITÉ ET AUX AVERTISSEMENTS. GARDER CE MANUEL AVEC L’OUTIL
POUR FUTUR RÉFÉRENCE. SI VOUS AVEZ DES QUESTIONS, CONTACTEZ
VOTRE REPRÉSENTANT OU VOTRE CONCESSIONNAIRE STANLEY-BOSTITCH.
OPERATION AND MAINTENANCE MANUAL
MANUAL DE OPERACIÓN Y DE MANTENIMIENTO
MANUEL D’INSTRUCTIONS ET D’ENTRETIEN
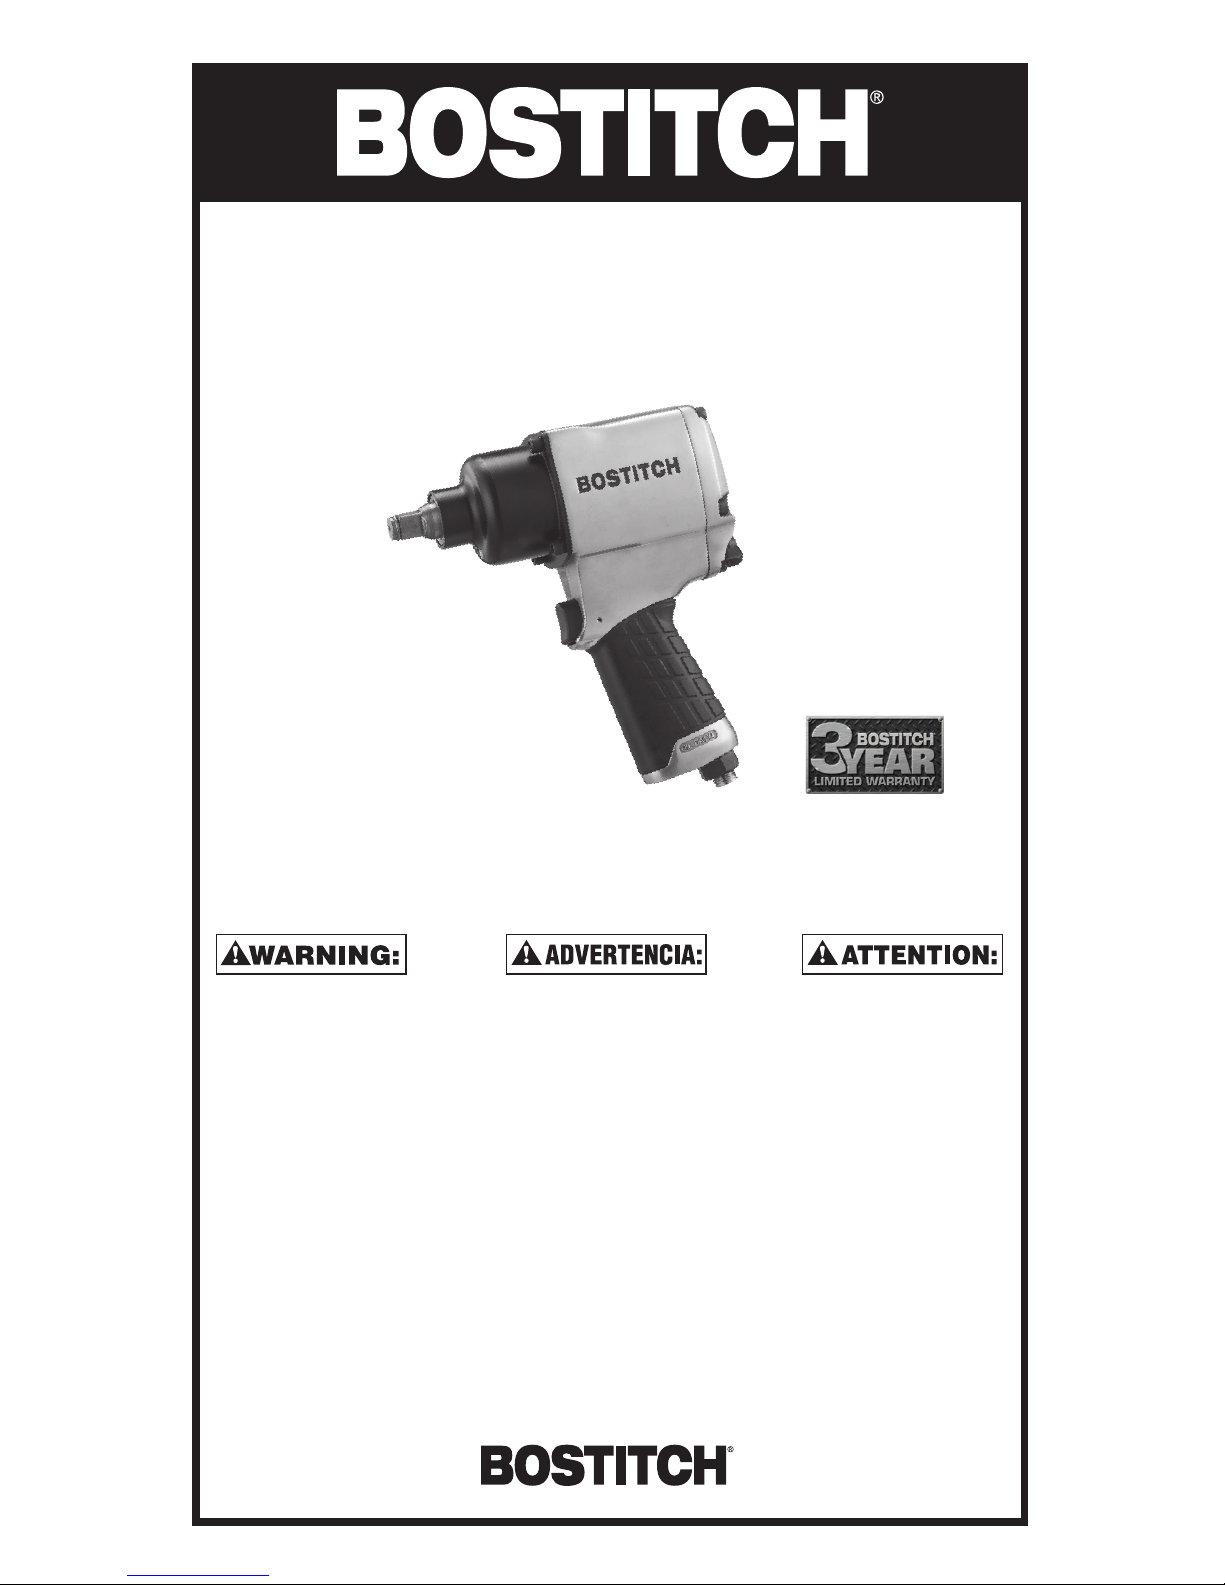
BTMT72391
1/2" DRIVE IMPACT WRENCH
CUADRANTE DE 1/2 PUL.LLAVE DE IMPACTO
PRISE ½ PO CLÉ À CHOC
Page 2
INTRODUCTION
• 500 ft-lb of torque for fast removal of stubborn bolts
• Free Speed of 7,200 RPM
• Handle exhaust directs air away from your face and work area
• Forward/reverse control and variable speed trigger
• Suggested applications: For removing wheel lug nuts,nuts, bolts and lag bolts
• Maximum Operating Pressure: 90 psi
INDEX
3 Year limited warranty .............................................................. 2
Tool components, Tool specications ....................................... 3
Denitions: safety guidelines,
Important safety instructions .................................................... 4
Warning: .....................................................................................5-6
Air supply and connections, installation,
safety rules for pneumatic tools ............................................... 7
Preparation for use .................................................................... 8
Operating instructions ............................................................... 9
Maintenance ............................................................................... 10
IMPORTANT
Please make certain that person who is to use this equipment carefully reads and understands these
instructions before operating.
3 YEAR LIMITED WARRANTY — U.S. and Canada Only
Stanley warrants this product to the original purchaser for a period of
THREE (3) YEARS
against
deciencies in material and workmanship.
This LIMITED WARRANTY
does not cover products that are
improperly used, abused, altered or repaired. Decient products will be replaced or repaired at Stanley's
option. Please call 1-800-505-4648 for more information or return instructions.
THIS LIMITED WARRANTY IS GIVEN IN LIEU OF ALL OTHERS INCLUDING THE IMPLIED WARRANTY OF
MERCHANTABILITY AND FITNESS FOR A PARTICULAR PURPOSE AND EXCLUDES ALL INCIDENTAL OR
CONSEQUENTIAL DAMAGES.
Some states do not allow limitations on how long an implied warranty
lasts or the exclusion or limitation of incidental or consequential damages, so these limitations may not
apply to you. This
LIMITED WARRANTY
gives you specic legal rights that may vary from state to state.
SAFETY GUIDELINES - DEFINITIONS
This manual contains information that is important for you to know and understand. This information
relates to protecting
YOUR SAFETY
and
PREVENTING EQUIPMENT PROBLEMS
. To help you recognize this
information, we use the symbols below. Please read the manual and pay attention to these sections.
SAFETY
and
PREVENTING EQUIPMENT PROBLEMS
.To help you recognize this information, we
use the symbols below. Please read the manual and pay attention to these sections.
Indicates an imminently
hazardous situation which,
if not avoided,
will
result in
death or serious
injury
.
Indicates a potentially
hazardous situation which,
if not avoided,
may
result in
minor or
moderate injury
.
Indicates a potentially
hazardous situation which,
if not avoided,
could
result in
death or serious injury
.
Used without the
safety alert symbol indicates a
potentially hazardous situation which,
if not avoided,
may
result in
property damage
.
- 2 -
Page 3
- 3 -
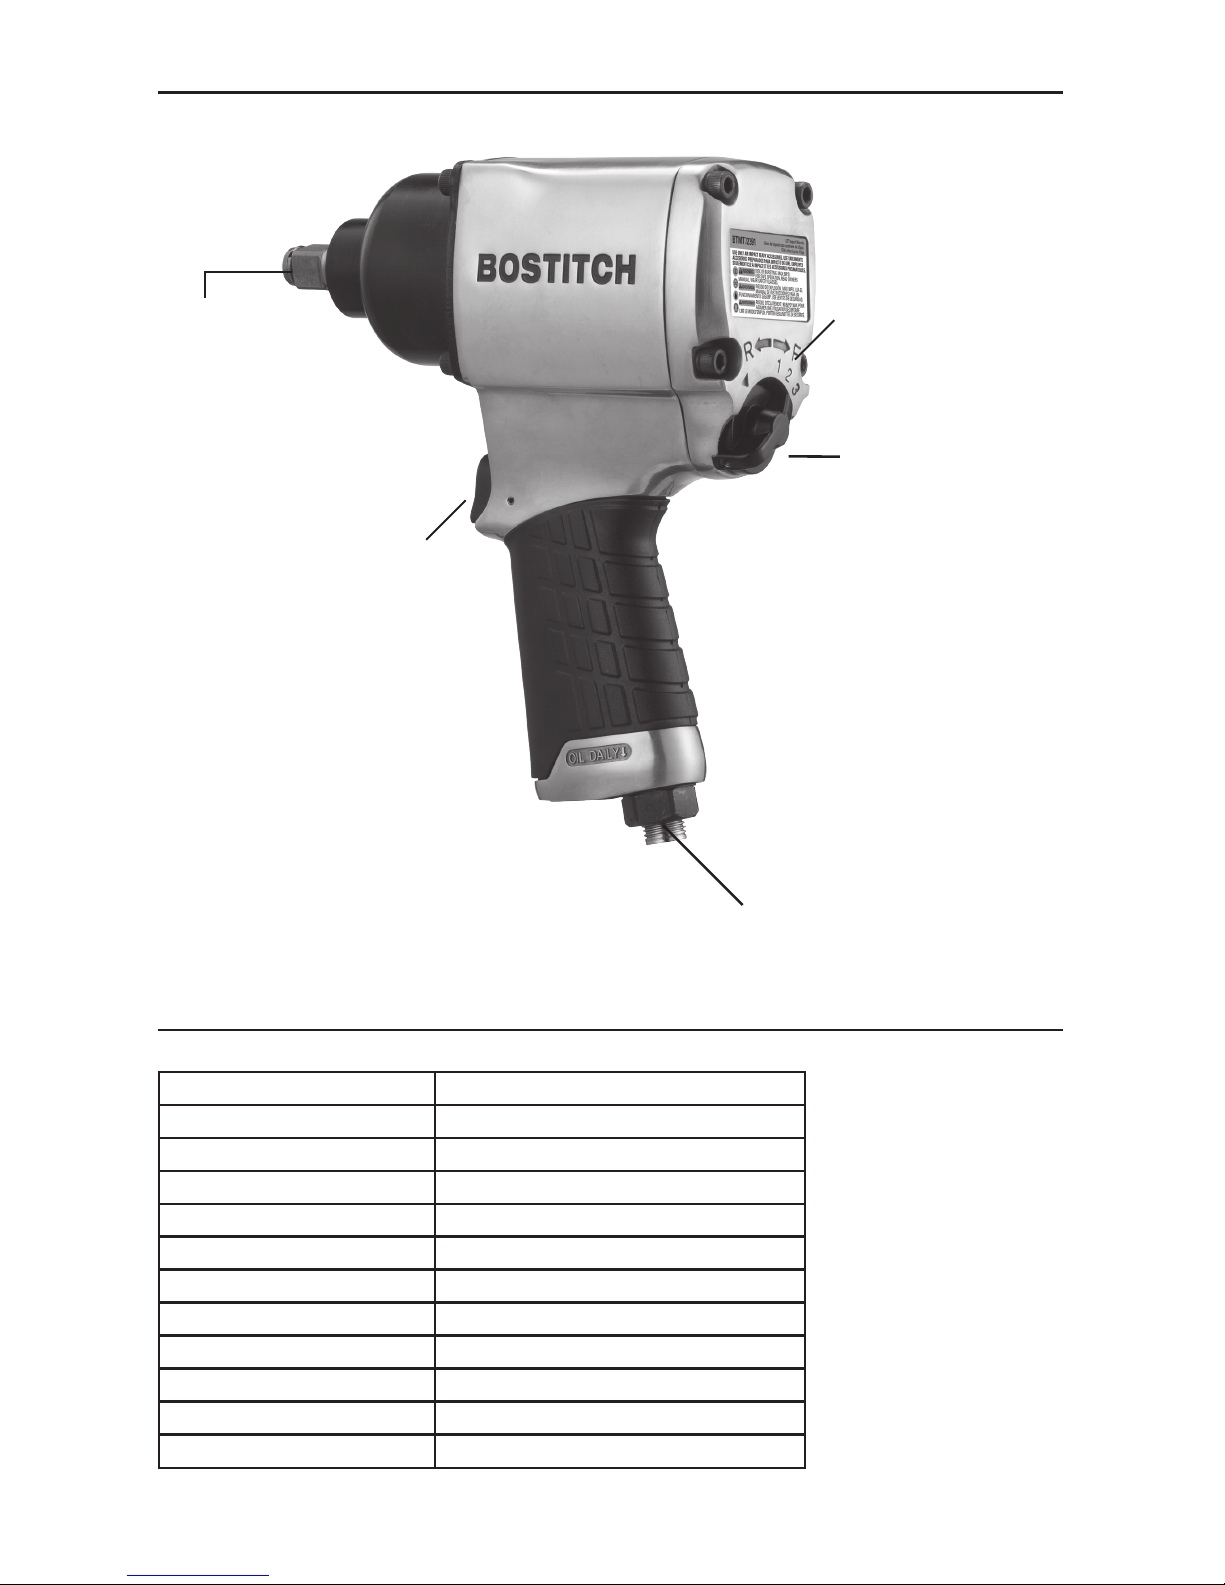
TOOL COMPONENTS
BTMT72391
Description
1/2" Drive Impact Wrench
Average Air Consumption
3.9CFM 100% Usage
Mechanism
Twin Hammer
Free Speed@90 PSI
7,200
Max. Torque
500 ft-lbs
Air Inlet
1/4" NPT (F)
Weight
5.95 lbs.
Recommended Hose Size
3/8"
Square Drive
1/2”
Exhaust
Handle
Air Pressure(PSI)
90
Trigger
Forward/
Reverse
Air inlet
Torque Forward/
Reverse Lever
1/2” Square
Drive
TOOL SPECIFICATIONS
All dimensions in inches unless otherwise specified.
FIG.1
Page 4
- 4 -
Definitions: Safety Guidelines
The definitions below describe the level of severity
for each signal word. Please read the manual and pay
attention to these symbols.
DANGER: Indicates an imminently hazardous
situation which, if not avoided, will result in death or
serious injury.
WARNING: Indicates a potentially hazardous
situation which, if not avoided, could result in death
or serious injury.
CAUTION: Indicates a potentially hazardous
situation which, if not avoided, may result in minor
or moderate injury.
CAUTION: Used without the safety alert symbol indi-
cates a potentially hazardous situation which, if not
avoided, may result in property damage.
IMPORTANT SAFETY INSTRUCTIONS
Some dust created by power
sanding, sawing, grinding, drilling,
and other construction activities contains chemicals
known to the State of California to cause cancer,
birth defects or other reproductive harm. Some
example of these chemicals are:
• Lead from lead-based paints
• Crystalline silica from bricks and cement
and other masonry products
• Arsenic and chromium from chemically-treated
lumber
Your risk from these exposures varies, depending on
how often you do this type of work. To reduce your
exposure to these chemicals: work in a well ventilated area, and work with approved safety equipment,
al ways wear
OSHA/MSHA/NIOSH
approved,
properly fit ting face mask or res pi ra tor when us ing
such tools.When using air tools, basic safety precautions should always be followed to reduce the risk of
personal injury.
This product contains chemicals,
known to the State of California to cause cancer,
and birth defects or other reproductive harm. Wash
hands after handling.
SAVE THESE INSTRUCTIONS
Improper operation or maintenance of
this product could result in serious injury
and property damage. Read and
understand all warnings and operating
instructions before using this equipment.
When using air tools, basic safety precautions
should always be followed to reduce the risk of
personal injury.
Read and understand this instruction manual
and tool labels before installing, operating or
servicing this tool. Keep these instructions in
a safe accessible place.
Operators and others in work area must wear
ANSI Z87.1 CAN/CSA Z94.3 approved safety
glasses with side shields.
Operators and others in work area must wear
ear protection.
Oil daily for optimal performance.
• Avoid prolonged use: repetitive motion or
exposure to vibration may be harmful to your
hands or arms. Use gloves to provide extra
cushion, take frequent rest periods, and limit
daily time of use.
• Do Not Use oxygen or reactive gases;
explosion may occur.
• Do Not Exceed air pressure of 90 PSI.
• Read all manuals included with this product
carefully. Be thoroughly familiar with the
controls and the proper use of the equipment.
• Only persons well acquainted with these rules
of safe operation should be allowed to use the
air tool.
• Do not exceed any pressure rating of any
component in the system.
• Disconnect the air tool from air supply before
changing tools or attachments and during
non-operation.
• Always wear safety glasses and ear protection
during operation. Always wear approved safety
glasses with shields. Always wear approved
hearing protection.
• Do not wear loose fitting clothing or apparel
which contains loose straps or ties, etc. Which
could become entangled in moving parts of the
tool and results in serious personal injury.
• Do not wear jewelry, watches, identifications,
bracelets, necklace, etc. When operating any
tool, they may become caught in moving parts
and result in serious injury.
• Do not depress trigger when connecting the air
supply hose.
• Always use attachments designed for use with
air powered impact tools.
• Do not use damaged or worn attachments.
• DO NOT use hand tool sockets. Use impact
quality sockets only.
• Never trigger the tool when not applied to a
work object Attachments must be securely
attached. Loose attachments can cause serious
injury.
• Protect air lines from damage or puncture.
• Never point an air tool at oneself or any other
person. Serious injury could occur.
• Check air hoses for weak or worn condition
before each use. Make sure all connections are
secure.
• Keep all nuts, bolts and screws tight and
ensure equipment is in safe working condition.
• Do not put hands near or under moving parts.
Page 5
- 5 -
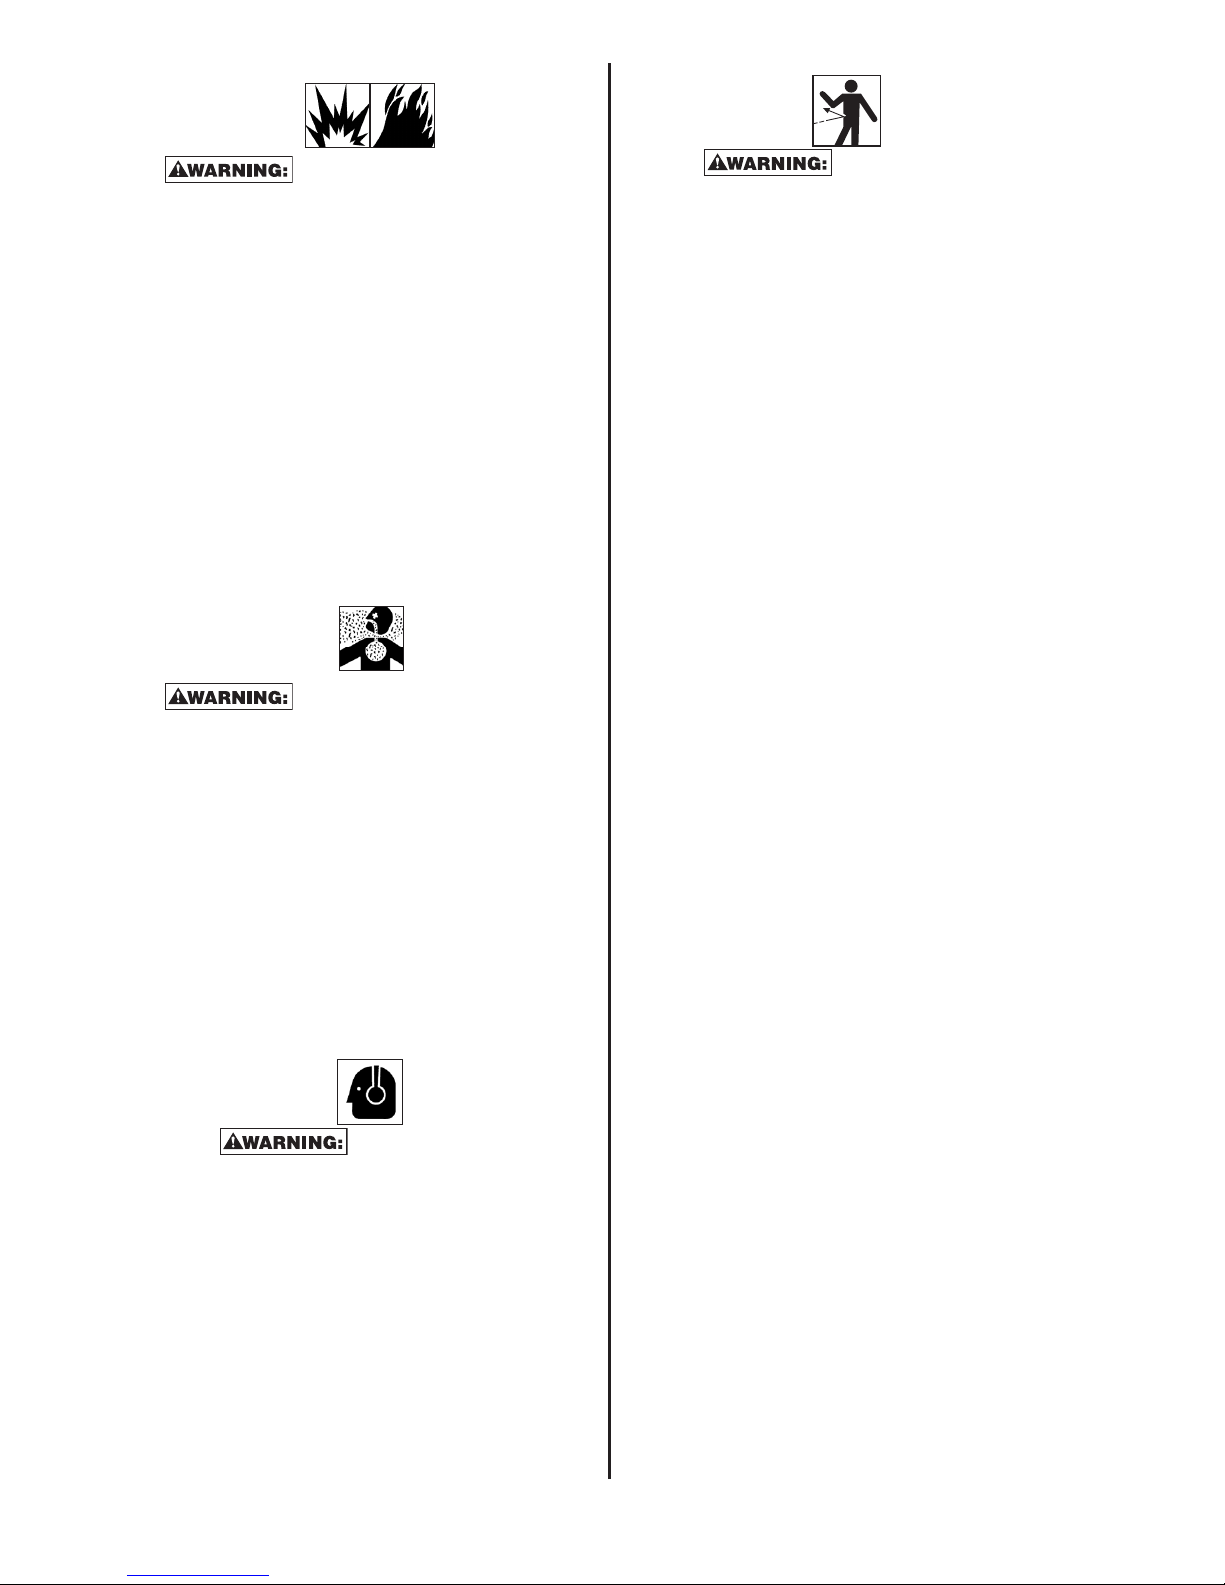
RISK OF EXPLOSION OR FIRE
WHAT CAN HAPPEN HOW TO PREVENT IT
• Abrasive tools such
as sanders and
grinders, rotating
tools such as drills,
and impact tools
such as wrenches,
hammers,and
reciprocating saws
are capable of
generating sparks
which could result
in ignition of flammable materials.
• Never operate tools
near flammable
substances such
as gasoline, naptha,
cleaning solvents,
etc.
• Work in a clean,well
ventilated area free
of combustible
materials.
• Never use oxygen,
carbon dioxide or
other bottled gases
as a power source
for air tools.
• Exceeding the
maximum pressure
rating of tools
accessories could
cause an explosion
resulting in serious
injury.
• Use compressed
air regulated to a
maximum pressure
at or below the
rated pressure of
any attachments.
RISK TO BREATHING
(ASPHYXIATION)
WHAT CAN HAPPEN
HOW TO PREVENT IT
• Abrasive tools,
such as grinders,
sanders, and cut-off
tools generate dust
and abrasive materials which can be
harmful to human
lungs and respiratory system.
• Always wear
MSHA/NIOSH
approved, properly
fitting face mask or
respirator when
using such tools.
• Some materials
such as adhesives
and tar contain
chemicals whose
vapors could cause
serious injury with
prolonged
exposure.
• Always work in a
clean, dry, well
ventilated area.
RISK FROM NOISE
WHAT CAN HAPPEN HOW TO PREVENT IT
• Long term
exposure to noise
produced from the
operation of air
tools can lead to
permanent
hearing loss.
• Always wear ANSI
(S3.19) hearing
protection.
RISK OF INJURY
WHAT CAN HAPPEN HOW TO PREVENT IT
• Tools left
unattended, or
with the air hose
attached can be
activated by unauthorized persons
leading to their
injury or injury to
others.
• Remove air hose
when tool is not in
use and store tool
in a secure location
away from reach
of children and/or
untrained users.
• Air tools can propel
loose objects or
other materials
throughout the
work area.
• Use only parts,
fasteners, and
accessories recommended by the
manufacturer.
• Keep work area
clean and free of
clutter. Keep
children and others
away from work
area during operation of the tool.
• Keep work area
well lit.
• Air tools can
become activated
by accident during
maintenance or tool
changes.
• Remove air hose
to lubricate, add, or
replace sockets.
• Never carry the tool
by the hose.
• Avoid unintentional
starting. Don’t carry
hooked-up tool with
finger on trigger.
• Repair service
should be done
only by an authorized service representative.
• A wrench or a key
that is left attached
to a rotating part of
the tool increases
the risk of personal
injury.
• Remove adjusting
keys and wrench
before turning
the tool on.
• Using inflato
nozzles for duster
applications can
cause serious
injury.
• DO NOT use
inflator nozzles for
duster applications.
• Air tools can cause
the work piece to
move upon contact
leading to injury.
• Use clamps or
other devices
to prevent
movement.
• Loss of control of
the tool can lead to
injury to self or others.
• Never operate tool
while under the
influence of drugs
or alcohol.
• Don’t overreach.
Keep proper footing
and balance at all
times.
• Keep handles dry,
clean, and free from
oil and grease.
• Stay alert. Watch
what you are doing.
Use common
sense. Do not
operate tool when
you are tired.
• Poor quality,
improper, or
damaged tools
such as grinding
wheels, chisels,
sockets, drill, etc.,
can fly apart
during operation,
propelling particles
throughout the
work area causing
serious injury.
• Always use tool
attachments rated
for the speed of
the power tool.
• Never use tools
which have been
dropped, impacted
or damaged by use.
• Use only impact
grade sockets on an
impact wrench.
• Do not apply excessive force to thetool
let the tool perform
the work.
Page 6

- 6 -
RISK OF INJURY (CONTINUED)
WHAT CAN HAPPEN HOW TO PREVENT IT
• Improperly
maintained tool and
accessories can
cause serious
injury.
• Maintain the tool
with care.
• There is a risk of
bursting if the tool
is damaged.
• Check for
misalignment or
binding of moving
parts, breakage of
parts, and any other
condition that
affects the tool’s
operation. If
damaged, have the
tool serviced before
using.
RISK FROM FLYING OBJECTS
WHAT CAN HAPPEN HOW TO PREVENT IT
• Air powered
equipment and
power tools are
capable of propelling materials such
as metal chips, saw
dust, and other
debris at high
speed, which could
result in serious eye
injury.
• Always wear ANSI
Z87.1 CAN/CSA
Z94.3 approved
safety glasses with
side shields.
• Never leave
operating tool
unattended.
Disconnect air hose
when tool is not
in use.
• Compressed air
can be hazardous.
The air stream can
cause injury to soft
tissue areas such
as eyes, ears, etc.
Particles or objects
propelled by the
stream can cause
injury.
• For additional
protection use
an approved face
shield in addition to
safety glasses.
• Tool attachments
can be come loose
or break and fly
apart propelling
particles at the
operator and others
in the work area.
• Make sure that any
attachments are
securely
assembled.
RISK OF ELETRIC SHOCK
WHAT CAN HAPPEN HOW TO PREVENT IT
• This tool is not
provided with an
insulated gripping
surface.Contact
with a “live” wire
will also make
exposed metal
parts of the tool
“live” and can
result in
electrocution or
death.
• Avoid body contact
with grounded
surfaces such as
pipes, radiators,
ranges, and refrigerators. There is
an increased risk
of electric shock
if your body is
grounded.
• Thoroughly investigate the workpiece
for possible hidden
wring before
performing work.
RISK OF CUT OR BURNS
WHAT CAN HAPPEN HOW TO PREVENT IT
• Tools which cut,
shear, drill, punch,
chisel, etc., are
capable of causing
serious injury.
• Keep the working
part of the tool
away from hands
and body.
RISK OF CUT OR BURNS
WHAT CAN HAPPEN HOW TO PREVENT IT
• Tools which contain
moving elements,
or drive other
moving tools such
as grinding wheels,
sockets, sanding
discs,etc., can
become entangled
in hair, clothing,
jewelry and other
loose objects,
resulting in severe
injury.
• Never wear loose
fitting clothes,
or apparel which
contains loose
straps or ties,
etc., which could
become entangled
in moving parts
of the tool.
• Remove any jewelry, watches,
identifications,
bracelets,
necklaces, etc.,
which might
become caught by
the tool.
• Keep hands away
from moving parts.
Tie up or cover
long hair.
• Always wear proper
fitting clothing and
other safety equipment when
using this tool.
Page 7
AIR SUPPLY AND CONNECTIONS
Do not use oxygen, combustible gases, or bottled gases as a power source for this tool as the
tool may explode, possibly causing injury.
Do not use supply sources which can potentially exceed 200 PSI (13.8 bar) as tool may burst, possibly causing
injury.
The connector on the tool must not hold pressure when air supply is disconnected. If a wrong fitting is used,
the tool can remain charged with air after disconnecting and thus will be able to after the air line is disconnected
possibly causing injury.
Always disconnect air supply:
1) Before making adjustments;
2) When servicing the tool;
3) When tool is not in use;
4) When moving to a different work area, as accidental actuation may occur, possibly causing injury.
SAVE THESE INSTRUCTIONS FOR FUTURE USE
INSTALLATION
AIR SUPPLY
The recommended hook-up is shown in
Figure A.
Pneumatic tools operate on a wide range of air
pressures. For maximum efficiency and longer tool life, the pressure of the air supplied to these tools MUST not
exceed the rated PSI at the tool when the tool is running. Using a higher than rated pressure will cause faster
wear and drastically shorten the tool’s life. A higher air pressure can also cause an unsafe condition and explosion. The inside diameter of the hose should be increased to compensate for unusually long air hoses (over 25
feet). Minimum hose diameter should be 3/8” I.D. and fittings should have 1/4” NPT thread. The use of air line
lubricators and air line filters is recommended to prevent water in the line that can damage the tool. Drain the
air tank daily. Clean the air inlet filter screen on at least a weekly schedule to remove accumulated dirt or other
matter that can restrict air flow. The tool’s air inlet used for connecting an air supply has standard 1/4” NPT
American thread.
SAFETY RULES FOR PNEUMATIC TOOLS
1) Inspect the air hose for cracks or other problems. Replace the hose if worn.
2) Never point an air hose at another person.
3) Disconnect the tool when not in use, or before performing service or changing accessories.
4) Use proper hoses and fittings. Never use quick change couplings attached to the tool. Instead, add a hose and
coupling between the tool and the air supply.
FIGURE A
- 7 -
1/2”(or larger)
Pipe and Fittings
Coupler
Air Hose
Leader Hose
Tool
Nipple
Oiler
Filter
Drain Daily
Page 8
- 8 -
PREPARATION FOR USE
PROPER USE OF THE TOOL
Your new 1/2” Drive Impact Wrench is designed for driving,
tightening and loosening threaded fasteners, usually nuts and
bolts, when tted with a suitable impact socket.
Always use impact-rated extension bars,
universal joints and socket adapters between the
square output drive of the impact wrench and the female square
drive of the socket. Do not use the tool for any other purpose than
that specied without consulting the manufacturer or the
manufacturer’s authorized supplier. To do so may be dangerous.
Never use the impact wrench as a hammer to dislodge or
straighten cross threaded fasteners. Never attempt to modify the
tool for other uses.
WORK STATIONS
Your impact wrench should only be used as a hand operated tool. It is always recommended that the tool
is used when standing with solid footing. It can be used in other positions but before any such use, the
operator must be in a secure position having a rm grip and footing and be aware that when loosening
fasteners the tool can move quite quickly away from the fastener being undone. An allowance must
always be made for this rearward movement so as to avoid the possibility of hand/arm/body entrapment.
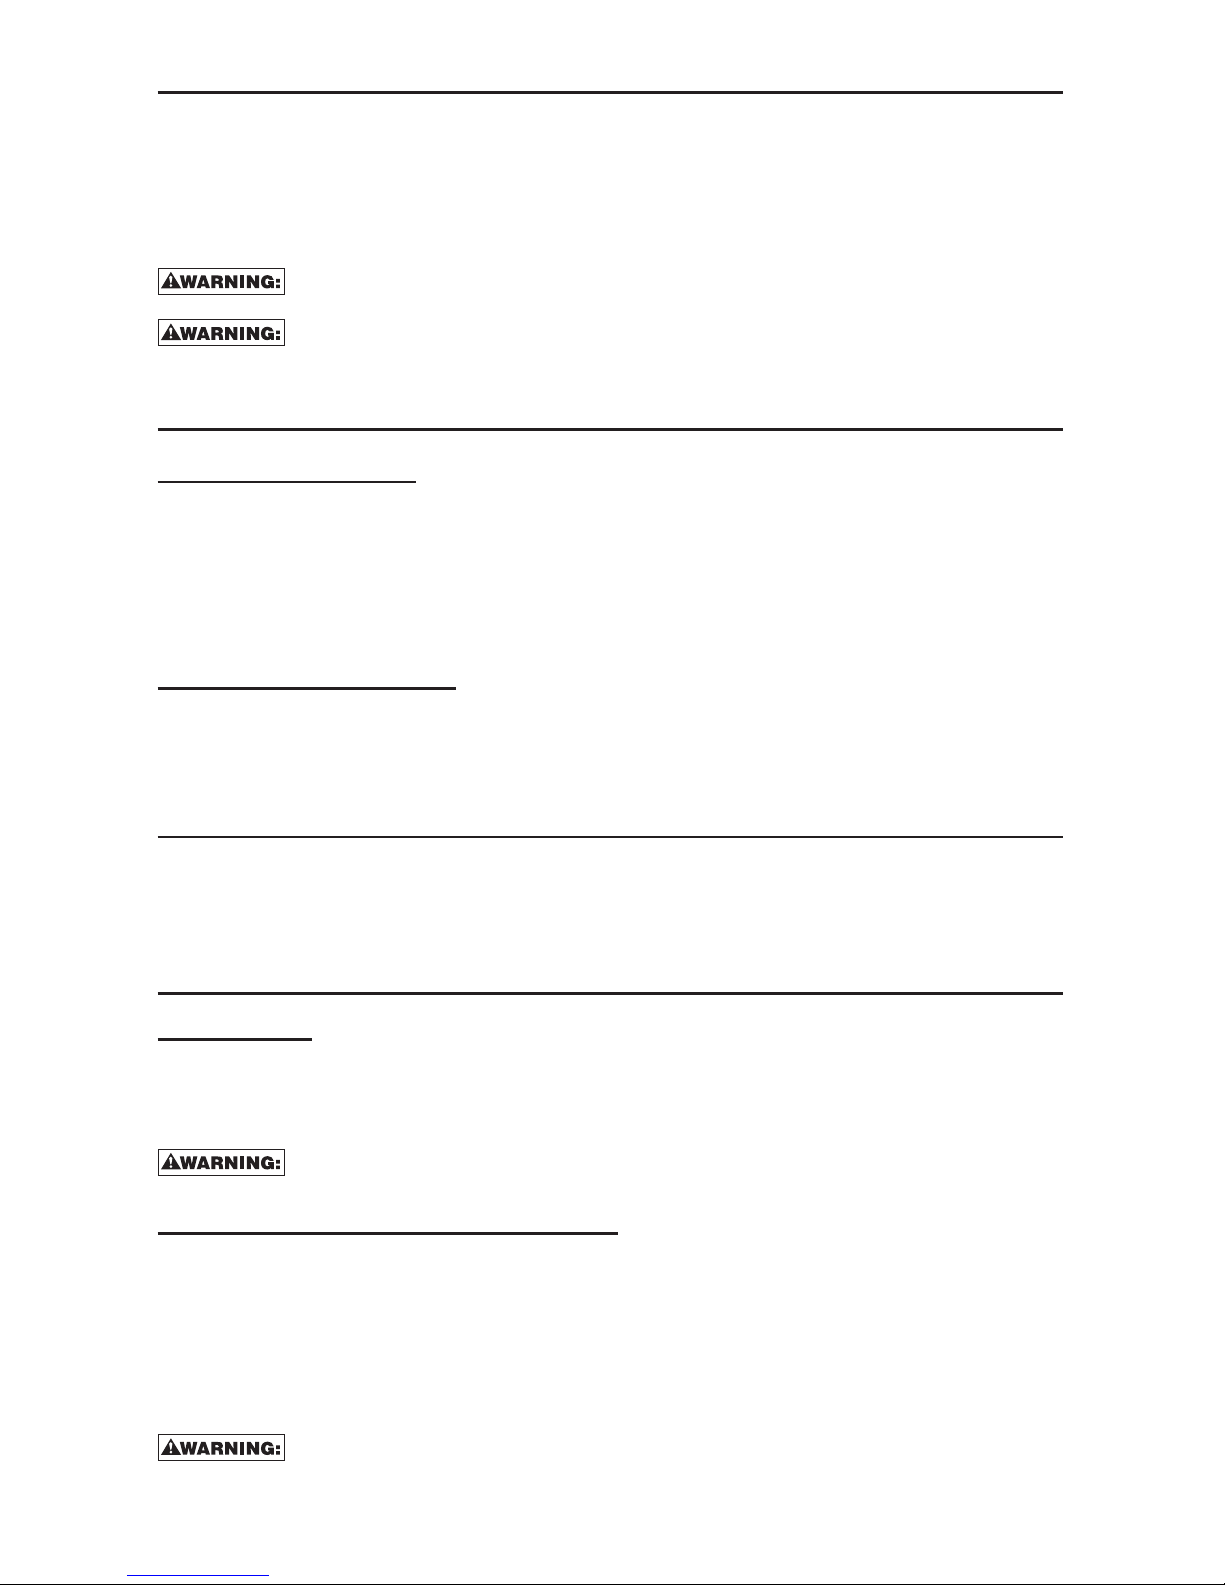
FORWARD / REVERSE SWITCH
Switch position for driving fasteners.Tool power
increases with higher numbered setting.
R
F
use: Repetitive motions or
exposure to vibration may be
harmful to your hands or arms.
90psig (6.2bar) Maximum
Air Pressure.
Instruction Manual
.
Wear eye and ear protection.
use: Repetitive motions or
exposure to vibration may be
harmful to your hands or arms.
90psig (6.2bar) Maximum
Air Pressure.
Instruction Manual
.
Wear eye and ear protection.
Switch position for removing fasteners.
1/2”
Square
Drive
Trigger
Air inlet
Torque
Forward/
Reverse
Lever
Forward/
Reverse
Page 9

- 9 -
PUTTING INTO SERVICE
AIR SUPPLY
Use a clean lubricated air supply that will give a measured air pressure at the tool of
90 psi/6.2 bar when the tool is running with the trigger fully depressed.
Use recommended hose size. It is recommended that the tool is connected to the air supply as shown
in
figure A
on page 7 . Do not connect the tool to the air line system without incorporating an easy to
reach and operate air shut off valve. The air supply should be lubricated. It is strongly recommended
that an air lter, regulator,
lubricator (FRL)
is used as shown in
figure A
on page 7 as this will supply
clean, lubricated air at the correct pressure to the tool. Details of such equipment can be obtained
from your supplier. If such equipment is not used then the tool should be lubricated by shutting off the
air supply to the tool and then depressurizing the line by pressing the trigger on the tool. Disconnect
the air line and pour into the air inlet 1 teaspoon (5cc.) of a suitable pneumatic motor lubricating oil,
preferably incorporating a rust inhibitor. Reconnect tool to air supply and run tool slowly for a few
seconds to allow air to circulate the oil.
Lubricate tool daily if used frequently, or when it starts to slow or lose power.
USING AN IMPACT WRENCH
1) Read all instructions before using this tool. All operators must be fully trained in its use and aware
of these safety rules.
2) Do not exceed the maximum working air pressure of 90 psi/6.2 bar.
3) Use personal safety equipment.
4) Use only compressed air at the recommended conditions.
5) If the tool appears to malfunction, remove from use immediately and arrange for service and repair.
6) If the tool is used with a balancer or other support device, ensure that it is xed securely.
7) Always keep hands away from the working attachment tted to the tool.
8) The tool is not electrically insulated. Never use the tool if there is any chance of it coming into
contact with live electricity.
9) When using the tool, always adopt a firm footing and/or position and grip the tool firmly to
counteract any forces or reaction forces that may be generated while using the tool.
10) Use only correct spare parts. Do not improvise or make temporary repairs.
11) Do not lock, tape, wire, etc. the on/off trigger in the run position. The trigger must always be free
to return to the “off” position when it is released.
12) Always shut off the air supply to the tool and depress the trigger to release air from the feed hose
before tting, adjusting or removing the working attachment.
13) Check hoses and fittings regularly for wear. Replace if necessary. Do not carry the tool by its
hose. Ensure the hand is removed from the on/off trigger when carrying the tool with the air supply
connected.
14) Take care against entanglement of moving tool parts with clothing, ties, hair, cleaning rags, etc.
This will cause the body to be drawn towards the tool and can be very dangerous.
15) It is expected that users will adopt safe working practices and observe all relevant legal
requirements when installing, using or maintaining the tool.
16) Only install the tool when an easily accessible and easily operable on/off switch is incorporated
in the air supply.
17) Take care that the tool exhaust air does not cause problems or blow onto another person.
18) Never lay a tool down unless the working attachment has stopped moving.
19) Always ensure that the forward/reverse switch is in the desired position before starting the tool.
20) Do not use sockets with excessive wear to the input or output drives. Periodically check the squae
drive on the impact wrench. Make surer the socket, extension bar, or other attachment is securely
tted before operating tool.
21) When loosening fasteners rst ensure that there is sufcient clearance behind the tool to avoid
hand entrapment. The tool will move away from the threaded joint as the nut/bolt is loosened and
rides up the thread, moving the tool with it.
Page 10
PRE-START CHECKLIST
• Drain water from air compressor tank and condensation from air lines. (Please refer to air compressor’s
operation manual.)
• Lubricate the tool. (Please refer to the “Maintenance” section in the manual.)
• Select the necessary impact sockets. The sockets have to match with the size of the drive on the air
impact wrench.
• Connect air impact wrench to air source with the hose of recommended size.
Risk of unsafe operation. Firmly grasp air hose with hand when installing or
disconnenting to prevent hose whip.
Risk of bursting. Too much air pressure causes a hazardous risk of bursting. Check the
manufacturer’s maximum pressure rating for air tools and accessories. The regulator
output pressure must never exceed the maximum pressure rating.
OPERATING PROCEDURES
START-UP (FIG. 1, PG.3)
• Turn on the air compressor and allow the air tank to be lled.
• Set the air compressor regulator to 90 PSI. This air tool operates at a maximum of 90 PSI air pressure.
• Adjust power dial (if it is available) to desired torque.
• Adjust tool either in forward or reverse position. See Features on page 8 for diagram.
• Depress the trigger to start operating the tool.
SHUT-DOWN (FIG. 1, PG. 3)
• Release the trigger in order to stop the tool.
• When changing sockets, always disconnect air supply to avoid injury.
• When job is completed, turn off the air compressor and store the air tool after lubrication.
OPERATING INSTRUCTIONS
• Securely t the socket or attachment to the impact wrench.
• Ensure that the forward/reverse switch is in the correct position for tightening or loosening the fastener.
• The nut/bolt can then run down the thread using the power drive of the tool. For loosening a joint the
tool can be used in the reverse sequence.
MAINTENANCE
LUBRICATION
Air tools require lubrication throughout the lifetime of the tools. The air motor and bearing uses
compressed air to power the tool. The compressed air contains moisture that will rust the air motor and
other parts in side of the tools, therefore lubrication is required daily. Failure to lubricate the air tool
properly will dramatically shorten the life of the tool and will void the warranty
This air tool requires lubrication BEFORE initial use, also before and after each additional
use.
TO LUBRICATE THE AIR TOOL MANUALLY:
1. Remove any attachment on the drive of air tools, such as: sockets, chisels and etc.
2. Disconnect the tool from the air supply source, place the air inlet face up.
3. Depress the trigger and place about 1 teaspoon (5cc.) of air tool oil into the air inlet. (Depressing the
trigger will help circulate oil in the motor.)
NOTE:Use SAE #10 weight oil if air tool oil is not available.
4. Connect the tool to an air source, cover the exhaust end with a towel and run for about 20 to 30
seconds.
Keep out of the reach of children. If taken internally, do not induce vomiting, call a doctor immediately.
- 10 -
Page 11

- 11 -
GLOSSARY
CFM:
Cubic feet per minute.
SCFM:
Standard cubic feet per minute; a unit of measure of air delivery.
PSI:
Pounds per square inch; a unit of measure of pressure.
Code Certification:
Products that bear one or more of the following marks:
UL, CUL, ETL, CETL
, have
been evaluated by
OSHA
certied independent safety laboratories and meet the applicable Underwriters
Laboratories Standards for Safety.
RPM:
Revolutions per minute; is a measure of the frequency of a rotation
BPM:
Beats per minute.
NPT:
National pipe thread (tapered thread); is a U.S. standard for tapered threads used on threaded
pipes and ttings.
ID:
Inner diameter
MAINTENANCE
Any excess oil in the motor is immediately expelled from the exhaust port. Always direct exhaust port
away from people or objects.
STORAGE:
The air tool must be lubricated before storing.
Follow the “Lubrication” instruction with exception of step 4.
Page 12

- 12 -
INTRODUCCIÓN
• 500 lbs. pie de torsión para remover rápidamente tornillos pegados
• Velocidad libre de 7.200 RPM
• El escape por el mango dirige el aire lejos de su cara y del área de trabajo
• Control de marcha adelante/atrás y gatillo de velocidad variable
• Usos sugeridos: Para remover pernos de ruedas, tuercas, tornillos y tirafondos
• Máxima presión de operación 90 lbs./ pul ².” (PSI)
ÍNDICE
Garantía Limitada De 3 Años ....................................................12
Componentes De La Herramienta,
Especicaciones De La Herramienta ........................................ 13
Deniciones: Normas de seguridad,
Instrucciones de seguridad importantes.................................. 14
Advertencia................................................................................. 15-16
Alimentación de aire y conexiones, instalación,
Reglas de seguridad para herramientas neumáticas .............. 17
Preparación para el uso ............................................................. 18-19
Notice d’emploi .......................................................................... 20
Mantenimiento ........................................................................... 21
IMPORTANT
Por favor asegúrese de que la persona que va a usar este equipo lea cuidadosamente y comprenda estas
instrucciones antes de operarlo.
GARANTÍA LIMITADA DE 3 AÑOS
Stanley garantiza este producto al comprador original durante un período de
TRES (3) AÑOS
contra
deficiencias en material y mano de obra. Esta
GARANTÍA LIMITADA
no cubre productos que sean
usados impropiamente, abusados, alterados o reparados. Los productos decientes serán reemplazados
o reparados a la opción de Stanley. Por favor llame al teléfono 1-800-505-4648 para obtener mayor
información o instrucciones de retorno.
ESTA GARANTÍA LIMITADA ES OTORGADA EN LUGAR DE TODAS LAS DEMÁS, INCLUYENDO GARANTÍA
IMPLÍCITA DE COMERCIABILIDAD O APTITUD PARA UN PROPÓSITO EN PARTICULAR Y EXCLUYE TODOS
LOS DAÑOS INCIDENTALES O CONSECUENTES.
Algunos estados no permiten limitaciones con relación
a cuanto dura una garantía implícita, o la exclusión o la limitación de daños incidentales o consecuentes,
de modo que estas limitaciones pueda que no le apliquen a usted. Esta
GARANTÍA LIMITADA
le otorga
derechos legales especícos los cuales pueden variar de estado a estado.
NORMAS DE SEGURIDAD – DEFINICIONES
Este manual contiene información que es importante que usted la sepa y la comprenda. Esta información
está relacionada con
SU SEGURIDAD
y
EVITAR PROBLEMAS CON EL EQUIPO
. Para ayudarle a reconocer
esta información, use los símbolos mostrados abajo. Por favor lea el manual y préstele atención a esas
secciones.
SEGURIDAD y EVITAR PROBLEMAS CON EL EQUIPO.
Para ayudarle a reconocer esta información, use
los símbolos mostrados abajo. Por favor lea el manual y préstele atención a esas secciones.
Indica una situación
inminentemente
peligrosa que, si no es evitada,
podrá
dar como
resultado la
muerte o lesiones graves
.
Indica una situación
potencialmente
peligrosa que, si no es evitada,
podrá
resultar en
heridas corporales menores o moderadas
.
Indica una situación
potencialmente peligrosa que,
si no es evitada,
podrá
resultar en la
muerte o en
lesiones graves
.
Usada sin el símbolo
de alerta de seguridad
indica una situación potencialmente peligrosa
que, si no es evitada,
podrá
resultar en
daños
a la propiedad
.
Page 13

- 13 -
COMPONENTES DE LA HERRAMIENTA
BTMT72391
Descripción
Cuadrante de 1/2 pul.Llave de impacto
Promedio de consumo de aire
3.9 CFM Uso al 100%
Mecanismo
Martillo Doble
Velocidad libre @ 90 lbs./pul/² (PSI)
7.200
Torsión máxima
500 lbs. pie
Entrada de aire
Rosca de 1/4 pul.NPT (Hembra)
Peso
5,95 lbs.
Tamaño de manguera
recomendado
3/8 pul.
Cuadrante
1/2 pul.
Escape
Mango
Presión de aire lbs./pul.² (PSI)
90
Gatillo
Marcha/
Reverso
Entrada de aire
Palanca de
marcha/ reverso
de torsión
Cuadrante de
1/2 pul.
ESPECIFICACIONES DE LA HERRAMIENTA
Todas las dimensiones están en pulgadas a menos que se especifique lo contrario.
FIG.1
Page 14

- 14 -- 14 -
Definiciones: Normas de seguridad
Las siguientes definiciones describen el nivel de
gravedad de cada advertencia. Lea el manual y preste
atención a estos símbolos.
PELIGRO: indica una situación de peligro
inminente que, si no se evita, provocará la muerte o
lesiones graves.
ADVERTENCIA: Indica una situación de peligro
potencial que, si no se evita, podría provocar la
muerte o lesiones graves.
ATENCIÓN: Indica una situación de peligro
potencial que, si no se evita, puede provocar lesiones leves o moderadas.
ATENCIÓN: Utilizado sin el símbolo de alerta de
seguridad indica una situación de peligro potencial
que, si no se evita, puede provocar daños en la
propiedad.
INSTRUCCIONES DE SEGURIDAD
IMPORTANTES
Algunas partículas originadas al lijar,
aserrar, amolar, taladrar y realizar otras actividades de
construcción contienen productos químicos reconocidos por
el Estado de California como causantes de cáncer, defectos
de nacimiento u otros problemas reproductivos. Algunos
ejemplos de estos productos químicos son:
• el plomo de las pinturas de base plomo
• la sílice cristalina de ladrillos, cemento y otros productos de mampostería,
• el arsénico y cromo de madera con tratamiento
químico.
El riesgo derivado de estas exposiciones varía según la
frecuencia con la que se realice este tipo de trabajo. Para
reducir la exposición a estos productos químicos: trabaje en
áreas bien ventiladas y con equipos de seguridad aprobados,
use siempre mascarilla facial o de respiración adecuada y
aprobada por OSHA/MSHA/NIOSH cuando use este tipo de
herramientas.
Cuando se utilizan herramientas neumáticas, siempre se
deben respetar las precauciones de seguridad para reducir el
riesgo de lesiones personales.
Este producto contiene sustancias químicas, incluido el
plomo, reconocidas por el Estado de California como causantes de cáncer, defectos de nacimiento u otros problemas
reproductivos. Lávese las manos después de utilizarlo.
GUARDE ESTAS INSTRUCCIONES
Laoperación o el mantenimiento inapropiados de
este producto podrán resultar en Lesiones graves
y daños a la propiedad. Lea y comprenda todas
las advertencias e Instrucciones de operación
antes de usar este equipo. Cuando use herramientas
neumáticas,Se deberán seguir las precauciones de seguridad
básicas para reducir el riesgo de heridas Personales.
Lea y comprenda este manual de instrucciones y los
rótulos en la herramienta antes de instalarla, operarla
o darle servicio a esta herramienta. Mantenga estas
instrucciones en un lugar seguro y accesible.
Tanto el operador como las demás personas deben
llevar puestas gafas de seguridad con protectores
laterales que cumplan con la norma ANSI Z87.1 CAN/
CSA Z94.3.
Los operadores y otros en el área deberán usar
protección para los oídos.
Graissez tous les jours pour un rendement optimal.
• Evite el uso prolongado: el movimiento repetitivo o la
exposición a la vibración podrán ser dañinos para sus
manos o brazos. Utilice guantes para proporcionar protección adicional, tome descansos frecuentes y limite el
el tiempo de uso diario.
• No use oxígeno o gases reactivos; podrá ocurrir una
explosión.
• No exceda una presión de aire de 90 lbs./pul.² (PSI).
• Lea cuidadosamente todos los manuales incluidos con
este producto. Familiarícese completamente con los
controles y con el uso apropiado del equipo.
• Sólo personas bien familiarizadas con estas reglas de
operación seguras se les deberá permitir el uso de la
herramienta neumática.
• No exceda ninguna capacidad de presión de ningún
componente en el sistema.
• Desconecte la herramienta neumática de la fuente de
aire antes de cambiar de herramienta o aditamento y
mientras no está operando.
• Siempre use gafas de seguridad y protección para los
oídos durante la operación. Siempre use gafas de
seguridad aprobadas con protector de cara. Siempre
use protección para los oídos aprobada.
• No use ropas sueltas o atavío que contengas cintas o
corbatas sueltas, etc. los cuales se podrán enredar con
las piezas en movimiento de la herramienta y resultar
en heridas corporales serias.
• No use joyas, relojes, identificaciones, brazaletes,
collares, etc. cuando opere esta herramienta, ellos se
podrán enredar con las piezas en movimiento de la
herramienta y resultar en lesiones graves.
• No oprima el gatillo cuando esté conectando la
manguera de alimentación de aire.
• Utilice siempre accesorios diseñados para ser utilizados
con herramientas de impacto neumáticas.
• No use accesorios dañados o desgastados.
• NO USE dados de herramientas manuales.
• IL NE FAUT JAMAIS utiliser les douilles des outils à
main.
• Il ne faut jamais déclencher l’outil lorsqu’il n’est pas
appliqué contre un objet. Les accessoires doivent êtrebien ancrés. Les accessoires lâches peuvent causer des
blessures graves.
• Protégez les conduits d’air des dommages et des pe
forations.
• Il ne faut jamais pointer l’outil pneumatique vers soi ou
autrui. Des blessures graves peuvent survenir.
• Vérifiez les boyaux d’air en cas d’usure ou de détério
tion avant chaque emploi. S’assurer que tous les ra
cords sont bien branchés.
• S’assurer que les boulons, écrous et vis sont bien se
rés et que l’équipement est en bon état.
• Ne jamais placer ses mains près d’une pièce mobile ou
en dessous.
Page 15

- 15 -- 15 -
RIESGO DE INCENDIO O
EXPLOSIÓN
¿QUÉ PUEDE SUCEDER? CÓMO EVITARLO
• Herramientas abrasivas
tales como lijadoras y
esmeriles,herramientas
rotativas como taladros, y herramientas de
impacto como llaves,
martillos y sierras
recíprocas son capaces
de generar chispas las
cuales pueden resultar
en la ignición de
materiales inflamables.
• Nunca operes herramientas cerca de
sustancias inflamables
como gasolina,
nafta, disolventes de
limpieza, etc.
• Trabaje en una área
limpia y bien ventilada
libre de materiales combustibles.
• Nunca use oxígeno,
dióxido de carbono u
otro gas embotellado
como fuente deenergía
para las herramientas
neumáticas.
• Exceder la presión
nominal máxima de los
accesorios de las herramientas puede causar
una explosión y ocasionar serias lesiones.
• Use aire comprimido
regulado a la presión
máxima o por debajo
de la clasificación de
presión de cualquier
accesorio.
RIESGO RESPIRATORIO
(asfixia)
¿QUÉ PUEDE SUCEDER? CÓMO EVITARLO
• Herramientas abrasivas,
tales como esmeriles,
lijadoras y herramientas
de corte, generan polvo
y materiales abrasivos
los cuales pueden ser
dañinos para los pulmones humanos y el
sistema respiratorio.
• Cuando use tales herramientas, siempre use
una máscara o respirador que le quede justo y
que sea aprobado por la
MSHA/NIOSH.
• Algunos materiales
tales como adhesivos
y brea, contienen
químicos cuyos vapores
pueden causar lesiones
graves bajo exposición
prolongada.
• Siempre trabaje en una
área limpia, seca y bien
ventilada.
RIESGO DE PERDIDA
AUDITIVA
¿QUÉ PUEDE SUCEDER? CÓMO EVITARLO
• La exposición prolongada al ruido producido
por el funcionamiento
de las herramientas
neumáticas puede causar una pérdida permanente de la audición.
• Utilice siempre protección auditiva de
acuerdo con la norma
ANSI (S3.19).
RIESGO DE LESIONES
¿QUÉ PUEDE SUCEDER? CÓMO EVITARLO
• Las herramientas
desatendidas, o con la
manguera conectada
pueden ser activadas
por personas no autorizadas conduciendo a
lesiones o a lesionar
a otros.
• Extraiga la manguera de
aire cuando no se utilice
la herramienta y guarde
la herramienta en un
lugar seguro lejos del
alcance de los niños o
usuarios no capacitados
para utilizarla.
• Las herramientas
neumáticas pueden
despedir objetos flojos
u otros materiales en el
área de trabajo.
• Use sólo las piezas,
los sujetadores y los
accesorios
recomendados por el
fabricante.
• Mantenga el área de
trabajo limpia y sin.
• obstrucciones.
Mantenga a los niños y
otros alejados del área
de trabajo mientras
opera la herramienta.
• Mantenga el área bien
alumbrada.
• Las herramientas
neumáticas pueden activarse accidentalmente
durante operaciones de
mantenimiento o cambios en la herramienta.
• Extraiga la manguera
de aire para lubricar,
añadir o reemplazar los
casquillos.
• Nunca transporte la
herramienta por la
manguera.
• Evite una arrancada
accidental. No transporte una herramienta
conectada con el dedo
en el gatillo.
• El servicio de reparación
deberá ser efectuado
sólo por un representante de servicio autorizado.
• Una llave o llave de
ajuste abandonada en
una pieza giratoria de la
herramienta incrementa
el riesgo de lesiones
personales.
• Extraiga la llave y las
llaves de ajuste antes
de encender la herramienta.
• Usar las boquillas de
inflado para eliminar
el polvo puede causar
serias lesiones.
• NO utilice las boquillas
de inflado para eliminar
el polvo.
• Las herramientas
mecanizadas pueden
causar que la pieza de
trabajo se mueva al
hacer contacto
causando lesiones.
• Use abrazaderas u otros
dispositivos para evitar
el movimiento.
• La pérdida del control
de la herramienta podrá
conducir a lesiones personales o de otros.
• No opere la herramienta
mientras esté bajo la
influencia de drogas o
alcohol.
• No se estire demasiado.
Mantenga los pies
sobre el piso y el balance en todo momento.
• Mantenga los mangos
secos, limpios y libres
de aceite y grasa.
• Manténgase alerta.
Vigile lo que está haciendo. Use el sentido
común. No opere la
herramienta cuando
esté cansado.
Page 16

- 16 -
RIESGO DE LESIONES (continuación)
¿QUÉ PUEDE SUCEDER? CÓMO EVITARLO
• Una herramienta o los
accesorios que no reciban un mantenimiento
adecuado pueden causar
serias lesiones.
• Mantenga la herr mienta
bien cuidada.
• Existen riesgos de que
la herramienta estalle si
está dañada.
• Revise la desalineación
o el atoramiento de
piezas en movimiento,
ruptura de piezas y
cualquier otra condición
que pueda afectar el funcionamiento de la herramienta. Si la herramienta
está dañada, envíela a
reparación antes de utilizarla.
RIESGO DE HERIDAS
EN LOS OJOS O CABEZA
¿QUÉ PUEDE SUCEDER? CÓMO EVITARLO
• Los equipos motorizados
neumáticos y las
herramientas motorizadas son capaces de propulsar materiales como
astillas, |viruta de sierra,
y otros desperdicios a
alta velocidad, lo que
puede resultar en heridas serias en los ojos.
• Utilice siempre gafas
de seguridad con
protectores laterales
que cumplan con la
norma ANSI Z87.1 CAN/
CSA Z94.3.
• Nunca deje desatendida una herramienta en
operación. Desconecte
la manguera de aire
cuando la herramienta
no esté siendo usada.
• El aire comprimido
puede ser peligroso. El
chorro de aire puede
causar heridas a los tejidos blandos tales
como los ojos, oídos,
etc. Las partículas u
objetos propulsados por
un chorro de aire pueden
causar
heridas.
• Para protección adicional
use un protector de cara
además de las gafas de
seguridad.
• Los accesorios de la
herramienta se pueden
aflojar o romper y volar
en pedazos impulsando
partículas al operador
u otros en el área de
trabajo.
• Compruebe que los
accesorios estén firmemente ensamblados.
RIESGO DE DESCARGA ELÉCTRICA
¿QUÉ PUEDE SUCEDER? CÓMO EVITARLO
• Esta herramienta no
incluye una superficie de
agarre aislada. El contacto con un cable cargado
también cargará las piezas metálicas expuestas
de la herramienta, lo
que puede ocasionar
una electrocución o la
muerte.
• Evite el contacto del
cuerpo con superficies
conectadas a tierra, tales
como caños, radiadores
y refrigeradores. Existe
un riesgo de descarga
eléctrica mayor si su
cuerpo está en contacto
con tierra.
• nvestigue exhaustivamente la pieza de trabajo
en busca de cableados
ocultos antes de realizar
el trabajo.
RIESGO DE CORTADAS O
QUEMADURAS
¿QUÉ PUEDE SUCEDER? CÓMO EVITARLO
• Las herramientas que
corta, cizallan, perforan, cincelan, etc., son
capaces de causar
lesiones graves.
• Mantenga la pieza de
trabajode la herramienta
alejada de las manos y
del cuerpo.
RIESGO DE ENREDO
¿QUÉ PUEDE SUCEDER? CÓMO EVITARLO
• Las herramientas que
contienen elementos
móviles, o propulsan
otras herramientas
móviles, tales como discos de esmeril,
discos de lijado, etc., se
pueden enredar en el
pelo, la ropa, las joyas
y otros objetos sueltos,
resultando en lesiones
severas.
• Nunca use ropas sueltas,
o atavíos que contengas
cintas
o corbatas sueltas, etc.
los cuales se podrán
enredar con las piezas en
movimiento de la
herramienta.
• Quítese cualquier joya,
reloj, identificación,
brazalete, collar, etc., que
se pueda enredar con la
herramienta.
• Mantenga las manos
alejadas de las piezas en
movimiento.
Amárrese o cúbrase el
pelo suelto.
• Siempre use ropa que
ajuste apropiadamente y
otros equipos de seguridad cuando
use esta herramienta.
Page 17

- 17 -
ALIMENTACIÓN DE AIRE Y CONEXIONES
• No use oxígeno, gases combustibles o gases embotellados como fuente de potencia para
esta herramienta ya que la herramienta puede explotar, posiblemente causando lesiones.
• No utilice fuentes de suministro que puedan exceder potencialmente 200 PSI (13,8 bar) ya que esto puede
ocasionar que la herramienta estalle y cause lesiones.
• El conector de la herramienta no deberá mantener la presión cuando el suministro de aire es desconectado. Si
se usa un acople equivocado, la herramienta podrá quedarse cargada
con aire después de desconectar y así será capaz de operar después de que la manguera de aire ha sido desconectada causando posiblemente lesiones.
• Siempre desconecte el suministro de aire:
1) Antes de efectuar ajustes,
2) Cuando le preste servicio a la herramienta,
3) Cuando la herramienta no esté siendo usada,
4) Cuando se mueva hacia otra área de trabajo, ya que puede
ocurrir activación accidental, posiblemente causando heridas.
CONSERVE ESTAS INSTRUCCIONES
PARA FUTURAS CONSULTAS
INSTALACIÓN
SUMINISTRO DE AIRE
La conexión recomendada se muestra en la
figura A
Las herramientas neumáticas operan sobre un amplio
margen depresiones de aire. Para obtener la máxima eficiencia y mayor vida útil de la herramienta, la presión
del aire suministrado a estas herramientas NO debe exceder la PSI de servicio especificada en la herramienta
durante su funcionamiento. El uso de una presión más alta de la capacidad nominal de la herramienta causará
un desgaste más rápido reduciendo drásticamente la vida de la herramienta. Una presión de aire más alta también causará una condición insegura y una explosión.
El diámetro interior de la manguera deberá ser aumentado para compensar por una manguera inusualmente
larga (más de 7,62 m o sea 25 pies). El diámetro mínimo de lamanguera deberá ser de 3/8” de D. I. y los conectores deben tener el mismo diámetro interno.
El uso de lubricadores de manguera de aire y de filtros de aire en línea es recomendado para evitar que agua
en la manguera dañe la herramienta. Drene diariamente el tanque de aire.
Limpie el cedazo del filtro de entrada de aire por lo menos una vez por semana para remover la mugre acumulada u otras cosas que puedan restringir el flujo de aire. La entrada de aire de la herramienta usada para
conectar una fuente de aire tiene una rosca estándar americana de 1/4” NPT.
REGLAS DE SEGURIDAD PARA HERRAMIENTAS
NEUMÁTICAS
1) Inspeccione las mangueras de aire para ver si están rajadas o tienen otros problemas. Reemplace la
manguera si está desgastada.
2) Nunca apunte una manguera de aire hacia otra persona.
3) Desconecte la herramienta cuando no esté siendo usada, antes de prestarle servicio o cambiar de accesorio.
4) Use las mangueras y conectores apropiados. Nunca use acopladores de cambio rápido en la herramienta. En
cambio, adicione una manguera y un acoplador entre la herramienta y la fuente de aire.
FIGURE A
Herramienta
Manguera líder
Acoples
1/2 pul. (o mayor)
Tubos y
conectores
Manguera
de aire
Aceitera
Conector
Filtro
Drene a diario
Page 18

- 18 -- 18 -
PREPARACIÓN PARA EL USO
USO APROPIADO DE LA HERRAMIENTA
Su llave de impacto de 1/2 pul. fue diseñada para enroscar,
apretar y desapretar sujetadores roscados, usualmente
tuercas y tornillos, cuando tiene instalado un dado de impacto
apropiado.
Siempre use barras de extensión, acoples
universales y dados clasicados para llaves de
impacto entre el cuadrante de salida de la llave de impacto y el
cuadrante hembra del dado. No use la herramienta para ningún
otro propósito diferente al especicado sin consultar al
fabricante o al distribuidor autorizado del fabricante. El hacer
esto podrá ser peligroso.
Nunca utilice la llave de impacto como un martillo para quitar
o enderezar sujetadores con las roscas cruzadas. Nunca intente
modicar la herramienta para otros usos.
ESTACIONES DE TRABAJO
Su llave de impacto debe ser utilizada solo como una herramienta manual. Se recomienda que utilice
la herramienta cuando esté parado de manera rme y equilibrada. Se puede utilizar en otras posiciones
pero antes de darle tal uso, el operador debe estar en una posición segura y tener buen equilibrio y agarre
rme, y tener siempre presente que al aojar sujetadores la herramienta puede moverse rápidamente
fuera del sujetador que se está aojando. Se debe permitir siempre una tolerancia para este movimiento
hacia atrás para evitar que la mano, el brazo o el cuerpo quedan atrapados.
INTERRUPTOR DE MARCHA/REVERSO
Posición del interruptor para apretar sujetadores.
La potencia de la herramienta aumenta en los
números más altos.
R
F
use: Repetitive motions or
exposure to vibration may be
harmful to your hands or arms.
90psig (6.2bar) Maximum
Air Pressure.
Instruction Manual
.
Wear eye and ear protection.
use: Repetitive motions or
exposure to vibration may be
harmful to your hands or arms.
90psig (6.2bar) Maximum
Air Pressure.
Instruction Manual
.
Wear eye and ear protection.
Posición del interruptor para desapretar
sujetadores.
Cuadrante
de
1/2 pul.
Gatillo
Entrada de aire
torsió
n
marcha/
reverso
Palanca
de
marcha/
reverso
de
Page 19

- 19 -- 19 -
PUESTA EN SERVICIO
SUMINISTRO DE AIRE
Use una fuente de aire limpio y lubricado que proporcione una presión de aire
medida en la herramienta de 90 lbs./pul.² (6,2 bar) cuando la herramienta esté
funcionando con el gatillo completamente oprimido.
Utilice el tamaño de manguera recomendado. Se recomienda conectar la manguera al suministro de
aire como se muestra en la
figura A
en la página 17. No conecte la herramienta al sistema de la tubería
de aire sin incorporar una válvula de cierre de aire de fácil alcance y operación. Se debe lubricar el
suministro de aire. Se recomienda encarecidamente que utilice un lubricador y regulador de ltro de
aire, como se muestra en la
figura A
en la página 17, ya que este permitirá proporcionar aire limpio y
lubricado a la presión correcta en la herramienta. Se recomienda enérgicamente que se use un ltro
de aire, regulador,
lubricador (FRL)
tal como se muestra en la
Figura A
, ya que esto le suministrará a
la herramienta aire limpio y lubricado a la presión correcta. Los detalles de este equipo pueden ser
obtenidos donde su proveedor. Si no se usa tal equipo, entonces la herramienta deberá ser lubricada
desconectando la fuente de aire de la herramienta y despresurizando el conducto oprimiendo el gatillo
de la herramienta. Desconecte la tubería de aire y vierta 1 cucharadita (5 cc.) de aceite lubricante para
motor neumático adecuado en la entrada de aire, que incorpore preferentemente un inhibidor de
óxido. Conecte la fuente de aire en la herramienta y opérela lentamente por unos segundospara que
el aceite circule. Lubrique la herramienta diariamente si es usada frecuentemente, o cuando comience
a perder velocidad o potencia.
USO DE UNA HERRAMIENTA DE IMPACTO
1) Lea todas las instrucciones antes de usar esta herramienta. Todos los operadores deberán ser
entrenados completamente en su uso y estar informados sobre estas reglas de seguridad.
2) No exceda la máxima presión de aire de trabajo de 90 lbs./pul.² (6,2 bar).
3) Use equipos de seguridad personales.
4) Use únicamente aire comprimido en las condiciones recomendadas.
5) Si parece que la herramienta funciona mal, retírela de servicio y haga los arreglos necesarios para
repararla.
6) Si la herramienta es usada con un balanceador u otro dispositivo de soporte, asegúrese de que
esté seguramente sujetado.
7) Mantenga siempre sus manos alejadas del accesorio de trabajo instalado en la herramienta.
8) Esta herramienta no está aislada eléctricamente. Nunca use la herramienta si hay alguna
probabilidad de que entre en contacto con laelectricidad.
9) Cuando use la herramienta, siempre adopte una posición de pies rmes y agarre rmemente la
herramienta para contrarrestar cualquier fuerza o fuerzas de reacción que puedan ser generadas al
usar la herramienta.
10) Utilice solo piezas de repuesto Dewalt o piezas que presten un servicio equivalente. No realice
arreglos temporales o permanentes con partes no autorizadas.
11) No trabe, pegue con cinta adhesiva, amarre con alambre el gatillo en la posición de marcha. El
gatillo siempre deberá estar libre para regresar a la posición de “apagado” al ser soltado.
12) Siempre cierre la fuente de aire de la herramienta y oprima el gatillo para aliviar el aire de la
manguera de alimentación antes de ajustar o remover el accesorio de trabajo.
13) Revise regularmente las mangueras y conectores para ver si están desgastados. Reemplácelos
si es necesario. No transporte la herramienta agarrándola por la manguera.Asegúrese de retirar su
mano del gatillo cuando transporte la herramienta con la fuente de aire conectada.
14) Tenga cuidado de no enredar ninguna pieza de la herramienta en la ropa, corbata, cabello, trapos
de limpieza, etc. Esto causará que el cuerpo sea atraído hacia la herramienta lo cual puede ser muy
peligroso.
15) Se espera que los usuarios adopten prácticas de trabajo seguras y observen todos los requisitos
egales relevantes al instalar, usar o darle mantenimiento a la herramienta.
16) Sólo instale la herramienta cuando tenga un interruptor de encendido/apagado fácilmente
accesible y operable en la fuente de aire.
17) Tenga cuidado para que el escape de aire de la herramienta no cause problemas o sople en
dirección a otra persona.
18) Nunca recueste la herramienta a menos que el accesorios de trabajo haya dejado de moverse.
19) Asegúrese siempre de que el interruptor de marcha adelante/reverso esté en la posición deseada
antes de arrancar la herramienta.
20) No use dados con desgaste excesivo en la cabeza motriz de entrada o de salida. Revise
periódicamente el cuadrante de la llave de impacto. Asegúrese de que el dado, barra de extensión u
otro aditamento quede asegurado rmemente antes de operar la herramienta.
21) Al aflojar sujetadores asegúrese primero que haya suficiente espacio libre detrás de la
herramienta para evitar que le atrape la mano. La herramienta se alejará de la junta roscada a medida
que la tuerca o tornillo es aojado ysale de la rosca, moviendo la herramienta con el sujetador.
Page 20

- 20 -
- 20 -
LISTA DE CONTROL PREVIA A LA PUESTA EN MARCHA
• Drene el agua del tanque del compresor de aire y la condensación de las mangueras de aire. (Por favor
consulte el manual de operación del compresor).
• Lubrique la herramienta.
• Seleccione los tubos de impacto necesarios. Los tubos deben coincidir con el tamaño del impulsor en la
llave neumática de impacto.
• Conecte la llave de impacto neumática a la fuente de aire con la manguera del tamaño recomendado.
Riesgo de operación insegura. Sostenga la manguera firmemente con las manos al
instalarla o desconectarla para evitar la desconexión repentina de la manguera.
Riesgo de rotura. Una presión de aire excesiva puede causar un riesgo de estallido
peligroso. Controle el valor nominal máximo de presión del fabricante para las
herramientas y los accesorios neumáticos. La presión de salida del regulador nunca debe exceder la
presión de servicio máxima.
PROCEDIMIENTOS OPERATIVOS
PUESTA EN MARCHA (FIG. 1, PG.13)
• Encienda el compresor de aire y permita que el tanque de aire se llene.
• Ajuste el regulador del compresor de aire a 90 PSI. Esta herramienta neumática funciona a una presión
de servicio máxima de 90 PSI.
• Ajuste el cuadrante de potencia (si está disponible) al par de apriete deseado.
• Ajuste la herramienta en la posición de avance o retroceso.
Consulte Características en la página 18 para
ver el diagrama.
• Presione el gatillo para comenzar a utilizar la herramienta.
APAGADO (FIG. 1, PG.13)
• Libere el gatillo para dejar de utilizar la herramienta.
• Al cambiar los casquillos, desconecte siempre el suministro de aire para evitar lesiones.
• Una vez que haya completado el trabajo, apague el compresor y almacene la herramienta neumática
después de haberla lubricado.
NOTICE D’EMPLOI
• Ajuste rmemente el casquillo o el accesorio a la llave de impacto.
• Compruebe que el interruptor de avance/retroceso esté en la posición correcta para apretar o aojar el
sujetador.
• La tuerca/El perno puede enroscar utilizando el encastre impulsor de la herramienta. Para aojar una
unión, la herramienta se puede utilizar en la secuencia inversa.
MANTENIMIENTO
GRAISSAGE
Les outils pneumatiques doivent être graissés pendant toute la vie des outils. Le moteur pneumatique
et les coussinets utilisent l’air comprimé pour actionner l’outil et comme l’humidité de l’air comprimé
entraîne la formation de rouille sur le moteur et les pièces intérieures de l’outil, il faut graisser l’outil
tous les jours. Tout manquement à graisser les outils correctement réduira fortement la vie de l’outil et
annulera la garantie.
Il faut graisser l’outil AVANT l’emploi initial, avant et après chaque usage additionnel.
POUR GRAISSER L’OUTIL PNEUMATIQUE À LA MAIN :
1. Débrancher l’outil de la source d’alimentation d’air, placer les entrées d’air vers le haut.
2. Retirer l’accessoire de la prise de l’outil pneumatique, comme les douilles, les ciseaux, etc.
3. Presione el gatillo y coloque alrededor de 1 cucharadita (5 cc.) de aceite para herramienta neumática en
la entrada de aire. (Presionar el gatillo ayudará a hacer circular el aceite en el motor.)
Remarque: Utiliser l’huile SAE n˚10 si l’huile à outil pneumatique n’est pas disponible.
4. Conecte la herramienta en una fuente de aire, cubra el extremo de escape con una toalla y hágalo
funcionar entre 20 y 30 segundos.
Page 21

- 21 -- 21 -
GLOSARIO
CFM:
Pies cúbicos por minuto.
PSI:
Libras por pulgada cuadrada; una unidad de medida de presión.
SCFM:
pies cúbicos estándar por minuto; unidad de medida de suministro de aire.
Certificación de código:
Los productos que tienen una o más de las indicaciones siguientes:
UL, CUL,
ETL, CETL,
han sido evaluados por los laboratorios de seguridad independientes certicados de
OSHA
y
cumplen los estándares de seguridad de Underwriters Laboratories cuya aplicación corresponda.
RPM:
Revoluciones por minuto; es una medida de la frecuencia de rotación.
BPM:
Golpes por minuto (del inglés, Beats Per Minute).
NPT:
Rosca de tubería nacional (del inglés, National Pipe Thread) (rosca cónica); es un estándar de
EE. UU.
para roscas cónicas utilizadas en caños y accesorios roscados.
ID:
Diámetro interno
MANTENIMIENTO
Gardez hors de la portée des enfants. En cas d’ingestion, ne pas provoquer de
vomissement, appelez un médecin immédiatement.
L’excédent d’huile dans le moteur est immédiatement expulsé par l’orifice
d’échappement. Toujours éloigner l’orifice d’échappement des gens ou objets.
RANGEMENT
Il faut graisser l’outil pneumatique avant de le ranger. Se reporter aux instructions sur le« Graissage » en
omettant l’étape 4.
Page 22

- 22 -
INTRODUCTION
• 500 pi-lb de couple pour retrait rapide des boulons tenaces
• Vitesse en régime libre de 7 200 rpm
• Échappement dans le manche pour éloigner l’air du visage et de la zone de travail
• Commande réversible et gâchette de vitesse variable
• Applications suggérées : Pour le retrait des écrous de roue, des écrous, des boulons et des tire-fond.
• Pression de fonctionnement maximale : 90 psi
TABLE DES MATIÈRES
Garantie limitée de 3 ans .......................................................... 22
Composants de l'outil,
Especicacispécications de l’outil .......................................... 23
Dénitions : lignes directrices en matière de sécurité,
Directives de sécurité importantes ........................................... 24
Avertissement ...........................................................................25-26
Arrivée d’air et raccords, installation,
règles de sécurité pour les outils pneumatiques .................... 27
Emploi correct de l’outil ............................................................ 28-29
Notice d’emploi .......................................................................... 30
Entretien ..................................................................................... 31
IMPORTANT
S’assurer que l’utilisateur de l’outil lit attentivement et comprend ces instructions avant d’utiliser l’outil.
GARANTIE LIMITÉE DE 3 ANS
Stanley garantit ce produit à l’acheteur d’origine pendant une période de
TROIS (3) ANS
contre les défauts
de matériaux et de main d’œuvre. Cette
GARANTIE LIMITÉE
ne couvre pas les produits qui ont été mal
utilisés, abusés, modiés ou réparés. Les produits défectueux seront remplacés ou réparés au choix de
Stanley. Veuillez appeler le
1-800-505-4648
pour plus de renseignements ou au sujet desinstructions de
renvoi.
CETTE GARANTIE LIMITÉE EST DONNÉE EN LIEU DE TOUTES AUTRES, Y COMPRIS LES
GARANTIESTACITES D’APTITUDE À ÊTRE VENDU ET UTILISÉ À UN BUT PARTICULIER, ET EXCLUT TOUS
LES DÉGÂTS SECONDAIRES OU CONSÉQUENTS.
Quelques états ne permettent pas de limites sur la
durée de garanties tacites ou sur l’exclusion ou la limitation des dégâts secondaires ou conséquents,
donc il se peut que ces limitations ne s’appliquent pas à vous.
Cette GARANTIE LIMITÉE
vous procure des
droits spéciques qui peuvent varier d’un état à l’autre.
DIRECTIVES DE SÉCURITÉ – DÉFINITIONS
Ce manuel contient des informations qu’il est important de connaître et de comprendre. Cette
information porte sur
VOTRE SÉCURITÉ
et sur la
PRÉVENTION DES PROBLÈMES D’OUTIL
. Pour vous
aider à reconnaître cette information, nous utilisons les symboles ci-dessous. Veuillez lire ce manuel
attentivement et accorder une attention particulière à ces paragraphes.
SÉCURITÉ et PRÉVENTION DES PROBLÈMES D’OUTIL
Pour vous aider à reconnaître cette information,
nous utilisons les symboles ci-dessous. Veuillez lire ce manuel attentivement et accorder une attention
particulière à ces paragraphes.
Indique une situation
dangereuse imminente
qui, si elle n’est pas évitée,
causera
le
décès ou une blessure grave
.
Indique une situation
dangereuse potentielle qui,
si elle n’est pas évitée,
peut
causer une
blessure
mineure ou modérée
.
Indique une situation
dangereuse potentielle qui, si elle
n’est pas évitée,
pourrait
causer le
décès ou
une blessure grave
.
Utilisé sans le symbole d’alerte de
sécurité indique une situation dangereuse
potentielle si, si elle n’est pas évitée,
peut
causer
des
dommages aux biens
.
Page 23

- 23 -
COMPOSANTS DE L'OUTIL
BTMT72391
Description
Prise ½ po Clé à choc
Consommation moyenne d’air
3,9 pi3/min Usage à 100 %
Mécanisme
Marteau jumelé
Régime en tr/min maximum
7 200
Torsion maximale
500 pi-lb
Entrée d’air
Taraudage de 6,35mm NPT (F)
Poids
5,95 lb
Taille minimale du tuyau
9,5 mm (3/8 po)
Carré d’entraînement
12,7 mm (1/2 po)
Échappement
Poignée
Pression requise en lb/po2 (PSI)
90
Gâchette
Réversible
Entrée d’air
Levier
réversible du
couple
Carréd’
entraînement
½ po
ESPECIFICACISPÉCIFICATIONS DE L’OUTIL
Les mesures sont métriques suivies de mesures impériales entre parenthèses.
FIG.1
Page 24

- 24 -
Définitions : lignes directrices
en matière de sécurité
Les définitions ci-dessous décrivent le niveau de
gravité pour chaque symbole. Veuillez lire le mode
d’emploi et porter une attention particulière à ces
symboles.
DANGER : Indique une situation dangereuse
imminente qui, si elle n’est pas évitée, causera la
mort ou des blessures graves.
AVERTISSEMENT : Indique une situation potentiellement dangereuse qui, si elle n’est pas évitée,
pourrait se solder par un décès ou des blessures
graves.
ATTENTION : Indique une situation potentielle-
ment dangereuse qui, si elle n’est pas évitée pourrait
se solder par des blessures mineures ou modérées.
ATTENTION : Utilisé sans le symbole d’alerte à la
sécurité, indique une situation potentiellement dangereuse qui, si elle n’est pas évitée pourrait se solder
par des dommages à la propriété.
DIRECTIVES DE SÉCURITÉ
IMPORTANTES
Nertaines poussières produites par les
travaux de ponçage, sciage, meulage, perçage et autres
peuvent contenir des produits chimiques pouvant selon l’état
de Californie causer le cancer, des anomalies congénitales ou
d’autres problèmes liés aux fonctions reproductrices. Voici
quelques exemples de ces produits chimiques :
• le plomb contenu dans les peintures à base de plomb;
• la silice cristalline provenant de la brique, du ciment et
d’autres produits de maçonnerie;
• l’arsenic et chrome provenant de bois traité chimiquement.
Les risques reliés à l’exposition à ces poussières varient
selon la fréquence à laquelle l’utilisateur travaille avec ce type
de matériaux. Pour réduire votre exposition à ces produits
chimiques : travailler dans un endroit bien ventilé et porter un
équipement de sécurité approuvé par
l’OSHA/MSHA/NIOSH
comme un masque anti-poussières spécialement adapté ou
un respirateur lors de l’utilisation de ces outils.
Lors de l’utilisation d’outils pneumatiques, des précautions
de base en matière de sécurité doivent être suivies afin de
réduire le risque de blessure personnelle.
Ce produit contient des produits chimiques, notamment le
plomb, reconnus par l’État de Californie comme étant cancérigènes et pouvant entraîner des anomalies congénitales et
d’autres dangers relatifs à la reproduction. Se laver les mains
après toute manipulation.
CONSERVER CES INSTRUCTIONS
a mauvaise utilisation ou maintenance de ce
produit peut causer des blessures graves Et des
dommages sérieux aux biens. Il faut lire et
comprendre tous les avertissements et la. Notice
d’emploi avant d’utiliser cet équipement. Lorsque vous
utilisez des outils pneumatiques, il faut respecter les mesures
de sécurité fondamentales pour réduire leRisque de
blessures.
l faut lire et comprendre ce guide d’instructions et les
étiquettes de l’outil avant d’installer, d’utiliser cet outil
ou d’en faire l’entretien. Gardez ces instructions dans
un lieu sûr à portée de la main.
Les opérateurs et autres personnes dans la zone de
travail doivent porter des lunettes de sécurité avec
écrans latéraux approuvées
ANSI Z87.1 CAN/CSA
Z94.3
.
Les utilisateurs et les gens dans la zone de travail
doivent porter une protection auditive.
Graissez tous les jours pour un rendement optimal.
• Évitez l’utilisation prolongée : le mouvement répétitif
ou l’exposition aux vibrations peuvent être nocifs pour
vos mains ou vos bras. Utiliser des gants pour offrir un
maximum de protection, prendre des pauses fréquentes et limiter le temps d’utilisation quotidien.
• N’utilisez pas de gaz oxygène ou réactif; une explosion
peut survenir.
• Ne pas excéder une pression d’air de 90 psi.
• Il faut lire attentivement tous les livrets inclus avec ce
produit. Il faut bien se familiariser avec les commandes
et l’emploi correct de l’équipement.
• Seules les personnes qui connaissent bien ces règles
de sécurité devraient utiliser l’outil pneumatique.
• Il ne faut pas excéder la pression limite des composantes du système.
• Débrancher l’outil pneumatique de l’arrivée d’air avant
de changer les outils ou les accessoires et lorsqu’il
n’est pas utilisé.
• Il faut toujours porter des lunettes de protection et une
protection auditive durant l’emploi.Il faut toujours
porter des lunettes de protection avec écrans latéraux.Il
faut toujours porter une protection auditive.
• Il ne faut jamais porter des vêtements amples ou un
habillement comportant des attaches ou bretelles
lâches, etc. qui pourraient être happées par les pièces
mobiles de l’outil et causer des blessures graves.
• Il ne faut pas porter de bijou, montre, identification,
bracelet, collier, etc. lorsque vous utilisez l’outil, car ils
pourraient être happés par les pièces mobiles de l’outil
et causer des blessures graves.
• Il ne faut pas abaisser la gâchette lorsque vous raccordez l’outil au boyau d’air d’arrivée.
• Toujours utiliser un accessoire conçu pour les outils
percuteurs pneumatique.
• Il ne faut jamais utiliser des accessoires endommagés
ou usés.
• IL NE FAUT JAMAIS utiliser les douilles des outils à
main.
• Il ne faut jamais déclencher l’outil lorsqu’il n’est pas
appliqué contre un objet. Les accessoires doivent être
bien ancrés. Les accessoires lâches peuvent causer des
blessures graves.
• Protégez les conduits d’air des dommages et des perforations.
• Il ne faut jamais pointer l’outil pneumatique vers soi ou
autrui. Des blessures graves peuvent survenir.
• Vérifiez les boyaux d’air en cas d’usure ou de détérioration avant chaque emploi. S’assurer que tous les raccords sont bien branchés.
• S’assurer que les boulons, écrous et vis sont bien serrés et que l’équipement est en bon état.
• Ne jamais placer ses mains près d’une pièce mobile ou
en dessous.
Page 25

- 25 -
RISQUE D’EXPLOSION OU
D’INCENDIE
CE QUI PEUT SE PRODUIRE COMMENT L’ÉVITER
• Les outils abrasifs
comme les sableuses
et les meules, les outils
rotatifs comme les
perceuses et les outils à
choc comme les clés,
les marteaux et les scies
à action réciproque
peuvent produire des
étincelles qui pourraient
allumer des produits
inflammables.
• Ne jamais utiliser les
outils près des substances inflammables,
comme l’essence, le
naphte, les solvants de
dégraissage, etc.
• Travailler dans une zone
de travail bien vetilée et
propre, exempte de
matériaux combutibles.
• Ne jamais utiliser de gaz
oxygène, de dioxyde de
carbone ou autres gaz
en bouteille comme
source d’énergie pour
les outils pneumatiques.
• Dépasser la pression
maximale nominale des
accessoires de l’outil
peut causer une explosion causant des blessures graves.
• Utiliser de l’air comprimé réglé à une pression
maximale près ou audessous de la pression
nominale des accessoires.
RISQUE REPIRATOIRE
(ASPHYXIE)
CE QUI PEUT SE PRODUIRE COMMENT L’ÉVITER
• Les outils abrasifs
comme les sableuses et
les meules et les outils
à tronçonner produisent
de la poussière et de
matériaux abrasifs qui
peuvent être nocifs pour
les poumons et le
système respiratoire.
• Toujours porter un
masque facial bien
ajusté ou un respirateur
homologué MSHA/
NIOSH lorsque vous
utilisez ces outils.
• Certains matériaux,
comme les adhésifs et
le goudron, contiennent
des produits chimiques
qui peuvent causer
des blessures graves à
l’exposition prolongée.
• Toujours travailler dans
une zone de travail bien
ventilée et propre.
RISQUE DE PERTED’OUÏE
CE QUI PEUT SE PRODUIRE COMMENT L’ÉVITER
• Une exposition prolongée au bruit produit par
le fonctionnement des
outils pneumatiques
peut causer une perte
auditive permanente.
• Toujours porter une
protection auditive
ANSI (S3.19).
RISQUE DE PERTED’OUÏE
CE QUI PEUT SE PRODUIRE COMMENT L’ÉVITER
• Les outils laissés sans
surveillance ou dont le
boyau d’air est branché
peuvent être activés
par des personnes non
autorisées qui pevent se
blesser ou blesser
autrui.
• Retirer le tuyau d’air
lorsque l’outil n’est
pas utilisé et ranger
l’outil dans un endroit
sûr hors de portée des
enfants et des utilisateurs n’ayant pas reçu la
formation requise.
• Les outils pneumatiques
peuvent projeter les
objets non fixés et
autres matériaux dans
toutes les directions de
la zone de travail.
• Utiliser uniquement les
pièces, les fixations et
les accessoires recommandés par le fabricant.
• Conserver la zone de
travail propre et en
bon ordre. Éloigner les
enfants et autrui de la
zone de travail durant
l’utilisation de l’outil.
• Conserver les lieux bien
illuminés.
• Les outils pneumatiques
peuvent être actionnés
accidentellement lors
d’un entretien ou d’un
changement d’outil.
• Retirer le tuyau d’air
pour lubrifier, ajouter ou
remplacer des douilles.
• Ne jamais transporter
l’outil par le boyau.
• Évitez les démarrages
non intentionnels. Ne
transportez pas l’outil
branché avec le doigt
sur la gâchette.
• Les réparations doivent
être effectuées seulement par un représentant de service autorisé.
• Le fait de laisser une
clé de réglage ou une
clé fixée sur une pièce
tournante augmente le
risque de blessures.
• Retirer toutes les clés
de réglage et les clés
avant de mettre l’outil
en marche.
• Utiliser des buses
gonflantes pour
l’époussetage peut
causer des blessures
graves.
• NE PAS utiliser de
buses gonflantes pour
l’époussetage.
• Les outils électriques
peuvent provoquer le
déplacement de
la pièce de travail au
contact et causer des
blessures.
• Utiliser des pinces ou
autres dispositifs pour
empêcher le mouvement.
• La perte de contrôle de
l’outil
peut causer des blessures à
soi-même et à autrui.
• Ne jamais utiliser l’outil
sous l’influence d’alcool
ou de drogues.
• Il ne faut pas tendre
l’outil trop loin. Gardez
l’équilibre en tout
temps.
• Gardez les mains
propres, sèches et
exemptes de graisse
et d’huile.
• Restez alerte. Portez
attention à ce que vous
faites. Servez-vous
de votre bon sens. Il ne
faut pas utiliser l’outil
lorsque vous êtes
fatigué.
• Des outils de mauvaise
qualité, inappropriés
ou endommagés tels
que les meules, les
ciseaux, les douilles, les
perceuses, etc., peuvent
voler en morceaux lors
du fonctionnement,
projetant des particules
dans toutes les directions de la zone de
travail et causer des
blessures graves.
• Toujours utiliser les
accessoires cotés pour
la vitesse de l’outil
électrique.
• Ne jamais utiliser des
outils que vous avez
échappés, impactés
ou endommagés par
l’usage.
• Ne pas exercer de force
excessive sur l’outil –
laisser l’outil effectuer
le travail.
Page 26

- 26 -
RISQUE DE BLESSURE (SUITE)
CE QUI PEUT SE PRODUIRE COMMENT L’ÉVITER
• Les outils et les accessoires qui ne sont pas
entretenus correctement
peuvent causer des blessures graves.
• Entretenir les outils de
façon minutieuse.
• L’outil risque de voler en
morceaux s’il est endommagé.
• Vérifier l’alignement et
la torsion des pièces
mobiles, la présence
de pièces brisées ou de
toute autre condition
pouvant nuire au fonctionnement de l’outil.
Faire réparer l’outil s’il
est endommagé avant
de l’utiliser.
RISQUE DE BLESSURE
À LA TÊTE OU AUX YEUX
CE QUI PEUT SE PRODUIRE COMMENT L’ÉVITER
• L’équipement pneumatique et les outils
électriques peuvent
propulser des matériaux,
comme les copeaux de
métal, le bran de scie et
autres débris, à haute
vitesse, ce qui pourrait
causer des blessures
graves.
• Toujours porter des
lunettes de sécurité avec
écrans latéraux approuvées ANSI Z87.1 CAN/
CSA Z94.3.
• Ne jamais laisser l’outil
sans surveillance.
Débrancher le boyau
d’air lorsque l’outil n’est
pas utilisé.
• L’air comprimé peut être
dangereux. Le courant
d’air peut causer des
lésions aux tissus mous,
comme les yeux, les
oreilles, etc.
Les particules ou objets
propulsés par le courant
d’air peuvent causer
des blessures.
• Pour plus de protection,
utiliser un masque facial
approuvé en plus des
lunettes de protection.
• Les accessoires des
outils peuvent devenir
lâches ou briser et se
dégager en propulsant
des particules en direction de l’utilisateur ou
des autres personnes
dans la zone de travail.
• S’assurer que tous les
accessoires sont fixés
solidement.
RISQUE D’ÉLECTROCUTION
CE QUI PEUT SE PRODUIRE COMMENT L’ÉVITER
• Cet outil ne comporte
pas de surface de prise
isolée. Le contact avec
un fil « sous tension »
mettra les surfaces
métalliques de l’outil
aussi « sous tension »,
ce qui peut causer une
électrocution ou la mort.
• Éviter tout contact
corporel avec les surfaces mises à la terre
telles que les tuyaux,
radiateurs, cuisinières et
réfrigérateurs. Le risque
d’électrocution est plus
grand si votre corps est
mis à la terre.
• Inspecter minutieusement la pièce de travail
afin de détecter tout
câblage dissimulé avant
d’exécuter le travail.
RISQUE DE COUPURES OU DE
BRÛLURES
CE QUI PEUT SE PRODUIRE COMMENT L’ÉVITER
• Les outils qui coupent,
cisaillent, percent,
poinçonnent, cisèlent,
etc. peuvent causer des
blessures graves.
• Éloigner la pièce mobile
de l’outil des mains et du
corps.
RISQUE D’EMMÊLEMENT
CE QUI PEUT SE PRODUIRE COMMENT L’ÉVITER
• Les outils qui contiennent des éléments
mobiles ou entraînent
d’autres outils mobiles,
comme les disques
de meulage, les douilles,
les meules, etc. peuvent
s’emmêler avec les
cheveux, les vêtements,
les bijoux et les objets
lâches, et causer des
blessures graves.
• Ne jamais porter de
vêtements amples ou
d’habillement
comprenant des attaches
ou des bretelles lâches,
etc. qui pourraient
s’emmêler dans
les pièces mobiles de
l’outil.
• Enlever les bijoux,
montres, identifications,
bracelets, colliers, etc.
pouvant être
happés par l’outil.
• Garder les mains
éloignées des pièces
mobiles. Attacher
ou couvrir les cheveux
longs.
• Portez toujours des vêtements bien ajustés et les
appareils de protection
appropriés lorsquevous
utilisez l’outil.
Page 27

- 27 -
ARRIVÉE D’AIR ET RACCORDS
N’utilisez jamais de gaz oxygène, de gaz combustible ou autres gaz en bouteille comme source
d’énergie pour cet outil, car l’outil peut exploser et possiblement causer des
blessures.
Ne pas utiliser de sources d’alimentation qui peuvent dépasser 13,8 bars (200 psi), car les outils peuvent voler
en morceaux et causer des blessures.
Le raccord ne doit pas maintenir une pression lorsque l’arrivée d’air est débranchée. Si le mauvais raccord est
utilisé, l’outil peut rester chargé d’air après l’avoir débranché;
l’outil pourra fonctionner après que le conduit d’air est débranché et pourra causer des blessures.
Toujours débrancher l’arrivée d’air :
1) avant d’effectuer des ajustements;
2) pour faire l’entretien de l’outil;
3) lorsque l’outil n’est pas utilisé;
4) pour le déplacer à une autre zone de travail, car l’outil peut être activé par accident et peut causer des blessures.
CONSERVER CES DIRECTIVES
POUR UN USAGE ULTÉRIEUR
INSTALLATION
ALIMENTATION D’AIR
Le branchement recommandé est illustré dans la figure A. Les outils pneumatiques fonctionnent selon une
grande plage de pression d’air. Pour une efficacité maximale et une longue vie de l’outil, la pression de l’air
fourni à ces outils NE DOIT PAS dépasser la pression nominale de l’outil lorsque l’outil fonctionne. L’utilisation
d’une pression plus élevée que la pression nominale peut provoquer l’usure plus rapide de l’outil et en écourter
la durée. Une pression d’air plus élevée peut aussi provoquer des conditions dangereuses et une explosion. Il
faut augmenter le diamètre intérieur du boyau comme compensation lorsqu’il est très long (plus de 25 pieds).
Le diamètre intérieur minimum du boyau est être de 3/8 po et les raccords doivent avoir les mêmes dimensions
intérieures.
Il est recommandé d’utiliser des lubrificateurs et des filtres à air dans les conduits d’air pour empêcher l’eau
de pénétrer dans le conduit et endommager l’outil. Vider le réservoir d’air tous les jours. Nettoyer le grillage du
filtre du conduit d’air au moins une fois par semaine pour supprimer la saleté accumulée ou autre débris qui
peutrestreindre le débit d’air.
L’entrée d’air de l’outil utilisée pour raccorder l’alimentation d’air comporte un fil standard américain de 1/4 po
NPT.
RÈGLES DE SÉCURITÉ POUR LES OUTILS
PNEUMATIQUES
1) Inspecter le boyau d’air pour noter les fêlures ou autres problèmes. Remplacer le boyau s’il est usé.
2) Ne jamais pointer le boyau d’air en direction d’une personne.
3) Débrancher l’outil lorsqu’il n’est pas utilisé ou avant d’en effectuer l’entretien ou de changer les accessoires.
4) Utiliser les boyaux et raccords appropriés. Ne jamais utiliser de manchons de conversion rapide fixés directement sur l’outil. Ajoutez plutôt un boyau et un raccord entre l’outil et ’alimentation d’air.
FIGURE A
Outil
Boyau récepteur
Connecteur
Boyau
d'air
Lubrificateur
Mamelon
Filtre
Vidanger tous les jours
Page 28

- 28 -
EMPLOI CORRECT DE L’OUTIL
POSTES DE TRAVAIL
Votre nouvelle clé à choc à prise de ½ po est fabriquée pour enfoncer,
serrer et desserrer les xations letées, habituellement les écrous et
les boulons lorsqu’elle utilise une douille appropriée pour clé à choc.
Toujours utiliser les rallonges à résistance
déterminée, les joints universels et les intermédiaires
de douilles entre la prise de sortie carrée de la clé à choc et la prise
carrée femelle de la douille. N’utilisez jamais l’outil pour toute autre
n que celle précisée sans consulter le fabricant ou le fournisseur
autorisé du fabricant. Cela peut être dangereux.
Ne jamais utiliser la clé à chocs comme un marteau pour déloger ou
redresser des attaches letées faussées. Ne jamais essayer de
modier l’outil pour d’autres usages.
POSTES DE TRAVAIL
Votre clé à chocs ne doit être utilisée que comme outil à main. Il
est toujours recommandé que l’utilisateur se tienne debout pour utiliser l’outil. L’outil peut être utilisé si
l’utilisateur est dans une autre position, mais avant d’en faire l’utilisation, ce dernier doit s’assurer qu’il
se trouve dans une position sécuritaire et qu’il peut avoir une prise ferme sur l’outil; prendre note que
lorsque l’outil est utilisé pour dévisser des attaches, l’outil peut alors s’éloigner rapidement de l’attache
à dévisser. Il faut prévoir un espace à l’arrière pour le mouvement de recul de l’outil an d’éviter le
coincement de la main, du bras ou du corps.
COMMUTATEUR RÉVERSIBLE
Position du commutateur pour enfoncer les
xations. La puissance de l’outil augmente avec un
réglage numéroté plus élevé.
R
F
use: Repetitive motions or
exposure to vibration may be
harmful to your hands or arms.
90psig (6.2bar) Maximum
Air Pressure.
Instruction Manual
.
Wear eye and ear protection.
use: Repetitive motions or
exposure to vibration may be
harmful to your hands or arms.
90psig (6.2bar) Maximum
Air Pressure.
Instruction Manual
.
Wear eye and ear protection.
Position du commutateur pour retirer les xations.
Gâchette
Entrée d’air
coupl
e
Levier
réversible
Levier
réversibl
e
Page 29

- 29 -
MISE EN SERVICE
ALIMENTATION D’AIR
Utilisez une alimentation d’air propre et graissée qui fournit une pression d’air
mesurée à l’outil de 90 psi/6.2 bar lorsque l’outil fonctionne avec la gâchette
pleinement abaissée.
Utiliser le boyau de diamètre recommandé. Il est recommandé de raccorder l’outil sur l’alimentation
en air comme illustré à la
figure A
de la page 27. Ne pas raccorder l’outil sur le circuit d’air sans y
intégrer un robinet d’arrêt, facile d’accès et facile à faire fonctionner. L’alimentation en air doit être
lubrifiée. Il est fortement recommandé d’utiliser un filtre à air, un régulateur et un
lubrificateur
(FRL)
comme illustré à la
figure A
de la page 27, car cela permettra de fournir à l’outil de l’air propre
et lubrifié à la pression appropriée. Les détails de cet équipement s’obtiennent auprès de votre
fournisseur. Si cet équipement n’est pas utilisé, il faut graisser l’outil en fermant l’alimentation d’air
et dépressuriser le conduit en abaissant la gâchette de l’outil. Séparer la conduite d’air et verser
1 cuillerée à thé (5 cc) d’une huile de lubrification pour moteurs pneumatiques appropriée, en y
ajoutant de préférence un antirouille. Rebranchez l’outil à l’alimentation d’air et faites tourner l’outil
lentement pendant quelques secondes pour permettre à l’air de circuler l’huile.
Graissez l’outil tous les jours si vous l’utilisez fréquemment ou lorsqu’il commence à ralentir ou à
perdre de la puissance.
UTILISATION D’UNE CLÉ À CHOCS
1) Lire toutes les instructions avant d’utiliser cet outil. Tous les utilisateurs doivent recevoir une
formation complète sur son utilisation et connaître les règles de sécurité.
2) Ne pas excéder la pression maximum d’utilisation d’air de 90 psi/6.2 bar.
3) Utiliser l’équipement de protection personnelle.
4) Utiliser seulement l’air comprimé dans les conditions recommandées.
5) Si l’outil semble mal fonctionner, cesser de l’utiliser et prendre les dispositions pour son entretien
et sa réparation.
6) Si l’outil s’utilise avec un compensateur ou tout autre dispositif de support, s’assurer qu’il est bien
assujetti.
7) Toujours garder les mains éloignées de l’accessoire de travail xé à l’outil.
8) L’outil n’est pas isolé électriquement. Ne jamais utiliser l’outil s’il existe un risque qu’il entre en
contact avec une ligne sous tension.
9) Lorsque vous utilisez l’outil, vous devez vous assurer d’avoir un bon équilibre et de tenir l’outil
fermement pour contrer les forces ou réactions qui peuvent se produire en utilisant l’outil.
10) Utiliser uniquement des pièces de rechange d’origine Dewalt ou des pièces de qualité équivalente.
Ne pas effectuer de réparations temporaires ou permanentes à l’aide de pièces inadéquates.
11) Ne pas verrouiller, utiliser du ruban ou du l métallique, etc. pour immobiliser la gâchette
réversible dans la position de marche. La gâchette doit toujours être en mesure de retourner à la
position « arrêt » lorsqu’elle est libérée.
12) Toujours fermer l’alimentation d’air en direction de l’outil et abaisser la gâchette pour libérer l’air
du boyau d’alimentation avant d’installer, d’ajuster ou de retirer l’accessoire de travail.
13) Vériez régulièrement les boyaux et les raccords pour en noter l’usure. Remplacer au besoin.
Ne pas transporter l’outil par le boyau. S’assurer de retirer la main de la gâchette réversible pour
transporter l’outil branché à l’alimentation d’air.
14) Assurez-vous d’éviter l’emmêlement des pièces mobiles de l’outil par les vêtements, les attaches,
les cheveux, les chiffons, etc, car cela aurait pour effet de pousser le corps vers l’outil et peut être très
dangereux.
15) Il est attendu que les utilisateurs adopteront des habitudes de prudence au travail et respecteront
toutes les prescriptions légales pertinentes pour installer, utiliser et entretenir l’outil.
16) Installer seulement l’outil lorsqu’un interrupteur facilement accessible et utilisable est incorporé
dans l’alimentation d’air.
17) S’assurer que l’échappement d’air de l’outil ne cause pas de problème ou n’est pas dirigé sur une
personne.
18) Ne jamais poser l’outil sur le sol si l’accessoire de travail est encore en marche.
19) Toujours s’assurer que l’interrupteur réversible est dans la position recherchée avant de démarrer
l’outil.
20) Ne pas utiliser les douilles très usées sur les prises d’entraînement ou de sortie. Vériez
périodiquement le carré d’entraînement sur la clé à choc. S’assurer que la douille, la rallonge ou autre
accessoire est bien assujetti avant d’utiliser l’outil.
21) Pour desserrer les xations, s’assurer qu’il y a sufsamment d’espace derrière l’outil pour éviter
de se coincer les mains. L’outil s’éloigne du joint leté lorsque l’écrou ou le boulon est desserré et
remonte le l, déplaçant l’outil dans son mouvement.
Page 30

- 30 -
LISTE DE VÉRIFICATION DE PRÉ-DÉMARRAGE
• Vidanger l’eau du réservoir d’air comprimé et la condensation des conduits d’air. (Veuillez consulter la
notice d’emploi du compresseur d’air.)
• Lubrier l’outil
• Sélectionner les douilles et les accessoires à chocs nécessaires. La dimension des douilles doit
correspondre à la dimension de la clé à chocs pneumatique.
• Brancher la clé à choc pneumatique à la source d’air en utilisant le boyau de la taille recommandée.
Risque d’utilisation dangereuse. Saisir fermement le tuyau en main lors du raccordement
ou de la déconnexion pour empêcher un à-coup du tuyau.
RISQUE DE RUPTURE. Une trop forte pression d’air représente un risque de rupture.
Vérifiez la pression maximum suggérée par le fabricant pour les outils pneumatiques et
les accessoires. La pression de sortie du régulateur ne doit jamais dépasser la pression maximale
nominale.
PROCÉDURES DE FONCTIONNEMENT
DÉMARRAGE (FIG. 1, PG23)
• Mettre le compresseur à air en marche et permettre au réservoir à air de se remplir.
• Régler le régulateur du compresseur sur 6,2 bars (90 PSI). Cet outil fonctionne à une pression d’air
maximale de 6,2 bars (90 PSI).
• Régler le cadran de puissance (le cas échéant) au couple désiré.
• Régler l’outil à la position Avant ou Arrière. Voir la section
Caractéristiques à la page 28 pour consulter le
schéma.
• Maintenir la gâchette enfoncée pour mettre l’outil en marche.
ARRÊT (FIG. 1, PG23)
• Relâcher la gâchette an d’arrêter l’outil.
• Avant de changer les douilles, toujours séparer l’alimentation en air an d’éviter les blessures.
• Une fois le travail terminé, arrêter le compresseur à air et ranger l’outil pneumatique après l’avoir
lubrié.
NOTICE D’EMPLOI
• Fixer la douille ou l’accessoire solidement sur la clé à chocs.
• S’assurer que l’interrupteur Avant/arrière est à la position appropriée pour visser ou dévisser l’attache.
• L’écrou ou le boulon peut ensuite être vissé sur le letage à l’aide de l’entraînement de l’outil. L’outil
peut être utilisé sur la position Inverser pour dévisser un joint.
ENTRETIEN
GRAISSAGE
Les outils pneumatiques doivent être graissés pendant toute la vie des outils. Le moteur pneumatique
et les coussinets utilisent l’air comprimé pour actionner l’outil et comme l’humidité de l’air comprimé
entraîne la formation de rouille sur le moteur et les pièces intérieures de l’outil, il faut graisser l’outil
tous les jours. Tout manquement à graisser les outils correctement réduira fortement la vie de l’outil et
annulera la garantie.
Il faut graisser l’outil AVANT l’emploi initial, avant et après chaque usage additionnel.
POUR GRAISSER L’OUTIL PNEUMATIQUE À LA MAIN :
1. Débrancher l’outil de la source d’alimentation d’air, placer les entrées d’air vers le haut.
2. Retirer l’accessoire de la prise de l’outil pneumatique, comme les douilles, les ciseaux, etc.
3. Maintenir la gâchette enfoncée et mettre environ 1 cuillerée à thé (5 cc.) d’huile pour outil pneumatique
dans l’entrée d’air. (Maintenir la gâchette enfoncée permettra de faire circuler l’huile dans le moteur.)
Remarque : Utiliser l’huile SAE n˚10 si l’huile à outil pneumatique n’est pas disponible.
4. Raccorder l’outil sur une source d’air, couvrir l’extrémité de l’échappement d’une serviette et faire
fonctionner de 20 à 30 secondes.
Page 31

- 31 -
GLOSSAIRE
CFM :
pied cube par minute.
SCFM :
pied cube par minute (standard), une unité de mesure du soufage.
PSI :
livres par pouce carré, une unité de mesure de pression.
Code de certifications :
les produits qui afchent un ou plusieurs des étampes suivantes :
UL, CUL, ETL,
CETL
ont été évalués pas un laboratoire de sécurité indépendant sanctionné par
l’OSHA
et qui répond aux
normes en vigueur des Underwriters Laboratories en ce qui a trait à la sécurité.
TR/MIN :
Tours par minute; est une unité de mesure indiquant la fréquence d’un tour
B/MIN :
Battements par minute.
NPT :
« National pipe thread » (letage conique); est une norme américaine pour les lets coniques
utilisés dans les tuyaux et les raccords letés.
ID :
Diamètre intérieur
ENTRETIEN
Gardez hors de la portée des enfants. En cas d’ingestion, ne pas provoquer de
vomissement, appelez un médecin immédiatement.
L’excédent d’huile dans le moteur est immédiatement expulsé par l’orifice
d’échappement. Toujours éloigner l’orifice d’échappement des gens ou objets.
GRAISSAGE
Il faut graisser l’outil pneumatique avant de le ranger. Se reporter aux instructions sur le « Graissage » en
omettant l’étape 4.
 Loading...