

Page 1
OPERATION and MAINTENANCE MANUAL
MANUAL DE OPERACIÓN Y DE MANTENIMIENTO
MANUEL D’INSTRUCTIONS ET D’ENTRETIEN
BEFORE OPERATING THIS TOOL, ALL OPERATORS SHOULD STUDY THIS MANUAL TO
UNDERSTAND AND FOLLOW THE SAFETY WARNINGS AND INSTRUCTIONS. KEEP THESE
INSTRUCTIONS WITH THE TOOL FOR FUTURE REFERENCE. IF YOU HAVE ANY QUESTIONS,
CONTACT YOUR BOSTITCH REPRESENTATIVE OR DISTRIBUTOR.
ANTES DE OPERAR ESTA HERRAMIENTA, TODOS LOS OPERADORES DEBERÁN ESTUDIAR
ESTE MANUAL PARA PODER COMPRENDER Y SEGUIR LAS ADVERTENCIAS SOBRE SEGURIDAD
Y LAS INSTRUCCIONES. MANTENGA ESTAS INSTRUCCIONES CON LA HERRAMIENTA PARA
FUTURA REFERENCIA, SI TIENE ALGUNA DUDA, COMUNÍQUESE CON SU REPRESENTANTE DE
BOSTITCH O CON SU DISTRIBUIDOR.
LIRE ATTENTIVEMENT LE PRÉSENT MANUEL AVANT D’UTILISER L’APPAREIL. PRÉTER UNE
ATTENTION TOUTE PARTICULIÈRE AUX CONSIGNES DE SÉCURITÉ ET AUX AVERTISSEMENTS.
GARDER CE MANUEL AVEC L’OUTIL POUR FUTUR RÉFÉRENCE. SI VOUS AVEZ DES QUESTIONS,
CONTACTEZ VOTRE REPRÉSENTANT OU VOTRE CONCESSIONNAIRE BOSTITCH.
9R209363RB 12/16
final size: 5.5 in x 8.5 in
BTF83PT, BTF83PL, BTF83WW
PNEUMATIC STICK NAILERS
CLOUEUSES PNEUMATIQUES À CHARGEUR
CLAVADORAS NEUMÁTICAS PARA CLAVOS EN TIRAS
Page 2
-2-
INTRODUCTION
BOSTITCH tools are precision-built tools, designed for precise, high volume nailing. These tools will deliver
efficient, dependable service when used correctly and with care. As with any fine power tool, for best
performance the manufacturer’s instructions must be followed. Please study this manual before operating
the tool and understand the safety warnings and cautions. The instructions on installation, operation and
maintenance should be read carefully, and the manual kept for reference. NOTE: Additional safety measures
may be required because of your particular application of the tool. Contact your BOSTITCH representative
or distributor with any questions concerning the tool and its use. BOSTITCH, 701 E. Joppa Road, Towson,
Maryland 21286, U.S. & Canada Only, É.-U. et Canada seulement
INDEX
Safety Instructions ........................................................................................................3–4
Tool/Fastener Specifications ........................................................................................4–5
Operating Modes ...........................................................................................................5–6
Air Supply, Connections .................................................................................................6–7
Lubrication ....................................................................................................................... 7
Loading the Tool, .........................................................................................................7–8
Fastener Depth Control Adjustment ................................................................................. 8
Removing Nails ................................................................................................................. 9
Tool Operation ............................................................................................................9–11
Maintaining the Pneumatic Tool ..................................................................................... 11
Trouble Shooting .....................................................................................................11–12
NOTE:
BOSTITCH tools have been engineered to provide excellent customer satisfaction and are designed to achieve
maximum performance when used with precision BOSTITCH fasteners engineered to the same exacting
standards. The BTF83PT is designed for use with 30° paper collated stick nails. The BTF83PL is designed for use
with 21° plastic collated stick nails. The BTF83WW is designed for use with 28° wire collated stick nails. BOSTITCH
cannot assume responsibility for product performance if our tools are used with fasteners or
accessories not meeting the specific requirements established for genuine BOSTITCH nails, staples and
accessories.
LIMITED WARRANTY — U.S. AND CANADA ONLY
BOSTITCH Fastening Systems “BOSTITCH” warrants to the original retail purchaser that the product purchased is
free from defects in material and workmanship, and agrees to repair or replace, at BOSTITCH’s option, any defective
BOSTITCH branded pneumatic stapler or nailer for a period of seven (7) years from date of purchase (one (1) year
from the date of purchase for compressors and tools used in production applications). Warranty is not transferable.
Proof of purchase date required. This warranty covers only damage resulting from defects in material or workmanship;
it does not cover conditions or malfunctions resulting from normal wear, neglect, abuse, accident or repairs attempted
or made by other than our national repair center or authorized warranty service centers. Driver blades, bumpers,
o-rings, pistons and piston rings are considered normally wearing parts. For optimal performance of your BOSTITCH
tool always use genuine BOSTITCH fasteners and replacement parts.
THIS WARRANTY IS IN LIEU OF ALL OTHER WARRANTIES, EXPRESS OR IMPLIED, INCLUDING BUT NOT
LIMITED TO THE IMPLIED WARRANTIES OF MERCHANTABILITY OR FITNESS FOR A PARTICULAR PURPOSE.
BOSTITCH SHALL NOT BE LIABLE FOR ANY INCIDENTAL OR CONSEQUENTIAL DAMAGES.
Some states and countries do not allow limitations on how long an implied warranty lasts, or the exclusion or limitation
of incidental or consequential damages, so the above limitations or exclusions may not apply to you. This warranty
gives you specific legal rights, and you may also have other rights which vary from state to state and country to country.
To obtain warranty service in the U.S. return the product, together with proof of purchase, to the U.S. BOSTITCH
National or Regional Independent Authorized Warranty Service Center. In the U.S. you may call us at 1-800-556-6696
or visit www.BOSTITCH.com for the location most convenient for you. In Canada please call us at 1-800-567-7705
or visit www.BOSTITCH.com
Page 3
-3-
SAFETY INSTRUCTIONS
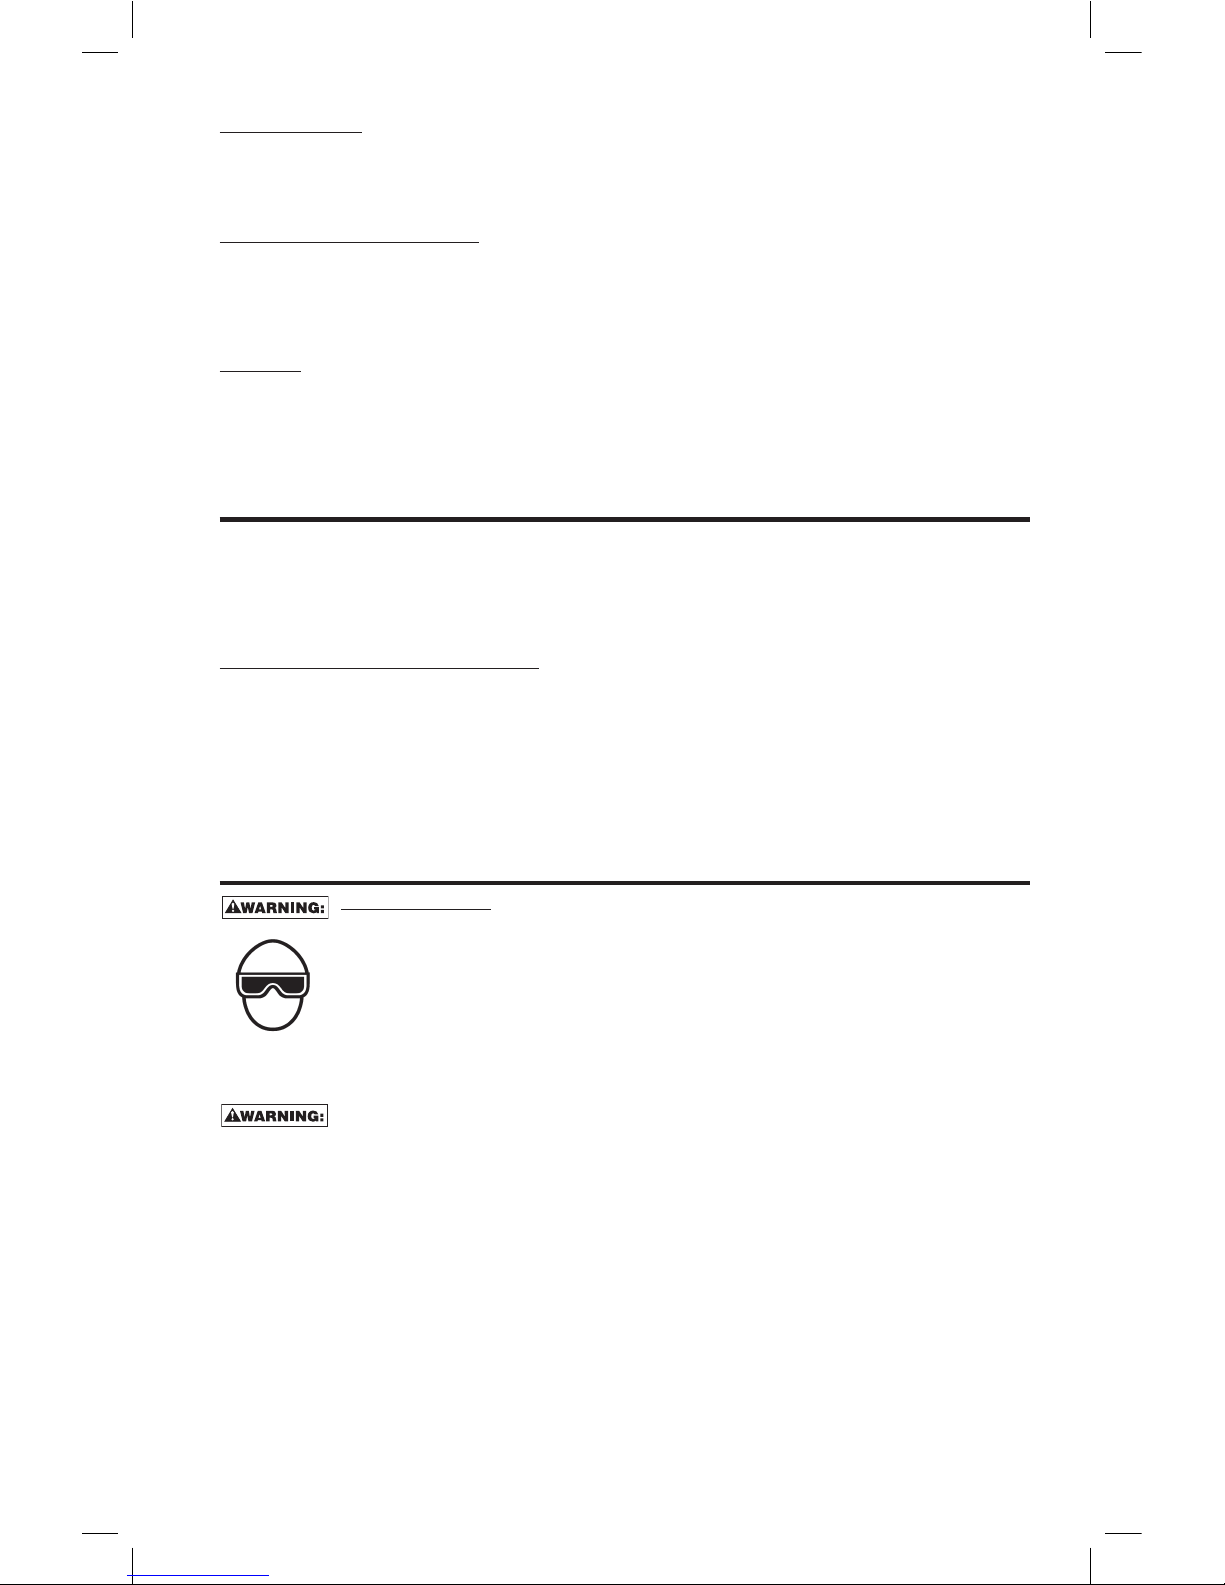
EYE PROTECTION which conforms to ANSI specifications and provides protection against
flying particles both from the FRONT and SIDE should ALWAYS be worn by the operator
and others in the work area when connecting to air supply, loading, operating or servicing
this tool. Eye protection is required to guard against flying fasteners and debris, which
could cause severe eye injury.
The employer and/or user must ensure that proper eye protection is worn. Eye protection
equipment must conform to the requirements of the American National Standards
Institute, ANSI Z87.1/CAN/CSA Z94.3 and provide both frontal and side protection. NOTE:
Non-side shielded spectacles and face shields alone do not provide adequate protection.
Additional Safety Protection will be required in some environments. For example, the
working area may include exposure to noise level which can lead to hearing damage. The
employer and user must ensure that any necessary hearing protection is provided and
used by the operator and others in the work area. Some environments will require the use
of head protection equipment. When required, the employer and user must ensure that
head protection conforming to ANSI CAN/CSA Z89.1 is used.
Some dust created by power sanding, sawing, grinding, drilling, and other construction
activities contains chemicals known to the State of California to cause cancer, birth
defects or other reproductive harm. Some examples of these chemicals are:
• lead from lead-based paints
• crystalline silica from bricks and cement and other masonry products
• arsenic and chromium from chemically-treated lumber
Your risk from these exposures varies, depending on how often you do this type of work.
To reduce your exposure to these chemicals: work in a well ventilated area, and work with
approved safety equipment, such as those dust masks that are specially designed to filter
out microscopic particles.
AIR SUPPLY AND CONNECTIONS
Do not use oxygen, combustible gases, or bottled gases as a power source for this tool as
tool may explode, possibly causing injury.
Use only clean, dry, regulated air. Condensation from an air compressor can rust and
damage the internal workings of the tool.
Do not use supply sources which can potentially exceed 200 p.s.i.g. (14 kg/cm2) as tool
may burst, possibly causing injury.
The connector on the tool must not hold pressure when air supply is disconnected. If a
wrong fitting is used, the tool can remain charged with air after disconnecting and thus will
be able to drive a fastener even after the air line is disconnected possibly causing injury.
Do not pull trigger or depress contact arm while connected to the air supply as the tool may
cycle, possibly causing injury.
Always disconnect air supply: 1.) Before making adjustments; 2.) When servicing the tool;3.)
When clearing a jam; 4.) When tool is not in use; 5.) When moving to a different work area, as
accidental actuation may occur, possibly causing injury.
LOADING TOOL
When loading tool: 1.) Never place a hand or any part of body in fastener discharge area
of tool; 2.) Never point tool at anyone; 3.) Do not pull the trigger or depress the trip as
accidental actuation may occur, possibly causing injury.
Connect tool to air supply before loading fasteners, to prevent a fastener from being fired
during connection. The tool driving mechanism may cycle when tool is connected to the
air supply. Do not load fasteners with trigger or contact trip depressed, to prevent
unintentional firing of a fastener.
OPERATION
Always handle the tool with care: 1.) Never engage in horseplay; 2.) Never pull the trigger
unless nose is directed toward the work; 3.) Keep others a safe distance from the tool while
tool is in operation 4.) Always assume that the tool contains fasteners as accidental
actuation may occur, possibly causing injury.
The operator must not hold the trigger pulled on contact arm tools except during fastening
operation as serious injury could result if the trip accidentally contacted someone or
something, causing the tool to cycle.
Keep hands and body away from the discharge area of the tool. A contact arm tool may
bounce from the recoil of driving a fastener and an unwanted s econd fastener may be
driven possibly causing injury.
Page 4
-4-
Do not remove, tamper with, or otherwise cause the tool, trigger, or contact trip to become
inoperable. Do not tape or tie trigger or contact trip in the on position. Do not remove
spring from contact trip. Make daily inspections for free movement of trigger and contact
trip. Uncontrolled discharge could result.
Do not alter or modify the tool in any way.
Make sure hose is free of obstructions or snags. Entangled or snarled hoses can cause
loss of balance or footing. Do not lift, pull or lower tool by the hose.
Use the tool only for its intended use. Do not discharge fasteners into open air, concrete,
stone, extremely hard woods, knots or any material too hard for the fastener to penetrate.
Do not use the body of the tool or top cap as a hammer. Discharged fasteners may follow
unexpected path and cause injury.
Always operate the tool in a clean, lighted area. Be sure the work surface is clear of any
debris and be careful not to lose footing when working in elevated environments such as
rooftops.
Grip tool firmly to maintain control while allowing tool to recoil away from work surface as
fastener is driven. In “Contact Actuation Mode” if contact trip is allowed to recontact work
surface before trigger is released an unwanted fastener will be fired.
Check operation of the contact arm mechanism frequently. Do not use the tool if the arm
is not working correctly as accidental driving of a fastener may result. Do not interfere
with the proper operation of the contact arm mechanism.
Do not drive fasteners on top of other fasteners or with the tool at an overly steep angle
as this may cause deflection of fasteners which could cause injury.
Do not drive fasteners close to the edge of the work piece as the wood may split, allowing
the fastener to be deflected possibly causing injury.
This nailer produces SPARKS during operation. NEVER use the nailer near flammable
substances, gases or vapors including lacquer, paint, thinner, gasoline, adhesives,
mastics, glues or any other material that is -- or the vapors, fumes or byproducts of which
are -- flammable, combustible or explosive. Using the nailer in any such environment could
cause an EXPLOSION resulting in personal injury or death to user and bystanders.
Never use rafter hook to hang tool from body, clothing or belt.
Always verify and be aware of tool operating mode by inspecting the trigger before
connecting to an air supply and/or using the tool.
MAINTAINING THE TOOL
When working on air tools note the warnings in this manual and use extra care when
evaluating problem tools.
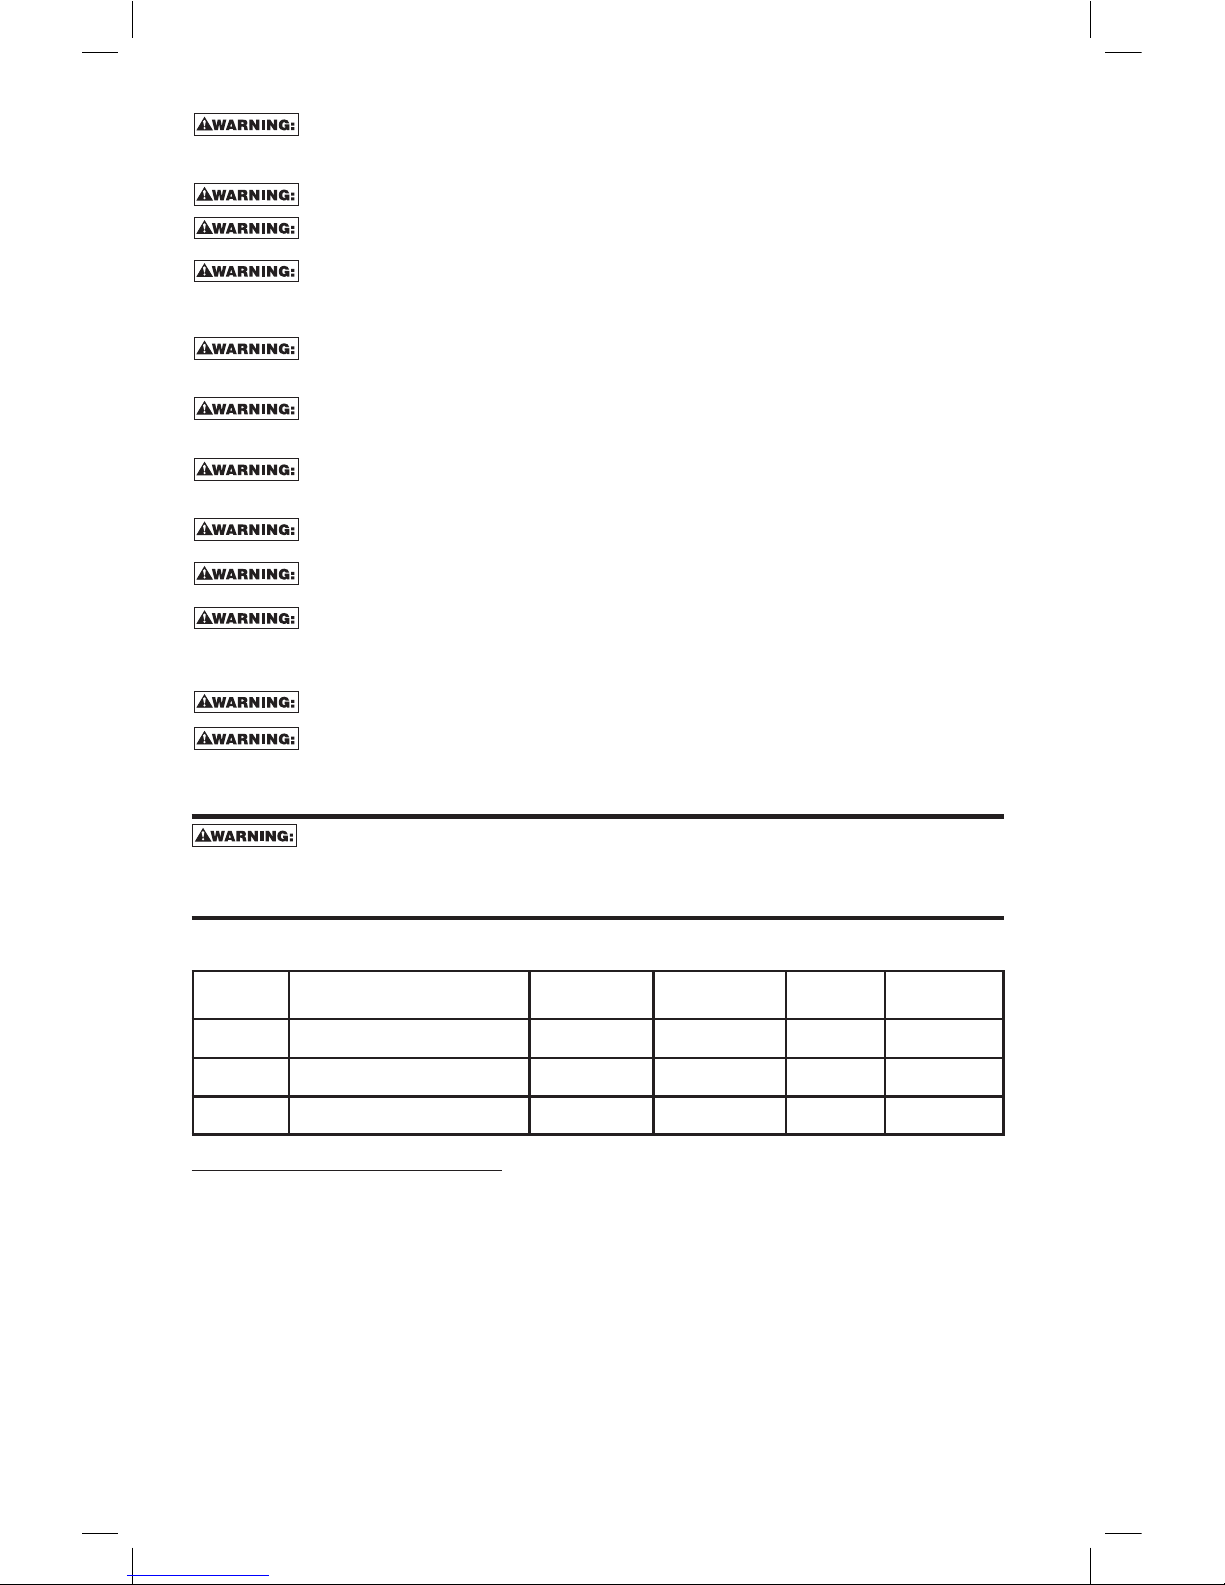
TOOL SPECIFICATIONS
All screws and nuts are metric.
MODEL TOOL ACTUATION LENGTH HEIGHT WIDTH WEIGHT
BTF83WW Selectable sequential / contact trip
20 1/2"
(521mm)
12-3/4"
(324mm)
5-3/4"
(146mm)
7.9lb (3.58kg)
BTF83PT Selectable sequential / contact trip
19 3/4"
(501mm)
12-3/4"
(324mm)
5-3/4"
(146mm)
7.8lb (3.54kg)
BTF83PL Selectable sequential / contact trip
21 1/2"
(547mm)
12-1/2"
(324mm)
5" (127mm) 7.7lb (3.49kg)
FASTENER SPECIFICATIONS:
BTF83PT
Uses 30° paper collated notched head or offset round head stick nails, in lengths of 2" to 3-1/4" (50-83mm)
and shank diameters of .113" to .131" (2.8 - 3.3mm)
BTF83PL
Uses 21° plastic collated notched head or offset round head stick nails, in lengths of 2" to 3-1/4" (50-83mm)
and shank diameters of .113" to .148" (2.8 - 3.3mm)
BTF83WW
Uses 28° wire collated notched head or offset round head stick nails, in lengths of 2" to 3-1/4" (50-83mm)
and shank diameters of .113" to .131" (2.8 - 3.3mm)
Page 5
-5-
TOOL AIR FITTING:
This tool uses a 3/8" N.P.T. male plug. The fitting must be capable of discharging tool air pressure when
disconnected from the air supply.
OPERATING PRESSURE:
70 to 120 p.s.i.g. (4.9 to 8.4 kg/cm2). Select the operating pressure within this range for best fastener
performance.
DO NOT EXCEED THIS RECOMMENDED OPERATING PRESSURE.
AIR CONSUMPTION:
These nailers require 6.4 cubic feet per minute (181 liters per minute) of free air to operate in sequential trip
mode at the rate of 100 nails per minute, at 80 p.s.i.g (5.6 kg/cm²). Take the actual rate at which the tool
will be run to determine the amount of air required. For instance, if your fastener usage averages 50 nails per
minute, you need 50% of the 6.4 c.f.m. (181 liters per minute) which is required to operate the tool at 100
nails per minute.
OPERATING MODES
BOSTITCH OFFERS TWO MODES OF OPERATION FOR THIS TOOL.
SEQUENTIAL TRIP:
The Sequential Trip requires the operator to hold the tool against the work surface before pulling the trigger.
This makes accurate fastener placement easier, for instance on framing, toe nailing and crating applications.
The Sequential Trip allows exact fastener placement without the possibility of driving a second fastener on
recoil, as described under “Contact Trip”. The Sequential Trip Tool has a positive safety advantage because it
will not accidentally drive a second fastener if the tool is contacted against the work – or anything else – while
the operator is holding the trigger pulled.
CONTACT TRIP:
The common operating procedure on “Contact Trip” tools is for the operator to contact the work surface
to actuate the trip mechanism while keeping the trigger pulled, thus driving a fastener each time the work
is contacted. This will allow rapid fastener placement on many jobs, such as sheathing, decking and pallet
assembly. All pneumatic tools are subject to recoil when driving fasteners. The tool may bounce, releasing
the trip, and if unintentionally allowed to re-contact the work surface with the trigger still actuated (finger still
holding trigger pulled) an unwanted second fastener will be driven.
MODE IDENTIFICATION:
Refer to Tool Operation Instructions on pages 9-11 before proceeding to use this tool.
Page 6

-6-
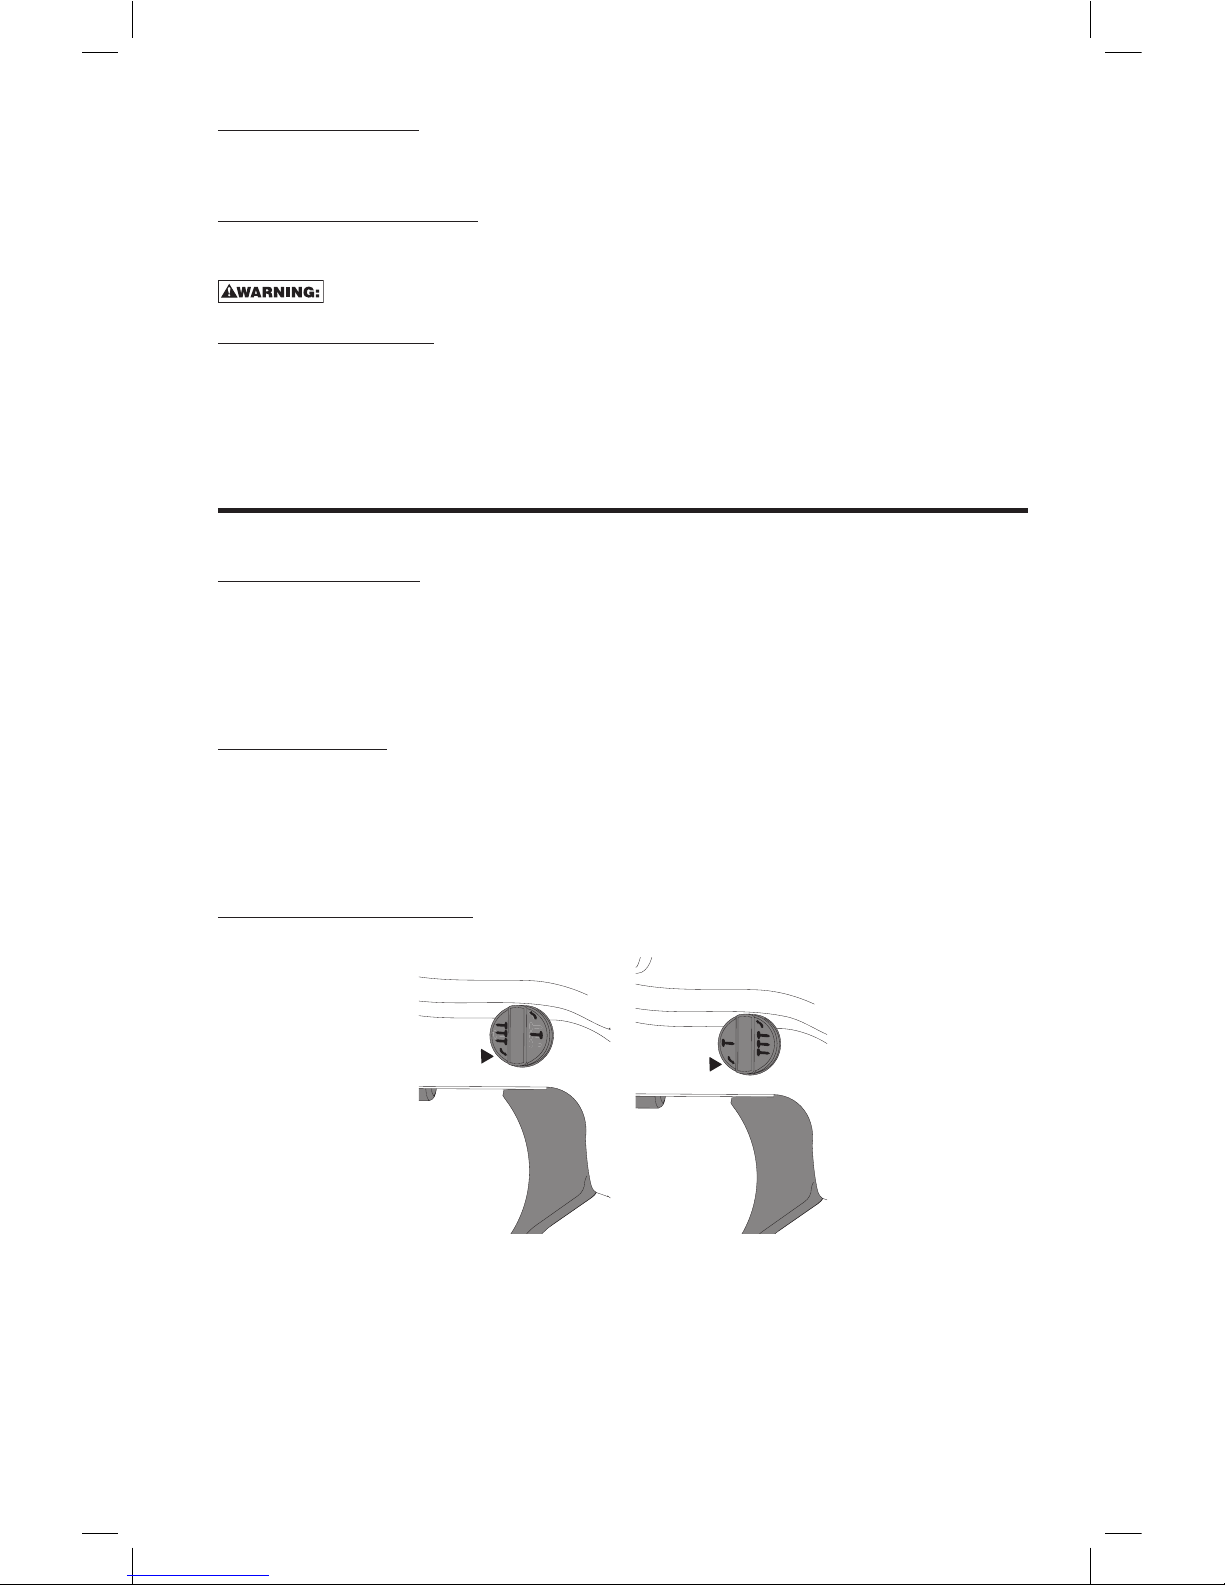
TO CHANGE OPERATING MODES:
Disconnect air line from tool and remove fasteners from magazine before making
adjustments or personal injury may result.
Always know the tool operating mode before connecting to an air supply and/or using the
tool.
SEQUENTIAL TRIP-
1. Push and hold in pivot pin opposite the selector, while rotating the selector 180° counterclockwise to the
sequential trip position .
2. Ensure the selector is fully seated in the new position.
Pivot Pin
Selector
To operate the nailer in sequential trip mode:
1. Depress the contact trip firmly against the work surface.
2. Depress the trigger.
A nail will fire each time the trigger is depressed as long as the contact trip remains
depressed.
CONTACT TRIP -
1. Push and hold in pivot pin while rotating the selector 180° clockwise to the contact trip position .
2. Ensure the selector is fully seated in the new position.
To operate the nailer in contact trip mode:
1. Depress the trigger.
2. Push the contact trip against the work surface. As long as the trigger is depressed, the tool will fire a nail
every time the contact trip is depressed. This allows the user to drive multiple nails in sequence.
Do not keep trigger depressed when tool is not in use.
AIR SUPPLY AND CONNECTIONS
Do not use oxygen, combustible gases, or bottled gases as a power source for this
tool as tool may explode, possibly causing injury.
Do not connect tool to any air supply which could potentially exceed
200p.s.i.g.(14kg/cm
2
).
FITTINGS:
Install a male plug on the tool which is free flowing and which will release air pressure from the tool when
disconnected from the supply source.
HOSES:
Air hoses should have a minimum of 150 p.s.i. (10.5 kg/cm2) working pressure rating or 150 percent of the
maximum pressure that could be produced in the air system. The supply hose should contain a fitting that will
provide “quick disconnecting” from the male plug on the tool.
SUPPLY SOURCE:
Use only clean regulated compressed air as a power source for this tool. NEVER USE OXYGEN,
COMBUSTIBLE GASES, OR BOTTLED GASES, AS A POWER SOURCE FOR THIS TOOL AS TOOL
MAY EXPLODE.
Page 7
-7-
REGULATOR:
A pressure regulator with an operating pressure of 0 - 125 p.s.i.g. (0 - 8.79 kg/cm2) is required to control the
operat ing pressure for safe operation of this tool. Do not connect this tool to air pressure which can potentially
exceed 200 p.s.i. (14 kg/cm2) as tool may fracture or burst, possibly causing injury.
OPERATING PRESSURE:
Do not exceed recommended maximum operating pressure as tool wear will be greatly increased. The air
supply must be capable of maintaining the operating pressure at the tool. Pressure drops in the air supply
can reduce the tool’s driving power. Refer to “Tool Specifications” for setting the correct operating pressure
for the tool.
FILTER:
An in-line filter will help to get the best performance and minimum wear from the tool. The filter must have
adequate flow capacity for the specific installation. The filter has to be kept clean to be effective in providing
clean compressed air to the tool. Consult the manufacturer’s instructions on proper maintenance of your filter.
A dirty and clogged filter will cause a pressure drop which will reduce the tool’s performance.
LUBRICATION
Frequent, but not excessive, lubrication is required for best performance. Use BOSTITCH Air Tool Lubricant,
PREMOIL, or equivalent. Do not use detergent oil or additives as these lubricants will cause accelerated wear
to the seals and bumpers in the tool, resulting in poor tool performance and frequent tool maintenance. Only
a few drops of oil at a time is necessary. Too much oil will only collect inside the tool and will be noticeable in
the exhaust cycle.
COLD WEATHER OPERATION:
For cold weather operation, near and below freezing, the moisture in the air line may freeze and prevent tool
operation. We recommend the use of BOSTITCH winter formula air tool lubricant, WINTEROIL, or permanent
antifreeze (ethylene glycol) as a cold weather lubricant.
NOTICE: Do not store tools in a cold weather environment to prevent frost or ice formation on the tools
operating valves and mechanisms that could cause tool failure.
NOTICE: Some commercial air line drying liquids are harmful to “O”-rings and seals – do not use these
low temperature air dryers without checking compatibility.
LOADING THE TOOL
EYE PROTECTION which conforms to ANSI specifications and provides protection
against flying particles both from the FRONT and SIDE should ALWAYS be worn by
the operator and others in the work area when loading, operating or servicing this
tool. Eye protection is required to guard against flying fasteners and debris, which
could cause severe eye injury.
The employer and/or user must ensure that proper eye protection is worn. Eye
protection equipment must conform to the requirements of the American National
Standards Institute, ANSI Z87.1 and provide both frontal and side protection. NOTE:
Non-side shielded spectacles and face shields alone do not provide adequate
protection.
TO PREVENT ACCIDENTAL INJURIES:
• Connect tool to air supply before loading fasteners to prevent a fastener from
being fired when connecting
• Never place a hand or any other part of the body in nail discharge area of tool
while the air supply is connected.
• Never point the tool at anyone else.
• Never engage in horseplay.
• Never pull the trigger unless nose is directed at the work.
• Always handle the tool with care.
• Do not pull the trigger or depress the trip mechanism while loading the tool.
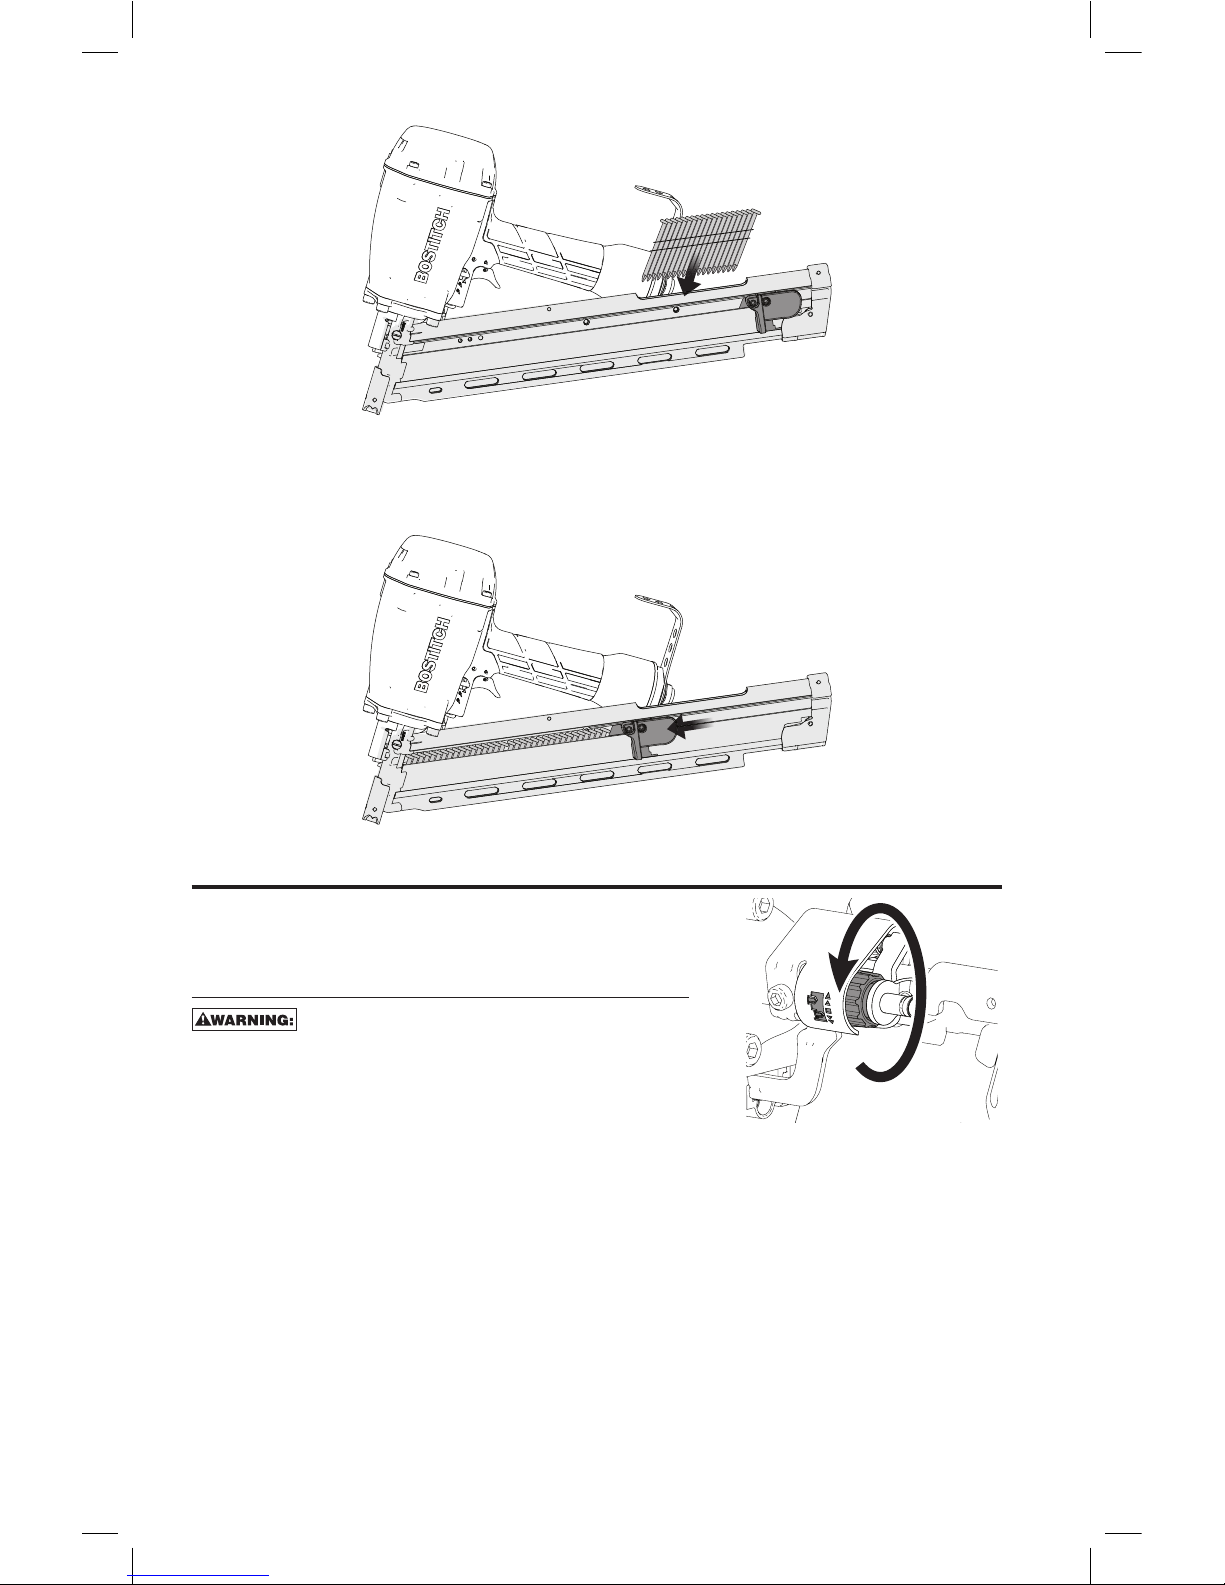
1. Slide pusher to the base of the magazine to lock it in place.
2. Hold the nailer with the magazine facing downward and insert the appropriate collated nail sticks into the
back of the magazine.
NOTE: See "Tool Specifications" to determine appropriate nail sizes and angles.
Page 8
-8-
3. Pull pusher back again to release and carefully allow pusher to slide forward until it makes contact with the
nails.
NOTE: Use only nails recommended for use in BOSTITCH Framing nailers or nails which meet the BOSTITCH
specifications.
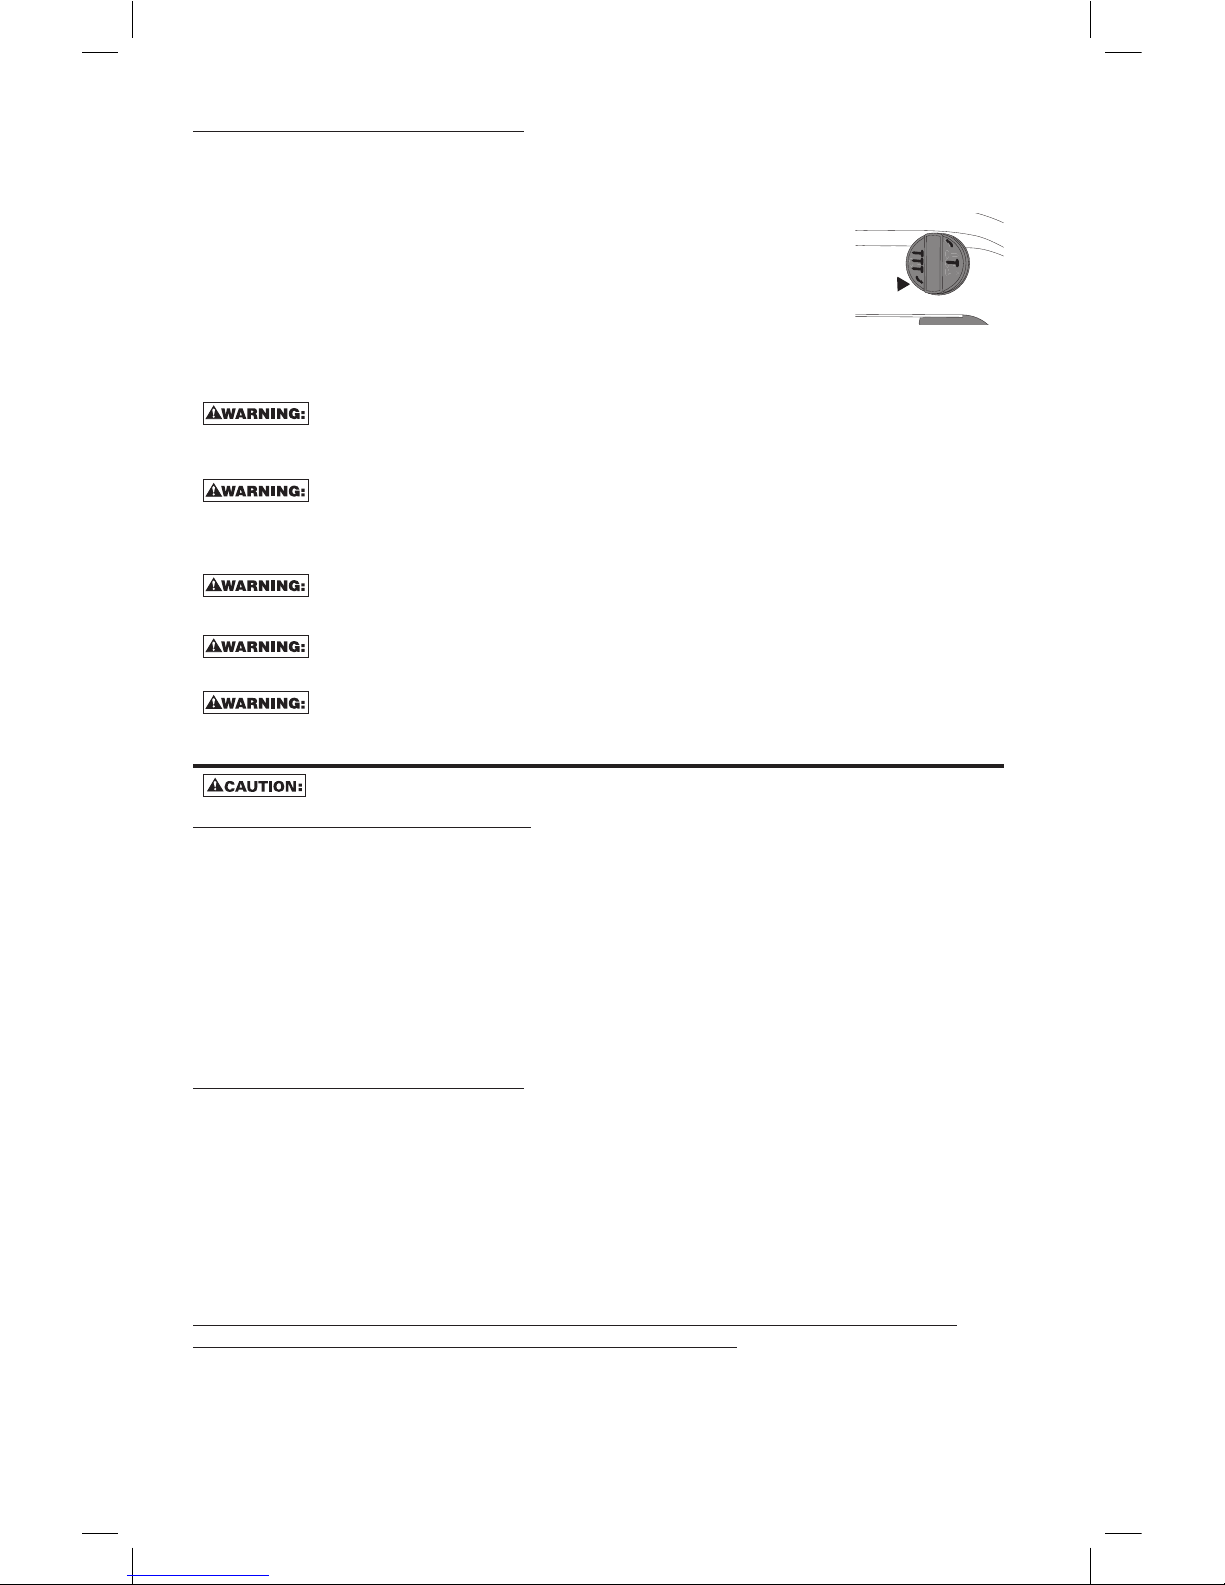
FASTENER DEPTH CONTROL ADJUSTMENT
The Fastener Depth Control Adjustment feature provides control of the
NOTE: Rotate depth control
wheel to give the desired depth
of drive.
nail drive depth from flush with or just above the work surface to
shallow or deep countersink.
TO ADJUST THE FASTENER DEPTH CONTROL:
Disconnect tool from air supply before attempting
any parts disassembly and before changing the work
contact element adjustment.
Rotate depth control wheel to give the desired depth of drive.
Page 9
-9-
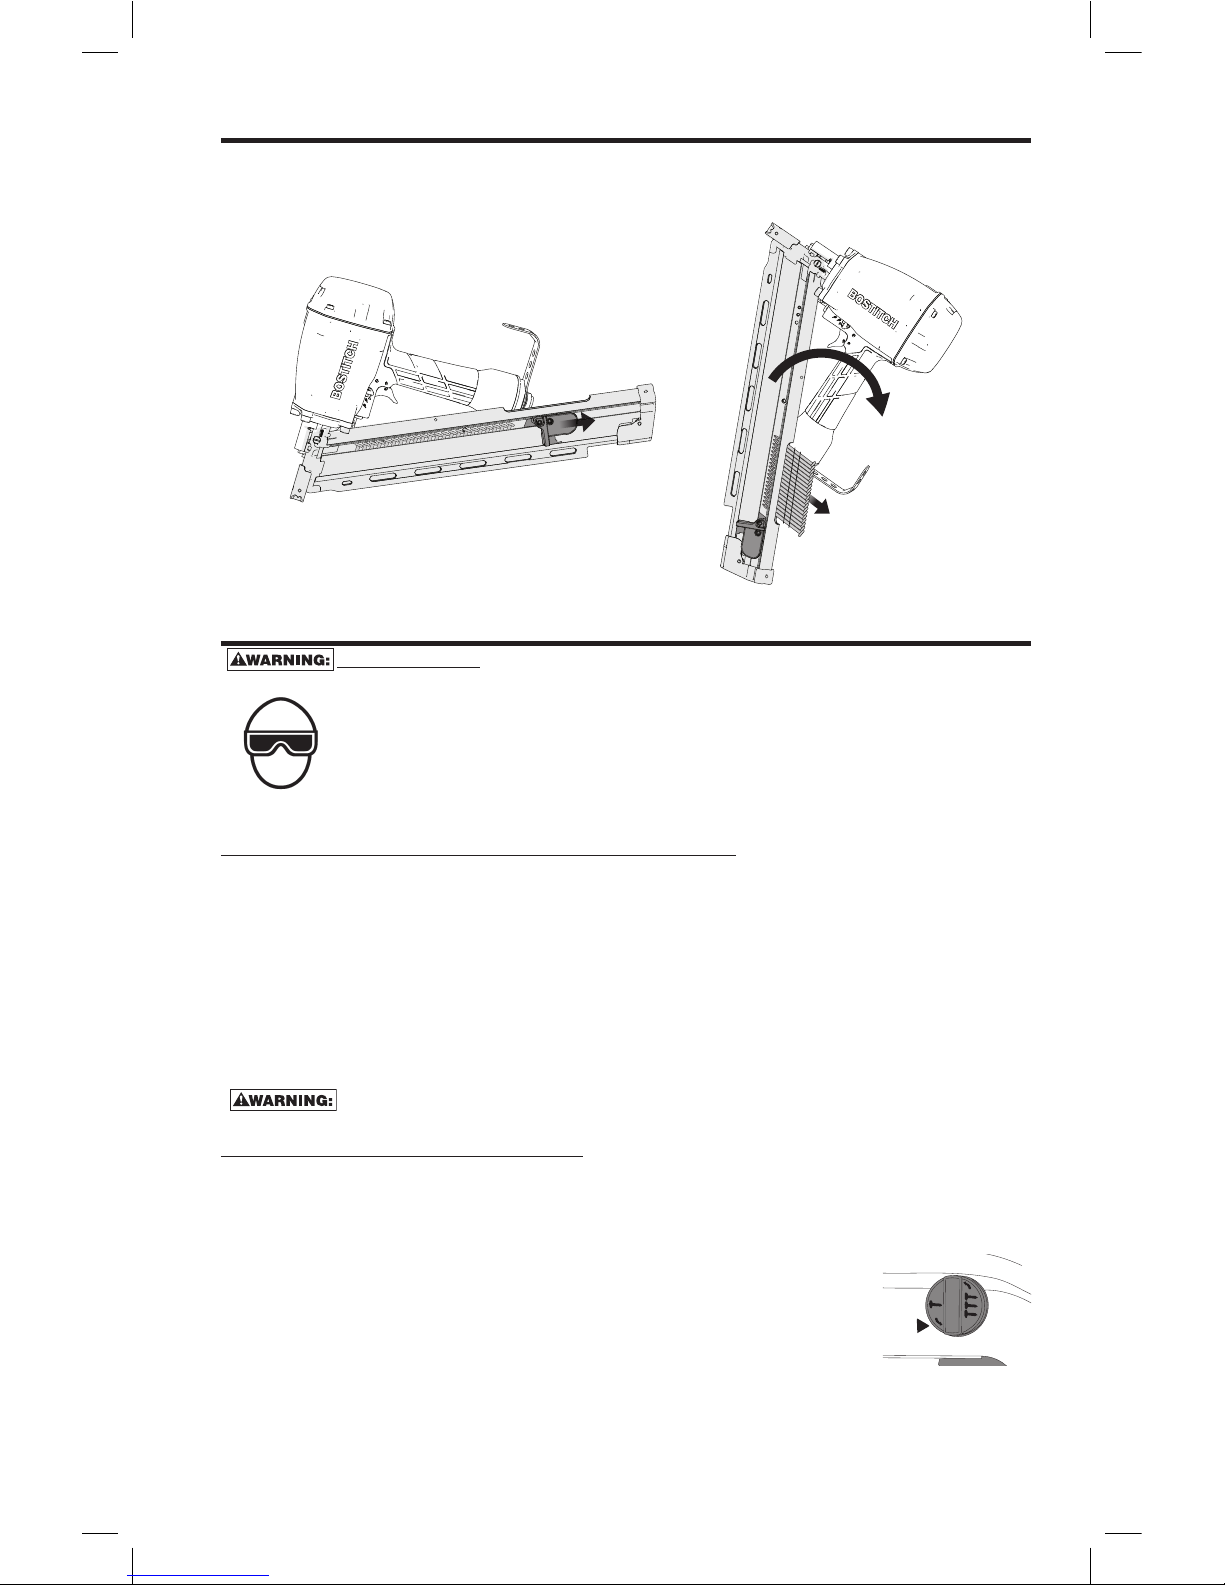
REMOVING NAILS
1. Slide pusher to base of the magazine to lock it in place.
2. Tilt the tool and slide the nails to the back of the magazine.
3. Slide the nails out of the magazine.
TOOL OPERATION
EYE PROTECTION which conforms to ANSI specifications and provides protection against
flying particles both from the FRONT and SIDE should ALWAYS be worn by the operator
and others in the work area when connecting to air supply, loading, operating or servicing
this tool. Eye protection is required to guard against flying fasteners and debris, which
could cause severe eye injury.
The employer and/or user must ensure that proper eye protection is worn. Eye protection
equipment must conform to the requirements of the American National Standards
Institute, ANSI Z87.1/CAN/CSA Z94.3 and provide both frontal and side protection. NOTE:
Non-side shielded spectacles and face shields alone do not provide adequate protection.
BEFORE HANDLING OR OPERATING THIS TOOL:
I. READ AND UNDERSTAND THE WARNINGS CONTAINED IN THIS MANUAL.
II. REFER TO “TOOL SPECIFICATIONS” IN THIS MANUAL TO IDENTIFY THE OPERATING
SYSTEM ON YOUR TOOL.
There are two available operation modes on these BOSTITCH pneumatic tools. They are:
1. SEQUENTIAL TRIP OPERATION
2. CONTACT TRIP OPERATION
BOSTITCH offers two types of operating modes which function differently: Sequential Trip and Contact Trip.
Each mode has specific advantages. You should evaluate your particular construction project to determine
which mode is best.
Always verify and be aware of tool operating mode by inspecting the trigger before
connecting to an air supply and/or using the tool.
1. SEQUENTIAL TRIP OPERATION:
The Sequential Trip (Mode) gets its name from the “sequence” required to drive a fastener. To drive a fastener,
the operator must first depress the “trip” FULLY against the work surface and then pull the trigger. To drive a
second nail, the operator must lift the tool from the work surface, release the trigger and then repeat the above
sequence.
A. The Sequential Trip (Mode): offers a positive safety advantage since it will not
accidentally drive a fastener if the tool is bumped against any surface or anybody
while the operator is holding the tools with the trigger pulled.
B. The Sequential Trip (Mode): allows “place nailing” without the possibility of driving
a second, unwanted fastener on recoil as described below under “Contact Trip”.
Page 10
-10-
2. CONTACT TRIP OPERATION:
Your new BOSTITCH tool can be configured for use in Contact Trip “Conventional trip” mode. To drive a nail, the
“trip” and the trigger must both be depressed. In conventional Contact Trip tools, the trigger may be depressed
and held, and each “contact” between the trip and the work surface will drive a nail.
A. SINGLE FASTENER PLACEMENT (Place Nailing) – First position the “trip”
FULLY on the work surface, WITHOUT PULLING THE TRIGGER. Depress the “trip”
FULLY until the nose of the tool touches the work surface and then pull the trigger
to drive a nail. Do not press the tool against the work surface with extra force.
Instead, allow the tool to recoil off the work surface to avoid a second unwanted
fastener. Note: remove your finger from the trigger after each operation.
B. RAPID FIRE OPERATION (“Bump” Nailing) – First, hold the tool with the “trip” pointing towards but not
touching the work surface. Pull the trigger and then tap or “bump” the trip against the work surface using
a bouncing motion. Each depression of the “trip” will cause a nail to be driven.
The Contact Trip will not prevent a nail from being accidentally driven if the trigger is
depressed and the “trip” is bumped against any object or person. Never hold or carry
the tool with your finger on the trigger. Only depress and hold trigger when you intend to
rapidly drive multiple nails and the tool is pointed at the work surface.
When using conventional Contact Trip for Place Nailing, the tool may bounce due to
recoil, and if the tool is allowed to re-contact the work surface while you are holding the
trigger pulled, a second unwanted nail will be driven. You should allow the tool to recoil
far enough to release the trip and avoid a second cycle. Don’t push the tool down extra
hard; let the tool do the work.
The operator must not hold the trigger pulled on contact trip tools except during
fastening operation, as serious injury could result if the trip accidentally contacted
someone or something, causing the tool to cycle.
Keep hands and body away from the discharge area of the tool. A contact trip tool may
bounce from the recoil of driving a fastener and an unwanted second fastener may be
driven, possibly causing injury.
Never use rafter hook to hang tool from body, clothing or belt.
TOOL OPERATION CHECK:
Remove all fasteners from tool before performing tool operation check.
SEQUENTIAL TRIP OPERATION:
A. Press the contact trip against the work surface, without touching the trigger.
THE TOOL MUST NOT CYCLE.
B. Hold the tool off the work surface and pull the trigger.
THE TOOL MUST NOT CYCLE.
Release the trigger. The trigger must return to the trigger stop on the frame.
C. Pull the trigger and press the contact trip against the work surface.
THE TOOL MUST NOT CYCLE.
D. With finger off the trigger, press the contact trip against the work surface. Pull the trigger.
THE TOOL MUST CYCLE.
2. CONTACT TRIP OPERATION:
A. With finger off the trigger, press the contact trip against the work surface.
THE TOOL MUST NOT CYCLE.
B. Hold the tool off the work surface, and pull the trigger.
THE TOOL MUST NOT CYCLE.
C. With the tool off the work surface, pull the trigger. Press the contact trip against the work surface.
THE TOOL MUST CYCLE.
D. Without touching the trigger, press the contact trip against the work surface, then pull the trigger.
THE TOOL MUST CYCLE.
IN ADDITION TO THE OTHER WARNINGS CONTAINED IN THIS MANUAL
OBSERVE THE FOLLOWING FOR SAFE OPERATION
• Use the BOSTITCH pneumatic tool only for the purpose for which it was designed.
• Never use this tool in a manner that could cause a fastener to be directed toward the user or
others in the work area.
• Do not use the tool as a hammer.
• Always carry the tool by the handle. Never carry the tool by the air hose.
Page 11
-11-
• Do not alter or modify this tool from the original design or function without approval from
BOSTITCH.
• Always be aware that misuse and improper handling of this tool can cause injury to yourself
andothers.
• Never clamp or tape the trigger or contact trip in an actuated position.
• Never leave a tool unattended with the air hose attached.
• Do not operate this tool if it does not contain a legible WARNING LABEL.
• Do not continue to use a tool that leaks air or does not function properly. Notify your nearest
BOSTITCH representative if your tool continues to experience functional problems.
MAINTAINING THE PNEUMATIC TOOL
When working on air tools, note the warnings in this manual and use extra care evaluating
problem tools.
Pusher spring (constant force spring). Caution must be used when working with the
spring assembly. The spring is wrapped around, but not attached to, a roller. If the spring
is extended beyond its length, the end will come off the roller and the spring will roll up
with a snap, with a chance of pinching your hand. Also the edges of the spring are very
thin and could cut. Care must also be taken to insure no permanent kinks are put in the
spring as this will reduce the springs force.
REPLACEMENT PARTS:
Use only Genuine OEM replacement parts.
ASSEMBLY PROCEDURE FOR SEALS:
When repairing a tool, make sure the internal parts are clean and lubricated. Use Parker “O”-LUBE or equivalent
on all “O”-rings. Coat each “O”-ring with “O”-LUBE before assembling. Use a small amount of oil on all moving
surfaces and pivots. After reassembly add a few drops of BOSTITCH Air Tool Lubricant through the air line
fitting before testing.
AIR SUPPLY-PRESSURE AND VOLUME:
Air volume is as important as air pressure. The air volume supplied to the tool may be inadequate because of
undersize fittings and hoses, or from the effects of dirt and water in the system. Restricted air flow will prevent
the tool from receiving an adequate volume of air, even though the pressure reading is high. The results will be
slow operation, misfeeds or reduced driving power. Before evaluating tool problems for these symptoms, trace
the air supply from the tool to the supply source for restrictive connectors, swivel fittings, low points containing
water and anything else that would prevent full volume flow of air to the tool.
TROUBLE SHOOTING
To reduce the risk of serious personal injury, remove fasteners from magazine before
making any adjustments or servicing this tool.
SYMPTOM CAUSE FIX
Trigger valve housing leaks O-ring or valve stem failure Replace valve using Trigger Valve Kit
Top cap leaks air Loose cap screws Tighten cap screws using appropriate hex wrench
Damaged or worn gasket or o-ring Replace gasket/o-rings using Nailer O-Ring Repair Kit
Exhaust leaks Main seal or o-ring damaged, debris
in tool.
Replace gasket/o-rings using Framing Nailer O-Ring Repair Kit
Air leaks around nose when tool is
at rest. (Driver blade in up position.)
Damaged or worn o-rings Replace gasket/o-rings using Framing Nailer O-Ring Repair Kit
Air leaks around nose when tool is
in actuated position. (Driver blade in
down position.)
Damaged or worn bumper Replace bumper using: Frame Nailer Bumper Kit
Tool does not cycle in cold weather Tool not receiving air Check air supply
Valve may be frozen Warm up tool. Lubricate with BOSTITCH Pneumatic Tool Oil or winter
weight pneumatic oil containing ethylene glycol
Damaged or worn o-rings Replace gasket/o-rings using Framing Nailer O-Ring Repair Kit
Broken or damaged driver blade Replace driver blade
Page 12

-12-
To reduce the risk of serious personal injury, remove fasteners from magazine before
making any adjustments or servicing this tool.
SYMPTOM CAUSE FIX
Lack of power; sluggish Low air pressure Check air supply
Lack of lubrication Lubricate tool using BOSTITCH pneumatic tool oil
Damaged or worn o-rings Replace gasket/o-rings using framing nailer o-ring repair kit
Exhaust port blocked or clogged Disconnect air, remove exhaust plate from top of tool, clean port
Depth adjustment set too shallowly Reset depth adjustment
Driver damaged or worn Replace driver blade
Skipping nails; intermittent feed Air restricted Check air supply and couplers
Lack of lubrication Lubricate tool using BOSTITCH pneumatic tool oil
Nosepiece screws loose Tighten nosepiece screws using appropriate hex wrench
Wrong size/angle fasteners Use only recommended fasteners
Dirty magazine Clean magazine track and nosepiece
Damaged/Worn magazine Replace magazine
Broken or damaged driver blade Replace driver blade
Trigger valve o-ring worn or
damaged
Replace valve using Trigger Valve Kit
Worn piston o-ring Replace O-ring using Framing Nailer O-Ring Repair Kit
Worn or damaged pusher spring Replace spring using Magazine Pusher Spring Kit
Fasteners jam in tool Driver channel in nosepiece worn Replace nosepiece
Wrong size/ angle fasteners Use only recommended fasteners
Worn driver blade Replace driver blade
Nosepiece screws loose Tighten nosepiece screws using appropriate hex wrench
Nails not feeding properly Ensure nails are feeding properly through the magazine and into the
nose
Page 13

-13-
INTRODUCCIÓN
Las herramientas BOSTITCH son herramientas construidas a precisión, diseñadas para clavar con exactitud un
alto volumen de clavos. Estas herramientas entregan un servicio eficiente y fiable cuando se usan correctamente
y con cuidado. Al igual que con toda herramienta automática de calidad, deben seguirse las instrucciones del
fabricante para obtener el óptimo rendimiento. Estudie este manual antes de operar la herramienta y tome nota
de las advertencias y precauciones de seguridad. Deben leerse en detalle las instrucciones sobre la instalación,
operación y mantenimiento, y debe conservarse el manual para referencia. NOTA: Pueden necesitarse medidas
adicionales de seguridad según la aplicación particular de la herramienta. Diríjase al representante o distribuidor
de BOSTITCH si tiene alguna pregunta referente a la herramienta y su uso. BOSTITCH, 701 E. Joppa Road,
Towson, Maryland 21286, EE.UU.
ÍNDICE
Instrucciones de seguridad ............................................................................................. ¹4
Especificaciones de la herramienta/Sujetador ................................................................. 16
Modes de operación ..................................................................................................16–17
Suministro de aire, conexiones ..................................................................................17–18
Lubricación .................................................................................................................... 18
Carga de la herramienta, .............................................................................................. 18
Ajuste del control de profundidad del clavo .................................................................... 19
Extracción de clavos ....................................................................................................... 20
Operación de la herramienta .....................................................................................20–22
Mantenimiento de la herramienta neumática .................................................................. 22
Solución de problemas ............................................................................................23–24
NOTA:
Las herramientas BOSTITCH han sido diseñadas para satisfacer completamente al cliente y lograr el máximo
desempeño cuando se utilizan con sujetadores de precisión BOSTITCH, construidos según los mismos
estándares exigentes. Le modèle BTF83PT a été conçu pour être utilisé avec des clous en bande papier 30°. Le
modèle BTF83PL a été conçu pour être utilisé avec des clous en bande plastique 21°. BOSTITCH no puede
asumir responsabilidad alguna por el desempeño del producto si nuestras herramientas se utilizan
con sujetadores o accesorios que no cumplan con los requisitos específicos establecidos para los
clavos, grapas y accesorios originales BOSTITCH.
GARANTÍA LIMITADA — SÓLO EE.UU. Y CANADÁ
BOSTITCH Fastening Systems “BOSTITCH” garantiza al comprador del comerciante original que el producto
comprado está exento de defectos en material y fabricación, y se compromete a reparar o reemplazar, a opción
de BOSTITCH, cualquier engrapadora o clavadora neumática defectuosa de marca BOSTITCH's por un período de
siete (7) años desde la fecha de compra (un (1) año de la fecha de compra en el caso de compresores y herramientas
utilizadas en aplicaciones de producción). La garantía no es transferible. Se requiere presentar evidencia de la
fecha de compra. Esta garantía solamente cubre daños resultantes de defectos en material o fabricación, y no
cubre condiciones o desperfectos resultantes del desgaste normal, negligencia, abuso, accidente o reparaciones
intentadas o efectuadas por terceros ajenos a nuestro centro nacional de reparaciones o a los centros de servicio
bajo garantía. Las aspas del impulsor, topes, juntas tóricas, pistones y aros de pistones se consideran componentes
de desgaste normal. Para obtener el rendimiento óptimo de la herramienta BOSTITCH siempre use fijaciones y piezas
de repuesto genuinas de BOSTITCH.
ESTA GARANTÍA SUSTITUYE TODA OTRA GARANTÍA, EXPRESA O IMPLÍCITA, INCLUIDAS ENTRE OTRAS, LAS
GARANTÍAS IMPLÍCITAS DE COMERCIABILIDAD O IDONEIDAD PARA UN FIN PARTICULAR. BOSTITCH NO
SERÁ RESPONSABLE DE DA—OS FORTUITOS O CONSECUENCIALES.
Algunos estados y países no permiten limitaciones a la duración de una garantía implícita ni la exclusión o limitación de
daños fortuitos o consecuenciales, de modo que las limitaciones o exclusiones anteriores pueden no corresponder
a su caso. Esta garantía le concede derechos legales específicos, y usted puede tener también otros derechos que
varían de un estado a otro y de un país a otro.
Para obtener servicio bajo garantía en los EE.UU. devuelva el producto, junto con el comprobante de compra, al
Centro de Servicio bajo Garantía Autorizado Independiente Nacional o Regional de BOSTITCH en los EE.UU. Dentro
de los EE.UU. usted puede llamarnos al 1-800-556-6696 o visitar www.BOSTITCH.com para ver la ubicación que
más le convenga. En Canadá llámenos al at 1-800-567-7705 o visite www.BOSTITCH.com.
Page 14

-14-
INSTRUCCIONES DE SEGURIDAD
Cuando el equipo está conectado al suministro de aire, tanto el operador como todas las
personas que se encuentren en el área de trabajo, SIEMPRE deben usar PROTECCIÓN
OCULAR que cumpla las especificaciones ANSI para resguardo contra partículas volantes
arrojadas desde el FRENTE o los LATERALES. Dicha protección ocular se requiere para
proteger contra residuos y remaches volantes, que podrían causar graves lesiones en los
ojos.
El empleador y/o usuario debe asegurar que la debida protección para los ojos sea usada.
El equipo protector de los ojos debe cumplir con los requisitos del Instituto de Normas
Nacionales Americano (American National Standards Institute), ANSI Z87.1/CAN/CSA Z94.3
y debe proveer protección de frente y de los lados. NOTA: Las gafas de seguridad que no
están protegidas de los lados y las máscaras por sí solas no proveen la debida protección.
En algunos ambientes se necesitará protección adicional de seguridad. Por ejemplo, el
área de trabajo puede exponer a un nivel de ruido que lesione el oído. El empleador y el
usuario deben comprobar que se cuente con la protección necesaria del oído y que el
operador y los demás presentes en el área la usen. Algunos ambientes exigirán el uso de
casco protector. Cuando sea necesario, el empleado y el usuario deben verificar que se
proteja la cabeza en conformidad con la norma ANSI CAN/CSA Z89.1.
El Estado de California tiene conocimiento de que cierto polvo generado por el lijado
eléctrico, el aserrado, .el taladrado y otras actividades de construcción contiene
componentes químicos que provocan cáncer, defectos en el nacimiento u otros daños
reproductivos. Algunos ejemplos de estos componentes químicos son:
• plomo de pinturas a base de plomo,
• sílice cristalina de ladrillos, cemento y otros productos de mampostería
• arsénico y cromo de leños tratados químicamente
El riesgo a estas exposiciones varía según la frecuencia con la que realiza este tipo de
trabajo.Para reducir la exposición a estos componentes químicos: trabaje en un área bien
ventilada y con el equipo de seguridad aprobado, como las mascarillas contra el polvo
especialmente diseñadas para filtrar las partículas microscópicas.
SUMINISTRO DE AIRE Y CONEXIONES
No utilice oxígeno ni gases combustibles o embotellados como fuente de suministro para
esta herramienta, ya que la herramienta puede estallar, posiblemente causando lesiones.
Utilice solamente aire limpio, seco y regulado. La condensación debida al compresor de aire
puede oxidar y dañar las piezas internas de la herramienta.
No utilice fuentes de suministro que potencialmente excedan las 200 p.s.i.g. (14 Kg/cm2)
ya que la herramienta puede estallar, posiblemente causando lesiones.
El conector de la herramienta no debe tener presión al desconectarse el suministro de
aire. Si se utiliza una conexión equivocada, la herramienta puede permanecer cargada con
aire después de ser desconectada y por lo tanto podrá impulsar un sujetador aún después
de que la línea de aire sea desconectada, posiblemente causando lesiones.
No hale el gatillo ni oprima el brazo de contacto mientras la herramienta esté conectada al
suministro de aire ya que la herramienta puede ciclarse, posiblemente causando lesiones.
Siempre desconecte el suministro de aire: 1.) Antes de efectuar ajustes; 2.) Al hacerle
servicio a la herramienta; 3.) Al despejar un atascamiento; 4.) Cuando la herramienta
no esté en uso; 5.) Al mudarse de un área distinta de trabajo, ya que se puede activar
accidentalmente, posiblemente causando lesiones.
AL CARGAR LA HERRAMIENTA
Al cargar la herramienta: 1.) Nunca coloque una mano o cualquier otra parte del cuerpo
en el área de descarga del sujetador de la herramienta; 2.) Nunca apunte la herramienta
hacia otra persona; 3.) No hale el gatillo ni oprima el disparador ya que se puede activar
accidentalmente, posiblemente causando lesiones.
Conecte la herramienta al suministro de aire antes de cargar los clavos para evitar que
se dispare un clavo durante la conexión. El mecanismo accionador de la herramienta
puede activarse cuando la herramienta está conectada al suministro de aire. No cargue
los clavos con el gatillo o el activador por contacto presionado, para evitar el disparo
involuntario de un clavo.
FUNCIONAMIENTO
Maneje siempre la herramienta con cuidado. 1) No juegue nunca con la herramienta; 2.)
No tire nunca del gatillo a menos que la tobera esté dirigida hacia la pieza de trabajo;
3.) Mantenga a otros a una distancia segura de la herramienta mientras ésta esté en
funcionamiento 4.) Suponga siempre que la herramienta contiene clavos puesto que puede
producirse una puesta en marcha accidental que podría causar lesiones.
Page 15

-15-
El operador no debe sujetar el gatillo cuando esté activado en herramientas con brazo de
contacto excepto durante la operación de disparo, puesto que pueden producirse lesiones
graves si el gatillo accidentalmente entrara en contacto con alguien o algo y ocasionara
que la herramienta se ponga en funcionamiento.
Mantenga siempre las manos y el cuerpo lejos del área de disparo de la herramienta. Una
herramienta con brazo de contacto puede saltar debido al retroceso que se produce al
disparar un clavo y puede dispararse un segundo clavo no deseado que posiblemente
cause una lesión.
No saque, altere o provoque de otro modo que la herramienta, el gatillo o el activador
por contacto dejen de funcionar. No ate ni fije con cinta adhesiva el gatillo o el activador
por contacto en la posición de encendido. No saque el muelle del activador por contacto.
Haga inspecciones diarias para comprobar el movimiento libre del gatillo y el activador por
contacto. Se puede producir una descarga descontrolada.
No altere o modifique la herramienta de ninguna manera.
La manguera debe estar libre de obstrucciones o enganches. Las mangueras enredadas o
enmarañadas pueden provocar una pérdida de equilibrio o una falta de apoyo. No levante,
jale o baje la herramienta por la manguera.
Use la herramienta solamente para el fin para el que se diseñó. No dispare clavos
directamente al aire, ni sobre hormigón, piedra, maderas extremadamente duras, nudos o
cualquier material que sea demasiado duro para que el clavo penetre. No utilice el cuerpo
de la herramienta o la tapa superior como martillo. Los clavos disparados pueden seguir
un camino inesperado y causar lesiones.
Opere la herramienta siempre en un área limpia e iluminada. Asegúrese de que la
superficie de trabajo esté despejada de residuos y tenga cuidado de no perder el equilibrio
al trabajar en entornos elevados como tejados.
Agarre la herramienta firmemente para mantener el control mientras permite que la misma
retroceda de la superficie de trabajo cuando se inserta el clavo. En la modalidad de
“funcionamiento por contacto” si se permite que el activador por contacto vuelva a estar
en contacto con la superficie de trabajo antes de que sea liberado el gatillo se disparará
un clavo no deseado.
Compruebe el funcionamiento del mecanismo de brazo de contacto frecuentemente.
No utilice la herramienta si el brazo no está funcionando correctamente, ya que puede
producirse el disparo accidental de un clavo. No interfiera con el funcionamiento
adecuado del mecanismo del brazo de contacto.
No clave encima de otros clavos o con la herramienta en un ángulo demasiado inclinado,
ya que esto puede causar una desviación de los clavos, lo cual puede ocasionar lesiones.
No clave cerca del borde de la pieza de trabajo, ya que la madera puede rajarse y permitir
que el clavo se desvíe y ocasione una posible lesión.
Esta clavadora produce CHISPAS durante el funcionamiento. NUNCA utilice la clavadora
cerca de sustancias, gases o vapores inflamables, incluidos laca, pintura, disolvente,
gasolina, adhesivos, masilla (mastique), gomas de pegar u otro material que sean −o
cuyos vapores, gases o derivados sean− inflamables, combustibles o explosivos. Utilizar
la clavadora en cualquier entorno de este tipo podría causar una EXPLOSIÓN que resulte
en lesiones personales o muerte del usuario y de las personas circunstantes.
No use nunca el gancho de arrastre para colgar la herramienta del cuerpo, la ropa o un
cinturón.
Siempre verifique y tenga en cuenta el modo de operación de la herramienta, inspeccionando
el gatillo antes de conectarla a un suministro de aire y/o utilizar la herramienta.
MANTENIMIENTO DE LA HERRAMIENTA
Tome nota de las advertencias en este manual al trabajar con herramientas neumáticas y
tenga mayor cuidado al evaluar herramientas problemáticas
ESPECIFICACIONES DE LA HERRAMIENTA
Todos las medidas de tornillos y tuercas son métricas.
MODELO
ACTIVACIÓN DE LA
HERRAMIENTA
LARGO ALTURA ANCHO PESO
BTF83WW
Activador secuencial/
activador por contacto
521mm (20,5")
324mm
(12,75")
127mm (5") 3,58kg (7,9lb)
BTF83PT
Activador secuencial/
activador por contacto
501mm (19,75")
324mm
(12,75")
146mm (5,75") 3,54kg (7,8lb)
BTF83PL
Activador secuencial/
activador por contacto
547mm (21,5")
317mm
(12,5")
146mm (5,75") 3,49kg (7,7lb)
Page 16

-16-
ESPECIFICACIONES DEL SUJETADOR:
DWF83PT
Utilise des clous en bande papier 30° à tête crantée ou à tête ronde, d’une longueur de 50 à 83mm (2 à
3-1/4po) et d’un diamètre de tige de 2,8 à 3,3mm (0,113 à 0,131po).
BTF83PL
Utilise des clous en bande plastique 21° à tête crantée ou à tête ronde décalée, d’une longueur de 50 à
83mm (2 à 3-1/4po) et d’un diamètre de tige de 2,8 à 3,75mm (0,113 à 0,148po).
BTF83WW
Utiliza clavos unidos de cabeza redonda de compresión o recortada unidos en tiras de alambre 28°, en
longitudes de 50 mm a 83 mm (2 a 3,25") y con diámetros de vástago de entre 2,8 mm y 3,3 mm (0,113 y
0,131")
CONEXIÓN DE AIRE DE LA HERRAMIENTA:
Esta herramienta usa un enchufe macho de 3/8". de rosca N.P.T. El accesorio debe poder descargar la presión
de aire de la herramienta al desconectarla del suministro de aire.
PRESIÓN DE OPERACIÓN:
70 a 120 p.s.i.g. (4,9 a 8,4 kg/cm2). Seleccione la presión operativa dentro de este rango para el mejor
rendimiento del sujetador.
NO EXCEDA ESTA PRESIÓN DE OPERACIÓN RECOMENDADA.
CONSUMO DE AIRE:
Ces clous requièrent 181 litres par minute (6,4pieds cubes par minute) d’air libre pour fonctionner en mode
de déclenchement séquentiel au rythme de 100 clous par minute, à une pression de 80 psig (5,6kg/cm²).
Considere la velocidad real en la que funcionará la herramienta para determinar la cantidad de aire requerido.
Por ejemplo, si los sujetadores que usa promedian los 50 clavos por minuto, necesita el 50% de los 6,4 pies
cúbicos por minuto (181 litros por minuto) que se requieren para operar la herramienta a una velocidad de
100clavos por minuto.
MODES DE OPERACIÓN
BOSTITCH OFRECE DOS MODOS DE OPERACIÓN PARA ESTA HERRAMIENTA.
DISPARO SECUENTIAL:
El disparo secuential requiere que el operador mantenga la herramienta contra la superficie de trabajo antes
de jalar el gatillo. Esto facilita la correcta colocación del sujetador, por ejemplo, en aplicaciones de marcos,
sujeción de bases y cajas. La herramienta con disparo secuential permite la colocación exacta del sujetador sin
que se impulse un segundo sujetador debido a un culatazo, como se describe en “disparo de contacto”. La
herramienta con un disparo secuential tiene una ventaja positiva debido a que no impulsará accidentalmente
ningún sujetador si la herramienta entra en contacto con la superficie de trabajo, o cualquier otra cosa, mientras
que el operador mantiene el gatillo presionado.
DISPARO DE CONTACTO:
El procedimiento de operación común en las herramientas de “disparo de contacto” implica que el operador
debe hacer contacto con la superficie de trabajo para activar el mecanismo del interruptor mientras mantiene
el gatillo presionado, con lo cual impulsa el sujetador cada vez que se contacta a la superficie de trabajo. Esto
permitirá la rápida colocación de los sujetadores en muchos proyectos, como montaje de revestimientos,
plataformas y tarimas. Todas las herramientas neumáticas están sujetas a un culatazo cuando se impulsan los
sujetadores. La herramienta puede rebotar, liberando el interruptor, y si se le permite involuntariamente volver a
contactar la superficie de trabajo con el gatillo activado, (el dedo aún deteniendo el gatillo), se podría impulsar
un segundo sujetador no deseado.
IDENTIFICACIÓN DEL MODO:
Consulte la sección Instrucciones de operación de la herramienta en las páginas 20 y 22 antes de utilizarla.
Page 17

-17-
PARA CAMBIAR LAS MODALIDADES DE OPERACIÓN
Desconecte la línea de aire de la herramienta y retire los clavos del cargador antes de
realizar ajustes o podrían producirse lesiones corporales.
Conozca siempre la modalidad de operación de la herramientas antes de conectarla a un
suministro de aire y/o de utilizar la herramienta.
ACTIVADOR SECUENCIAL-
1. Empuje y mantenga presionada la clavija de pivote enfrente del selector, mientras gira el selector 180° en
sentido contrario a las agujas del reloj con respecto a la posición del activador secuencial .
2. Asegúrese de que el selector esté totalmente asentado en la nueva posición.
Clavija de
pivote
Selector
Para utilizar la clavadora en la modalidad de activador secuencial:
1. Presione firmemente el activador por contacto contra la superficie de trabajo.
2. Presione el gatillo.
Se disparará un clavo cada vez que el gatillo esté presionado siempre que el activador por
contacto permanezca presionado.
ACTIVADOR POR CONTACTO
1. Empuje y mantenga presionada la clavija de pivote mientras gira el selector 180° en sentido contrario a las
agujas del reloj con respecto a la posición del activador por contacto .
2. Asegúrese de que el selector esté totalmente asentado en la nueva posición.
Para utilizar la clavadora en modalidad de activador por contacto:
1. Presione el gatillo.
2. Empuje el activador por contacto contra la superficie de trabajo. Siempre que el gatillo esté presionado, la
herramienta disparará un clavo cada vez que se presione el activador por contacto. Esto permite al usuario
clavar múltiples clavos en secuencia.
No mantenga el gatillo apretado cuando la herramienta no esté siendo utilizada.
SUMINISTRO DE AIRE Y CONEXIONES
No use oxígeno, gases combustibles o gases embotellados como una fuente de
Page 18

-18-
suministro para esta herramienta, ya que la herramienta puede estallar, posiblemente
causando lesiones.
No conecte la herramienta ningún suministro de aire que pueda potencialmente
exceder 200 p.s.i.g. (14 Kg/cm
2
).
CONEXIONES:
Instale un enchufe macho en la herramienta que fluya libre y que descargue la presión de aire de la herramienta
cuando sea desconectada de la fuente de suministro.
MANGUERAS:
Las mangueras de aire deben tener un mínimo de clasificación de presión de operación de 150 p.s.i
(10,5Kg/cm2) ó 150 porciento de la presión máxima de operación que podría producirse en el sistema de aire.
La manguera de suministro debe contener una conexión que provea un “desconectado rápido” del enchufe
macho en la herramienta.
FUENTE DE SUMINISTRO:
Use sólo aire comprimido regulado limpio como una fuente de suministro para esta herramienta. NUNCA
USE OXÍGENO, GASES COMBUSTIBLES O GASES EMBOTELLADOS COMO UNA FUENTE DE
SUMINISTRO PARA ESTA HERRAMIENTA, YA QUE LA HERRAMIENTA PODRÍA ESTALLAR.
REGULADOR:
Se requiere un regulador de presión con una presión de operación de 0-125 p.s.i.g (0-8,7 Kg/cm2) para
controlar la presión de operación para la segura operación de esta herramienta. No conecte esta herramienta
a una presión de aire que potencialmente exceda 200 p.s.i.g. (14 Kg/cm2), ya que la herramienta puede
fracturarse o estallar, posiblemente causando lesiones.
PRESIÓN DE OPERACIÓN:
No supere la presión operativa máxima recomendada porque aumentará considerablemente el desgaste de
la herramienta. El suministro de aire debe ser capaz de mantener la presión operativa de la herramienta. Las
caídas de presión en el suministro de aire pueden reducir la energía impulsora de la herramienta. Consulte las
“especificaciones de la herramienta” para establecer la presión operativa correcta de la herramienta.
FILTRO:
Un filtro alineado ayuda a obtener el mejor rendimiento y el mínimo de desgaste en la herramienta. El filtro debe
tener la capacidad de flujo adecuada para la instalación específica. El filtro se debe mantener limpio para ser
efectivo en proporcionar aire comprimido limpio a la herramienta. Consulte las instrucciones del fabricante sobre
el mantenimiento adecuado de su filtro. Un filtro sucio y tapado causará una caída de presión que reduce el
rendimiento de la herramienta.
LUBRICACIÓN
Se necesita una lubricación frecuente, pero no excesiva, para obtener el óptimo rendimiento. Use el Lubricante
para herramientas neumáticas BOSTITCH, PREMOIL-4oz u otro equivalente. No use aceite ni aditivos
detergentes porque estos lubricantes causarán un desgaste acelerado a los sellos y topes de la herramienta,
ocasionando un rendimiento deficiente y mantenimiento frecuente de la herramienta. Solamente se necesitan
unas pocas gotas de aceite a la vez. El exceso de aceite se acumulará dentro de la herramienta y se notará
en el ciclo de escape.
OPERACIÓN EN LA ÉPOCA DE FRÍO:
Para el funcionamiento en clima frío, cerca o bajo cero grados centígrados, la humedad de la línea de aire puede
congelarse e impedir el funcionamiento de la herramienta. Recomendamos el uso del lubricante invernal para
herramientas neumáticas BOSTITCH winter formula o anticongelante permanente, WINTEROIL-4oz (etilenglicol)
como lubricante en clima frío.
AVISO: No guarde herramientas en un entorno con clima frío para evitar la congelación o formación de
hielo en las válvulas y mecanismos de funcionamiento de la herramienta que puedan ocasionar una falla
de la herramienta.
AVISO: Algunos líquidos de secado de línea de aire comerciales son perjudiciales para las juntas tóricas
o sellos; no utilice estos secadores de aire de baja temperatura sin comprobar la compatibilidad.
Page 19

-19-
CÓMO CARGAR LAS HERRAMIENTAS
PROTECCIÓN PARA LOS OJOS que cumple con las especificaciones de ANSI y que
proporciona protección contra partículas voladoras tanto del FRENTE como del LADO
debe ser usada SIEMPRE por el OPERADOR y otros en el área de trabajo al cargar, operar
o hacerle servicio a esta herramienta. La protección para los ojos es necesaria para
proteger contra sujetadores voladores y escombros que pueden causar daños severos a
los ojos.
El empleador y/o usuario debe asegurar que la debida protección para los ojos sea
usada. El equipo protector de los ojos debe cumplir con los requisitos del Instituto de
Normas Nacionales Americano (American National Standards Institute), ANSI Z87.1 y
debe proveer protección de frente y de los lados. NOTA: Las gafas de seguridad que no
están protegidas de los lados y las máscaras por sí solas no proveen la debida protección.
PARA IMPEDIR LESIONES ACCIDENTALES:
• Conecte la herramienta al suministro de aire antes de cargar los clavos para evitar
que se dispare un clavo durante la conexión
• Nunca coloque una mano o cualquier otra parte del cuerpo en el área de descarga del
sujetador de la herramienta mientras el suministro de aire está conectado;
• Nunca apunte la herramienta hacia otra persona;
• Nunca participe en juegos rudos con la herramienta;
• Nunca hale el gatillo a menos que la nariz esté apuntada hacia el trabajo;
• Siempre maneje la herramienta con cuidado.
• No hale el gatillo ni oprima el mecanismo de disparo al cargar la herramienta.
1. Deslice el impulsor hasta la base del cargador para bloquearlo en su sitio.
2. Sujete la clavadora con el cargador hacia abajo e inserte las tiras de clavos apropiadas en la parte de atrás
del cargador.
NOTA: Consulte la sección de “especificaciones de la herramienta” para determinar los tamaños
apropiados de los clavos y los ángulos.
3. Tire del impulsor hacia atrás de nuevo para liberarlo y con cuidado deje que el impulsor se deslice hacia
adelante hasta que entre en contacto con los clavos.
NOTA: Use solamente clavos recomendados para usarse con las clavadoras enmarcadoras de BOSTITCH o
clavos que reúnan las especificaciones de BOSTITCH.
Page 20

-20-
AJUSTE DEL CONTROL DE PROFUNDIDAD DEL CLAVO
La función de ajuste del control de profundidad del clavo permite regular el
NOTA: Gire la rueda de control
de profundidad para elegir la
profundidad de impulso deseada.
impulso del clavo desde un nivel al ras o justo sobre la superficie de trabajo
hasta avellanado leve o profundo.
PARA AJUSTAR EL CONTROL DE PROFUNDIDAD
DEL CLAVO:
Desconecte la herramienta del suministro de aire antes
de intentar desarmar piezas y antes de cambiar el
ajuste del elemento de contacto con la superficie de
trabajo.
Gire la rueda de control de profundidad para elegir la profundidad de impulso
deseada.
EXTRACCIÓN DE CLAVOS
1. Deslice el impulsor hasta la base del cargador para bloquearlo en su sitio.
2. Incline la herramienta y deslice los clavos hasta la parte de atrás del cargador.
3. Deslice los clavos para sacarlos del cargador.
Page 21

-21-
OPERACIÓN DE LA HERRAMIENTA
PROTECCIÓN PARA LOS OJOS que cumple con las especificaciones de ANSI y
que proporciona protección contra partículas voladoras tanto del FRENTE como
del LADO debe ser usada SIEMPRE por el OPERADOR y otros en el área de trabajo
al cargar, operar o hacerle servicio a esta herramienta. La protección para los ojos
es necesaria para proteger contra sujetadores voladores y escombros que pueden
causar daños severos a los ojos.
El empleador y/o usuario debe asegurar que la debida protección para los ojos
sea usada. El equipo protector de los ojos debe cumplir con los requisitos del
Instituto de Normas Nacionales Americano (American National Standards Institute),
ANSI Z87.1 y debe proveer protección de frente y de los lados. NOTA: Las gafas
de seguridad que no están protegidas de los lados y las máscaras por sí solas no
proveen la debida protección.
ANTES DE MANEJAR U OPERAR ESTA HERRAMIENTA:
I. LEA Y ENTIENDA LAS ADVERTENCIAS CONTENIDAS EN ESTE MANUAL.
II. CONSULTE “ESPECIFICACIONES DE LA HERRAMIENTA” EN ESTE MANUAL PARA
IDENTIFICAR EL SISTEMA OPERATIVO DE SU HERRAMIENTA.
Estas herramientas neumáticas de BOSTITCH tienen dos modos de operación. Estos son:
1. OPERACIÓN DEL DISPARO SECUENTIAL
2. OPERACIÓN DEL DISPARO DE CONTACTOO:
OPERACIÓN
BOSTITCH ofrece dos tipos de modos de operación que funcionan de distinta manera: disparo secuential e
disparo de contacto. Cada modo tiene ventajas específicas. Debe evaluar su proyecto de construcción en
particular para determinar qué modo es el mejor.
La herramienta viene de fábrica en la configuración de disparo secuential. Se puede cambiar fácilmente al
modo de operación de disparo de contacto usando este kit de conversión de disparo de contacto. Consulte
la sección “para cambiar las modalidades de operación” para cambiar entre los modos de disparo secuential
e disparo de contacto.
Siempre verifique y tenga en cuenta el modo de operación de la herramienta, inspeccionando
el gatillo antes de conectarla a un suministro de aire y/o utilizar la herramienta.
1. OPERACIÓN DEL DISPARO SECUENTIAL:
El (modo de) disparo secuential obtiene su nombre de la “secuencia” requerida para impulsar un sujetador. Para
impulsar un sujetador, primero el operador debe oprimir el “interruptor” COMPLETAMENTE contra la superficie
de trabajo y luego jalar el gatillo. Para impulsar un segundo clavo, el operador debe levantar la herramienta de
la superficie de trabajo, soltar el gatillo y luego repetir la secuencia anterior.
A. El (modo de) disparo secuential: ofrece una ventaja de seguridad positiva
debido a que no impulsará accidentalmente ningún sujetador si la herramienta se
golpea contra la superficie de trabajo, o cualquier otra cosa, mientras el operador
sostiene la herramienta con el gatillo presionado.
B. El (modo de) disparo secuential: permite “colocar clavos” sin impulsar un
segundo sujetador no deseado por un culatazo como se describe a continuación
en “disparo de contacto”.
2. OPERACIÓN DEL DISPARO DE CONTACTO:
Tenga en cuenta que una vez que se retira el pasador de bloqueo de modo, el gatillo se
convierte en un gatillo seleccionable, que activa los modos de operación de disparo de
contacto e disparo secuential.
Tenga en cuenta que una vez que se retira el pasador de bloqueo de modo, el gatillo se convierte en un gatillo
seleccionable, que activa los modos de operación de disparo de contacto e disparo secuential.
Su nueva herramienta de BOSTITCH se puede configurar para usar en el modo “Interruptor convencional” del
disparo de contacto. Para impulsar un clavo, tanto el “interruptor” como el gatillo deben estar oprimidos. En las
herramientas de disparo de contacto convencionales, el gatillo puede mantenerse oprimido y cada “contacto”
entre el interruptor y la superficie de trabajo impulsará un clavo.
Page 22

-22-
A. COLOCACIÓN DE UN SOLO SUJETADOR (Clavado en el lugar): Primero
ubique el “interruptor” COMPLETAMENTE en la superficie de trabajo, SIN JALAR
EL GATILLO. Oprima el “interruptor” POR COMPLETO hasta que la punta de la
herramienta toque la superficie de trabajo. Luego jale el gatillo para impulsar un
clavo. No aplique fuerza extra para presionar la herramienta contra la superficie de
trabajo. En su lugar, permita que la herramienta recule desde la superficie de trabajo
para evitar la colocación de un segundo sujetador no deseado. NOTA: retire el
dedo del gatillo después de cada operación.
B. OPERACIÓN DE DISPARO RÁPIDO (Clavado por “golpe”): Primero, sostenga la herramienta con el
“interruptor” apuntando hacia la superficie de trabajo pero sin tocarla. Jale el gatillo y luego golpee ligeramente el
interruptor contra la superficie de trabajo con un movimiento de rebote. Cada vez que se oprime el “interruptor”,
se impulsará un clavo.
El disparo de contacto no evitará que se impulse un clavo accidentalmente si se oprime
el gatillo y se golpea el “interruptor” contra algún objeto o una persona. Nunca sostenga
o transporte la herramienta con el dedo en el gatillo. Sólo mantenga oprimido el gatillo
cuando desee impulsar varios clavos rápidamente y la herramienta apunte hacia la
superficie de trabajo.
Al usar el disparo de contacto convencional para el clavado en el lugar, la herramienta
puede rebotar a causa de un culatazo, y si se permite que la herramienta vuelva a hacer
contacto con la superficie de trabajo mientras mantiene el gatillo oprimido, se impulsará
un segundo clavo no deseado. Debe tratar de que la herramienta recule lo suficientemente
lejos para soltar el interruptor y evitar un segundo ciclo. No presione la herramienta hacia
abajo con fuerza extra; permita que la herramienta realice su trabajo.
El operador no debe mantener el gatillo presionado en herramientas de disparo de
contacto, excepto durante la operación de sujeción, ya que se podría generar una lesión
grave si el interruptor contactara accidentalmente a alguna persona o cosa, causando que
la herramienta cicle.
Mantenga las manos y el cuerpo lejos del área de descarga de la herramienta. Una
herramienta de disparo de contacto puede votar debido al culatazo de impulsar el
sujetador y se podría impulsar un segundo sujetador no deseado que podría causar una
lesión.
No use nunca el gancho de arrastre para colgar la herramienta del cuerpo, la ropa o un
cinturón.
VERIFICACIÓN DE LA OPERACIÓN DE LA HERRAMIENTA:
Quite todos los sujetadores de la herramienta antes de efectuar la verificaciÓn de la
operaciÓn de la herramienta!
1. OPERACIÓN POR DISPARO SECUENCIAL:
A. Presione el disparador de contacto contra la superficie de trabajo, sin tocar el gatillo.
LA HERRAMIENTA NO DEBE EFECTUAR SU CICLO.
B. Sostenga la herramienta alejada de la superficie de trabajo, y hale el gatillo.
LA HERRAMIENTA NO DEBE EFECTUAR SU CICLO.
C. Hale el gatillo y presione el disparador de contacto contra la superficie de trabajo.
LA HERRAMIENTA NO DEBE EFECTUAR SU CICLO.
D. Con el dedo alejado del gatillo, presione el disparador de contacto contra la superficie de trabajo.
Hale el gatillo.
LA HERRAMIENTA SÍ DEBE EFECTUAR SU CICLO.
2. FUNCIONAMIENTO DEL DISPARO DE CONTACTO:
A. Con el dedo lejos del gatillo, presione el disparo de contacto contra la superficie de trabajo.
NO DEBE HACER UN CICLO LA HERRAMIENTA.
B. Sostenga la herramienta sin tocar la superficie de trabajo y tire del gatillo.
NO DEBE HACER UN CICLO LA HERRAMIENTA.
C. Con la herramienta sin tocar la superficie de trabajo, accione el gatillo. Presione el disparo de contacto
contra la superficie de trabajo.
DEBE HACER UN CICLO LA HERRAMIENTA.
D. Sin tocar el gatillo, presione el disparo de contacto contra la superficie de trabajo, luego accione el gatillo.
DEBE HACER UN CICLO LA HERRAMIENTA.
Page 23

-23-
ADEMÁS DE LAS OTRAS ADVERTENCIAS CONTENIDAS EN ESTE MANUAL,
OBSERVE LO SIGUIENTE PARA UNA OPERACIÓN SEGURA.
• Utilice la herramienta neumática de BOSTITCH únicamente para impulsar sujetadores.
• Jamás utilice esta herramienta de manera que pudiera causar que un sujetador sea dirigido
hacia usted mismo u otras personas dentro del área de trabajo.
• No utilice la herramienta como un martillo.
• Siempre cargue la herramienta por la manija. Jamás cargue la herramienta por la manguera de
aire.
• No modifique o altere esta herramienta de su diseño original o función sin la aprobación de
BOSTITCH, INC.
• Siempre esté consciente de que el mal trato y manejo inadecuado de esta herramienta puede
originar lesiones para usted y los demás.
• Jamás sujete o ate con cinta el gatillo o el disparador de contacto en una posición activada.
• Jamás deje una herramienta sola con la manguera de aire conectada.
• NOTA: No siga usando una herramienta que tenga una fuga de aire o que no funciona
debidamente. Notifique a su representante de BOSTITCH más cercano si su herramienta sigue
teniendo problemas de funcionamiento.
MANTENIMIENTO DE LA HERRAMIENTA NEUMÁTICA
Al trabajar con herramientas neumáticas, tenga presente las advertencias que se hacen
en este manual, y sea particularmente cuidadoso al evaluar herramientas problemáticas.
El resorte de empuje (resorte de fuerza constante): Se debe tener cuidado al trabajar con
el ensamblaje de resorte. El resorte está enrollado alrededor de, pero no sujetado a, un
enrollador. Si el resorte se extiende más allá de su largo, la punta se desprenderá del enrollador, y el resorte se enrollará bruscamente, y puede pellizcar su mano. Además, los bordes
del resorte son muy delgados y podrían cortarlo. Se debe tener cuidado para asegurar que
no se formen cocas permanentes en el resorte, ya que esto reducirá la fuerza del resorte.
PARTES DE REEMPLAZO:
Utilizar únicamente repuestos OEM genuine.
PROCEDIMIENTO DE ENSAMBLE PARA LOS SELLOS:
Al reparar una herramienta, asegúrese de que las partes internas estén limpias y lubricadas. Utilice Parker
“O” -LUBE o su equivalente en todos los anillos en “O” . Cubra cada anillo en “O” con “O” -LUBE antes de
ensamblar. Utilice una cantidad pequeña de aceite en todas las superficies y pivotes móviles. Después del
rearmado, añada unas cuantas gotas del Lubricante para Herramientas Neumáticas de BOSTITCH mediante la
conexión de la línea de aire, antes de probar la herramienta.
PRESIÓN Y VOLUMEN DEL SUMINISTRO DE AIRE:
El volumen de aire es tan importante como la presión del aire. El volumen de aire suministrado a la herramienta
puede ser inadecuado debido a conexiones y mangueras más pequeñas que lo normal, o debido a los efectos
de polvo y agua dentro del sistema. Un flujo de aire restringido impedirá que la herramienta reciba un volumen
de aire adecuado, aunque la lectura de la presión sea alta. Los resultados serán una operación lenta, la mala
alimentación o una potencia impulsadora reducida. Antes de evaluar los problemas de la herramienta en busca
de estos síntomas, siga la pista del suministro de aire desde la herramienta hasta la fuente de suministro para
ver si hay conexiones restrictivas, accesorios giratorios, puntos bajos que contienen agua y cualquier otra cosa
que evitaría un flujo de aire de volumen completo a la herramienta.
Page 24

-24-
DIAGNÓSTICO DE FALLA
Para reducir el riesgo de lesiones personales graves, quite los remaches del cargador
antes de realizar ajustes o reparar esta herramienta
SÍNTOMA CAUSA SOLUCIÓN
La carcasa de la válvula del gatillo tiene
fugas
Falla del vástago de la válvula o la junta
tórica
Reemplace la válvula usando el Kit de la válvula del gatillo
Fugas de aire en la tapa superior Afloje los tornillos de la tapa Ajuste los tornillos de la tapa con una llave hexagonal
apropiada
Junta o burlete dañado o desgastado Reemplace el burlete/las juntas tóricas con el Kit de
reparación de junta tórica de la clavadora
Fugas en el escape Sello principal o junta tórica dañados,
desechos en la herramienta.
Reemplace el burlete/las juntas tóricas con el Kit de
reparación de junta tórica de la clavadora de marcos
Fugas de aire alrededor de la nariz cuando
la herramienta no está en uso. (Hoja de
transmisión en posición.)
Juntas tóricas dañadas o desgastadas Reemplace el burlete/las juntas tóricas con el Kit de
reparación de junta tórica de la clavadora de marcos
Fugas de aire alrededor de la nariz
alrededor de la herramienta cuando la
herramienta se coloca en su posición. (Hoja
de transmisión hacia abajo.)
Tope dañado o desgastado Reemplace el tope con: Kit del tope de la clavadora de
marcos
La herramienta no funciona en clima frío La herramienta no recibe aire Compruebe el suministro de aire
La válvula puede estar congelada Caliente la herramienta. Lubrique con aceite para
herramientas neumáticas BOSTITCH o aceite neumático para
peso de invierno con glicol etileno
Juntas tóricas dañadas o desgastadas Reemplace el burlete/las juntas tóricas con el Kit de
reparación de junta tórica de la clavadora de marcos
Hoja de transmisión rota o dañada Reemplace la hoja de transmisión
Falta de corriente o baja corriente Baja presión de aire Revise el suministro de aire
Falta de lubricación Lubrique la herramienta con el aceite para herramientas
neumáticas BOSTITCH
Junta tórica dañada o desgastada Reemplace el burlete/las juntas tóricas con el Kit de
reparación de junta tórica de la clavadora de marcos
Puerto de escape bloqueado u obstruido Desconecte el aire, quite la placa de escape de la parte
superior de la herramienta, limpie el puerto
Ajuste de profundidad demasiado reducido Restablezca el ajuste de profundidad
Transmisión dañada o desgastada Reemplace la hoja de transmisión
Clavos faltantes; alimentación intermitente Aire restringido Revise el suministro de aire y los acopladores
Falta de lubricación Lubrique la herramienta con el aceite para herramientas
neumáticas BOSTITCH
Tornillos de la nariz sueltos Ajuste los tornillos de la nariz con una llave hexagonal
apropiada
Remaches de tamaño/ángulo incorrecto Use solo remaches recomendados
Cargador sucio Limpie el riel del cargador y la nariz
Cargador dañado/desgastado Reemplace el cargador
Hoja de transmisión rota o dañada Reemplace la hoja de transmisión
Junta tórica de la válvula del gatillo
desgastada o dañada
Reemplace la válvula con el Kit de la válvula del gatillo
Junta tórica del pistón desgastada Reemplace la junta tórica con el Kit de reparación de junta
tórica de la clavadora de marcos
Resorte del impulsor desgastado o dañado Reemplace el resorte usando el Kit de resorte del impulsor
del cargador
Los remaches se traban en la herramienta Canal de transmisión en la nariz
desgastado
Reemplace la nariz
Remaches de tamaño/ángulo incorrecto Use solo remaches recomendados
Hoja de transmisión desgastada Reemplace la hoja de transmisión
Tornillos de la nariz flojos Ajuste los tornillos de la nariz con una llave hexagonal
apropiada
Los clavos no se alimentan correctamente Verifique que los clavos pasen correctamente por el cargador
y hacia la nariz
Page 25

-25-
INTRODUCTION
Les outils BOSTITCH sont des outils de précision conçus pour un clouage exact et à haut rendement. Ils offrent
un service efficace et fiable lorsque utilisés correctement et avec soin. Comme pour tout outil sophistiqué, il
est nécessaire de suivre les instructions du fabricant pour obtenir de meilleures performances. Veuillez étudier
ce manuel avant la mise en fonction de l’outil, et vous assurer d’avoir compris les avertissements et consignes
de sécurité inclus. Lisez avec précaution les instructions d’installation, de fonctionnement et de maintenance;
conservez le manuel pour référence ultérieure. REMARQUE : Des mesures de sécurité supplémentaires
peuvent être requises en fonction de votre utilisation particulière de l’outil. Pour toute question concernant l’outil
et son utilisation, contactez votre représentant ou distributeur BOSTITCH. BOSTITCH, 701 E. Joppa Road,
Towson, Maryland 21286, U.S. & Canada Only, É.-U. et Canada seulement
SOMMAIRE
Consignes de sécurité ............................................................................................... 26
Fiche technique de l’outil .......................................................................................27–28
Modes de fonctionnement .....................................................................................28–29
Alimentation en air comprimé et raccordement .................................................29–30
Lubrification ................................................................................................................ 30
Chargement de l’outil ...........................................................................................30–31
Commande de réglage de profondeur de fixation .................................................. 31
Retrait des clous .......................................................................................................... 32
Fonctionnement de l’outil ................................................................................... 32–34
Entretien de l’appareil ............................................................................................34–35
Dépannage .............................................................................................................35–36
REMARQUE :
Les outils BOSTITCH ont été conçus et fabriqués pour offrir une grande satisfaction de la clientèle et pour
atteindre un rendement maximal, lorsqu’utilisé avec des attaches de précision BOSTITCH conçues et fabriquées
pour répondre à des normes identiques. La BTF83PT está diseñada para utilizarse con clavos en tiras unidos por
papel de 30°. La BTF83PL está diseñada para utilizarse con clavos en tiras unidos por plástico de 21°. BOSTITCH
ne garantit pas les performances de vos outils s’ils sont utilisés avec des pièces de fixation ou
accessoires ne répondant pas aux exigences strictes établies pour les clous, agrafes et accessoires
BOSTITCH d’origine.
GARANTIE LIMITÉE – É.-U. ET CANADA SEULEMENT
BOSTITCH Fastening Systems “BOSTITCH” garantit à l’acheteur d’origine au détail que ce produit est exempt
de tout défaut de matériaux et de fabrication et accepte, le cas échéant, de réparer ou de remplacer, à la
discrétion de BOSTITCH’s, toute agrafeuse ou cloueuse de marque BOSTITCH défectueuse pour une période
de sept (7) ans à partir de la date d’achat (1 (un) an à partir de la date d’achat pour les compresseurs et les
outils utilisés dans des applications de production). Cette garantie n’est pas cessible. Une preuve de la date
d’achat est requise. Cette garantie couvre uniquement les dommages résultant de défaut de matériaux et de
fabrication, et ne couvre pas les conditions ou défauts de fonctionnement résultant d’une usure normale, d’une
négligence, d’un usage abusif, d’un accident, d’une réparation ou d’une tentative de réparation par une entité
autre que notre Centre de réparation national ou l’un de nos Centres de service de garantie autorisé. Les lames
du mandrin, les amortisseurs, les joints toriques, les pistons et les garnitures de piston sont considérés comme
des pièces normales d’usure. Pour une performance optimale de votre outil BOSTITCH, utilisez toujours des
attaches et des pièces de rechange BOSTITCH d’origine.
CETTE GARANTIE REMPLACE TOUTE AUTRE GARANTIE, IMPLICITE OU EXPLICITE, COMPRENANT, MAIS
SANS S’Y LIMITER, LES GARANTIES IMPLICITES DE COMMERCIALISATION OU D’ADAPTATION À UN
USAGE PARTICULIER. BOSTITCH NE SERA PAS TENUE RESPONSABLE DES DOMMAGES INDIRECTS OU
ACCESSOIRES.
Les limitations imposées par la durée d’une garantie implicite ou l’exclusion des dommages accessoires ou
indirects n’étant pas reconnues dans certains États et pays, les limitations ou exclusions précitées peuvent ne
pas vous être adressées. Cette garantie vous confère des droits juridiques spécifiques qui s’ajoutent aux autres
droits éventuels qui peuvent varier d’une province, d’un État ou d’un pays à l’autre.
Pour obtenir aux États-Unis des services liés à la garantie, retournez le produit à vos frais accompagné de la
preuve d’achat à votre Centre de service national américain ou à un Centre de service régional indépendant de
garantie autorisé. Aux États-Unis, appelez-nous au 1-800-556-6696 ou visitez le www.BOSTITCH.com pour
connaître l’emplacement du Centre le plus près de chez vous. Au Canada, appelez-nous au 1-800-567-7705
ou visitez le www.BOSTITCH.com.
Page 26

-26-
CONSIGNES DE SECURITE
UNE PROTECTION DES YEUX, conforme aux normes ANSI et fournissant une protection
contre les projectiles en provenance de l’AVANT et des CÔTÉS, doit toujours être portée
par l’opérateur et les personnes présentes dans la zone de travail, lors du raccordement
au réseau d’air, du chargement, du fonctionnement et de la maintenance de l’outil. Une
telle protection est indispensable pour vous protéger contre les projections d’attaches et
de particules qui peuvent entraîner des blessures graves.
L’employeur et/ou l’utilisateur doivent s’assurer du port d’une protection oculaire
adéquate. L’équipement de protection oculaire doit être conforme aux normes ANSI Z87.1/
CAN/CSA Z94.3 (de l’Institut National Américain des Normes), et offrir une protection à la
fois frontale et latérale. REMARQUE : les lunettes de protection sans écrans latéraux et les
masques de protection portés seuls, n’offrent pas une protection suffisante.
Des mesures de sécurité supplémentaire sont requises dans certains environnements.
Par exemple, la zone de travail peut favoriser l’exposition à un niveau de bruit susceptible
d’entraîner une surdité. L’employeur et l’utilisateur doivent s’assurer qu’une protection
de l’ouïe sera utilisée par l’opérateur et les personnes présentes dans la zone de travail.
Certains environnements exigeront l’utilisation d’un équipement de protection de la tête.
Lorsque cela s’avère nécessaire, l’employeur et l’utilisateur doivent s’assurer que la
protection de la tête est conforme à la norme ANSI CAN/CSA Z89.1.
La poussière produite par le sablage, le sciage, le meulage et le vissage avec des
outils électriques et d’autres activités de construction renferme des produits chimiques
reconnus par l’État de la Californie comme pouvant causer le cancer, des anomalies
congénitales ou d’autres dommages aux fonctions reproductrices. Voici quelques
exemples de ces produits chimiques :
• Le plomb contenu dans les peintures à base de plomb
• La silice cristallisée contenue dans les briques, le ciment et d’autres produits de
maçonnerie
• L’arsenic et le chrome contenu dans le bois traité chimiquement
les risques d’exposition varient selon la fréquence de ce genre de travaux. Pour réduire
le risque d’exposition à ces produits chimiques : Travailler dans un endroit bien aéré et
porter un équipement de protection adéquat comme des masques antipoussières conçus
spécifiquement pour filtrer les particules microscopiques.
ALIMENTATION EN AIR COMPRIMÉ ET RACCORDEMENT
l’oxygène ou les gaz combustibles ne doivent en aucun cas être employés comme source
d’énergie, sachant que l’outil peut exploser et provoquer des blessures.
utiliser exclusivement de l’air pur, sec et régulé. La condensation d’un compresseur d’air
peut faire rouiller les pièces motrices internes de l’outil et les endommager.
n’utiliser en aucun cas des sources d’énergie à une pression dépassant 200 p.s.i.g.
(14kg/cm2), car l’outil peut éclater et causer des blessures.
l’appareil ne doit pas rester sous pression lorsqu’il est déconnecté de la source d’air.
Si un mauvais raccord est utilisé, l’outil peut demeurer sous pression même après le
désaccouplement, et de ce fait, peut éjecter un élément d’assemblage et causer des
blessures.
ne pas appuyer sur la détente ou abaisser le mécanisme de contact tant que l’outil
est connecté à la source d’air, car celui-ci peut se déclencher et donc provoquer des
blessures.
toujours désaccoupler l’appareil de sa source d’énergie : 1) avant tout réglage; 2) lors
de l’entretien; 3) lors d’un désenrayage; 4) à la fin de l’utilisation; 5) lors du déplacement
vers une nouvelle zone de travail, car un déclenchement accidentel peut se produire et
causer des blessures.
CHARGEMENT DE L’APPAREIL
lors du chargement de l’appareil : 1) Ne jamais placer la main ou toute autre partie du
corps dans la direction de projection de l’élément d’assemblage de l’outil; 2) Ne jamais
pointer l’outil vers quelqu’un; 3) Ne pas presser sur la détente ou appuyer sur le palpeur
de surface, car un déclenchement accidentel peut se produire et causer des blessures.
connecter l’outil à l’air comprimé avant d’insérer les attaches pour éviter qu’une attache
soit libérée lors de la connexion. Le mécanisme moteur de l’outil pourrait se mettre à
fonctionner tout seul lorsque l’outil est connecté à l’air comprimé. Ne pas insérer les
attaches alors que la gâchette ou le déclencheur par contact est activé pour prévenir
toute libération accidentelle d’une attache.
Page 27

-27-
FONCTIONNEMENT
manipuler systématiquement l’outil avec prudence : 1.) Ne jamais chahuter avec l’outil;
2.) Ne jamais appuyer sur la gâchette à moins que le nez de l’outil soit directement
pointé sur le travail; 3.) Maintenir les autres à une distance sécuritaire de l’outil pendant
son utilisation; 4.) Assumer systématiquement que l’outil contient des attaches, car un
déclenchement accidentel pourrait survenir et poser des risques de dommages corporels.
l’utilisateur ne devrait jamais maintenir la gâchette d’un outil à bras de contact appuyée
en dehors du clouage, car il y a risques de dommages corporels graves en cas de contact
accidentel du déclencheur avec quelqu’un ou quelque chose, qui activerait l’outil.
maintenir les mains et le corps à l’écart de la zone d’expulsion des attaches de l’outil.
Un outil à bras de contact pourrait rebondir alors qu’une attache est enfoncée et une
seconde attache pourrait être expulsée et poser des risques de dommages corporels.
ne pas retirer, modifier, ou rendre de quelque manière que ce soit l’interrupteur ou
le déclencheur par contact inopérant. Ne pas coller ou attacher l’interrupteur ou le
déclencheur par contact en position de marche. Ne pas retirer le ressort du déclencheur
par contact. Vérifier quotidiennement que la gâchette et le déclencheur par contact
bougent librement. Dans le cas contraire, une décharge incontrôlée pourrait en résulter.
ne pas altérer ou modifier l’outil en aucune façon.
s’assurer que le tuyau est exempt de toute obstruction ou déchirure. Les tuyaux
embrouillés ou tordus pourraient faire perdre l’équilibre ou perdre pied. Ne pas soulever,
tirer ou abaisser l’outil par son tuyau.
n’utiliser l’outil que pour l’usage il a été conçu. Ne pas expulser les attaches en l’air, dans
le béton, la pierre, des bois extrêmement durs, les nœuds ou tout autre matériau trop
dur pour être pénétré par les attaches. Ne pas utiliser le corps de l’outil ou le capuchon
supérieur en tant que marteau. Les attaches libérées pourraient suivre une trajectoire
inattendue et causer des dommages corporels.
utiliser systématiquement l’outil dans un endroit propre et bien éclairé. S’assurer que
la surface de travail est propre de tout débris, et de maintenir son équilibre lorsque l’on
travaille en hauteur comme sur les toits par exemple.
maintenir l’outil fermement pour conserver son contrôle tout en permettant à l’outil
de rebondir de la surface à travailler alors que l’attache est enfoncée. En « mode par
contact», si on laisse la butée de déclenchement retoucher la surface de travail avant de
relâcher la gâchette, une attache non désirée sera libérée.
vérifier fréquemment le bon fonctionnement du mécanisme du bras de contact. Ne pas
utiliser l’outil si le bras ne fonctionne pas correctement, car le déclenchement accidentel
d’une attache pourrait en résulter. Ne pas interférer avec le bon fonctionnement du
mécanisme du bras de contact.
ne pas enfoncer une attache sur une autre ou alors que l’outil se trouve à un angle
d’inclinaison trop prononcé, car l’attache pourrait être déviée et poser des risques de
dommages corporels.
ne pas enfoncer d’attaches sur le bord d’une pièce à travailler, car le bois pourrait éclater,
et l’attache pourrait être déviée et poser des risques de dommages corporels.
les cloueuses produisent des ÉTINCELLES pendant l’utilisation. NE JAMAIS utiliser la
cloueuse à proximité de substances, gaz ou vapeurs inflammables, y compris les laques,
diluants, carburants, adhésifs, mastics, colles ou tout autre matériau (ou leurs vapeurs,
émanations ou sous-produits) inflammable, combustible ou explosif. L’utilisation de la
cloueuse dans un tel environnement pose des risques d’EXPLOSION avec risques de
dommages corporels ou de mort à l’utilisateur et aux tiers présents.
ne jamais utiliser le crochet pour suspendre l’outil au corps, aux vêtements ou à la
ceinture.
toujours vérifier et surveiller le mode de fonctionnement de l’outil en inspectant la
gâchette avant de le brancher à l’alimentation d’air ou avant de l’utiliser.
ENTRETIEN DE L’APPAREIL
lors de l’utilisation d’un outil fonctionnant sous-pression, lire les avertissements du
manuel et user d’extrêmes précautions lors de la découverte d’un problème.
Page 28

-28-
FICHE TECHNIQUE DE L’OUTIL
Toutes les mesures des vis et des boulons sont dans le système métrique.
MODÉLE DÉCLENCHEMENT LONGUEUR HAUTEUR LARGEUR POIDS
BTF83WW
déclenchement
séquentiel/
déclenchement par
contact
521mm (20,5po.)
324mm
(12,75po.)
127mm (5po.) 3,58kg (7,9lb)
BTF83PT
déclenchement
séquentiel/
déclenchement par
contact
521mm (20,5po.)
324mm
(12,75po.)
127mm (5po.) 3,54kg (7,8lb)
BTF83PL
déclenchement
séquentiel/
déclenchement par
contact
521mm (20,5po.)
317mm
(12,5po.)
127mm (5po.) 3,49kg (7,7lb)
CARACTÉRISTIQUES DES ÉLÉMENTS D’ASSEMBLAGE :
BTF83PT
Utiliza clavos en tiras de cabeza con muesca o de cabeza redonda descentrada unidos por papel de 30°, en
largos de 50 a 83mm (2 a 3-1/4 pulg.) y diámetros de vástago de 2,8 a 3,3mm (0,113 a 0,131 pulg.).
BTF83PL
Utiliza clavos en tiras de cabeza con muesca o de cabeza redonda descentrada unidos por plástico de 21°,
en largos de 50 a 83mm (2 a 3-1/4 pulg.) y diámetros de vástago de 2,8 a 3,3mm (0,113 a 0,148 pulg.).
BTF83WW
Utilise des bandes de clous assemblés en plastique de 28 ° po ou des clous à tête ronde décentrée, en
longueurs de 50 à 83 mm (2 à 3,25 po) avec diamètres de tige de 2,8 à 3,3 mm (0,113 à 0,131 po).
RACCORDEMENTS À L’AIR :
Cet outil utilise une fiche mâle avec un pas de tuyauterie de 3/8 po. Le raccord doit être en mesure d’évacuer
la pression pneumatique lorsque l’outil est débranché de l’alimentation d’air.
PRESSION D’UTILISATION :
70 à 120 de pression manométrique en lb/po² (4,9 à 8,4 kg/cm2). Sélectionnez la pression de fonctionnement
pour les meilleures performances.
NE PAS DÉPASSER LA PRESSION MAXIMALE RECOMMANDÉE.
CONSOMMATION D’AIR :
Estas clavadoras requieren 181 litros por minuto (6,4 pies cúbicos por minuto) de aire libre para operar en
modalidad de activador secuencial a una velocidad de 100 clavos por minuto, a 80 p.s.i.g (5,6 kg/cm²).
Considere la velocidad real en la que funcionará la herramienta para determinar la cantidad de aire requerido.
Por ejemplo, si los sujetadores que usa promedian los 50 clavos por minuto, necesita el 50% de los 6,4 pies
cúbicos por minuto (181 litros por minuto) que se requieren para operar la herramienta a una velocidad de
100clavos por minuto.
MODES DE FONCTIONNEMENT
BOSTITCH OFFRE DEUX MODES DE FONCTIONNEMENT POUR CET OUTIL.
DÉCLENCHEMENT SÉQUENTIEL :
Le déclenchement séquentiel requiert que l’opérateur maintienne l’outil contre la surface de travail avant
d’appuyer sur la gâchette. Cela permet une plus grande précision de fixation, par exemple pour les applications
de clouage sur charpente, en biais ou sur des caisses. Ce type de déclenchement permet de choisir un
emplacement exact pour l’attache, et élimine le risque de l’éjection d’une deuxième attache au rebond, comme
décrit dans la section « Déclenchement sur contact ». Un outil à déclenchement séquentiel offre un avantage
certain en matière de sécurité parce qu’il est impossible d’enfoncer une attache accidentellement lorsque l’outil
entre en contact avec la surface de travail, ou toute autre surface, alors que l’opérateur appuie sur la gâchette.
DÉCLENCHEMENT SUR CONTACT :
La procédure normale pour les outils à «déclenchement sur contact» demande à l’opérateur de faire contact
avec la surface de travail afin d‘actionner le mécanisme de déclenchement tout en maintenant la gâchette
Page 29

-29-
tirée, ce qui déclenche l’expulsion d’une attache chaque fois que le contact est établi avec la surface de travail.
Cette méthode permet de fixer rapidement des attaches dans le cadre de nombreuses applications comme
les revêtements, les planchers ou l’assemblage de palettes. Tous les outils pneumatiques accusent un recul
lorsqu’une attache est tirée. L’outil peut rebondir, ce qui relâche le déclencheur, et si un contact non intentionnel
est fait avec la surface de travail alors que la gâchette est toujours actionnée (le doigt maintient toujours la
gâchette tirée) une deuxième attache non désirée sera expulsée.
MODE IDENTIFICATION :
Avant d’utiliser cet outil, consultez les pages 32 et 33 sur les instructions de fonctionnement.
CHANGEMENT DU MODE DE FONCTIONNEMENT:
déconnecter la ligne d’air de l’outil et retirer les attaches du chargeur avant tout réglage
pour prévenir tout risque de dommages corporels.
connaître systématiquement le mode de fonctionnement de l’outil avant de le connecter à
de l’air comprimé et/ou de l’utiliser.
DÉCLENCHEMENT SÉQUENTIEL -
1. Maintenez appuyé l’axe à l’opposé du sélecteur, tout en tournant le sélecteur à 180° vers la gauche sur la
position de déclenchement séquentiel .
2. Assurez-vous que le sélecteur est bien calé sur sa nouvelle position.
Appuyé
l’axe
Sélecteur
Pour utiliser la cloueuse en mode de déclenchement séquentiel:
1. Maintenez fermement le déclencheur par contact contre la surface à travailler.
2. Appuyez sur la gâchette.
un clou est enfoncé chaque fois qu’on appuie sur la gâchette tant qu’on maintient le
déclencheur par contact appuyé.
DÉCLENCHEMENT PAR CONTACT -
1. Maintenez appuyé l’axe tout en tournant le sélecteur à 180° vers la droite sur la position de déclenchement
par contact .
2. Assurez-vous que le sélecteur est bien calé sur sa nouvelle position.
Pour utiliser la cloueuse en mode de déclenchement par contact:
1. Appuyez sur la gâchette.
2. Appuyez le déclencheur par contact contre la surface à travailler. Tant que l’on appuiera sur la gâchette,
l’outil continuera de tirer un clou chaque fois que l’on appuiera sur le déclencheur par contact. Cela permet
à l’utilisateur d’enfoncer plusieurs clous l’un après l’autre.
Page 30

-30-
ne plus appuyer sur la gâchette en fin d’utilisation de l’outil.
ALIMENTATION EN AIR COMPRIMÉ ET RACCORDEMENT
l’oxygène, les gaz combustibles ou les bouteilles de gaz ne doivent en aucun cas être
employés comme source d’énergie, car ils peuvent exploser et provoquer des blessures.
ne jamais connecter l’outil à de l’air comprimé qui pourrait excéder 200 p.s.i.g.
(14kg/cm2)
RACCORDEMENTS :
Installer le raccord mâle sur l’appareil. Lors du désaccouplement de la source d’énergie, le raccord mâle doit
permettre rapidement la mise à l’atmosphère de toute pression résiduelle.
TUYAUX :
Les tuyaux d’air comprimé doivent résister à une pression d’utilisation minimale constante de 150 p.s.i.
(10.5kg/cm2), ou 150% de la pression pouvant être produite pour l’installation. Le tuyau d’alimentation doit
contenir un raccord permettant « un désaccouplement rapide » du raccord mâle de l’appareil.
ALIMENTATION EN AIR COMPRIMÉ :
Les appareils doivent être alimentés avec de l’air propre et sec. L’OXYGÈNE, LES GAZ COMBUSTIBLES
OU LES BOUTEILLES DE GAZ NE DOIVENT EN AUCUN CAS TRE EMPLOYÉS COMME SOURCE
D’ÉNERGIE CAR ILS PEUVENT EXPLOSER.
RÉGULATEUR :
Un régulateur de pression fonctionnant à des pressions de 0 -150 p.s.i. (0 à 8,7 Kg/cm2) est nécessaire pour
contrôler la pression d’utilisation du cloueur. Ne pas accoupler cet appareil à un régulateur de pression pouvant
excéder 200 p.s.i.g. (14 Kg/cm2) car l’outil pourrait se fracturer ou se rompre, et causer des blessures.
PRESSION D’UTILISATION :
Ne dépassez pas la pression de fonctionnement recommandée, car l’usure de l’outil augmenterait de façon
considérable. L’alimentation d’air doit être en mesure de maintenir la pression de fonctionnement de l’outil.
Une baisse de pression subite de l’alimentation d’air est susceptible de réduire la puissance motrice de l’outil.
Consultez les «fiche technique de l’outil» pour régler correctement la pression de fonctionnement de l’outil.
FILTRE :
Un filtre en ligne aidera à maintenir la meilleure performance et une usure minimale de l’outil. Le filtre doit avoir
une capacité d’écoulement adéquate pour l’installation en question. Le filtre doit être maintenu propre pour être
efficace et fournir de l’air comprimé propre à l’outil. Consultez les instructions du fabricant concernant l’entretien
de votre filtre. Un filtre sale et obstrué entraînera une baisse de pression et réduira la performance de
LUBRIFICATION
Une lubrification fréquente mais sans excès est nécessaire pour assurer un fonctionnement optimal. Utilisez le
lubrifiant pour outil pneumatique BOSTITCH, PREMOIL-4oz, ou un équivalent. N’utilisez pas d’huile détergente
ni d’additifs. Ces lubrifiants accélèrent l’usure des joints et des butées de l’outil, ce qui a un effet négatif sur
les performances et la fréquence d’entretien. Quelques gouttes suffisent. Tout excès s’accumule dans l’outil et
apparaîtra lors du cycle d’échappement.
UTILISATION PAR TEMPS FROID :
Pour un fonctionnement par temps froid (une température proche ou inférieure à 0 °C), la conduite d’air peut
geler et empêcher le fonctionnement de l’outil. Nous vous recommandons d’utiliser la formule hivernale du
lubrifiant pour outil pneumatique BOSTITCH ou, WINTEROIL-4oz à défaut, un antigel permanent (éthylèneglycol).
AVIS: ne pas entreposer les outils dans un environnement froid pour prévenir toute formation de gel ou
glace sur les soupapes ou les mécanismes de l’outil pouvant occasionner la défaillance de l’outil.
AVIS: certains séchoirs de liquides de conduites d’air commerciaux sont nocifs pour les joints toriques
Page 31

-31-
ou autres joints. Ne pas utiliser ces séchoirs à air, à faibles températures sans vérifier leur compatibilité.
CHARGEMENT DES L’OUTIL
PROTECTION DES YEUX : Elle doit répondre aux spécifications ANSI et offrir une
protection contre les particules projetées, à la fois FRONTALE et LATÉRALE. Cette
protection devra toujours être portée par l’opérateur et les autres membres du personnel
qui travaillent dans le lieu de chargement, de fonctionnement et d’entretien de l’appareil.
La protection oculaire est exigée pour protéger contre la projection d’éléments
d’assemblage et de débris, qui pourraient causer de sévères blessures aux yeux.
L’employeur et/ou l’utilisateur doivent s’assurer du port d’une protection oculaire
adéquate. L’équipement de protection oculaire doit être conforme aux normes ANSI
Z87.1/CAN/CSA Z94.3 (de l’Institut National Américain des Normes), et offrir une
protection à la fois frontale et latérale. REMARQUE : les lunettes de protection sans
écrans latéraux et les masques de protection portés seuls, n’offrent pas une protection
suffisante.
POUR PRÉVENIR UN ACCIDENT
• Connecter l’outil à l’air comprimé avant d’insérer les attaches pour éviter qu’une
attache soit libérée lors de la connexion.
• Ne jamais placer la main ou toute autre partie du corps dans la zone d’éjection des clous
lorsque l’outil est relié à la source d’air.
• Ne jamais pointer le cloueur vers quelqu’un.
• Ne jamais jouer avec l’outil.
• Ne jamais appuyer sur la détente si le nez n’est pas dirigé vers le plan de travail.
• Toujours manier l’outil avec précautions.
1. Poussez le poussoir vers la base du chargeur pour le verrouiller en place.
2. Maintenez la cloueuse avec le chargeur orienté vers le bas et insérez les clous en bande soudés appropriés
à l’arrière du chargeur.
REMARQUE: voir la «fiche technique de l’outil» pour déterminer la taille des clous et l’angle appropriés.
Page 32

-32-
3. Repoussez à nouveau le poussoir pour le libérer et laissez-le lentement avancer jusqu’à ce qu’il touche les
clous.
REMARQUE: utilisez uniquement des clous recommandés pour une utilisation dans BOSTITCH
Encadrement cloueurs ou des clous qui répondent aux spécifications BOSTITCH.
COMMANDE DE RÉGLAGE DE
PROFONDEUR DE FIXATION
La commande de réglage de profondeur de fixation permet de contrôler
REMARQUE : Faites pivoter la
roue de réglage de profondeur
jusqu’à la profondeur de fixation
désirée.
précisément la profondeur de pénétration des dispositifs de fixation :
encastrement faible, peu profond ou profond.
POUR RÉGLER LA PROFONDEUR DE FIXATION :
déconnectez l’outil de l’arrivée d’air avant d’essayer
de démonter toute pièce et de modifier le réglage de
l’élément de contact.
Faites pivoter la roue de réglage de profondeur jusqu’à la profondeur de
fixation désirée.
RETRAIT DES CLOUS
1. Poussez le poussoir vers la base du chargeur pour le verrouiller en place.
2. Inclinez l’outil puis insérez les clous au fond du chargeur.
3. Sortez les clous du chargeur.
Page 33

-33-
FONCTIONNEMENT DE L’OUTIL
PROTECTION DES YEUX : Elle doit répondre aux spécifications ANSI et offrir une
protection contre les particules projetées, à la fois FRONTALE et LATÉRALE. Cette
protection devra TOUJOURS être portée par l’opérateur et les autres membres du
personnel qui travaillent dans le lieu de chargement, de fonctionnement et d’entretien de
l’appareil. La protection oculaire est exigée pour protéger contre la projection d’éléments
d’assemblage et de débris, qui pourraient causer de sévères blessures aux yeux.
l’employeur et/ou l’utilisateur doivent s’assurer du port d’une protection oculaire
adéquate. L’équipement de protection oculaire doit être conforme aux normes ANSI
Z87.1/CAN/CSA Z94.3 (de l’Institut National Américain des Normes), et offrir une
protection à la fois frontale et latérale. REMARQUE : les lunettes de protection sans
écrans latéraux et les masques de protection portés seuls, n’offrent pas une protection
suffisante.
AVANT DE MANIPULER OU D’UTILISER CET OUTIL :
I. LIRE ET COMPRENDRE LES AVERTISSEMENTS CONTENUS DANS CE MANUEL.
II. SE RÉFÉRER À LA RUBRIQUE « CARACTÉRISTIQUES DE L’APPAREIL » DU MANUEL AFIN
D’IDENTIFIER LE MODE D’UTILISATION DE VOTRE OUTIL.
Ces outils pneumatiques de BOSTITCH sont munis de deux modes de fonctionnement. Notamment :
1. FONCTIONNEMENT PAR DÉCLENCHEMENT SÉQUENTIEL
2. FONCTIONNEMENT PAR DÉCLENCHEMENT SUR CONTACT
BOSTITCH offre deux modes de fonctionnement qui opèrent différemment : Le déclenchement séquentiel ou
sur contact. Chacun des modes comporte ses propres avantages. Vous devez évaluer le projet de construction
en question pour déterminer le mode le plus approprié.
Votre outil a quitté l’usine avec la configuration déclenchement séquentiel. Il peut facilement être converti
au mode déclenchement sur contact à l’aide de cette trousse de conversion de mode de déclenchement.
Consultez la section « changement du mode de fonctionnement » pour alterner entre les modes déclenchement
séquentiel et déclenchement sur contact.
vérifiez et surveillez toujours le mode de fonctionnement de l’outil en inspectant la
gâchette avant de le brancher à l’alimentation d’air ou avant de l’utiliser.
1. FONCTIONNEMENT EN MODE DÉCLENCHEMENT SÉQUENTIEL:
Le mode déclenchement séquentiel prend son nom de la « séquence » requise pour enfoncer une attache. Pour
enfoncer une attache, l’opérateur doit d’abord appuyer COMPLÈTEMENT le déclencheur contre la surface de
travail, puis appuyer sur la gâchette. Pour enfoncer une deuxième attache, il doit retirer l’outil de la surface de
travail, lâcher la gâchette, puis répéter la séquence.
1. Le mode déclenchement séquentiel : offre un avantage de sécurité réel,
puisqu’une attache nesera pas accidentellement enfoncée si l’outil entre en contact
avec la surface de travail ou qui que ce soit pendant que la gâchette est tirée.
2. Le mode déclenchement séquentiel : permet de choisir un emplacement
exact pour l’attache etélimine le risque de l’éjection d’une deuxième attache non
désirée au rebond, comme décrit ci-dessous dans la section « Déclenchement sur
contact».
Page 34

-34-
2. FONCTIONNEMENT PAR DÉCLENCHEMENT SUR CONTACT :
toujours garder à l’esprit que, une fois la goupille de verrouillage de modes retirée, la
gâchette peut changer de mode, activant les modes de déclenchement par contact ou
séquentiel.
Votre nouvel outil BOSTITCH peut être configuré en mode de déclenchement conventionnel, soit sur contact.
Pour enfoncer un clou, le déclencheur et la gâchette doivent tous deux être enfoncés. Sur les outils de
déclenchement sur contact conventionnels, la gâchette peut être maintenue enfoncée et chaque contact entre
le déclencheur et la surface de travail provoquera l’enfoncement d’un clou.
A. PLACEMENT D’UNE ATTACHE UNIQUE (clouage en place) : placez d’abord
le déclencheur COMPLÈTEMENT sur la surface de travail, SANS APPUYER SUR
LA GÂCHETTE. Enfoncez COMPLÈTEMENT le déclencheur jusqu’à ce quele nez
de l’outil touche à la surface de travail, puis appuyez sur la gâchette pour enfoncer
un clou. Veillez à ne pas exercer plus de force que nécessaire sur la surface de
travail. Au contraire, laissez l’outil rebondir afin d’éviter de fixer une deuxième
attache superflue. REMARQUE: Retirez votre doigt de la gâchette après chaque
utilisation.
B. UTILISATION RAPIDE (clouage par contact) : commencez par orienter l’outil avec le déclencheur
pointant vers la surface de travail, sans toutefois établir le contact. Appuyez sur la gâchette, puis tapez
ou « heurtez » le déclencheur contre la surface de travail, en tirant parti du rebond. Chaque pression du
déclencheur contre la surface enfoncera un clou.
le déclencheur par contact n’empêchera pas un clou d’être enfoncé accidentellement si
la gâchette est maintenue enfoncée et que le déclencheur entre en contact avec un objet
ou une personne. Pour cette raison, ne tenez jamais ni ne transportez l’outil avec le doigt
sur la gâchette. Ne gardez la gâchette enfoncée que si vous prévoyez d’enfoncer plusieurs
clous rapidement et que l’outil est pointé vers la surface de travail.
en mode déclenchement sur contact conventionnel pour le clouage en place, l’outil
peut rebondir, et si ce dernier touche de nouveau la surface de travail pendant que vous
appuyez toujours sur la gâchette, un deuxième clou peut être accidentellement enfoncé.
Vous devez permettre à l’outil de reculer suffisamment pour dégager le déclencheur
et ainsi d’éviter un deuxième cycle. Évitez d’appuyer trop fort sur l’outil; laissez-le
simplement faire son travail.
l’opérateur ne doit pas maintenir la gâchette enfoncée sur les outils à bras de contact
sauf lors des opérations d’attache puisque de graves blessures peuvent être causées si
le déclencheur entrait en contact avec quelqu’un ou quelque chose accidentellement, ce
qui pourrait actionner l’outil.
ne placez jamais la main ou le corps dans la zone d’éjection de l’outil. Un outil à
déclenchement sur contact peut rebondir en raison du recul causé au moment d’enfoncer
une attache et une deuxième attache pourrait être enfoncée inopinément et occasionner
des blessures.
ne jamais utiliser le crochet pour suspendre l’outil au corps, aux vêtements ou à la
ceinture.
VÉRIFICATION DU FONCTIONNEMENT DE L’OUTIL
retirer toutes les attaches de fixation de l’outil avant de procéder à une vérification du
fonctionnement de celui-ci.
1. SYSTÈME DE SÉCURITÉ AU COUP-PAR-COUP:
A. Appuyer l’élément palpeur sur la surface de travail sans actionner la détente.
L’APPAREIL NE DOIT PAS SE DÉCLENCHER
B. Éloigner l’appareil de la surface de travail et actionner la détente.
L’APPAREIL NE DOIT PAS SE DÉCLENCHER
Relâcher la détente; elle doit revenir à sa position initiale.
C. Appuyer sur la détente, et appuyer l’élément palpeur sur la surface de travail.
L’APPAREIL NE DOIT PAS SE DÉCLENCHER
D. Détente libre, appuyer l’élément palpeur sur la surface de travail. Actionner la détente.
L’APPAREIL DOIT SE DÉCLENCHER
2 . FONCTIONNEMENT DE LA BUTÉE DE DÉCLENCHEMENT :
A. Le doigt hors de la gâchette, appuyez la butée de déclenchement sur la surface de travail.
L’OUTIL NE DOIT PAS EFFECTUER UN CYCLE.
B. Maintenez l’outil hors de la surface de travail et appuyez sur la gâchette.
Page 35

-35-
L’OUTIL NE DOIT PAS EFFECTUER UN CYCLE.
C. Maintenez l’outil hors de la surface de travail et appuyez sur la gâchette. Appuyez la butée de
déclenchement sur la surface de travail.
L’OUTIL DOIT EFFECTUER UN CYCLE.
D. Le doigt hors de la gâchette, appuyez la butée de déclenchement sur la surface de travail,
puis appuyez sur la gâchette.
L’OUTIL DOIT EFFECTUER UN CYCLE.
EN SUPPLÉMENT DES AUTRES AVERTISSEMENTS CONTENUS DANS CE
MANUEL, OBSERVEZ LES RÈGLES SUIVANTES POUR OPÉRER EN TOUTE
SÉCURITÉ
• Utiliser cet outil pneumatique BOSTITCH uniquement pour éjecter des éléments d’assemblage.
• Ne jamais utiliser l’outil de telle manière qu’un élément d’assemblage peut être dirigé vers vousmême ou vers d’autres personnes présentes dans la zone de travail.
• Ne pas utiliser l’outil comme un marteau
• Porter toujours l’outil par la poignée, jamais par le nez.
• Ne pas altérer ou modifier cet outil par rapport à sa forme originale sans l’agrément de
BOSTITCH, INC.
• Toujours avoir présent à l’esprit qu’une manipulation ou une utilisation inadéquate de cet outil
peuvent causer des blessures.
• Ne jamais attacher ou maintenir la détente en position déchenchée.
• Ne jamais laisser le cloueur connecté au tuyau d’air sans surveillance.
• Ne pas utiliser cet outil s’il n’est pas pourvu d’une ÉTIQUETTE D’AVERTISSEMENT (WARNING
LABEL) lisible.
• Cesser d’utiliser un outil qui perd de l’air ou ne fonctionne pas correctement. Notifier votre
concessionnaire BOSTITCH si votre outil continue à mal fonctionner.
ENTRETIEN DE L’APPAREIL
lors de l’utilisation d’un outil fonctionnant sous-pression, lire les avertissements du
manuel et user d’extrêmes précautions lors de la découverte d’un problème.
ressort-poussoir (ressort à poussée constante). Il est recommandé d’user de prudence
lors de la manipulation du système du ressort. Le ressort est enroulé autour du rouleau
mais n’y est pas attaché. Si le ressort est tiré au delà de sa longueur d’extension,
l’extrémité se détachera du rouleau et reviendra à sa longueur première, risquant ainsi de
vous pincer les doigts. Les bords du ressort sont très fins et risquent de couper. Il faut
aussi vérifier qu’il n’existe pas de torsion du ressort, celles-ci pouvant diminuer la force
du ressort.
PIÈCES DE RECHANGE :
Utilisez uniquement des pièces de rechange d'origine OEM.
PROCÉDURE D’ASSEMBLAGE DES GARNITURES :
Lors des réparations, vérifier que les pièces internes sont propres et bien lubrifiées. Appliquer du lubrifiant “O”
LUBE de Parker sur tous les joints toriques, avant de procéder à l’assemblage. Appliquer une fine pellicule
de “O” LUBE sur toutes les pièces mobiles et pivots. Les opérations de remontage terminées, veiller à mettre
quelques gouttes de lubrifiant pour outils pneumatiques BOSTITCH dans le circuit d’air avant de procéder aux
essais.
ALIMENTATION D’AIR - PRESSION - VOLUME :
Le volume d’air est aussi important que la pression. Le volume d’air nécessaire au bon fonctionnement de
l’appareil peut être perturbé par des tuyaux et des raccordements sous dimensionnés, ou par la présence d’eau
dans le circuit d’air. Même si la pression d’air lue au manomètre est correcte, les diminutions du volume d’air se
traduiront par une perte de puissance de l’appareil, une diminution de la vitesse ou une alimentation inadéquate.
Avant de rechercher la cause de ces symptômes, vérifier les raccords et les tuyaux depuis l’outil jusqu’à la
source d’énergie et vérifier qu’il n’existe pas de raccords trop serrés, tordus, des niveaux bas contenant de
l’eau, ou tout autre cause qui puisse expliquer une diminution du volume d’air vers l’appareil.
Page 36

-36-
PROBLÈMES DE FONCTIONNEMENT
pour réduire les risques de blessures graves, retirer les fixations du chargeur avant de
régler, entretenir ou réparer l’outil.
Symptôme Cause Solution
Fuite au logement de la valve de
gâchette
Défaillance de la tige de la valve ou du joint
torique
Remplacer la valve à l’aide de l’ensemble de valve de gâchette
Fuite d’air à la tête supérieure Vis de la tête desserrées Serrer les vis de la tête à l’aide d’une clé hexagonale
Joint d’étanchéité ou torique endommagé ou usé
Remplacer le joint d’étanchéité/torique à l’aide de l’ensemble de
réparation de joints toriques de la cloueuse
Fuite à l’échappement
Joint principal ou torique endommagé, débris
dans l’outil
Remplacer le joint d’étanchéité/torique à l’aide de l’ensemble
de réparation de joints toriques de la cloueuse à charpente à
rouleau
Fuite d’air dans la région du nez
lorsque l’outil est au repos (lame
d’entraînement en haut)
Joints toriques endommagés ou usés
Remplacer les joints d’étanchéité/toriques à l’aide de l’ensemble
de réparation de joints toriques de la cloueuse à charpente à
rouleau
Fuite d’air dans la région
du nez lorsque l’outil est en
position d’actionnement (lame
d’entraînement en bas)
Butoir endommagé ou usé
Remplacer le butoir à l’aide de l’ensemble de butoir pour
cloueuse à charpente à rouleau
Pas de déclenchement par
temps froid
L’air n’arrive pas à l’outil Vérifier l’alimentation d’air
Possibilité que la valve soit gelée
Réchauffer l’outil. Le lubrifier avec de l’huile pour outils
pneumatiques BOSTITCH ou de l’huile d’hiver pour outils
pneumatiques contenant de l’éthylèneglycol
Joints toriques endommagés ou usés
Remplacer les joints d’étanchéité/toriques à l’aide de l’ensemble
de réparation de joints toriques de la cloueuse à charpente à
rouleau
Lame d’entraînement cassés ou endommagée Remplacer la lame d’entraînement
Manque de puissance; outil
paresseux
Pression d’air faible Vérifier l’alimentation d’air
Manque de lubrification
Lubrifier l’outil à l’aide d’huile pour outils pneumatiques
BOSTITCH
Joints toriques endommagés ou usés
Remplacer les joints d’étanchéité/toriques à l’aide de l’ensemble
de réparation de joints toriques de la cloueuse à charpente à
rouleau
Trou d’échappement bloqué ou obstrué
Débrancher l’air, retirer la plaque d’échappement du haut de
l’outil, nettoyer le port
Réglage de la profondeur trop faible Réinitialiser le réglage de la profondeur
Entraînement endommagé ou usé Remplacer la lame d’entraînement
Clous non utilisés; alimentation
intermittente
Débit d’air limité Vérifier l’alimentation d’air et les raccords
Manque de lubrification
Lubrifier l’outil à l’aide d’huile pour outils pneumatiques
BOSTITCH
Vis de l’embout desserrées
Serrer les vis de l’embout à l’aide d’une clé hexagonale de la
dimension et de l’angle appropriés
Fixation de taille/angle inadaptés N’utiliser que des fixations recommandées
Chargeur sale Nettoyer le rail du chargeur et l’embout
Chargeur endommagé/usé Remplacer le chargeur
Lame d’entraînement cassée ou endommagée Remplacer la lame d’entraînement
Joint torique de la valve de gâchette usée ou
endommagée
Remplacer la valve à l’aide de l’ensemble de valve de gâchette
Joint torique du piston usé
Remplacer le joint torique à l’aide de l’ensemble de réparation
de joints toriques de la cloueuse à charpente à rouleau
Ressort de poussoir usé ou endommagé
Remplacer le ressort à l’aide de l’ensemble de ressort de
poussoir
Fixations coincées dans l’outil Canal d’entraînement de l’embout usé Remplacer l’embout
Fixations de dimension/angle inadaptés N’utiliser que des fixations recommandées
Lame d’entraînement usée Remplacer la lame d’entraînement
Vis de l’embout desserrées Serrer les vis de l’embout à l’aide d’une clé hexagonale
Mauvaise alimentation en clous
Vérifier que les clous passent facilement dans le chargeur et
dans le nez
(DEC 2016)
Copyright © 2016
Part
No. 9R209363RB
BOSTITCH
BTF83PT, BTF83PL, BTF83WW
 Loading...