How it Works
Log In / Sign Up
Buy Points
How it Works
FAQ
Contact Us
Questions and Suggestions
Users
BOSS
Loading...
B
BV8IRF
BV8WFLIP
BV900ACP
BV9050
BV9055 PART 1
2
bv9155b
BV9.2
BV9200
BV9.2BA
BV9.2CBL
BV9.2CGR
BV9.2CTA
BV9.2GA
BV9.2TA
BV9348B
BV9355B
BV9362BI
BV9364B
BV9380NV
BV9386NV
4
BV9450
BV9455 PART 1
2
BV9555
BV9557
BV9560B
BV9562B
BV9562I
BV9564BI
bv9565bi
BV9566BI
BV9567BI
BV9600
BV9650
BV9755
BV9757B
BV9758BI
BV9759BD
bv9963i
BV9965
BV9967B
2
BV9968BI
BV9972
BV9974B
2
BV9975B
BV9976B
BV9977
2
BV9979B
BV9980NV
BV9982I
BV9990T
BV9995B
BV9996BT
BV9997BI
BVB9967RC
BVCP9675A
BVCP9685A
BVCP9700A
BVCP9850W
BVFL10.4
BVH6
BVI9994
BVT5.6
BVTS
BVTS4
BX-15
BX-16
2
BX-25
BX-35
BX-4
BX-45
2
BX-55
BX-60
BX-600
2
BX-8
2
BX-800
C
C1000
C1200
C150
C-3040
C450
C700
C800
C900
CABINET 112 BASS
CAM10
CAM20
CAP10
CAP10B
CAP10R
CAP18
2
CAP20
CAP20B
CAP20C
CAP20R
CAP25C
CAP25S
CAP2B
CAP2C
CAP2R
CAP2S
Loading...
Loading...
Nothing found
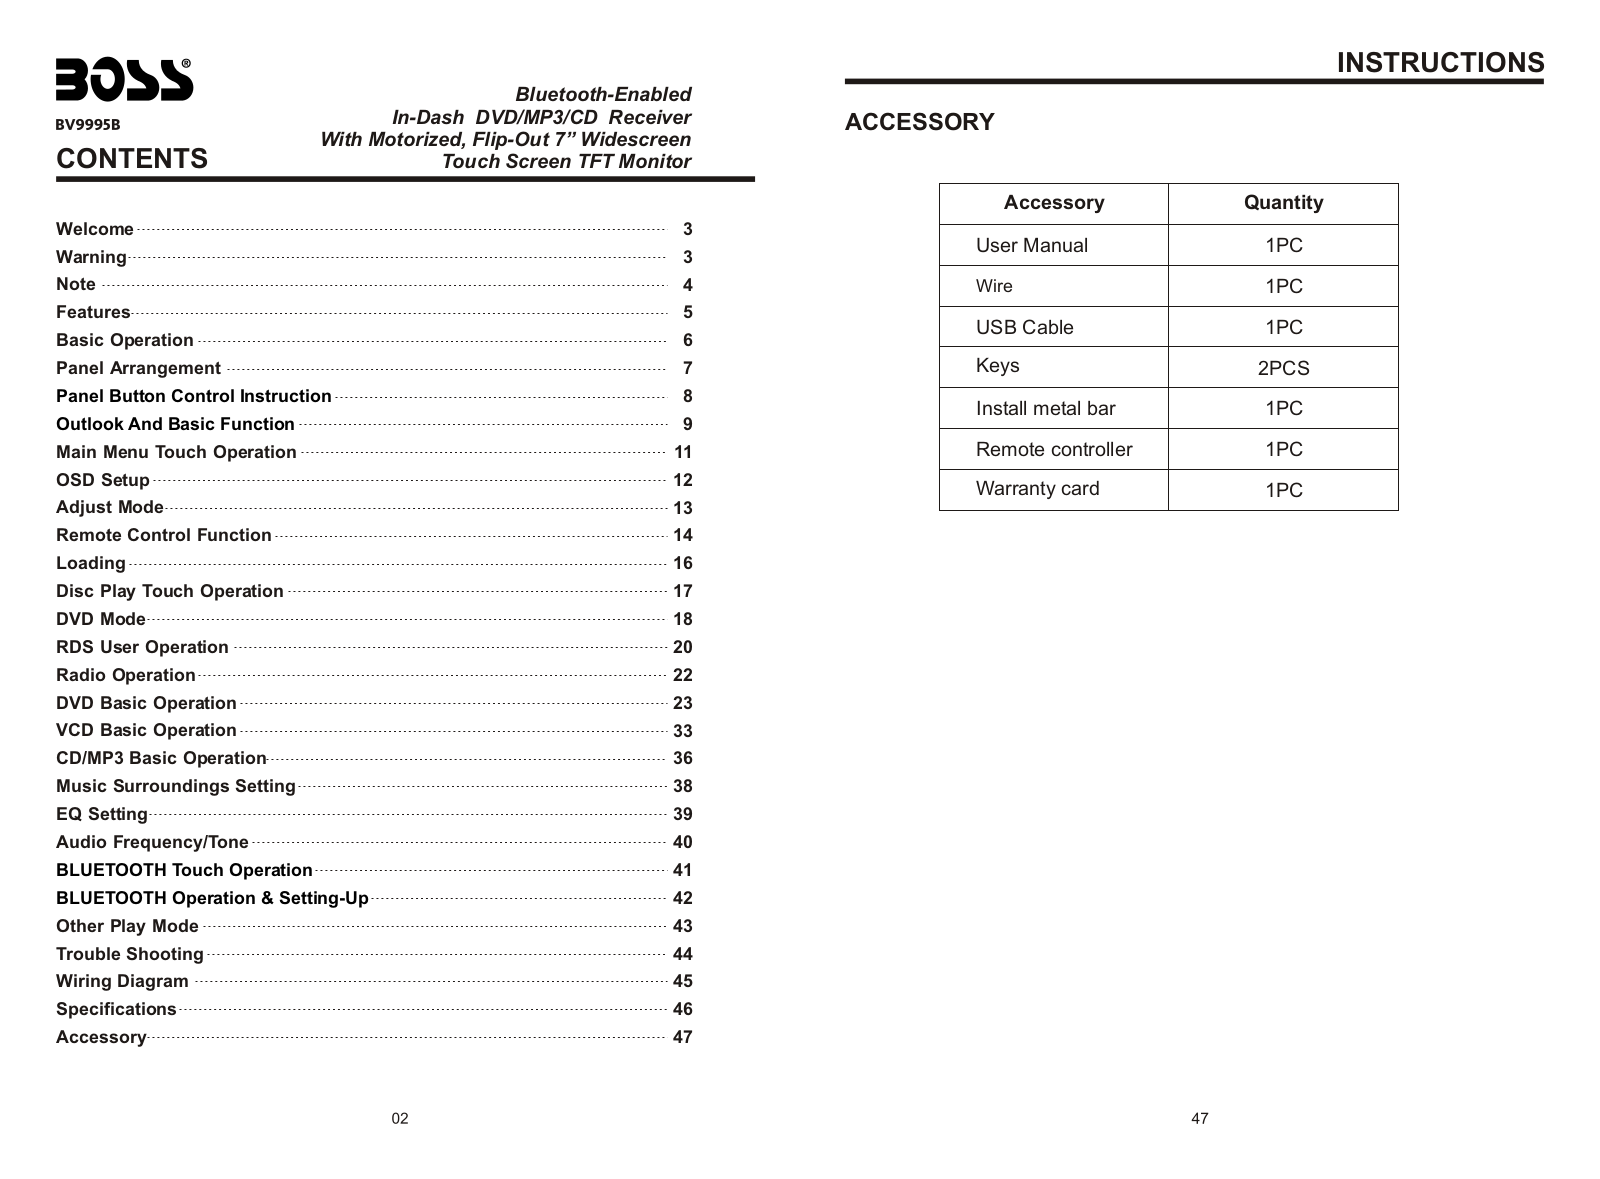
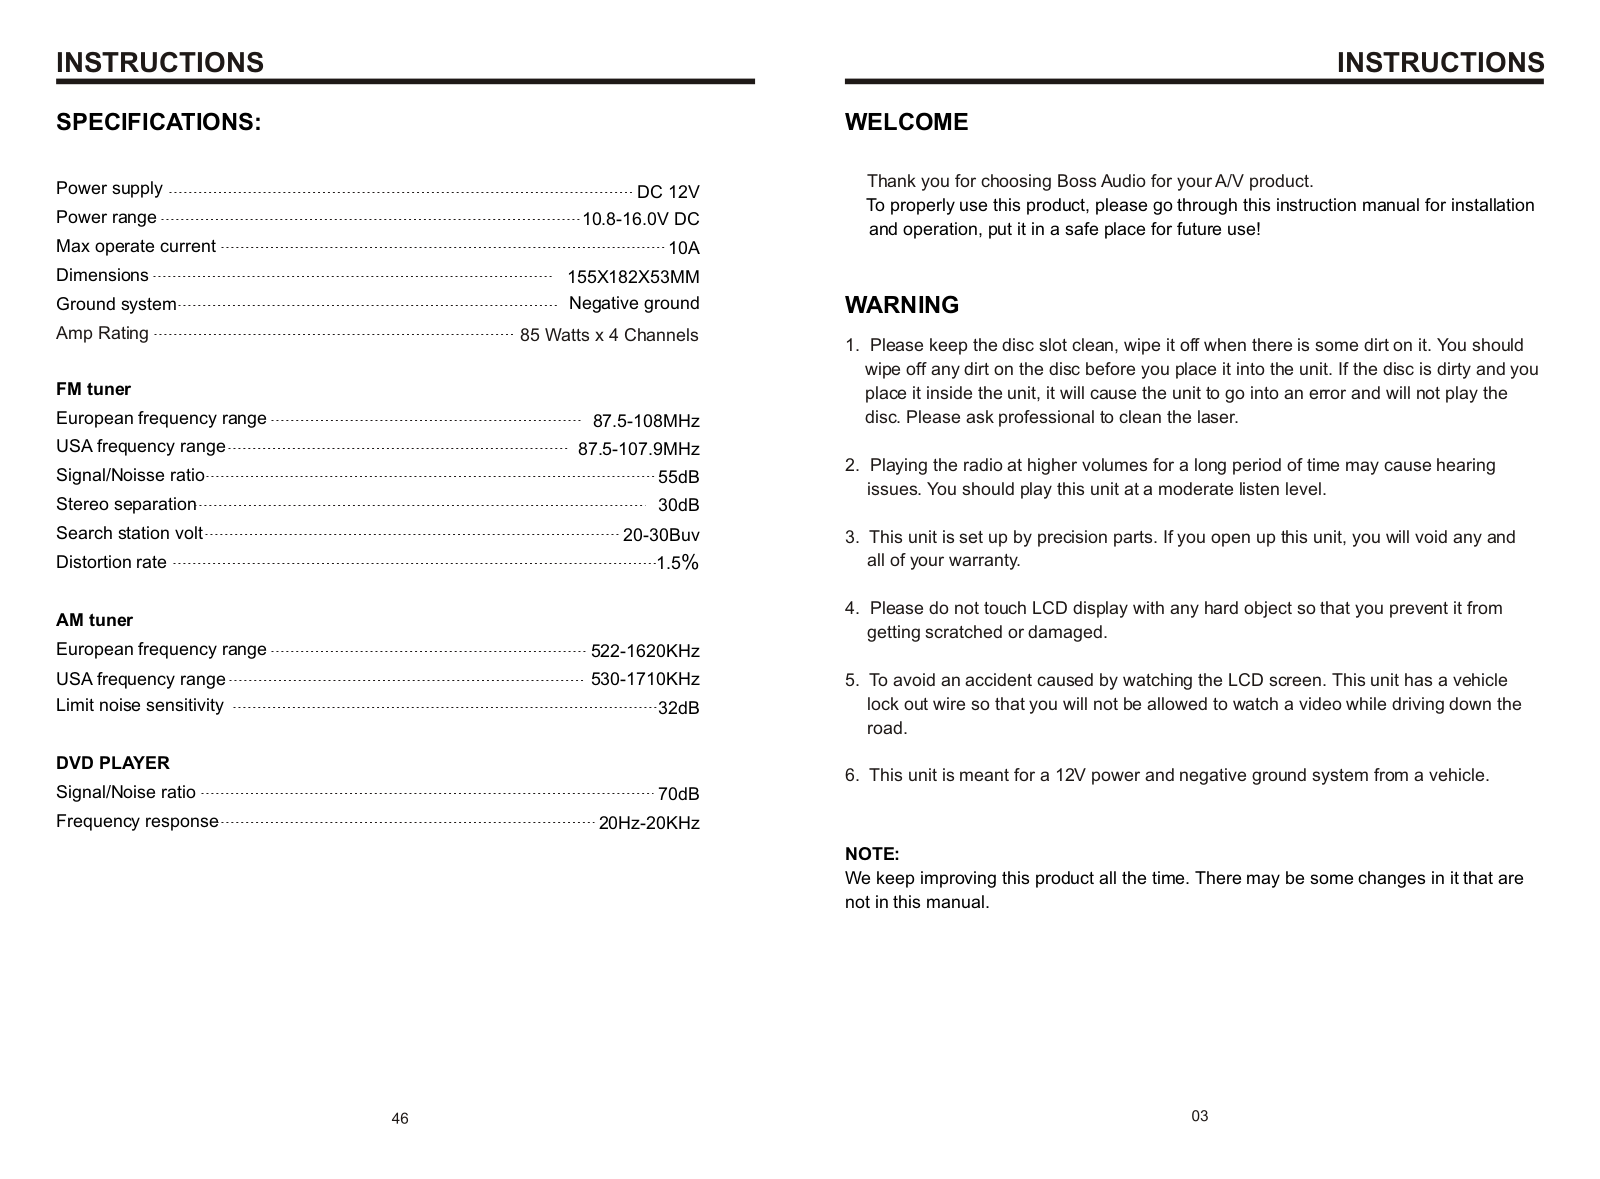
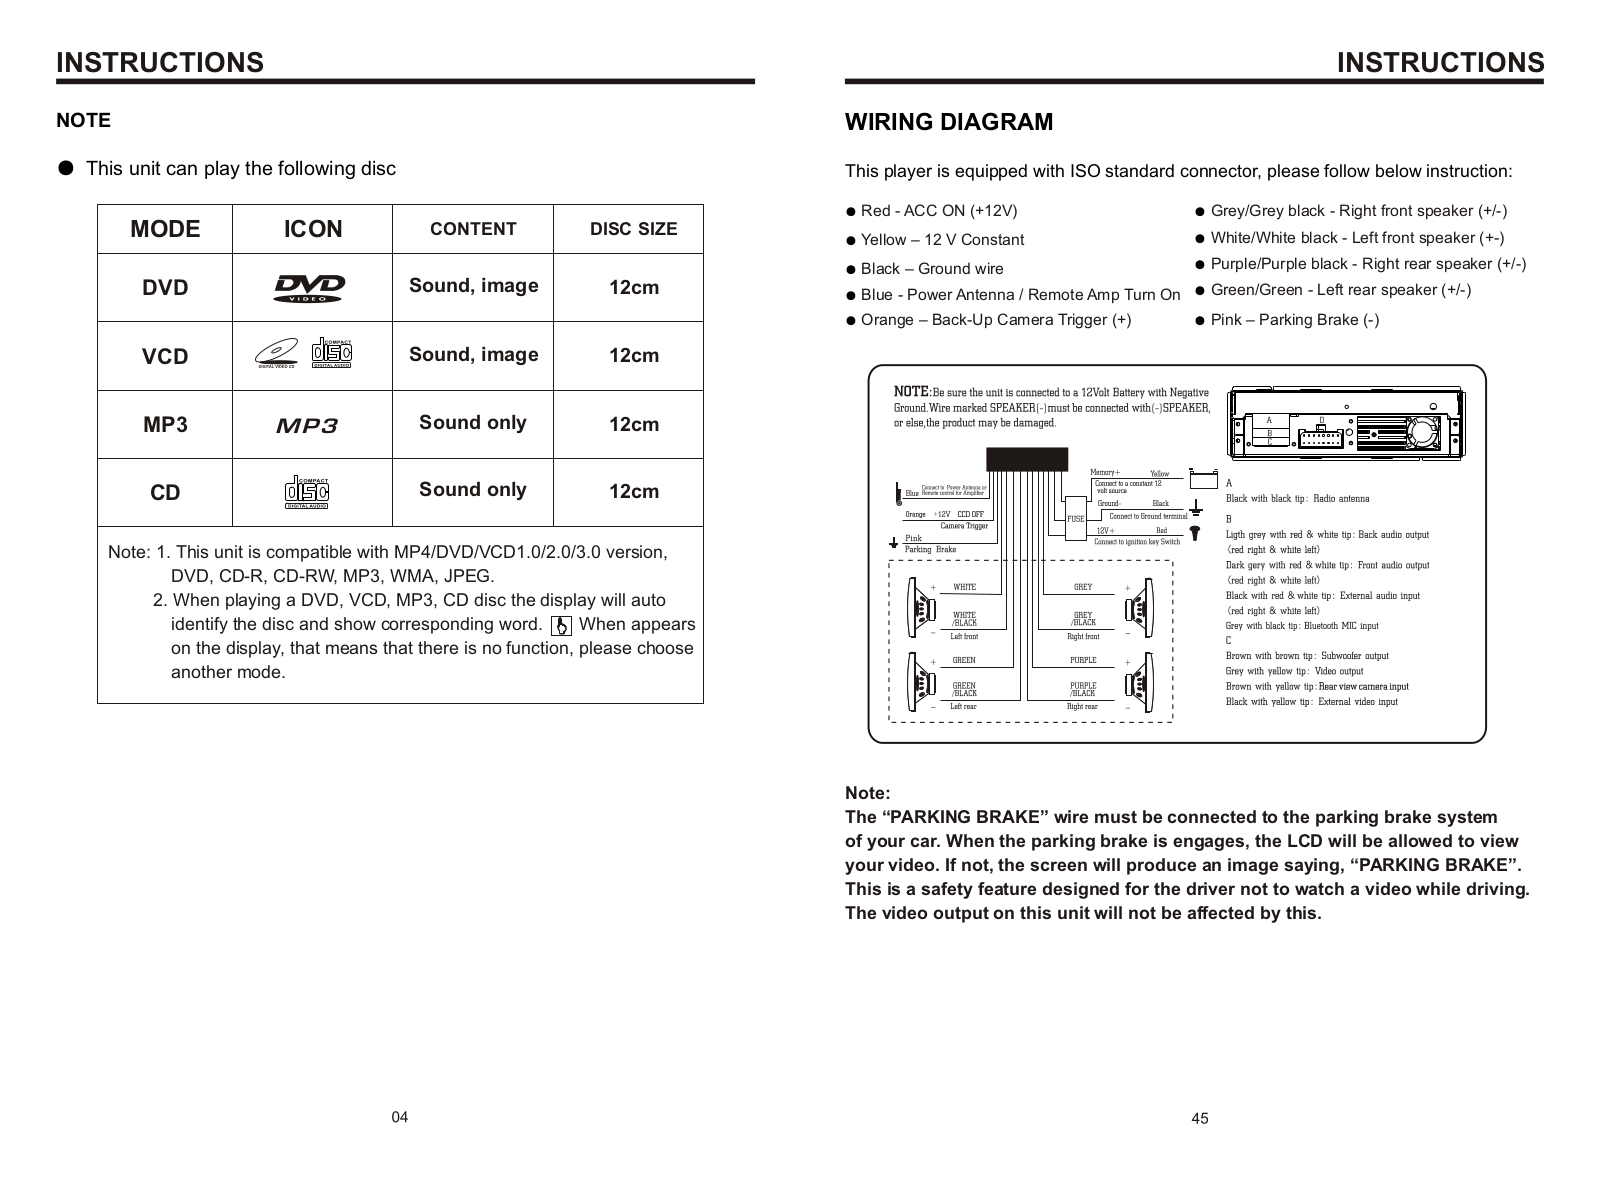
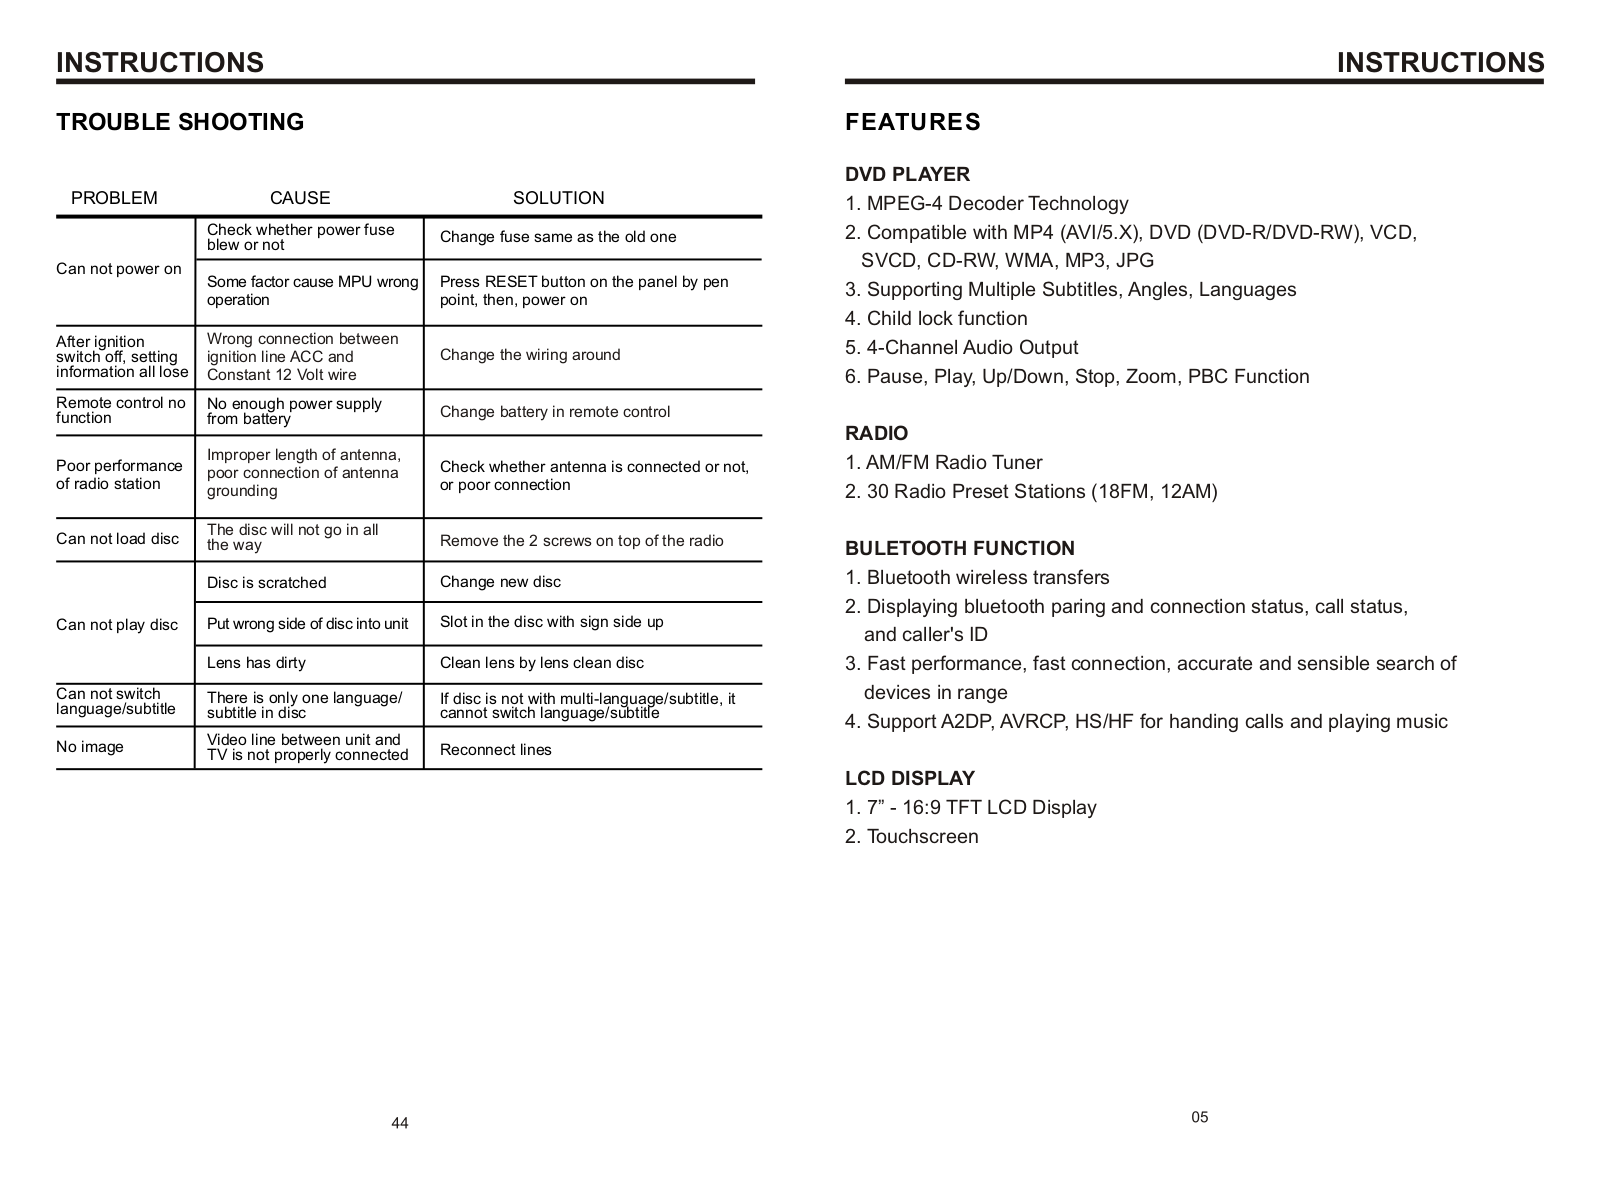
BV9995B
User Manual
24 pgs
5.39 Mb
0
Table of contents
Loading...
BOSS BV9995B User Manual
...
BOSS User Manual
Download
Text View
Picture View
Page 1
Page 2
Page 3
Page 4
Page 5
Page 6
Page 7
Page 8
Page 9
Page 10
Page 11
Page 12
Page 13
Page 14
Page 15
Page 16
Page 17
Page 18
Page 19
Page 20
Page 21
Page 22
Page 23
Page 24
Loading...
+
hidden pages
Unhide
You need points to download manuals.
1 point = 1 manual.
You can buy points or you can get point for every manual you upload.
Buy points
Upload your manuals
 Loading...