

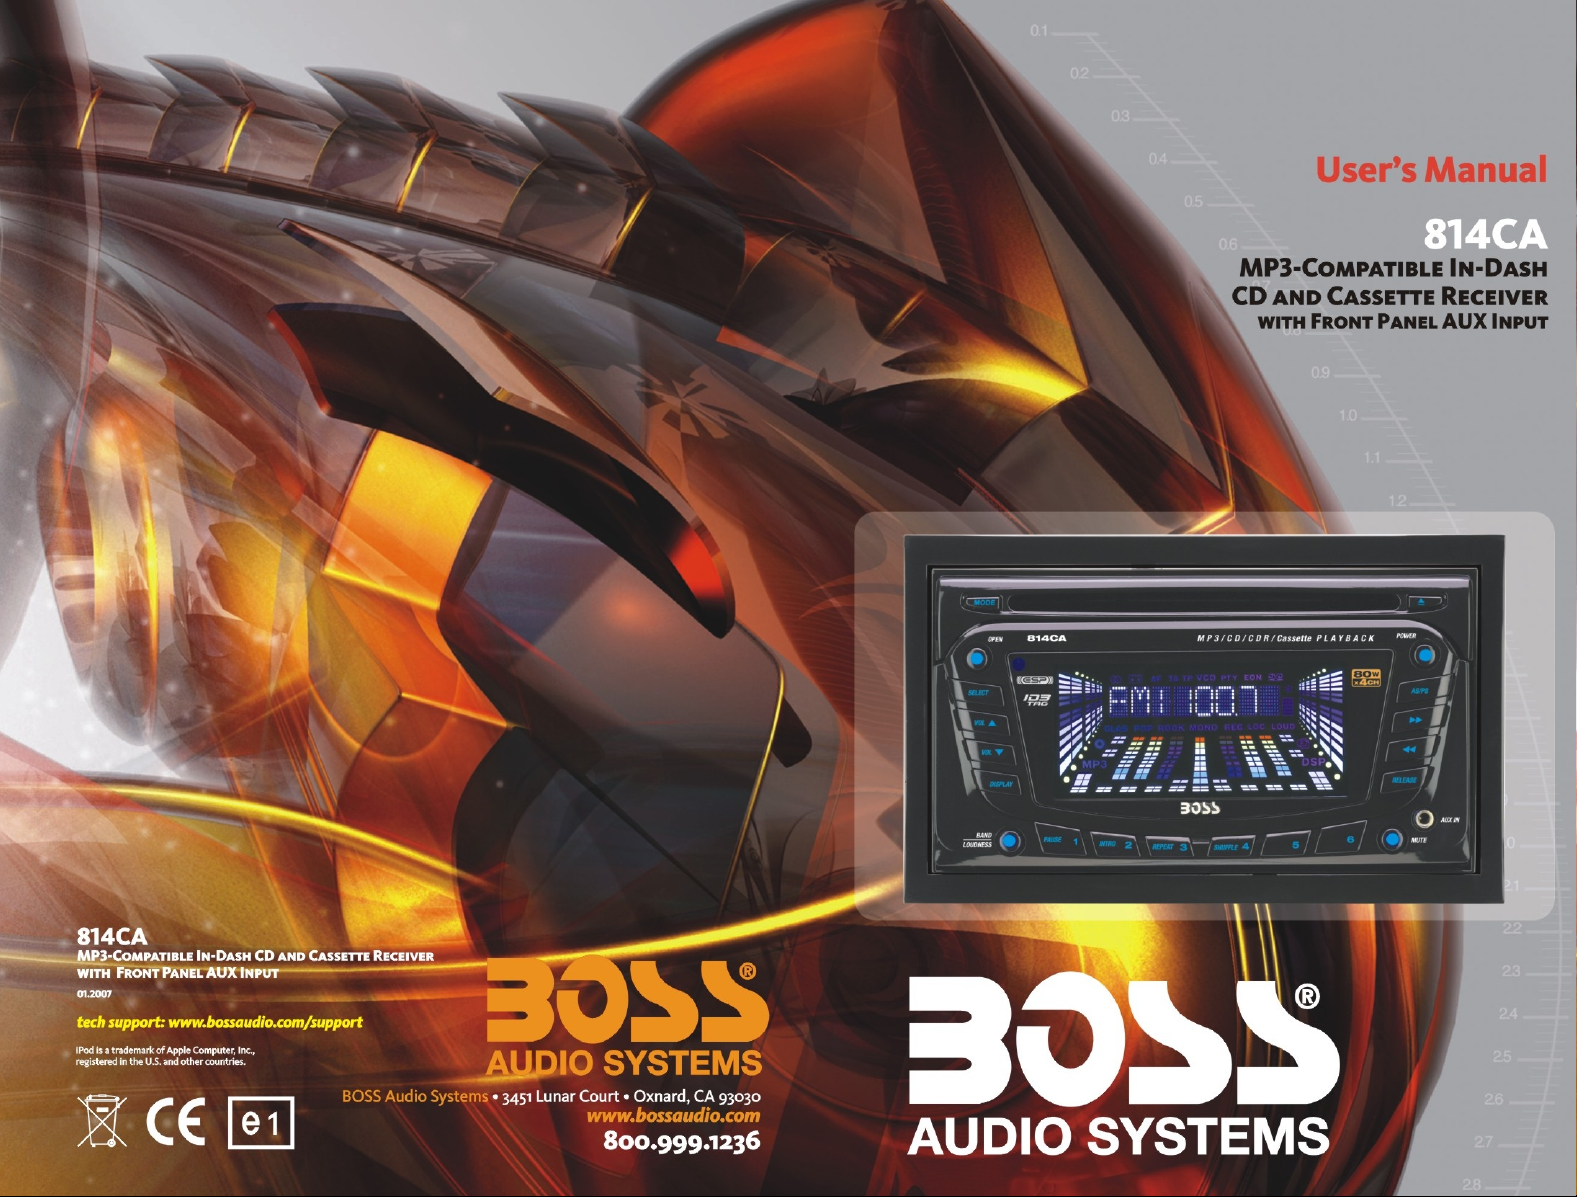
Page 1
Page 2

Page 3

LIST OF THE PRODUCT
NO.
1
2
3
4
5
6
7
8
9
10
11
12
13
14
15
DESCRIPTION
Main Set
Front Panel
Trim-Plate
Panel Bag
Install Bracket A
Install Bracket B-Left
Install Bracket B-Right
Spring Washer
Plate Washer
Screw M5
Screw M5X8 BHW
Screw ST5X20 BAW
Holder Strip 195mm
User Manual
Warranty Card
QTY
1
1
1
1
2
1
1
5
6
1
4
1
1
1
1
16
17
Remote Control
Connector and Lines
1
1
Page 4

TROUBLESHOOTINGCONTENTS
INSTALLATION
WIRING INSTRUCTION
WIRING DIAGRAM
CONTROL LOCATIONS
REMOTE CONTROL BUTTON LOCATIONS
GETTING STARTED
BUTTON FUNCTION
MP3 PLAYER OPERATION
2
3
4
5
6
7~9
10~11
1
Problem Cause Action
Yellow wire not connected or
Unit will not turn on
(no power)
Unit has power
(but no sound)
Unit blows fuses
Excessive skipping
incorrect voltage.
Red wire not connected or
incorrect voltage.
Black wire not connected
Fuse blown
Speaker wires not connected
One or more speaker wires
touching each other or
touching chassis ground
Yellow or red wire touching
chassis ground
Speaker wires touching
chassis ground
Incorrect fuse rating
Unit is not mounted correctly
or back strap is not secure
Physical defect in media
(CD / MP3/CD-R / CD-RW)
Check connections for
proper voltage(11-14VDC)
Check connection
to ground
Replace fuse
Check connections
at speakers
Insulate all bare speaker
wires from each other
and chassis ground
Check for pinched wire
Check for pinched wire
Use fuse with correct
rating
Check mounting sleeve
and back strap support
Check media for
scratches
SPECIFICATIONS
TROUBLESHOOTING
12
13
ERROR1 appears
on display
ERROR2 appears
on display
Mechanism error
Servo error or disc is in
upside down
13
Press eject or RESET
Press eject or RESET
Page 5

SPECIFICATIONS
SUPPLIED MOUNTING HARDWARE FOR INSTALLATION
GENERAL
FM TUNER
SECTION
AM TUNER
SECTION
TAPE
SECTION
CD
SECTION
RCA
Power Supply: DC 13.8 Volts. Negative Ground
Current consumption:15A MAX
Maximum Output Power:4X80W
Frequency Range:87.5MHZ-107.9MHz
Usable sensitivity:3uV.
I. F. Frequency :10.7MHz
Frequency Range:530KHz-1710KHz
Wow&Flutter:0.1%
S/N Ratio:52dB
Separation:45dB
Frequency Response:50Hz - 15KHz
System: Compact disc audio system
Signal Format: Sampling Frequency 44.1KHz
No of quantization bits 1bit
Frequency:20-100Hz<5dB/10K-20KHz<5dB
S/N Ratio:70dB(1KHz)(IEC-A net work)
Number of channels:4 STEREO
RCA line output: 450-1500 mv
12 1
INSTALLATION
The installation described in this manual
assumes that you have a typical car.
If your specific car requires any adjustments
or modifications, consult your nearest
Boss Audio car audio dealer.
PRECAUTIONS
This unit is designed for negative - ground,
12-V DC operation only.
Before starting installation, make sure the
ignition switch is set to OFF and disconnect the
ground terminal of the car battery to avoid short circuiting.
Install the unit where it will not injure the
operation of the vehicle.
Install the unit where it will not injure the
passenger if where is a sudden stop, like an
emergency stop.
Avoid installing the unit where it would be
subject to high temperatures caused by direct
sunlight or hot air from the heater, or where it
would be subject to dust, dirt or excessive vibration.
Use only the supplied mounding hardware for a
safe and secure installation.
REINSTALLATIONS
A
If there is installation hardware for another
receiver already in the dashboard, it must be
removed. Before installing the unit in the dashboard, Remove the trim plate from the unit. Then,
please remove the screws ( ) on the top of unit.
FRONT PANEL INSTALLATION
1 2
B
Store the detachable in its protective case for safe
keeping. To drop/take away/install and recover
front panel, see the picture.
BASIC INSTALLATION
B
C
Note that the installation show is a typical example.
For some car types you may need to make
adjustments or modification to make adjustments
or modification to install the unit. If your car is of
such type, consult you nearest Boss Audio car
audio dealer.
Mounting-angle adjustment
The mounting angle should be 30 degrees or less
from horizontal.
Caution on installation without using the sleeve
Be sure to use the screws ( ) attach the
4a3
mounting brackets. (Not supplied).
A
B
CONSOLE
INSTALL BRACKET
3
C
1
FACEPLATE
DETACHABLE
2
4
a
Page 6

WIRING INSTRUCTION
MP3 PLAYER OPERATION
Speakers Connection
This unit can be wired up to 4 speakers.
Make sure that you check all connections before powering up this unit.
Caution:
Do not short speaker wires to chassis ground .
It will cause the unit to be damaged.
Ground Connection
Connect Black Wire to Ground terminal.
Power Connection
First connect the Yellow Wire (w/15Amp fuse block) directly to +12v
constant power. Then connect Red Wire(w/1 Amp fuse block) to ignition output.
Antenna Connection
Insert coaxial connector to antenna socket.
Caution:
If a fuse is blown, only replace it with one of the same rating.
Other wise may cause severe damage . Repeated blown fuse indicates
potential problem(s) exists. A thorough inspection is recommended.
Root Folder
Navigate
Step2
Step3
Step4
Current Folder
Navigate
Step2
AS/PS
Press three times to navigate from the root folder.
The root folder name is briefly displayed, after which the first
track or subfolder name is displayed.
If a subfolder is selected, the icon will illuminate.
Press " " (or turn rotary encoder to the down) first, to
preview the desired track or subfolder.
NOTE: " " must be pressed first (or turn the rotary encoder
encoder to the down) to continue navigating.
Press BAND/LOUDNESS to select the desired track or
subfolder. If a subfolder is selected, two "\\" will illuminate.
BAND/LOUDNESS
Press first, then " " (or turn the rotary
encoder to the down) to begin navigating the selected
subfolder. NOTE: " " must be pressed first (or turn the
rotary encoder to the down) to navigate within the subfolder.
Press to select the desired track within
BAND/LOUDNESS
the folder.
Press four times to navigate the current folder.
AS/PS
The current folder name is displayed. After the current folder
name is displayed, the currently playing track name is displayed.
If a subfolder is selected, the icon will illuminate.
Press " " (or turn the rotary encoder to the down) first,
to preview the desired track or subfolder. NOTE: " " must
be pressed first (or turn the rotary encoder to the down) to
continue navigating.
FF
FF
Step3
Step4
2
BAND/LOUDNESS
Press to select the desired track or
subfolder. If a subfolder is selected, two "\\" will illuminate in
the LCD. Press AS/PS first, then " " (or turn the rotary
encoder to the down) to begin navigating the selected subfolder.
NOTE: " " must be pressed first (or turn the rotary encoder
to the down) to navigate within the subfolder.
Press to select the desired track within
BAND/LOUDNESS
the folder.
11
Page 7

MP3 PLAYER OPERATION
WIRING DIAGRAM
MP3 MODEL
MP3 Direct Select
Search and
Navigate Modes
Direct Numeric
Track Select
Step2
Alphanumeric
Track or Folder
Search
Step2
Step3
Step4
Step5
The following keys are
assigned as MP3 disc
plays. Key assigned in
searching mode.
Remark:
1. M5 and M6 is
assigned Searching
file or directory.
AS/PS MODE SELECT
BAND ENTER
M1 A,B,C,1
M2 D,E,F,2
M3 G,H,I,3
M4 J,K,L,4
M5 M,N,O,5
M6 P,Q,R,6
SCAN S,T,U,7
T-DOWN V,W,X,8
T-UP Y,Z,SPACE,9
DISPLAY _,-,+,0
SEL CHAR,SHIFT
VOL UP/DOWN CHAR,SEL(A,B~8,9,0)
Press AS/PS to select between the following MP3 Modes:
Direct Numeric Track Select
Alphanumeric Track or Folder Search
Root Folder Navigate
Current Folder Navigate
AS/PS
Press one time. "MP3 T*" will flash in the display.
Use the buttons in the above table (3 keystroke maximum
input), or the rotary encoder to enter the desired track
number.
Press BAND/LOUDNESS to confirm the selected track
number or, wait for the input cycle to time out
(approximately 4 seconds).
AS/PS
Press two times, an " * " will flash in the display.
Use the buttons in the table on page 7 (16 keystroke
maximum input) or the rotary encoder or enter the desired
alphanumeric search characters. Press AUDIO for
character shift.
Press BAND/LOUDNESS to initiate the selected
alphanumeric search.
Press " "(or turn the rotary encoder to the down), first
to preview the search results. If the search returns a folder,
FF
the icon will illuminate. NOTE: " " must be pressed
first (or turn the rotary encoder to the down) to continue
the search.
Press BAND/LOUDNESS to select the desired track or
folder. If a folder is selected, two "\\" will illuminate.
BAND/LOUDNESS
Press first, then " " (or turn the
rotary encoder to the down) to begin searching the
selected folder. NOTE: " " must be pressed first (or turn
the rotary encoder to the down) to search within the folder.
Press to select the desired track
BAND/LOUDNESS
within the folder.
10
A
A
B C
D
++
------
++
++
++
--
--
LL
RR
LL
--
RR
--
Black
GROUND
Red
(ACC)
Yellow
(12V CONSTANT)
Blue
(AUTO ANT)
Pink (POWER AMP)
++
++
--
1A
15A
++++
--
+ ++ +
--
+ +++
++++
----
b
Grey
Grey/black
c
Violet
Violet/Black
++
LL
------
++
RR
++
--------
++
E
IGNITION
POWER ANTENNA
BATTERY
CONTROL
RELAY
F
a
White
White/black
d
Green
Green/Black
++
++
--
++
--
++
--
CONNECTIONS
PRECAUTIONS
PRECAUTION ON MAKING
CONNECTIONS
Before connecting, make sure that
the ignition switch is set to OFF.
And remove the ground terminal of
the battery to protect the unit and
your car from damage.
Caution
Make the connection correctly, as illustrated
in the connection diagram. Do not connect
the negative cord of each speaker wire to
--
a common point. When replacing the fuse.
Be sure to use a fuse of the same rated
amperage. Use of a fuse of a higher rating
may cause serious damage to the unit.
c
a
d
CONNECTION DIAGRAM
One or more of the connectors , and
F
may not exist on the model your car.
b
B C
Make the appropriate connection or
connections according to the
configuration of your unit.
See the section "SPECIFICATIONS" of
the separate Operating Instructions.
A
From the car antenna
B
CD Changer(option)
C
RCA Audio output (Front and Rear).
D
AUX IN
E
To the wiring of the vehicle colors of
leads
Black (ground lead to be connected to
vehicle <metal> boby.)
Red (ACC lead to be connected to the
terminal from which power is supplied
when the ignition switch is set to AC.)
Yellow (Connect to a 12 volt constant wire.)
Blue (power antenna lead. If your car has
a power antenna, this wire will turn it on.)
LL
RR
Pink (Power amp remote control)
F
4-SPEAKER CONNECTIONS
Note
Speakers with an impedance of 4 to 8
ohms and with adequate power handing
capacities. Otherwise, the speakers may
be damaged.
DO NOT connect the speakers in parallel.
DO NOT connect the terminal of the speaker
system to the car chassis.
3
Page 8

CONTROL LOCATIONS
BUTTON FUNCTION
21
20
19
18
MODE
1
2
3
4
5
6
7
(REMOTE CONTROL )
DISC SLOT BUTTON
LCD WINDOW
EJECT
POWER
AS/PS
(REMOTE CONTROL )
(REMOTE CONTROL )
T-UP/DOWN
(REMOTE CONTROL )
8
RELEASE
AUX IN
9
10
MUTE
(REMOTE CONTROL )
11
M6/D-UP
(REMOTE CONTROL )
1
MODEMODE
17 16
2
3
4
DISPLAY
When pressed short, it is activated as "CLOCK" key. Clock is displayed
for few seconds. When pressed long with displaying CLOCK, "CLOCK
ADJUST" mode is activated for few second. During clock adjust mode,
hour is adjusted by "T- UP" key and minute by "T-DN" key.
5
6
7
8
9
SELECT/
VOL UP/
VOL DOWN
Press SELECT button,VOLUME MODE is switched on:
VOLUME/BASS/TREBLE/BALANCE/FADER
VOLUME
1.Press SELECT button once display shows VOL.
2.To adjust VOL level, the VOL up or down.
BASS
1.Press SELECT button twice display shows BAS.
15
14
13
12
4
1
5
M5/D-DOWN
13
M4/SHUFFLE
14
M3/REPEAT
15
M2/INTRO
M1/PAUSE
16
17
BAND/LOUDNESS
(REMOTE CONTROL )
18
3
DISPLAY
19
VOL-UP/VOL-DOWN
(REMOTE CONTROL )
SELECT CONTROL BUTTON
11
20
(REMOTE CONTROL )
OPEN
21
18
10
1112
(REMOTE CONTROL )
(REMOTE CONTROL )
(REMOTE CONTROL )
(REMOTE CONTROL )
(REMOTE CONTROL )
6
(REMOTE CONTROL )
2
17
10
12
8
9
13
14
OPEN
CD
FUNCTION
2.To adjust BAS level, the VOL up or down.
TREBLE
1.Press button three, display shows TRE.
2.To adjust TRE level,
SELECT
the VOL up or down.
BALANCE
1.Press button four times, display shows BAL.
2.To adjust BAL level,
SELECT
the VOL up or down.
FADER
1.Press button five times, display shows FAD.
2.To adjust FAD level,
SELECT
the VOL up or down.
Press the OPEN to allow the front panel to fold down.
1.CDP MODE
As lift indication, pause, intro, repeat, shuffle of CDP is selected.
2.CDP MP3 mode
Pause function of CDP is selected by M1(PAUSE) key.
When pressed M2~4 short, INTRO, REPEAT, SHUFFLE function
in whole disc is selected.
Superior anti-shock performance (CD-45'S MP3-100'S)
Superior disc reading ability: Able to read CD/MP3
Superior ECC(error correction code) capability
Color LCD display(black mask)
4
9
Page 9

Press the OPEN to allow the front panel to fold down.
BUTTON FUNCTION
Press RELEASE button to allow the front panel to detachable.RELEASE
MUTE
M1(PAUSE)
M2(INTRO)
M3(REPEAT)
M4(SHUFFLE)
M5(D-DOWN)
M6(D-UP)
This key serves to switch the "muted" state on/off.
The releasing mode of the mute state is when any key is
pressed again.
1)RADIO MODE.
M1~M6
-PRESET MEMORY is loaded when key is pressed for less
than 1 second.
-PRESET MEMORY is saved when key is pressed for longer
than 1 secretary.
2)CD/MP3 PLAY MODE
PLAY/PAUSE-PLAY/PAUSE is activated. During a PAUSE,
DISC INDICATOR flashes.
TOP -First song will play when Top key is pressed for longer
than 0.5sec during play.
INTRO
-INTRO ON/OFF is activated. During INTRO ON, INT indicator
comes on and begins playing the first 10sec of each song,
until the last song is played, It begins playing the entire track
from where INT started.
REPEAT
-CD PLAY mode: REPEAT ON/OFF is activated.
When REPEAT ON, RPT INDICATOR comes on and repeats
the existing track.
SHUFFLE
-This function shall cause to immediately stop playing the
current track and jump to be
played in a random order commencing.
D-UP/D-DOWN
-MP3 MODE: 10 TRACK UP/DOWN is activated.
When the total track is 10 or less, KEY is inactivated.
REMOTE CONTROL BUTTON LOCATIONS
BAND/
LOUDNESS
When short pressing BAND/LOUNDESS the FM/AM band is
toggled OF CHANGER.
Cyclically through the tuning bands: FM1->FM2->FM3->AM
The loudness mode in E.VR is activated by pressing this key
for more than 1 secretary.
LOUD of individual sag is turned on when LOUD mode is engaged.
LOUD of individual sag is turned off when LOUD mode is released.
8
5
Page 10

GETTING STARTED
BUTTON FUNCTION
RESET BUTTON
1
2
EJECT BUTTON
2
1
3
4
push down to eject the cassette tape.
3
CASSETTE COMPARTMENT
Insert a tape into the cassette compartment.
The unit will automatically switch from 'TAPE' will be shown on display.
4
FAST FORWARD/REWIND/PROGRAM BUTTON
Fast forward/rewind: Press the button with the double arrows pointing the
same direction as the direction indicator in the LCD to fast forward.
Press the other button in the opposite direction to rewind.
Program: Push down both buttons together to play the other side of the tape.
MODE
INSERT/
EJECT
CD DISC
POWER
ON/OFF
AS/PS
SEARCH
When pressed short, It is used as the selection of each function.
When a mode is selected, the sound source switching is controlled
in E.V.R. And relative port control is also implemented.
>RADIO >CDP >TAP >AUX
When a CDP is existed inside, S-CDP of individual segment is
turned on.
1.Press the POWER button to turn the unit on.
2.Insert the CD, and then display shows CD sign, playing begins to
start automatically.
When the last track on disc playing finished, the disc track number
will return to track one, and play again.
3.Press the( )button to eject the CD disc from the slot; If the disc
has not yet been taken away within 10 seconds, it will automatically
be loaded into the slot again, but will not play.
When system is on, by pressing this key, the radio system goes into
power off mode. All information about its current setting, and
restores the information when switched on again. The system
comes to ON by pressing any key.
When short pressing:
The radio searches for each preset station.
When the field strength level is more than the threshold level of stop
level, the radio is holding at preset number for few secretary with
releasing mute, and than searches again.
In FM band,FM1,FM2 and FM3 is checked one at a time.
When long pressing(more than 1 secretary )
The radio searches from the current frequency and checks the signal
strength, level until 1cycle search is finished. And then 6 strongest
stations are preset to the corresponding preset number.
The AS operation is finished, the radio executes the Preset scan.
Radio frequency area option:(see the pict re )u
USA
EUR
6
T-UP/
DOWN
1)RADIO MODE.
-Frequency moves one step up/down when press T-UP/DOWN key
is pressed for less than 500ms.
-SEEK MODE is activated as below when T-UP/DOWN key is pressed
for longer than500ms.
*Establishing SEEK MODE from the MENU.
-SEEK1:SEEk is activated right away when key is pressed for longer
than 500ms.
-SEEK2:SEEK is activated after key is released.
2)CDP MODE.
-TRACK UP/DOWN is activated when key is pressed for less than
500ms .Track returns to the beginning of the song when play has
been on for longer than 3 sec.
-SEARCH FF/FR is activated when T-UP/DN key is pressed for longer
than 500ms. Search function is activated up to the first track at
0min 0sec,then resumes play.
7
 Loading...