

Page 1

SOUNDBAR 700
Page 2

IMPORTANT SAFETY INSTRUCTIONS
Please read and keep all safety and use instructions.
Important Safety Instructions
1. Read these instructions.
2. Keep these instructions.
3. Heed all warnings.
4. Follow all instructions.
5. Do not use this apparatus near water.
6. Clean only with a dry cloth.
7. Do not block any ventilation openings. Install in accordance with the manufacturer’s instructions.
8. Do not install near any heat sources such as radiators, heat registers, stoves, or other apparatus (including
amplifiers) that produce heat.
9. Protect the power cord from being walked on or pinched particularly at plugs, convenience receptacles, and the
point where they exit from the apparatus.
10. Only use attachments/accessories specified by the manufacturer.
11. Use only with the cart, stand, tripod, bracket, or table specified by the manufacturer, or sold with the
12. Unplug this apparatus during lightning storms or when unused for long periods of time.
13. Refer all servicing to qualified personnel. Servicing is required when the apparatus has been damaged in any
apparatus. When a cart is used, use caution when moving the cart/apparatus combination to avoid
injury from tip-over.
way, such as power-supply cord or plug is damaged, liquid has been spilled or objects have fallen into the
apparatus, the apparatus has been exposed to rain or moisture, does not operate normally, or has been dropped.
2
ENG
|
Page 3
IMPORTANT SAFETY INSTRUCTIONS
WARNINGS/CAUTIONS
This symbol on the product means there is uninsulated, dangerous voltage within the product enclosure that
may present a risk of electrical shock.
This symbol on the product means there are important operating and maintenance instructions in this guide.
Contains small parts which may be a choking hazard. Not suitable for children under age 3.
This product contains magnetic material. Consult your physician on whether this might aect your
implantable medical device.
This product contains a tempered glass surface. Use caution to avoid impact. In the event of breakage,
use care in handling broken glass.
• To reduce the risk of fire or electrical shock, do NOT expose this product to rain, liquids or moisture.
• Do NOT expose this product to dripping or splashing, and do not place objects filled with liquids, such as vases, on
or near the product.
• Keep the product away from fire and heat sources. Do NOT place naked flame sources, such as lighted candles, on
or near the product.
• Do NOT make unauthorized alterations to this product.
• Do NOT use in vehicles or boats.
• Where the mains plug or an appliance coupler is used as the disconnect device, the disconnect device shall remain
readily operable.
仅适用于 2000m 以下地区安全使用
Use at altitude less than 2000 meters only.
• The battery provided with this product may present a risk of fire or chemical burn if mishandled.
• If the battery leaks, do not allow the liquid to come in contact with the skin or eyes. If contact is made,
seek medical advice.
• Do not expose products containing batteries to excessive heat (e.g. from storage in direct sunlight, fire or the like).
• Only use the following hardware to mount this product: Bose Soundbar Wall Bracket.
3
ENG
|
Page 4
REGULATORY INFORMATION
NOTE: This equipment has been tested and found to comply with the limits for a Class B digital device, pursuant to
Part 15 of the FCC Rules. These limits are designed to provide reasonable protection against harmful interference in a
residential installation. This equipment generates, uses, and can radiate radio frequency energy and, if not installed
and used in accordance with the instructions, may cause harmful interference to radio communications. However,
there is no guarantee that interference will not occur in a particular installation. If this equipment does cause harmful
interference to radio or television reception, which can be determined by turning the equipment o and on, the user
is encouraged to try to correct the interference by one or more of the following measures:
• Reorient or relocate the receiving antenna.
• Increase the separation between the equipment and receiver.
• Connect the equipment into an outlet on a circuit dierent from that to which the receiver is connected.
• Consult the dealer or an experienced radio/TV technician for help.
Changes or modifications not expressly approved by Bose Corporation could void the user’s authority to operate
this equipment.
This device complies with part 15 of the FCC Rules and with Industry Canada license-exempt RSS standard(s).
Operation is subject to the following two conditions: (1) This device may not cause harmful interference, and (2) this
device must accept any interference received, including interference that may cause undesired operation.
This device complies with FCC and Industry Canada radiation exposure limits set forth for general population.
This equipment should be installed and operated with a minimum distance of 20 cm between radiator and your body.
This transmitter must not be co-located or operating in conjunction with any other antenna or transmitter.
This device for operation in the band 5150 – 5250 MHz is only for indoor use to reduce the potential for harmful
interference to other co-channel mobile satellite systems.
CAN ICES-3 (B)/NMB-3(B)
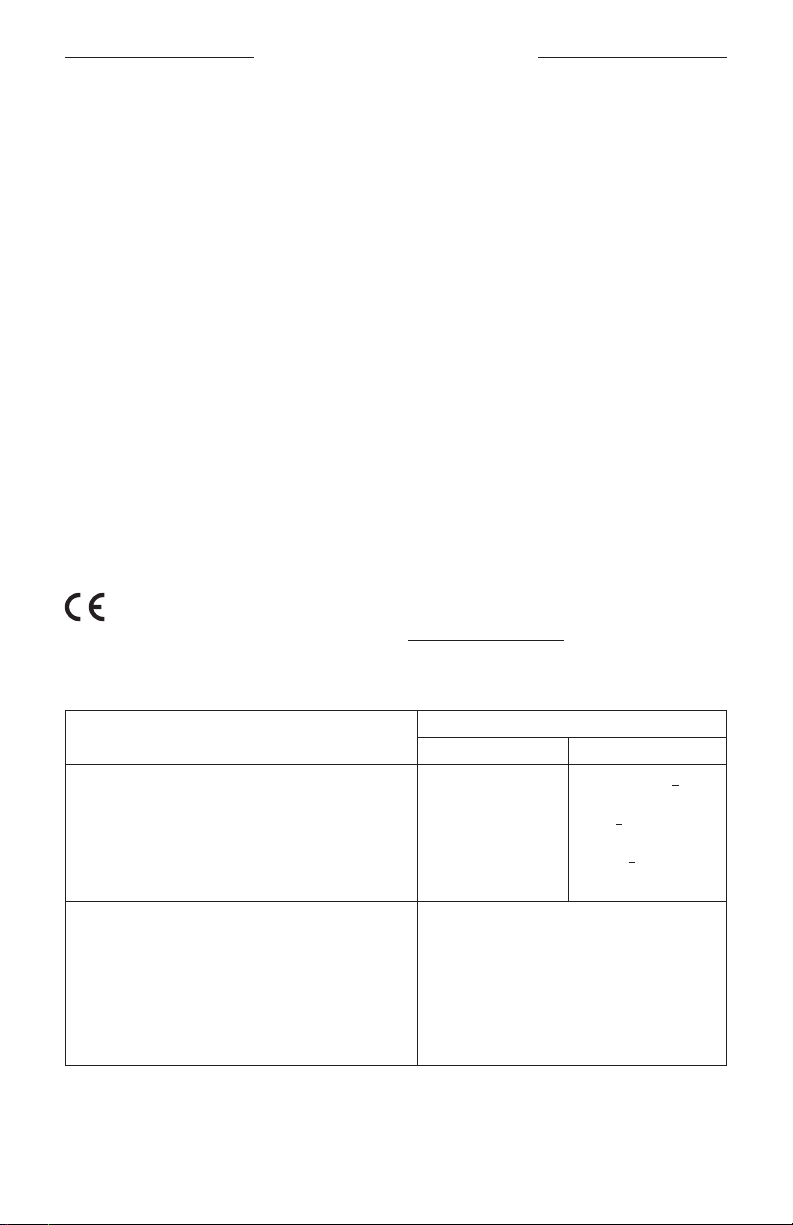
Bose Corporation hereby declares that this product is in compliance with the essential requirements and
other relevant provisions of Directive 2014/53/EU and all other applicable EU directive requirements. The
complete declaration of conformity can be found at: www.Bose.com/compliance
The product, in accordance with the Ecodesign Requirements for Energy Related Products Directive 2009/125/EC, is
in compliance with the following norm(s) or document(s): Regulation (EC) No. 1275/2008, as amended by Regulation
(EU) No. 801/2013.
Required Power State Information
Power consumption in specified power mode, at 230V/50Hz input
Standby* Networked Standby
< 0.5 W
Power Modes
all network types < 2.0 W
Time after which equipment is automatically switched into mode
Power consumption in networked standby if all wired network
ports are connected and all wireless network ports are activated, at
230V/50Hz input
Network port deactivation/activation procedures. Deactivating all
networks will enable standby mode.*
* Prior to deactivating networks or entering standby mode, use the
microphone on/o button to ensure the microphone is turned on
(the red indicator light will be o).
4
|
< 2.5 hours
N/A
Wi-Fi®: Deactivate by pressing and holding the Bose Music
and Skip Forward buttons on the remote simultaneously.
Repeat to activate.
Bluetooth®: Deactivate by clearing the pairing list by
pressing and holding the Bluetooth® button on the remote
for 10 seconds. Activate by pairing with a Bluetooth®
source.
Ethernet: Deactivate by removing the Ethernet cable.
Activate by inserting the Ethernet cable.
ENG
< 20 minutes
< 2.0 W
Page 5
REGULATORY INFORMATION
For Europe:
Frequency band of operation 2400 to 2483.5 MHz:
• Bluetooth/Wi-Fi: Maximum transmit power less than 20 dBm EIRP.
• Bluetooth Low Energy: Maximum power spectral density less than 10 dBm/MHz EIRP.
Frequency bands of operation 5150 to 5350 MHz and 5470 to 5725 MHz:
• Wi-Fi: Maximum transmit power less than 20 dBm EIRP.
This device is restricted to indoor use when operating in the 5150 to 5350 MHz frequency range in all EU Member
States listed in the table.
BE DK IE UK FR CY SK HU AT SE
BG DE PT EL HR LV LT MT PL
CZ EE FI ES IT RO LU NL SI
This symbol means the product must not be discarded as household waste, and should be delivered to an
appropriate collection facility for recycling. Proper disposal and recycling helps protect natural resources,
human health and the environment. For more information on disposal and recycling of this product, contact
your local municipality, disposal service, or the shop where you bought this product.
Management Regulation for Low-power Radio-frequency Devices
Article XII
According to “Management Regulation for Low-power Radio-frequency Devices” without permission granted by
the NCC, any company, enterprise, or user is not allowed to change frequency, enhance transmitting power or alter
original characteristic as well as performance to an approved low power radio-frequency devices.
Article XIV
The low power radio-frequency devices shall not influence aircraft security and interfere legal communications; If
found, the user shall cease operating immediately until no interference is achieved. The said legal communications
means radio communications operated in compliance with the Telecommunications Act.
The low power radio-frequency devices must be susceptible with the interference from legal communications or ISM
radio wave radiated devices.
Please dispose of used batteries properly, following local regulations. Do not incinerate.
5
ENG
|
Page 6
REGULATORY INFORMATION
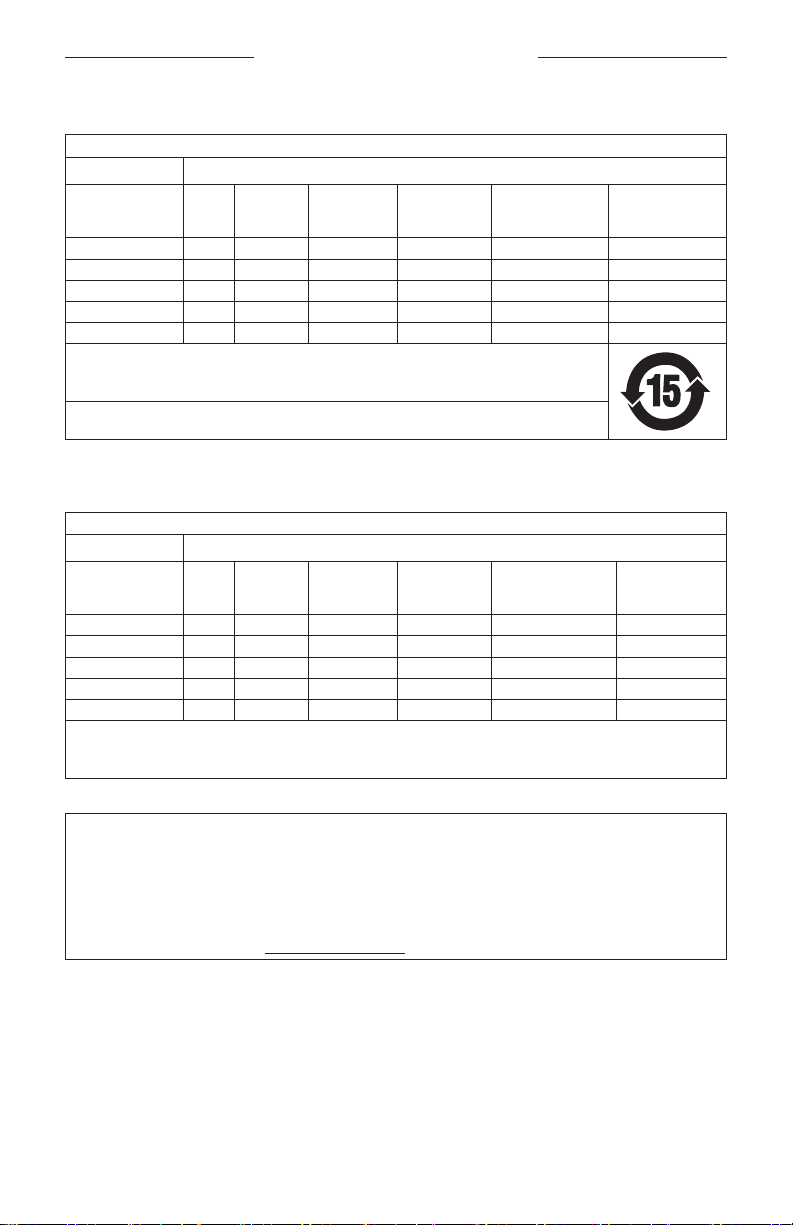
China Restriction of Hazardous Substances Table
Names and Contents of Toxic or Hazardous Substances or Elements
Toxic or Hazardous Substances and Elements
Lead
Part Name
PCBs X O O O O O
Metal Parts X O O O O O
Plastic Parts O O O O O O
Speakers X O O O O O
Cables X O O O O O
This table is prepared in accordance with the provisions of SJ/T 11364.
O: Indicates that this toxic or hazardous substance contained in all of the homogeneous materials for this
part is below the limit requirement of GB/T 26572.
X: Indicates that this toxic or hazardous substance contained in at least one of the homogeneous materials
used for this part is above the limit requirement of GB/T 26572.
(Pb)
Mercury
(Hg)
Cadmium
(Cd)
Hexavalent
(CR(VI))
Polybrominated
Biphenyl
(PBB)
Polybrominated
diphenylether
(PBDE)
Taiwan Restriction of Hazardous Substances Table
Equipment name: Powered Speaker, Type designation: 425842
Restricted substances and its chemical symbols
Unit
PCBs
Metal Parts
Plastic Parts
Speakers
Cables
Note 1: “○” indicates that the percentage content of the restricted substance does not exceed the percentage of reference value
of presence.
Note 2: The “−” indicates that the restricted substance corresponds to the exemption.
Lead
Mercury (Hg) Cadmium (Cd)
(Pb)
- ○ ○ ○ ○ ○
- ○ ○ ○ ○ ○
○ ○ ○ ○ ○ ○
- ○ ○ ○ ○ ○
- ○ ○ ○ ○ ○
Hexavalent
chromium (Cr+6)
Polybrominated
biphenyls (PBB)
Polybrominated
diphenyl ethers
(PBDE)
Please complete and retain for your records
The serial and model numbers are located on the back of the soundbar.
Serial number: ____________________________________________________________________
Model number: ____________________________________________________________________
Please keep your receipt with your owner’s guide. Now is a good time to register your Bose product.
You can easily do this by going to global.Bose.com/register
6
ENG
|
Page 7

REGULATORY INFORMATION
Date of Manufacture: The eighth digit in the serial number indicates the year of manufacture; “9” is 2009 or 2019.
China Importer: Bose Electronics (Shanghai) Company Limited, Part C, Plan 9, No. 353 North Riying Road, China
(Shanghai) Pilot Free Trade Zone
EU Importer: Bose Products B.V., Gorslaan 60, 1441 RG Purmerend, The Netherlands
Taiwan Importer: Bose Taiwan Branch, 9F-A1, No.10, Section 3, Minsheng East Road, Taipei City 104, Taiwan
Phone Number: +886-2-2514 7676
Mexico Importer: Bose de México, S. de R.L. de C.V. , Paseo de las Palmas 405-204, Lomas de Chapultepec,
11000 México, D.F. Phone Number: +5255 (5202) 3545
Input Rating: 100 - 240V 50/60Hz, 65W
7
ENG
|
Page 8

LEGAL INFORMATION
Amazon, Alexa, Amazon Music, and all related logos are trademarks of Amazon, Inc. or its aliates.
Apple, the Apple logo, and AirPlay are trademarks of Apple Inc., registered in the U.S. and other countries. App Store
is a service mark of Apple Inc.
Use of the Works with Apple badge means that an accessory has been designed to work specifically with the
technology identified in the badge and has been certified by the developer to meet Apple performance standards.
The Bluetooth® word mark and logos are registered trademarks owned by Bluetooth SIG, Inc. and any use of such
marks by Bose Corporation is under license.
Dolby, Dolby Audio and the double-D symbol are trademarks of Dolby Laboratories.
For DTS patents, see http://patents.dts.com. Manufactured under license from DTS, Inc. DTS, the
Symbol, DTS in combination with the Symbol, and DTS Digital Surround are registered trademarks or
trademarks of DTS, Inc. in the United States and/or other countries. © DTS, Inc. All Rights Reserved.
Google, Google Play, and the Google Play logo are trademarks of Google LLC.
The terms HDMI, HDMI High-Definition Multimedia Interface, and the HDMI logo are trademarks or
registered trademarks of HDMI Licensing Administrator, Inc.
This product contains the iHeartRadio service. iHeartRadio is a registered trademark of iHeartMedia, Inc.
This product is protected by certain intellectual property rights of Microsoft. Use or distribution of such technology
outside of this product is prohibited without a license from Microsoft.
Pandora is a trademark or registered trademark of Pandora Media, Inc. used with permission.
This product incorporates Spotify software which is subject to 3rd party licenses found here:
www.spotify.com/connect/third-party-licenses
Spotify is a registered trademark of Spotify AB.
Designed with UEI Technology™. Under License from Universal Electronics, Inc. © UEI 2000-2018
Wi-Fi is a registered trademark of Wi-Fi Alliance®.
Acoustimass, ADAPTiQ, Bose, Bose Bass Module, Bose Music, Bose Soundbar, Bose Soundbar Universal Remote,
Bose Soundbar Wall Bracket, Bose Surround Speakers, and Virtually Invisible are trademarks of Bose Corporation.
Bose Corporation Headquarters: 1-877-230-5639
©2019 Bose Corporation. No part of this work may be reproduced, modified, distributed or otherwise used without
prior written permission.
8
ENG
|
Page 9

LICENSE DISCLOSURES
To view the license disclosures that apply to the software packages included as components of your Bose Soundbar
700 product:
1. On the remote, press and hold the Bluetooth button l and Skip backward button J for 5 seconds.
2. Connect a USB cable to the SERVICE connector on the back of the soundbar.
3. Connect the other end of the cable to a computer.
4. On the computer, enter http://203.0.113.1/opensource in a browser window to display the EULA and
license disclosure.
9
ENG
|
Page 10

CONTENTS
WHAT’S IN THE CARTON
Contents ............................................................................................................................. 13
SOUNDBAR PLACEMENT
Recommendations.......................................................................................................... 14
Wall mount the soundbar ............................................................................................ 15
POWER
Connect the soundbar to power ............................................................................... 16
Network standby ............................................................................................................. 16
BOSE MUSIC APP SETUP
Download the Bose Music app .................................................................................. 17
EXISTING BOSE MUSIC APP USERS
Add the soundbar to an existing account ............................................................. 18
Connect to a dierent Wi-Fi® network ................................................................... 18
ADAPTIQ AUDIO CALIBRATION
Run ADAPTiQ audio calibration using the Bose Music app ........................... 19
SOUNDBAR CONTROLS
Voice assistant controls ................................................................................................ 20
Remote functions ............................................................................................................ 21
Power ........................................................................................................................... 22
Sources ....................................................................................................................... 23
Presets ........................................................................................................................ 24
Media playback, channels, and volume .......................................................... 25
Cable/satellite functions ...................................................................................... 26
Adjust the bass ................................................................................................................ 26
Program a third-party remote ................................................................................... 26
10 | ENG
Page 11

CONTENTS
VOICE ASSISTANT
Voice assistant options ................................................................................................. 27
Set up your voice assistant ......................................................................................... 27
Access Alexa ..................................................................................................................... 28
Use your voice ......................................................................................................... 28
Use the soundbar controls .................................................................................. 29
Access your Google Assistant ................................................................................... 30
Use your voice ......................................................................................................... 30
Use the soundbar controls .................................................................................. 31
Play music with your Google Assistant .................................................................. 32
Choose a default audio service ......................................................................... 32
PRESET PERSONALIZATION
Set a preset ....................................................................................................................... 33
Play a preset ..................................................................................................................... 35
BLUETOOTH® CONNECTIONS
Connect a mobile device ............................................................................................. 36
Disconnect a mobile device ........................................................................................ 37
Reconnect a mobile device ......................................................................................... 37
Connect an additional mobile device ..................................................................... 38
Clear the soundbar device list ................................................................................... 38
STREAM AUDIO WITH AIRPLAY
Stream audio from the Control Center ................................................................... 39
Stream audio from an app .......................................................................................... 39
11 | ENG
Page 12

CONTENTS
SOUNDBAR STATUS
Wi-Fi status ....................................................................................................................... 40
Bluetooth status .............................................................................................................. 40
Voice assistant status .................................................................................................... 41
Microphone o indicator ..................................................................................... 41
Media playback and volume ....................................................................................... 42
Update and error status ............................................................................................... 42
ADVANCED FEATURES
Update the soundbar .................................................................................................... 43
Disable/enable Wi-Fi capability ................................................................................ 43
Connect accessories (optional) ................................................................................. 44
CARE AND MAINTENANCE
Install the remote batteries ......................................................................................... 45
Clean the soundbar ........................................................................................................ 46
Replacement parts and accessories ........................................................................ 46
Limited warranty ............................................................................................................. 46
TROUBLESHOOTING
Try these solutions first ................................................................................................ 47
Other solutions ................................................................................................................ 47
Reset the soundbar ........................................................................................................ 53
APPENDIX: SETUP REFERENCE
Connection options ........................................................................................................ 54
Connect the soundbar to your TV ........................................................................... 55
Option 1 (preferred): HDMI eARC or ARC..................................................... 55
Option 2: Optical ..................................................................................................... 56
Check for sound ............................................................................................................. 57
12 | ENG
Page 13
WHAT’S IN THE CARTON
CONTENTS
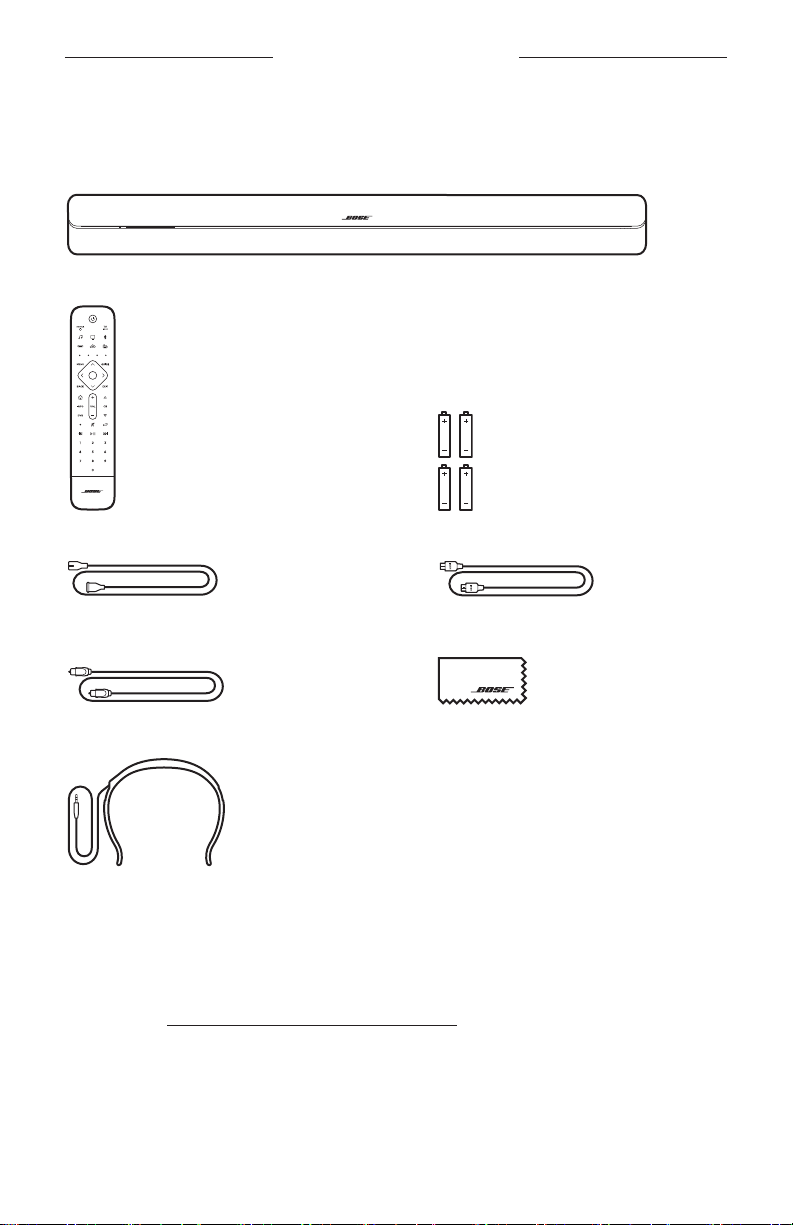
Confirm that the following parts are included:
Bose Soundbar 700
Bose Soundbar Universal Remote AA Battery (4)
Power cord* HDMI cable
Optical cable
ADAPTiQ headset
Cleaning cloth
*May ship with multiple power cords. Use the power cord for your region.
NOTE: If any part of the product is damaged or if the glass on the soundbar is broken,
do NOT use it. Contact your authorized Bose dealer or Bose customer service.
Visit: worldwide.Bose.com/Support/SB700
13 | ENG
Page 14
SOUNDBAR PLACEMENT
RECOMMENDATIONS
For best performance, follow these recommendations when placing the soundbar:
• Do NOT place any objects on top of the soundbar.
• To avoid wireless interference, keep other wireless equipment 1 – 3 ft.
(0.3 – 0.9 m) away from the soundbar. Place the soundbar outside and away from
metal cabinets, other audio/video components and direct heat sources.
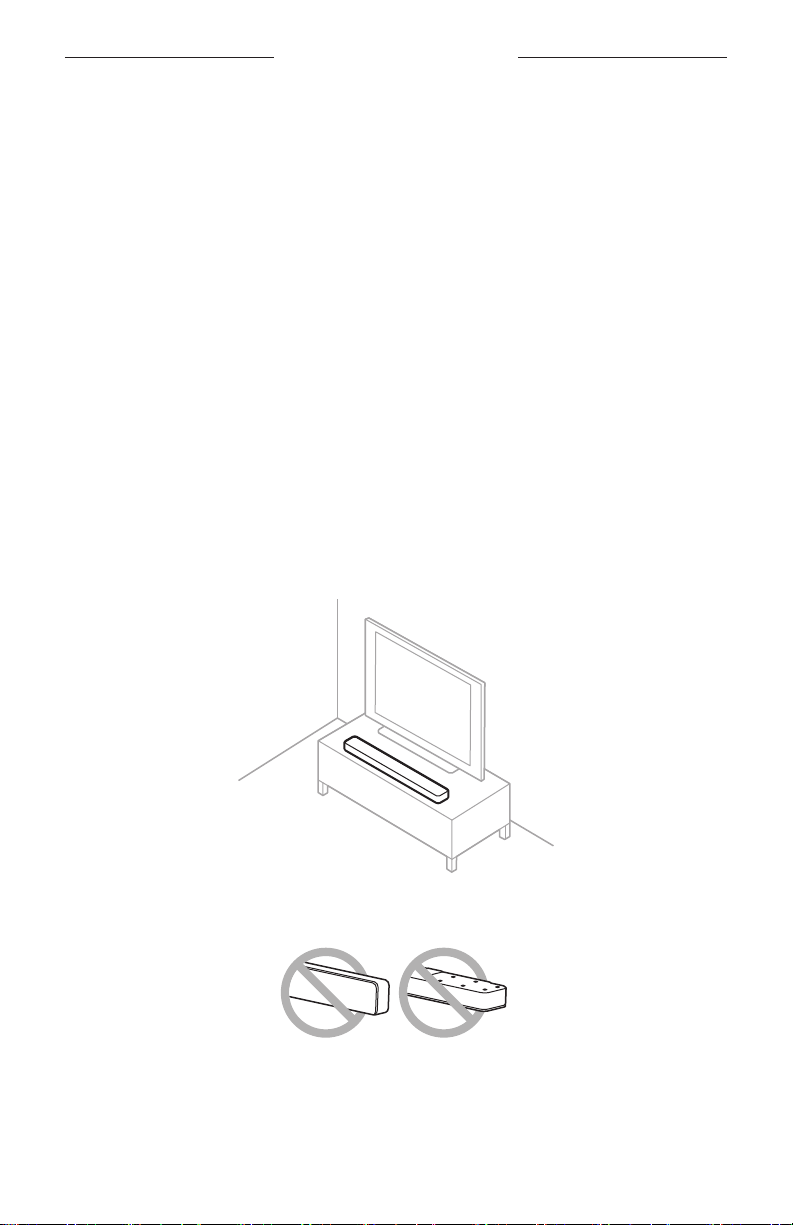
• Place the soundbar directly below (preferred) or above your TV with the grille
facing into the room.
• Place the soundbar on its rubber feet on a stable and level surface. For proper
support, both feet must be resting on the surface. Vibration can cause the soundbar
to move, particularly on smooth surfaces like marble, glass or highly polished wood.
• Keep the back side of the soundbar at least 0.4 in. (1 cm) from any other surface.
Blocking the ports on this side aects acoustic performance.
• Make sure there is an AC (mains) outlet nearby.
• For best sound quality, do NOT place the soundbar in an enclosed cabinet or
diagonally in a corner.
• If placing the soundbar on a shelf or TV stand, position the front of the soundbar as
close as possible to the front edge of the shelf or TV stand for optimal
acoustic performance.
CAUTION: Do NOT place the soundbar on its front, back or top when in use.
14 | ENG
Page 15

SOUNDBAR PLACEMENT
WALL MOUNT THE SOUNDBAR
You can mount the soundbar on a wall. To purchase the Bose Soundbar Wall Bracket,
contact your authorized Bose dealer.
Visit: worldwide.Bose.com/Support/SB700
CAUTION: Do NOT use any other hardware to mount the soundbar.
15 | ENG
Page 16
POWER
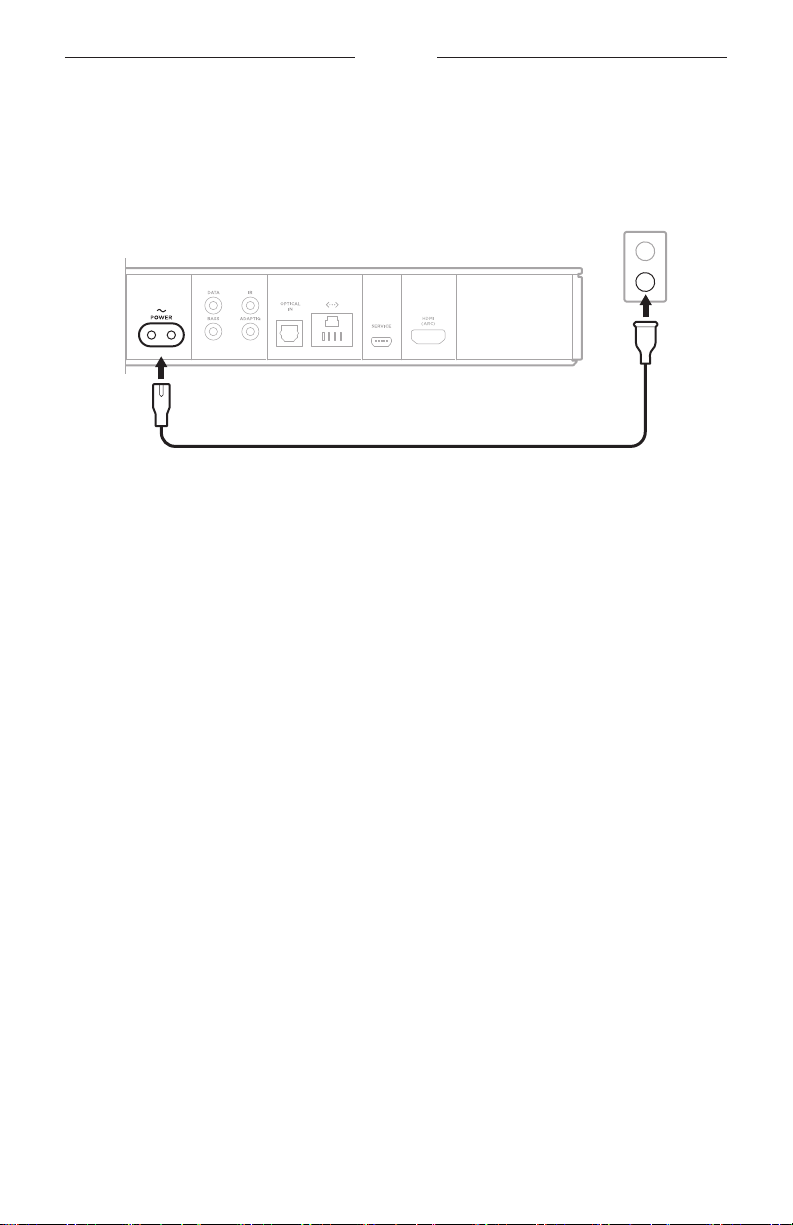
CONNECT THE SOUNDBAR TO POWER
1. Connect the power cord to the b connector on the back of the soundbar.
2. Plug the other end of the power cord into an AC (mains) power outlet.
The soundbar powers on and the light bar glows solid amber.
NETWORK STANDBY
The soundbar transitions to network standby when audio has stopped and you have
not pressed any buttons for 20 minutes. To wake the soundbar from network standby:
• Play or resume audio using your mobile device or using the Bose Music app.
• Talk to Amazon Alexa or your Google Assistant.
• On the remote, press the Power button I, a source button (see page 23), or
Bose Music button m then a preset button (see page 24).
NOTES:
• To access your voice assistant in network standby, make sure the soundbar is set up
using the Bose Music app and the microphone is on (see page 27).
• You can disable the standby timer using the Bose Music app.
16 | ENG
Page 17
BOSE MUSIC APP SETUP
The Bose Music app lets you set up and control the soundbar from your mobile device,
such as a smartphone or tablet.
Using the app, you can stream music, set and change presets, add music services,
explore internet radio stations, configure Amazon Alexa or your Google Assistant, and
manage soundbar settings.
NOTE: If you have already created a Bose account in the Bose Music app for another
Bose product, see “Existing Bose Music App Users” on page 18.
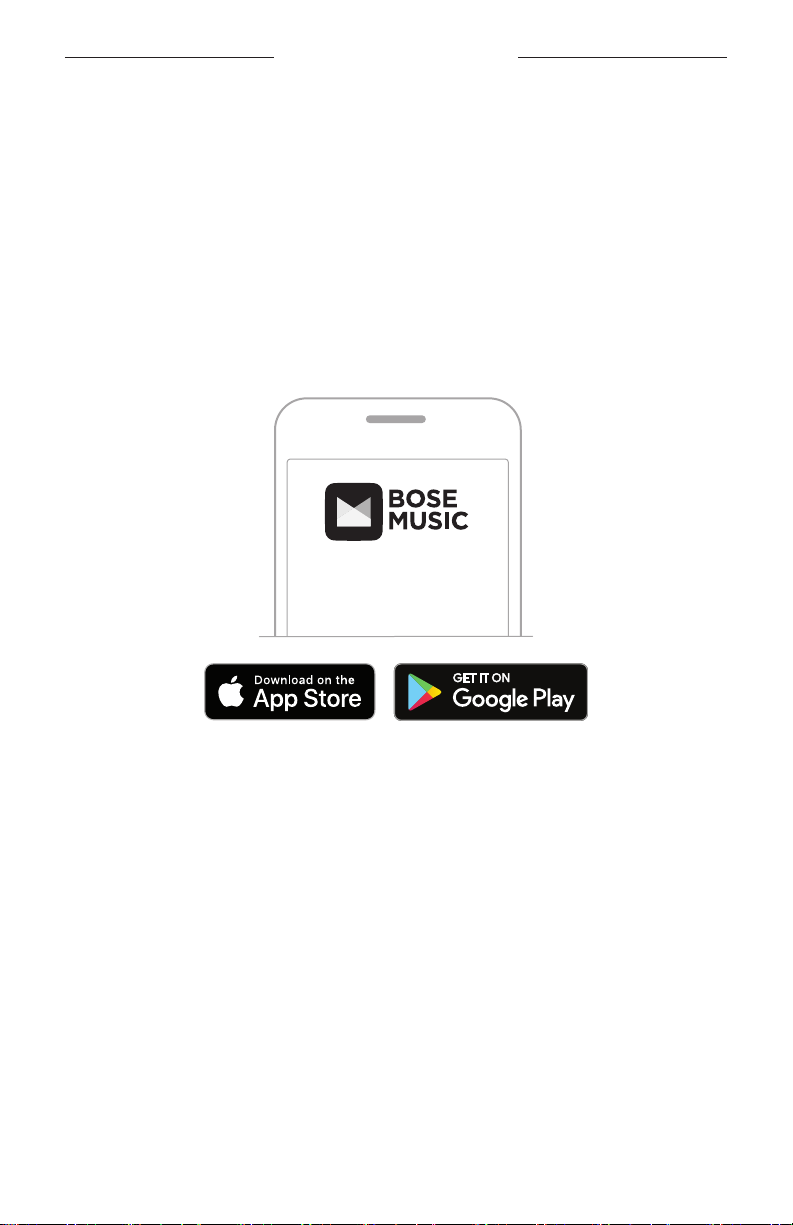
DOWNLOAD THE BOSE MUSIC APP
1. On your mobile device, download the Bose Music app.
2. Follow the app instructions.
17 | ENG
Page 18

EXISTING BOSE MUSIC APP USERS
ADD THE SOUNDBAR TO AN EXISTING ACCOUNT
1. In the Bose Music app, from the My Bose screen, tap H.
NOTE: To return to the My Bose screen, tap in the top-left corner of the screen.
2. Follow the app instructions.
CONNECT TO A DIFFERENT WI-FI NETWORK
Connect to a dierent network if your network name or password has changed, or if
you want to change or add another network.
1. On the remote, press and hold the TV button O and Skip backward button J until
the light bar glows amber.
2. On your mobile device, open your Wi-Fi settings.
3. Select Bose Soundbar 700.
4. Open the Bose Music app, and follow the app instructions.
NOTE: If the app doesn’t prompt you to set up your soundbar, tap the My Bose
icon in the top-left corner. Tap H to add your product.
18 | ENG
Page 19

ADAPTIQ AUDIO CALIBRATION
After you set up the soundbar using the Bose Music app, the app prompts you to run
ADAPTiQ audio calibration for best acoustic performance. ADAPTiQ audio calibration
customizes the sound of the system to the acoustics of your listening area by taking
five audio measurements. To run an audio calibration, you need 10 minutes when the
room is quiet.
During ADAPTiQ audio calibration, a microphone on the top of the ADAPTiQ headset
(provided with the soundbar) measures the sound characteristics of your room to
determine optimal sound quality.
RUN ADAPTIQ AUDIO CALIBRATION USING THE BOSE MUSIC APP
If you later connect an optional bass module or surround speakers, move the
soundbar or move any furniture, run ADAPTiQ audio calibration again to ensure
optimal sound quality.
1. In the Bose Music app, from the My Bose screen, select your soundbar.
2. Tap the soundbar image on the bottom-right corner of the screen.
3. Tap Settings > ADAPTiQ > Run again.
4. Follow the app instructions.
19 | ENG
Page 20

SOUNDBAR CONTROLS
The soundbar controls are located on the top of the soundbar and on the remote.
NOTE: You can also control your soundbar using the Bose Music app.
Microphone o button (see page 28)
Action button (see page 28)
Microphone o indicator (see page 41)
Light bar (see page 40)
VOICE ASSISTANT CONTROLS
You can use the Action button b and Microphone o button n to control
Amazon Alexa (see page 29) or your Google Assistant (see page 31).
20 | ENG
Page 21

SOUNDBAR CONTROLS
REMOTE FUNCTIONS
Use the remote to control the soundbar, sources connected to the soundbar,
Bluetooth connections, and presets.
Powers on/o the soundbar
(see page 22)
Powers on/o the
selected source
(see page 23)
Selects a source connected
to your TV
Source buttons (see page 23)
Cable/satellite function buttons
(see page 26)
Navigation pad
Displays the Internet TV
home page or the current
source’s home menu
Lists recorded
DVR programs
Mute/Unmute
(see page 25)
Volume controls (see page 25)
Channel controls (see page 25)
Previous channel, chapter
or track (see page 25)
Media playback (see page 25)
Numeric keypad.
Numbers 1 – 6 play music from
preset streaming music
sources (see page 35)
NOTE: You program your remote using the Bose Music app.
21 | ENG
Page 22

SOUNDBAR CONTROLS
Power
To power the soundbar on/o, press the Power button I on the remote.
When powered on, the remote buttons glow according to the last active source.
Power button
NOTES:
• When you plug the soundbar into an AC (mains) outlet, the soundbar
automatically powers on.
• The first time the soundbar is powered on, the soundbar defaults to TV g source.
• You can still access your voice assistant when the soundbar is powered o as long
as it has been set up using the Bose Music app and the microphone is on
(see page 27).
22 | ENG
Page 23

SOUNDBAR CONTROLS
Sources
The remote has four programmable source buttons (g, s, t, and q). You can
program these buttons to control your TV, cable/satellite box, game system, DVD or
Blu-ray Disc™ player or other source. You can switch between sources by selecting
dierent inputs on your TV using the remote.
Source power button
TV input button
Source buttons
1. On the remote, press the appropriate source button (g, s, t, or q).
The remote buttons glow according to the selected source.
2. Press .
The source powers on.
3. Press .
4. Select the correct input on your TV.
NOTES:
• If CEC is enabled on your TV, the TV may automatically switch the source when the
source is powered on.
• Pressing source buttons on the remote doesn’t change the TV input. It powers on
the soundbar and changes the mode of the remote so that the remote can control
the source functions.
• The remote is programed to your TV during setup using the Bose Music app.
If you replace your TV, use the Bose Music app to program the remote to your
new TV.
23 | ENG
Page 24

SOUNDBAR CONTROLS
Presets
The soundbar includes six presets that you can set to play audio from your favorite
music services. Once set, you can access your music, at any time, with a simple touch
of a button on the remote or using the Bose Music app.
Preset buttons (1 – 6)
For more information about presets, see “Preset Personalization” on page 33.
24 | ENG
Page 25

SOUNDBAR CONTROLS
Media playback, channels, and volume
Volume controls
Channel controls
Mute/Unmute
FUNCTION WHAT TO DO
Press F.
Play/Pause
When audio is paused, the sides of the light bar glow solid
white until audio resumes.
Skip backward
Skip forward
Press J.
Press v.
Previous channel, chapter or track
Media playback
Previous channel, chapter,
or track
Volume up
25 | ENG
Press r.
Press H.
NOTE: To quickly increase the volume, press and hold H.
Page 26

SOUNDBAR CONTROLS
FUNCTION WHAT TO DO
Volume down
Mute/Unmute
Channel up
Channel down
Press z.
NOTE: To quickly decrease the volume, press and hold z.
Press A.
When audio is muted, the sides of the light bar glow solid
white until audio resumes.
NOTE: You can also press H to resume audio.
Press P.
Press r.
Cable/satellite functions
The red, green, yellow and blue buttons on the remote correspond with the
color-coded function buttons on your cable/satellite box. Refer to your cable/satellite
box owner’s guide.
ADJUST THE BASS
1. In the Bose Music app, from the My Bose screen, select your soundbar.
2. Tap the soundbar image in the bottom-right corner of the screen.
3. Tap Adjustments to adjust the bass.
PROGRAM A THIRD-PARTY REMOTE
You can program a third-party remote, such as your cable/satellite box remote, to
control the soundbar. Refer to your third-party remote owner’s guide or website for
instructions.
Once programmed, the third-party remote controls basic soundbar functions such as
power on/o and volume.
NOTE: Not all third-party remotes are compatible with the soundbar. The remote
must support IR (infrared) signals in order to control the soundbar.
26 | ENG
Page 27

VOICE ASSISTANT
VOICE ASSISTANT OPTIONS
You can program your soundbar to quickly and easily access Amazon Alexa or your
Google Assistant.
NOTE: Amazon Alexa and the Google Assistant aren’t available in certain languages
and countries.
OPTIONS HOW TO USE
Amazon Alexa
Your Google Assistant
Use your voice and/or the Action button b
(see page 29).
Use voice and/or the Action button b
(see page 31).
NOTE: You can’t set the soundbar to access Amazon Alexa and the Google Assistant
at the same time.
SET UP YOUR VOICE ASSISTANT
Before you begin, make sure your mobile device and the soundbar are connected to
the same Wi-Fi network.
To set up your voice assistant, use the Bose Music app. You can access this option
from the Settings menu.
NOTE: When setting up your voice assistant, make sure you use the same audio
service account that you used in the Bose Music app.
27 | ENG
Page 28

VOICE ASSISTANT
ACCESS ALEXA
The soundbar is Amazon Alexa enabled. With Alexa, you can ask to play music, hear
the news, check the weather, control smart home devices and more. Using Alexa on
your soundbar is as simple as asking. Just ask or use the Action button b and Alexa
responds instantly.
For more information about what Alexa can do, visit:
https://www.amazon.com/usealexa
NOTE: Alexa isn’t available in certain languages and countries.
Use your voice
Start with “Alexa,” then say:
THINGS TO TRY EXAMPLE OF WHAT TO SAY
Talk to Alexa What’s the weather?
Play Beethoven.
Play audio
NOTE: Amazon Music is set as the default music
service. To change the default music service,
use the Alexa app.
Control volume Turn the volume up.
Play NPR on TuneIn.
Play from a specific audio service
Play on a specific speaker
Skip to the next song Next song.
Set a timer Set a timer for 5 minutes.
Discover more skills What new skills do you have?
Stop Alexa Stop.
28 | ENG
NOTE: Amazon Alexa doesn't support all
audio services.
Play funk in the living room.
NOTE: Make sure you say the speaker name you
assigned in the Bose Music app. If multiple
speakers have the same name, use the name
assigned in the Alexa app or change the
name in the Bose Music app.
Page 29

VOICE ASSISTANT
Use the soundbar controls
The Action button b and Microphone o button n are used to control Alexa. They are
located on the top of the soundbar.
Microphone
o button
THINGS TO TRY WHAT TO DO
Tap b then say your request.
Talk to Alexa
For a list of things to try, visit:
https://www.amazon.com/usealexa
Stop alarms and timers
Stop Alexa
Turn the microphone on/o
Tap b.
Tap b.
Tap n.
NOTE: When the microphone is o, n glows solid
red, and you can’t access Alexa.
29 | ENG
Page 30

VOICE ASSISTANT
ACCESS YOUR GOOGLE ASSISTANT
Get hands-free help from your Bose Soundbar 700, which now works with your
Google Assistant so you can pause and play your favorite media using just your voice.
For more information on what your Google Assistant can do, visit:
https://support.google.com/assistant
NOTES:
• The Google Assistant isn’t available in certain languages and countries.
• For more information about playing audio with your Google Assistant, “Play music
with your Google Assistant” on page 32
Use your voice
Start with “Hey Google,” then say:
THINGS TO TRY EXAMPLES OF WHAT TO SAY
Access Google’s smarts How do you say friend in Spanish?
Have family fun What noise does an elephant make?
Set a reminder Remind me to call mom on Thursday.
Check your calendar How does my day look?
Control your smart home Turn o the lights.
30 | ENG
Page 31

VOICE ASSISTANT
Use the soundbar controls
You can use the Action button b and Microphone o button n to control your
Google Assistant. They are located on the top of the soundbar.
Microphone o
button
THINGS TO TRY WHAT TO DO
Tap b then say your request.
Talk to your Google Assistant
For a list of things to try, visit:
https://support.google.com/assistant
Stop alarms and timers
Stop your Google Assistant
Turn the microphone on/o
Tap b.
Tap b.
Tap n.
When the microphone is o, n glows solid red, and
you can’t access your Google Assistant.
31 | ENG
Page 32

VOICE ASSISTANT
PLAY MUSIC WITH YOUR GOOGLE ASSISTANT
You can ask your Google Assistant to play music from your default audio service or
from a specific audio service.
Start with “Hey Google,” then say:
THINGS TO TRY EXAMPLES OF WHAT TO SAY
Play jazz.
Play music
Control your speaker Turn it up.
Play from a specific audio service
Play on a specific speaker
NOTE: The Google Assistant uses your default audio
service. To change the default audio service,
use the Google Assistant app.
Play NPR on TuneIn.
NOTE: The Google Assistant doesn’t support all
audio services.
Play hip-hop in the kitchen.
NOTE: Make sure you say the speaker name you
assigned in the Bose Music app. If multiple
speakers have the same name, use the name
assigned in the Google Assistant app or
change the name in the Bose Music app.
Choose a default audio service
During initial setup for your Google Assistant, the Google Assistant app prompts
you to select a default audio service. When using your Google Assistant with Bose
products, only Pandora and Spotify are supported default services. Although other
audio services are listed as available during setup, they are not supported.
For the best experience, choose Pandora or Spotify as your default audio service.
If you choose an unsupported audio service, you hear an error message when
requesting to play music.
32 | ENG
Page 33

PRESET PERSONALIZATION
You can control presets using the Bose Music app or the remote.
NOTE: You can’t set presets in Bluetooth mode.
SET A PRESET
1. Stream music using the Bose Music app.
2. On the remote, press the Bose Music button m.
Bose Music button
33 | ENG
Page 34

PRESET PERSONALIZATION
3. Press and hold a preset button until you hear a tone.
Preset buttons
34 | ENG
Page 35

PRESET PERSONALIZATION
PLAY A PRESET
1. On the remote, press the Bose Music button m.
2. Press a preset button to play music.
Preset buttons
35 | ENG
Page 36

BLUETOOTH CONNECTIONS
Bluetooth wireless technology lets you stream music from mobile devices such as
smartphones, tablets, and laptop computers. Before you can stream music from a
device, you must connect your device to the soundbar.
CONNECT A MOBILE DEVICE
1. On the remote, press the Bluetooth button l.
Bluetooth button
The light bar pulses blue.
2. On your mobile device, turn on the Bluetooth feature.
TIP: The Bluetooth menu is usually found in the Settings menu.
36 | ENG
Page 37

BLUETOOTH CONNECTIONS
3. Select your soundbar from the device list.
TIP: Look for the name you entered for your soundbar in the Bose Music app.
If you didn’t name your soundbar, the default name appears.
Device Name
Once connected, you hear a tone. The light bar glows solid white then fades to
black. The soundbar’s name appears in the mobile device list.
DISCONNECT A MOBILE DEVICE
Use the Bose Music app to disconnect your mobile device.
TIP: You can also use Bluetooth settings on your mobile device. Disabling the
Bluetooth feature disconnects all other devices.
RECONNECT A MOBILE DEVICE
On the remote, press the Bluetooth button l.
The soundbar tries to connect with the most recently connected device.
NOTES:
• Make sure the Bluetooth feature is enabled on your mobile device.
• The device must be within 30 ft. (9 m) and powered on.
37 | ENG
Page 38

BLUETOOTH CONNECTIONS
CONNECT AN ADDITIONAL MOBILE DEVICE
You can store up to eight devices in the soundbar device list, and the soundbar can be
actively connected to two devices at a time.
NOTE: You can play audio from only one device at a time.
1. On the remote, press and hold the Bluetooth button l.
Bluetooth button
The light bar pulses blue.
2. On your mobile device, select your soundbar from the device list.
NOTE: Make sure the Bluetooth feature is enabled on your mobile device.
CLEAR THE SOUNDBAR DEVICE LIST
1. Tap and hold l for 10 seconds until the light bar pulses white twice then fades
to black.
The light bar pulses blue.
2. Delete the soundbar from the Bluetooth list on your device.
All devices are cleared, and the soundbar is ready to connect (see page 36).
38 | ENG
Page 39

STREAM AUDIO WITH AIRPLAY
The soundbar is capable of playing AirPlay 2 audio, which allows you to quickly stream
audio from your Apple device to the soundbar or multiple speakers.
NOTES:
• To use AirPlay 2, you need an Apple device running iOS 11.4 or later.
• Your Apple device and soundbar must be connected to the same Wi-Fi network.
• For more information about AirPlay, visit: https://www.apple.com/airplay
STREAM AUDIO FROM THE CONTROL CENTER
1. On your Apple device, open the Control Center.
2. Tap and hold the audio card in the top-right corner of the screen, then tap
the AirPlay icon A.
3. Select your soundbar or speakers.
STREAM AUDIO FROM AN APP
1. Open a music app (like Apple Music), and select a track to play.
2. Tap A.
3. Select your soundbar or speakers.
39 | ENG
Page 40

SOUNDBAR STATUS
The LED light bar located on the front of the soundbar shows the soundbar status.
Light bar
NOTE: The light bar displays one status at a time of the selected source.
WI-FI STATUS
Shows the Wi-Fi connection status of the soundbar.
LIGHT BAR ACTIVITY SYSTEM STATE
Pulsing white
Solid white then fades
to black
Connecting to Wi-Fi
Connected to Wi-Fi
BLUETOOTH STATU S
Shows the Bluetooth connection status of mobile devices.
LIGHT BAR ACTIVITY SYSTEM STATE
Pulsing blue
Pulsing white
Solid white then fades
to black
White light pulses twice
then fades to black
Ready to connect to
mobile device
Connecting to
mobile device
Connected to
mobile device
Clearing device list
40 | ENG
Page 41

SOUNDBAR STATUS
VOICE ASSISTANT STATUS
Shows the status of your voice assistant.
LIGHT BAR ACTIVITY
O Voice assistant is idle
White light slides to the
center then glows solid
White light slides to
the sides
Pulsing white (full)
Pulsing yellow
SYSTEM STATE
Voice assistant is listening
Voice assistant is thinking
Voice assistant is speaking
Notification from
voice assistant
Microphone o indicator
Microphone o indicator
INDICATOR ACTIVITY SYSTEM STATE
Solid red The microphone is o
41 | ENG
Page 42

SOUNDBAR STATUS
MEDIA PLAYBACK AND VOLUME
Shows the soundbar status when controlling media playback and volume.
LIGHT BAR ACTIVITY
Two center lights glow
solid white
Right end of the light bar
pulses white
Left end of the light bar
pulses white
SYSTEM STATE
Play/Pause
Volume up
Volume down
UPDATE AND ERROR STATUS
Shows the status of software updates and error alerts.
LIGHT BAR ACTIVITY SYSTEM STATE
Solid amber Wi-Fi setup in progress
White light slides from
right to left
White light slides from
left to right
Pulses amber four times
Downloading update
Updating soundbar
Source error - refer to the
Bose Music app
Pulses red four times
Solid red
42 | ENG
Request is temporarily
unavailable - try again later
Soundbar error - contact
Bose customer service
Page 43

ADVANCED FEATURES
UPDATE THE SOUNDBAR
The soundbar updates automatically when connected to the Bose Music app and to
your Wi-Fi network.
DISABLE/ENABLE WI-FI CAPABILITY
On the remote, press and hold the Bose Music button m and Skip forward button v
until the light bar pulses white twice then fades to black.
Bose Music button
43 | ENG
Skip forward button
Page 44

ADVANCED FEATURES
CONNECT ACCESSORIES (OPTIONAL)
You can connect any of these accessories to your soundbar. For more information,
refer to your accessory owner’s guide.
• Bose Bass Module 500: worldwide.Bose.com/Support/BASS500
• Bose Bass Module 700: worldwide.Bose.com/Support/BASS700
• Acoustimass 300 bass module: global.Bose.com/Support/AM300
• Bose Surround Speakers: worldwide.Bose.com/Support/WSS
• Virtually Invisible 300 wireless surround speakers:
global.Bose.com/Support/VI300
44 | ENG
Page 45

CARE AND MAINTENANCE
INSTALL THE REMOTE BATTERIES
1. Slide open the battery compartment cover on the back of the remote.
2. Insert the four provided AA (IEC-LR3) 1.5V batteries. Match the H and z symbols
on the batteries with the H and z markings inside the compartment.
3. Slide the battery compartment cover back into place.
45 | ENG
Page 46

CARE AND MAINTENANCE
CLEAN THE SOUNDBAR
Clean the exterior of the soundbar with the provided cleaning cloth or another soft
dry cloth.
CAUTIONS:
• Do NOT allow liquids to spill onto the system or into any openings.
• Do NOT blow air into the system.
• Do NOT use a vacuum to clean the system.
• Do NOT use any sprays near the system.
• Do NOT use any solvents, chemicals or cleaning solutions containing alcohol,
ammonia or abrasives.
• Do NOT allow objects to drop into any openings.
REPLACEMENT PARTS AND ACCESSORIES
Replacement parts and accessories can be ordered through Bose customer service.
Visit: worldwide.Bose.com/Support/SB700
LIMITED WARRANTY
The soundbar is covered by a limited warranty. Visit our website at
global.Bose.com/warranty for details of the limited warranty.
To register your product, visit global.Bose.com/register for instructions.
Failure to register will not aect your limited warranty rights.
46 | ENG
Page 47

TROUBLESHOOTING
TRY THESE SOLUTIONS FIRST
If you experience problems with the soundbar:
• Make sure the soundbar is connected to a live AC (mains) outlet.
• Secure all cables.
• Verify the state of the light bar (see page 40).
• Move the soundbar away 1 – 3 ft. (0.3 – 0.9 m) from possible interference (wireless
routers, cordless phones, televisions, microwaves, etc.).
• Move the soundbar within the recommended range of your wireless router or
mobile device for proper operation.
• Place the soundbar according to the placement guidelines (see page 14).
OTHER SOLUTIONS
If you could not resolve your issue, see the table below to identify symptoms and
solutions to common problems. If you are unable to resolve your issue, contact
Bose customer service.
Visit: worldwide.Bose.com/contact
SYMPTOM SOLUTION
No HDMI eARC (ARC)
or optical connector
on your TV
Soundbar doesn’t
power on
47 | ENG
Connect to your TV using an audio converter and separate audio
cable, such as a coaxial, 3.5 mm or analog audio cable (not
provided). The type of converter and cable you need depends on
the audio output connectors available on your TV.
Plug the power cord into a dierent AC (mains) outlet.
Use the remote to power on the soundbar (see page 22).
Unplug the power cords for the soundbar and optional bass module
or surround speakers, wait 30 seconds and firmly plug them into the
AC (mains) outlet.
Page 48

TROUBLESHOOTING
SYMPTOM SOLUTION
Match the H and z symbols on the batteries with the H and z
markings inside the compartment (see page 45).
Replace the batteries (see page 45).
Make sure the remote is within operating range 20 ft. (6.0 m) of
the soundbar.
Make sure there are no obstructions between the remote and
Remote is
inconsistent or
doesn’t work
the soundbar.
Make sure you are in the correct source by pressing the volume
button on the remote to see if the correct source button flashes.
On the soundbar, tap and hold the Action button b for 5 seconds
to pair the remote with the soundbar. Insert the batteries into the
remote (see page 45). The remote turns on and the source
buttons glow.
NOTE: This solution applies only if a voice assistant has not been
set up.
If the sides of the light bar are pulsing, the soundbar is muted. Press
the Mute/Unmute button A to unmute the soundbar.
Make sure your mobile device is not muted.
Increase the volume on the soundbar (see page 25) or your
mobile device.
Switch to a dierent source (see page 23).
Play audio from a dierent application or music service.
If the audio is from a Wi-Fi source, reset the router.
Restart your mobile device.
Make sure you’re using a compatible Bluetooth mobile device.
NOTE: You can’t connect Bluetooth headphones to the soundbar.
Intermittent or
no audio
Make sure that the soundbar’s HDMI cable is inserted into a
connector on your TV labeled eARC or ARC (Audio Return
Channel), not a standard HDMI connector. If your TV does not have
an HDMI eARC or ARC connector, connect the soundbar using the
optical cable (see page 56).
If the soundbar is connected to your TV’s HDMI eARC or ARC
connector, make sure that Consumer Electronics Control (CEC) is
enabled in your TV system menu. Your TV may refer to CEC by a
dierent name. Refer to your TV owner’s guide.
Disconnect the soundbar’s HDMI cable from your TV’s HDMI eARC or
ARC connector and reconnect it.
Insert the optical cable into a connector on your TV labeled Output
or OUT, not Input or IN.
Unplug the power cords for the soundbar and optional bass module
or surround speakers, wait 30 seconds and firmly plug them into the
AC (mains) outlet.
48 | ENG
Page 49

TROUBLESHOOTING
SYMPTOM SOLUTION
Refer to your bass module or surround speakers owner’s guide for
troubleshooting (see page 44).
Soundbar doesn’t
connect to bass
module or
surround speakers
Make sure our bass module or surround speakers are compatible
with the soundbar (see page 44).
Unplug the power cords for the soundbar and optional bass module
or surround speakers, wait 30 seconds and firmly plug them into the
AC (mains) outlet.
Make sure your bass module or surround speakers are compatible
No audio from bass
module or
surround speakers
with the soundbar (see page 44).
Make sure the software is current in the Bose Music app.
Adjust the bass level using the Bose Music app (see page 26).
Switch to a dierent source (see page 23).
Make sure that the soundbar’s HDMI cable is inserted into a
connector on your TV labeled eARC or ARC (Audio Return Channel).
If your TV does not have an HDMI eARC or ARC connector, connect
to the soundbar using the optical cable (see page 56).
Turn o your TV speakers. Refer to your TV owner’s guide.
If the soundbar is connected to your TV’s HDMI eARC or ARC
Sound is coming from
TV speaker
connector, make sure that Consumer Electronics Control (CEC) is
enabled in your TV system menu. Your TV may refer to CEC by a
dierent name. Refer to your TV owner’s guide.
Disconnect the soundbar’s HDMI cable from your TV’s HDMI eARC or
ARC connector and reconnect it.
Decrease your TV volume to its lowest setting.
Connect to the soundbar using both the HDMI cable (see page
55) and optical cable (see page 56).
Test dierent sources if available.
Make sure that your TV can output surround sound audio. Refer to
your TV owner’s guide.
Poor or
distorted audio
If the audio is being played from another device, reduce the volume
of that device.
Adjust the bass level using the Bose Music app (see page 26).
Power o your TV speakers. Refer to your TV owner’s guide.
Run ADAPTiQ audio calibration (see page 19).
49 | ENG
Page 50

TROUBLESHOOTING
SYMPTOM SOLUTION
Soundbar doesn’t
play audio from the
correct source or
selects the incorrect
source after a delay
Set CEC to Alternate using the Bose Music app.
Disable CEC on your source (refer to the source owner’s guide for
more information).
Connect to the soundbar using both the HDMI cable (see page
55) and the optical cable (see page 56).
Soundbar and source
do not power
on/o simultaneously
Soundbar doesn’t
connect to
Wi-Fi network
Soundbar doesn’t
connect to
Bluetooth device
On the remote, press the source button for the source that is out
of sync.
Press the Power button I to power on/o the source.
In the Bose Music app, select correct network name, and enter the
network password (case-sensitive).
Make sure the soundbar and your mobile device are connected to
the same Wi-Fi network.
If your network information has changed, see page 18.
Enable Wi-Fi on the mobile device you are using for setup.
Close other open applications on your mobile device.
Restart your mobile device and router.
If your router supports both 2.4GHz and 5GHz bands, make sure
both your mobile device and the soundbar are connecting to the
same band.
NOTE: Give each band a unique name to make sure you’re
connecting to the correct band.
Reset the router.
Unplug the power cords for the soundbar and optional bass module
or surround speakers, wait 30 seconds and firmly plug them into
the AC (mains) outlet. Uninstall the Bose Music app on your mobile
device, reinstall the app and restart setup.
Connect to the network using an Ethernet cable.
On your mobile device, turn the Bluetooth feature o and then on.
Delete the soundbar from the Bluetooth list. Connect again
(see page 36).
Connect a dierent mobile device (see page 36).
Make sure you’re using a compatible Bluetooth mobile device.
NOTE: You can’t connect Bluetooth headphones to the soundbar.
Remove the soundbar from your mobile device Bluetooth pairing list
and connect again (see page 36).
Clear the soundbar device list (see “Clear the soundbar device list”
on page 38) and connect again (see page 36).
50 | ENG
Page 51

TROUBLESHOOTING
SYMPTOM SOLUTION
Make sure your soundbar is powered on and in range
(see page 14).
Make sure your Apple device and your soundbar are connected to
Soundbar doesn’t
stream audio
using AirPlay
the same Wi-Fi network.
Update your Apple device.
Make sure the soundbar is up-to-date (see page 43).
If you can’t find the AirPlay icon A in the music app you are
streaming from, stream audio from the Control Center.
For additional support, visit: https://www.apple.com/airplay
Make sure your mobile device is compatible with the Bose Music app
Bose Music app
doesn’t work on
mobile device
and meets minimum system requirements. For more information,
refer to the app store on your mobile device.
Uninstall the Bose Music app on your mobile device then reinstall the
app (see page 17).
Soundbar isn’t visible
to add to a nother
Bose account
Alexa doesn’t
respond
Make sure sharing is enabled on your soundbar using the Bose
Music app.
Make sure the soundbar and your mobile device are connected to
the same Wi-Fi network.
Make sure Alexa has been set up using the Bose Music app
(see page 27).
NOTE: The soundbar must be set up and connected to your Wi-Fi
network using the Bose Music app.
Make sure you’re in a country where Amazon Alexa is available.
Make sure the Microphone o indicator is not glowing red. To turn
on the microphone, see page 28.
Make sure you say the name you assigned in the Bose Music app. If
multiple speakers have the same name, use the name assigned in
the Alexa app or change the name in the Bose Music app.
For additional support, visit: https://www.amazon.com/usealexa
51 | ENG
Page 52

TROUBLESHOOTING
SYMPTOM SOLUTION
Make sure your Google Assistant has been set up using the
Bose Music app (see page 27).
Connect your mobile device to Wi-Fi.
Make sure you’re in a country where the Google Assistant
is available.
Make sure you are using the most up-to-date version of the Google
Assistant app.
Make sure your mobile device is compatible.
Your Google Assistant
doesn’t respond
Remove your Google Assistant from the soundbar using the Bose
Music app. Then, add your Google Assistant again.
Choose Pandora or Spotify as your default audio service
(see page 32).
Make sure you use the same audio service account on the Bose
Music app and Google Assistant app.
Your Google Assistant may not support your request. New features
are added periodically.
For additional support, visit:
https://support.google.com/assistant
Change your Google
Assistant personal
result settings
Preset doesn’t
respond
To turn o personal results or change the account for personal
results, use the Settings menu in the Google Assistant app.
Make sure the preset has been set (see page 33).
52 | ENG
Page 53

TROUBLESHOOTING
RESET THE SOUNDBAR
Factory reset clears all source, volume, network and ADAPTiQ audio calibration
settings from the soundbar and returns it to original factory settings.
1. On the remote, press and hold the Power button I and Skip forward button v for
5 seconds until light bar pulses white twice then fades to black.
Power button
Skip forward button
The soundbar reboots. When the reset is complete, the light bar glows
solid amber.
2. To restore the soundbar’s network and audio settings:
a. Launch the Bose Music app on your mobile device and add the soundbar to your
network (see page 18).
b. Run ADAPTiQ audio calibration using the Bose Music app.
53 | ENG
Page 54

APPENDIX: SETUP REFERENCE
CONNECTION OPTIONS
Connect the soundbar to your TV using one of the following connection options:
Option 1 (preferred): HDMI eARC or ARC (Audio Return Channel)
Option 2: Optical
NOTE: The preferred option is to connect the soundbar to your TV’s HMDI eARC or
ARC connector using the HDMI cable.
1. On the back of your TV, locate the HDMI IN and Audio OUT (optical)
connector panels.
NOTE: Your TV’s connector panel may not appear as shown. Look for the shape of
the connector.
Option 1 (Preferred)
HDMI eARC or ARC: Use the
HDMI cable for this connection.
2. Choose an audio cable.
54 | ENG
Option 2
Optical: If your TV doesn’t have an
HDMI eARC or ARC connector, use an
optical cable for this connection.
Page 55

APPENDIX: SETUP REFERENCE
CONNECT THE SOUNDBAR TO YOUR TV
After choosing an audio cable, connect the soundbar to your TV.
Option 1 (preferred): HDMI eARC or ARC
1. Insert one end of the HDMI cable into your TV’s HDMI eARC or ARC connector.
NOTE: Make sure you insert the HDMI cable into an HDMI eARC or ARC connector
on your TV, not a standard HDMI connector. If your TV does not have an
HDMI eARC or ARC connector, see page 56.
2. Insert the other end of the cable into the HDMI (ARC) connector on the soundbar.
55 | ENG
Page 56

APPENDIX: SETUP REFERENCE
Option 2: Optical
If your TV doesn’t have an HDMI eARC or ARC connector, use the optical cable to
connect the soundbar to your TV.
1. Remove the protective cap from both ends of the optical cable.
CAUTION: Inserting the plug in the wrong orientation can damage the plug
and/or the connector.
2. Insert one end of the optical cable into your TV’s Optical OUT connector.
3. Hold the plug at the other end of the optical cable.
4. Align the plug with the soundbar’s OPTICAL IN connector, and insert the
plug carefully.
NOTE: The connector has a hinged door that swings inward when inserting
the plug.
5. Firmly push the plug into the connector until you hear or feel a click.
56 | ENG
Page 57

APPENDIX: SETUP REFERENCE
CHECK FOR SOUND
NOTE: To avoid hearing distorted audio, turn o your TV speakers. Refer to your TV
owner’s guide for more information.
1. Power on your TV.
2. If you are using a cable/satellite box or other secondary source:
a. Power on this source.
b. Select the appropriate TV input.
3. If the soundbar is not powered on, press the Power button I on the remote.
You hear sound coming from the soundbar.
4. Press the Mute/Unmute button A.
You don’t hear sound coming from the TV speakers or soundbar.
NOTE: If you don’t hear sound coming from the soundbar or hear sound coming from
your TV speakers, see page 49.
57 | ENG
Page 58

©2019 Bose Corporation, 100 The Mountain Road, Framingham, MA 01701-9168 USA
AM810651-0010 Rev. 04
 Loading...