


Table of Contents
1
Svenska Nederlands Italiano Français Español Deutsch Dansk EnglishDanskDeutschItalianoNederlandsSvenska Français Español English
Auditioner® Playback System III User Guide
Table of Contents
Safety
Safety information . . . . . . . . . . . . . . . . . . . . . . . . . . . . . . . . . . . . . . . . . . . . . . . . . . . . . .2
Important safety instructions . . . . . . . . . . . . . . . . . . . . . . . . . . . . . . . . . . . . . . . . . . . . . .3
Introduction
Auditioner® Playback System III features . . . . . . . . . . . . . . . . . . . . . . . . . . . . . . . . . . . . 4
Minimum system requirements . . . . . . . . . . . . . . . . . . . . . . . . . . . . . . . . . . . . . . . . . . . .5
Recommended computer configuration . . . . . . . . . . . . . . . . . . . . . . . . . . . . . . . . . . . . .5
Getting additional help . . . . . . . . . . . . . . . . . . . . . . . . . . . . . . . . . . . . . . . . . . . . . . . . . .5
Auditioner® Playback System III Overview
Auditioner® Playback System III contents . . . . . . . . . . . . . . . . . . . . . . . . . . . . . . . . . . . 6
Auditioner® Playback System III tour . . . . . . . . . . . . . . . . . . . . . . . . . . . . . . . . . . . . . . .7
Using Auditioner Playback System III
Powering the unit on . . . . . . . . . . . . . . . . . . . . . . . . . . . . . . . . . . . . . . . . . . . . . . . . . . . .8
Adjusting the chin rest . . . . . . . . . . . . . . . . . . . . . . . . . . . . . . . . . . . . . . . . . . . . . . . . . . .8
Auditioner® Playback System III USB connection . . . . . . . . . . . . . . . . . . . . . . . . . . . . .9
Connecting Auditioner® Playback System III to a PC . . . . . . . . . . . . . . . . . . . . . . . . .10
Connecting Auditioner® Playback System III to a USB hub . . . . . . . . . . . . . . . . . . . . .10
Connecting one Auditioner® Playback System III to another (daisy chaining) . . . . . . .11
Connecting an audio device to Auditioner® Playback System III . . . . . . . . . . . . . . . . .12
Monitoring Sound Pressure Levels . . . . . . . . . . . . . . . . . . . . . . . . . . . . . . . . . . . . . . . .12
Using Calibrate Mode . . . . . . . . . . . . . . . . . . . . . . . . . . . . . . . . . . . . . . . . . . . . . . . . . .14
Placing Auditioner® Playback System III on a stand . . . . . . . . . . . . . . . . . . . . . . . . . .15
Backing up Auditioner® Playback System III information . . . . . . . . . . . . . . . . . . . . . . .15
Caring for Auditioner Playback System III
Cleaning Auditioner® Playback System III . . . . . . . . . . . . . . . . . . . . . . . . . . . . . . . . . .16
Packing and transporting Auditioner® Playback System III . . . . . . . . . . . . . . . . . . . . .16
Carrying Auditioner® Playback System III . . . . . . . . . . . . . . . . . . . . . . . . . . . . . . . . . .16
Storing Auditioner® Playback System III . . . . . . . . . . . . . . . . . . . . . . . . . . . . . . . . . . .16
Auditioner Playback System III Specifications
General Specifications . . . . . . . . . . . . . . . . . . . . . . . . . . . . . . . . . . . . . . . . . . . . . . . . . .17
System Specifications . . . . . . . . . . . . . . . . . . . . . . . . . . . . . . . . . . . . . . . . . . . . . . . . . .17
Auditioner® Playback System III Specifications
17
Svenska Nederlands Italiano Français Español Deutsch Dansk EnglishDanskDeutschItalianoNederlandsSvenska Français Español English
Auditioner® Playback System III User Guide
Auditioner Playback System III Specifications
General Specifications
System Specifications
Auditioner playback system
dimensions - closed
h: 28.6 cm (11.26")
w: 50.2 cm (19.76")
d: 32.8 cm (12.91")
Auditioner playback system
dimensions - open
h: 42.0 cm (16.54”)
w: 50.2 cm (19.76”)
d: 24.8 cm (9.76”)
Case dimensions h: 42.0 cm (16.54")
w: 60.3 cm (23.74")
d: 38.1 cm (15.00")
Temperature Non-Operating: -26°C (-15°F) to 49°C (120°F)
Operating: 0°C (32°F) to 40°C (104°F)
Maximum Inrush Current Cold Start = 3.17 A (Peak to Peak)
5 Second Power Interruption = 2.54 A (Peak to Peak)
System Sensitivity Reference Calibration: 116 dB SPL at 1 VRMS (RCA),
100mVRMS (3.5mm), or Digital Full Scale.
Maximum Sound Pressure
Level - Program Material
110 dB SPL (using IEC-shaped pink noise according to
IEC 268-5)
System Frequency Response
Range
25 Hz to 15 kHz
Safety
2
English Deutsch FrançaisDansk Español Italiano SvenskaNederlandsDansk Italiano SvenskaDeutsch NederlandsEnglish FrançaisEspañol
Auditioner® Playback System III User Guide
Safety
Safety information
WARNI NG: To reduce the risk of fire or electrical shock, do not expose the product to
rain or moisture.
WARNI NG: The apparatus shall not be exposed to dripping or splashing, and objects
filled with liquids, such as vases, shall not be placed on the apparatus. As with any
electronic products, use care not to spill liquids into any part of the system. Liquids
can cause a failure and/or a fire hazard.
The lightning flash with arrowhead symbol within an equilateral triangle alerts the
user to the presence of uninsulated dangerous voltage within the system
enclosure that may be of sufficient magnitude to constitute a risk of electrical
shock.
The exclamation point within an equilateral triangle, as marked on the system, is
intended to alert the user to the presence of important operating and
maintenance instructions in this user guide.
CAUTION:
To prevent electric shock, match the wide blade of the line cord plug to the wide
slot of the AC (mains) receptacle. Insert fully.
WARNI NG: No naked flame sources, such as lighted candles, should be placed on the appara-
tus. See item 18 of Important Safety Instructions.
Please read this owner’s guide
Please take the time to follow the instructions in this owner’s guide carefully. It will help you
set up and operate your system properly and enjoy all of its advanced features. Please save
this owner’s guide for future reference.
Additional Safety Information
See the additional instructions on the Important Safety Instructions sheet (North America
only) enclosed in the shipping carton.
This product conforms to the EMC Directive 89/336/EEC and to the Low Voltage
Directive 73/23/EEC. The complete Declaration of Conformity can be found on
<www.bose.com>
Note:
The product label is located on the bottom of the product
Note: The product must be used indoors. It is neither designed or tested for use outdoors, in rec-
reational vehicles, or on boats.
CAUTION
CA UTI ON
RISK OF ELECTRICAL SHOCK
DO NOT OPEN
CAUTION: TO REDUCE THE RISK OF ELECTRIC SHOCK,
DO NOT REMOVE COVER (OR BACK).
NO USER-SERVICABLE PARTS INSIDE.
REFER SERVICING TO QUALIFIED PERSONNEL.
AVIS
VIS
RISQUE DE CHOC ÉLECTRIQUE
NE PAS OUVRIR
ATTENTION : POUR RÉDUIRE LE RISQUE DE DÉCHARGE
ÉLECTRIQUE, NE PAS RETIRER LE COUVERCLE (OU
L’ARRIÈRE). IL NE SE TROUVE À L’INTÉRIEUR AUCUNE
PIÈCE POUVANT ÊTRE RÉPARÉE PAR L’USAGER.
S’ADRESSER À UN RÉPARATEUR COMPÉTENT

Safety
3
Svenska Nederlands Italiano Français Español Deutsch Dansk EnglishDanskDeutschItalianoNederlandsSvenska Français Español English
Auditioner® Playback System III User Guide
Important safety instructions
1. Read these instructions.
2. Keep these instructions - for future reference.
3. Heed all warnings - on the product and in the owner’s guide.
4. Follow all instructions.
5. Do not use this apparatus near water or moisture.
6. Clean only with a dry cloth.
7. Do not block any ventilation openings. Install in accordance with the manufacturer’s instruc-
tions - To ensure reliable operation of the product and to protect it from overheating, put the prod-
uct in a position and location that will not interfere with its proper ventilation.
8. Do not install near any heat sources, such as radiators, heat registers, stoves or other apparatus (including amplifiers) that produce heat.
9. Do not defeat the safety purpose of the polarized or grounding-type plug. A polarized plug
has two blades with one wider than the other. A grounding-type plug has two blades and a
third grounding prong. The wider blade or third prong are provided for your safety. If the provided plug does not fit in your outlet, consult an electrician for replacement of the obsolete
outlet.
10. Protect the power cord from being walked on or pinched, particularly at plugs, convenience
receptacles, and the point where they exit from the apparatus.
11. Only use attachments/accessories specified by the manufacturer.
12. Use only with the cart, stand, tripod, bracket or table specified by the manufacturer
or sold with the apparatus. When a cart is used, use caution when moving the cart/
apparatus combination to avoid injury from tip-over.
13. Unplug this apparatus during lightning storms or when unused for long periods of time - to
prevent damage to this product.
14. Refer all servicing to qualified service personnel. Servicing is required when the apparatus
has been damaged in any way: such as power-supply cord or plug is damaged; liquid has
been spilled or objects have fallen into the apparatus; the apparatus has been exposed to
rain or moisture, does not operate normally, or has been dropped - Do not attempt to service
this product yourself. Opening or removing covers may expose you to dangerous voltages or other
hazards. Please call Bose to be referred to an authorized service center near you.
15. To prevent risk of fire or electric shock, avoid overloading wall outlets, extension cords, or
integral convenience receptacles.
16. Do not let objects or liquids enter the product - as they may touch dangerous voltage points or
short-out parts that could result in a fire or electric shock.
17. See product enclosure back for safety related markings.
18. No naked flame sources, such as lighted candles, should be placed on the apparatus.
Information about products that generate electrical noise
NOTE: This equipment has been tested and found to comply with the limits for a Class A digital device,
pursuant to Part 15 of the FCC Rules. These limits are designed to provide reasonable protection
against harmful interference when the equipment is operated in a commercial environment. This
equipment generates, uses, and can radiate radio frequency energy and, if not installed and used in
accordance with the instruction manual, may cause harmful interference to radio communications.
Operation of this equipment in a residential area is likely to cause harmful interference in which case the
user will be required to correct the interference at his own expense.
Caring for Auditioner® Playback System III
16
English Deutsch FrançaisDansk Español Italiano SvenskaNederlandsDansk Italiano SvenskaDeutsch NederlandsEnglish FrançaisEspañol
Auditioner® Playback System III User Guide
Caring for Auditioner Playback System III
Cleaning Auditioner® Playback System III
You should keep the Auditioner playback system dust free, which you can do by dusting it
with a dry cloth. If you want to clean the chin rest between users, use a commercial, nonabrasive household cleaner.
Note: You cannot replace the chin rest on the Auditioner playback system. If cleaned with a
standard household cleaner, the chinrest should not wear or degrade over time.
Under no circumstances should you place the Auditioner playback system in water or use
excessive amounts of liquid to clean the unit. Avoid placing any cleaners or liquids near the
back of the unit or the loudspeakers.
Packing and transporting Auditioner® Playback System III
The Auditioner playback system has been designed to be easy to transport. It comes with a
sturdy carrying case that includes handles on the top and sides. There are wheels on the
bottom and a retractable handle to make it easy to pull along with you.
Note that the unit weighs about 35 lbs (16 kg) inside the case, so be certain to take care when
moving or picking up the case. We recommend shipping the product ahead of your visit to a
customer site using a standard shipping company. When traveling on an airplane, Auditioner
playback system should be checked with the airline. It is not designed to be a carry-on item.
When you store the Auditioner playback system, make sure the chin rest is pushed down as
low as it can go so that it will fit into the carrying case. The case includes slots for your
cables and power cord. The padded interior has been designed to protect the Auditioner
playback system from minor jolts and drops. However, care should be taken to protect the
unit during travel.
Carrying Auditioner® Playback System III
When you remove the Auditioner playback system from its case, hold the unit by the handle
on the back. If you need to carry multiple units, always carry them by the handles.
When lifting Auditioner playback system off of a table, raise the unit until the rubber feet lift o ff
the table. As soon you are able, grab the unit by the handle to transport it beyond the table.
You can also safely move the unit by grabbing the two outer vertical arms that link the base to
the loudspeakers. Be sure to hold the unit by both of these arms.
WARNI NG: Never pick up the Auditioner playback system by the high frequency or low
frequency loudspeakers.
Storing Auditioner® Playback System III
When you are not using the Auditioner playback system for an extended period of time, we
recommend that you store it in its carrying case. This protects Auditioner playback system
from spills, dust, and other environmental factors that could harm the unit.
Using Auditioner® Playback System III
15
Svenska Nederlands Italiano Français Español Deutsch Dansk EnglishDanskDeutschItalianoNederlandsSvenska Français Español English
Auditioner® Playback System III User Guide
3. Make sure the calibrate push button is in the “up” position for calibration. Play the calibration tone track on the CD on your analog CD player. See “Connecting an audio device
to Auditioner® Playback System III” on page 12
4. The LED read-out provides the following information:
• Calibration High - Red LED: Incoming signal is too high. Decrease output level from
source.
• Calibration Reference - Green LED: Unit is calibrated within ±1 dB SPL
• Calibration Low - Yellow LED: Incoming signal is too low. Increase output level from
source.
Note: If none of the LEDs are illuminated, either the CD player output is turned all the way
down or there is a problem with the connection to Auditioner playback system.
5. Increase or decrease the output level on the CD player until the Green LED is on.
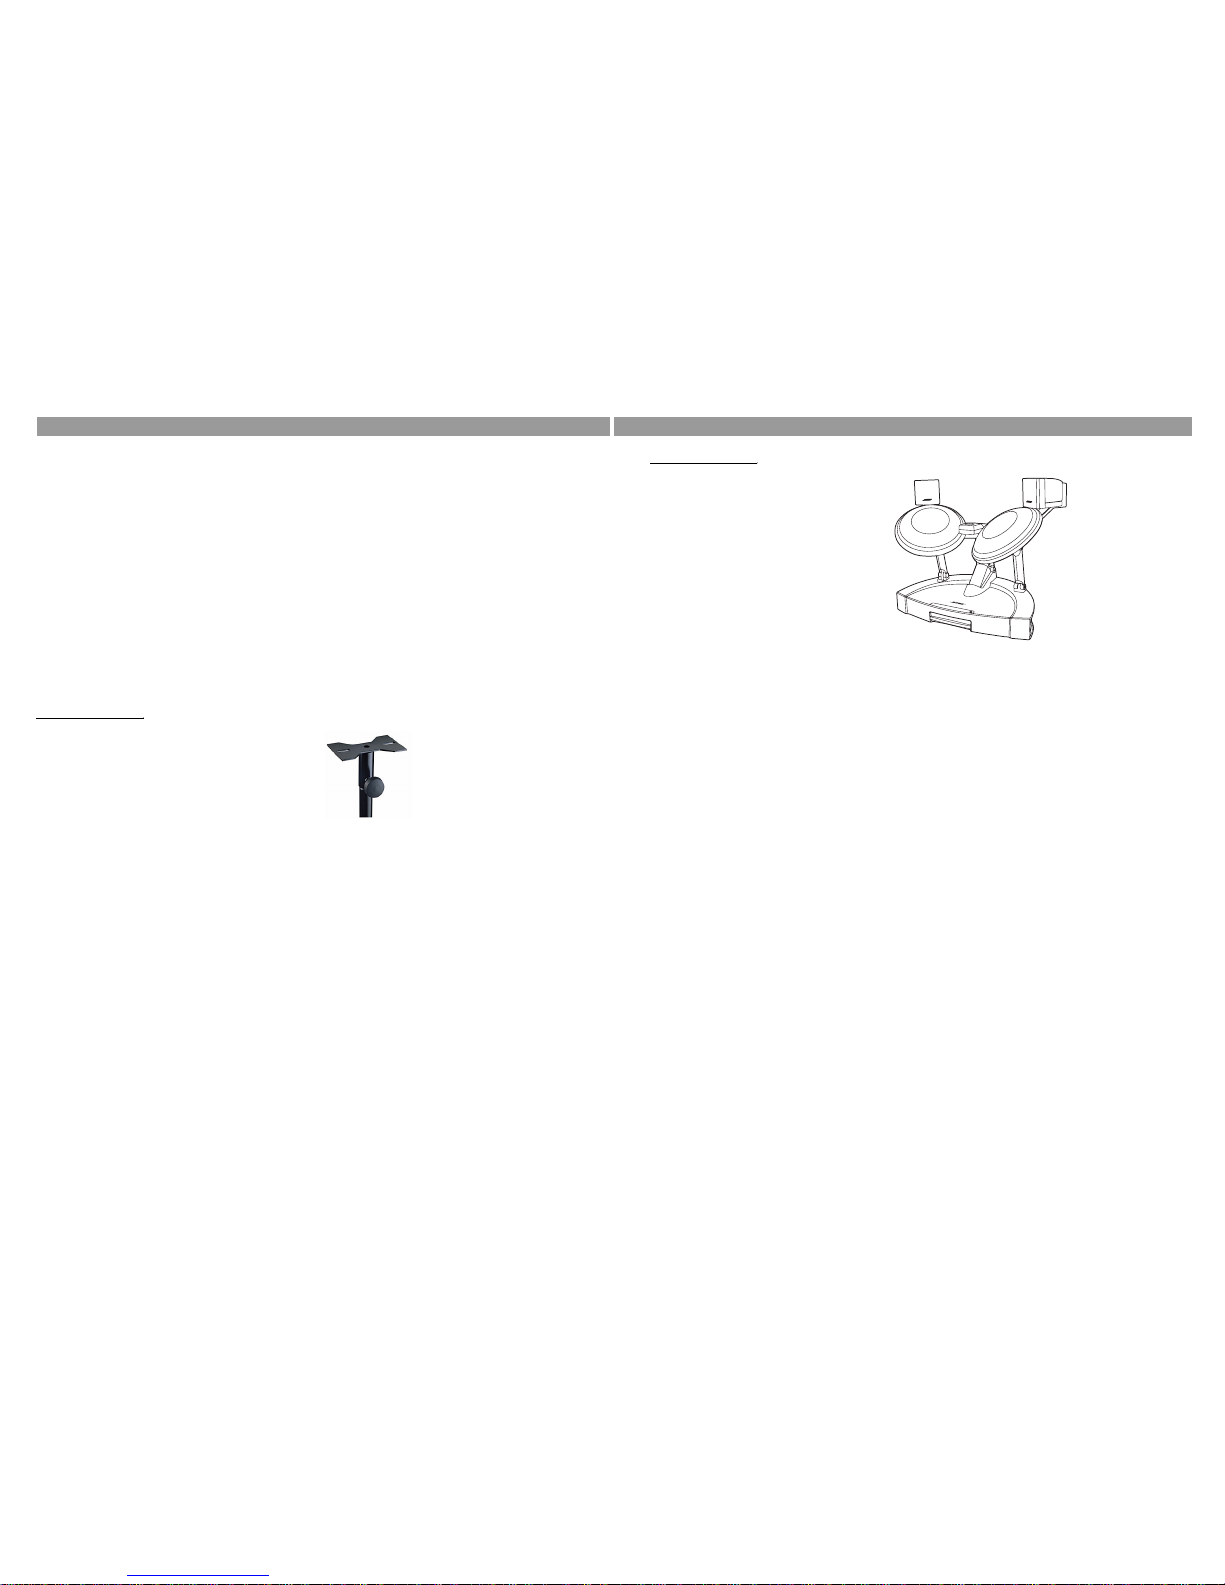
Placing Auditioner® Playback System III on a stand
You may want to place the Auditioner playback system on a standard Bose loudspeaker
stand. There are two screw holes on the underside of the unit to attach it to the stand. Place
the Auditioner playback system on top of the stand, being certain to line up the screw holes
correctly, then attach it using the screws that come with the stand.
Figure 12
Top of Bose SS-10 stand
Note: Auditioner playback system was designed to be used with a Bose® SS-10 stand. We
recommend that you purchase a Bose SS-10 loudspeaker stand as an accesso ry product.
Contact your local Bose representative for more information.
Backing up Auditioner® Playback System III information
Using the Bose® Modeler® Plus software, you can backup or archive the information you used
to listen to your simulation. This is strongly recommended as it provides a backup in the
event you need to listen to your simulation again in the future.
See the Auditioner
®
Playback System III Software User Guide for more information on how to
backup Auditioner playback system files.
Introduction
4
English Deutsch FrançaisDansk Español Italiano SvenskaNederlandsDansk Italiano SvenskaDeutsch NederlandsEnglish FrançaisEspañol
Auditioner® Playback System III User Guide
Introduction
Figure 1
Auditioner® Playback
System III
Welcome to the user guide for the Auditioner playback system. This user guide is intended
for those who have already completed Auditioner playback system training. If you have not
been trained to use the Auditioner playback system, please contact Bose
®
Professional Sys-
tems before using this product.
Auditioner playback system can playback sound systems that were designed using Bose
®
Modeler
®
Plus software. It combines technical accuracy with ease of use to provide you with
all of the tools necessary to optimize any sound system that you design.
The Auditioner playback system lets you use your ears to realize the sound quality that you
want. We believe that you can achieve better sound systems when you use Bose
®
Modeler®
Plus software. We encourage you to contact your local Bose office to learn more about the
Bose
®
Performance Guarantee. Only qualified Bose dealers and distributors can offer the
Bose
®
Performance Guarantee.
Auditioner® Playback System III features
The Auditioner playback system includes the following features:
• Two high-frequency Bose loudspeakers
• Two low-frequency Bose loudspeakers
• Sound Pressure Level (SPL) LED bargraph
• Calibrate LED array to accurately monitor output level
• USB input connector and USB activity/standby LEDs to monitor USB activity
• Input, Chain and Output RCA connectors
• 3.5 mm stereo CD In jack
• On/Off switch on back of unit with green LED to indicate power is on
• Adjustable chin rest
• Built-in inter national power supply
• Built-in retractable handle to easily carry and set up unit
• Durable carrying case with handle for easy transportation

Introduction
5
Svenska Nederlands Italiano Français Español Deutsch Dansk EnglishDanskDeutschItalianoNederlandsSvenska Français Español English
Auditioner® Playback System III User Guide
Minimum system requirements
We recommend the following minimum system requirements for running Bose® Modeler® Plus
software:
• Microsoft Windows XP Professional, Service Pack 1 (or later)
• Intel Pentium 4 850 MHz processor (or better)
• 256 MB of RAM available (512 MB RAM recommended)
• 100 MB of disk space available (500 MB recommended)
•CD-Rom Drive
• 1024x768 32-bit XGA color video display adapter, Open GL (or better)
• A USB hardware key (supplied with the software)
• 2 USB ports available for Bose Modeler hardware key and Auditioner playback system
Recommended computer configuration
We recommend the following computer configuration for Bose® Modeler® Plus software:
• A laptop running Microsoft Windows XP Pro that exceeds the minimum system require-
ments outlined above
• A scroll-wheel mouse (for example a USB mouse)
• This configuration may require three (3) USB connections. Therefore we recommend the
use of an off-the-shelf USB hub device if your computer does not have enough USB ports.
Getting additional help
If you need additional help using the Auditioner playback system, please refer to the following:
• The Modeler User Guide and Online Help - Refer to these sources for help on the Mod-
eler software.
• The Auditioner
®
Playback System III Software User Guide - Refer to this source when
you are running the Auditioner features in Bose
®
Modeler® Plus software.
• Bose Pro Web Site - Check http://pro.bose.com for software updates, documentation
updates and answers to frequently asked questions.
Using Auditioner® Playback System III
14
English Deutsch FrançaisDansk Español Italiano SvenskaNederlandsDansk Italiano SvenskaDeutsch NederlandsEnglish FrançaisEspañol
Auditioner® Playback System III User Guide
Using Calibrate Mode
Figure 11
The Auditioner® Playback
System III LED display
When the Sound Pressure Level that you hear from the Auditioner playback system matches
the level of the original signal that you recorded, you have a "calibrated" signal. When you
play pre-recorded material from an analog source on the Auditioner playback system, you
need to take a series of steps (see below) to ensure that the level you hear is correctly
calibrated.
When the Auditioner playback system is connected to a digitally-transmitted signal, the
calibration is automatic. It is possible for your digital recording to lose calibration if you use
an analog playback device. Although the file itself will not lose calibration (because it is
digital), the audio device that you use (such as a portable CD player) might cause the
calibration to be lost. We recommend that you playback all digital files from the hard drive of
your computer using the USB connection to avoid losing calibration. If you must use an
analog CD player, we recommend that you record the provided calibration tone onto the CD
when you record your audio. The calibration tone can be found on the Bose
®
Modeler® Plus
software product CD.
Note: The calibration display has a push button switch that provides a way to toggle between
Sound Pressure Level and calibration readings. The “up” position is calibrate mode, the
“down” position activates the SPL meter. For information on monitoring the Sound Pressure
Levels, see “Monitoring Sound Pressure Levels” on page 12.
Follow these steps to calibrate the Auditioner playback system when using an analog
playback device:
1. In the Bose
®
Modeler® Plus software, record your audio to the hard drive as a .wav file.
2. Record your .wav file to a normal audio CD. When you record the CD, you should include
the calibration tone file located on the Bose
®
Modeler® Plus software product CD. You
should record this calibration tone as the first track on the CD.
Table 1: LED Values
LED Color dB SPL
Red 110
105
100
Yellow 95
90
85
Green 80
75
70
65

Using Auditioner® Playback System III
13
Svenska Nederlands Italiano Français Español Deutsch Dansk EnglishDanskDeutschItalianoNederlandsSvenska Français Español English
Auditioner® Playback System III User Guide
Note: The Sound Pressure Level meter in the Bose® Modeler® Plus software always shows
the average Sound Pressure Level that would be measured with a bare microphone at the
active listener position in the absence of any background noise.
Auditioner playback system can mix together 2 additional analog sound sources into the
playback audio (using the RCA line-in and the 3.5 mm stereo line-in). This is useful for
situations such as adding in background noise in addition to the program material. When you
mix in additional sources, the Sound Pressure Level meter on the Auditioner playback system
will display the combined sound pressure level of the source material plus the additional
analog sources. Please note that the Sound Pressure Level meter in the Bose
®
Modeler® Plus
software only displays the level of the source material. It will not take into account the
additional analog sources that are input into the Auditioner playback system. In summary:
Follow these steps to monitor the Sound Pressure Level using Auditioner playback system.
1. Connect Auditioner playback system to a Windows XP PC running Bose
®
Modeler® Plus
software, or connect Auditioner playback system to an external audio device. See “Con-
necting Auditioner® Playback System III to a PC” on page 10 or “Connecting an audio
device to Auditioner® Playback System III” on page 12.
2. With an audio source selected, choose a particular listener location in the Bose
®
Mod-
eler
®
Plus software and play the sound system simulation.
3. Monitor the Sound Pressure Levels on the Auditioner playback system and adjust the
source level in the Bose
®
Modeler® Plus software.
See Table 1 on page 14 for the correlation between the LED display and actual Sound
Pressure Level values. The Sound Pressure Level values represent an averaged level over a
100 ms time constant. Each LED lights and stays lit when the average sound has exceeded
its dB SPL value.
For example, the first yellow LED lights when the average Sound Pressure Level exceeds 85
dB SPL over a 100 ms time constant. This LED (and all green LEDs below it) is lit while the
average Sound Pressure Level is below 90 dB SPL. When the average Sound Pressure Level
exceeds 90 dB SPL the second yellow LED will become lit (and all the green and one yellow
LED are lit).
If you have: Bose
®
Modeler®
Plus software SPL
meter will display:
Auditioner® Playback System III SPL meter will display:
Program material playback with an absence
of background noise
SPL level that would
be measured with a
bare microphone at
listener position
SPL level at listener position
plus a small variation due to
the Playback EQ
Program material playback with additional
background noise
sources
SPL level that would
be measured with a
bare microphone at
listener position
Higher SPL level than at listener position (SPL level at
listener position plus Playback EQ, plus background
noise level)
Auditioner® Playback System III Overview
6
English Deutsch FrançaisDansk Español Italiano SvenskaNederlandsDansk Italiano SvenskaDeutsch NederlandsEnglish FrançaisEspañol
Auditioner® Playback System III User Guide
Auditioner® Playback System III Overview
Auditioner® Playback System III contents
Figure 2
Auditioner® Playback System III box contents
The Auditioner playback system box contains the following items. If any items are missing,
contact Bose:
• Carrying Case
• Auditioner playback system unit
• User Guide
•Cables
• U.S. Line cord (Purchase a local power cord if outside North America)
• 10 ft. USB male A-B cable
• 6 ft. Stereo 3.5mm to 3.5mm stereo cable (for CD line-in jack)
• 6 ft. Stereo RCA to RCA cable (for analog input)
WARNI NG: Never pick up the Auditioner playback system by the high frequency or low frequency loudspeakers. Auditioner playback system should only be picked up by the handle, or
with both hands on the two outer arms that connect the base to the loudspeakers.

Auditioner® Playback System III Overview
7
Svenska Nederlands Italiano Français Español Deutsch Dansk EnglishDanskDeutschItalianoNederlandsSvenska Français Español English
Auditioner® Playback System III User Guide
Auditioner® Playback System III tour
Figure 3
Front of Auditioner® Playback System III
Figure 4
Back of Auditioner® Playback System III
Using Auditioner® Playback System III
12
English Deutsch FrançaisDansk Español Italiano SvenskaNederlandsDansk Italiano SvenskaDeutsch NederlandsEnglish FrançaisEspañol
Auditioner® Playback System III User Guide
Connecting an audio device to Auditioner® Playback System III
Figure 9
Connect the stereo cable
from your audio device to
Auditioner
®
Playback Sys-
tem III
This section describes how to connect a CD player to the Auditioner playback system. If you
wish to use Auditioner playback system with a CD player as your audio source, you will first
need to record a CD with the audio output from the Bose
®
Modeler® Plus software. You can
then connect a CD player to the Auditioner playback system using the steps below. Using
the Auditioner playback system calibration feature it is possible to play this recording back at
a calibrated level. (See “Using Calibrate Mode” on page 14)
To connect a CD player to the Auditioner playback system follow these steps:
1. Connect one end of the 3.5 mm stereo cable to the 3.5 mm line-in on the back of Audi-
tioner playback system.
2. Connect the other end to the headphone jack on the portable CD player.
Note: The line-in input will boost the signal from the CD player by +20 dB.
Monitoring Sound Pressure Levels
Figure 10
The Auditioner® Playback
System III LED display
During Auditioner playback system operation you can monitor the Sound Pressure Level
(SPL) by checking the Sound Pressure Level meter. To view the Sound Pressure Level meter,
make sure that the Auditioner playback system is not in Calibrate mode. The Calibrate
button is in the “up” position in Calibrate mode, and in the “down” position to activate the
Sound Pressure Level meter. An array of ten rectangular LEDs display the average operating
Sound Pressure Level of the system.
Note: The clip light indicator will illuminate whenever the hardware experiences an internal
overload condition. The clip LED closely relates to the physical limitations of the hardware at
different frequencies. If the clip light illuminates, turn down the source level or use different
program material.
There are two places you can view Sound Pressure Level data: in the Bose
®
Modeler® Plus
software, and on the Sound Pressure Level meter located on the Auditioner playback system.
These two Sound Pressure Level meters will generally show the same levels during a listening
session, however there may be a small difference due to the Playback EQ that is applied by
the Auditioner playback system.

Using Auditioner® Playback System III
11
Svenska Nederlands Italiano Français Español Deutsch Dansk EnglishDanskDeutschItalianoNederlandsSvenska Français Español English
Auditioner® Playback System III User Guide
Connecting one Auditioner® Playback System III to another (daisy chaining)
Figure 7
You can daisy chain up to
12 Auditioner
®
Playback
System IIIs.
You can daisy chain up to 12 Auditioner playback system units. All Auditioner playback
systems will play the same audio as the “parent” system, and each Sound Pressure Level
meter will show the same level for all connected playback systems. The USB activity light will
only be illuminated on the "parent" system. The “parent” system receives the digital signal
from the computer. Each additional “child” system is daisy-chained to the “parent” by an
analog connection.
Note: During presentations, we recommend that you place the parent system so that the presenter can see the USB activity light on the back of the Auditioner playback system. This will
allow the presenter to easily verify that sound data is being input into the daisy-chained systems.
Figure 8
Daisy chain connections
Follow these steps to daisy chain Auditioner playback system units:
1. Connect the Auditioner playback system’s USB cable from the USB port of your com-
puter (or USB hub) to the USB input on the Auditioner playback system. Connect the A
end (the larger end) to the laptop (or USB hub) and the B end (the smaller end) to the
Auditioner playback system. This will be the "parent" System.
2. Connect the parent playback system's RCA “OUT" to the second (child) playback sys-
tems RCA "IN"
3. Connect the second (child) playback system's RCA “CHAIN" to the third (child) playback
system's RCA "IN".
4. Connect the third playback system’s RCA “CHAIN” to the fourth system’s RCA “IN”.
5. Repeat step 4 until all Playback systems are connected.
6. Power on each system by flipping the power switch located on the back panel of each
Auditioner playback system.
Using Auditioner® Playback System III
8
English Deutsch FrançaisDansk Español Italiano SvenskaNederlandsDansk Italiano SvenskaDeutsch NederlandsEnglish FrançaisEspañol
Auditioner® Playback System III User Guide
Using Auditioner Playback System III
Powering the unit on
The On/Off switch is located on the back of the Auditioner playback system. Press the
switch into the On position to turn the unit on. If the unit does not power on, make sure it is
plugged in.
Note: The Auditioner playback system has been designed to work only with the Bose
®
Modeler
®
Plus software. Although it is possible to connect Auditioner playback system as a
standard USB audio device, or as an analog audio device, any signal that Auditioner playback
system receives would not be equalized for the playback system. As a result, the audio signal
will be spectrally and spatially incorrect.
Adjusting the chin rest
Figure 5
Use both hands to adjust
the Auditioner
®
Playback
System III chin rest.
Follow these steps to adjust the chin rest:
1. Place one hand on the chin rest.
2. Press the chin rest adjuster with your other hand. Take care not to pinch your hand or
fingers as you adjust the position.
3. Gently push the chin rest up or down until it is in a comfortable position
Note: When you store the Auditioner playback system, make sure the chin rest is pushed
down as low as it can go so that it will fit into the carrying case.

Using Auditioner® Playback System III
9
Svenska Nederlands Italiano Français Español Deutsch Dansk EnglishDanskDeutschItalianoNederlandsSvenska Français Español English
Auditioner® Playback System III User Guide
Auditioner® Playback System III USB connection
Auditioner playback system is a standard Microsoft Windows USB 1.0 compliant audio
device. Auditioner playback system works as a USB 1.0 device when using USB 2.0. The
Auditioner playback system connects like any other USB device that you add to your
computer and it appears as an additional sound card.
Whenever you connect a USB device, the computer's host controller polls certain information
from the device, and then decides if there is enough bandwidth available to add the device. If
there is enough bandwidth, the host controller adds the device. If there is not enough
bandwidth, you will need to disconnect one or more of your other USB devices (such as a
USB printer) to make more bandwidth available for the Auditioner playback system. We
recommend that you only have one active sound device connected to your computer at a
time. If you do experience a conflict, it is likely that you are using a similar USB chip (for
example, USB bus-powered speakers) on your network. To resolve this problem, simply
unplug the other USB device(s).
There should be no audio dropouts over your USB network. Once the Auditioner playback
system is connected and accepted by the host controller, there will be sufficient bandwidth to
pass audio to the USB device. Streaming audio will always take precedence over other USB
traffic such as a USB mouse or USB printer.
If you do not have enough open USB ports on your computer, you may want to use a USB
hub to provide more ports. You can buy any off-the-shelf USB hub. We have tested USB 1.0
and 2.0 compliant hubs from D-Link, Belkin, Targus, and IOGEAR, and have found them to be
reliable. Connect the USB hub to your computer, then connect the Auditioner playback
system and other USB devices to the hub. For more information on using a USB hub, see
“Connecting Auditioner® Playback System III to a USB hub” on page 10.
Note: When using a USB hub, you may experience a slight latency due to network traffic. As
the latency is very short, this should not have an impact on your Auditioner playback system
listening session.
After you connect the Auditioner playback system to your Windows laptop (or other device)
you can monitor the connection by checking the USB activity lights on the back of the
Auditioner playback system system. When there is activity, the green LED illuminates. When
the connection is in standby mode, the red LED illuminates.
Using Auditioner® Playback System III
10
English Deutsch FrançaisDansk Español Italiano SvenskaNederlandsDansk Italiano SvenskaDeutsch NederlandsEnglish FrançaisEspañol
Auditioner® Playback System III User Guide
Connecting Auditioner® Playback System III to a PC
Figure 6
Connect Auditioner® Playback System III to your laptop using the A-B USB
cable that came with the
unit.
Connect the Auditioner playback system directly to a Microsoft Windows PC running Bose®
Modeler
®
Plus software using the A-B USB cable that came with the unit.
Follow these steps to connect Auditioner playback system to a PC:
1. Connect the USB type A connector (the larger end of the USB cable) to the PC’s USB
port.
2. Connect the USB type B connector (the smaller end) to the USB port on the back of the
Auditioner playback system system. As soon as you connect the unit to the PC, Windows “Plug and Play” technology detects the Auditioner playback system as a Plug and
Play device and configures it to run under Windows XP.
Connecting Auditioner® Playback System III to a USB hub
If you have limited USB ports on your computer you will want to use a USB hub to provide
more ports.
Follow these steps to use the Auditioner playback system with a USB hub:
1. Connect the USB hub to a USB port on your computer using a standard USB cable
2. Connect the smaller end of the provided USB cable to the USB port on the back of the
Auditioner playback system.
3. Connect the larger end of the USB cable to the hub.
 Loading...