


191 SPEAKERS
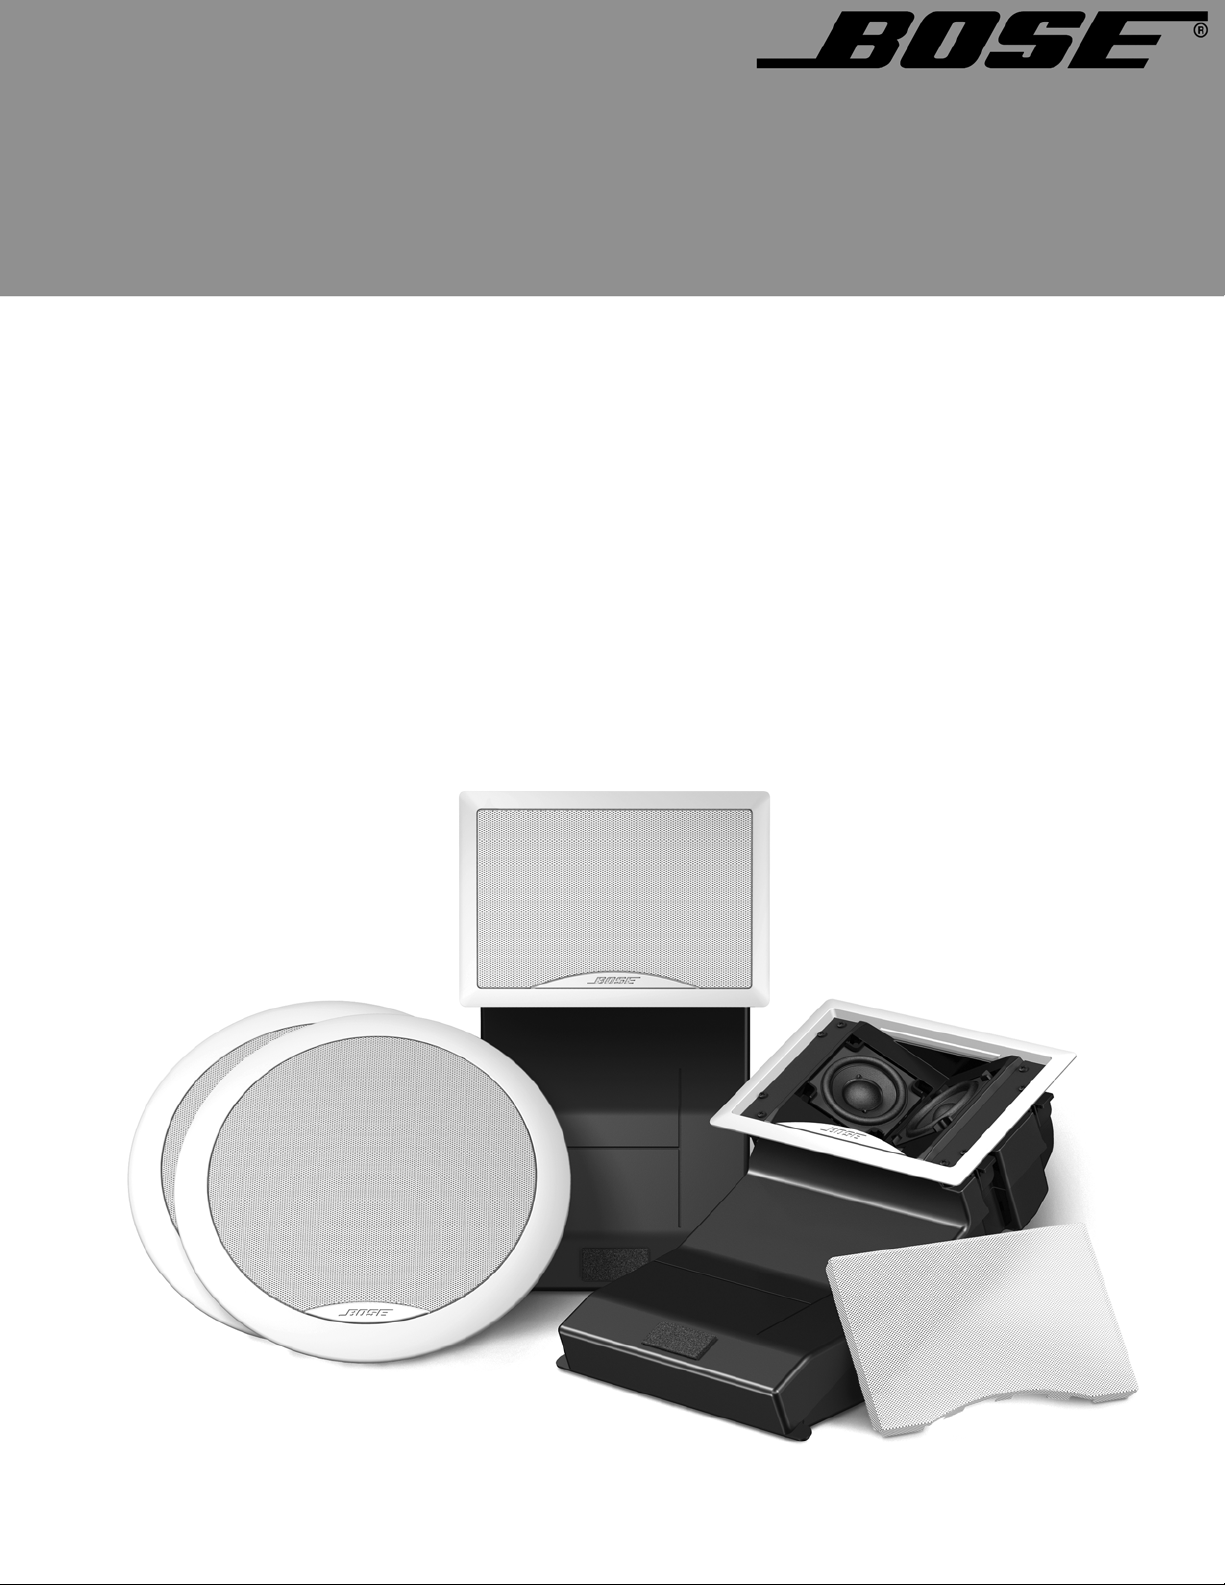
VIRTUALLY INVISIBLE
191 SPEAKERS
,QVWDOODWLRQ*XLGH
®

SAFETY INFORMATION
Important words of caution
Please read this owner’s guide completely before you start. Then carefully consider your experience using the tools
and taking the precautions referred to here. If you have doubts about doing this installation, you should contact
either the dealer you purchased the product from, an electrician, or a professional audio/video installer. You can
describe the job and request a cost estimate before committing to installation service.
WARNING:
70, and/or the National Fire Alarm Code, ANSI/NFPA 72, as applicable. The wiring method and compartment shall be
such as not to interfere with the operation of the speaker.
CAUTION:
Installation shall be in accordance with the applicable section of the National Electrical Code, ANSI/NFPA
Consult local building codes before you get started with this installation.
EnglishFrançaisNederlands DeutschItaliano
CAUTION:
CAUTION:
This product is not intended for use in Air-Handling Plenum Spaces.
Failure to follow the instructions in this owner’s guide voids all warranties on your speakers.
Use these instructions with wood frame or similar construction only
Each speaker requires 81/16 in. (20.5 cm) of horizontal space, and 14 in. (35.6 cm) of vertical space inside the wall or
ceiling, plus a minimum of 4
(1.9 cm) thick.
Bose recommends installing these speakers only in wood frame or similar construction where there is enough
space between studs, as is found in 2 x 4 or 2 x 6 wall/ceiling construction. The instructions in this guide are
specific to that type of installation only.
Note:
These speakers are not designed for installation in walls or ceilings of masonry.
1
/8in. (10.5 cm) of depth from the face of wallboard that is a maximum of 3/4 in.
Important Safety Instructions
1. Read these instructions - for all components before using this product.
2. Keep these instructions - for future reference.
3. Heed all warnings - on the product and in the owner’s guide.
4. Follow all instructions.
5. Do not block any ventilation openings, install in accordance with the manufacturer’s instructions.
6. Only use attachments/accessories specified by the manufacturer.
Bose® Virtually Invisible® 191 Loudspeakers comply with the following specifications:
This product conforms to the EMC Directive 89/336/EEC and to the Low Voltage Directive 73/23/EEC.
The complete Declaration of Conformity can be found on <www.bose.com>.
For your records
Serial numbers are located on the center rear of each of the Virtually Invisible® 191 speakers.
Serial numbers:______________________________ and __________________________________
Dealer name:_______________________________________________________________________
Dealer phone:_____________________________Purchase date: __________________________
We suggest you keep your sales receipt and warranty card together with this owner’s guide.
2

English Español NederlandsDeutsch Français
CONTENTS
INTRODUCTION 4
Before you begin... . . . . . . . . . . . . . . . . . . . . . . . . . . . . . . . . . . . . . . . . . . . . . . . . . . . . . . . . . . . . . . . . . . . . . . . . . . . . 4
What makes this speaker better also makes it different . . . . . . . . . . . . . . . . . . . . . . . . . . . . . . . . . . . . . . . . . . . . . . . 4
PREPARATION 5
Unpacking . . . . . . . . . . . . . . . . . . . . . . . . . . . . . . . . . . . . . . . . . . . . . . . . . . . . . . . . . . . . . . . . . . . . . . . . . . . . . . . . . . 5
Other equipment you will need . . . . . . . . . . . . . . . . . . . . . . . . . . . . . . . . . . . . . . . . . . . . . . . . . . . . . . . . . . . . . 5
Deciding on speaker placement . . . . . . . . . . . . . . . . . . . . . . . . . . . . . . . . . . . . . . . . . . . . . . . . . . . . . . . . . . . . . . . . . 6
Three tips for determining speaker placement . . . . . . . . . . . . . . . . . . . . . . . . . . . . . . . . . . . . . . . . . . . . . . . . . . 6
Consider which shape you prefer for your speakers . . . . . . . . . . . . . . . . . . . . . . . . . . . . . . . . . . . . . . . . . . . . . 7
Considering your wall type and the approach it requires . . . . . . . . . . . . . . . . . . . . . . . . . . . . . . . . . . . . . . . . . . 7
For placement in walls . . . . . . . . . . . . . . . . . . . . . . . . . . . . . . . . . . . . . . . . . . . . . . . . . . . . . . . . . . . . . . . . . . . . 7
For placement in ceilings . . . . . . . . . . . . . . . . . . . . . . . . . . . . . . . . . . . . . . . . . . . . . . . . . . . . . . . . . . . . . . . . . . 8
STEPS TO INSTALLING 9
Before you make any holes . . . . . . . . . . . . . . . . . . . . . . . . . . . . . . . . . . . . . . . . . . . . . . . . . . . . . . . . . . . . . . . . . . . . . 9
Drill a pilot hole for testing the wall space . . . . . . . . . . . . . . . . . . . . . . . . . . . . . . . . . . . . . . . . . . . . . . . . . . . . . . . . . . 9
Using the template . . . . . . . . . . . . . . . . . . . . . . . . . . . . . . . . . . . . . . . . . . . . . . . . . . . . . . . . . . . . . . . . . . . . . . . 9
Drilling the pilot hole . . . . . . . . . . . . . . . . . . . . . . . . . . . . . . . . . . . . . . . . . . . . . . . . . . . . . . . . . . . . . . . . . . . . . . 10
Testing the space behind the hole . . . . . . . . . . . . . . . . . . . . . . . . . . . . . . . . . . . . . . . . . . . . . . . . . . . . . . . . . . . 11
Passing the pilot hole test . . . . . . . . . . . . . . . . . . . . . . . . . . . . . . . . . . . . . . . . . . . . . . . . . . . . . . . . . . . . . . . . . 13
Repairing a pilot hole . . . . . . . . . . . . . . . . . . . . . . . . . . . . . . . . . . . . . . . . . . . . . . . . . . . . . . . . . . . . . . . . . . . . . 13
Prepare the wall for inserting the speaker . . . . . . . . . . . . . . . . . . . . . . . . . . . . . . . . . . . . . . . . . . . . . . . . . . . . . . . . . . 13
Measure and mark the hole to be cut . . . . . . . . . . . . . . . . . . . . . . . . . . . . . . . . . . . . . . . . . . . . . . . . . . . . . . . . 13
Cutting the speaker hole . . . . . . . . . . . . . . . . . . . . . . . . . . . . . . . . . . . . . . . . . . . . . . . . . . . . . . . . . . . . . . . . . . 14
Reorienting or changing speaker frames . . . . . . . . . . . . . . . . . . . . . . . . . . . . . . . . . . . . . . . . . . . . . . . . . . . . . . . . . . . 15
Reorienting the rectangular frame logo . . . . . . . . . . . . . . . . . . . . . . . . . . . . . . . . . . . . . . . . . . . . . . . . . . . . . . . 15
Installing round speaker frames . . . . . . . . . . . . . . . . . . . . . . . . . . . . . . . . . . . . . . . . . . . . . . . . . . . . . . . . . . . . . 15
Insert and wire the speaker . . . . . . . . . . . . . . . . . . . . . . . . . . . . . . . . . . . . . . . . . . . . . . . . . . . . . . . . . . . . . . . . . . . . . 15
Insert the speaker into the opening . . . . . . . . . . . . . . . . . . . . . . . . . . . . . . . . . . . . . . . . . . . . . . . . . . . . . . . . . . 16
Make the speaker connections . . . . . . . . . . . . . . . . . . . . . . . . . . . . . . . . . . . . . . . . . . . . . . . . . . . . . . . . . . . . . 17
Test the speaker now . . . . . . . . . . . . . . . . . . . . . . . . . . . . . . . . . . . . . . . . . . . . . . . . . . . . . . . . . . . . . . . . . . . . . 17
Position the speaker all the way into the hole . . . . . . . . . . . . . . . . . . . . . . . . . . . . . . . . . . . . . . . . . . . . . . . . . . 17
Secure the speaker to the wall . . . . . . . . . . . . . . . . . . . . . . . . . . . . . . . . . . . . . . . . . . . . . . . . . . . . . . . . . . . . . . . . . . . 18
Attaching rectangular grille frames . . . . . . . . . . . . . . . . . . . . . . . . . . . . . . . . . . . . . . . . . . . . . . . . . . . . . . . . . . . 19
Attaching round grilles . . . . . . . . . . . . . . . . . . . . . . . . . . . . . . . . . . . . . . . . . . . . . . . . . . . . . . . . . . . . . . . . . . . . 19
REFERENCE 20
Painting the speakers . . . . . . . . . . . . . . . . . . . . . . . . . . . . . . . . . . . . . . . . . . . . . . . . . . . . . . . . . . . . . . . . . . . . . . . . . . 20
Painting the grille . . . . . . . . . . . . . . . . . . . . . . . . . . . . . . . . . . . . . . . . . . . . . . . . . . . . . . . . . . . . . . . . . . . . . . . . 20
Painting the frame . . . . . . . . . . . . . . . . . . . . . . . . . . . . . . . . . . . . . . . . . . . . . . . . . . . . . . . . . . . . . . . . . . . . . . . 21
Help for the beginning installer . . . . . . . . . . . . . . . . . . . . . . . . . . . . . . . . . . . . . . . . . . . . . . . . . . . . . . . . . . . . . . . . . . 21
Optional items that will assist you: . . . . . . . . . . . . . . . . . . . . . . . . . . . . . . . . . . . . . . . . . . . . . . . . . . . . . . . . . . . 21
Accessories that can help . . . . . . . . . . . . . . . . . . . . . . . . . . . . . . . . . . . . . . . . . . . . . . . . . . . . . . . . . . . . . . . . . 22
Using speaker cord . . . . . . . . . . . . . . . . . . . . . . . . . . . . . . . . . . . . . . . . . . . . . . . . . . . . . . . . . . . . . . . . . . . . . . 22
Preparing the speaker cord . . . . . . . . . . . . . . . . . . . . . . . . . . . . . . . . . . . . . . . . . . . . . . . . . . . . . . . . . . . . . . . . 22
Before the wallboard goes up . . . . . . . . . . . . . . . . . . . . . . . . . . . . . . . . . . . . . . . . . . . . . . . . . . . . . . . . . . . . . . 22
Installing in a pre-wired room . . . . . . . . . . . . . . . . . . . . . . . . . . . . . . . . . . . . . . . . . . . . . . . . . . . . . . . . . . . . . . . 23
Where the walls are finished . . . . . . . . . . . . . . . . . . . . . . . . . . . . . . . . . . . . . . . . . . . . . . . . . . . . . . . . . . . . . . . 23
What to do when the room is not pre-wired . . . . . . . . . . . . . . . . . . . . . . . . . . . . . . . . . . . . . . . . . . . . . . . . . . . 24
Installing in an exterior wall . . . . . . . . . . . . . . . . . . . . . . . . . . . . . . . . . . . . . . . . . . . . . . . . . . . . . . . . . . . . . . . . 26
Use special care in cutting through plaster and lath . . . . . . . . . . . . . . . . . . . . . . . . . . . . . . . . . . . . . . . . . . . . . 26
Special considerations in cold climate regions . . . . . . . . . . . . . . . . . . . . . . . . . . . . . . . . . . . . . . . . . . . . . . . . . 26
Troubleshooting . . . . . . . . . . . . . . . . . . . . . . . . . . . . . . . . . . . . . . . . . . . . . . . . . . . . . . . . . . . . . . . . . . . . . . . . . . . . . . 27
Customer service . . . . . . . . . . . . . . . . . . . . . . . . . . . . . . . . . . . . . . . . . . . . . . . . . . . . . . . . . . . . . . . . . . . . . . . . . . . . . 27
Warranty period . . . . . . . . . . . . . . . . . . . . . . . . . . . . . . . . . . . . . . . . . . . . . . . . . . . . . . . . . . . . . . . . . . . . . . . . . . . . . . 27
Accessories . . . . . . . . . . . . . . . . . . . . . . . . . . . . . . . . . . . . . . . . . . . . . . . . . . . . . . . . . . . . . . . . . . . . . . . . . . . . . . . . . 28
Technical information . . . . . . . . . . . . . . . . . . . . . . . . . . . . . . . . . . . . . . . . . . . . . . . . . . . . . . . . . . . . . . . . . . . . . . . . . . 28
3

INTRODUCTION
Before you begin...
CAUTION: Please be sure to read this guide carefully before you do any cutting. There are many
factors to consider before proceeding with this type of installation.
Thank you for choosing to install Bose
engineering and advanced design enable these speakers to deliver Bose quality performance
for big impact in spite of their small size.
Virtually Invisible
that delivers the type of clear, lifelike sound and even coverage known as Bose Stereo
Everywhere
®
191 speakers feature an Articulated Array® speaker configuration
®
speaker performance.
What makes this speaker better also makes it different
When installed, Virtually Invisible® 191 speakers take up very little wall space. What isn’t
apparent is their advanced speaker enclosure design, shown in Figure 1. It ensures
predictably fine performance wherever the speakers are installed, regardless of the size and
shape of the wall space. It also helps prevent the speaker sound from invading other rooms, a
common problem with installed speakers of more conventional design.
®
Virtually Invisible® 191 speakers. Innovative
EnglishFrançaisNederlands DeutschItaliano
Figure 1
Speaker enclosure with the
rectangular frame attached
Rectangular grille
Speaker frame screws
Rectangular
speaker frame
Speaker face
Dogleg clamps
Dogleg clamp
screws
Speaker enclosure
4
English Français NederlandsDeutsch Italiano
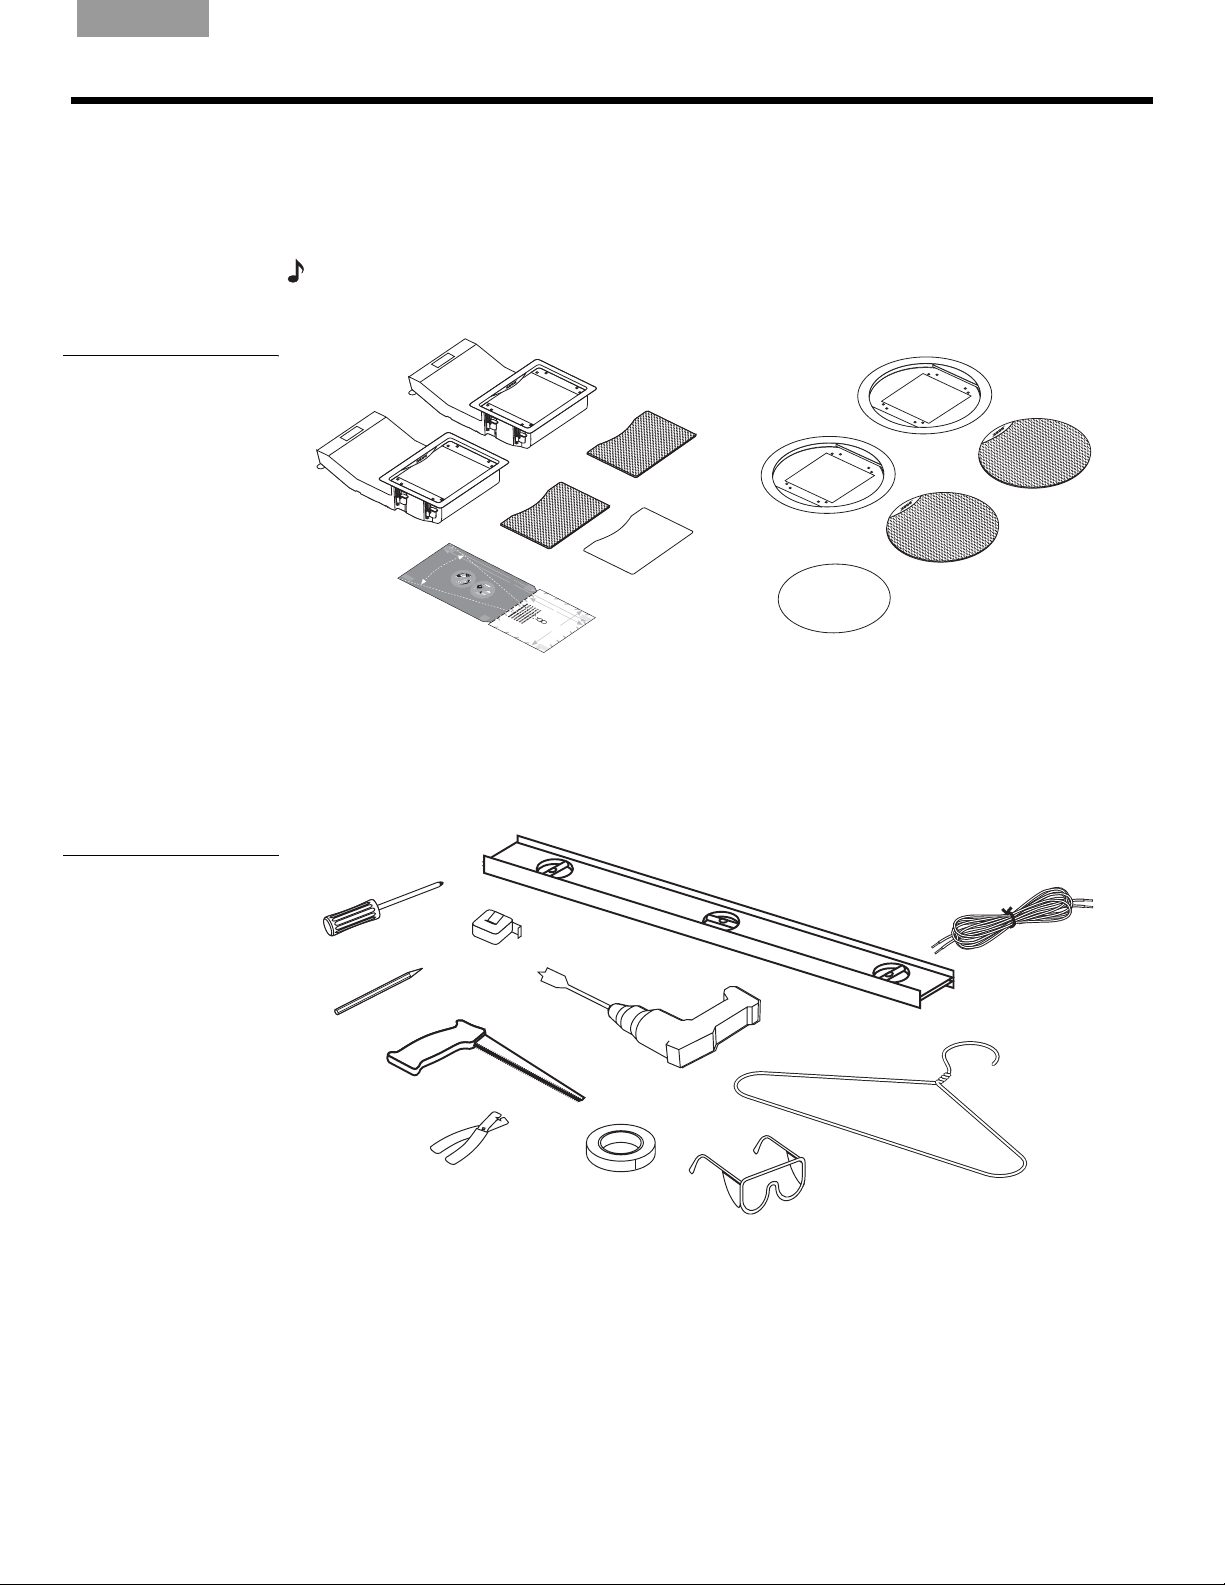
Unpacking
Carefully unpack the speakers. Check to be sure the carton includes all the parts shown in
Figure 2. If any part of the speaker pair appears damaged, do not use them. Notify Bose or
your authorized Bose dealer immediately. For Bose contact information, refer to the address
list included in the carton.
Note:
Now is a good time to find the serial numbers on the back of each speaker and copy the
numbers onto your warranty card and in the “For your records” space on page 2.
PREPARATION
Figure 2
Contents of the carton:
• 2 Speakers, rectangular
frames attached
• 2 Rectangular speaker
grilles
• 1 Rectangular paint shield
• 1 Template
• 2 Round speaker frames
• 2 Round speaker grilles
• 1 Circular paint shield
Figure 3
Items required to install the
speakers as instructed
Speakers
Rectangular
Round speaker
frames
speaker grilles
H
E
TA
RE
P
E
G
RA
C
U
YAREA
T
A
D
RO
O
U
N
N
O
G
R
C
A
UT
YA
A
R
D
R
E
O
O
A
U
N
N
OT
H
D
ERE
T
A
P
E
Template
D
T
G
R
C
AY
U
T
AR
AR
D
E
O
O
A
U
N
N
O
D
T
9
G
"
R
(
2
C
2
AYA
.
U
9cm
TAR
G
RA
YARE
T
A
ROU
A
N
O
D
T
)
R
14
D
C
E
O
O
U
D
ON
/
A
2
1
"(
U
N
36
N
O
.
9
D
T
c
m
H
)
ER
T
A
E
P
E
G
R
C
AY
U
TA
AR
G
RA
C
U
Y
T
A
A
RE
D
ROUN
ON
A
O
D
T
b
e
f
D
a
ROU
o
r
r
E
en
eyou
e
O
le
ot
A
h
c
az
t
r
s
i
p
for
ur
c
a
N
ro
alw
r
e,
d
d
c
W
N
s
r
e
c
illi
O
i
A
ed.
o
ri
c
n
on
n
ns
R
D
g
g,
N
.
T
u
c
D
I
ea
l
c
N
t
o
o
a
G
n
l
n
ed
pr
d
:
o
ui
M
tc
o
b
t
f
a
s
ehi
ess
u
k
t
or
es
t
n
h
A
io
r
d
pl
ure
o
na
um
t
ug
h
E
l
em
t
h
n
i
he
b
ns
g
su
i
yo
n
,
t
l
s
g
s
a
i
r
u
po
p
s
f
.
uch
l
ace
le
rof
p
h
I
t
r
f
r
are
oc
c
y
e
&
s
a
ho
ou
s
e
s
c
th
s
not
T
o
ed
s
i
on
at
n
en
r
su
du
a
.
h
a
s
n
c
av
li
i
ure
c
i
s
h
t
sl
o
s
n
s
e
n
a
s
o
s
a
,
a
t
c
s
r
u
a
c
f
e
ti
e
p
rf
G
e
on
ll
d
a
e
l
a
o
l
u
r
e
l
r
e
i
c
s
m
n
l
c
l
s
b
e
d
u
i
t
n
RA
YAR
R
E
O
A
U
N
D
T
H
E
T
RE
A
P
E
p
s
b
e
r
s
l
ta
i
g
be
o
c
i
C
f
n
o
t
.
W
t
a
hat
g
r
Don
h
ch
l
e
.
A
w
in
U
I
o
R
ha
f
ir
d
s
y
i
N
n
ot
th
e
o
v
g,
I
T
n
u
N
e
e
c
m
i
G
u
h
s
t
a
:
,
saf
t
z
A
M
h
a
r
a
e
o
r
ds
k
u
D
fo
e
g
r
h
su
ON
r
e
t
h
e
c
m
O
)
y
o
u
p
e
r
o
n
c
o
e
t
p
e
s
r
d
l
e
o
u
P
.
p
c
c
r
r
e
t
e
o
i
r
I
,
e
ic
lo
fe
f
c
d
y
a
s
o
e
h
.
o
l
s
n
l
t
a
u
e
w
i
s
v
o
c
c
i
u
a
e
o
n
r
t
r
i
l
r
n
a
n
i
t
t
h
e
c
s
h
c
l
g
a
a
a
r
n
e
i
s
,
z
l
o
c
n
a
o
a
a
w
h
u
s
f
t
le
r
o
ta
i
g
e
d
r
su
W
in
s
d
h
s
l
f
e
l
o
g
e
A
r
b
s
n
r
e
,c
r
u
e
RN
,
i
H
b
r
h
be
s
o
f
c
e
i
a
n
n
s
o
h
I
f
c
f
o
p
N
d
o
afefo
d
n
o
e
e
r
u
r
s
G:
r
m
o
t
s
e
l
e
i
n
u
h
t
f
e
s
.
e
o
th
lt
e
y
y
p
M
s
I
o
t
ou
m
p
o
u
f
rd
a
a
r
s
r
s
l
o
u
t
a
y
u
t
i
,
c
t
p
u
o
fe
i
k
co
o
m
r
h
o
n
s
p
l
r
n
il
e
u
u
e
u
a
n
g
r
s
c
l
a
b
m
n
o
i
a
,
c
v
s
d
.
s
n
o
a
l
i
d
c
ng
s
ha
eha
i
c
u
b
u
D
g
n
i
re
o
d
n
e
u
o
be
i
re
i
.
c
e
n
n
r
o
t
s
e
i
.I
n
s
i
t
D
e
le
g
a
a
l
n
s
t
s
d
l
n
s
a
h
W
a
h
th
i
t
.
l
o
o
o
z
n
.
f
i
c
u
l
o
o
i
l
az
o
i
l
a
t
r
n
e
g
t
yo
e
e
n
AR
l
n
t
r
n
r
t
s
r
s
d
p
d
.
r
s
i
o
c
d
sb
a
c
u
s
a
ur
u
l
D
t
t
u
u
th
s
a
b
r
p
a
r
N
n
ds
f
c
o
t
m
a
e
l
e
o
l
a
o
e
e
l
I
u
t
erb
r
w
,
h
t
N
c
n
l
h
t
b
m
e
i
t
o
s
c
i
c
e
i
ot
r
c
i
G
n
r
w
n
o
,
o
o
s
s
i
u
dt
n
s
g
n
:
su
u
n
e
a
c
t
u
t
g
s
.
M
g
c
f
f
h
u
t
r
h
e
o
,
u
WAR
5
h
I
c
e
h
e
a
t
f
a
e
r
l
h
r
f
a
t
t
e
t
o
y
o
t
k
m
s
hr
h
l
c
h
a
o
e
r
e
u
u
y
es
,
a
o
u
d
d
r
g
o
m
p
s
N
s
f
v
u
r
h
a
u
r
a
u
i
u
e
p
g
ll
o
I
c
r
r
N
c
in
)
o
pr
h
fe
e
e
e
h
t
G:
g.
W
s
s
o
s
n
t
c
a
h
u
cee
s
h
t
o
D
s
h
e
r
M
io
os
t
f
a
o
a
e
H
s
s
n
a
t
en
d.
c
l
p
u
a
k
e
h
e
r
o
li
e
c
a
e
s
I
t
t
n
ve
,
r
T
c
t
i
s
h
c
c
h
t
o
a
a
a
o
h
EC
t
n
l
s
ll
a
h
s
w
erb
e
z
u
a
n
i
a
r
lta
l
v
t
in
r
i
e
d
s
a
e
g
s
h
f
s
,
o
U
,
a
a
r
s
z
p
e
f
u
e
a
T
c
ro
yo
r
f
h
d
o
c
s
u
r
a
fe
ondu
OU
s
p
r
ss
el
o
c
e
e
c
i
e
t
o
ri
T
i
d
t
c
n
.
s
D
a
a
l
A
o
o
l
r
in
RE
n
pl
s
o
t
u
t
a
m
c
A
l
le
u
b
t
r
i
n
thr
g
,
o
u
g
h
H
E
T
R
A
E
PE
E
AR
T
U
O
T
U
C
E
T
5
I
p
r
o
H
c
/
f
2
1
o
e
n
s
"
c
s
d
o
W
io
u
n
(14
d
i
ce
n
r
ts
i
l
a
lin
W
a
l
o
l
i
g
r
e
n
A
.
p
d
s
R
D
l
t
u
w
b
a
NI
o
m
e
ll
i
r
er
n
h
W
N
in
b
o
i
in
G
n
g
A
t
b
d
,
c
g
:
R
e
u
c
.I
M
t
f
N
h
o
o
t
a
e
t
r
n
I
f
h
N
e
k
m
d
y
ro
e
G
u
o
,
ug
it
u
:
s
s
so
u
u
M
a
h
r
c
r
e
a
s
h
r
k
ur
t
p
a
e
h
l
f
s
e
u
ac
su
m
e
s
e
r
p
b
b
e
s
o
i
n
e
t
t
t
h
g
h
c
f
a
,
e
o
h
t
c
o
o
s
r
o
s
p
n
e
nc
e
o
c
n
t
e
y
cho
e
i
a
o
l
a
e
u
d
s
l
c
ed
e
b
p
n
est
eh
r
i
s
o
i
b
n
sa
d
ce
e
h
f
t
e
h
a
e
f
in
th
o
d
r
:
d
c
.
a
M
th
v
a
e
T
e
k
r
m
a
h
e
n
8
s
a
.
l
s
za
I
u
f
/
1
1
r
yo
rd
6
e
"
s
t
u
h
(
,
2
e
a
s
0
re
u
s
.
c
p
h
n
o
o
t
a
t
c
s
s
h
e
u
o
l
r
s
e
e
e
c
,
ni
tr
c
i
o
c
s
n
a
s
su
l
a
w
fe
ir
in
f
o
g
r
,
c
ut
t
i
n
g.
Rectangular
paint shield
H
E
TA
R
E
c
P
E
s
u
r
W
f
a
A
R
N
IN
G
Circular
paint shield
Round
speaker grilles
Other equipment you will need
Hardware for securing the speaker to a wall or ceiling comes attached to the speaker, but you
will need a variety of other equipment and tools to install the speakers (Figure 3).
Please refer to “Help for the beginning installer” on page 21 for additional information
on working with tools, materials, and other do-it-yourself information.
Phillips-head
screwdriver
Tape measure
Carpenter’s level*
Speaker cord**
Sharp pencil
Keyhole saw****
Half-inch spade bit
Power drill
Sturdy wire
(such as a coat hanger)
that is 22 in. long
Painter’s tape***
Wire cutter/stripper
Protective eyewear
* Carpenter’s level is suggested for use when installing speakers in a wall.
** Speaker cord specifications are provided in the Reference section of this guide.
*** Painter’s tape or other tape with light adhesive that will not damage paint or wallpaper.
**** Cutting tool – For drywall: a keyhole saw, drywall saw, rotary cutting tool, or jigsaw.
For plaster and lath: a saber saw or a rotary cutting tool.
5
P
English&
ranslations
REPARATION
Deciding on speaker placement
The design of your new Virtually Invisible® 191 speakers makes them well-suited to either wall
or ceiling installation. The location you choose will affect the procedure for installing them.
Consider the options below, then follow the instructions that apply to your choices:
• How you will use the speakers?
• for stereo sound at the front of a room or seating arrangement, or
• as home theater front speakers or surround sound rear speakers
• What surface will you install them in?
• an interior wall (abutting another room), or exterior wall (abutting outside), or ceiling
• in finished (plaster and lath or wallboard), or new construction
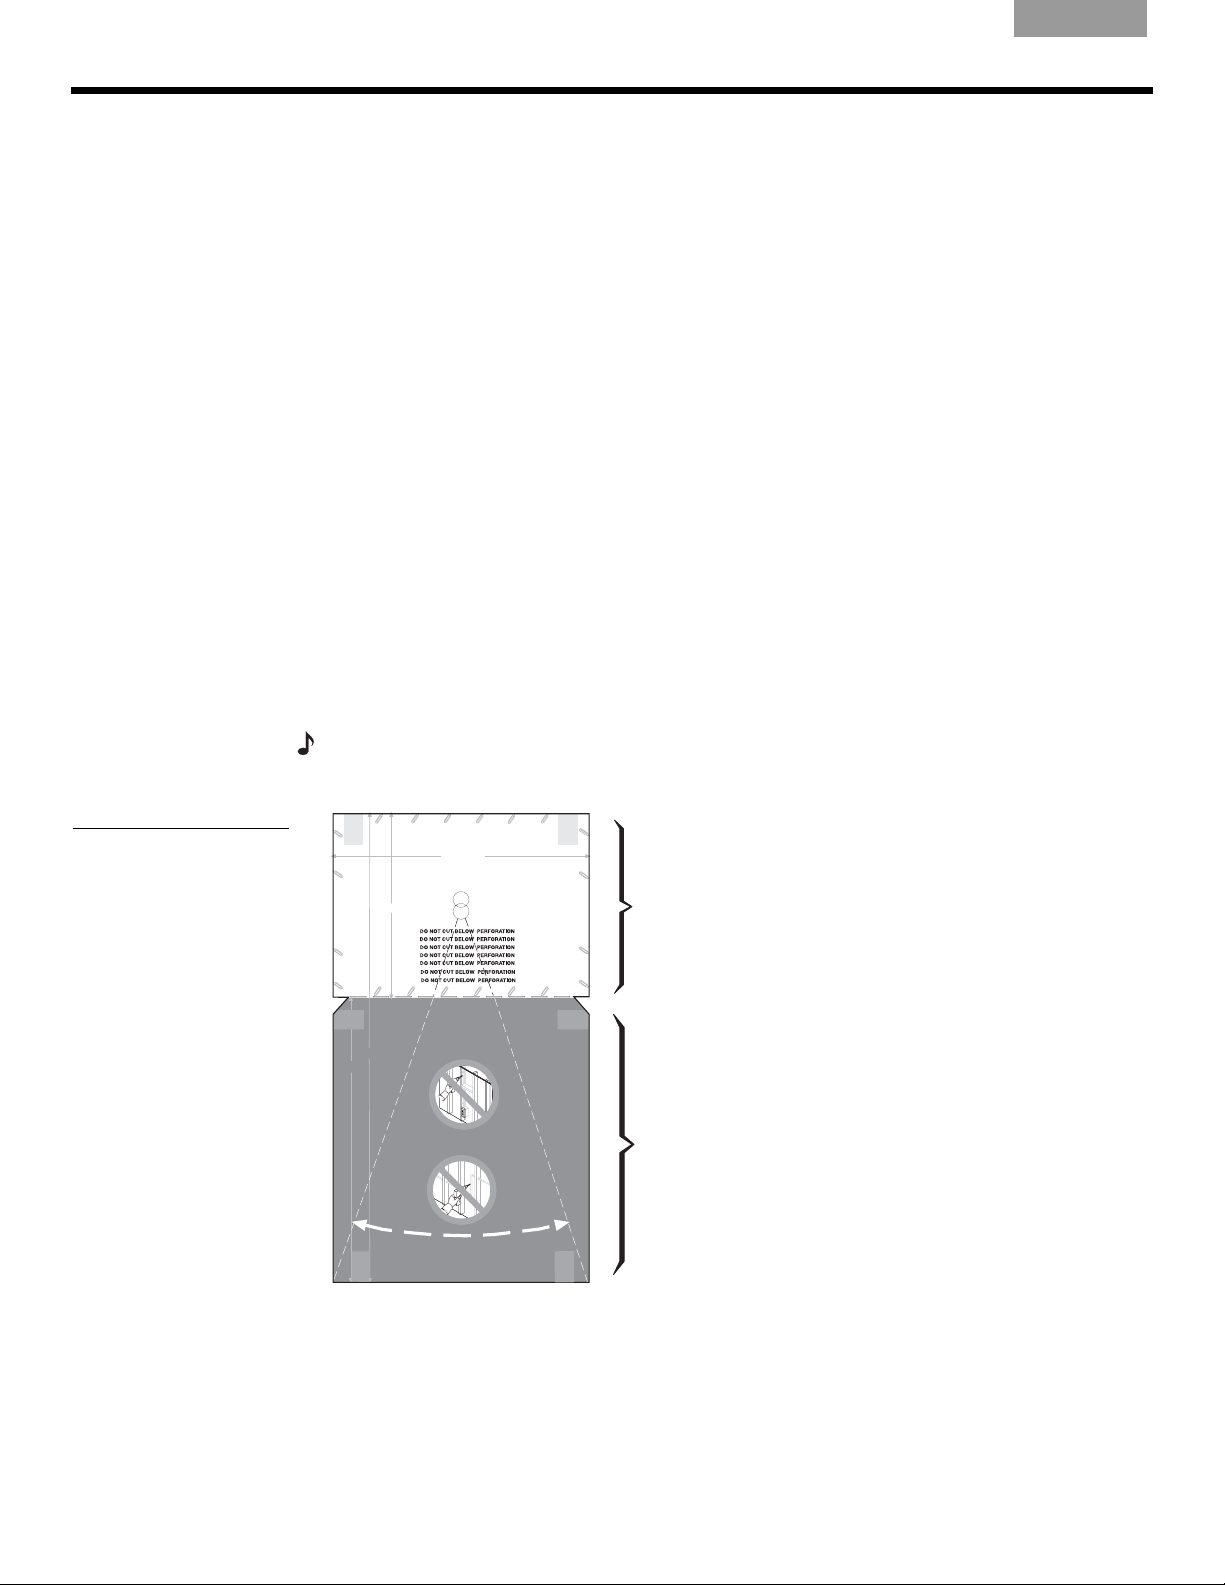
Three tips for determining speaker placement
1. The template can be placed against a wall or ceiling to help determine the amount of
space the speaker will need. Each speaker enclosure extends into the wall or ceiling, as
shown in the gray DO NOT CUT area on the template (Figure 4). In a wall, the speaker
may be inserted either up or down and will extend either above or below the grille.
2. Use of a stud finder can help ensure that the speaker hole is at least 4
a stud or joist.
3. All electrical wiring, vents and plumbing pipes located inside the walls must be avoided
(Figure 5 on page 7). Check with a trained professional to learn how to locate and avoid
them.
EnglishFrançaisNederlands DeutschItaliano
3
/4 in. (12 cm) from
Figure 4
Tem pl at e
Note:
To prevent problems with condensation in cold climates where a humidifier is used, avoid
inserting the speaker upside-down in an exterior wall.
TAPE
WARNING: Make sure the spot chosen is safe for cutting. Do not cut through
HERE
surfaces that have hazards, such as electrical wiring, conduits or plumbing,
concealed behind them. If you are not sure, consult a professional installer
before you proceed.
WARNING: Make sure the spot chosen is safe for cutting. Do not cut through surfaces that have hazards, such as electrical
wiring, conduits or plumbing, concealed behind them. If you are not sure, consult a professional installer before you proceed.
WARNING: Make sure the spot chosen is safe for
WHITE CUT OUT AREA
drilling. Do not cut through surfaces that have hazards
concealed behind them, such as electrical wiring,
conduits or plumbing. If you are not sure, consult a
professional installer before you proceed.
51/2" (14 cm)
WARNING: Make sure the
spot chosen is safe for
drilling. Do not cut through
surfaces that have hazards
concealed behind them,
such as electrical wiring,
conduits or plumbing. If you
are not sure, consult a
professional installer before
you proceed.
WARNING: Make sure the spot chosen is safe
for drilling. Do not cut through surfaces that have
hazards concealed behind them, such as
electrical wiring, conduits or plumbing. If you
are not sure, consult a professional installer
before you proceed.
DO NOT
TAPE
HERE
CUT AROUND
GRAY AREA
141/2" (36.9 cm)
9" (22.9 cm)
CUT AROUND
GRAY AREA
DO NOT
CUT AROUND
GRAY AREA
DO NOT
TAPE
CUT AROUND
HERE
GRAY AREA
DO NOT
81/16" (20.5 cm)
Translations below
WARNING: Make sure the spot chosen is safe for
drilling. Do not cut through surfaces that have hazards
concealed behind them, such as electrical wiring,
conduits or plumbing. If you are not sure, consult a
professional installer before you proceed.
Pilot Hole
English &
Translations
CUT AROUND
CUT AROUND
WARNING: Make
sure the spot chosen
is safe for drilling. Do
not cut through
surfaces that have
hazards concealed
behind them, such
as electrical wiring,
conduits or
plumbing. If you are
not sure, consult a
professional installer
before you proceed.
WARNING: Make sure the spot
chosen is safe for drilling. Do not cut
through surfaces that have hazards
concealed behind them, such as
electrical wiring, conduits or plumbing.
If you are not sure, consult a
professional installer before you
proceed.
DO NOT
GRAY AREA
DO NOT
CUT AROUND
GRAY AREA
DO NOT
CUT AROUND
GRAY AREA
DO NOT
GRAY AREA
TAPE
HERE
WHITE CUT OUT AREA
TAPE
HERE
TAPE
HERE
FOR CUTTING
Large white area
represents what to cut
out for the speaker face.
NOT FOR CUTTING
Large gray area
represents space to
reserve behind the wall
for the speaker
enclosure.
6

English Français NederlandsDeutsch Italiano
P
REPARATION
Figure 5
Cautions against unseen
danger, such as (a) electrical wires or (b) plumbing
pipes, behind the wallboard
CAUTION:
When installed, the speaker enclosure cannot be seen behind the wall or ceiling. Do
not attempt to nail, cut, or drill on that surface area. Puncturing the speaker enclosure with a tool
will seriously damage the speaker.
(a)
(b)
Consider which shape you prefer for your speakers
You have a choice of a rectangular or round speaker face – the part that is visible when the
speaker is installed. Consider which shape will work best in the location you choose for the
speakers. Typically, the rectangular shape is best suited for walls and the round shape is best
suited for ceilings.
It is easy to remove the rectangular frames and replace them with round frames. You can do it
now or wait until you know for sure where each speaker will fit. However, be sure to make
that change before you insert either speaker into the wall or ceiling. The lip of the
speaker frame prevents the speaker from slipping behind the wall and out of reach. Do not
remove the frame while the speaker is in the wall. See
frames” on page 15 for instructions for removing and replacing speaker frames.
“Reorienting or changing speaker
Considering your wall type and the approach it requires
If you are installing the speakers in a pre-wired room of finished construction with 2 x 4 stud
walls covered with wallboard, the placement of your speakers has already been determined.
Please refer to “Steps to Installing” on page 9. These instructions cover installation of the
speakers, with either a rectangular or round grille, in a wall or ceiling.
If your installation is different, use the information below to help determine where to place
your speakers. As you decide where you want each speaker grille, use the guidelines below:
CAUTION:
Do not install near any heat sources, such as halogen lamps, registers, stoves, or
other apparatus (including amplifiers) that produce heat.
For placement in walls
• The two speakers should be a minimum of 5 ft. (1.5 m) apart.
• For in-wall speakers providing stereo at the front of the room or home theater surround
sound from the rear, install so each speaker grille is 4 to 6 ft. (1.2 to 1.8 m) from the floor for
best performance.
• For in-wall home theater front speakers, install the pair horizontally aligned with the center
of the video screen (Figure 6 on page 8).
7
P
REPARATION
EnglishFrançaisNederlands DeutschItaliano
• Place the in-wall center channel speaker above or below the video screen, centered
between, but not on horizontal center with, the left and right front speakers. If a line were
drawn between the left, center, and right front speakers a “V” shape would be created.
• The speakers should not be installed sideways in a wall; the enclosure should be either
above or below the speaker face.
Figure 6
Orienting wall speakers for
front home theater use
5ft.
(1.5m)
4 - 6 ft.
(1.2 - 1.8 m)
For placement in ceilings
When placing the speakers in the ceiling, please use the following guidelines. The direction
the enclosures face will be determined by the spacing of the ceiling joists. The speaker
enclosures should be parallel to the ceiling joists.
For best in-ceiling stereo performance:
• the speakers should each be placed an equal distance on either side of the primary
listening area.
For best in-ceiling home theater performance:
• Place the right and left front speakers at equal distances to the right and left above the
video screen.
• Place the center speaker above the center of the video screen.
• Place the surround speakers opposite the video screen wall, evenly spaced.
8
English Français NederlandsDeutsch Italiano
Before you make any holes
Be sure you have read and understand the considerations provided in “Preparation” starting
on page 5, so you can proceed with confidence.
STEPS TO INSTALLING
CAUTION:
If you are unsure of your ability to complete this process, contact a professional
installer.
Small check marks call your attention to the tools you’ll need for the next step.
Tips offer ideas to make the job go easier and help you avoid mistakes.
Drill a pilot hole for testing the wall space
Before you make a large cut into the wallboard, check the space by probing behind the wall
or ceiling through a small pilot hole. Time spent now can help ensure a successful installation.
Note:
behind a pilot hole. You may prefer to eliminate this step and skip ahead to “Prepare the wall for
inserting the speaker” on page 13. Do this only if you can be sure the insulation is malleable and
that nothing else behind the wall will impede the installation.
WARNING:
do not drill or cut into that wall. Find a different location for the speakers instead.
Using the template
You will need a sharp pencil for this step.
The template shows where to drill two
large enough for the entire speaker. You can then test the space behind the hole to make sure
there is enough room for the speaker and that there are no materials blocking the installation.
Notice the dotted lines extending at an angle from the pilot hole to the bottom corners of
the DO NOT CUT area on the template. Use them as a guideline to be sure there is enough
room below the pilot hole for the length and width of the speaker enclosure.
To position the template
1. Select a spot on the wall or ceiling where you want the center of the speaker grille. Allow
2. Center the pilot-hole circles on the selected spot as you press the template to the wall.
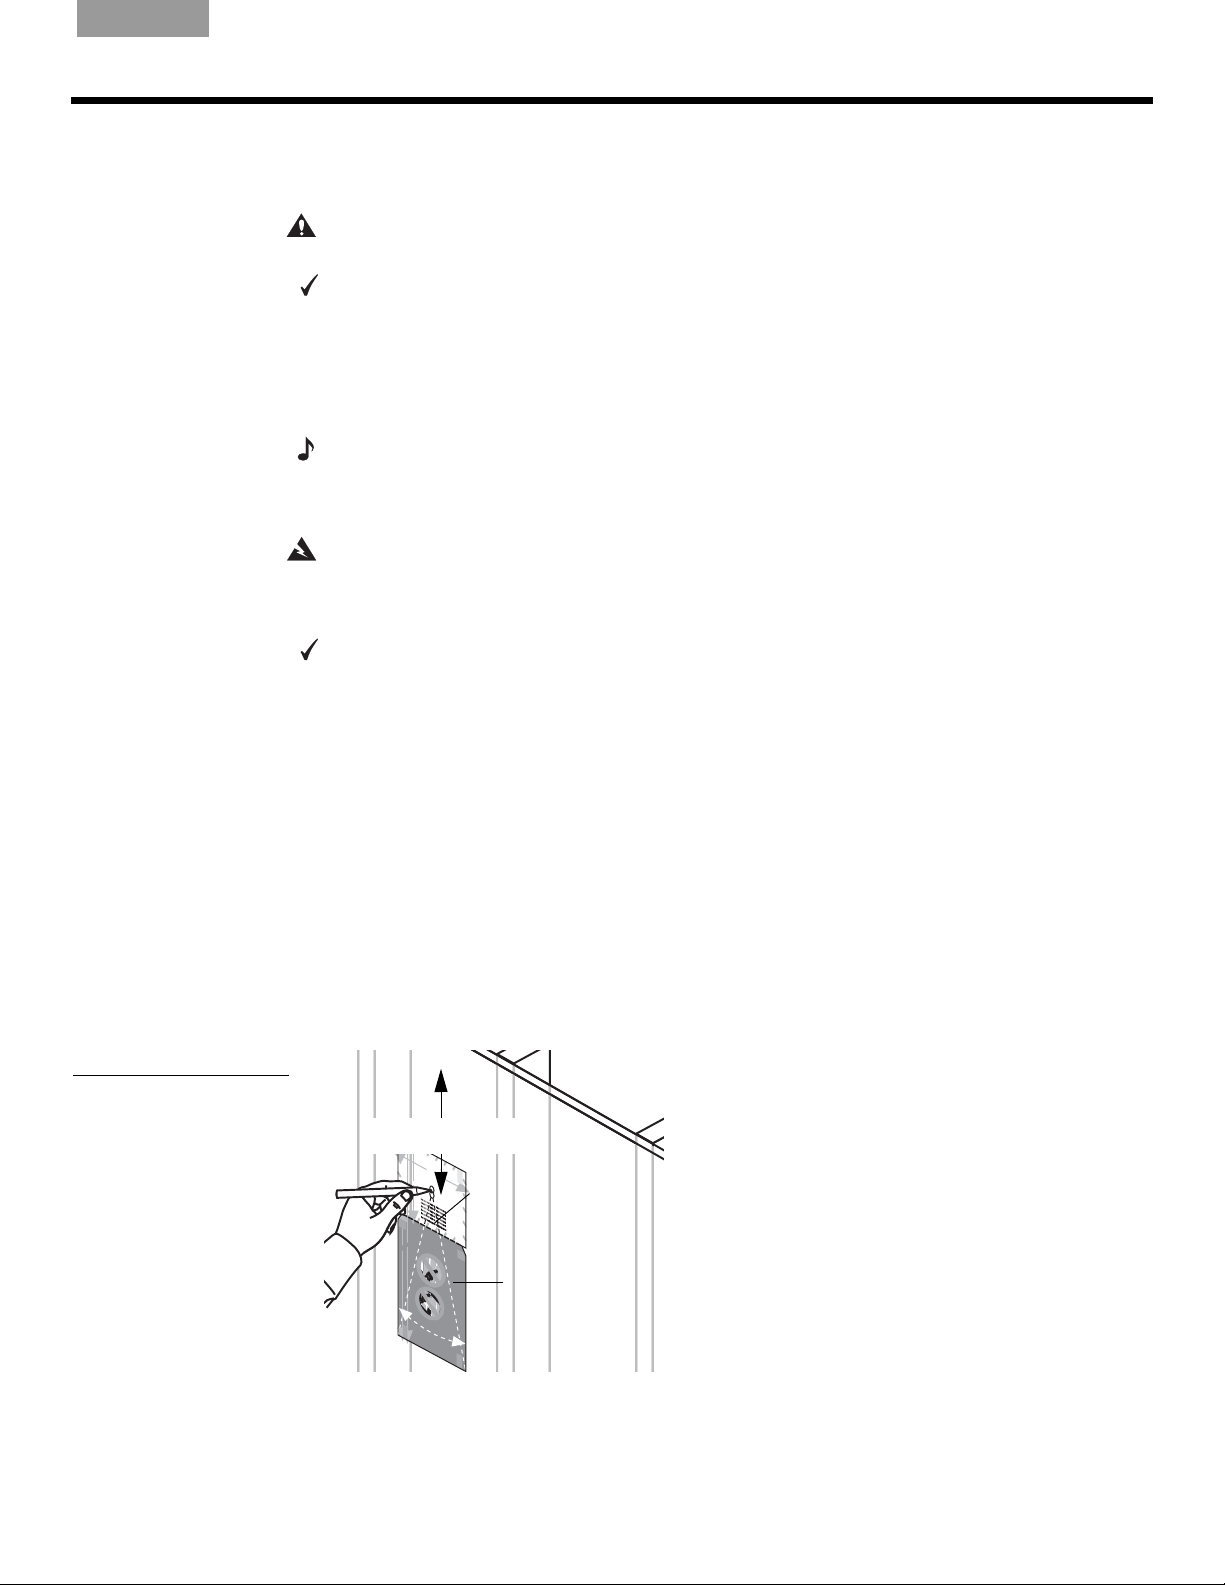
3. Use a pencil to trace around the inside of the circles (Figure 7).
4. Remove the template.
If you are working in an exterior wall where there is insulation, it may be difficult to probe
If you believe the insulation behind the wall may be composed of asbestos,
enough space for the speaker enclosure both above and below the pilot hole. You may
need that second option if you find an impediment in the space below the hole.
1
/2 in. (13 mm) pilot holes before you make an opening
Figure 7
Preparing to cut a pilot hole
At least 9" (22.9 cm)
T
AP
E
H
E
R
E
WA
R
N
s
ING:
urfa
ces
Make
c
on
tha
ce
s
t
ale
ur
befo
h
e
ave
d
th
be
re
h
e
y
h
az
s
ind
po
ou
ard
t
pro
th
ch
s
em
,
o
c
su
s
ee
. If
e
c
n
d
h
WHITE CUT OUT AREA
is sa
.
y
a
ou
s
e
are
fe
le
W
fo
ctr
A
not
R
N
r
ic
IN
w
c
a
ir
G
ut
i
su
l
n
:
g,
M
w
ti
re,
c
ng.
a
iring,
o
k
n
e
d
s
c
u
u
D
i
o
t
r
s
W
e
nsu
o
o
t
co
1
A
8
h
r
R
n
e
p
nduits
s
N
l
o
u
d
/
lt
IN
po
m
r
t
il
li
G
b
a
t
c
n
"
i
c
:
n
g
1
u
M
h
p
g
.
6
(20
co
o
t th
D
,
r
a
s
c
o
ofe
or
ke
n
e
o
c
n
n
n
.5
ea
ot
r
s
c
i
s
oug
plu
e
u
T
c
ssion
c
l
r
a
T
e
s
o
r
u
c
e
a
a
l
d
n
ed
A
t
n
th
f
m
t
d
e
b
s
h
mb
P
u
l
h
e
e
r
ati
be
fo
i
o
)
h
t
p
E
s
s
u
r
i
o
r
h
a
n
p
o
c
g
ing
n
o
i
d
o
h
n
s
l in
u
f
r
t
e
t
H
d
t
s
p
he
t
b
s
c
u
i
l
th
s
e
n
h
E
u
,
r
l
i
g
o
m
f
stall
m
o
o
e
a
R
.
s
w
n
m
c
,
b
e
D
s
a
e
i
E
n
. I
n
l i
o
s
u
g
i
f
ch
n
th
n
s
er
.
y
s
s
o
at
o
a
t
If
t
a
a
c
u
y
s
ha
l
f
l
e
u
e
a
o
e
fo
t
r
r
v
u
l
e
e
e
t
b
h
n
a
r
c
e
h
r
r
tr
o
fo
o
az
e
i
u
1
t
c
5
r
n
g
a
s
a
e
o
h
u
rd
l
y
t
r
w
s
s
s
o
e
/
i
u
u
,
u
r
i
r
c
r
"
ng
fa
p
e
o
r
, c
c
2
n
o
,
(
e
s
1
c
o
s
u
e
4
n
l
e
t
t
s
h
d
a
u
a
cm
.
l
t h
p
t
r
a
o
a
f
W
v
)
e
e
s
A
W
s
h
R
i
A
o
az
NI
n
R
d
a
a
N
r
N
r
l
i
s
I
d
l
i
N
G
l
n
p
i
s
n
G
o
s
:
,
g
t
t
:
M
s
a
.D
M
c
co
u
l
h
a
l
c
e
a
o
k
o
d
n
h
P
r
k
s
e
ri
c
n
e
e
b
a
l
e
l
s
i
n
o
i
e
s
ng
s
a
l
u
t
u
f
co
i
l
o
o
s
e
r
e
c
r
.
e
e
r
l
u
d
s
D
su
n
e
e
t
af
t
tt
t
d
c
o
h
be
h
y
r
t
e
u
Pilot hole
e
h
f
e
r
n
o
ace
i
i
r
f
hi
ot
t
ca
u
p
o
o
s
s
r
r
n
p
u
p
c
o
or
l
s
c
d
o
g
u
r
f
o
t
o
h
e
t c
t
h
t
n
t
p
c
h
s
at
h
c
s
l
e
s
h
e
u
e
ro
u
i
e
o
h
m
m
o
a
rfa
u
d
ave
s
l
n
s
e
,
b
g
e
.
u
a
d b
c
s
H
i
h
n
n
c
l
e
u
h
h
g
i
s
is
c
n
e
a
o
.
a
h
s
h
t
z
I
s
h
s
a
t
i
f y
a
n
l
c
a
a
a
e
r
e
o
d
s
l
fe
d
t
l
l
ou
n
e
e
s
t
h
e
d
he
f
ct
r
a
l
b
u
o
e
ric
a
v
i
m
r
t
ct
e
r
s
e
a
a
e
,
fo
r
o
re
l w
h
n
i
r
c
r
a
pl
a
e
o
n
i
z
ri
l
t
o
u
a
w
y
n
m
t
su
r
o
g
s
p
d
i
u p
,
b
ri
u
r
s
re
in
o
n
r
e,
f
g
g
,
es
r
.
o
,
co
co
s
ce
I
f
io
y
n
n
y
o
e
n
s
o
s
WA
u
ali
u
d
u
u
l
l
.
p
t
t
ns
RN
r
a
a
o
W
c
tal
f
e
I
o
NG
A
e
l
e
r
d
R
d
r
.
:
ri
b
N
ll
M
e
i
I
s
n
f
N
o
a
h
u
g.
r
k
a
G
r
e
e
e
z
D
:
a
th
su
o
M
r
ds
e
n
i
r
a
s
e
o
el
s
k
s
t
c
p
t
c
e
e
h
af
on
o
c
e
u
t
t
e
t
ric
cea
sp
ch
th
f
n
o
al
r
ar
o
o
o
r d
o
l
t
s
t
ed
u
w
e
c
e
c
gh
r
no
h
ir
i
n
u
l
o
b
i
l
n
i
t
n
s
e
s
s
t
g
t
s
e
g.
u
h
be
h
u
,
n
rf
i
u
r
r
c
n
o
f
a
D
f
r
i
o
d
a
s
o
e
c
u
o
n
c
r
,
e
t
s
g
e
d
h
es
co
s
a
h
h
u
em
y
fe
th
a
i
o
ns
t
th
s
z
a
u
,
a
t
u
or
a
s
p
h
r
l
t
u
t
d
r
a
pl
oc
c
h
a
b
s
v
h
a
u
e
e
p
c
e
v
m
a
h
r
o
e
e
o
s
in
bi
n
d
fe
.
c
d
n
s
e
t
g
a
s
al
h
.
s
i
o
e
e
I
e
n
f
m
d
l
al
y
ec
,
ou
s
i
n
c
t
r
u
o
s
i
c
t
c
n
al
al
h
d
le
u
w
r
i
t
p
ir
s
l
i
u
n
o
m
g
r
,
b
i
n
n
g
o
.
t
su
I
f
y
r
o
e
p
u
r
,
o
a
c
f
o
e
re
n
s
s
s
b
i
u
on
e
l
t
f
o
a
a
r
li
ey
n
s
o
t
a
u
l
le
T
p
r
r
A
oc
W
WHITE CUT OUT AREA
P
e
A
e
E
R
d
N
.
c
I
H
h
N
os
G
E
e
:
R
n
M
th
i
E
a
s
r
k
s
o
e
u
a
g
su
fe
h
c
D
r
f
o
s
or
e
n
u
t
c
rf
h
d
O
e
a
e
r
a
i
c
l
e
l
s
le
i
e
n
le
p
N
s
d
g
o
c
t
.
t
t
b
ha
r
D
i
e
c
o
h
a
O
t
If
C
i
l
h
n
n
y
w
a
o
d
o
i
v
t
T
r
U
u
t
in
e
c
h
u
a
g
e
ha
p
t
r
,
m
T
e
ro
c
z
,
o
n
f
a
s
n
e
o
r
u
d
s
d
A
t
c
u
s
s
s
p
h
i
i
t
o
u
ro
s
R
n
a
r
e
o
c
a
s
r
,
e
l
i
p
c
e
O
n
lu
o
d
E
s
n
.
m
t
s
n
a
U
G
b
u
l
g
le
i
l
n
t
l
r
g
is
a
N
R
.
b
h
e
fo
D
A
&
r
e
T
Y
y
r
ans
o
u
A
l
at
R
i
on
E
s
A
1
1
4
/
D
"
O
2
(
3
6
N
.
9
9
"
O
C
c
(
m
2
T
U
2
)
.
9
T
c
m
A
)
R
O
U
G
N
R
D
A
T
Y
A
P
A
E
R
H
E
E
R
A
E
D
O
N
O
C
T
U
T
A
R
O
U
G
N
R
D
A
Y
A
R
E
A
D
O
N
O
C
T
U
T
A
R
O
U
G
N
R
D
A
Y
Template
A
R
E
A
D
O
N
O
C
T
U
T
A
R
O
U
G
N
R
D
A
Y
A
R
E
A
D
O
N
O
C
T
U
T
A
R
O
U
G
N
R
D
A
Y
A
R
E
A
D
O
N
O
T
C
A
T
P
U
E
T
H
E
A
R
R
E
O
U
G
N
R
D
A
Y
A
R
E
A
D
O
N
O
C
T
U
T
A
R
O
U
G
N
R
D
A
Y
A
R
E
A
T
A
P
E
H
E
R
E
9
 Loading...