

Page 1
Bose® Solo 5
TV Sound System
Owner’s Guide • Guía del usuario • Notice d’utilisation
Page 2

Important Safety Instructions
Please read this owner’s guide carefully and save it for future reference.
The lightning flash with arrowhead symbol within an equilateral triangle alerts the user to the
presence of uninsulated, dangerous voltage within the system enclosure that may be of
sufficient magnitude to constitute a risk of electric shock.
The exclamation point within an equilateral triangle, as marked on the system, is
intended to alert the user to the presence of important operating and maintenance
instructions in this owner’s guide.
WARNINGS:
• To reduce the risk of fire or electric shock, do not expose this product to rain or moisture.
• Do not expose this apparatus to dripping or splashing, and do not place objects filled with
liquids, such as vases, on or near the apparatus. As with any electronic products, use care
not to spill liquids into any part of the product. Exposure to liquids may create a failure and/
or fire hazard.
• Do not place naked flame sources, such as lighted candles, on or near the product.
• Replace only with a AA (IEC LR06) alkaline battery (or batteries).
CAUTION: Do not make unauthorized alterations to the product; doing so may compromise
WARNING: This product contains magnetic material. Contact your physician if you have
NOTES:
• Where the mains plug or appliance coupler is used as the disconnect device, such disconnect
device shall remain readily operable.
• This product must be used indoors. It is neither designed nor tested for use outdoors, in
recreational vehicles, or on boats.
• This product is intended to be used only with the power supply provided.
Bose Corporation hereby declares that this product is in compliance with the essential
requirements and other relevant provisions of Directive 1999/5/EC and all other applicable
EU directive requirements. The complete declaration of conformity can be found at:
www.Bose.com/compliance
Please dispose of used batteries properly, following local regulations. Do not incinerate.
safety, regulatory compliance, system performance, and may void the warranty.
questions on whether this might affect the operation of your implantable
medical device.
Important Safety Instructions
1. Read these instructions.
2. Keep these instructions.
3. Heed all warnings.
4. Follow all instructions.
5. Do not use this apparatus near water.
6. Clean only with a dry cloth.
7. Do not block any ventilation openings. Install in accordance with the manufacturer’s instructions.
8. Do not install near any heat sources, such as radiators, heat registers, stoves, or other apparatus
(including amplifiers) that produce heat.
9. Protect the power supply or cord from being walked on or pinched, particularly at plugs,
convenience receptacles, and the point where they exit from the apparatus.
10. Only use attachments/accessories specified by the manufacturer.
11. Use only with the cart, stand, tripod, bracket, or table specified by the manufacturer, or
sold with the apparatus. When a cart is used, use caution when moving the cart/
apparatus combination to avoid injury from tip-over.
12. Unplug this apparatus during lightning storms or when unused for long periods of time.
13. Refer all servicing to qualified service personnel. Servicing is required when the apparatus has
been damaged in any way: such as power supply or cord is damaged; liquid has been spilled or
objects have fallen into the apparatus; the apparatus has been exposed to rain or moisture, does
not operate normally, or has been dropped.
2 - English
Page 3

Important Safety Instructions
This symbol means the product must not be discarded as household waste, and should
be delivered to an appropriate collection facility for recycling. Proper disposal and
recycling helps protect natural resources, human health and the environment. For more
information on disposal and recycling of this product, contact your local municipality,
disposal service, or the shop where you bought this product.
Note: This equipment has been tested and found to comply with the limits for a Class B digital
device, pursuant to Part 15 of the FCC Rules. These limits are designed to provide
reasonable protection against harmful interference in a residential installation. This equipment
generates, uses, and can radiate radio frequency energy and, if not installed and used in
accordance with the instructions, may cause harmful interference to radio communications.
However, there is no guarantee that interference will not occur in a particular installation. If
this equipment does cause harmful interference to radio or television reception, which can be
determined by turning the equipment off and on, the user is encouraged to try to correct the
interference by one or more of the following measures:
• Reorient or relocate the receiving antenna.
• Increase the separation between the equipment and receiver.
• Connect the equipment into an outlet on a circuit different from that to which the receiver is
connected.
• Consult the dealer or an experienced radio/TV technician for help.
Changes or modifications not expressly approved by Bose Corporation could void the user’s
authority to operate this equipment.
This device complies with part 15 of the FCC Rules and Industry Canada license-exempt
RSS standard(s). Operation is subject to the following two conditions: (1) This device may not
cause harmful interference, and (2) this device must accept any interference received, including
interference that may cause undesired operation.
This Class B digital apparatus complies with Canadian ICES-003.
CAN ICES-3 (B) / NMB-3 (B)
This device complies with FCC and Industry Canada RF radiation exposure limits set forth for
general population. It must not be co-located or be operating in conjunction with any other
antennas or transmitters.
This equipment complies with FCC/IC radiation exposure limits set forth for an uncontrolled
environment. This equipment should be installed and operated with minimum distance 20cm
between the radiator and your body.
Management Regulation for Low-power Radio-frequency Devices
Article XII
According to "Management Regulation for Low-power Radio-frequency Devices" without
permission granted by the NCC, any company, enterprise, or user is not allowed to change
frequency, enhance transmitting power or alter original characteristic as well as performance to an
approved low power radio-frequency devices.
Article XIV
The low power radio-frequency devices shall not influence aircraft security and interfere legal
communications; If found, the user shall cease operating immediately until no interference is
achieved. The said legal communications means radio communications operated in compliance
with the Telecommunications Act.
The low power radio-frequency devices must be susceptible with the interference from legal
communications or ISM radio wave radiated devices.
English - 3
Page 4
Regulatory Information
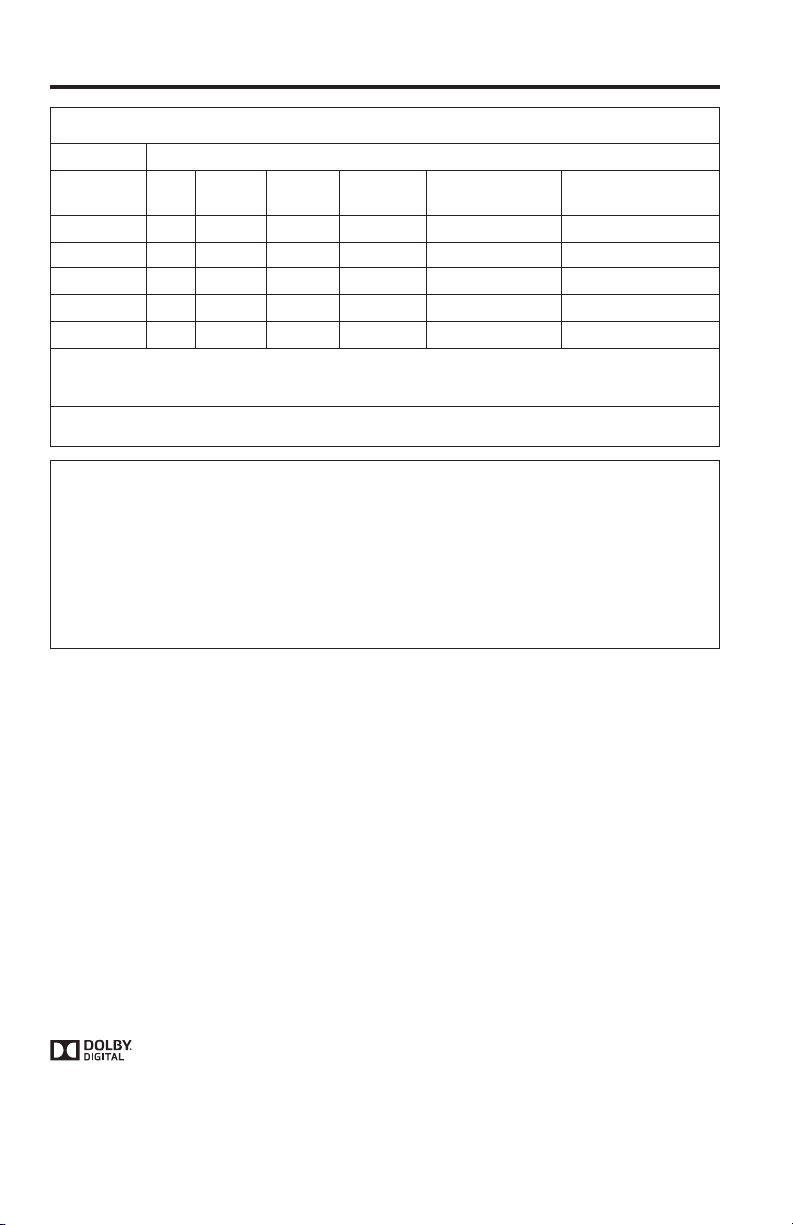
Names and Contents of Toxic or Hazardous Substances or Elements
Toxic or Hazardous Substances and Elements
Lead
Part Name
PCBs
Metal parts
Plastic parts
Speakers
Cables
This table is prepared in accordance with the provisions of SJ/T 11364.
O: Indicates that said hazardous substance contained in all of the homogeneous materials for this part is
below the limit requirement of GB/T 26572.
X: Indicates that said hazardous substance contained in at least one of the homogeneous materials used for this part is above
the limit requirement of GB/T 26572.
Mercury
(Pb)
X O O O O O
X
O O O O O O
X O O O O O
X O O O O O
Please complete and retain for your records:
Serial numbers can be found on the bottom of the soundbar and on the packaging for the
remote control.
Remote serial number: ________________________________________________________________
Soundbar serial number: ______________________________________________________________
Purchase date: _______________________________________________________________________
We suggest you keep your receipt with this owner’s guide.
Cadmium
(Hg)
O O O O O
(Cd)
Hexavalent
(CR(VI))
Polybrominated
Biphenyl (PBB)
Polybrominated
diphenylether (PBDE)
Date of manufacture: The first bolded digit in the serial number indicates the year of manufacture;
“5” is 2005 or 2015.
China Importer: Bose Electronics (Shanghai) Company Limited, Part C, Plan 9, No. 353 North
Riying Road, China (Shanghai) Pilot Free Trade Zone
EU Importer: Bose GP, Castleblayney Road, Carrickmacross, Ireland
Taiwan Importer: Bose Taiwan Branch, Room 905, 9F, Worldwide House, 131 Min Sheng East Rd,
Section 3, Taipei, Taiwan, 105
The Bluetooth® word mark and logos are registered trademarks owned by Bluetooth SIG, Inc. and
any use of such marks by Bose Corporation is under license.
™
Blu-ray Disc
and Blu-ray™ are trademarks of the Blu-ray Disc Association.
Manufactured under license from Dolby Laboratories. Dolby and the double-D symbol
are trademarks of Dolby Laboratories.
The terms HDMI and HDMI High-Definition Multimedia Interface, and the HDMI Logo are trademarks or registered trademarks of HDMI Licensing LLC in the United States and other countries.
©2015 Bose Corporation. No part of this work may be reproduced, modified, distributed, or
otherwise used without prior written permission.
4 - English
Page 5

Contents
Introduction
About your TV sound system ............................................................................................. 7
System features............................................................................................................ 7
Unpacking .............................................................................................................................. 8
Placing the soundbar ........................................................................................................... 9
Sample soundbar placement ..................................................................................... 9
Wall mounting the soundbar ............................................................................................. 9
Setting Up the System
Cable options ......................................................................................................................... 10
Connecting your TV .............................................................................................................. 10
Connecting the soundbar ................................................................................................... 11
Option 1: Optical cable (preferred) ............................................................................. 11
Option 2: Coaxial cable ................................................................................................ 12
Connecting to power ............................................................................................................ 13
Mounting ring ............................................................................................................... 13
Turning off your TV speakers .............................................................................................. 14
Powering on your soundbar ................................................................................................ 14
Confirming your TV speakers are off ......................................................................... 14
Using the System
Remote control buttons ...................................................................................................... 15
Programming the universal remote ................................................................................ 16
Customizing the power button .................................................................................. 17
Resyncing your cable/satellite box and TV ...................................................................... 17
Switching between sources ................................................................................................ 17
Function buttons .................................................................................................................. 17
Adjusting the volume .......................................................................................................... 18
Adjusting the bass level ...................................................................................................... 18
Resetting the bass level .............................................................................................. 18
Dialogue mode ...................................................................................................................... 19
Auto-wake .............................................................................................................................. 19
Programming a non-Bose remote control ....................................................................... 19
English - 5
Page 6

Contents
Bluetooth
Pairing a Bluetooth® device ................................................................................................ 20
Connecting to a paired Bluetooth
Switching between connected devices ............................................................................ 21
Clearing the soundbar’s Bluetooth
®
®
device ....................................................................... 21
®
pairing list ............................................................. 21
Getting System Information
Soundbar indicators ............................................................................................................. 22
Status indicator ............................................................................................................ 22
Bluetooth® indicator .................................................................................................... 22
Alternate Setup
No sound from a source(s) connected to your TV .................................................. 23
No optical or coaxial connector on your TV ............................................................. 23
Care and Maintenance
Troubleshooting ................................................................................................................... 29
Adjusting the audio for wall mounting .................................................................... 30
Replacing the remote batteries ......................................................................................... 31
Cleaning .................................................................................................................................. 32
Customer service .................................................................................................................. 32
Limited warranty .................................................................................................................. 32
Technical Information .......................................................................................................... 32
6 - English
Page 7

Introduction
About your TV sound system
Your TV sound system provides clear, spacious sound from one
compact soundbar.
System features
• Videostage® and TrueSpace® technologies deliver many of the benefits of a
five-speaker home theater in a single soundbar.
• Sleek and elegantly designed soundbar fits easily in front of your TV.
• Connects with just one audio cable for easy setup.
• Programmable universal remote powers on/off your TV, cable/satellite box and
system with the press of a single button.
• Stream music from Bluetooth
• Stores up to eight Bluetooth devices in its pairing list.
• Connects up to two Bluetooth devices for easy switching
between devices.
• Mounting ring to hide the power supply behind your mounted TV.
• Soundbar can be mounted on the wall (kit available separately).
®
devices.
English - 7
Page 8

Introduction
Unpacking
Carefully unpack the carton and confirm that the following parts are included:
Soundbar Power supply and cord
Optical cable Coaxial cable
(Europe only)
Universal remote control
(batteries provided)
May ship with multiple power cords. The appropriate power cord for your
region is supplied.
Note: If part of the system is damaged, do not use it. Contact your authorized
8 - English
®
Bose
dealer or Bose customer service. Refer to the contact sheet in
the carton.
Page 9
Introduction
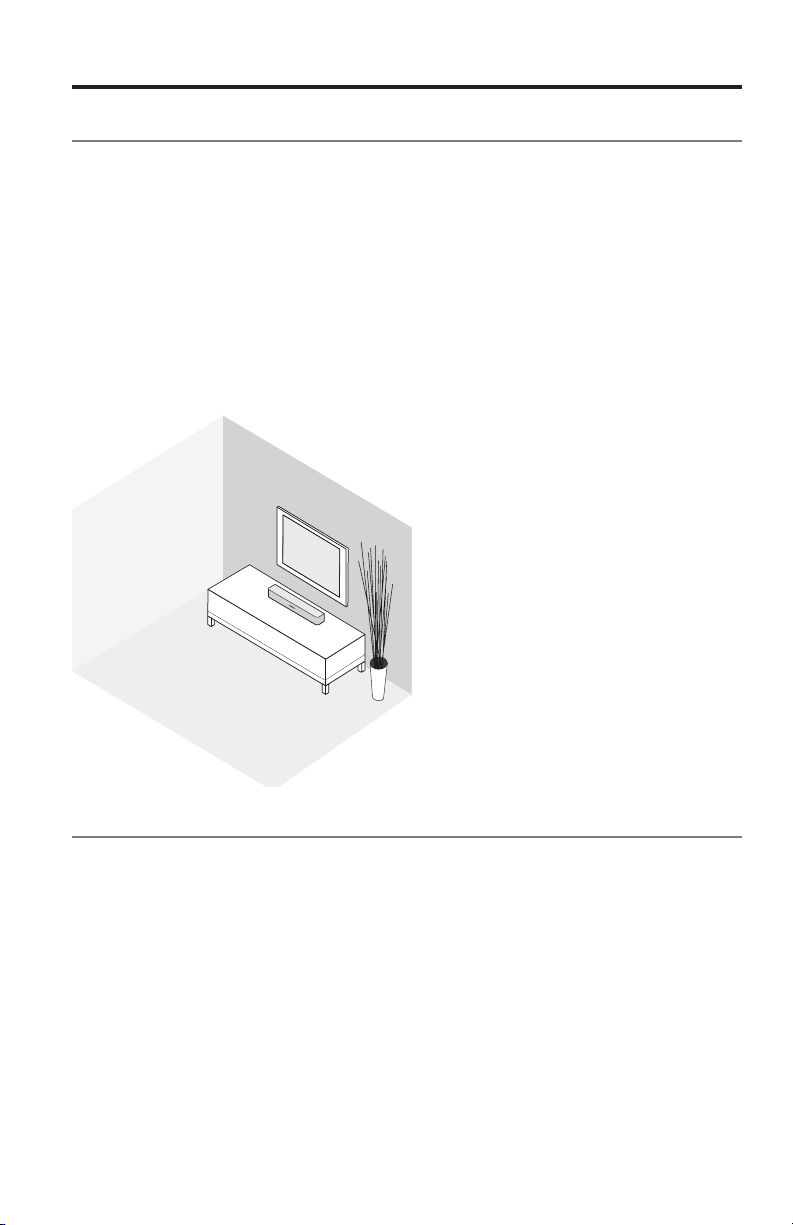
Placing the soundbar
• Stand the soundbar on its feet in front of your TV.
• Do not place your TV on the soundbar.
• Make sure there is an AC (mains) power outlet nearby.
To avoid wireless interference:
• Keep other wireless equipment away from the soundbar.
• Place the soundbar outside of and away from metal cabinets, other audio/video
components and direct heat sources.
Sample soundbar placement
Wall mounting the soundbar
You can mount the soundbar on a wall. To purchase the WB-120 Wall Mount Kit,
contact your local Bose
After wall mounting and setting up the soundbar, adjust the audio for better bass
sound (see page 30).
CAUTION: Do not use any other hardware to mount the soundbar.
®
dealer or visit www.Bose.com
English - 9
Page 10
Setting Up the System
Cable options
Connect your TV to the soundbar using one of the two digital cable options.
The optical cable is the preferred method for connection.
Note: If your TV does not have an optical or coaxial connector, see
"Alternate Setup" on page 24.
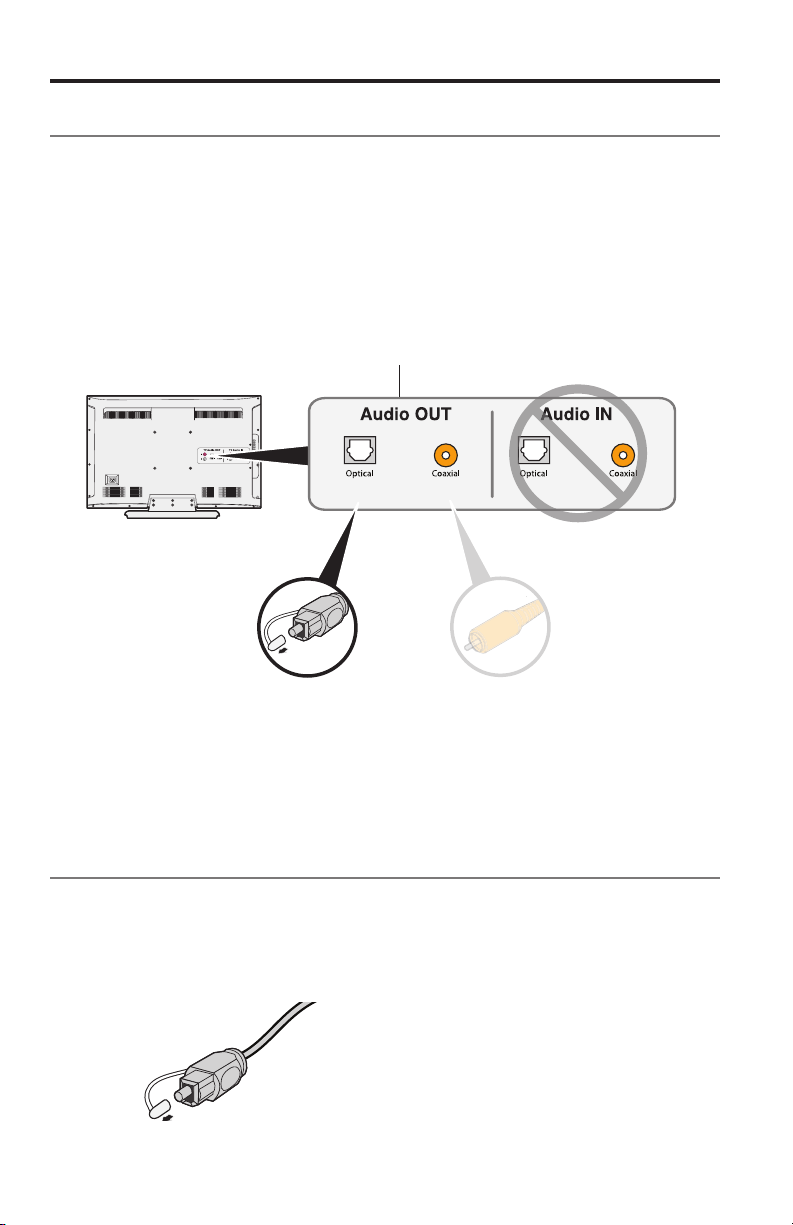
1. On the back of your TV, locate the Audio OUT (digital) connector panel.
Note: You must connect the audio cable through your Audio OUT
connector panel.
Your TV's connector panel may not appear as shown.
Look for the shape or color (coaxial) of the connector.
Option 1:
Optical cable (digital audio)
Preferred method for
connection.
2. Choose an audio cable.
Option 2:
Coaxial cable (digital audio)
Use if no optical output
is available.
Connecting your TV
Insert one end of the audio cable into the correct Audio OUT (digital) connector on
your TV.
CAUTION: If using an optical cable, remove the protective caps from both ends.
10 - English
Inserting the plug in the wrong orientation can damage the plug and/or
the connector.
Page 11

AUX Optical Coaxial
Power
TV Input
Setting Up the System
Connecting the soundbar
After connecting the audio cable to your TV, connect the other end to your
soundbar. Use only one audio cable.
For instructions on connecting a coaxial cable, see page 12.
Option 1: Optical cable (preferred)
CAUTION: Ensure you have removed the protective cap from both ends of the
1. Hold the optical cable’s plug with the Bose logo facing down.
2. Align the plug with the Optical connector on the soundbar and insert the
optical cable. Inserting the plug in the wrong orientation can damage
the plug and/or the connector.
plug carefully.
Hinged door
Note: The connector has a hinged door that swings inward when inserting
the plug.
3. Firmly push the plug into the connector until you hear or feel a click.
English - 11
Page 12

Setting Up the System
Option 2: Coaxial cable
Insert the other end of the coaxial cable into the Coaxial connector on the
soundbar.
12 - English
Page 13

Setting Up the System
Connecting to power
1. Plug the power supply into the Power connector.
1
2. Plug one end of the power cord into the power supply.
3. Plug the other end into a live AC power (mains) outlet.
The soundbar emits a tone.
3
2
Mounting ring
To hide the power supply behind your mounted TV, use the mounting ring.
Attach the mounting ring to your TV's wall mount using zip ties or bread ties
(not provided).
English - 13
Page 14

Setting Up the System
Turning off your TV speakers
To avoid hearing distorted sound, turn off your TV speakers.
Refer to your TV’s owner’s guide for more information.
Powering on your soundbar
1. Power on your TV.
2. If you are using a cable/satellite box or other secondary source, power on
the source.
3. Press the Power button (
The status indicator glows green.
) on the remote control.
Status indicator
4. Check if sound is coming from the soundbar.
Note: If you do not hear sound coming from the soundbar, see
"Troubleshooting" on page 29.
Confirming your TV speakers are off
1. Press the Mute button ( ) on the remote control.
2. Check that no sound is coming from your TV.
Note: If you hear sound coming from your TV, see
"Troubleshooting" on page 29.
14 - English
Page 15

Using the System
Remote control buttons
Use the remote to control sources connected to your system, adjust the system
volume, change channels, use playback functions, enable cable/satellite box
functions and navigate source menus.
Source selection
Selects a source
connected to
your TV
Navigation pad
Lists recorded
DVR programs
Volume controls
controls the
Bluetooth® feature
Powers on/off the
soundbar
Powers on/off a
selected source
Bass controls
Dialogue mode
Previous channel,
chapter or track
Playback
controls
TV aspect ratio
Closed captioning
Teletext mode
Function buttons
(see page 17)
English - 15
Page 16

Using the System
Programming the universal remote
You can program the universal remote to control your source, such as a TV, DVD/
Blu-ray Disc
code for your source’s brand. There may be several codes for your source. You
may need to perform this procedure multiple times to locate the correct code.
™
player, cable/satellite box, game system or DVR, by entering the
Locate your source’s code
1. Power on your source.
2. Locate the code for your source’s brand in the Universal Remote Device
Codes book (provided).
Enter your source’s code
1. On the remote control, press and hold the appropriate source button until all
six source buttons glow, then release.
For example, to program your TV, press and hold
buttons glow, then release.
The appropriate source button continues to glow.
2. On the number keypad, enter the code for your source’s brand and press + on
the volume button.
until all six source
Test your source’s code
1. Test your source for basic functions. Follow the instructions for your source:
• TV: press the channel buttons. Press
Press
• Cable/satellite box: press
• DVD or Blu-ray Disc
Press
• Game system: press
2. Based on your source’s response to basic functions:
• Remote responds accurately: press
save your settings.
• Remote does not respond or does not respond accurately:
Tip: After you exit programming mode, press the appropriate source button to
Note: Your source may not be compatible with universal remote controls. Refer to
your source’s owner’s guide for more information.
and to navigate.
. The programming guide appears. Press
and to navigate.
™
player: press . The settings menu appears.
and to navigate.
and to navigate through your menu.
– If your source button glows: press + on the volume button to move to
the next code. Repeat steps 1-2 in “Test your source’s code”. You may
need to repeat this procedure 30 or more times. If all six buttons blink
three times, you have cycled through all codes for your source.
– If your source button is off: your remote exited programming mode.
Repeat steps 1-2 in “Enter your source’s code” and steps 1-2 in “Test
your source’s code”.
use your source.
. The settings menu appears.
to exit programming and
16 - English
Page 17

Using the System
Customizing the power button
You can customize (power button) on your remote to power on/off your
soundbar, TV and cable/satellite box simultaneously.
1. Program your remote to control your TV and cable/satellite box
(see page 16).
2. Press
Both buttons flash three times.
and simultaneously and hold for 10 seconds.
Resyncing your cable/satellite box and TV
After customizing the power button, your cable/satellite box and TV may become
out of sync and not power on/off simultaneously. Use the following steps to resync
your soundbar.
1. Press the source button for the source that is out of sync.
2. Press
3. Press
Your sources power on/off simultaneously.
to power on/off the source.
.
Switching between sources
You can switch from one source to another by pressing the appropriate source
button on the remote.
Note: Before you begin, ensure you have correctly programmed your sources.
1. Press the button for the source you want to control.
The source button glows.
2. Press
The source powers on.
3. Press
.
and select the correct input on your TV.
Function buttons
The red, green, yellow and blue buttons on the remote control correspond with the
color-coded function buttons on your cable/satellite box or teletext functions.
• Cable/satellite box functions: refer to your cable/satellite box’s owner’s guide.
• Teletext functions: correspond with color-coded page numbers, headings or
shortcuts on a teletext display.
English - 17
Page 18

Using the System
Adjusting the volume
On the remote control:
• Press
• Press
• Press
Note: If you hear sound coming from your TV, see "Troubleshooting" on page 29.
to increase the volume.
to decrease the volume.
to mute or unmute the audio.
Adjusting the bass level
1. Press the Bass button ( ).
The status indicator blinks white three times.
2. On the remote control:
• Press
• Press
3. Press the Bass button (
The status indicator blinks white three times and the soundbar saves
your settings.
Note: For optimal sound quality for dialogue-only programs, such as news and talk
shows, see page 19.
to increase the bass.
to decrease the bass.
).
Resetting the bass level
On the remote control, press and hold for five seconds to reset the bass level
to original factory settings.
18 - English
Page 19

Using the System
Dialogue mode
Dialogue mode provides optimal sound quality for dialogue-only programs, such as
news and talk shows, by decreasing the soundbar’s bass settings.
Press the dialogue button (
audio settings.
The status indicator glows amber when dialogue mode is enabled.
) to toggle between dialogue mode and your default
Auto-wake
You can set the soundbar to power on whenever a sound signal is received.
Note: The soundbar powers off after 60 minutes of inactivity.
Press and hold
and default power settings.
The status indicator glows dim amber when the soundbar is off and auto-wake
is enabled.
on the remote for five seconds to toggle between auto-wake
Programming a non-Bose remote control
You can program a non-Bose remote control, such as your cable/satellite box
remote, to control the soundbar. Refer to your non-Bose remote control’s owner’s
guide or cable/satellite website for instructions.
Once programmed, the non-Bose remote performs basic functions such as power
on/off and volume.
English - 19
Page 20

Bluetooth
®
Pairing a Bluetooth® device
Bluetooth® wireless technology enables you to stream music from Bluetooth
smartphones, tablets, computers or other audio devices to the soundbar.
Before you can stream music from a Bluetooth device, you must pair your device
with the soundbar.
1. On the remote control, press and hold
blinks blue.
Make sure the Bluetooth indicator blinks blue before you pair your device.
2. On your Bluetooth device, turn on the Bluetooth feature.
Tip: The Bluetooth feature is usually found in Settings. A gear icon (
represents Settings on the Home screen.
until the Bluetooth indicator
) often
3. Select Bose Solo 5 system from your device list.
Once paired, the Bose Solo 5 system appears connected in the device list.
4. On your Bluetooth device, play music to stream to your soundbar.
If you cannot pair your device
You may need to clear the soundbar’s Bluetooth pairing list (see page 21).
After you clear the list, try pairing again.
See "Troubleshooting" on page 29 for more information.
20 - English
Page 21

Bluetooth
Connecting to a paired Bluetooth® device
You can stream audio from a Bluetooth device to the soundbar.
Note: If there are multiple devices stored in the soundbar’s pairing list, it may take
a minute or two for the paired device to connect. The soundbar’s Bluetooth
indicator shows connection status (see page 22).
1. On the remote control, press
The soundbar connects to the last two devices that streamed to
your soundbar.
2. Once connected, on the Bluetooth device, play music.
.
If you cannot stream audio from a paired device
The soundbar may have lost connection to your device. Check the soundbar’s
Bluetooth indicator. If the paired device is out of range of the soundbar, move your
device within range.
Switching between connected devices
The soundbar supports multi-point connectivity, which allows you to seamlessly
switch playing music between connected devices.
The last two devices that streamed to the soundbar remain connected. During
playback, you can pause audio on the streaming device, and then play music from
another connected device.
1. Pause music from the streaming device.
2. On another connected device, play music.
3. Repeat steps 1 and 2 to switch between connected devices.
®
Clearing the soundbar’s Bluetooth®
pairing list
When you pair a Bluetooth® device to the soundbar, the connection is stored in the
soundbar’s pairing list. You may need to clear the pairing list if you cannot connect
to a device. Once you clear the list, you need to pair the device again.
1. Press and hold
2. On your mobile device, delete Bose Solo 5 system from the Bluetooth menu.
The soundbar emits a tone and is ready to pair to a device (see page 20).
for 10 seconds, until the Bluetooth indicator blinks blue.
English - 21
Page 22

Getting System Information
Soundbar indicators
The status and Bluetooth® indicators on the front of the soundbar provide
information on soundbar activity.
®
Status
indicator
Bluetooth
indicator
Status indicator
Indicator activity System state
Off Soundbar off (standby)
Green Solid: Soundbar is on
Blinking: Soundbar is muted
Amber Dim: Standby, auto-wake is enabled
Solid: Dialogue mode
Blinking: Dialogue mode, soundbar is muted
Red System error: Call Bose Customer Service. Refer to
the contact sheet in the carton.
Bluetooth® indicator
Indicator activity System state
Blue Blinking: Ready to pair
White Blinking: Connecting
Solid: Connected
22 - English
Page 23

Alternate Setup
You may need to use an alternate setup method for the following reasons:
• No sound from a source(s) connected to your TV.
• No optical or coaxial connector on your TV.
No sound from a source(s) connected to your TV
Some TVs do not deliver sound from connected sources to the soundbar. Use an
alternate setup method to directly connect your source(s) to the soundbar.
Problem What to do
No sound from a source connected to
your TV
No sound from two sources
connected to your TV
No optical or coaxial connector on your TV
Some TVs do not have optical or coaxial connectors. Use an alternate setup
method to connect your TV to the soundbar.
Problem What to do
TV only has an analog connector Connect your TV using a 3.5 mm to RCA stereo
TV only has a headphones connector Connect your TV using a 3.5 mm stereo cable
TV has no audio outputs Use the audio outputs on another source, such as
Connect your source to the soundbar using one of
the two cable options. (See page 24.)
Connect your sources to the soundbar using
Option 1 or Option 2. (See page 26.)
cable (not provided). (See page 25.)
(not provided). (See page 28.)
a cable/satellite box to connect to the soundbar.
(See page 24.)
English - 23
Page 24

Alternate Setup
Connecting a source to the soundbar
If you do not get sound from a source, such as a DVD/Blu-ray Disc™ player,
cable/satellite box, game system or DVR, connected to your TV, connect it to
the soundbar. Use only one audio cable.
CAUTION: If using an optical cable, remove the protective caps from both ends.
1. On the back of your source, locate the Audio OUT (digital) connector panel.
Audio OUT
Source connector panel
Inserting the plug in the wrong orientation can damage the plug and/or
the connector.
Soundbar connector panel
2. Choose an audio cable.
3. If you have not already, disconnect your TV from the soundbar.
4. Connect the audio cable from your cable/satellite box’s Audio OUT (digital)
connector panel to the soundbar.
Note: Do not disconnect your source’s video cable, such as an HDMI
™
cable,
from your TV.
24 - English
Page 25

Alternate Setup
Connecting a source’s analog connector to the soundbar
If your source does not have an optical or coaxial connector, and only has analog
connectors (red and white), use a 3.5 mm to RCA stereo cable (not provided) to
connect to the soundbar.
1. If you have not already, disconnect your TV from the soundbar.
2. Insert the RCA analog cable into the Audio OUT RCA (red and white)
connectors on your source.
3. Insert the stereo plug into the soundbar's AUX connector.
Audio OUT
Source connector panel
3.5 mm to RCA
stereo cable
(not provided)
Soundbar connector panel
English - 25
Page 26

Alternate Setup
Connecting two sources to the soundbar
If you do not get sound from any source, such as a DVD/Blu-ray Disc™ player,
cable/satellite box, game system or DVR, connected to your TV, connect it to the
soundbar. Use only one audio cable for each source.
1. On the back of each source, locate the Audio OUT (digital) connector panel.
2. Choose a separate audio cable for each source using either Option 1 or
Option 2 (see page 27).
Note: You MUST use either Option 1 or Option 2. Do not use the coaxial cable
and optical cable at the same time.
3. If you have not already, disconnect your TV from the soundbar.
4. Separately connect the chosen audio cable from each source’s Audio OUT
(digital) connector panel to the soundbar.
Note: Do not disconnect your source's video cable, such as an HDMI
from your TV.
Option 1
This figure shows two source connections using an optical cable and 3.5 mm to
RCA stereo cable (not provided).
CAUTION: If using an optical cable, remove the protective caps from both ends.
Inserting the plug in the wrong orientation can damage the plug and/or
the connector.
™
cable,
3.5 mm to RCA
stereo cable
(not provided)
26 - English
Audio OUT
Source 1
Soundbar connector panel
Audio OUT
Source 2
Page 27

Alternate Setup
Option 2
This figure shows two source connections using a coaxial cable and 3.5 mm to
RCA stereo cable (not provided).
Audio OUT
Source 1
3.5 mm to RCA
stereo cable
(not provided)
Soundbar connector panel
Audio OUT
Source 2
Using two sources connected to the soundbar
Power off sources when not in use. In order for one source to deliver audio to the
soundbar, your other source must be off.
English - 27
Page 28

Alternate Setup
Connecting a TV headphones connector to the soundbar
If your TV only has a headphones connector, use a 3.5 mm stereo cable (not
provided) to connect it to the soundbar.
1. Insert the stereo plug into the TV headphones connector.
2. Insert the other end of the cable into the AUX connector on your soundbar.
3. Ensure your TV speakers are on. Refer to your TV’s owner’s guide for
more information.
4. To ensure optimal volume control from your soundbar,
• Set your TV’s volume to 75 percent of maximum.
• Next, set the volume level of your soundbar using the remote control.
Audio OUT
TV headphones connector panel
(or other variable audio output)
3.5 mm stereo cable
(not provided)
Soundbar connector panel
28 - English
Page 29

Care and Maintenance
Troubleshooting
Problem What to do
No power • Secure both ends of the power cord.
• Plug the power cord into a live AC (mains) outlet.
• Unplug the power cord for at least one minute and reconnect.
No sound • Unmute the soundbar.
• Increase the volume.
• Plug the audio cable into a connector on your TV labelled
Audio Output or Audio OUT, not Audio Input or Audio IN.
• Use only one audio cable.
• Secure all cable connections and ensure they are correct.
• If you are using a cable/satellite box or other secondary source for
sound, select the correct TV input.
• Enable your TV’s audio output and select the correct setting, such
as such as Stereo or 5.1 Channel Audio. Refer to your TV’s owner’s
guide for more information.
• Use alternate setup (see page 23).
• If connecting to two sources:
– Power off the other source.
– Ensure that you are not using an optical cable and coaxial cable.
• If the soundbar is connected to a TV output labelled VARIABLE (VAR),
power off your TV speakers, set your TV volume to 75 percent of
maximum and unmute your TV.
• If connecting through a TV headphones output, increase your TV
volume to the maximum limit.
• Unplug the power cord for at least one minute and reconnect.
Cannot play
Bluetooth
®
• On your soundbar:
– Pair a device (see page 20).
– Clear the soundbar’s pairing list (see page 21).
– Try pairing a different device.
• On your Bluetooth device:
– Turn off and on the Bluetooth feature.
– Remove the soundbar from the Bluetooth menu. Pair again.
– Use a different music source.
– Check your Bluetooth device for compatibility. Refer to your
Bluetooth device’s owner’s guide.
• Increase the volume on the soundbar, your mobile device and
music source.
• Ensure you are using the correct device.
• If more than one Bluetooth device is connected, pause your streaming
device first.
• Disconnect other Bluetooth devices when not in use.
• See "No sound" or "Distorted sound" on page 30.
English - 29
Page 30

Care and Maintenance
Problem What to do
Distorted sound
Remote control
is inconsistent
or does not
work
Sound is coming
from the TV
Status indicator
is red
Adjusting the audio for wall mounting
After wall mounting the soundbar, adjust the audio for better bass sound.
Press and hold
Tip: If you remove the soundbar from the wall, repeat to return the soundbar to
default audio settings.
• Secure cable connections on the soundbar and TV (or other
connected sources).
• If the soundbar is connected to a TV output labelled VARIABLE (VAR),
reduce the TV volume.
• Use alternate setup (see page 23).
• If wall mounting the soundbar, adjust the audio (see "Adjusting the
audio for wall mounting").
• Unplug the power cord for at least one minute and reconnect.
• Check the batteries to see if they are installed properly or if they need
to be replaced (see page 31).
• Point the remote control directly at the soundbar.
• Check that the status indicator flashes when you press the remote
volume or mute button.
• Unplug the power cord for at least one minute and reconnect.
• Turn off your TV speakers (see page 14).
• Mute or decrease the volume your TV.
• System error: Call Bose Customer Service. Refer to the contact sheet
in the carton.
for five seconds.
30 - English
Page 31

Care and Maintenance
Replacing the remote batteries
Replace both batteries when the remote control stops operating or its range seems
reduced. Use Alkaline batteries.
1. Slide open the battery compartment cover on the back of the remote.
2. Remove both batteries.
3. Dispose of the batteries according to the regulations in your area.
4. Insert two AA (IEC-LR6) 1.5V batteries or the equivalent. Match the + and –
symbols on the batteries with the + and – markings inside the compartment.
5. Slide the battery compartment cover back into place.
English - 31
Page 32

Care and Maintenance
Cleaning
• Clean the surface of the system with a soft, dry cloth.
• Do not use any sprays near the system. Do not use any solvents, chemicals or
cleaning solutions containing alcohol, ammonia or abrasives.
• Do not allow liquids to spill into any openings.
Customer service
For additional help, contact Bose Customer Service. Refer to the contact sheet in
the carton.
Limited warranty
Your system is covered by a limited warranty. Details of the limited warranty are
provided on the product registration card in the carton. Please refer to the product
registration card for instructions on how to register. Failure to register will not affect
your limited warranty rights.
The warranty information provided with this product does not apply in
Australia or New Zealand. See our website at www.bose.com.au/warranty or
www.bose.co.nz/warranty for details of the Australia and New Zealand warranty.
Technical Information
Input rating
Input: 20VDC, 30W MAX.
32 - English
Page 33

English - 33
Page 34

©2015 Bose Corporation, The Mountain,
Framingham, MA 01701-9168 USA
AM754007 Rév. 00
 Loading...