

Page 1

3FHJTUFS
\RXU
QHZGHYLFHRQ
0\%RVFKQRZDQG
JHWIUHHEHQHILWV
CPTDIIPNFDPN
XFMDPNF
Built-in oven
ﺞﻣﺪﻤﻟا نﺮﻔﻟا
VBC011BR0M
[en] Instruction manual Built-in oven
[ar]
لﺎﻤﻌﺘﺳﻻا ﻞﻴﻟد ﺞﻣﺪﻤﻟا نﺮﻔﻟا
Page 2

Page 3

Table of contents
[en]I n st r u ct i on manual Bui l t - i n oven
8 Intended use . . . . . . . . . . . . . . . . . . . . . . . . . . . . . 4
( Important safety information . . . . . . . . . . . . . . . 4
General information . . . . . . . . . . . . . . . . . . . . . . . . . . . 4
] Causes of damage . . . . . . . . . . . . . . . . . . . . . . . . 5
General information . . . . . . . . . . . . . . . . . . . . . . . . . . . 5
en
4 Customer service . . . . . . . . . . . . . . . . . . . . . . . . 15
E number and FD number . . . . . . . . . . . . . . . . . . . . .15
J Tested for you in our cooking studio. . . . . . . . 16
Tips for using your appliance . . . . . . . . . . . . . . . . . . .16
7 Environmental protection . . . . . . . . . . . . . . . . . . 6
Saving energy . . . . . . . . . . . . . . . . . . . . . . . . . . . . . . . 6
Environmentally-friendly disposal . . . . . . . . . . . . . . . . . 6
* Getting to know your appliance . . . . . . . . . . . . . 7
Control panel . . . . . . . . . . . . . . . . . . . . . . . . . . . . . . . . 7
Types of heating and functions . . . . . . . . . . . . . . . . . . 7
Time selector . . . . . . . . . . . . . . . . . . . . . . . . . . . . . . . . 8
Temperature selector . . . . . . . . . . . . . . . . . . . . . . . . . . 8
Temperature control indicator . . . . . . . . . . . . . . . . . . . 8
Cooking compartment functions . . . . . . . . . . . . . . . . . 8
_ Accessories . . . . . . . . . . . . . . . . . . . . . . . . . . . . . 8
Shelf positions . . . . . . . . . . . . . . . . . . . . . . . . . . . . . . . 8
Locking function. . . . . . . . . . . . . . . . . . . . . . . . . . . . . . 8
Special accessories . . . . . . . . . . . . . . . . . . . . . . . . . . . 9
K Before using for the first time. . . . . . . . . . . . . . . 9
Baking out the oven . . . . . . . . . . . . . . . . . . . . . . . . . . . 9
Cleaning the accessories. . . . . . . . . . . . . . . . . . . . . . . 9
1 Operating the appliance . . . . . . . . . . . . . . . . . . 10
Switching the oven on and off . . . . . . . . . . . . . . . . . . 10
Produktinfo
Additional information on products, accessories,
replacement parts and services can be found at
www.bosch-home.com and in the online shop
www.bosch-eshop.com
O Time-setting options . . . . . . . . . . . . . . . . . . . . . 10
Setting the timer . . . . . . . . . . . . . . . . . . . . . . . . . . . . . 10
Setting the cooking time . . . . . . . . . . . . . . . . . . . . . . 10
D Cleaning . . . . . . . . . . . . . . . . . . . . . . . . . . . . . . . 11
Suitable cleaning agents . . . . . . . . . . . . . . . . . . . . . . 11
Keeping the appliance clean . . . . . . . . . . . . . . . . . . . 12
Cleaning the cooking compartment . . . . . . . . . . . . . . 12
p Rails. . . . . . . . . . . . . . . . . . . . . . . . . . . . . . . . . . . 12
Detaching the shelf supports . . . . . . . . . . . . . . . . . . . 12
Refitting the shelf supports. . . . . . . . . . . . . . . . . . . . . 12
q Appliance door . . . . . . . . . . . . . . . . . . . . . . . . . . 13
Removing and installing the door panels . . . . . . . . . . 13
Removing and fitting the appliance door . . . . . . . . . .13
3 Trouble shooting . . . . . . . . . . . . . . . . . . . . . . . . 14
Replacing the oven light bulb. . . . . . . . . . . . . . . . . . . 14
3
Page 4

en Intended use
8Intended use
Intended use
Read these instructions carefully. Only then
will you be able to operate your appliance
safely and correctly. Retain the instruction
manual and installation instructions for future
use or for subsequent owners.
This appliance is only intended to be fully fitted
in a kitchen. Observe the special installation
instructions.
Check the appliance for damage after
unpacking it. Do not connect the appliance if it
has been damaged in transport.
Only a licensed professional may connect
appliances without plugs. Damage caused by
incorrect connection is not covered under
warranty.
This appliance is intended for domestic use
only. The appliance must only be used for the
preparation of food and drink. The appliance
must be supervised during operation. Only
use this appliance indoors.
This appliance is intended for use up to a
maximum height of 2000 metres above sea
level.
This appliance is not intended for operation
with an external clock timer or a remote
control.
This appliance may be used by children over
the age of 8 years old and by persons with
reduced physical, sensory or mental
capabilities or by persons with a lack of
experience or knowledge if they are
supervised or are instructed by a person
responsible for their safety how to use the
appliance safely and have understood the
associated hazards.
Children must not play with, on, or around the
appliance. Children must not clean the
appliance or carry out general maintenance
unless they are at least 15 years old and are
being supervised.
Keep children below the age of 8 years old at
a safe distance from the appliance and power
cable.
Always slide accessories into the cooking
compartment the right way round.
~ "Accessories" on page 8
(Important safety
information
Impor t ant saf ety informat i on
General information
:Warning – Risk of fire!
■ Combustible items stored in the cooking
compartment may catch fire. Never store
combustible items in the cooking
compartment. Never open the appliance
door if there is smoke inside. Switch off the
appliance and unplug it from the mains or
switch off the circuit breaker in the fuse box.
Risk of fire!
■ Loose food remnants, fat and meat juices
may catch fire. Before using the appliance,
remove the worst of the food remnants from
the cooking compartment, heating elements
and accessories.
Risk of fire!
■ A draught is created when the appliance
door is opened. Greaseproof paper may
come into contact with the heating element
and catch fire. Do not place greaseproof
paper loosely over accessories during
preheating. Always weight down the
greaseproof paper with a dish or a baking
tin. Only cover the surface required with
greaseproof paper. Greaseproof paper
must not protrude over the accessories.
:Warning – Risk of burns!
■ The appliance becomes very hot. Never
touch the interior surfaces of the cooking
compartment or the heating elements.
Always allow the appliance to cool down.
Keep children at a safe distance.
Risk of serious burns!
■ Accessories and ovenware become very
hot. Always use oven gloves to remove
accessories or ovenware from the cooking
compartment.
Risk of burns!
■ Alcoholic vapours may catch fire in the hot
cooking compartment. Never prepare food
containing large quantities of drinks with a
high alcohol content. Only use small
quantities of drinks with a high alcohol
content. Open the appliance door with care.
Risk of burns!
■ The telescopic shelves become hot when
the appliance is in use. Take special care
not to get burnt when they are pulled out.
4
Page 5

Causes of damage en
:Warning – Risk of scalding!
■ The accessible parts become hot during
operation. Never touch the hot parts. Keep
children at a safe distance.
Risk of scalding!
■ When you open the appliance door, hot
steam can escape. Steam may not be
visible, depending on its temperature. When
opening, do not stand too close to the
appliance. Open the appliance door
carefully. Keep children away.
Risk of scalding!
■ Water in a hot cooking compartment may
create hot steam. Never pour water into the
cooking compartment when the cooking
compartment is hot.
:Warning – Risk of injury!
■ Scratched glass in the appliance door may
develop into a crack. Do not use a glass
scraper, sharp or abrasive cleaning aids or
detergents.
Risk of injury!
■ The hinges on the appliance door move
when opening and closing the door, and
you may be trapped. Keep your hands away
from the hinges.
:Warning – Risk of electric shock!
■ Incorrect repairs are dangerous. Repairs
may only be carried out by one of our
trained after-sales engineers. If the
appliance is faulty, unplug the mains plug or
switch off the fuse in the fuse box. Contact
the after-sales service.
Risk of electric shock and serious injury!
■ The cable insulation on electrical
appliances may melt when touching hot
parts of the appliance. Never bring
electrical appliance cables into contact with
hot parts of the appliance.
Risk of electric shock!
■ Do not use any high-pressure cleaners or
steam cleaners, which can result in an
electric shock.
Risk of electric shock!
■ When replacing the cooking compartment
bulb, the bulb socket contacts are live.
Before replacing the bulb, unplug the
appliance from the mains or switch off the
circuit breaker in the fuse box.
Risk of electric shock!
■ A defective appliance may cause electric
shock. Never switch on a defective
appliance. Unplug the appliance from the
mains or switch off the circuit breaker in the
fuse box. Contact the after-sales service.
]Causes of damage
Cau s es of damage
General information
Caution!
■ Accessories, foil, greaseproof paper or ovenware on
the cooking compartment floor: do not place
accessories on the cooking compartment floor. Do
not cover the cooking compartment floor with any
sort of foil or greaseproof paper. Do not place
ovenware on the cooking compartment floor if a
temperature of over 50 ºC has been set. This will
cause heat to accumulate. The baking and roasting
times will no longer be correct and the enamel will
be damaged.
■ Aluminium foil: Aluminium foil in the cooking
compartment must not come into contact with the
door glass. This could cause permanent
discolouration of the door glass.
■ Water in a hot cooking compartment: do not pour
water into the cooking compartment when it is hot.
This will cause steam. The temperature change can
cause damage to the enamel.
■ Moisture in the cooking compartment: Over an
extended period of time, moisture in the cooking
compartment may lead to corrosion. Allow the
cooking compartment to dry after use. Do not keep
moist food in the closed cooking compartment for
extended periods of time. Do not store food in the
cooking compartment.
■ Cooling with the appliance door open: Following
operation at high temperatures, only allow the
cooking compartment to cool down with the door
closed. Do not trap anything in the appliance door.
Even if the door is only left open a crack, the front of
nearby furniture may become damaged over time.
Only leave the cooking compartment to dry with the
door open if a lot of moisture was produced whilst
the oven was operating.
■ Fruit juice: when baking particularly juicy fruit pies,
do not pack the baking tray too generously. Fruit
juice dripping from the baking tray leaves stains that
cannot be removed. If possible, use the deeper
universal pan.
■ Extremely dirty seal: If the seal is very dirty, the
appliance door will no longer close properly during
operation. The fronts of adjacent units could be
damaged. Always keep the seal clean. Never
operate the appliance if the seal is damaged or
missing. ~ "Cleaning" on page 11
■ Appliance door as a seat, shelf or worktop: Do not
sit on the appliance door, or place or hang anything
on it. Do not place any cookware or accessories on
the appliance door.
■ Inserting accessories: depending on the appliance
model, accessories can scratch the door panel
when closing the appliance door. Always insert the
accessories into the cooking compartment as far as
they will go.
■ Carrying the appliance: do not carry or hold the
appliance by the door handle. The door handle
cannot support the weight of the appliance and
could break.
5
Page 6
en Environmental protection
7Environmental protection
Envi r onment al pr ot ect i on
Your new appliance is particularly energy-efficient.
Here you can find tips on how to save even more
energy when using the appliance, and how to dispose
of your appliance properly.
Saving energy
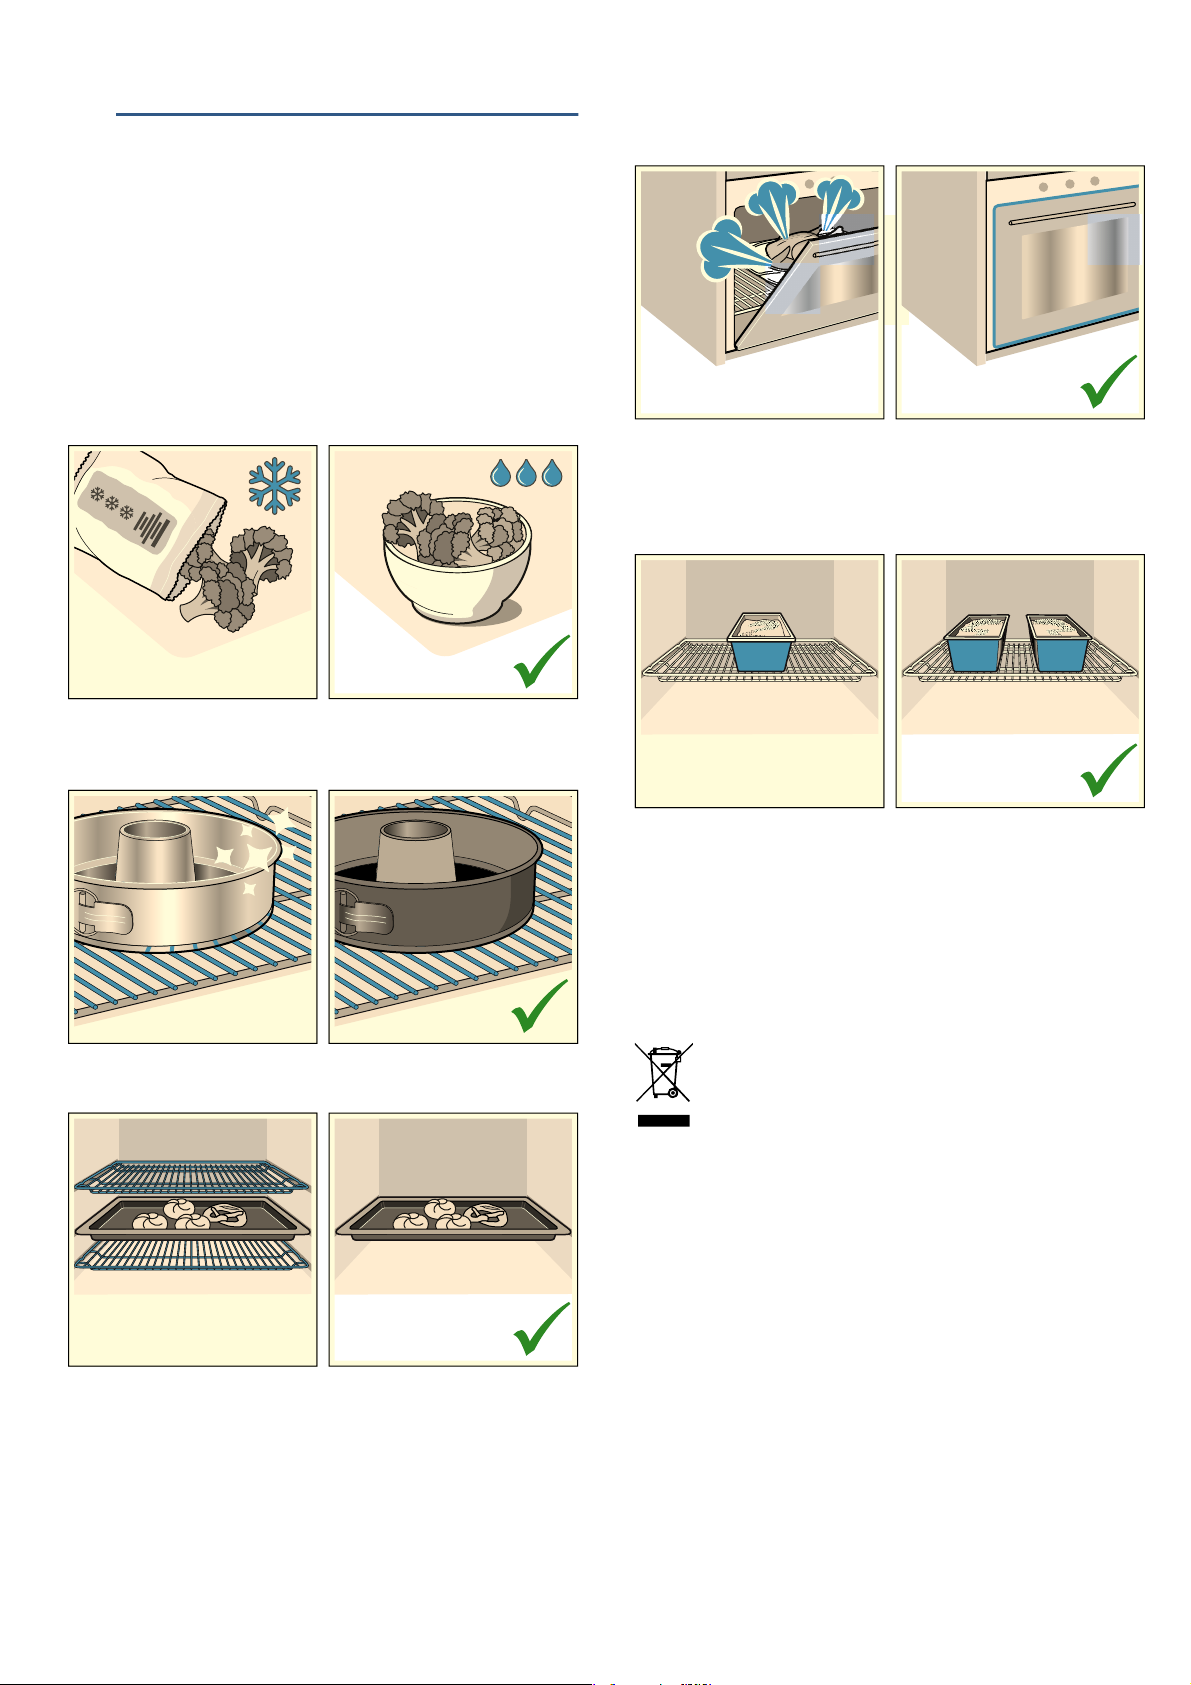
■ Only preheat the appliance if this is specified in the
recipe or in the tables in the operating instructions.
■ Leave frozen food to defrost before placing it in the
cooking compartment.
■ Open the appliance door as infrequently as possible
when the appliance is in use.
■ It is best to bake several cakes one after the other.
The cooking compartment stays warm. This reduces
the baking time for the second cake. You can place
two cake tins next to each other in the cooking
compartment.
■ Use baking tins that are dark-coloured, painted black
or have an enamel coating. These absorb the heat
particularly well.
■ Remove any unnecessary accessories from the
cooking compartment.
■ For longer cooking times, you can switch the
appliance off 10 minutes before the end of the
cooking time and use the residual heat to finish
cooking.
Environmentally-friendly disposal
Dispose of packaging in an environmentally-friendly
manner.
This appliance is labelled in accordance with
European Directive 2012/19/EU concerning
used electrical and electronic appliances
(waste electrical and electronic equipment WEEE). The guideline determines the
framework for the return and recycling of used
appliances as applicable throughout the EU.
6
Page 7
Getting to know your appliance en
*Getting to know your
appliance
Gett i ng to know your appl i ance
In this section, we will explain the indicators and
controls. You will also find out about the various
functions of your appliance.
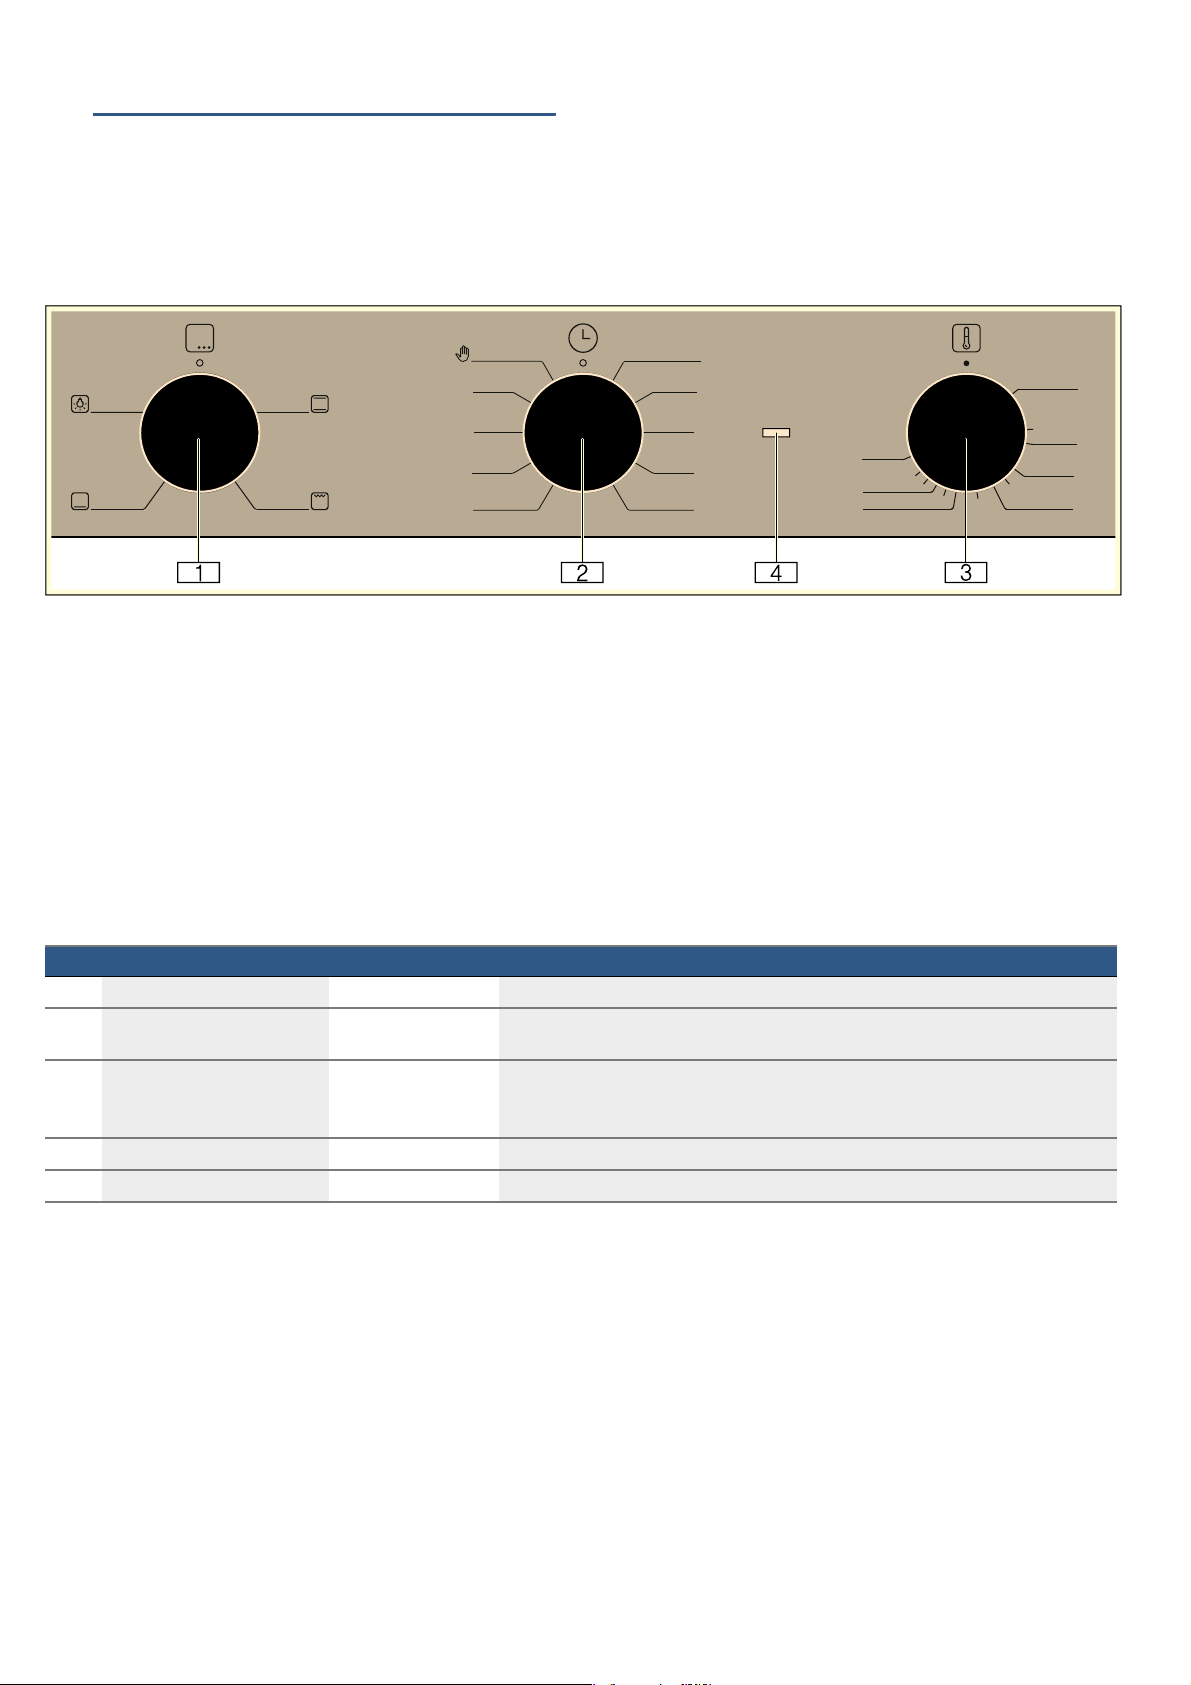
Function selector
(
Use the function selector to set the type of heating
or other functions.
You can turn the function selector clockwise or
anti-clockwise from the zero setting.
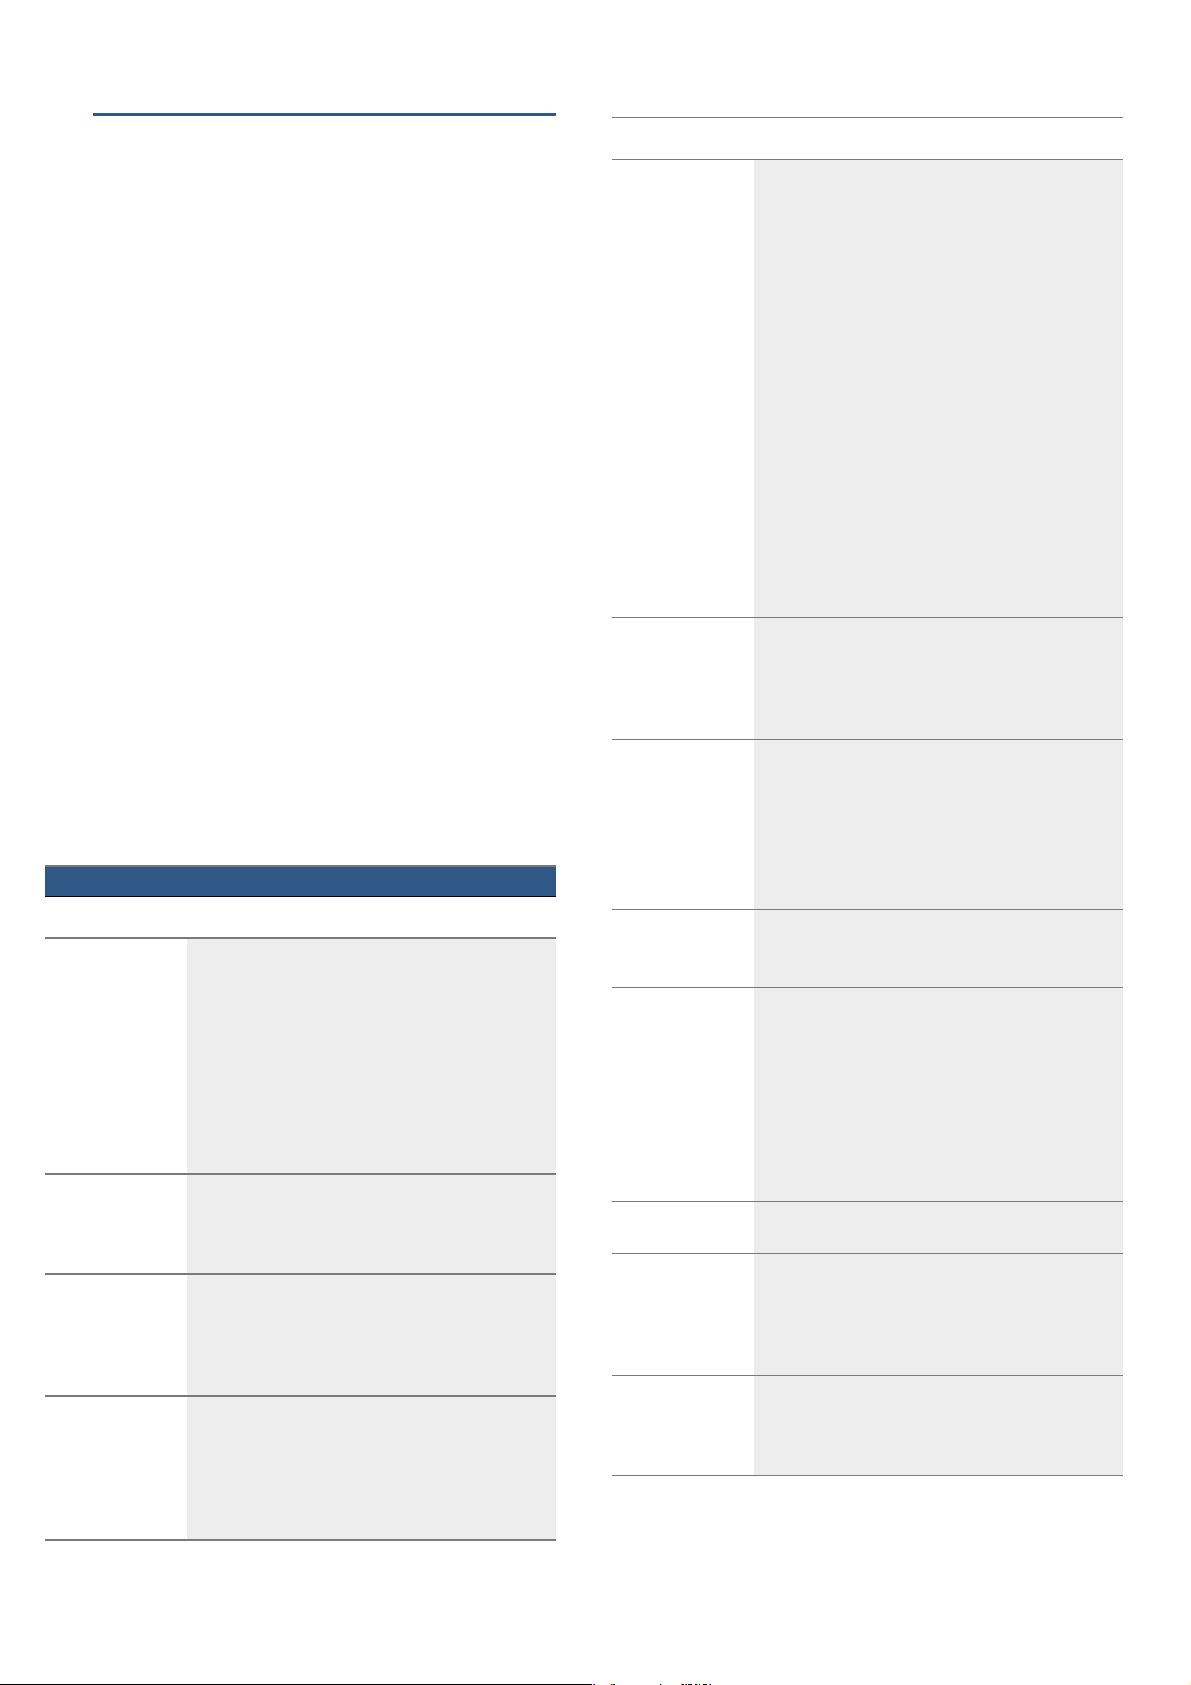
Time selector
0
You can use the time selector to set the duration
of the operation or use it as a short-term timer.
Note: Depending on the appliance model, individual
details and colours may differ.
Control panel
You can set your appliance's various functions on the
control panel. Below, you will see an overview of the
control panel and the layout of the controls.
Temperature selector
8
Use the temperature selector to set the
temperature for the heating function.
You can turn the temperature selector clockwise
and anti-clockwise.
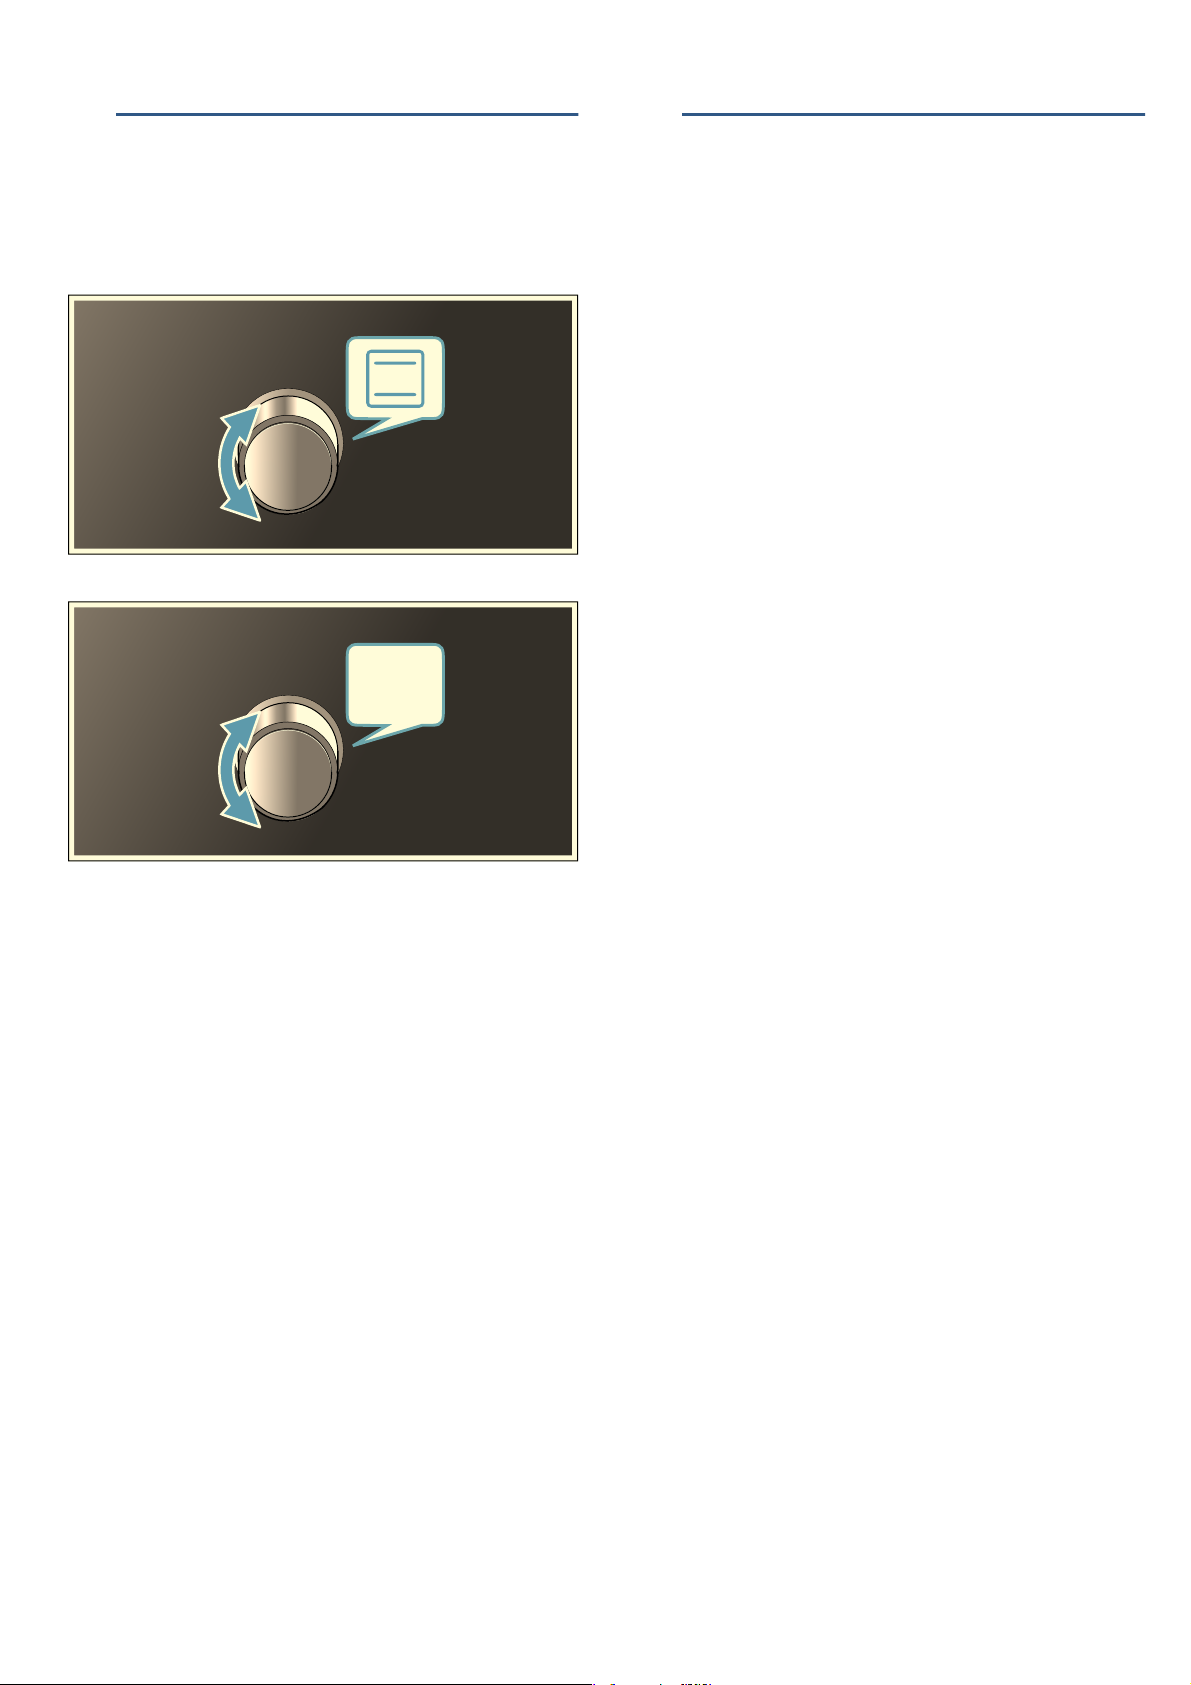
Temperature control indicator
@
Types of heating and functions
Use the function selector to set the types of heating and
other functions.
Heating function Temperature/setting Use
"Off" position - In this position, the oven is switched off.
Û
Bottom heating 50-250 °C Use when you want to cook the food for a little longer. Heat is emitted only from
$
below.
Full-surface grill 50-250 °C For grilling flat items, such as steaks or sausages, for making toast, and for browning
(
food.
The whole area below the grill element becomes hot.
Top/bottom heating 50-250 °C For cakes, bakes and lean joints. Heat is emitted evenly from above and below.
%
Interior lighting - Switches on the interior lighting.
^
--------
To make sure you always use the right type of heating
to cook your food, we have explained the differences
and applications below.
7
Page 8
en Accessories
Time selector
You can use the time selector to set the cooking time or
use it as a short-term timer. In order to not set cooking
time, set the time selector to >
Temperature selector
Use the temperature selector to set the temperature.
Temperature control indicator
When the appliance is heating, the temperature control
indicator lights up. It goes out during pauses in heating.
When you are preheating the appliance, the optimum
time to place your food in the cooking compartment is
when the temperature control indicator first goes out.
Cooking compartment functions
Some functions make your appliance easier to use.
This, for example, enables the cooking compartment to
be well lit and a cooling fan to prevent the appliance
from overheating.
Interior lighting
The interior lighting switches on as soon as the
operation starts. Once the operation is complete, the
lighting switches off.
To switch on the interior lighting when the appliance is
not in operation, turn the function selector to ^.
Cooling fan
The cooling fan switches on and off as required. The
warm air escapes above the door.
_Accessories
Acc es so r i es
Your appliance is accompanied by a range of
accessories. Here, you can find an overview of the
accessories included and information on how to use
them correctly.
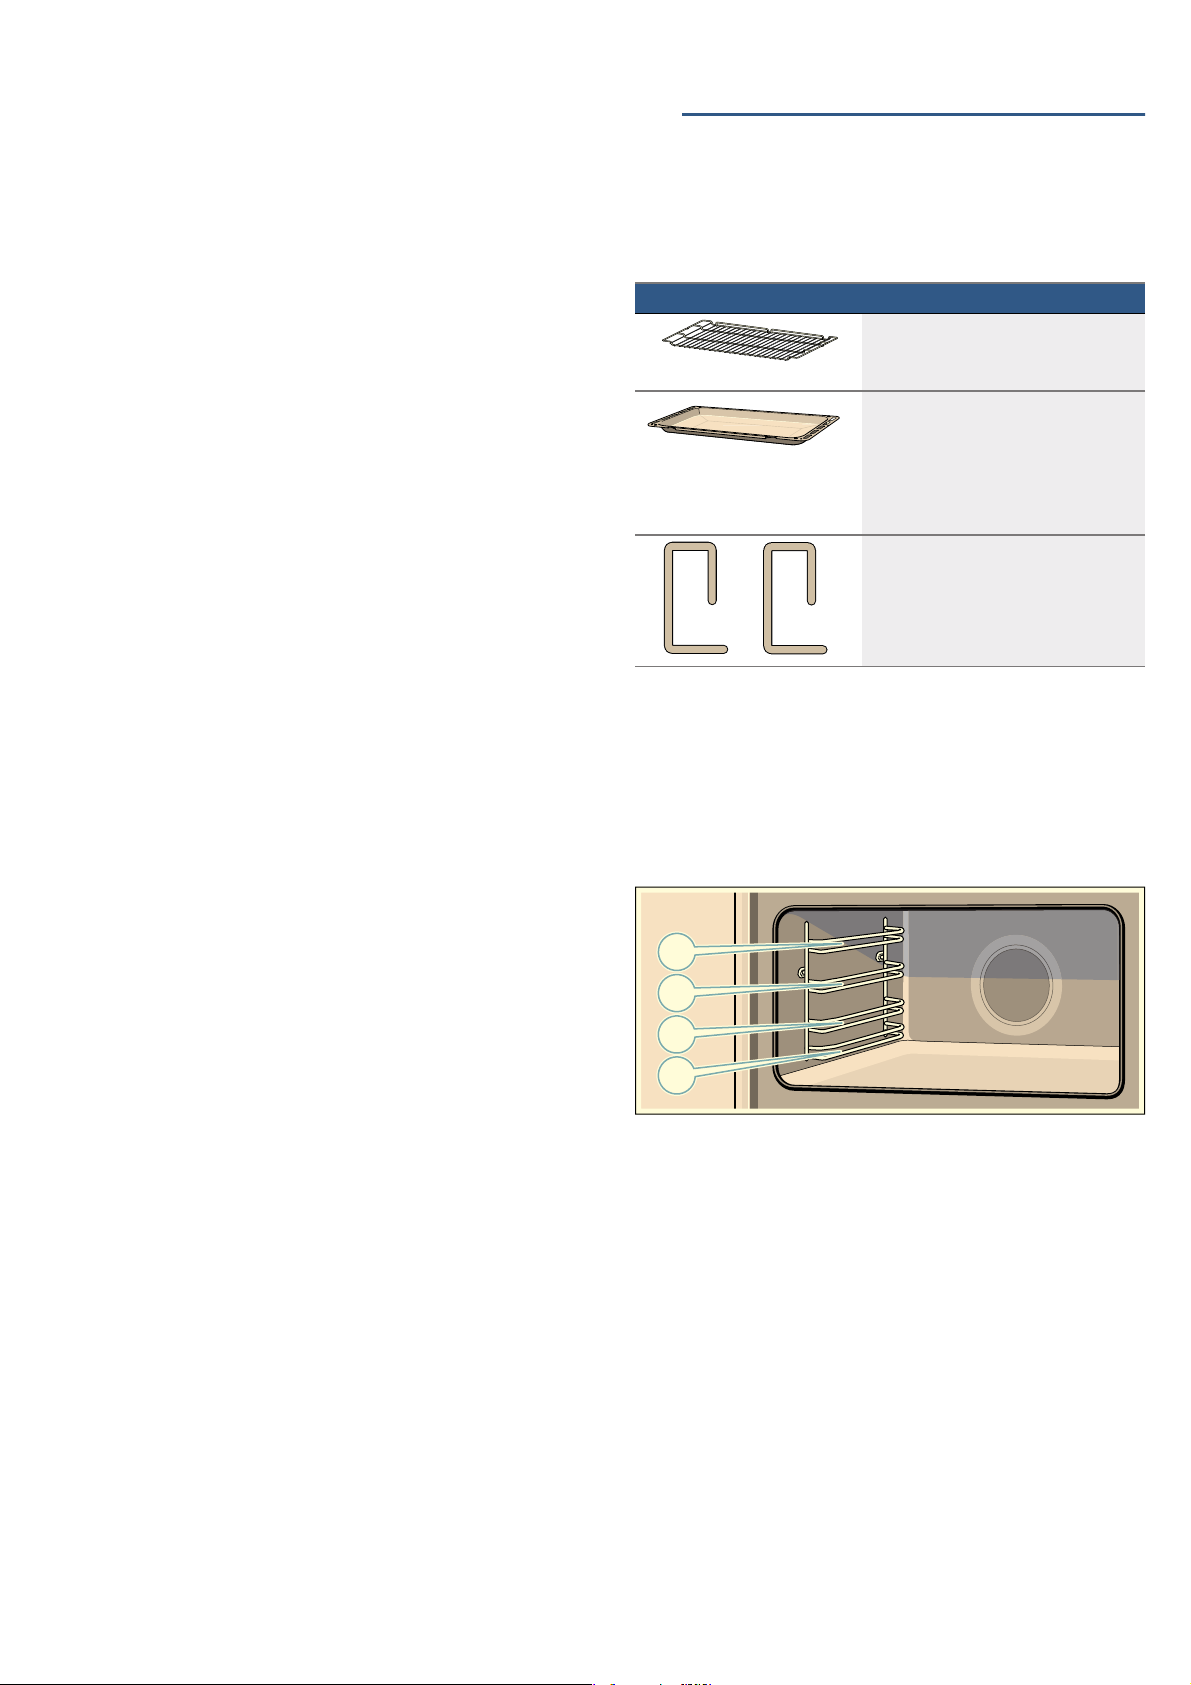
Accessories Description
Baking and roasting shelf
For cookware, cake tins, joints of
meat, grilled items and frozen food.
Universal pan
For moist cakes, pastries, frozen
meals and large roasts. The universal
pan can be used to catch dripping fat
when you are grilling directly on the
wire rack.
Locking pins
For locking the hinges.
--------
Shelf positions
The baking tray and the baking and roasting shelf can
be moved into four different heights within the cooking
compartment. Always insert them as far as they will go
so that the accessories do not touch the door panel.
Ensure that you always insert the accessories into the
cooking compartment the right way round.
Caution!
Do not cover the ventilation slots, otherwise the oven
will overheat.
To cool the cooking compartment more quickly after
operation, the cooling fan continues to run for a certain
period afterwards.
:Warning – Risk of fire!
Under no circumstances should a roasting tin, baking
tray, frying pan or any other form of cookware be
placed directly on the oven floor. This causes the floor
of the appliance to overheat and can seriously damage
the appliance.
Locking function
The accessories can be pulled out approximately
halfway before they lock in place.The locking function
prevents the accessories from tilting when they are
pulled out.The accessories must be inserted into the
cooking compartment correctly for the tilt protection to
work properly.
8
Page 9
Before using for the first time en
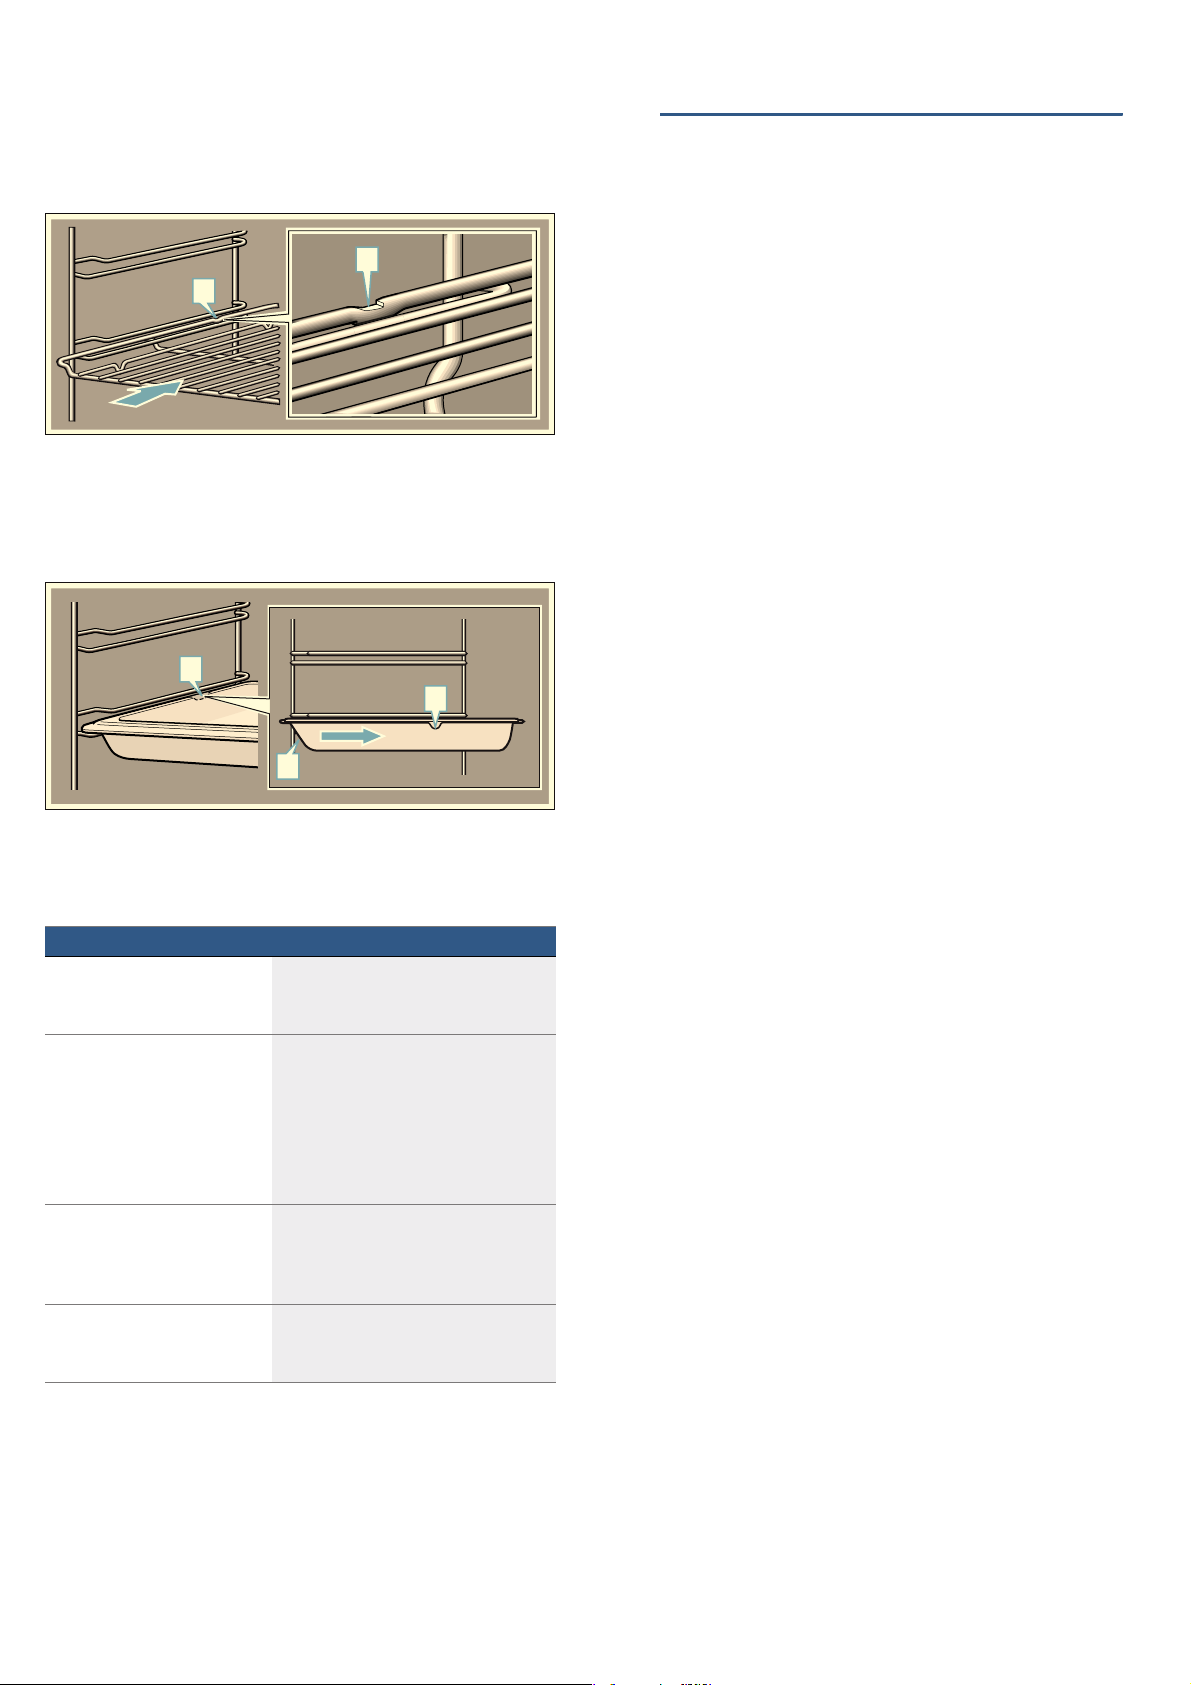
When inserting the wire rack, ensure that the lug
‚ is at
the rear and is facing downwards. The open side must
be facing the appliance door and the curvature must be
at the bottom (i.e. ¾).
D
D
When inserting baking trays, ensure that the lug ‚ is at
the rear and is facing downwards. The sloping edge of
the accessory ƒ must be facing towards the appliance
door.
Example in the picture: Universal pan
D
D
E
Special accessories
You can buy accessories from the after-sales service.
Accessories Description
Enamelled baking tray For tray bakes and small baked items.
After-sales service number:
11012235
Universal pan For moist cakes, pastries, frozen
meals and large roasts.
The universal pan can be used to
catch dripping fat when you are grilling directly on the wire rack.
After-sales service number:
11012236
Baking and roasting shelf For cookware, cake tins, joints of
meat, grilled items and frozen food.
After-sales service number:
00776605
Telescopic shelf set Telescopic shelf set for one level.
After-sales service number:
--------
12006236
KBefore using for the first
time
Bef o r e usi ng for the first time
In this section, you can find out what you must do
before using your oven to prepare food for the first time.
Remove the appliance packaging and dispose of it
appropriately.
Baking out the oven
Precleaning the oven
1. Remove the accessories and the shelf supports from
the cooking compartment. ~ "Rails" on page 12
2. Completely remove any leftover packaging, e.g.
small pieces of polystyrene, from the cooking
compartment.
3. Some parts are covered with a protective film.
Remove this scratch protection film.
4. Clean the outside of the appliance with a soft, damp
cloth.
5. Clean the cooking compartment with hot soapy
water.
Heating up the oven
To remove the new cooker smell, heat up the oven
when it is empty and closed.
Note: Make sure that there is no leftover packaging,
such as polystyrene pellets, in the cooking
compartment. Before heating up the appliance, wipe
the smooth surfaces in the cooking compartment with a
soft, damp cloth.Keep the kitchen ventilated while the
appliance is heating.
1. Turn the function selector to %.
2. Turn the temperature selector to the maximum
temperature.
3. Switch the oven off after 1 hour.
Note: When the appliance is heating up for the first
time, you may hear crackling noises coming from the
oven.
Recleaning the oven
1. Clean the cooking compartment with hot soapy
water.
2. Refit the hook-in racks.
3. If necessary, clean the door panels. ~ "Appliance
door" on page 13
Cleaning the accessories
Before using the accessories, clean them thoroughly
using a cloth and warm soapy water.
9
Page 10
en Operating the appliance
&
1Operating the appliance
Operat i ng the appl i ance
Switching the oven on and off
Switching on the oven
1. Use the function selector to set the heating function.
2. Use the temperature selector to set the temperature.
3. Use the time selector to set the cooking time or
select > to not set any cooking time.
The oven then begins to heat.
OTime-setting options
Ti me-set t i ng opt i ons
Setting the timer
The short-term timer has no effect on how the oven
works. The short-term timer duration can be set from
5to 90minutes. The appliance must be in standby
mode to do this.
Use the time selector to set the required cooking time.
An audible signal sounds once the time has elapsed.
Note: To stop the timer counting down, set the
remaining time to zero.
Setting the cooking time
You can set the cooking time for your food on the
appliance. This prevents the food from accidentally
being cooked for too long, and means that you do not
have to stop what you are doing to switch off the oven.
1. Set the type of heating and the temperature you
require.
2. Use the time selector to set the required cooking
time.
Notes
– The cooking time can be set to between 5and
90 minutes.
– In order to not set a cooking time, set the time
selector to >.
The oven starts.
3. An audible signal sounds once the time has
elapsed. Turn the function selector to the zero
setting.
Note: The temperature control indicator shows the
current status of the heating-up phase.
Changing settings
The heating function and temperature or grill setting can
be changed at any time using the relevant selector.
Switching off the oven
Turn the function selector to the "Off" position.
10
Page 11
Cleaning en
DCleaning
Cleani ng
With good care and cleaning, your appliance will retain
its appearance and remain fully functioning for a long
time to come. We will explain here how you should
correctly care for and clean your appliance.
:Warning – Risk of electric shock!
Do not use any high-pressure cleaners or steam
cleaners, which can result in an electric shock.
:Warning – Risk of burns!
The appliance becomes very hot. Never touch the
interior surfaces of the cooking compartment or the
heating elements. Always allow the appliance to cool
down. Keep children at a safe distance.
Suitable cleaning agents
Observe the following information to ensure that the
different surfaces are not damaged by using the wrong
type of cleaning agent.
Do not use any of the following
on the oven:
■ Any harsh or abrasive cleaning agents,
■ Cleaning agents with a high concentration of
alcohol,
■ Hard scouring pads or sponges,
■ High-pressure cleaners or steam cleaners.
Wash new sponge cloths thoroughly before use.
Area Cleaning
Appliance exterior
Stainless steel
front
Control panel Hot soapy water:
Door panels Hot soapy water:
Door handle Hot soapy water:
Hot soapy water:
Clean with a dish cloth and then dry with a soft
cloth.
Remove flecks of limescale, grease, starch and
albumin (e.g. egg white) immediately. Corrosion
can form under such flecks.
Special stainless steel cleaning products suitable
for hot surfaces are available from our after-sales
service or from specialist retailers. Apply a very
thin layer of the cleaning product with a soft cloth.
Clean with a dish cloth and then dry with a soft
cloth.
Do not use glass cleaner or a glass scraper.
Clean with a dish cloth and then dry with a soft
cloth.
Do not use a glass scraper or a stainless steel
scouring pad.
Clean with a dish cloth and then dry with a soft
cloth.
If descaler comes into contact with the door handle, wipe it off immediately. Otherwise, any stains
will not be able to be removed.
Appliance interior
Enamelled surfaces
Hot soapy water or a vinegar solution:
Clean with a dish cloth and dry with a soft cloth.
Soften baked-on food remnants with a damp cloth
and soapy water. Use stainless steel wire wool or
oven cleaner to remove stubborn dirt.
Caution!
Never use oven cleaner in the cooking compartment when it is still warm.This may damage the
enamel. Remove all food remnants from the cooking compartment and the appliance door before
you next heat up the appliance.
Leave the cooking compartment open to dry after
cleaning it.
It is best to clean the enamelled surfaces along
with the rest of the cooking compartment.
Note: Food residues can cause white deposits to
form. These are harmless and do not affect how
the appliance works.
Remove using lemon juice if required.
Glass cover for
the interior lighting
Hot soapy water:
Clean with a dish cloth and then dry with a soft
cloth.
If the cooking compartment is heavily soiled, use
oven cleaner.
Door panels Hot soapy water:
Clean with a dish cloth and dry with a soft cloth.
Do not use a glass scraper or a stainless steel
scouring pad.
It is best to clean the door panels along with the
rest of the cooking compartment. ~ "Cleaning
the cooking compartment" on page 12
Door seal
Do not remove.
Hot soapy water:
Clean with a dish cloth.
Do not scour.
Door cover made from stainless steel:
Use stainless steel cleaner. Follow the manufacturers' instructions. Do not use stainless steel
care products.
made from plastic:
Clean using hot soapy water and a dish cloth. Dry
with a soft cloth. Do not use glass cleaner or a
glass scraper.
Remove the door cover for cleaning.
Rails Hot soapy water:
Soak and clean with a dish cloth or brush.
Pull-out system Hot soapy water:
Clean with a dish cloth or a brush.
Do not remove the lubricant while the pull-out rails
are pulled out – it is best to clean them when they
are pushed in. Do not clean in the dishwasher.
Accessories Hot soapy water:
Soak and clean with a dish cloth or brush.
If there are heavy deposits of dirt, use a stainless
steel scouring pad.
--------
11
Page 12

en Rails
Notes
■ Slight differences in colour on the front of the
appliance are caused by the use of different
materials, such as glass, plastic and metal.
■ Shadows on the door panels, which look like
streaks, are caused by reflections made by the
interior lighting.
■ Enamel is baked on at very high temperatures.This
can cause some slight colour variation. This is
normal and does not affect operation.
The edges of thin trays cannot be completely
enamelled. As a result, these edges can be rough.
This does not impair the anti-corrosion protection.
Keeping the appliance clean
Always keep the appliance clean and remove dirt
immediately so that stubborn deposits of dirt do not
build up.
:Warning – Risk of fire!
Loose food remnants, fat and meat juices may catch
fire. Before using the appliance, remove the worst of the
food remnants from the cooking compartment, heating
elements and accessories.
Tips
■ Clean the cooking compartment after each use. This
will ensure that dirt cannot be baked on.
■ Always remove flecks of limescale, grease, starch
and albumin (e.g. egg white) immediately.
■ Use the universal pan for baking very moist cakes.
■ Use suitable ovenware for roasting, e.g. a roasting
dish.
pRails
Rai l s
Detaching the shelf supports
The shelf supports are each fixed to the side panels of
the cooking compartment at three points.
1. Grip the front of the shelf support and pull it round to
the middle of the cooking compartment.
The front hook of the shelf support will come out of
the hole.
2. Swing the shelf support round further and pull it out
of the rear holes in the side panel.
3. Remove the shelf supports from the cooking
compartment.
D
Refitting the shelf supports
1. Insert the hooks of the shelf support into the rear
holes in the side panel.
2. Push the front hook of the shelf support into the
hole.
E
Cleaning the cooking compartment
1. Pour 0.4litres of water into the centre of the cooking
compartment floor.
2. Set the $ heating function.
3. Use the temperature controller to set a temperature
of 50 °C.
4. Switch off the appliance after 18minutes.
5. Allow the appliance to cool down.
6. Clean the cooking compartment with a cloth.
:Warning – Risk of burns!
The appliance becomes very hot. Never touch the
interior surfaces of the cooking compartment or the
heating elements. Always allow the appliance to cool
down. Keep children at a safe distance.
12
Page 13

Appliance door en
qAppliance door
Appliance door
With good care and cleaning, your appliance will retain
its appearance and remain fully functional for a long
time to come. This will tell you how to clean the
appliance door.
Removing and installing the door panels
To facilitate cleaning, you can remove the glass panels
from the oven door.
Removing the door panels
1. Open the oven door fully.
2. Lock the two hinges on the left and right using the
locking pin.
Note: The locking pins must be fully inserted into the
holes in the hinges.
Removing and fitting the appliance door
If the oven is very heavily soiled, the oven door can be
removed for easier cleaning. Normally, however, this is
not necessary.
Removing the appliance door
1. Open the oven door fully.
2. Lock the two hinges on the left and right using the
locking pin (a).
Note: The locking pins must be fully inserted into the
holes in the hinges.
3. Take hold of the sides of the oven door with both
hands and close the oven door by approx. 30° (b).
DE
4. Lift the oven door slightly and pull it out.
Note: Do not close the oven door fully,otherwise the
hinges could become bent and the enamel could be
damaged.
3. Lift the bottom of the inner panel slightly until the
fastening pins come out of the holder (1).
4. Carefully lift the top of the inner panel until the
fastening pins come out of the holder (2).
5. Remove the inner panel.
Clean the panels with glass cleaner and a soft cloth.
:Warning – Risk of injury!
Scratched glass in the appliance door may develop into
a crack. Do not use a glass scraper, sharp or abrasive
cleaning aids or detergents.
Fitting the door panels
1. Reinsert the inner panel.
Note: All four fastening pins must engage in the
holders provided for them.
2. Remove the locking pins and close the oven door.
Fitting the appliance door
1. Take hold of the sides of the oven door with both
hands.
2. Slide the hinges into the slots in the oven (a).
Note: The notch at the bottom of the hinges must
engage into the frame of the oven (b).
ED
3. Lower the door.
4. Remove the locking pins.
:Warning – Risk of injury!
If the oven door falls out accidentally or a hinge snaps
shut, do not reach into the hinge. Call the after-sales
service.
:Warning – Risk of injury!
The door may not close properly if the door hinges have
not engaged correctly. This will allow heat to escape
and the parts of the appliance may become very hot. To
prevent this from happening, remove the door again.
Then refit the door as shown in the drawing, making
sure that the groove on the underside of the hinges
engages in the oven frame.
13
Page 14

en Trouble shooting
3Trouble shooting
Troubl e shoot i ng
Fault Possible cause Notes/remedy
The appliance does not work The plug is not plugged into the mains Connect the appliance to the power supply
Power cut Check whether other kitchen appliances are working
The circuit breaker is faulty Check in the fuse box to make sure that the fuse for
the appliance is OK
The appliance cannot be started The appliance door is not fully closed Close the appliance door
The appliance is not switched off Switch the appliance off and back on again
The oven lighting has failed. Oven light is faulty
Replace the oven light.
(See section "Replacing oven light")
All food that is cooked in the oven
Thermostat faulty. Call the after-sales service.
burns within an extremely short
period of time.
Door panels are steamed up. This is normal and results from differences in temper-
--------
Replacing the oven light bulb
If the oven light bulb fails, it must be replaced.
Replacement heat-resistant bulbs can be obtained from
the after-sales service or from specialist retailers.
ature.
8. Refit the glass cover for the oven light bulb.
9. Refit the shelf supports.
10. Remove the tea towel.
11. Switch the circuit breaker back on.
12. Check that the oven lighting is working again.
Please specify the E number and FD number of your
appliance. Do not use any other type of bulb.
:Warning – Risk of electric shock!
When replacing the cooking compartment bulb, the
bulb socket contacts are live. Before replacing the bulb,
unplug the appliance from the mains or switch off the
circuit breaker in the fuse box.
1. Allow the cooking compartment to cool down.
2. Open the appliance door.
3. Place a tea towel in the cooking compartment to
prevent damage.
4. Remove the shelf supports.
5. Remove the glass cover.To do this, open the glass
cover from the front with your hand. Should you
experience difficulties removing the glass cover, use
a spoon to help you.
6. Remove the oven light bulb.
Heat the appliance up to 100°C and then switch it
back off after 5minutes.
7. Replace the oven light bulb with a bulb of the same
type:
Voltage: 230V;
Power: 40W;
Fitting: G9;
Temperature resistance: 300°C
14
Page 15

4Customer service
Cus t omer ser vice
Our after-sales service is there for you if your appliance
needs to be repaired. We will always find an
appropriate solution, also in order to avoid after-sales
personnel having to make unnecessary visits.
E number and FD number
When calling us, please quote the full product number
(E no.) and the production number (FD no.) so that we
can provide you with the correct advice. The rating plate
bearing these numbers can be found when you open
the appliance door.
On some appliances with a steam-assisted cooking
function, you will find the rating plate behind the control
panel.
=1U)'(1U
7\SH
To save time, you can make a note of the numbers for
your appliance and the telephone number of the aftersales service in the space below in case you need
them.
Customer service en
E no. FD no.
After-sales service O
Please note that a visit from an after-sales service
engineer is not free of charge in the event that the
appliance has been misused, even during the warranty
period.
Please find the contact data of all countries in the
enclosed customer service list.
To book an engineer visit and product advice
GB 03448928979
Calls charged at local or mobile rate.
IE 014502655
0.03 € per minute at peak. Off peak 0.0088 €
per minute.
Rely on the professionalism of the manufacturer. You
can therefore be sure that the repair is carried out by
trained service technicians who carry original spare
parts for your appliances.
15
Page 16

en Tested for you in our cooking studio
JTested for you in our
Tips for using your appliance
Here you will find a selection of tips on ovenware and
cooking studio
Test e d for you in our cook i ng st udio
Note: A lot of steam can build up in the cooking
compartment when cooking food.
Your appliance is very energy-efficient and radiates very
little heat to its surroundings during operation. Due to
the high difference in temperature between the
appliance interior and the external parts of the
appliance, condensation may build up on the door,
control panel or adjacent kitchen cabinet panels. This is
a normal physical phenomenon. Condensation can be
reduced by preheating the oven or opening the door
carefully.
Baking tips
You want to find out whether the cake
is completely cooked in the middle.
The cake collapses. Next time, use less liquid. Alternatively, set the temperature to be 10°C lower and extend the baking time.
The cake has risen in the middle but
is lower around the edge.
The fruit juice overflows. Next time, use the universal pan.
Small baked items stick to one
another during baking.
The cake is too dry. Set the temperature 10°C higher and shorten the baking time.
The cake is generally too light in colour.
The cake is too light on top, and too
dark underneath.
The cake is too dark on top, and too
light underneath.
Cakes baked in a tray or tin are too
brown at the back.
The whole cake is too dark. Select a lower temperature next time and extend the baking time if necessary.
The cake is unevenly browned. Select a slightly lower temperature.
You were baking on several levels.
The items on the top baking tray are
darker than those on the lower baking
tray.
The cake looks good, but is not
cooked properly in the middle.
The cake cannot be turned out of the
dish when it is turned upside down.
Push a cocktail stick into the highest point on the cake. If the cocktail stick comes out clean with no dough residue, the cake is ready.
Adhere to the specified ingredients and preparation instructions in the recipe.
Only grease the base of the springform cake tin. After baking, loosen the cake carefully with a knife.
There should be a gap of approx. 2cm around each item. This gives enough space for the baked items to
expand well and brown on all sides.
If the shelf position and the cookware are correct, then you should increase the temperature if necessary or
extend the baking time.
Bake the cake one level higher in the oven the next time.
Bake the cake one level lower in the oven the next time. Select a lower temperature and extend the baking
time.
Place the baking tray in the middle of the accessories, not directly against the back wall.
Protruding greaseproof paper can affect the air circulation. Always cut greaseproof paper to size.
Ensure that the baking tin does not stand directly in front of the openings in the cooking compartment back
wall.
When baking small items, you should use similar sizes and thicknesses wherever possible.
Always select hot air when baking on several levels. Baked items that are placed into the oven on trays or in
baking tins/dishes at the same time will not necessarily be ready at the same time.
Use a lower temperature and bake slightly longer; if necessary, add slightly less liquid. For cakes with a moist
topping, bake the base first. Sprinkle it with almonds or breadcrumbs and then place the topping on top.
Allow the cake to cool down for 5to 10minutes after baking. If it still sticks, carefully loosen the cake around
the edges again using a knife. Turn the cake tin upside down again and cover it several times with a cold, wet
cloth. Next time, grease the baking tin/dish and sprinkle with breadcrumbs.
preparation methods.
Notes
■ Use the accessories provided. Additional
accessories may be obtained as special accessories
from specialist retailers or from the after-sales
service.
Before using the oven, remove any unnecessary
accessories and ovenware from the cooking
compartment.
■ Always use an oven cloth or oven gloves when
taking accessories or cookware out of the cooking
compartment.
16
Page 17

Tips for Roasting and Braising
Tested for you in our cooking studio en
The roast is too dark and the crackling is burned in places, and/or the
Check the shelf position and temperature. Select a lower temperature the next time and reduce the roasting
time if necessary.
roast is too dry.
The crackling is too thin. Increase the temperature or switch on the grill briefly at the end of the roasting time.
The roast looks good but the juices
Next time, use a smaller roasting dish and add more liquid if necessary.
are burnt.
The roast looks good but the juices
Next time, use a larger roasting dish and add less liquid if necessary.
are too clear and watery.
The meat gets burned during braising.
Acrylamide in foodstuffs
Acrylamide is mainly produced in grain and potato
The roasting dish and lid must fit together well and close properly.
Reduce the temperature and add more liquid when braising if necessary.
crisps, chips, sliced bread, bread rolls, bread or fine
baked goods (biscuits, gingerbread, spiced biscuit).
products prepared at high temperatures, such as potato
Tips for keeping acrylamide to a minimum
General ■ Keep cooking times as short as possible.
■ Cook food until it is golden brown, but not too dark.
■ Large, thick pieces of food contain less acrylamide.
Baking With top/bottom heating at max. 200°C.
With hot air at max. 180°C.
Biscuits With top/bottom heating at max. 190°C.
With hot air at max. 170°C.
Egg or egg yolk reduces the production of acrylamide.
Oven chips Spread out a single layer evenly on the baking tray. Cook at least 400g at once on a baking tray so that
the chips do not dry out.
17
Page 18

ﺎﻨﺑ صﺎﺨﻟا ﻲﻬﻄﻟا ﻮﻳدﻮﺘﺳ ﻲﻓ ﺎهرﺎﺒﺘﺧا ﻢﺗ ﻲﺘﻟا قﺎﺒﻃﻷاar
ﺔﺋدﺎه رﺎﻧ ﻰﻠﻋ ﻲﻬﻄﻟاو ﺮﻴﻤﺤﺘﻟا صﻮﺼﺨﺑ ﺢﺋﺎﺼﻧ
ﺮﻴﻤﺤﺘﻟا ةﺪﻣ ﺮﻴﺼﻘﺗو ﺎﻴﺒﺴﻧ ﻞﻗأ ةراﺮﺣ ﺔﺟرد رﺎﻴﺘﺧﺎﺑ ﺔﻣدﺎﻘﻟا ةﺮﻤﻟا ﻲﻓ ﻢﻗ .ةراﺮﺤﻟا ﺔﺟردو لﺎﺧدﻹا ىﻮﺘﺴﻣ ﻦﻣ ﻖﻘﺤﺗ
.موﺰﻠﻟا ﺪﻨﻋ
.ﻞﺋﺎﺴﻟا ﻦﻣ ﺪﻳﺰﻤﻟا موﺰﻠﻟا ﺪﻨﻋ ﻒﺿأو ﺎﻴﺒﺴﻧ ﺮﻐﺻأ ﺮﻴﻤﺤﺗ ءﺎﻧإ ﺔﻣدﺎﻘﻟا ةﺮﻤﻟا ﻲﻓ ﺮﺘﺧا
.ﻞﺋﺎﺴﻟا ﻦﻣ ﻞﻗأ ﺔﻴﻤآ موﺰﻠﻟا ﺪﻨﻋ ﻒﺿأو ﺎﻴﺒﺴﻧ ﺮﺒآأ ﺮﻴﻤﺤﺗ ءﺎﻧإ ﺔﻣدﺎﻘﻟا ةﺮﻤﻟا ﻲﻓ ﺮﺘﺧا
.اﺪﻴﺟ نﺎﻘﻠﻐﻳو ﻦﻴﻤﺋاﻮﺘﻣ ءﺎﻄﻐﻟاو ﺮﻴﻤﺤﺘﻟا ءﺎﻧإ نﻮﻜﻳ نأ ﺐﺠﻳ
.ﺔﺋدﺎه رﺎﻧ ﻰﻠﻋ ﻲﻬﻄﻟا ءﺎﻨﺛأ ﻞﺋﺎﺴﻟا ﻦﻣ ىﺮﺧأ ﺔﻴﻤآ ﺔﺟﺎﺤﻟا ﺪﻨﻋ ﻒﺿأو ةراﺮﺤﻟا ﺔﺟرد ﻞﻴﻠﻘﺘﺑ ﻢﻗ
،ﻞﻴﺒﺠﻧﺰﻟا ﺰﺒﺧو ،ﺖﻳﻮﻜﺴﺒﻟا) ﺔﻘﻴﻗﺮﻟا تازﻮﺒﺨﻤﻟا وأ ﺰﺒﺨﻟاو فﻮﻔﻠﻤﻟا ﺰﺒﺨﻟاو
.(ﻞﺒﺘﻤﻟا ﺖﻳﻮﻜﺴﺒﻟاو
ﻲﻓ ةﺪﻌُﻤﻟا ﺲﻃﺎﻄﺒﻟاو بﻮﺒﺤﻟا تﺎﺠﺘﻨﻣ ﻲﻓ ﻲﺴﻴﺋر ﻞﻜﺸﺑ ﺪﻴﻣﻼﻳﺮآﻷا ﺞﺘﻨﻳ
ﺖﺳﻮﺘﻟا ﺰﺒﺨﻟاو يﺮﻓ مﻮﺒﻟاو ﺲﻃﺎﻄﺒﻟا ﻖﺋﺎﻗر ﻞﺜﻣ ،ﺔﻴﻟﺎﻋ ةراﺮﺣ تﺎﺟرد
مﺎﻌﻄﻟا ﺮﻴﻀﺤﺗ ﺪﻨﻋ ﺪﻴﻣﻼﻳﺮآﻷا ﻦﻣ ﺪﺤﻠﻟ ﺢﺋﺎﺼﻧ
■.ﺔﻳﺎﻐﻠﻟ ﺎﻤﺗﺎﻗ ﺲﻴﻟو ﻲﺒهذ ﻲﻨﺑ ﺎﻬﻧﻮﻟ ﺢﺒﺼﻳ ﻰﺘﺣ تﺎﺒﺟﻮﻟا ﻲﻬﻄﺑ ﻢﻗ
■.ﻞﻗأ ﺪﻴﻣﻼﻳﺮآأ ﻰﻠﻋ يﻮﺘﺤﺗ مﺎﻌﻄﻟا ﻦﻣ ةﺮﻴﺒﻜﻟا ﻊﻄﻘﻟا
180°.م
ﻰﺼﻗأ ﺪﺤﺑ ﻦﺧﺎﺴﻟا ءاﻮﻬﻟﺎﺑ
ﻰﺼﻗأ ﺪﺤﺑ ﻦﺧﺎﺴﻟا ءاﻮﻬﻟﺎﺑ
170°.م
.ﺪﻴﻣﻼﻳﺮآﻷا ةدﺎﻣ جﺎﺘﻧإ ﻦﻣ ﻞﻠﻘﻳ ﺾﻴﺒﻟا رﺎﻔﺻ وأ ﺾﻴﺒﻟا
.يﺮﻓ مﻮﺒﻟا ﺲﻃﺎﻄﺑ ﻒﺠﺗ ﻻ
ﺔﻳﺎﻐﻠﻟ ﺎًﻤﺗﺎﻗ ﺎًﻴﻨﺑ ﺎًﻧﻮﻟ ﻢﺤﻠﻟا ﺐﺴﺘآا
ﺎﻬﺤﻄﺳ ﻦﻣ ﻊﺿاﻮﻤﻟا ﺾﻌﺑ ﺖﻗﺮﺘﺣاو
.ﺔﻳﺎﻐﻠﻟ ﺎﻓﺎﺟ ﻢﺤﻠﻟا ﺢﺒﺻأ وأ/و ﻲﺟرﺎﺨﻟا
.ﺔﻳﺎﻐﻠﻟ ﺔﻌﻴﻓر ةﺮﺸﻘﻟا.ﺮﻴﻤﺤﺘﻟا ةﺪﻣ ءﺎﻬﺘﻧا ﺪﻌﺑ ةﺮﻴﺼﻗ ةﺮﺘﻔﻟ ﺔﻳاﻮﺸﻟا ﻞﻴﻐﺸﺘﺑ ﻢﻗ وأ ةراﺮﺤﻟا ﺔﺟرد ةدﺎﻳﺰﺑ ﻢﻗ
ﻦﻜﻟو ،ةﺪﻴﺟ ﺔﻟﺎﺤﺑ وﺪﺒﺗ ﻢﺤﻠﻟا ﺔﻌﻄﻗ
.قﺮﺘﺤﻣ صﻮﺼﻟا
ﻦﻜﻟو ،ةﺪﻴﺟ ﺔﻟﺎﺤﺑ وﺪﺒﺗ ﻢﺤﻠﻟا ﺔﻌﻄﻗ
ﻒﻔﺨﻣو ﺔﻳﺎﻐﻠﻟ نﻮﻠﻟا ﺢﺗﺎﻓ صﻮﺼﻟا
.ﺔﻳﺎﻐﻠﻟ
قﺮﺘﺤﻳ ﺔﺋدﺎه رﺎﻧ ﻰﻠﻋ ﻲﻬﻄﻟا ﺪﻨﻋ
.ﻢﺤﻠﻟا
ﺔﻴﺋاﺬﻐﻟا داﻮﻤﻟا ﻲﻓ ﺪﻴﻣﻼﻳﺮآﻷا
ﺔﻣﺎﻋ طﺎﻘﻧ■.ﻰﻧدﻷا ﺪﺤﻟا ﻰﻟإ ﻲﻬﻄﻟا تﺎﻗوأ ﻞﻠﻗ
تازﻮﺒﺨﻤﻟا داﺪﻋإ ﻰﺼﻗأ ﺪﺤﺑ ﻲﻠﻔﺴﻟا/يﻮﻠﻌﻟا ﻦﻴﺨﺴﺘﻟﺎﺑ200°.م
ﺖﻳﻮﻜﺴﺑ ﻰﺼﻗأ ﺪﺤﺑ ﻲﻠﻔﺴﻟا/يﻮﻠﻌﻟا ﻦﻴﺨﺴﺘﻟﺎﺑ190°.م
نﺮﻔﻟﺎﺑ يﺮﻓ مﻮﺒﻟا ﺲﻃﺎﻄﺑ داﺪﻋﺈﺑ ﻢﻗ .ﺰﻴﺒﺨﻟا حﻮﻟ ﻰﻠﻋ يوﺎﺴﺘﻟﺎﺑ ﺎﻬﻨﻣ ةﺪﺣاو ﺔﻘﺒﻃ ﻊﻳزﻮﺘﺑ ﻢﻗ400 ﻰﺘﺣ ﻚﻟذو ،حﻮﻟ ﻞآ ﻰﻠﻋ ﻞﻗﻷا ﻰﻠﻋ ﻢﺟ
17
Page 19

arﺎﻨﺑ صﺎﺨﻟا ﻲﻬﻄﻟا ﻮﻳدﻮﺘﺳ ﻲﻓ ﺎهرﺎﺒﺘﺧا ﻢﺗ ﻲﺘﻟا قﺎﺒﻃﻷا
ماﺪﺨﺘﺳﻻا ﺢﺋﺎﺼﻧ
.ﺮﻴﻀﺤﺘﻟا قﺮﻃو ﻲﻬﻄﻟا ﻲﻧاوأ لﻮﺣ ﺢﺋﺎﺼﻨﻟا ﻦﻣ ﺔﻋﻮﻤﺠﻣ ﺎﻨه ﺪﺠﺗ
تﺎﻈﺣﻼﻣ
■ تﺎﻴﻟﺎﻤﻜﻟا ﻰﻠﻋ لﻮﺼﺤﻟا ﻚﻨﻜﻤﻳو .زﺎﻬﺠﻟا ﻊﻣ ةدرﻮﻤﻟا تﺎﻴﻟﺎﻤﻜﻟا مﺪﺨﺘﺳا
ءﻼﻤﻌﻟا ﺔﻣﺪﺧ ﻦﻣ وأ ﺔﺼﺼﺨﺘﻤﻟا ﺮﺟﺎﺘﻤﻟا ﻦﻣ ﺔﺻﺎﺧ تﺎﻴﻟﺎﻤﻜآ ﺔﻴﻓﺎﺿﻹا.
ﺰﻴﺣ ﻦﻣ ﻲﻧاوﻷاو ﺔﻳروﺮﻀﻟا ﺮﻴﻏ تﺎﻴﻟﺎﻤﻜﻟا جﺮﺧأ ،نﺮﻔﻟا ماﺪﺨﺘﺳا ﻞﺒﻗ
.ﻲﻬﻄﻟا
■ ﻦﻣ ﺔﻨﺧﺎﺴﻟا ﻲﻧاوﻷا وأ تﺎﻴﻟﺎﻤﻜﻟا جاﺮﺧإ ﺪﻨﻋ ﻲﻧاوأ ﺔﻃﻮﻓ ﺎًﻤﺋاد مﺪﺨﺘﺳا
.ﻲﻬﻄﻟا ﺰﻴﺣ
.ﺔﻔﺻﻮﻟا ﻲﻓ ةدراﻮﻟا داﺪﻋﻹا تادﺎﺷرإو ةرﻮآﺬﻤﻟا تﺎﻓﺎﺿﻹا ةﺎﻋاﺮﻣ ﻰﻠﻋ صﺮﺣا
.ﻦﻴﻜﺳ ماﺪﺨﺘﺳﺎﺑ صﺮﺤﺑ ﻚﻴﻜﻟا ﻞﺼﻓا ،ﺰﻴﺒﺨﻟا ﺪﻌﺑ .ةﺪﺑﺰﻟﺎﺑ ﺐﻧاﻮﺠﻟا ﻞﺼﻔﻟ ﺔﻠﺑﺎﻘﻟا ﻚﻴﻜﻟا ﺔﻴﻨﻴﺻ ةﺪﻋﺎﻗ ﻂﻘﻓ ﻦهدا
.تﺎﻬﺠﻟا ﻊﻴﻤﺟ ﻦﻣ ﺎهﺮﻴﻤﺤﺘﻟو ﺪﻴﺟ ﻞﻜﺸﺑ تازﻮﺒﺨﻤﻟا
.ﻰﻠﻋأ ىﻮﺘﺴﻣ ﻰﻠﻋ ﺔﻣدﺎﻘﻟا ةﺮﻤﻟا ﻲﻓ ﻚﻴﻜﻟا ﻞﺧدأ
.ﺰﻴﺒﺨﻟا ﻦﻣز ﺔﻟﺎﻃﺈﺑ ﻢﻗو ﺎﻴﺒﺴﻧ ﻞﻗأ ةراﺮﺣ ﺔﺟرد ﺮﺘﺧا .ﻰﻧدأ ىﻮﺘﺴﻣ ﻰﻠﻋ ﺔﻣدﺎﻘﻟا ةﺮﻤﻟا ﻲﻓ ﻚﻴﻜﻟا ﻞﺧدأ
.تﺎﻴﻟﺎﻤﻜﻟا ﻖﺤﻠﻣ ﻰﻠﻋ ﻒﺼﺘﻨﻤﻟا ﻲﻓ ﺎﻬﻌﺿ ﺎﻤﻧإو ،ةﺮﺷﺎﺒﻣ ﻲﻔﻠﺨﻟا راﺪﺠﻟا ﻰﻠﻋ تازﻮﺒﺨﻤﻟا داﺪﻋإ ﺔﻴﻨﻴﺻ ﻊﻀﺗ ﻻ
ﺎﻤﺋاد تازﻮﺒﺨﻤﻟا داﺪﻋإ قرو ﻊﻴﻄﻘﺘﺑ ﻢﻗ .ءاﻮﻬﻟا ﺮﻳوﺪﺗ ﻰﻠﻋ ﺮﺛﺆﻳ نأ ﻦﻜﻤﻳ زرﺎﺒﻟا تازﻮﺒﺨﻤﻟا داﺪﻋإ قرو ﺎﻀﻳأ
.ﻲﻬﻄﻟا ﺰﻴﺤﻟ ﻲﻔﻠﺨﻟا راﺪﺠﻟا تﺎﺤﺘﻓ مﺎﻣأ ةﺮﺷﺎﺒﻣ تازﻮﺒﺨﻤﻟا داﺪﻋإ ﺔﻴﻨﻴﺻ ﻊﺿو مﺪﻋ ةﺎﻋاﺮﻣ ﻰﻠﻋ صﺮﺣا
.ﻚﻤُﺴﻟاو ﻢﺠﺤﻟا ﺲﻔﻨﺑ ﻊﻄﻗ ماﺪﺨﺘﺳا نﺎﻜﻣﻹا رﺪﻗ ﻚﻴﻠﻋ ﻲﻐﺒﻨﻳ ةﺮﻴﻐﺼﻟا
ﻰﻠﻋ ﺪﺣاو ﺖﻗو ﻲﻓ ﺎﻬﻟﺎﺧدإ ﻢﺘﻳ ﻲﺘﻟا تازﻮﺒﺨﻤﻟا .تﺎﻳﻮﺘﺴﻣ ةﺪﻋ ﻰﻠﻋ ﺰﻴﺒﺨﻟا ﺪﻨﻋ ﻦﺧﺎﺴﻟا ءاﻮﻬﻟا ﻊﺿو ﺎﻤﺋاد ﺮﺘﺧا
.ﺪﺣاو ﺖﻗو ﻲﻓ ةروﺮﻀﻟﺎﺑ ﺞﻀﻨﺗ ﻻ ﻲﻧاﻮﺻ ﻲﻓ وأ حاﻮﻟأ
ﻦﻣ ﺎﻴﺒﺴﻧ ﻞﻗأ ﺔﻴﻤآ ﻒﺿأ موﺰﻠﻟا ﺪﻨﻋو ءﻲﺸﻟا ﺾﻌﺑ لﻮﻃأ ةﺪﻤﻟو ﺎﻴﺒﺴﻧ ﻰﻧدأ ةراﺮﺣ ﺔﺟرﺪﺑ تازﻮﺒﺨﻤﻟا داﺪﻋﺈﺑ ﻢﻗ
ﺰﺒﺨﻟا وأ زﻮﻠﻟﺎﺑ ﻪﺷﺮﺑ ﻢﻗ .ﻚﻴﻜﻟا ةﺪﻋﺎﻘﻟ ﻖﺒﺴﻣ داﺪﻋإ ءاﺮﺟﺈﺑ ﻻوأ ﻢﻗ ﺔﺒﻃﺮﻟا ﺔﻳﻮﻠﻌﻟا ﺔﻘﺒﻄﻟا يذ ﻚﻴﻜﻠﻟ ﺔﺒﺴﻨﻟﺎﺑ .ﻞﺋﺎﺴﻟا
ﺔﺒﻃر شﺎﻤﻗ ﺔﻌﻄﻘﺑ تاﺮﻣ ةﺪﻋ ﺔﻴﻨﻴﺼﻟا ﺔﻴﻄﻐﺘﺑ ﻢﻗو اًدﺪﺠﻣ ﻚﻴﻜﻟا ﺐﻠﻗا .ﻦﻴﻜﺳ ماﺪﺨﺘﺳﺎﺑ صﺮﺤﺑ ىﺮﺧأ ةﺮﻣ ﺐﻧاﻮﺠﻟا
.ﺎﻬﻴﻠﻋ قﻮﻗﺪﻤﻟا ﺰﺒﺨﻟا ﺮﺜﻧو ةﺪﺑﺰﻟﺎﺑ ﺔﻴﻨﻴﺼﻟا ﻦهﺪﺑ ﺔﻣدﺎﻘﻟا ةﺮﻤﻟا ﻲﻓ ﻢﻗ .ةدرﺎﺑو
ءﺎﻨﺛأ جرﺎﺨﻠﻟ ﻪﻨﻣ ﺚﻌﺒﻨﻳ ﻻو ﺔﻗﺎﻄﻟا كﻼﻬﺘﺳا ﻲﻓ ﺔﻘﺋﺎﻔﻟا ﺔﻴﻟﺎﻌﻔﻟﺎﺑ كزﺎﻬﺟ ﻢﺴﺘﻳ
ةراﺮﺤﻟا ﺔﺟرد ﻲﻓ ﺔﻴﻟﺎﻌﻟا قوﺮﻔﻠﻟ اﺮﻈﻧو .ةراﺮﺤﻟا ﻦﻣ ﻞﻴﻠﻘﻟا ىﻮﺳ ﻞﻴﻐﺸﺘﻟا
ﺐﺳﺮﺘﻳ نأ ﻦﻜﻤﻤﻟا ﻦﻤﻓ ،زﺎﻬﺠﻠﻟ ﺔﻴﺟرﺎﺨﻟا ءاﺰﺟﻷاو زﺎﻬﺠﻠﻟ ﻲﻠﺧاﺪﻟا ﺰﻴﺤﻟا ﻦﻴﺑ
ﺦﺒﻄﻤﻟا
ءﺎﻤﻟا ﻞﻴﻠﻘﺗ ﻦﻜﻤﻳو .ﺔﻌﻴﺒﻄﻟا ﻦﻴﻧاﻮﻘﻟ ﺎﻘﻓو ﺔﻴﻌﻴﺒﻃ ةﺮهﺎﻇ ﻩﺬهو .ةروﺎﺠﻤﻟا
راﺪﻘﻤﺑ ﻞﺻﺎﻓ كﺎﻨه نﻮﻜﻳ نأ ﻲﻐﺒﻨﻳ2 ﻊﻄﻗ دﺪﻤﺘﻟ فﺎآ ﺰﻴﺣ دﻮﺟﻮﺑ ﺢﻤﺴﻳ اﺬهو .ىﺮﺧﻷاو ﺔﻌﻄﻗ ﻞآ ﻦﻴﺑ ﺎًﺒﻳﺮﻘﺗ ﻢﺳ
.ﻪﻗﻮﻓ ﺔﻳﻮﻠﻌﻟا ﺔﻘﺒﻄﻟا ﻊﺿ ﻢﺛ قﻮﻗﺪﻤﻟا
تاﺪﺣو تﺎﻬﺟاو وأ لﺎﻤﻌﺘﺳﻻا قﺎﻄﻧ وأ بﺎﺒﻟا ﻰﻠﻋ ﻒﺜﻜﺘﻣ ءﺎﻣ
.صﺮﺤﺑ بﺎﺒﻟا ﺢﺘﻓ وأ ءﺎﻤﺣﻹا لﻼﺧ ﻦﻣ ﻒﺜﻜﺘﻤﻟا
.ﺰﻴﺒﺨﻟا
.ﺐﺳﺎﻨﻤﻟا سﺎﻘﻤﻟﺎﺑ
تازﻮﺒﺨﻤﻟا داﺪﻋإ ﺪﻨﻋ
J ﻮﻳدﻮﺘﺳ ﻲﻓ ﺎهرﺎﺒﺘﺧا ﻢﺗ ﻲﺘﻟا قﺎﺒﻃﻷا
ﺎﻨﺑ صﺎﺨﻟا ﻲﻬﻄﻟا
:ﺔﻈﺣﻼﻣ ﻲﻓ ءﺎﻤﻟا رﺎﺨﺑ ﻦﻣ ﺮﻴﺜﻜﻟا ﺄﺸﻨﻳ نأ ﻦﻜﻤﻳ ﺔﻴﺋاﺬﻐﻟا داﻮﻤﻟا داﺪﻋإ ﺪﻨﻋ
.ﻲﻬﻄﻟا ﺰﻴﺣ
تازﻮﺒﺨﻤﻟا داﺪﻋﻹ ﺢﺋﺎﺼﻧ
.ﻚﻴﻜﻟا ﺞﻀﻧ ﻦﻣ ﻖﻘﺤﺘﻟا ﺪﻳﺮﺗ.ﺖﺠﻀﻧ ﺪﻗ ﻚﻴﻜﻟا نﻮﻜﺗ ،ﺔﻠﺨﻟﺎﺑ ﻦﻴﺠﻌﻟا ﻖﺼﺘﻠﻳ ﻢﻟ اذإ .ﺔﻄﻘﻧ ﻰﻠﻋأ ﻦﻣ ﻚﻴﻜﻟا ﻲﻓ ﺔﻴﺒﺸﺧ ﺔﻠﺧ سﺮﻏا
.ﻂﺒﻬﻳ ﻚﻴﻜﻟا راﺪﻘﻤﺑ ﻞﻗأ ةراﺮﺣ ﺔﺟرد ﻂﺒﺿا وأ .ﺔﻴﻟﺎﺘﻟا ةﺮﻤﻟا ﻲﻓ ﻞﺋﺎﺴﻟا ﻦﻣ ﻞﻗأ ﺔﻴﻤآ مﺪﺨﺘﺳا10° .ﺰﻴﺒﺨﻟا ﻦﻣز ﺔﻟﺎﻃﺈﺑ ﻢﻗو م
ﻪﻨﻜﻟو ﻒﺼﺘﻨﻤﻟا ﻦﻣ ﻊﻔﺗﺮﻣ ﻚﻴﻜﻟا
.فاﻮﺤﻟا ﺪﻨﻋ ﺾﻔﺨﻨﻣ
.ﺾﻴﻔﻳ ﻪآاﻮﻔﻟا ﺮﻴﺼﻋ.ﺔﻴﻟﺎﺘﻟا ةﺮﻤﻟا ﻲﻓ تﺎﻣاﺪﺨﺘﺳﻻا دﺪﻌﺘﻣ حﻮﻠﻟا مﺪﺨﺘﺳا
ﺎﻬﻀﻌﺒﺑ ﻖﺼﺘﻠﺗ ةﺮﻴﻐﺼﻟا تازﻮﺒﺨﻤﻟا
.ﺎهﺰﺒﺧ ﺪﻨﻋ
.اًﺪﺟ فﺎﺟ ﻚﻴﻜﻟا راﺪﻘﻤﺑ ﻰﻠﻋأ ةراﺮﺣ ﺔﺟرد ﻂﺒﺿا10°.ﺰﻴﺒﺨﻟا ﻦﻣز ﺮﻴﺼﻘﺘﺑ ﻢﻗو م
.نﻮﻠﻟا ﺢﺗﺎﻓ ﺔﻴﻟﺎﻤﺟإ ﺔﻔﺼﺑ ﻚﻴﻜﻟا ﻦﻣز ﺔﻟﺎﻃإ وأ ةراﺮﺤﻟا ﺔﺟرد ةدﺎﻳﺰﺑ موﺰﻠﻟا ﺪﻨﻋ ﻢﻗ ،ﺔﺤﻴﺤﺼﻟا تﺎﻴﻟﺎﻤﻜﻟاو ﺢﻴﺤﺼﻟا لﺎﺧدﻹا ىﻮﺘﺴﻣ ماﺪﺨﺘﺳا ﺔﻟﺎﺣ ﻲﻓ
ﻦﻣ ﻪﻨﻜﻟ ،ﺔﻳﺎﻐﻠﻟ ﺢﺗﺎﻓ ﻰﻠﻋأ ﻦﻣ ﻚﻴﻜﻟا
.ﺔﻳﺎﻐﻠﻟ ﻦآاد ﻞﻔﺳأ
ﻦﻣ ﻪﻨﻜﻟ ،ﺔﻳﺎﻐﻠﻟ ﻦآاد ﻰﻠﻋأ ﻦﻣ ﻚﻴﻜﻟا
.ﺔﻳﺎﻐﻠﻟ ﺢﺗﺎﻓ ﻞﻔﺳأ
ﺔﻳﺎﻐﻠﻟ ﻦآاد ﻞﻴﻄﺘﺴﻤﻟا وأ ﺮﻳﺪﺘﺴﻤﻟا ﻚﻴﻜﻟا
.ﻒﻠﺨﻟا ﻦﻣ
.ﺔﻳﺎﻐﻠﻟ نﻮﻠﻟا ﻦآاد ﺔﻴﻟﺎﻤﺟإ ﺔﻔﺼﺑ ﻚﻴﻜﻟا.موﺰﻠﻟا ﺪﻨﻋ ﺰﻴﺒﺨﻟا ﻦﻣز ﺔﻟﺎﻃإو ﺎﻴﺒﺴﻧ ﻞﻗأ ةراﺮﺣ ﺔﺟرد رﺎﻴﺘﺧﺎﺑ ﺔﻣدﺎﻘﻟا ةﺮﻤﻟا ﻲﻓ ﻢﻗ
.ٍو ﺎ ﺴ ﺘ ﻣ ﺮﻴﻏ ﻞﻜﺸﺑ ةﺮﻤﺤﻣ تازﻮﺒﺨﻤﻟا.ءﻲﺸﻟا ﺾﻌﺑ ﻞﻗأ ةراﺮﺣ ﺔﺟرد ﺮﺘﺧا
ﻊﻄﻗ .تﺎﻳﻮﺘﺴﻣ ةﺪﻋ ﻰﻠﻋ نﺎآ ﺰﻴﺒﺨﻟا
يﻮﻠﻌﻟا حﻮﻠﻟا ﻰﻠﻋ ةدﻮﺟﻮﻤﻟا تازﻮﺒﺨﻤﻟا
حﻮﻠﻟا ﻰﻠﻋ ةدﻮﺟﻮﻤﻟا ﻦﻣ اﺮﻴﻤﺤﺗ ﺮﺜآأ
.ﻲﻠﻔﺴﻟا
ﻪﻧأ ﻻإ ،جرﺎﺨﻟا ﻦﻣ اﺪﻴﺟ ﻚﻴﻜﻟا وﺪﺒﻳ ﺪﻘﻓ
.ﻞﺧاﺪﻟا ﻦﻣ ﺞﻀﻨﻳ ﻢﻟ
.ﻪﺒﻠﻗ ﺪﻨﻋ ﻞﺼﻔﻨﻳ ﻻ ﻚﻴﻜﻟا ﻦﻣ ةﺪﻤﻟ ﻩداﺪﻋإ ﺪﻌﺑ دﺮﺒﻳ ﻚﻴﻜﻟا كﺮﺗا5 ﻰﺘﺣ 10 ﻦﻣ ﻚﻴﻜﻟا ﻞﺼﻔﺑ ﻢﻘﻓ ،ﻚﻟذ ﺪﻌﺑ ﻪﻠﺼﻓ رﺬﻌﺗ ﺮﻤﺘﺳا اذإو .ىﺮﺧأ ﻖﺋﺎﻗد
ﺎﻨﺑ صﺎﺨﻟا ﻲﻬﻄﻟا ﻮﻳدﻮﺘﺳ ﻲﻓ ﺎهرﺎﺒ ﺘﺧا ﻢﺗ ﻲﺘﻟا قﺎﺒﻃﻷا
16
Page 20

ءﻼﻤﻌﻟا ﺔﻣﺪﺧar
4ءﻼﻤﻌﻟا ﺔﻣﺪﺧ
.ﺔﺒﺳﺎﻨﻤﻟا ﻚﺘﻬﺟو ﻮه ءﻼﻤﻌﻟا ﺔﻣﺪﺨﻟ ﺎﻧﺰآﺮﻤﻓ ،حﻼﺻﻺﻟ كزﺎﻬﺟ جﺎﺘﺣا اذإ
ﻦﻣ ﺔﻳروﺮﺿ ﺮﻴﻏ تارﺎﻳز ﺔﻳأ ﻚﺒﻨﺠﻨﻟ ﺐﺳﺎﻨﻤﻟا ﻞﺤﻟا ﻦﻋ ﺎًﻤﺋاد ﺚﺤﺒﻧ ﻦﺤﻧ
.ءﻼﻤﻌﻟا ﺔﻣﺪﺧ ﻲﻨﻓ
ﺞﺘﻨﻤﻟا ﻢﻗرE ﻊﻨﺼﻟا ﻢﻗرو FD
ﺞﺘﻨﻤﻟا ﻢﻗر ﺮآذ ﻰﺟﺮﻳ ﺔﻣﺪﺨﻟا ﺰآﺮﻤﺑ لﺎﺼﺗﻻا ﺪﻨﻋ)E-Nr. ( ﻊﻨﺼﻟا ﻢﻗرو
.زﺎﻬﺠﻟا بﺎﺑ ﺢﺘﻓ ﺪﻨﻋ مﺎﻗرﻷا ﺎﻬﺑو ﻊﻨﺼﻟا
ةدﻮﺟﻮﻣ ﻊﻨﺼﻟا ﺔﺣﻮﻟ ﺪﺠﺗ ،رﺎﺨﺒﻟﺎﺑ ﻲﻬﻄﻟا ﺔﻔﻴﻇﻮﺑ ةدوﺰﻤﻟا ةﺰﻬﺟﻷا ﺾﻌﺑ ﻲﻓ
.ءﺎﻄﻏ ﻒﻠﺧ
=1U)'(1U
7\SH
ﺮﻄﻀﺗ ﻻ ﻲآ ،ءﻼﻤﻌﻟا ﺔﻣﺪﺧ ﻒﺗﺎه ﻢﻗرو كزﺎﻬﺟ تﺎﻧﺎﻴﺑ ﻦﻳوﺪﺗ ﺎﻨه ﻚﻨﻜﻤﻳ
.تﺎﻧﺎﻴﺒﻟا ﻩﺬه ﻰﻟإ جﺎﻴﺘﺣﻻا ﺪﻨﻋ ﻞﻳﻮﻃ ﺖﻗﻮﻟ ﺚﺤﺒﻠﻟ
ﻊﻨﺼﻟا ﻢﻗر
FD-Nr.
ﺞﺘﻨﻤﻟا ﻢﻗر
E-Nr.
ءﻼﻤﻌﻟا ﺔﻣﺪﺧO
ءﻼﻤﻌﻟا ﺔﻣﺪﺧ
)FD-Nr. ( ﺔﺣﻮﻟ ﺪﺠﺗ .ﺔﺤﻴﺤﺼﻟا ةرﻮﺸﻤﻟا ﻚﻟ مﺪﻘﻧ نأ ﻊﻴﻄﺘﺴﻧ ﻰﺘﺣ ،ﻞﻣﺎﻜﻟﺎﺑ
ﺊﻃﺎﺨﻟا لﺎﻤﻌﺘ
ﺳﻻا ﺔﻟﺎﺣ ﻲﻓ نﺎﺠﻤﻟﺎﺑ ﺖﺴﻴﻟ ءﻼﻤﻌﻟا ﺔﻣﺪﺧ ﻲﻨﻓ ةرﺎﻳز نأ ﻰﻋاﺮﻳ
.نﺎﻤﻀﻟا ةﺮﺘﻓ ءﺎﻨﺛأ ﻰﺘﺣ
بﺮﻗﺄﺑ لﺎﺼﺗﻻا تﺎﻧﺎﻴﺑ ءﻼﻤﻌﻟا ﺔﻣﺪﺧ ﺰآاﺮﻤﻟ ﻖﻓﺮﻤﻟا ﻞﻴﻟﺪﻟا ﻲﻓ وأ ﺎﻨه ﺪﺠﺗ
.ناﺪﻠﺒﻟا ﻊﻴﻤﺟ ﻲﻓ ءﻼﻤﻌﻟا ﺔﻣﺪﺨﻟ ﺰآﺮﻣ
ﺔﻓﺮﻌﻤﺑ ﻢﺘﻳ فﻮﺳ حﻼﺻﻹا نأ ﺪآﺄﺗو .ﺔﻌﻧﺎﺼﻟا ﺔﻬﺠﻟا ةﺮﺒﺧو ةءﺎﻔآ ﻲﻓ ﻖﺛ
.كزﺎﻬﺠﻟ ﺔﻴﻠﺻﻷا رﺎﻴﻐﻟا ﻊﻄﻗ ﻢﻬﻳﺪﻟو ﻦﻴﺑرﺪﻣ ﺔﻣﺪ
ﺧ ﻲﻴﻨﻓ
15
Page 21

ماﺮﻳ
ar؟ﻞﻤﻌﻟا ﺎﻣ ،تﻻﻼﺘﺧﻻا
3؟ﻞﻤﻌﻟا ﺎﻣ ،تﻻﻼﺘﺧﻻا
؟ﻞﻤﻌﻟا ﺎﻣ ،تﻻﻼﺘﺧﻻا
ﻞﻠﺨﻟاﻞﻤﺘﺤﻤﻟا ﺐﺒﺴﻟالﻮﻠﺣ/تادﺎﺷرإ
ﻲﺋﺎﺑﺮﻬﻜﻟا ﺲﺒﻘﻤﻟا ﻲﻓ عﻮﺿﻮﻣ ﺮﻴﻏ ﺲﺑﺎﻘﻟاﺔﻴﺋﺎﺑﺮﻬﻜﻟا ﺔﻜﺒﺸﻟﺎﺑ زﺎﻬﺠﻟا ﻞﻴﺻﻮﺘﺑ ﻢﻗ
ﻲﺋﺎﺑﺮﻬﻜﻟا رﺎﻴﺘﻟا عﺎﻄﻘﻧاﺔﻠﻐﺸﻣ ىﺮﺧأ ﺦﺒﻄﻣ ةﺰﻬﺟأ كﺎﻨه ﺖﻧﺎآ اذإ ﺎﻤﻣ ﻖﻘﺤﺗ
ﻒﻟﺎﺗ ﺮﻬﺼﻤﻟا ﺎﻣ ﻰﻠﻋ ﺮهﺎﺼﻤﻟا قوﺪﻨﺻ ﻲﻓ زﺎﻬﺠﻟا ﺮﻬﺼﻣ نأ ﻖﻘﺤﺗ
مﺎﺗ ﻞﻜﺸﺑ ﺎﻘﻠﻐﻣ ﺲﻴﻟ زﺎﻬﺠﻟا بﺎﺑزﺎﻬﺠﻟا بﺎﺑ ﻖﻠﻏأ
زﺎﻬﺠﻟا فﺎﻘﻳإ ﻢﺘﻳ ﻢﻟﻪﻠﻴﻐﺸﺗ ﺪﻋأ ﻢﺛ زﺎﻬﺠﻟا فﺎﻘﻳﺈﺑ ﻢﻗ
ﻞﻤﻌﻳ ﻻ زﺎﻬﺠﻟا
زﺎﻬﺠﻟا ﻞﻴﻐﺸﺗ رﺬﻌﺘﻳ
.نﺮﻔﻟا ةءﺎﺿإ ﻞﻄﻌﺗﺔﻔﻟﺎﺗ نﺮﻔﻟا ﺔﺒﻤﻟ(«نﺮﻔﻟا ﺔﺒﻤﻟ ﺮﻴﻴﻐﺗ» عﻮﺿﻮﻣ ﺮﻈﻧا) .نﺮﻔﻟا ﺔﺒﻤﻟ ﺮﻴﻴﻐﺘﺑ ﻢﻗ
ىﺮﺧأ ةﺮﻣ ﻪﻠﻴﻐﺸﺗ ﻒﻗوأو م°100 ﻰﻠﻋ زﺎﻬﺠﻟا ﻦﻴﺨﺴﺘﺑ ﻢﻗ
5
ﺪﻌﺑ
.ﻖﺋﺎﻗد
230 ،ﻂﻠﻓ
:ﻲﺋﺎﺑﺮﻬﻜﻟا ﺪﻬﺠﻟا
300°م
:ةراﺮﺤﻟا ﺔﻣوﺎﻘﻣ
.ﻒﻟﺎﺗ تﺎﺘﺳﻮﻣﺮﺜﻟا.ءﻼﻤﻌﻟا ﺔﻣﺪﺨﺑ ﻞﺼﺗا
ةراﺮﺤﻟا تﺎﺟرد ﻲﻓ قﺮﻔﻟا ﻰﻠﻋ ﺪﻤﺘﻌﺗ ﺔﻴﻌﻴﺒﻃ ةﺮهﺎﻇ
.ةدﻮﺟﻮﻤﻟا
7. :عﻮﻨﻟا ﺲﻔﻧ ﻦﻣ ىﺮﺧﺄﺑ نﺮﻔﻟا ﺔﺒﻤﻟ لﺪﺒﺘﺳا
40 ،طاو
G9 ،
:ةرﺪﻘﻟا
:ةاوﺪﻟا
8..نﺮﻔﻟا ﺔﺒﻤﻠﻟ ﻲﺟﺎﺟﺰﻟا ءﺎﻄﻐﻟا ﺐﻴآﺮﺗ ﺪﻋأ
9..ﻖﻴﻠﻌﺘﻟا نﺎﺒﻀﻗ تﺎﻜﺒﺷ ﺐﻴآﺮﺘﺑ ﻢﻗ
10. .ىﺮﺧأ ةﺮﻣ ﻲﻧاوﻷا ﺔﻃﻮﻓ جﺮﺧأ
11..ﺮﻬﺼﻤﻟا ﻞﻴﺻﻮﺗ ﺪﻋأ
12..ﺪﻳﺪﺟ ﻦﻣ ﻞﻤﻌﺗ نﺮﻔﻟا ةءﺎﺿإ نأ ﺪآﺄﺗ
ﺔﻠﻳﺪﺒﻟا تﺎﺒﻤﻠﻟا ﻰﻠﻋ لﻮﺼﺤﻟا ﻚﻨﻜﻤﻳ .ﺎﻬﻔﻠﺗ ﺔﻟﺎﺣ ﻲﻓ نﺮﻔﻟا ﺔﺒﻤﻟ ﺮﻴﻴﻐﺗ ﺐﺠﻳ
.ﺔﺼﺼﺨﺘﻤﻟا ﺮﺟﺎﺘﻤﻟا ﻦﻣ وأ ءﻼﻤﻌﻟا ﺔﻣﺪﺧ ﺰآﺮﻣ ﻦﻣ ﺔﻧﻮﺨﺴﻟا ﻞﻤﺤﺘﺗ ﻲﺘﻟا
رﺎﻴﺗ ﺎﻬﻴﻓ يﺮﺴﻳ ﺔﺒﻤﻠﻟا ةاود تﺎﺴﻣﻼﻣ نأ ﻲﻬﻄﻟا ﺰﻴﺣ ﺔﺒﻤﻟ ﺮﻴﻴﻐﺗ ﺪﻨﻋ ﻰﻋاﺮﻳ
ﻞﺼﻓا وأ ﺲﺒﻘﻤﻟا ﻦﻣ ﻲﺋﺎﺑﺮﻬﻜﻟا ﺲﺑﺎﻘﻟا عﺰﻧا ،ﺔﺒﻤﻠﻟا ﺮﻴﻴﻐﺗ ﻞﺒﻗ .ﻲﺋﺎﺑﺮﻬآ
.ﺔﻘﻌﻠﻤﺑ ﻦﻌﺘﺳا ﻲﺟﺎﺟﺰﻟا ءﺎﻄﻐﻟا ﻊﻠﺧ رﺬﻌﺗ ﺔﻟﺎﺣ ﻲﻓ
ﻲﻓ ﺎهداﺪﻋإ ﻢﺘﻳ ﻲﺘﻟا ﺔﻤﻌﻃﻷا ﻊﻴﻤﺟ
.ةﺮﻴﺼﻗ ةﺮﺘﻓ ﺪﻌﺑ قﺮﺘﺤﺗ نﺮﻔﻟا
.بﺎﺒﻟا جﺎﺟز ﻰﻠﻋ ءﺎﻣ رﺎﺨﺑ كﺎﻨه
--------
نﺮﻔﻟا ﺔﺒﻤﻟ ﺮﻴﻴﻐﺗ
E ﻢﻗرو FD.ىﺮﺧأ عاﻮﻧأ ﻦﻣ تﺎﺒﻤﻟ مﺪﺨﺘﺴﺗ ﻻ .كزﺎﻬﺠﻟ
ﻢﻗر ﺮآذ ﻰﺟﺮﻳو
:ﺮﻳﺬﺤﺗ – !ﻲﺋﺎﺑﺮﻬﻜﻟا ﻖﻌﺼﻟا ﺮﻄﺧ
.ﺮهﺎﺼﻤﻟا قوﺪﻨﺻ ﻲﻓ دﻮﺟﻮﻤﻟا ﺮﻬﺼﻤﻟا
1..دﺮﺒﻳ ﻰﺘﺣ ﻲﻬﻄﻟا ﺰﻴﺣ كﺮﺗا
2..زﺎﻬﺠﻟا بﺎﺑ ﺢﺘﻓ
3..راﺮﺿأ ثوﺪﺣ ﺐﻨﺠﺘﻟ ﻲﻬﻄﻟا ﺰﻴﺣ ﻲﻓ ﻲﻧاوأ ﺔﻃﻮﻓ ﻊﺿ
4..ﻖﻴﻠﻌﺘﻟا تﺎﻜﺒﺷ ﻊﻠﺧا
5.ﻚﻳﺪﻴﺑ مﺎﻣﻷا ﻦﻣ ﻲﺟﺎﺟﺰﻟا ءﺎﻄﻐﻟا ﺢﺘﻓا ﻚﻟﺬﺑ مﺎﻴﻘﻠﻟ .ﻲﺟﺎﺟﺰﻟا ءﺎﻄﻐﻟا ﻊﻠﺧا .
6..جرﺎﺨﻠﻟ نﺮﻔﻟا ﺔﺒﻤﻟ بﺬﺟا
14
Page 22

زﺎﻬﺠﻟا بﺎﺑar
DE
ED
زﺎﻬﺠﻟا بﺎﺑ ﺐﻴآﺮﺗو ﻚﻓ
ﻒﻴﻈﻨﺗ ىﻮﺘﺴﻣ نﺎﻤﻀﻟ ةﺪﻴﻨﻌﻟا تﺎﺧﺎﺴﺗﻻا ﺔﻟﺎﺣ ﻲﻓ نﺮﻔﻟا بﺎﺑ ﻊﻠﺧ ﻦﻜﻤﻳ
.ﺔﻳدﺎﻌﻟا تﺎﺧﺎﺴﺗﻻا ﻊﻣ ﻚﻟﺬﺑ ﺢﺼﻨﻧ ﻻو .ﻞﻀﻓأ
زﺎﻬﺠﻟا بﺎﺑ ﻚﻓ
:ﺔﻈﺣﻼﻣ.ﺎﻣﺎﻤﺗ تﻼﺼﻔﻤﻟا ﻒﻳوﺎﺠﺗ ﻲﻓ ﻦﻴﻣﺄﺘﻟا ﺮﻴﺑاﻮﺧ لﺎﺧدإ ﺐﺠﻳ
:ﺔﻈﺣﻼﻣ ﺐﺒﺴﺗو تﻼﺼﻔﻤﻟا ﻲﻨﺜﻨﺗ نأ ﻦﻜﻤﻳ ﺚﻴﺣ .ﺎًﻣﺎﻤﺗ نﺮﻔﻟا بﺎﺑ ﻖﻠﻐﺗ ﻻ
.(ﻞﻴﻣﺎﻨﻳﻹا) ﺎﻨﻴﻤﻟا ﺔﻘﺒﻄﺑ اراﺮﺿأ
qزﺎﻬﺠﻟا بﺎﺑ
ﻪﻴﻔﻴﻇﻮﻟا ﻪﺗءﺎﻔآو ﻪﻟﺎﻤﺟ ﻰﻠﻋ ﻆﻓﺎﺤﻳ مﺎﻤﺘهﺎﺑ ﻪﻔﻴﻈﻨﺗو كزﺎﻬﺠﺑ ةﺪﻴﺠﻟا ﺔﻳﺎﻨﻌﻟا
.زﺎﻬﺠﻟا بﺎﺑ ﻒﻴﻈﻨﺗ ﺔﻴﻔﻴآ ﻰﻠﻋ ﺎﻨه فﺮﻌﺘﺗ .ﺔﻠﻳﻮﻃ ةﺮﺘﻔﻟ
1..ﺎﻣﺎﻤﺗ نﺮﻔﻟا بﺎﺑ ﺢﺘﻓا
2.ﻦﻴﻣﺄﺘﻟا رﻮﺑﺎﺨﺑ ﻰﻨﻤﻴﻟاو ىﺮﺴﻴﻟا ﻦﻴﺘﻠﺼﻔﻤﻟا ﺖﻴﺒﺜﺘﺑ ﻢﻗ)a(.
بﺎﺒﻟا جﺎﺟز ﺐﻴآﺮﺗو ﻚﻓ
.ﻞﻀﻓأ ﻞﻜﺸﺑ ﻒﻴﻈﻨﺘﻟا ﺔﻴﻠﻤﻋ ءاﺮﺟﻹ نﺮﻔﻟا بﺎﺑ ﻦﻣ ﺔﻴﺟﺎﺟﺰﻟا حاﻮﻟﻷا ﻚﻓ ﻚﻨﻜﻤﻳ
3. ﻲﻟاﻮﺣ ﺔﻳواﺰﺑ ﻪﻘﻠﻏأ ﻢﺛ ﻚﻳﺪﻳ ﺎﺘﻠﻜﺑ ﻦﻴﺒﻧﺎﺠﻟا ﻦﻣ نﺮﻔﻟا بﺎﺑ ﻚﺴﻣأ30°)b(.
بﺎﺒﻟا جﺎﺟز ﻚﻓ
:ﺔﻈﺣﻼﻣ.ﺎﻣﺎﻤﺗ تﻼﺼﻔﻤﻟا ﻒﻳوﺎﺠﺗ ﻲﻓ ﻦﻴﻣﺄﺘﻟا ﺮﻴﺑاﻮﺧ لﺎﺧدإ ﺐﺠﻳ
4..جرﺎﺨﻠﻟ ﻪﺒﺤﺳاو ﻼﻴﻠﻗ نﺮﻔﻟا بﺎﺑ ﻊﻓرا
زﺎﻬﺠﻟا بﺎﺑ
1..ﺎﻣﺎﻤﺗ نﺮﻔﻟا بﺎﺑ ﺢﺘﻓا
2..ﻦﻴﻣﺄﺘﻟا رﻮﺑﺎﺨﺑ ﻰﻨﻤﻴﻟاو ىﺮﺴﻴﻟا ﻦﻴﺘﻠﺼﻔﻤﻟا ﺖﻴﺒﺜﺘﺑ ﻢﻗ
زﺎﻬﺠﻟا بﺎﺑ ﺐﻴآﺮﺗ
)b(.
:ﺔﻈﺣﻼﻣنﺮﻔﻟا رﺎﻃإ ﻲﻓ ﺖﺒﺜﻳ نأ ﺐﺠﻳ تﻼﺼﻔﻤﻟﺎﺑ ﻲﻠﻔﺴﻟا ﺰﺤﻟا
:ﺮﻳﺬﺤﺗ – !ﺔﺑﺎﺻﻹا ﺮﻄﺧ
ﻞﻜﺸﺑ ﺔﻠﺼﻔﻣ قﻼﻐﻧا ﺔﻟﺎﺣ ﻲﻓ وأ ﺪﺼﻗ نود جرﺎﺨﻠﻟ نﺮﻔﻟا بﺎﺑ طﻮﻘﺳ ﺔﻟﺎﺣ ﻲﻓ
.ءﻼﻤﻌﻟا ﺔﻣﺪﺨﺑ ﻞﺼﺗا .ﺔﻠﺼﻔﻤﻟا ﻲﻓ كﺪﻳ ﻞﺧﺪﺗ ﻻ ،يداﺪﺗرا
:ﺮﻳﺬﺤﺗ – !ﺔﺑﺎﺻﻹا ﺮﻄﺧ
ﻞﻜﺸﺑ بﺎﺒﻟا ﻖﻠﻏ ﻰﻨﺴﺘﻳ ﻦﻠﻓ ،ﻢﻴﻠﺳ ﻞﻜﺸﺑ بﺎﺒﻟا تﻼﺼﻔﻣ ﺖﻴﺒﺜﺗ ﻢﺘﻳ ﻢﻟ اذإ
ﺔﻨﺧﺎﺳ زﺎﻬﺠﻟا ءاﺰﺟأ ﺢﺒﺼﺗو جرﺎﺨﻠﻟ ﺔﻧﻮﺨﺴﻟا بﺮﺴﺘﺗ نأ ﻦﻜﻤﻳو ،ﺢﻴﺤﺻ
بﺎﺒﻟا ﺐﻴآﺮﺗ ﺪﻋأ ﻢﺛ .ىﺮﺧأ ةﺮﻣ بﺎﺒﻟا ﻚﻔﺑ ﻢﻗ ،ﻚﻟذ ثوﺪﺣ ﺐﻨﺠﺘﻟو .ﺔﻳﺎﻐﻠﻟ
.
نﺮﻔﻟا رﺎﻃإ ﻲﻓ ﺔﻠﺼﻔﻤﻠﻟ ﻲﻠﻔﺴﻟا ءﺰﺠﻟﺎﺑ ﺰﺤﻟا ﺖﺒﺜﻳ ﺚﻴﺤﺑ ،ﻦﻴﺒﻤﻟا ﻢﺳﺮﻠﻟ ﺎﻘﺒﻃ
3. ﺮﻴﺑاﻮﺧ ﻚﻔﻨﺗ نأ ﻰﻟإ ءﻲﺸﻟا ﺾﻌﺑ ﻲﻠﺧاﺪﻟا جﺎﺟﺰﻠﻟ ﻲﻠﻔﺴﻟا ءﺰﺠﻟا ﻊﻓرا
)1(.
1..ﻦﻴﺒﻧﺎﺠﻟا ﻦﻣ ﻚﻳﺪﻳ ﺎﺘﻠﻜﺑ نﺮﻔﻟا بﺎﺑ ﻚﺴﻣأ
2.نﺮﻔﻟا ﻒﻳوﺎﺠﺗ ﻲﻓ تﻼﺼﻔﻤﻟا ﻞﺧدأ)a(.
3..ﻞﻔﺳﻷ بﺎﺒﻟا لﺰﻧأ
4..ﻦﻴﻣﺄﺘﻟا ﺮﻴﺑاﻮﺧ جﺮﺧأ
ﺖﻴﺒﺜﺘﻟا ﻊﺿﻮﻣ ﻦﻣ ﺖﻴﺒﺜﺘﻟا
)2(.
ﺖﻴﺒﺜﺘﻟا ﻊﺿﻮﻣ ﻦﻣ ﺖﻴﺒﺜﺘﻟا
4. ﺮﻴﺑاﻮﺧ ﻚﻔﻨﺗ نأ ﻰﻟإ صﺮﺤﺑ ﻲﻠﺧاﺪﻟا جﺎﺟﺰﻠﻟ يﻮﻠﻌﻟا ءﺰﺠﻟا ﻊﻓرا
5..ﻲﻠﺧاﺪﻟا جﺎﺟﺰﻟا ﻊﻠﺧا
.ﺔﻤﻋﺎﻧ ﺔﻃﻮﻓو جﺎﺟز ﻒﻈﻨﻣ ماﺪﺨﺘﺳﺎﺑ ﺔﻴﺟﺎﺟﺰﻟا حاﻮﻟﻷا ﻒﻴﻈﻨﺘﺑ ﻢﻗ
:ﺮﻳﺬﺤﺗ – !ﺔﺑﺎﺻﻹا ﺮﻄﺧ
جﺎﺟز ﺔﻄﺷﺎآ مﺪﺨﺘﺴﺗ ﻻ .تﺎﻘﻘﺸﺗ ﻰﻟإ رﻮﻄﺘﺗ ﺪﻗ زﺎﻬﺠﻟا بﺎﺑ جﺎﺟز شوﺪﺧ
.ﻞآﺂﺘﻠﻟ ﺔﺒﺒﺴﻣ وأ ﺔﻨﺸﺧ ﻒﻴﻈﻨﺗ داﻮﻣ وأ
بﺎﺒﻟا جﺎﺟز ﺐﻴآﺮﺗ
13
1..ﻲﻠﺧاﺪﻟا جﺎﺟﺰﻟا ﺐﻴآﺮﺗ ﺪﻋأ
:ﺔﻈﺣﻼﻣ ﻊﺿاﻮﻣ ﻲﻓ ﺔﻌﺑرﻷا ﺖﻴﺒﺜﺘﻟا ﺮﻴﺑاﻮﺧ ﻊﻴﻤﺟ ﺮﻘﺘﺴﺗ نأ ﺐﺠﻳ
.ﺎﻬﻟ ﺔﺼﺼﺨﻤﻟا ﺖﻴﺒﺜﺘﻟا
2..نﺮﻔﻟا بﺎﺑ ﻖﻠﻏأو ﻦﻴﻣﺄﺘﻟا ﺮﻴﺑاﻮﺧ ﺔﻟازﺈﺑ ﻢﻗ
Page 23

pنﺎﺒﻀﻘﻟا
D
E
نﺎﺒﻀﻘﻟا ﻚﻓ
ﻦﻳراﺪﺠﻟا ﻰﻠﻋ طﺎﻘﻧ ثﻼﺛ ﻰﻠﻋ ﺔﺘﺒﺜﻣ ﻖﻴﻠﻌﺘﻟا نﺎﺒﻀﻗ تﺎﻜﺒﺷ ﻦﻣ ﺔﻜﺒﺷ ﻞآ
.ﻲﻬﻄﻟا ﺰﻴﺣ ﻞﺧاد ﻦﻴﻴﺒﻧﺎﺠﻟا
.ﻒﻳﻮﺠﺘﻟا ﻦﻣ ﻖﻴﻠﻌﺘﻟا نﺎﺒﻀﻗ ﺔﻜﺒﺸﻟ ﻲﻣﺎﻣﻷا فﺎﻄﺨﻟا ﻚﻔﻨﻴﻓ
.ﻲﺒﻧﺎﺠﻟا راﺪﺠﻠﻟ
arنﺎﺒﻀﻘﻟا
تﺎﻈﺣﻼﻣ
■ ﺔﻔﻠﺘﺨﻣ تﺎﻣﺎﺧ ماﺪﺨﺘﺳا ﺐﺒﺴﺑ زﺎﻬﺠﻟا ﺔﻬﺟاﻮﺑ ﺔﻔﻴﻔﻃ ﺔﻴﻧﻮﻟ قوﺮﻓ ﺄﺸﻨﺗ
.نﺪﻌﻤﻟا وأ ﻚﻴﺘﺳﻼﺒﻟا وأ جﺎﺟﺰﻟا ﻞﺜﻣ
نﺎﺒﻀﻘﻟا
■ ﻰﻟإ ﻊﺟﺮﺗ طﻮﻄﺨﻟﺎآ وﺪﺒﺗ ﻲﺘﻟاو بﺎﺒﻟا حاﻮﻟأ ﻰﻠﻋ ةدﻮﺟﻮﻤﻟا لﻼﻈﻟا
.ﻲﻬﻄﻟا ﺰﻴﺣ ةءﺎﺿإ ﻦﻋ ﺔﺠﺗﺎﻧ تﺎﺳﺎﻜﻌﻧا
■ ﺪﻗو .ﺔﻳﺎﻐﻠﻟ ﺔﻴﻟﺎﻋ ةراﺮﺣ تﺎﺟرد ﻰﻠﻋ (ﻞﻴﻣﺎﻨﻳﻹا) ﺎﻨﻴﻤﻟا ﺔﻘﺒﻃ ﻒﻴﻔﺠﺗ ﻢﺘﻳ
ﻰﻠﻋ ﺮﺛﺆﻳ ﻻو ﻲﻌﻴﺒﻃ ﺮﻣأ اﺬهو .ﺔﻔﻴﻔﻃ ﺔﻴﻧﻮﻟ تﺎﻓﻼﺘﺧا ﻲﻓ ﻚﻟذ ﺐﺒﺴﺘﻳ
1. .ﻲﻬﻄﻟا ﺰﻴﺣ ﻒﺼﺘﻨﻣ ﻰﻟإ ﺎﻬﺒﺤﺳاو مﺎﻣﻷا ﻦﻣ نﺎﺒﻀﻗ ﺔﻜﺒﺷ ﻚﺴﻣأ
.ﺎﻬﻠﻤﻋ
.ﻞﻣﺎآ ﻞﻜﺸﺑ (ﻞﻴﻣﺎﻨﻳﻹا) ﺎﻨﻴﻤﻟا ﺔﻘﺒﻄﺑ ﺎﻬﺋﻼﻃ ﻦﻜﻤﻳ ﻻ ﺔﻌﻴﻓﺮﻟا حاﻮﻟﻷا فاﻮﺣ
2. ﺔﻴﻔﻠﺨﻟا ﻒﻳوﺎﺠﺘﻟا ﻦﻣ ﺎﻬﺒﺤﺳاو ،ﻊﺳوأ ﻞﻜﺸﺑ ﻖﻴﻠﻌﺘﻟا نﺎﺒﻀﻗ ﺔﻜﺒﺷ ﺢﺘﻓا
ﺺﺋﺎﺼﺧ ﻰﻠﻋ ﻚﻟذ ﺮﺛﺆﻳ ﻻو .ﺔﻨﺸﺧ فاﻮﺤﻟا ﻩﺬه نﻮﻜﺗ ﺪﻘﻓ ،ﻚﻟﺬﻟ ًﺔﺠﻴﺘﻧو
.ﻞآﺂﺘﻟا ﻦﻣ ﺔﻳﺎﻤﺤﻟا
3..ﻲﻬﻄﻟا ﺰﻴﺣ ﻦﻣ ﻖﻴﻠﻌﺘﻟا نﺎﺒﻀﻗ ﺔﻜﺒﺷ جﺮﺧأ
زﺎﻬﺠﻟا ﺔﻓﺎﻈﻧ ﻰﻠﻋ ﺔﻈﻓﺎﺤﻤﻟا
تﺎﺨﺴﺗﻻا ﺔﻟازﺈﺑ ﻢﻗو زﺎﻬﺠﻟا ﺔﻓﺎﻈﻧ ﻰﻠﻋ ﺎﻤﺋاد ﻆﻓﺎﺣ ةﺪﻴﻨﻋ تﺎﺧﺎﺴﺗا نﻮﻜﺘﺗ ﻻ ﻲآ
.ﺔﻋﺮﺴﻟا ﻪﺟو ﻰﻠﻋ
:ﺮﻳﺬﺤﺗ – !ﻖﻳﺮﺤﻟا ﺮﻄﺧ
صﺮﺣا .ﻞﻌﺘﺸﺗ نأ ﻦﻜﻤﻳ مﻮﺤﻠﻟا تارﺎﺼﻋو نﻮهﺪﻟاو ﺔﺒﺋﺎﺴﻟا ﺔﻤﻌﻃﻷا ﺎﻳﺎﻘﺑ
ﺮﺻﺎﻨﻋ ﻦﻣو ﻲﻬﻄﻟا ﺰﻴﺣ ﻦﻣ ﺔﻓﺎﺠﻟا تﺎﺧﺎﺴﺗﻻا ﺔﻟازإ ﻰﻠﻋ ﻞﻴﻐﺸﺘﻟا ﻞﺒﻗ
.تﺎﻴﻟﺎﻤﻜﻟا ﻦﻣو ﻦﻴﺨﺴﺘﻟا
نﺎﺒﻀﻘﻟا ﺐﻴآﺮﺗ
ﺢﺋﺎﺼﻧ
■ نأ تﺎﺧﺎﺴﺗﻼﻟ ﻰﻨﺴﺘﻳ ﻻ ﻚﻟﺬﺑو .ماﺪﺨﺘﺳا ﻞآ ﺪﻌﺑ ﻲﻬﻄﻟا ﺰﻴﺣ ﻒﻴﻈﻨﺘﺑ ﻢﻗ
.قﺮﺘﺤﺗ
■.رﻮﻔﻟا ﻰﻠﻋ ﺾﻴﺒﻟا ضﺎﻴﺑو ﺎﺸﻨﻟا ﻊﻘﺑو ﺔﻴﻨهﺪﻟاو ﺔﻳﺮﻴﺠﻟا ﻊﻘﺒﻟا ﺔﻟازﺈﺑ ﺎﻤﺋاد ﻢﻗ
1..ﻲﺒﻧﺎﺠﻟا راﺪﺠﻠﻟ ﺔﻴﻔﻠﺨﻟا ﻒﻳوﺎﺠﺘﻟا ﻲﻓ ﻖﻴﻠﻌﺘﻟا نﺎﺒﻀﻗ ﺔﻜﺒﺷ تﺎﻓﺎﻄﺧ ﻞﺧدأ
2..ﻒﻳﻮﺠﺘﻟا ﻲﻓ ﻖﻴﻠﻌﺘﻟا نﺎﺒﻀﻗ ﺔﻜﺒﺸﻟ ﻲﻣﺎﻣﻷا فﺎﻄﺨﻟا ﻂﻐﺿا
■.ﺔﻳﺎﻐﻠﻟ ﺐﻃﺮﻟا ﻚﻴﻜﻟا داﺪﻋﻹ تﺎﻣاﺪﺨﺘﺳﻻا دﺪﻌﺘﻣ حﻮﻠﻟا مﺪﺨﺘﺳا
■.ﺮﻴﻤﺤﺗ ءﺎﻧإ ﻞﺜﻣ ﺔﺒﺳﺎﻨﻣ ﻲﻧاوأ ﺮﻴﻤﺤﺘﻠﻟ مﺪﺨﺘﺳا
ﻲﻬﻄﻟا ﺰﻴﺣ ﻒﻴﻈﻨﺗ
1. ﺐﺼﺑ ﻢﻗ0,4 .ﻲﻬﻄﻟا ﺰﻴﺣ ﺔﻴﺿرأ ﻒﺼﺘﻨﻣ ﻲﻓ ءﺎﻤﻟا ﻦﻣ ﺮﺘﻟ
2. ﻦﻴﺨﺴﺘﻟا عﻮﻧ ﻂﺒﺿا$.
3. ﻰﻠﻋ ةراﺮﺤﻟا ﺔﺟرد ﻂﺒﺿا50°.ةراﺮﺤﻟا ﺔﺟرد ﻢﻈﻨﻣ ماﺪﺨﺘﺳﺎﺑ م
4. روﺮﻣ ﺪﻌﺑ زﺎﻬﺠﻟا ﻞﻴﻐﺸﺗ ﻒﻗوأ18 .ﺔﻘﻴﻗد
5..دﺮﺒﻳ زﺎﻬﺠﻟا كﺮﺗا
6..ﺔﻃﻮﻓ ماﺪﺨﺘﺳﺎﺑ ﻲﻬﻄﻟا ﺰﻴﺣ ﻒﻴﻈﻨﺘﺑ ﻢﻗ
:ﺮﻳﺬﺤﺗ – !قوﺮﺤﺑ ﺔﺑﺎﺻﻹا ﺮﻄﺧ
وأ ﻲﻬﻄﻟا ﺰﻴﺤﻟ ﺔﻴﻠﺧاﺪﻟا ﺢﻄﺳﻷا اﺪﺑأ ﺲﻤﻠﺗ ﻻ .ﺔﻳﺎﻐﻠﻟ ﺎﻨﺧﺎﺳ زﺎﻬﺠﻟا ﺢﺒﺼﻳ
ﺪﻌﺑأو .دﺮﺒﻳ زﺎﻬﺠﻟا كﺮﺗ ﻰﻠﻋ ﺎًﻤﺋاد صﺮﺣا .ﺔﻨﺧﺎﺳ ﻲهو ﻦﻴﺨﺴﺘﻟا ﺮﺻﺎﻨﻋ
.زﺎﻬﺠﻟا ﻦﻋ لﺎﻔﻃﻷا
12
Page 24

ﻒﻴﻈﻨﺘﻟاar
~
:ﻞﺨﻟا لﻮﻠﺤﻣ وأ ﻦﺧﺎﺳ ﻲﻧﻮﺑﺎﺻ لﻮﻠﺤﻣ
ﻚﻟذ ﺪﻌﺑ ﻒﻴﻔﺠﺘﻟﺎﺑ ﻢﻗ ﻢﺛ ،ﻒﻴﻈﻨﺗ ﺔﻃﻮﻔﺑ ﻒﻴﻈﻨﺘﻟﺎﺑ ﻢﻗ
.ﻢﻋﺎﻧ ﻞﻳﺪﻨﻣ ماﺪﺨﺘﺳﺎﺑ
ﺔﻃﻮﻓ ماﺪﺨﺘﺳﺎﺑ مﺎﻌﻄﻟا ﻦﻣ ﺔﻗﺮﺘﺤﻤﻟا ﺎﻳﺎﻘﺒﻟا ﺢﺴﻣا
تﺎﺧﺎﺴﺗا دﻮﺟو ﺔﻟﺎﺣ ﻲﻓ .ﻲﻧﻮﺑﺎﺻ لﻮﻠﺤﻣو ﺔﺒﻃر
ﺲﻠﻧﺎﺘﺳﻻا ﻦﻣ ﺔﻄﺷﺎآ ﻒﻴﻈﻨﺗ ﺔﻔﻴﻟ مﺪﺨﺘﺳا ةﺪﻳﺪﺷ
.ناﺮﻓﻷا ﻒﻈﻨﻣ وأ ﻞﻴﺘﺳ
!ﻪﻴﺒﻨﺗ
.ﻦﺧﺎﺴﻟا ﻲﻬﻄﻟا ﺰﻴﺣ ﻲﻓ نﺮﻔﻟا تﺎﻔﻈﻨﻣ
اًﺪﺑأ مﺪﺨﺘﺴﺗ ﻻ
ﺔﻘﺒﻄﺑ راﺮﺿأ ثوﺪﺣ ﻲﻓ ﻚﻟذ ﺐﺒﺴﺘﻳ نأ ﻦﻜﻤﻳ
ﻲﻬﻄﻟا ﺰﻴﺣ ﻦﻣ ﺐﺳاوﺮﻟا ﻊﻴﻤﺟ ﺔﻟازﺈﺑ ﻢﻗ .ﻞﻴﻣﺎﻨﻳﻹا
.مدﺎﻘﻟا ﻦﻴﺨﺴﺘﻟا ﻞﺒﻗ ﺎﻣﺎﻤﺗ زﺎﻬﺠﻟا بﺎﺑ ﻦﻣو
.ﻒﺠﻴﻟ ﺎﺣﻮﺘﻔﻣ ﻲﻬﻄﻟا ﺰﻴﺣ كﺮﺗا ﻒﻴﻈﻨﺘﻟا ﺪﻌﺑو
.ﻞﻣﺎﻜﻟﺎﺑ ﻲﻬﻄﻟا ﺰﻴﺣ ﻊﻣ ﻪﻔﻴﻈﻨﺗ ﻞﻀﻔﻳ
:ﺔﻈﺣﻼﻣ نﻮﻜﺗ ﻲﻓ ﺔﻤﻌﻃﻷا ﺎﻳﺎﻘﺑ ﺐﺒﺴﺘﺗ نأ ﻦﻜﻤﻳ
ﺎﻬﻟ ﺲﻴﻟو ﻖﻠﻘﻠﻟ ﻮﻋﺪﺗ ﻻ
تﺎﻘﺒﻄﻟا ﻩﺬه .ءﺎﻀﻴﺑ تﺎﻘﺒﻃ
.ﺔﻔﻴﻇﻮﻟا ﻰﻠﻋ ﺮﻴﺛﺄﺗ
.نﻮﻤﻴﻠﻟا ﺾﻤﺣ ماﺪﺨﺘﺳﺎﺑ ﺎﻬﺘﻟازإ ﺔﺟﺎﺤﻟا ﺪﻨﻋ ﻚﻨﻜﻤﻳو
:ﻦﺧﺎﺳ ﻲﻧﻮﺑﺎﺻ لﻮﻠﺤﻣ
ﻚﻟذ ﺪﻌﺑ ﻒﻴﻔﺠﺘﻟﺎﺑ ﻢﻗ ﻢﺛ ،ﻒﻴﻈﻨﺗ ﺔﻃﻮﻔﺑ ﻒﻴﻈﻨﺘﻟﺎﺑ ﻢﻗ
.ﻢﻋﺎﻧ ﻞﻳﺪﻨﻣ ماﺪﺨﺘﺳﺎﺑ
.نﺮﻔﻟا ﻒﻈﻨﻣ مﺪﺨﺘﺳا ﺪﻳﺪﺸﻟا خﺎﺴﺗﻻا ﺔﻟﺎﺣ ﻲﻓ
:ﻦﺧﺎﺳ ﻲﻧﻮﺑﺎﺻ لﻮﻠﺤﻣ
ﻚﻟذ ﺪﻌﺑ ﻒﻴﻔﺠﺘﻟﺎﺑ ﻢﻗ ﻢﺛ ،ﻒﻴﻈﻨﺗ ﺔﻃﻮﻔﺑ ﻒﻴﻈﻨﺘﻟﺎﺑ ﻢﻗ
.ﻢﻋﺎﻧ ﻞﻳﺪﻨﻣ ماﺪﺨﺘﺳﺎﺑ
ﺔﻄﺷﺎآ ﻒﻴﻈﻨﺗ ﺔﻔﻴﻟ وأ جﺎﺟز ﺔﻄﺷﺎآ ﺔﻳأ مﺪﺨﺘﺴﺗ ﻻ
.ﻞﻴﺘﺳ ﺲﻠﻧﺎﺘﺳﻻا ﻦﻣ
.ﻞﻣﺎﻜﻟﺎﺑ ﻲﻬﻄﻟا ﺰﻴﺣ ﻊﻣ ﻪﻔﻴﻈﻨﺗ ﻞﻀﻔﻳ
ﺔﺤﻔﺻ ﻲﻓ «ﻲﻬﻄﻟا ﺰﻴﺣ ﻒﻴﻈﻨﺗ»
12
:ﻦﺧﺎﺳ ﻲﻧﻮﺑﺎﺻ لﻮﻠﺤﻣ
.ﻒﻴﻈﻨﺗ ﺔﻃﻮﻔﺑ ﻒﻴﻈﻨﺘﻟﺎﺑ ﻢﻗ
.ﻪﻜﺤﺑ ﻢﻘﺗ ﻻ
:ذﻻﻮﻔﻟا ﻦﻣ
ﺔﻬﺠﻟا تادﺎﺷرإ ﻰﻋاﺮﺗ .ذﻻﻮﻔﻟا ﻒﻈﻨﻣ مﺪﺨﺘﺳا
.ﻞﻴﺘﺳ ﺲﻠﻧﺎﺘﺳﻻﺎﺑ ﺔﻳﺎﻨﻋ داﻮﻣ ﺔﻳأ مﺪﺨﺘﺴﺗ ﻻ .ﺔﻌﻧﺎﺼﻟا
:ﻚﻴﺘﺳﻼﺒﻟا ﻦﻣ
ﺔﻃﻮﻓو ﻦﺧﺎﺳ ﻲﻧﻮﺑﺎﺻ لﻮﻠﺤﻣ ماﺪﺨﺘﺳﺎﺑ ﻒﻴﻈﻨﺘﻟﺎﺑ ﻢﻗ
.ﺔﻤﻋﺎﻧ ﺔﻃﻮﻓ ماﺪﺨﺘﺳﺎﺑ ﻚﻟذ ﺪﻌﺑ ﻪﻔﻴﻔﺠﺘﺑ ﻢﻗو .ﻒﻴﻈﻨﺗ
.جﺎﺟز ﺔﻄﺷﺎآ وأ جﺎﺟز ﻒﻈﻨﻣ مﺪﺨﺘﺴﺗ ﻻ
.بﺎﺒﻟا ءﺎﻄﻏ ﻊﻠﺧا ﻒﻴﻈﻨﺘﻠﻟ
:ﻦﺧﺎﺳ ﻲﻧﻮﺑﺎﺻ لﻮﻠﺤﻣ
.ةﺎﺷﺮﻓ وأ ﻒﻴﻈﻨﺗ ﺔﻃﻮﻔﺑ ﺎﻬﻔﻴﻈﻨﺘﺑ ﻢﻗ ﻢﺛ ﺎﻬﻌﻘﻧا
:ﻦﺧﺎﺳ ﻲﻧﻮﺑﺎﺻ لﻮﻠﺤﻣ
.ةﺎﺷﺮﻓ وأ ﻒﻴﻈﻨﺗ ﺔﻃﻮﻓ ماﺪﺨﺘﺳﺎﺑ ﻒﻴﻈﻨﺘﻟﺎﺑ ﻢﻗ
،ﻞﻣاﻮﺤﻟا نﺎﺒﻀﻗ ﻰﻠﻋ ﻖﻴﻟﺰﺘﻟا ﻢﺤﺷ ﺔﻟازﺈﺑ ﻢﻘﺗ ﻻ
ﻲﻓ ﺎﻬﻔﻴﻈﻨﺘﺑ ﻢﻘﺗ ﻻ .ﻞﺧاﺪﻟﺎﺑ ﻲهو ﺎﻬﻔﻴﻈﻨﺗ ﻞﻀﻔﻳو
.قﺎﺒﻃﻷا ﺔﻟﺎﺴﻏ
:ﻦﺧﺎﺳ ﻲﻧﻮﺑﺎﺻ لﻮﻠﺤﻣ
.ةﺎﺷﺮﻓ وأ ﻒﻴﻈﻨﺗ ﺔﻃﻮﻔﺑ ﺎﻬﻔﻴﻈﻨﺘﺑ ﻢﻗ ﻢﺛ ﺎﻬﻌﻘﻧا
ﻒﻴﻈﻨﺗ ﺔﻔﻴﻟ مﺪﺨﺘﺳا ةﺪﻳﺪﺷ تﺎﺧﺎﺴﺗا دﻮﺟو ﺔﻟﺎﺣ ﻲﻓ
.ﻞﻴﺘﺳ ﺲﻠﻧﺎﺘﺳﻻا ﻦﻣ ﺔﻄﺷﺎآ
ﻞﺧاﺪﻟا ﻦﻣ زﺎﻬﺠﻟا
ﺎﻨﻴﻤﻟا ﺢﻄﺳأ
(ﻞﻴﻣﺎﻨﻳﻹا)
ﻲﺟﺎﺟﺰﻟا ءﺎﻄﻐﻟا
ﺰﻴﺣ ةءﺎﺿﻹ
ﻲﻬﻄﻟا
بﺎﺒﻟا جﺎﺟز
بﺎﺒﻟا مﺎﻜﺣإ رﺎﻃإ
!ﻪﻜﻔﺑ ﻢﻘﺗ ﻻ
بﺎﺒﻟا ءﺎﻄﻏ
نﺎﺒﻀﻘﻟا
يرﺎﺠﻤﻟا مﺎﻈﻧ
تﺎﻴﻟﺎﻤﻜﻟا
Dﻒﻴﻈﻨﺘﻟا
ﻪﻴﻔﻴﻇﻮﻟا ﻪﺗءﺎﻔآو ﻪﻟﺎﻤﺟ ﻰﻠﻋ ﻆﻓﺎﺤﻳ مﺎﻤﺘهﺎﺑ ﻪﻔﻴﻈﻨﺗو كزﺎﻬﺠﺑ ةﺪﻴﺠﻟا ﺔﻳﺎﻨﻌﻟا
ﺔﻘﻳﺮﻄﺑ ﻪﻔﻴﻈﻨﺗو كزﺎﻬﺠﺑ ﺔﻳﺎﻨﻌﻟا ﺔﻴﻔﻴآ ﻲﻠﻳ ﺎﻤﻴﻓ ﻚﻟ ﺢﺿﻮﻧو .ﺔﻠﻳﻮﻃ ةﺮﺘﻔﻟ
.ﺔﺤﻴﺤﺻ
.ﻲﺋﺎﺑﺮﻬآ ﻖﻌﺻ ثوﺪﺣ ﻲﻓ ﺐﺒﺴﺘﺗ ﺪﻗ زﺎﻬﺠﻟا ﻲﻓ ﻞﻏﻮﺘﺗ ﻲﺘﻟا ﺔﺑﻮﻃﺮﻟا
وأ ﻲﻬﻄﻟا ﺰﻴﺤﻟ ﺔﻴﻠﺧاﺪﻟا ﺢﻄﺳﻷا اﺪﺑأ ﺲﻤﻠﺗ ﻻ .ﺔﻳﺎﻐﻠﻟ ﺎﻨﺧﺎﺳ زﺎﻬﺠﻟا ﺢﺒﺼﻳ
ﺪﻌﺑأو .دﺮﺒﻳ زﺎﻬﺠﻟا كﺮﺗ ﻰﻠﻋ ﺎًﻤﺋاد صﺮﺣا .ﺔﻨﺧﺎﺳ ﻲهو ﻦﻴﺨﺴﺘﻟا ﺮﺻﺎﻨﻋ
.زﺎﻬﺠﻟا ﻦﻋ لﺎﻔﻃﻷا
ﺔﺒﺳﺎﻨﻤﻟا تﺎﻔﻈﻨﻤﻟا
ﻰﻋاﺮﺗ ،ﺔﺒﺳﺎﻨﻣ ﺮﻴﻏ تﺎﻔﻈﻨﻣ ماﺪﺨﺘﺳا ﻞﻌﻔﺑ ﺔﻔﻠﺘﺨﻤﻟا ﺢﻄﺳﻷا رﺮﻀﺘﺗ ﻻ ﻰﺘﺣ
.ﺔﻴﻟﺎﺘﻟا تﺎﻤﻴﻠﻌﺘﻟا
مﺪﺨﺘﺴﺗ ﻻ
نﺮﻔﻟا ﻊﻣ
.ﺎﻬﻣاﺪﺨﺘﺳا ﻞﺒﻗ اﺪﻴﺟ ةﺪﻳﺪﺠﻟا ﺔﻴﺠﻨﻔﺳﻹا طﻮﻔﻟا ﻞﺴﻏا
جرﺎﺨﻟا ﻦﻣ زﺎﻬﺠﻟا
:ﻦﺧﺎﺳ ﻲﻧﻮﺑﺎﺻ لﻮﻠﺤﻣ
ﻚﻟذ ﺪﻌﺑ ﻒﻴﻔﺠﺘﻟﺎﺑ ﻢﻗ ﻢﺛ ،ﻒﻴﻈﻨﺗ ﺔﻃﻮﻔﺑ ﻒﻴﻈﻨﺘﻟﺎﺑ ﻢﻗ
.ﻢﻋﺎﻧ ﻞﻳﺪﻨﻣ ماﺪﺨﺘﺳﺎﺑ
ضﺎﻴﺑو ﺎﺸﻨﻟا ﻊﻘﺑو ﺔﻴﻨهﺪﻟاو ﺔﻳﺮﻴﺠﻟا ﻊﻘﺒﻟا ﺔﻟازﺈﺑ ﻢﻗ
.ﻊﻘﺒﻟا ﻩﺬه ﺖﺤﺗ أﺪﺼﻟا نﱠﻮﻜﺘﻳ ﺪﻘﻓ .رﻮﻔﻟا ﻰﻠﻋ ﺾﻴﺒﻟا
ﺔﺼﺼﺨﺘﻤﻟا ﺮﺟﺎﺘﻤﻟا وأ ءﻼﻤﻌﻟا ﺔﻣﺪﺧ ىﺪﻟ ﺮﻓاﻮﺘﺗ
ﺢﻄﺳﻷا ﺐﺳﺎﻨﺗ ﻞﻴﺘﺳ ﺲﻠﻧﺎﺘﺳﻼﻟ ﺔﺻﺎﺧ تﺎﻔﻈﻨﻣ
ﺔﻄﺳاﻮﺑ ﺔﻳﺎﻨﻌﻟا ةدﺎﻣ ﻦﻣ ﺔﻘﻴﻗر
ﺔﻘﺒﻃ ﻊﺿ .ﺔﻨﺧﺎﺴﻟا
.ﺔﻤﻋﺎﻧ ﺔﻃﻮﻓ
:ﻦﺧﺎﺳ ﻲﻧﻮﺑﺎﺻ لﻮﻠﺤﻣ
ﻚﻟذ ﺪﻌﺑ ﻒﻴﻔﺠﺘﻟﺎﺑ ﻢﻗ ﻢﺛ ،ﻒﻴﻈﻨﺗ ﺔﻃﻮﻔﺑ ﻒﻴﻈﻨﺘﻟﺎﺑ ﻢﻗ
.ﻢﻋﺎﻧ ﻞﻳﺪﻨﻣ ماﺪﺨﺘﺳﺎﺑ
.جﺎﺟز ﺔﻄﺷﺎآ وأ جﺎﺟز ﻒﻈﻨﻣ مﺪﺨﺘﺴﺗ ﻻ
:ﻦﺧﺎﺳ ﻲﻧﻮﺑﺎﺻ لﻮﻠﺤﻣ
ﻚﻟذ ﺪﻌﺑ ﻒﻴﻔﺠﺘﻟﺎﺑ ﻢﻗ ﻢﺛ ،ﻒﻴﻈﻨﺗ ﺔﻃﻮﻔﺑ ﻒﻴﻈﻨﺘﻟﺎﺑ ﻢﻗ
.ﻢﻋﺎﻧ ﻞﻳﺪﻨﻣ ماﺪﺨﺘﺳﺎﺑ
ﺔﻄﺷﺎآ ﻒﻴﻈﻨﺗ ﺔﻔﻴﻟ وأ جﺎﺟز ﺔﻄﺷﺎآ ﺔﻳأ مﺪﺨﺘﺴﺗ ﻻ
.ﻞﻴﺘﺳ ﺲﻠﻧﺎﺘﺳﻻا ﻦﻣ
:ﻦﺧﺎﺳ ﻲﻧﻮﺑﺎﺻ لﻮﻠﺤﻣ
ﻚﻟذ ﺪﻌﺑ ﻒﻴﻔﺠﺘﻟﺎﺑ ﻢﻗ ﻢﺛ ،ﻒﻴﻈﻨﺗ ﺔﻃﻮﻔﺑ ﻒﻴﻈﻨﺘﻟﺎﺑ ﻢﻗ
.ﻢﻋﺎﻧ ﻞﻳﺪﻨﻣ ماﺪﺨﺘﺳﺎﺑ
ﺾﺒﻘﻣ ﻰﻟإ ﺔﻳﺮﻴﺠﻟا تﺎﺒﺳﺮﺘﻟا ﺔﻟازإ داﻮﻣ ﺖﻠﺻو اذإ
رﺬﻌﺘﻳ فﻮﺴﻓ ﻻإو .رﻮﻔﻟا ﻰﻠﻋ ﺎﻬﺤﺴﻤﺑ ﻢﻘﻓ ،بﺎﺒﻟا
--------
.ﻚﻟذ ﺪﻌﺑ ﻊﻘﺒﻟا ﻩﺬه ﺔﻟازإ
ﺲﻠﻧﺎﺘﺳﻻا ﺔﻬﺟاﻮﻟا
لﺎﻤﻌﺘﺳﻻا قﺎﻄﻧ
بﺎﺒﻟا جﺎﺟز
بﺎﺒﻟا ﺾﺒﻘﻣ
ﻒﻴﻈﻨﺘﻟا
:ﺮﻳﺬﺤﺗ – !ﻲﺋﺎﺑﺮﻬﻜﻟا ﻖﻌﺼﻟا ﺮﻄﺧ
ﻻ.رﺎﺨﺒﻟﺎﺑ ﻒﻴﻈﻨﺗ ةﺰﻬﺟأ وأ ﻲﻟﺎﻌﻟا ﻂﻐﻀﻟﺎﺑ ﻒﻴﻈﻨﺗ ةﺰﻬﺟأ ﺔﻳأ مﺪﺨﺘﺴﺗ
:ﺮﻳﺬﺤﺗ – !قوﺮﺤﺑ ﺔﺑﺎﺻﻹا ﺮﻄﺧ
■ﺔﺷدﺎﺧ وأ ﺔﻨﺸﺧ تﺎﻔﻈﻨﻣ ﺔﻳأ
■لﻮﺤﻜﻟا ﻰﻠﻋ يﻮﺘﺤﺗ ﺔﻳﻮﻗ تﺎﻔﻈﻨﻣ ﺔﻳأ
■ﺔﻨﺸﺧ تﺎﺠﻨﻔﺳإ وأ تﺎﻔﻴﻟ ﺔﻳأ
■.رﺎﺨﺒﻟﺎﺑ وأ ﻲﻟﺎﻌﻟا ﻂﻐﻀﻟﺎﺑ ﻒﻴﻈﻨﺗ ةﺰﻬﺟأ ﺔﻳأ
قﺎﻄﻨﻟاﻒﻴﻈﻨﺘﻟا
ﻞﻴﺘﺳ
11
Page 25

arزﺎﻬﺠﻟا لﺎﻤﻌﺘﺳا
&
Oﺖﻗﻮﻟا ﻒﺋﺎﻇو
ﺮﻴﺼﻘﻟا ﺖﻗﻮﻟا ﻲﺗﺎﻘﻴﻣ ﻂﺒﺿ
ةﺪﻣ ﻂﺒﺿ ﻦﻜﻤﻳ .نﺮﻔﻟا ﻞﻤﻋ ﻰﻠﻋ ﺮﻴﺛﺄﺗ يأ ﺮﻴﺼﻘﻟا ﺖﻗﻮﻟا ﻲﺗﺎﻘﻴﻤﻟ نﻮﻜﻳ ﻻو
5 ﻰﻟإ 90 ﻊﺿو ﻲﻓ زﺎﻬﺠﻟا نﻮﻜﻳ نأ ﺐﺠﻳ .ﺔﻘﻴﻗد
ﻦﻣ ﺮﻴﺼﻘﻟا ﺖﻗﻮﻟا ﻲﺗﺎﻘﻴﻣ
.داﺪﻌﺘﺳﻻا
.ﺖﻗﻮﻟا ﻂﺒﺿ حﺎﺘﻔﻣ ماﺪﺨﺘﺳﺎﺑ ﺔﺑﻮﻏﺮﻤﻟا ةﺪﻤﻟا ﻂﺒﺿا
.ﺔﻴﺗﻮﺻ ةرﺎﺷإ رﺪﺼﺗ ﺖﻗﻮﻟا ءﺎﻀﻘﻧا ﺪﻌﺑ
:ﺔﻈﺣﻼﻣ.ﺮﻔﺻ ﻰﻠﻋ ﻰﻘﺒﺘﻤﻟا ﻞﻴﻐﺸﺘﻟا ﺖﻗو ﻂﺒﺿا ﺮﻴﺼﻘﻟا ﺖﻗﻮﻟا ﻲﺗﺎﻘﻴﻣ ءﺎﻐﻟﻹ
ﺔﻴﻨﻣﺰﻟا ةﺪﻤﻟا ﻂﺒﺿ
ﻲﻬﻄﻟا ةﺪﻣ زوﺎﺠﺗ ﻢﺘﻳ ﻻ ﻚﻟﺬﺑو .زﺎﻬﺠﻟا ﻦﻣ ﻚﻘﺒﻃ ﻲﻬﻃ ةﺪﻣ ﻂﺒﺿ ﻚﻨﻜﻤﻳ
.ﻞﻴﻐﺸﺘﻟا ءﺎﻬﻧﻹ ىﺮﺧﻷا ﻚﻟﺎﻤﻋأ ﻊﻄﻘﺗ نﻷ ﺮﻄﻀﺗ ﻻو ،ﺪﺼﻗ نود
تﺎﻈﺣﻼﻣ
– ﻦﻣ ﻞﻴﻐﺸﺘﻠﻟ ﺔﻴﻨﻣﺰﻟا ةﺮﺘﻔﻟا ﻂﺒﺿ ﻦﻜﻤﻳ5 ﻰﻟإ 90.ﺔﻘﻴﻗد
>.
.نﺮﻔﻟا ﻞﻴﻐﺸﺗ أﺪﺒﻴﻓ
.ﺮﻔﺼﻟا ﻊﺿو
– ﻰﻠﻋ ﺖﻗﻮﻟا ﻂﺒﺿ حﺎﺘﻔﻣ ﻂﺒﻀﻣا ،ةدﺪﺤﻣ ةﺪﻣ ﻂﺒﺿ مﺪﻌﻟ
1زﺎﻬﺠﻟا لﺎﻤﻌﺘﺳا
ﺖﻗﻮﻟا ﻒﺋﺎﻇو
نﺮﻔﻟا فﺎﻘﻳإو ﻞﻴﻐﺸﺗ
ﻲﻬﻄﻟا نﺮﻓ ﻞﻴﻐﺸﺗ
1..ﺔﺑﻮﻏﺮﻤﻟا ةراﺮﺤﻟا ﺔﺟردو ﻦﻴﺨﺴﺘﻟا عﻮﻧ ﻂﺒﺿا
2..ﺖﻗﻮﻟا ﻂﺒﺿ حﺎﺘﻔﻣ ماﺪﺨﺘﺳﺎﺑ ﺔﺑﻮﻏﺮﻤﻟا ةﺪﻤﻟا ﻂﺒﺿا
3. ﻰﻠﻋ ﺔﻔﻴﻇﻮﻟا رﺎﻴﺘﺧا حﺎﺘﻔﻣ ردأ .ﺔﻴﺗﻮﺻ ةرﺎﺷإ رﺪﺼﺗ ﺖﻗﻮﻟا ءﺎﻀﻘﻧا ﺪﻌﺑ
زﺎﻬﺠﻟا لﺎﻤﻌﺘﺳا
1..ﺔﻔﻴﻇﻮﻟا رﺎﻴﺘﺧا حﺎﺘﻔﻣ ماﺪﺨﺘﺳﺎﺑ ﻦﻴﺨﺴﺘﻟا عﻮﻧ ﻂﺒﺿا
2..ةراﺮﺤﻟا ﺔﺟرد رﺎﻴﺘﺧا حﺎﺘﻔﻣ ماﺪﺨﺘﺳﺎﺑ ةراﺮﺤﻟا ﺔﺟرد ﻂﺒﺿا
.ﻦﻴﺨﺴﺘﻟﺎﺑ نﺮﻔﻟا أﺪﺒﻴﻓ
:ﺔﻈﺣﻼﻣ.ﻦﻴﺨﺴﺘﻟا ﺔﻴﻠﻤﻌﻟ ﺔﻴﻧﻵا ﺔﻟﺎﺤﻟا ةراﺮﺤﻟا ﺔﺟرد ﺔﺒﻗاﺮﻣ نﺎﻴﺑ ضﺮﻌﻳ
ﻂﺒﻀﻟا عﺎﺿوأ ﺮﻴﻴﻐﺗ
ﻦﻋ ﺖﻗو يأ ﻲﻓ ءاﻮﺸﻟا ﺔﺟرد وأ ةراﺮﺤﻟا ﺔﺟردو ﻦﻴﺨﺴﺘﻟا عﻮﻧ ﺮﻴﻴﻐﺗ ﻚﻨﻜﻤﻳ
.ﻲﻨﻌﻤﻟا رﺎﻴﺘﺧﻻا حﺎﺘﻔﻣ ﻖﻳﺮﻃ
نﺮﻔﻟا فﺎﻘﻳإ
.ﺮﻔﺼﻟا ﻊﺿو ﻰﻠﻋ ﺔﻔﻴﻇﻮﻟا رﺎﻴﺘﺧا حﺎﺘﻔﻣ ردأ
3. ﺮﺘﺧا وأ ﺖﻗﻮﻟا ﻂﺒﺿ حﺎﺘﻔﻣ ماﺪﺨﺘﺳﺎﺑ ةﺪﻤﻟا ﻂﺒﺿا>.ةﺪﻣ يأ ﻂﺒﺿ مﺪﻌﻟ
10
Page 26

ةﺮﻣ لوﻷ ماﺪﺨﺘﺳﻻا ﻞﺒﻗar
D
D
~
~
Kةﺮﻣ لوﻷ ماﺪﺨﺘﺳﻻا ﻞﺒﻗ
ﻲﻓ نﺮﻔﻟا ماﺪﺨﺘﺳا ﻞﺒﻗ ﻪﺑ مﺎﻴﻘﻟا ﺐﺠﻳ ﺎﻣ ﻰﻠﻋ ءﺰﺠﻟا اﺬه لﻼﺧ ﻦﻣ فﺮﻌﺘﺘﺳ
.ﻰﻟوﻷا ةﺮﻤﻠﻟ مﺎﻌﻄﻟا داﺪﻋإ
.ﺔﻤﻴﻠﺳ ﺔﻘﻳﺮﻄﺑ ﺎﻬﻨﻣ ﺺﻠﺨﺗو زﺎﻬﺠﻟا ﻦﻋ ﻒﻴﻠﻐﺘﻟا داﻮﻣ ﺔﻟازﺈﺑ ﻢﻗ
نﺮﻔﻟا ﻦﻴﺨﺴﺗ
نﺮﻔﻠﻟ ﻖﺒﺴﻤﻟا ﻒﻴﻈﻨﺘﻟا
«نﺎﺒﻀﻘﻟا»
12
ﺔﺤﻔﺻ ﻲﻓ
ﻲﻬﻄﻟا ﺰﻴﺣ ﻦﻣ ،ﻦﻳﺮﻴﺘﺴﻴﻟﻮﺒﻟا تﺎﺌﻳﺰﺟ ﻞﺜﻣ ،ﻒﻴﻠﻐﺘﻟا داﻮﻣ ﺎﻳﺎﻘﺑ ﺔﻟازﺈﺑ ﻢﻗ
.ﺎﻣﺎﻤﺗ
.شوﺪﺨﻟا ﻦﻣ ﺔﻴﻗاﻮﻟا
نﺮﻔﻟا ﻦﻴﺨﺴﺗ
ﻮهو نﺮﻔﻟا ﻦﻴﺨﺴﺘﺑ ﻢﻗ ،ةﺪﻳﺪﺠﻟا ءﺎﻴﺷﻸﻟ ﺔﺒﺤﺘﺴﻤﻟا ﺮﻴﻏ ﺢﺋاوﺮﻟا ﻦﻣ ﺺﻠﺨﺘﻠﻟ
.غرﺎﻓو ﻖﻠﻐﻣ
ﺖﻴﺒﺜﺘﻟا ﺔﻔﻴﻇو
.ﺎﻬﻧﺎﻜﻣ ﻲﻓ ﺖﺒﺜﺗ ﻰﺘﺣ ﺎﺒﻳﺮﻘﺗ ﺔﻓﺎﺴﻤﻟا ﻒﺼﻧ ﻰﻟإ تﺎﻴﻟﺎﻤﻜﻟا جاﺮﺧإ ﻦﻜﻤﻤﻟا ﻦﻣ
لﺎﺧدإ ﺐﺠﻳو .جرﺎﺨﻠﻟ ﺎﻬﺒﺤﺳ ﺪﻨﻋ تﺎﻴﻟﺎﻤﻜﻟا بﻼﻘﻧا ﺖﻴﺒﺜﺘﻟا ﺔﻔﻴﻇو ﻊﻨﻤﺗ
ةﺮﻣ لوﻷ ماﺪﺨﺘﺳﻻا ﻞﺒﻗ
1. .ﻲﻬﻄﻟا ﺰﻴﺣ ﻦﻣ ﻖﻴﻠﻌﺘﻟا تﺎﻜﺒﺷو تﺎﻴﻟﺎﻤﻜﻟا جﺮﺧأ
2.
3. ﺔﻗﺎﻗﺮﻟا ﻩﺬه ﺔﻟازﺈﺑ ﻢﻗ .شوﺪﺨﻟا ﻦﻣ ﺔﻴﻗاو ﺔﻗﺎﻗﺮﺑ ةﺎﻄﻐﻣ ءاﺰﺟﻷا ﺾﻌﺑ
4..ﺐﻃر ﻢﻋﺎﻧ ﻞﻳﺪﻨﻤﺑ جرﺎﺨﻟا ﻦﻣ زﺎﻬﺠﻟا ﻒﻴﻈﻨﺘﺑ ﻢﻗ
5..ﻦﺧﺎﺳ ﻲﻧﻮﺑﺎﺻ لﻮﻠﺤﻤﺑ ﻲﻬﻄﻟا ﺰﻴﺣ ﻒﻴﻈﻨﺘﺑ ﻢﻗ
ﺔﻳﺎﻤﺤﻟا ﺔﻴﺻﺎﺧ ﻞﻤﻌﺗ ﻰﺘﺣ ﺔﺤﻴﺤﺻ ﺔﻘﻳﺮﻄﺑ ﻲﻬﻄﻟا ﺰﻴﺣ ﻲﻓ تﺎﻴﻟﺎﻤﻜﻟا
.ﻢﻴﻠﺳ ﻞﻜﺸﺑ بﻼﻘﻧﻻا ﻦﻣ
ﺖﻴﺒﺜﺘﻟا فﺮﻃ نأ ﺔﻴﻜﻠﺴﻟا ﺔﻜﺒﺸﻟا لﺎﺧدإ ﺪﻨﻋ ﺪآﺄﺗ
‚ .ﻞﻔﺳأ ﻰﻟإ ﺮﻴﺸﻳو ﻒﻠﺨﻟﺎﺑ
ﺎًﻬﺟﻮﻣ سﻮﻘﺘﻟاو زﺎﻬﺠﻟا بﺎﺒﻟ ﺎًﻬﺟﻮﻣ حﻮﺘﻔﻤﻟا ﺐﻧﺎﺠﻟا نﻮﻜﻳ نأ ﺐﺠﻳ
¾.
ﻞﻔﺳﻷ
‚ ﺐﺠﻳ .ﻞﻔﺳأ ﻰﻟإ ﺮﻴﺸﻳو ﻒﻠﺨﻟﺎﺑ
ﺖﻴﺒﺜﺘﻟا فﺮﻃ نأ حاﻮﻟﻷا لﺎﺧدإ ﺪﻨﻋ ﺪآﺄﺗ
ƒ.زﺎﻬﺠﻟا بﺎﺑ ﺔﻬﺟاﻮﻣ ﻲﻓ مﺎﻣﻷا ﻲﻓ
تﺎﻴﻟﺎﻤﻜﻠﻟ ﺔﻠﺋﺎﻤﻟا ﺔﻓﺎﺤﻟا نﻮﻜﺗ نأ
تﺎﻣاﺪﺨﺘﺳﻻا دﺪﻌﺘﻣ حﻮﻠﻟا :ةرﻮﺼﻟا ﻲﻓ لﺎﺜﻤﻟا
:ﺔﻈﺣﻼﻣ ﻦﻳﺮﺘﺴﻟﻮﺒﻟا زﺮﺨآ ﻒﻴﻠﻐﺘﻟا داﻮﻣ ﻦﻣ ﺎﻳﺎﻘﺑ ﺔﻳأ دﻮﺟو مﺪﻋ ﻦﻣ ﺪآﺄﺗ
ﻲﻬﻄﻟا ﺰﻴﺣ ﻲﻓ ﺔﻘﻟﺰﻟا ﺢﻄﺳﻷا ﺢﺴﻤﺑ ﻢﻗ ﻦﻴﺨﺴﺘﻟا ﻞﺒﻗ .ﻲﻬﻄﻟا ﺰﻴﺣ ﻲﻓ ﻼﺜﻣ
.ﻦﻴﺨﺴﺘﻟﺎﺑ زﺎﻬﺠﻟا مﺎﻴﻗ ءﺎﻨﺛأ
ﺦﺒﻄﻤﻟا ﺔﻳﻮﻬﺘﺑ ﻢﻗ .ﺐﻃرو ﻢﻋﺎﻧ ﻞﻳﺪﻨﻣ ماﺪﺨﺘﺳﺎﺑ
:ﺔﻈﺣﻼﻣ تاﻮﺻأ نﺮﻔﻟا ﻦﻣ رﺪﺼﺗ نأ ﻦﻜﻤﻳ ﻰﻟوﻷا ﻦﻴﺨﺴﺘﻟا ﺔﻴﻠﻤﻋ ءﺎﻨﺛأ
.ﺔﻘﻄﻘﻃ
نﺮﻔﻠﻟ ﻖﺣﻼﻟا ﻒﻴﻈﻨﺘﻟا
«زﺎﻬﺠﻟا بﺎﺑ»
13
ﻲﻓﺔﺤﻔﺻ
تﺎﻴﻟﺎﻤﻜﻟا ﻒﻴﻈﻨﺗ
.ﻒﻴﻈﻨﺗ ﺔﻃﻮﻓو ﺊﻓاد ﻲﻧﻮﺑﺎﺻ لﻮﻠﺤﻤﺑ اًﺪﻴﺟ ﺎﻬﻔﻴﻈﻨﺘﺑ ﻢﻗ تﺎﻴﻟﺎﻤﻜﻟا ماﺪﺨﺘﺳا ﻞﺒﻗ
D
D
1. ﻰﻠﻋ ﺔﻔﻴﻇﻮﻟا رﺎﻴﺘﺧا حﺎﺘﻔﻣ ردأ%.
2..ىﻮﺼﻘﻟا ةراﺮﺤﻟا ﺔﺟرد ﻰﻠﻋ ةراﺮﺤﻟا ﺔﺟرد رﺎﻴﺘﺧا حﺎﺘﻔﻣ ردأ
3..ﺔﻋﺎﺳ ﺪﻌﺑ نﺮﻔﻟا فﺎﻘﻳﺈﺑ ﻢﻗ
E
ﺔﺻﺎﺨﻟا تﺎﻴﻟﺎﻤﻜﻟا
1. .ﻦﺧﺎﺳ ﻲﻧﻮﺑﺎﺻ لﻮﻠﺤﻤﺑ ﻲﻬﻄﻟا ﺰﻴﺣ ﻒﻴﻈﻨﺘﺑ ﻢﻗ
2..ﻖﻴﻠﻌﺘﻟا تﺎﻜﺒﺷ ﺐﻴآﺮﺘﺑ ﻢﻗ
3. .باﻮﺑﻷا جﺎﺟز ﻒﻴﻈﻨﺘﺑ ﻢﻗ ﺔﺟﺎﺤﻟا ﺪﻨﻋو
حﻮﻟ ﻰﻠﻋ ﻩداﺪﻋإ ﻢﺘﻳ يﺬﻟا ﻚﻴﻜﻠﻟ
.ةﺮﻴﻐﺼﻟا تازﻮﺒﺨﻤﻟاو
11012235
.ةﺮﻴﺒﻜﻟا ﻢﺤﻠﻟا ﻊﻄﻗو ةﺪﻤﺠﻤﻟا
تﺎﻣاﺪﺨﺘﺳﻻا دﺪﻌﺘﻣ حﻮﻠﻟا ماﺪﺨﺘﺳا ﻦﻜﻤﻳ
ﺎﻣﺪﻨﻋ ﺔﻄﻗﺎﺴﺘﻤﻟا نﻮهﺪﻟا ﻊﻴﻤﺠﺘﻟ ءﺎﻋﻮآ
ﺔﻜﺒﺸﻟا ﻰﻠﻋ ﺮﺷﺎﺒﻣ ﻞﻜﺸﺑ ءاﻮﺸﻟﺎﺑ مﻮﻘﺗ
11012236
.ةﺪﻤﺠﻤﻟا تﺎﺒﺟﻮﻟاو ﺔﻳﻮﺸﻤﻟا ﺔﻤﻌﻃﻷاو
00776605
12006236
.ءﻼﻤﻌﻟا ﺔﻣﺪﺧ ﻦﻣ تﺎﻴﻟﺎﻤﻜﻟا ءاﺮﺷ ﺎًﻘﺣﻻ ﻚﻨﻜﻤﻳ
تﺎﻴﻟﺎﻤﻜﻟاحﺮﺸﻟا
ﺔﻘﺒﻄﺑ ﻲﻠﻄﻤﻟا ﺰﻴﺒﺨﻟا حﻮﻟ
(ﻞﻴﻣﺎﻨﻳﻹا) ﺎﻨﻴﻤﻟا
:ءﻼﻤﻌﻟا ﺔﻣﺪﺧ ﻢﻗر
تﺎﻣاﺪﺨﺘﺳﻻا دﺪﻌﺘﻣ حﻮﻠﻟا تﺎﺒﺟﻮﻟاو تازﻮﺒﺨﻤﻟاو ﺐﻃﺮﻟا ﻚﻴﻜﻠﻟ
.ﺔﻴﻜﻠﺴﻟا
:ءﻼﻤﻌﻟا ﺔﻣﺪﺧ ﻢﻗر
ءاﻮﺸﻟاو ﺰﻴﺒﺨﻟا ﺔﻜﺒﺷ ﻢﺤﻠﻟا ﻊﻄﻗو ﻚﻴﻜﻟا ﻲﻧاﻮﺻو ﻲﻧاوﻸﻟ
:ءﻼﻤﻌﻟا ﺔﻣﺪﺧ ﻢﻗر
ﺔﻴﺑﻮﻜﺴﻠﺗ ﻞﻣاﻮﺣ ﻢﻘﻃ.ﺪﺣاو ىﻮﺘﺴﻤﻟ ﺔﻴﺑﻮﻜﺴﻠﺗ ﻞﻣاﻮﺣ ﻢﻘﻃ
:ءﻼﻤﻌﻟا ﺔﻣﺪﺧ ﻢﻗر
--------
9
Page 27

arتﺎﻴﻟﺎﻤﻜﻟا
_تﺎﻴﻟﺎﻤﻜﻟا
تﺎﻴﻟﺎﻤﻜﻟا ﻦﻋ ﺔﻣﺎﻋ ةﺮﻈﻧ ﻰﻠﻋ ﺎﻨه ﻞﺼﺤﺗ .ةدﺪﻌﺘﻣ تﺎﻴﻟﺎﻤآ كزﺎﻬﺠﺑ ﻖﻓﺮﻣ
.ﺢﻴﺤﺼﻟا ﺎﻬﻣاﺪﺨﺘﺳاو ﺔﻘﻓﺮﻤﻟا
تﺎﻴﻟﺎﻤﻜﻟاحﺮﺸﻟا
ءاﻮﺸﻟاو ﺰﻴﺒﺨﻟا ﺔﻜﺒﺷ
ﻢﺤﻠﻟا ﻊﻄﻗو ﻚﻴﻜﻟا ﻲﻧاﻮﺻو ﻲﻧاوﻸﻟ
.ةﺪﻤﺠﻤﻟا تﺎﺒﺟﻮﻟاو ﺔﻳﻮﺸﻤﻟا ﺔﻤﻌﻃﻷاو
تﺎﻣاﺪﺨﺘﺳﻻا دﺪﻌﺘﻣ حﻮﻠﻟا
تﺎﺒﺟﻮﻟاو تازﻮﺒﺨﻤﻟاو ﺐﻃﺮﻟا ﻚﻴﻜﻠﻟ
ﻦﻜﻤﻳ .ةﺮﻴﺒﻜﻟا ﻢﺤﻠﻟا ﻊﻄﻗو ةﺪﻤﺠﻤﻟا
تﺎﻣاﺪﺨﺘﺳﻻا دﺪﻌﺘﻣ حﻮﻠﻟا ماﺪﺨﺘﺳا
ﺎﻣﺪﻨﻋ ﺔﻄﻗﺎﺴﺘﻤﻟا نﻮهﺪﻟا ﻊﻴﻤﺠﺘﻟ ءﺎﻋﻮآ
ﺔﻜﺒﺸﻟا ﻰﻠﻋ ﺮﺷﺎﺒﻣ ﻞﻜﺸﺑ ءاﻮﺸﻟﺎﺑ مﻮﻘﺗ
.ﺔﻴﻜﻠﺴﻟا
ﻦﻴﻣﺄﺘﻟا ﺮﻴﺑاﻮﺧ
.تﻼﺼﻔﻤﻟا ﺖﻴﺒﺜﺘﻟ
لﺎﺧدﻹا تﺎﻳﻮﺘﺴﻣ
ﻰﻠﻋ ﻲﻬﻄﻟا ﺰﻴﺣ ﻲﻓ ءاﻮﺸﻟاو ﺰﻴﺒﺨﻟا ﺔﻜﺒﺷو ﺰﻴﺒﺨﻟا حﻮﻟ لﺎﺧدإ ﻦﻜﻤﻳ
ﻲﻬﻄﻟا ﺰﻴﺣ ﻲﻓ تﺎﻴﻟﺎﻤﻜﻟا لﺎﺧدإ ﺎﻤﺋاد ﻰﻋاﺮﻳ .بﺎﺒﻟا جﺎﺟز ﺲﻣﻼﺗ ﻻ ﻰﺘﺣ
.ﺢﻴﺤﺻ ﻞﻜﺸﺑ
ةراﺮﺤﻟا ﺔﺟرد ﺔﺒﻗاﺮﻣ نﺎﻴﺑ
لﻼﺧ ﺊﻔﻄﻨﺗو .ةراﺮﺤﻟا ﺔﺟرد ﺔﺒﻗاﺮﻣ نﺎﻴﺑ ءﻲﻀﻳ ،زﺎﻬﺠﻟا ﻦﺨﺴﻳ ﺎﻣﺪﻨﻋ
تﺎﻴﻟﺎﻤﻜﻟا
ﻚﻣﺎﻌﻃ لﺎﺧدﻹ ﻲﻟﺎﺜﻤﻟا ﺖﻗﻮﻟا ﻰﻟإ لﻮﺻﻮﻟا ﻢﺘﻳ ،نﺮﻔﻟا ءﺎﻤﺣﺈﺑ مﺎﻴﻘﻟا ﺪﻨﻋ
.ﻰﻟوﻷا ةﺮﻤﻠﻟ ةراﺮﺤﻟا ﺔﺟرد ﺔﺒﻗاﺮﻣ نﺎﻴﺑ ءﺎﻔﻄﻧا دﺮﺠﻤﺑ
.ﻦﻴﺨﺴﺘﻟا ﻦﻋ ﻒﻗﻮﺘﻟا تاﺮﺘﻓ
ﻲﻬﻄﻟا ﺰﻴﺣ ﻒﺋﺎﻇو
ﺮﻴﺒآ ءﺰﺟ ةءﺎﺿإ ﻢﺘﻳ ﺚﻴﺣ .كزﺎﻬﺟ ﻞﻴﻐﺸﺗ ﻞﻴﻬﺴﺗ ﺎﻬﻧﺄﺷ ﻦﻣ ﻒﺋﺎﻇﻮﻟا ﺾﻌﺑ
ﺔﻧﻮﺨﺴﻟا طﺮﻓ ﻦﻣ زﺎﻬﺠﻟا ﺔﻳﺎﻤﺤﺑ ﺪﻳﺮﺒﺘﻟا ﺔﺣوﺮﻣ مﻮﻘﺗ ﺎﻤآ ،ًﻼﺜﻣ ﻲﻬﻄﻟا ﺰﻴﺣ ﻦﻣ.
ﻲﻬﻄﻟا ﺰﻴﺣ ةءﺎﺿإ
ﻲﻬﺘﻨﻳ ﺎﻣﺪﻨﻋو .ﻞﻴﻐﺸﺘﻟا ﺔﻘﻳﺮﻃ ءﺪﺑ دﺮﺠﻤﺑ ،ﻲﻬﻄﻟا ﺰﻴﺣ ةءﺎﺿإ ﻞﻴﻐﺸﺗ ﻢﺘﻳ
.ةءﺎﺿﻹا ﺊﻔﻄﻨﺗ ﻞﻴﻐﺸﺘﻟا
ﺔﻔﻴﻇﻮﻟا رﺎﻴﺘﺧا حﺎﺘﻔﻣ ردأ ،فﺎﻘﻳﻹا ﺔﻟﺎﺣ ﻲﻓ ﻲﻬﻄﻟا ﺰﻴﺣ
ﻦﻣ ﻦﺧﺎﺴﻟا ءاﻮﻬﻟا جﺮﺨﻳو .ﺔﺟﺎﺤﻟا ﺪﻨﻋ ﺪﻳﺮﺒﺘﻟا ﺔﺣوﺮﻣ فﺎﻘﻳإو ﻞﻴﻐﺸﺗ ﻢﺘﻳ
--------
.ﺔﻧﻮﺨﺴﻟا طﺮﻔﻟ نﺮﻔﻟا ضﺮﻌﺘﻳ فﻮﺴﻓ ﻻإو .ﺔﻳﻮﻬﺘﻟا تﺎﺤﺘﻓ ﺔﻴﻄﻐﺘﺑ ﻢﻘﺗ ﻻ
ﺔﺣوﺮﻣ ﻞﻴﻐﺸﺗ ﺮﻤﺘﺴﻳ ،ﻞﻴﻐﺸﺘﻟا ﺪﻌﺑ عﺮﺳأ ﻞﻜﺸﺑ ﻲﻬﻄﻟا ﺰﻴﺣ ﺪﻳﺮﺒﺗ ﻢﺘﻳ ﻰﺘﺣ
4 ﺔﻳﺎﻬﻨﻟا ﻰﺘﺣ تﺎﻴﻟﺎﻤﻜﻟا لﺎﺧدإ ﻰﻠﻋ ﺎﻤﺋاد صﺮﺣا .ﺔﻔﻠﺘﺨﻣ عﺎﻔﺗرا تﺎﻳﻮﺘﺴﻣ
ةءﺎﺿإ ﻞﻴﻐﺸﺘﻟ
^.
ﻰﻠﻋ
ﺪﻳﺮﺒﺘﻟا ﺔﺣوﺮﻣ
.بﺎﺒﻟا قﻮﻓ
!ﻪﻴﺒﻨﺗ
.ﺔﻨﻴﻌﻣ ةﺮﺘﻔﻟ ﺪﻳﺮﺒﺘﻟا
ﻲﻬﻃ ءﺎﻋو يأ وأ ةﻼﻘﻣ وأ ﺰﻴﺒﺧ حﻮﻟ ﻊﺿو لاﻮﺣﻷا ﻦﻣ لﺎﺣ يﺄﺑ زﻮﺠﻳ ﻻ
ﺔﻧﻮﺨﺳ طﺮﻓ ﻰﻟإ يدﺆﻳ ﻚﻟذ نإ ﺚﻴﺣ .ﺮﺷﺎﺒﻣ ﻞﻜﺸﺑ نﺮﻔﻟا ﺔﻴﺿرأ ﻰﻠﻋ ﺮﺧﺁ
.زﺎﻬﺠﻟﺎﺑ ﺎﻐﻟﺎﺑ ارﺮﺿ ﻖﺤﻠﻳ نأ ﻦﻜﻤﻳو زﺎﻬﺠﻟا ﺔﻴﺿرأ
:ﺮﻳﺬﺤﺗ – !ﻖﻳﺮﺤﻟا ﺮﻄﺧ
8
Page 28

زﺎﻬﺠﻟا ﻰﻠﻋ فﺮﻌﺘﻟاar
لﺎﻤﻌﺘﺳﻻا قﺎﻄﻧ
ىﺮﺗ .كزﺎﻬﺠﻟ ﺔﻔﻠﺘﺨﻤﻟا ﻒﺋﺎﻇﻮﻟا ﻂﺒﺿ لﺎﻤﻌﺘﺳﻻا قﺎﻄﻧ ﻖﻳﺮﻃ ﻦﻋ ﻚﻨﻜﻤﻳ
.لﺎﻤﻌﺘﺳﻻا ﺮﺻﺎﻨﻋ ﺔﻴﻌﺿوو لﺎﻤﻌﺘﺳﻻا قﺎﻄﻨﻟ ﺎًﻣﺎﻋ ﺎًﺿﺮﻋ ﺎﻨه
ةراﺮﺤﻟا ﺔﺟرد رﺎﻴﺘﺧا حﺎﺘﻔﻣ
حﺎﺘﻔﻣ ماﺪﺨﺘﺳﺎﺑ ﻦﻴﺨﺴﺘﻟا عﻮﻨﻟ ﺔﺒﺳﺎﻨﻤﻟا ةراﺮﺤﻟا ﺔﺟرد ﻂﺒﺿ ﻚﻨﻜﻤﻳ
.ةراﺮﺤﻟا ﺔﺟرد رﺎﻴﺘﺧا
رﺎﺴﻴﻟا ﺔﻬﺟو ﻦﻴﻤﻴﻟا ﺔﻬﺟ ةراﺮﺤﻟا ﺔﺟرد رﺎﻴﺘﺧا حﺎﺘﻔﻣ ةرادإ ﻚﻨﻜﻤﻳ
ةراﺮﺤﻟا ﺔﺟرد ﺔﺒﻗاﺮﻣ نﺎﻴﺑ
8
.ﺎًﻀﻳأ
@
*زﺎﻬﺠﻟا ﻰﻠﻋ فﺮﻌﺘﻟا
ﺎﻀﻳأ فﺮﻌﺘﺗ ﺎﻤآ .لﺎﻤﻌﺘﺳﻻا ﺮﺻﺎﻨﻋو تﺎﻧﺎﻴﺒﻟا ﻞﺼﻔﻟا اﺬه ﻲﻓ ﻚﻟ حﺮﺸﻧ
.كزﺎﻬﺠﻟ ﺔﻔﻠﺘﺨﻤﻟا ﻒﺋﺎﻇﻮﻟا ﻰﻠﻋ
:ﺔﻈﺣﻼﻣ ﻞﻴﺻﺎﻔﺘﻟاو ناﻮﻟﻷا ﻲﻓ تﺎﻓﻼﺘﺧﻻا ﺾﻌﺑ كﺎﻨه نﻮﻜﺗ نأ دراﻮﻟا ﻦﻣ
.زﺎﻬﺠﻟا ﻞﻳدﻮﻣ ﺐﺴﺣ
ﺔﻔﻴﻇﻮﻟا رﺎﻴﺘﺧا حﺎﺘﻔﻣ
ﻒﺋﺎﻇو وأ ﻦﻴﺨﺴﺘﻟا عﻮﻧ ﻂﺒﺿ ﻚﻨﻜﻤﻳ ﺔﻔﻴﻇﻮﻟا رﺎﻴﺘﺧا حﺎﺘﻔﻣ ماﺪﺨﺘﺳﺎﺑ
.ىﺮﺧأ
رﺎﺴﻴﻟا ﺔﻬﺟ ﻰﻟإ ﺮﻔﺼﻟا ﻊﺿو ﻦﻣ ﺔﻔﻴﻇﻮﻟا رﺎﻴﺘﺧا حﺎﺘﻔﻣ ةرادإ ﻚﻨﻜﻤﻳ
.ﻦﻴﻤﻴﻟا وأ
ﺖﻗﻮﻟا ﻂﺒﺿ حﺎﺘﻔﻣ
وأ ﻞﻴﻐﺸﺘﻟا ﺔﻘﻳﺮﻃ ةﺪﻣ ﻂﺒﺿ ﻚﻨﻜﻤﻳ ﺖﻗﻮﻟا ﻂﺒﺿ حﺎﺘﻔﻣ ماﺪﺨﺘﺳﺎﺑ
.ﺮﻴﺼﻘﻟا ﺖﻗﻮﻠﻟ ﻲﺗﺎﻘﻴﻤآ ﻪﻣاﺪﺨﺘﺳا
زﺎﻬﺠﻟا ﻰﻠﻋ فﺮﻌﺘﻟا
(
0
.ماﺪﺨﺘﺳﻻا تﺎﻗﺎﻄﻧو تﺎﻓﻼﺘﺧﻻا ﺎﻨه ﻚﻟ
.ﻒﻗﻮﺘﻣ نﺮﻔﻟا
.ﺔﻳاﻮﺸﻟا ﻦﻴﺨﺴﺗ ﻢﺴﺟ ﻞﻔﺳأ ﻞﻣﺎﻜﻟﺎﺑ ﺢﻄﺴﻟا ﻦﺨﺴﻳو
.يوﺎﺴﺘﻟﺎﺑ ﻞﻔﺳأ
.ﻲﻬﻄﻟا ﺰﻴﺣ ةءﺎﺿإ ﻞﻴﻐﺸﺘﻟ
ﻒﺋﺎﻇﻮﻟاو ﻦﻴﺨﺴﺘﻟا عاﻮﻧأ
.ىﺮﺧأ ﻒﺋﺎﻇوو ﻦﻴﺨﺴﺘﻟا عاﻮﻧأ ﻂﺒﺿ ﻚﻨﻜﻤﻳ ﺔﻔﻴﻇﻮﻟا رﺎﻴﺘﺧا حﺎﺘﻔﻣ ماﺪﺨﺘﺳﺎﺑ ﺢﺿﻮﻧ ،ﻩداﺪﻋﺈﺑ مﻮﻘﺗ يﺬﻟا ﻖﺒﻄﻠﻟ ﺐﺳﺎﻨﻤﻟا ﻦﻴﺨﺴﺘﻟا عﻮﻧ ﻰﻟإ ﺎًﻤﺋاد ﻞﺼﺗ ﻲآ
ماﺪﺨﺘﺳﻻا
ﻦﻴﺨﺴﺘﻟا عﻮﻧ/ةراﺮﺤﻟا ﺔﺟرد
ىﻮﺘﺴﻤﻟا
-
ﺮﻔﺼﻟا ﻊﺿو
ﻲﻠﻔﺴﻟا ﻦﻴﺨﺴﺘﻟا50- 250 °م.ﻂﻘﻓ ﻞﻔﺳأ ﻦﻣ ﺔﻧﻮﺨﺴﻟا ﺚﻌﺒﻨﺗ .مﺎﻌﻄﻠﻟ ﻖﺣﻼﻟا ﻦﻴﺨﺴﺘﻟا
ﺮﻴﺒآ ﺢﻄﺳ ،ﺔﻳاﻮﺸﻟا50- 250 °م.ﺮﻴﻤﺤﺘﻠﻟ وأ ﺖﺳﻮﺘﻟا وأ (ﻖﻧﺎﻘﻨﻟا) ﻖﺠﺴﻟا وأ ﻚﻴﺘﺳﻻا ﻞﺜﻣ ةدوﺮﻔﻤﻟا ﺔﻤﻌﻃﻷا ءاﻮﺸﻟ
ﻲﻠﻔﺴﻟا/يﻮﻠﻌﻟا ﻦﻴﺨﺴﺘﻟا50- 250 °م ﻦﻣو ﻰﻠﻋأ ﻦﻣ ﺔﻧﻮﺨﺴﻟا ﺚﻌﺒﻨﺗو .نﻮهﺪﻟا ﻦﻣ ﺔﻴﻟﺎﺨﻟا ﻢﺤﻠﻟا ﻊﻄﻗو ﻮﺸﺤﻤﻟاو ةدﺎﺴﻟا ﻚﻴﻜﻠﻟ
-
ﻲﻬﻄﻟا ﺰﻴﺣ ةءﺎﺿإ
ﺖﻗﻮﻟا ﻂﺒﺿ حﺎﺘﻔﻣ
ﻪﻣاﺪﺨﺘﺳا وأ ﻞﻴﻐﺸﺘﻟا ﺔﻘﻳﺮﻃ ةﺪﻣ ﻂﺒﺿ ﻚﻨﻜﻤﻳ ﺖﻗﻮﻟا ﻂﺒﺿ حﺎﺘﻔﻣ ماﺪﺨﺘﺳﺎﺑ
ﺖﻗﻮﻟا ﻂﺒﺿ حﺎﺘﻔﻣ ﻂﺒﻀﻣا ،ةدﺪﺤﻣ ةﺪﻣ ﻂﺒﺿ مﺪﻌﻟ .ﺮﻴﺼﻘﻟا ﺖﻗﻮﻠﻟ ﻲﺗﺎﻘﻴﻤآ
>
ةراﺮﺤﻟا ﺔﺟرد رﺎﻴﺘﺧا حﺎﺘﻔﻣ
.ةراﺮﺤﻟا ﺔﺟرد رﺎﻴﺘﺧا حﺎﺘﻔﻣ ماﺪﺨﺘﺳﺎﺑ ةراﺮﺤﻟا ﺔﺟرد ﻂﺒﺿ ﻚﻨﻜﻤﻳ
Û
$
(
%
^
--------
ﻰﻠﻋ
7
Page 29

arﺔﺌﻴﺒﻟا ﺔﻳﺎﻤﺣ
■.ﻞﻴﻐﺸﺘﻟا ءﺎﻨﺛأ نﺎﻜﻣﻹا رﺪﻗ زﺎﻬﺠﻟا بﺎﺑ ﺢﺘﻔﺗ ﻻ
7ﺔﺌﻴﺒﻟا ﺔﻳﺎﻤﺣ
تازﻮﺒﺨﻤﻟا داﺪﻋﻹ مزﻼﻟا ﺖﻗﻮﻟا ﻞﻘﻳ ﻚﻟﺬﺑو .ﻪﺘﻧﻮﺨﺴﺑ ﺎًﻈﻔﺘﺤﻣ ﻲﻬﻄﻟا
ﻲﻓ ﻦﻴﺗروﺎﺠﺘﻣ ﻦﻴﺘﻴﻨﻴﺻ ﻊﺿو ﺎﻀﻳأ ﻚﻨﻜﻤﻳ ﺎﻤآ .ﺔﻴﻧﺎﺜﻟا ةﺮﻴﻄﻔﻠﻟ ﺔﺒﺴﻨﻟﺎﺑ
.ﻲﻬﻄﻟا ﺰﻴﺣ
ﺢﺋﺎﺼﻧ ﺎﻨه ﺪﺠﺗ .ﺔﻗﺎﻄﻟا كﻼﻬﺘﺳا ﻲﻓ ﺔﺻﺎﺧ ةءﺎﻔآو ﺔﻴﻟﺎﻌﻓ وذ ﺪﻳﺪﺠﻟا كزﺎﻬﺟ
ﺔﺌﻴﺒﻟ ا ﺔﻳﺎﻤﺣ
زﺎﻬﺠﻟا ﻦﻣ ﺺﻠﺨﺘﻟا ﺔﻴﻔﻴآو ﺔﻗﺎﻄﻟا ﻲﻓ ﺮﻴﻓﻮﺘﻟاو كزﺎﻬﺟ ﻊﻣ ﻞﻣﺎﻌﺘﻟا ﺔﻴﻔﻴآ لﻮﺣ
.ﺔﻤﻴﻠﺳ ﺔﻘﻳﺮﻄﺑ
ﺔﻗﺎﻄﻟا ﺮﻴﻓﻮﺗ
■ﺎًﺻﻮﺼﻨﻣ وأ ﻲﻬﻄﻟا ﺔﻔﺻو ﻲﻓ اًرﺮﻘﻣ ﻚﻟذ نﺎآ اذإ ﻻإ زﺎﻬﺠﻟا ءﺎﻤﺣﺈﺑ ﻢﻘﺗ ﻻ
.لﺎﻤﻌﺘﺳﻻا ﻞﻴﻟد لواﺪﺟ ﻲﻓ ﻪﻴﻠﻋ
■.ﻲﻬﻄﻟا ﺰﻴﺣ ﻲﻓ ﺎﻬﻌﺿو ﻞﺒﻗ ةﺪﻤﺠﻤﻟا ﺔﻤﻌﻃﻷا ﺪﻤﺠﺗ ﺔﺑاذإ ﻰﻠﻋ صﺮﺣا
■ ﺰﻴﺣ ﻞﻈﻳ ﺚﻴﺣ .ىﺮﺧﻷا ﺪﻌﺑ ةﺪﺣاﻮﻟا ﺮﺋﺎﻄﻔﻟا ﻦﻣ ﺪﻳﺪﻌﻟا ﺰﺒﺧ ﻞﻀﻓﻷا ﻦﻣ
■ ﺎﻨﻴﻤﻟا ﺔﻘﺒﻄﺑ وأ ءادﻮﺳ ﺔﻘﺒﻄﺑ ﺔﻴﻠﻄﻤﻟا وأ ﺔﻤﺗﺎﻘﻟا ﺰﻴﺒﺨﻟا ﻲﻧاﻮﺻ مﺪﺨﺘﺳا
.ﺔﻳﺎﻐﻠﻟ ةﺪﻴﺟ ةرﻮﺼﺑ ةراﺮﺤﻟا ﺺﺘﻤﺗ ﻲﻬﻓ .(ﻞﻴﻣﺎﻨﻳﻹا)
10.ﻲﻬﻄﻟا ءﺎﻬﻧﻹ ﺔﻴﻘﺒﺘﻤﻟا ةراﺮﺤﻟا ماﺪﺨﺘﺳاو ،ﻖﺋﺎﻗد
ةﺪﻤﺑ ﻲﻬﻄﻟا
ﺔﺌﻴﺒﻟﺎﺑ ﺮﻀﺗ ﻻ ﺔﻘﻳﺮﻄﺑ تﺎﻔﻠﺨﻤﻟا ﻦﻣ ﺺﻠﺨﺘﻟا
.ﺔﺌﻴﺒﻟﺎﺑ ﺮﻀﺗ ﻻ ﺔﻘﻳﺮﻄﺑ ﻒﻴﻠﻐﺘﻟا داﻮﻣ ﻦﻣ ﺺﻠﺨﺗ
ﺔﻴﺑوروﻷا ﺔﻔﺻاﻮﻤﻠﻟ ﺎًﻘﺒﻃ ﺰﻴﻤﻣ زﺎﻬﺠﻟا اﺬه 2012/19/EU
ﺎﻤﻴﻓﺔﻤﻳﺪﻘﻟا ﺔﻴﻧوﺮﺘﻜﻟﻹاو ﺔﻴﺋﺎﺑﺮﻬﻜﻟا ةﺰﻬﺟﻷﺎﺑ ﻖﻠﻌﺘﻳ
دﺎﺤﺗﻻا لود ﻞﺧاد يرﺎﺴﻟا مﺎﻌﻟا رﺎﻃﻹا ﺔﻔﺻاﻮﻤﻟا ﻩﺬه دﺪﺤﺗو
.ﺎﻬﻟﻼﻐﺘﺳا ةدﺎﻋإو ﺔﻤﻳﺪﻘﻟا ةﺰﻬﺟﻷا دادﺮﺘﺳا ﺔﻴﻠﻤﻌﻟ ﻲﺑوروﻷا
■ ﻦﻣز ﺔﻳﺎﻬﻧ ﻞﺒﻗ زﺎﻬﺠﻟا ءﺎﻔﻃإ ﻚﻨﻜﻤﻳ ﺎًﻴﺒﺴﻧ ﺔﻠﻳﻮﻄﻟا ﻲﻬﻄﻟا تﺎﻗوﻷ ﺔﺒﺴﻨﻟﺎﺑ
)waste electrical and electronic equipment - WEEE(.
■.ﻲﻬﻄﻟا ﺰﻴﺣ ﻦﻣ ﺔﻳروﺮﻀﻟا ﺮﻴﻏ تﺎﻴﻟﺎﻤﻜﻟا جﺮﺧأ
6
Page 30

راﺮﺿﻷا بﺎﺒﺳأar
~
ﺔﻣﺎﻋ طﺎﻘﻧ
ﺔﻴﻄﻐﺘﺑ ﻢﻘﺗ ﻻ .ﻲﻬﻄﻟا ﺰﻴﺣ ﺔﻴﺿرأ ﻰﻠﻋ تﺎﻴﻟﺎﻤآ ﺔﻳأ ﻊﻀﺗ ﻻ :ﻲﻬﻄﻟا ﺰﻴﺣ
تازﻮﺒﺨﻤﻟا قرو وأ مﻮﻴﻨﻣﻮﻟﻷا ﻖﺋﺎﻗر ﻦﻣ عﻮﻧ يﺄﺑ ﻲﻬﻄﻟا ﺰﻴﺣ ﺔﻴﺿرأ .
ةراﺮﺣ ﺔﺟرد ﻂﺒﺿ ﺔﻟﺎﺣ ﻲﻓ ﻲﻬﻄﻟا ﺰﻴﺣ ﺔﻴﺿرأ ﻰﻠﻋ ﻲﻧاوأ ﺔﻳأ ﻊﻀﺗ ﻻ
50° ﺔﻨﻣزأ نأ ﺎﻤآ .ﺔﻧﻮﺨﺴﻟا ﻢآاﺮﺗ ﻰﻟإ يدﺆﻳ ﻚﻟذ نإ ﺚﻴﺣ .م
ﻦﻣ ﻰﻠﻋأ
ﻲﻓ ﻚﻟذ ﺐﺒﺴﺘﻳ فﻮﺳو ،ﺔﺤﻴﺤﺻ نﻮﻜﺗ ﻦﻟ ﺮﻴﻤﺤﺘﻟاو تازﻮﺒﺨﻤﻟا داﺪﻋإ
.(ﻞﻴﻣﺎﻨﻳﻹا) ﺎﻨﻴﻤﻟا ﺔﻘﺒﻄﺑ رﺮﻀﻟا قﺎﺤﻟإ
جﺎﺟز ﻰﻠﻋ ﺔﻤﺋاد ﺔﻴﻧﻮﻟ ﺎًﻌﻘﺑ كﺮﺘﺗ ﺪﻘﻓ .بﺎﺒﻟا جﺎﺟز ﻊﻣ ﻲﻬﻄﻟا ﺰﻴﺣ ﻲﻓ
.بﺎﺒﻟا
ﺔﺟرد ﺮﻴﻐﺗ نأ ﺎﻤآ .ءﺎﻣ رﺎﺨﺑ ﺪﻴﻟﻮﺗ ﻰﻟإ يدﺆﻳ ﻚﻟذ نإ ﺚﻴﺣ .ﻦﺧﺎﺴﻟا
.(ﻞﻴﻣﺎﻨﻳﻹا) ﺎﻨﻴﻤﻟا ﺔﻘﺒﻄﺑ اراﺮﺿأ ﻖﺤﻠﻳ ﺪﻗ ةراﺮﺤﻟا
.ﻪﻣاﺪﺨﺘﺳا ﺪﻌﺑ ﻒﺠﻳ ﻲﻬﻄﻟا ﺰﻴﺣ كﺮﺗا .أﺪﺼﻟا نﻮﻜﺘﻟ يدﺆﻳ نأ ﻦﻜﻤﻳ
بﺎﺑ ﻲﻓ ءﻲﺷ يأ ﺮﺸﺤﺗ ﻻ .ﻂﻘﻓ ﻖﻠﻐﻣ نﺮﻔﻟا بﺎﺑو دﺮﺒﻳ ﻲﻬﻄﻟا ﺰﻴﺣ كﺮﺗا
نﺈﻓ ،ﻂﻘﻓ ﻂﻴﺴﺑ راﺪﻘﻤﺑ ﻮﻟو ﺎًﺣﻮﺘﻔﻣ نﺎآ اذإ زﺎﻬﺠﻟا بﺎﺑ نأ ﻰﻋاﺮﻳو .زﺎﻬﺠﻟا
.ﺖﻗﻮﻟا روﺮﻤﺑ رﺮﻀﺘﺗ نأ ﻦﻜﻤﻳ ةروﺎﺠﻤﻟا تاﺪﺣﻮﻟا تﺎﻬﺟاو
ﻒﻴﻔﺠﺘﻟ بﺎﺒﻟا ﺢﺘﻔﺑ ﻢﻗ زﺎﻬﺠﻟا
ﻲﺘﻟا ﺔﻬآﺎﻔﻟا ةرﺎﺼﻌﻓ .ﺪﺤﻟا ﻦﻋ ﺪﺋاز ﻞﻜﺸﺑ ﺰﻴﺒﺨﻟا حﻮﻟ ءﻞﻤﺑ ﻢﻘﺗ ﻻ ،ةﺮﻴﺒآ
دﺪﻌﺘﻣ حﻮﻠﻟا مﺪﺨﺘﺳا .ﺎﻬﺘﻟازإ رﺬﻌﺘﻳ ﺎًﻌﻘﺑ كﺮﺘﺗ ﺰﻴﺒﺨﻟا حﻮﻟ ﻦﻣ ﺮﻃﺎﻘﺘﺗ
راﺮﺿأ ﻖﺤﻠﺗ ﺪﻗو .ﻞﻴﻐﺸﺘﻟا ﺪﻨﻋ ﺢﻴﺤﺻ ﻞﻜﺸﺑ زﺎﻬﺠﻟا بﺎﺑ ﻖﻠﻏ ﻦﻜﻤﻳ ﻻ
ﺔﻓﺎﻈﻧ ﻰﻠﻋ ﺎﻤﺋاد ﺔﻈﻓﺎﺤﻤﻟا ﺐﺠﻳ ﻚﻟﺬﻟ .ةروﺎﺠﻤﻟا تاﺪﺣﻮﻟا تﺎﻬﺟاﻮﺑ
اذإ وأ مﺎﻜﺣﻹا رﺎﻃإ نوﺪﺑ زﺎﻬﺠﻟا ﻞﻴﻐﺸﺘﺑ اﺪﺑأ ﻢﻘﺗ ﻻ .بﺎﺒﻟا مﺎﻜﺣإ رﺎﻃإ
زﺎﻬﺠﻟا بﺎﺑ ﻰﻠﻋ ﺪﻨﺘﺴﺗ ﻻ :ءﺎﻴﺷﻷا ﻊﺿﻮﻟ وأ سﻮﻠﺠﻠﻟ ﺢﻄﺴآ زﺎﻬﺠﻟا بﺎﺑ
ﻰﻠﻋ تﺎﻴﻟﺎﻤآ وأ ﻲﻧاوأ ﺔﻳأ ﻊﻀﺗ ﻻو .ﻪﻴﻠﻋ ءﺎﻴﺷﻷا ﻖﻠﻌﺗ وأ ﻪﻴﻠﻋ ﺲﻠﺠﺗ وأ
تﺎﻴﻟﺎﻤﻜﻟا لﺎﺧدإ ﻰﻠﻋ ﺎﻤﺋاد صﺮﺣﺎﻓ .زﺎﻬﺠﻟا بﺎﺑ ﻖﻠﻏ ﺪﻨﻋ بﺎﺒﻟا جﺎﺟز
.ﻚﻟﺬﻟ ًﺔ ﺠ ﻴ ﺘ ﻧ ﺮﺴﻜﻨﻳ ﺪﻗو ،زﺎﻬﺠﻟا نزو ﻞﻤﺤﺘﻳ نأ ﻊﻴﻄﺘﺴﻳ ﻻ
ﻞﻴﻐﺸﺗ ﺪﻌﺑ ةﺮﻴﺜآ ﺔﺑﻮﻃر دﻮﺟو ﺔﻟﺎﺣ ﻲﻓ ﻂﻘﻓ
.ﻲﻬﻄﻟا ﺰﻴﺣ
.ﺎًﻘﻤﻋ ﺮﺜآأ ﻮﻬﻓ ،عﺎﻄﺘﺴﻤﻟا رﺪﻗ تﺎﻣاﺪﺨﺘﺳﻻا
ﺔﺤﻔﺻ ﻲﻓ «ﻒﻴﻈﻨﺘﻟا»
11
.ﺔﻳﺎﻬﻨﻟا ﻰﺘﺣ ﻲﻬﻄﻟا ﺰﻴﺣ ﻲﻓ
.رﺮﺿ ﻪﺑ نﺎآ
.زﺎﻬﺠﻟا بﺎﺑ
]راﺮﺿﻷا بﺎﺒﺳأ
!ﻪﻴﺒﻨﺗ
ﻻ .ﺔﻠﻳﻮﻃ تاﺮﺘﻔﻟ ﻖﻠﻐﻣ ﻮهو ﻲﻬﻄﻟا ﺰﻴﺣ ﻲﻓ ﺔﺒﻃر ﺔﻤﻌﻃﺄﺑ ﻆﻔﺘﺤﺗ
ﻻ.ﻲﻬﻄﻟا ﺰﻴﺣ ﻲﻓ ﺔﻤﻌﻃأ ﺔﻳأ ﻦﻳﺰﺨﺘﺑ ﻢﻘﺗ
:ﺮﻳﺬﺤﺗ – !قوﺮﺤﺑ ﺔﺑﺎﺻﻹا ﺮﻄﺧ
■ .ﻞﻴﻐﺸﺘﻟا ءﺎﻨﺛأ ﻦﺨﺴﺗ ﺎﻬﻴﻟإ لﻮﺻﻮﻟا ﻦﻜﻤﻳ ﻲﺘﻟا ءاﺰﺟﻷا
راﺮﺿﻷا بﺎﺒﺳأ
■ ﺔﻴﺿرأ ﻰﻠﻋ ﻲﻧاوﻷا وأ تازﻮﺒﺨﻤﻟا داﺪﻋإ قرو وأ ﻖﺋﺎﻗﺮﻟا وأ تﺎﻴﻟﺎﻤﻜﻟا
زﺎﻬﺠﻟا ﻦﻣ بﺮﻘﻟﺎﺑ ﻒﻘﺗ ﻻ .ةراﺮﺤﻟا ﺔﺟرد ﺐﺴﺣ رﺎﺨﺒﻟا ﺔﻳؤر
زﺎﻬﺠﻟا ﻦﻋ لﺎﻔﻃﻷا ﺪﻌﺑأو .صﺮﺤﺑ زﺎﻬﺠﻟا بﺎﺑ ﺢﺘﻓا .ﻪﺤﺘﻓ ﺪﻨﻋ.
ﻻ.زﺎﻬﺠﻟا ﻦﻋ لﺎﻔﻃﻷا ﺪﻌﺑأو .ﺔﻨﺧﺎﺴﻟا ءاﺰﺟﻷا اﺪﺑأ ﺲﻤﻠﺗ
■ ﻦﻜﻤﻳ ﻻ ﺪﻗ .زﺎﻬﺠﻟا بﺎﺑ ﺢﺘﻓ ﺪﻨﻋ ﻦﺧﺎﺴﻟا رﺎﺨﺒﻟا بﺮﺴﺘﻳ ﺪﻗ
■ ﺪﻟﻮﻳ نأ ﻦﻜﻤﻳ ﻦﺧﺎﺳ ﻮهو ﻲﻬﻄﻟا ﺰﻴﺣ ﻲﻓ ءﺎﻤﻟا ﺾﻌﺑ دﻮﺟو
ﻲﻬﻄﻟا ﺰﻴﺣ ﻲﻓ ءﺎﻤﻟا ﺐﺼﺑ اﺪﺑأ ﻢﻘﺗ ﻻ .ﻦﺧﺎﺳ ءﺎﻣ رﺎﺨﺑ
.ﻦﺧﺎﺴﻟا
■ ﻲهو مﻮﻴﻨﻣﻮﻟﻷا ﻖﺋﺎﻗر ﻦﻴﺑ ﺲﻣﻼﺗ ثوﺪﺤﺑ ﺢﻤﺴﻳ ﻻ :مﻮﻴﻨﻣﻮﻟﻷا ﻖﺋﺎﻗر
:ﺮﻳﺬﺤﺗ – !ﺔﺑﺎﺻﻹا ﺮﻄﺧ
■ مﺪﺨﺘﺴﺗ ﻻ .تﺎﻘﻘﺸﺗ ﻰﻟإ رﻮﻄﺘﺗ ﺪﻗ زﺎﻬﺠﻟا بﺎﺑ جﺎﺟز شوﺪﺧ
.ﻞآﺂﺘﻠﻟ ﺔﺒﺒﺴﻣ وأ ﺔﻨﺸﺧ ﻒﻴﻈﻨﺗ داﻮﻣ وأ جﺎﺟز ﺔﻄﺷﺎآ
■ ﻲﻬﻄﻟا ﺰﻴﺣ ﻲﻓ ءﺎﻤﻟا ﺐﺼﺑ اًﺪﺑأ ﻢﻘﺗ ﻻ :ﻦﺧﺎﺴﻟا ﻲﻬﻄﻟا ﺰﻴﺣ ﻲﻓ ءﺎﻤﻟا
■ ﻲﻟﺎﺘﻟﺎﺑو ﻪﻘﻠﻏو بﺎﺒﻟا ﺢﺘﻓ ﺪﻨﻋ زﺎﻬﺠﻟا بﺎﺑ تﻼﺼﻔﻣ كﺮﺤﺘﺗ
قﺎﻄﻧ ﻲﻓ كﺪﻳ ﻞﺧﺪﺗ ﻻ .ﻚﻤﺴﺟ ﻦﻣ ءﺰﺟ ﺎﻬﻴﻓ ﺮﺸﺤﻨﻳ نأ ﻦﻜﻤﻳ
■ ﻲﻬﻄﻟا ﺰﻴﺣ ﻲﻓ ﺔﻠﻳﻮﻃ ةﺮﺘﻔﻟ ﺔﺑﻮﻃﺮﻟا دﻮﺟو :ﻲﻬﻄﻟا ﺰﻴﺣ ﻲﻓ ﺔﺑﻮﻃﺮﻟا
.تﻼﺼﻔﻤﻟا
:ﺮﻳﺬﺤﺗ – !ﻲﺋﺎﺑﺮﻬﻜﻟا ﻖﻌﺼﻟا ﺮﻄﺧ
■ .رﺎﻄﺧأ ﻰﻠﻋ ﺎﻴﻨﻓ ﺔﻤﻴﻠﺴﻟا ﺮﻴﻏ حﻼﺻﻹا لﺎﻤﻋأ يﻮﻄﻨﺗ
■ ﺔﻌﻔﺗﺮﻣ ةراﺮﺣ تﺎﺟرد ﻰﻠﻋ زﺎﻬﺠﻟا ﻞﻴﻐﺸﺗ ﺪﻌﺑ :حﻮﺘﻔﻣ زﺎﻬﺠﻟا بﺎﺑو ﺪﻳﺮﺒﺘﻟا
ﺲﺑﺎﻘﻟا عﺰﻧﺎﻓ ،زﺎﻬﺠﻟﺎﺑ ﻞﻄﻋ كﺎﻨه نﺎآ اذإ .ﺎﻨﻠﺒِﻗ ﻦﻣ برﺪﻣ
قوﺪﻨﺻ ﻲﻓ دﻮﺟﻮﻤﻟا ﺮﻬﺼﻤﻟا ﻞﺼﻓا وأ ﺲﺒﻘﻤﻟا ﻦﻣ ﻲﺋﺎﺑﺮﻬﻜﻟا
.ءﻼﻤﻌﻟا ﺔﻣﺪﺨﺑ ﻞﺼﺗا .ﺮهﺎﺼﻤﻟا
■ ﺔﻴﻤﻜﺑ ﺔﻬآﺎﻓ ةرﺎﺼﻋ ﻰﻠﻋ يﻮﺘﺤﺗ ﻲﺘﻟا ﺮﺋﺎﻄﻔﻟا داﺪﻋإ ﺪﻨﻋ :ﺔﻬآﺎﻔﻟا ةرﺎﺼﻋ
ﻞﻴﺻﻮﺗ تﻼﺑﺎآ ﻞﻌﺠﺗ ﻻ .زﺎﻬﺠﻠﻟ ﺔﻨﺧﺎﺴﻟا ءاﺰﺟﻷا ﺔﺴﻣﻼﻣ
اﺪﺑأ زﺎﻬﺠﻠﻟ ﺔﻨﺧﺎﺴﻟا ءاﺰﺟﻷا ﺲﻣﻼﺗ ﺔﻴﺋﺎﺑﺮﻬﻜﻟا ةﺰﻬﺟﻷا.
■ ،مﺎﻜﺣﻹا رﺎﻃﻹ ﺪﻳﺪﺸﻟا خﺎﺴﺗﻻا ﺔﻟﺎﺣ ﻲﻓ :بﺎﺒﻟا مﺎﻜﺣإ رﺎﻃﻹ ﺪﻳﺪﺸﻟا خﺎﺴﺗﻻا
ةﺰﻬﺟأ وأ ﻲﻟﺎﻌﻟا ﻂﻐﻀﻟﺎﺑ ﻒﻴﻈﻨﺗ ةﺰﻬﺟأ ﺔﻳأ مﺪﺨﺘﺴﺗ ﻻ .ﻲﺋﺎﺑﺮﻬآ
.رﺎﺨﺒﻟﺎﺑ ﻒﻴﻈﻨﺗ
ﺲﺑﺎﻘﻟا عﺰﻧا ،ﺔﺒﻤﻠﻟا ﺮﻴﻴﻐﺗ ﻞﺒﻗ .ﻲﺋﺎﺑﺮﻬآ رﺎﻴﺗ ﺎﻬﻴﻓ يﺮﺴﻳ
■
ﻲﻓ دﻮﺟﻮﻤﻟا ﺮﻬﺼﻤﻟا ﻞﺼﻓا وأ ﺲﺒﻘﻤﻟا ﻦﻣ ﻲﺋﺎﺑﺮﻬﻜﻟا
.ﺮهﺎﺼﻤﻟا قوﺪﻨﺻ
■ شﺪﺧ ﻲﻓ تﺎﻴﻟﺎﻤﻜﻟا ﺐﺒﺴﺘﺗ ﺪﻗ زﺎﻬﺠﻟا زاﺮﻃ ﺐﺴﺣ :تﺎﻴﻟﺎﻤﻜﻟا لﺎﺧدإ
ﺲﺒﻘﻤﻟا ﻦﻣ ﻲﺋﺎﺑﺮﻬﻜﻟا ﺲﺑﺎﻘﻟا عﺰﻧا .ﻞﻄﻌﻣ زﺎﻬﺟ ﻞﻴﻐﺸﺘﺑ اًﺪﺑأ
ﻞﺼﺗا .ﺮهﺎﺼﻤﻟا قوﺪﻨﺻ ﻲﻓ دﻮﺟﻮﻤﻟا ﺮﻬﺼﻤﻟا ﻞﺼﻓا وأ
■ بﺎﺒﻟا ﺾﺒﻘﻤﻓ .بﺎﺒﻟا ﺾﺒﻘﻣ ﻦﻣ ﻪﻜﺴﻤﺗ وأ زﺎﻬﺠﻟا ﻞﻤﺤﺗ ﻻ :زﺎﻬﺠﻟا ﻞﻘﻧ
.ءﻼﻤﻌﻟا ﺔﻣﺪﺨﺑ
ﻻ ءﻼﻤﻋ ﺔﻣﺪﺧ ﻲﻨﻓ ﻞﺒﻗ ﻦﻣ ﻻإ حﻼﺻﻹا لﺎﻤﻋأ ﺬﻴﻔﻨﺗ زﻮﺠﻳ
■ ﺔﻟﺎﺣ ﻲﻓ ﺔﻴﺋﺎﺑﺮﻬﻜﻟا ةﺰﻬﺟﻷا تﻼﺑﺎﻜﻟ ﺔﻟزﺎﻌﻟا ةدﺎﻤﻟا ﺮﻬﺼﻨﺗ ﺪﻗ
■ ﻖﻌﺻ ثوﺪﺣ ﻲﻓ ﺐﺒﺴﺘﺗ ﺪﻗ زﺎﻬﺠﻟا ﻲﻓ ﻞﻏﻮﺘﺗ ﻲﺘﻟا ﺔﺑﻮﻃﺮﻟا
■ ﺔﺒﻤﻠﻟا ةاود تﺎﺴﻣﻼﻣ نأ ﻲﻬﻄﻟا ﺰﻴﺣ ﺔﺒﻤﻟ ﺮﻴﻴﻐﺗ ﺪﻨﻋ ﻰﻋاﺮﻳ
■ ﻢﻘﺗ ﻻ .ﻲﺋﺎﺑﺮﻬآ ﻖﻌﺻ ثوﺪﺣ ﻲﻓ ﺐﺒﺴﺘﻳ ﺪﻗ ﻞﻄﻌﻤﻟا زﺎﻬﺠﻟا
5
Page 31

arتﺎﻤﻴﻠﻌﺘﻠﻟ ﻖﺑﺎﻄﻤﻟا لﺎﻤﻌﺘﺳﻻا
~
ﺔﻣﺎﻋ طﺎﻘﻧ
.ﻲﻬﻄﻟا ﺰﻴﺣ ﻲﻓ لﺎﻌﺘﺷﻼﻟ ﺔﻠﺑﺎﻗ داﻮﻤﺑ اﺪﺑأ ﻆﻔﺘﺤﺗ ﻻ .ﻞﻌﺘﺸﺗ نأ
ﻒﻗوأ .ﻪﻠﺧاﺪﺑ ﺔﻨﺧدأ دﻮﺟو ﺔﻟﺎﺣ ﻲﻓ اًﺪﺑأ زﺎﻬﺠﻟا بﺎﺑ ﺢﺘﻔﺗ ﻻ
ﺮﻬﺼﻤﻟا ﻞﺼﻓا وأ ﺲﺒﻘﻤﻟا ﻦﻣ ﻲﺋﺎﺑﺮﻬﻜﻟا ﺲﺑﺎﻘﻟا عﺰﻧاو زﺎﻬﺠﻟا
.ﺮهﺎﺼﻤﻟا قوﺪﻨﺻ ﻲﻓ
ﺔﻓﺎﺠﻟا تﺎﺧﺎﺴﺗﻻا ﺔﻟازإ ﻰﻠﻋ ﻞﻴﻐﺸﺘﻟا ﻞﺒﻗ صﺮﺣا .ﻞﻌﺘﺸﺗ
.تﺎﻴﻟﺎﻤﻜﻟا ﻦﻣو ﻦﻴﺨﺴﺘﻟا ﺮﺻﺎﻨﻋ ﻦﻣو ﻲﻬﻄﻟا ﺰﻴﺣ ﻦﻣ
ﻰﻟإ يدﺆﻳ ﺎﻤﻣ ،ﻦﻴﺨﺴﺘﻟا ﺮﺻﺎﻨﻋو تازﻮﺒﺨﻤﻟا داﺪﻋإ قرو
ﻰﻠﻋ ﻪﺘﻴﺒﺜﺗ نود تازﻮﺒﺨﻤﻟا داﺪﻋإ قرو ﻊﻀﺗ ﻻ .ﻪﻟﺎﻌﺘﺷا
داﺪﻋإ قرو ﺖﻴﺒﺜﺗ ﻰﻠﻋ ﺎﻤﺋاد صﺮﺣا .ءﺎﻤﺣﻹا ءﺎﻨﺛأ تﺎﻴﻟﺎﻤﻜﻟا
ﻢﻗو .ﻪﻴﻠﻋ ﺰﻴﺒﺧ ﺔﻴﻨﻴﺻ وأ ﻖﺒﻃ ﻊﺿﻮﺑ ﻪﻧﺎﻜﻣ ﻲﻓ تازﻮﺒﺨﻤﻟا
تازﻮﺒﺨﻤﻟا داﺪﻋإ قرﻮﺑ ﻂﻘﻓ
بﻮﻠﻄﻤﻟا ﺢﻄﺴﻟا ﺔﻴﻄﻐﺘﺑ .
ﻻو.تﺎﻴﻟﺎﻤﻜﻟا قﻮﻓ تازﻮﺒﺨﻤﻟا داﺪﻋإ قرو زﺮﺒﻳ نأ زﻮﺠﻳ
ﺎًﻤﺋاد صﺮﺣا .ﺔﻨﺧﺎﺳ ﻲهو ﻦﻴﺨﺴﺘﻟا ﺮﺻﺎﻨﻋ وأ ﻲﻬﻄﻟا ﺰﻴﺤﻟ
.زﺎﻬﺠﻟا ﻦﻋ لﺎﻔﻃﻷا ﺪﻌﺑأو .دﺮﺒﻳ زﺎﻬﺠﻟا كﺮﺗ ﻰﻠﻋ
ﻲﻬﻄﻟا ﺰﻴﺣ ﻦﻣ نﺮﻔﻟا ﻲﻧاوأ وأ تﺎﻴﻟﺎﻤﻜﻟا جاﺮﺧﻹ نﺮﻔﻠﻟ ﺔﻃﻮﻓ.
ﻦﻣ ةﺮﻴﺒآ تﺎﻴﻤآ ﻰﻠﻋ يﻮﺘﺤﺗ ﺔﻤﻌﻃأ ﺮﻴﻀﺤﺘﺑ اًﺪﺑأ ﻢﻘﺗ ﻻ
ﻰﻠﻋ ﺮﺼﺘﻗا .لﻮﺤﻜﻟا ﻦﻣ ﺔﻴﻟﺎﻋ ﺔﺒﺴﻧ ﻰﻠﻋ ﺔﻠﻤﺘﺸﻤﻟا ﻞﺋاﻮﺴﻟا
بﺎﺑ ﺢﺘﻓا .ةﺰآﺮﻤﻟا تﺎﺑوﺮﺸﻤﻟا ﻦﻣ ﺔﻠﻴﻠﻗ تﺎﻴﻤآ ماﺪﺨﺘﺳا
.صﺮﺤﺑ زﺎﻬﺠﻟا
.قوﺮﺤﺑ ﺔﺑﺎﺻﻹا مﺪﻌﻟ ﺔﺟﺮﺨُﻣ ﻞﻣاﻮﺤﻟاو ﺪﻳﺪﺸﻟا صﺮﺤﻟا
(ﺔﻤﻬﻤﻟا نﺎﻣﻷا تادﺎﺷرإ
ﻞﻜﺸﺑ زﺎﻬﺠﻟا ماﺪﺨﺘﺳا ﻚﻨﻜﻤﻴﺳ ﻂﻘﻓ ﺬﺋﺪﻨﻋ .ﺔﻳﺎﻨﻌﺑ ﻞﻴﻟﺪﻟا اﺬه أﺮﻗا
ﺔﻤﻬﻤﻟا نﺎﻣﻷا تادﺎﺷرإ
8تﺎﻤﻴﻠﻌﺘﻠﻟ ﻖﺑﺎﻄﻤﻟا لﺎﻤﻌﺘﺳﻻا
تﺎﻤﻴﻠﻌﺘﻠﻟ ﻖﺑﺎﻄﻤﻟا لﺎﻤﻌﺘﺳﻻا
ﺎﻘﺣﻻ ﻪﻣاﺪﺨﺘﺳﻻ ﺐﻴآﺮﺘﻟاو لﺎﻤﻌﺘﺳﻻا ﻞﻴﻟﺪﺑ ﻆﻔﺘﺣا .ﻦﻣﺁو ﺢﻴﺤﺻ
:ﺮﻳﺬﺤﺗ – !ﻖﻳﺮﺤﻟا ﺮﻄﺧ
■ ﻦﻜﻤﻳ ﻲﻬﻄﻟا ﺰﻴﺣ ﻲﻓ ﺎﻬﻨﻳﺰﺨﺗ ﻢﺘﻳ ﻲﺘﻟا لﺎﻌﺘﺷﻼﻟ ﺔﻠﺑﺎﻘﻟا داﻮﻤﻟا
.ﺪﻳﺪﺠﻟا ﻚﻟﺎﻤﻠﻟ ﻪﻤﻴﻠﺴﺘﻟ وأ
تاﺪﺣو ﻞﺧاد ﺞﻣﺪﻣ ﻞﻜﺸﺑ ﺐﻴآﺮﺘﻠﻟ ﻂﻘﻓ ﺺﺼﺨﻣ زﺎﻬﺠﻟا اﺬه
.ﺐﻴآﺮﺘﻟﺎﺑ ﺔﺻﺎﺨﻟا تﺎﻤﻴﻠﻌﺘﻟا ﻰﻋاﺮﺗ .ﺦﺒﻄﻤﻟا
ﻞﻴﺻﻮﺘﺑ ﻢﻘﺗ ﻻو .ﻒﻴﻠﻐﺘﻟا داﻮﻣ ﻦﻣ ﻪﺟاﺮﺧإ ﺪﻌﺑ زﺎﻬﺠﻟا ﺺﺤﻓا
.ﻞﻘﻨﻟا ﺔﻴﻠﻤﻋ ﻦﻋ ﺔﺠﺗﺎﻧ
■ نأ ﻦﻜﻤﻳ مﻮﺤﻠﻟا تارﺎﺼﻋو نﻮهﺪﻟاو ﺔﺒﺋﺎﺴﻟا ﺔﻤﻌﻃﻷا ﺎﻳﺎﻘﺑ
.ﺪﻤﺘﻌﻣ ﻲﻨﻓ ﻞﺒﻗ ﻦﻣ ﻻإ ﺲﺑاﻮﻗ نوﺪﺑ ةﺰﻬﺟﻷا ﻞﻴﺻﻮﺗ زﻮﺠﻳ ﻻ
راﺮﺿأ دﻮﺟو ﺔﻟﺎﺣ ﻲﻓ زﺎﻬﺠﻟا
ﺔﺠﺗﺎﻨﻟا راﺮﺿﻷا ﺔﻟﺎﺣ ﻲﻓ نﺎﻤﻀﻟا قﻮﻘﺤﺑ ﺔﺒﻟﺎﻄﻤﻟا ﻖﺤﻳ ﻻ ﺚﻴﺣ
.ﺊﻃﺎﺨﻟا ﻞﻴﺻﻮﺘﻟا ﻦﻋ
■ ﻦﻴﺑ ﺲﻣﻼﺗ ثﺪﺤﻳ ﺪﻗو .زﺎﻬﺠﻟا بﺎﺑ ﺢﺘﻓ ﺪﻨﻋ ﻲﺋاﻮه رﺎﻴﺗ ﺄﺸﻨﻳ
ﻲﻠﺧاﺪﻟا قﺎﻄﻨﻟا ﻲﻓو ﻲﻟﺰﻨﻤﻟا ماﺪﺨﺘﺳﻼﻟ ﺺﺼﺨﻣ زﺎﻬﺠﻟا اﺬه
ﻂﻘﻓ ﺔﻤﻌﻃﻷا داﺪﻋإ ﻲﻓ زﺎﻬﺠﻟا ماﺪﺨﺘﺳا ﻰﻠﻋ ﺮﺼﺘﻗا .
اﺬه مﺪﺨﺘﺳا .ﻞﻴﻐﺸﺘﻟا ءﺎﻨﺛأ زﺎﻬﺠﻟا ﺔﺒﻗاﺮﻣ
ﻦﻴﻌﺘﻳو .تﺎﺑوﺮﺸﻤﻟاو
.ﻂﻘﻓ ﺔﻘﻠﻐﻤﻟا ﻦآﺎﻣﻷا ﻲﻓ زﺎﻬﺠﻟا
2000قﻮﻓ ﺮﺘﻣ
ﻰﺘﺣ عﺎﻔﺗرا ﻰﻠﻋ ماﺪﺨﺘﺳﻼﻟ ﺐﺳﺎﻨﻣ زﺎﻬﺠﻟا اﺬه
.ﻰﺼﻗأ ﺪﺤآ ﺮﺤﺒﻟا ﺢﻄﺳ ىﻮﺘﺴﻣ
ﺔﻄﺳاﻮﺑ وأ ﻲﺟرﺎﺧ ﻲﺗﺎﻘﻴﻣ ﻊﻣ ﻞﻴﻐﺸﺘﻠﻟ ﺎﻤﻤﺼﻣ ﺲﻴﻟ زﺎﻬﺠﻟا اﺬه
:ﺮﻳﺬﺤﺗ – !قوﺮﺤﺑ ﺔﺑﺎﺻﻹا ﺮﻄﺧ
■ ﺔﻴﻠﺧاﺪﻟا ﺢﻄﺳﻷا اﺪﺑأ ﺲﻤﻠﺗ ﻻ .ﺔﻳﺎﻐﻠﻟ ﺎﻨﺧﺎﺳ زﺎﻬﺠﻟا ﺢﺒﺼﻳ
8 تاﻮﻨﺳ
ﺮﻤﻋ ﻦﻣ لﺎﻔﻃﻷا ﻞَﺒِﻗ ﻦﻣ زﺎﻬﺠﻟا اﺬه ماﺪﺨﺘﺳا ﻦﻜﻤﻳ
.ﺪﻌﺑ ﻦﻋ ﻞﻴﻐﺸﺗ زﺎﻬﺟ
وأ ﺔﻳﺪﺴﺠﻟا تارﺪﻘﻟا ﻲﻓ ﺺﻘﻧ ﻦﻣ نﻮﻧﺎﻌﻳ ﻦﻳﺬﻟا صﺎﺨﺷﻷا وأ
■ ﺎﻤﺋاد مﺪﺨﺘﺳا .ﺔﻳﺎﻐﻠﻟ ﺔﻨﺧﺎﺳ ﺢﺒﺼﺗ نﺮﻔﻟا ﻲﻧاوأو تﺎﻴﻟﺎﻤﻜﻟا
ةﺮﺒﺨﻟا ﻲﻓ رﻮﺼﻗ ﻢﻬﻳﺪﻟ ﻦﻳﺬﻟا صﺎﺨﺷﻷا وأ ﺔﻴﻠﻘﻌﻟا وأ ﺔﻴﺴﺤﻟا
فاﺮﺷﻹﺎﺑ ﻢﻬﺘﻣﻼﺳ ﻦﻋ لوﺆﺴﻣ ﺺﺨﺷ مﻮﻘﻳ نأ ﺔﻄﻳﺮﺷ ﺔﻓﺮﻌﻤﻟا وأ
■ .ﻦﺧﺎﺳ ﻮهو ﻲﻬﻄﻟا ﺰﻴﺣ ﻲﻓ ﻞﻌﺘﺸﺗ نأ ﻦﻜﻤﻳ لﻮﺤﻜﻟا ةﺮﺨﺑأ
ﻦﻣ ﺪآﺄﺘﻟا ﻊﻣ زﺎﻬﺠﻠﻟ ﻦﻣﻵا ماﺪﺨﺘﺳﻻا ﺔﻴﻔﻴآ ﻰﻟإ ﻢﻬﻬﻴﺟﻮﺗ وأ ﻢﻬﻴﻠﻋ
.ﻚﻟﺬﺑ ﺔﻄﺒﺗﺮﻤﻟا رﺎﻄﺧﻸﻟ ﻢﻬآاردإ
زﺎﻬﺠﻟا ﻒﻴﻈﻨﺗ لﺎﻔﻃﻸﻟ زﻮﺠﻳ
ﻻ .زﺎﻬﺠﻟﺎﺑ ﺚﺒﻌﻟا لﺎﻔﻃﻸﻟ زﻮﺠﻳ ﻻ
ﻦﺳ ﻲﻓ اﻮﻧﻮﻜﻳ ﻢﻟ ﺎﻣ مﺪﺨﺘﺴﻤﻟﺎﺑ ﺔﻃﻮﻨﻤﻟا ﺔﻧﺎﻴﺼﻟا لﺎﻤﻋأ ءاﺮﺟإ وأ
15.ﻚﻟذ ءﺎﻨﺛأ ﻢﻬﺘﺒﻗاﺮﻣ ﻢﺘﻳ نأ ﻰﻠﻋ ،ﺮﺜآأ وأ ﺔﻨﺳ
■ ﻲﺧﻮﺗ ﻰﺟﺮُﻳ .زﺎﻬﺠﻟا ﻞﻴﻐﺸﺗ ءﺎﻨﺛأ ﺔﻴﺑﻮﻜﺴﻴﻠﺘﻟا ﻞﻣاﻮﺤﻟا ﻦﺨﺴﺗ
8 ﻞﺑﺎآو زﺎﻬﺠﻟا ﻦﻋ ﻢهدﺎﻌﺑإ ﺐﺠﻳ تاﻮﻨﺳ
ﻦﺳ نود لﺎﻔﻃﻷا
.ﻞﻴﺻﻮﺘﻟا
ﺢﻴﺤﺻ ﻞﻜﺸﺑ ﻲﻬﻄﻟا ﺰﻴﺣ ﻲﻓ تﺎﻴﻟﺎﻤﻜﻟا لﺎﺧدإ ﻰﻠﻋ ﺎﻤﺋاد صﺮﺣا .
ﺔﺤﻔﺻ ﻲﻓ «تﺎﻴﻟﺎﻤﻜﻟا»
8
4
Page 32

ar
تﺎﻳﻮﺘﺤﻤﻟا سﺮﻬﻓ
ﻻا ﻞﻴﻟدلﺎ ﻤﻌﺘﺳﺞﻣﺪﻤﻟا نﺮﻔ ﻟ ا
]ar[
4ءﻼﻤﻌﻟا ﺔﻣﺪﺧ. . . . . . . . . . . . . . . . . . . . . . . . . . . .15
ﺞﺘﻨﻤﻟا ﻢﻗرE ﻊﻨﺼﻟا ﻢﻗرو FD. . . . . . . . . . . . . . . . . . . . . . 15
Jﺎﻨﺑ صﺎﺨﻟا ﻲﻬﻄﻟا ﻮﻳدﻮﺘﺳ ﻲﻓ ﺎهرﺎﺒﺘﺧا ﻢﺗ ﻲﺘﻟا قﺎﺒﻃﻷا. . . .16
ماﺪﺨﺘﺳﻻا ﺢﺋﺎﺼﻧ. . . . . . . . . . . . . . . . . . . . . . . . . . . . . .16
تﺎﺠﺘﻨﻤﻟا تﺎﻣﻮﻠﻌﻣ
تﺎﻣﺪﺨﻟاو رﺎﻴﻐﻟا ﻊﻄﻗو تﺎﻴﻟﺎﻤﻜﻟاو تﺎﺠﺘﻨﻤﻟا لﻮﺣ تﺎﻣﻮﻠﻌﻤﻟا ﻦﻣ ﺪﻳﺰﻤﻟا ﺪﺠﺗ
www.bosch-home.comﻲﻧوﺮﺘﻜﻟﻹا ﺮﺠﺘﻤﻟا ﻲﻓو
www.bosch-eshop.com
ةﺰﻬﺟﻷا تﺎﻣاﺪﺨﺘﺳاو تﺎﻘﻴﺒﻄﺘﺑ ﻖﻠﻌﺘﻳ ﺎﻤﻴﻓ ﻢﻜﺗارﺎﺴﻔﺘﺳا ﻰﻠﻋ دﺮﻟاو ﺔﻣزﻼﻟا
089 69 339 339 ﻦﻣ :ﺔﻌﻤﺠﻟا ﻰﻟإ ﻦﻴﻨﺛﻻا ﻦﻣ ﻚﻟذو)
:ﺖﻧﺮﺘﻧﻹا ﻊﻗﻮﻣ ﻰﻠﻋ
:ﺖﻧﺮﺘﻧﻹا ﻊﻗﻮﻣ ﻰﻠﻋ
ﺮﺴﻳشﻮﺑ تﺎﻣﻼﻌﺘﺳا ﻖﻳﺮﻓتﺎﺠﺘﻨﻤﻟا تﺎﻣﻮﻠﻌﻣو ةرﻮﺸﻤﻟا ﻚﻟ مﺪﻘﻳ نأ
ﻰﻠﻋ ﻢﻗر :ﻒﺗﺎه
8.00 ﺔﻋﺎﺴﻟا ﻰﻟإ 18.00.ﺎﻴﻧﺎﻤﻟأ ﻰﻠﻋ ﻂﻘﻓ يﺮﺴﻳ (
ﺔﻋﺎﺴﻟا
8تﺎﻤﻴﻠﻌﺘﻠﻟ ﻖﺑﺎﻄﻤﻟا لﺎﻤﻌﺘﺳﻻا . . . . . . . . . . . . . . . . . . . .4
(ﺔﻤﻬﻤﻟا نﺎﻣﻷا تادﺎﺷرإ. . . . . . . . . . . . . . . . . . . . . . .4
ﺔﻣﺎﻋ طﺎﻘﻧ . . . . . . . . . . . . . . . . . . . . . . . . . . . . . . . . . . 4
]راﺮﺿﻷا بﺎﺒﺳأ. . . . . . . . . . . . . . . . . . . . . . . . . . . 5
ﺔﻣﺎﻋ طﺎﻘﻧ . . . . . . . . . . . . . . . . . . . . . . . . . . . . . . . . . . 5
7ﺔﺌﻴﺒﻟا ﺔﻳﺎﻤﺣ . . . . . . . . . . . . . . . . . . . . . . . . . . . . .6
ﺔﻗﺎﻄﻟا ﺮﻴﻓﻮﺗ . . . . . . . . . . . . . . . . . . . . . . . . . . . . . . . . . 6
ﺔﺌﻴﺒﻟﺎﺑ ﺮﻀﺗ ﻻ ﺔﻘﻳﺮﻄﺑ تﺎﻔﻠﺨﻤﻟا ﻦﻣ ﺺﻠﺨﺘﻟا . . . . . . . . . . . . . . .6
*زﺎﻬﺠﻟا ﻰﻠﻋ فﺮﻌﺘﻟا. . . . . . . . . . . . . . . . . . . . . . . . 7
لﺎﻤﻌﺘﺳﻻا قﺎﻄﻧ . . . . . . . . . . . . . . . . . . . . . . . . . . . . . . .7
ﻒﺋﺎﻇﻮﻟاو ﻦﻴﺨﺴﺘﻟا عاﻮﻧأ . . . . . . . . . . . . . . . . . . . . . . . . . .7
ﺖﻗﻮﻟا ﻂﺒﺿ حﺎﺘﻔﻣ . . . . . . . . . . . . . . . . . . . . . . . . . . . . . .7
ةراﺮﺤﻟا ﺔﺟرد رﺎﻴﺘﺧا حﺎﺘﻔﻣ . . . . . . . . . . . . . . . . . . . . . . . . 7
ةراﺮﺤﻟا ﺔﺟرد ﺔﺒﻗاﺮﻣ نﺎﻴﺑ . . . . . . . . . . . . . . . . . . . . . . . . . 8
ﻲﻬﻄﻟا ﺰﻴﺣ ﻒﺋﺎﻇو . . . . . . . . . . . . . . . . . . . . . . . . . . . . .8
_تﺎﻴﻟﺎﻤﻜﻟا. . . . . . . . . . . . . . . . . . . . . . . . . . . . . . .8
لﺎﺧدﻹا تﺎﻳﻮﺘﺴﻣ . . . . . . . . . . . . . . . . . . . . . . . . . . . . . . 8
ﺖﻴﺒﺜﺘﻟا ﺔﻔﻴﻇو . . . . . . . . . . . . . . . . . . . . . . . . . . . . . . . . 9
ﺔﺻﺎﺨﻟا تﺎﻴﻟﺎﻤﻜﻟا . . . . . . . . . . . . . . . . . . . . . . . . . . . . . .9
Kةﺮﻣ لوﻷ ماﺪﺨﺘﺳﻻا ﻞﺒﻗ . . . . . . . . . . . . . . . . . . . . . . 9
نﺮﻔﻟا ﻦﻴﺨﺴﺗ . . . . . . . . . . . . . . . . . . . . . . . . . . . . . . . . .9
تﺎﻴﻟﺎﻤﻜﻟا ﻒﻴﻈﻨﺗ . . . . . . . . . . . . . . . . . . . . . . . . . . . . . . .9
1زﺎﻬﺠﻟا لﺎﻤﻌﺘﺳا. . . . . . . . . . . . . . . . . . . . . . . . . . .10
نﺮﻔﻟا فﺎﻘﻳإو ﻞﻴﻐﺸﺗ. . . . . . . . . . . . . . . . . . . . . . . . . . . . 10
Oﺖﻗﻮﻟا ﻒﺋﺎﻇو. . . . . . . . . . . . . . . . . . . . . . . . . . . .10
ﺮﻴﺼﻘﻟا ﺖﻗﻮﻟا ﻲﺗﺎﻘﻴﻣ ﻂﺒﺿ. . . . . . . . . . . . . . . . . . . . . . . . .10
ﺔﻴﻨﻣﺰﻟا ةﺪﻤﻟا ﻂﺒﺿ. . . . . . . . . . . . . . . . . . . . . . . . . . . . . 10
Dﻒﻴﻈﻨﺘﻟا. . . . . . . . . . . . . . . . . . . . . . . . . . . . . . . 11
ﺔﺒﺳﺎﻨﻤﻟا تﺎﻔﻈﻨﻤﻟا. . . . . . . . . . . . . . . . . . . . . . . . . . . . . .11
زﺎﻬﺠﻟا ﺔﻓﺎﻈﻧ ﻰﻠﻋ ﺔﻈﻓﺎﺤﻤﻟا. . . . . . . . . . . . . . . . . . . . . . . . 12
ﻲﻬﻄﻟا ﺰﻴﺣ ﻒﻴﻈﻨﺗ. . . . . . . . . . . . . . . . . . . . . . . . . . . . . 12
pنﺎﺒﻀﻘﻟا. . . . . . . . . . . . . . . . . . . . . . . . . . . . . . . 12
نﺎﺒﻀﻘﻟا ﻚﻓ. . . . . . . . . . . . . . . . . . . . . . . . . . . . . . . . . 12
نﺎﺒﻀﻘﻟا ﺐﻴآﺮﺗ. . . . . . . . . . . . . . . . . . . . . . . . . . . . . . . 12
qزﺎﻬﺠﻟا بﺎﺑ. . . . . . . . . . . . . . . . . . . . . . . . . . . . . 13
بﺎﺒﻟا جﺎﺟز ﺐﻴآﺮﺗو ﻚﻓ. . . . . . . . . . . . . . . . . . . . . . . . . . 13
زﺎﻬﺠﻟا بﺎﺑ ﺐﻴآﺮﺗو ﻚﻓ. . . . . . . . . . . . . . . . . . . . . . . . . . 13
3؟ﻞﻤﻌﻟا ﺎﻣ ،تﻻﻼﺘﺧﻻا. . . . . . . . . . . . . . . . . . . . . . . .14
نﺮﻔﻟا ﺔﺒﻤﻟ ﺮﻴﻴﻐﺗ. . . . . . . . . . . . . . . . . . . . . . . . . . . . . . .14
3
Page 33

6
Page 34

6
Page 35

6
Page 36

5IBOLZPVGPSCVZJOHB
#PTDI)PNF"QQMJBODF
5HJLVWHU\RXUQHZGHYLFHRQ0\%RVFKQRZDQGSURILWGLUHFWO\IURP
t&YQFSUUJQTUSJDLTGPSZPVSBQQMJBODF
t8BSSBOUZFYUFOTJPOPQUJPOT
t%JTDPVOUTGPSBDDFTTPSJFTTQBSFQBSUT
t%JHJUBMNBOVBMBOEBMMBQQMJBODFEBUBBUIBOE
t&BTZBDDFTTUP#PTDI)PNF"QQMJBODFT4FSWJDF
)UHHDQGHDV\UHJLVWUDWLRQ²DOVRRQPRELOHSKRQHV
XXXCPTDIIPNFDPNXFMDPNF
-PPLJOHGPSIFMQ
:PV}MMGJOEJUIFSF
([SHUWDGYLFHIRU\RXU%RVFKKRPHDSSOLDQFHVQHHGKHOSZLWKSUREOHPV
RUDUHSDLUIURP%RVFKH[SHUWV
)LQGRXWHYHU\WKLQJDERXWWKHPDQ\ZD\V%RVFKFDQVXSSRUW\RX
XXXCPTDIIPNFDPNTFSWJDF
$POUBDUEBUBPGBMMDPVOUSJFTBSFMJTUFEJOUIFBUUBDIFETFSWJDFEJSFDUPSZ
3PCFSU#PTDI)BVTHFSÉUF(NC)
DUO:HU\6WUDH
&
0QFKHQ
*HUPDQ\
XXXCPTDIIPNFDPN
*9001438264*
9001438264
990911
 Loading...