

Bosch SIDEEXHAUST User Manual

Clothes Dryer Side Exhaust Conversion Kit
Instructions
Clothes Dryer Side Exhaust Conversion Kit Instructions 5070000698

CLOTHES DRYER BOTTOM EXHAUST CONVERSION INSTRUCTIONS
Your clothes dryer is manufactured as a rear exhaust unit. Using the Side Exhaust
Conversion Kit, the dryer can be configured to exhaust from the side of the unit.
• Do not use these instructions or the materials contained in the Clothes Dryer Side Exhaust
Conversion Kit for any other purpose than that for which they are intended, which is the conversion of the clothes dryer from a rear exhaust unit to a side exhaust unit.
• As the manufacturer has no control over the customer’s selection of the service technician who will perform
the work described in this manual, the manufacturer can not be held responsible for death, injury, or
property damage that may result from work performed improperly or from the use of inferior tools and/or
materials.
Carefully read and understand these instructions before attempting the appliance conversion.
SAVE THESE INSTRUCTIONS
1Clothes Dryer Side Exhaust Conversion Instructions 5070000698
CLOTHES DRYER BOTTOM
EXAUST CONVERSION
INSTRUCTIONS
1. Materials Supplied
• Straight Duct
• Elbow Duct
• Exit Duct with Collar
• Self Tapping Screws (5)
• Cover
Aluminum Tape
•
• Instructions
2. Materials Needed
• T orx T20 Driver
• Hammer
• Marker, Scratch Awl, or Punch
• Drill
• Drill Bit, 1/8”
• Cutting Tool, 4” diameter (“Knock-out
Punch” tool), Bosch part no. WTZ1310,
Siemens part no. WZ20410
• Large sheet of cardboard or other
protective barrier for dryer front
3. Procedure
1) If the unit is secured to the floor with
anti-tip restraints, remove the
restraints.
2) If the unit is a gas dryer, turn off the
gas supply to the dryer.
3) Disconnect the electrical power to
the dryer.
4) If the unit is a gas dryer, disconnect
the gas connection from the dryer.
5) Move the dryer away from the wall.
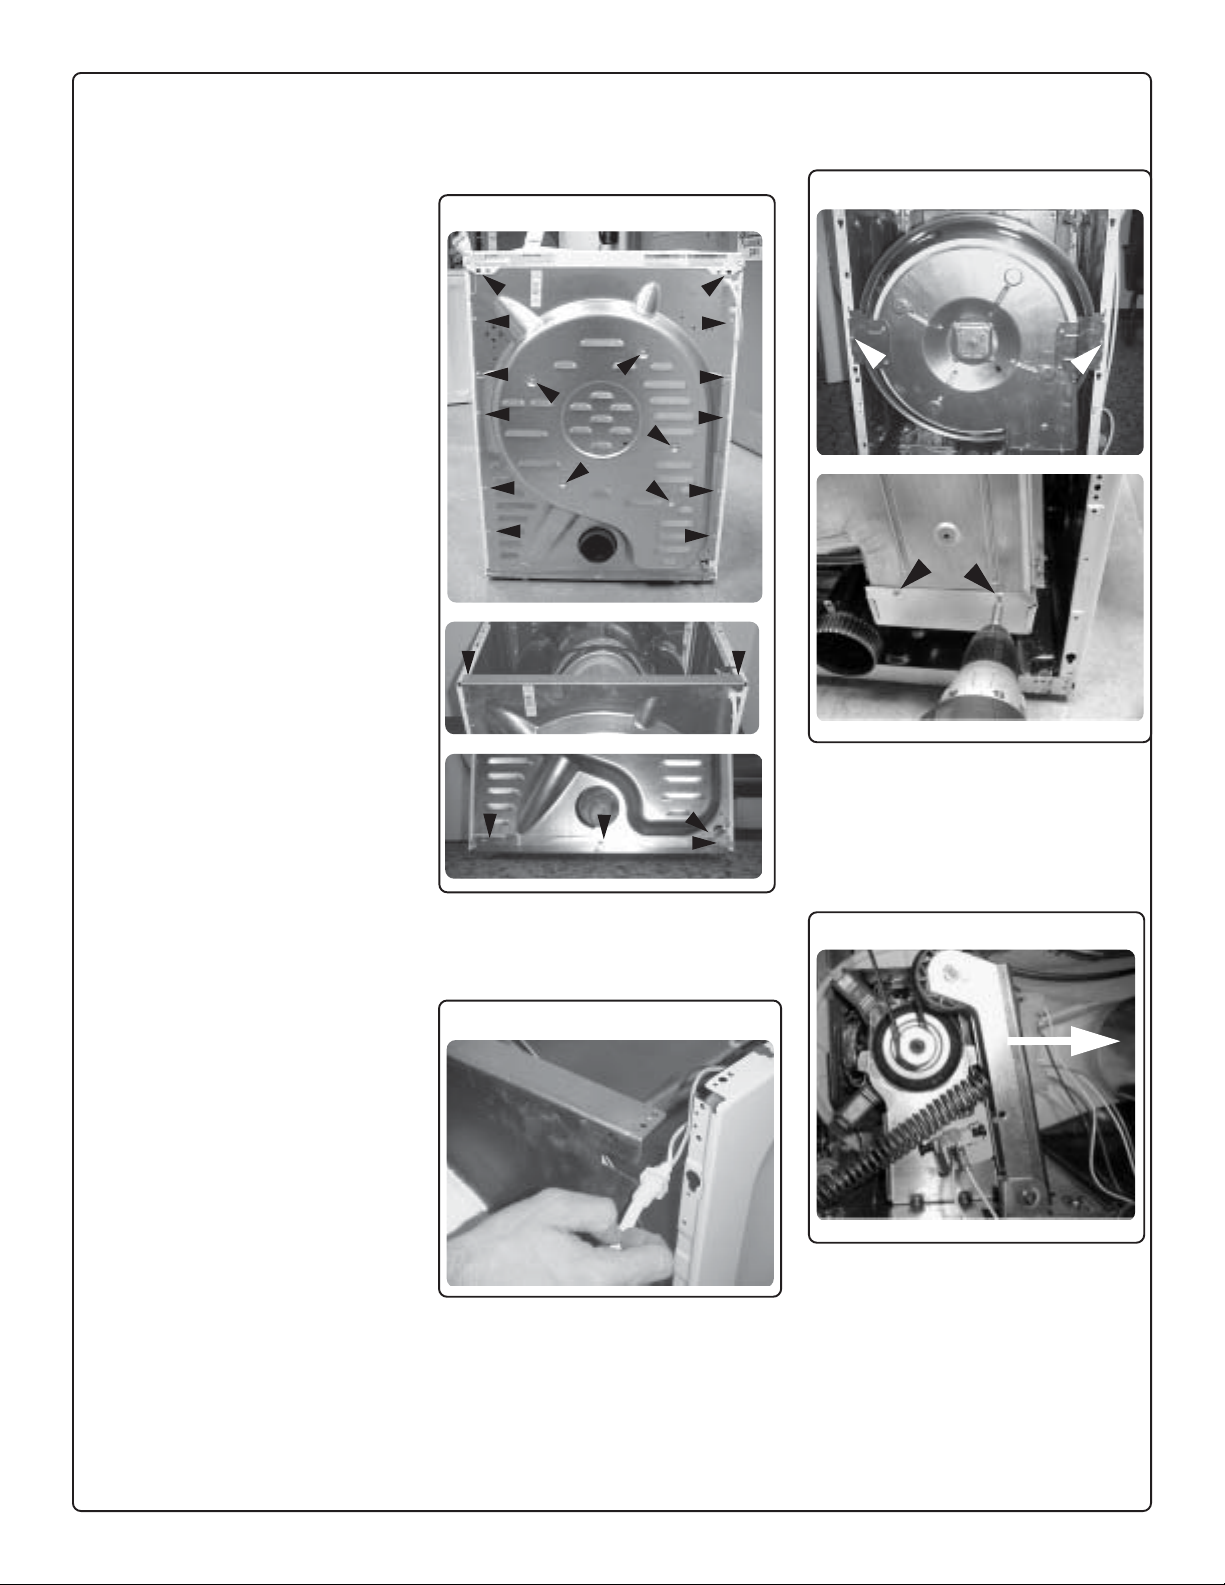
6) Use a Torx T20 driver to remove the
screws that secure the back and top
panels to the dryer as shown in
Figure 1. Set the secrews aside for
reinstallation later.
Figure 1
7) Remove the top panel and back
panels, being careful to remove the
power cord from the back panel as
shown in Figure 2.
8) Use a Torx T20 driver to remove the
four screws shown in Figure 3. Set
the screws aside for reinstallation
later.
Figure 3
NOTE: After removing the belt from the
drive pulley, do not allow the tension
lever to slam to its resting position
9) Pull the tension lever to the right as
shown by the arrow in Figure 4,
and remove the belt from the drive
pulley.
Figure 4
Figure 2
2 Clothes Dryer Side Exhaust Conversion Kit Instructions 5070000698
 Loading...