

Bosch SHE99C05 Use And Care Manual
BOSCH
YOUR LIFE. OUR INSPIRATION.
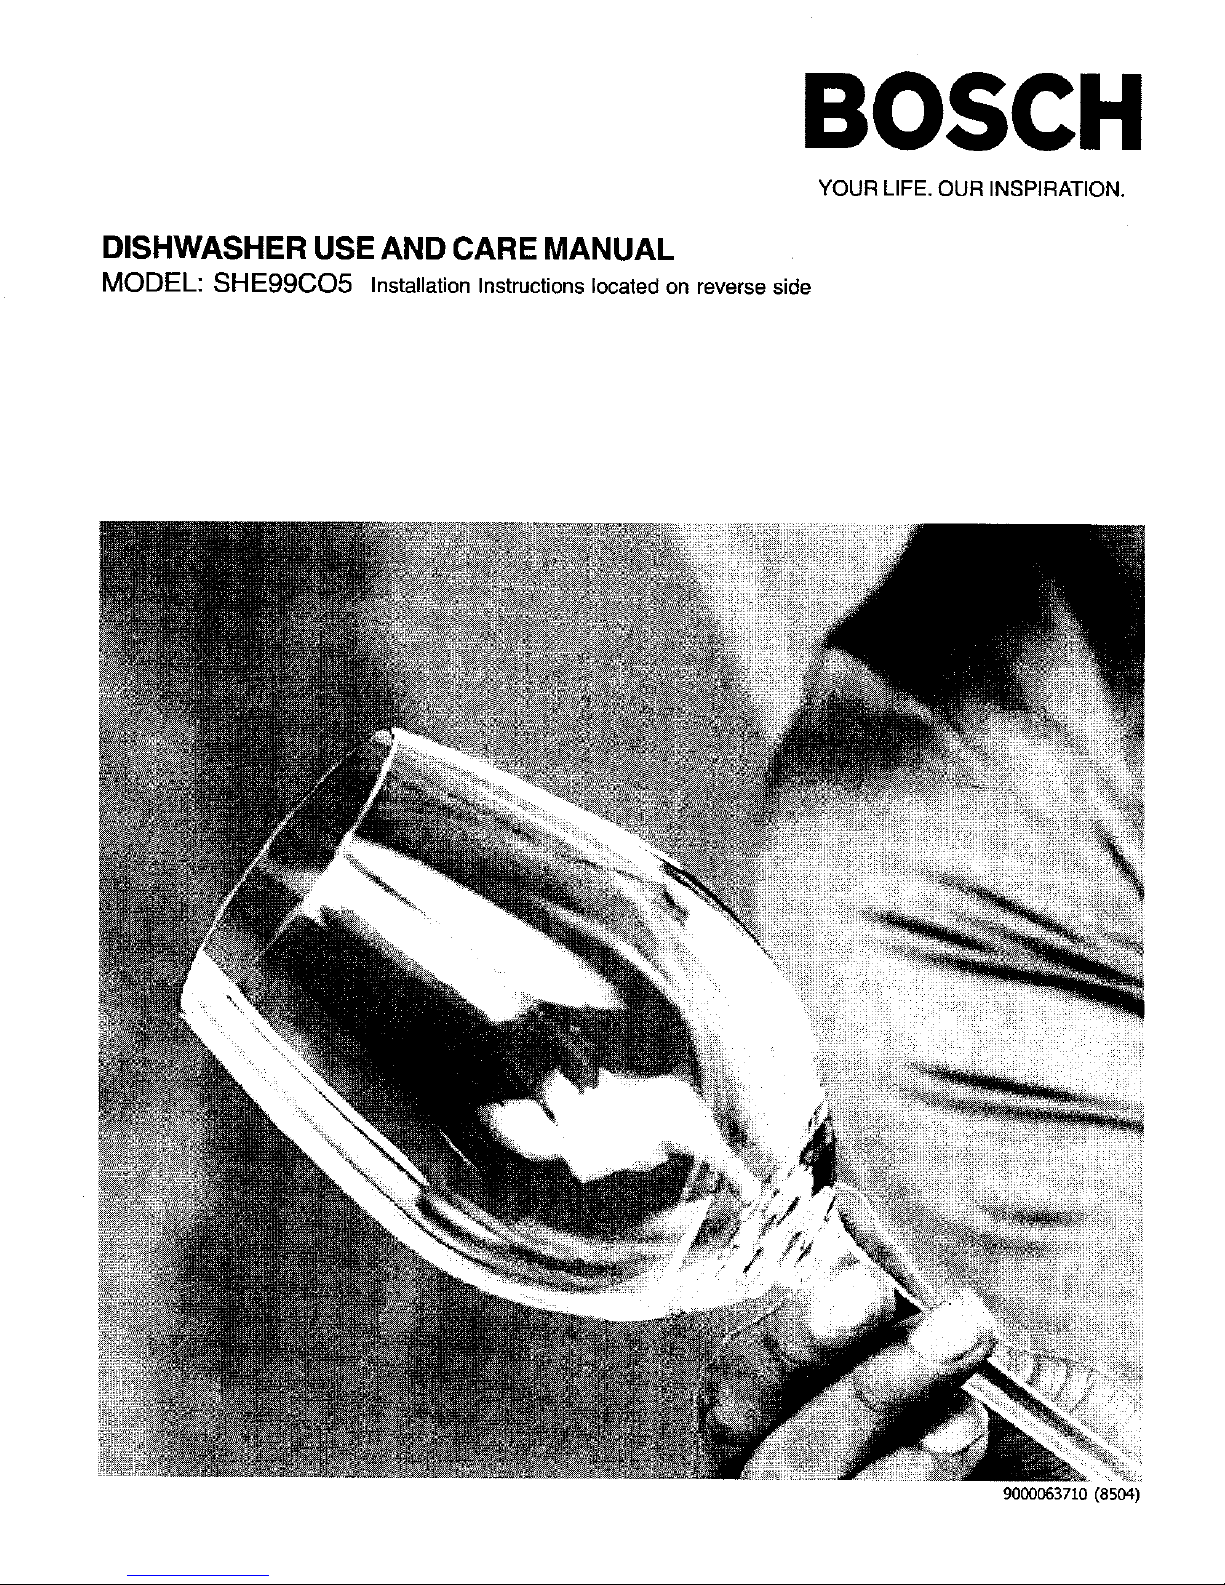
DISHWASHER USE AND CARE MANUAL
MODEL: SHE99CO5 Installation Instructions located on reverse side
9000063710 (8504)

Congratulations and Thank You from Bosch!
Thank you for selecting a Bosch dishwasher. You have joined the many consumers who
demand quiet and superior performance from their dishwashers.
This manual was written with your safety and convenience in mind, and the information
contained herein is very important. We highly recommend that you read this manual
before you use your dishwasher for the first time.
To learn even more about your dishwasher and available accessories, as well as many
other top-quality Bosch appliances, visit our website at www.boschappliances.com.
Please contact us if you have any questions or comments. You can call us at
1-800-944-2904, or you can write us at:
BSH Home Appliances, Corp.
5551 McFadden Avenue
Huntington Beach, CA 92649
Enjoy!
Table of Contents
IMPORTANT SAFETY INSTRUCTIONS ................................................. 2
Dishwasher Components ........................................................................... 3
Dishwasher Features ................................................................................. 3
Dishware Materials .................................................................................... 4
Preparing and Loading the Dishware ......................................................... 5
Loading the Silverware Basket ................................................................... 8
Operating the Dishwasher .......................................................................... 9
Selecting a Wash Cycle .......................................................................................................... 9
Selecting Dishwasher Options ................................................................................................ 10
Adding Detergent and RinseAid ............................................................... 14
Care and Maintenance ............................................................................. 16
Self Help .................................................................................................. 19
Cycle Duration/Water Usage Information .................................................. 20
Customer Service ..................................................................................... 21
Statement of Warranties ........................................................................... 22
important Safety instructions
Misuse of the dishwasher can result
in serious injury or death. Do not use the
dishwasher in any way not covered in this
manual or for any purpose other than
those explained on the following pages.
Severe product damage and/or injury could
result from the use of unqualified service
technicians or non=original replacement
parts. All repairs must be performed by a
qualified service technician using only
original equipment factory replacement
parts.
Never use steam cleaning product to clean
your dishwasher. The manufacturer will not
be liable for possible damages or
consequences.
Never use harsh chemicals to clean your
dishwasher. Some chloride-containing
cleaning products can damage your
dishwasher and may present health hazardst
o Do not tamper with or override controls and
interlocks.
Do not abuse, sit on, or stand on the door or
dish racks of the dishwasher.
To reduce the risk of injury, do not allow
children to play in or on the dishwasher.
When children become old enough to operate
the appliance, it is the legal responsibility of
the parents or legal guardians to ensure that
they are instructed in safe practices by
qualified persons.
Under certain conditions, hydrogen gas may
be produced in a hot water system that has
not been used for two weeks or more.
Hydrogen gas is explosive. Before using a
dishwasher that is connected to a hot water
system that has been unused for two weeks
or longer, turn on all hot water faucets and let
the water flow from each for several minutes.
This will release any accumulated hydrogen
gas. As the gas is explosive, do not smoke or
use an open flame during this time.
Remove the door to the washing
compartment when removing an old
dishwasher from service or discarding.
To avoid floor damage and possible mold
growth, do not allow wet areas to remain
around or under the dishwasher.
Protect your dishwasher from the elements.
Protect against freezing to avoid possible
damage to the fill valve. Damage caused by
freezing is not covered by the warranty.
Use this dishwasher only for its intended
function, which is the washing of household
dishware and kitchenware.
This dishwasher is provided with a manual set
which includes Installation Instructions and
Use and Care Manual. Read and understand
all instructions before using the dishwasher.
Use only detergents or wetting agents
recommended for use in a dishwasher, and
keep them out of the reach of childen.
When loading items to be washed:
Locate sharp items so that they are
not likely to damage the door seal.
Load knives and other sharp utensils
with their HANDLES UP to reduce the
risk of cut-type injuries.
Do not wash plastic items unless they are
marked "dishwasher safe" or the equivalent.
For plastic items not so marked, check the
manufacturer's recommendations.
• Do not operate your dishwasher unless all
enclosure panels are in place.
Electrical shock or fire could result if the
electrical supply for the dishwasher
covered in this manual is incorrectly
installed or if the dishwasher has been
improperly grounded. Do not use the
dishwasher covered in this manual if you
are not certain the electrical supply has
been correctly installed or the dishwasher
has been properly grounded.
GROUNDING INSTRUCTIONS
This appliance must be grounded to a metal,
permanent wiring system, or an equipment
grounding conductor must be run with the circuit
conductors and connected to the equipment
grounding terminal or lead on the dishwasher.
See the Installation instructions included with
this dishwasher for more information on electrical
requirements.
SAVE THESE INSTRUCTIONS!
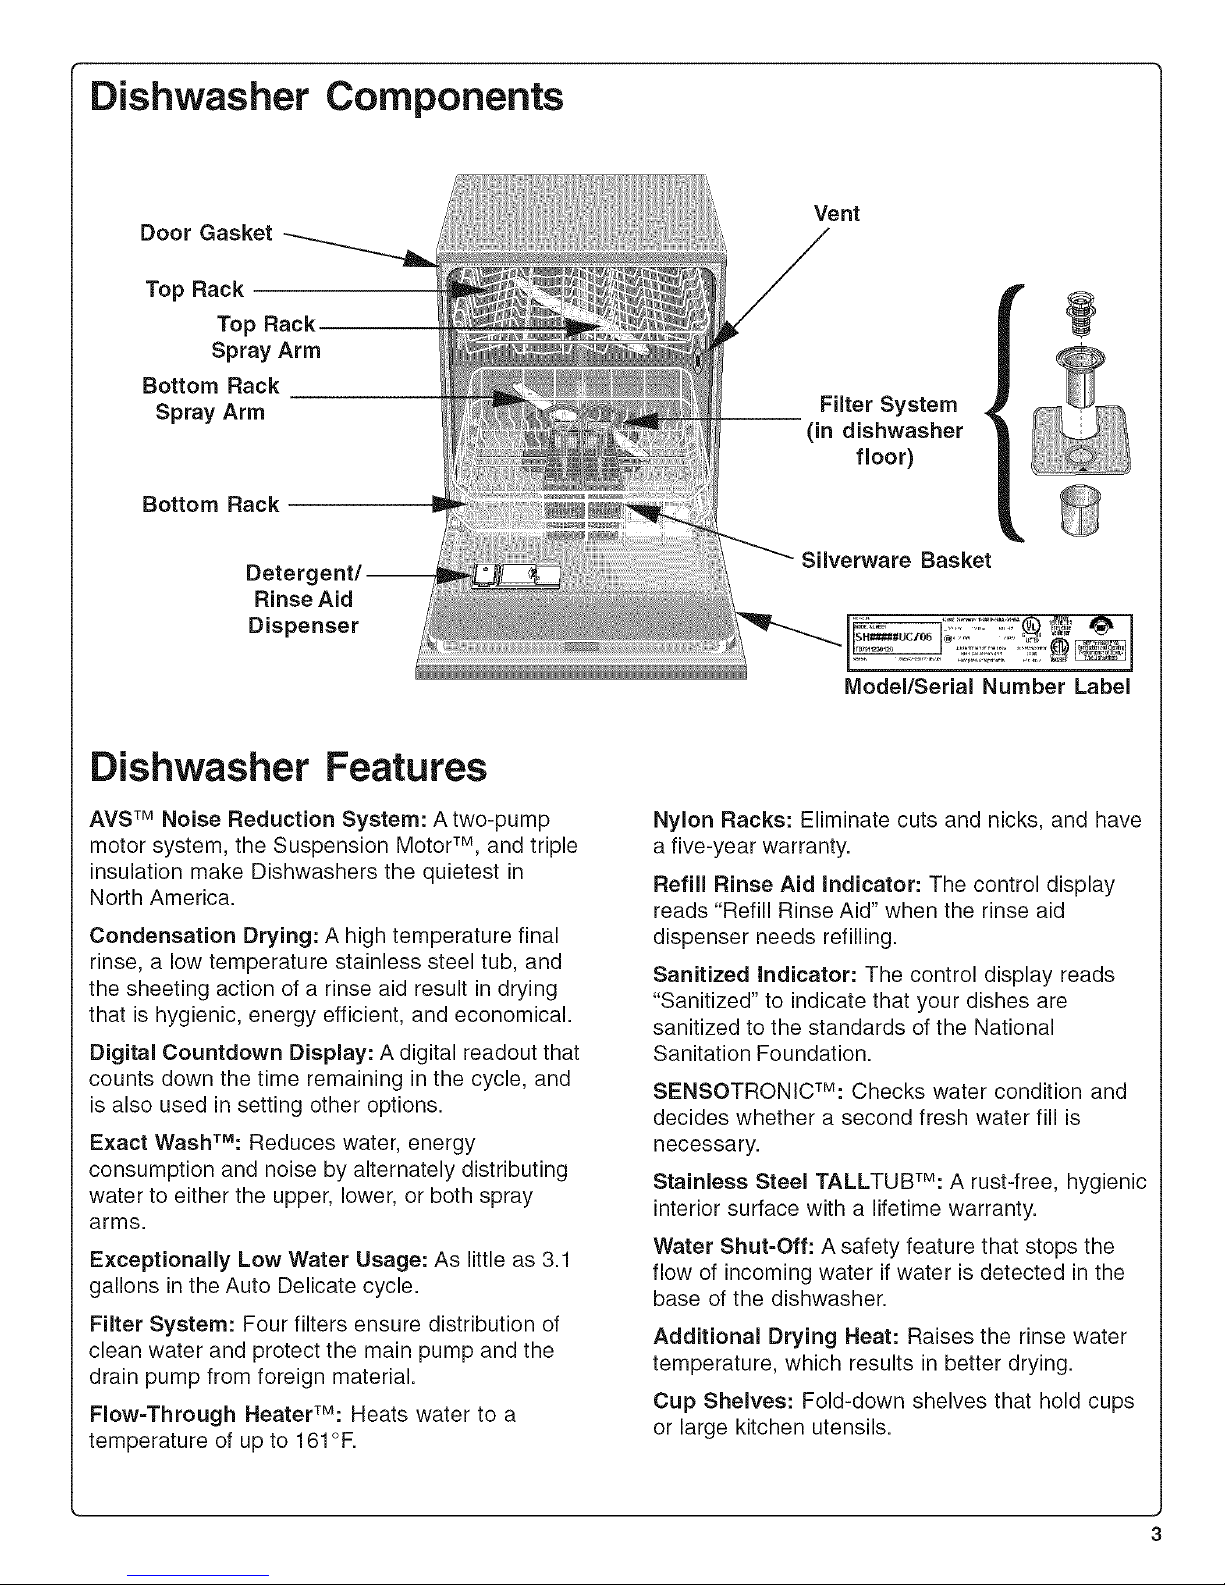
Dishwasher Components
Door Gasket
Vent
Top Rack
Top Rack
Spray Arm
Bottom Rack
Spray Arm
Bottom Rack
Deterg
Rinse Aid
Dispenser
Filter System
(in dishwasher
floor)
Silverware Basket
IVlodel/Serial Number Label
Dishwasher Features
AVS TM Noise Reduction System: A two-pump
motor system, the Suspension Motor TM, and triple
insulation make Dishwashers the quietest in
North America.
Condensation Drying: A high temperature final
rinse, a low temperature stainless steel tub, and
the sheeting action of a rinse aid result in drying
that is hygienic, energy efficient, and economical.
Digital Countdown Display: A digital readout that
counts down the time remaining in the cycle, and
is also used in setting other options.
Exact WashTM: Reduces water, energy
consumption and noise by alternately distributing
water to either the upper, lower, or both spray
arms.
Exceptionally Low Water Usage: As little as 3.1
gallons in the Auto Delicate cycle.
Filter System: Four filters ensure distribution of
clean water and protect the main pump and the
drain pump from foreign material.
Flow-Through HeaterZU: Heats water to a
temperature of up to 161 °F.
Nylon Racks: Eliminate cuts and nicks, and have
a five-year warranty.
Refill Rinse Aid indicator: The control display
reads "Refill Rinse Aid" when the rinse aid
dispenser needs refilling.
Sanitized indicator: The control display reads
"Sanitized" to indicate that your dishes are
sanitized to the standards of the National
Sanitation Foundation.
SENSOTRONICTM: Checks water condition and
decides whether a second fresh water fill is
necessary.
Stainless Steel TALLTUBTM: A rust-free, hygienic
interior surface with a lifetime warranty.
Water Shut=Off: A safety feature that stops the
flow of incoming water if water is detected in the
base of the dishwasher.
Additional Drying Heat: Raises the rinse water
temperature, which results in better drying.
Cup Shelves: Fold-down shelves that hold cups
or large kitchen utensils.
Dishwasher Features
(continued)
Cycle Completion Signal: A tone that sounds
when your dishwasher finishes washing and
drying your dishes.
Delay Start: Allows you to delay the start of the
wash cycle for up to 24 hours.
Knife Rack: Designed to securely hold fine
cutlery and silverware.
RACKMATIC TM Height-Adjustable Top Rack:
Lower the top rack to accommodate large items
in the top rack, or raise the top rack to make
room for larger items in the bottom rack.
Top Rack and Bottom Rack Flip Tines: Tines
that fold down allow loading versatility.
POWERBOOSTTM: Reduces the time to
complete the wash cycle by preheating.
OPTIDRYTM: Senses when the unit is low on
rinse aid and automatically adjusts the drying
performance.
CLEARTOUCH TM Controls: Provide easy
cleaning while preventing accidental activation.
Rack Attachment: Adds additional fold down
shelves on the lower rack.
Dishware Materials
NOTE: Before using your dishwasher for the first
time, check the information in this section. Some
items are not dishwasher safe and should be
hand-washed; others require special loading.
Contact the item's manufacturer if you are unsure
about the item's dishwasher suitability.
Recommended
Aluminum: Colored anodized aluminum may fade
over time. Minerals in your water may cause the
aluminum to darken or spot. This can usually be
removed by using a soap-filled steel wool pad.
China, Crystal, Stoneware: Some
hand-painted pieces may discolor, fade, or spot.
Hand-wash these pieces. Position fragile
glassware so that it will not topple over or
contact other pieces during the wash cycle.
Glass: Milk glass may yellow.
Non-Stick Coatings: Apply a light coating of
vegetable oil to non-stick surfaces after drying.
Plastics: Make sure the piece is dishwasher safe.
Stainless Steel, Sterling Silver, and Silver
Plate: Place these pieces so that they do not
contact dissimilar metals.
Not Recommended
Acrylic: Crazing (small cracks throughout the
acrylic) may occur.
Adhesive=Joined Pieces: Adhesives that join
materials such as plastic, wood, bone, steel
copper, tin, etc. may loosen.
Bone=Handled Utensils: Handles may separate.
Iron: Iron will rust. Hand-wash and dry
immediately.
Non-Dishware Items: Your dishwasher is
intended for use in cleaning ONLY standard
household dishware and kitchenware.
Pewter, Brass, Bronze: Pewter will tarnish.
Hand-wash and dry immediately.
Tin: Tin will rust. Hand-wash and dry
immediately.
Wood: Wooden bowls, wooden utensils, and
wood-handled utensils can crack, warp, and lose
their finish.
Preparing and Loading the Dishware
Preparing the Dishware
Do not pre-wash items having loosely-attached
soiling.
Remove large food particles, bones, seeds,
toothpicks, and excessive grease.
Items having burned-on or hard, stuck-on soiling
may require soaking and hand-scouring.
Loading the Dishwasher
To avoid dishwasher damage, do not load
the dishwasher with objects such as paper
products, plastic bags, packing materials,
or anything other than normal dishware and
kitchenware. Do not load the dishwasher
with anything other than dishwasher=safe
dishware and kitchenware.
Check the Dishware Materials section of this
manual if you are unsure about an item's
dishwasher suitability.
Load only dishwasher-safe items into the
dishwasher.
Load items so that water can reach every part of
every item.
Place pots, pans, cups, bowls, and glasses
upside-down in the racks.
Separate items of dissimilar metals.
NOTE: Make sure items do not protrude through
the bottom of the racks and block the spray arms.
Top Rack Accessories
RACKMATIC TM Top Rack Height Adjustment
The top rack can be lowered to accommodate
large items in the top rack, and raised to make
room for large items in the bottom rack.
To lower the top rack:
1. Pull the top rack
out of the
dishwasher
until it stops
rolling.
2. Press the
RackMatic TM
handles inward
as shown in
Figure 1 and let
the rack drop.
Figure 1
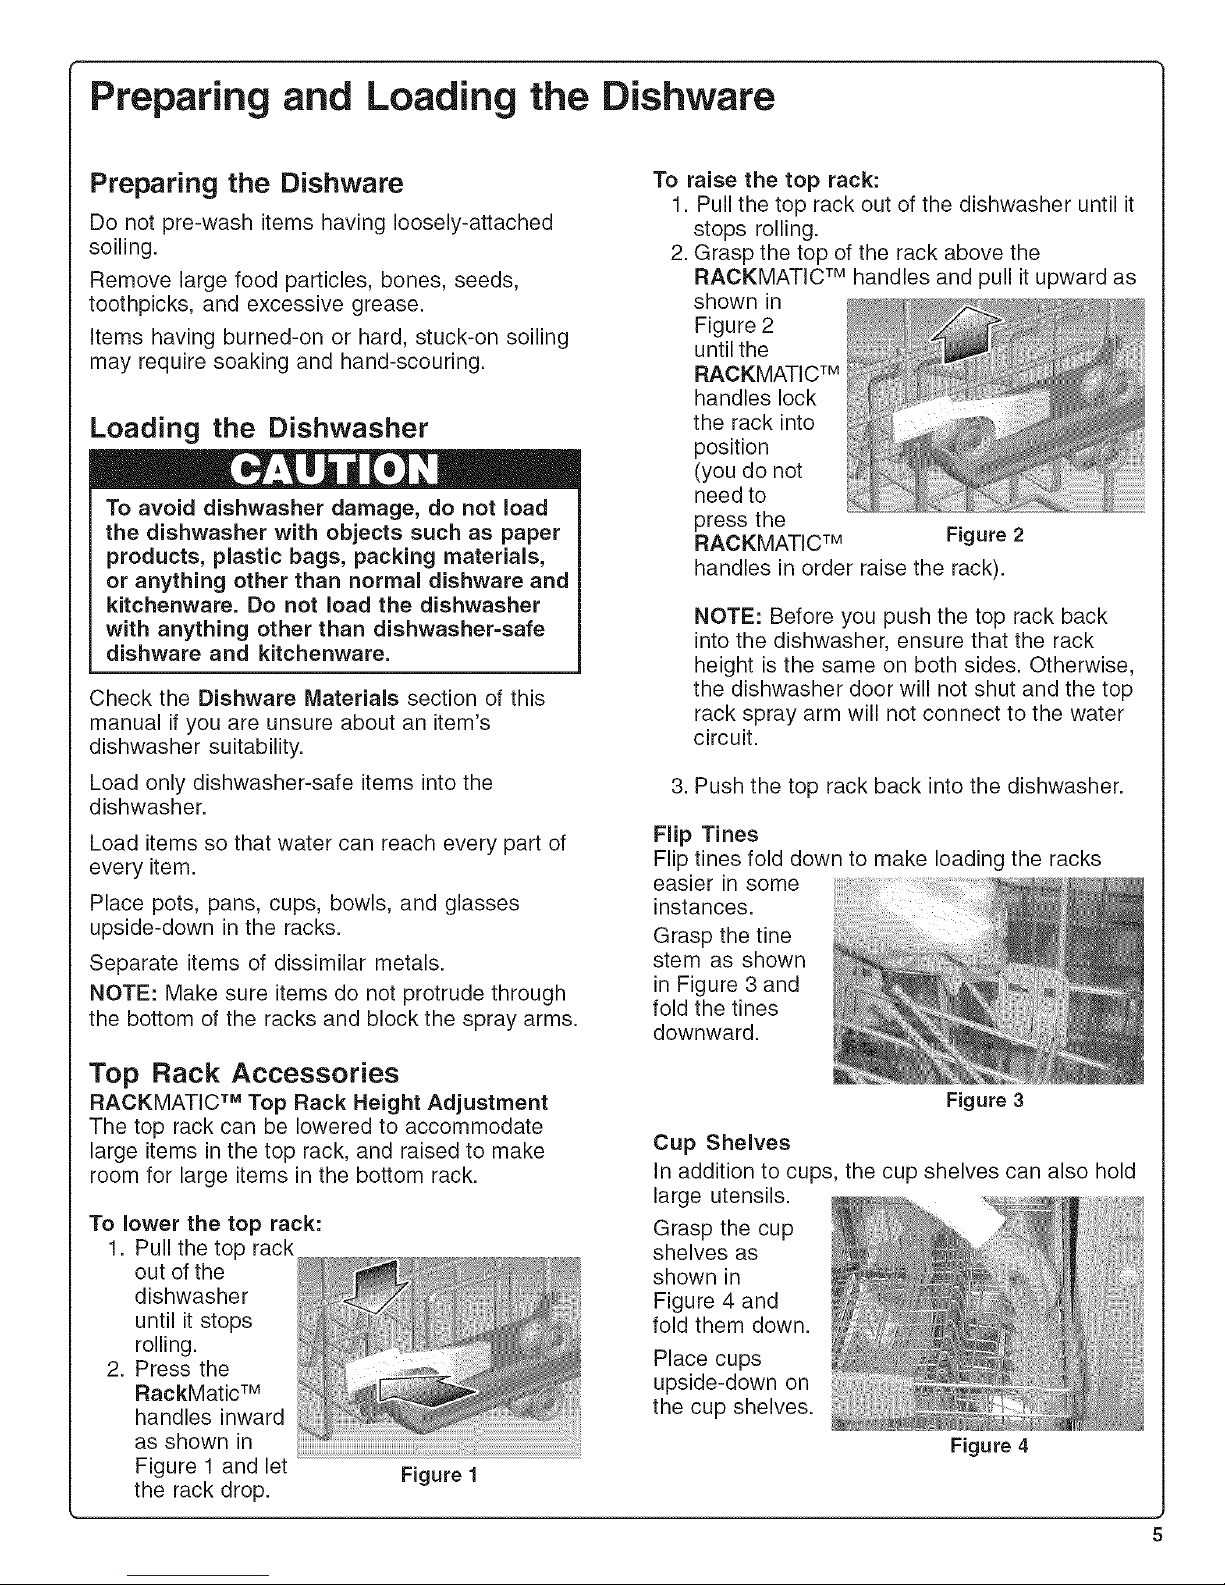
To raise the top rack:
1. Pull the top rack out of the dishwasher until it
stops rolling.
2. Grasp the top of the rack above the
RACKMATIC TM handles and pull it upward as
shown in
Figure 2
until the
RACKMATIC TM
handles lock
the rack into
position
(you do not
need to
press the
RACKMATIC TM
handles in order raise the rack).
Figure 2
NOTE: Before you push the top rack back
into the dishwasher, ensure that the rack
height is the same on both sides. Otherwise,
the dishwasher door will not shut and the top
rack spray arm will not connect to the water
circuit.
3. Push the top rack back into the dishwasher.
Flip Tines
Flip tines fold down to make loading the racks
easier in some
instances.
Grasp the tine
stem as shown
in Figure 3 and
fold the tines
downward.
Figure 3
Cup Shelves
In addition to cups, the cup shelves can also hold
large utensils.
Grasp the cup
shelves as
shown in
Figure 4 and
fold them down.
Place cups
upside-down on
the cup shelves.
Figure 4
Preparing and Loading the Dishware cont oue¢
Top Rack Accessories
Knife Rack
The knife rack is an extra shelf for knives and
other large utensils. It is assembled onto an edge
of the upper rack.
Figure 5
Place knives
with sharp
sides down,
see Fig. 5.
Loading the Top Rack
Figure 6 shows
how to arrange
a typical mixed
load in the
top rack.
Figure 6
Figure 7 shows
the top rack
load pattern
for 12 place
settings.
Figure 7
Bottom Rack Accessories
Flip Tines
Flip Tines fold down to make loading the racks
easier in some instances.
Grasp the Figure 8
tines
as shown
in Figure 8
and fold
the tines
downward.
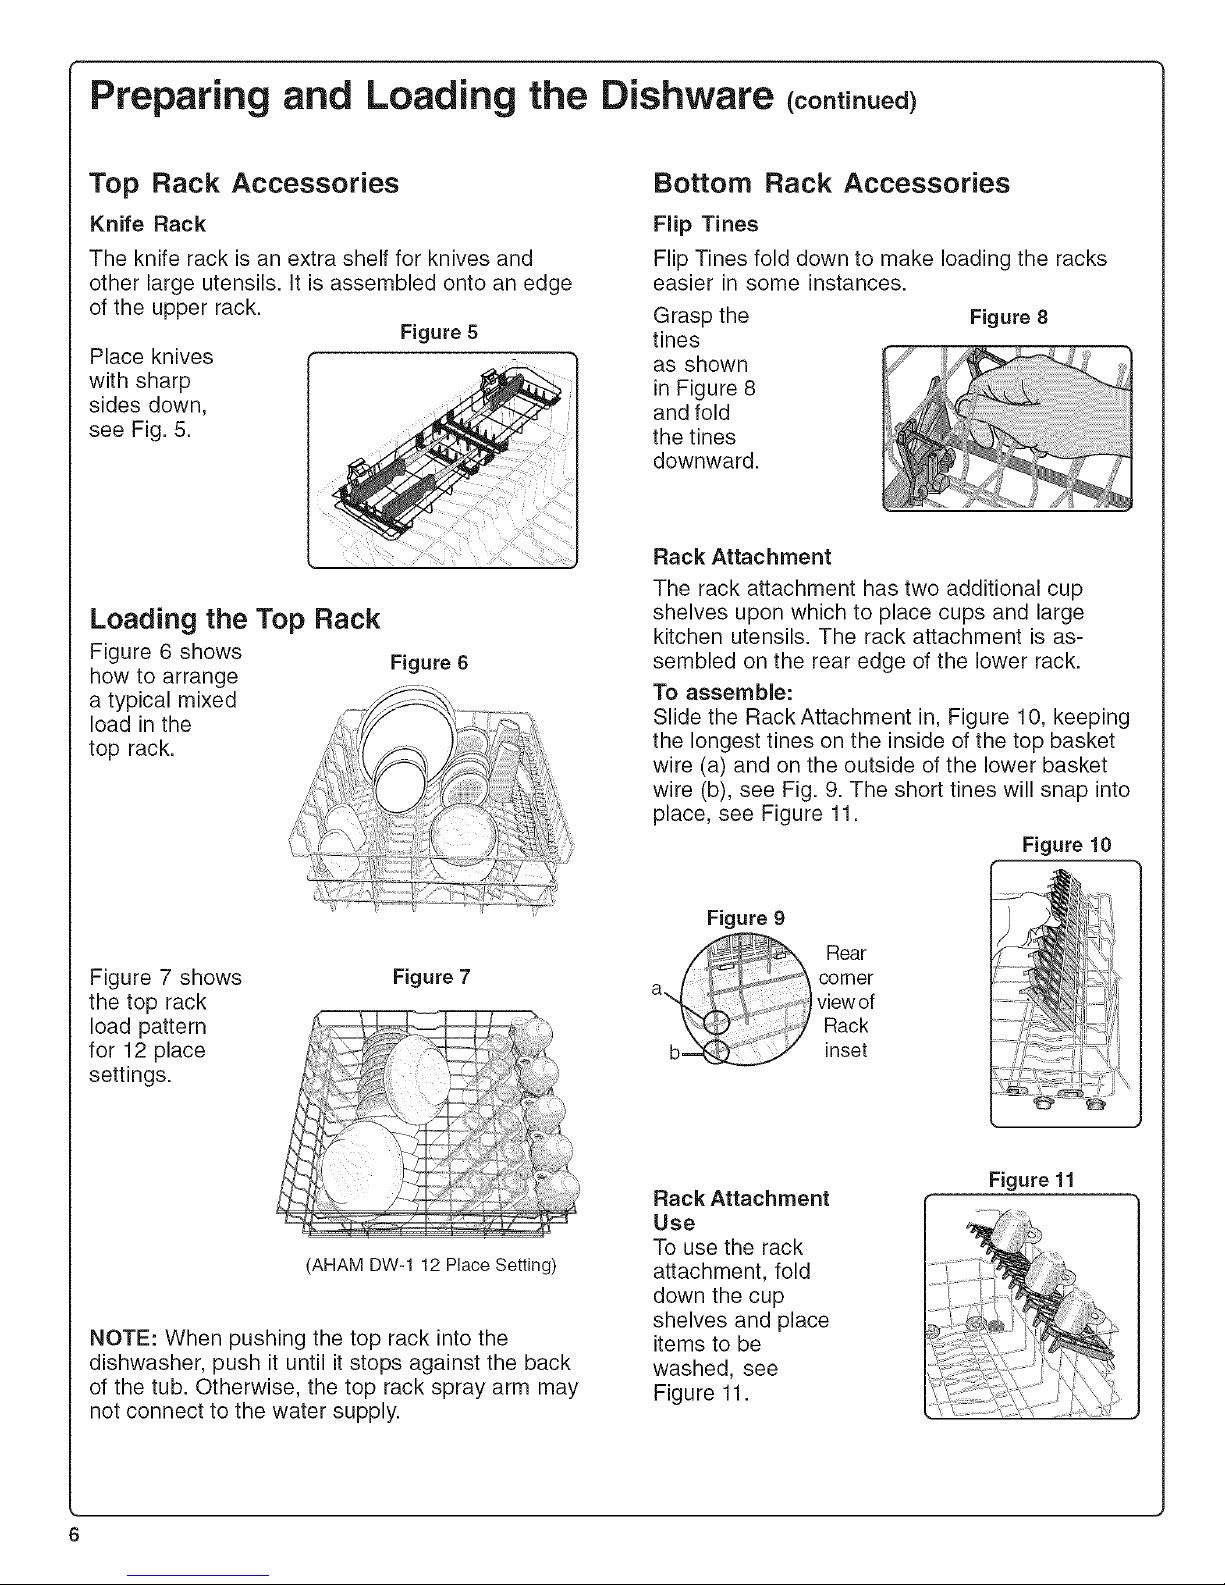
Rack Attachment
The rack attachment has two additional cup
shelves upon which to place cups and large
kitchen utensils. The rack attachment is as-
sembled on the rear edge of the lower rack.
To assemble:
Slide the Rack Attachment in, Figure 10, keeping
the longest tines on the inside of the top basket
wire (a) and on the outside of the lower basket
wire (b), see Fig. 9. The short tines will snap into
place, see Figure 11.
Figure 10
Figure 9
Rear
comer
view of
Rack
inset
(AHAM DW-1 12 Place Setting)
NOTE: When pushing the top rack into the
dishwasher, push it until it stops against the back
of the tub. Otherwise, the top rack spray arm may
not connect to the water supply.
Rack Attachment
Use
To use the rack
attachment, fold
down the cup
shelves and place
items to be
washed, see
Figure 11.
Figure 11
Preparing and Loading the Dishware (cont oue¢
Loading the Bottom Rack
NOTE: Keep the vent on the tub's right side clear
by placing tall items such as plastic cutting
boards and tall baking sheets on the bottom
rack's left side, center, or back.
Place large
items in the
bottom rack.
Load pots
and pans
upside-down.
Figure 12
shows a
typical mixed
load in the
bottom rack.
Figure 12
Figure 13
shows the
bottom rack
load pattern
for 12 place
settings.
Figure 13
(AHAM DW-1 12 Place Setting)
When the bottom rack is loaded, push it into the
dishwasher.
To Load Extra Tall Items:
1. Remove the empty top rack by pulling it out
of the dishwasher until it stops rolling.
2. Pull the front of the rack upward and
outward until the rollers are completely free
of the roller guides. Set the top rack aside.
3. Push the roller guides back into the
dishwasher.
Figure 14
4. Insert the
Extra Tall Item
Sprinkler into
the top rack
spray outlet
and turn the
sprinkler
clockwise to
lock it into
position as
shown in
Figure 14.
NOTE: Keep the vent on the tub's right side clear
by placing tall items such as plastic cutting
boards and tall baking sheets on the bottom
rack's left side, center, or back.
5. Place your extra tall item(s) in the bottom rack
as shown in Figure 15.
Figure 15
Do not block vent.
To avoid dishwasher damage, do not
reinstall the top rack without removing the
extra tall item sprinkler. Do not reinstall the
top rack with the sprinkler installed.
To remove the sprinkler and return the
dishwasher to its normal condition:
1. Turn the sprinkler counterclockwise and
remove it from the top rack spray outlet.
2. Retrieve the top rack.
3. Tilt the top rack upwards and position the
top rack rollers onto the roller guides.
4. Continue pushing the top rack until the
rollers are on the guides.
5. Push the top rack into the dishwasher.
 Loading...