How it Works
Log In / Sign Up
Buy Points
How it Works
FAQ
Contact Us
Questions and Suggestions
Users
Bosch
Loading...
N
NET8666SUC/01
2
NET8666UC
4
NET8666UC/01
2
NET8668SUC
6
NET8668SUC/01
2
NET8668UC
5
NET8668UC/01
2
NET9652UC
2
NET9652UC/01
2
NetDVR
NETP066SUC
5
NETP066SUC/01
NETP068SUC
7
NETP666SUC
6
NETP666SUC/01
NETP668SUC
8
NETP668SUC/01
2
NEXXT
9
Nexxt 100
3
Nexxt 300
3
Nexxt 300 WFMC2201UC
Nexxt 500
5
Nexxt 500 Plus
5
Nexxt 500 Plus WTMC553
Nexxt 700
4
Nexxt 700 WFMC640
Nexxt 800
4
Nexxt 800 WFMC840
Nexxt DLX
8
Nexxt DLX WFMC 4300UC
Nexxt Gas
Nexxt premium
Nexxt Premium Gas
Nexxt Premium Platinum WTMC 632SCN
Nexxt Premium Platinum WTMC 632SUS
Nexxt Premium Platinum WTMC 652SUC
Nexxt Premium WFMC6400UC
Nexxt Premium WTMC6300
Nexxt washer
Nexxt WFMC2100UC
NEXXT WFMC3200UC
NEXXT WFMC4300UC
Nexxt WFMC8400UC
Nexxt WFMC8401UC
2
Nexxt WFW91250
Nexxt WTMC3300CN
Nexxt WTMC3300US
Nexxt WTMC 3500UC
Nexxt WTMC 3510UC
NEXXT WTMC4300US
NEXXT WTMC4500UC
NEXXT WTMC6300CN
Nexxt WTMC6300US
Nexxt WTMC6500UC
Nexxt WTMC6521UC
Nexxt WTMC8520UC
Nexxt WTMC8521UC
NEZ1056
NEZ34VLA
NEZ-4112-CPCW4
NEZ-4112-PPCW4
3
NEZ-4212-PPCW4
NEZ-5130-IRCW4
NEZ-5130-PPCW4
NEZ-5230-IRCW4
2
NFN-60122
NFN-60122-F0
3
NFN-60122-F1
3
NFN 67..
NFN675T01
9
NFN-70122
NFN-70122-F0A
3
NFN-70122-F1A
3
NG
NGM
3
NGM30
NGM3054UC
3
NGM3054UC/01
2
NGM3054UC/02
NGM3056UC
3
NGM3654UC
2
NGM3654UC/01
3
NGM3654UC/02
2
NGM3656UC
3
NGM50
2
NGM5024UC
5
NGM5024UC/01
2
NGM5024UC/03
2
NGM5054UC
5
NGM5054UC/01
2
NGM5054UC/03
2
NGM5054UC/04
NGM5055
2
NGM5055UC
8
NGM5055UC/01
3
NGM5056UC
11
NGM5064UC
5
NGM5064UC/01
2
NGM5064UC/03
2
NGM5064UC/04
2
Loading...
Loading...
Nothing found
NEXXT WTMC4500UC
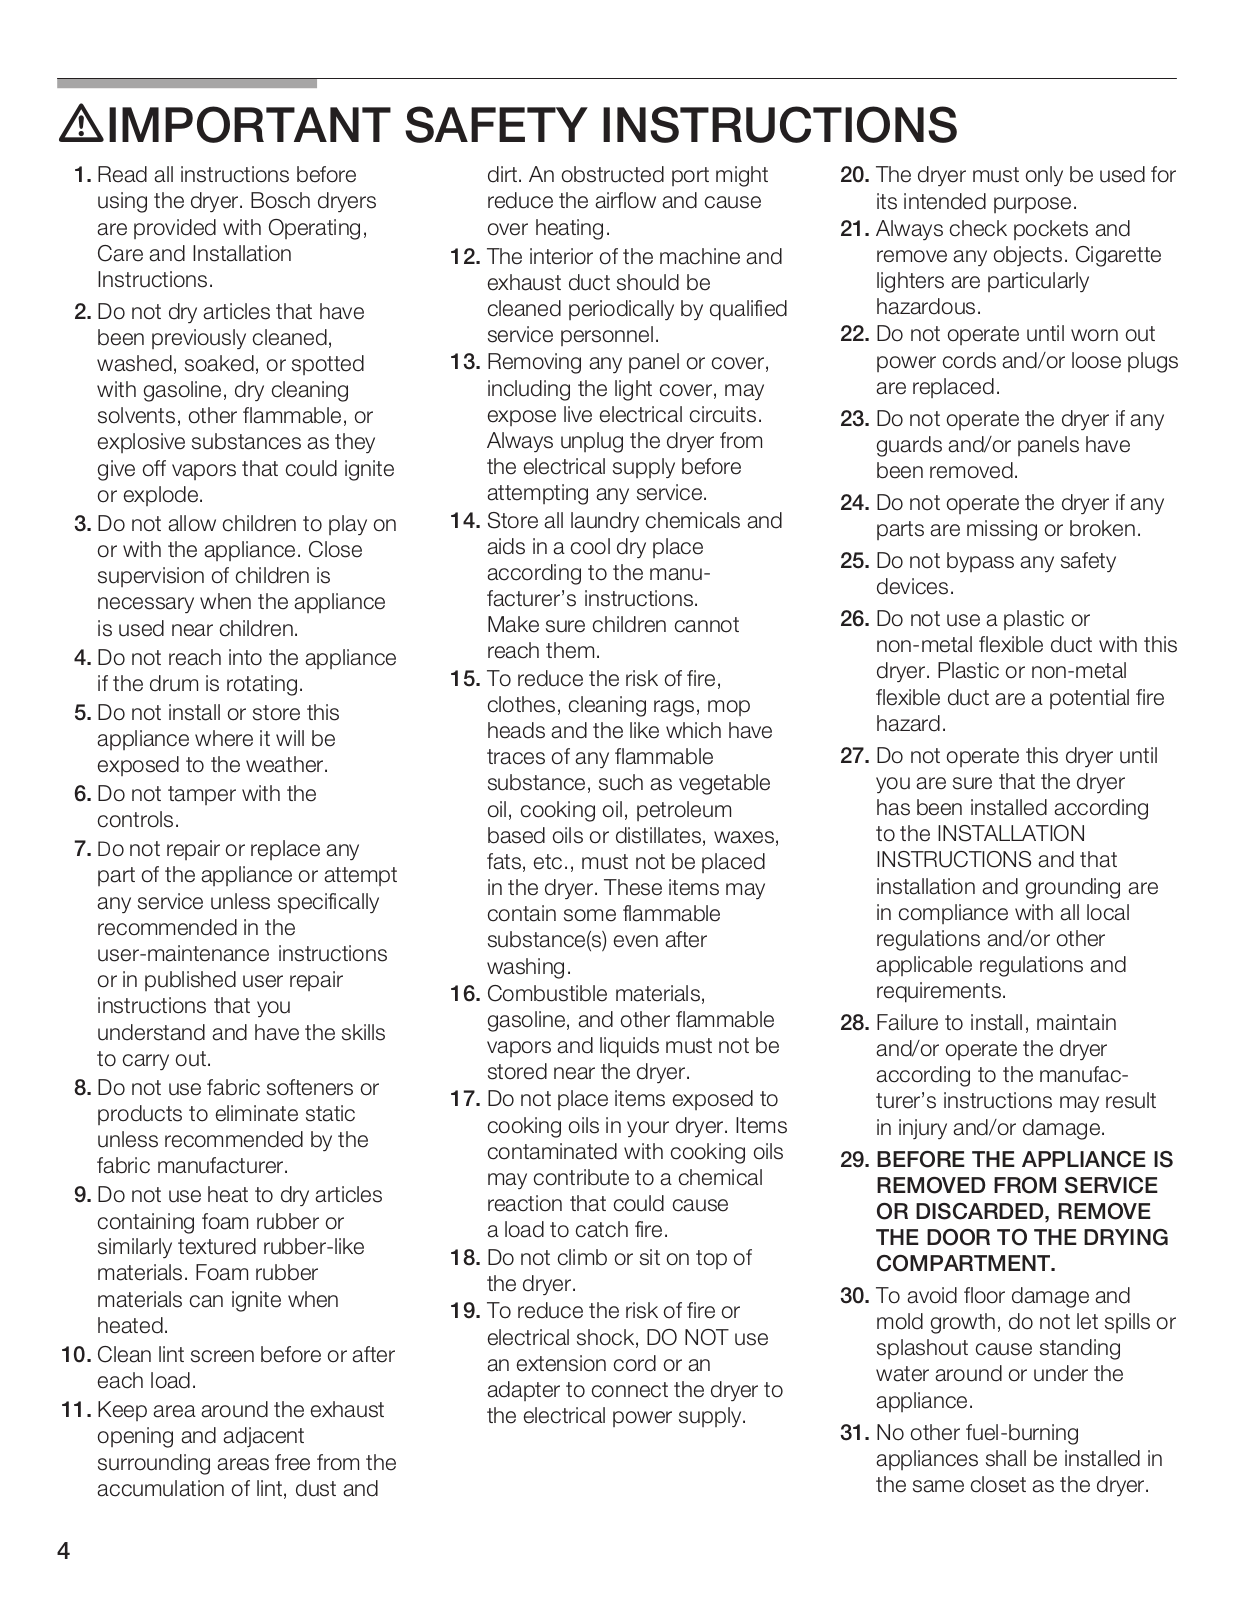
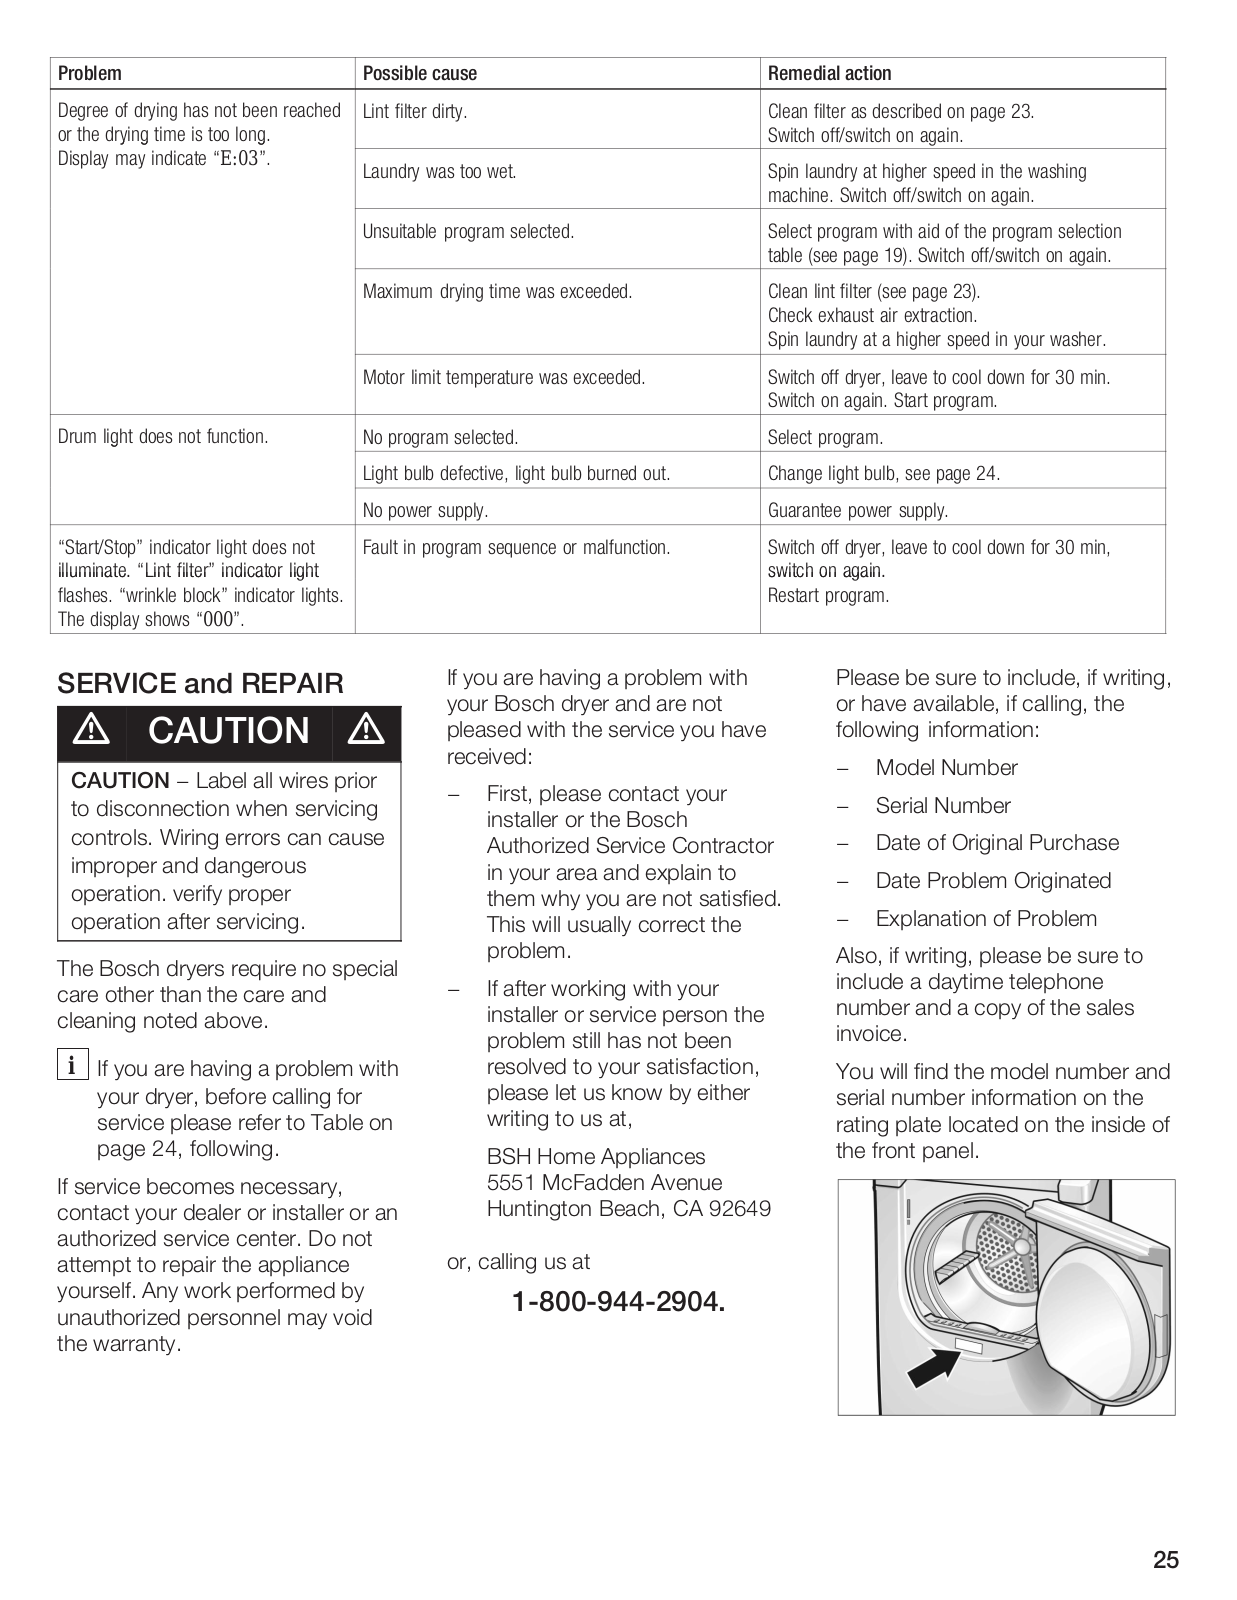
INSTALLATION GUIDE
82 pgs
10.77 Mb
0
Table of contents
Loading...
Bosch NEXXT WTMC4500UC INSTALLATION GUIDE
...
Bosch INSTALLATION GUIDE
Download
Specifications and Main Features
Frequently Asked Questions
User Manual
Download
Loading...
+
57
hidden pages
Unhide
You need points to download manuals.
1 point = 1 manual.
You can buy points or you can get point for every manual you upload.
Buy points
Upload your manuals
 Loading...