

Page 1
\
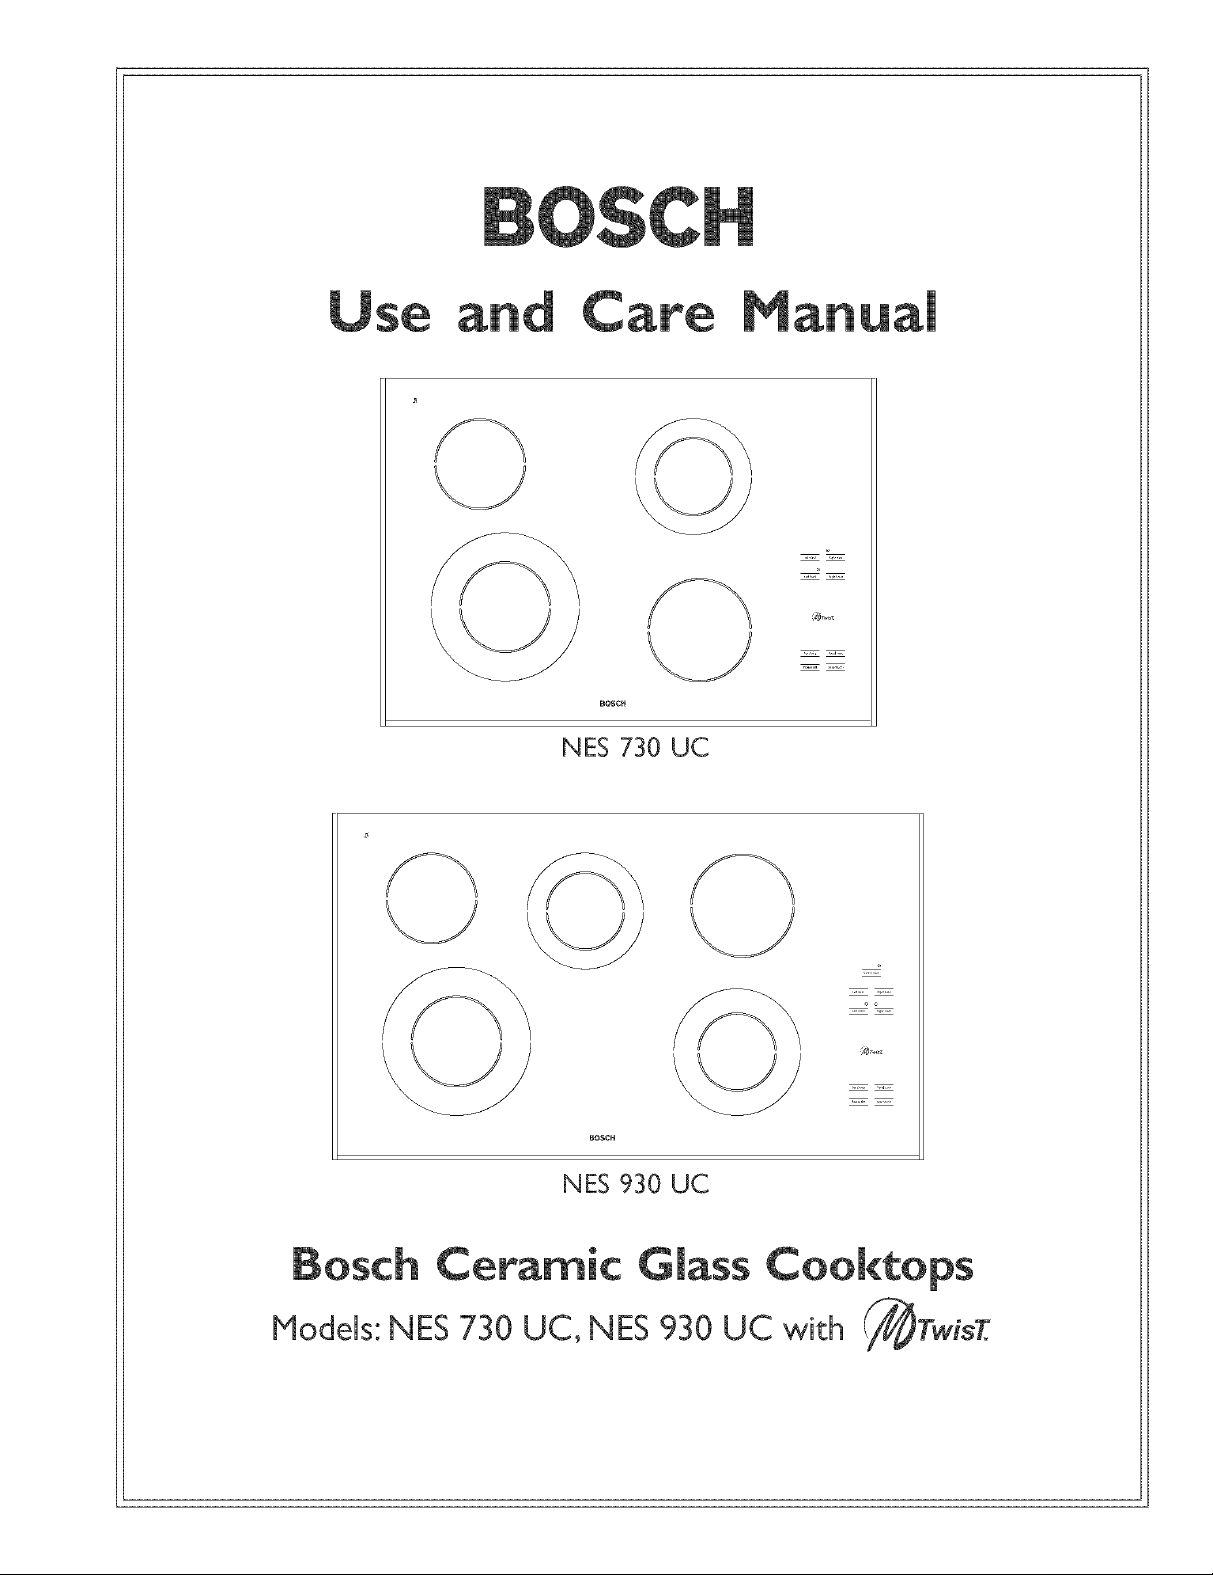
N ES 730 UC
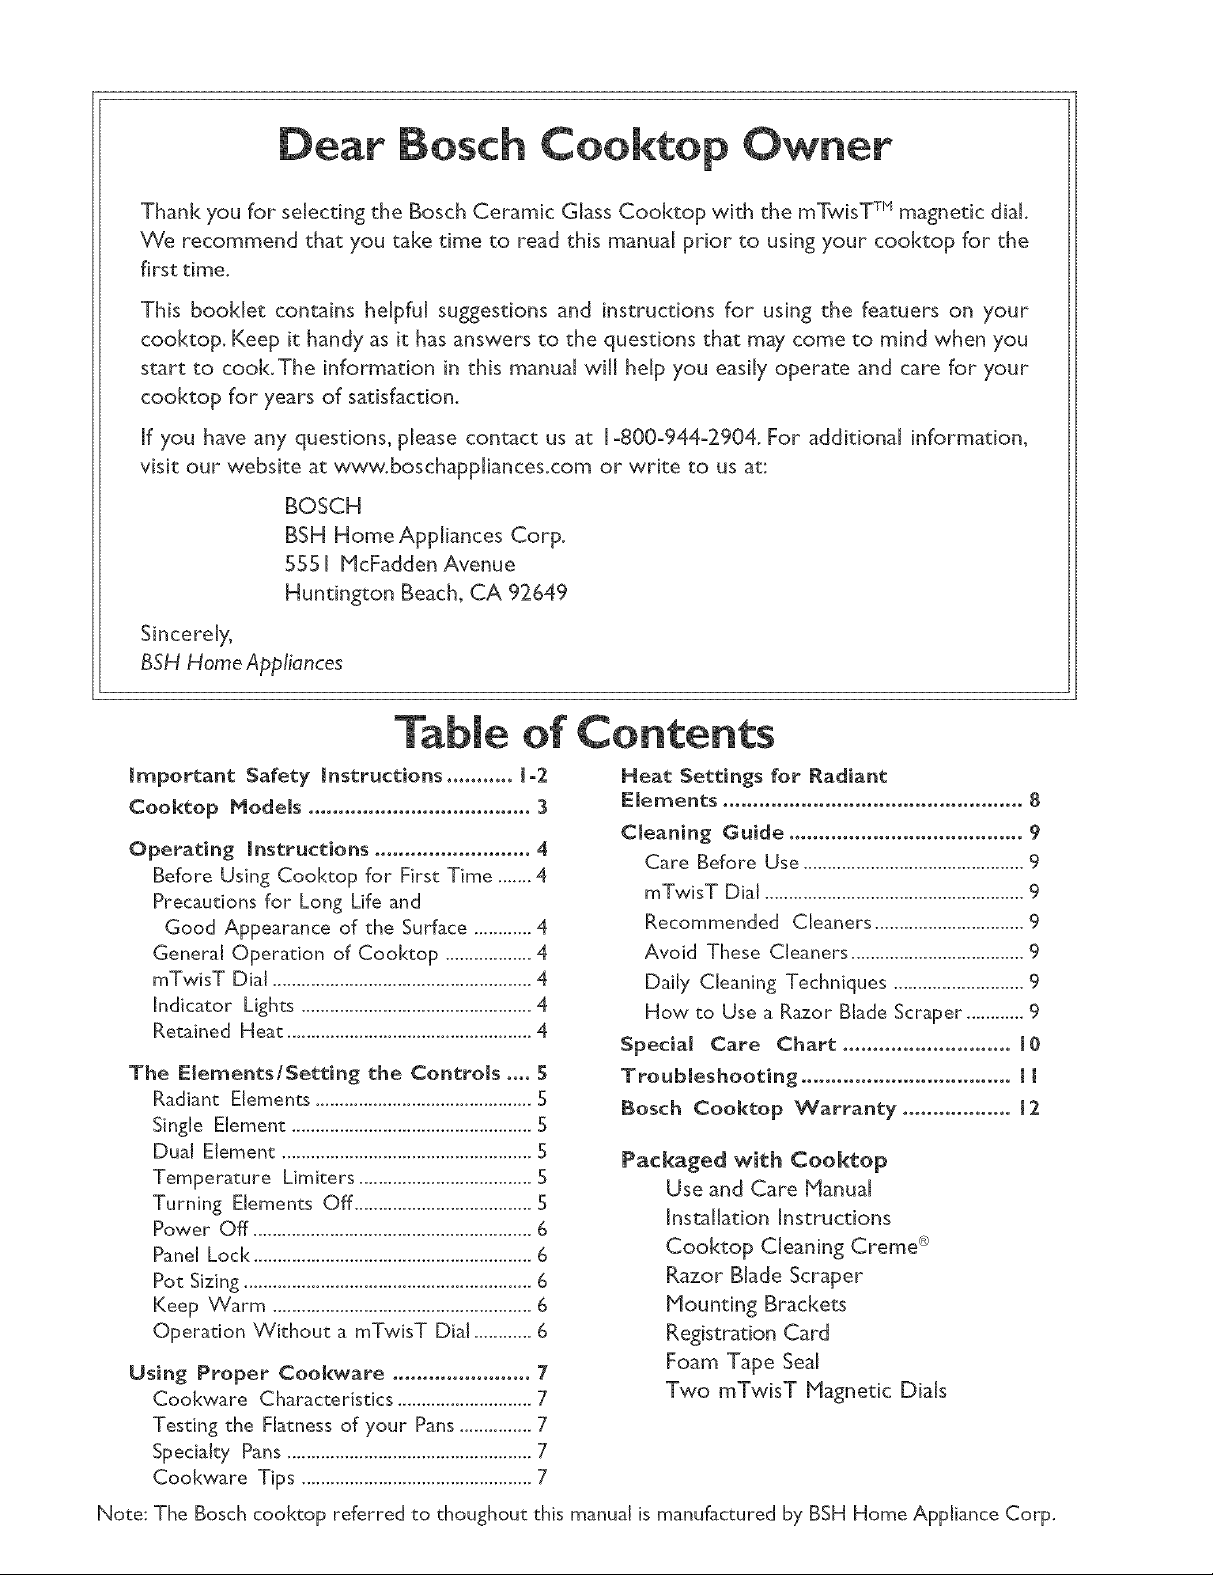
NES 930 UC
Bosch Ceramic Glass Cooktops
Models: NES 730 UC, NES 930 UC with
Page 2
Dear Bosch Cooktop Owner
Thank you for selecting the Bosch Ceramic Glass Cooktop with the mTwisT TM magnetic dial.
We recommend that you take time to read this manual prior to using your cooktop for the
first time.
This booklet contains helpful suggestions and instructions for using the featuers on your
cooktop. Keep it handy as it has answers to the questions that may come to mind when you
start to cook.The information in this manual will help you easily operate and care for your
cooktop for years of satisfaction.
If you have any questions, please contact us at 1-800-944-2904. For additional information,
visit our website at www.boschappliances.com or write to us at:
BOSCH
BSH Home Appliances Corp.
5551 McFadden Avenue
Huntington Beach, CA 92649
Sincerely,
BSH Home Appliances
Table of Contents
Important Safety instructions ........... 1-2
Cool{top Models ..................................... 3
Operating instructions .......................... 4
Before Using Cooktop for First Time ....... 4
Precautions for Long Life and
Good Appearance of the Surface ............ 4
General Operation of Cooktop .................. 4
inTwisT Dial ...................................................... 4
Indicator Lights ................................................ 4
Retained Heat ................................................... 4
The EiementstSetting the Controls .... 5
Radiant Elements ............................................. 5
Single Element .................................................. 5
Dual Element .................................................... 5
Temperature Limiters .................................... S
Turning Elements Off ..................................... S
Power Off .......................................................... 6
Panel Loci< .......................................................... 6
Pot Sizing ............................................................ 6
Keep Warm ...................................................... 6
Operation Without a mTwisT Dial ............ 6
Using Proper Cookware ....................... 7
Cool<ware Characteristics ............................7
Testing the Flatness of your Pans ............... 7
Specialty Pans ................................................... 7
Cool<ware Tips ................................................ 7
Heat Settings for Radiant
Elements .................................................. 8
Cleaning Guide ....................................... 9
Care Before Use .............................................. 9
inTwisT Dial ...................................................... 9
Recommended Cleaners ............................... 9
Avoid These Cleaners .................................... 9
Daily Cleaning Techniques ........................... 9
How to Use a Razor Blade Scraper ............ 9
Speda[ Care Chart ............................ 10
Troubleshooting ................................... [ [
Bosch Cool{top Warranty .................. 12
Pad(aged with ¢ooktop
Use and Care Manual
Installation Instructions
Cooktop Cleaning Creme _
Razor Blade Scraper
Mounting Brackets
Registration Card
Foam Tape Seal
Two mTwisT Magnetic Dials
Note: The Bosch cooktop referred to thoughout this manual is manufactured by BSH Home Appliance Corp.
Page 3
NES Cooktop Use and Care Manuam m_portant Safety mnstrucdons
IMPORTANT SAFETY INSTRUCTIONS
READ ALL INSTRUCTIONS BEFORE USINGYOUR COOKTOP
If the information in this manual is not followed exactly,
afire or explosion may result causing property damage,
personal injury or death.
PERSONAL SAFETY
WARNING E TO REDUCE
,_ THE RISK OF INJURY TO
PERSONS, IN THE EVENT OF
A GREASE FIRE, OBSERVE
THE FOLLOWING:
Inthe event of agreasefire SMOTHER FLAMESwith
a close-fitting lid, cookie sheet, or other metal tray,
then turn off the gas burner. BE CAREFUL TO
PREVENT BURNS. If the flames do not go out
immediately, EVACUATE AND CALL THE FIRE
DEPARTMENT.
Do not usewater, includingwet dishclothes or towels
on greasefires. A violent steam explosion may result.
NEVER PICK UP A FLAMING PAN. You may be
burned.
ALWAYS havea working SMOKE DETECTOR
near the kitchen.
LEAVE THE HOOD VENTILATOR ON when
flamb@ingfood.
Use an extinguisher ONLY IF:
WARNING
TO REDUCE THE RISK OF FIRE,
ELECTRIC SHOCK, OR INJURY TO
PERSONS, OBSERVE THE FOLLOWING:
Use this unit only in the manner intended by the
manufacturer. If you have any questions, contact
the manufacturer.
o Before servicing unit, switch power OFF at service
panel and lock service panel to prevent power from
being switched on accidentally.
o Do not cool< on a cool<top in which the glass top
has broken. If the cool<top glass should break, do
not use it or attempt to clean or fix it. Cleaning
solutions and spill overs may penetrate the broken
cool<top and create a risk of electric shock.Turn
off electric circuit to the cool<top and call an
authorized service agency immediately.
Do not store items of interest to children above
the cool<top or at the back of it. If children climb
onto the coot<top to reach these items, they could
be seriously injured.
° Children and pets should not be left alone or
unattended in an area where appliances are in use.
They should never be allowed to sit or stand on
any part of appliance.
o You know you have a ClassABC extinguisher,
and you already know how to operate it.
The fire issmallandcontained in the areawhere
itstarted.
The fire department is being called.
You canfight the fire with your back to an exit.
SMOTHER FLAMES from other types of food
fires with baking soda. NEVER use water on
cooking fires.
WARNING
DO NOT STORE FLAMNABLE
NATERIALS ON OR NEAR THE
COOKTOPo
When using the cool<top, DO NOTTOUCH THE
HOT COOKING AREA OR THE IMMEDIATE
SURROUNDING AREA. Eventhough dark in colon
these areas may be hot. Areas adjacent to the
elements may become hot enough to cause burns.
Never let clothing, potholders, or other
flammable materials come in contact with a
cooking area until it has cooled.
o For personal safety wear proper apparel.
Loose fitting garments or those with long, loose
sleeves should never be worn while cooking.
Tie long hair so that it doesn't hang loose.
PAGE I
Page 4
NES Cooktop Use and Care Manuam important Safety Jnstrucdons
IMPORTANT SAFETY INSTRUCTIONS
Read all instructions before using },our cooktop
Use only dry potholders. Moist or damp pot
holders on hot surfaces may cause burns from
steam, Do not use a towel or other bulky cloth in
place of potholders. Do not let potholders touch
hot cooking areas,
This appliance is equipped with one or more
surface units of different sizes. Always use utensils
that have flat bottoms and that are large enough
to cover the whole cooking area. The use of a
utensil smaller than the size of the cooking area
will expose a portion of the heated area to direct
contact with the user which could result in burns.
Proper relationship of utensil to burner will also
improve efficiency.
Turn handles of utensils inward so that they do
not extend over adjacent work areas, cooking
areas, or the edge of the cool<top. This will help
prevent hot food spills, risk of burns and ignition
of flammable materials, and preventing access by
children.
" Use high heat settings on the cooktop only when
necessary. Use low to medium settings to heat oil
slowly.
Never move a pan of hot oil, especially a deep fat
fryer. Wait until it is cool.
Never leave the cooktop unattended when using
high heat settings. Boi[overs can cause smoke and
possibly damage the cooktop.
. Hold the handle of the pan to prevent movement
of the utensil when stirring or turning food.
Other than the use of metal pans, only certain types
of glass, heatproof glass ceramic, ceramic,
earthenware, or other glazed utensils are suitable
for cooktop use.These types of utensils may break
with sudden temperature changes. Use only on low
or medium heat settings according to the utensil
manufacturer's directions.
The cooktop is for cooking. Never use itto warm
or heat a room.
Be sure your appliance is propermy installed
and grounded by a qualified servicer in
accordance with the |nstamlation
instructions provided with the cooktop.
Do not repair or replace any part of the
appliance unless specifically recommended
in this manual AH other servicing should
be referred to a qualified servicer.
Always use cookware and utensils appropriate for
the type and amount of food being prepared.
Do not place any hot cookware on the control
panel area.
Clean the cooktop with caution. If the soil must
be removed while the cooktop is hot, clean the
hot top with the metal razor blade scraper only.
Do not use a wet sponge or cloth while it is hot.
Some cleaners produce noxious fumes if applied
to a hot surface.
Clean the ventilation system above or behind the
cooktop frequently so that grease from the
cooking vapors does not accumulate on the filters,
fan, intake, or hood.
For people who wear electronic implants such
as a pacemaker or insulin pump, it is possible that
some implants may be affected by magnetic fields.
You should not carry the control knob (inTwisT
dial) in your pockets. The control knob is highly
magnetic and persons wearing electronic implants
should keep the control knob at least four inches
from the implant.
Save These instructions
PAGE 2
Page 5
NES Cooktop Use and Care Manuam Cooktop Modems
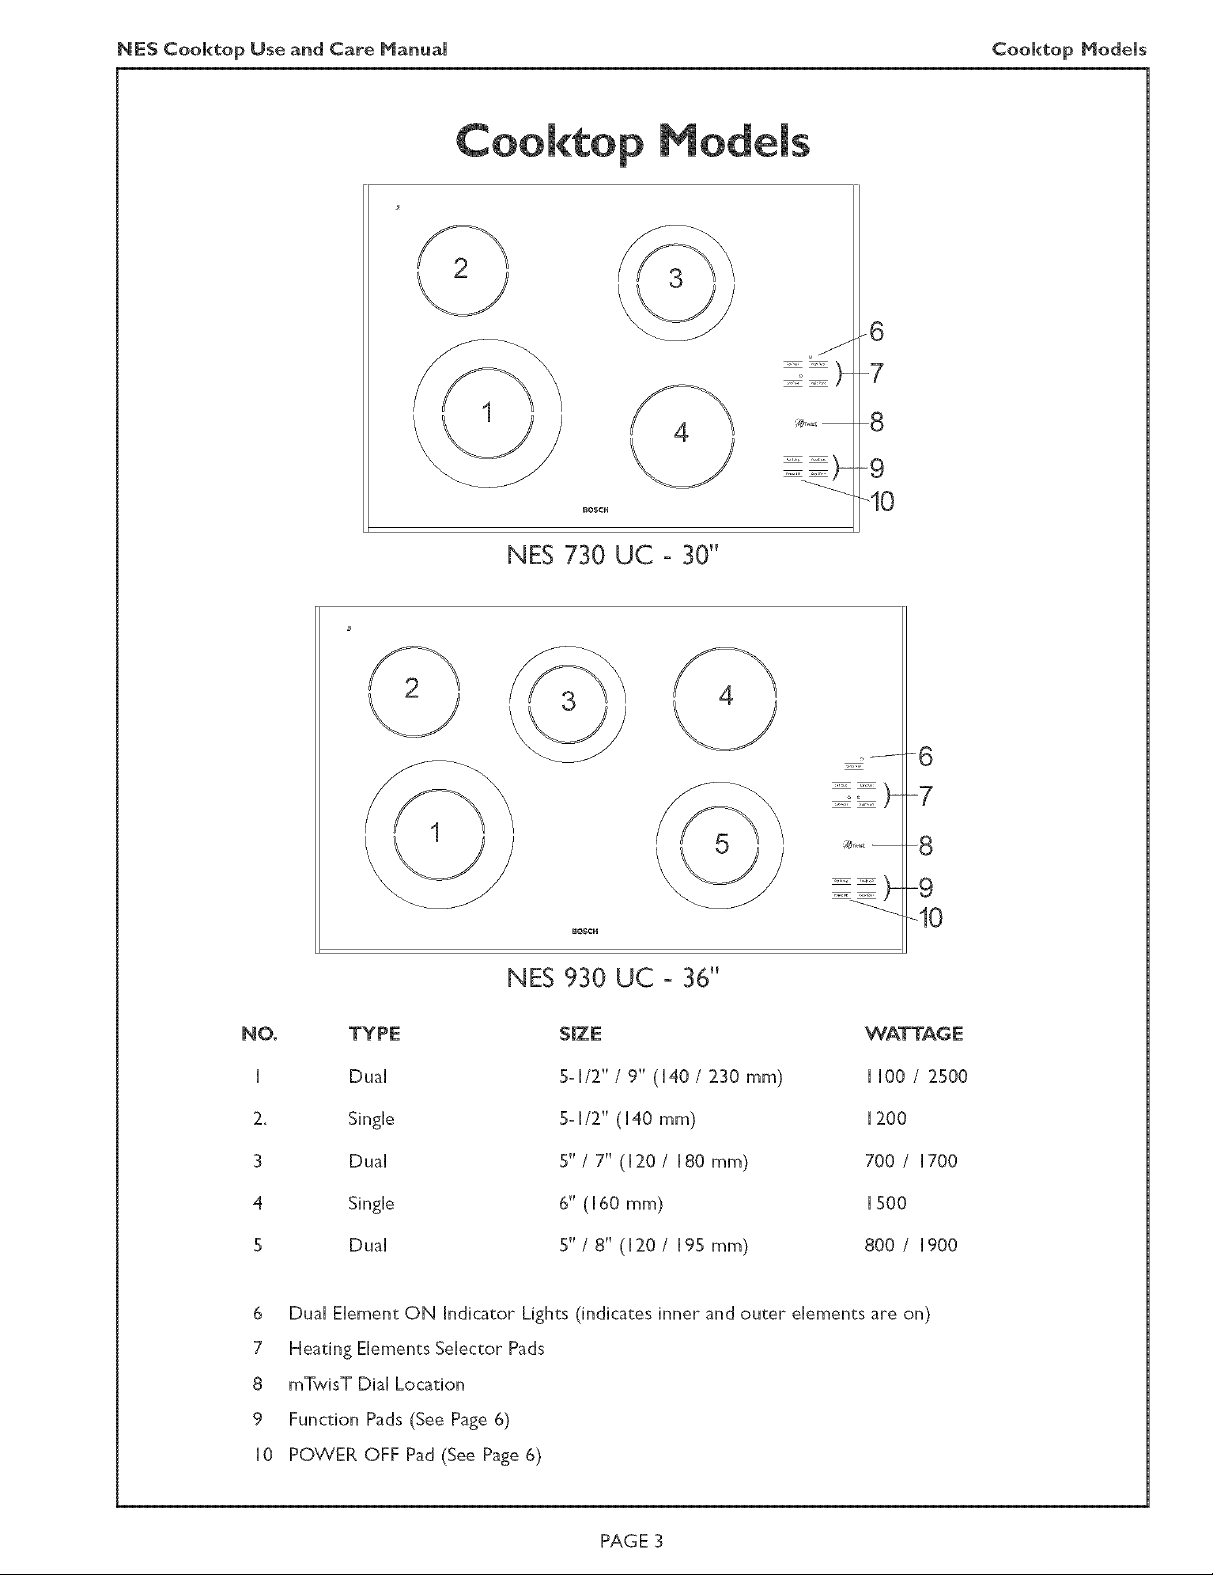
Cooktop Models
-6
o/
8
-9
e,o_cH
NES 730 UC - 30"
-10
NES 930 UC - 36"
NO,
H
2,
3
4
5
6
7
8
TYPE
DuaH
S[ngHe
DuaH
S[ngHe
DuaH
DuaHEHement ON Indicator Dghts Ond[cates inner and outer eHements are on)
Heating Elements Selector Pads
mTw[sT D[aHLocation
SIZE
5oH/2" / 9" (H40 / 230 ram)
5oH/2" (H40 ram)
5" / 7" ([20 / [80 mm)
6" ([ 60 mm)
5"/8"(H20 H95mm)
-6
15C)-
-8
-9
-10
WATTAGE
[[00/ 2500
[200
700 / [700
[500
800 / [900
9
Function Pads (See Page 6)
NO
POVVER OFF Pad (See Page 6)
PAGE 3
Page 6

NE$ Cooktop Use and Care Manuam Cooktop Operating instructions
Cooktop Operating Instructions
BEFORE USJNGTHE COOKTOP
FORTHE FJRSTTJME
Remove all packing materials and literature from
the cooktop surface.
While cool, wipe with a clean, damp sponge and
dry.
" Apply the Cool<top Cleaning Creme @ packaged
with the cool<top. Buff with a clean cloth. (See
Page 9 for daily care instructions.}
There may be a slight odor during the first several
uses;this is normal and will disappear.
° Optimum cooking results depend on the proper
cool<ware being selected and used. (See Page 7.)
° The cooking surface will hold the heat and remain
hot up to 25 or 30 minutes after the elements
have been turned off.
° Read all safety precautions and Use and Care
Manual information prior to operating.
Precautions for LongLifeand Good Appearance of
the Surface
Regular, daily care using the Cool<top Cleaning
Creme will protect the surface and make it easier
to remove food soil and water spots.
" The ceramic glass cooking surface is a durable
material resistant to impact but not unbreakable
if a pan or other object is dropped on it.
° Do not use aluminum foil directly on the glass; it
will melt and damage the glass surface.
Genera[ Operation of Cooktop
The cooktop uses touch pads and a magnetic dial to
operate the cooktop.When touching the glassof atouch
pad, such as an dement or function pad, use the flat
part of the finger and touch the center of the pad. A
beep will sound when touching any of these pads.
rnTwisT Dial
The cod<top uses a mTwisT magnetic dial to select
the desired heat setting. The inTwisT dial is held onto
the cool<top by a strong magnet and automatically
positions itself in the center of the dial location when
placed on the cooktop.
Note: If the dial is removed from the cooktop when
in use, all elements will be turned off. The cool<top is
locked and the Panel Loci<light comes on. (See Setting
Panel Loci< on Page 6.)
E[ement'ON' indicator Light
The area above the dement touch pad being used
will show the cool< setting when the dement is on.
When the element is turned off, the hot surface
indicator comes on in this area. (See Hot Surface
Indicator Light below).
Hot Su_ace indicator Light
Each element features a hot indicator light to show
when the cooking surface is too hot to touch. A
letter H will appear above the element touch pad.
The light remains on until the cooking area has cooled to a
safe-to-touch temperature.
Ifa hot surface light is on, use caution when working or
cleaning around the cooktop as the cooktop is still hot_
Do not allow plastic, paper, or cloth to come in
contact with the hot glass surface; these items can
melt or burn and damage the glass surface.
Do not allow pans to boil dry. This can damage
the pan, dement and/or the cooktop.
" Never cool< food directly on the glass.
" Avoid placing a wok support ring, trivet or other
metal stand on the glass surface.
Do not use the glass surface as a cutting board.
Do not slide cookware across the cooking surface;
it may scratch the glass.
Do not place wet pans on the glass surface.
H o2
Left Rear
Left Front
Retained Heat
The glass cooking surface retains heat and stays hot
after the element(s) have been turned off. The retained
heat may be used to hold foods at serving temperatures
for a short time.
PAGE4
Right Rear
U
tl
Right Front
Page 7

The Elements/Setting the Controls
Radiant Emements
Bosch UitraSpeed TH radiant elements use a wire
ribbon located under the ceramic glass surface to
provide the heat for cooking.These radiant elements
will cycle on and off by design (see Temperature
Limiters, below.) There are 9 heat setting positions
from 9 (high) to I (low) and a speda[ setting for keep
warm.
Dua[ Emement
The dual element consists of two radiant ribbon
elements within the same heating area. Either the small
inner dement or both the inner and outer elements
may be selected for use, depending on the size of
cookware. (See page 7.)
Temperature Limiters
Each UltraSpeed heating dement has its own sensor
to protect the glass cooking surface from extreme
high temperatures. The limiters will operate
automatically by cycling the element on and off
regardless of the coot< setting.
Although cycling is normal, any one of the following
conditions can activate the limiter and cause it to
cycle on and off more than usual:
* The base of the pan is not making full contact
with the heating surface (due to a warped or
uneven base).
The pan is too small for the size of the element.
° The pan has boiled dry.
The material or shape of the pan is slow to
transfer the heat.
Setting the Controls (dual element)
I. Place pan on element.
2.Touch element pad for desired element. Display
will show a 0.
3.Touch POT SIZING pad. Control defaults to large
size (inner and outer) element. Touch the POT
SIZING element pad again for smaller element.
Touching the POT SIZING pad repeatedly alternates
the dement size.The dual element light comes on
above element pad when using large element.
4.Turn the mTwisT dial to the desired setting.
To the right (clockwise) starts with heat setting
I (low).
To the left (counterclockwise) starts with heat
setting 9 (high).
Turn the dial until the desired heat setting is
displayed.
Setting the Controls (single element)
I. Follow steps I, 2 and 4 above.
Changing Heat SettingWhile Cooking
I. Touch element pad for element desired. Display
will show 0.
2. Turn dial. The first turn of the mTwisT dial will
display the current cool< setting.
3.Turn dial left or right to new cool< setting. The new
cool< setting is displayed.
Change Pot Size when Cooking (for dual only)
See Pot Sizing (Page 6 ).
To Turn Off One Surface Element
I.Touch element pad for desired dement.
2. Display shows 0. After 5 seconds the element
shuts off.
Or
touch dement pad twice.
Or
touch element pad once. After five seconds,
the element turns off.
To Turn OffAl[ Elements at the Same Time
I.Touch POWER OFF pad.
Or
Remove inTwisT dial from cooktop. Once
removed, the cooktop controls are locked. Replace
inTwisT dial then touch and hold PANEL LOCK pad
for three seconds to unlock control.
LeftFront
PAGE 5
Page 8

NES Cooktop Oseand Care Manuam Cooktop Operating _nstructions
$e ing the Controls
Operation Without inTwisT Dial
The cooktop can be operated without the mTwisT dial
J.Turn off Panel Lock (see below).
2.Touch eHement pad for desired eHement. Display shows 0.
3. Choose the POT SIZING pad (if using duaH eHement).
4.Touch dement pad repeatedHy untiH desired heat settting
is displayed.
Change Heat Setting
H.SeHect eHement pad for desired eHement.
2. Each touch of the eHement pad changes setting.
Continue touching repeadedHy untiH desired heat setting
is displayed.
Cooktop Function Pads
Power Off
Change Pot Size - (for dual elements only)
1. Select element pad for desired element.
2.Touch Pot Sizing pad for desired pad.
3.Touch element pad until desired heat setting is displayed.
Turn Off Element
I.Touch element pad.
2.Touch element pad untiH 0 is displayed.
Or
for several elements, select PO_A/ER OFF pad.
Turns off a[_ elements at the same time.The indicator light
above the POWER OFF pad is Hitwhen at Heast one eHement
is on.The Hight wiHHturn off when the POWER OFF pad is
touched or aHHdements are turned off.
Panel Loci(
The paneH Hock is seHected to prevent the cooktop from
being turned on, such as for cHeaning. The eHements wiHH
not function when turned on.
Setting Panel Loci<
H.Touch and hold PANEL LOCK pad for three seconds.A
Hight above the pad stays Hitwhen the paneH is Hocked.
2.To unHock Touch the PANEL LOCK pad and hold for
three seconds. The Hight above the pad wiHHdisappear.
The cooktop cannot be locked when a surface element is
operating. [t is recommended to mock the cooktop
before cleaning.
Pot Sizing
Use this pad to choose the pot size on dual elements.
H.Touch eHement pad for duaH eHement. ControH defaults to
larger element. Dual element Hightcomes on above element
pad indicating Harge size is seHected.
2.Touch POT SIZING pad to change to smaller element.
DuaH eHement HightwiHHturn off.
3.Turn mTwisTdiaH to desired heat setting.
2.Touch POT SIZING pad to change eHement size chosen,
eHement turns off.
3.Turn mTwisT diaH to desired heat setting.
KeepWarm
Each element has a keep warm setting to keep hot, cooked
foods at serving temperatures.
To set Keep V_/arm feature:
H.Touch element pad for desired element.
2.Touch KEEPWARH pad. L is displayed above selected
element and element comes on.
Keep Warm Guidelines
Use pans/utensils with fiat bases. Plates and casseroles
with shaHHow ridges around the base can be used provided
they are made of heat-safe materials.
Keep dish covered to keep foods hot.
Choose pans and cookware that may be safely used on a
hot surface. ExampHe: Use ComingS'are® "Safe for
Rangetop" rather than Pyrex® which is not recommended
for cooktop use.
Use a trivet or steamer inside a pan when necessary to
raise food off bottom of pan.
Pot Sizing Panel Lock
To change element size for different size cooking pot when
the element is on:
H.Touch eHement pad. Display wiHHshow 0.
P0wec 8ff KeepWarm
PAGE 6
Page 9

NES Cooktop Use and Care Manuam Cooktop Operating mnstructions
Using Proper Cool.rare
Cookware Characteristics
The choice of pans directly affects the cooking speed
and uniformity. For best results select pans with the
following features:
I. Flat Bases - When a pan is hot, the base (pan
bottom) should rest evenly on the surface without
wobbling (rocl<ing). Flat, medium to heavy-weight
pans are best.
I m_::._ I
_-_ ,_:...:..
Coolovare Tips
Use of pots and pans with rounded (either
concave or convex) warped or dented bottoms
should be avoided. See drawings above.
Make sure the bottom of the pot or pan being
To test the flatness of your pans
Turn the pan upside down on the countertop and place
a ruler flat against the bottom of the pan. The bottom
of the pan and the straight edge of the ruler should be
flush against each other.
Another simple test to determine even heat
distribution across the cool<ware bottom is to place
I" of water in the pan. Bring the water to a boil and
observe the location of the bubbles as the water starts
to boil. Good, flat cookware will have an even
distribution of bubbles over the bottom surface area.
2. Diameter - The base of the pan should cover or
match the diameter of the element being used.
Pans may overhang the element area by I" all
around.
3.Tight Fitting Lid - A lid shortens cooking time by
holding the heat inside the pan.
Specialty pans
Specialty pans, such as griddles, roasters, pressure
cookers, woks, water bath canners and pressure
canners must have the same features as described
above. Use only a fiat-bottom wok. Never place a
support ring, such as a wok ring or trivet, on the
cooking surface.
used is clean and dry.
Use pots and pans with thick, smooth metal
bottoms.
" Do not slide metal pots across the cooktop. Pans
may leave marks. (See Page 9 for cleaning.)
Do not use glass pans as they may scratch the
surface.
Foods packaged in aluminum foil should not
be placed directly on the glass ceramic surface for
cooking; aluminum foil can melt and cause perma-
nent damage.
Plastic, paper and cloth can melt or burn
when in contact with a hot surface. Do not let
these items come in contact with the hot glass
ceramic surface.
Do not allow pans to boil dry. This can
permanently damage the pan, the element and
the cool<top glass.
PAGE 7
Page 10

Heat Settings for Radiant Elements
All these settings are recommended without the element being preheated. Use this chart as a guide.
A range of heat settings are listed because the actua[
Type of Food
HEAT SETTINGS
setting depends on:
I) type and quality of pan
Melting butter/chocolate I
Delicate sauces
Finishing rice
Simmering sauces with
butter and egg yolk
Bacon
Cooking vegetables, fish,
broths
Egs, fried or scrambled
Finishing cereals, pasta
Mill<
Pancakes
Pudding
Simmering meats
Steaming vegetables,
fish, broths
Pan frying
Spaghetti sauces
Sauteed vegetables
Stewing meat, soups
2) type, quantity and temperature of the food
3) dement used
4) the cook's preference.
I-3
208/240 Volt Connection: The Heat Settings
recommended on this page are based on a 240 volt
power source. If your cooktop is connected to 208
volts,the same heat settings apply but foods may take
a little longer to finish cooking.
4-6
Braising meat
Pan frying meat, fish,
Stirfrying
Quickly brown or
sear meats
Hold rapid boil
Boiling water for
vegetables, pasta,
rice,etc.
6-8
PAGE 8
Page 11

NES Cooktop Use and Care Manuam Cooktop Care and Maintenance
Cleaning
Care Before Use
Care is easy when preventative steps are taken. For
example, apply a small amount of Cooktop Cleaning
Creme (packaged with cooktop) on a daily basis.
This provides a protective film that makes it easy to
remove water spots or food spatters.The temperature
of the cooking surface reduces the protective qualities
of this cleanem: It must be reappmied before each use.
Use a clean cloth and apply Cooktop Cleaning Creme
before each use to remove dust or metal marks that
can occur on the cooktop surface between uses.
inTwisT Dia[
Remove dial from cooktop.Wipe with a hot, soapy cloth,
rinse and dry. Do not soak in water.
Side Trim
(Stainless steel models)
Always wipe with the grain when cleaning. For moderate/
heavy soil use BonAmi _ or Soft Scrub _ (no bleach).
Wipe using a damp sponge or cloth, rinse and dry.
Guide
Dally Cleaning Techniques
[° Clean the surface when it is completely coo[
with the fo[[owing exception.
Remove Dry Sugar, Sugar Syrup, Tomato
Products and Milk immediately with the
razor blade scraper.
How to use a Razor Blade Scraper
Recommended Cleaners
Cool(top Cleaning Cr&me
Use only a small amount. Apply to a clean paper
towel or cloth.Wipe on the surface and buffwith a
clean dry towel
BonAmi#): rinse and dry.
Soft Scrub _) (without bleach): rinse and dry.
WhiteVinegar: rinse and dry.
Razor blade scraper (packaged with cooktop)
Note:The recommended cleaners indicate a type
of cleaner and do not constitute an endorsement.
Avoid These Cleaners
" Glass cleaners which contain ammonia or
chlorine bleach° These ingredients may
permanendy etch or stain the cooktop.
" Caustic Cleaners
Oven cleaners may etch the cooktop surface.
" Abrasive Cleaners
Metal scouring pads and scrub sponges can scratch
and / or leave metal marks.
Soap-1ffl[ed scouring pads can scratch the surface.
Powdery cleaners containing chlorine bleach
can permanently stain the cooktop.
Flammable cleaners such as lighter fluid or
WD-40.
Do not use any kind of cleaner on the glass while the
surface is hot; use only the razor blade scraper. The
resulting fumes can be hazardous to your health.
Heating the cleaner can chemically attack and damage
the surface.
2. Wipe off spatters with a dean, damp sponge
or paper towel. Rinse and dry. Use white vinegar if
smudge remains. Rinse and dry.
Use Daily
,
Apply a small amount of the Cooktop
Cleaning Or&me° When dry, buff surface with
a clean paper towel or cloth.
PAGE 9
Page 12

NE$ Cooktop Use and Care Manuam Cooktop Care and Maintenance
Chart
TYPE OF SOiL POSSmBLE SOLUTmON
Dry sugar, sugar syrup, mill< or tomato spills°
Melted plastic film or foil. Aim these items
REQUmRE mMMEDmATE REMOVAL,
Remove only these types of spills while the
surface is hot using the razor bmade scraper, See
illustration on Page 8.
Be sure to use a new, sharp razor in your scraper.
Burned-on food soil, dark streaks_ and specks
Greasy spatters
Metal marks: |ridescent stain
Failure to remove these soils immediately can
permanently damage the surface,
, Remove pan and turn off the element.
" Wearing an oven mitt, hold scraper at 30° angle,
using care not to gouge or scratch the glass. Push
soil off the heated area.
" After the surface has cooled, remove the residue
and apply the Cooktop Cleaning Creme.
Soften by laying a damp paper towel or sponge on
top of soil for about 30 minutes.
Use a plastic scrubber and Cooktop Cleaning
Creme or use the razor blade scraper. Rinse and
dry.
* Use a soapy sponge or cloth to remove grease;
rinse thoroughly and dry. Apply Cooktop Cleaning
Creme.
Pans with aluminum, copper or stainless steel bases
may leave marks. Treat immediately, after surface
has cooled,with the Cooktop Cleaning Creme. if this
does not remove the metal marks, try a mild abrasive
(Bon AMP', Soft Scrub e) without bleach) with a
dampened paper towel Rinse and reapp[y creme.
Failure to remove metal marks before the
next heating makes removal very difficu[to
Hard Water Spots
Hot cooking [iquidsdripped on surface
Surface scratches
Small scratches are to be expected on the glass surface,
but do not affect cooking. [n time, small scratches will
become smoother and much less noticeable with daily
use of the Cooktop Cleaning Creme.
The minerals in some water can be transferred
onto the surface and cause stains. Use undiluted
white vinegar, rinse and dry. Recondition with
Cooktop Cleaning Creme.
Remove boilovers and stains, before using the
cooktop again.
Apply Cleaning Creme before using to remove
sand-like grains and grit such as salt and seasoning.
Scratches can be reduced by using pans with
bases that are smooth, clean, and dry before use.
Use recommended Cool<top Cleaning Creme
daily on the cooktop.
Be Careful: Diamond rings will scratch the
su trace.
PAGE IO
Page 13

NE$ Cooktop Use and Care Manuam Cooktop Care and Maintenance
Troubleshooting
Before ca[ling for service, check these suggestions to avoid unnecessary service charges.
QUEST|ON SUGGESTED $OLUT|ONS
Element cycles on the highest , This is normal The temperature [imiter operates
setting automatically to protect the glass ceramic surface
Element cycles more than usual
A slight odor is not:iceab[e when an o This is normal with new cooktops and will disappear
element is turned on after several uses.
from extreme high temperature damage.
Pan base is warped and not making full contact with
the heating surface.
Base diameter of pan is too small for the size of the
element.
Pan ingredients have boiled dry.
Material of pan is a poor heat conductor; heat
transfers too slowly
Cooktop controls wi[[ not turn on
Replacement razor blades for the
scraper
Cooking results are not what was
expected
Replacement
cooktop
inTwisT dial for
o Check the power source to see if a fuse has blown
or if the circuit breaker tripped.
o Check power supply.
" Cooktop pane[ is locked. Touch and hold PANEL
LOCK pad until indicator light turns off.
o The scraper is packaged with single-edge, stainless
steel blades. Use a standard single-edge blade for
replacement.
° The cooktop is not level.
° Cooking pan does not fit the surface being used.
o Cookware is not the type or size recommended.
A back-up dial is packaged with the cooktop. If an
additional dial is required, ca[[ 1-800-944-2904 and
order replacement part #5060003783.
HOW TO OBTAIN SERVICE
CaM: For authorized service or parts information, call 800/944-2904. We want you to remain a satisfied
customer. If you have any questions or concerns, please let us [<now.
Write: BSH Home Appliances Corp., Customer Support, 5551 McFadden Avenue, Huntington Beach, CA
92649. Whether you write or call, please provide us with the model number, serial number and date of
original purchase or installation.
PAGE II
Page 14

NES Cooktop Use and Care ManuM Bosch CooktopWarrant
Statement of Limited "Warranty
The warranties provided by BSH Home Appliances Corp in this Statement of Limited Warranty apply only to the BSH Electric
Cooktops ("Cooktop') sold to you, the first using purchaser, provided that the Cooktop was purchased (I) for your use and not for
resale and (2) in the United States or Canada and is Iocated in the country of purchase.As used in this Statement of Limited
Warranty, the term "Date of Mstallation" shall refer to the earlier of the date the Cooktop is installed or ten (10) business d_ys
after the date the Cooktop is sold to the first using purchaser; the warranties stated herein apply only to the first using purchaser
and are not transferable_
Standard L|mited Warrant Z
BSH warrants that its Cooktop is free from defects in materials and workmanship for a period of twelve (I 2) months from the
Date of Installation. During the warranty period, BSH or its authorized service center will repair or replace, at its sole option, any
Cooktop that proves to have been defective under conditions of normal use without charge.All removed parts and components
shall become the property of BSH, at BSH's option.All replaced and/or repaired parts shall assume the identity of the original part
for purposes of this warranty and this warranty shall not be extended with respect to such parts.
E×tended Umited Warrant Z
BSH further warrants that the electric heating elements and controls of the Cooktop and the ceramic glass of the Cooktop shall be
free from defects in materials for a period of time beginning on the twelfth (I 2th) month from the Date of Installation and continu-
ing until the sixtieth (60th) month from the Date of Installation ("extended warranty period"). During the extended warranty period,
BSH will replace any electric heating elements, controls, or ceramic glass of the Cooktop that proves to have been defective under
normal conditions of use without charge, excluding any labor (including but not limited to labor charges incurred in the removal and
reinstallation of any Cooktop), transportation, and/or shipping costs incurred in the performance of this extended warranty.All
replaced parts covered under this paragraph shall assume the Identity of the original for purposes of this extended warranty and this
warranty shall not be extended with respect to such parts.
Other Conditions of the U_ited Warranties
The warranties provided in this Statement of Limited V_%rranty exclude defects or damage resulting from (I) use of the Cooktop in
other than its normal and customary manner (commercial use of the Cooktop shall not be deemed normal or customary), (2)
misuse, abuse, accidents or neglect, (3) improper operation, maintenance, installation or unauthorized service, (4) adjustment or
alteration or modification of any kind, (5) a failure to comply with applicable state, local, city, and county electrical and/or building
codes, (6) spills of food or liquid, and (7) external forces such as floods, fires, acts of God or other circumstances beyond BSH's
control.Also excluded from this warranty are scratches and damages on external surfaces and exposed parts of Cooktops on which
the serial numbers have been altered, defaced of removed.
To the extent allowed by law, this warranty sets out your exclusive remedies with respect to products covered by it, whether the
claim arises in contract or tort (including strict liability and negligence) or otherwise. BSH will not be Iiable for consequential or
incidental damages, losses, or expenses.THIS VVARRANTY IS IN LIEU OF ALL OTHER EXPRESSWARRANTIES.ANY\6ZARRANTY
IMPLIED BY LAW, WHETHER FOR MERCHANTABILITY OR FITNESS FOR A PARTICULAR PURPOSE OR OTHERWISE, SHALL
BE EFFECTIVE ONLY FOR, THE PERIOD THAT THIS EXPRESS WARRANTY IS EFFECTIVE. No attempt to aker, modify, or amend
this warranty shalI be effective unless authorized in writing by an officer of BSH.
How to Obtain Warranty Service
To obtain warranty service for the Cooktop, you should contact the nearest BSH authorized service center or the BSH Customer
Support Call Center; SSSI McFadden Avenue, Huntington Beach, CA 92649, 8001944-2904.
NOTICE TO CALIFORNIA OWNERS
If your Cooktop needs warranty service and there is no authorized BSH service center reasonably close to you, you may notify the
BSH reseller from whom you purchased the Cooktop •If the BSH reseller fails to repair or replace the defective parts, or partially
refund your purchase price (where applicable),you m_y have the Cool<top repaired at any Iarge appliance repair shop or center and
you wil! be reimbursed for" all reasonable expenses provided the costs are substantiated in writing and the work performed is
covered by this warranty BSH shall not reimburse any repair costs hereunder which exceed the depreciated value of the Cool<top.
PAGE 12
Page 15

PAGEH3
Page 16

Model Number
Serial Number
Specifications are for phnning purposes only. Refer toinstallation instructions and consuHt your countertop suppHier
prior to making counter opening. ConsuHt with a heating and ventihting engineer for your specific ventihtion re:
quirements. For the most detailed information, refer to installation instructions accompanyin 8 product or write to
BSH Home AppHiances Corp. indicating modemnumber.
We reserve the right to change specifications or design without notice. Some models are certified for use in Canada.
BSH is not responsible for products which are transported from the United States for use in Canada. Check with
your local Canadian distributor or dealer.
For the most up to date critical instalhtion dimensions by fax, use your fax handset and call 702/833-3600. Use code #8317,
BSH Home Appliance Corporation
555_
McFadden Avenue, Huntington Beach, CA 92649 " 800/944-2904
@2002 BSH Home Appliances Corp." Litho in USA "
50 60 00 38 38 (8205)
 Loading...