

Page 1
Installation
Instructions
LTC 5136 Series
EN
AutoDome
C
ontrollers
F.01U.284.614
®
Page 2

Bosch Security
Systems
| 08 May 2013
LTC 5136 Series |
Instruction Manual | Important
Important S
1. Read
2. Retain
3. Heed Warnings - All
4. Follow
5.
6.
7. Water and Moisture - Do not use this unit
8.
9.
10. Power Sources - This unit should be operated
Instructions
instructions
operated.
Instructions
instructions
the
operating instructions
Instructions
instructions
Cleaning
cleaning.
cleaners.
Attachments
recommended
may cause
water - for
swimming
installation,
location.
Accessories
stand, tripod, bracket, or mount. The unit may
causing
damage
bracket, or mount
manufacturer
mounting
manufacturer's instructions
mounting accessory recommended
manufacturer
An
appliance
be moved with care. Quick stops,
force, and uneven surfaces may cause
appliance
Ventilation
built-in installation
ventilation
instructions
must not exceed its
temperature requirements.
from the type of power source
marking
power supply you plan to use, consult your
or local power
operate from
to the
operating instructions.
afeguards
- All safety and
should be read before the unit
- The safety and
should be retained for future
warnings
- All
should be
- Unplug the unit from the outlet
Do not use liquid cleaners or
Use a damp cloth for
- Do not use
by the product
hazards.
example,
pool, in an
or in any area
- Do not place this unit on an
serious injury to a person and
to the unit. Use only with a stand,
or sold with the product.
of the unit should follow
.
and cart
and cart
- This unit should not be placed in
is
provided,
have been adhered to. The
label. If you are not sure of the type
company.
battery
followed.
in a wet
unprotected outdoor
recommended
combination should
combination
or rack, unless
maximum operating
power or other sources,
operating
on the unit and
should be adhered
operating
cleaning.
attachments not
manufacturer
basement,
classified
by
and should use
excessive
to
proper
or the
manufacturer’s
indicated
For units
is
operating
reference.
and
use
before
aerosol
as
near
near
as a
wet
unstable
serious
tripod,
the
Any
the
a
by
the
the
overturn.
intended to
equipment
on
the
dealer
Safeguards
in
to.
they
a
fall,
a
only
of
refer
Grounding
11.
equipped with a
plug (a plug
other).
one way. This is a safety feature. If you are
to insert the plug fully into the outlet, try
the plug. If the plug should still fail to fit,
your
not defeat the safety purpose of the
Alternately,
wire
(grounding)
grounding-type
feature. If you are unable to insert the plug into
outlet, contact your
obsolete outlet. Do not defeat the safety purpose
the
grounding-type plug.
12. Power Cord
be routed so that they are not likely to be
or pinched by items placed upon or
paying particular attention
convenience receptacles,
exit from the
13. Power Lines - An outdoor system should not
located in the
other electric light or power circuits or where it
fall into such power lines or circuits.
installing
be taken to keep from
circuits as contact with them might be fatal.
models only - refer to the
Article 820
14.
Overloading
extension
electric
15. Object and Liquid Entry - Never push objects
any kind into this unit
may touch
parts that could result in a fire or electric
Never spill liquid of any kind on the
16.
Servicing
yourself
you to
servicing
or
Polarization
polarized alternating-current line
having
This plug will fit into the power outlet
electrician
grounding-type
shock.
as
dangerous voltage
to replace your obsolete outlet. Do
this unit may be equipped with a
pin. This plug will only fit into
power outlet. This is a
Protection
appliance.
vicinity
an outdoor system,
regarding installation
- Do not
cords as this can result in a risk of fire
dangerous voltage
- Do not attempt to service this
opening
to
qualified
- This unit may
one blade wider than
polarized plug.
plug, a plug
electrician
- Power supply cords
to cords and
and the point where
of
overhead
touching
National Electrical Code
overload
through openings,
or
removing
or other hazards. Refer
service
having a third
safety
to replace
against
plugs,
power lines
When
extreme
points or short
personnel.
care
such power lines
of CATV
outlets
and
unit.
covers may
be
the
unable
reversing
contact
a
your
should
walked
them,
should
U.S.A
systems.
as
they
shoc
unit
EN
only
3-
the
of
on
they
be
or
can
or
of
out
k.
expose
|
or
.
all
2
Page 3

Bosch Security
Systems
| 08 May 2013
LTC 5136 Series |
17.
Damage Requiring Service
the outlet and refer
personnel
a. When the power supply cord or plug
damaged.
b. If liquid has been spilled or objects have
into the
c. If the unit has been exposed to water
inclement weather
d. If the unit does not operate
following
those controls that are
instructions,
controls may result in
require
to restore the unit to its normal
e. If the unit has been dropped or the cabinet
been
f. When the unit
performance--this indicates
18.
Replacement
required, be sure the service
replacement
or have the same
part.
Unauthorized substitutions
electric shock, or other
19. Safety Check - Upon
repairs to this unit, ask the service
perform safety checks to
in proper
20. Coax
21.
Grounding
connected
grounded.
National Electrical
provides information
grounding
grounding
grounding conductors,
connection
requirements
Lightning
a
lightning
unused for long periods of time, unplug it from
wall outlet and
will prevent damage
and power line
Instruction Manual
servicing
under the
unit.
the
extensive
damaged.
parts specified by the
operating condition.
to the unit, be sure the cable system
U.S.A. models
of the mount and
of the coax to a
to
for the
- For added
storm, or when it is left
following conditions:
(rain, snow,
operating instructions.
as an
improper adjustment
work by a
exhibits
Parts - When
characteristics
hazards.
completion
determine
- If an outside cable system
Code, ANSI/NFPA
with respect to
location of
grounding electrodes, and
grounding electrode.
protection
disconnect
to the unit due to
surges.
| FCC Information
- Unplug the unit
to
qualified service
is
and/
etc.).
normally
covered
damage
qualified
a distinct
a need for
replacement
technician
as the
may result in
of any service
only--Section
supporting structure,
discharge
of this unit
the cable system.
by
Adjust
by the
operating
and will
technician
operation.
change in
service.
parts
has
manufacturer
original
technician to
that the unit
810 of
No.70,
proper
unit, size
discharge unit,
unattended and
lightning
from
fallen
or
of
other
often
used
is
the
during
This
only
has
are
fire,
or
is
is
of
the
EN
FCC & ICES Informat
(U.S.A. and Canadian Models
This device complies with part 15 of the FCC Rules.
Operation
(1) This device may not cause harmful
(2) This device must accept any
is subject to the
and
received, including interference
undesired operation.
ion
following
Only)
two
conditions:
interference,
interference
that may
cause
NOTE: This
comply
pursuant
Industry Canada.
reasonable protection against
when
the
environment.
radiates
and used in
may cause harmful
communications. Operation
residential
in which case the user will be required to correct
interference
Intentional
not
expressly approved
compliance,
modifications
the
equipment.
dealer or an
corrective action.
THIS IS
ENVIRONMENT, THIS PRODUCT
INTERFERENCE,
BE
The user may find the
the Federal
How to
Problems. This booklet is
Government Printing
Stock No.
equipment
with the limits for a Class A
to Part 15 of the FCC Rules and
equipment
This
radio
frequency energy,
accordance
area is likely to cause harmful
at his
or
unintentional changes
shall not be made. Any such
could void the user’s
If
experienced radio/television technician for
A CLASS A
REQUIRED
Communications Commission, helpful:
Identify
and
004-000-00345-4.
has been tested and found
digital device,
These limits are
is operated in a
equipment generates,
with the
interference
expense.
necessary,
IN WHICH CASE,
TO
by the party
PRODUCT. IN A DOMESTIC
TAKE ADEQUATE MEASURES.
following
Resolve Radio-TV Interference
available
Office,
designed
harmful
of this
the user should consult
Washington,
interference
commercial
uses
and if not
instruction manual,
to
radio
equipment
or
modifications,
responsible for
authority
MAY CAUSE RADI
THE
booklet, prepared
from the
ICES-003 of
to
provide
and
installed
in
a
interference,
the
changes or
to
operate
USER MAY
by
U.S.
DC
20402
|
to
the
O
3
,
Page 4
Bosch Security
Systems
| 08 May 2013
LTC 5136 Series |
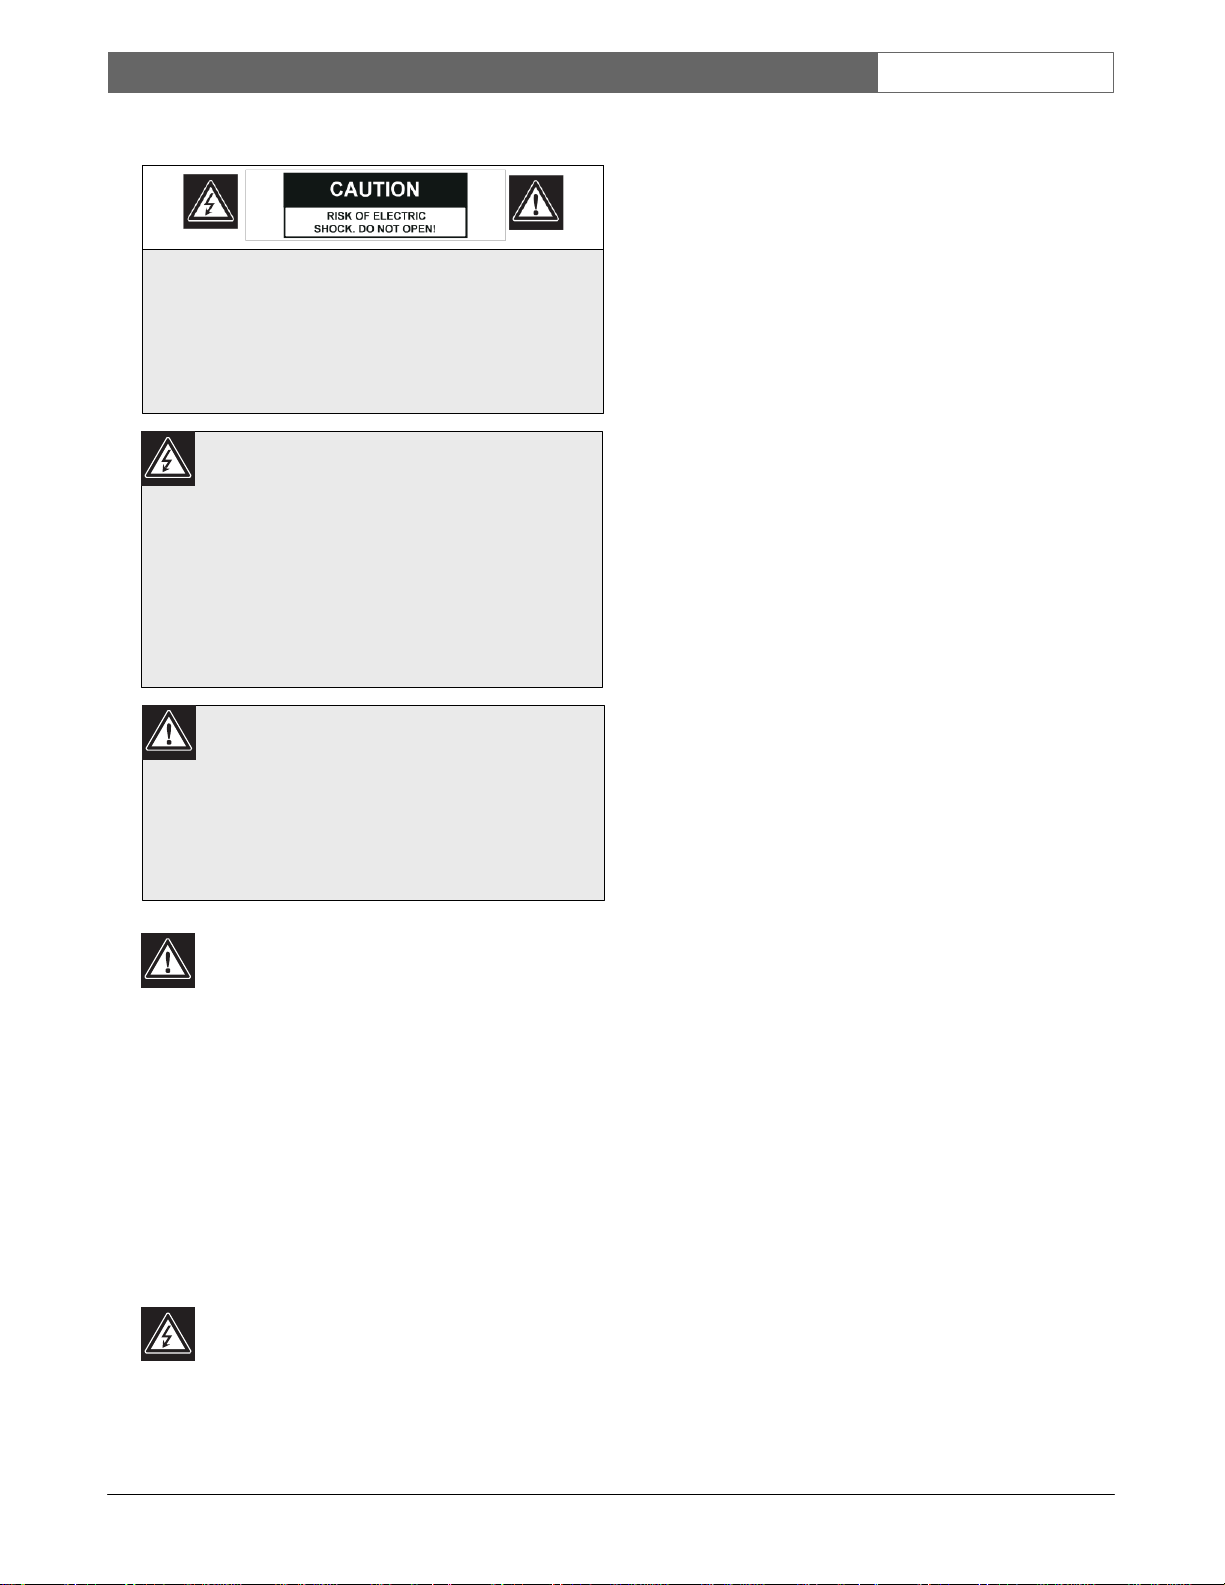
Safety
CAUTION: TO
ELECTRIC SHOCK,
(OR BACK). NO USER
INSID
SERVICE PERSONNEL.
Instruction Manual
Prec
E.
The
symbol, within
intended
presence of
voltage” within
that may be of sufficient
constitute
persons.
The
equilateral triangle
the user to
operating
instructions
accompanying
Attention: Installation
qualified
with the
local
aut
ions
REDUCE
DO NOT
REFER SERVICING
lightning
exclamation
National Electrical
codes.
flash with an
an
to alert the user to
uninsulated “dangerous
the product’s
a risk of electric shock to
presence
and
maintenance (servicing
in the
the
service
personnel
| Safety Precautions
THE RISK OF
REMOVE
SERVICEABLE
TO QUALIFIED
equilateral triangle, is
magnitude to
point
within an
is
intended
of
important
literature
appliance.
should be performed
only in
Code or
COVER
PARTS
arrowhead
the
enclosure
to
alert
accordance
applicable
|
4
EN
)
by
To meet the Mains Supply Voltage Dips and Short
Interruptions requirements per EN 50130-4 Alarm
Standard, ancillary equipment (for example, UPS) is
necessary. The UPS must have a Transfer time
between 2-6 ms and Backup Runtime of greater than
5 seconds for the power level as specified on the
product data sheet.
Power
Disconnect.
OFF
switches
whenever
power source;
only when the ON-OFF switch is in the
position. The power cord is the main
disconnect
the power cord is inserted into
for all
Units with or
have power supplied to the
however,
units.
the unit is
without ON-
operational
power
unit
the
ON
Page 5

Bosch Security
Systems
| 08 May 2013
LTC 5136 Series |
Instruction Manual
| Contents
Table of Cont
Important
FCC
Information
1
UNPACKING
2
SERVICE
3 DESCRIPTION . . . . . . . . . . . . . . . . . . . . . . . . . . . . . . . . . . . . . . . . . . . . . . . . . . . . . . . . . . . . . . .
3.1 Power . . . . . . . . . . . . . . . . . . . . . . . . . . . . . . . . . . . . . . . . . . . . . . . . . . . . . . . . . . . . . . . . . . . . . . . .
4 INSTALLATION . . . . . . . . . . . . . . . . . . . . . . . . . . . . . . . . . . . . . . . . . . . . . . . . . . . . . . . . . . . . . . .7
4.1 General . . . . . . . . . . . . . . . . . . . . . . . . . . . . . . . . . . . . . . . . . . . . . . . . . . . . . . . . . . . . . . . . . . . . . .
4.2
Installation
4.3
Installation
4.4
Installation
4.5 AutoDome Camera or
5 SETTING FAST ADDRESS FEATURE . . . . . . . . . . . . . . . . . . . . . . . . . . . . . . . . . . . . . . . . . . .
6
CONTROLLER
6.1
Controls/Indicators
7 TECHNICAL
8 DATA
ents
Safeguards
. . . . . . . . . . . . . . . . . . . . . . . . . . . . . . . . . . . . . . . . . . . . . . . . . . . . . . . . . . . . . . . . . . . . .2
. . . . . . . . . . . . . . . . . . . . . . . . . . . . . . . . . . . . . . . . . . . . . . . . . . . . . . . . . . . . . . . . . . . . .6
using Biphase Code . . . . . . . . . . . . . . . . . . . . . . . . . . . . . . . . . . . . . . . . . . . . . . . . . . . . .7
using RS-232 Data Direct to Camera Site . . . . . . . . . . . . . . . . . . . . . . . . . . . . . . . . . . .8
using an RS-232 Data
REF ERENCE
CONVERTER
. . . . . . . . . . . . . . . . . . . . . . . . . . . . . . . . . . . . . . . . . . . . . . . . . . . . . . . . . . . . . . . . . .2
. . . . . . . . . . . . . . . . . . . . . . . . . . . . . . . . . . . . . . . . . . . . . . . . . . . . . . . . . . . . . . . . . .6
Transmission
Receiver/Driver
OPERATION . . . . . . . . . . . . . . . . . . . . . . . . . . . . . . . . . . . . . . . . . . . . . . . . . . .11
. . . . . . . . . . . . . . . . . . . . . . . . . . . . . . . . . . . . . . . . . . . . . . . . . . . . . . . . . . . . .11
. . . . . . . . . . . . . . . . . . . . . . . . . . . . . . . . . . . . . . . . . . . . . . . . . . . . .13
PINOUTS . . . . . . . . . . . . . . . . . . . . . . . . . . . . . . . . . . . . . . . . . . . . . . . . .16
Site
Link to a Biphase Camera Site . . . . . . . . . . . . . . .9
Configuration
. . . . . . . . . . . . . . . . . . . . . . . . . . . . . .10
EN
.6
.6
.7
.10
|
5
Page 6

Bosch Security
Systems
| 08 May 2013
LTC 5136 Series |
Instruction Manual
| Unpacking
1 UNPACKING
This
electronic equipment
handled
Check for the
carefully.
following items:
•
LTC
5136/61
C
ontroller.
•
Interface unit.
•
Power
supply.
•
Power supply
•
One (1) 3 m (10 ft) cable with two (2) RJ-1
connectors.
If an item appears to have been
replace it
If any items are
Systems,
S
ervice.
properly
Inc. Sales
in its carton and notify the
missing,
Representative
shipping
The
unit may be
carton is the safest
transported.
2 SERVICE
If the unit ever needs repair service, the customer should
contact the nearest Bosch Security Systems, Inc. Service
Center for authorization to return and shipping
instructions.
Service Cent
U.S.A.: Phone:
fax:
e-mail: NationalS
Canada:
Europe, Middle East & Asia Pacific
For
see
NOTE: Grounded wrist straps must be worn
proper ESD safety
handling
boards.
additional information,
www
.bosc
the
ers
800-366-2283
800-366-1329
514-738-2434
3
2-1-440-0
hsecuritysystems.com.
precautions observed when
electrostatic-sensitive
should be
unpacked and
or LTC
5136/51 D
cable.
damaged
notify your Bosch Security
or
Customer
container
Save it for possible future
or
408-956-3895
or 408-
erviceC
711
956-3896
enter@ca.slr
R
egion:
printed
esktop
in
shipment,
shipper
in which
.com
and
circuit
1
the
use.
3 DESCRIPTION
The LTC 5136 Series
with the Bosch
also be used to operate any of the
Allegiant®
Series of
The LTC 5136 Series
AutoDome
and
including variable
auxiliaries,
etc.
LTC 5136 junction box is
AutoDome
camera or
will use a daisy chain
(8) camera sites can be
biphase
The biphase control code cable can extend
.
maximum distance
1.0 mm
outputs.
2
(18 AWG) shielded
(Belden 8760 or
3.1 Power
The model number and
on the product
.
Model No
Rated Voltage Range Rated Volt
LTC 5136/51 230
LTC 5136/61 120
Controllers
AutoDome
Series
Receiver/
controllers
Allegiant receiver/driver functions
speed
pan/tilt/zoom, pre-positions,
Typically,
one of the 16 outputs of
connected
receiver/driver.
wiring configuration,
controlled
of 1.5 km (5000 ft),
twisted
equivalent
).
operating voltage
label.
VAC,
50/60 Hz 195.5 to 253 6
VAC,
50/60 Hz 105 to 132 6 W
are
designed
cameras.
for
They
conventional
Drivers.
support control of
to a
single
If the
application
up to
from each of the
a
using
pair
cable
are
shown
Voltage Power at
W
EN
use
can
the
eight
all
16
age
|
6
Page 7

Bosch Security
Systems
| 08 May 2013
EN |
7
LTC 5136 Series |
Instruction Manual
| Installation
4 INSTALLATION
4.1 General
The desktop
location
contains a single RJ-11
both
power and data
the supplied 3 m (10 ft)
directly
converts
unit
Controller
The
interface
power to the
An LED
will flash to
the
Controller
biphase control
There are no video
video signal(s) from the camera site(s) should
connected
video
etc.).
If the
communication
RS-232 Series
Receiver/Driver
using the supplied
applications,
Hookup Kit should be
installation
with the LTC 8557 Series Kit can then be used
connect the RS-232 wires TX and GND from
Controller’s
communication
simplex
Three
the type of
This
document
typical applications,
during
Controller
convenient
unit should be
to the operator. The Controller
connector,
connections.
power/data
to the supplied
the RS-232 data
unit into
unit also
Controller unit.
visible
on the top cover of the
indicate
has
code.
to an
appropriate viewing
interface
unit. The
generated
Allegiant
biphase control
provides
a path to
that the RS-232 data coming
successfully
been
connections
to the
processing equipment (switcher, multiplexer,
application
will utilize an RS-232
link, or will be
AutoDome
units, the
interface
cameras or RS-232
installation
unit. For RS-232
connected directly to
an LTC 8557 Series Remote Keyboard
purchased
to
process. One of the junction boxes
output to the
user-supplied RS-232
link. The RS-232 protocol requires
link
operating
installation
application
also includes
at 9600
baud.
sections are detailed
you will be
various diagrams of
that will be helpful to refer
installation.
installed
which is used
In most
cable is
applications,
connected
interface
by
the
code.
connect
interface unit
converted into
Controller. The
be
monitor, or
data
Allegiant
is done
without
simplify the
below; select
using.
in
a
for
from
other
supplied
to
the
a
to
4.2 Installation Using Biphase Code
(See Figures 3 and 4)
Install the supplied
enough to the
interface
Controller
3 m (10 ft) data cable can be used. Note that
interface
four holes are
unit is rated for indoor use only. If
provided
to a flat surface. The power supply (to power
Controller
a convenient
the
bayonet
and
interface
location near the
style
connector
into the jack located on the side of the
the power supply cable must be
supply, the
is not
suitable AC power
Connect
RJ-11
interface
end may be
polarity
is not
polarity sensitive.
source.
the supplied 3 m (10 ft) data cable with
connectors, between
unit. The
orientation
connected
The next step is to connect the biphase control
outputs of the
Typically,
connected
interface
receiver/drivers
configuration,
c
hain
daisy
AutoDome
The last (and
connection
interface
a single camera site
to each output, but the outputs of
unit are rated to handle up to eight (8)
when
to a
maximum
connection,
camera or
only
the last) unit in the daisy chain
should be
drivers should have the
when the looping cable is
Connect
equivalent) between
shielded
twisted
the camera site
location and the biphase output
the
interface unit.
unit in a location
unit so the that
supplied
the
desired,
for
mounting
the
interface unit
the
unit) should also be located
interface
unit. Connect
of the power supply
interface
attached
important;
to the
the
Interface Unit
Plug the power supply into
the
Controller
is not
to either
device.
unit to the data
unit and
important
cables.
receiver/driver
the
connected
in a daisy chain
of 1.5 km (5000 ft). In a
the cable is looped
receiver/driver
terminated.
All other
terminating
connected.
along the
resistor
through eac
receiver/
removed
pair cable (Belden 8760
receiver/
connections
driver
located
close
--
code
can
in
cable
unit.
power
a
two
the
either
be
way
.
or
on
If
h
Page 8

Bosch Security
Systems
| 08 May 2013
EN |
8
LTC 5136 Series |
Instruction Manual
| Installation
Pin 1
Pin 6
Figure 1
Interface
Unit Supplied with LTC
5136
The
removable terminal
connections:
diagram above.
Select and
maintain
confusion at the camera
(+), (–), and (S [Shield]), as shown in
blocks have
a wire color
site(s
).
three
convention
EXAMPLE: White to (+), Black to (–), and Shield to (S).
NOTE: The shield
are
connected
to the shield wire of the cable. Skip
AutoDome Camera
complete the
installation.
terminals
or
Receiver/Driver
(S) of the
Site
interface unit
Configuration
4.3 Installation Using RS-232 Data
Direct to Camera Site (See Figure
In this
application,
by the
Controller
Series
AutoDome
Receiver/Driver
not
used in this
receiver/driver
on-screen
menu) for 9600 baud
Install one of the junction boxes supplied in
LTC 8557 Series Kit (ordered
close enough to the
3 m (10 ft) data cable can be used. If desired, four
are
provided
junction
power the
box to a flat surface. The power supply
Controller)
LTC 8557 Series junction box.
style connector
located on the side of the junction box. If the
supply cable must be
polarity
is not
the RS-232 data that is
is
connected directly
cameras or RS-232
units. The supplied
application.
The
must be set (via
Controller
for
mounting
the LTC 8557 Series
AutoDome
internal
operation.
separately)
unit so that the
generated
to RS-232
Allegiant
interface
DIP switch
in a
should also be located near
Connect
the
bayonet
of the power supply cable into the
attached
important;
to the power supply,
the
Interface
Unit is
to
avoid
5
)
unit
camera
the
location
supplied
(to
power
not
the
to
to
is
or
or
holes
the
jac
k
the
polarity sensitive.
AC power
Connect
RJ-11
the supplied 3 m (10 ft) data cable with
connectors, between
junction box. The
end may be
Connect
an
suitable for use with RS-232
Plug the power supply into a
source.
the
Controller
orientation
connected
appropriate
is not
to either
length of cable (not
signals, between the
important
device.
unit and
LTC 8557 Series junction box, and the camera
receiver/driver location.
If the
distance between the
box and camera site is much over 20-30 m (60-90 ft),
the use of
RS-232 line
devices
transmission
The LTC 8557 Series junction box
removable
connections.
user-supplied
extender devices
short haul modems or
may be required.
must be able to support an RS-232
rate of 9600
baud.
provides a
screw
The
terminal
terminal
block for the
block has four
data
connections,
simplex
marked 1, 2, 3, & 4, as shown in the junction
diagram.
Figure 2 Junction Box Supplied with
Pins 1 and 2 are not used. Pin 3 is the Controller’s
232 TX output, and Pin 4 is the Signal
connection. Connect
RX
driver.
to the data ground
Only a single camera site can be
manner – RS-232
c
hain
RS-232
Skip to
to complete the
LTC 8557 Series Kit
the wire from
connection
Respectively,
of the
AutoDome
connect the wire from
connection.
connection.
signals.
signals
Be sure to use cable suitable
cannot be wired using a daisy
AutoDome Camera or Receiver/Driver
installation.
terminal
camera or
connected
Ground
terminal 4
in
Site Configuration
suitable
two
the
--
either
supplied
site
other
These
box
RS-
3 to
the
receiver/
this
for
),
Page 9

Bosch Security
Systems
| 08 May 2013
EN |
9
LTC 5136 Series |
Instruction Manual
| Installation
4.4 Installation Using an RS-232 Data
Transmission Link to a
Camera Site (See Figure
In this
application,
by the
Controller
transmission
phone
modems, etc.). The RS-232
must be able to support an RS-232
transmission
RS-232
converted
supplied
connected
transmission
into
interface
to the
receiver/driver units.
Install one of the junction boxes supplied in
LTC 8557 Series Kit (ordered
close enough to the
3 m (10 ft) data cable can be used. If desired, four
are
provided
junction
power the
box to a flat surface. The power supply
Controller)
LTC 8557 Series junction box.
style connector
located on the side of the junction box. If the
supply cable must be
polarity
is not
polarity sensitive.
AC power
Connect
RJ-11
source.
the supplied 3 m (10 ft) data cable with
connectors, between
junction box. The
end may be
Connect
an
suitable for use with RS-232
8557 Series junction box and the RS-232
device.
If the
much over 20-30 m (60-90 ft), the use of
short haul modems or other RS-232 line
devices
may be required. These
support an RS-232
baud.
The LTC 8557 Series junction box
removable
screw
connections.
marked 1, 2, 3, & 4. See Figure 2, Junction
Supplied with LTC 8557 Series
Pins 1 and 2 are not used. Pin 3 is the Controller’s
RS-232 TX output, and Pin 4 is the Signal
connection.
the RS-232 data that is
is
connected directly
link (fiber optics,
rate of 9600 baud. At the other end of
link, the RS-232 signal
Allegiant
biphase protocol, using
unit. The biphase data is
AutoDome
cameras or
Controller
for
mounting
the LTC 8557 Series
should also be located near
of the power supply cable into the
attached
important;
the
Interface
Plug the power supply into a
the
orientation
connected
appropriate
to either
length of cable (not
signals, between
distance between
simplex transmission
The
terminal
terminal
block for the
block has four
Be sure to use cable suitable for RS-232
Biphase
6)
to an RS-232
microwave, dial-up
transmission link
simplex
Allegiant
separately)
unit so that the
Connect
to the power supply,
Controller
is not
device.
the box and device is
devices
Kit.
in a
the
Unit is
important
transmission
user-supplied
extender
must be able to
rate of
provides a
data
connections
generated
is
then
the
location
supplied
bayonet
power
not
suitable
unit and
--
supplied
the LTC
9600
Box
Ground
the
the
holes
(to
the
jac
the
two
the
either
)
signals. Connect
connection
Respectively,
data ground
At the camera side of the RS-232
install the
it can easily be
NOTE: The
If desired, use the four holes
box to a flat
Connect
the
the wire from
of the RS-232
transmission device.
connect the wire from
connection.
interface
connected
interface
surface.
bayonet
unit in a
to the
unit is rated for indoor use
style
connector
terminal
terminal
transmission device,
convenient
transmission device.
provided
supply cable into the jack located on the side of
interface
attached
important;
unit. If the power supply cable must
to the power supply, the
the
Interface
Unit is not
polarity
polarity sensitive.
Plug the power supply into a suitable AC
source.
k
Connect a transmit
the RS-232
the
interface
connector
Converter
connections.
transmission
unit. Either the RJ-11 or the 9-pin D
input may be used. Refer to the Data
Pinouts section for the
wire and a signal ground wire
device to the desired input
appropriate pin
Next, connect the biphase control code outputs of
interface
unit to the data cable.
camera site
receiver/driver
Typically, a single
is
connected
output, but each biphase output of the
rated to handle up to eight (8)
connected
in a daisy chain
of 1.5 km (5000 ft). For a daisy chain
cable is looped
receiver/driver
through
along the way. The last (and
last) unit in the daisy chain
terminated.
terminating
connected.
Connect
equivalent) between
All other
resistor
shielded
receiver/drivers
removed
twisted
the camera site
and the biphase output
interface
three
unit. The
connections:
FIGURE 1,
Select and
maintain
removable terminal
(+), (–), and (S [Shield]). See
Interface
Unit Supplied with LTC
a wire color
confusion at the camera
Example:
NOTE: The shield
connected
White to (+), Black to (–), and Shield to (S).
terminals
to the Shield wire of the
receiver/drivers when
configuration,
connection, the
each
AutoDome
connection
when the looping cable
pair cable (Belden 8760
receiver/
connections
located on
convention
site(s).
of the
interface
cable.
3 to the
4 to
location
to mount
of the
power
be
is
not
power
to a
single
interface
to a
maximum
camera
only the
should
be
should have
driver
blocks
have
5136.
to
unit
RX
the
where
only
the
the
from
type
the
unit
or
the
or
the
avoid
are
.
on
is
is
Page 10

Bosch Security
Systems
| 08 May 2013
LTC 5136 Series |
Instruction Manual
4.5 AutoDome Camera or
Receiver/Driver Site
Follow the
with the
Receiver/Driver
unit. Set the address of the
receiver/driver,
selected on the
also support address setting via the
Fast
the
AutoDome’s
Video
to the
site(s) should be
monitor or other video
multiplexer, etc.).
5
standard installation instructions provided
AutoDome Camera
unit to connect the data cable to
to the camera number that will
Controller keypad. AutoDome cameras
Address
feature. The next section outlines setting
Fast Addr
signals
Controller.
from the camera site are NOT
The video signal(s) from the
connected
processing equipment (
SETTING
FAST ADDRESS
FEATURE
Use the
AutoDome
menus instead of using the switch
(thumbwheel).
addresses,
The
AutoDome
The
address
AutoDome’s
address via the
even if the
following
(ID number 26636, logical camera #3).
AutoDome
(thumbwheel)
1. Call up the camera to the screen you
viewing
2. Press
ON-999-ENTER.
FIGURE FA1 is
•
Any camera
display
the
are
viewing
program.
•
If the
keyboard
make
mode. This is required to
Fast
Fast
Fast
Address
thumbwheel
is an
example
being Fast
set to 0.
(i.e. CAM ERA-3-
displayed.
without
the screen in FIGURE FA1
ON-999-ENTER
the camera that you want
camera’s
address,
the camera enter the Fast Addr
A
ddr
ess
.
| Setting Fast Address
Configurat
or
Allegiant Series
AutoDome
ess
.
to an
Address
controller
can also be used to
of how to Fast
Addressed
The screen shown in
a Fast
Fast
Address
ON-999-ENTER
camera
on-screen menu
appropriate
feature to set
and
address
switch is
has the
ENTER).
Address
is used. Make sure
is the same as
change
ion
the
or
be
connected
camera
viewing
switc
the
on-screen
change
set.
Address
switc
h
are
will
when
to
will
ess
or disable a
of
her,
an
you
the
Figure FA1
Figure FA2
• ON-998-ENTER
regardless
addressing mode.
3. Press
4. Press
ON-26-ENTER.
FIGURE FA2 will be
any camera whose ID does not begin with
will exit the Fast
ON-636-ENTER.
FIGURE FA3 is
Camera
the Fast
ID 26636 will be the only camera
Addressing
of Fast
Addressing
displayed.
mode.
causes all
address
The screen shown in
displayed.
cameras,
status, to enter
At this
mode.
The screen shown
At this
point,
|
EN
the
point,
26
in
in
10
Figure FA3
Page 11

Bosch Security
Systems
| 08 May 2013
EN |
11
LTC 5136 Series |
Instruction Manual
| Controller Operation
5. Press
ON-1-ENTER
Once the Fast
(thumbwheel)
stored to
change
non-volatile memory,
if power is
are restored (SET
•
To reset the dome’s address to the
address
(thumbwheel),
steps and end by
•
To
check/confirm
camera and press
command
display
causes all cameras to
their
and the address is
Address
is set, the switch
is ignored. The Fast
removed
-899-
or
ENTER).
repeat the
pressing OFF-1-
the address, call up
ON-997-ENTER. This
addresses.
6
Operation
controlled
numeric
press ENTER. The camera can now be operated
the
appropriate, pre-position
can also be
Note that a delay of more than 3-4 seconds
entering a selection
to the default camera entry mode. If this
occurs, start the
A complete
provided
6.1 Cont
LED
is used to
number.
SET
all
Drivers which are equipped with this option.
the
the desired scene to be
enter the desired
keypad
Certain pre-position
certain
operation
features.
USER
Controller diagnostic
CONTROLLER
OPERATION
is quite simple. If the camera number to
is not
visible
in the LED
keypad
appropriate joystick and/or
to select the desired camera,
lens controls.
scenes and
entered.
results in the
selection
description
in the next
rols/
Indicators:
key:
AutoDome
joystick
The four digit,
display
This key is used to set
cameras and
and lens controls to position the camera
data entry and the selected
again, from the
of the controls and
section.
Indicators
Allegiant
7-segment
pre-position
programmed.
pre-position
number on the
(1 to 99). Press ENTER to store the
numbers are also used to
AutoDome
features. Refer to the AutoD
manual for a complete listing of the
key:
Press
USER-1-ENTE R
mode. This function can be
displays,
auxiliary functions
Controller returning
Series
Press SET,
to enter
set.
address
Address
and will
is
not
factory defaults
switc
h
above
ENTER.
the
briefly
be
use
the
then
using
If
while
condition
beginning.
indicators is
LED
display
camera
scenes
of
Receiver/
Operate
then
numeric
position.
program
ome
available
the
used
to ensure that all
working
order. It also
Controller
center position of the
this mode, the
display
buttons also
this time, the
Controller
readouts and LEDs behind the first two rows
illuminate
joystick undergoes calibration,
LEDs and buttons are
automatically calibrates the
analog joystick.
sounds a short beep.
for about two seconds.
careful not to move it until the LED
gone dark. The operator should note any LED
failures during the time they are
Each key may now be pressed to
code number
associated
with that key. Use the
below to ensure that all keys are
illuminated.
display a unique
operating properly
Push the USER key last, as this will cause
Controller
to exit the test
mode.
Key Number Key
Set 0009 9
Camera 0025 0
Shot 0010 Enter
On 0018 Clear
Off 0026
1 0011
2 0019
3 0027
4 0012 Up 1x53
5 0020 Down 0x51
6 0028 Left 1x52
7 0013 Right 0x54
8 0021
to
NOTE: The x digit shown in the number column,
up, down, left, right, and zoom values,
value, and will
activated.
change
Focus
(up)
Focus
(down)
Iris
(up)
Iris
(down)
Zoom
(CW) 1x41
Zoom
(CCW) 0x42
based on how far the control
Upon
entering
The
During
so
be
displays have
display
table
the
Number
0029
0014
0030
0038
0043
0044
0045
0046
indicates
in
of
.
for
a speed
is
Page 12

Bosch Security
Systems
| 08 May 2013
EN |
12
LTC 5136 Series |
Instruction Manual
| Controller Operation
CAMERA key:
when
selecting
inadvertently
made, the
Controller immediately
mode.
Normally,
entering
keypad,
SHOT
key:
scenes of all
Receiver/Drivers
This key is only used to correct an
a camera number. If another key
pressed when a camera
Camera
button may be pressed to put
back into camera
a camera
the desired camera number using the
then
pressing
ENTER.
This key is used to recall
AutoDome
cameras and
that are equipped with this
Press SHOT, then enter the desired
number on the numeric
ENTER to recall a
Certain pre-position
certain
operation
features.
ON
of the
AutoDome
manual for a complete listing of the
key:
This key is used to
AutoDome
receiver/drivers.
auxiliary
number on the numeric
Press ON, then enter the
keypad
previously
numbers are also used to
features. Refer to the AutoD
cameras and
ENTER to complete the
Certain auxiliary
certain
operation
features.
OFF
key:
functions of the
Series
desired
AutoDome
This key is used to
Receiver/Drivers.
auxiliary
numbers are also used to
features. Refer to the AutoD
manual for a complete listing of the
AutoDome
Press OFF, then enter
number on the numeric
press ENTER to complete the
Certain auxiliary
certain
AutoDome
operation
features.
numbers are also used to
features. Refer to the AutoD
manual for a complete listing of the
selection
is
selection
selection
is made
by
numeric
pre-position
Allegiant Series
option.
pre-position
(1 to 99). P
stored camera
ress
position.
program
ome
available
activate auxiliary functions
Allegiant Series
desired
action.
keypad,
and
press
program
ome
available
deactivate auxiliary
cameras and
Allegiant
the
keypad, and
action.
program
ome
available
error
is
being
the
NUMERIC
keypad: These keys are used to
numeric data. When the first numeric key is
the LED
indicate
ENTER key: This key is used to
display
will become a data
the numeric value
display and
pressed.
terminate commands.
When using the ON or OF F function, holding this
will cause the function to repeat until the key
released.
functions are
adjustments.
CLEAR key:
This feature is useful where
associated
with level type
This key is used to clear
auxiliary
invalid
some cases, it can be pressed twice. If there is
data in the camera
data,
and the second push returns the
display,
the first push clears
Controller
camera mode. This allows the operator to
incorrect
there
clears the entire
FOCUS and IRIS
to control the lens focus and iris
Joystick:
pan
joystick
Rotation
in or
If the camera is capable of
the degree of
correspond
data
without leaving
is no data in the LED
Controller,
keys:
the current mode.
display,
back to the default
These rocker
functions.
Movement
of the
joystick
the selected camera left or right.
up or down will tilt the camera up or
of the
out.
joystick
knob will move the zoom
variable
joystick deflection
to different speed
(or rotation)
responses.
the first
switches
left or right
Movement
speed
enter
pressed,
is
camera
entries.
numeric
clear
push
are
down.
operations,
will
this
to
If
state.
used
will
of
lens
key
In
the
the
Page 13

Bosch Security
Systems
| 08 May 2013
EN |
13
LTC 5136 Series |
Instruction Manual | Technical
Reference
7
TECHNICAL
REFERENCE
Video Monitor
Power
Supply
Adapter
DVR or Video
Switcher
Data
Converter
Unit
Up to 16
control code
Video
biphase
outputs
Signal
Video
Signal
RS-232
Data
&
Power
Controller
Figure 3 Typical Camera Site Using Biphase Control Code
Video Monitor
Video
Signal
Power
Supply
Adapter
Video
Signal
Video
Daisy
Biphase
DVR or Video
Switcher
Converter
RS-232
Data
Power
Data
&
Unit
Typical
biphase
control code
output
Controller
Chain
Data
Daisy
Biphase
Typical AutoDome Cameras or
Allegiant Receiver/Driver units
Figure 4 Typical Multiple Camera Sites Using Daisy Chain Biphase Control Code Wiring Configuration
Typical AutoDome
Cameras or Allegiant
Receiver/Driver units
Signal
Chain
Data
Page 14

Bosch Security
Systems
| 08 May 2013
EN |
14
LTC 5136 Series |
Instruction Manual | Technical
Reference
Video Monitor
Power
Supply
Adapter
Video
Signal
Controller
RS-232
Data
Power
&
LTC
8557
Junction Box
RS-232 Cable or
Communication Link
Figure 5 Typical Installation Using RS-232 Model Camera Site
Video Monitor
DVR or Video
Switcher
Controller
RS-232 Data & Power
Video
Power
Supply
Adapter
LTC
8557
Junction
Signal
Box
Power
Supply
Adapter
Data
Converter
Unit
RS-232 Cable or
Communication Link
RS-232
Data
Figure 6 Typical Installation Using RS-232 Communication Link to Biphase Camera Site
Typical AutoDome Camera or
Allegiant Receiver/Driver unit
Video Signal
Biphase
Data
Typical AutoDome
Cameras or Allegiant
Receiver/Driver units
Biphase
Data
Page 15

Bosch Security
Systems
| 08 May 2013
EN |
15
LTC 5136 Series |
Instruction Manual | Technical
Reference
Pin
6
Pin
1
Figure 7 Supplied 6-Conductor 3 m (10 ft) Data Cable Detail
Pin
6
Figure 8 Rear Panel Controller Connector Detail
108
4.26
Figure 9 Mounting Dimensions of Supplied
154
6.08
70
2.75
122
4.80
mm
in
Interface
Box
Pin
1
Pin
6
Connector
12V
1.
2. Not
3. Rx (Not
used
Pinouts:
used)
4. Tx
5.
Signal Ground
6.
12V
Pin 1
127
5.0
38
1.
5
132
5.2
mm
in
Page 16

LTC 5136 Series |
8 DATA
CONVERTER
Data In - 9-Pin Connector (Male)
Pin Connect
1 No Connection
2
3 No Connection
4 No Connection
5 Ground
6 No Connection
7 No Connection
8 No Connection
9 No Connection
Rx
KBD -
RJ-11
Designations (If
Pin Connect
1 Output Voltage
2
3
4 Ground
5 No Connection
6 Output Voltage
Signal
Rx
Instruction Manual
ion
Used
)
ion
Ground
| Data
Converter
PINOUTS
Pinouts
Bosch Security
Systems
| 08 May 2013
 Loading...