

Page 1
HMT84G421 HMT84G451 HMT84G461
Microwave
Micro-ondes
jhhô쫪dG ¿ôa
∞
[en] Instruction manual
[ar]
∫ɪ©à°S’G π«dO
[fr] Notice d’utilisation
Page 2

Ú Table of contents
[en]Instruction manual
Important safety information .................................................... 2
Causes of damage .............................................................................4
Installation and connection ...................................................... 5
The control panel....................................................................... 5
Rotary selector ....................................................................................5
Types of heating..................................................................................6
Accessories .........................................................................................6
Before using the appliance for the first time........................... 6
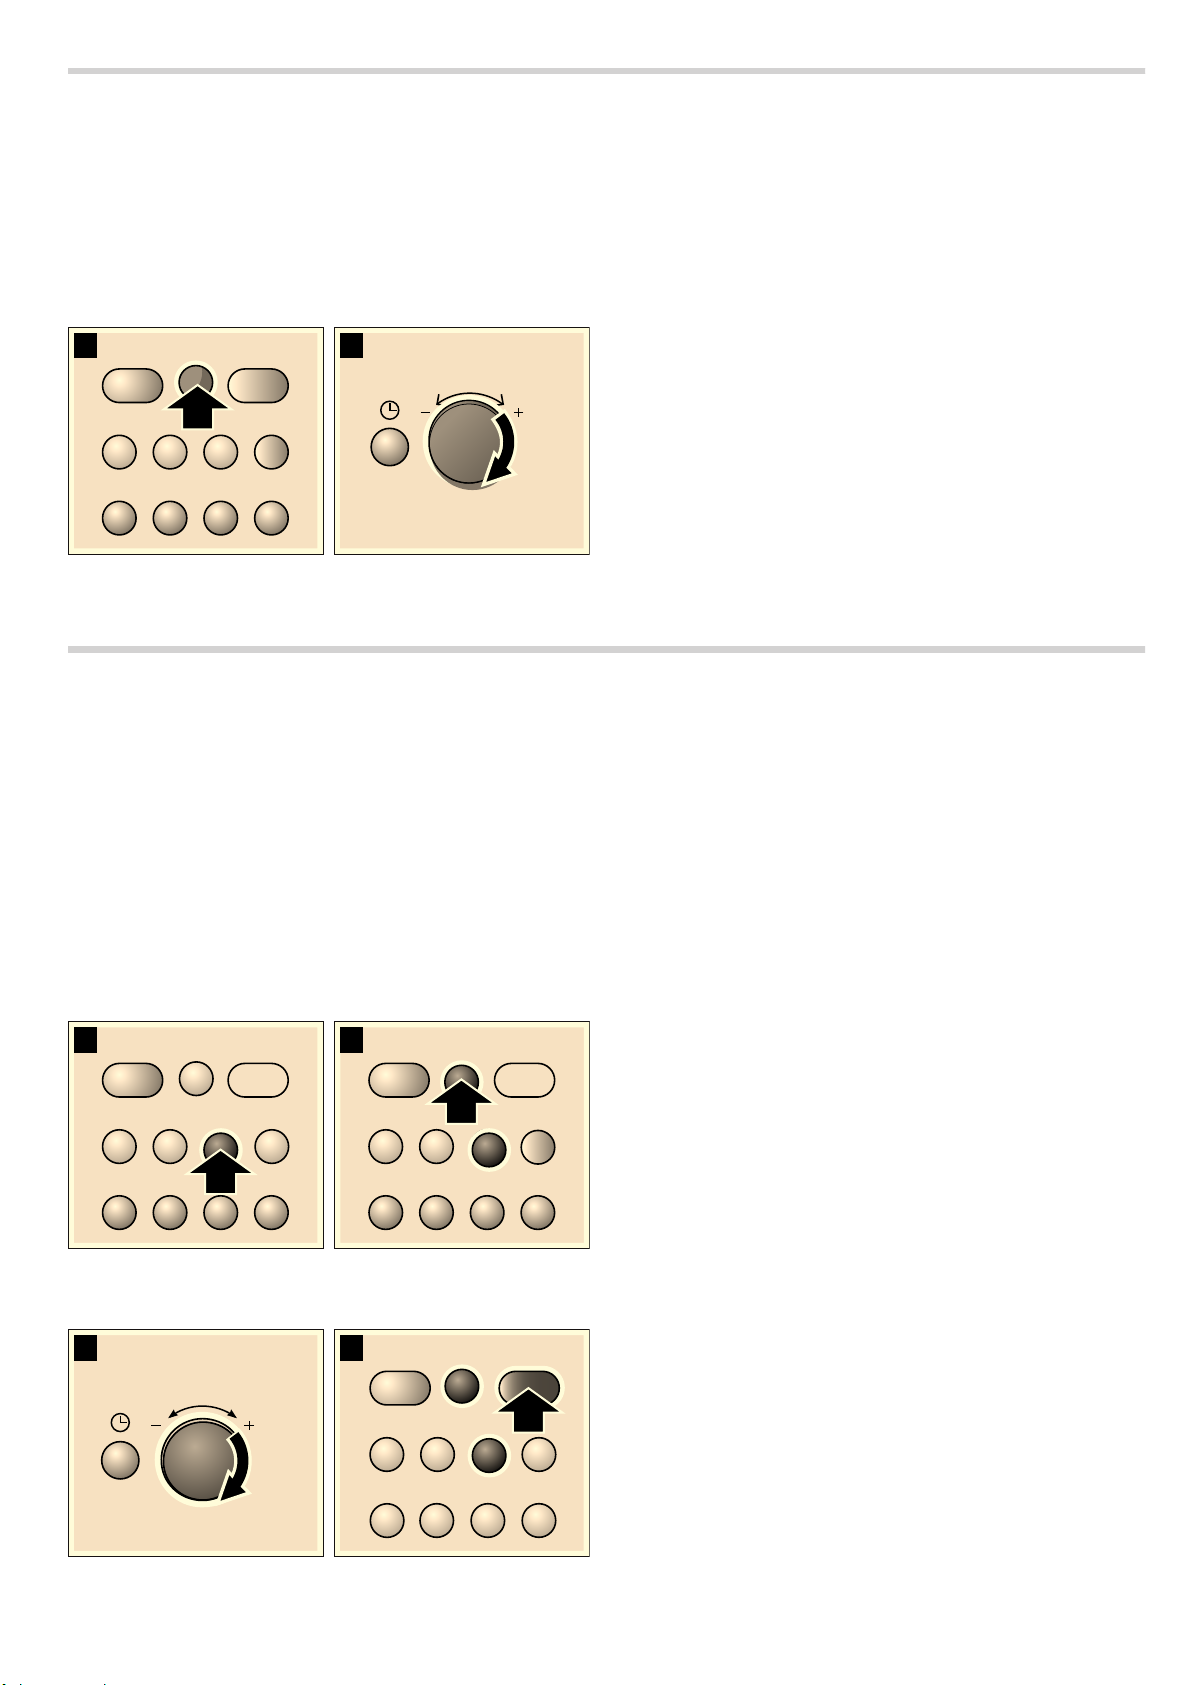
Setting the clock .................................................................................6
Heating up the cooking compartment............................................6
The microwave........................................................................... 7
Notes regarding ovenware................................................................7
Microwave power settings.................................................................7
Setting the microwave........................................................................7
Cooling fan...........................................................................................7
Grilling ........................................................................................ 8
Setting the grill.....................................................................................8
Combined microwave and grill................................................. 8
Setting the microwave and grill........................................................8
Memory ....................................................................................... 9
Saving memory settings ....................................................................9
Starting the memory...........................................................................9
Changing the signal duration ................................................... 9
Care and cleaning...................................................................... 9
Cleaning agents ...............................................................................10
Malfunction table ..................................................................... 10
After-sales service................................................................... 11
E number and FD number .............................................................11
Technical data ..................................................................................11
Environmentally-friendly disposal.................................................. 11
Automatic programmes........................................................... 11
Setting a programme ......................................................................11
Defrosting using the automatic programmes............................. 12
Cooking with the automatic programmes................................... 12
Combicooking programme........................................................... 13
Tested for you in our cooking studio ..................................... 13
Information regarding the tables................................................... 13
Defrost................................................................................................ 13
Defrosting, heating up or cooking frozen food .......................... 14
Heating food .....................................................................................14
Cooking food.................................................................................... 15
Microwave tips.................................................................................. 15
Tips for grilling..................................................................................15
Combined grill and microwave ..................................................... 16
Test dishes in accordance with EN 60705............................. 17
Cooking and defrosting with the microwave ..............................17
Produktinfo
Additional information on products, accessories, replacement
parts and services can be found at www.bosch-home.com and
in the online shop www.bosch-eshop.com
: Important safety information
Read these instructions carefully. Only then will you be able to operate your appliance safely and correctly. Retain the instruction manual for future use or for subsequent owners.
Check the appliance for damage after unpacking it. Do not connect the appliance if it has been damaged in transport.
Only a licensed professional may connect appliances without plugs. Damage caused by incorrect connection is not covered under warranty.
This appliance is intended for domestic use only. The appliance must only be used for the preparation of food and drink. The appliance must be supervised during operation. Only use this appliance indoors.
This appliance is intended for use up to a maximum height of 4000 metres above sea level.
This appliance may be used by children
over the age of 8 years old and by persons
with reduced physical, sensory or mental
capabilities or by persons with a lack of
experience or knowledge if they are
supervised or are instructed by a person
responsible for their safety how to use the
appliance safely and have understood the
associated hazards.
Children must not play with, on, or around the appliance. Children must not clean the appliance or carry out general maintenance unless they are at least 8 years old and are being supervised.
Keep children below the age of 8 years old at a safe distance from the appliance and power cable.
Risk of fire!
■
The appliance becomes very hot. If the
appliance is installed in a fitted unit with a
decorative door, heat will accumulate
when the decorative door is closed. Only
operate the appliance when the decorative
door is open.
Risk of fire!
■
Combustible items stored in the cooking
compartment may catch fire. Never store
combustible items in the cooking
2
Page 3

compartment. Never open the appliance
door if there is smoke inside. Switch off
the appliance and unplug it from the
mains or switch off the circuit breaker in
the fuse box.
Risk of fire!
■
The appliance becomes very hot. Never
use the top of the appliance as a work top
or storage area.
Risk of fire!
■
The appliance becomes very hot. Pay
attention to the information in the section
Installation and connection regarding
minimum clearances for the appliance.
The appliance must not be installed in a
fitted unit.
Risk of fire!
■
Using the appliance for anything other
than its intended purpose is dangerous
and may cause damage.
The following is not permitted: drying out
food or clothing, heating slippers, grain or
cereal pillows, sponges, damp cleaning
cloths or similar.
For example, heated slippers and grain or
cereal pillows may catch fire, even several
hours after they have been heated.The
appliance must only be used for the
preparation of food and drinks.
Risk of fire!
■
Food may catch fire. Never heat food in
heat-retaining packages.
Do not leave food heating unattended in
containers made of plastic, paper or other
combustible materials.
Do not select a microwave power or time
setting that is higher than necessary.
Follow the information provided in this
instruction manual.
Never use the microwave to dry food.
Never defrost or heat food with a low
water content, e.g. bread, at too high a
microwave power or for too long.
Risk of fire!
■
Cooking oil may catch fire. Never use the
microwave to heat cooking oil on its own.
Risk of explosion!
Liquids and other food may explode when in containers that have been tightly sealed. Never heat liquids or other food in containers that have been tightly sealed.
Risk of serious damage to health!
■
The surface of the appliance may become
damaged if it is not cleaned properly.
Microwave energy may escape. Clean the
appliance on a regular basis, and remove
any food residue immediately. Always
keep the cooking compartment, door seal,
door and door stop clean; see also
section Care and cleaning.
Risk of serious damage to health!
■
Microwave energy may escape if the
cooking compartment door or the door
seal is damaged. Never use the appliance
if the cooking compartment door or the
door seal is damaged. Contact the aftersales service.
Risk of serious damage to health!
■
Microwave energy will escape from
appliances that do not have any casing.
Never remove the casing. For any
maintenance or repair work, contact the
after-sales service.
Risk of electric shock!
■
Incorrect repairs are dangerous. Repairs
may only be carried out and damaged
power cables replaced by one of our
trained after-sales technicians. If the
appliance is defective, unplug the
appliance from the mains or switch off the
circuit breaker in the fuse box. Contact the
after-sales service.
Risk of electric shock and serious injury!
■
The cable insulation on electrical
appliances may melt when touching hot
parts of the appliance. Never bring
electrical appliance cables into contact
with hot parts of the appliance.
Risk of electric shock!
■
Do not use any high-pressure cleaners or
steam cleaners, which can result in an
electric shock.
Risk of electric shock!
■
Penetrating moisture may cause electric
shock. Never subject the appliance to
intense heat or humidity. Only use this
appliance indoors.
Risk of electric shock!
■
A defective appliance may cause electric
shock. Never switch on a defective
appliance. Unplug the appliance from the
mains or switch off the circuit breaker in
the fuse box. Contact the after-sales
service.
Risk of electric shock!
■
The appliance is a high-voltage appliance.
Never remove the casing.
Risk of serious burns!
■
Accessories and ovenware become very
hot. Always use oven gloves to remove
accessories or ovenware from the cooking
compartment.
Risk of burns!
■
Alcoholic vapours may catch fire in the hot
cooking compartment. Never prepare food
containing large quantities of drinks with a
high alcohol content. Only use small
quantities of drinks with a high alcohol
3
Page 4

content. Open the appliance door with
care.
Risk of burns!
■
Foods with peel or skin may burst or
explode during, or even after, heating.
Never cook eggs in their shells or reheat
hard-boiled eggs. Never cook shellfish or
crustaceans. Always prick the yolk when
baking or poaching eggs. The skin of
foods that have a peel or skin, such as
apples, tomatoes, potatoes and sausages,
may burst. Before heating, prick the peel
or skin.
Risk of burns!
■
Heat is not distributed evenly through
baby food. Never heat baby food in closed
containers. Always remove the lid or teat.
Stir or shake well after the food has been
heated. Check the temperature of the food
before it is given to the child.
Risk of burns!
■
Heated food gives off heat. The ovenware
may become hot. Always use oven gloves
to remove ovenware or accessories from
the cooking compartment.
Risk of burns!
■
Airtight packaging may burst when food is
heated. Always observe the instructions
on the packaging. Always use oven gloves
to remove dishes from the cooking
compartment.
Risk of burns!
■
The appliance becomes very hot. Never
touch the interior surfaces of the cooking
compartment or the heating elements.
Always allow the appliance to cool down.
Keep children at a safe distance.
Risk of scalding!
■
When you open the appliance door, hot
steam may escape. Open the appliance
door with care. Keep children at a safe
distance.
Risk of scalding!
■
Water in a hot cooking compartment may
create hot steam. Never pour water into
the hot cooking compartment.
Risk of scalding!
■
There is a possibility of delayed boiling
when a liquid is heated. This means that
the liquid reaches boiling temperature
without the usual steam bubbles rising to
the surface. Even if the container only
vibrates a little, the hot liquid may
suddenly boil over and spatter. When
heating, always place a spoon in the
container. This will prevent delayed
boiling.
glass scraper, sharp or abrasive cleaning
aids or detergents.
Risk of injury!
■
Unsuitable ovenware may crack. Porcelain
or ceramic ovenware can have small
perforations in the handles or lids. These
perforations conceal a cavity below. Any
moisture that penetrates this cavity could
cause the ovenware to crack. Only use
microwave-safe ovenware.
Risk of injury!
■
If using the appliance in microwave mode
only, placing cookware and containers
made of metal inside the appliance may
cause sparks when the appliance is
operating. This will damage the appliance.
Never use metal containers when using
the appliance in microwave mode
only.Use only microwave-safe cookware
or, alternatively, the microwave in
combination with a type of heating.
Causes of damage
Caution!
■ Heavily soiled seal: If the seal is very dirty, the appliance door
will no longer close properly during operation. The fronts of
adjacent units could be damaged. Always keep the seal
clean.
■ Operating the microwave without food: Operating the
appliance without food in the cooking compartment may lead
to overloading. Never switch on the appliance unless there is
food in the cooking compartment. An exception to this rule is
a short crockery test (see the section "Microwave, suitable
crockery").
■ Microwave popcorn: Never set the microwave power too
high. Use a power setting no higher than 600 watts. Always
place the popcorn bag on a glass plate. The disc may jump if
overloaded.
■ Liquid that has boiled over must not be allowed to run
through the turntable drive into the interior of the appliance.
Monitor the cooking process. Choose a shorter cooking time
initially, and increase the cooking time as required.
■ Never use the microwave oven without the turntable.
■ Creation of sparks: Metal e.g. a spoon in a glass must be
kept at least 2 cm from the oven walls and the inside of the
door. Sparks could irreparably damage the glass on the
inside of the door.
■ Foil containers: Do not use foil containers in the appliance.
They damage the appliance by producing sparks.
■ Cooling with the appliance door open: Only leave the
cooking compartment to cool with the door closed. Do not
trap anything in the appliance door. Even if the door is only
slightly ajar, the fronts of adjacent units may be damaged
over time.
■ Condensation in the cooking compartment: Condensation
may appear on the door window, interior walls and floor. This
is normal and does not adversely affect microwave operation.
To prevent corrosion, wipe off the condensation every time
you cook.
Risk of injury!
■
Scratched glass in the appliance door
may develop into a crack. Do not use a
4
Page 5
Installation and connection
This appliance is intended for domestic use only.
Place the tabletop appliance on a firm, level surface (at least
85 cm above the floor). The ventilation slots at the rear, top and
bottom of the appliance must not be obstructed. The minimum
height of the free space above the surface of the appliance is
30 cm.
The control panel
Here, you will see an overview of the control panel. Depending
on the appliance model, there may be differences in the
particular details.
The appliance is fitted with a plug and must only be connected
to a properly-installed earthed socket. The fuse protection must
be rated at 10 amperes (L or B circuit breakers). The mains
voltage must correspond to the voltage specified on the rating
plate.
The socket must be installed and the power cable replaced by
a qualified electrician only. The appliance plug must always be
accessible.
Do not use multiple plugs, power strips or extension leads.
Overloading results in a risk of fire.
&ORFNEXWWRQ
6WRSEXWWRQ
*ULOOEXWWRQ
0HPRU\EXWWRQ
%XWWRQVIRUDXWRPDWLF
J SURJUDPPHEXWWRQ
SURJUDPPHV
ZHLJKWEXWWRQ
PLQ
NJ
6WRS
L
J
6WDUW
'LVSOD\
IRUFORFNDQGFRRNLQJWLPH
5RWDU\VHOHFWRU
IRUDGMXVWLQJWKHFORFN
DQGFRRNLQJWLPH
RUIRUVHWWLQJWKH
DXWRPDWLFSURJUDPPHV
6WDUWEXWWRQ
%XWWRQVIRUWKH
PLFURZDYHSRZHUVHWWLQJV
ZDWWV
ZDWWV
ZDWWV
ZDWWV
ZDWWV
Rotary selector
The rotary selector is used to alter the default values and set
'RRURSHQHU
values.
The rotary selector is retractable. Press on the rotary selector to
lock it in or out.
5
Page 6
Types of heating
Microwaves
Microwaves are converted to heat inside food. The microwave
is ideal for rapid defrosting, heating up, melting and cooking.
Microwave power settings
■ 900 watt - for heating liquids.
■ 600 watts - for heating and cooking food.
■ 360 watts - for cooking meat and heating delicate foods.
■ 180 watts - for defrosting and continued cooking.
■ 90 watts - for defrosting delicate foods .
Grill
(
You can use this to grill or cook bakes "au gratin".
Combined grill and microwave
This involves simultaneous operation of the grill and the
microwave. The combined operation is particularly suitable for
cooking bakes and gratins. The food becomes crispy and
brown. It is much quicker and saves energy.
Accessories
Caution!
When removing dishes, make sure that the turntable does not
move. Make sure that the turntable is properly locked. The
turntable can turn left or right.
The turntable
How to fit the turntable:
1. Place the turntable ring a in the recess in the cooking
compartment.
2. Let the turntable b slot in place in the drive c in the centre of
the cooking compartment floor.
E
D
F
Note: Do not use the appliance if the turntable is not in place.
Ensure that it is properly slotted into place. The turntable can
turn clockwise or anti-clockwise.
Wire rack
Wire rack for grilling, e.g. steaks,
sausages or for toasting bread, or as a
surface, e.g. for shallow dishes.
Note: Place the wire rack on the
turntable.
Before using the appliance for the first time
Here you will find everything you need to do before using the
microwave to prepare food for the first time. First read the
section on Safety information.
Setting the clock
When the appliance is first connected or after a power cut,
three zeros will appear in the display panel.
1. Press the 0 button.
"12:00" and
2. Set the clock using the rotary selector.
0 appear in the display.
PLQ
NJ
3. Press the 0 button again.
The current time is set.
PLQ
NJ
Resetting the clock
Press the
"12:00" appears in the display. Make settings as detailed in
points 2 and 3.
Change the clock, e.g. from summer to winter time
Set as described in point 1 to 3.
0 button.
Heating up the cooking compartment
Heat the empty cooking compartment with the turntable
inserted and the door closed for 10 minutes to remove the new
smell. Ensure that no packaging remnants have been left in the
cooking compartment.
1. Press the ( grill button.
10:00 min appears in the display
2. Press the Start button.
A signal sounds once the time has elapsed. Press the Stop
button or open the appliance door.
Hiding the clock
Press the
The display is blank.
6
0 button and then press Stop.
Page 7
The microwave
Microwaves are converted to heat in foodstuffs.
You can set the microwave on its own or in combination with
the grill.
You will find information about ovenware and how to set the
microwave.
Note: In the Tested for you in our cooking studio section, you
will find examples for defrosting, heating, melting and cooking
with the microwave oven.
Try out the microwave straight away. You could heat up a cup
of water for your tea, for example.
Use a large cup without any decorative gold or silver trim and
place a teaspoon in it. Place the cup containing the water on
the turntable.
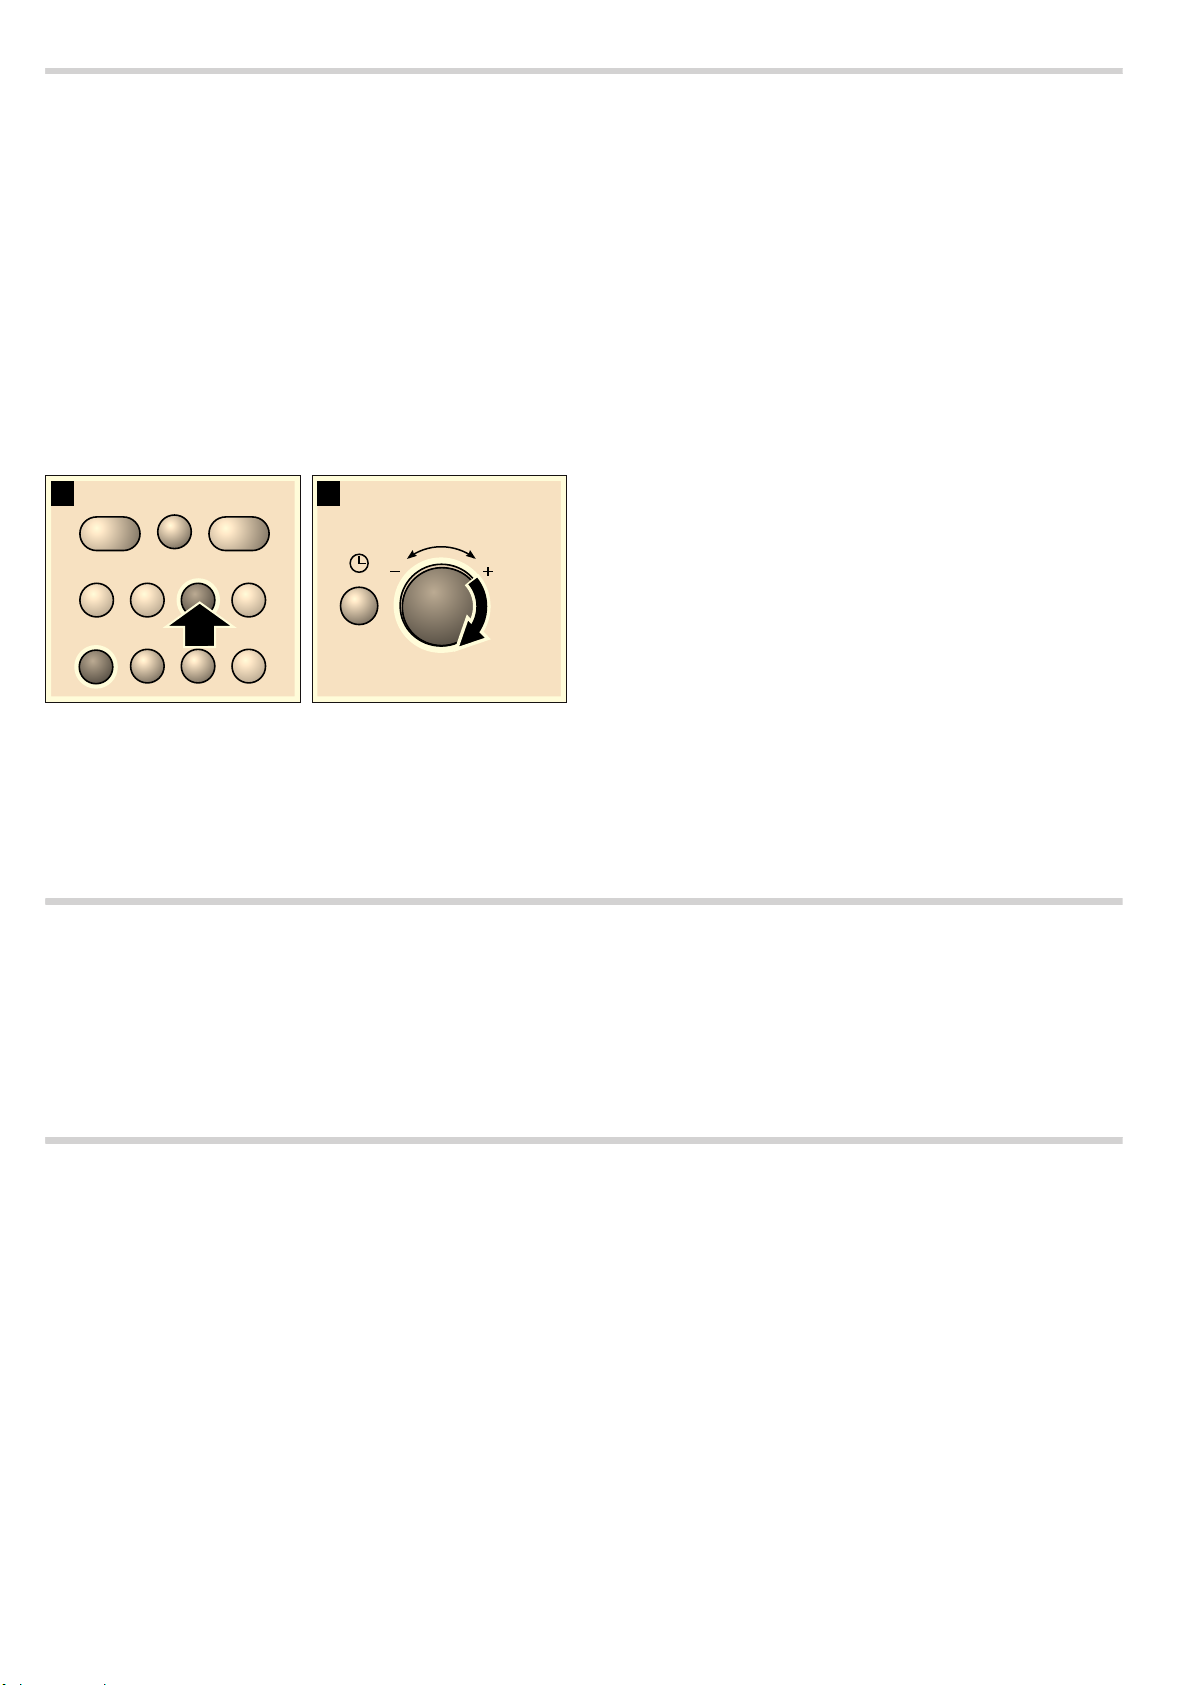
1. Press 900 W.
2. Set 1:30 minutes using the rotary knob.
3. Press the Start button.
After 1 minute 30 seconds, a signal sounds. The water for the
tea is hot.
As you are drinking your tea, please take time to read again the
safety information that can be found at the front of the
instruction manual. This is very important.
Notes regarding ovenware
Suitable ovenware
Suitable dishes are heat-resistant ovenware made of glass,
glass ceramic, porcelain, ceramic or heat-resistant plastic.
These materials allow microwaves to pass through.
You can also use serving dishes. This saves you having to
transfer food from one dish to another. You should only use
ovenware with decorative gold or silver trim if the manufacturer
guarantees that they are suitable for use in microwaves.
Unsuitable ovenware
Metal ovenware is unsuitable. Metal does not allow microwaves
to pass through. Food in covered metal containers will remain
cold.
Caution!
Creation of sparks: metal – e.g. a spoon in a glass – must be
kept at least 2 cm from the oven walls and the inside of the
door. Sparks could destroy the glass on the inside of the door.
Ovenware test
Do not switch on the microwave unless there is food inside. The
following ovenware test is the only exception to this rule.
Perform the following test if you are unsure whether your
ovenware is suitable for use in the microwave:
1. Heat the empty ovenware at maximum power for ½ to
1 minute.
2. Check the temperature occasionally during that time.
The ovenware should still be cold or warm to the touch.
The ovenware is unsuitable if it becomes hot or sparks are
generated.
Microwave power settings
Microwave power
setting
90 W Defrosting delicate foods
180 W Defrosting and continued cooking
360 W Cooking meat and heating delicate foods
Suitable for
Microwave power
setting
600 W Heating and cooking food
900 W Heating liquids
Note: You can set the 900 W microwave power setting for 30
minutes, 600 W for 1 hour, the other power settings for 1 hour
and 39 minutes respectively.
Suitable for
Setting the microwave
Example: microwave power setting of 600 watts
1. Press the required microwave power setting.
The selected microwave power setting lights up in the
display, and "1:00 min" appears.
2. Set a cooking time using the rotary selector.
6WRS
L
J
3. Press the Start button.
The cooking time counts down in the display.
The cooking time has elapsed
A signal sounds. Open the appliance door or press Stop. The
clock reappears.
Changing the cooking time
This can be done at any time. Change the cooking time using
the rotary selector.
Pausing
Press the Stop button once, or open the appliance door. Press
the START button after closing the door.
Cancelling operation
Press the Stop button twice, or open the door and press the
Stop button once.
Note: You can also adjust the cooking time first and then the
microwave power setting.
6WDUW
PLQ
NJ
Cooling fan
The appliance is equipped with a cooling fan. The fan may run
on even if the oven has been switched off.
Notes
■ The cooking compartment remains cold during microwave
operation. The cooling fan will still switch on. The fan may run
on even when microwave operation has ended.
■ Condensation may appear on the door window, interior walls
and floor. This is normal and does not adversely affect
microwave operation. Wipe away the condensation after
cooking.
7
Page 8
Grilling
A powerful grill ensures an intensive surface heat and even
browning of the food.
Setting the grill
1. Press the ( grill button.
10:00 min and the symbol appear in the display.
2. Set the cooking time using the rotary selector.
6WRS
L
3. Press the Start button.
6WDUW
PLQ
NJ
J
Combined microwave and grill
You can set the grill and the microwave at the same time. The
food becomes crispy and brown. It is much quicker and saves
energy.
You can select any microwave power setting.
Exception: 900 and 600 watt.
Setting the microwave and grill
Example: 360 W, ( grill, 5 minutes
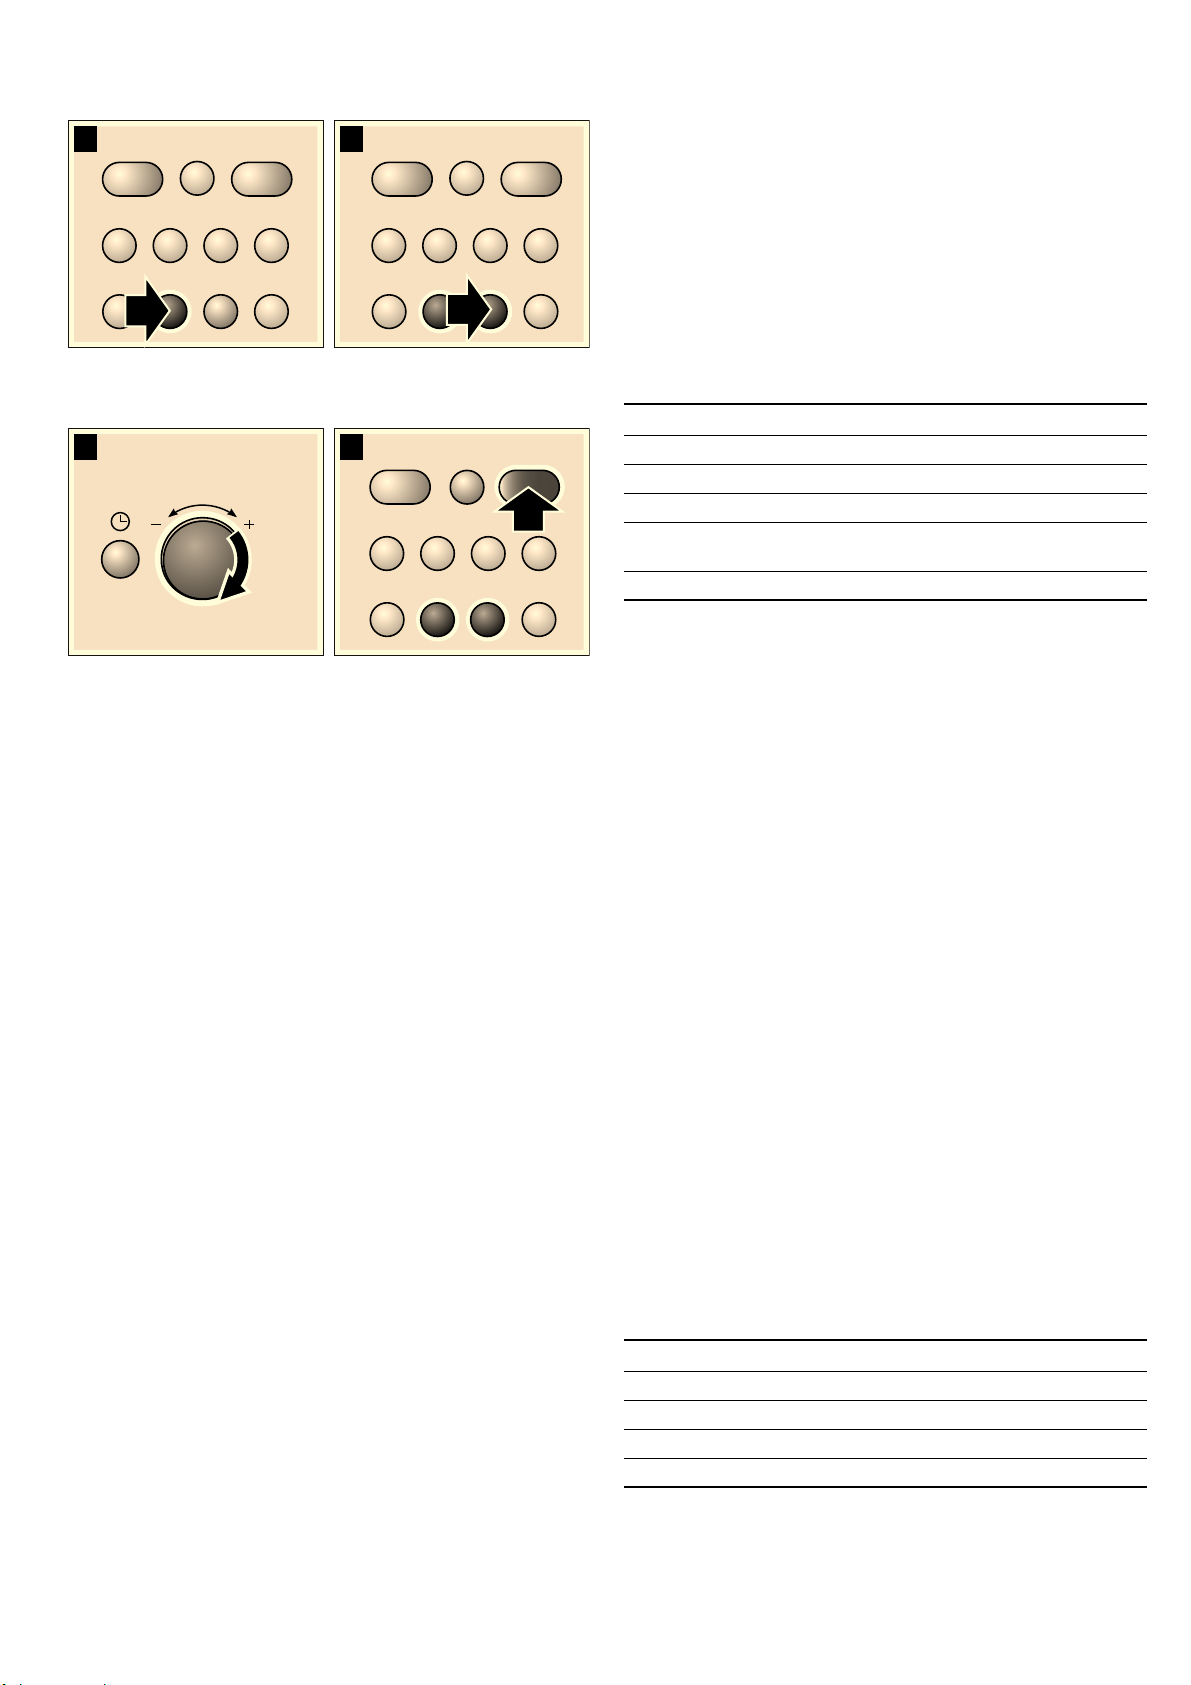
1. Press the required microwave power setting.
The selected microwave power setting lights up in the
display, and "1:00 min" appears.
2. Press the ( grill button.
6WRS
6WDUW
6WRS
6WDUW
The cooking time counts down in the display.
The cooking time has elapsed
A signal sounds. Open the appliance door or press Stop. The
clock reappears.
Changing the cooking time
This can be done at any time. Change the cooking time using
the rotary selector.
Pausing
Press the Stop button once, or open the appliance door. Press
the START button after closing the door.
Correction
You may correct a set cooking time at any time.
Cancelling the setting
Press the Stop button twice, or open the appliance door and
press the Stop button once.
The cooking time has elapsed
A signal sounds. Open the appliance door or press Stop. The
clock reappears.
Changing the cooking time
This can be done at any time. Change the cooking time using
the rotary selector.
Pausing
Press the Stop button once, or open the appliance door. Press
the START button after closing the door.
Cancelling operation
Press the Stop button twice, or open the door and press the
Stop button once.
Note: You can also adjust the cooking time first and then the
microwave power setting.
L
J
3. Set the cooking time using the rotary selector.
4. Press the Start button.
The cooking time counts down in the display.
8
PLQ
NJ
L
J
6WRS 6WDUW
L
J
Page 9
Memory
You can save the settings for a dish in the memory and call it
up again at any time.
The memory is useful for if you frequently prepare a specific
dish.
Saving memory settings
Example: 360 W, 25 minutes
1. Press the i button.
"M" appears in the display.
2. Press the required microwave power setting.
"M", the selected power setting and "1:00 min" appear in the
display.
3. Set the cooking time using the rotary selector.
6WRS
L
4. Confirm by pressing the i button.
The clock reappears. The setting is saved.
Notes
■ You can also store grill only or grill combined with
microwave.
J
6WDUW
PLQ
NJ
■ You cannot save several microwave power settings one after
the other.
■ You cannot save automatic programmes.
■ You can save the memory settings and start the appliance
immediately. When finishing, instead of pressing
Start.
■ Saving a new setting in the memory: press the ibutton. The
old settings appear. Save the new programme as described
in steps 1-4.
i, press
Starting the memory
It is very easy to start the saved programme. Place your meal
into the appliance. Close the appliance door.
1. Press the i button.
The saved settings are displayed.
2. Press the Start button.
The cooking time counts down in the display.
The cooking time has elapsed
A signal sounds. Open the appliance door or press Stop. The
clock reappears.
Pausing
Press the Stop button once, or open the appliance door. Press
the START button after closing the door.
Cancelling the setting
Press the Stop button twice, or open the appliance door and
press the Stop button once.
Changing the signal duration
You will hear a signal when the appliance is switched off. You
can change the duration of the acoustic signal.
Press the Start button for approx. 6 seconds.
Care and cleaning
With careful care and cleaning your microwave oven will retain
its looks and remain good order. We will explain here how you
should care for and clean your appliance correctly.
: Risk of short circuit!
Never use high-pressure cleaners or steam cleaners to clean
the oven.
: Risk of burns!
Never clean the appliance immediately after switching off. Let
the appliance cool down.
: Risk of electric shock!
Do not immerse the appliance in water or clean under a jet of
water.
Surfaces are different, and damage caused by using the wrong
cleaning agent can be avoided by observing the information in
the table below.
The new signal duration is adopted.
The clock reappears.
The following are possible:
Short signal duration - 3 tones
Long signal duration - 30 tones.
Do not use
■ sharp or abrasive cleaning agents.
The surface could be damaged. If such a substance comes
into contact with the front of the appliance, wash it off
immediately with water.
■ metal or glass scrapers to clean the glass in the appliance
door.
■ metal or glass scrapers for cleaning the seal.
■ hard scouring pads or cleaning sponges.
Wash new sponge cloths thoroughly before use.
■ cleaning agents with high concentrations of alcohol.
9
Page 10

Cleaning agents
Caution!
Before cleaning, unplug the appliance from the mains or switch
off the circuit breaker in the fuse box. Clean the outside of the
appliance and the cooking compartment with a damp cloth and
mild detergent. Dry with a clean cloth.
Area Cleaning agents
Appliance front Hot soapy water:
Appliance front with
stainless steel
Clean with a dish cloth and dry with a
soft cloth. Do not use glass cleaners or
metal or glass scrapers for cleaning.
Hot soapy water:
Clean with a dish cloth and dry with a
soft cloth. Remove flecks of limescale,
grease, starch and albumin (e.g. egg
white) immediately. Corrosion can form
under such residues. Special stainless
steel cleaning agents can be obtained
from the after-sales service or from specialist shops. Do not use glass cleaners
or metal or glass scrapers for cleaning.
Area Cleaning agents
Cooking compartment made of stainless steel
Recess in cooking
compartment
Turntable and turntable ring
Wire rack Hot soapy water:
Door panels Glass cleaner:
Seal Hot soapy water:
Hot soapy water or a vinegar solution:
Clean with a dish cloth and dry with a
soft cloth.
If the oven is very dirty: use oven
cleaner, but only when cooking compartment is cold. It is best to use a stainless-steel sponge. Do not use oven
spray or other aggressive oven cleaners
or abrasive materials. Scouring pads,
rough sponges and pan cleaners are
also unsuitable. These items scratch the
surface. Allow the interior surfaces to
dry thoroughly.
Damp cloth:
Ensure that no water seeps through the
turntable drive into the appliance interior.
Hot soapy water:
When putting the turntable back in
place, make sure it slots in correctly.
Clean using stainless steel cleaning
agent or in the dishwasher.
Clean with a dish cloth. Do not use a
glass scraper.
Clean with a dish cloth, do not scour. Do
not use a metal or glass scraper for
cleaning.
Malfunction table
Malfunctions often have simple explanations. Please refer to the
malfunction table before calling the after-sales service.
If a meal does not turn out exactly as you wanted, refer to the
Tested for you in our cooking studio section, where you will
find plenty of cooking tips and tricks.
Troubleshooting
Error message Possible cause Remedy/Note
The appliance does not work The plug is not plugged into the mains. Plug the plug in
Power cut Check whether the kitchen light works.
Faulty circuit breaker Look in the fuse box and check that the cir-
Incorrect operation Switch off the circuit breaker in the fuse
Three zeros flash in the display. Power cut Reset the time.
The appliance is not in operation. A
cooking time appears in the display.
The microwave does not work. The door was not fully closed. Check whether food remains or foreign
The rotary selector was accidentally pressed. Press the Stop button.
The Start button was not pressed after the set-
ting was made.
The Start button was not pressed. Press the Start button.
: Risk of electric shock!
Incorrect repairs are dangerous. Repairs may only be carried
out by one of our trained after-sales engineers.
You can take remedial action yourself for some error
messages.
cuit breaker for the appliance is in working
order.
box. Reconnect it after approx.
10 seconds.
Press the Start button or clear the setting
by pressing the Stop button.
material is trapped in the door.
10
Page 11

Error message Possible cause Remedy/Note
The food takes longer than usual to
heat up
The turntable is making a scratching
or grinding noise.
Microwave operation has been cancelled for no apparent reason.
The microwave power setting was too low. Select a higher microwave power setting.
You have placed a larger amount of food than
normal in the appliance.
The food was colder than usual. Stir or turn the food during cooking
There is dirt or a foreign object in the area
around the turntable drive.
The microwave has a fault. If this fault occurs repeatedly, please call
Double the amount = double the cooking
time.
Clean the roller ring and recess in the
cooking compartment.
the after-sales service.
After-sales service
Our after-sales service is there for you if your appliance needs
to be repaired. We will always find the right solution in order to
avoid unnecessary visits from a service technician.
E number and FD number
When calling us, please give the product number (E no.) and
the production number (FD no.) so that we can provide you with
the correct advice. The rating plate bearing these numbers can
be found on the right-hand side when you open the appliance
door. To save time, you can make a note of the number of your
appliance and the telephone number of the after-sales service
in the space below, should it be required.
E no.
After-sales service
Please note that there will be a fee for a visit by a service
technician in the event of a malfunction, even during the
warranty period.
Please find the contact data of all countries in the enclosed
customer service list.
To book an engineer visit and product advice
GB 0344 892 8979
Calls charged at local or mobile rate.
IE 01450 2655
0.03 € per minute at peak. Off peak 0.0088 € per
minute.
Rely on the professionalism of the manufacturer. You can
therefore be sure that the repair is carried out by trained service
technicians who carry original spare parts for your appliances.
O
FD no.
This appliance corresponds to the standards EN 55011 and
CISPR 11. It is a Group 2, Class B product.
Group 2 means that microwaves are produced for the purpose
of heating food. Class B states that the appliance is suitable for
private households.
Technical data
Input voltage AC 220-230 V, 50 Hz
Power consumption 1450 W
Maximum output power 900 W
Grill power 1200 W
Microwave frequency 2450 MHz
Fuse 10 A
Dimensions (HxWxD)
appliance 305 x 513 x 408 mm
cooking compartment 215 x 337 x 354 mm
VDE approved yes
CE mark yes
Environmentally-friendly disposal
Dispose of packaging in an environmentally-friendly manner.
This appliance is labelled in accordance with
European Directive 2012/19/EU concerning used
electrical and electronic appliances (waste electrical
and electronic equipment - WEEE). The guideline
determines the framework for the return and recycling
of used appliances as applicable throughout the EU.
Automatic programmes
The automatic programmes enable you to prepare food very
easily. You select the programme and enter the weight of your
food. The automatic programme makes the optimum setting.
Note: You can choose from 8 programmes.
Setting a programme
Once you have selected a programme, make settings as
follows:
1. Press the g button repeatedly until the required programme
number appears.
11
Page 12
2. Press the 1 button.
"P" and a default weight appear in the display.
6WRS
L
J
3. Turn the rotary selector to specify the weight of the dish.
4. Press the Start button.
6WDUW
6WRS
L
J
6WRS 6WDUW
6WDUW
PLQ
NJ
J
L
You will see the cooking time for the programme counting
down.
The cooking time has elapsed
A signal sounds. Open the appliance door or press Stop. The
clock reappears.
Correction
Press the Stop button twice and reset.
Pausing
Press the Stop button once, or open the appliance door. Press
the START button after closing the door.
Cancelling operation
Press the Stop button twice, or open the door and press the
Stop button once.
Notes
■ For some programmes, a signal sounds after a certain time.
Open the appliance door and stir the food or turn the meat or
poultry. After closing, press the Start button again.
■ You can query the programme number and weight using g or
1. The queried value is shown for 3 seconds in the display.
Defrosting using the automatic programmes
You can use the 4 defrosting programmes to defrost meat,
poultry and bread.
Notes
■ Preparing food
Use food that has been frozen at -18 °C and stored in
portion-sized quantities that are as thin as possible.
Take the food to be defrosted out of all packaging and weigh
it. You need to know the weight to set the programme.
■ Liquid will be produced when defrosting meat or poultry.
Drain off this liquid when turning meat and poultry and under
no circumstances use it for other purposes or allow it to
come into contact with other foods.
■ Ovenware
Place the food in a microwaveable shallow dish, e.g. a china
or glass plate, but do not cover.
■ Resting time
The defrosted food should be left to stand for an additional
10 to 30 minutes until it reaches an even temperature. Large
pieces of meat require a longer standing time than smaller
pieces. Flat pieces of meat and items made from minced
meat should be separated from each other before leaving to
stand.
After this time, you can continue to prepare the food, even
though thick pieces of meat may still be frozen in the middle.
The giblets can be removed from poultry at this point.
■ Signal
For some programmes, a signal sounds after a certain time.
Open the appliance door and separate the food out or turn
the meat or poultry. Close the door and press the Start
button.
Programme no. Weight range in kg
Defrost
P 01 Minced meat 0.20 - 1.00
P 02 Pieces of meat 0.20 - 1.00
P 03
Chicken, chicken
pieces
0.40 - 1.80
P 04 Bread 0.20 - 1.00
Cooking with the automatic programmes
With the 3 cooking programmes, you can cook rice, potatoes
or vegetables.
Notes
■ Ovenware
The food must be cooked in microwaveable cookware with a
lid. For rice, you should use a large, deep dish.
■ Preparing food
Weigh out the food. You need to know the weight to set the
programme.
Rice:
Do not use boil-in-the-bag rice. Add the required amount of
water, as specified on the packaging. This is usually two or
three times the quantity of rice.
Potatoes:
For boiled potatoes, cut the fresh potatoes into small, evensized pieces. Add one tablespoon of water for each 100 g
boiled potatoes, and a little salt.
Fresh vegetables:
Weigh out the fresh, trimmed vegetables. Cut the vegetables
into small, even-sized pieces. Add a tbsp water for each
100 g vegetables.
■ Signal
While the programme is running, a signal sounds after some
time. Stir the food.
■ Resting time
Once the programme has finished, stir the food again. You
should leave it to stand for another 5 to 10 minutes until it
reaches an even temperature.
The cooking result will depend on the quality and consistency
of the food.
Programme no. Weight range in kg
Cooking
P 05 Rice 0.05 - 0.2
P 06 Potatoes 0.15 - 1.0
P 07 Vegetables 0.15 - 1.0
12
Page 13

Combicooking programme
Notes
■ Ovenware
Cook the food in ovenware which is not too big, and is heat
resistant and microwaveable.
■ Preparing food
■ Resting time
Once the programme has finished, allow the food to rest for
another 5 to 10 minutes so it reaches an even temperature.
Programme no. Weight range in kg
Take the food out of its packaging and weigh it. If it is not
possible to enter the exact weight, you should round it up or
down.
Tested for you in our cooking studio
P 08
Combi-cooking programme
Bake, frozen, up to
0.4 - 0.9
3 cm in height
Here you will find a selection of recipes and the ideal settings
for them. We show you which microwave power setting is best
suited to your dish. There are also tips about ovenware and
preparation methods.
Information regarding the tables
The following tables provide you with numerous options and
settings for the microwave.
The times specified in the tables are only guidelines. They may
vary according to the ovenware used, the quality, temperature
and consistency of the food.
Time ranges are often specified in the tables. Set the shortest
time first and then extend the time if necessary.
It may be that you have different quantities from those specified
in the tables. A rule of thumb can be applied:
Double the amount - almost twice the cooking time
Half the amount - half the cooking time.
Always place the ovenware on the turntable.
Defrost Weight Microwave power setting in watts,
Defrost
Notes
■ Place the frozen food in an open container on the turntable.
■ Delicate parts such as the legs and wings of chicken or fatty
outer layers of roasts can be covered with small pieces of
aluminium foil. The foil must not touch the oven walls. You
can remove the foil half way through the defrosting time.
■ Liquid will be produced when defrosting meat or poultry.
Drain off this liquid when turning meat and poultry and under
no circumstances use it for other purposes or allow it to
come into contact with other foods.
■ Turn or stir the food once or twice during the defrosting time.
Large pieces of food should be turned several times.
■ Leave defrosted items to stand at room temperature for a
further 10 to 20 minutes so that the temperature is even
throughout. The giblets can be removed from poultry at this
point. The meat can still be further prepared, even if it has a
small frozen core.
Notes
cooking time in minutes
Whole pieces of meat (beef or veal on the bone or boned)
800 g 180 W, 15 mins + 90 W, 10-20 mins 1 kg 180 W, 20 mins + 90 W, 15-25 mins
1.5 kg 180 W, 30 mins + 90 W, 20-30 mins
Meat in pieces or slices of beef or
veal
200 g 180 W, 2 mins + 90 W, 4-6 mins Separate any defrosted parts when
500 g 180 W, 5 mins + 90 W, 5-10 mins
turning
800 g 180 W, 8 mins + 90 W, 10-15 mins
Minced meat, mixed 200 g 90 W, 10 mins Freeze food flat if possible
500 g 180 W, 5 mins + 90 W, 10-15 mins
Turn several times, remove any
defrosted meat
800 g 180 W, 8 mins + 90 W, 10-20 mins
Poultry or poultry portions 600 g 180 W, 8 mins + 90 W, 10-15 mins -
1.2 kg 180 W, 15 mins + 90 W, 20-25 mins
Fish fillet, fish steak or slices 400 g 180 W, 5 mins + 90 W, 10-15 mins Separate any defrosted parts
Vegetables, e.g. peas 300 g 180 W, 10-15 mins Fruit, e.g. raspberries 300 g 180 W, 710 mins Stir carefully during defrosting and
500 g 180 W, 8 mins + 90 W, 5-10 mins
separate any defrosted parts
Butter, defrosting 125 g 180 W, 1 min. + 90 W, 2-3 mins Remove all packaging
250 g 180 W, 1 min + 90 W, 3-4 mins
Loaf of bread 500 g 180 W, 6 mins + 90 W, 5-10 mins -
1 kg 180 W, 12 mins + 90 W, 10-20 mins
Cakes, dry, e.g. sponge cake 500 g 90 W, 10-15 mins Only for cakes without icing, cream or
crème pâtissière, separate the pieces
of cake
gelatine
Cakes, moist, e.g. fruit flan, cheesecake
750 g 180 W, 5 mins + 90 W, 10-15 mins
500 g 180 W, 5 mins + 90 W, 15-20 mins Only for cakes without icing, cream or
750 g 180 W, 7 mins + 90 W, 15-20 mins
13
Page 14
Defrosting, heating up or cooking frozen food
Notes
■ Take ready meals out of the packaging. They will heat up
more quickly and evenly in microwaveable ovenware. The
different components of the meal may not require the same
amount of time to heat up .
■ Food which lies flat will cook more quickly than food which is
piled high. You should therefore distribute the food so that it
is as flat as possible in the ovenware. Different foodstuffs
should not be placed in layers on top of one another.
■ Always cover the food. If you do not have a suitable cover for
your ovenware, use a plate or special microwave foil.
■ Stir or turn the food 2 or 3 times during cooking.
■ After heating, allow the food to stand for a further 2 to
5 minutes so that it can achieve an even temperature.
■ Always use an oven cloth or oven gloves when removing
plates from the oven.
■ This will help the food retain its own distinct taste, so it will
require less seasoning.
Defrosting, heating up or cooking frozen food
Menu, plated meal, ready meal
Weight Microwave power setting in
watts, cooking time in minutes
300-400 g 600 W, 8-11 mins -
Notes
(2-3 components)
Soup 400 g 600 W, 8-10 mins Stews 500 g 600 W, 10-13 mins Slices or pieces of meat in sauce, e.g.
goulash
500 g 600 W, 12-17 mins Separate the pieces of meat when stir-
ring
Fish, e.g. fillet steaks 400 g 600 W, 10-15 mins Add water, lemon juice or wine as
desired
Bakes, e.g. lasagne, cannelloni 450 g 600 W, 1015 mins Side dishes, e.g. rice, pasta 250 g 600 W, 2-5 mins Add a little liquid
500 g 600 W, 8-10 mins
Vegetables, e.g. peas, broccoli, carrots 300 g 600 W, 8-10 mins Pour water into the dish so that it cov-
600 g 600 W, 14-17 mins
ers the base
Creamed spinach 450 g 600 W, 11-16 mins Cook without additional water
Heating food
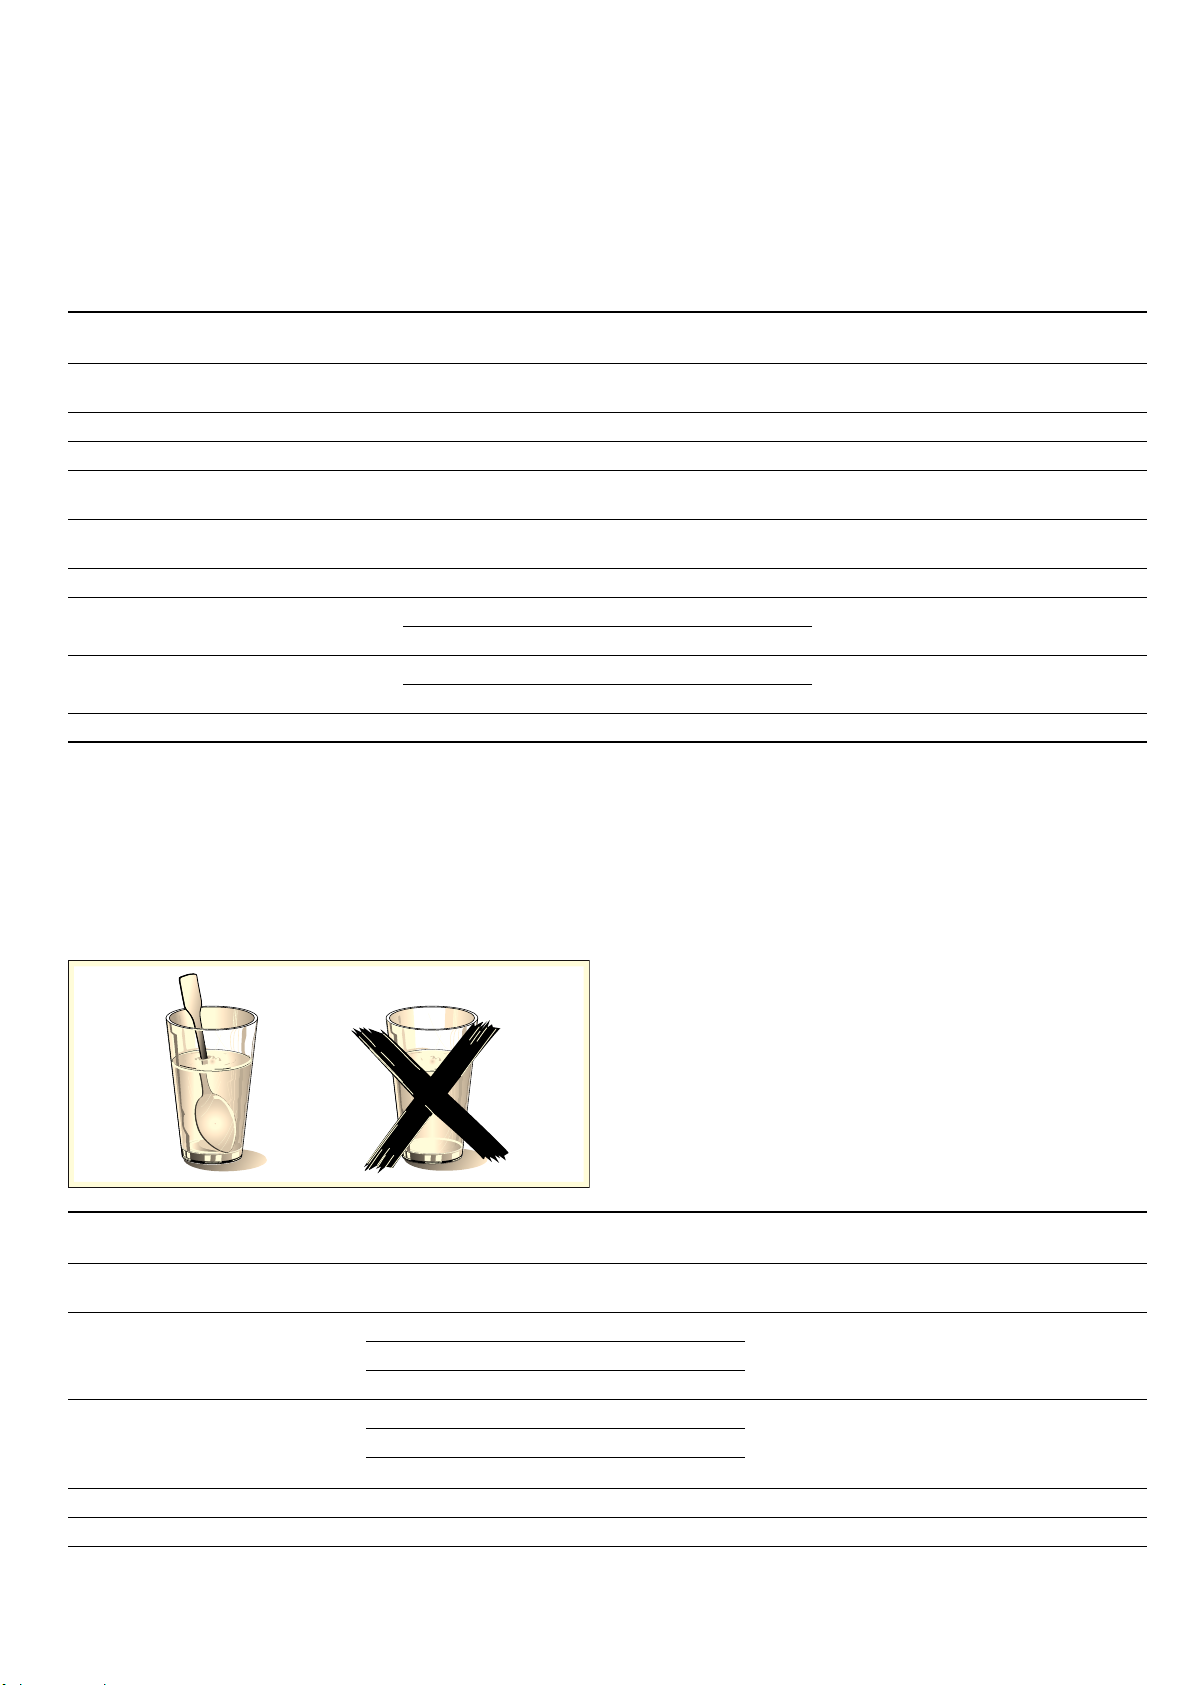
: Risk of scalding!
There is a possibility of delayed boiling when a liquid is heated.
This means that the liquid reaches boiling temperature without
the usual steam bubbles rising to the surface. Even if the
container only moves a little, the hot liquid can suddenly boil
over and spatter. When heating liquids, always place a spoon in
the container. This will prevent delayed boiling.
Caution!
Metal e.g. a spoon in a glass must be kept at least 2 cm
from the oven walls and the inside of the door. Sparks could
irreparably damage the glass on the inside of the door.
Notes
■ Take ready meals out of the packaging. They will heat up
more quickly and evenly in microwaveable ovenware. The
different components of the meal may not require the same
amount of time to heat up .
■ Always cover the food. If you do not have a suitable cover for
your container, use a plate or special microwave foil.
■ Stir or turn the food several times during the heating time.
Check the temperature.
■ After heating, allow the food to stand for a further 2 to
5 minutes so that it can achieve an even temperature.
■ Always use an oven cloth or oven gloves when removing
plates from the oven.
Heating food Weight Microwave power setting in
Notes
watts, cooking time in minutes
Menu, plated meal, ready meal
350-500 g 600 W, 4-8 mins -
(2-3 components)
Drinks 150 ml 900 W, 1-2 mins Place a spoon in the glass; do not overheat
300 ml 900 W, 3-3 mins
alcoholic drinks; check during heating
500 ml 900 W, 3-4 mins
Baby food, e.g. baby bottle 50 ml 360 W, approx. ½ min No teats or lids. Always shake well after heat-
100 ml 360 W, approx. 1 min
200 ml
360 W, 1
^ min
ing. You must check the temperature
Soup 1 cup 200 g 600 W, 2-3 mins Soup, 2 cups 400 g 600 W, 4-5 mins Meat in sauce 500 g 600 W, 8-11 mins Separate the slices of meat
14
Page 15

Heating food Weight Microwave power setting in
Notes
watts, cooking time in minutes
Stew 400 g 600 W, 6-8 mins -
800 g 600 W, 8-11 mins Vegetables, 1 portion 150 g 600 W, 2-3 mins add a little liquid
Vegetables, 2 portions 300 g 600 W, 3-5 mins
Cooking food
Notes
■ Food which lies flat will cook more quickly than food which is
piled high. You should therefore distribute the food so that it
is as flat as possible in the ovenware. Different foodstuffs
should not be placed in layers on top of one another.
■ Cook the food in ovenware with a lid. If you do not have a
suitable lid for your ovenware, use a plate or special
microwave foil.
■ This will help the food retain its own distinct taste, so it will
require less seasoning.
■ After cooking, allow the food to stand for a further 2 to
5 minutes so that it can achieve an even temperature.
■ Always use an oven cloth or oven gloves when removing
plates from the oven.
Cooking food Weight Microwave power setting in
Notes
watts, cooking time in minutes
Meat loaf 750 g 600 W, 20-25 mins Cook uncovered
Whole chicken, fresh, no giblets 1.2 kg 600 W, 25-30 mins Turn halfway through the cooking time
Fresh vegetables 250 g 600 W, 5-10 mins Cut vegetables into pieces of equal size.
500 g 600 W, 10-15 mins
Add 1 to 2 tbsp water per 100 g of vegetables.
Stir during cooking
Potatoes 250 g 600 W, 8-10 mins Cut potatoes into pieces of equal size;
500 g 600 W, 11-14 mins
Add 1 to 2 tbsp water for every 100 g.
Stir during cooking
750 g 600 W, 15-22 mins
Rice 125 g 900 W, 5-7 mins +
Add double the quantity of liquid.
180 W, 12-15 mins
250 g 900 W, 6-8 mins +
180 W, 15-18 mins
Sweet foods, e.g. blancmange
(instant)
500 ml 600 W, 6-8 mins Stir the custard pudding thoroughly 2 to
3 times during cooking using an egg whisk.
Fruit, compote 500 g 600 W, 9-12 mins -
Microwave tips
You cannot find any information about the settings for the
quantity of food you have prepared.
The food has become too dry. Next time, set a shorter cooking time or select a lower microwave
When the time has elapsed, the food is not defrosted, hot or
cooked.
When the time has elapsed, the food is overheated at the
edge but not done in the middle.
After defrosting, the poultry or meat is defrosted on the outside but not defrosted in the middle.
Condensation
Condensation may appear on the door window, interior walls
and floor. This is normal. This does not affect how the
microwave operates. Wipe away the condensation after
cooking.
Quantity Accessories Cooking time in minutes
Bread for toasting (pre-toasting) 2 to 4 slices Wire rack 1st side: approx. 2 to 4
Toast with topping 2 to 6 slices Wire rack Depending on topping: 7 to 10
Increase or reduce the cooking times using the following rule of
thumb:
Double the amount = almost double the cooking time
Half the amount = half the cooking time
power setting. Cover the food and add more liquid.
Set a longer time. Large quantities and food which is piled high
require longer times.
Stir it during the cooking time and next time, select a lower micro-
wave power setting and a longer cooking time.
Next time, select a lower microwave power setting. If you are
defrosting a large quantity, turn it several times.
Tips for grilling
Notes
■ All the values given are guidelines and can vary depending
on the properties of your food.
■ Always grill on the wire rack with the cooking compartment
door closed and do not preheat.
■ Always place the wire rack on the turntable.
2nd side: approx. 2 to 4
15
Page 16

Soup with toppings,
e.g. onion soup
Quantity Accessories Cooking time in minutes
2 to 4 cups Turntable approx. 15 to 20
Combined grill and microwave
Notes
■ The combined operation is particularly suitable for cooking
bakes and gratins.
■ Always place the dish on the turntable and do not cover the
food.
■ Use a high-sided dish for roasting. This keeps the cooking
compartment cleaner.
■ Use large flat ovenware for bakes and gratins. Food takes
longer to cook in narrow, deep containers and browns more
on top.
Weight Accesso-
ries
Chicken portions, small,
e.g. chicken thighs or wings
approx. 800 g Ovenware
on the wire
grill
Frozen marinated chicken
wings
approx. 800 g Ovenware
on the wire
grill
Pasta bake
approx.1000 g Turntable
(using pre-cooked ingredients)
Potato gratin
approx.1000 g Turntable
(using raw potatoes)
Fish, scalloped approx.400 g Turntable
Quark bake approx.1000 g Turntable
Vegetable kebab 4-5 pieces Wire rack
Fish kebabs 4-5 pieces Wire rack
Bacon rashers approx. 8 rash-
Wire rack
ers
Microwave power setting in watts
360 W +
360 W +
360 W +
360 W +
360 W +
360 W +
180 W +
180 W +
180 W +
■ Check that your ovenware fits in the cooking compartment. It
must not be too large, as the turntable must still be able to
turn.
■ Always set the maximum cooking time. Check the food after
the shorter time specified.
■ Leave the meat to rest for another 5 to 10 minutes before
cutting it. This allows the meat juices to be distributed evenly
so that they do not run out when the meat is cut.
■ Bakes and gratins should be left to cook in the appliance for
a further 5 minutes after the appliance has been switched off.
Cooking time
Notes
in minutes
(
30-40 mins Place with the skin side up. Do
not turn.
(
(
15-25 mins Do not turn.
25-35 mins Sprinkle with cheese. Maxi-
mum of 5 cm in height
(
(
30-40 mins Maximum of 4 cm in height
20-25 mins Defrost frozen fish before cook-
ing.
(
(
(
(
30-35 mins Maximum of 5 cm in height
15-20 mins Use wooden skewers.
10-15 mins Use wooden skewers.
10-15 mins
16
Page 17

Test dishes in accordance with EN 60705
The quality and correct operation of microwave appliances are
tested by testing institutes using these dishes.
In accordance with EN 60705, IEC 60705, DIN 44547 and
EN 60350 (2009)
Cooking and defrosting with the microwave
Microwave cooking
Dish Microwave power setting in watts, cooking
Egg wash, 750 g 360 W, 12-17 mins+ 90 W, 20-25 mins Pyrex dish, 20 x 25 cm on the turntable.
Sponge 600 W, 8-10 mins Place a pyrex dish with a diameter of 22 cm on the turnta-
Meat loaf 600 W, 20-25 mins Place the pyrex dish on the turntable.
Microwave defrosting
Dish Microwave power setting in watts, cooking
Meat 180 W, 5-7 mins+ 90 W, 10-15 mins Place a pyrex dish with a diameter of 22 cm on the turnta-
Combined microwave cooking
Dish Microwave power setting in watts, cooking
Potato gratin
time in minutes
time in minutes
time in minutes
( grill + 360 W, 35-40 mins
Note
ble.
Note
ble.
Note
Place a pyrex dish with a diameter of 22 cm on the turntable.
17
Page 18

Þ Table des matières
[fr]Notice d’utilisation
Précautions de sécurité importantes..................................... 18
Causes de dommages ................................................................... 21
Installation et branchement .................................................... 21
Le bandeau de commande...................................................... 22
Sélecteur rotatif ................................................................................ 22
Les modes de cuisson ................................................................... 22
Les accessoires ............................................................................... 22
Avant la première utilisation................................................... 23
Régler l'heure ................................................................................... 23
Chauffer le compartiment de cuisson.......................................... 23
Les microondes ...................................................................... 23
Conseils pour les récipients .......................................................... 23
Puissances microondes ................................................................ 24
Réglage des microondes.............................................................. 24
Ventilateur de refroidissement....................................................... 24
Grillades.................................................................................... 24
Régler le gril ..................................................................................... 24
Microondes et gril combinés ................................................. 25
Régler les micro-ondes et le gril................................................... 25
Memory ..................................................................................... 25
Enregistrer Memory ......................................................................... 25
Démarrer Memory............................................................................ 26
Modifier la durée du signal ..................................................... 26
Entretien et nettoyage ............................................................. 26
Nettoyants ......................................................................................... 26
Tableau des pannes ................................................................. 27
Service après-vente................................................................. 28
Numéro E et numéro FD ................................................................28
Caractéristiques techniques .......................................................... 28
Elimination écologique.................................................................... 28
Programmes automatiques..................................................... 28
Réglage du programme .................................................................28
Décongélation avec les programmes automatiques ................29
Cuisson avec les programmes automatiques............................ 29
Programme de cuisson combiné ................................................. 29
Testés pour vous dans notre laboratoire .............................. 30
Remarques relatives aux tableaux ............................................... 30
Décongélation...................................................................................30
Décongeler, réchauffer ou cuire des préparations surgelés... 31
Réchauffer des préparations .........................................................31
Cuire des préparations ...................................................................32
Astuces concernant les microondes........................................... 32
Conseils pour les grillades ............................................................ 32
Gril combiné avec micro-ondes.................................................... 33
Plats tests selon EN 60705...................................................... 34
Cuisson et décongélation avec les microondes....................... 34
Produktinfo
Vous trouverez des informations supplementaires concernant
les produits, accessoires, pièces de rechange et services sur
Internet sous : www.bosch-home.com et la boutique en ligne :
www.bosch-eshop.com
: Précautions de sécurité importantes
Lire attentivement ce manuel. Ce n'est qu'après en avoir pris connaissance que vous pourrez utiliser votre appareil correctement et en toute sécurité. Conserver la notice d'utilisation pour un usage ultérieur ou pour le propriétaire suivant.
Contrôler l'état de l'appareil après l'avoir déballé. Ne pas le raccorder s'il présente des avaries de transport.
Seul un expert agréé peut raccorder l'appareil sans fiche. La garantie ne couvre pas les dommages résultant d'un mauvais raccordement.
Cet appareil est conçu uniquement pour un
usage ménager privé et un environnement
domestique. Utiliser l'appareil uniquement
pour préparer des aliments et des
boissons. Surveiller l'appareil lorsqu'il
fonctionne. Utiliser l'appareil uniquement
dans des pièces fermées.
Cet appareil est conçu pour une utilisation jusqu'à une altitude maximale de 4 000 m.
Cet appareil peut être utilisé par des
enfants de 8 ans ou plus et par des
personnes dotées de capacités physiques,
sensorielles ou mentales réduites ou
disposant de connaissances ou
d’expérience insuffisantes, sous la
surveillance d'un tiers responsable de leur
sécurité ou bien lorsqu'ils ont reçu des
instructions liées à l'utilisation de l'appareil
en toute sécurité et qu'ils ont intégré les
risques qui en résultent.
Les enfants ne doivent pas jouer avec l'appareil. Le nettoyage et l'entretien effectué par l'utilisateur ne doivent pas être accomplis par des enfants, sauf s'ils sont âgés de 8 ans et plus et qu'un adulte les surveille.
Les enfants de moins de 8 ans doivent être tenus à distance de l'appareil et du cordon d'alimentation.
Risque d'incendie !
■
L'appareil devient très chaud. Si l'appareil
est installé dans un meuble encastré doté
18
Page 19

d'une porte décorative, il se produit une
accumulation de chaleur lorsque la porte
décorative est fermée. Garder
impérativement la porte décorative
ouverte lorsque l'appareil est en marche.
Risque d'incendie !
■
Tout objet inflammable entreposé dans le
compartiment de cuisson peut
s'enflammer. Ne jamais entreposer
d'objets inflammables dans le
compartiment de cuisson. Ne jamais
ouvrir la porte de l'appareil lorsqu'il s'en
dégage de la fumée. Éteindre l'appareil et
débrancher la fiche secteur ou enlever le
fusible dans le boîtier à fusibles.
Risque d'incendie !
■
L'appareil devient très chaud. Ne jamais
utiliser le dessus de l'appareil comme
surface de rangement.
Risque d'incendie !
■
L'appareil devient très chaud. Suivre les
consignes spécifiées au chapitre
Installation et raccordement concernant la
distance minimum à respecter vis-à-vis de
l'appareil. L'appareil ne doit pas être
installé dans un meuble encastré.
Risque d'incendie !
■
Toute utilisation non conventionnelle de
l'appareil est dangereuse et peut
provoquer des dommages.
Il est interdit de sécher des aliments ou
vêtements, de chauffer des chaussons,
coussins de graines ou de céréales,
éponges, chiffons humides et similaire.
Par exemple des chaussons, coussins de
graines ou de céréales chauffés peuvent
s'enflammer même après plusieurs
heures.Utiliser l'appareil uniquement pour
préparer des aliments et des boissons.
Risque d'incendie !
■
Les aliments peuvent s'enflammer. Ne
jamais réchauffer les aliments dans des
emballages qui conservent la chaleur.
Ne jamais réchauffer des aliments dans
des récipients en plastique, en papier ou
autres matériaux inflammables, sans les
surveiller.
Ne jamais régler une puissance ou une
durée de micro-ondes trop élevée. Suivre
les indications de cette notice d'utilisation.
Ne jamais déshydrater des aliments aux
micro-ondes.
Ne jamais décongeler ni réchauffer au
micro-ondes à une puissance trop élevée
ou trop longtemps des aliments dont la
teneur en eau est faible, comme du pain.
Risque d'incendie !
■
L'huile alimentaire peut s'enflammer. Ne
jamais chauffer de l'huile alimentaire seule
aux micro-ondes.
Risque d'explosion !
Les liquides ou autres aliments dans des récipients hermétiquement fermés peuvent exploser. Ne jamais chauffer de liquides ou d'autres aliments dans des récipients hermétiquement fermés.
Risque de préjudice sérieux pour la santé !
■
En cas de nettoyage insuffisant, la surface
de l'appareil peut être endommagée. De
l'énergie de micro-ondes risque de
s'échapper. Nettoyer l'appareil
régulièrement et enlever immédiatement
tous les restes d'aliments. Veiller à ce que
le compartiment de cuisson, le joint de
porte, la porte et la butée de porte soient
toujours propres ; voir également le
chapitre Entretien et Nettoyage.
Risque de préjudice sérieux pour la santé !
■
L'énergie du micro-ondes peut s'échapper
par une porte de compartiment de
cuisson ou un joint de porte endommagé.
Ne jamais utiliser l'appareil si la porte ou
le joint de porte du compartiment de
cuisson est endommagé. Appeler le
service après-vente.
Risque de préjudice sérieux pour la santé !
■
L'énergie du micro-ondes s'échappe dans
le cas d'appareils sans habillage. Ne
jamais enlever l'habillage du corps de
l'appareil. Appeler le service après-vente
en cas d'intervention de maintenance ou
de réparation.
Risque de choc électrique !
■
Tenter de réparer vous-même l'appareil
est dangereux. Seul un technicien du
service après-vente formé par nos soins
est habilité à effectuer des réparations et à
remplacer des câbles d'alimentation
défectueux. Si l'appareil est défectueux,
débrancher la fiche secteur ou enlever le
fusible dans le boîtier à fusibles. Appeler
le service après-vente.
Risque de choc électrique !
■
L'isolation des câbles des appareils
électroménagers peut fondre au contact
des pièces chaudes de l'appareil. Ne
jamais mettre le câble de raccordement
des appareils électroménagers en contact
avec des pièces chaudes de l'appareil.
Risque de choc électrique !
■
De l'humidité qui pénètre peut
occasionner un choc électrique. Ne pas
utiliser de nettoyeur haute pression ou de
nettoyeur à vapeur.
Risque de choc électrique !
■
Une infiltration d'humidité peut provoquer
un choc électrique. Ne jamais exposer
l'appareil à une forte chaleur ou humidité.
19
Page 20

Utiliser l'appareil uniquement dans des
pièces fermées.
Risque de choc électrique !
■
Un appareil défectueux peut provoquer un
choc électrique. Ne jamais mettre en
service un appareil défectueux.
Débrancher la fiche secteur ou enlever le
fusible dans le boîtier à fusibles. Appeler
le service après-vente.
Risque de choc électrique !
■
L'appareil fonctionne avec une tension
élevée. Ne jamais retirer le boîtier.
Risque de brûlure !
■
Les récipients ou les accessoires
deviennent très chaud. Toujours utiliser
des maniques pour retirer le récipient ou
les accessoires du compartiment de
cuisson.
Risque de brûlure !
■
Les vapeurs d'alcool peuvent s'enflammer
dans un compartiment de cuisson chaud.
Ne jamais préparer de plats contenant de
grandes quantités de boissons fortement
alcoolisées. Utiliser uniquement de petites
quantités de boissons fortement
alcoolisées. Ouvrir la porte de l'appareil
avec précaution.
Risque de brûlure !
■
Les aliments comportant une enveloppe
ou une peau dure peuvent éclater, à la
manière d'une explosion, au moment de
les réchauffer, mais également après. Ne
jamais faire cuire d'oeufs dans leur
coquille ni réchauffer des oeufs durs. Ne
jamais faire cuire d'animaux à coquilles ni
de crustacés. Avant de faire des œufs sur
le plat ou des œufs pochés, percer leur
jaune.En cas d'utilisation d'aliments
comportant une enveloppe ou une peau
dure, comme des pommes, tomates,
pommes de terre ou saucisses,
l'enveloppe peut éclater. Percer
l'enveloppe ou la peau avant de les
réchauffer.
Risque de brûlure !
■
La chaleur ne se répartit pas
uniformément dans l'alimentation pour
bébé. Ne jamais réchauffer des aliments
pour bébé dans des récipients fermés.
Toujours retirer le couvercle et la tétine.
Après réchauffage, remuer ou secouer
énergiquement. Vérifier la température
des aliments avant de donner les aliments
à l'enfant.
Risque de brûlure !
■
Les aliments chauffés dégagent de la
chaleur. Le plat peut devenir chaud.
Toujours utiliser des maniques pour retirer
le récipient ou les accessoires du
compartiment de cuisson.
Risque de brûlure !
■
Si les aliments sont hermétiquement
emballés, leur emballage peut éclater.
Toujours respecter les consignes figurant
sur l'emballage. Toujours utiliser des
maniques pour retirer des plats du
compartiment de cuisson.
Risque de brûlure !
■
L'appareil devient très chaud. Ne jamais
toucher les surfaces intérieures chaudes
du compartiment de cuisson ni les
résistances chauffantes. Toujours laisser
l'appareil refroidir. Tenir les enfants
éloignés.
Cet appareil et ses parties accessibles
deviennent chauds pendant leur
utilisation. Il convient de veiller à ne pas
toucher les éléments chauffants. Il
convient de maintenir à distance les
enfants de moins de 8 ans à moins qu’ils
ne soient sous une surveillance continue.
Risque de brûlure !
■
De la vapeur chaude peut s'échapper lors
de l'ouverture de la porte de l'appareil.
Ouvrir la porte de l'appareil avec
précaution. Tenir les enfants éloignés.
Risque de brûlure !
■
La présence d'eau dans un compartiment
de cuisson chaud peut générer de la
vapeur d'eau chaude. Ne jamais verser
d'eau dans le compartiment de cuisson
chaud.
Risque de brûlure !
■
Un retard d'ébullition peut se produire
lorsque vous chauffez des liquides. Cela
signifie que la température d'ébullition est
atteinte sans que les bulles de vapeur
typiques remontent. À la moindre
secousse ou vibration, le liquide chaud
peut alors subitement déborder et jaillir.
Toujours placer une cuillère dans le
récipient que vous faites chauffer. Cela
permet d'éviter ce retard d'ébullition.
Risque de blessure !
■
Un verre de porte d'appareil rayé peut se
fendre. Ne pas utiliser de racloir à verre, ni
de produit de nettoyage agressif ou
abrasif.
Risque de blessure !
■
Toute vaisselle inappropriée peut éclater.
La vaisselle en porcelaine ou en
céramique peut présenter des
microporosités dans les poignées et les
couvercles. Derrière ces microporosités
se dissimulent des cavités. De l'humidité
peut s'y introduire et faire éclater le
récipient. Utiliser uniquement de la
vaisselle conçue pour aller au microondes.
Risque de blessures !
■
Les récipients et les ustensiles métalliques
peuvent produire des étincelles en mode
micro-ondes pur. L'appareil est
20
Page 21

endommagé. En mode micro-ondes pur,
n'utilisez jamais de récipients métalliques.
Utilisez uniquement un récipient adapté au
micro-ondes ou le micro-ondes en
combinaison avec un mode de cuisson.
Causes de dommages
Attention !
■ Joint fortement encrassé : Si le joint est fortement encrassé,
la porte de l'appareil ne ferme plus correctement lors du
fonctionnement. La façade des meubles voisins peut être
endommagée. Veillez à ce que le joint soit toujours propre.
■ Fonctionnement du micro-ondes sans aliments : Faire
fonctionner l'appareil sans aliments dans le compartiment de
cuisson entraîne une surchauffe. Ne jamais mettre l'appareil
en marche sans aliments dans le compartiment de cuisson.
Un test rapide de la vaisselle fait exception à cette règle (voir
le chapitre Microondes, récipients.
■ Pop corn au micro-ondes : N'utilisez jamais une puissance
micro-ondes trop élevée. Réglez au maximum sur 600 Watt.
Veillez à toujours placer le cornet de pop corn sur une
assiette en verre. La vitre peut éclater en cas de surcharge.
■ Du liquide débordé ne doit pas parvenir dans l'intérieur de
l'appareil en passant par l'entraînement du plateau tournant.
Surveiller le déroulement de la cuisson. Commencer par une
durée de cuisson plus courte, puis allonger la durée de
cuisson si nécessaire.
■ Ne jamais utiliser l'appareil micro-ondes sans plateau
tournant.
■ Formation d'étincelles : Du métal p.ex. une cuillère dans un
verre doit se trouver à une distance d'au moins 2 cm des
parois du four et de l'intérieur de la porte. Des étincelles
pourraient détériorer la vitre de la porte.
■ Barquettes en aluminium : N'utilisez pas de barquettes en
aluminium dans l'appareil. L'appareil subira des dommages
par la formation d'étincelles.
■ Refroidissement avec la porte de l'appareil ouverte : Laissez
refroidir le compartiment de cuisson uniquement avec la
porte fermée. Ne coincez rien dans la porte de l'appareil.
Même si la porte n'est qu'en partie ouverte, les façades des
meubles voisins peuvent être endommagées avec le temps.
■ Eau de condensation dans le compartiment de cuisson : De
l'eau de condensation peut se former à la vitre de la porte,
aux parois intérieures et à la sole. Ceci est normal et ne
compromet pas le fonctionnement des micro-ondes. Pour
éviter de la corrosion, essuyez toujours l'eau de
condensation après chaque cuisson.
Installation et branchement
Cet appareil est destiné à un usage domestique uniquement.
Placer l'appareil de table sur une surface ferme et plate (au
moins 85 cm au-dessus du sol). Les fentes d'aération à
l'arrière, au-dessus et en-dessous doivent rester libres. La
hauteur minimum d'espace libre au-dessus de l'appareil est de
30 cm.
L'appareil est livré prêt à brancher et doit être raccordé
impérativement à une prise de courant de sécurité installée de
manière réglementaire. Le fusible le protégeant doit être de
10 ampères (interrupteur automatique L ou B). La tension du
secteur doit correspondre à celle spécifiée sur la plaque
signalétique.
Seul un électricien agréé est habilité à installer ou à déplacer la
prise ou à changer le cordon de raccordement. La fiche de
l'appareil doit être en permanente accessible.
Ne pas utiliser de prises multiples, de connecteur plat ni de
rallonges. Une surcharge entraînerait un risque d'incendie.
21
Page 22

Le bandeau de commande
Ci-après l'aperçu du bandeau de commande. Des variations de
détails sont possibles selon le modèle d'appareil.
$IILFKDJH
GHOKHXUHHWGHODGXUpH
7RXFKH+RUORJH
6WRS
7RXFKH$UUrW
7RXFKH*ULO
7RXFKH0HPRU\
3URJUDPPHVDXWRPDWLTXHV
7RXFKHVSRXUOHV
J WRXFKH3URJUDPPH
WRXFKH3RLGV
L
Sélecteur rotatif
Avec le sélecteur rotatif, vous pouvez modifier toutes les
valeurs de référence et de réglage.
Le sélecteur rotatif est escamotable. Appuyez sur le sélecteur
rotatif pour l'enclencher et le désenclencher.
Les modes de cuisson
Microondes
En pénétrant dans les aliments, elles se transforment en
chaleur. Les microondes conviennent pour décongeler
rapidement, réchauffer, faire fondre et cuire.
Puissances microondes
■ 900 watts pour chauffer des liquides.
■ 600 watts pour chauffer et cuire des mets.
■ 360 watts pour faire cuire de la viande et pour réchauffer des
mets délicats.
■ 180 watts pour décongeler et poursuivre la cuisson.
■ 90 watts pour décongeler des mets délicats.
PLQ
NJ
J
6WDUW
6pOHFWHXUURWDWLI
SRXUUpJOHUOKHXUH
HWODGXUpHRXSRXU
UpJOHUOHVSURJUDPPHV
DXWRPDWLTXHV
7RXFKH0DUFKH
7RXFKHVSRXUOHV
3XLVVDQFHVPLFURäRQGHV
:DWWV
:DWWV
:DWWV
:DWWV
:DWWV
7RXFKHGRXYHUWXUH
GHSRUWH
Gril et microondes combinés
Dans ce cas, le gril fonctionne en même temps que les
microondes. Le mode combiné est idéal pour des soufflés et
gratins. Les mets seront croustillants et dorés. C'est plus rapide
et vous économisez de l'énergie.
Les accessoires
Attention !
Lors du retrait de la vaisselle, veiller à ce que le plateau
tournant ne se décale pas. Veiller à ce que le plateau tournant
soit correctement enclenché. Le plateau tournant peut tourner à
gauche ou à droite.
Le plateau tournant
Mise en place du plateau tournant :
1. Placer l'anneau à roulettes a dans le creux situé dans le
compartiment de cuisson.
2. Laisser le plateau tournant b s'enclencher dans
l'entraînement c au centre du fond du compartiment de
cuisson.
Gril
(
Permet de gratiner des soufflés.
22
Page 23

Remarque : Utilisez l'appareil uniquement avec le plateau
tournant en place. Veillez à ce qu'il soit correctement
E
enclenché. Le plateau tournant peut tourner à gauche ou à
droite.
D
F
Avant la première utilisation
Vous apprendrez ici ce que vous devez faire avant d'utiliser
votre appareil micro-ondes pour la première fois pour préparer
des mets. Avant de commencer, lisez le chapitre Consignes de
sécurité.
Régler l'heure
Après le raccordement de l'appareil ou après une panne de
courant, trois zéros s'allument dans la zone d'affichage.
1. Appuyer sur la touche 0.
12:00 h et
2. Régler l'heure avec le sélecteur rotatif.
0 apparaissent dans l'affichage
Grille
Grille pour griller, p.ex. des steaks,
saucisses ou du toast ou comme
surface support, p.ex. pour des plats à
gratin.
Remarque : Placez la grille sur le
plateau tournant
L'heure actuelle est réglée.
Masquer l'heure
Appuyer sur la touche 0 et ensuite sur Stop.
L'affichage est obscurci.
Réafficher l'heure
Appuyer sur la touche
Dans l'affichage apparaît 12:00. Régler ensuite comme décrit
sous le point 2 et 3.
Modifier l'heure p.ex. passage de l'heure d'été à l'heure d'hiver
Régler comme décrit sous le point 1 à 3.
0.
PLQ
NJ
3. Réappuyer sur la touche 0.
PLQ
NJ
Les microondes
En pénétrant dans les aliments, les micro-ondes se
transforment en chaleur.
Vous pouvez utilisez la fonction microondes soit seule, soit
combinée au mode gril.
Cette notice vous donne des informations concernant la
vaisselle et comment régler le microondes.
Remarque : Dans le chapitre Testés pour vous dans notre
laboratoire vous trouverez des exemples pour décongeler,
réchauffer, faire fondre et cuire avec les microondes.
Faites un essai avec les microondes. Faites chauffer par
exemple une tasse d'eau pour votre thé.
Prenez une grande tasse sans décor doré ou argenté, puis
placez une cuillère à café dans la tasse. Placez la tasse
contenant l'eau sur le plateau tournant.
1. Appuyer sur la touche 900 W.
2. Régler 1:30 min au moyen du sélecteur rotatif.
3. Appuyer sur la touche Start.
Chauffer le compartiment de cuisson
Pour éliminer l’odeur du neuf, faire chauffer le four vide fermé
avec le plateau tournant en place pendant 10 minutes.
Assurez-vous que le compartiment de cuisson ne contient pas
de restes d'emballage.
1. Appuyer sur la touche Gril (.
10:00 min apparaît dans l'affichage
2. Appuyer sur la touche Start.
Un signal retentit après l'écoulement de la durée. Appuyer sur
Stop ou ouvrir la porte de l'appareil.
Un signal sonore retentit au bout de 1 minute 30 secondes.
L'eau pour le thé est chaude.
Pendant que vous buvez le thé, veuillez relire les consignes de
sécurité figurant au début de la notice d'utilisation. Ces
consignes sont très importantes.
Conseils pour les récipients
Récipients appropriés
Sont appropriés des récipients en verre, vitrocéramique,
porcelaine, céramique ou plastique résistant à la chaleur. Ces
matières laissent passer les microondes.
Vous pouvez également utiliser de la vaisselle de service. Vous
n'aurez pas besoin de transvaser. Utilisez de la vaisselle avec
des motifs dorés ou argentés uniquement si le fabricant
garantit qu'elle est appropriée aux micro-ondes.
23
Page 24

Récipients inappropriés
Les récipients métalliques sont inappropriés. Le métal ne laisse
pas passer les microondes. Dans les récipients en métal, les
préparations restent froides.
Attention !
Formation d'étincelles : le métal p. ex. une cuillère dans un
verre doit se trouver à une distance d'au moins 2 des parois
du four et de l'intérieur de la porte. Des étincelles pourraient
détériorer la vitre de la porte.
Test de la vaisselle
Ne faites jamais fonctionner le microondes sans aliments. La
seule exception à cette règle est le test de vaisselle suivant.
Si vous n'êtes pas sûr que votre récipient est micro-ondable,
effectuez le test suivant :
1. Placez le plat vide dans l'appareil pendant ½ à 1 minute à la
puissance maximale.
2. Vérifiez régulièrement la température.
Le récipient doit être froid ou tiède.
S'il est chaud ou si des étincelles se produisent, votre récipient
n'est pas approprié.
2. Régler une durée au moyen du sélecteur rotatif.
6WRS
L
J
3. Appuyer sur la touche Start.
La durée s'écoule visiblement dans l'affichage.
La durée est écoulée
Un signal retentit. Ouvrir la porte de l'appareil ou appuyer sur
Stop. L'heure se réaffiche.
Modifier la durée
Vous pouvez à tout moment modifier la durée. Pour ce faire,
utilisez le sélecteur rotatif.
6WDUW
PLQ
NJ
Puissances microondes
Puissance
microondes
90 W Décongeler des mets délicats
180 W Décongeler et poursuivre la cuisson
360 W Cuire de la viande et faire chauffer des
600 W Faire chauffer et cuire des mets
900 W Faire chauffer des liquides
Remarque : Vous pouvez régler la puissance microondes
900 W pour 30 minutes, 600 W pour 1 heure, les autres
puissances pour respectivement 1 heure et 39 minutes.
convient pour
mets délicats
Réglage des microondes
Exemple : puissance microondes 600 Watts
1. Appuyer sur la puissance microondes désirée.
Dans l'affichage, la puissance microondes réglée s'allume et
1:00 min apparaît.
Arrêter
Appuyer une fois sur la touche Stop ou ouvrir la porte de
l'appareil. Réappuyer sur la touche Start après avoir fermé la
porte.
Annuler le fonctionnement
Appuyer 2 fois sur la touche Stop ou ouvrir la porte et appuyer
une fois sur la touche Stop.
Remarque : Vous pouvez également régler d'abord la durée et
ensuite la puissance microondes.
Ventilateur de refroidissement
L'appareil est équipé d'un ventilateur de refroidissement. Le
ventilateur peut continuer de fonctionner même si vous avez
déjà éteint l'appareil.
Remarques
■ Le compartiment de cuisson reste froid lors du
fonctionnement des micro-ondes. Toutefois le ventilateur de
refroidissement se met en marche. Il peut continuer de
fonctionner même si le mode micro-ondes est déjà terminé.
■ De l'eau de condensation peut se former à la vitre de la
porte, aux parois intérieures et à la sole. Ceci est normal et
ne compromet pas le fonctionnement des microondes.
Essuyez l'eau de condensation après la cuisson.
Grillades
Un gril puissant assure une chaleur intense sur la surface et un
brunissage uniforme des aliments.
Régler le gril
1. Appuyer sur la touche Gril (.
10:00 min et le symbole apparaissent dans l'affichage.
24
2. Régler la durée au moyen du sélecteur rotatif.
6WRS
L
3. Appuyer sur la touche Start.
La durée s'écoule visiblement dans l'affichage.
6WDUW
J
PLQ
NJ
Page 25

La durée est écoulée
Un signal retentit. Ouvrir la porte de l'appareil ou appuyer sur
Stop. L'heure se réaffiche.
Modifier la durée
Vous pouvez à tout moment modifier la durée. Pour ce faire,
utilisez le sélecteur rotatif.
Microondes et gril combinés
Arrêter
Appuyer une fois sur la touche Stop ou ouvrir la porte de
l'appareil. Réappuyer sur la touche Start après avoir fermé la
porte.
Correction
Vous pouvez corriger à tout moment une durée réglée.
Annuler le réglage
Appuyer deux fois sur la touche Stop ou ouvrir la porte de
l'appareil et appuyer une fois sur la touche Stop.
Vous pouvez régler le gril et les microondes simultanément.
Les mets seront croustillants et dorés. C'est plus rapide et vous
économisez de l'énergie.
Vous pouvez enclencher toutes les puissances microondes.
Sauf : 900 et 600 Watts.
Régler les micro-ondes et le gril
Exemple : 360 W, Gril (, 5 minutes
1. Appuyer sur la puissance microondes désirée.
Dans l'affichage, la puissance microondes réglée s'allume et
1:00 min apparaît.
2. Appuyer sur la touche Gril (.
6WRS
L
J
3. Régler la durée au moyen du sélecteur rotatif.
6WDUW
6WRS
L
J
6WDUW
4. Appuyer sur la touche Start.
PLQ
NJ
La durée s'écoule visiblement dans l'affichage.
La durée est écoulée
Un signal retentit. Ouvrir la porte de l'appareil ou appuyer sur
Stop. L'heure se réaffiche.
Modifier la durée
Vous pouvez à tout moment modifier la durée. Pour ce faire,
utilisez le sélecteur rotatif.
Arrêter
Appuyer une fois sur la touche Stop ou ouvrir la porte de
l'appareil. Réappuyer sur la touche Start après avoir fermé la
porte.
6WRS 6WDUW
L
J
Memory
Avec la fonction Memory vous pouvez mémoriser le réglage
pour un plat et l'appeler à tout moment.
Memory est utile si vous préparez un plat assez souvent.
Enregistrer Memory
Exemple : 360 W, 25 minutes
1. Appuyer sur la touche i.
« M » s'allume dans l'affichage.
2. Appuyer sur la puissance microondes désirée.
« M », la puissance désirée et 1:00 min. s'allument dans
l'affichage.
Annuler le fonctionnement
Appuyer 2 fois sur la touche Stop ou ouvrir la porte et appuyer
une fois sur la touche Stop.
Remarque : Vous pouvez également régler d'abord la durée et
ensuite la puissance microondes.
3. Régler la durée au moyen du sélecteur rotatif.
6WRS
L
4. Confirmer à l'aide de la touche i.
L'heure se réaffiche. Le réglage est mémorisé.
J
6WDUW
PLQ
NJ
25
Page 26

Remarques
■ Vous pouvez également mémoriser le gril seul ou le gril
combinié avec les micro-ondes.
■ Vous ne pouvez pas mémoriser plusieurs puissances
microondes successives.
■ Vous ne pouvez pas mémoriser les programmes
automatiques.
■ Vous pouvez aussi enregistrer Memory et le démarrer tout de
suite. A la fin, n'appuyez pas sur
■ Nouvel enregistrement de Memory : Appuyer sur la
touche
i. Les anciens réglages apparaissent. Mémorisez le
nouveau programme comme décrit sous les points 1 à 4.
i, mais sur Start.
Démarrer Memory
Il est très simple de démarrer le programme mémorisé. Placez
votre plat dans l'appareil. Fermez la porte de l'appareil.
Modifier la durée du signal
1. Appuyer sur la touche i.
Les réglages mémorisés apparaissent.
2. Appuyer sur la touche Start.
La durée s'écoule visiblement dans l'affichage.
La durée est écoulée
Un signal retentit. Ouvrir la porte de l'appareil ou appuyer sur
Stop. L'heure se réaffiche.
Arrêter
Appuyer une fois sur la touche Stop ou ouvrir la porte de
l'appareil. Réappuyer sur la touche Start après avoir fermé la
porte.
Annuler le réglage
Appuyer deux fois sur la touche Stop ou ouvrir la porte de
l'appareil et appuyer une fois sur la touche Stop.
Lorsque l'appareil se désactive, vous entendez un signal. Vous
pouvez modifier la durée du signal sonore.
Pour cela, appuyez env. 6 secondes sur la touche Start.
Entretien et nettoyage
Si vous entretenez et nettoyez soigneusement votre appareil
micro-ondes, il gardera longtemps un aspect neuf et restera
intact. Vous trouverez ici des conseils pour entretenir et
nettoyer correctement votre appareil.
: Risque de court-circuit !
N'utilisez jamais de nettoyant à pression ou à vapeur.
: Risque de brûlure !
Ne nettoyez jamais l'appareil juste après l'avoir éteint. Laissez
refroidir l'appareil.
: Risque de choc électrique !
Ne jamais plonger l'appareil dans l'eau ni le nettoyer sous un
jet d'eau.
Afin de ne pas endommager les différentes surfaces en utilisant
des nettoyants inappropriés, veuillez respecter les indications
dans le tableau.
N'utilisez pas
■ de produits agressifs ou récurants.
La surface peut être endommagée. Si un tel produit arrive sur
la façade, essuyez-le immédiatement avec de l'eau.
■ de racloirs à verre ou métalliques pour nettoyer la porte
vitrée.
■ de racloirs à verre ou métalliques pour nettoyer le joint.
■ de tampons en paille métallique ni d'éponges à dos récurant.
Avant d'utiliser des lavettes éponges neuves, rincez-les
soigneusement.
■ de nettoyants fortement alcoolisés.
La nouvelle durée du signal est validée.
L'heure se réaffiche.
Réglages possibles :
Durée du signal courte - 3 sons
Durée du signal longue - 30 sons
Nettoyants
Attention !
Avant le nettoyage, retirer la fiche secteur ou couper le fusible
dans le boîtier à fusibles. Nettoyer l'extérieur de l'appareil et le
compartiment de cuisson avec un chiffon humide et un
nettoyant doux. Sécher avec un chiffon propre.
Niveau Nettoyants
Façade de l'appareil Eau chaude additionnée de produit à
Façade de l'appareil
avec de l'inox
vaisselle :
Nettoyer avec une lavette et sécher
avec un chiffon doux. N'utilisez pas de
nettoyant pour vitres, ni de racloirs à
verre ou métalliques pour le nettoyage.
Eau chaude additionnée de produit à
vaisselle :
Nettoyer avec une lavette et sécher
avec un chiffon doux. Éliminez immédiatement les dépôts calcaires, de graisse,
de fécule et de blanc d'œuf. De la corrosion peut se former sous ces salissures.
Des nettoyants spéciaux pour inox sont
en vente au service après-vente ou dans
le commerce spécialisé. N'utilisez pas
de nettoyant pour vitres, ni de racloirs à
verre ou métalliques pour le nettoyage.
26
Page 27

Niveau Nettoyants
Compartiment de
cuisson en inox
Eau chaude additionnée de produit à
vaisselle ou de l'eau vinaigrée :
Nettoyer avec une lavette et sécher
avec un chiffon doux.
En cas d'encrassement important : utiliser un produit de nettoyage pour four
uniquement dans le compartiment de
cuisson froid. Utilisez de préférence une
éponge pour inox. N'utilisez pas de
spray pour four ni d'autres produits
agressifs de nettoyage pour four ni de
produits récurants. Des tampons en
paille métallique, éponges à dos récurant et des produits abrasifs sont également inappropriés. Ils rayent la surface.
Laisser bien sécher les surfaces intérieures.
Tableau des pannes
Niveau Nettoyants
Creux dans le compartiment de cuisson
Plateau tournant et
anneau à roulettes
Grille Eau chaude additionnée de produit à
Vitres du four Nettoyant pour vitres :
Joint Eau chaude additionnée de produit à
Chiffon humide :
De l'eau ne doit pas parvenir dans l'intérieur de l'appareil en passant par
l'entraînement du plateau tournant.
Eau chaude additionnée de produit à
vaisselle :
Lorsque vous remettez le plateau tournant en place, veillez à ce qu'il
s'enclenche correctement.
vaisselle :
Nettoyer avec un nettoyant pour inox ou
au lave-vaisselle.
Nettoyer avec une lavette. Ne pas utiliser de racloir à verre.
vaisselle :
Nettoyer avec une lavette, sans frotter.
N'utilisez pas de racloirs à verre ou
métalliques pour le nettoyage.
Une anomalie de fonctionnement n'est souvent due qu'à un
problème simple. Avant d'appeler le service après-vente,
veuillez essayer de remédier vous-même à la panne à l'aide du
tableau.
Si un jour, le résultat de cuisson d'un plat n'est pas optimal,
consultez le chapitre Testés pour vous dans notre laboratoire.
Vous y trouverez de nombreux conseils et astuces pour la
cuisson.
Incidents et dépannage
Message d'erreur Cause possible Remède/remarque
L'appareil ne fonctionne pas La fiche n'est pas connectée. Connecter la fiche
Coupure de courant Vérifiez si la lumière marche dans la cui-
Fusible défectueux Vérifiez dans le boîtier à fusibles si le
Manipulation incorrecte Couper le fusible dans la boîte à fusibles.
Trois zéros sont allumés dans l'affichage.
L'appareil n'est pas en marche. L'affichage indique une durée.
Le microondes ne fonctionne pas. La porte n'est pas complètement fermée. Vérifiez si des résidus alimentaires ou un
Les mets chauffent plus lentement
qu'avant
Le plateau tournant émet un bruit de
grésillement ou de frottement.
Le mode microondes s'arrête sans
raison apparente.
Coupure de courant Réglez l'heure à nouveau.
Le sélecteur rotatif a été actionné par mégarde. Appuyez sur la touche Stop.
La touche Start n'a pas été appuyée après le
réglage.
Vous n'avez pas appuyé sur la touche Start. Appuyez sur la touche Start.
Vous avez réglé une puissance microondes
trop faible.
Vous avez placé dans l'appareil une quantité
d'aliments plus importante que d'habitude.
Les mets étaient plus froids que d'habitude. Pendant la cuisson, remuer ou retourner
Encrassement ou un corps étranger au niveau
de l'entraînement du plateau tournant.
Le mode microondes est en panne. Si cette panne se réitère, appelez le ser-
: Risque de choc électrique !
Tenter de réparer vous-même l'appareil est dangereux. Seul un
technicien du service après-vente formé par nos soins est
habilité à effectuer des réparations.
Vous pouvez remédier vous-même à certains messages
d'erreur.
sine.
fusible utilisé pour l'appareil est en bon
état.
Réenclencher au bout d'env. 10 secondes.
Appuyez sur la touche Start ou annulez le
réglage à l'aide de la touche Stop.
corps étranger coincent la porte.
Choisissez une puissance microondes
plus élevée.
Double quantité double durée.
les mets de temps en temps.
Nettoyer l'anneau à roulettes et le creux
dans le compartiment de cuisson.
vice après-vente.
27
Page 28

Service après-vente
Si votre appareil a besoin d'être réparé, notre service aprèsvente se tient à votre disposition. Nous trouvons toujours une
solution appropriée pour éviter des visites inutiles d'un
technicien.
Numéro E et numéro FD
Lors de votre appel, veuillez indiquer le numéro de produit (n°
E) et le numéro de fabrication (n° FD), pour nous permettre de
mieux vous aider. La plaque signalétique avec les numéros se
trouve à droite, en ouvrant la porte de l'appareil. Pour éviter
d'avoir à les rechercher en cas de besoin, vous pouvez inscrire
ici les données de votre appareil et le numéro de téléphone du
service après-vente.
N° E
Service après-vente
Veuillez noter que la visite d'un technicien du SAV n'est pas
gratuite en cas de manipulation incorrecte, même pendant la
période de garantie.
Vous trouverez les données de contact pour tous les pays dans
l'annuaire ci-joint du service après-vente.
Commande de réparation et conseils en cas de dérangements
B 070 222 141
FR 01 40 10 11 00
CH 0848 840 040
Faites confiance à la compétence du fabricant. Vous
garantissez ainsi que la réparation sera effectuée par des
techniciens de SAV formés qui disposent des pièces de
rechange d’origine adaptées à votre appareil.
Cet appareil est conforme à la norme EN 55011 ou bien CISPR
11. C'est un produit du groupe 2, classe B.
O
N° FD
« Groupe 2 » signifie que des micro-ondes sont générées pour
chauffer des aliments. « Classe B » signifie que l'appareil est
approprié à l'environnement domestique.
Caractéristiques techniques
Tension d'entrée AC 220-230 V, 50 Hz
Consommation d'énergie 1450 W
Puissance de sortie maxi-
male
Puissance du gril 1200 W
Fréquence microondes 2450 MHz
Fusible 10 A
Dimensions (HxLxP)
appareil 305 x 513 x 408 mm
compartiment de cuisson 215 x 337 x 354 mm
Conforme aux normes VDE oui
Marque CE oui
900 W
Elimination écologique
Eliminez l'emballage en respectant l'environnement.
Cet appareil est marqué selon la directive
européenne 2012/19/UE relative aux appareils
électriques et électroniques usagés (waste electrical
and electronic equipment - WEEE).
La directive définit le cadre pour une reprise et une
récupération des appareils usagés applicables dans
les pays de la CE.
Programmes automatiques
Les programmes automatiques vous permettent de préparer
des plats très facilement. Il vous suffit de sélectionner le
programme et d'entrer le poids de votre préparation. La
commande des programmes automatiques se charge du
réglage optimal.
Remarque : Vous pouvez choisir parmi 8 programmes.
Réglage du programme
Après avoir choisi un programme, réglez de façon suivante :
1. Appuyer répétitivement sur la touche g, jusqu'à ce que le
numéro du programme désiré apparaisse.
28
2. Appuyer sur la touche 1.
« P » s'allume dans l'affichage et un poids de référence apparaît.
6WRS
L
J
3. Avec le sélecteur rotatif, régler le poids du mets.
6WDUW
6WRS
L
J
6WDUW
Page 29

4. Appuyer sur la touche Start.
PLQ
NJ
6WRS 6WDUW
L
J
La durée du programme s'écoule visiblement.
La durée est écoulée
Un signal retentit. Ouvrir la porte de l'appareil ou appuyer sur
Stop. L'heure se réaffiche.
Correction
Appuyer deux fois sur la touche Stop et régler de nouveau.
Arrêter
Appuyer une fois sur la touche Stop ou ouvrir la porte de
l'appareil. Réappuyer sur la touche Start après avoir fermé la
porte.
Annuler le fonctionnement
Appuyer 2 fois sur la touche Stop ou ouvrir la porte et appuyer
une fois sur la touche Stop.
Remarques
■ Lors de certains programmes, un signal retentit après un
certain temps. Ouvrez la porte de l'appareil et remuez les
aliments ou bien retournez la viande ou la volaille. Réappuyez
sur la touche Start après avoir fermé la porte.
■ Vous pouvez interroger le numéro de programme et le poids
en appuyant sur
g ou bien 1. La valeur interrogée apparaît
pendant 3 secondes dans l'affichage.
Décongélation avec les programmes automatiques
Avec les 4 programmes de décongélation vous pouvez
décongeler de la viande, de la volaille et du pain.
Remarques
■ Préparation des aliments
Utilisez des aliments qui ont été congelés et stockés si
possible à plat et par portion, à -18 °C.
Pour la décongélation, retirez l'aliment de son emballage et
pesezle. Vous avez besoin de connaître le poids pour le
réglage du programme.
■ Un liquide se forme lors de la décongélation de viande et de
volaille. En retournant les aliments, enlever ce liquide. Il ne
doit en aucun cas être utilisé par la suite ou entrer en contact
avec d'autres aliments.
■ Récipient
Placez l'aliment sur un récipient plat micro-ondable, p.ex. une
assiette en verre ou en porcelaine, et ne mettez pas de
couvercle.
■ Temps de repos
L'aliment dégelé doit encore reposer 10 à 30 minutes afin
que la température s'égalise. Les gros morceaux de viande
nécessitent un temps de repos plus long que les petits
morceaux. Séparez les morceaux plats et la viande hachée
avant le temps de repos.
Ensuite vous pouvez continuer à transformer les aliments,
même si les gros morceaux de viande sont éventuellement
encore gelés au cœur. En cas de volaille, vous pouvez
maintenant retirer les abats.
■ Signal
Lors de certains programmes, un signal retentit après un
certain temps. Ouvrez la porte de l'appareil et séparez les
aliments ou bien retournez la viande ou la volaille. Appuyer
sur la touche Start après avoir fermé la porte.
Numéro de programme.
Fourchette de poids
en kg
Décongeler
P 01 Viande hachée 0,20 - 1,00
P 02
P 03
Morceaux de
viande
Poulet, morceaux
de poulet
0,20 - 1,00
0,40 - 1,80
P 04 Pain 0,20 - 1,00
Cuisson avec les programmes automatiques
Avec les 3 programmes de cuisson vous pouvez faire cuire du
riz, des pommes de terre ou des légumes.
Remarques
■ Récipient
Faites toujours cuire l'aliment dans un récipient microondable avec un couvercle. Pour du riz, utilisez un grand
moule à bord haut.
■ Préparation des aliments
Pesez l'aliment. Vous avez besoin de connaître le poids pour
le réglage du programme.
Riz :
N'utilisez pas de riz en sachet. Ajoutez la quantité d'eau
nécessaire selon les indications du fabricant sur l'emballage.
C'est généralement deux à trois volumes d'eau pour un
volume de riz.
Pommes de terre :
Pour des pommes de terre à l'anglaise, coupez les pommes
de terre fraîches en petits morceaux de grosseur égale.
Ajoutez une c.à s. d'eau et un peu de sel pour 100 g de
pommes de terre.
Légumes frais :
Pesez les légumes frais, nettoyés. Coupez les légumes en
petits morceaux de grosseur égale. Ajoutez une c.à s. d'eau
pour 100 g de légumes.
■ Signal
Pendant le déroulement du programme, un signal retentit
après un certain temps. Remuez l'aliment.
■ Temps de repos
Remuez l'aliment encore une fois à la fin du programme.
Laissez reposer l'aliment encore 5 à 10 minutes afin que la
température s'égalise.
Les résultats de cuisson dépendent de la qualité et de la
nature de l'aliment.
Numéro de programme.
Fourchette de poids en
kg
Cuire
P 05 Riz 0,05 - 0,2
P 06 Pommes de terre 0,15 - 1,0
P 07 Légumes 0,15 - 1,0
Programme de cuisson combiné
Remarques
■ Récipient
Faites cuire les aliments dans un récipient micro-ondable pas
trop grand, résistant à la chaleur.
29
Page 30

■ Préparation des aliments
Retirez les aliments de leur emballage et pesezles. Si vous
ne pouvez pas programmer le poids exact, arrondissez-le
Numéro de programme.
vers le haut ou vers le bas.
■ Temps de repos
A la fin du programme, laissez reposer l'aliment encore 5 à
P 08
10 minutes afin que la température s'égalise à l'intérieur.
Testés pour vous dans notre laboratoire
Programme combiné
Soufflé surgelé,
jusqu'à 3 cm de
hauteur
Fourchette de poids en
kg
0,4 - 0,9
Vous trouverez ici un choix de plats et les réglages optimaux
correspondants. Nous vous montrons quelle puissance
microondes est la plus appropriée pour votre plat et vous
donnons des conseils concernant les récipients et la
préparation.
Remarques relatives aux tableaux
Les tableaux suivants vous indiquent de nombreuses
possibilités et valeurs de réglage pour les microondes.
Les durées indiquées dans les tableaux sont indicatives. Elles
dépendent des récipients, de la qualité, de la température et de
la nature de l'aliment.
Les tableaux indiquent souvent des plages de durée. Réglez
d'abord sur la plus courte durée, puis rallongez-la si
nécessaire.
Il se peut que les quantités dont vous disposez diffèrent de
celles indiquées dans les tableaux. En règle générale :
Double quantité quasiment double durée
Si vous réduisez de moitié la quantité, réduisez d'autant la
durée.
Placez le récipient toujours sur le plateau tournant.
Décongélation
Remarques
■ Disposez les aliments surgelés dans un récipient non fermé
que vous placez sur le plateau tournant.
■ Vous pouvez recouvrir les morceaux délicats, p.ex. les
cuisses et les ailes de poulet ou bien les bords gras des
rôtis, avec de petits morceaux de feuille d'aluminium. La
feuille ne doit pas entrer en contact avec les parois du four. À
la moitié de la durée de décongélation, vous pouvez retirer la
feuille d'aluminium.
■ Un liquide se forme lors de la décongélation de viande et de
volaille. En retournant les aliments, enlever ce liquide. Il ne
doit en aucun cas être utilisé par la suite ou entrer en contact
avec d'autres aliments.
■ Pendant le processus de décongélation, remuer ou retourner
les aliments 1 à 2 fois. Retournez les gros morceaux
plusieurs fois.
■ Laissez reposer les aliments décongelés pendant 10 à
20 minutes à température ambiante, afin que la température
s'égalise. En cas de volaille, vous pouvez alors retirer les
abats. Vous pouvez continuer à transformer la viande même
si elle est encore légèrement congelée au cœur.
Décongélation Poids Puissance microondes en Watt, durée
Conseils
en minutes
Viande de bœuf ou de veau en un
seul morceau (avec ou sans os)
800 g 180 W, 15 min. + 90 W, 10-20 min. 1 kg 180 W, 20 min. + 90 W, 15-25 min.
1,5 kg 180 W, 30 min. + 90 W, 20-30 min.
Viande de bœuf ou de veau en morceaux ou en tranches
200 g 180 W, 2 min. + 90 W, 4-6 min. En les retournant, séparer les pièces
500 g 180 W, 5 min. + 90 W, 5-10 min.
déjà décongelées
800 g 180 W, 8 min. + 90 W, 10-15 min.
Viande hachée, mixte 200 g 90 W, 10 min. La congeler à plat, si possible
500 g 180 W, 5 min. + 90 W, 10-15 min.
Retourner plusieurs fois, enlever la
viande déjà décongelée
800 g 180 W, 8 min. + 90 W, 10-20 min.
Volaille ou morceaux de volaille 600 g 180 W, 8 min. + 90 W, 10-15 min. -
1,2 kg 180 W, 15 min. + 90 W, 20-25 min.
Filet, darnes ou tranches de pois-
400 g 180 W, 5 min. + 90 W, 10-15 min. Séparer les pièces déjà décongelées
son
Légumes, p.ex. petits pois 300 g 180 W, 10-15 min. Fruits, p.ex. framboises 300 g 180 W, 7-10 min. Remuer délicatement régulièrement,
500 g 180 W, 8 min. + 90 W, 5-10 min.
séparer les pièces déjà décongelées.
Dégeler du beurre 125 g 180 W, 1 min. + 90 W, 2-3 min. Retirer l'emballage complètement
250 g 180 W, 1 min. + 90 W, 3-4 min.
Pain entier 500 g 180 W, 6 min. + 90 W, 5-10 min. -
1 kg 180 W, 12 min. + 90 W, 10-20 min.
Gâteau sec, p.ex. cake 500 g 90 W, 10-15 min. Uniquement pour des gâteaux sans
glaçage, chantilly ou crème fraîche,
séparer les morceaux de gâteau
glaçage, chantilly ou gélatine
Gâteau fondant, p.ex. gâteau aux
fruits, gâteau au fromage blanc
750 g 180 W, 5 min. + 90 W, 10-15 min.
500 g 180 W, 5 min. + 90 W, 15-20 min. Uniquement pour des gâteaux sans
750 g 180 W, 7 min. + 90 W, 15-20 min.
30
Page 31

Décongeler, réchauffer ou cuire des préparations surgelés
Remarques
■ Sortez les plats cuisinés de leur emballage. Dans un récipient
micro-ondable ils réchauffent plus rapidement et plus
uniformément. Les différents ingrédients du plat peuvent se
réchauffer plus ou moins vite.
■ Les aliments peu épais se réchauffent plus vite que des
aliments épais. C'est pourquoi il est recommandé de bien
répartir uniformément les aliments dans le récipient afin qu'ils
forment le moins d'épaisseur possible. N'empilez pas les
aliments.
■ Recouvrez toujours les préparations. Si vous ne disposez pas
d'un couvercle adapté à votre récipient, prenez une assiette
ou du film micro-ondable.
■ Remuez ou retournez les aliments 2 à 3 fois pendant le
processus de décongélation, de réchauffage ou de cuisson.
■ Une fois réchauffés, laissez reposer les aliments 2 à
5 minutes pour que la température s'égalise à l'intérieur.
■ Utilisez toujours des gants anti-chaleur ou des maniques
lorsque vous retirez le récipient.
■ Les aliments gardent leur saveur. Vous pouvez donc faire
usage de sel et d'épices avec modération.
Décongeler, faire chauffer ou cuire
des aliments surgelés
Menu, plat, plat cuisiné
Poids Puissance microondes en
Watt, durée en minutes
300400 g 600 W, 8-11 min. -
Remarques
(2-3 composants)
Potage 400 g 600 W, 8-10 min. Potées/Ragoûts 500 g 600 W, 10-13 min. Tranches ou morceaux de viande en
sauce, p.ex. goulasch
500 g 600 W, 12-17 min. En remuant, séparer les morceaux de
viande
Poisson, p.ex. morceaux de filet 400 g 600 W, 10-15 min. Ajouter éventuellement de l'eau, du jus
de citron ou du vin
Soufflés, p.ex. lasagne, cannelloni 450 g 600 W, 10-15 min. Garnitures, p.ex. riz, pâtes 250 g 600 W, 2-5 min. Ajouter un peu de liquide
500 g 600 W, 8-10 min.
Légumes, p.ex. petits pois, brocolis,
carottes
300 g 600 W, 8-10 min. Ajouter de l'eau dans le récipient de
600 g 600 W, 14-17 min.
façon à ce que le fond soit recouvert
Épinards à la crème 450 g 600 W, 11-16 min. Faire cuire sans ajouter de l'eau
Réchauffer des préparations
: Risque de brûlure !
Un retard d'ébullition peut se produire lorsque vous chauffez
des liquides. Cela signifie que la température d'ébullition est
atteinte sans que les bulles de vapeur typiques remontent. À la
moindre secousse ou vibration, le liquide chaud peut alors
subitement déborder et jaillir. Mettez toujours une cuillère dans
le récipient lorsque vous réchauffez un liquide. Vous éviterez
ainsi un retard d'ébullition.
Attention !
Du métal p.ex. une cuillère dans un verre doit se trouver à
une distance d'au moins 2 cm des parois du four et de
l'intérieur de la porte. Des étincelles pourraient détériorer la
vitre de la porte.
Remarques
■ Sortez les plats cuisinés de leur emballage. Dans un récipient
micro-ondable ils réchauffent plus rapidement et plus
uniformément. Les différents ingrédients du plat peuvent se
réchauffer plus ou moins vite.
■ Recouvrez toujours les mets. Si vous ne disposez pas d'un
couvercle adapté à votre récipient, utilisez une assiette ou du
film micro-ondable.
■ Entre-temps, remuez ou retournez les mets plusieurs fois.
Vérifiez la température.
■ Une fois réchauffées, laissez reposer les préparations 2 à
5 minutes pour que la température s'égalise à l'intérieur.
■ Utilisez toujours des gants anti-chaleur ou des maniques
lorsque vous retirez le récipient.
Faire chauffer des mets Poids Puissance microondes en
Remarques
Watt, durée en minutes
Menu, plat, plat cuisiné
350-500 g 600 W, 4-8 min. -
2-3 composants)
Boissons 150 ml 900 W, 1-2 min. Placer une cuillère dans le verre, ne pas chauffer
300 ml 900 W, 3-3 min.
trop les boissons alcoolisées, contrôler régulièrement
500 ml 900 W, 3-4 min.
Aliments pour bébé, p.ex. biberon
de lait
50 ml 360 W, env. ½ min. Sans tétine ou couvercle. Toujours bien agiter
100 ml 360 W, env. 1 min.
200 ml
360 W, 1
^ min.
après le chauffage. Contrôler impérativement la
température !
Potage 1 tasse 200 g 600 W, 2-3 min. Potage, 2 tasses 400 g 600 W, 4-5 min. -
31
Page 32

Faire chauffer des mets Poids Puissance microondes en
Remarques
Watt, durée en minutes
Viande en sauce 500 g 600 W, 811 min. Séparer les tranches de viande
Ragoût/potée 400 g 600 W, 6-8 min. -
800 g 600 W, 811 min. Légumes, 1 portion 150 g 600 W, 2-3 min. Ajouter un peu de liquide
Légumes, 2 portions 300 g 600 W, 3-5 min.
Cuire des préparations
Remarques
■ Les aliments peu épais se réchauffent plus vite que des
aliments épais. C'est pourquoi il est recommandé de bien
répartir uniformément les aliments dans le récipient afin qu'ils
forment le moins d'épaisseur possible. N'empilez pas les
aliments.
■ Faites cuire les aliments dans un récipient fermé. Si vous ne
disposez pas d'un couvercle adapté à votre récipient, utilisez
une assiette ou du film micro-ondable.
■ Les aliments gardent leur saveur. Vous pouvez donc faire
usage de sel et d'épices avec modération.
■ Une fois cuits, laissez reposer les aliments 2 à 5 minutes
pour que la température s'égalise à l'intérieur.
■ Utilisez toujours des gants anti-chaleur ou des maniques
lorsque vous retirez le récipient.
Cuire des mets Poids Puissance microondes en
Remarques
Watt, durée en minutes
Rôti de viande hachée 750 g 600 W, 20-25 min. Cuire à découvert
Poulet entier, frais, sans abats 1,2 kg 600 W, 25-30 min. Retourner à mi-cuisson
Légumes, frais 250 g 600 W, 5-10 min. Couper les légumes en morceaux de même
500 g 600 W, 10-15 min.
grosseur ;
ajouter 1 à 2 c.à s. d'eau pour 100 g de
légumes ;
remuer entre-temps
Pommes de terre 250 g 600 W, 8-10 min. Couper les pommes de terre en morceaux de
500 g 600 W, 11-14 min.
750 g 600 W, 15-22 min.
Riz 125 g 900 W, 5-7 min. +
même grosseur ;
ajouter 1 à 2 c.à s. d'eau pour 100 g ;
remuer entre-temps
Ajouter deux fois son volume de liquide
180 W, 12-15 min.
250 g 900 W, 6-8 min. +
180 W, 15-18 min.
Entremets, p.ex. flan (instant.) 500 ml 600 W, 6-8 min. Entre-temps, bien remuer le flan 2 à 3 fois avec
un fouet
Fruits, compote 500 g 600 W, 912 min. -
Astuces concernant les microondes
Vous ne trouvez pas d'indication de réglage pour la quantité
d'aliments préparée.
Les aliments sont devenus trop secs. La prochaine fois, réglez un temps de cuisson plus court ou choi-
Après écoulement du temps, les aliments ne sont pas encore
décongelés, chauds ou cuits.
Après écoulement du temps de cuisson, les aliments sont
trop chauds au bord mais pas encore cuits au milieu.
Après la décongélation, la volaille ou la viande a commencé à
cuire à l'extérieur, mais n'est pas encore décongelée au
milieu.
Eau de condensation
De l'eau de condensation peut se former à la vitre de la porte,
aux parois intérieures et à la sole. C'est normal. Cela ne
compromet pas le fonctionnement du microondes. Essuyez
l'eau de condensation après la cuisson.
Allongez ou réduisez les temps de cuisson selon la règle générale
suivante :
Si vous doublez la quantité, doublez la durée
Si vous réduisez de moitié la quantité, réduisez d'autant le temps
sissez une plus faible puissance micro-ondes. Couvrez les aliments
et ajoutez plus de liquide.
Réglez un temps plus long. Les aliments placés en grandes quantités et plus épais nécessitent plus de temps.
Remuez régulièrement et la prochaine fois, choisissez une plus
faible puissance et une durée plus longue.
La prochaine fois, choisissez une plus faible puissance
microondes. Lorsqu'il s'agit de grandes quantités, retournez plusieurs fois les aliments à décongeler.
Conseils pour les grillades
Remarques
■ Toutes les valeurs mentionnées sont approximatives et
peuvent varier selon la nature de l'aliment.
■ Grillez toujours sur la grille avec la porte du four fermée et
sans préchauffage.
■ Placez toujours la grille sur le plateau tournant.
32
Page 33

Quantité Accessoire Durée en minutes
Pain à toast (à pré-toaster) 2 à 4 tranches Grille 1ère face : env. 2 à 4
2ème face : env. 2 à 4
Gratiner des toasts 2 à 6 tranches Grille Selon la garniture : 7 à 10
Faire gratiner les soupes,
2 à 4 tasses Plateau tournant env. 15 à 20
par ex. la soupe à l'oignon
Gril combiné avec micro-ondes
Remarques
■ Le mode combiné est particulièrement adapté pour les
soufflés et gratins.
■ Placez le récipient toujours sur le plateau tournant sans
recouvrir le plat.
■ Utilisez un moule élevé pour la cuisson. Cela garantit un
compartiment de cuisson plus propre.
■ Pour des soufflés et gratins, utilisez un grand récipient. Dans
des récipients étroits et hauts, les mets nécessitent plus de
temps pour la cuisson et brunissent davantage à la surface.
Poids Accessoire Puissance
Petits morceaux de poulet,
par ex. cuisses de poulet
env. 800 g Plat sur la
grille
ou ailes de poulet
Ailes de poulet, marinées,
congelées
Gratin de pâtes
(à partir d'ingrédients pré-
env. 800 g Plat sur la
grille
env.1000 g Plateau
tournant
cuits)
Gratin de pommes de terre
(à partir de pommes de
env.1000 g Plateau
tournant
terre crues)
Poisson, gratiné env.400 g Plateau
tournant
Soufflé de fromage env.1000 g Plateau
tournant
Brochettes de légumes 4 - 5 pièces Grille
Brochettes de poisson 4 - 5 pièces Grille
Bardes env. 8 tranches Grille
microondes, Watts
360 W +
360 W +
360 W +
360 W +
360 W +
360 W +
180 W +
180 W +
180 W +
■ Vérifiez si la taille du récipient est adaptée au compartiment
de cuisson. Celui-ci ne doit pas être trop grand afin que le
plateau tournant puisse tourner librement.
■ Veillez à toujours régler le temps de cuisson maximum.
Vérifiez le plat après le temps spécifié le plus court.
■ Laissez reposer la viande de 5 à 10 minutes avant la
découpe. Ainsi, le jus de la viande se répartit uniformément
et ne s'échappe pas lors de la découpe.
■ Le soufflés et gratins doivent encore mijoter 5 minutes une
fois le four éteint.
Durée en
Remarques
minutes
(
30 - 40 min. Le(s) placer coté peau vers le
haut. Ne pas le retourner.
(
(
15 - 25 min. Ne pas le retourner.
25 - 35 min. Saupoudré de fromage. Au
maximum 5 cm de hauteur.
(
(
30 - 40 min. Au maximum 4 cm de hauteur.
20 - 25 min. Décongeler au préalable le
poisson surgelé.
(
(
(
(
30 - 35 min. Au maximum 5 cm de hauteur.
15 - 20 min. Utiliser des brochettes en bois.
10 - 15 min. Utiliser des brochettes en bois.
10 - 15 min.
33
Page 34

Plats tests selon EN 60705
Les laboratoires d'essai se servent de ces plats tests pour
vérifier la qualité et le fonctionnement des appareils microondes.
Selon la norme EN 60705, IEC 60705 ou DIN 44547 et
EN 60350 (2009)
Cuisson et décongélation avec les microondes
Cuisson avec les microondes
Plat Puissance microondes watts, durée en
Lait aux œufs,
750 g
Génoise 600 W, 8-10 min. Placer le moule en Pyrex Ø 22 cm sur le plateau tournant.
Rôti de viande
hachée
Décongeler avec les micro-ondes
Plat Puissance microondes watts, durée en
Viande 180 W, 5-7 min. + 90 W, 10-15 min. Placer le moule en Pyrex Ø 22 cm sur le plateau tournant.
Cuisson avec le mode combiné microondes
Plat Puissance microondes watt, durée en
Gratin de pommes
de terre
minutes
360 W, 12-17 min. + 90 W, 20-25 min. Placer le moule en Pyrex 20 x 25 cm sur le plateau tour-
600 W, 20-25 min. Placer le moule Pyrex sur le plateau tournant.
minutes
minutes
Gril
( + 360 W, 35-40 min.
Remarque
nant.
Remarque
Remarque
Placer le moule en Pyrex Ø 22 cm sur le plateau tournant.
34
Page 35

EN 60705 áØ°UGƒª∏d É≤ah IôÑàîªdG ä’ƒcCɪdG ¥ÉÑWCG
á«∏«¨°ûàdG É¡JAÉØch ∞jhhô쫪dG ¿GôaCG IOƒL QÉÑàNÉH QÉÑàN’G äÉÄ«g âeÉb
.á«dÉàdG ä’ƒcCɪdG ¥ÉÑWCG ∂dP »a káeóîà°ùe
DIN 44547 h IEC 60705 h EN 60705 áØ°UGƒª∏d É≤ah
EN 60350 (2009) h
∞jhhô쫪dG ΩGóîà°SÉH óªéàdG áHGPEGh »¡£dG
∞jhhô쫪dG ¿ôa ΩGóîà°SÉH »¡£dG
á¶MÓe
á¶MÓe
á¶MÓe
.QGhódG øë°üdG ≈∏Y º°S 22 ô£≤H ¢ùcôjÉÑdG ≥ÑW ™°V
≥Ñ£dG »¡£dG øeR ,•GƒdÉH ∞jhhô쫪dG ¿ôa IQób §Ñ°V
≥FÉbódÉH
ºL 750 ,¢†«ÑdG ¥ƒØîeá≤«bO 25-20 ,•Gh 90 + á≤«bO 17-12 ,•Gh 360.QGhódG øë°üdG ≈∏Y º°S 25 x 20 ¢SÉ≤e ,¢ùcôjÉH ≥ÑW
10-8 ,•Gh 600.QGhódG øë°üdG ≈∏Y º°S 22 ô£≤H ¢ùcôjÉÑdG ≥ÑW ™°V
25-20 ,•Gh 600.QGhódG øë°üdG ≈∏Y ¢ùcôjÉÑdG ≥Ñ£dG ™°V
»éæØ°SEG ∂«c≥FÉbO
ΩhôØe ºëd ÖdÉbá≤«bO
∞jhhô쫪dG ¿ôa ΩGóîà°SÉH óªéàdG áHGPEG
≥Ñ£dG »¡£dG øeR ,•GƒdÉH ∞jhhô쫪dG ¿ôa IQób §Ñ°V
≥FÉbódÉH
Ωƒëdá≤«bO 15-10 ,•Gh 90 + ≥FÉbO 7-5 ,•Gh 180.QGhódG øë°üdG ≈∏Y º°S 22 ô£≤H ¢ùcôjÉÑdG ≥ÑW ™°V
∞jhhô쫪dÉH ∑ôà°ûªdG »¡£dG
≥Ñ£dG »¡£dG øeR ,•GƒdÉH ∞jhhô쫪dG ¿ôa IQób §Ñ°V
≥FÉbódÉH
(
ø«JGôL ¢ùWÉ£Há≤«bO 40-35 ,•Gh 360 + ájGƒ°ûdG
18
Page 36

4 ≈dEG 2 ÉÑjô≤J :»fÉãdG ÖfÉédG
Ñjô≤J 20 ≈dEG 15
k
ÜGƒcCG
᫪μdGäÉ«dɪμdG≥FÉbódÉH »¡£dG øeR
(»dhCG ¢ü«ªëJ) ¢ü«ªëà∏d õÑNíFGô°T 4 ≈dEG 2á«μ∏°ùdG áμÑ°ûdG 4 ≈dEG 2 ÉÑjô≤J :∫hC’G ÖfÉédG
6 ≈dEG 2á«μ∏°ùdG áμÑ°ûdG10 ≈dEG 7 :äÉaÉ°VE’G ´ƒf Ö°ùM
4 ≈dEG 2QGhódG øë°üdGÉ
äÉaÉ°VEG ™e â°SƒJíFGô°T
,äÉaÉ°VE’G ™e AÉ°ùëdG
π°üÑdG AÉ°ùM πãe
.¿GQhódG ≈∏Y GQOÉb QGhódG øë°üdG π¶j ¿CG Öéj
.OóëªdG
.ºë∏dG ™«£≤J óæY ≈∏YC’ ôKÉæàj ’ å«ëH …hÉ°ùàdÉH ´Rƒàj ºë∏dG ¢Uƒ°U π©éj
.RÉ¡édG ±É≤jEG ó©H iôNCG
äɶMÓe
»¡£dG øeR
≥FÉbódÉH
•GƒdÉH ∞jhhô쫪dG
.Ö∏≤dÉH º≤J ’
.¬«¡W
■ å«M ,ΩRÓdG øe ôÑcCG ¿ƒμJ ’CG Öéj .»¡£dG õ«ëd áÑ°SÉæe ¿ôØdG »fGhCG ¿CG ócCÉJ
■ ô«°ü≤dG øeõdG AÉ°†≤fG ó©H ΩÉ©£dG ¢üëaG .»¡£∏d øeR ≈°übCG §Ñ°†H ɪFGO ºb
■ Gògh .É¡©«£≤J πÑb iôNCG ≥FÉbO 10 ≈dEG 5 ø«H ìhGôàJ Ióªd CGó¡J Ωƒë∏dG ∑ôJG
■ ≥FÉbO 5 Ióªd RÉ¡édG »a ∑ôàJ ¿CG Öéj øÑédÉH IÉ£¨ªdG äÓcC’Gh äÉæ驪dG
∞jhhô쫪dG ¿ôah ájGƒ°û∏d ∑ôà°ûªdG ΩGóîà°S’G
äɶMÓe
■.øÑédÉH IÉ£¨ªdG äÓcC’Gh äÉæ驪dG »¡W É°ü«°üN Ö°SÉæj ∑ôà°ûªdG 𫨰ûàdG
■.ΩÉ©£dG á«£¨àH º≤J ’h QGhódG øë°üdG ≈∏Y ≥Ñ£dG ɪFGO ™°V
■.»¡£dG õ«M áaɶf ≈∏Y ßaÉëj ∂dP ¿C’ .AGƒ°û∏d ¿ÉcQC’G ™ØJôe ≥ÑW Ωóîà°SG
■ ΩÉ©£dG ¥ô¨à°ùj .øÑédÉH IÉ£¨ªdG äÓcC’Gh äÉæ驪∏d í£°ùe ¿ôa AÉfEG Ωóîà°SG
Ékfƒd …ƒ∏©dG í£°ùdG Ö°ùàμjh á≤«ªYh á≤«°V »fGhCG »a ¬«¡W óæY ∫ƒWCG Ékàbh
.ôãcCG Ék«æH
¿RƒdGäÉ«dɪμdG ¿ôa IQób §Ñ°V
(
+ •Gh 360á≤«bO 40-30 .≈∏YC’ ó∏édG ≈∏Y πªà°ûªdG ÖfÉédG ™°V
ºL 800 »dGƒM ≈∏Y ¿ôa AÉfEG
ájGƒ°ûdG
á«μ∏°ùdG
( + •Gh 360á≤«bO 25-15.Ö∏≤dÉH º≤J ’
ºL
800 »dGƒM ≈∏Y ¿ôa AÉfEG
áYƒ≤æªdG IóªéªdG êÉLódG áëæLCG
ájGƒ°ûdG
á«μ∏°ùdG
(
(
(
(
(
(
(
+ •Gh 360á≤«bO 35-25º°S 5 ´ÉØJQG ≈°übCG .øÑédÉH ¢TôdG
+ •Gh 360á≤«bO 40-30º°S 4 ´ÉØJQG ≈°übCG
+ •Gh 360á≤«bO 25-20 πÑb óªéªdG ∂ª°ùdG øY óªéàdG áHGPEÉH ºb
+ •Gh 360á≤«bO 35-30º°S 5 ´ÉØJQG ≈°übCG
+ •Gh 180á≤«bO 20-15.á«Ñ°ûN OGƒYCG Ωóîà°SG
+ •Gh 180á≤«bO 15-10.á«Ñ°ûN OGƒYCG Ωóîà°SG
+ •Gh 180á≤«bO 15-10
ΩGôL
ΩGôL
1000 »dGƒMQGhódG øë°üdG
1000 »dGƒMQGhódG øë°üdG
400 »dGƒMQGhódG øë°üdG
1000 »dGƒMQGhódG øë°üdG
5-4á«μ∏°ùdG áμÑ°ûdG
5-4á«μ∏°ùdG áμÑ°ûdG
8 »dGƒMá«μ∏°ùdG áμÑ°ûdG
,Iô«¨°U ,êÉLO ™£b
êÉLódG áëæLCG hCG ∑GQhCG πãe
πîdG »a
¿ôa áfhôμ©e
Iõ¡éªdG ±Éæ°UC’G ΩGóîà°SG)
(»¡£∏d
Qƒ°ûѪdG øÑédÉH ¢ùWÉ£H
(áÄ«f ¢ùWÉ£H ΩGóîà°SG)
܃dÉμ°SG ,∂ª°SºL
¢†«HC’G øÑédÉH õÑNΩGôL
äGhô°†îdÉH ÜÉÑc ¢û«°T™£b
∂ª°ùdG ÜÉÑc ¢û«°T™£b
í∏ªªdG º°SódG ºë∏dG íFGô°TíFGô°T
17
Page 37

äɶMÓe
ΩÉ©£dG ø«î°ùJ¿RƒdG ,•GƒdÉH ∞jhhô쫪dG ¿ôa IQób §Ñ°V
≥FÉbódÉH »¡£dG øeR
-
-
ºL 800á≤«bO 11-8 ,•Gh 600
IóMGh áÑLh ,äGhô°†îdGºL 150≥FÉbO 3-2 ,•Gh 600πFÉ°ùdG øe kÓ«∏b GkQób ∞°VCG
300≥FÉbO 5-3 ,•Gh 600
¿ÉàÑLh ,äGhô°†îdGºL
áæîjºL 400≥FÉbO 8-6 ,•Gh 600
á«fó©ªdG á«£¨àdG ≥FÉbQ hCG Ék≤ÑW Ωóîà°SÉa ,¬eóîà°ùJ …òdG ¿ôØdG AÉfE’
.∞jhhô쫪dG ¿ôØd á°ü°üîªdG
.É«Ñ°ùf πbCG πHGƒàdG øe ¬LÉ«àMG
.¬JQGôM áLQO ¢ùfÉéàJ
RÉØb hCG ¿ôØ∏d ¢Tɪb á©£b ÉkªFGO Ωóîà°SG
k
äɶMÓe
.äGhô°†îdG øe ºL 100 πμd AɪdG øe ø«à≤©∏e hCG á≤©∏e ∞°VCG
»¡£dG AÉæKCG É¡Ñ«∏≤àH ºbh
.ºL 100 πμd AɪdG øe ø«à≤©∏e hCG á≤©∏e ∞°VCG
»¡£dG AÉæKCG É¡Ñ«∏≤àH ºbh
.πFGƒ°ùdG øe ᫪μdG ∞©°V ∞°VCG
.»¡£dG AÉæKCG äGôe çÓK hCG ø«Jôe
■ Ö°SÉæe AÉ£Z ∂jód ôaƒàj ºd GPEG .AÉ£¨H IOhõe ¿ôa »fGhCG »a ΩÉ©£dG »¡£H ºb
ΩÉ©£dG »¡W
äɶMÓe
■ ¿ƒμ«°S ºK øeh ,ΩÉ©£∏d õ«ªªdG ¥GòªdG ≈∏Y ®ÉØëdG »a ∂dP óYÉ°ùj ±ƒ°S
»a √Oôa ºàj å«ëH ΩÉ©£dG ™jRƒàH Ωƒ≤J ¿CG »¨Ñæj ∂dòdh .äÉ≤ÑW »a áYƒ°VƒªdG
■ å«ëH á«aÉ°VEG ≥FÉbO 5 h ø«à≤«bO ø«H ìhGôàJ Ióªd ΩÉ©£dG ∑ôJG ,»¡£dG ó©H
■.¿ôØdG øe ¥ÉÑWC’G êGôNEG óæY ¿ôØ∏d G
.É¡°†©H ¥ƒa äÉ≤ÑW »a áØ∏àîªdG ᪩WC’G ™°Vh Rƒéj ’ .¿ÉμeE’G Qób ¿ôØdG AÉfEG
■ ᪩WC’G øe ´ô°SCG πμ°ûH É¡«¡W ºàj »≤aCG iƒà°ùe ≈∏Y IOhôتdG ᪩WC’G
ΩÉ©£dG »¡W¿RƒdG ,•GƒdÉH ∞jhhô쫪dG ¿ôa IQób §Ñ°V
≥FÉbódÉH »¡£dG øeR
ΩhôØe ºëd ÖdÉbºL 750á≤«bO 25-20 ,•Gh 600AÉ£Z ¿hóH »¡W
1.2á≤«bO 30-25 ,•Gh 600»¡£dG øeR ∞°üf Qhôe ó©H É¡Ñ∏bG
…hÓμdGh óÑμdG ¿hóH ,áLRÉW ,á∏eÉc áLÉLOºéc
250≥FÉbO 10-5 ,•Gh 600 .ºéëdG ájhÉ°ùàe ™£b ≈dEG äGhô°†îdG ™«£≤àH ºb
500á≤«bO 15-10 ,•Gh 600
ºL
500á≤«bO 14-11 ,•Gh 600
ºL
ºL 750á≤«bO 22-15 ,•Gh 600
á≤«bO 15-12 ,•Gh 180
250 + ≥FÉbO 8-6 ,•Gh 900
ºL
á≤«bO 18-15 ,•Gh 180
πe 500≥FÉbO 8-6 ,•Gh 600 ¢†«ÑdG á≤Øîe ΩGóîà°SÉH Gó«L Oôà°SÉμdG èæjOƒH Ö«∏≤àH ºb
-
500á≤«bO 12-9 ,•Gh 600
èæjOƒÑdG πãe ,IÓëªdG ᪩WC’G
áLRÉ£dG äGhô°†îdGºL
¢ùWÉ£ÑdGºL 250≥FÉbO 10-8 ,•Gh 600 ,ºéëdG ájhÉ°ùàe ™£b ≈dEG ¢ùWÉ£ÑdG ™«£≤àH ºb
RQC’GºL 125 + ≥FÉbO 7-5 ,•Gh 900
(õ«¡éàdG á©jô°S)
äƒÑªc ,¬cGƒaºL
:á«dÉàdG á«∏ª©dG IóYÉ≤dG ΩGóîà°SÉH »¡£dG áæeRCG π«∏≤J hCG IOÉjõH ºb
ÉÑjô≤J »¡£dG øeR ∞©°V = ᫪μdG ∞©°V
»¡£dG øeR ∞°üf = ᫪μdG ∞°üf
.πFGƒ°ùdG øe ójõªdG ∞°VCGh ΩÉ©£dG á«£¨àH ºb
¿ôa IQó≤d πbCG §Ñ°V ™°Vh áeOÉ≤dG IôªdG »a ôàNGh »¡£dG øeR AÉæKCG ΩÉ©£dG Ö«∏≤àH ºb
.∫ƒWCG »¡W øeRh ∞jhhô쫪dG
óªéàdG áHGPEÉH Ωƒ≤J ÉeóæY .∞jhhô쫪dG ¿ôa IQó≤d πbCG §Ñ°V ™°Vh áeOÉ≤dG IôªdG »a ôàNG
.äGôe IóY É¡Ñ∏≤H ºb ,ΩÉ©£dG øe Iô«Ñc ᫪c øY
AGƒ°û∏d íFÉ°üf
äɶMÓe
■ Ö°ùM ∞∏àîJ ¿CG øμªjh ájOÉ°Tôà°SG ɪ«b ’EG »g Ée IQƒcòªdG º«≤dG ™«ªL
.∂eÉ©W ¢UGƒN
■ »¡£dG õ«M ÜÉH ≥∏Z IÉYGôe ™e ,á«μ∏°ùdG áμÑ°ûdG ≈∏Y ºë∏dG AGƒ°ûH É
ªFGO ºb
.≥Ñ°ùe πμ°ûH RÉ¡édG ø«î°ùàH º≤J ’h
ªFGO á«μ∏°ùdG áμÑ°ûdG ™°V
k
k
■.QGhódG øë°üdG ≈∏Y É
∞jhhôμ«ŸG ¿ôØH á°UÉN íFÉ°üf
᫪μH á≤∏©àªdG §Ñ°†dG ´É°VhCG ¢Uƒ°üîH äÉeƒ∏©e ájCG ≈∏Y Qƒã©dG ∂æμªj ’
.√OGóYEÉH âªb …òdG ΩÉ©£dG
.Iô«Ñc áLQóH ᪩WC’G ±ÉØL .∞jhhô쫪dG ¿ôa IQó≤d πbCG §Ñ°V ™°Vh ôàNG hCG áeOÉ≤dG IôªdG »a ô°übCG »¡W øeR §Ñ°VG
.¬«¡W hCG ¬æ«î°ùJ ºàj ’ hCG ΩÉ©£dG óªéJ áHGPEG ºàj ’ »¡£dG øeR AÉ°†≤fG óæY.Ék«Ñ°ùf á∏jƒW äGôàa ≈dEG êÉàëJ äÉ≤Ñ£dG IOó©àe ᪩WC’Gh Iô«ÑμdG äÉ«ªμdG .∫ƒWCG Iôàa §Ñ°VG
ɪæ«H áaÉëdG øe áWôتdG áfƒî°ù
ø«M »a ,êQÉîdG øe ºë∏dG hCG Qƒ«£dG øY óªéàdG áHGPEG ºàj óªéàdG áHGPEG ó©H
Gòg .RÉ¡édG á«°VQCGh á«∏NGódG ¿GQóédGh ÜÉÑdG IòaÉf ≈∏Y ∞ãμàe AÉe ô¡¶j ɪHQ
øe AÉ¡àf’G ó©H ∞ãμàªdG AɪdG í°ùeG .¿ôØdG πªY ≈∏Y ôKDƒj ’ ƒgh .»©«ÑW ôeCG
∏d ΩÉ©£dG ¢Vô©àj »¡£dG øeR AÉ°†≤fG óæY
.πNGódG øe è°†æj ºd
.πNGódG øe Ióªéàe π¶J
AɪdG ∞ãμJ
.»¡£dG á«∏ªY
16
Page 38

¿ôØd á°ü°üîªdG á«fó©ªdG á«£¨àdG ≥FÉbQ hCG Ék≤ÑW Ωóîà°SÉa ,¬eóîà°ùJ
.∞jhhô쫪dG
.¬JQGôM áLQO ¢ùfÉéàJ
RÉØb hCG ¿ôØ∏d ¢Tɪb á©£b ÉkªFGO Ωóîà°SG
k
.É«Ñ°ùf πbCG πHGƒàdG øe ¬LÉ«àMG
■ …òdG ¿ôØdG AÉfE’ Ö°SÉæe AÉ£Z ∂jód ôaƒàj ºd GPEG .ΩÉ©£dG á«£¨àH ɪFGO ºb
■.»¡£dG AÉæKCG äGôe çÓK hCG ø«Jôe ¬Ñ∏b hCG ΩÉ©£dG Ö«∏≤àH ºb
■ å«ëH á«aÉ°VEG ≥FÉbO 5 h ø«à≤«bO ø«H ìhGôàJ Ióªd ΩÉ©£dG ∑ôJG ,ø«î°ùàdG ó©H
IóªéªdG ᪩WC’G »¡W hCG ø«î°ùàdG hCG óªéàdG áHGPEG
êÉàëJ ’ ób .∞jhhô쫪dG ¿ôØd áÑ°SÉæªdG ¿ôØdG »fGhCG »a É°ùfÉéJ ôãcCG πμ°ûHh
.ø«î°ùà∏d ΩRÓdG âbƒdG øe Qó≤dG ¢ùØæd áÑLƒdÉH áØ∏àîªdG ±Éæ°UC’G
■.¿ôØdG øe ¥ÉÑWC’G êGôNEG óæY ¿ôØ∏d G
»a √Oôa ºàj å«ëH ΩÉ©£dG ™jRƒàH Ωƒ≤J ¿CG »¨Ñæj ∂dòdh .äÉ≤ÑW »a áYƒ°VƒªdG
■ ¿ƒμ«°S ºK øeh ,ΩÉ©£∏d õ«ªªdG ¥GòªdG ≈∏Y ®ÉØëdG »a ∂dP óYÉ°ùj ±ƒ°S
.É¡°†©H ¥ƒa äÉ≤ÑW »a áØ∏àîªdG ᪩WC’G ™°Vh Rƒéj ’ .¿ÉμeE’G Qób ¿ôØdG AÉfEG
äɶMÓe
■ ´ô°SCG âbh »a äÉÑLƒdG √òg ø«î°ùJ ºàj .É¡JGƒÑY øe IõgÉédG äÉÑLƒdG êôNCG
■ ᪩WC’G øe ´ô°SCG πμ°ûH É¡«¡W ºàj »≤aCG iƒà°ùe ≈∏Y IOhôتdG ᪩WC’G
äɶMÓe
≥FÉbódÉH »¡£dG øeR ,•GƒdÉH
-
-
-
-
≥Ñ£dG
!¬«ÑæJ
π≤J ’ áaÉ°ùe ≈∏Y ,܃μdG πNGO á≤©∏ªdG πãe ,á«fó©ªdG AÉ«°TC’G ™°VƒoJ ¿CG Öéj
±ÓJEG »a Qô°ûdG ÖÑ°ùàj ó≤a .ÜÉÑ∏d »∏NGódG ÖfÉédGh ¿ôØdG ¿GQóL øe º°S 2 øY
.¬MÓ°UEG Ö©°üj πμ°ûH ÜÉÑ∏d »∏NGódG ÖfÉédÉH êÉLõdG
äɶMÓe
êÉàëJ ’ ób .∞jhhô쫪dG ¿ôØd áÑ°SÉæªdG ¿ôØdG »fGhCG »a É°ùfÉéJ ôãcCG πμ°ûHh
.ø«î°ùà∏d ΩRÓdG âbƒdG øe Qó≤dG ¢ùØæd áÑLƒdÉH áØ∏àîªdG ±Éæ°UC’G
.∞jhhô쫪dG ¿ôØd á°ü°üîªdG á«fó©ªdG á«£¨àdG ≥FÉbQ hCG
.¬JQGôM áLQO ¢ùfÉéàJ
RÉØb hCG ¿ôØ∏d ¢Tɪb á©£b ÉkªFGO Ωóîà°SG
k
¿RƒdG ∞jhhô쫪dG ¿ôa IQób §Ñ°V
ºL 400-300á≤«bO 11-8 ,•Gh 600
᪩WC’G »¡W hCG ø«î°ùàdG hCG óªéàdG áHGPEG
IõgÉL áÑLh ,áÑLh ≥ÑW ,á∏eÉμàe áÑLh
ºë∏dG ¢TÓL πãe ,¢Uƒ°üdÉH ºë∏dG ™£b hCG íFGô°TºL 500á≤«bO 17-12 ,•Gh 600Ö«∏≤àdG AÉæKCG ºë∏dG ™£b π°üaG
400á≤«bO 15-10 ,•Gh 600áÑZôdG Ö°ùM ¿ƒª«∏dG ô«°üY hCG AɪdG ¢†©H ∞°VCG
450á≤«bO 15-10 ,•Gh 600
»fƒ∏«fÉμdGh É«fGRÓdG πãe ,äÉæé©eºL
¬«∏«ØdG íFGô°T πãe ,∑ɪ°SCGºL
áfhô쩪dG ,RQC’G πãe ,á«ÑfÉL ¥ÉÑWCGºL 250≥FÉbO 5-2 ,•Gh 600πFÉ°ùdG øe kÓ«∏b GkQób ∞°VCG
500≥FÉbO 10-8 ,•Gh 600
ºL
QõédG ,»∏chôÑdG ,A’RÉÑdG πãe äGhô°†îdGºL 300≥FÉbO 10-8 ,•Gh 600 ô©b »£¨J å«ëH ≥Ñ£dG »a AɪdG ¢†©H Ö°üH ºb
600á≤«bO 17-14 ,•Gh 600
ºL
ΩÉ©£dG ø«î°ùJ
!äGAGƒàcÉH áHÉ°UE’G ô£N
π°üj πFÉ°ùdG ¿CG »æ©j Gògh .πFGƒ°ùdG ø«î°ùJ AÉæKCG ¿É«∏¨dG »a ôNCÉJ çóëj ¿CG øμªj
πbCG ™eh .í£°ùdG ≈∏Y IOÉ੪dG QÉîÑdG äÉYÉ≤a óYÉ°üàJ ¿CG ¿hO ¿É«∏¨dG áLQO ≈dEG
AÉæKCG ɪFGO ¢UôMG .PGPQ ôjÉ£àj hCG Iƒ≤H øNÉ°ùdG πFÉ°ùdG QƒØj ¿CG øμªj AÉYƒ∏d ácôM
■ ´ô°SCG âbh »a äÉÑLƒdG √òg ø«î°ùJ ºàj .É¡JGƒÑY øe IõgÉédG äÉÑLƒdG êôNCG
■ ≥ÑW Ωóîà°SÉa ,∂FÉYƒd Ö°SÉæe AÉ£Z ∂jód ôaƒàj ºd GPEG .ΩÉ©£dG á«£¨àH ɪFGO ºb
■.IQGôëdG áLQO ™LGQh .ø«î°ùàdG Ióe AÉæKCG äGôe IóY ΩÉ©£dG Ö∏b hCG Ö«∏≤àH ºb
■ å«ëH á«aÉ°VEG ≥FÉbO 5 h ø«à≤«bO ø«H ìhGôàJ Ióªd ΩÉ©£dG ∑ôJG ,ø«î°ùàdG ó©H
■.¿ôØdG øe ¥ÉÑWC’G êGôNEG óæY ¿ôØ∏d G
.¿É«∏¨dG ôNCÉJ IôgÉX ÖæéàJ ∂dòHh .AÉYƒdG πNGO á≤©∏e ™°Vh ≈∏Y πFGƒ°ùdG ø«î°ùJ
IóªéªdG
(áKÓK hCG ¿ÉØæ°U)
AÉ°ùMºL 400≥FÉbO 10-8 ,•Gh 600
áæîjºL 500á≤«bO 13-10 ,•Gh 600
ïfÉÑ°ùdG ¿ƒé©eºL 450á≤«bO 16-11 ,•Gh 600»aÉ°VEG AÉe ¿hóH »¡£dÉH ºb
:
15
äɶMÓe
ø«î°ùàdG AÉæKCG Ühô°ûªdG ÖbGQh ,•ôØe πμ°ûH
IQGôëdG áLQO á©LGôe øe óH ’h .ø«î°ùàdG
ΩÉ©£dG ø«î°ùJ¿RƒdG ,•GƒdÉH ∞jhhô쫪dG ¿ôa IQób §Ñ°V
≥FÉbódÉH »¡£dG øeR
-
ºL 350-500≥FÉbO 8-4 ,•Gh 600
300≥FÉbO 3-3 ,•Gh 900
πe
πe 500≥FÉbO 4-3 ,•Gh 900
100IóMGh á≤«bO »dGƒM ,•Gh 360
πe
πe 200á≤«bO 1^ ,•Gh 360
-
-
IõgÉL áÑLh ,áÑLh ≥ÑW ,á∏eÉμàe áÑLh
(áKÓK hCG ¿ÉØæ°U)
äÉHhô°ûªdGπe 150á≤«bO 2-1 ,•Gh 900 á«dƒëμdG äÉHhô°ûªdG ø«î°ùàH º≤J ’h ,܃μdG »a á≤©∏e ™°V
áYÉ°VôdG äÉLÉLR πãe ,™°VôdG ΩÉ©Wπe 50á≤«bO ½ »dGƒM ,•Gh 360 ó©H Gó«L áLÉLõdG êôH ɪFGO ºbh .á«£ZC’G hCG äɪ∏ëdG ™∏NG
óMGh ܃c ,AÉ°ùMºL 200≥FÉbO 3-2 ,•Gh 600
¿ÉHƒc ,AÉ°ùMºL 400≥FÉbO 5-4 ,•Gh 600
¢Uƒ°üdÉH ºëdºL 500á≤«bO 11-8 ,•Gh 600ºë∏dG íFGô°T π°üaG
Page 39

≈àM iôNCG ≥FÉbO 10 ≈dEG 5 øe Ióªd CGó¡j ΩÉ©£dG ∑ôJG èeÉfôÑdG AÉ¡àfG OôéªH
.á°ùfÉéàe IQGôM áLQO ≈dEG π°üj
èeÉfôÑdG ºbQΩGôLƒ∏«μdÉH ¿RƒdG ¥É£f
∑ôà°ûªdG »¡£dG èeÉfôH
0.9 - 0.4
,Ióªée ,äGRƒÑîe
º°S 3 ≈dEG π°üj É¡YÉØJQG
P 08
ÉæH ¢UÉîdG »¡£dG ƒjOƒà°S »a Égô«°†ëJ ºJ »àdG ¥ÉÑWC’G
■áFó¡àdG Iôàa
∑ôà°ûªdG »¡£dG èeÉfôH
äɶMÓe
■¿ôØdG »fGhCG
¿ƒμJ ¿CG ≈∏Y ,ΩRÓdG øe ôãcCG Iô«Ñc â°ù«d ¿ôa »fGhCG »a ΩÉ©£dG »¡£H ºb
.∞jhhô쫪dG ¿ôØd áÑ°SÉæeh áfƒî°ù∏d áehÉ≤e
■᪩WC’G OGóYEG
,≥«bódG ¿RƒdG ∫ÉNOEG Qò©J GPEG .¬fRƒH ºbh ∞«∏¨àdG IƒÑY øe ΩÉ©£dG êôNCG
.Öjô≤àdÉH ¬Ñ°ùMÉa
óªéàdG áHGPEG
äɶMÓe
¿CG Rƒéj ’ .Ωƒ«æeƒdC’G ≥FÉbQ øe Iô«¨°U ™£≤H É¡«à£¨J øμªj AGƒ°ûdG ºë∏d
ó©H Ωƒ«æeƒdC’G ≥FÉbQ ádGREG ∂æμªj .¿ôØdG ¿GQóL Ωƒ«æeƒdC’G ≥FÉbQ ¢ùeÓJ
.óªéàdG áHGPEG âbh ∞°üf AÉ°†≤fG
¬∏©éJ ’h iôNCG ¢VGôZCG ájC’ ±hôX ájCG âëJ ¬eóîà°ùJ ’h Qƒ«£dGh Ωƒë∏dG Ö∏b
.iôNCG ᪩WCG ájCG ¢ùeÓj
.äGôe IóY Iô«ÑμdG ΩÉ©£dG
ªdG ᪩WC’G ∑ôJG
»a øμªjh .á∏Kɪàe IQGôM áLQO ≈dEG AGõLC’G ™«ªL π°üJ ≈àM iôNCG á≤«bO 20
¿Éc ¿EGh ≈àM ºë∏dG ô«°†ëJ øμªj .Qƒ«£∏d á«∏NGódG AÉ°ûMC’G ádGREG âbƒdG Gòg
.πNGódG øe kÓ«∏b Gkóªée ∫Gõj ’
äɶMÓe
-
É¡æY ÜGòoj ºëd ™£b ájCG π°üaGh ,äGôe IóY ¬Ñ∏bGh
óªéàdG
-
-
óªéàdG É¡æY ÜGòoj AGõLCG
-
∂«μdG ™£b π°üaG ,Oôà°SÉc hCG áªjôc
ø«JÓ«¸ hCG áªjôc
o
∂d í°Vƒf ±ƒ°Sh .É¡d á«dÉãªdG §Ñ°†dG ´É°VhCGh äÉØ°UƒdG øe ábÉH Éæg óéà°S
.√OGóYEÉH Ωƒ≤J …òdG ≥Ñ£∏d áÑ°ùædÉH ∞jhhô쫪dG ¿ôa IQó≤d §Ñ°V ™°Vh π°†aCG
.ô«°†ëàdG ¥ôWh ¿ôØdG »fGhCG ∫ƒM íFÉ°üf É°†jCG ∑Éæg
■.QGhódG øë°üdG ≈∏Y ìƒàØe AÉYh »a óªéàªdG ΩÉ©£dG ™°V
■ á«LQÉîdG á«ægódG äÉ≤Ñ£dG hCG êÉLódG áëæLCGh πLQCG πãe ,á°SÉ°ùëdG AGõLC’G
∫hGóédG ¢Uƒ°üîH äÉeƒ∏©e
.∞jhhô쫪dG ¿ôØd §Ñ°†dG ´É°VhCGh äGQÉ«îdG øe ójó©dG á«dÉàdG ∫hGóédG ∂d Ωó≤J
É©ÑJ ähÉØàJ óbh .§≤a ájOÉ°Tôà°SG º«b áHÉãªH ∫hGóédG »a IOóëªdG äÉbhC’G ó©J
.ΩÉ©£dG ΩGƒb á©«ÑWh IQGôM áLQOh IOƒL iƒà°ùeh áeóîà°ùªdG ¿ôØdG »fGhC’
■ óæY πFÉ°ùdG Gòg øe ¢ü∏îJ .Qƒ«£dG hCG Ωƒë∏dG øY óªéàdG áHGPEG óæY πFÉ°S èàæj
ájGóÑdG »a á«æeR Ióe ô°übCG §Ñ°VG .∫hGóédG »a á«æeõdG äÉbÉ£ædG ójóëJ ÉÑdÉZ ºàj
.Ωhõ∏dG óæY É¡JOÉjõH ºb ºK
IóYÉ≤dG ΩGóîà°SG øμªj .∫hGóédG »a IOóëªdG ∂∏J øY áØ∏àîe äÉ«ªc ∂jód ¿ƒμj ób
■ ™£b Ö∏b »¨Ñæjh .óªéàdG áHGPEG Ióe AÉæKCG ø«Jôe hCG Iôe ΩÉ©£dG Ö«∏≤J hCG Ö∏≤H ºb
■ ≈dEG 10 øe Ióªd áaô¨dG IQGôM áLQO »a óªéàdG É¡æY ÜGò
ÉÑjô≤J »¡£dG øeR ∞©°V - ᫪μdG ∞©°V
.»¡£dG øeR ∞°üf - ᫪μdG ∞°üf
.QGhódG øë°üdG ≈∏Y ¿ôØdG »fGhCG ɪFGO ™°V
≥FÉbódÉH »¡£dG
ºL 800á≤«bO 20-10 ,•Gh 90 + á≤«bO 15 ,•Gh 180
ºéc 1.5á≤«bO 30-20 ,•Gh 90 + á≤«bO 30 ,•Gh 180
ºL
ºL 800á≤«bO 15-10 ,•Gh 90 + ≥FÉbO 8 ,•Gh 180
ºL
ºL 800á≤«bO 20-10 ,•Gh 90 + ≥FÉbO 8 ,•Gh 180
ºéc 1.2á≤«bO 25-20 ,•Gh 90 + á≤«bO 15 ,•Gh 180
ºL
ºL
ºL
ºL
ƒ∏àÑdG ºëd hCG …ô≤ÑdG ºë∏dG) á∏eÉμdG ºë∏dG ™£b
ºéc 1á≤«bO 25-15 ,•Gh 90 + á≤«bO 20 ,•Gh 180
(º¶Y ¿hóH hCG º¶©dÉH -
ƒ∏àÑdG ºëd hCG …ô≤ÑdG ºë∏dG íFGô°T hCG ™£bºL 200≥FÉbO 6-4 ,•Gh 90 + á≤«bO 2 ,•Gh 180Ö∏≤dG AÉæKCG óªéàdG É¡æY ÜGòoj AGõLCG ájCG π°üaG
500≥FÉbO 10-5 ,•Gh 90 + ≥FÉbO 5 ,•Gh 180
500á≤«bO 15-10 ,•Gh 90 + ≥FÉbO 5 ,•Gh 180
Qƒ«£dG AGõLCG hCG Qƒ«£dGºL 600á≤«bO 15-10 ,•Gh 90 + ≥FÉbO 8 ,•Gh 180
íFGô°T hCG ∂ª°S íFGô°T ,¬«∏«a ∂ª°SºL 400á≤«bO 15-10 ,•Gh 90 + ≥FÉbO 5 ,•Gh 180óªéàdG É¡æY ÜGòj AGõLCG ájCG π°üaG
300á≤«bO 15-10 ,•Gh 180
A’RÉÑdG πãe äGhô°†NºL
≥«∏o©dG äƒJ πãe ,á¡cÉaºL 300≥FÉbO 10-7 ,•Gh 180 ájCG π°üaGh óªéàdG áHGPEG AÉæKCG ájÉæ©H É¡Ñ«∏≤àH ºb
500≥FÉbO 10-5 ,•Gh 90 + ≥FÉbO 8 ,•Gh 180
250≥FÉbO 4-3 ,•Gh 90 + á≤«bO 1 ,•Gh 180
ºéc 1á≤«bO 20-10 ,•Gh 90 + á≤«bO 12 ,•Gh 180
500á≤«bO 15-10 ,•Gh 90 hCG ¢SÓL ≈∏Y ájƒàëªdG ô«Z ∂«μdG ´GƒfC’ §≤a
750á≤«bO 15-10 ,•Gh 90 + ≥FÉbO 5 ,•Gh 180
500á≤«bO 20-15 ,•Gh 90 + ≥FÉbO 5 ,•Gh 180 hCG ¢SÓL ≈∏Y ájƒàëªdG ô«Z ∂«μdG ´GƒfC’ §≤a
750á≤«bO 20-15 ,•Gh 90 + ≥FÉbO 7 ,•Gh 180
Óãe »éæØ°SEG ∂«c ,±ÉL ,∂«cºL
k
Óãe ∂«c õ«°ûJh ¬cGƒa ∂«c ,ÖWQ ,∂«cºL
k
§∏àîe ΩhôØe ºëdºL 200≥FÉbO 10 ,•Gh 90 √ó«ªéJ óæY ¿ÉμeE’G Qób ΩÉ©£dG OôaG
óªéàdG áHGPEG ,óHõdGºL 125≥FÉbO 3-2 ,•Gh 90 + á≤«bO 1 ,•Gh 180∞«∏¨àdG OGƒe ™«ªL ádGREÉH ºb
:á«dÉàdG á«∏ª©dG
óªéàdG áHGPEG¿RƒdG øeR ,•GƒdÉH ∞jhhô쫪dG ¿ôa IQób §Ñ°V
õÑN ÖdÉbºL 500≥FÉbO 10-5 ,•Gh 90 + ≥FÉbO 6 ,•Gh 180
14
Page 40

»aõN hCG »LÉLR ≥Ñ£c ,∞jhhô쫪∏d Ö°SÉæe í£°ùe AÉYh »a ΩÉ©£dG ™°V
.¬à«£¨J ¿hO øμdh ,kÓãe
≈àM iôNCG á≤«bO 30 ≈dEG 10 øe Ióªd óªéàdG ¬æY ÜGòoªdG ΩÉ©£dG ∑ôJ Öéj
∫ƒWCG IôàØd ∑ôàoJ ¿CG Ö∏£àJ Iô«ÑμdG ºë∏dG ™£b .á°ùfÉéàe IQGôM áLQO ≈dEG π°üj
ºë∏dG ™£bh á룰ùªdG ºë∏dG íFGô°T π°üa »¨Ñæj ɪc .Iô«¨°üdG ™£≤dG øe
.É¡côJ πÑb ¢†©ÑdG É¡°†©H øY ΩhôتdG
ºë∏dG ™£b âfÉc GPEG ≈àM ,ΩÉ©£dG OGóYEG á∏°UGƒe ∂æμªj IôàØdG √òg AÉ°†≤fG ó©H
á«∏NGódG AÉ°ûMC’G ádGREG âbƒdG Gòg »a øμªjh .§°SƒdG »a Ióªéàe ∫GõJ ’ á쫪°ùdG
.Qƒ«£∏d
π°üaGh RÉ¡édG ÜÉH íàaG .Oóëe âbh ó©H á«Jƒ°U IQÉ°TEG Qó°üJ èeGôÑdG ¢†©H ™e
≈∏Y §¨°VG ºK ÜÉÑdG ≥∏ZCG .Qƒ«£dG hCG ºë∏dG ™£b Ö∏bG hCG É¡°†©H øY ΩÉ©£dG AGõLCG
.(𫨰ûJ) Start QõdG
èeÉfôÑdG ºbQΩGôLƒ∏«μdÉH ¿RƒdG ¥É£f
óªéàdG áHGPEG
■¿ôØdG »fGhCG
.¢Vô©dG IóMh ‘ »°SÉ«≤dG ¿RƒdGh
■áFó¡àdG Iôàa
■á«Jƒ°üdG IQÉ°TE’G
.1 QõdG ≈∏Y §¨°VG
"P" õeôdG ô¡¶j
.2
.3 .≥Ñ£dG ¿Rh ójóëàd QGhódG QÉ«àN’G ìÉàØe QOCG
.4 .(𫨰ûJ) Start QõdG ≈∏Y §¨°VG
1.00 - 0.20
1.00 - 0.20
1.80 - 0.40
1.00 - 0.20
ΩhôØe ºëd
ºëd ™£b
êÉLO ™£b ,êÉLO
õÑN
P 01
P
02
P
03
P
04
á«μ«JÉeƒJhC’G èeGôÑdG ΩGóîà°SÉH »¡£dG
.äGhô°†îdG hCG ¢ùWÉ£ÑdG hCG RQC’G »¡W ∂æμªj ,áKÓãdG »¡£dG èeGôH ΩGóîà°SÉH
äɶMÓe
áÑ°ùædÉHh .AÉ£¨H IOhõeh ∞jhhô쫪∏d áÑ°SÉæe ¿ôa »fGhCG »a ΩÉ©£dG »¡W Öéj
.≥«ªYh ô«Ñc ≥ÑW ΩGóîà°SG »¨Ñæj ,RQCÓd
.ºFÓªdG èeÉfôÑdG §Ñ°V πLCG шe ¬fRh бaф©ªd кЙала°S .ΩÉ©£dG ¿RƒH ºb
:RQC’G
ƒg ɪc ,áHƒ∏£ªdG AɪdG ᫪c ∞°VCG .»¡£dG ¢SÉ«cCG »a CÉÑ©ªdG RQC’G Ωóîà°ùJ ’
hCG RQC’G ¿Rh ∞©°V ¿ƒμJ Ée IOÉYh .IƒÑ©dG ≈∏Y áfhóªdG äGOÉ°TQE’G »a í°Vƒe
.¬dÉãeCG áKÓK
:¢ùWÉ£ÑdG
™£b ≈dEG áLRÉ£dG ¢ùWÉ£ÑdG ™«£≤J ≈∏Y ¢UôMG ,ábƒ∏°ùªdG ¢ùWÉ£Ñ∏d áÑ°ùædÉH
,ábƒ∏°ùªdG ¢ùWÉ£ÑdG øe ºL
™«£≤àH ºb ºK .É¡æe IóFGõdG AGõLC’G ádGREG ó©H áLRÉ£dG äGhô°†îdG ¿RƒH ºb
100 πμd AɪdG øe á≤©∏e ∞°VCG .ájhÉ°ùàeh Iô«¨°U ™£b ≈dEG äGhô°†îdG
ºL
.ΩÉ©£dG Ö«∏≤àH ºb .áæ«©e Iôàa ó©H á«Jƒ°U IQÉ°TEG Qó°üJ ,èeÉfôÑdG 𫨰ûJ AÉæKCG
Ióªd ΩÉ©£dG ∑ôJ »¨Ñæjh .iôNCG Iôe ΩÉ©£dG Ö«∏≤àH ºb ,èeÉfôÑdG AÉ¡àfG OôéªH
.á°ùfÉéàe IQGôM áLQO ≈dEG π°üj ≈àM iôNCG ≥FÉbO
0.2 - 0.05
1.0 - 0.15
1.0 - 0.15
100 πμd AÉe á≤©∏e ∞°VCG .ájhÉ°ùàeh Iô«¨°U
.í∏ªdG øe kÓ«∏bh
:áLRÉ£dG äGhô°†îdG
.äGhô°†îdG øe
10 ≈dEG 5 øe
.¬°ùfÉéJh ΩÉ©£dG IOƒL ≈∏Y óªà©J »¡£dG áé«àf
èeÉfôÑdG ºbQΩGôLƒ∏«μdÉH ¿RƒdG ¥É£f
»¡£dG
RQC’G
¢ùWÉ£ÑdG
äGhô°†îdG
P 05
P
06
P
07
.èeÉfôÑ∏d OóëªdG »¡£dG øeõd »dRÉæàdG ó©dG ∂d ô¡¶«a
»¡£dG øeR AÉ°†≤fG
■¿ôØdG »fGhCG
■᪩WC’G OGóYEG
■á«Jƒ°üdG IQÉ°TE’G
■áFó¡àdG Iôàa
ô¡¶àa .(±É≤jEG) Stop QõdG ≈∏Y §¨°VG hCG RÉ¡édG ÜÉH íàaG .á«Jƒ°U IQÉ°TEG Qó°üJ
.§Ñ°†dG óYCGh ø«Jôe (±É≤jEG) Stop QõdG ≈∏Y §¨°VG
,ÜÉÑdG ≥∏Z ó©H .RÉ¡édG ÜÉH íàaG hCG IóMGh Iôªd (±É≤jEG) Stop QõdG ≈∏Y §¨°VG
START QõdG ≈∏Y §¨°VG
.(𫨰ûJ)
Stop QõdG ≈∏Y §¨°VG ºK ÜÉÑdG íàaG hCG ø«Jôe (±É≤jEG) Stop QõdG ≈∏Y §¨°VG
.IóMGh Iôªd (±É≤jEG)
Start QõdG ≈∏Y §¨°VG ≥∏¨dG ó©H .Qƒ«£dG hCG ºë∏dG Ö∏b hCG ΩÉ©£dG Ö«∏≤àH
(𫨰ûJ)
hCG g ΩGóîà°SÉH ¿RƒdGh èeÉfôÑdG ºbQ øY ΩÓ©à°S’G ∂æμªj
1
.¢Vô©dG IóMh »a ¿GƒK 3 Ióªd É¡æY º∏©à°ùªdG
á«μ«JÉeƒJhC’G èeGôÑdG ΩGóîà°SÉH óªéàdG áHGPEG
Qƒ«£dGh Ωƒë∏dG øY óªéàdG áHGPE’ á©HQC’G óªéàdG áHGPEG èeGôH ΩGóîà°SG ∂æμªj
äÉ«ªμH ¬æjõîJh Ωº18- IQGôM áLQO óæY √ó«ªéJ ºJ …òdG ΩÉ©£dG Ωóîà°SG
.¿ÉμeE’G Qób á©«aQh ájhÉ°ùàe
.¬fRƒH ºbh ∞«∏¨àdG OGƒe ™«ªL øe ¬æY óªéàdG áHGPEG OGôªdG ΩÉ©£dG êôNCG
.ºFÓªdG èeÉfôÑdG §Ñ°V πLCG шe ¬fRh бaф©ªd кЙала°S
¬∏©éJ ’h iôNCG ¢VGôZCG ájC’ ±hôX ájCG âëJ ¬eóîà°ùJ ’h Qƒ«£dGh Ωƒë∏dG Ö∏b
.iôNCG ᪩WCG ájCG ¢ùeÓj
.iôNCG Iôe áYÉ°ùdG
í«ë°üàdG
âbDƒªdG ±É≤jE’G
𫨰ûàdG AɨdEG
äɶMÓe
■ ºbh RÉ¡édG ÜÉH íàaG .Oóëe âbh ó©H á«Jƒ°U IQÉ°TEG Qó°üJ èeGôÑdG ¢†©H ™e
.iôNCG Iôe
■ ᪫≤dG ô¡¶Jh .
.õÑîdGh
äɶMÓe
■᪩WC’G OGóYEG
■ óæY πFÉ°ùdG Gòg øe ¢ü∏îJ .Qƒ«£dG hCG Ωƒë∏dG øY óªéàdG áHGPEG óæY πFÉ°S èàæj
13
Page 41

CÉ£îdG ádÉ°SQπªàëªdG ÖÑ°ùdGá¶MÓe/πëdG
.ΩRÓdG øe πbCG ¿Éc ∞jhhô쫪dG ¿ôa IQób §Ñ°V ™°Vh.∞jhhô쫪dG ¿ôa IQó≤d ≈∏YCG §Ñ°V ™°Vh ôàNG
.RÉ¡édG »a OÉ੪dG øe ôÑcCG ΩÉ©W ᫪c ™°Vh ºJ.»¡£dG øeR ∞©°V = ᫪μdG ∞©°V
»a OƒLƒªdG ∞jƒéàdGh IQGhódG IôμÑdG ¥ƒW ∞«¶æàH ºb
.»¡£dG õ«M
≈Lôoj ,π∏îdG Gòg çhóM QôμJ GPEG
.™«ÑdG ó©H Ée
í°VƒJh .ΩÉ©£dG ø«î°ùJ ¢Vô¨d á©æ°üe ∞jhhô쫪dG ¿GôaCG ¿CG 2 áYƒªéªdG »æ©J
.»dõæªdG ΩGóîà°SÓd ºFÓe RÉ¡édG ¿CG B áÄØdG
∫ƒM IOƒLƒªdG á≤£æªdG »a áÑjôZ ΩÉ°ùLCG hCG äÉNÉ°ùJG ∑Éæg
á«æØdG äÉØ°UGƒªdG
πNó∏d »FÉHô¡μdG ó¡édGõJôg 50 ,§∏" 230-220 OOôàe QÉ«J
1450
AÉHô¡μdG ∑Ó¡à°SG•Gh
êôî∏d IQób ≈°übCG•Gh 900
ájGƒ°ûdG IQób•Gh 1200
∞jhhô쫪dG äÉLƒe OOôJõJôg Éé«e 2450
ô¡°üªdGô«ÑeCG 10
óæY OÉ੪dG øe ∫ƒWCG Éàbh ΩÉ©£dG òNCÉj
¬æ«î°ùJ
.OÉ੪dG øe IOhôH ôãcCG ¿Éc ΩÉ©£dG»¡£dG AÉæKCG ¬Ñ∏b hCG ΩÉ©£dG Ö«∏≤àH ºb
hCG ôjô°U 䃰U QGhódG øë°üdG øY Qó°üj
.QGhódG øë°üdG á«dBG
.∞jhhô쫪dG ¿ôØH π∏N ∑Éæg áeóN õcôªH ∫É°üJ’G
ô«Z ÖÑ°ùd ∞jhhô쫪dG ¿ôa 𫨰ûJ AɨdEG ºJ
.∑ÉμàMG
™«ÑdG ó©H Ée áeóN
ájC’ ∑RÉ¡L êÉàMG Ée GPEG ¿ƒ©dG ÉæH á°UÉîdG ™«ÑdG ó©H Ée áeóN õcGôe ∂d Ωó≤J
ô«Z äGQÉjR ájCG ∂Ñæéæd í«ë°üdG πëdG øY ɪFGO åëÑf øëf .ìÓ°UEG ∫ɪYCG
.áeóîdG »æa øe ájQhô°V
FD ™æ°üdG ºbQh E èàæªdG ºbQ
≈àM (FD no. ) ™æ°üdG ºbQh (E no. ) èàæªdG ºbQ ºjó≤J ≈Lôj ÉæH ∫É°üJ’G óæY
ΩÉbQC’G √òg πªëJ »àdG ™æ°üdG áMƒd óLƒJ .áë«ë°üdG IQƒ°ûªdG ∂d Ωó≤f ¿CG ™«£à°ùf
∂æμªj ,∂dP AGôLE’ ΩRÓdG âbƒdG ô«aƒàd .øªjC’G ÖfÉédG ≈∏Y RÉ¡édG ÜÉH íàa óæY
äÉZGôØdG »a ™«ÑdG ó©H Ée áeóN õcôe ∞JÉg ºbQh ∑RÉ¡L ºbôH áXƒë∏e øjhóJ
.√ÉfOCG IOƒLƒªdG
E no. èàæªdG ºbQFD no. ™æ°üdG ºbQ
.í°VGh
(≥ªY x ¢VôY x ´ÉØJQG) OÉ©HC’G
RÉ¡édG
»¡£dG õ«M -ºe 354 x 337 x 215
AÉHô¡μdG »°Sóæ¡e OÉëJG øe óªà©e
º©f
VDE ¿ÉªdC’G
CE á«HhQhC’G á≤HÉ£ªdG áeÓYº©f
áÄ«ÑdG ≈∏Y á¶aÉëe á≤jô£H äÉØ∏îªdG øe ¢ü∏îàdG
.áÄ«ÑdG ≈∏Y á¶aÉëe á≤jô£H ∞«∏¨àdG IƒÑY øe ¢ü∏îJ
≥∏©àj ɪ«a 2012/19/EU á«HhQhC’G áØ°UGƒª∏d É≤ÑW õ«ªe RÉ¡édG Gòg
áªjó≤dG á«fhôàμdE’Gh á«FÉHô¡μdG Iõ¡LC’ÉH
.
(waste electrical and electronic equipment - WEEE)
á∏ª©à°ùªdG Iõ¡LC’G ´ÉLôà°S’ ΩÉ©dG QÉWE’G áØ°UGƒªdG √òg OóëJh
.»HhQhC’G OÉëJ’G ∫hO ™«ªL »a ¬H ∫ƒª©e ƒg ɪc ÉgôjhóJ IOÉYEGh
™«ÑdG ó©H Ée áeóN
-ºe 408 x 513 x 305
∫ÓN π∏îdG çóM GPEG ≈àM áeóîdG »æa IQÉjR πHÉ≤e Ωƒ°SQ óLƒJ ¬fCG IÉYGôe ≈Lôj
.á≤aôªdG AÓª©dG áeóN áëF’ »a ∫hódG ™«ªéH á°UÉîdG ∫É°üJ’G äÉfÉ«H óéJ
O
.¿Éª°†dG ¿Éjô°S Iôàa
èàæªdG øY QÉ°ùØà°SÓdh »æØdG øe IQÉjR õéëd
0344 892 8979
.ádGƒédG hCG á«∏ëªdG ä’É°üJ’G áØjô©àH äɪdÉμªdG áØ∏μJ ÜÉ°ùàMG ºàj
01450 2655
IhQòdG äÉYÉ°S êQÉNh .IhQòdG äÉbhCG »a á≤«bó∏d hQƒj 0.03
.á≤«bó∏d hQƒj 0.0088
òØæ«°S …òdG ¿CG ÉkæĪ£e øμà∏a .á©fÉ°üdG á¡édG á«aGôàMG ≈∏Y OɪàY’G ∂æμªj
.∂Jõ¡LC’ á«∏°UCG QÉ«Z ™£b ¿ƒeóîà°ùj ø«HQóe ø««æa ìÓ°UE’G
дЙйажe шª°V кQужjh .
CISPR 11 h EN 55011 áØ°UGƒª∏d ≥HÉ£e RÉ¡édG Gòg
B áÄØdG ,2 áYƒªéªdG
.
á«μ«JÉeƒJhC’G èeGôÑdG
É«fÉ£jôH
GóædôjCG
QÉ«àNG iƒ°S ∂«∏Y ɪa .ádƒ¡°S πμH ΩÉ©£dG ô«°†ëJ øe á«μ«JÉeƒJhC’G èeGôÑdG ∂æμªJ
§Ñ°†dG ™°Vh QÉ«àNÉH »μ«JÉeƒJhC’G èeÉfôÑdG Ωƒ≤j .ΩÉ©£dG ¿Rh ∫ÉNOEGh èeÉfôÑdG
.»dÉãªdG
8 ø«H øe QÉ«àN’G ∂æμªj :á¶MÓe
.èeGôH
èeÉfôH §Ñ°V
:»∏j ɪc §Ñ°†dG ´É°VhCG AGôLEÉH ºb ,èeÉfôH QÉ«àNÉH Ωƒ≤J ¿CG OôéªH
QõdG ≈∏Y §¨°†dG Qôc
g
12
.1 .܃ZôŸG èeÉfÈdG ºbQ ô¡¶j ≈àM
Page 42

:πîdG ∫ƒ∏ëe hCG øNÉ°S »fƒHÉ°U ∫ƒ∏ëe
∞«ØéàdÉH ºbh »fGhCG áWƒa ΩGóîà°SÉH ∞«¶æàdÉH ºb
.áªYÉf ¢Tɪb á©£b ΩGóîà°SÉH
,¿GôaCG ∞¶æe Ωóîà°SG :ájɨ∏d Éî°ùàe ¿ôØdG ¿Éc GPEG
π°†Øjh .OQÉH »¡£dG õ«Mh ’EG ¬eóîà°ùJ ’ øμdh
.π«à°S ¢ù∏fÉà°S’G ∞«¶æJ áéæØ°SEG ΩGóîà°SG
äÉضæe ájCG hCG ¿ôØdG ∞«¶æJ …GôÑ°SG Ωóîà°ùJ ’
á°TOÉîdG á°ûªbC’G ôÑà©J .á°TOÉN OGƒe hCG ádÉcCG ¿ôa
äÉjÓ≤dЙH б°UЙоdG дЙШ¶жªdGh бж°ыоdG дЙйжШ°SE’Gh
»a AÉ«°TC’G √òg ÖÑ°ùàJ å«M .É°†jCG áÑ°SÉæe ô«Z
á«∏NGódG í£°SC’G ∑ôJG .í£°SC’ÉH ¢ThóN çhóM
.ÉkeɪJ ∞éJ
øë°üdG IQGOEG IóMh ôÑY AɪdG πZƒJ ΩóY øe ócCÉJ
.RÉ¡édG πNGO
:øNÉ°S »fƒHÉ°U ∫ƒ∏ëe
¬Ñ«côJ øe ócCÉJ QGhódG øë°üdG Ö«côJ IOÉYEG óæY
¢ù∏fÉà°S’G ∞«¶æJ IOÉe ΩGóîà°SÉH ∞«¶æàdÉH ºb
.»fGhC’G ádÉ°ùZ »a hCG π«à°S
Ωóîà°ùJ ’ .»fGhCG áWƒa ΩGóîà°SÉH ∞«¶æàdÉH ºb
.∑ôØdÉH º≤J ’h »fGhCG áWƒa ΩGóîà°SÉH ∞«¶æàdÉH ºb
.∞«¶æàdG »a êÉLõdG hCG ¿OÉ©ªdG äÉ£°TÉc Ωóîà°ùJ ’
≈dEG QGhódG
.í«ë°U πμ°ûH
.êÉLR ᣰTÉc
¥É£ædG∞«¶æàdG OGƒe
øe ´ƒæ°üªdG »¡£dG õ«M
π«à°S ¢ù∏fÉà°S’G
»¡£dG õ«M »a ∞jƒéàdG :á∏∏Ñe ¢Tɪb á©£b
á≤∏Mh QGhódG øë°üdG
QGhódG øë°üdG
á«μ∏°ùdG áμÑ°ûdG :øNÉ°S »fƒHÉ°U ∫ƒ∏ëe
ÜÉÑdG äÉMƒd :êÉLõdG ∞¶æe
≥∏¨dG ΩÉμMEG QÉWEG :øNÉ°S »fƒHÉ°U ∫ƒ∏ëe
∞«¶æàdG OGƒe
π°üaG hCG »FÉHô¡μdG QÉ«àdG áμÑ°T øe RÉ¡édG π°üaG ,∞«¶æàdG ∫ɪYCG AGôLEG πÑb
êQÉîdG øe RÉ¡édG ∞«¶æàH ºb .ôgÉ°üªdG ¥hóæ°U »a á«FÉHô¡μdG IôFGódG ™WÉb
á©£≤H ¬ØØLh .áØ«ØN ∞«¶æJ IOÉeh áÑWQ ¢Tɪb á©£b ΩGóîà°SÉH »¡£dG õ«Mh
.áØ«¶f ¢Tɪb
¥É£ædG∞«¶æàdG OGƒe
RÉ¡édG á¡LGh :øNÉ°S »fƒHÉ°U ∫ƒ∏ëe
∞«ØéàdÉH ºbh »fGhC’G áWƒa ΩGóîà°SÉH ∞«¶æàdÉH ºb
äÉضæe Ωóîà°ùJ ’ .áªYÉf ¢Tɪb á©£b ΩGóîà°SÉH
.∞«¶æàdG »a êÉLõdG hCG ¿OÉ©ªdG äÉ£°TÉc hCG êÉLõdG
:øNÉ°S »fƒHÉ°U ∫ƒ∏ëe
∞«ØéàdÉH ºbh »fGhC’G áWƒa ΩGóîà°SÉH ∞«¶æàdÉH ºb
™≤ÑdG ádGREÉH ºb .áªYÉf ¢Tɪb á©£b ΩGóîà°SÉH
¢VÉ«H πãe) ∫’õdGh É°ûædG ™≤Hh á«ægódG hCG ájô«édG
πØ°SCG CGó°üdG ¿ƒμàj ¿CG ø쪪dG øªa .QƒØdG ≈∏Y (¢†«ÑdG
á°UÉN äÉضæe ≈∏Y ∫ƒ°üëdG øμªj .ÉjÉ≤ÑdG √òg
hCG ™«ÑdG ó©H Ée áeóN õcGôe iód π«à°S ¢ù∏fÉà°SÓd
hCG êÉLõdG äÉضæe Ωóîà°ùJ ’ .á°ü°üîàªdG ôLÉàªdG
.∞«¶æàdG »a êÉLõdG hCG ¿OÉ©ªdG äÉ£°TÉc
áYƒæ°üªdG RÉ¡édG á¡LGh
π«à°S ¢ù∏fÉà°S’G øe
!¬«ÑæJ
!»FÉHô¡μdG ≥©°üdG ô£N
§≤a ìÓ°UE’G ∫ɪYCG ò«ØæJ »¨Ñæj Gòd .IQƒ£N πãªJ ᪫∏°ùdG ô«Z ìÓ°UE’G ∫ɪYCG
.Éæ∏Ñb øe ø«HQóoªdG ™«ÑdG ó©H Ée áeóN »«æa óMCG áaô©ªH
≈∏Y Ö∏¨à∏d äGAGôLE’G ¢†©ÑH ΩÉ«≤dG ∂æμªj ,áæ«©e CÉ£N πFÉ°SQ Qƒ¡X ádÉM »a
.º«∏°S πμ°ûH πª©j RÉ¡édÉH ¢UÉîdG á«FÉHô¡μdG
10 »dGƒM ó©H ¬∏«°UƒJ óYCG .ôgÉ°üªdG
.m¿GƒK
Stop QõdG ≈∏Y §¨°VG
™°Vh ƒëªH ºb hCG (𫨰ûJ) Start QõdG ≈∏Y §¨°VG
.(±É≤jEG) Stop QõdG ≈∏Y §¨°†dG ∫ÓN øe §Ñ°†dG
.ÜÉÑdÉH Iô°üëæe
™°Vh AGôLEG ó©H (𫨰ûJ)
:
.á∏μ°ûªdG
.ó°üb ¿hO QGhódG QÉ«àN’G ìÉàØe ≈∏Y §¨°†dG ºJ.(±É≤jEG)
∫É£YC’G ∫hóL
πÑb ∫É£YC’G ∫hóL ≈dEG ´ƒLôdG ≈Lôoj .ᣫ°ùH ÜÉÑ°SCG ≈dEG ∫É£YC’G Oƒ©J Ée ÉÑdÉZ
.™«ÑdG ó©H Ée áeóîH ∫É°üJ’G
¥ÉÑWC’G
´ƒ°Vƒe ≈dEG ´ƒLôdG ≈Lôoj ,ójôJ âæc Ée ô«Z ≈∏Y ∂bÉÑWCG óMCG êôN GPEG
øe ójó©dG ∑Éæg óéJ ±ƒ°Sh ,
.»FÉHô¡μdG QÉ«àdG ´É£≤fG.ïÑ£ªdG IAÉ°VEG πªY øe ócCÉJ
á«FÉHô¡μdG IôFGódG ™WÉb π£©J IôFGódG ™WÉb ¿CG ócCÉJh ôgÉ°üªdG ¥hóæ°U ¢üëaG
Start QõdG ≈∏Y §¨°†dG ºàj ºd
Start QõdG ≈∏Y §¨°†dG ºàj ºd.(𫨰ûJ) Start QõdG ≈∏Y §¨°VG
.(𫨰ûJ)
𫨰ûàdG »a CÉ£N ¥hóæ°U »a OƒLƒªdG á«FÉHô¡μdG IôFGódG ™WÉb π°üaG
ÉæH ¢UÉîdG »¡£dG ƒjOƒà°S »a ÉgQÉÑàNG ºJ »àdG
.»¡£dG QGô°SCGh íFÉ°üf
∫É£YC’G ≈∏Y Ö∏¨àdG
.¢Vô©dG IóMh »a QÉØ°UCG áKÓK ¢†eƒJ.»FÉHô¡μdG QÉ«àdG ´É£≤fG.âbƒdG §Ñ°V óYCG
»a »¡£dG øeR ô¡¶j ɪæ«H .πª©j ’ RÉ¡édG
.§Ñ°†dG
.πª©j ’ ∞jhhô쫪dG ¿ôa.πeÉc πμ°ûH ≥∏¨oj ºd ÜÉÑdG áÑjôZ ΩÉ°ùLCG hCG ΩÉ©W ÉjÉ≤H ∑Éæg âfÉc GPEG Ée ócCÉJ
CÉ£îdG ádÉ°SQπªàëªdG ÖÑ°ùdGá¶MÓe/πëdG
πª©j ’ RÉ¡édG.»FÉHô¡μdG ¢ùÑ≤ªdG »a ´ƒ°Vƒe ô«Z ¢ùHÉ≤dG»FÉHô¡μdG ¢ùÑ≤ªdG »a ¢ùHÉ≤dG ™°V
.¢Vô©dG IóMh
11
Page 43

■.ôNB’G ƒ∏J óMGƒdG ∞jhhô쫪dG ¿ôa IQó≤d §Ñ°V ´É°VhCG IóY øjõîJ ∂æμªj ’
■.á«μ«JÉeƒJhC’G èeGôÑdG øjõîJ É°†jCG ∂æμªj ’ ɪc
■ óæY .QƒØdG ≈∏Y RÉ¡édG 𫨰ûJh IôcGòdG »a §Ñ°†dG ´É°VhCG øjõîJ ∂æμªj
.(𫨰ûJ) start QõdG ≈∏Y §¨°VG ,i QõdG ≈∏Y §¨°†dG øe k’óH ,AÉ¡àf’G
QõdG ≈∏Y §¨°VG :IôcGòdG »a ójóédG §Ñ°†dG ™°Vh øjõîJ
i
■ ô¡¶àa .
»a í°Vƒe ƒg ɪc ójóédG èeÉfôÑdG øjõîàH ºb .áªjó≤dG §Ñ°†dG ´É°VhCG
.4-1 äGƒ£îdG
IôcGòdG 𫨰ûJ
.RÉ¡édG ÜÉH ≥∏ZCG .RÉ¡édG »a ∂àÑLh ™°V .¿õîªdG èeÉfôÑdG 𫨰ûJ GóL π¡°ùdG øe
QõdG ≈∏Y §¨°VG
i
.áfõîªdG §Ñ°†dG ´É°VhCG ¢VôY ºàj
.¢Vô©dG IóMh »a »¡£dG øeõd »dRÉæàdG ó©dG CGóÑ«a
»¡£dG øeR AÉ°†≤fG
ô¡¶àa .(±É≤jEG) Stop QõdG ≈∏Y §¨°VG hCG RÉ¡édG ÜÉH íàaG .á«Jƒ°U IQÉ°TEG Qó°üJ
.iôNCG Iôe áYÉ°ùdG
âbDƒªdG ±É≤jE’G
,ÜÉÑdG ≥∏Z ó©H .RÉ¡édG ÜÉH íàaG hCG IóMGh Iôªd (±É≤jEG) Stop QõdG ≈∏Y §¨°VG
.(𫨰ûJ) START QõdG ≈∏Y §¨°VG
§Ñ°†dG ™°Vh AɨdEG
QõdG ≈∏Y §¨°VG ºK RÉ¡édG ÜÉH íàaG hCG ø«Jôe (±É≤jEG) Stop QõdG ≈∏Y §¨°VG
.IóMGh Iôªd (±É≤jEG) Stop
.1 .
.2 .(𫨰ûJ) Start QõdG ≈∏Y §¨°VG
IôcGòdG
.âbh …CG »a iôNCG Iôe ÉgDhÉYóà°SGh IôcGòdG »a Ée áÑLh §Ñ°V ´É°VhCG øjõîJ ∂æμªj
.Qôμàe πμ°ûH É¡æ«©H áÑLh ô°†ëJ âæc GPEG IôcGòdG ∑ó«ØJ
IôcGòdG »a §Ñ°†dG ´É°VhCG øjõîJ
á≤«bO 25 ,•Gh 360 :∫Éãe
QõdG ≈∏Y §¨°VG
i
.¢Vô©dG IóMh »a
"1:00 min" ¿É«ÑdGh IQó≤∏d QÉàîªdG §Ñ°†dG ™°Vhh "M" ±ôëdG A»°†«a
.¢Vô©dG IóMh »a (IóMGh á≤«bO)
QõdG ≈∏Y §¨°†dG ∫ÓN øe ócCG
i
.§Ñ°†dG ™°Vh øjõîJ ºàjh .iôNCG Iôe áYÉ°ùdG ô¡¶àa
"M" ±ôëdG ô¡¶j
äɶMÓe
■.∞jhhô쫪dG ¿ôa ™e ájGƒ°ûdG hCG §≤a ájGƒ°ûdG ™°Vh øjõîJ É°†jCG ∂æμªj
.1 .
.2 .∞jhhô쫪dG ¿ôa IQó≤d ܃ZôªdG §Ñ°†dG ™°Vh ≈∏Y §¨°VG
.3 .QGhódG QÉ«àN’G ìÉàØe ΩGóîà°SÉH »¡£dG øeR §Ñ°VG
.4 .
.IójóédG IQÉ°TE’G Ióe OɪàYG ºà«a
.iôNCG Iôe áYÉ°ùdG ô¡¶àa
:»∏j Ée QÉ«àNG øμªj
äÉfQ 3 - Iô«°üb IQÉ°TEG Ióe
.áfQ
30 - á∏jƒW IQÉ°TEG Ióe
Ωóîà°ùJ ’
OGƒªdG √òg øe IOÉe ájCG á°ùeÓe ádÉM »ah .í£°ùdG ±ÓJE’ ∂dP …ODƒj ó≤a
.AɪdÉH GQƒa É¡∏°ùZ ≈∏Y πªYÉa RÉ¡édG á¡LGƒd
.É¡eGóîà°SG πÑb Gkó«L IójóédG ∞«¶жаdG дЙйжШ°SEG π°ùZG
á«Jƒ°üdG IQÉ°TE’G Ióe ô««¨J
IQÉ°TE’G Qhó°U Ióe ô««¨J ∂æμªjh .RÉ¡édG AÉØWEG óæY á«Jƒ°U IQÉ°TEG ™ª°ùJ ±ƒ°S
.á«Jƒ°üdG
.ÉÑjô≤J m¿GƒK
6 Ióªd (𫨰ûJ) Start QõdG ≈∏Y §¨°VG
∞«¶æàdGh ájÉæ©dG
¬JAÉØch √ô¡¶e ≈∏Y ßaÉëJ ¢UôëH ¬Ø«¶æJh ∞jhhô쫪dG ¿ôØH Ió«édG ájÉæ©dG
■ .ádÉcC’G hCG áæ°ûîdG ∞«¶æàdG OGƒe
■.RÉ¡édG ÜÉH êÉLR ∞«¶æJ óæY êÉLõdG hCG ¿OÉ©ªdG äÉ£°TÉc
■.ΩÉμME’G QÉWEG ∞«¶æJ »a êÉLõdG hCG ¿OÉ©ªdG äÉ£°TÉc
■ .ø°ûîdG ∞«¶æàdG èæØ°SEG hCG ∞«d
■.∫ƒëμdG øe á«dÉY äGõ«côJ ≈∏Y ájƒàëªdG ∞«¶æàdG OGƒe
.¬Ø«¶æJh RÉ¡édÉH ájÉæ©∏d í«ë°üdG ܃∏°SC’G Éæg ∂d ìô°ûf ±ƒ°Sh .áeÉàdG
!á«FÉHô¡c á∏Øb çhóM ô£N
:
.¿ôØdG ∞«¶æàd QÉîÑdG hCG »dÉ©dG §¨°†dÉH ∞«¶æàdG Iõ¡LCG GkóHCG Ωóîà°ùJ ’
!¥hôëH áHÉ°UE’G ô£N
:
.OôÑj RÉ¡édG ∑ôJG .¬aÉ≤jEG Qƒa RÉ¡édG ∞«¶æàH GkóHCG º≤J ’
!»FÉHô¡μdG ≥©°üdG ô£N
:
.»FÉe QÉ«J âëJ ¬Ø¶æJ hCG AɪdÉH RÉ¡édG ôª¨J ’
ΩGóîà°SG áé«àf çóëj …òdG Qô°†dG ÖæéJ øμªjh ,É¡à©«Ñ£H í£°SC’G ∞∏àîJ
∫hóédG »a IQƒcòªdG äÉeƒ∏©ªdG IÉYGôe ∫ÓN øe áÑ°SÉæe ô«Z ∞«¶æJ IOÉe
.»∏j ɪ«a OQGƒdG
10
Page 44

AGƒ°ûdG
.¢Vô©dG IóMh »a »¡£dG øeõd »dRÉæàdG ó©dG CGóÑ«a
»¡£dG øeR AÉ°†≤fG
ô¡¶àa .(±É≤jEG) Stop QõdG ≈∏Y §¨°VG hCG RÉ¡édG ÜÉH íàaG .á«Jƒ°U IQÉ°TEG Qó°üJ
.iôNCG Iôe áYÉ°ùdG
»¡£dG øeR ô««¨J
QÉ«àN’G ìÉàØe ΩGóîà°SÉH »¡£dG øeR ô««¨àH ºb .âbh …CG »a ∂dP AGôLEG øμªj
.QGhódG
âbDƒªdG ±É≤jE’G
,ÜÉÑdG ≥∏Z ó©H .RÉ¡édG ÜÉH íàaG hCG IóMGh Iôªd (±É≤jEG) Stop QõdG ≈∏Y §¨°VG
.(𫨰ûJ)
START QõdG ≈∏Y §¨°VG
í«ë°üàdG
.âbh …CG »a •ƒÑ°†ªdG »¡£dG øeR í«ë°üJ ∂æμªj
§Ñ°†dG ™°Vh AɨdEG
QõdG ≈∏Y §¨°VG ºK RÉ¡édG ÜÉH íàaG hCG ø«Jôe (±É≤jEG) Stop QõdG ≈∏Y §¨°VG
.IóMGh Iôªd (±É≤jEG) Stop
ájGƒ°ûdGh ∞jhhô쫪dG ¿ôØd ∑ôà°ûªdG ΩGóîà°S’G
»¡£dG øeR AÉ°†≤fG
ô¡¶àa .(±É≤jEG) Stop QõdG ≈∏Y §¨°VG hCG RÉ¡édG ÜÉH íàaG .á«Jƒ°U IQÉ°TEG Qó°üJ
.iôNCG Iôe áYÉ°ùdG
»¡£dG øeR ô««¨J
QÉ«àN’G ìÉàØe ΩGóîà°SÉH »¡£dG øeR ô««¨àH ºb .âbh …CG »a ∂dP AGôLEG øμªj
.QGhódG
âbDƒªdG ±É≤jE’G
,ÜÉÑdG ≥∏Z ó©H .RÉ¡édG ÜÉH íàaG hCG IóMGh Iôªd (±É≤jEG) Stop QõdG ≈∏Y §¨°VG
.(𫨰ûJ) START QõdG ≈∏Y §¨°VG
𫨰ûàdG AɨdEG
Stop QõdG ≈∏Y §¨°VG ºK ÜÉÑdG íàaG hCG ø«Jôe (±É≤jEG) Stop QõdG ≈∏Y §¨°VG
.IóMGh Iôªd (±É≤jEG)
.hÉ°ùàe πμ°ûH ΩÉ©£dG ô«ªëJh í£°ù∏d ÉØãμe Éæ«î°ùJ ájƒ≤dG ájGƒ°ûdG øª°†J
ájGƒ°ûdG §Ñ°V
ájGƒ°ûdG QR ≈∏Y §¨°VG
(
.¢Vô©dG IóMh »a õeôdGh (≥FÉbO
Ék°ûeô≤e ΩÉ©£dG íÑ°üj .âbƒdG ¢ùØf »a ∞jhhô쫪dG ¿ôa ™e ájGƒ°ûdG §Ñ°V ∂æμªj
.ábÉ£dG ô«aƒJ ™eh ´ô°SCG πμ°ûH ∂dP ºàjh .¿ƒ∏dG »æHh
10:00) 10:00 min ¿É«ÑdG ô¡¶j
.∞jhhô쫪dG ¿ôØd IQób ájCG QÉ«àNG ∂æμªj
600 h 900 :AÉæãà°S’G
.•Gh
ájGƒ°ûdGh ∞jhhô쫪dG ¿ôa §Ñ°V
≥FÉbO 5 ,ájGƒ°ûdG ( ,•Gh 360 :∫Éãe
ô¡¶jh ,¢Vô©dG IóMh »a ∞jhhô쫪dG ¿ôØd QÉàîªdG §Ñ°†dG ™°Vh A»°†«a
.(IóMGh á≤«bO)
"1:00 min" ¿É«ÑdG
ájGƒ°ûdG QR ≈∏Y §¨°VG
(
.1 .
.2 .QGhódG QÉ«àN’G ìÉàØe ΩGóîà°SÉH »¡£dG øeR §Ñ°VG
.3 .(𫨰ûJ) Start QõdG ≈∏Y §¨°VG
.1 .∞jhhôμ«ŸG ¿ôa IQó≤d ܃ZôŸG §Ñ°†dG ™°Vh ≈∏Y §¨°VG
.2 .
ó©H ∞jhhô쫪dG ¿ôa IQób §Ñ°V ºK k’hCG »¡£dG øeR §Ñ°V Ék°†jCG ∂æμªj
9
:á¶MÓe
.∂dP
.3 .QGhódG QÉ«àN’G ìÉàØe ΩGóîà°SÉH »¡£dG øeR §Ñ°VG
.4 .(𫨰ûJ) Start QõdG ≈∏Y §¨°VG
.¢Vô©dG IóMh »a »¡£dG øeõd »dRÉæàdG ó©dG CGóÑ«a
Page 45

∞jhhô쫪dG ¿ôa
`d Ö°SÉæe
¿ôa IQób §Ñ°V
∞jhhô쫪dG
•Gh 600ΩÉ©£dG »¡Wh ø«î°ùJ
•Gh
•Gh
600 h á≤«bO 30 Ióªd •Gh 900 ∞jhhô쫪dG ¿ôa IQób §Ñ°V ∂æμªj :á¶MÓe
áYÉ°S Ióªd ∞jhhô쫪dG ¿ôa IQó≤d iôNC’G §Ñ°†dG ´É°VhCGh ,IóMGh áYÉ°S Ióªd
.»dGƒàdG ≈∏Y á≤«bO
39 h IóMGh
∞jhhô쫪dG ¿ôa §Ñ°V
•Gh 600 ∞jhhô쫪dG ¿ôa IQób §Ñ°V ™°Vh :∫Éãe
ô¡¶jh ,¢Vô©dG IóMh »a ∞jhhô쫪dG ¿ôØd QÉàîªdG §Ñ°†dG ™°Vh A»°†«a
.(IóMGh á≤«bO)
.¢Vô©dG IóMh »a »¡£dG øeõd »dRÉæàdG ó©dG CGóÑ«a
"1:00 min" ¿É«ÑdG
æeR §Ñ°VG
k
»¡£dG øeR AÉ°†≤fG
ô¡¶àa .(±É≤jEG) Stop QõdG ≈∏Y §¨°VG hCG RÉ¡édG ÜÉH íàaG .á«Jƒ°U IQÉ°TEG Qó°üJ
.iôNCG Iôe áYÉ°ùdG
»¡£dG øeR ô««¨J
QÉ«àN’G ìÉàØe ΩGóîà°SÉH »¡£dG øeR ô««¨àH ºb .âbh …CG »a ∂dP AGôLEG øμªj
âbDƒªdG ±É≤jE’G
,ÜÉÑdG ≥∏Z ó©H .RÉ¡édG ÜÉH íàaG hCG IóMGh Iôªd (±É≤jEG) Stop QõdG ≈∏Y §¨°VG
.(𫨰ûJ) START QõdG ≈∏Y §¨°VG
𫨰ûàdG AɨdEG
Stop QõdG ≈∏Y §¨°VG ºK ÜÉÑdG íàaG hCG ø«Jôe (±É≤jEG) Stop QõdG ≈∏Y §¨°VG
.IóMGh Iôªd (±É≤jEG)
∞jhhô쫪dG ¿ôa IQób §Ñ°V ºK k’hCG »¡£dG øeR §Ñ°V Ék°†jCG ∂æμªj
:á¶MÓe
.∂dP ó©H
ójôÑàdG áMhôe
.¿ôØdG ±É≤jEG ó©H ≈àM áMhôªdG ¿GQhO ôªà°ùj óbh .ójôÑJ áMhôªH Ohõe RÉ¡édG
äɶMÓe
OQÉH »¡£dG õ«M π¶j
.∞jhhô쫪dG ¿ôa 𫨰ûJ AÉ¡àfG ó©H ≈àM áMhôªdG ¿GQhO ôªà°ùj óbh .á∏¨°ûe
AɪdG í°ùeG .∞jhhô쫪dG ¿ôa 𫨰ûJ ≈∏Y ÉkÑ∏°S ôKDƒj ’h »©«ÑW ôeCG Gògh
.»¡£dG á«∏ªY øe AÉ¡àf’G ó©H ∞ãμàªdG
k
900πFGƒ°ùdG ø«î°ùJ
.1 .∞jhhôμ«ŸG ¿ôa IQó≤d ܃ZôŸG §Ñ°†dG ™°Vh ≈∏Y §¨°VG
.2 .QGhódG QÉ«àN’G ìÉàØe ΩGóîà°SÉH »¡£∏d É
.3 .(𫨰ûJ) Start QõdG ≈∏Y §¨°VG
.QGhódG
■ ójôÑàdG áMhôe π¶Jh .∞jhhô쫪dG ¿ôa 𫨰ûJ AÉæKCG G
■ .RÉ¡édG á«°VQCGh á«∏NGódG ¿GQóédGh ÜÉÑdG IòaÉf ≈∏Y ∞ãμàe AÉe ô¡¶j ɪHQ
.᪩WC’G πNGO »a IQGôM ≈dEG ∞jhhô쫪dG äÉLƒe ∫ƒëàJ
.ájGƒ°ûdG ™e ¬£Ñ°V hCG √óMh ∞jhhô쫪dG §Ñ°V ∂æμªj
¿ôa §Ñ°V á«Ø«ch ¿ôØdG »¡W »fGhCÉH á≤∏©àªdG äÉeƒ∏©ªdG Éæg óéà°Sh
.∞jhhô쫪dG
»¡£dG ƒjOƒà°S »a ÉgQÉÑàNG ºJ »àdG ¥ÉÑWC’G
¿ôa ΩGóîà°SÉH »¡£dGh ô¡°üdGh ø«î°ùàdGh óªéàdG áHGPE’ á∏ãeCG
.Óãe …É°T ¿Ééæa OGóYE’ AÉe ܃c ø«î°ùJ ∂æμªjh .¿B’G ∞jhhô쫪dG ¿ôa Üôéà∏a
Iô«¨°U á≤©∏e ™°Vh á«°†a hCG áÑgòoe äÉ«∏M ájCG ≈∏Y πªà°ûj ’ Gkô«Ñc ÉkHƒc Ωóîà°SG
.QGhódG øë°üdG ≈∏Y AɪdG ¬Hh ܃μdG ™°V .¬∏NGóH
.ÉkæNÉ°S …É°ûdG AÉe ¿ƒμj òFóæY .á«Jƒ°U IQÉ°TEG Qó°üJ á«fÉK
äGOÉ°TQEG IAGôb »a ∂àbh øe AõL AÉ°†b ≈Lôoj ,…É°ûdG ¿ÉéæØd ∂FÉ°ùàMG AÉæKCG
.GkóL áeÉg »¡a .iôNCG Iôe ∫ɪ©à°S’G π«dO ájGóH »a IOƒLƒªdG ¿ÉeC’G
´ƒ°Vƒe »a óéà°S :á¶MÓe
ÉæH ¢UÉîdG
.∞jhhô쫪dG
30 h IóMGh á≤«bO ó©H
¿ôØdG »fGhCG ¢Uƒ°üîH äɶMÓe
áÑ°SÉæªdG ¿ôØdG »fGhCG
hCG êÉLõdG øe áYƒæ°üªdG áfƒî°ù∏d áehÉ≤ªdG ¿ôØdG »fGhCG »g áÑ°SÉæªdG »fGhC’G
å«M .áfƒî°ù∏d ΩhÉ≤ªdG ∂«à°SÓÑdG hCG ±õîdG hCG ø«∏°SQƒÑdG hCG »LÉLõdG ±õîdG
.∞jhhô쫪dG äÉLƒªd IòØæe É¡fCÉH OGƒªdG √òg õ«ªàJ
.ôNB’ ≥ÑW øe ΩÉ©£dG π≤f Gòg ∂«∏Y ôaƒjh .IóFɪdG ¥ÉÑWCG ΩGóîà°SG É°†jCG ∂æμªj
â檰V GPEG ’EG á«°†a hCG áÑgòoe äÉ«∏M ≈∏Y …ƒàëJ ¿ôa »fGhCG Ωóîà°ùJ ’CG »¨Ñæj
.∞jhhô쫪dG ¿GôaCG »a ΩGóîà°SÓd É¡àeAÓe á©fÉ°üdG á¡édG
áÑ°SÉæªdG ô«Z ¿ôØdG »fGhCG
.∞jhhô쫪dG äÉLƒªd òØæe ô«Z ¿ó©ªdÉa .áÑ°SÉæe ô«Z á«fó©ªdG ¿ôØdG »fGhCG ôÑà©J
.IOQÉH IÉ£¨ªdG á«fó©ªdG »fGhC’G »a IOƒLƒªdG ᪩WC’G π¶J »dÉàdÉHh
!¬«ÑæJ
,܃μdG πNGO á≤©∏ªdG πãe ,á«fó©ªdG AÉ«°TC’G ™°VƒoJ ¿CG Öéj :¿ó©ªdG :Qô°ûdG ódƒJ
ÖÑ°ùàj ó≤a .ÜÉÑ∏d »∏NGódG ÖfÉédGh ¿ôØdG ¿GQóL øe º°S 2 øY π≤J ’ áaÉ°ùe ≈∏Y
.ÜÉÑ∏d »∏NGódG ÖfÉédÉH êÉLõdG ô°ùc »a Qô°ûdG
¿ôØdG »fGhCG QÉÑàNG
AÉæãà°S’Gh .¬∏NGóH ΩÉ©£dG ™°Vh ºàj ºd Ée ∞jhhô쫪dG ¿ôa 𫨰ûàH GóHCG º≤J ’
.»dÉàdG ¿ôØdG »fGhCG QÉÑàNG ƒg IóYÉ≤dG √ò¡d ó«MƒdG
»a ΩGóîà°SÓd ¿ôØdG AÉfEG áeAÓe øe ócCÉàe ô«Z âæc GPEG »dÉàdG QÉÑàN’G πª©H ºb
:∞jhhô쫪dG ¿ôa
.á∏eÉc á≤«bOh
.∑ó«H ¬°ùªd øe ∂æμªJ IQGôM áLQO »a hCG GOQÉH ¿ôØdG AÉfEG π¶j ¿CG »¨Ñæj
.Ö°SÉæe ô«Z ¬fCG »æ©j Gò¡a ,Qô°T ódƒJ ádÉM »a hCG ÉæNÉ°S ¿ôØdG AÉfEG íÑ°UCG GPEGh
∞jhhô쫪dG ¿ôa IQób §Ñ°V ´É°VhCG
`d Ö°SÉæe
¿ôa IQób §Ñ°V
∞jhhô쫪dG
•Gh 90IQGôë∏d á°SÉ°ùëdG ᪩WC’G øY óªéàdG áHGPEG
180ôªà°ùªdG »¡£dGh óªéàdG áHGPEG
•Gh
360IQGôë∏d á°SÉ°ùëdG ᪩WC’G ø«î°ùJh Ωƒë∏dG »¡W
•Gh
.1 .•Gh 900 ≈∏Y §¨°VG
.2 .QGhódG ìÉàتdG ΩGóîà°SÉH á≤«bO 1:30 âbƒdG §Ñ°VG
.3 .(𫨰ûJ) Start QõdG ≈∏Y §¨°VG
.1 á≤«bO ∞°üf ø«H ìhGôàJ Ióªd IQób ≈°übCÉH ÆQÉØdG ¿ôØdG AÉfEG ø«î°ùàH ºb
.2 .IôàØdG √òg ∫ÓN ôNB’ âbh øe IQGôëdG áLQO ™LGQ
8
Page 46

QGhódG øë°üdG
:QGhódG øë°üdG Ö«côJ á«Ø«c
.»¡£dG õ«M
b
a
c
øe ≥≤ëJh .¬©°Vƒe »a QGhódG øë°üdG øμj ºd GPEG RÉ¡édG Ωóîà°ùJ ’ :á¶MÓe
¢ùμYh »a Qhój ¿CG øμªj QGhódG øë°üdG .º«∏°S πμ°ûH É¡©°Vƒe »a ¬àëàa RÉμJQG
.áYÉ°ùdG ÜQÉ≤Y ácôM √ÉéJG
á«μ∏°ùdG áμÑ°ûdG
hCG ºë∏dG íFGô°T πãe ,᪩WC’G AGƒ°ûd á«μ∏°S áμÑ°T
øμªj ɪc ,õÑîdG ¢ü«ªëàd hCG (≥fÉ≤ædG) ≥é°ùdG
.kÓãe á룰ùªdG »fGƒ°üdG ™°Vƒd í£°ùc É¡eGóîà°SG
.QGhódG øë°üdG ≈∏Y á«μ∏°ùdG áμÑ°ûdG ™°V
:á¶MÓe
ø«î°ùàdG ´GƒfCG
∞jhhô쫪dG äÉLƒe
.1 .»¡£dG õ«M ‘ OƒLƒŸG ∞jƒéàdG ‘ a QGhódG øë°üdG á≤∏M ™°V
.2 á«°VQCG §°Sh »a c IQGOE’G IóMh ™°Vƒe »a ô≤à°ùJ b QGhódG øë°üdG áëàa π©LG
∞jhhô쫪dG ¿ôØa Gòd .᪩WC’G πNGO »a IQGôM ≈dEG ∞jhhô쫪dG äÉLƒe ∫ƒëàJ
.»¡£dGh ô¡°üdGh ø«î°ùàdGh óªéà∏d á©jô°ùdG áHGPEÓd »dÉãe
∞jhhô쫪dG ¿ôa IQób §Ñ°V ´É°VhCG
■.πFGƒ°ùdG ø«î°ùàd - •Gh 900
■.ΩÉ©£dG »¡Wh ø«î°ùàd - •Gh 600
■.IQGôë∏d á°SÉ°ùëdG ᪩WC’G ø«î°ùJh Ωƒë∏dG »¡£d - •Gh 360
■.ôªà°ùªdG »¡£dGh óªéàdG áHGPE’ - •Gh 180
■.IQGôë∏d á°SÉ°ùëdG ᪩WC’G øY óªéàdG áHGPE’ - •Gh 90
ájGƒ°ûdG
(
.zø«JGôédG ™e{ äGRƒÑîªdG »¡W hCG AGƒ°ûd É¡eGóîà°SG ∂æμªj
∞jhhô쫪dG ¿ôah ájGƒ°û∏d ∑ôà°ûªdG ΩGóîà°S’G
𫨰ûàdG .âbƒdG ¢ùØf »a ∞jhhô쫪dGh ájGƒ°ûdG 𫨰ûJ á≤jô£dG √òg øª°†àJ
íÑ°üj .øÑédÉH IÉ£¨ªdG äÓcC’Gh äÉæ驪dG »¡W É°ü«°üN Ö°SÉæj ∑ôà°ûªdG
.ábÉ£dG ô«aƒJ ™eh ´ô°SCG πμ°ûH ∂dP ºàjh .¿ƒ∏dG »æHh Ék°ûeô≤e ΩÉ©£dG
äÉ«dɪμdG
!¬«ÑæJ
QGhódG øë°üdG ¿CG ócCÉJh .¥ÉÑWC’G êGôNEG óæY QGhódG øë°üdG ∂jôëJ ΩóY øe ócCÉJ
.É櫪j hCG GQÉ°ùj QGhódG øë°üdG Qhój ¿CG øμªj .í«ë°U πμ°ûH âÑãe
áYÉ°ùdG §Ñ°V ´ÉLQEG
.0 QõdG ≈∏Y §¨°VG
í°Vƒe ƒg ɪc §Ñ°†dG ´É°VhCG AGôLEÉH ºb .¢Vô©dG IóMh »a
"12:00" ¿É«ÑdG ô¡¶j
.3 h 2 ø«Jƒ£îdG »a
â«bƒàdG ≈dEG »Ø«°üdG â«bƒàdG øe ∫ÉãªdG π«Ñ°S ≈∏Y ,áYÉ°ùdG ô««¨J
…ƒà°ûdG
.3 ≈dEG 1 øe äGƒ£îdG »a í°Vƒe ƒg ɪc É¡£Ñ°VG
»¡£dG õ«M ø«î°ùJ
≥∏¨e ÜÉÑdG ɪæ«H QGhódG øë°üdG ¬«a Öcôeh ÆQÉa ƒgh »¡£dG õ«M ø«î°ùàH ºb
ÉjÉ≤H ájCG ∑ôJ ΩóY øe ócCÉJ .ójóL ƒgh RÉ¡édG áëFGQ øe ¢ü∏îà∏d ≥FÉbO 10 Ióªd
.»¡£dG õ«M πNGO ∞«∏¨J OGƒªd
ájGƒ°ûdG QR ≈∏Y §¨°VG
(
íàaG hCG (±É≤jEG)
¢Vô©dG IóMh »a (≥FÉbO
Stop QõdG ≈∏Y §¨°VG .âbƒdG AÉ°†≤fG OôéªH á«Jƒ°U IQÉ°TEG Qó°üJ
10:00) 10:00 min ¿É«ÑdG ô¡¶j
.RÉ¡édG ÜÉH
≈dhC’G Iôª∏d RÉ¡édG ΩGóîà°SG πÑb
ΩÉ©£dG OGóYEG »a ∞jhhô쫪dG ¿ôa ΩGóîà°SG πÑb ¬H ΩÉ«≤dG Öéj Ée πc Éæg óéà°S
.
¿ÉeC’G äGOÉ°TQEG
ô¡¶J ,»FÉHô¡μdG QÉ«àdG ´É£≤fG ó©H hCG ≈dhC’G Iôª∏d AÉHô¡μdÉH RÉ¡édG π«°UƒJ óæY
.¢Vô©dG IóMh »a
.1 .
.2 .(𫨰ûJ) Start QõdG ≈∏Y §¨°VG
AõL ’hCG CGôbG .≈dhC’G Iôª∏d
áYÉ°ùdG §Ñ°V
.¿É«ÑdG á°TÉ°T »a QÉØ°UCG áKÓK
0
õeôdGh "12:00" ¿É«ÑdG ô¡¶j
0
0
.»dÉëdG âbƒdG §Ñ°V ºàj
QõdG ≈∏Y §¨°VG
QõdG ≈∏Y §¨°VG
.1 .
.2 .QGhódG QÉ«àN’G ìÉàØe ΩGóîà°SÉH áYÉ°ùdG §Ñ°VG
.3 .iôNCG Iôe
âbƒdG AÉØNEG
.(±É≤jEG) Stop ≈∏Y §¨°VG ºK 0 QõdG ≈∏Y §¨°VG
.áZQÉa ¢Vô©dG IóMh íÑ°üàa
7
Page 47

π«°UƒàdGh Ö«côàdG
!
1
.í«ë°U πμ°ûH Öcôeh ¢VQDƒe ¢ùÑ≤ªH ÉkªFGO ¬∏«°UƒJ Ωõ∏jh ,¢ùHÉ≤H Ohõe RÉ¡édG
.(
B hCG L õeôdÉH Iõ«ªe IôFGO ™WÉb) ô«ÑeCG 10 ô¡°üªdG ájɪM ∫ó©e ¿ƒμj ¿CG Öéjh
≈∏Y áfhóªdG »FÉHô¡μdG ó¡édG ᪫≤d É≤HÉ£e á«FÉHô¡μdG áμÑ°ûdG ó¡L ¿ƒμj ¿CG Öéj
.™æ°üdG áMƒd
.§≤a ¢ü°üîàe »FÉHô¡c áaô©ªH AÉHô¡μdG πHÉc ô««¨Jh ¢ùHÉ≤dG Ö«côJ ÉkªFGO Öéj
.ɪFGO ó«dG ∫hÉæàe »a »FÉHô¡μdG ¢ùHÉ≤dG ¿ƒμj ¿CG Öéj
π«ªëàdG IOÉjõa .ádÉWEG ∑Ó°SCG ’h QÉ«à∏d äÓ°Uƒe ’h IOó©àe ¢ùHGƒb Ωóîà°ùJ ’
.≥jôM ܃°ûf ≈dEG …ODƒJ
.§≤a »dõæªdG ΩGóîà°SÓd ¢ü°üîe RÉ¡édG Gòg
º°S
85 áaÉ°ùªH á«°VQC’G øe ≈∏YCG)
ƒà°ùeh âHÉK í£°S äGP Ió°†æe ≈∏Y RÉ¡édG ™°V
m
¢Vô©àJ ’CG Öéj ¬∏Ø°SCGh √ÓYCÉHh RÉ¡édG ô¡¶H IOƒLƒªdG ájƒ¡àdG äÉëàa .(πbC’G ≈∏Y
.πbC’G ≈∏Y º°S 30 RÉ¡édG í£°S ≈∏YCG ÆGôØdG õ«M ´ÉØJQG ¿ƒμj ¿CG ≈YGôjh .OGó°ùfÓd
300
30
100100
ºμëàdG áMƒd
π«°UÉØàdG ¢†©H »a äÉaÓàNG ô¡¶J óbh .ºμëàdG áMƒ∏d ÉkeÉY Ék°VôY Éæg iôJ
.RÉ¡édG πjOƒe Ö°ùM
áYÉ°ùdG QR
±É≤jE’G QR
ájGƒ°ûdG QR
IôcGòdG QR
á«μ«JÉeƒJhC’G èeGôÑdG QGQRCG
èeÉfôÑdG QR =
¿RƒdG QR =
¢VôY IóMh
»¡£dG øeRh áYÉ°ùdG
min.
kg
Stop
90 180 360 600
i
P
(
g
Start
900
QGhódG QÉ«àNC’G ìÉàØe
áYÉ°ùdG §Ñ°†d
»¡£dG øeRh
á«μ«JÉeƒJhC’G èeGôÑdG §Ñ°†d hCG
𫨰ûàdG QR
§Ñ°V ´É°VhCG QGQRCG
∞jhhô쫪dG ¿ôa IQób
90
•Gh
•Gh 180
•Gh 360
•Gh 600
•Gh 800
ÜÉÑdG íàa QR
QGhódG QÉ«àN’G ìÉàØe ≈∏Y §¨°VG .êQÉî∏d QGhódG QÉ«àN’G ìÉàØe Öë°S øμªj
.»LQÉîdG hCG »∏NGódG ™°VƒdG ≈∏Y ¬à«Ñãàd
QGhódG QÉ«àN’G ìÉàØe
.áWƒÑ°†ªdG º«≤dGh á«°SÉ«≤dG º«≤dG ô««¨àd QGhódG QÉ«àN’G ìÉàØe Ωóîà°ùoj
6
Page 48

!áHÉ°UE’G ô£N
≈∏Y IóYÉ°ùe πFÉ°Sh hCG êÉLR ᣰTÉc Ωóîà°ùJ ’
.ádÉcCG hCG áæ°ûN ∞«¶æJ OGƒe hCG ∞«¶æàdG
≈∏Y …ƒàëJ ób ±õîdG hCG ø«∏°SQƒÑdG øe áYƒæ°üªdG
äÉZGôa ∑Éægh .É¡à«£ZCGh É¡°†HÉ≤e »a Iô«¨°U ܃≤K
√òg ≈dEG πZƒàJ áHƒWQ ájCGh .܃≤ãdG √òg ∞∏N »ØàîJ
.»fGhC’G ∂∏J QÉ°ùμfG »a ÖÑ°ùàJ ¿CG øμªj äÉZGôØdG
»a ΩGóîà°SÓd áæeBG ¿ôa »fGhCG ΩGóîà°SG ≈∏Y ô°üàbG
.∞jhhô쫪dG ¿ôa
áYƒæ°üªdG á«YhC’Gh ¿ôØdG »fGhCG ™°Vh ¿EÉa ,§≤a
Qô°T ódƒJ »a ÖÑ°ùàj ób RÉ¡édG πNGO ¿ó©ªdG øe
¥ÉëdEG ¬fCÉ°T øe Gògh .RÉ¡édG 𫨰ûJ ºàj ÉeóæY
á«fó©e á«YhCG ájCG GóHCG Ωóîà°ùJ ’ .RÉ¡édÉH Qô°†dG
.§≤a ∞jhhô쫪dG á≤jô£H RÉ¡édG ΩGóîà°SG óæY
ΩGóîà°SÓd áæeBG ¿ôa »fGhCG ΩGóîà°SG ≈∏Y ô°üàbGh
¿ôa ,∂dP øe ’óH ,Ωóîà°SG hCG ,∞jhhô쫪dG ¿ôa »a
.ø«î°ùJ ´ƒf ™e ∑Gôà°T’ÉH ∞jhhô쫪dG
QGô°VC’G ÜÉÑ°SCG
!¬«ÑæJ
î°ùàe ≥∏¨dG ΩÉμMEG QÉWEG ¿Éc GPEG :≥∏¨dG ΩÉμMEG QÉWE’ ójó°ûdG ñÉ°ùJ’G
k
á«eÉeC’G AGõLC’G ¿CG ɪc .𫨰ûàdG AÉæKCG í«ë°U πμ°ûH ≥∏¨æj ød RÉ¡édG ÜÉH
QÉWEG áaɶf ≈∏Y ÉkªFGO á¶aÉëªdG Öéj ∂dòd .Qô°†àJ ¿CG øμªj IQhÉéªdG äGóMƒ∏d
.≥∏¨dG ΩÉμMEG
»a ’EG RÉ¡édG 𫨰ûàH GóHCG º≤J ’ .π«ªëàdG IOÉjR ≈dEG …ODƒj ¿CG øμªj »¡£dG
ô«°üb QÉÑàNG πªY IóYÉ≤dG √òg øe ≈æãà°ùojh .»¡£dG õ«M »a ΩÉ©W OƒLh ádÉM
.(záÑ°SÉæªdG ¿ôØdG »fGhCG ,∞jhhô쫪dG ¿ôa{ AõL ô¶fG) ¿ôØdG »fGhC’
óHCG §Ñ°†J ’ :∞jhhô쫪dG QÉ°ûa
k
.»LÉLR ≥ÑW ≈∏Y QÉ°ûØdG ¢ù«c ÉkªFGO ™°V .•Gh
.¬«∏Y π«ªëàdG IOÉjR ádÉM »a ¢Uô≤dG õØ≤j ó≤a
»¡W øeõH CGóHG .»¡£dG á«∏ªY ÖbGQ .RÉ¡é∏d »∏NGódG õ«ëdG ≈dEG QGhódG øë°üdG
.áLÉëdG Ö°ùM »¡£dG øeR ádÉWEÉH ºb ºK ,ô°übCG
ÖÑ°ùàj ó≤a .ÜÉÑ∏d »∏NGódG ÖfÉédGh ¿ôØdG ¿GQóL øe º°S 2 øY π≤J ’ áaÉ°ùe
.¬MÓ°UEG Ö©°üj πμ°ûH ÜÉÑ∏d »∏NGódG ÖfÉédÉH êÉLõdG ±ÓJEG »a Qô°ûdG
.Qô°ûdG ó«dƒJ ∫ÓN øe RÉ¡édÉH Qô°†dG ≥ë∏J ó≤a .RÉ¡édG πNGO Ωƒ«æeƒdC’G
ªFGO ¢UôMG :ìƒàØe ÜÉÑdGh RÉ¡édG ójôÑJ
GPEG ÜÉÑdG ¿CG ≈YGôjh .RÉ¡édG ÜÉH »a ô°üëæj A»°T …CG π©éJ ’h .OôÑj »¡£dG
¿CG øμªj IQhÉéªdG äGóMƒdG äÉ¡LGh ¿EÉa ,§≤a §«°ùH QGó≤ªH ƒdh ÉkMƒàØe ¿Éc
¿ôa 𫨰ûJ ≈∏Y ÉkÑ∏°S ôKDƒj ’h »©«ÑW ôeCG Gògh .RÉ¡édG á«°VQCGh á«∏NGódG
.»¡£dÉH É¡«a Ωƒ≤J Iôe πc ∞ãμàªdG AɪdG í°ùeG ,CGó°U çhóM ™æªd .∞jhhô쫪dG
k
600 øe ôÑcCG ᪫b ≈∏Y IQó≤dG
óHCG ∞jhhô쫪dG ¿ôa Ωóîà°ùJ ’
k
J ¿CG Öéj :Qô°ûdG ódƒJ
o
.âbƒdG QhôªH Qô°†àJ
øe Iô«¨°U äÉ«ªc ΩGóîà°SG ≈∏Y ô°üàbG .∫ƒëμdG øe
.∫ƒëμdG øe á«dÉY áÑ°ùf ≈∏Y …ƒàëJ »àdG äÉHhô°ûªdG
■ .äÉ≤≤°ûJ ≈dEG Qƒ£àJ ób RÉ¡édG ÜÉH êÉLR ¢ThóN
.¢UôëH RÉ¡édG ÜÉH íàaG
■ ¿ôØdG »fGhCG .≥≤°ûàJ ób áÑ°SÉæªdG ô«Z ¿ôØdG »fGhCG
ó©H ≈àM hCG AÉæKCG ôéØæJ hCG ≥≤°ûàJ ób á«LQÉN
,¬Jô°ûb πNGO ¢†«ÑdG ≥∏°ùH GkóHCG º≤J ’ Gòd .ø«î°ùàdG
º≤J ’h .¥ƒ∏°ùªdG ¢†«ÑdG ø«î°ùJ IOÉYEÉH GkóHCG º≤J ’h
hCG »¡W ádÉM »a .äÉjô°û≤dGh äÉ«aó°üdG ≥∏°ùH GkóHCG
QÉØ°U »a Ö≤K πªY ÉkªFGO Öéj ,(¿ƒ«Y) ¢†«ÑdG »∏b
á≤Ñ£dG hCG Iô°û≤dG äGP ᪩WC’G ôéØæJ ób .¢†«ÑdG
¢ùWÉ£ÑdGh ºWɪ£dGh ìÉØàdG πãe ,á«LQÉîdG ájó∏édG
á≤Ñ£dG hCG Iô°û≤dG »a Ö≤K πª©H ºb .(≥fÉ≤ædG) ≥é°ùdGh
■ ∞jhhô쫪dG á≤jô£H RÉ¡édG ΩGóîà°SG ádÉM »a
.ø«î°ùàdG á«∏ªY πÑb á«LQÉîdG ájó∏édG
™°VôdG ∫ÉØWC’G ΩÉ©W ø«î°ùàH GkóHCG º≤J ’ Gòd .™°VôdG
hCG AÉ£¨dG ™∏N ≈∏Y ÉkªFGO ¢UôMGh .á≤∏¨e á«YhCG »a
.Gkó«L ¬LQ hCG ¬Ñ«∏≤àH ºb ,ΩÉ©£dG ø«î°ùJ ó©H .áª∏ëdG
.πØ£∏d ¬ªjó≤J πÑb ΩÉ©£dG IQGôM áLQO øe ócCÉJ
êGôNE’ ¿ôØ∏d GkRÉØb ÉkªFGO Ωóîà°SG .áæNÉ°S ¿ôØdG
.»¡£dG õ«M øe ¿ôØdG »fGhCG hCG äÉ«dɪμdG
Ωóîà°SG .äGƒÑ©dG ≈∏Y IOƒLƒªdG äÉfÉ«ÑdG ÉkªFGO ≈YGôJ
■ ¿EÉa ,Ió°ûH É
.»¡£dG õ«M øe ¥ÉÑWC’G êGôNE’ ¿ôØ∏d GkRÉØb ÉkªFGO
óHCG ¢ùª∏J ’ .ájɨ∏d ÉkæNÉ°S RÉ¡édG íÑ°üj
k
■ õ«M »a ᪩WCG OƒLh ¿hO RÉ¡édG 𫨰ûJ :ΩÉ©W ¿hóH ∞jhhô쫪dG ¿ôa 𫨰ûJ
¢UôMG .ø«î°ùàdG ô°UÉæY hCG »¡£dG õ«ëd á«∏NGódG
áaÉ°ùªd ∫ÉØWC’G ó©HCGh .OôÑj RÉ¡édG ∑ôJ ≈∏Y ÉkªFGO
■ §Ñ°†J ’h .∞jhhô쫪dG ¿ôØd ájɨ∏d á«dÉY IQób G
!äGAGƒàcÉH áHÉ°UE’G ô£N
■ IQGOEG á«dBG ôÑY πZƒàj ¬côJ ΩóY Öéj ¬fGQƒa ádÉM »a Öμ°ùæj …òdG πFÉ°ùdG
.á«aÉc áaÉ°ùªd ∫ÉØWC’G ó©HCGh .¢UôëH RÉ¡édG ÜÉH íàaG
■.QGhódG øë°üdG ¿hóH G
.øNÉ°ùdG »¡£dG õ«M »a AɪdG Ö°üH GkóHCG º≤J ’ .øNÉ°ùdG
■ ≈∏Y ,܃μdG πNGO á≤©∏ªdG πãe ,á«fó©ªdG AÉ«°TC’G ™°Vƒ
¿É«∏¨dG áLQO ≈dEG π°üj πFÉ°ùdG ¿CG »æ©j Gògh .πFGƒ°ùdG
■ ≥FÉbQ øe áYƒæ°üªdG á«YhC’G Ωóîà°ùJ ’ :Ωƒ«æeƒdC’G ≥FÉbQ øe áYƒæ°üªdG á«YhC’G
.í£°ùdG ≈∏Y IOÉ੪dG QÉîÑdG äÉYÉ≤a óYÉ°üàJ ¿CG ¿hO
øNÉ°ùdG πFÉ°ùdG QƒØj ¿CG øμªj AÉYƒ∏d RGõàgG πbCG ™eh
■ õ«M ∑ôJ óæY ¿ôØdG ÜÉH ≥∏Z ≈∏Y É
ÉkªFGO ¢UôMG ,ø«î°ùàdG AÉæKCG .PGPQ ôjÉ£àj hCG Iƒ≤H
IôgÉX ÖæéàJ ∂dòHh .AÉYƒdG πNGO á≤©∏e ™°Vh ≈∏Y
■ ¿GQóédGh ÜÉÑdG IòaÉf ≈∏Y ∞ãμàe AÉe ô¡¶j ɪHQ :»¡£dG õ«M »a ∞ãμàªdG AɪdG
.¿É«∏¨dG ôNCÉJ
■ ájó∏L á≤ÑW ≈∏Y ájƒàëªdG hCG Iô°û≤dG äGP ᪩WC’G
■ ∫ÉØWC’G ΩÉ©W »a …hÉ°ùàdÉH áfƒî°ùdG ´RƒàJ ’
■ »fGhCG íÑ°üJ óbh .IQGôM ¬æe å©ÑæJ øî°ùªdG ΩÉ©£dG
■ .᪩WC’G øî°ùJ ÉeóæY ôéØæJ ób ≥∏¨dG áªμëe äGƒÑ©dG
■ í£°SC’G G
.á«aÉc
■ .RÉ¡édG ÜÉH íàØJ ÉeóæY øNÉ°ùdG QÉîÑdG Üô°ùàj ób
■ QÉîÑdG ¿ƒμJ ≈dEG …ODƒj ób øNÉ°ùdG »¡£dG õ«M »a AɪdG
■ ø«î°ùJ AÉæKCG ¿É«∏¨dG »a ôNCÉJ çóëj ¿CG øμªj
5
Page 49

,ÜÉÑdG ó°üeh ÜÉÑdGh ÜÉÑdG ≥∏Z ΩÉμMEG QÉWEGh »¡£dG
∞«¶æàdGh ájÉæ©dG
.
´ƒ°Vƒe É°†jCG ô¶fG
.Qô°†∏d ÜÉÑdG ≥∏Z ΩÉμMEG QÉWEG hCG »¡£dG õ«M ÜÉH
õ«M ÜÉH ¢Vô©J ádÉM »a GkóHCG RÉ¡édG Ωóîà°ùJ ’
õcôªH π°üJG .Qô°†∏d ÜÉÑdG ≥∏Z ΩÉμMEG QÉWEG hCG »¡£dG
.™«ÑdG ó©H Ée áeóN
.RÉ¡édG º°ùL ∂ØH GkóHCG º≤J ’ .É¡æe RÉ¡édG º°ùL ∂a
õcôªH π°üJG ,ìÓ°UEG hCG áfÉ«°U ∫ɪYCG ájCG AGôLE’
.™«ÑdG ó©H Ée áeóN
!»FÉHô¡μdG ≥©°üdG ô£N
AÉHô¡μdG äÓHÉc ô««¨J hCG ìÓ°UE’G ∫ɪYCG AGôLEG
ø«∏eÉ©dG ø«HQóªdG ø««æØdG óMCG áaô©ªH ’EG áØdÉàdG
ádÉM »a .Éæd á©HÉàdG ™«ÑdG ó©H Ée áeóN õcGôe »a
hCG AÉHô¡μdG øY RÉ¡édG π°üaG ,RÉ¡édÉH π∏N Qƒ¡X
¥hóæ°U »a OƒLƒªdG á«FÉHô¡μdG IôFGódG ™WÉb π°üaG
.™«ÑdG ó©H Ée áeóN õcôªH π°üJG .ôgÉ°üªdG
π©éJ ’ .RÉ¡é∏d áæNÉ°ùdG AGõLC’G á°ùeÓe ádÉM »a
áæNÉ°ùdG AGõLC’G ¢ùeÓJ »FÉHô¡μdG RÉ¡édG äÓHÉc
.GkóHCG RÉ¡é∏d
≥©°U çhóM »a ÖÑ°ùàJ ¿CG øμªj å«M ,QÉîÑdÉH
.»FÉHô¡c
áHƒWôdG hCG IQGôë∏d GkóHCG RÉ¡édG ¢Vô©J ’ .»FÉHô¡μdG
.§≤a ∫õæªdG πNGO RÉ¡édG Gòg Ωóîà°SG .Iójó°ûdG
¬H ¿Éc GPEG RÉ¡édG 𫨰ûàH GóHCG º≤J ’ Gòd .»FÉHô¡μdG
hCG »FÉHô¡μdG QÉ«àdG áμÑ°T øY RÉ¡édG π°üaG .π£Y
.ôgÉ°üªdG ¥hóæ°U »a á«FÉHô¡μdG IôFGódG ™WÉb π°üaG
.™«ÑdG ó©H Ée áeóN õcôªH π°üJG
á∏HÉb OGƒªH GkóHCG ßØàëJ ’ .π©à°ûJ ¿CG øμªj »¡£dG
■ ¢Vô©J ádÉM »a ∞jhhô쫪dG ábÉW Üô°ùàJ ¿CG øμªj
GkóHCG RÉ¡édG ÜÉH íàØJ ’ .»¡£dG õ«M »a ∫É©à°TÓd
¬∏°üaGh RÉ¡édG ∞bhCG .¬∏NGóH áæNOCG OƒLh ádÉM »a
IôFGódG ™WÉb π°üaG hCG »FÉHô¡μdG QÉ«àdG áμÑ°T øY
.ôgÉ°üªdG ¥hóæ°U »a á«FÉHô¡μdG
æNÉ°S RÉ¡édG íÑ°üj
k
■ ádÉM »a Iõ¡LC’G øe ∞jhhô쫪dG ábÉW Üô°ùàJ
.AÉ«°TC’G ™°Vƒd ¿Éμªc hCG πª©∏d í£°ùc GkóHCG RÉ¡é∏d
æNÉ°S RÉ¡édG íÑ°üj
k
≈fOCÉH ≥∏©àj ɪ«a
π«°UƒàdGh Ö«côàdG
AõL »a IOQGƒdG
πNGO RÉ¡édG Ö«côJ Rƒéj ’h .RÉ¡é∏d ¢Uƒ∏N º«b
.áÑcôe ïÑ£e IóMh
»°SÉ°SC’G ¢Vô¨dG ±ÓîH ¢VôZ …C’ RÉ¡édG ΩGóîà°SG ¿EG
■ Rƒéj ’h .IQƒ£N πãªJ ᪫∏°ùdG ô«Z ìÓ°UE’G ∫ɪYCG
.äÉ«Ø∏J ÖÑ°ùj óbh Gô«£N GôeCG ó©j ¬d ¢ü°üîªdG
hCG ¢ùHÓªdG hCG ΩÉ©£dG ∞«ØéJ :»∏j ɪH íª°ùoj ’
äÉ°ûeô≤ªdG hCG ܃ÑëdG ¢SÉ«cCG hCG áÄaóàdG Ö°TÉÑ°T
.¬HÉ°T Ée hCG áÑWôdG ∞«¶æàdG á°ûªbCGh èæØ°SE’G ™£bh
Ö°TÉÑ°ûdG π©à°ûJ ¿CG ∫ÉãªdG π«Ñ°S ≈∏Y ø쪪dG øªa
ó©H ≈àM ,äÉ°ûeô≤ªdG hCG ܃ÑëdG ¢SÉ«cCGh ICÉaóªdG
≈∏Y QÉ°üàb’G Öéj .É¡àÄaóJ øe äÉYÉ°S IóY Qhôe
■ á«FÉHô¡μdG Iõ¡LC’G äÓHÉμd ádRÉ©dG IOɪdG ô¡°üæJ ób
.äÉHhô°ûªdGh ᪩WC’G OGóYEG »a RÉ¡édG ΩGóîà°SG
óHCG º≤J ’ .π©à°ûJ ¿CG øμªj ᪩WC’G
k
.áfƒî°ù∏d á¶aÉM äGƒÑY πNGO
∂«à°SÓÑdG øe áYƒæ°üe á«YhCG πNGO ᪩WCG ø«î°ùàH º≤J ’
■ hCG »dÉ©dG §¨°†dÉH ∞«¶æJ Iõ¡LCG ájCG Ωóîà°ùJ ’
.áÑbGôe ¿hO ∫É©à°TÓd á∏HÉb OGƒe ájCG hCG ¥QƒdG hCG
ΩRÓdG øe ≈∏YCG IQób ≈∏Y ∞jhhô쫪dG ¿ôa §Ñ°†J ’
äÉfÉ«ÑdÉH ó°Tôà°SG .ΩRÓdG øe ∫ƒWCG ΩGóîà°SG Iôàa hCG
■ ≥©°üdG »a ÖÑ°ùàJ ób RÉ¡édG »a πZƒàJ »àdG áHƒWôdG
.π«dódG Gòg »a IOQGƒdG
.᪩WC’G ∞«ØéJ »a GkóHCG ∞jhhô쫪dG ¿ôa Ωóîà°ùJ ’
≈∏Y ájƒàëªdG IóªéàªdG ᪩WC’G áHGPEÉH GkóHCG º≤J ’ Gòd
IQó≤H ,kÓãe õÑîdÉc ,É¡æ«î°ùJ hCG AɪdG øe á∏«∏b áÑ°ùf
■ ≥©°üdG »a ÖÑ°ùàj ¿CG øμªj RÉ¡édG »a π£Y OƒLh
.ΩRÓdG øe ∫ƒWCG IôàØd hCG ∞jhhô쫪dG ¿ôØd ájɨ∏d á«dÉY
.√óMh ΩÉ©£dG âjR ø«î°ùJ »a GkóHCG ∞jhhô쫪dG
!QÉéØf’G ô£N
■ õ«M »a É¡æjõîJ ºàj »àdG ∫É©à°TÓd á∏HÉ≤dG OGƒªdG
■ …ƒ∏©dG í£°ùdG Ωóîà°ùJ ’ .ájɨ∏d É
■ äGOÉ°TQE’G ≈YGôJ .ájɨ∏d É
■
■ ᪩WCG ø«î°ùàH G
■ ¿ôa Ωóîà°ùJ ’ .π©à°ûj ¿CG øμªj ΩÉ©£dG âjR
óHCG º≤J ’ .™ØJôe ó¡éH πª©j RÉ¡édG
k
!á¨dÉH ¥hôëH áHÉ°UE’G ô£N
¿ôØdG »fGhCG hCG äÉ«dɪμdG êGôNE’ ¿ôØdG äGRÉØb ÉkªFGO
.»¡£dG õ«M øe
≈∏Y …ƒàëJ ᪩WCG ô«°†ëàH GkóHCG º≤J ’ Gòd .øNÉ°ùdG
á«dÉY áÑ°ùf ≈∏Y á∏ªà°ûªdG πFGƒ°ùdG øe Iô«Ñc äÉ«ªc
■.RÉ¡édG º°ùL ∂ØH G
É¡©°Vh ádÉM »a ôéØæJ ób iôNC’G ᪩WC’Gh πFGƒ°ùdG
ø«î°ùàH GkóHCG º≤J ’ Gòd .≥∏¨dG áªμëe á«YhCG πNGO
.≥∏¨dG áªμëe á«YhCG πNGO iôNC’G ᪩WC’G hCG πFGƒ°ùdG
■ Ωóîà°SG .ájɨ∏d áæNÉ°S íÑ°üJ ¿ôØdG »fGhCGh äÉ«dɪμdG
!᪫°ùL á«ë°U QGô°VCG çhóM ô£N
■ »¡£dG õ«M »a π©à°ûJ ¿CG øμªj ∫ƒëμdG IôîHCG
.∞jhhô쫪dG ábÉW Üô°ùàJ ¿CG øμªjh .º«∏°S πμ°ûH
ádGREÉH ºbh ,᪶àæe äGôàa ≈∏Y RÉ¡édG ∞«¶æàH ºb
õ«M áaɶf ≈∏Y ÉkªFGO ßaÉM .QƒØdG ≈∏Y ᪩WC’G ÉjÉ≤H
■ ¬Ø«¶æJ ºàj ºd GPEG Qô°†∏d RÉ¡édG í£°S ¢Vô©àj ób
4
Page 50

äÉjƒàëªdG ¢Sô¡a
Ñ
12 ...............................................................................................™«ÑdG ó©H Ée áeóN
12 ................................................................................FD ™æ°üdG ºbQh E èàæªdG ºbQ
12 ....................................................................................................á«æØdG äÉØ°UGƒªdG
12 ..............................................áÄ«ÑdG ≈∏Y á¶aÉëe á≤jô£H äÉØ∏îªdG øe ¢ü∏îàdG
12 ..........................................................................................á«μ«JÉeƒJhC’G èeGôÑdG
12 ............................................................................................................èeÉfôH §Ñ°V
13 .......................................................á«μ«JÉeƒJhC’G èeGôÑdG ΩGóîà°SÉH óªéàdG áHGPEG
13 .................................................................á«μ«JÉeƒJhC’G èeGôÑdG ΩGóîà°SÉH »¡£dG
14 ...........................................................................................∑ôà°ûªdG »¡£dG èeÉfôH
14 .................... ÉæH ¢UÉîdG »¡£dG ƒjOƒà°S »a Égô«°†ëJ ºJ »àdG ¥ÉÑWC’G
14 ...................................................................................∫hGóédG ¢Uƒ°üîH äÉeƒ∏©e
14 ..............................................................................................................óªéàdG áHGPEG
15 ................................................IóªéªdG ᪩WC’G »¡W hCG ø«î°ùàdG hCG óªéàdG áHGPEG
15 ..........................................................................................................ΩÉ©£dG ø«î°ùJ
16 ..............................................................................................................ΩÉ©£dG »¡W
16 ...........................................................................∞jhhô쫪dG ¿ôØH á°UÉN íFÉ°üf
16 ..........................................................................................................AGƒ°û∏d íFÉ°üf
17 .....................................................∞jhhô쫪dG ¿ôah ájGƒ°û∏d ∑ôà°ûªdG ΩGóîà°S’G
18 ............................EN 60705 áØ°UGƒª∏d É≤ah IôÑàîªdG ä’ƒcCɪdG ¥ÉÑWCG
18 .........................................................∞jhhô쫪dG ΩGóîà°SÉH óªéàdG áHGPEGh »¡£dG
ÉgóéJ äÉeóîdGh QÉ«¨dG ™£bh äÉ«dɪμdGh дЙйажªdG ∫ƒM äÉeƒ∏©ªdG øe ójõªdG
≈∏Y »fhôàμdE’G ôéàªdG »ah www.bosch-home.com âfôàfE’G ™bƒe ≈∏Y
www.bosch-eshop.com ™bƒe
3 ............................................................................................᪡ªdG ¿ÉeC’G äGOÉ°TQEG
5 ........................................................................................................... QGô°VC’G ÜÉÑ°SCG
6 ................................................................................................... π«°UƒàdGh Ö«côàdG
6 ............................................................................................................. ºμëàdG áMƒd
6 ................................................................................................QGhódG QÉ«àN’G ìÉàØe
7 ............................................................................................................ø«î°ùàdG ´GƒfCG
7 ................................................................................................................... äÉ«dɪμdG
7 ...................................................................... ≈dhC’G Iôª∏d RÉ¡édG ΩGóîà°SG πÑb
7 ...............................................................................................................áYÉ°ùdG §Ñ°V
7 .....................................................................................................»¡£dG õ«M ø«î°ùJ
8 ....................................................................................................... ∞jhhô쫪dG ¿ôa
8 ............................................................................. ¿ôØdG »fGhCG ¢Uƒ°üîH äɶMÓe
8 ........................................................................∞jhhô쫪dG ¿ôa IQób §Ñ°V ´É°VhCG
8 ..............................................................................................∞jhhô쫪dG ¿ôa §Ñ°V
8 ............................................................................................................ ójôÑàdG áMhôe
9 ...........................................................................................................................AGƒ°ûdG
9 .............................................................................................................. ájGƒ°ûdG §Ñ°V
9 ............................................ ájGƒ°ûdGh ∞jhhô쫪dG ¿ôØd ∑ôà°ûªdG ΩGóîà°S’G
9 .............................................................................. ájGƒ°ûdGh ∞jhhô쫪dG ¿ôa §Ñ°V
10 .......................................................................................................................IôcGòdG
10 ...........................................................................IôcGòdG »a §Ñ°†dG ´É°VhCG øjõîJ
10 ...........................................................................................................IôcGòdG 𫨰ûJ
10 ...............................................................................á«Jƒ°üdG IQÉ°TE’G Ióe ô««¨J
10 ..................................................................................................∞«¶æàdGh ájÉæ©dG
11 ...........................................................................................................∞«¶æàdG OGƒe
11 ..........................................................................................................∫É£YC’G ∫hóL
¢UÉî°TC’G hCG á«∏≤©dG hCG á«°ùëdG hCG á«fɪ°ùédG äGQó≤dG
á£jô°T áaô©ªdG hCG IôÑîdG »a Qƒ°üb º¡jód øjòdG
hCG º¡àÑbGôªH º¡àeÓ°S øY ∫hDƒ°ùe ¢üî°T Ωƒ≤j ¿CG
ócCÉàdG ™e ¿ÉeCÉH RÉ¡édG ΩGóîà°SG á«Ø«c ≈dEG º¡¡«LƒJ
.∂dòH á£ÑJôªdG QÉ£NCÓd º¡cGQOEG øe
Ö©∏dG hCG RÉ¡édÉH åÑ©dÉH ∫ÉØWCÓd ìɪ°ùdG Rƒéj ’
hCG RÉ¡édG ∞«¶æJ ∫ÉØWCÓd Rƒéj ’ .¬æe Üô≤dÉH hCG ¬«∏Y
ø°S »a Gƒfƒμj ºd Ée ¬«∏Y áeÉ©dG áfÉ«°üdG ∫ɪYCG AGôLEG
.∂dP AÉæKCG º¡àÑbGôe ºàj ¿CG ≈∏Y ,πbC’G ≈∏Y äGƒæ°S
RÉ¡édG øY ºgOÉ©HEG Öéj äGƒæ°S 8 ø°S ¿hO ∫ÉØWC’G
.áæeBG áaÉ°ùªd AÉHô¡μdG πHÉch
!≥jôM ܃°ûf ô£N
Ñcôoe RÉ¡édG ¿Éc GPEG .ájɨ∏d ÉkæNÉ°S RÉ¡édG íÑ°üj ób
k
áfƒî°ùdG ºcGôàJ ±ƒ°ùa ,»aôNR ÜÉH äGP IóMh πNGO
RÉ¡édG 𫨰ûàH º≤J ’ .»aôNõdG ÜÉÑdG ≥∏Z óæY
.ìƒàØe »aôNõdG ÜÉÑdGh ’EG
■ É
᪡ªdG ¿ÉeC’G äGOÉ°TQEG
∂æ쪫°S §≤a òFóæ©a .ájÉæ©H äɪ«∏©àdG √òg CGôbG
π«dódG Gò¡H ßØàMG .øeBGh í«ë°U πμ°ûH ∑RÉ¡L ΩGóîà°SG
.ójóédG ∂dɪ∏d ¬ª«∏°ùàd hCG Ék≤M’ ¬eGóîà°S’
¬LGôNEG ó©H RÉ¡édÉH QGô°VCG OƒLh ΩóY øe ≥≤ëJ
ádÉM »a RÉ¡édG π«°UƒàH º≤J ’h .∞«∏¨àdG IƒÑY øe
.π≤ædG á«∏ªY øY áéJÉf QGô°VCG ±É°ûàcG
»æa áaô©ªH ’EG ¢ùHGƒb ¿hóH Iõ¡LC’G π«°UƒJ Rƒéj ’
π«°UƒJ øY èJÉædG Qô°†dG πª°ûj ’ ¿Éª°†dÉa .óªà©e
8
¿CG Öéj .§≤a »dõæªdG ΩGóîà°SÓd ¢ü°üîe RÉ¡édG Gòg
᪩WC’G ô«°†ëJ ≈∏Y GkQƒ°ü≤e RÉ¡édG ΩGóîà°SG ¿ƒμj
.𫨰ûàdG AÉæKCG RÉ¡édG áÑbGôe ø«©àjh .äÉHhô°ûªdGh
.§≤a ∫õæªdG πNGO RÉ¡édG Gòg Ωóîà°SG
ôàe
4000 ´ÉØJQG ≈àM ΩGóîà°SÓd Ö°SÉæe RÉ¡édG Gòg
ø°S ¥ƒa ∫ÉØWC’G πnÑpb øe RÉ¡édG Gòg ΩGóîà°SÉH íª°ùoj
»a ¢ü≤f øe ¿ƒfÉ©j øjòdG ¢UÉî°TC’G hCG äGƒæ°S
.í«ë°U ô«Z πμ°ûH RÉ¡édG
.ôëÑdG í£°S iƒà°ùe ¥ƒa
8
3
Page 51

Page 52

Robert Bosch Hausgeräte GmbH
Carl-Wery-Straße 34
81739 München
Germany
www.bosch-home.com
*9000921818*
9000921818
981025
 Loading...