

Page 1
DOOR HINGE
Figure 2
REVERSAL KIT
INSTRUCTIONS
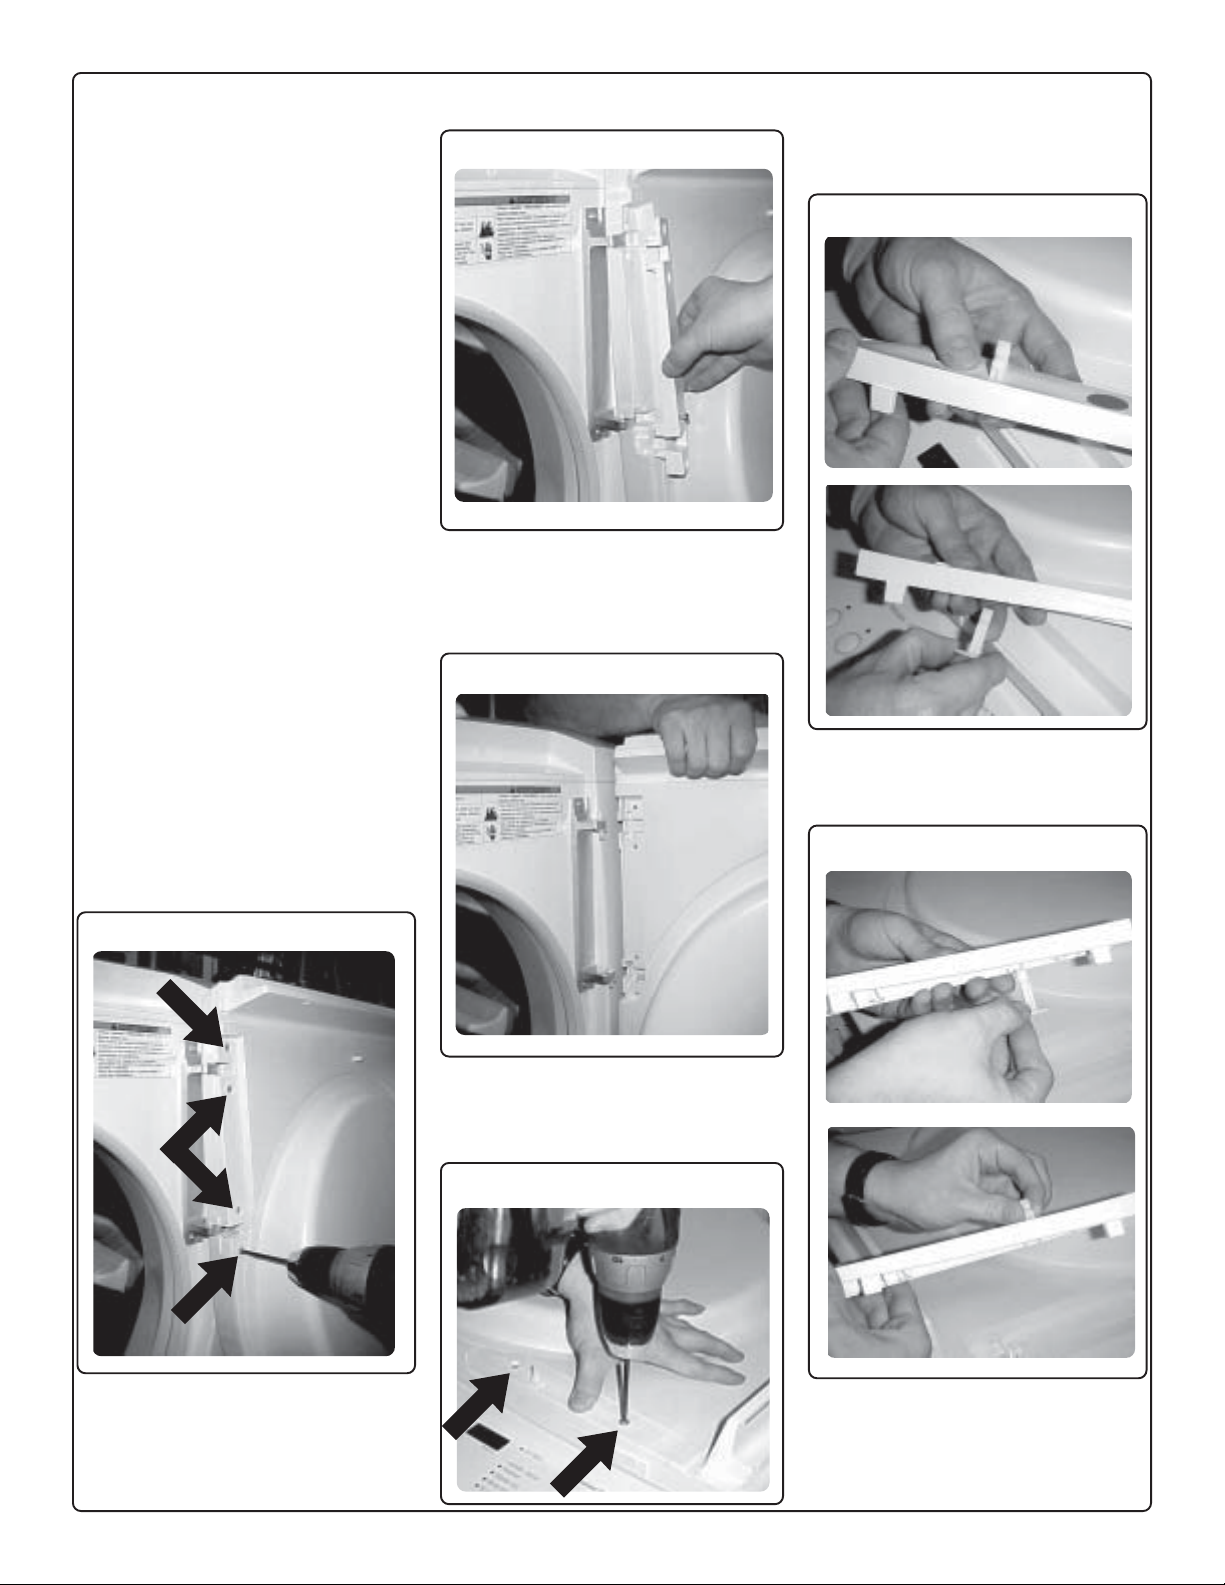
4) Remove the hinge coverplate as
shown in Figure 2.
8) Set the two screws aside.
9) Remove the striker coverplate/latch
assembly from the dryer door.
10) Remove the latch from the striker
coverplate as shown in Figure 5.
Your Bosch clothes dryer leaves our
factory with its door hinged on the right
side. With the Door Hinge Reversal kit
you can place the hinge on the left side if
doing so will make using your clothes
dryer more convenient.
1. Materials Needed
• T20 Torx screwdsriver
• Small flat-head screwdriver
2. Materials Supplied
• Hinge (left side version)
• Spacer Nuts (2)
• Striker Coverplate (right side version)
• Hinge Coverplate (left side version)
• Latch Retainer
• Bottom Hinge Hole Cover (1)
•Top Hinge Hole Cover
• Instructions
3. Procedure
NOTE: Throughout these instructions,
the phrases “right side” and “left side”
refer to the dryer and dryer door as seen
when you are facing the front of the dryer
with the dryer door shut.
A. Remove and Prepare the Dryer
Door
1) Open the dryer door as far as it will
open.
2) Remove the four screws that secure
the hinge coverplate as shown in Figure
1.
Figure 5
NOTE: The door weighs about 8 lbs.
5) Grasp the dryer door, lift it slightly,
and remove it from its hinge as shown in
Figure 3.
Figure 3
11) Take the supplied right-side version
striker coverplate and insert the latch into
it as shown in Figure 6.
Figure 6
Figure 1
3) Set the four screws aside.
6) Set the dryer door on a work surface.
7) Remove the two screws that secure
the striker coverplate to the dryer door’s
left side as shown in Figure 4.
Figure 4
1
Page 2
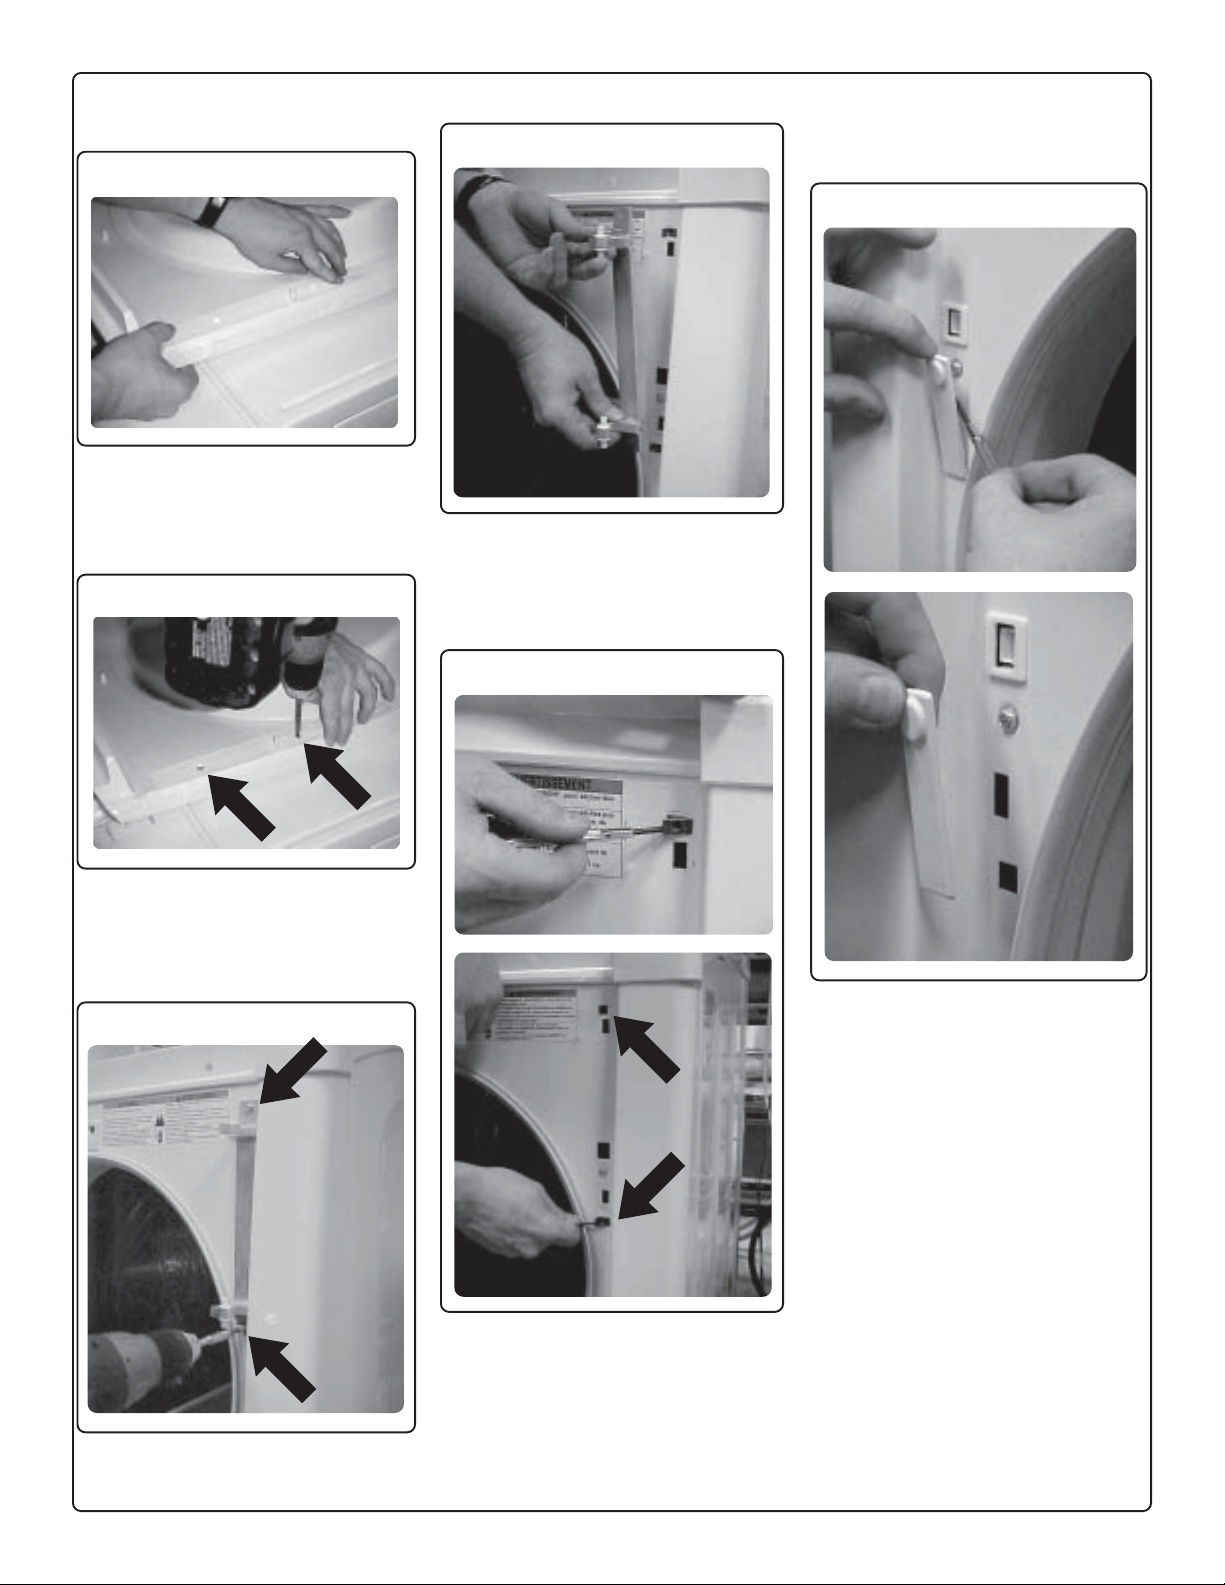
12) Place the right-side version striker
coverplate/latch assembly on the dryer
door’s right side as shown in Figure 7.
Figure 7
13) Retrieve the two striker coverplate
screws and use them to secure the rightside version striker coverplate/latch
assembly to the dryer door’s right side as
shown in Figure 8.
Figure 8
3) Lift the hinge and remove it from the
dryer’s right side as shown in Figure 10.
Figure 10
4) Set the hinge aside.
5) Use a small flat head screwdriver to
pry and remove the two spacer nuts from
the dryer’s right side as shown in Figure
11.
7) Use a small flat head screwdriver to
pry the bottom hinge hole cover from the
dryer’s left side. Lift the bottom hinge hole
cover slightly, and remove it as shown in
Figure 12.
Figure 12
B. Prepare the Dryer
1) Remove the two screws that secure
the hinge to the dryer’s right side as
shown in Figure 9.
Figure 9
Figure 1 1
7) Set the bottom hinge hole cover
aside.
2) Set the two screws aside.
2
6) Set the spacer nuts aside.
Page 3

9) Use a small flat head screwdriver to
pry the top hinge hole cover from the
dryer’s left side. Lift the top hinge hole
cover slightly, and remove it as shown in
Figure 13.
Figure 13
11) Take the supplied bottom hinge hole
cover, position it on the dryer’s right side
as shown in Figure 15, and press it into
place.
Figure 15
NOTE: Considerable pressure is
required to insert the spacer nuts.
13) Take the two supplied spacer nuts,
position them on the dryer’s left side as
shown in Figure 17, and press them into
place.
Figure 17
10) Take the supplied top hinge hole
cover, position it on the dryer’s right side
as shown in Figure 14, and press it into
place.
Figure 14
12) Take the supplied latch retainer,
positon it on the dryer’s right side as
shown in Figure 16, and press it into
position.
Figure 16
14) Take the supplied left-side version
hinge and position it on the dryer’s left
side as shown in Figure 18. Make certain
that the two holes on the hinge line up
with the two spacer nut holes.
Figure 18
3
Page 4

15) Retrieve the two screws from the
right-side version hinge, and use them to
secure the left-side version hinge to the
dryer’s left side as shown in Figure 19.
Figure 19
2) Take the supplied left-side version
hinge coverplate and position it as shown
in Figure 21.
Figure 21
5) On the top edge of the dryer door,
there are two signal strips, one red and
one white, embedded in the dryer door as
shown in Figure 23.
Figure 23
The red strip signals the side of the
dryer door that opens.
6) On the underside of the dryer door
edge are two square holes as shown in
Figure 24.
C. Install the Dryer Door
1) Retrieve the dryer door, position it
over the hinge as shown in Figure 20, and
drop it into place.
Figure 20
3) Retrieve the four screws from the
right-side hinge coverplate, and use them
to secure the left-side hinge coverplate as
shown in Figure 22.
Figure 22
Figure 24
7) Insert a small flat head screwdriver
into the holes to lift and remove the signal
strips as shown in Figure 25.
Figure 25
4) Swing the dryer door several times
through its range of motion to check for
smooth operation.
4
Page 5

8) Change the positions of the signal
strips so that the red signal strip is on
dryer door’s right side and the white
signal strip is on the dryer door’s left side
as shown in Figure 26.
Figure 26
5
 Loading...