

Bosch FR 120 Operating Instructions For The User
Operating instructions for the user
Room temperature controller with solar control
FR 120
6 720 612 481-00.1R
6 720 800 818 (2012/02)

6 720 800 818 (2012/02)
2 |
Dear Customer,
The controller is the “cool head” of your heating
system. At the factory, we have set it up to suit
most requirements. As a result, daily operation is
very easy. The large and clear display of the
controller offers you “plain text” and shows you
all relevant information.
Program your heating
Using the controller, you can select when you
require less heat thus saving energy.
One example: You work and are away from home
during the day. You may then like to have the full
heating comfort in the morning and evening.
During the daytime, you'll save energy in
“economy mode”, whilst at night, the heating
system will go further into setback. You may, of
course, have very different demands, because
you're at home all day. No matter what your
lifestyle and habits, the heating system will
adjust perfectly to your requirements.
Even in unforeseen circumstances: 100 %
comfort
Perhaps you arrive home earlier than planned one
day and would like to have your home warm right
away, even though your heating appliance is
working in “economy mode” right now. In that
case, the controller changes over to “heating
mode” at the push of a button. In next to no time
you'll have it as cosy as you want. Another
example: You want to take a shower although
your heating appliance is operating in “economy
mode” right now. Here too, the solution is
available at the push of a button. The water is
heated and within the shortest time, you'll be
able to enjoy a hot shower. Subject to the type of
DHW heating, the “economy mode” starts again
automatically after 30 or 60 minutes.
Solar optimisation for DHW heating
With our patented process
“SolarInside-ControlUnit” you can save up to
15 % additional energy during DHW heating. You
will find details regarding the solar yield in the
info menu of the controller.
These operating instructions
These operating instructions contain the most
important information on the daily operation of
the controller.
You can find a list of further interesting controller
functions in Chapter 6
If you wish to “go deeper”, you will find detailed
descriptions of all available functions in the full
installation and operating instructions.
Technical terms are explained at the end of these
operating instructions.
We hope you will enjoy your new Bosch product!
Your Bosch team.

6 720 800 818 (2012/02)
Contemnts | 3
Contemnts
1 Key to symbols and safety precautions . . 4
1.1 Key to symbols . . . . . . . . . . . . . . . . . 4
1.2 Safety precautions . . . . . . . . . . . . . . 4
2 Information about the controller . . . . . . . 5
2.1 Disposal . . . . . . . . . . . . . . . . . . . . . . 5
2.2 Cleaning the casing . . . . . . . . . . . . . 5
3 Display . . . . . . . . . . . . . . . . . . . . . . . . . . . . 6
4 Operation with closed flap . . . . . . . . . . . . 7
4.1 Controls . . . . . . . . . . . . . . . . . . . . . . 7
4.2 If you feel too cold or too hot . . . . . . 8
4.3 If you want to change the heating
program temporarily . . . . . . . . . . . . 8
4.4 If you want to change the DHW
program temporarily . . . . . . . . . . . . 9
5 Operation with flap open . . . . . . . . . . . . 10
5.1 Controls . . . . . . . . . . . . . . . . . . . . . 10
5.2 Changing the room temperatures for
the heating program permanently . 12
5.3 Constant room temperature . . . . . . 14
5.4 Adjusting the heating program . . . . 15
5.4.1 Adjusting the heating program to suit
individual requirements . . . . . . . . . 16
5.4.2 Resetting a heating program to its
factory settings . . . . . . . . . . . . . . . 17
5.5 Selecting and adjusting a DHW
program . . . . . . . . . . . . . . . . . . . . . 18
5.5.1 Combining a DHW program with the
heating program . . . . . . . . . . . . . . 19
5.5.2 Activating a DHW program . . . . . . . 20
5.5.3 Adjusting a DHW program
individually . . . . . . . . . . . . . . . . . . 20
5.5.4 Resetting a DHW program to its
factory settings . . . . . . . . . . . . . . . 21
5.6 Setting up a holiday program . . . . . 22
5.6.1 Setting the start of the holiday . . . . 22
5.6.2 Setting the end of the holiday . . . . 23
5.6.3 Starting the holiday program . . . . . 23
5.6.4 Terminating the holiday program
early . . . . . . . . . . . . . . . . . . . . . . . . 23
5.7 Changing the time and date . . . . . 24
5.7.1 Changing the time . . . . . . . . . . . . 24
5.7.2 Changing the date . . . . . . . . . . . . 24
6 Details regarding further functions . . . 25
7 Environmental protection . . . . . . . . . . . 26
8 Troubleshooting . . . . . . . . . . . . . . . . . . . 27
8.1 Troubleshooting “perceived”
faults . . . . . . . . . . . . . . . . . . . . . . . 27
8.2 Removing a displayed fault . . . . . . 29
9 Energy saving tips . . . . . . . . . . . . . . . . . 30
10 Menu structure . . . . . . . . . . . . . . . . . . . 31
Technical terms . . . . . . . . . . . . . . . . . . . 34
6 720 800 818 (2012/02)
4 | Key to symbols and safety precautions
1 Key to symbols and safety precautions
1.1 Key to symbols
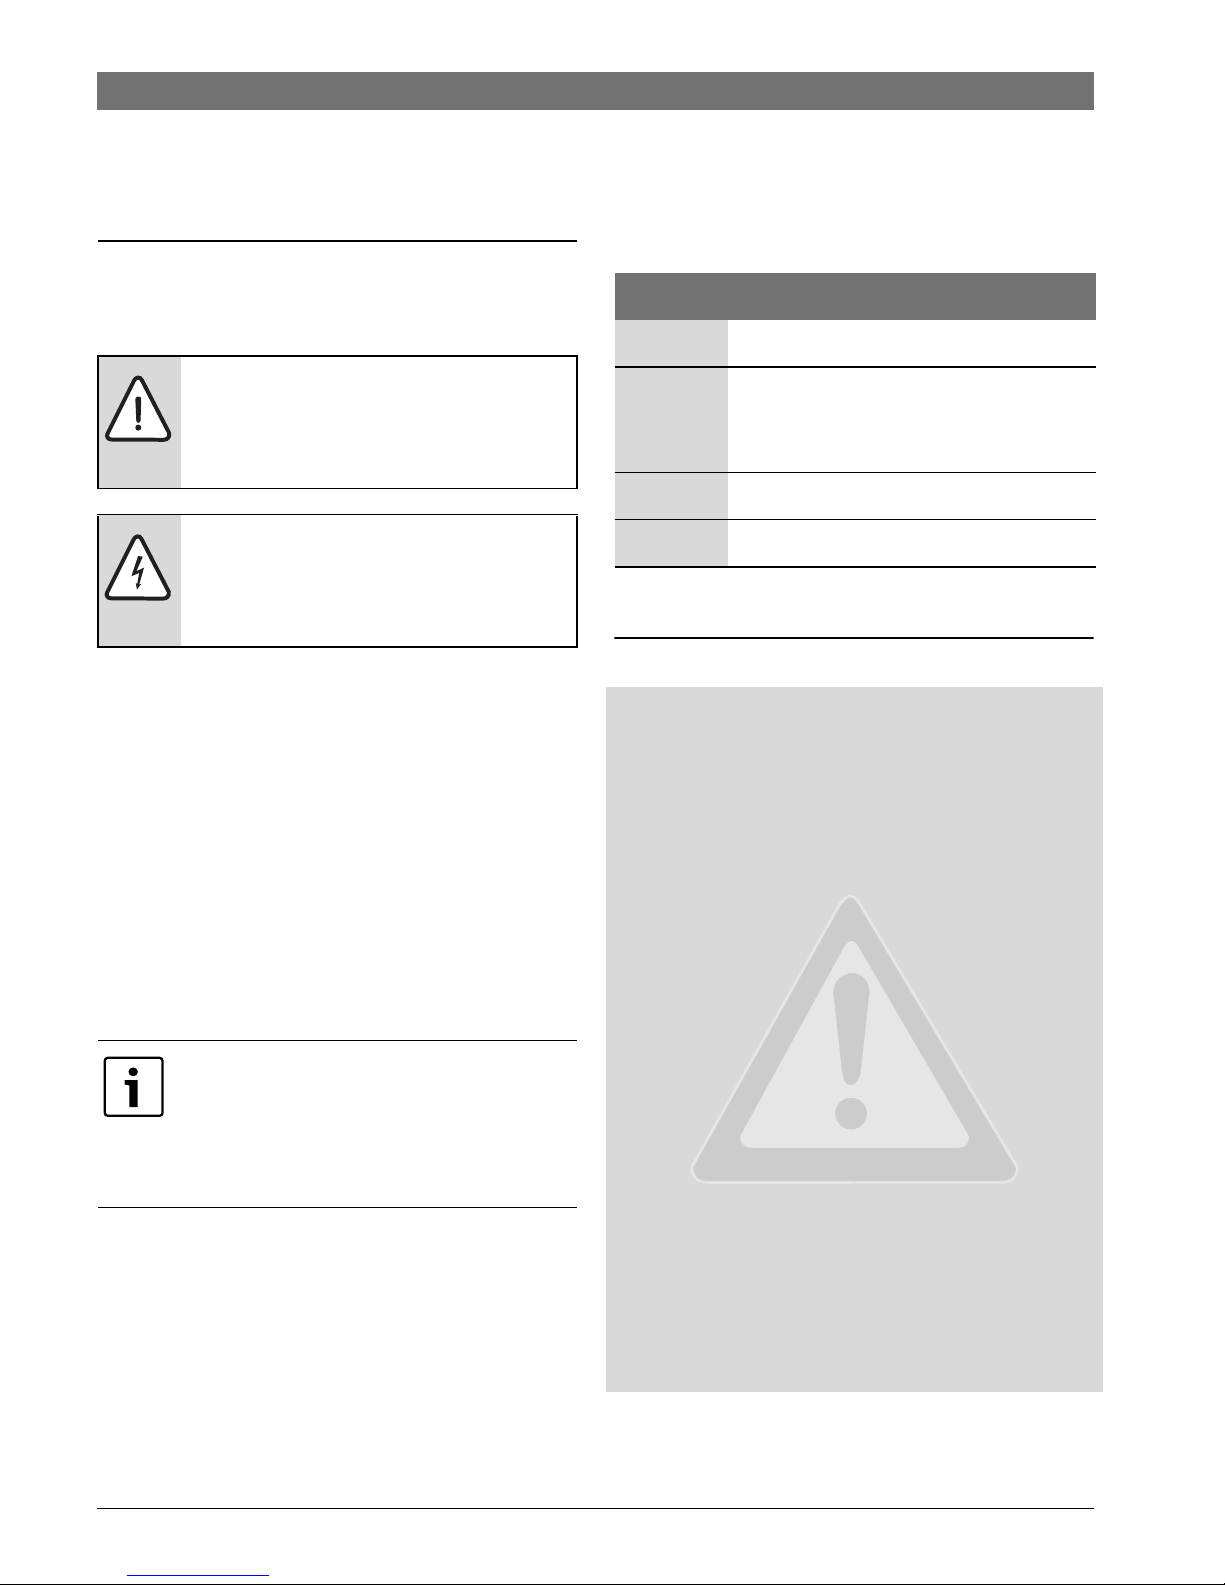
Warnings
Keywords at the start of a warning indicate the
type and seriousness of the ensuing risk if
measures to prevent the risk are not taken.
• NOTE indicates that material losses may
occur.
• CAUTION indicates that minor to medium
injury may occur.
• WARNING indicates that severe injury may
occur.
• DANGER indicates a risk to life.
Important information
Additional symbols
1.2 Safety precautions
B These instructions must be observed to
ensure correct operation.
B Risk of scalding during thermal disinfection:
Apply thermal disinfection with DHW
temperatures in excess of 60 °C only when all
occupants have been informed of the risk of
scalding during this period. During that
period, avoid drawing off DHW if possible.
B When there is a risk of frost, leave the heating
appliance switched on and follow the frost
protection information.
Damage due to operator error
Incorrect operation can cause injury and/or
material damage.
B Ensure that children never operate this
controller unsupervised or play with it.
B Ensure that only individuals who can operate
this controller correctly have access to it.
Warnings in this document are
framed and identified by a warning
triangle printed against a grey
background.
If there is a danger due to
electricity, the exclamation mark in
the warning triangle is replaced by a
lightning symbol.
Important information where there
is no risk to people or property is
indicated with the adjacent symbol.
It is bordered by lines above and
below the text.
Symbol Explanation
B Action step
Æ Cross-reference to other parts of
this document or to other
documents
• List/list entry
– List/list entry (second level)
Tab. 1

6 720 800 818 (2012/02)
Information about the controller | 5
2 Information about the controller
2.1 Disposal
B Dispose of packaging in an environmentally
responsible manner.
2.2 Cleaning the casing
B If required, use a damp cloth to wipe the
controller casing; for this never use harsh or
corrosive cleaning agents.
6 720 800 818 (2012/02)
6 | Display
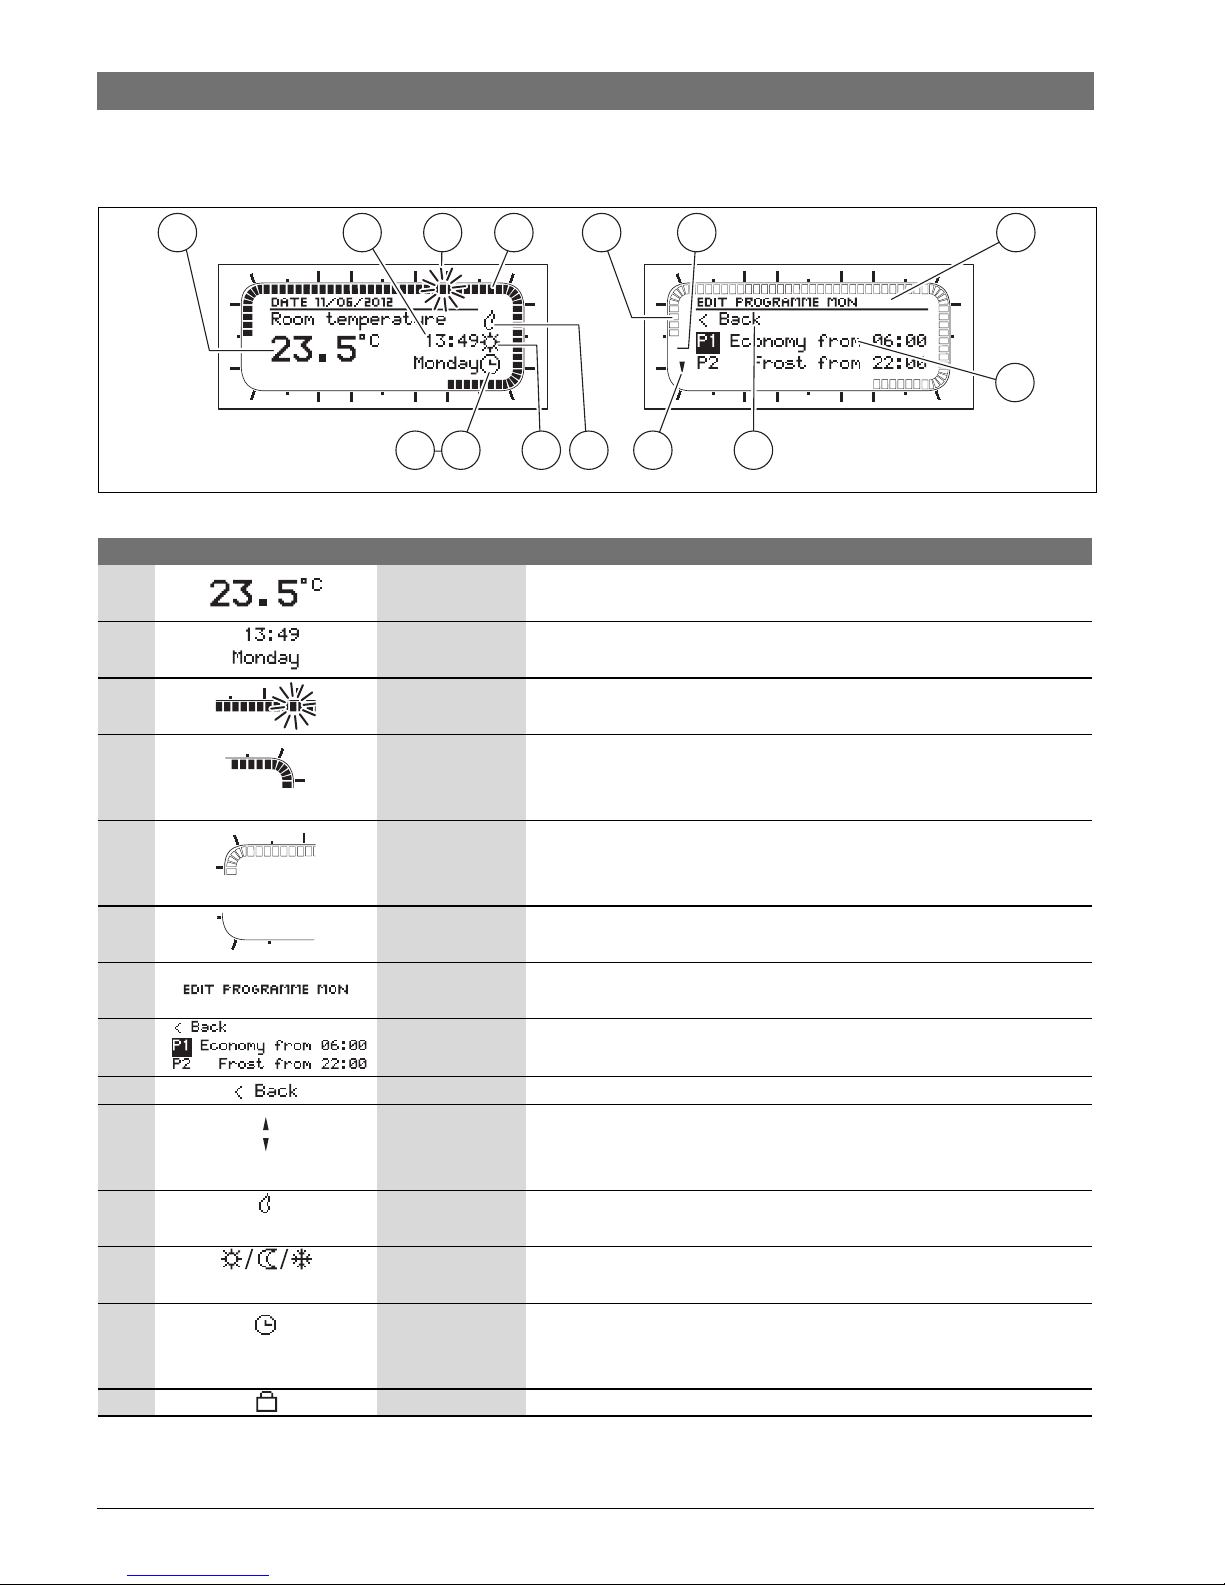
3Display
Fig. 1 Symbols in the display (examples)
Item Symbol Designation Explanation
1 Temperature
indicator
Current or required room temperature
2 Time and day Current time and day.
3 Flashing
segment
Current time (1 segment = 15 minutes, here 13:45 h to
14:00 h) or switching time in the heating program.
4 Full segments Period for Comfort mode (high room temperature) or
DHW heating (high DHW temperature),
1 segment = 15 minutes.
5 Empty
segments
Period for Economy mode (medium room temperature)
or DHW heating (average DHW temperature),
1 segment = 15 minutes.
6 No segment Period for Frost mode (low room temperature) or DHW
heating (low DHW temperature).
7 Header Title of the next highest menu level, program etc.
8 3 text lines Menu points, info texts, setting values etc.
9 Back Return to the menu level up.
10 Further text An arrow indicates if the displayed text is longer than 3
lines. Turning the rotary selector makes the additional
text visible.
11 Burner
operation
The heating appliance heats.
12 Operating
mode
Current operating mode Comfort / Economy / Frost.
13 Automatic
mode
Automatic changeover of the operating mode at the
selected switching times in accordance with the heating
program.
14 Holiday The holiday program is active.
Tab. 2 Symbols in the display
6 720 800 818-01.1O
9
12
h
15
18
21 24
h
3
6
9
12
h
15
18
21 24
h
3
6
3
2
4
6
12
5
1
9
8
11
7
13 14
10
12
h
15
9
3
6 720 800 818 (2012/02)
Operation with closed flap | 7
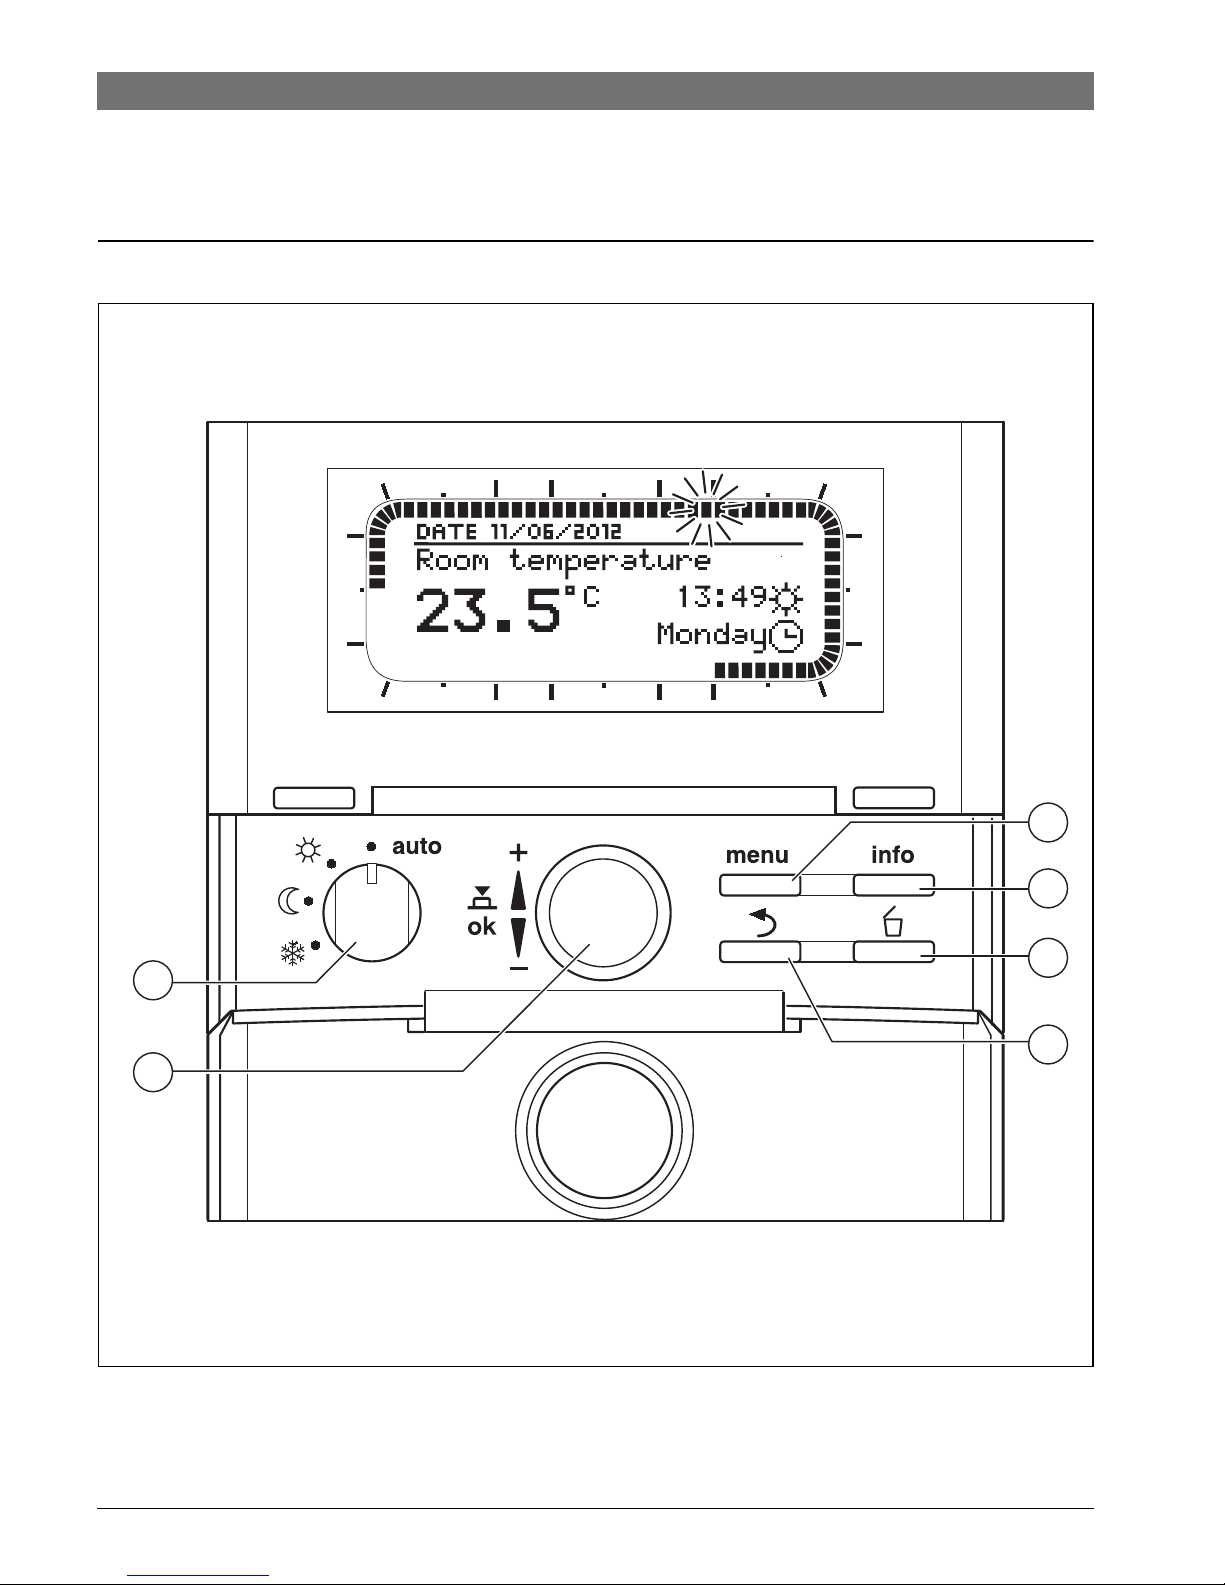
4 Operation with closed flap
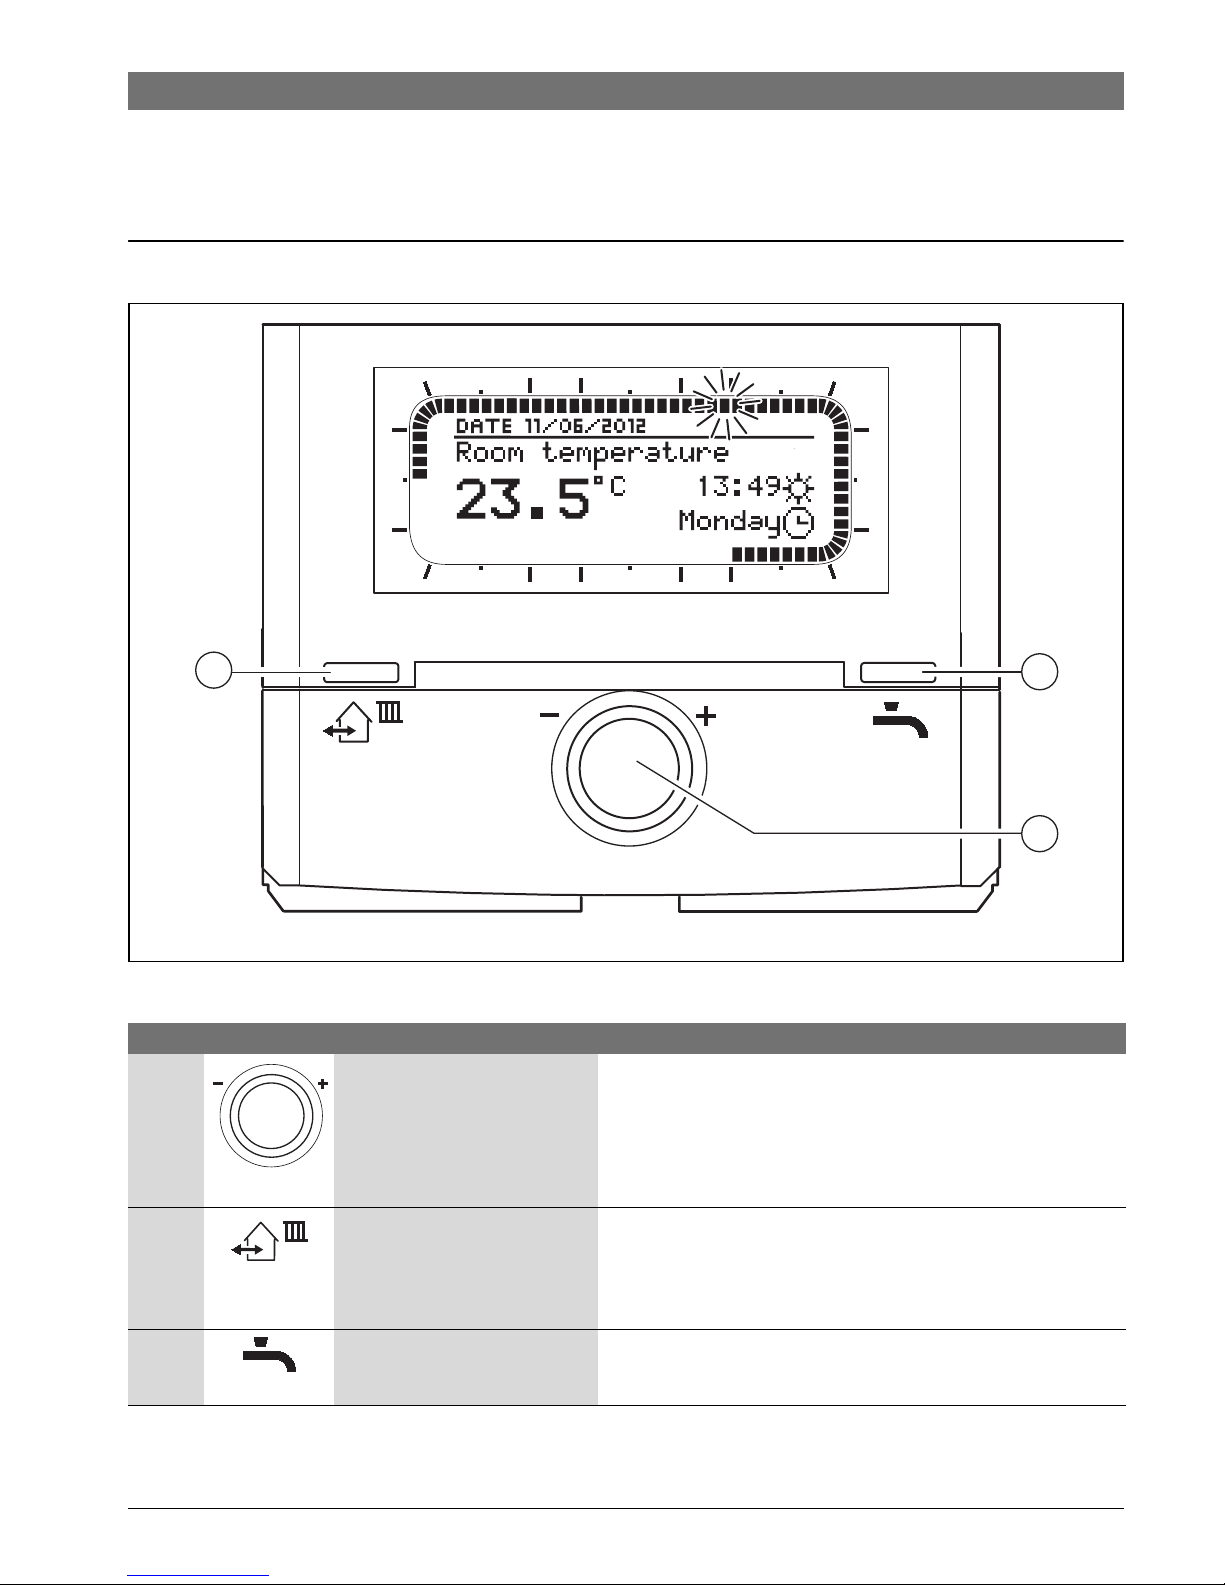
4.1 Controls
Fig. 2 Controls with closed flap
Item Element Designation Explanation
1 Rotary selector • Turn rotary selector:
Display the setting of the required room
temperature and change it temporarily.
• Press rotary selector:
Confirm setting.
2 Keys “Coming/Going” Immediately start the next operating mode Comfort /
Economy / Frost of the heating program. This changes
the heating program temporarily.
3 Key “Immediate DHW” Start DHW heating immediately. This changes the
DHW program temporarily.
Tab. 3 Controls with closed flap
6720645348-01.2O
2
9
12
h
15
18
2124
h
3
6
3
1
6 720 800 818 (2012/02)
8 | Operation with closed flap
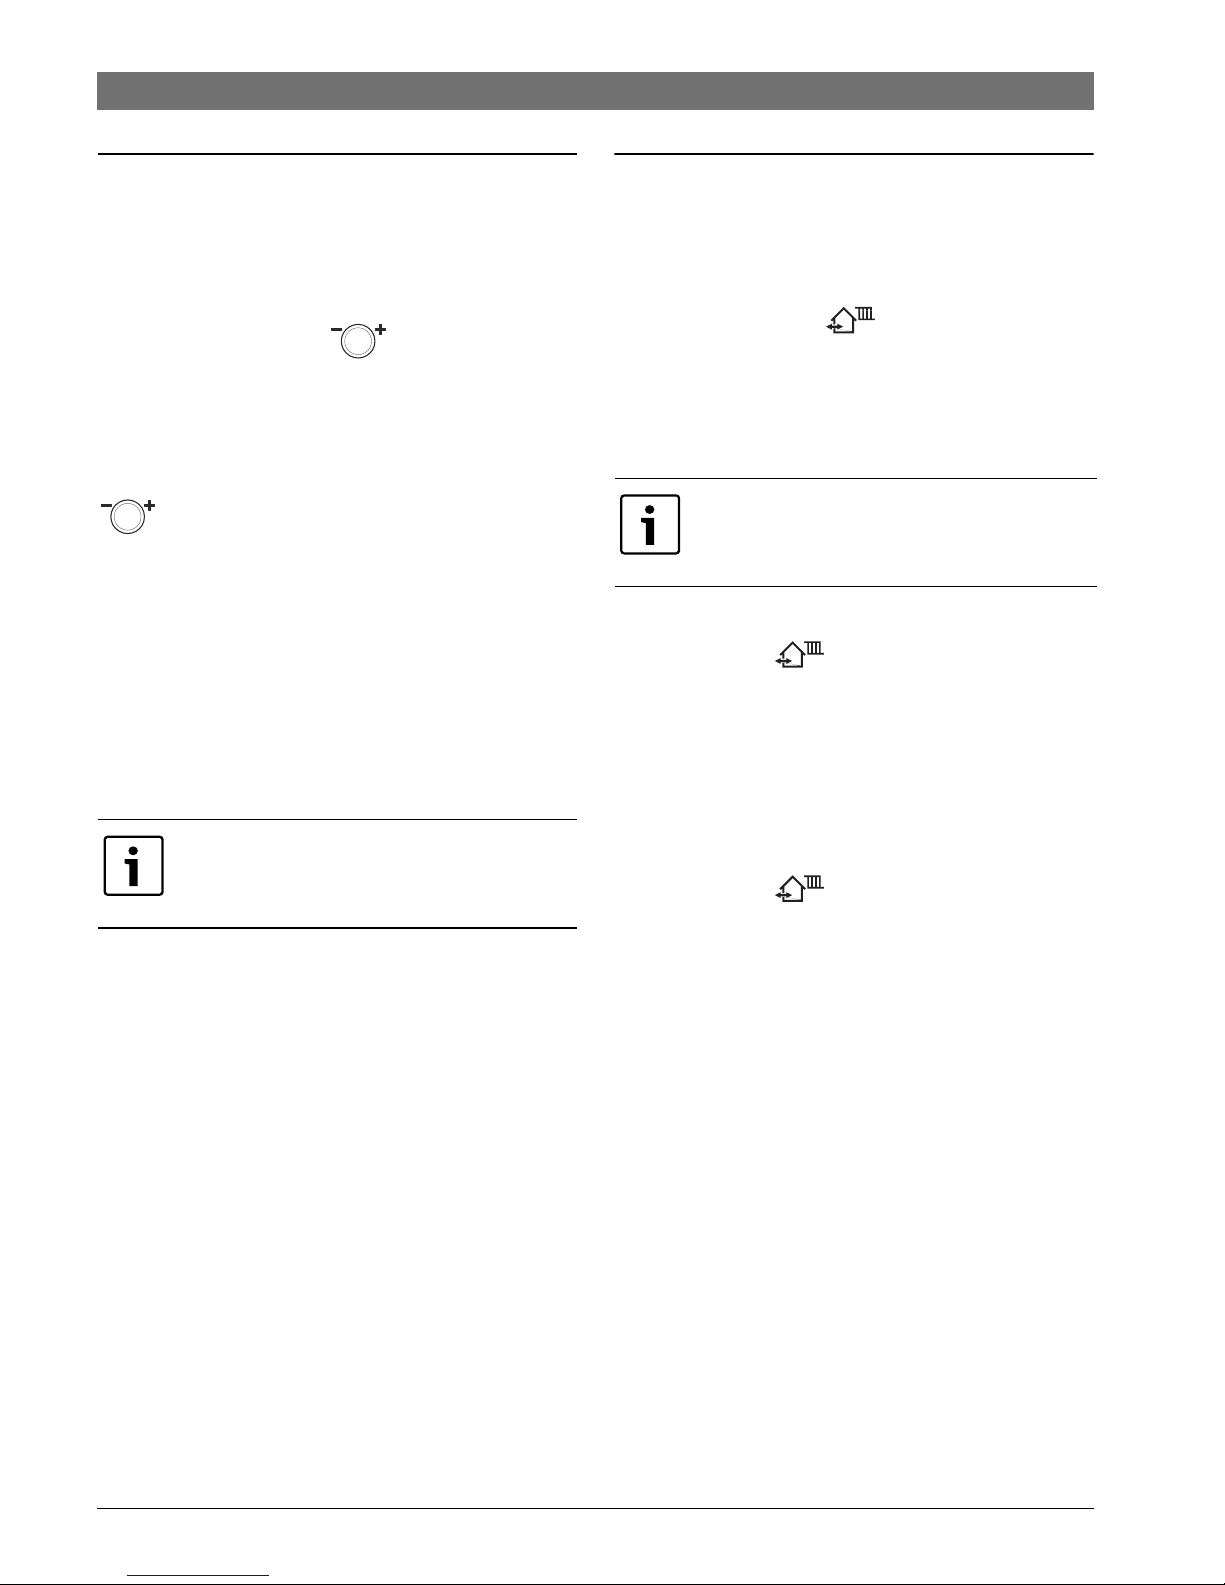
4.2 If you feel too cold or too hot
You can check the current room temperature on
the display.
Displaying the room temperature settings
B Turn rotary selector one click.
Temporarily changing the room temperature
settings
With the flap closed, you can change the room
temperature temporarily with rotary selector
.
B Turn the rotary selector until the required
room temperature is displayed.
The temperature display flashes.
B Push the rotary selector.
The change applies until the next switching
time in your heating program is reached.
Afterwards, the settings of your heating
program will apply again.
4.3 If you want to change the
heating program temporarily
If y o u d e ci d e to go t o be d earlier than usual, if you
leave your home or return early, you can start the
next operating mode Comfort / Economy /
Frost of the heating system with immediate
effect. This changes the heating program
temporarily until the next switching time has
been reached.
Start “Coming/Going”
B Briefly press .
The next operating mode Comfort /
Economy / Frost of the heating program
starts immediately with the required assigned
room temperature. The change is reflected in
the display.
Terminating “Coming/Going” early
B Briefly press .
“Coming/Going” is terminated and the
controller operates again according to the
heating program.
You can also permanently change
the room temperature
(Æ Chapter 5.2).
The operating mode selector under
the flap must be set to auto
(Æ Fig. 3 [2], page 10).

6 720 800 818 (2012/02)
Operation with closed flap | 9
4.4 If you want to change the DHW
program temporarily
If you want to take a shower although your
heating appliance is operating in "economy
mode" right now, you can start DHW heating
immediately by pressing . This changes the
DHW program temporarily.
Starting “DHW immediately”
B Briefly press .
The change is reflected in the display.
– During DHW heating, DHW is heated in a
DHW cylinder for 60 minutes to the
selected DHW temperature.
– When heating DHW with a combi boiler,
comfort mode is active for 30 minutes.
Terminating “Immediate DHW” early
B Briefly press .
“Immediate DHW” is terminated and the
controller operates again according to the
DHW program.
See the operating instructions of the
heating appliance for further
information regarding comfort
mode.
6 720 800 818 (2012/02)
10 | Operation with flap open
5 Operation with flap open
5.1 Controls
Fig. 3 Controls with flap open
1
2
3
4
5
6
6720645348-02.2O
auto
9
12
h
15
18
2124
h
3
6

6 720 800 818 (2012/02)
Operation with flap open | 11
Item Element Designation Explanation
1 Rotary selector • Turn the rotary selector:
– Display the current setting of the required
room temperature and change it temporarily.
– Scroll through the menu to change the value.
• Push the rotary selector:
– Open the menu.
– Confirm the setting.
2 Operating mode selector • auto:
Heating according to the heating program.
• / / :
Heating constantly according to operating mode
Comfort/Economy/Frost (the heating program is
switched off).
3 Menu button Open and close the main menu.
4 Info key Open and close the info menu. Display of current
information regarding the heating system, e.g.
heating, DHW, solar.
5 “Delete” key Delete/reset a value in the menu.
6 “Back” key Return to the menu level up.
Tab. 4 Controls with flap open
menu
info
 Loading...