

Page 1

OPERATING INSTRUCTIONS
x
Page 2

OPERATING INSTRUCTIONS
Contents
DiBos
4.998.137.631 A3
Introduction and safety instructions 3. . . . . . . . . . . . . . . . . . .
Introduction to the system 4
Password 4
Logging on 4
Changing users/logging off 4
Exiting the system / ending the program 4
The basic live image window 5
General information 6
Basic window menu bar 7
Basic window toolbar / alarm simulation bar 8
Basic window status bar / connection window
Controlling a dome camera 10
The basic image archive window 12
Image archive menu bar 13
Image archive toolbar 14
Image archive toolbar / alarm simulation bar 15
Image archive status bar / connection window /
Recorder buttons 16
Looking at, printing, saving, swapping out,
and deleting archive images 17
Deleting archives / searching for archive
images and additional data 18
Connecting backup drive and / swapping
out archive images on diskette 19
Formatting a CD 20
Export data to CD 22
Export data (e.g. to hard disk or network drive) 25
9
Alarm simulation 27
Connection with a remote station 28
Searching for and looking at archive
images from the remote station 30
– 2 –BOSCH Security Systems GmbH A3/06–2004
Page 3
Introduction and safety instructions
What do these operating instructions tell you?
These operating instructions provide you with all relevant information that
you need in order to perform the tasks described in the table of contents
quickly and easily.
You will find more detailed information about the respective screens online
on your system if you press the F1 key or click the Help button.
Caution!
To avoid electrical shock, do not remove the cover. Leave all
maintenance to qualified personnel.
Warning!
To avoid fire or electrical shock, never expose the device to rain or
humidity.
Warning!
Installation should only be undertaken by qualified customer service
personnel in accordance with all applicable electrical regulations.
Note
It your are not able to accomplish some of the described steps of
this manual, it may be that you don’t have the rigth authority level.
In this case please contact your authorized dealer.
Notes on cleaning
When cleaning the surface, be sure that you do not use any
caustic or scrubbing cleansers and that no liquid gets inside the
device.
The device may only be operated by trained
persons! For security reasons and in order to avoid faulty
operation, any authorization code required for operation
should only be communicated to these persons.
Power connection!
Devices with or without power cords have voltage in the device as
soon as the power cord is plugged into the outlet. However, the
device is only ready for use if the power switch (ON/OFF) is on ON.
If you unplug the power cable from the outlet, the voltage supply to
the device is completely halted.
– 3 –BOSCH Security Systems GmbH A3/06–2004
Service station:
Telephone:
Page 4
Introduction to the system
When the computer is booted, the system runs automatically in the background and is able to respond to signals and record images. You
must only log on if you wish to perform operating tasks. Only authorized users have access to operate the system, based on a password.
Depending on your access privileges, with the user interface you can:
·view live images for monitoring purposes and manually switch camera views
·open the image archive and retrieve, print, and delete saved images
·perform system configuration
·perform an alarm simulation
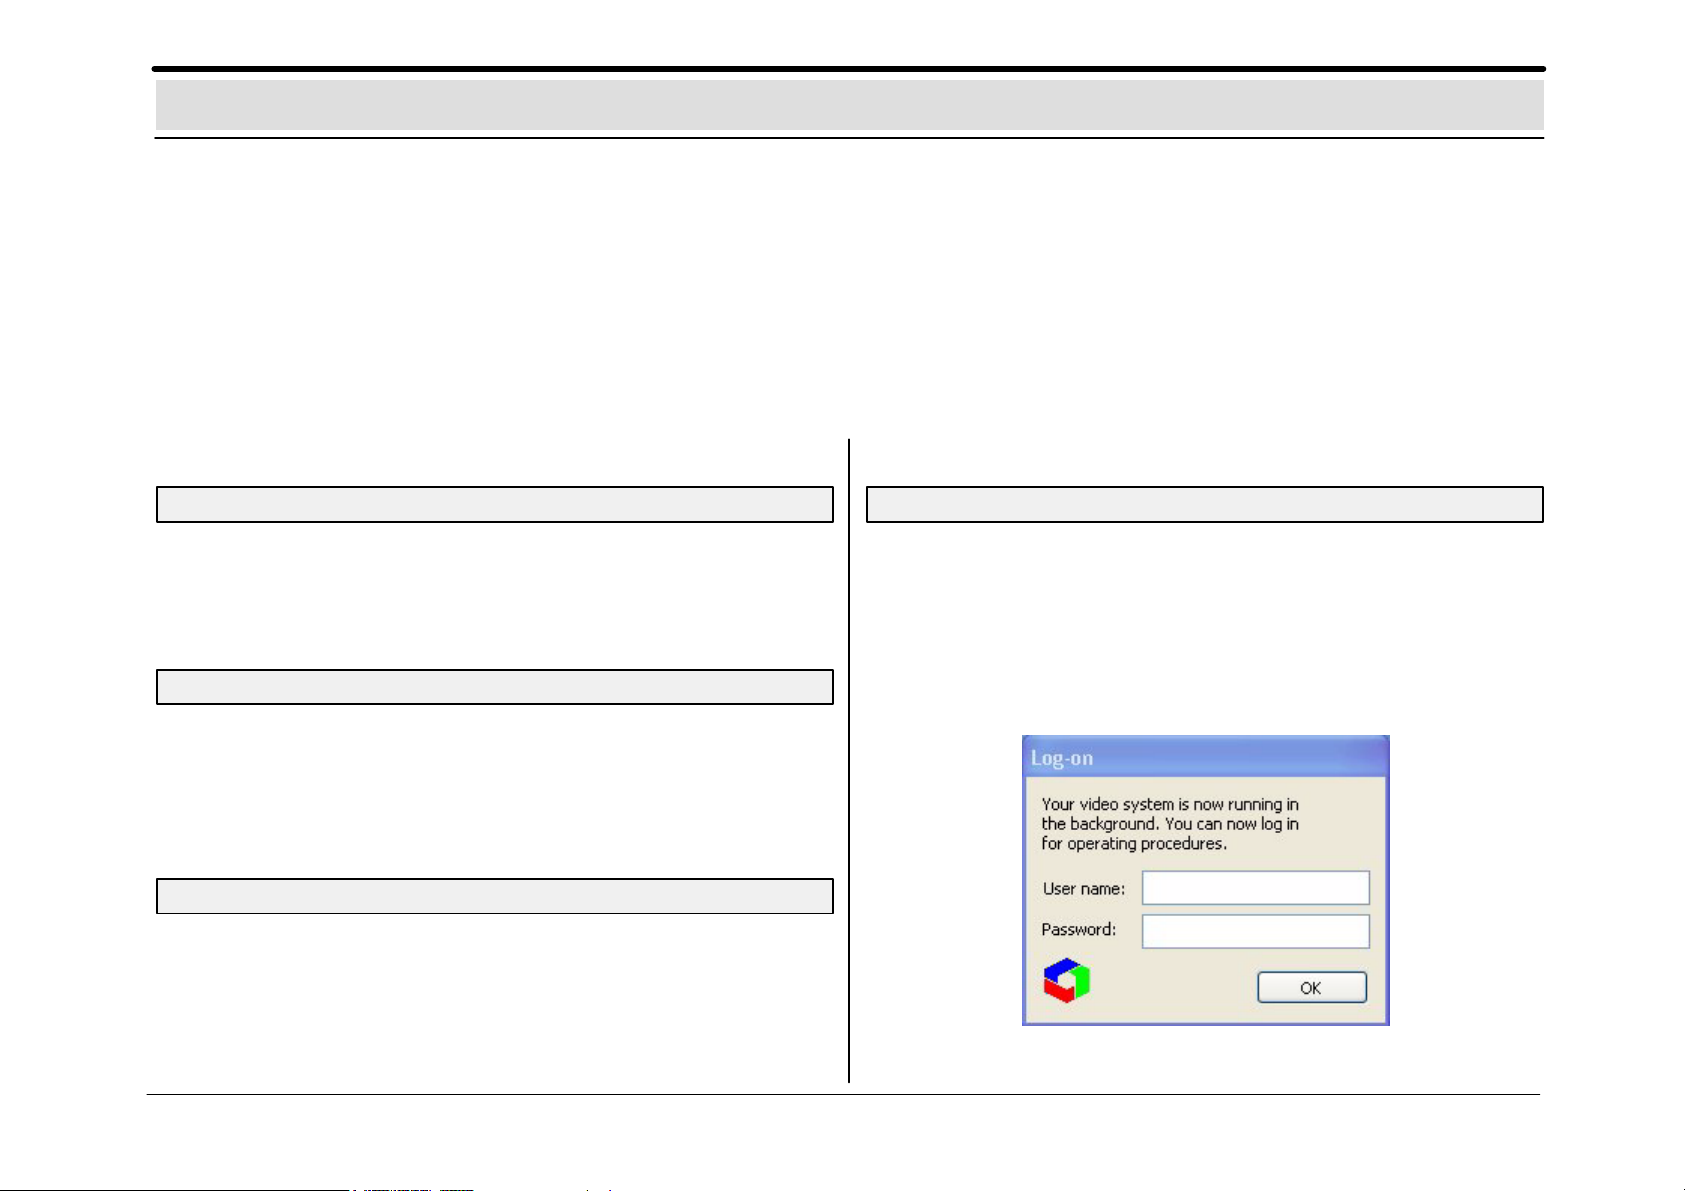
You must log on to the system in order to commence operation.
After you have switched on the system and the live image screen appears, you will see a dialog box in the middle of the screen that invites
you to log on.
Password
For the password, there are no restrictions as to the type and number
of characters permitted.
You can change the password on the System menu.
Logging on
Enter your user name and password and confirm with OK. You are
now on the live image.
The live image consists of the live image basic window, which is also
displayed if no video station was selected or one or several
connection windows
Changing users/logging off
On the System menu, you can change users or log off. During a
change of user, the system continues to run in the background. This
is recommended if you leave the system.
Exiting the system / ending the program
Select System from the menu bar and click Exit system.
Logon screen
– 4 –BOSCH Security Systems GmbH A3/06–2004
Page 5
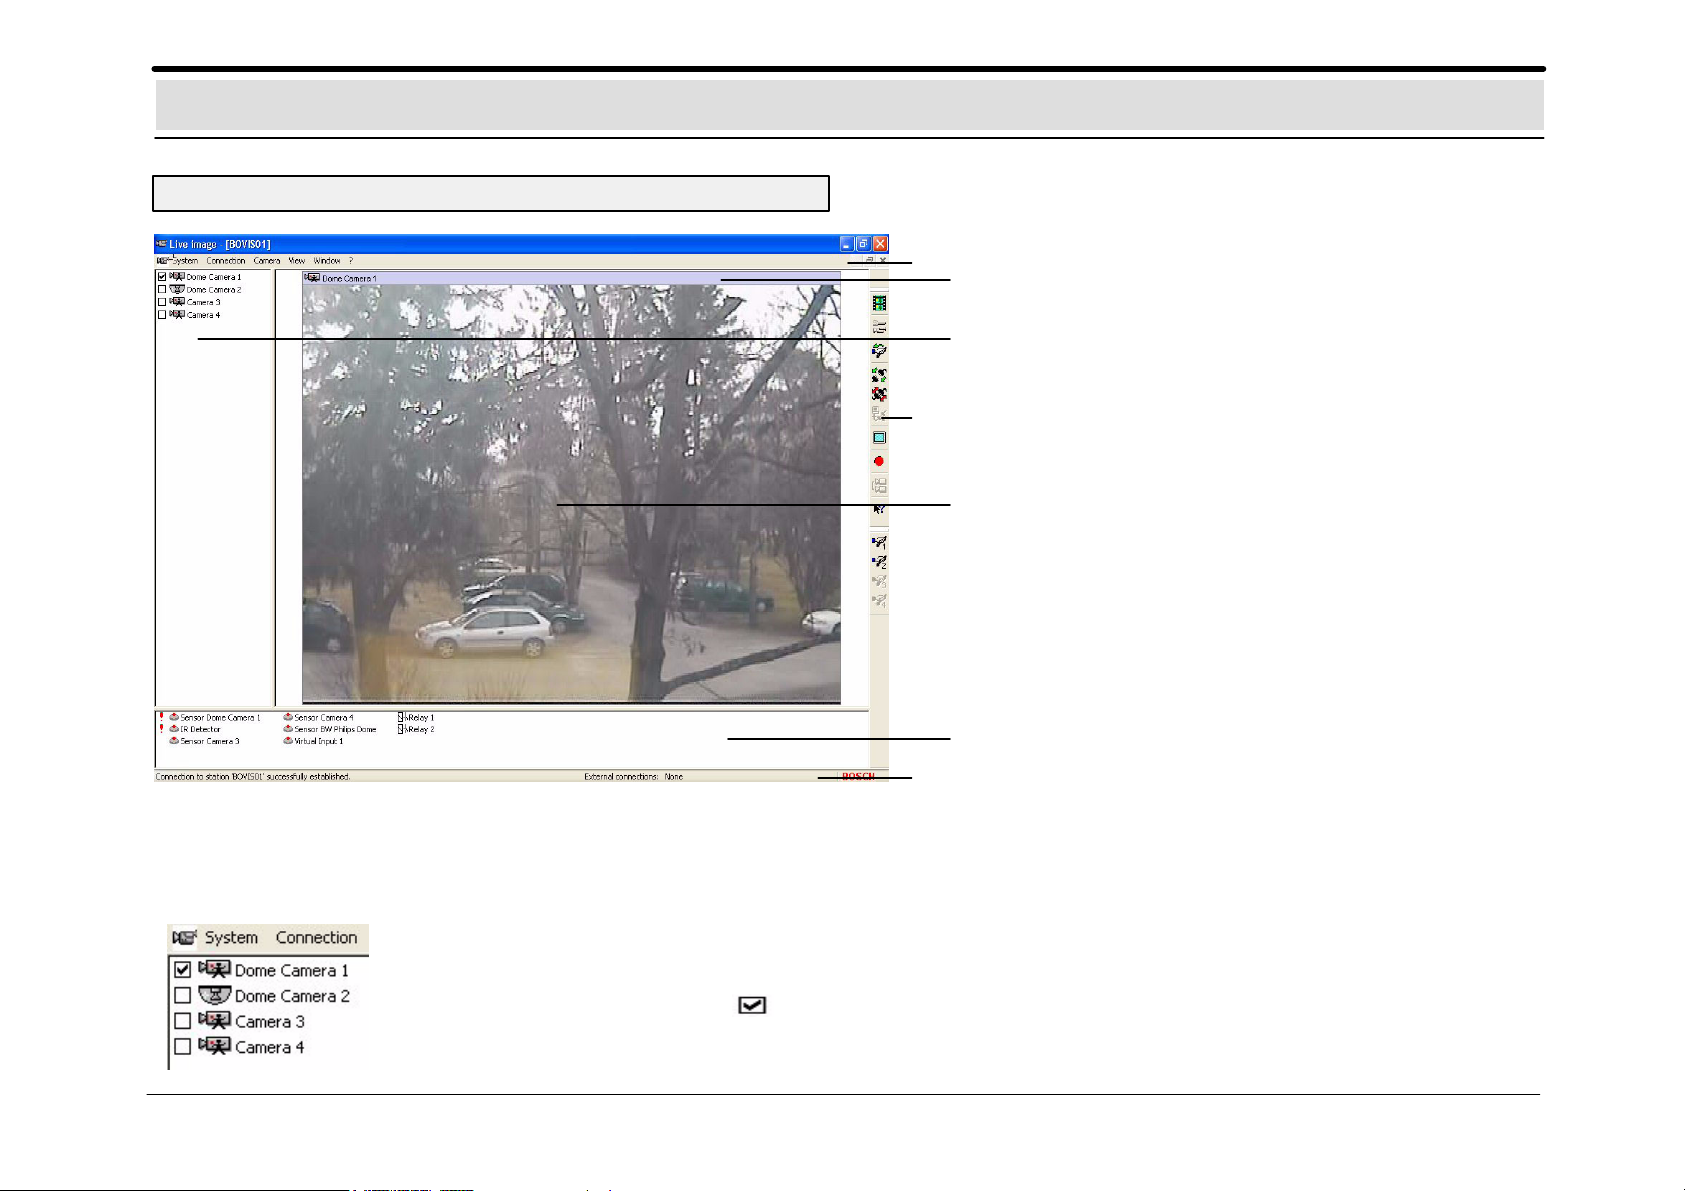
The basic live image window
General information
The basic live image window
1
4
1 Menu bar
2 Toolbar
3 Status bar
5
Connection window
4 Title bar of the connection window for the
2
6
selected station
5 Display all configured cameras of the
selected station
6 Display of selected camera images
7 Display of status of all configured alarm
inputs of the selected station and re
lay statuses
7
3
Display of several live images
You can display several live images, depending on the number of connected and configured cameras. The live images are always arranged
automatically from left to right in consecutive rows.
For each camera marked with a , a live image is shown.
– 5 –BOSCH Security Systems GmbH A3/06–2004
Page 6
The basic live image window
General information
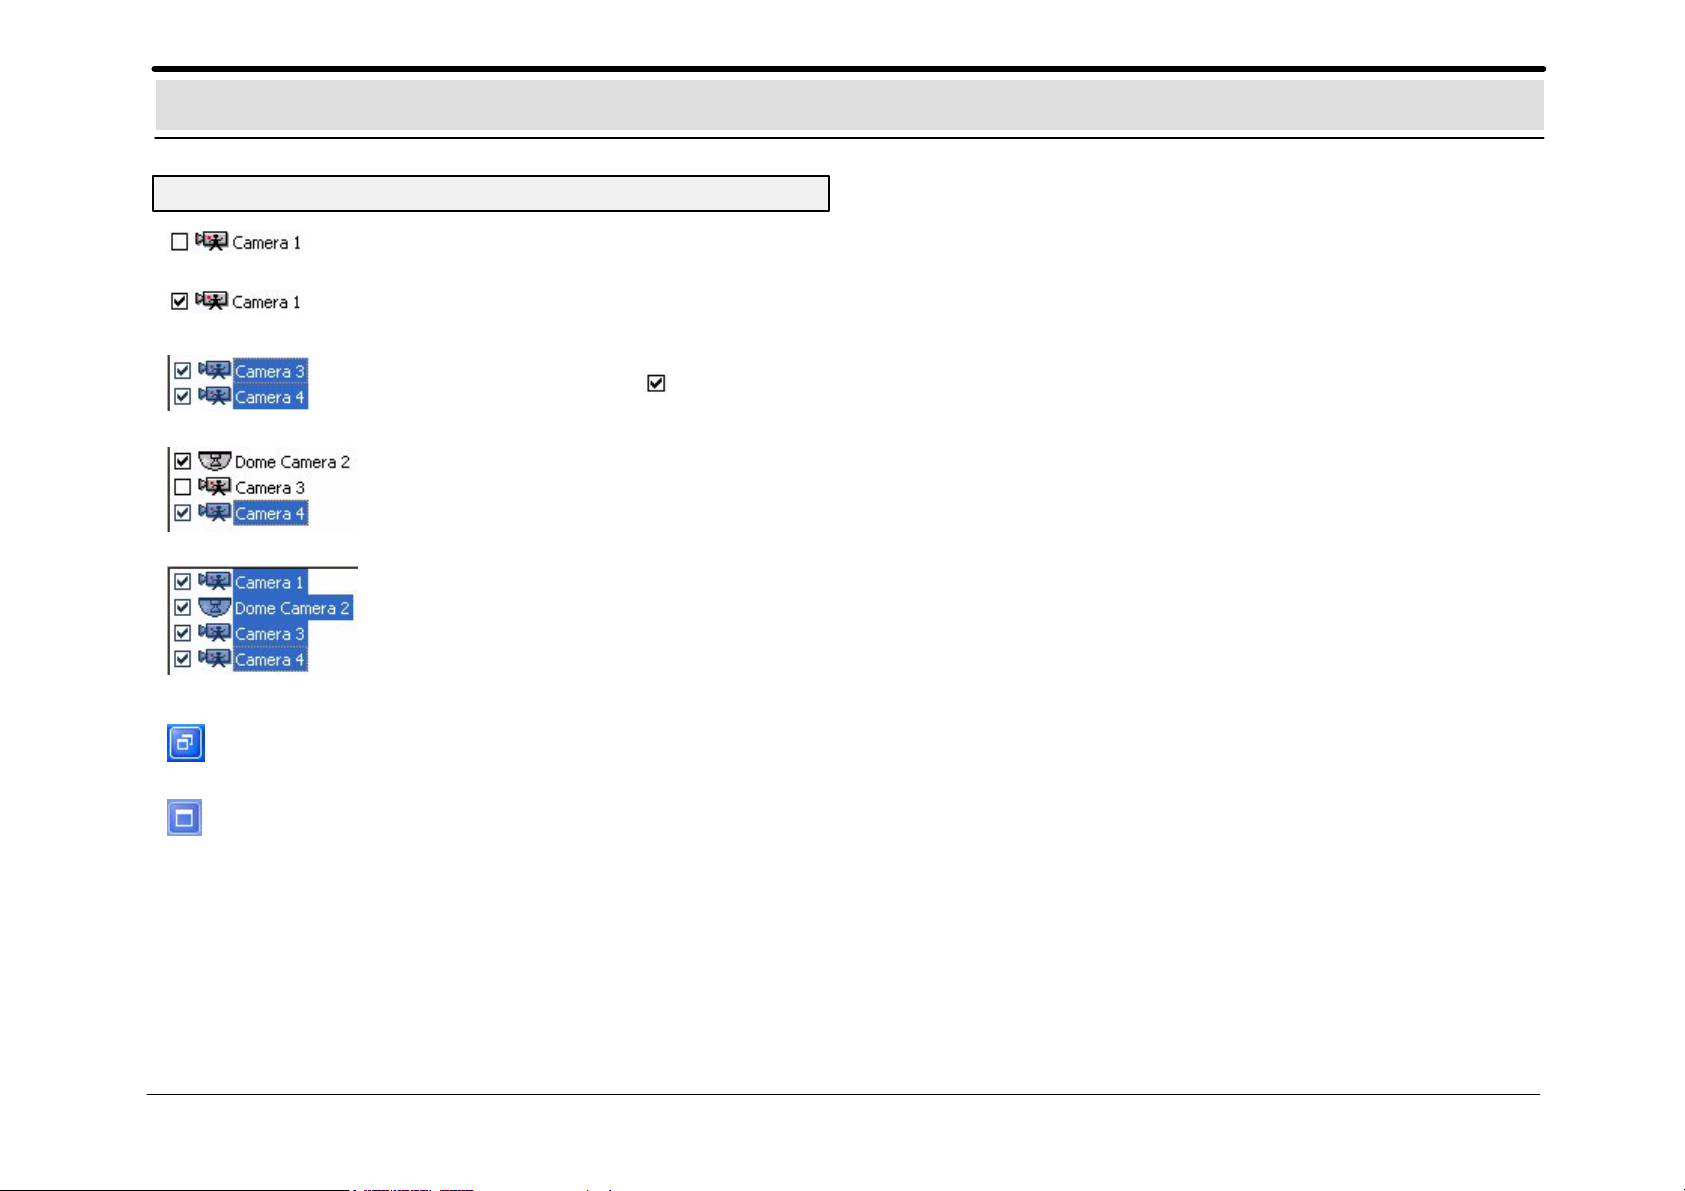
Camera deactivated
Camera activated: if you click this box, you can activate the camera and show the live image.
If several cameras are selected and activated with the left mouse button (highlighted in blue), these camera images can
all be shown together. Click to show and hide the camera images.
If you click the Ctrl key and click the left mouse button on selected cameras, you can combine these into non–continuous
camera blocks.
If you click the Shift key and click the left mouse button on the first and last selected cameras, you can create continuous blocks.
If you click this button (in the upper right corner), you will minimize (depending out the configuration) the basic window.
This gives you the opportunity to look at the minimized images and to edit texts in the interface simultaneously.
Click to return to a full–sized image.
– 6 –BOSCH Security Systems GmbH A3/06–2004
Page 7
The menu bar of the basic window in the live image
System
Image archive: change to the image archive
Configuration: change to the configuration
Alarm simulation: trigger an alarm or other actions
Change user: log the user off and log on screen for new
user
Change password: change the password
Exit system: end the program (administrator)
Connection
Establish connection: establish connection via ISDN/network/
modem
Terminate connection: terminate connection via ISDN/network/
modem
Local connection: establish local connection (live image)
Camera
Camera switching: to the next camera selected with
Image quality: image compression can be changed
save displayed
images: Activate and deactivate automatic saving
from all images displayed
Windows
Tile: open windows are displayed next to one another
Cascade: open windows are displayed overlapping one
another (cascading)
Arrange icons: icons can be deposited at the bottom of the window
Station X: all stations with a connection are displayed
?
Help topics: calling up online Help
Info: Info about the system, e.g. version and
serial number
View
Toolbar: on/off
Status bar: on/off
Alarm simulation bar: on/off
Video image mode: enlarges the image of the selected camera
to full–screen size
– 7 –BOSCH Security Systems GmbH A3/06–2004
Page 8
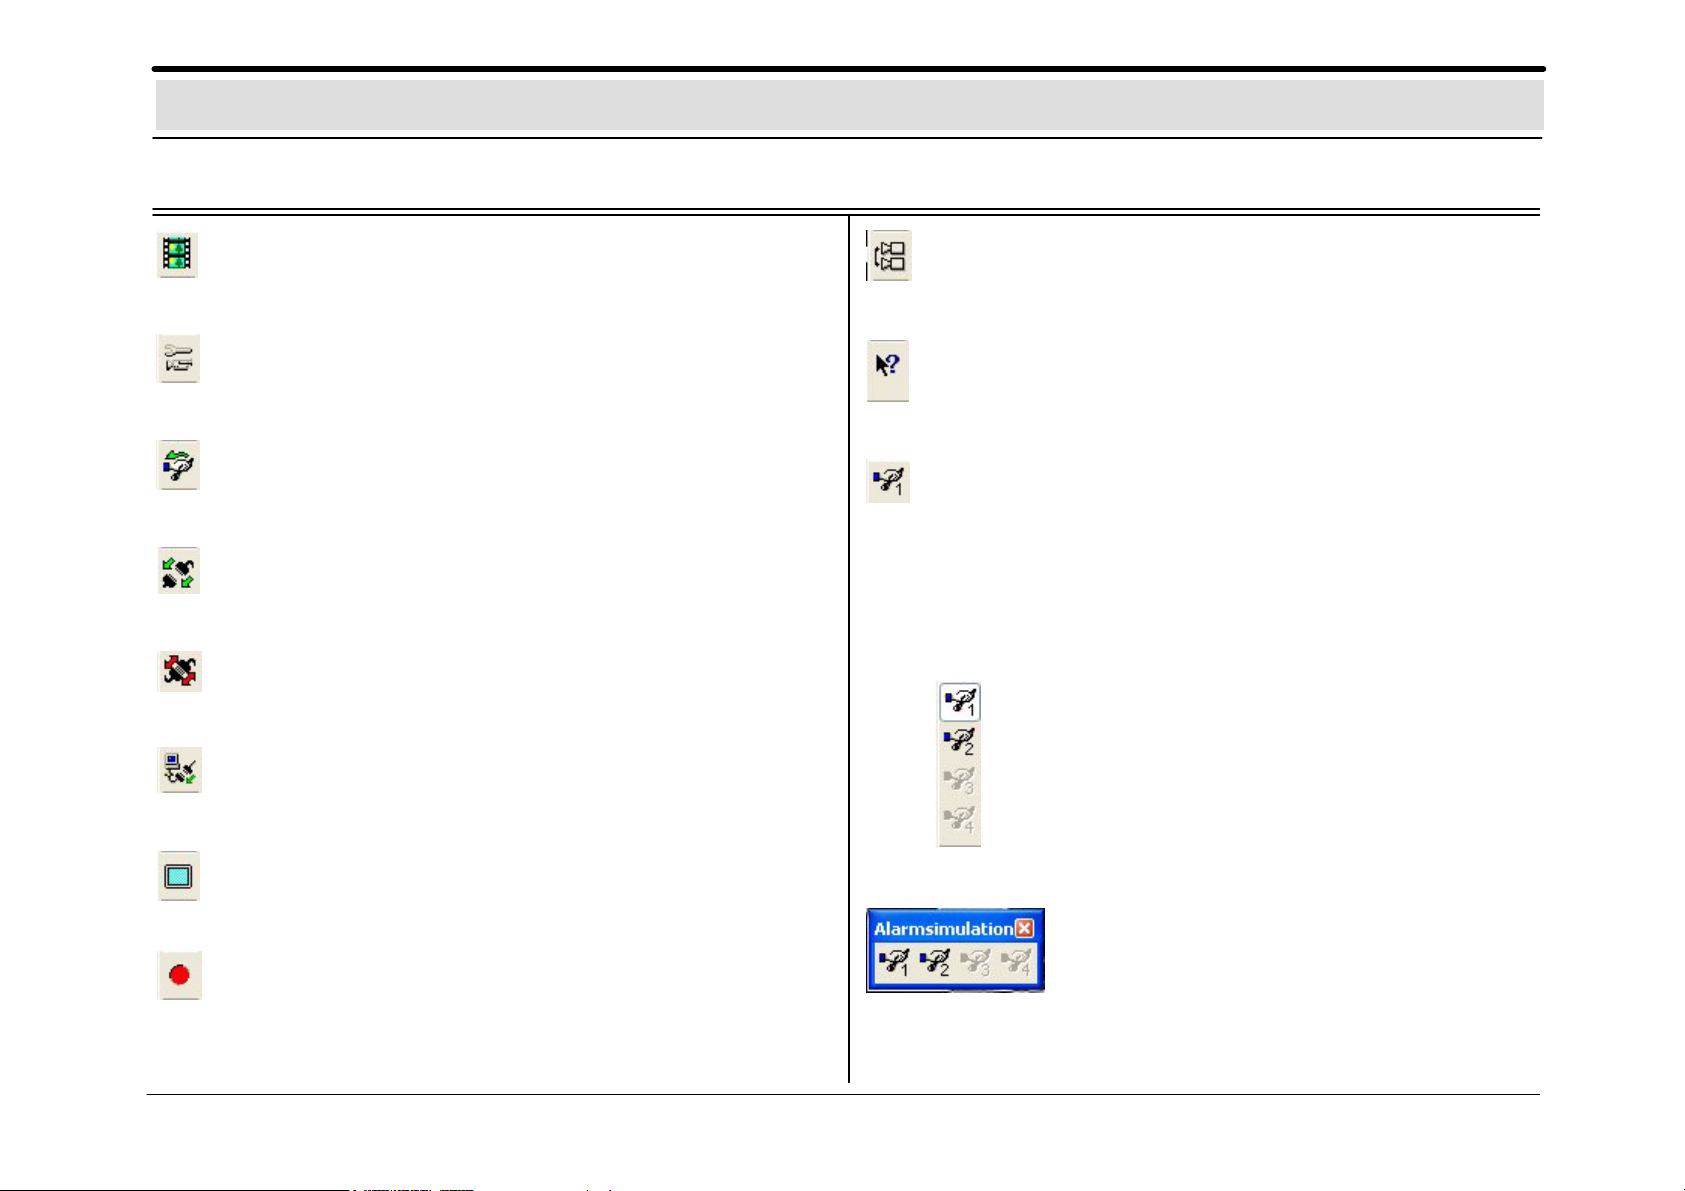
Basic window toolbar / alarm simulation bar in live image
NameIcon
Image
archive
Configuration Hardware, image saving, image
Alarm
simulation
Connect with a remote station
Terminate established connection will be
Local
connection
Explanation
Look at, search for, swap out or print
saved images in local/remote archives.
transmission, and user settings.
Not active with integrated operating
station.
The configured alarm simulation
buttons will be called up.
(network/ISDN/DSL/modem)
terminated.
Connection will be established to the
local system.
NameIcon Explanation
Automatic
camera
switchover
Help If you place the mouse pointer over an
Alarm
simulation
The alarm simulation bar can be embedded in the toolbar or
free–standing.
Embedded
Switchover of all cameras displayed.
object, you will receive help with that
object.
Buttons for the configured alarm
simulation signals or other configured
actions.
Alarm simulation 1 triggered
Alarm simulation 2 not triggered
Alarm simulation 3 and 4 not configured
Video image
mode
Save images
displayed
Enlarges the image of the selected
camera to full–screen size.
Activate, deactivate automatic saving of
all images displayed. With
simultaneous generation of a separate
archive in the image archive with the
name <Computername>_normal.
Free–standing
– 8 –BOSCH Security Systems GmbH A3/06–2004
Page 9
Basic window toolbar / connection window in live image
The Status bar (lowermost line of the screen) contains help
information about the menu you are currently using. It shows the
name of the remote station to which an external connection has just
been established.
The Title bar contains:
– the window title with the name of the selected station and
– the buttons to minimize, maximize and close the window.
Clicking minimizes the window and places it at the bottom
edge of the screen.
Clicking restores the window to normal size.
Terminates the existing connection
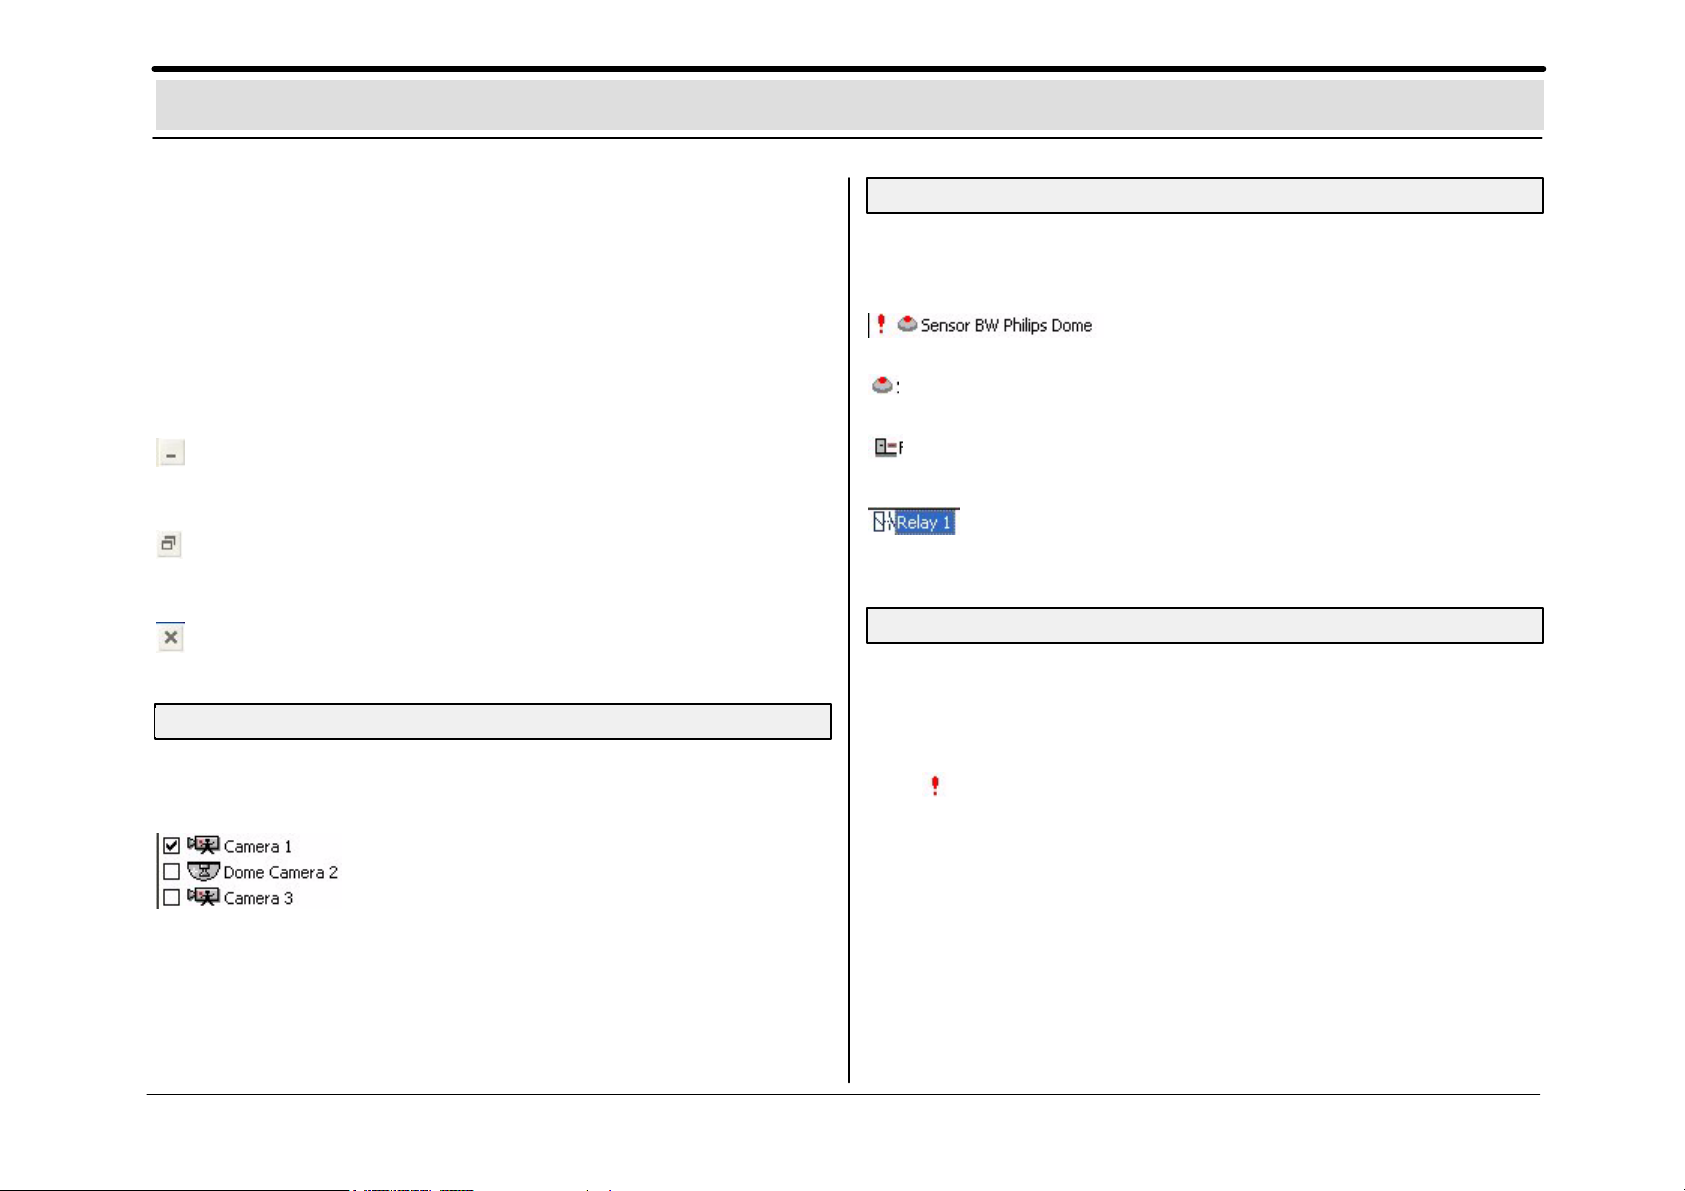
Display of the existing / approved cameras
On the left side of the screen, you will find a list of the configured
cameras.
Display of the configured alarm inputs
The lower portion of the image displays all configured alarm inputs.
Configured alarm inputs are displayed
in the live image
Contact input or video motion detector of
a camera
Foyer card reader / barcode reader
on
Status display of the configured alarm inputs
The statuses of all configured alarm inputs are displayed as follows.
no icon Input is in standby
Input has triggered
Configured relay outputs can be activated
and deactivated by clicking with the right
mouse button
Existing / approved cameras will be
displayed in live image.
?
– 9 –BOSCH Security Systems GmbH A3/06–2004
Input does not exist as hardware
Page 10
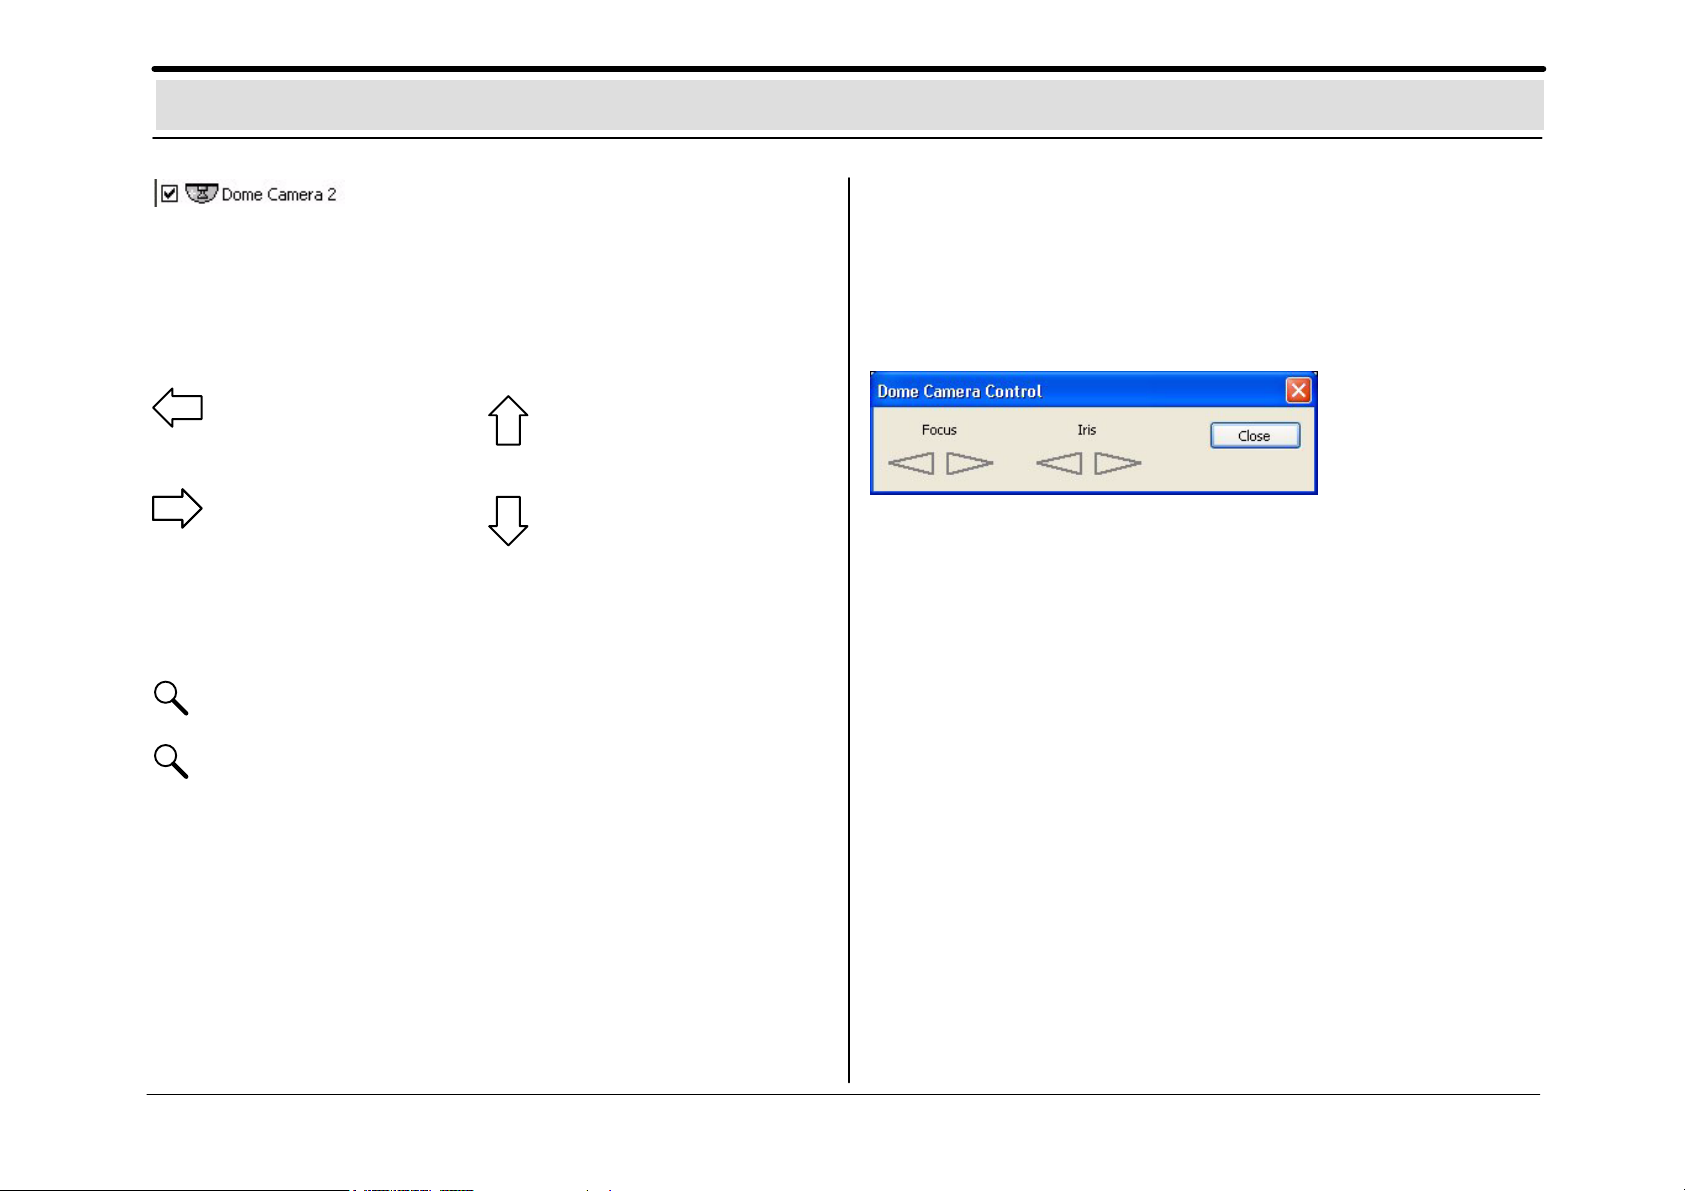
Control of a dome camera
Configured dome camera
If a dome camera is configured, an arrow will appear in its live
image if the user moves the mouse (variable speed) over the live
image. With the left mouse button, you can control the camera in
the direction of the activated arrow.
e.g. to the left
e.g. to the right
A magnifying glass appears in the middle of the screen. If
you see a + sign, this means that you are zooming in on
the image. If you see a – sign, the camera angle is getting
larger.
+
–
Zoom in: reduce camera angle (zoom in)
Zoom out: enlarge camera angle (zoom out)
e.g. up
e.g. down
By clicking the right mouse button on the live image, you activate
the following menu:
– Dome camera control
– Positions saved
– Macros saved
Dome camera control
Here you can set the focus (sharp/ blurred) and aperture (open /
close).
Positions saved
In the configuration, you can call up set camera positions here.
Macros saved
Call up saved camera commands.
(Start/end macros).
Note
Depending where you place the mouse cursor you operate with a
variable speed.
Note
Pre–positions and macros are to be configured in the set up in
advance.
Please also use the online help
– 10 –BOSCH Security Systems GmbH A3/06–2004
Page 11

The image archive of the basic window
Information about image archive
You can also use the Image archive menu to open and close live image display. It enables access to and searching in:
– local and remote video system image archives and
– existing files on hard disk or diskettes.
In the image archive you have the following possibilities:
· Start configuration (in addition to the image archive)
· Call alarm simulation
· Establish an ISDN, network or modem connection to a remote station (in addition to the connection to the local station);
the remove archive tree is thus shown under the local archive tree
· Swap out saved images
· Print saved images
· Search for saved images
Basic live image window
1 Menu bar of the image archive basic window
2 Toolbar of the image archive basic window
3 Status bar of the image archive basic window
4 Tree structure of configured archives
Image display window
5 Title bar of saved image
6 Display of saved images
7 Recorder buttons for playback of saved images
8 Print the displayed image
9 Save images on drive or diskette
10 Set the playback speed
11 Slider for further switching
12 Anzahl der zu überspringenden Bilder verändern
13 Image information about the saved image e.g. date,
time, camera no., image resolution, etc.
14 Check authentication
15 Show detected cells
– 11 –BOSCH Security Systems GmbH A3/06–2004
Page 12

The image archive of the basic window
Several archive images tiled
You can display several archive images next to one another (tiled), up to a maximum of 8. The archive images are always arranged from left
to right consecutively and in a row. In each image, you can use the functions of the recorder buttons.
Selecting menu tree for archive images Example of image archives
– 12 –BOSCH Security Systems GmbH A3/06–2004
Page 13

Image archive menu bar
System
Live image: change to the live image
Configuration: change to the configuration
Alarm simulation: trigger an alarm (depending on the
configuration)
Close image archive: close image archive basic window, return
to the live image
Exit system log off the system
Connect
Establish connection: establish connection via
network/ISDN/modem
Terminate connection: terminate connection via
network/ISDN/modem
File
Open: open files to compare images
Logbook: search for saved files
Print comment: enter a print comment about the
current cluster
Setup printer: vary the print image layout, setup
or selection of available printers
Database
Search dialog
(individual images) find images in archives
Search dialog
(motion information) the search dialog enables
searching for and finding images in
which motion has occurred
Update archive list Update of the archive list
Database information query about type, size, etc.
Select backup drive: The backup drives are displayed
and can be selected. They are dis-
played in the archive list.
Hide backup drive: The backup drives are hidden in the
archive list
Export to CD Data can be exported to CD.
Export to backup drives Data can, e.g. be exported to hard
drive and network drive.
View
Toolbar: on/off
Status bar: on/off
Alarm simulation bar: on/off
Archive list: on/off
?
Help topics: call up online Help
Info: Info about the system, e.g. version
and serial number
– 13 –BOSCH Security Systems GmbH A3/06–2004
Page 14

Image archive toolbar
NameIcon
Live
image
Configuration Hardware, image saving, image
Alarm
simulation
Connect Establish a connection with a remote
Terminate
Explanation
Switchover to live image display.
transmission, and user settings.
Not active with integrated operating
station.
Alarm simulation can be called up
depending on the configuration.
station via ISDN/network/modem.
Established connection will be
terminated.
NameIcon Explanation
Print The selected image can be printed with
additional information.
Search
dialog
(single
image)
Images in
original size
Image
information
on/off
Archive
list on/off
Search and find images in local or
remote archives and their automatic
saving.
Possible display of the image in original
size.
The display of image information can be
deactivated in favor of a larger window
display.
Display of the archive list can be
deactivated.
Open Image archives located on hard disk or
diskette can be opened and displayed.
Save as
Export to CD Data can be exported to CD.
Selected images can be swapped out
on hard disk or diskette.
Arrange all
windows
Help Help for image archive
– 14 –BOSCH Security Systems GmbH A3/06–2004
Automatically arranges all windows.
Call up online HelpHelp topics
Page 15

Image archive toolbar / alarm simulation bar
NameIcon Explanation
Alarm
simulation
The alarm simulation bar can be embedded in the toolbar or
free–standing.
Embedded
Free–standing
Buttons for the configured alarm
simulation signals or other configured
actions.
Alarm simulation 1 triggered
Alarm simulation 2 not triggered
Alarm simulation 3 and 4 not configured
– 15 –BOSCH Security Systems GmbH A3/06–2004
Page 16

Image archive status bar / connection window / recorder buttons
The Status bar (lowermost line of the screen) contains help
information about the menu you are currently using. It shows the
name of the remote station to which an external connection has just
been established.
The Title bar contains:
– the window title with the name of the selected station and
– the buttons to minimize, maximize and close the window.
Clicking minimizes the window and places it at the bottom
edge of the screen.
Clicking restores the window to normal size.
Terminates the existing connection
Display of configured archives
On the left side of the
screen, you will find a list of
the configured archives.
First cluster image
Playback backwards
Previous cluster image
Film stop
Changes the playback speed.
Jumps ahead within the images of a cluster.
The recorder buttons
Save as
Print
Last cluster image
Replay forwards
Next cluster image
Here you have the opportunity to
check wheter the stored images
were changed.
This information (detected motion
in the image) is only available for
images that were recorded with
activated motion detection
function.
Example: movement in image
– 16 –BOSCH Security Systems GmbH A3/06–2004
Page 17

Looking at, printing, saving, swapping out, and deleting archive images
You are now on the live image means you are logged into the
system.
Looking at 1. From the System menu, select the Image
archive archive command. The image archive will be
images opened.
2. Open the archive by clicking in front of the
archive name.
3. Double–click on the first entry of the relevant day.
You will see the first image of the saved film
sepuence.
4. Let the film run ventually reduce the playback
speed. To do this, use the recorder buttons at the
bottom of the image window.
Print archive1. Use the recorder buttons to navigate to the
images images that you would like to print. Keep in mind
that you can only print the image that is currently
displayed on the screen.
2. If necessary, change the format on the
File/Setup printer menu and on the File/Print
comment menu, enter a comment about the
cluster. This note will only be printed in panel
format.
3. Click the Print icon, which you will find at the
buttons of the image window.
Save archive Use the recorder buttons to navigate to the
images images that you would like to save. Keep in mind
that
you can only save the image that is currently
displayed on the screen.
Click on the Save icon, which you will find at the
bottom
dialog box, enter the file name with the ending
.jpg.
information!
or with the ending HTML (recommended). Saving
occurs with additional image information!
of the image window and on the Save as
Saving will occur without any additional image
Swap out 1. Your backup drive must be connected. If not,
archive please connect it.
images 2. From the Database menu, select the command
Show backup drive. A dialog box for selecting
the backup drive appears.
3. On the Selection backup drive dialog box, click
on the drive. Confirm with OK.
4. From the Database menu, select the
Swap out backup drive command. A dialog box
for searching the archive will open.
5. Enter the archive to be swapped out and if
necessary, additional criteria, and click the Search
button.
The system will search.
6. Enter the backup archive name and confirm with
Delete Before exiting the system, make sure there is
archive sufficient storage space, e.g. by deleting. If you
images click the left mouse button on the relevant cluster
Attention: Some backup drives may only be removed or
OK.
7. On the Database menu, deactivate the command
Show backup drive.
and then click the right mouse button, you will
delete it.
connected when DiBos is switched off!
For details, read the manual for your backup drive.
– 17 –BOSCH Security Systems GmbH A3/06–2004
Page 18

Deleting archives / searching for archive images and additional data
You are now on the live image
Deleting 1. From the System menu, select the Image
old search archive command. The image archive will be
results opened.
2. On the archive tree, click on the + sign in front of
the archive. The archive will be opened, the
image clusters will be shown.
3. Select the clusters to be deleted in the archive by
clicking with the rigth mouse button and selecting
the Delete command from the menu that opens.
You will see another confirmation box.
4. Confirm the deletion with Yes.
Image 5. From the Database menu, select the Search
search for (single images) command. A dialog box for
additional searching the archive will open.
data 6. Enter the search criteria and/or the archives to be
searched and click the Search button.
The images found will be saved in the local
archive Search results.
7. The images found in the search results archive
can be looked at, printed, saved, and swapped
out.
Search dialog
(single images)
Note
This function is only working for images
which one record through the internal
motion detection, not for continously
recorded images.
Search dialog
(motion information)
For a targeted search, an
image selection can be
displayed on the camera
image. If you click the left
mouse button, you will see a
(+) sign. You can set several
selections next to one
another or individually. If you
click the right mouse button,
you will see a (–) sign. Now
you can modify or remove
image selections. Enter the
search criteria and click
Search.
– 18 –BOSCH Security Systems GmbH A3/06–2004
Page 19

Connecting backup drive and / swapping out archive images on diskette
Swapping out saved archive images on a backup driveSaving saved archive images on diskette
Saving 1. Carry out steps 1 – 4 under Looking at
archive images saved archive images.
(single images) 2. Use the recorder buttons to navigate to the
images that you want to save. Keep in mind
mind that you can only save the image that is
currently displayed on the screen.
3. Click on the Save icon, which you will find at
the bottom of the image window and on the
Save as dialog box, enter the file name with
the ending .jpg.
Connecting a backup drive
Connect 1. Exit DiBos from the System menu with the
backup Exit DiBos command . You must have
drive administrator authorization to do this.
2. Switch the computer off.
3. Connect the backup medium.
4. Switch the computer on and log on.
Images 1. Your backup drive must be connected. If not, see
Connecting a backup drive.
2. From the System menu, select the Image archive
command. The image archive will be opened.
3. From the Database menu, select the
Show backup drive command . A dialog box for
selecting the backup drive appears.
4. On the Select backup drive dialog box, click on
the drive. Confirm with OK.
5. From the Database menu, select the
Swap out backup command. A dialog box for
searching the archive will open.
6. Enter the archive to be swapped out and, if
necessary, additional criteria and click Search.
The system will search.
7. Enter the new backup archive name and
confirm with OK.
8. On the Database menu, deactivate the command
Show backup drive.
– 19 –BOSCH Security Systems GmbH A3/06–2004
Page 20

Formatting a CD
Call up the taskbar. It is located below your status bar. If it is not shown, call it up with the keyboard using the Windows key. You will find the CD
icon on the right side of the taskbar. Click on the dialog box for the desired action and confirm. Bosch recommends using CD–R disk as they do
not require as long of a formatting time, (formatting CD RW can take up to 20 minutes).
Enter a name. Continue
If you see a red character, this CD
is already formatted.
Double–click on this icon. If the
icon does not have a red
character, this CD must be
formatted.
After you double–click,
this dialog window will be
activated. Place a blank
CD in the drive and click
Format CD.
with Start format.
The CD is formatted.
The CD is read for
read/write access.
Confirm with OK
– 20 –BOSCH Security Systems GmbH A3/06–2004
Page 21

Formatting a CD
If you want to eject the
CD, click the eject button.
Click next to one of the
options and confirm with
OK.
– 21 –BOSCH Security Systems GmbH A3/06–2004
Page 22

Export data to CD
You must be in the image archive to export data to a CD.
When exporting proceed as follows:
– Place a CD into the CD writer and format it (see ”Formatting a CD)”.
– In the toolbar, click on the CD symbol, or in the Database menu,
click on Export to CD.
The search dialog box is displayed.
– If necessary, change the search criteria in the search dialog box.
If necessary, click on the Transaction data – show tab if you wish
to search for data from automatic cash dispensers and barcode
scanners.
Note: If you have opened the image that you wish to save,
DiBos will automatically export this image and an extra 5
minutes onto CD.
Click on Export.
Day – Date Date on which the images are to be
1
Time From:
2
Elapsed days Number of days passed. Always includes
3
Camera – Number Number of camera.
4
Local archives
5
Remote stations
6
Transfer at max. speed If this function is selected, the images
7
Until:
Search all archives All the archives are searched.
Selected archive:
On all configured remote network stations
Selected remote stations The search is only performed in those re-
searched for.
Time within which the images are to be
searched for.
the present day.
The search is only performed in those archives which you select in the following
list box.
All parameterized remote stations are
searched.
mote stations which you select in the following list box.
Note:
Local archives only refer to the local computer.
found in a network are transmitted at the
greatest possible speed.
Please note that the transmission rate depends on network activity. Therefore, activation of this function is only practical in
dedicated networked video systems or at
times at which there is no ”non–video
technology” data activity on the network
Transaction data (optional) You can search for the account number,
8
Scan code (optional) A scan code search can be performed for
9
BRC, credit card number etc. for automatic cash dispensers.
a barcode scanner.
– 22 –BOSCH Security Systems GmbH A3/06–2004
Page 23

Export data to CD
– This is followed by a new dialog box.
Enter the archive name, e.g. East Gate, and click on OK.
A backup archive with this name is created in the archive list of the
image archive.
– Click on Close to export the detected images onto the CD.
– In the Database menu, click on Hide backup drive.
The backup archive is hidden from view in the archive list of the
image archive.
– Click here on the CD symbol at the bottom right of the status bar.
The directCD dialog box is displayed.
– In the directCD dialog box, click on Eject.
Once recording is finished, the images can then be viewed in the
image archive. To do so, click on the archive in the archive list.
– 23 –BOSCH Security Systems GmbH A3/06–2004
Page 24

Export data to CD
– Activate the function
Close to Read on Any Computer – Close the CD so it can
be read . . .
and
Protect CD so it cannot be written to again.
– Click on OK.
The CD writer is opened.
– 24 –BOSCH Security Systems GmbH A3/06–2004
Page 25

Export data (e.g. to hard disk or network drive)
You must be in the image archive to export data.
Proceed as follows for remote storage:
– In the Database menu, click on Select backup drive. Select a
drive and confirm with OK.
– In the Database menu, click on Export to backup drive.
The search dialog box is displayed.
– If necessary, change the search criteria in the search dialog box.
If necessary, click on the Transaction data – show tab if you wish
to search for data from automatic cash dispensers and barcode
scanners.
Click on Export.
Note: If you have opened the image that you wish to export, this
image and an extra 5 minutes are automatically exported
onto CD.
Day – Date Date on which the images are to be
1
Time From:
2
Elapsed days Number of days passed. Always includes
3
Camera – Number Number of camera.
4
Local archives
5
Remote stations
6
Transfer at max. speed If this function is selected, the images
7
Until:
Search all archives All the archives are searched.
Selected archive:
On all configured remote network stations
Selected remote stations The search is only performed in those re-
searched for.
Time within which the images are to be
searched for.
the present day.
The search is only performed in those archives which you select in the following
list box.
All parameterized remote stations are
searched.
mote stations which you select in the following list box.
Note:
Local archives only refer to the local computer.
found in a network are transmitted at the
greatest possible speed.
Please note that the transmission rate depends on network activity. Therefore, activation of this function is only practical in
dedicated networked video systems or at
times at which there is no ”non–video
technology” data activity on the network
Transaction data (optional) You can search for the account number,
8
Scan code (optional) A scan code search can be performed for
9
BRC, credit card number etc. for automatic cash dispensers.
a barcode scanner.
– 25 –BOSCH Security Systems GmbH A3/06–2004
Page 26

Export data (e.g. to hard disk or network drive)
– This is followed by a new dialog box.
Enter the archive name, e.g. East Gate, and click on OK.
A backup archive with this name is created in the archive list of the
image archive.
– Click on Close to export the detected images.
– In the Database menu, click on Hide backup driveor close the
image archive.
The backup archive is hidden from view in the archive list.
Once exporting is finished the images can then be viewed in the
image archive. To do so, click on the archive in the archive list.
– 26 –BOSCH Security Systems GmbH A3/06–2004
Page 27

Alarm simulation
If alarm simulation signals are configured, you will be able to see
this from the buttons shown (see alarm simulation bar) and from
whether the Alarm simulation element is active on the System
menu.
If you select alarm simulation, a dialog box in which you can trigger
alarms for a maximum of four detectors will appear. Another click
on the alarm button will cancel the simulation.
The alarm is represented on the simulation
detector (connection window) by a red
exclamation point.
A second possibility for alarm simulation is to use the alarm
simulation bar.
To carry out an alarm simulation, click on the
corresponding simulation button. Thus the color of
the button changes and the alarm is represented
on the simulation detector (connection window) by
a red exclamation point.
– 27 –BOSCH Security Systems GmbH A3/06–2004
Page 28

Connection with a remote station
Incoming alarm connection
You are on the live image view of an image receiver
Automatic On alarm, an external station automatically
connection establishes image transmission to your system
established and the images transmitted can be saved
by a remote automatically by the receiver in the archive
station on <Remote station> Alarm.
alarm
Camera Click on the icons for the individual cameras to
selection for see their images.
external station On the Display menu, you can display several
cameras per remote station simultaneously.
Activating/ During image transmission, you can cancel
deactivating/ image saving. This can be useful if no relevant
saving procedures are running and you wish to save
on the image storage space in your archive.
receiver In this case, deactivate by clicking
· Save received images
on the Camera menu or
· the icon on the right–hand side of the screen
red circle).
Note: Deactivating the saving process relates
only to the current signal. A new signal
is saved automatically.
If saving should be continued, activate it by
clicking
·the Save received images command from the
Camera menu or
· the icon on the right–hand side of the screen.
Disconnect On the Connect menu, click the command and
confirm the query as to whether you really want
to disconnect with Yes .
– 28 –BOSCH Security Systems GmbH A3/06–2004
Page 29

Connection with a remote station
Looking at live images, performing control procedures on a
remote station
You are now on the live image
Establish From the Connection menu, select the
connection Connection command.
The Connection dialog box opens.
Select the desired connection type, e.g.
ISDN/network.
Click on the remote station in the list box and
confirm with OK.
The connection to the remote station is
established.
Select In the image window, on the icons for the
camera individual cameras to see their images. On the
Display menu, you can display several cameras
per remote station simultaneously.
From the Camera menu, select the Camera
switchover command.
The Automatic camera switchover dialog box
opens.
In the dialog box, specify the cameras that should
be affected by the switchover. If necessary,
consult the online Help.
Control From the Relay menu, select the Relay...
relay command. The relay output is controlled (e.g. light
outputs on). Clicking the command again will reset the
control procedure.
Disconnect On the Connect menu, click the Disconnect
command and confirm the query as to whether you
really want to disconnect with Yes .
– 29 –BOSCH Security Systems GmbH A3/06–2004
Page 30

Searching for and looking at archive images from the remote station
You are now on the live image
Open image From the System menu, select the Image
archive archive command. The image archive will be
opened.
Establish From the Connection menu, select the
connection establish connection command.
The Connection dialog box opens.
Select the desired connection type, e.g.
ISDN/network/modem.
Click on the remote station in the box and
confirm with OK. The connection to the remote
station is established. In the archive tree, the
archives of the remote station will appear under
its name.
Select By selecting the remote station, you can
remote the area to be searched on the remote station
station on the next dialog; you can limit the search area
to particular archives.
Search for From the Database menu, select the
images on Search dialog (single images) command. A
the remote dialog box for searching the archive will open.
station Enter the search criteria and/or the archives to be
searched and click the Search button. The
images found will be saved on your system in the
<Remote station> Search archive.
Looking at Open the archive by clicking on the symbol
archive in front of the archive name.
images of Double–click on the relevant entry. You will see the
the remote first image of the saved film sequence.
station Let the film run. To do this, use the recorder
buttons at the bottom of the image window.
Disconnect On the Connection menu, click the Disconnect
command and confirm the query as to wheter you
really want to disconnect with Yes .
– 30 –BOSCH Security Systems GmbH A3/06–2004
Page 31

Notes
– 31 –BOSCH Security Systems GmbH A3/06–2004
Page 32

Sicherheitssysteme GmbH, Robert–Koch–Strasse 100,
D–85521 Ottobrunn, (Postfach 1270, D–85504 Ottobrunn)
Telefon (089) 6290–0, Fax (089) 6290–1020
614–4.998.137.631
Edition:3
Status: 06–2004
 Loading...