

Bosch 715ES, C800ES, C920ES, C920ESC, 2400ES Service Bulletin
...
S
1
S
2
S
2
1
http://waterheatertimer.org/Troubleshoot-Bosch-Tankless-water-heaters.html
Service Bulletin G3-28
Models: 715ES, C800ES, C920ES, C920ESC, 2400ES, 2700ES
Replacing gas valve
Introduction
This procedure must be performed by a licensed gas technician
with a calibrated combustion gas analyzer.
The gas valve is not gas type specic but requires different CO₂
values when calibrating for different gas types.
Tools needed:
Phillips head screwdriver
Small at head screwdriver
#40 Torx driver
Combustion gas analyzer
30mm open end wrench or large adjustable wrench
4mm allen wrench
Preparation
1. Unplug water heater and turn off gas to heater using installer
supplied manual shut off valve.
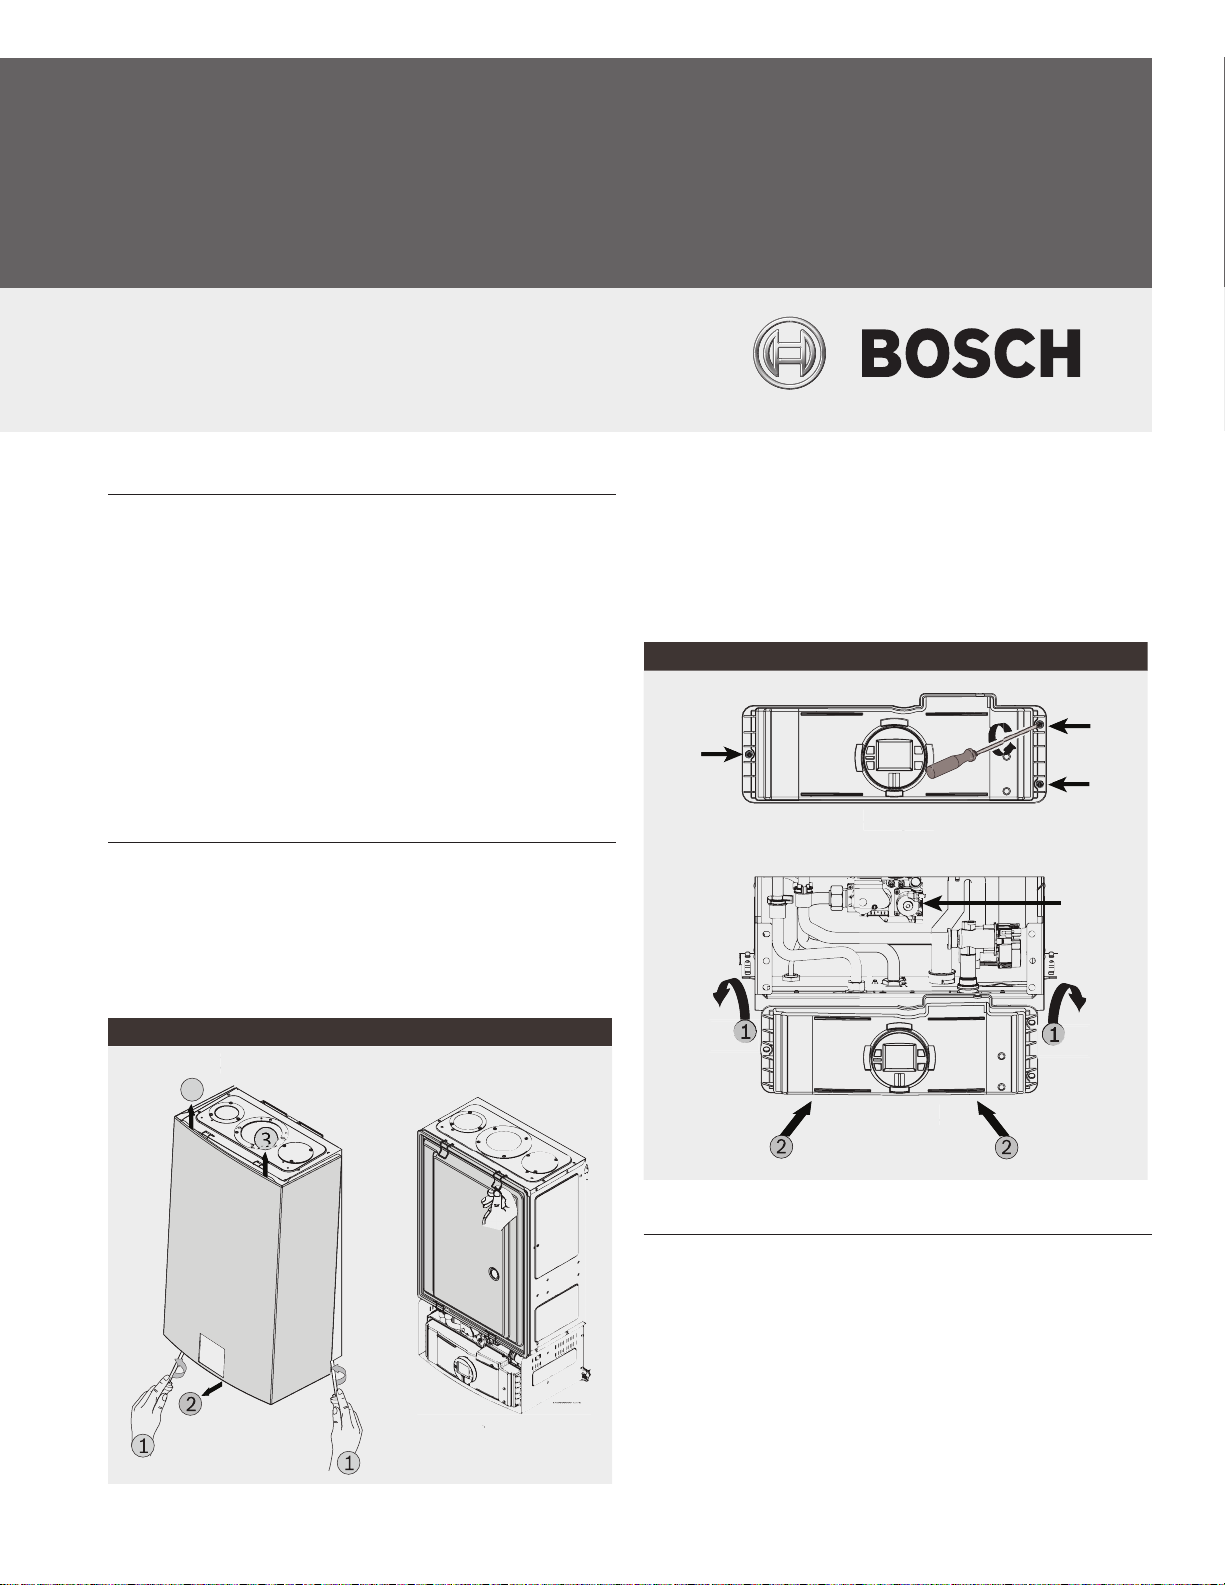
2. Loosen two Phillips head screws located at bottom rear of cover.
(Fig. 1, step 1, pos. 1).
3. Lift front cover upward and remove. (Fig. 1, step 1, pos. 2 & 3)
Figure 1
Step 2
tep
Step 1
tep
3
3
4. Remove combustion cover by unclipping two upper and two
lower clips securing cover. (Fig. 1, step 2)
5. Remove 3 Phillips screws on control unit (Fig. 2, step 1). Place
control unit into the service postion by engaging its tabs with
the holes in the horizontal sheet metal on bottom of the heater
chassis . (Fig. 2, step 2).
Step 1
Step
Step 2
tep
Figure 2
Gas
Valve
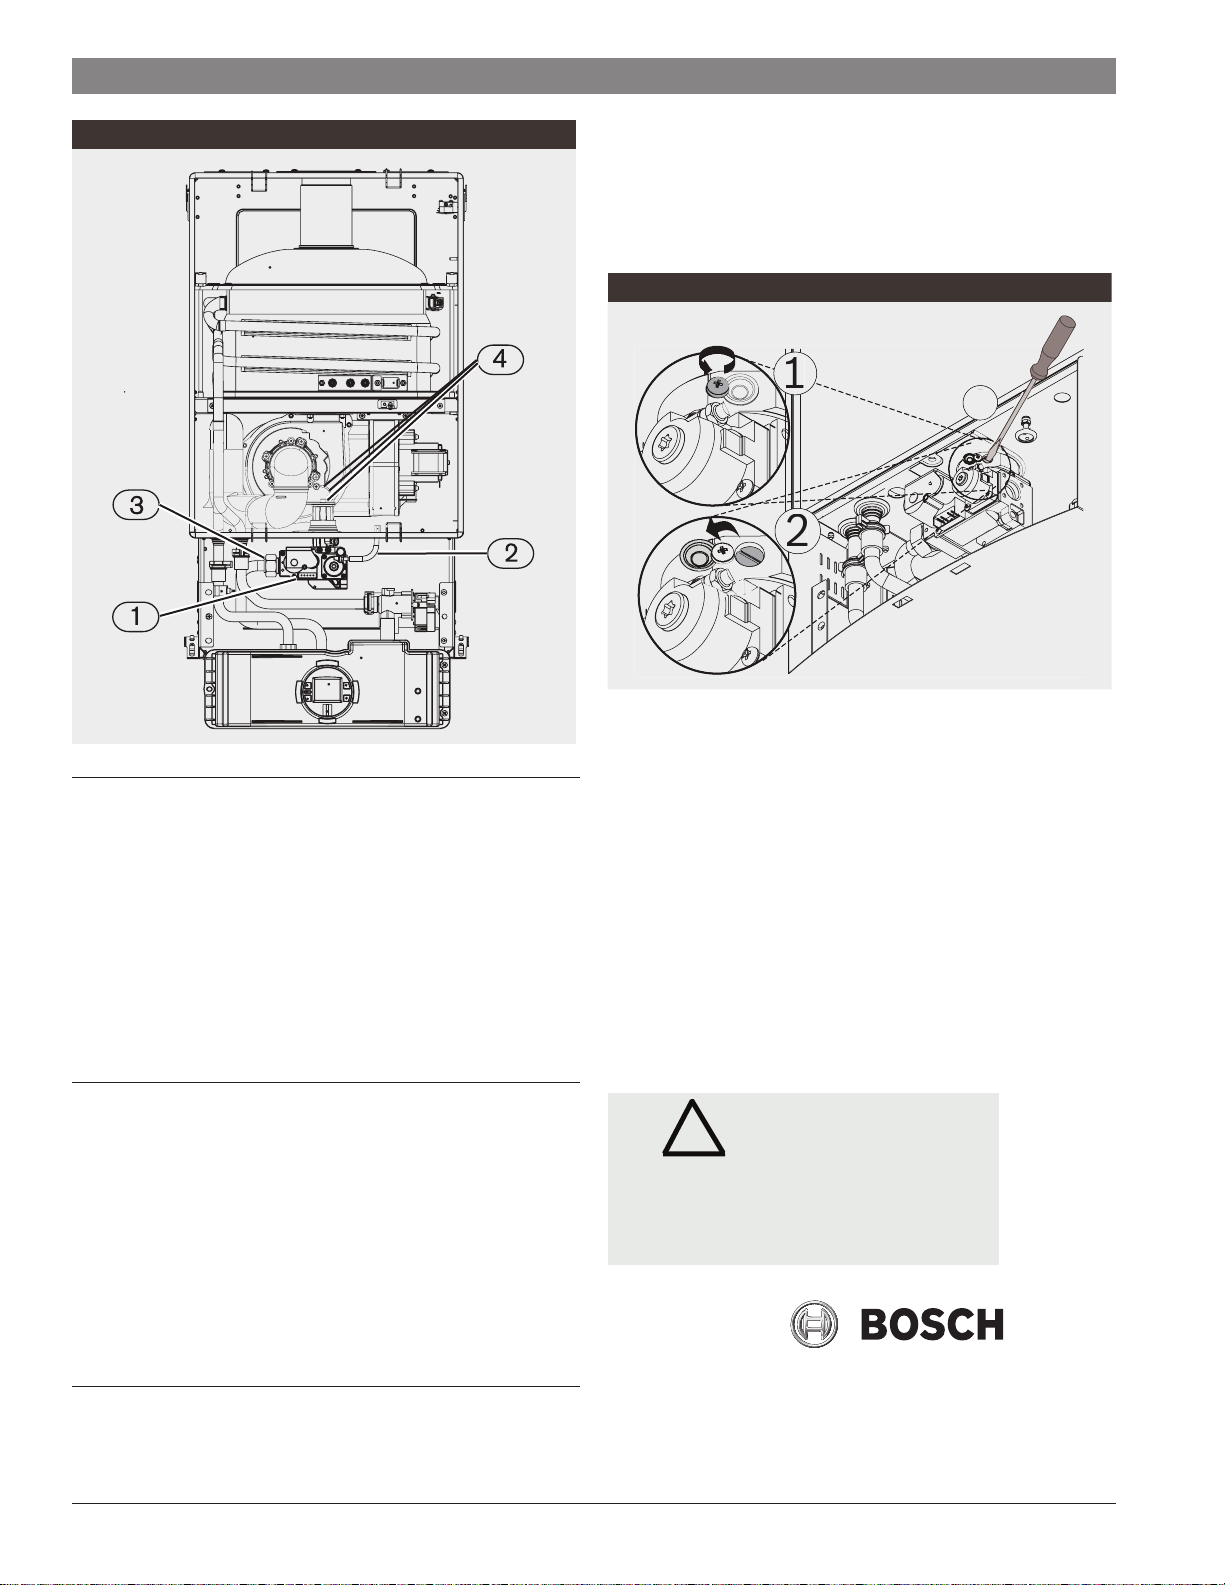
Removing the gas valve
1. Unplug wire connection from gas valve. (Fig. 3, pos. 1).
2. Disconnect clear silicone pressure balance tube from right side
of gas valve. (Fig. 3, pos. 2)
3. Loosen and disconnect large 30mm hex nut on the left side of
gas valve. (Fig. 3, pos. 3).
4. Unscrew the three 4mm allen screws from the top of the gas
valve. (Fig. 3, pos. 4).
5. Remove gas valve from the water heater.
18 | G3-28 | 715ES, C800ES, C920ES, C920ESC, 2400ES, 2700ES
Figure 3
3
2
1
Figure 4
! WARNING
FAILURE TO PROPERLY CALIBRATE THE
HEATER’S CO₂ LEVEL MAY RESULT IN A
HAZARDOUS CONDITION CAUSING
SEVERE PERSONAL INJURY OR DEATH.
Service bulletin
to do so will damage the gas valve.
1. Locate adjustment screw on gas valve. Loosen Phillips head
screw so retaining cover can be rotated to expose brass slotted
screw. (Fig. 4, pos. 1 & 2).
2. Turn brass slotted screw clockwise gently until it bottoms out
and/or screw resistance increases. (Fig. 4, pos. 3).
Installing gas valve
1. Replace both the grey ber washer on the left side of the gas
valve and the rubber gasket on the top of the gas valve.
2. Hold replacement gas valve in place and reinstall the three allen
screws into the top of the gas valve. (Fig. 3, pos. 4).
3. Reinstall 30mm hex nut on the left side of gas valve.
(Fig. 3, pos. 3)
4. Open manual gas shutoff valve and check for leaks at all connections.
5. Reinstall silicone pressure balance tube to right side of gas
valve. (Fig. 3, pos. 2).
6. Reconnect wire connection to gas valve. (Fig. 3, pos. 1).
Calibrating gas valve
1. Reinstall combustion cover. (Fig. 1, step 2).
2. Return control unit to normal position and secure with 3 Phillips
head screws. (Fig. 2)
3. Plug in water heater and push power button to the "ON" position.
4. Open a hot water tap. If heater res, adjust CO₂ using service
bulletin G3-12 Measuring and adjusting CO₂.
5. If the heater does not fire, allow the unit to display the EA error
code and shut off hot water tap. The fan will continue to run to
purge the heater of gasses. Continue to the next section for a
rough gas valve adjustment.
Rough gas valve adjustment
Note: Do not forcefully tighten adjustment screws past bottom out
Data subject to change without notice | Printed in the USA | BTC 710002312 A | 01.2009
point. Stop bottoming out screw when resistance is felt. Failure
3. Once the slotted screw is bottomed out, make the following
adjustment to the slotted screw depending on your model and
gas type. (Fig. 4, pos. 3)
For models GWH 715 ES/GWH 2700 ES/ GWH 2400 ES:
Natural Gas: 2.5 turns counter-clockwise on brass slotted screw
Liquid Propane: .75 turns counter-clockwise on brass slotted screw
For model GWH C 800 ES:
Natural Gas: 3 turns counter-clockwise on brass slotted screw
Liquid Propane: 1 turn counter-clockwise on brass slotted screw
For models GWH C920 ES/GWH C 920 ESC:
Natural Gas: 2.5 turns counter-clockwise on brass slotted screw
Liquid Propane: Leave brass slotted screw bottomed out
4. Open a hot water tap. If heater res, adjust CO₂ using service
bulletin G3-12 Measuring and adjusting CO₂. If heater still does
not re, contact Bosch Thermotechnology Corp.
5. Reinstall brass slotted screw cover and secure with Phillips
screw. (Fig. 4, pos. 1 & 2).
Bosch Thermotechnology Corp.
50 Wentworth Avenue
Londonderry, NH 03053
Tel: 1-866-642-3198
Fax: 1-603-584-1681
www.boschhotwater.com
Bosch Thermotechnology Corp.
 Loading...