

Page 1

Developing Applications for
™
J2EE
Servers
JBuilder® 2005
Page 2

Borland Software Corporation
100 Enterprise Way
Scotts Valley, California 95066-3249
www.borland.com
Refer to the file deploy.html located in the redist directory of your JBuilder product for a complete list
of files that you can distribute in accordance with the JBuilder License Statement and Limited
Warranty.
Borland Software Corporation may have patents and/or pending patent applications covering subject
matter in this document. Please refer to the product CD or the About dialog box for the list of
applicable patents. The furnishing of this document does not give you any license to these patents.
OPYRIGHT © 1997–2004 Borland Software Corporation. All rights reserved. All Borland brand and
C
product names are trademarks or registered trademarks of Borland Software Corporation in the
United States and other countries. Java and all Java-based marks are trademarks or registered
trademarks of Sun Microsystems, Inc. in the United States and other countries. All other marks are
the property of their respective owners.
For third-party conditions and disclaimers, see the Release Notes on your JBuilder product CD.
Printed in the U.S.A.
JB2005j2eeapps 3E4R0804
0405060708-987654321
PDF
Page 3

Contents
Chapter 1
Introduction 1
Documentation conventions . . . . . . . . . . . . . 1
Developer support and resources. . . . . . . . . . . 2
Contacting Borland Developer Support . . . . . . 3
Online resources. . . . . . . . . . . . . . . . . . 3
World Wide Web . . . . . . . . . . . . . . . . . . 3
Borland newsgroups . . . . . . . . . . . . . . . . 3
Usenet newsgroups . . . . . . . . . . . . . . . . 4
Reporting bugs . . . . . . . . . . . . . . . . . . 4
Chapter 2
Programming for the Java 2 Platform,
Enterprise Edition 5
Why are J2EE applications desirable? . . . . . . . . 5
Benefits of the multi-tier model . . . . . . . . . . 8
How JBuilder can help . . . . . . . . . . . . . . . . 9
Client tier technologies . . . . . . . . . . . . . . 9
Middle-tier technologies . . . . . . . . . . . . . . 9
Other J2EE technologies . . . . . . . . . . . . . 10
Preparing to deploy J2EE applications . . . . . . 11
Learning about J2EE . . . . . . . . . . . . . . . . . 11
Chapter 3
Creating applications with J2EE
technologies 13
Client-server applications . . . . . . . . . . . . . . . 14
Multi-tier applications . . . . . . . . . . . . . . . . . 15
Stand-alone clients . . . . . . . . . . . . . . . . . . 15
Consumers of dynamic web content. . . . . . . . 16
Java client calling EJBs . . . . . . . . . . . . . . 16
Web-centric applications . . . . . . . . . . . . . . . 17
Business to business . . . . . . . . . . . . . . . . . 17
Chapter 5
Using JBuilder with Borland servers 29
Configuring Borland servers in JBuilder . . . . . . . 29
Borland Enterprise Server AppServer
Edition 6.0. . . . . . . . . . . . . . . . . . . . 29
Borland Enterprise Server AppServer
Edition 5.2.1. . . . . . . . . . . . . . . . . . . 31
Making the ORB available to JBuilder . . . . . . . . 34
Configurations, partitions, partition services,
and J2EE APIs . . . . . . . . . . . . . . . . . . . 34
Changing the management port . . . . . . . . . 37
Starting the configuration or server . . . . . . . . . 38
Remote deploying . . . . . . . . . . . . . . . . . . 40
Remote debugging. . . . . . . . . . . . . . . . . . 41
Remote debugging for Borland Enterprise
Server 6.0. . . . . . . . . . . . . . . . . . . . 41
Preparing to remote debug partitions
that are not managed in JBuilder . . . . . . 41
Preparing to remote debug partitions
that are managed in JBuilder . . . . . . . . 41
Remote debugging for Borland Enterprise
Server 5.2.1. . . . . . . . . . . . . . . . . . . 42
Preparing to remote debug before the
Borland Enterprise Server AppServer
Edition 5.2.1 is running . . . . . . . . . . . 42
Preparing to remote debug when the
Borland Enterprise Server AppServer
Edition 5.2.1 is already running . . . . . . . 42
Remote debugging in JBuilder . . . . . . . . . . 43
Web module workarounds . . . . . . . . . . . . . . 43
Displaying the Borland Management Console
in JBuilder . . . . . . . . . . . . . . . . . . . . . 44
International issues . . . . . . . . . . . . . . . . . 44
Borland servers and JDataStore 7.0. . . . . . . . . 44
Chapter 4
Configuring the target server settings 19
Supported servers . . . . . . . . . . . . . . . . . .19
Setting up servers within JBuilder . . . . . . . . . . 20
Creating a duplicate configuration to edit . . . . . 22
Adding a service pack . . . . . . . . . . . . . . . . 22
The created libraries . . . . . . . . . . . . . . . . . 23
Selecting a server. . . . . . . . . . . . . . . . . . . 24
Setting up JDBC drivers . . . . . . . . . . . . . . . 26
Creating the .library and .config files . . . . . . . 26
Adding the JDBC driver to projects . . . . . . . . 27
Updating projects with the latest server settings . . . 27
Updating from an earlier version of JBuilder . . . . . 28
Chapter 6
Using JBuilder’s CORBA tools 45
How JBuilder and the VisiBroker ORB
work together. . . . . . . . . . . . . . . . . . . . 45
RMI . . . . . . . . . . . . . . . . . . . . . . . . 46
Setting up JBuilder for CORBA applications. . . . . 47
Configuring VisiBroker when the Borland
Enterprise Server is installed . . . . . . . . . . 47
Configuring VisiBroker stand-alone . . . . . . . 48
Configuring the OrbixWeb ORB . . . . . . . . . 50
Adding a new configuration. . . . . . . . . . . . 51
Setting and viewing ORB build properties . . . . . . 52
Setting VisiBroker ORB properties . . . . . . . . 52
Setting build properties for the OrbixWeb
or other third-party ORBs . . . . . . . . . . . . 54
i
Page 4

Setting and viewing IDL build properties . . . . . . . 55
Using the CORBA wizards . . . . . . . . . . . . . . 57
Sample IDL wizard . . . . . . . . . . . . . . . . 57
CORBA Client Interface wizard . . . . . . . . . . 57
CORBA Server Interface wizard. . . . . . . . . . 58
HTML CORBA Client wizard . . . . . . . . . . . 58
CORBA Server Application wizard . . . . . . . . 59
Use CORBA Interface wizard . . . . . . . . . . . 59
Chapter 7
Using JBuilder with BEA WebLogic
servers 61
Service packs. . . . . . . . . . . . . . . . . . . . . 61
Configuring JBuilder for WebLogic servers. . . . . . 61
Creating a duplicate configuration to edit . . . . . 63
Created libraries. . . . . . . . . . . . . . . . . . 64
Adding a service pack. . . . . . . . . . . . . . . 64
Selecting a server . . . . . . . . . . . . . . . . . . 64
Working in JBuilder . . . . . . . . . . . . . . . . . . 66
Using existing code . . . . . . . . . . . . . . . . 66
Creating WebLogic entity beans in JBuilder. . . . 67
Using the DD Editor . . . . . . . . . . . . . . . . 67
Compiling . . . . . . . . . . . . . . . . . . . . . 67
Starting the server . . . . . . . . . . . . . . . . . . 67
Remote deploying . . . . . . . . . . . . . . . . . . 68
WebLogic Application Sever 7.x and
WebLogic Platform Server 8.1. . . . . . . . . . 68
Deploying J2EE modules as an
exploded directory . . . . . . . . . . . . . . 69
Mapping EJB project modules at runtime . . . 69
Redeploying individual classes. . . . . . . . . 70
WebLogic 8.x Platform Server deployment
features . . . . . . . . . . . . . . . . . . . . . 70
Remote debugging . . . . . . . . . . . . . . . . . . 71
Remote debugging of JavaServer Pages . . . . . 71
Updating projects with the latest server settings . . . 72
Chapter 9
Using JBuilder with JBoss servers 83
Configuring JBuilder for the JBoss application
server . . . . . . . . . . . . . . . . . . . . . . . .83
Selecting a server . . . . . . . . . . . . . . . . . . .84
Creating a JBoss service module . . . . . . . . . . .84
Copying an existing JBoss service module . . . .85
Creating a JBoss service node for an
existing service module archive (SAR) in
a directory outside your project. . . . . . . . . .87
Editing the JBoss service module deployment
descriptor . . . . . . . . . . . . . . . . . . . . . .88
MBeans . . . . . . . . . . . . . . . . . . . . . .88
Starting the server. . . . . . . . . . . . . . . . . . .88
Deploying locally . . . . . . . . . . . . . . . . . . .89
Deploying exploded web modules. . . . . . . . . . .90
Remote debugging . . . . . . . . . . . . . . . . . .90
JSP debugging . . . . . . . . . . . . . . . . . . . .91
Chapter 10
Using JBuilder with Tomcat 93
Selecting Tomcat as your project’s web server . . . .95
Running your servlet or JSP with Tomcat . . . . . . .96
Starting Tomcat . . . . . . . . . . . . . . . . . .96
Stopping Tomcat . . . . . . . . . . . . . . . . . .96
Changing Tomcat’s port number . . . . . . . . . .97
Creating a custom server.xml file with Tomcat . . .97
Debugging JSPs with Tomcat 4.1 . . . . . . . . .98
Chapter 11
Editing J2EE deployment descriptors 99
Displaying the DD Editor . . . . . . . . . . . . . . 100
Standard and server-specific pages. . . . . . . . . 101
Adding to and deleting from a deployment
descriptor . . . . . . . . . . . . . . . . . . . . . 102
Validating a deployment descriptor entry . . . . . . 103
Chapter 8
Using JBuilder with IBM WebSphere
servers 73
Configuring JBuilder for WebSphere servers. . . . . 73
Selecting a server . . . . . . . . . . . . . . . . . . 75
Generating WebSphere deployment
descriptors for WebSphere 4.0 . . . . . . . . . . . 75
Starting the server . . . . . . . . . . . . . . . . . . 76
Deploying . . . . . . . . . . . . . . . . . . . . . . . 77
Using the DD Editor . . . . . . . . . . . . . . . . 77
WebSphere Application Server 5.x . . . . . . . . 77
Remote deploying . . . . . . . . . . . . . . . 77
Deploying locally . . . . . . . . . . . . . . . . 78
WebSphere Server 4.0 . . . . . . . . . . . . . . 78
Remote deploying . . . . . . . . . . . . . . . 78
Deploying locally . . . . . . . . . . . . . . . . 79
Enabling remote debugging . . . . . . . . . . . . . 79
WebSphere Application Server 5.x . . . . . . . . 79
WebSphere Single Server 4.0. . . . . . . . . . . 80
WebSphere Server Advanced Edition 4.0. . . . . 80
Container-managed persistence (CMP) 1.1
and 2.0 in WebSphere 5.x . . . . . . . . . . . . . 81
Chapter 12
Integrating with Enterprise
Information Systems 105
Creating a connector module node in the
project pane . . . . . . . . . . . . . . . . . . . . 105
Creating an empty connector module . . . . . . 106
Copying an existing connector module. . . . . . 107
Creating a module node for an existing
module in a directory outside your project . . . 108
Creating a connector module node for an
existing archive (RAR) outside your project . . 109
Viewing the connector module deployment
descriptors . . . . . . . . . . . . . . . . . . . . . 110
Editing the resource adapter descriptors . . . . . . 111
Authentication Mechanism page . . . . . . . . . 112
Configuration Property page . . . . . . . . . . . 113
Security Permission page . . . . . . . . . . . . 113
Server-specific pages . . . . . . . . . . . . . . . . 114
Compiling the connector module . . . . . . . . . . 114
ii
Page 5

Chapter 13
Building J2EE modules 115
J2EE modules . . . . . . . . . . . . . . . . . . . 115
Setting module build properties . . . . . . . . . . . 116
File type filters . . . . . . . . . . . . . . . . . . 116
Class and resource filters . . . . . . . . . . . . 116
Clean filters . . . . . . . . . . . . . . . . . . . 117
Dependencies . . . . . . . . . . . . . . . . . . 117
Adding custom file types . . . . . . . . . . . . . . 117
Sample build scenarios . . . . . . . . . . . . . . . 118
EJB JAR without any bean classes . . . . . . . 118
EJB JAR with custom files . . . . . . . . . . . . 118
EJB JAR without EJB designer XML
descriptors . . . . . . . . . . . . . . . . . . . 119
WAR with custom descriptor(s) in the
WEB-INF directory . . . . . . . . . . . . . . .119
WAR without any classes. . . . . . . . . . . . . 119
WAR with custom class filters . . . . . . . . . . 119
WAR with custom file types. . . . . . . . . . . . 119
EAR with custom files . . . . . . . . . . . . . .120
RAR with classes and dependencies. . . . . . .120
Application client module with classes and
dependencies . . . . . . . . . . . . . . . . . .120
Improving module build performance . . . . . . . .121
Web modules. . . . . . . . . . . . . . . . . . .121
Index 123
iii
Page 6

iv
Page 7

Chapter
1
Chapter1Introduction
Developing Applications for J2EE Servers introduces you to the various technologies
that make up the Java™ 2 Platform, Enterprise Edition (J2EE™), explains why they
are important, and describes how you can use JBuilder to create J2EE applications
that target your application server. You’ll learn how to configure JBuilder to work with
your server, and how to accomplish the essential programming tasks of running your
applications, debugging them remotely, and deploying them to your server.
Documentation conventions
The Borland documentation for JBuilder uses the typefaces and symbols described in
the following table to indicate special text.
Table 1.1 Typeface and symbol conventions
Typeface Meaning
Bold Bold is used for java tools, bmj (Borland Make for Java), bcj (Borland
Italics Italicized words are used for new terms being defined, for book titles, and
Keycaps This typeface indicates a key on your keyboard, such as “Press Esc to
Monospaced type
Compiler for Java), and compiler options. For example: javac, bmj,
-classpath.
occasionally for emphasis.
exit a menu.”
Monospaced type represents the following:
■ text as it appears onscreen
■ anything you must type, such as “Type Hello World in the Title field
of the Application wizard.”
■ file names
■ path names
■ directory and folder names
■ commands, such as SET PATH
■ Java code
■ Java data types, such as boolean, int, and long.
■ Java identifiers, such as names of variables, classes, package
names, interfaces, components, properties, methods, and events
■ argument names
■ field names
■ Java keywords, such as void and static
Chapter 1: Introduction 1
Page 8

Developer support and resources
Table 1.1 Typeface and symbol conventions (continued)
Typeface Meaning
[ ] Square brackets in text or syntax listings enclose optional items. Do not
< > Angle brackets are used to indicate variables in directory paths,
Italics, serif This formatting is used to indicate variable strings within code samples
... In code examples, an ellipsis (…) indicates code that has been omitted
type the brackets.
command options, and code samples. JDK 5.0 uses angle brackets to
denote generics.
For example,
supply a file name (including file extension), and <username> typically
indicates that you must provide your user name.
When replacing variables in directory paths, command options, and code
samples, replace the entire variable, including the angle brackets (< >).
For example, you would replace
employee.jds, and omit the angle brackets.
as
See “Using command-line tools” in Building Applications with JBuilder for
more information.
Note: Angle brackets are used in HTML, XML, JSP, and other tag-based
files to demarcate document elements, such as <font color=red> and
<ejb-jar>. The following convention describes how variable strings are
specified within code samples that are already using angle brackets for
delimiters.
that are already using angle brackets as delimiters. For example,
<filename> may be used to indicate where you need to
<filename> with the name of a file, such
<url="jdbc:borland:jbuilder\\samples\\guestbook.jds">
from the example to save space and improve clarity. On a button, an
ellipsis indicates that the button links to a selection dialog box.
JBuilder is available on multiple platforms. See the following table for a description of
platform conventions used in the documentation.
Table 1.2 Platform conventions
Item Meaning
Paths Directory paths in the documentation are indicated with a forward slash (/).
For Windows platforms, use a backslash (\).
Home directory The location of the standard home directory varies by platform and is
indicated with a variable,
■ For UNIX, Linux, and OS X, the home directory can vary. For example,
it could be
■ For Windows NT, the home directory is C:\Winnt\Profiles\
<username>
■ For Windows 2000 and XP, the home directory is C:\Documents and
Settings\<username>
Screen shots Screen shots reflect the Borland Look & Feel on various platforms.
Developer support and resources
Borland provides a variety of support options and information resources to help
developers get the most out of their Borland products. These options include a range of
Borland Technical Support programs, as well as free services on the Internet, where
you can search our extensive information base and connect with other users of Borland
products.
<home>.
/user/<username> or /home/<username>
2 Developing Applications for J2EE Servers
Page 9

Developer support and resources
Contacting Borland Developer Support
Borland offers several support programs for customers and prospective customers.
You can choose from several categories of support, ranging from free support upon
installation of the Borland product, to fee-based consultant-level support and extensive
assistance.
For more information about Borland’s developer support services, see our web site at
http://www.borland.com/devsupport/, call Borland Assist at (800) 523-7070, or contact
our Sales Department at (831) 431-1064.
When contacting support, be prepared to provide complete information about your
environment, the version of the product you are using, and a detailed description of the
problem.
For support on third-party tools or documentation, contact the vendor of the tool.
Online resources
You can get information from any of these online sources:
World Wide Web
http://www.borland.com/
http://info.borland.com/techpubs/jbuilder/
Electronic newsletters To subscribe to electronic newsletters, use the online form at:
http://www.borland.com/products/newsletters/index.html
World Wide Web
Check the JBuilder page of the Borland website, www.borland.com/jbuilder, regularly.
This is where the Java Products Development Team posts white papers, competitive
analyses, answers to frequently asked questions, sample applications, updated
software, updated documentation, and information about new and existing products.
You may want to check these URLs in particular:
■
http://www.borland.com/jbuilder/ (updated software and other files)
■
http://info.borland.com/techpubs/jbuilder/ (updated documentation and other
files)
■
http://bdn.borland.com/ (contains our web-based news magazine for developers)
Borland newsgroups
When you register JBuilder you can participate in many threaded discussion groups
devoted to JBuilder. The Borland newsgroups provide a means for the global
community of Borland customers to exchange tips and techniques about Borland
products and related tools and technologies.
You can find user-supported newsgroups for JBuilder and other Borland products at
http://www.borland.com/newsgroups/.
Chapter 1: Introduction 3
Page 10

Developer support and resources
Usenet newsgroups
The following Usenet groups are devoted to Java and related programming issues:
■
news:comp.lang.java.advocacy
■
news:comp.lang.java.announce
■
news:comp.lang.java.beans
■
news:comp.lang.java.databases
■
news:comp.lang.java.gui
■
news:comp.lang.java.help
■
news:comp.lang.java.machine
■
news:comp.lang.java.programmer
■
news:comp.lang.java.security
■
news:comp.lang.java.softwaretools
Note These newsgroups are maintained by users and are not official Borland sites.
Reporting bugs
If you find what you think may be a bug in the software, please report it to Borland at
one of the following sites:
■
Support Programs page at http://www.borland.com/devsupport/namerica/. Click the
Information link under “Reporting Defects” to open the Welcome page of Quality
Central, Borland’s bug-tracking tool.
■
Quality Central at http://qc.borland.com. Follow the instructions on the Quality
Central page in the “Bugs Report” section.
■
Quality Central menu command on the main Tools menu of JBuilder (Tools|Quality
Central). Follow the instructions to create your QC user account and report the bug.
See the Borland Quality Central documentation for more information.
When you report a bug, please include all the steps needed to reproduce the bug,
including any special environmental settings you used and other programs you were
using with JBuilder. Please be specific about the expected behavior versus what
actually happened.
If you have comments (compliments, suggestions, or issues) for the JBuilder
documentation team, you may email
issues only. Please note that you must address support issues to developer support.
JBuilder is made by developers for developers. We really value your input.
[email protected]. This is for documentation
4 Developing Applications for J2EE Servers
Page 11

Chapter
2
Chapter2Programming for the Java 2 Platform,
Enterprise Edition
The Java™ 2 Platform, Enterprise Edition (J2EE™) is an architecture for a Java
development platform for distributed enterprise applications. It was developed by Sun
Microsystems, with input from the development community, including Borland. J2EE
platform products, such as the Borland Enterprise Server, offer the developer the
capability of building applications with these benefits:
■
Reliability and scalability, so business transactions are processed quickly and
accurately.
■
Excellent security to protect users’ privacy and the integrity of the enterprise’s data.
■
Ready availability, to meet the increasing demands of the global business
environment.
JBuilder is a Java integrated development environment that, when coupled with a
supported application server from companies such as Borland, BEA, and IBM greatly
simplifies and speeds the development of J2EE applications.
Why are J2EE applications desirable?
In the early 1990s, information systems frequently used a client-server architecture.
The user interface to the application usually ran on a desktop computer. This was the
client tier. The enterprise data being accessed by the client resided in a database and
Chapter 2: Programming for the Java 2 Platform, Enterprise Edition 5
Page 12
Why are J2EE applications desirable?
was “served up” by a server. This approach initially promised improved scalability and
functionality.
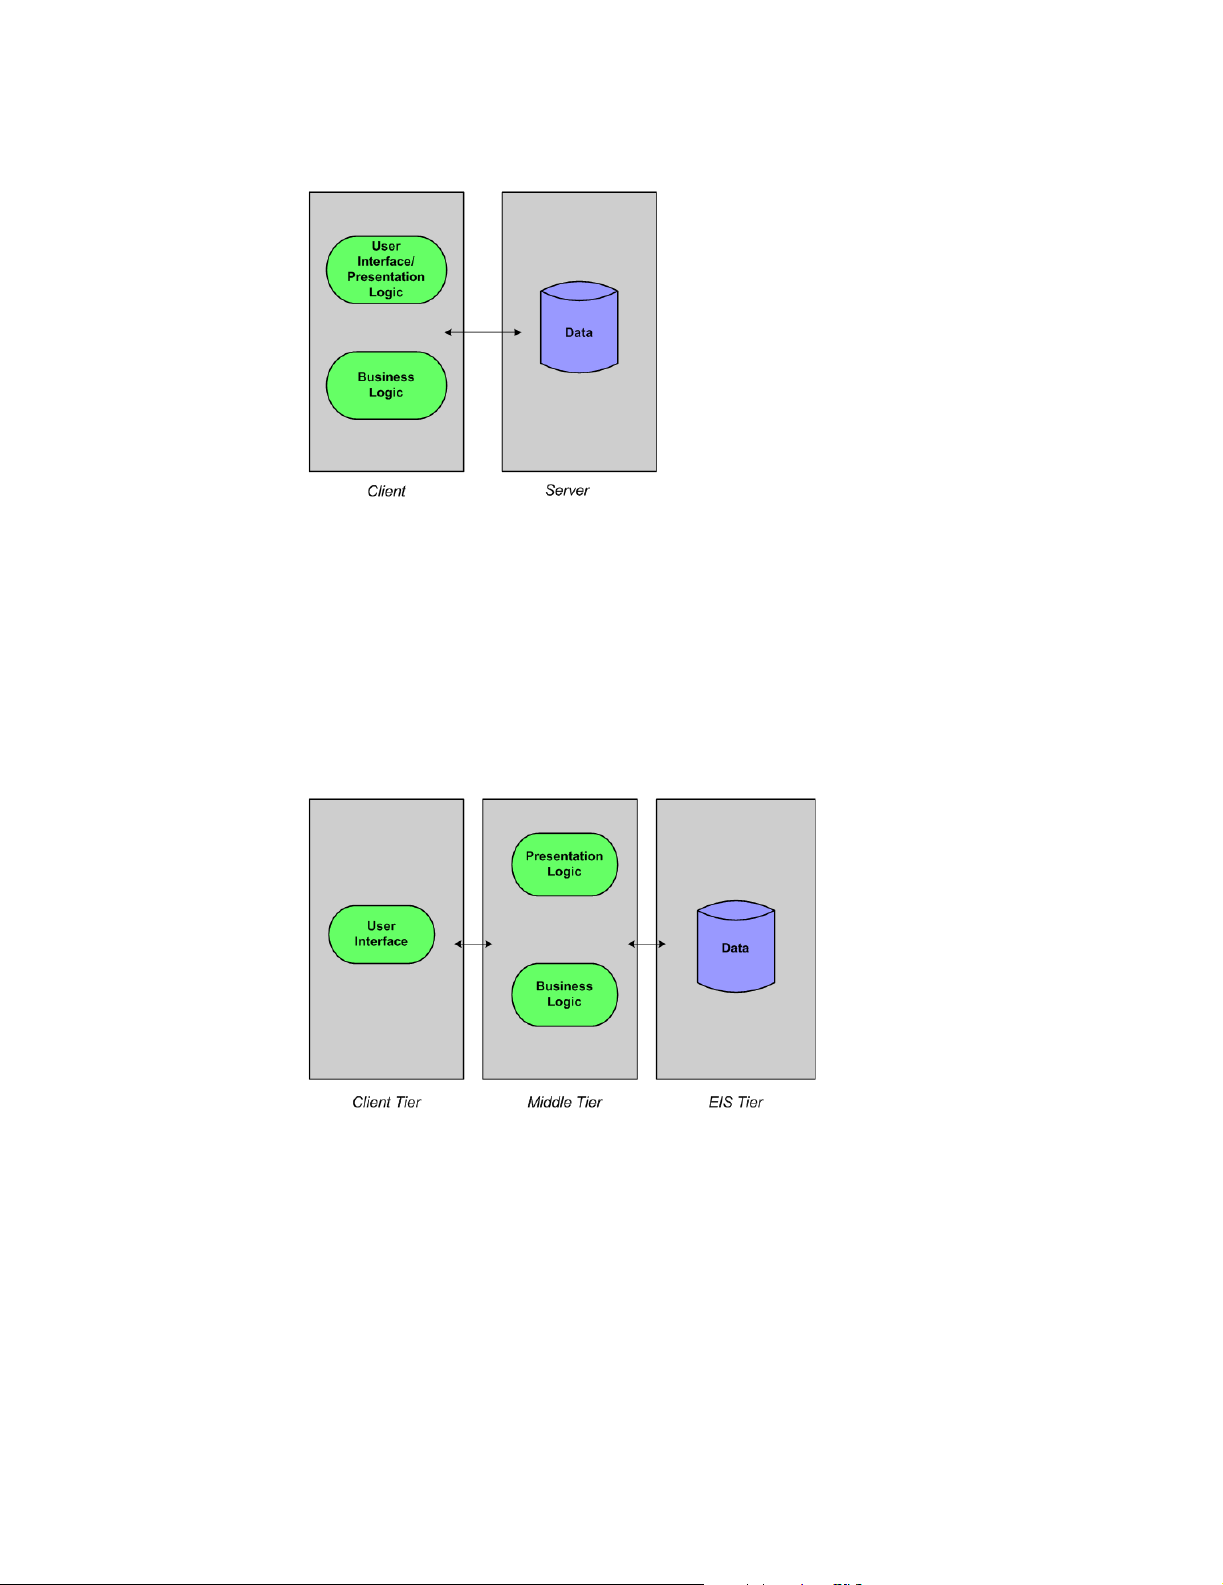
Through hard experience, however, the development community learned that building
and maintaining a flexible distributed system is very difficult using the client-server
model. For example, the business logic of the application was in the client application.
Every time that logic needed modification, the revised application had to be installed on
every client machine in the enterprise. Maintenance became a nightmare. These
applications also had to manage transactions, be concerned with security, and process
the data efficiently, all the while presenting an attractive, easy-to-understand interface
to its users. Few developers have talents in all these areas. While a client-server
architecture might be adequate for some environments, most of today’s global
companies demand considerably more than the client-server model can deliver.
Once the limitations of the client-server approach became apparent, the development
community began seeking a better way. The result is the multi-tier model.
In the multi-tier model, the logic involved in presenting the user interface of the
application to the user lives on the middle tier. The business logic is now on the middle
tier also. When changes are needed, they can be updated in one place instead of on
each client machine.
6 Developing Applications for J2EE Servers
Page 13
Why are J2EE applications desirable?
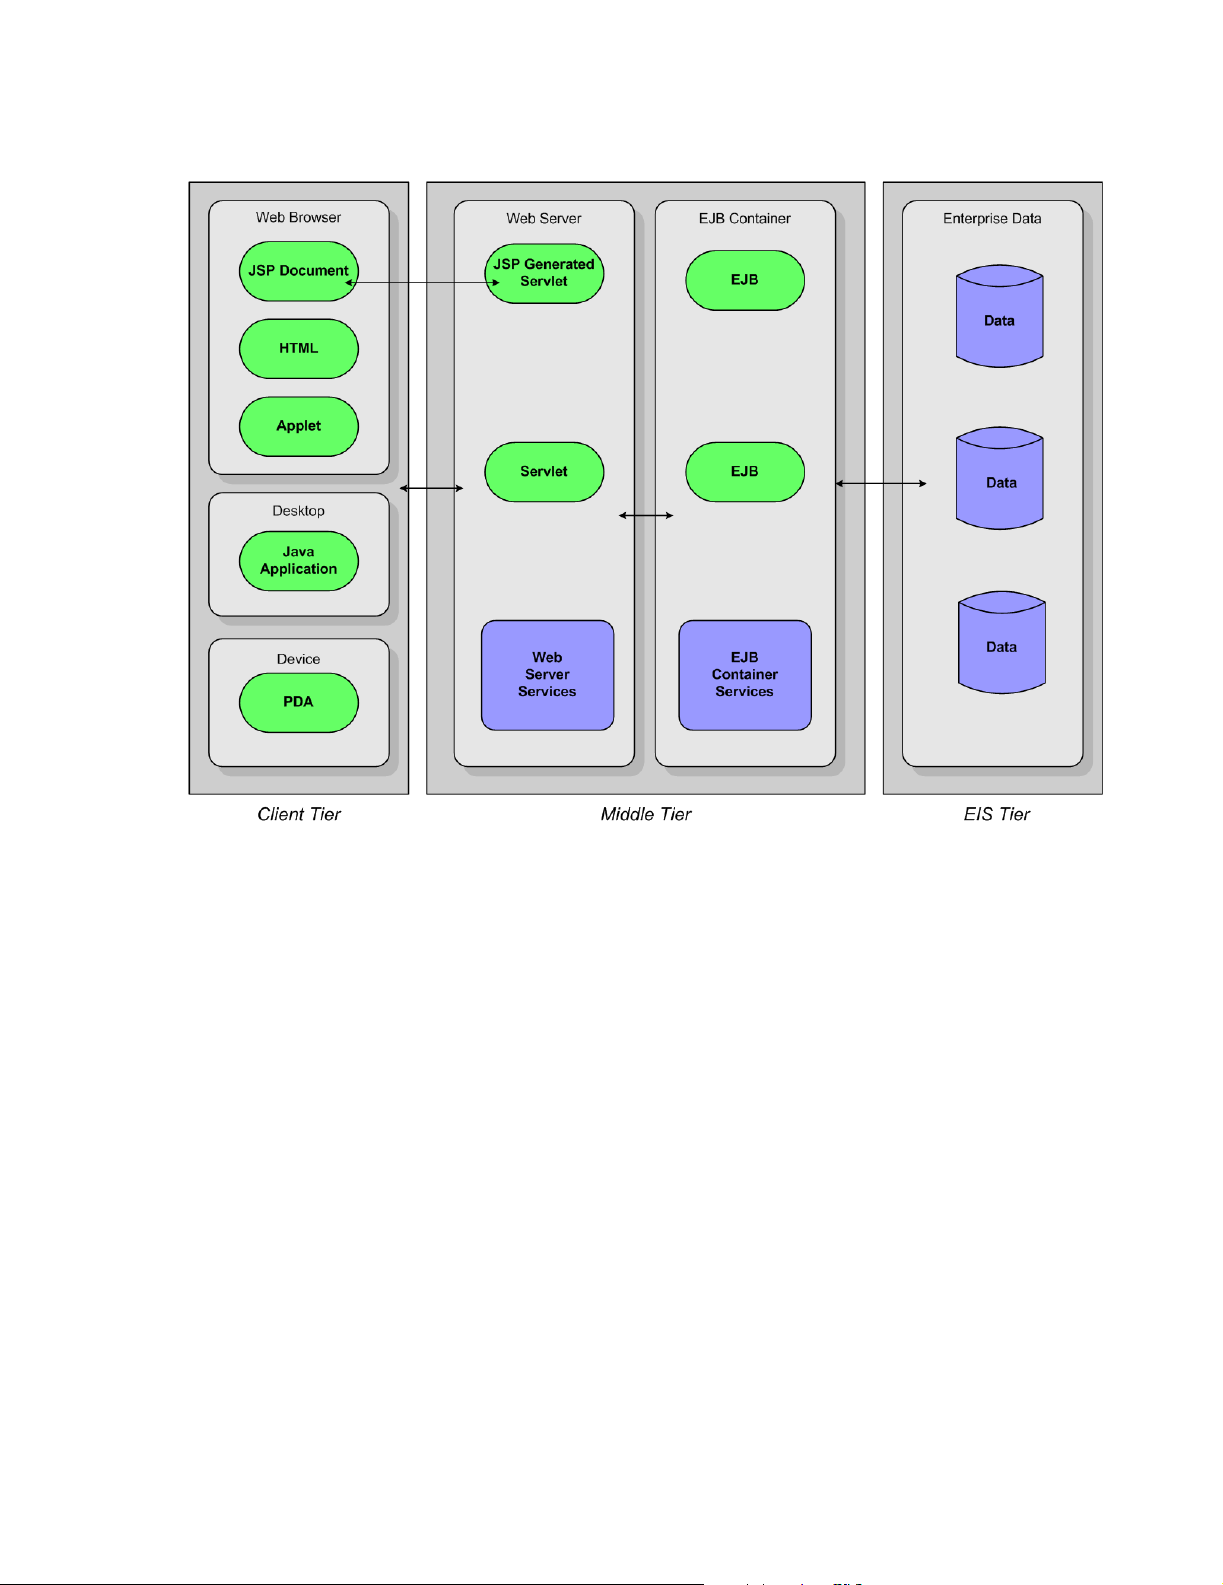
This expanded diagram shows you the various components you might find running on
the various tiers:
The client in a J2EE application can be a JavaServer Page (JSP), HTML page, or
applet running in a browser; a Java application on a desktop machine; or even a Java
client on some portable device, such as a personal digital assistant (PDA) or cell
phone.
The middle-tier can have a servlet or a JSP-generated servlet running on a web server.
These elements usually make up the server-side presentation logic. An EJB container
provides a runtime environment for Enterprise JavaBeans™, which contain the
business logic of application. Both a web server and an Enterprise JavaBeans (EJB)
container provide services to the components that run on them. Because these
services are always available, programmers don’t have to include them in the
components they write.
The Enterprise Information System (EIS) tier is a repository for the enterprise’s data.
Usually it consists of the data in a relational database system.
Few J2EE applications have all of these components. They can be mixed and matched
in very flexible ways to meet the needs of the enterprise. See Chapter 3, “Creating
applications with J2EE technologies” for more on this topic.
Chapter 2: Programming for the Java 2 Platform, Enterprise Edition 7
Page 14

Why are J2EE applications desirable?
Benefits of the multi-tier model
The multi-tier approach adopted by the J2EE platform has several benefits:
■
It reduces the complexity of distributed development with a simplified architecture
and the sharing of the work load among roles.
The business logic of the application runs in the middle tier inside an Enterprise
JavaBean (EJB) container and/or on a web server. These containers and servers
can handle many of the difficult tasks for developers. For example, an EJB container
can handle transactions, instance pooling, and data persistence without requiring
the EJB programmer to write the logic to perform these tasks. A web server can
create and pool instances of servlet classes and handle multiple threads and socket
connections. Instead of writing the code to do these things, a member of the
development team specifies the desired behavior at deployment time.
Members of the development team play different roles. Each is a specialist in one or
more areas. For example, the content of an HTML page or stylesheet would likely
be created by a graphic designer or webmaster. A senior developer might be
responsible for the business logic of the application encapsulated within Enterprise
JavaBean components. A web developer might develop the user interface and
presentation logic using JavaServer Pages (JSPs) and servlets. An application
assembler takes the various components of the application and puts it all together,
often creating an Enterprise Archive (EAR) file and creating the deployment
descriptor that explains how the application is to be deployed. The application
deployer and administrator deploy the application. By partitioning the work this way,
each step of the development/deployment process is handled by someone skilled in
their area while no one has to be an expert in every area.
■
It is highly scalable, allowing the development of systems to meet many different
needs that can change quickly.
When demands on the system increase, the logic can be updated easily in one
place on the middle tier without having to load new logic on every client machine.
■
New applications can integrate well with existing information systems.
JDBC, a J2EE technology, is a Java API to SQL databases, permitting the access to
any type of tabular data that might exist in the enterprise. The Java Naming and
Directory Interface (JNDI) allows applications that use Java technology to access
enterprise naming and directory services. The J2EE Connector architecture gives
Java applications connections to heterogeneous legacy systems. The Java
Message Service (JMS) is the Java API for sending and receiving messages though
enterprise messaging systems. CORBA services are called using JavaIDL.
■
Security is enhanced.
J2EE technologies are designed with security in mind. For example, only users in
assigned roles can access certain methods in enterprise beans. Who can access
these methods isn’t coded in the enterprise beans themselves. Instead this
information is set in the enterprise beans’ deployment descriptors, which are used
by the deployer to establish their behavior after they are deployed. This type of
security is called declarative security.
For complex security requirements, however, J2EE also allows programmable
security. In these cases, the security logic is placed within the code itself.
■
Developers can choose from a variety of development tools, servers, and
components to develop the applications they need.
The development team can select the solutions that are best for their needs, without
becoming locked into the offerings of a single vendor.
8 Developing Applications for J2EE Servers
Page 15

How JBuilder can help
JBuilder Enterprise Edition has many features to help your team develop J2EE
applications. These are the technologies JBuilder has to help you develop the client
tier:
Client tier technologies
■
Applets
Applets are a special kind of Java application that are downloaded and run by a web
browser on a client machine. To begin developing an applet in JBuilder, start with
the Applet wizard. For information about working with applets, see “Working with
applets” in Developing Web Applications.
■
Java user interface applications
JBuilder has several features that can help you develop an application that runs on
a client machine. Begin a Java application using the Application wizard. Continue
designing your user interface by using JBuilder’s UI designer. You create your UI by
adding UI components from JBuilder’s component palette. For information on
working with JBuilder’s UI designer, see “Visual design in JBuilder” in Designing
Applications with JBuilder.
If you want to create your own JavaBean components to use in your user interface,
BeansExpress can simplify the task for you. For information about using
BeansExpress, see “Creating JavaBeans with BeansExpress” in Designing
Applications with JBuilder. JBuilder’s DataExpress components for enterprise beans
make it easier for you to build client applications using database-aware visual
components such as dbSwing or InternetBeans Express. For more information
about DataExpress for EJB, see “Using the DataExpress for Enterprise JavaBeans
components” in Developing Applications with Enterprise JavaBeans.
Both a web server and/or an EJB container can run on the middle tier. JBuilder
ships with Tomcat, a servlet container that can be used as a web server, and with
the Borland Enterprise Server 5.2.1, which contains the EJB container. You can
build applications for these servers or you can set up JBuilder to enable you to
develop applications for BEA WebLogic 7.x, and 8.1, IBM WebSphere 4.0 and 5.0,
Sun-Netscape iPlanet 6.0 and 6.5, and Sybase 4.1 and 4.2.
How JBuilder can help
Middle-tier technologies
These are the middle-tier J2EE technologies that use a web server:
■
Servlets
A servlet is a server-side Java application that can process requests from clients.
The servlet responds to the request by generating dynamic output that is sent back
to the client. You can begin developing servlets with JBuilder’s Standard Servlet
wizard. To find out more about servlets and developing them, see “Developing
servlets” in Developing Web Applications.
■
JavaServer Pages (JSPs)
An extension of servlet technology, JSPs offer a simplified way to develop servlets.
Like servlets, they generate dynamic output that is sent back to the client’s web
browser, thus bridging the client and middle tier. Begin developing JSPs with
JBuilder’s JavaServer Page wizard. To find out more about JSPs and developing
them, see “JavaServer Pages (JSP)” in Developing Web Applications.
InternetBeans Express is a component library that supplements the servlet and JSP
technology available in JBuilder. This library makes it easy to present and
Chapter 2: Programming for the Java 2 Platform, Enterprise Edition 9
Page 16

How JBuilder can help
manipulate data from a database so you can build data-aware servlets and JSPs.
For information about InternetBeans Express, see “Using InternetBeans Express” in
the Developing Web Applications.
This is the middle-tier J2EE technology that uses an EJB container:
■
Enterprise JavaBeans (EJBs)
Enterprise JavaBeans are server-side components that contain the business logic of
the application. JBuilder assists you in building EJB 1.x and EJB 2.0 components.
Start building enterprise beans by using the EJB wizards on the Enterprise page of
the object gallery (File|New|Enterprise). For building EJB 2.0 components, JBuilder
offers the EJB designer, a Two-Way Tool™ that allows you to design your beans
visually all the while keeping your code, deployment descriptors, and design
synchronized. For more information about building, testing, and deploying
enterprise beans, see “An introduction to EJB development” in Developing
Applications with Enterprise JavaBeans.
As you create your enterprise beans, JBuilder is building your EJB deployment
descriptors. You can use JBuilder’s EJB DD Editor to modify them as you wish. For
more information about the EJB DD Editor see Chapter 11, “Editing J2EE
deployment descriptors” and “Editing EJB deployment descriptors” in Developing
Applications with Enterprise JavaBeans.
All the web application components and enterprise bean components can be combined
and delivered in an application module. JBuilder has an Application Module wizard. For
more information, see “Creating an application module” in the “Deploying enterprise
beans” chapter of the Developing Applications with Enterprise JavaBeans book.
Other J2EE technologies
While not confined to a particular architectural tier, these technologies are enablers
that make things work:
■
Java Database Connectivity (JDBC)
JDBC is the standard used to access your database on the Enterprise Information
Systems (EIS) tier. It defines a Java API you use to write SQL statements that are
sent to your database.
JBuilder includes DataExpress, a component library for accessing data in your
database. It connects your application to your database using JDBC drivers.
JBuilder also includes JDataStore, an all-Java embedded database and component
library. You access JDataStore using JDBC.
Entity beans that access rows in your database, also connect to your data using
JDBC.
■
Java Message Service (JMS)
JMS is an enterprise messaging service that routes messages between
components and processes in a distributed application.
The Borland Enterprise Server includes SonicMQ, a JMS implementation. Also
JBuilder supports EJB 2.0 components, which include message-driven beans.
Message-driven beans integrate JMS into enterprise beans. JBuilder also includes a
JMS wizard. See “Creating JMS producers and consumers” in Developing
Applications with Enterprise JavaBeans for information on creating classes and
applications that can create and consume JMS messages.
■
Java Naming and Directory Interface (JNDI)
All J2EE servers use JNDI, a Java naming service used to locate distributed
objects.
10 Developing Applications for J2EE Servers
Page 17

■
Extensible Markup Language (XML)
Although not really a J2EE technology, XML is widely used by J2EE technologies.
For example, web components and enterprise beans have their deployment
descriptors written in XML. These deployment descriptors describe how the
components behave once they are deployed.
JBuilder has several XML features that help you accomplish common programming
tasks you might encounter in your J2EE projects. For information about JBuilder’s
XML features, see “Introduction” in Working with XML.
Preparing to deploy J2EE applications
As you create and compile your web applications and enterprise beans, JBuilder can
create the WAR (Web Archive) and EJB-JAR (EJB Archive) files for you automatically.
You can choose to bundle the components of a J2EE application together into an EAR
file. JBuilder provides an Application Module wizard to help you do this. For more
information, see “Creating an application module” in Developing Applications with
Enterprise JavaBeans.
Learning about J2EE
Learning about J2EE
If you’ve read this far, you’ve been exposed very briefly to many concepts and, with all
the acronyms to identify J2EE technologies, an alphabet soup. To develop a deeper
understanding of J2EE benefits and concepts, begin your explorations on Sun’s
www.java.sun.com web site. This http://java.sun.com/j2ee/docs.html link takes you to
Sun’s J2EE documentation home page where you can find an abundance of useful
information.
If you’re new to J2EE programming, look at the J2EE tutorial at
j2ee/tutorial/index.html
recommended programming practices to use in your J2EE applications, don’t miss the
very detailed J2EE Blueprints, found at
index.html
you need to understand deeper concepts and are looking for the best ways to
approach J2EE development. This material is also available in book form as Designing
Enterprise Applications with the Java 2 Platform, Enterprise Edition written by Nicholas
Kassem and the Enterprise Team of Sun.
aboutthebook.html
You’ll find additional documentation and specifications for the various J2EE
technologies on the Sun site. There are also excellent third-party books, but because
J2EE is a developing product, be aware which versions of the various technologies
they address.
. J2EE Blueprints is an integral part of J2EE itself. You’ll find it useful when
links you to information about the book.
. For an in-depth discussion of J2EE programming and the
http://java.sun.com/j2ee/blueprints/
http://java.sun.com/j2ee/blueprints/
http://java.sun.com/
Chapter 2: Programming for the Java 2 Platform, Enterprise Edition 11
Page 18

12 Developing Applications for J2EE Servers
Page 19

Chapter
3
Chapter3Creating applications with J2EE
technologies
The Developing Web Applications, Developing Applications with Enterprise
JavaBeans, and other parts of JBuilder’s documentation explain how to use J2EE
technologies. They describe in depth how to use JBuilder features to develop web
applications, work with XML, develop Enterprise JavaBeans, access and work with
your data using DataExpress, and create web services. Within each of these areas of
the documentation, you should find the information to understand these technologies
and work productively with them.
But today’s web-based enterprise applications usually use several J2EE technologies.
How do these disparate technologies fit together in applications you and your team
might develop? Which technologies are right for which kind of applications? This
chapter intends to help you see how the pieces fit together, while highlighting the
flexibility of J2EE applications. It borrows heavily from the Introduction chapter of
Designing Enterprise Applications with the J2EE Platform by Inderjeet Singh, Beth
Stearns, Mike Johnson, and the Sun Enterprise Team. You can find the book online on
the Sun web site at
designing_enterprise_applications_2e/#chapters
http://java.sun.com/blueprints/guidelines/
, and it is also available for purchase.
Chapter 3: Creating applications with J2EE technologies 13
Page 20
Client-server applications
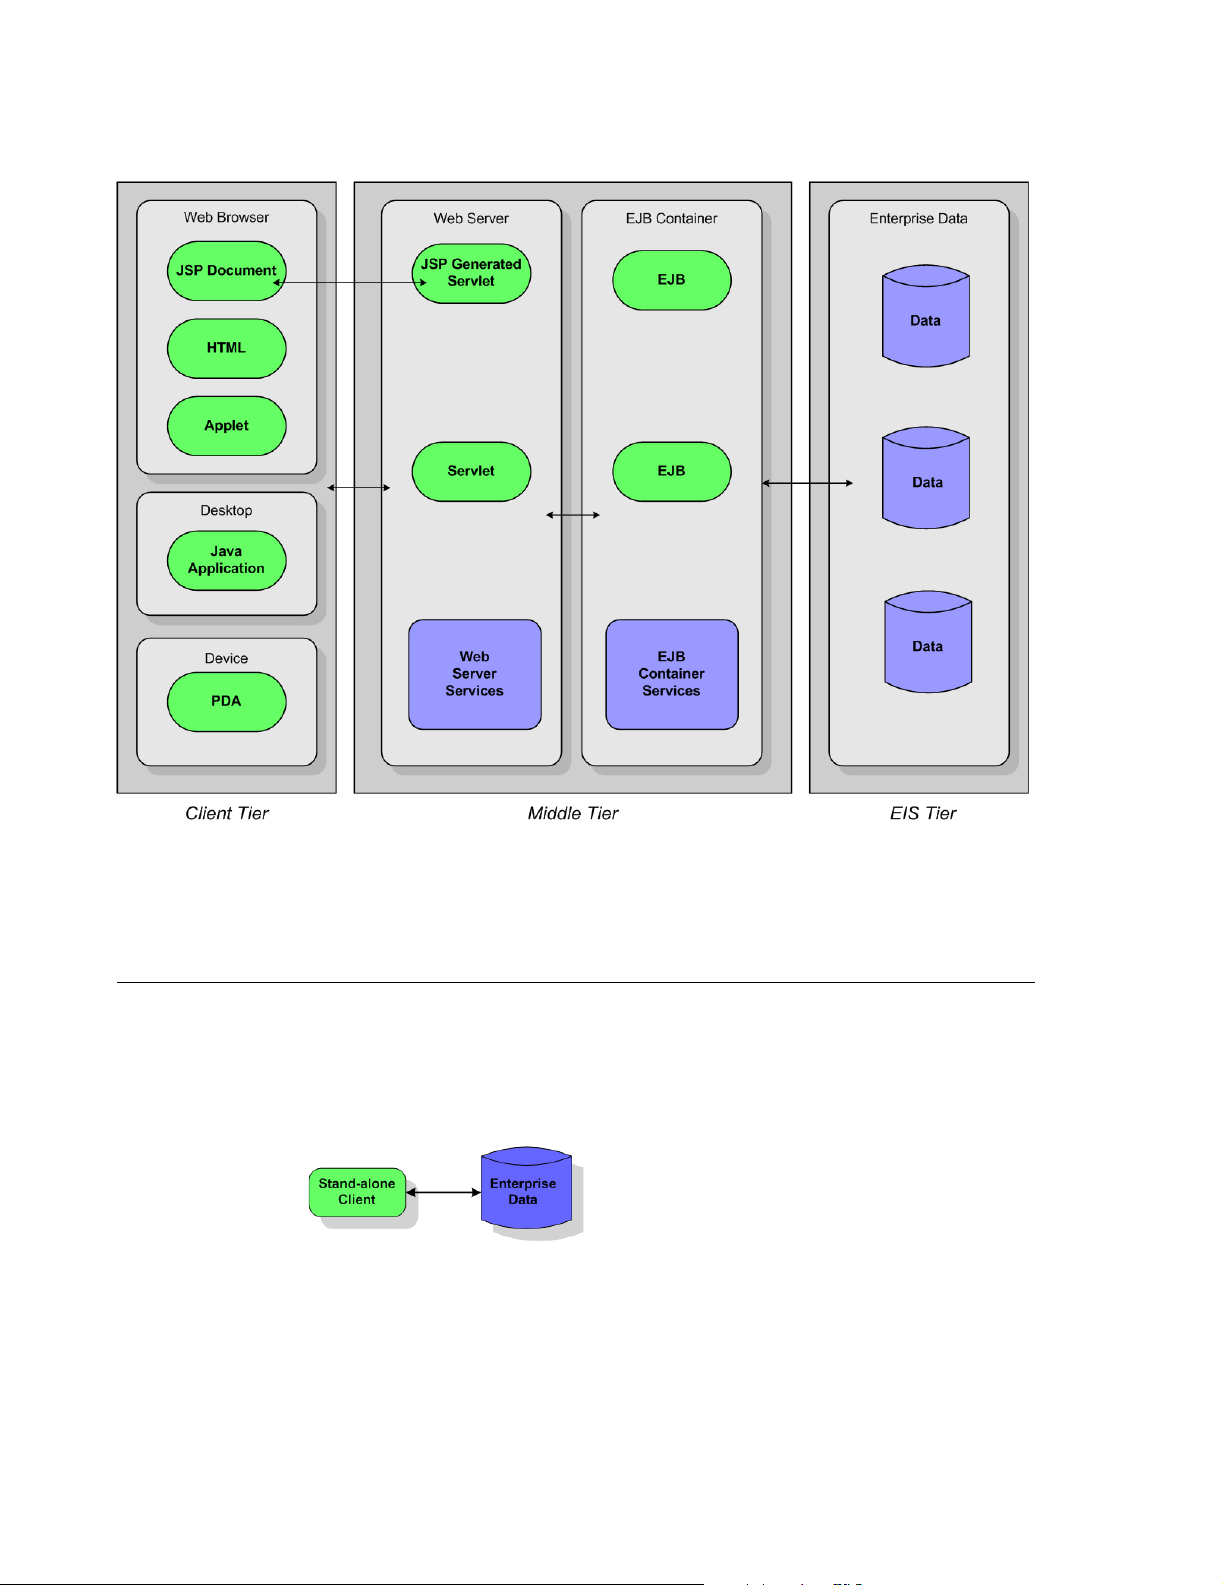
Here’s the diagram from the previous chapter showing the multiple tiers used in most
J2EE applications:
The diagram shows you all the different types of entities found on each tier, but it
doesn’t show you the common ways J2EE applications combine these technologies to
create reliable, scalable, and easily distributed applications.
Client-server applications
Before looking at multi-tier J2EE models, consider the old standard, the two-tier clientserver model. Using J2EE technologies does not preclude you from creating clientserver applications. Client-server applications omit the middle tier shown in the multitier application diagram. While the client-server model scales poorly and maintaining
and distributing such applications is more difficult, sometimes a Java client on a
desktop that accesses the data of the company directly is all you really need.
The Java client can contain both the presentation and business logic, although it’s
possible one application could handle the presentation tasks while another could
14 Developing Applications for J2EE Servers
Page 21
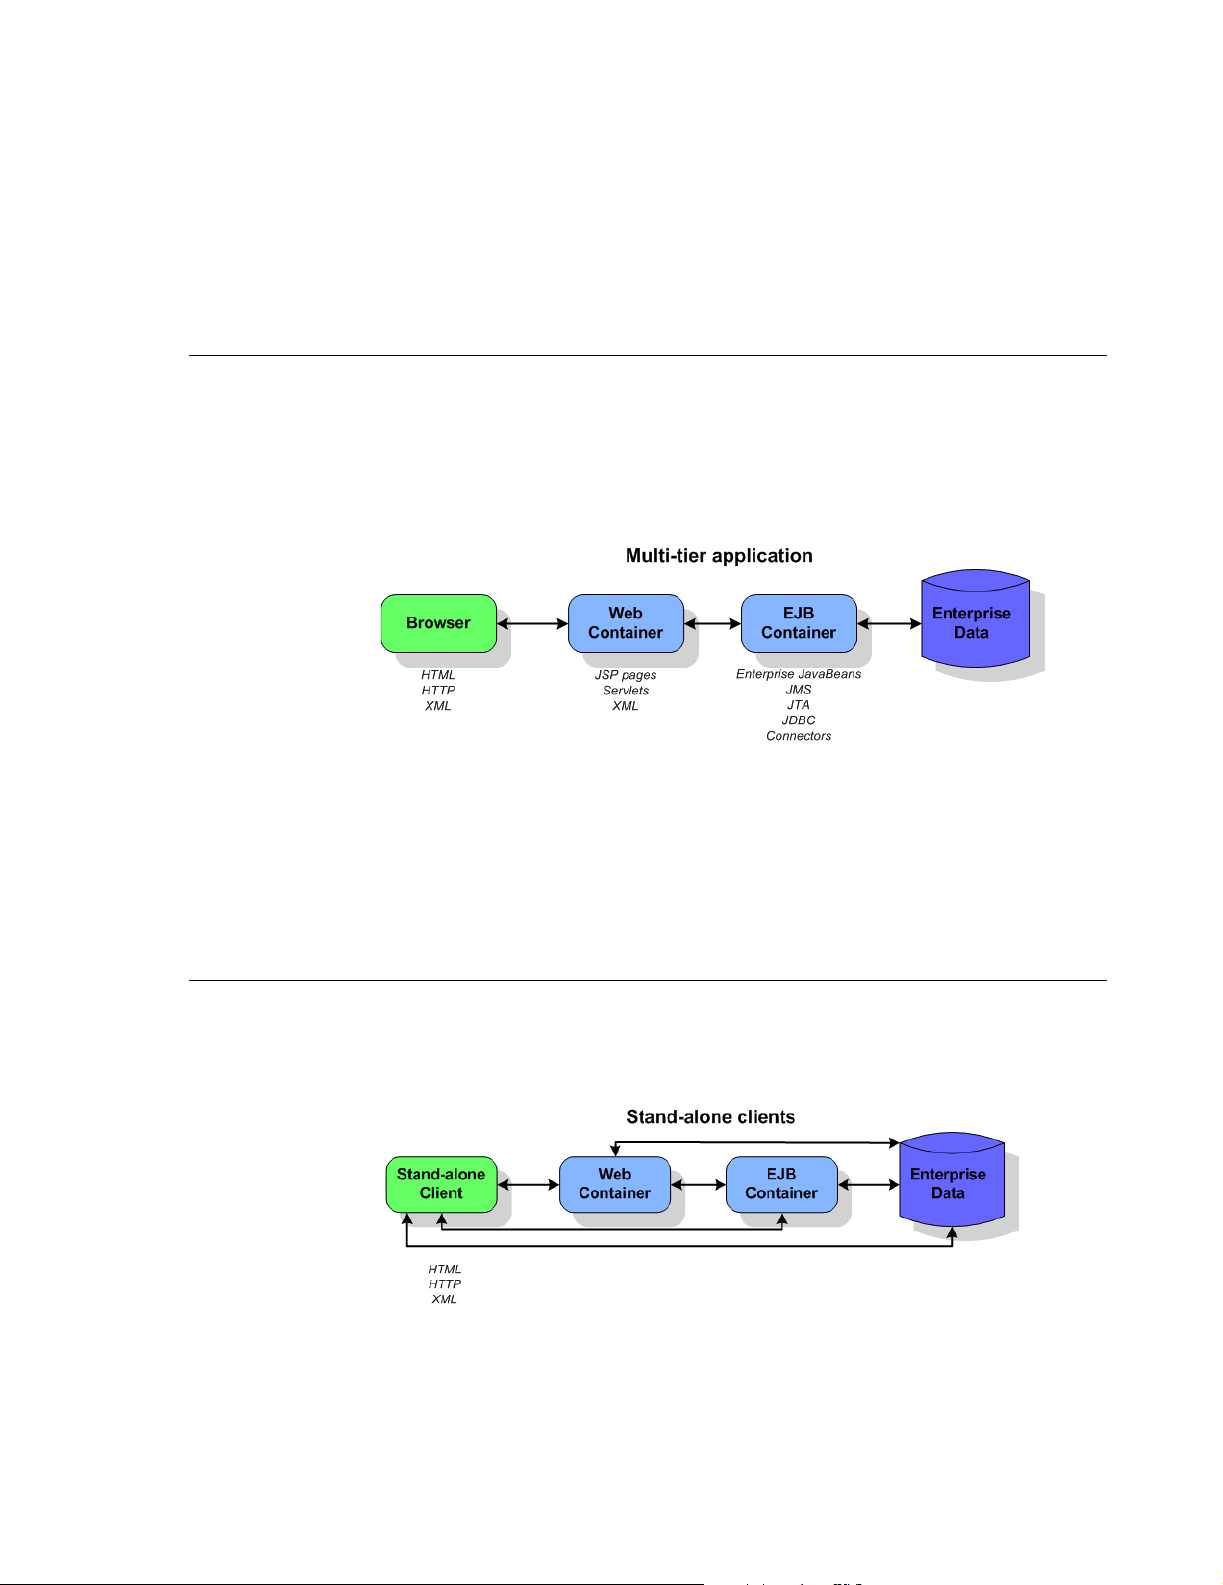
handle business logic, all on the client tier. You would use JDBC or Connectors to
access the data on the Enterprise Information System (EIS) tier.
Consider using the client-server model only when the number of desktops running
clients is quite small and will remain so. Once the demand for more than a few client
instances increases, you should probably consider another type of application
architecture.
Multi-tier applications
Here you see the classic multi-tier, distributed architecture that uses three tiers: the
browser on the client tier, the web container and EJB container on the middle tier that
runs on a J2EE server, and the Enterprise Information Systems (EIS) tier that is
managed by a database system. Such an application uses web components such as
JavaServer Pages (JSPs), servlets, and XML to manage the application’s presentation
logic. The EJB container contains enterprise beans that respond to requests from the
web tier components and access the data in the EIS tier.
Multi-tier applications
When should you use JavaServer Pages and when should you use servlets?
JavaServer Pages are intended as user interface components. Servlets are usually
used for processing requests and controlling application logic.
XML can be very important in multi-tier applications. XML data messages use HTTP as
their transport protocol. Such data messages can encapsulate all types of data and
respond to a variety of client types, including XML-enabled browsers.
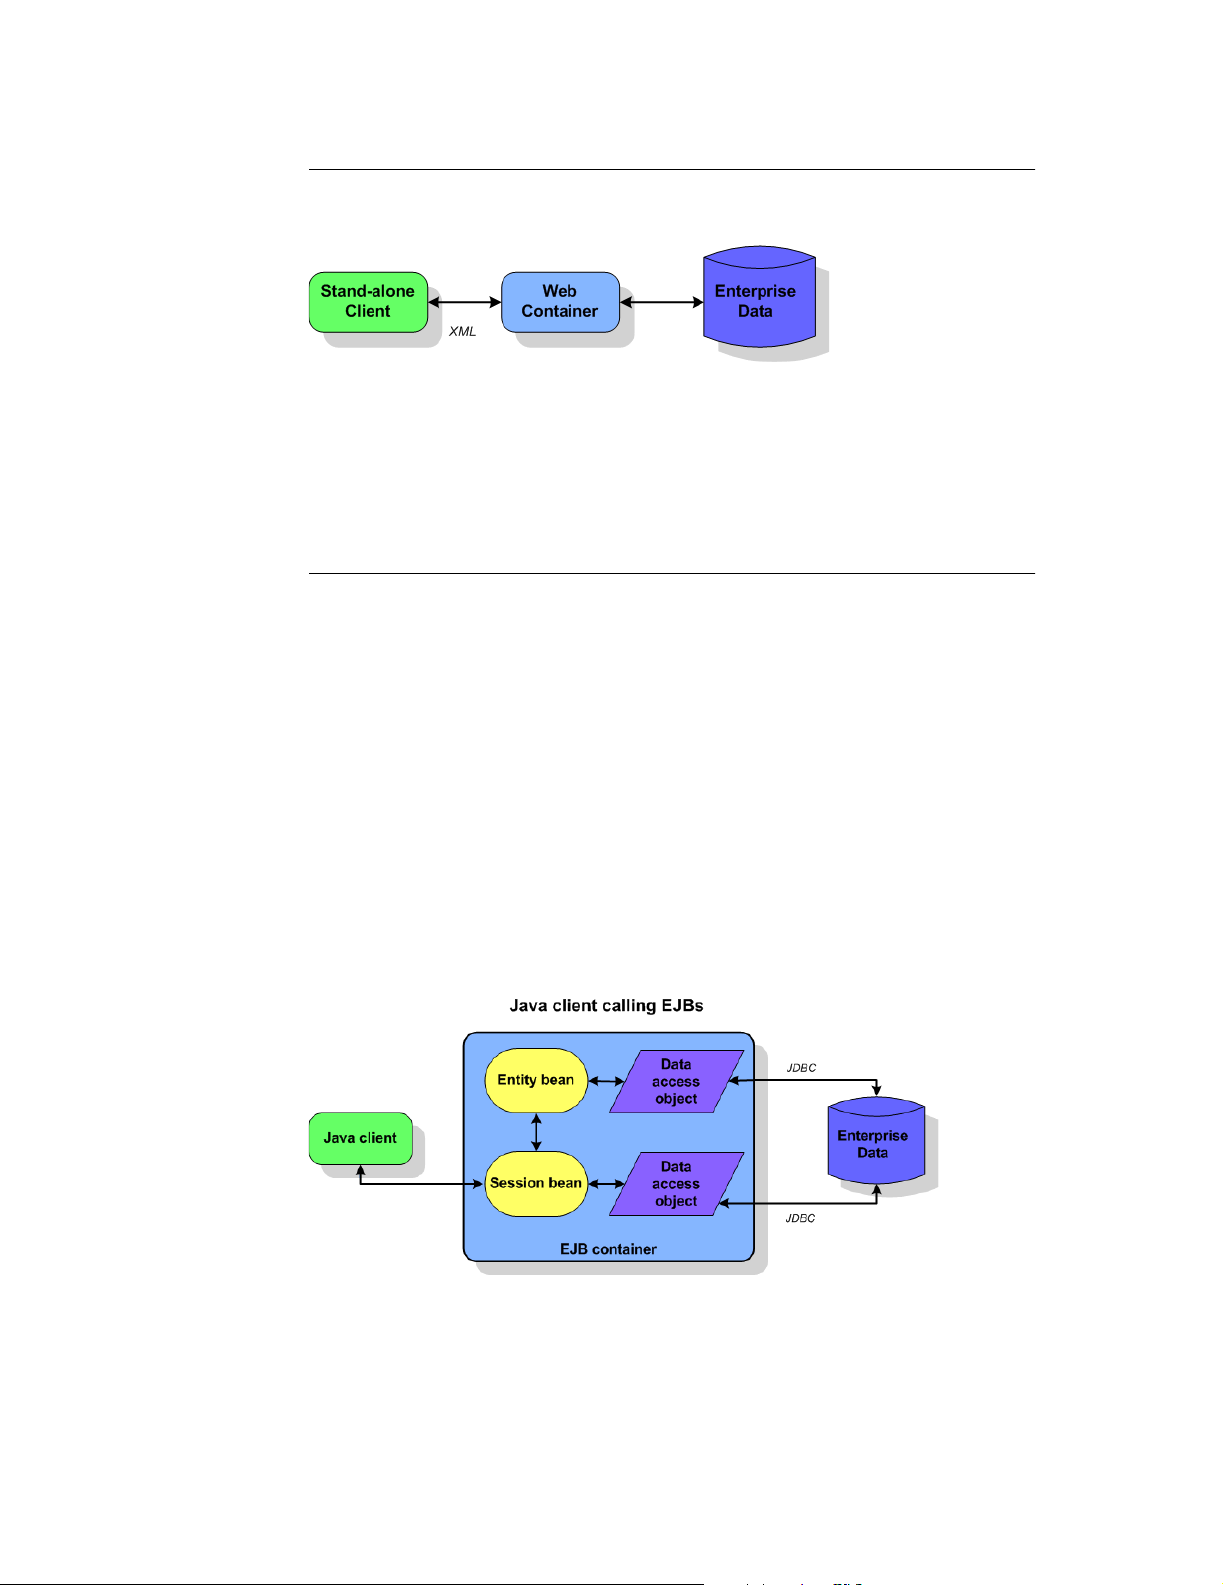
Stand-alone clients
Not all multi-tier applications use a browser on the client tier. Often the client is a Java
client or a client written in another language that consumes dynamic web content or an
application that interacts directly with enterprise beans running in an EJB container.
This diagram shows you the possibilities of this type of application:
Note that this diagram includes the client-server application also as such an application
includes a stand-alone client, too.
Chapter 3: Creating applications with J2EE technologies 15
Page 22
Stand-alone clients
Consumers of dynamic web content
One type of stand-alone client is a Java application or another programming language
that consumes dynamic web content. This web content is usually XML data messages:
The web container performs the XML transformations and provides web connectivity to
clients. The client handles the presentation logic while the web tier manages the
business logic and accesses the data on the EIS tier if necessary. Business logic might
be implemented as enterprise beans. The J2EE technologies likely to be used are
XML, servlets, web services, and possibly enterprise beans and JDBC to access
enterprise data.
Java client calling EJBs
Enterprise JavaBeans (EJBs) are server-side components that run in a middle-tier EJB
container. The container provides services to the beans, such as transaction
management and security. You, as the developer, don’t have to implement such lowlevel and complex services, but instead can concentrate on developing the business
logic for the beans, knowing that the services are there when they are needed.
Developers often choose EJBs when building applications that will be distributed over
several servers. They also like to use EJBs because of the transparent way they
handle transactions.
The following diagram depicts a Java client that calls upon the business methods
encapsulated with the enterprise beans that are running in an EJB container. If the
beans are entity beans, they access company data on the EIS tier through JDBC and
J2EE connectors. Ideally, the client should access company data through a session
bean which interacts with the entity beans that model company data. A session bean
that interacts with an entity bean in this way is usually using the Session Facade
design pattern; see “Creating session facades for entity beans” in Developing
Applications with Enterprise JavaBeans for more information. XML is used in the
deployment descriptors for enterprise beans.
If the application you need requires secure transactions over a distributed system,
consider using enterprise beans.
16 Developing Applications for J2EE Servers
Page 23
Web-centric applications
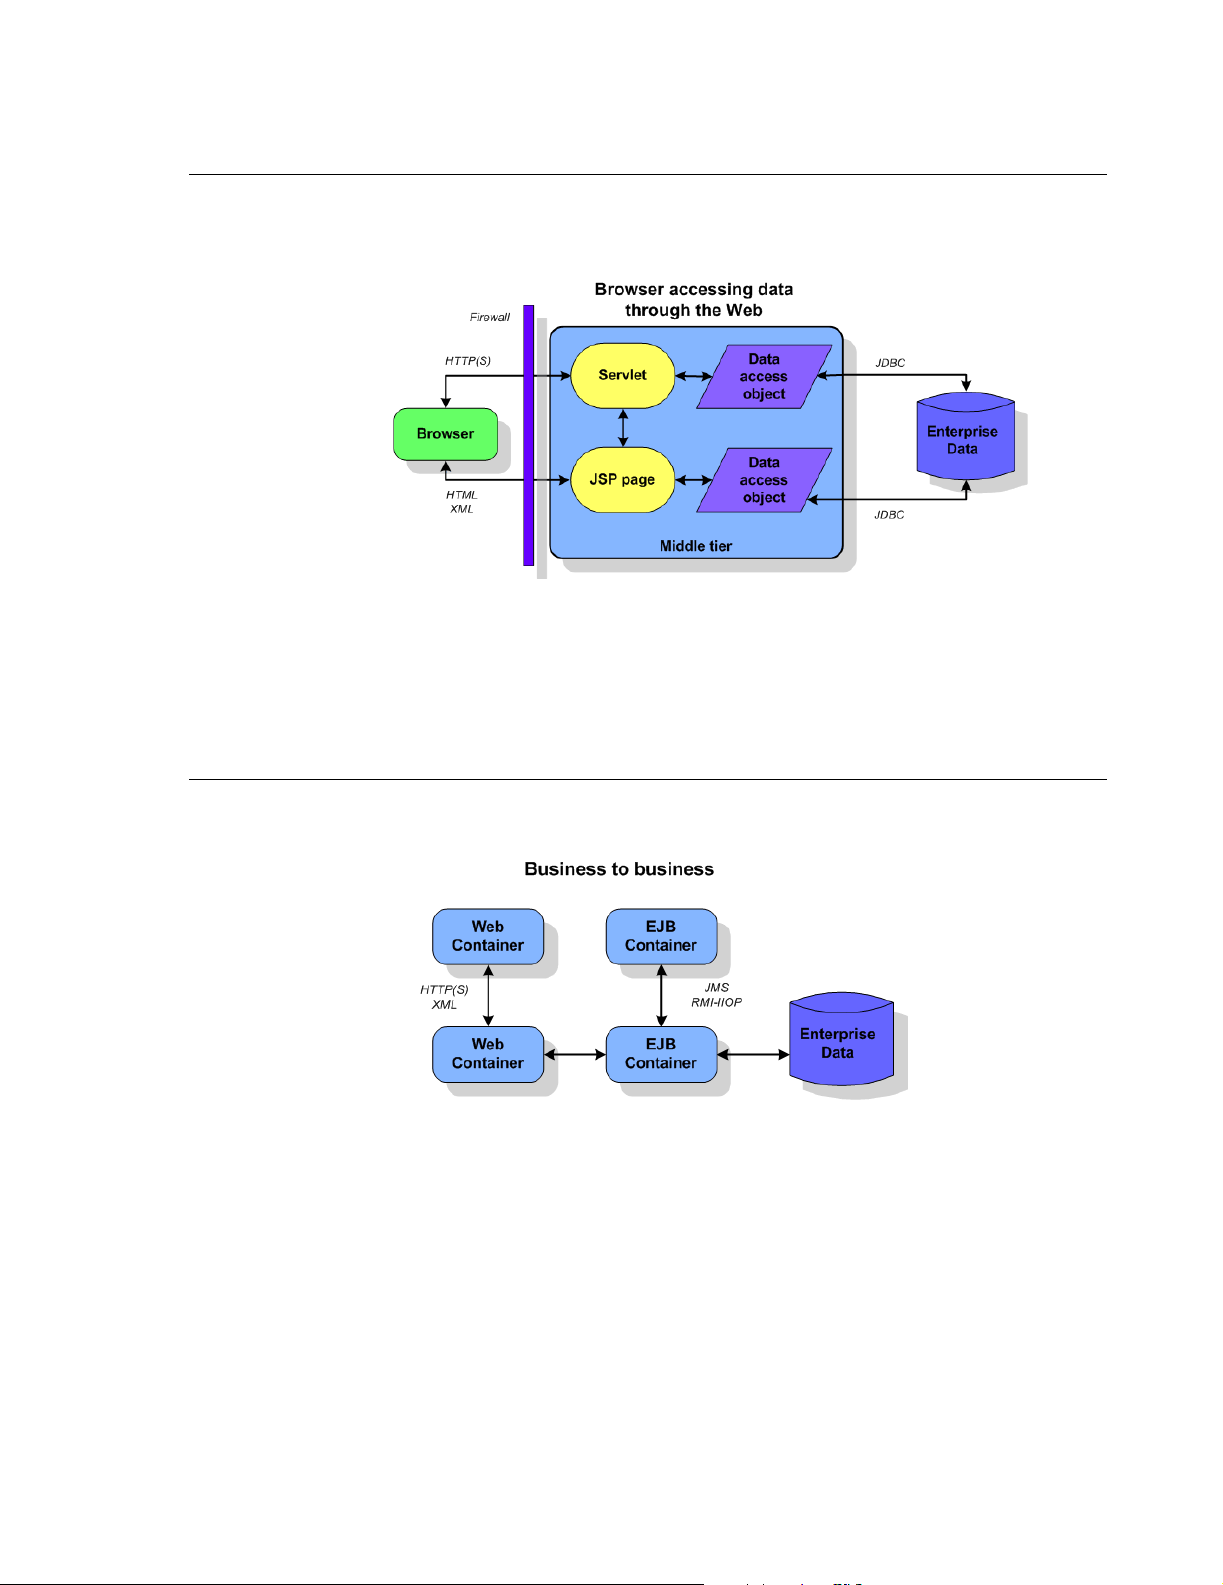
There are times when your application just doesn’t need to use enterprise beans and if
you do so, you add a layer of complexity. If your application doesn’t require
transactions on a distributed system, consider a web-centric application model:
This scenario puts both the presentation and business logic on the web tier. The web
container can host JavaServer Pages and servlets. The client is simply a browser and
data is transferred using XML, HTTP protocol, and/or HTML pages. Servlets can
access the EIS tier, when necessary, using JDBC or connectors. Applications using
this type of architecture are quite common.
Web-centric applications
Business to business
When you need a web-based commerce solution, consider the business-to-business
model. This might include multiple web containers and multiple EJB containers.
Web container to web container architecture is suitable for ecommerce solutions.
Communication takes place through XML data message over HTTP. Such applications
are very loosely coupled.
Peer-to-peer communication between EJB containers offers a more tightly coupled
model that works well for intranet solutions. In these types of applications, seriously
consider using message-driven enterprise beans and Java Message Service (JMS),
which enable you to develop loosely coupled applications.
Chapter 3: Creating applications with J2EE technologies 17
Page 24

18 Developing Applications for J2EE Servers
Page 25

Chapter
4
Chapter4Configuring the target server
settings
Before you begin creating enterprise applications, you must configure the settings for
the application server and/or web server to which you are going to deploy.
Tip Be sure to see the server-specific chapters for the various servers to find additional
configuration information for each server. These are the chapters:
■
Chapter 5, “Using JBuilder with Borland servers”
■
Chapter 7, “Using JBuilder with BEA WebLogic servers”
■
Chapter 8, “Using JBuilder with IBM WebSphere servers”
■
Chapter 9, “Using JBuilder with JBoss servers”
■
Chapter 10, “Using JBuilder with Tomcat”
Supported servers
JBuilder supports the following servers:
■
Borland Enterprise Server 5.2.1
■
Borland Enterprise Server 6.0.1
■
BEA WebLogic Server 7.0 SP 5
■
BEA WebLogic Platform 8.1 SP 3
■
IBM WebSphere Application Server 4.0.7 Single Server
■
IBM WebSphere Application Server 4.0.7 Advanced Edition
■
IBM WebSphere Application Server 5.0.2.4, 5.1.0.4
■
JBoss Application Server 3.0.8
■
JBoss Application Server 3.2.5
■
Tomcat 4.1.30
■
Tomcat 5.0.27
Chapter 4: Configuring the target server settings 19
Page 26
Setting up servers within JBuilder
Setting up servers within JBuilder
This is a feature of
JBuilder Developer
and Enterprise
To configure the settings to target one or more application servers,
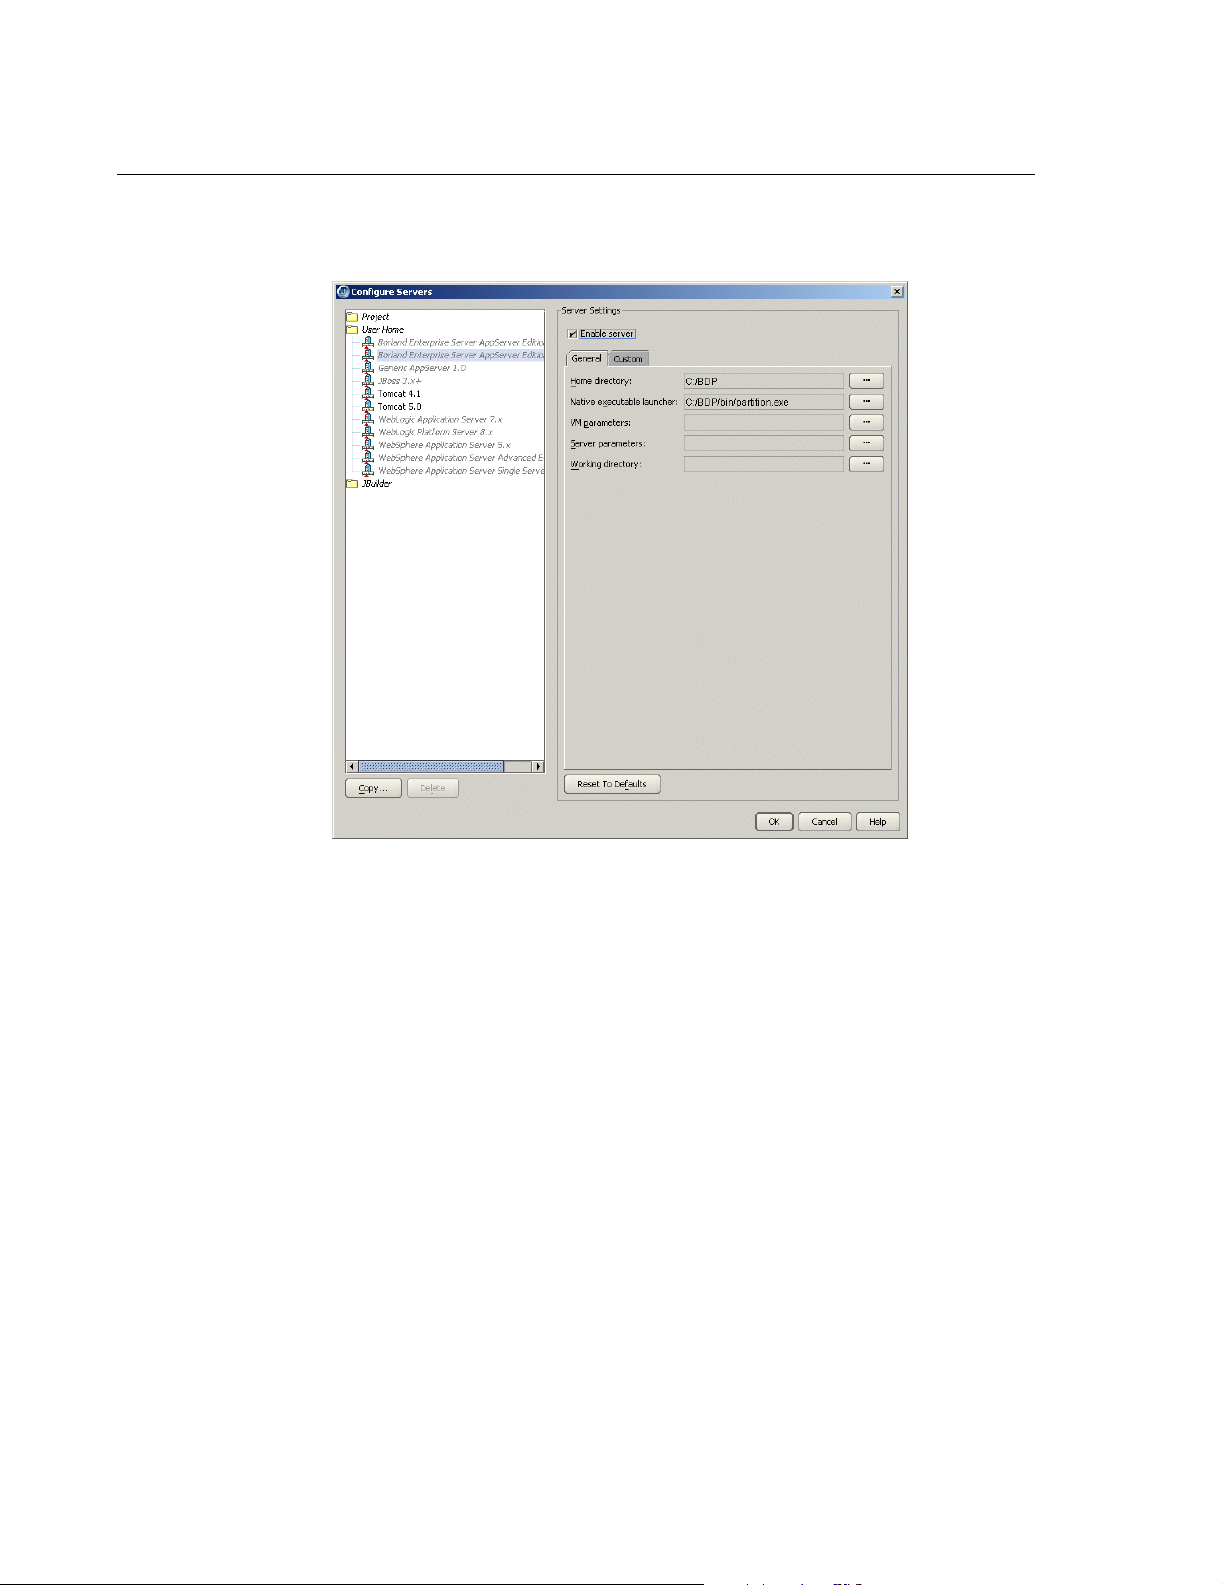
1 Choose Enterprise|Configure Servers. The Configure Servers dialog box is
displayed:
The left side of the dialog box lists the servers that can be configured in JBuilder and
for which JBuilder finds a registered OpenTool.
2 Select the server you want to configure by clicking it in the pane on the left.
The right side of the dialog box lists the default settings for the selected server. Each
application server except Generic App Server 1.0 and all versions of Tomcat has
both a General and a Custom page for editing settings. The General page has fields
that all the application servers have in common, while the Custom page has fields
that are specific to the selected application server. In some cases, modifying a
Custom setting will update a setting on the General page and vice versa.
The Generic AppServer 1.0 server option is a generic option. It represents a basic
application server that supports EJB 1.1 and/or EJB 2.0 development. Select it if the
application server you use is not currently supported by JBuilder. You will probably
want to edit the resulting deployment descriptor with tools supplied with that
application server to get the exact settings you want. You could also choose this
option if the you aren’t targeting a specific application server.
3 Check the Enable Server check box at the top of the dialog box.
Checking this option enables the fields for the selected application server. You won’t
be able to edit any fields until it is checked. The Enable Server check box also
determines whether this server will appear in the list of servers when you select a
server for your project using the Server page of the Project|Project Properties dialog
box.
JBuilder provides default settings for the selected server. If JBuilder’s default
settings are not appropriate, edit any of the settings as needed. Some servers
require you to enter settings in addition to the defaults. Clicking the OK button in this
20 Developing Applications for J2EE Servers
Page 27

Setting up servers within JBuilder
dialog box when not all required values are set or selecting another server while the
current one is enabled displays a message dialog box that informs you about the
missing settings and usually selects the control representing the missing setting.
4 If you want to change any of the settings, click the ellipsis (…) button next to the field
and make your changes.
You can add any necessary application dependencies to the server’s classpath by
clicking the Required Libraries tab and using the Add button to add the libraries the
server needs.
5 Click the Custom tab to view settings unique to the server. Most application servers
allow you to specify the location of the JDK the server uses; some require you to
specify the JDK location for successful configuration completion. Updates you make
on the Custom page can update settings on the General page. (Note that Tomcat
configurations do not have a Custom tab.)
Following are the JDKs and their installed locations for the application servers
supported by JBuilder:
■
Borland Enterprise Server AppServer Edition 5.2.1: <bes home>/jdk/jdk1.3.1 or
<bes home>/jdk/jdk1.4.1 (the default value)
■
Borland Enterprise Server AppServer Edition 6.0: <bes home>/jdk/jdk1.4.2
■
WebLogic Server 7.x: <bea home>/jdk131_10
■
WebLogic Platform Server 8.1: <bea home>/jdk141_04. WebLogic 8.1 also
supports JRockit (a JDK optimized for server applications), so the JDK directory
could be <bea home>/jrockit81sp3_142_04
■
WebSphere 4.x (either Advanced Edition or Single Server): <websphere home>/
java
■
WebSphere 5.x: <websphere home>/java
As you make your edits, JBuilder attempts to validate your settings. Once you’ve
made your edits, click the OK button to accept your changes and close the dialog
box. If you prefer that JBuilder not try to validate your changes, uncheck the Enable
Server dialog box. Selecting OK saves changes for all servers you’ve enabled,
disabled, or modified.
6 Click OK when you are through configuring the application server.
When you click OK and the Enable Server check box is checked, JBuilder attempts
to verify your settings. If errors are detected, a message box containing information
about the errors appears and focus is given to the control appropriate for fixing the
error. If the Enable Server option is unchecked, the dialog box simply closes and no
setting validation is performed.
Once a server is properly configured and validated, the server you configured is listed
in black type in the pane on the left. Gray type indicates the server hasn’t been
configured yet. Red type indicates an error condition; specifically it means the server’s
library containing its settings has been read, but the OpenTool representing the server
can’t be found. You can delete a server shown in red by selecting it and clicking the
Delete button.
The Reset To Defaults button sets the settings back to the values they originally had
when JBuilder was first installed and the server is disabled.
If a dialog box appears with a message that you must restart JBuilder, you must close
and then restart JBuilder for changes to become effective; otherwise, restarting
JBuilder is not necessary.
Chapter 4: Configuring the target server settings 21
Page 28
Adding a service pack
Creating a duplicate configuration to edit
Once you’ve created a server configuration, you might find you’d like to have a similar
one, but with some slight differences. Follow these steps to create a duplicate
configuration you can then edit:
1 Choose Enterprise|Configure Servers to display the Configure Servers dialog box.
2 Select the server configuration you would like to duplicate from the left pane.
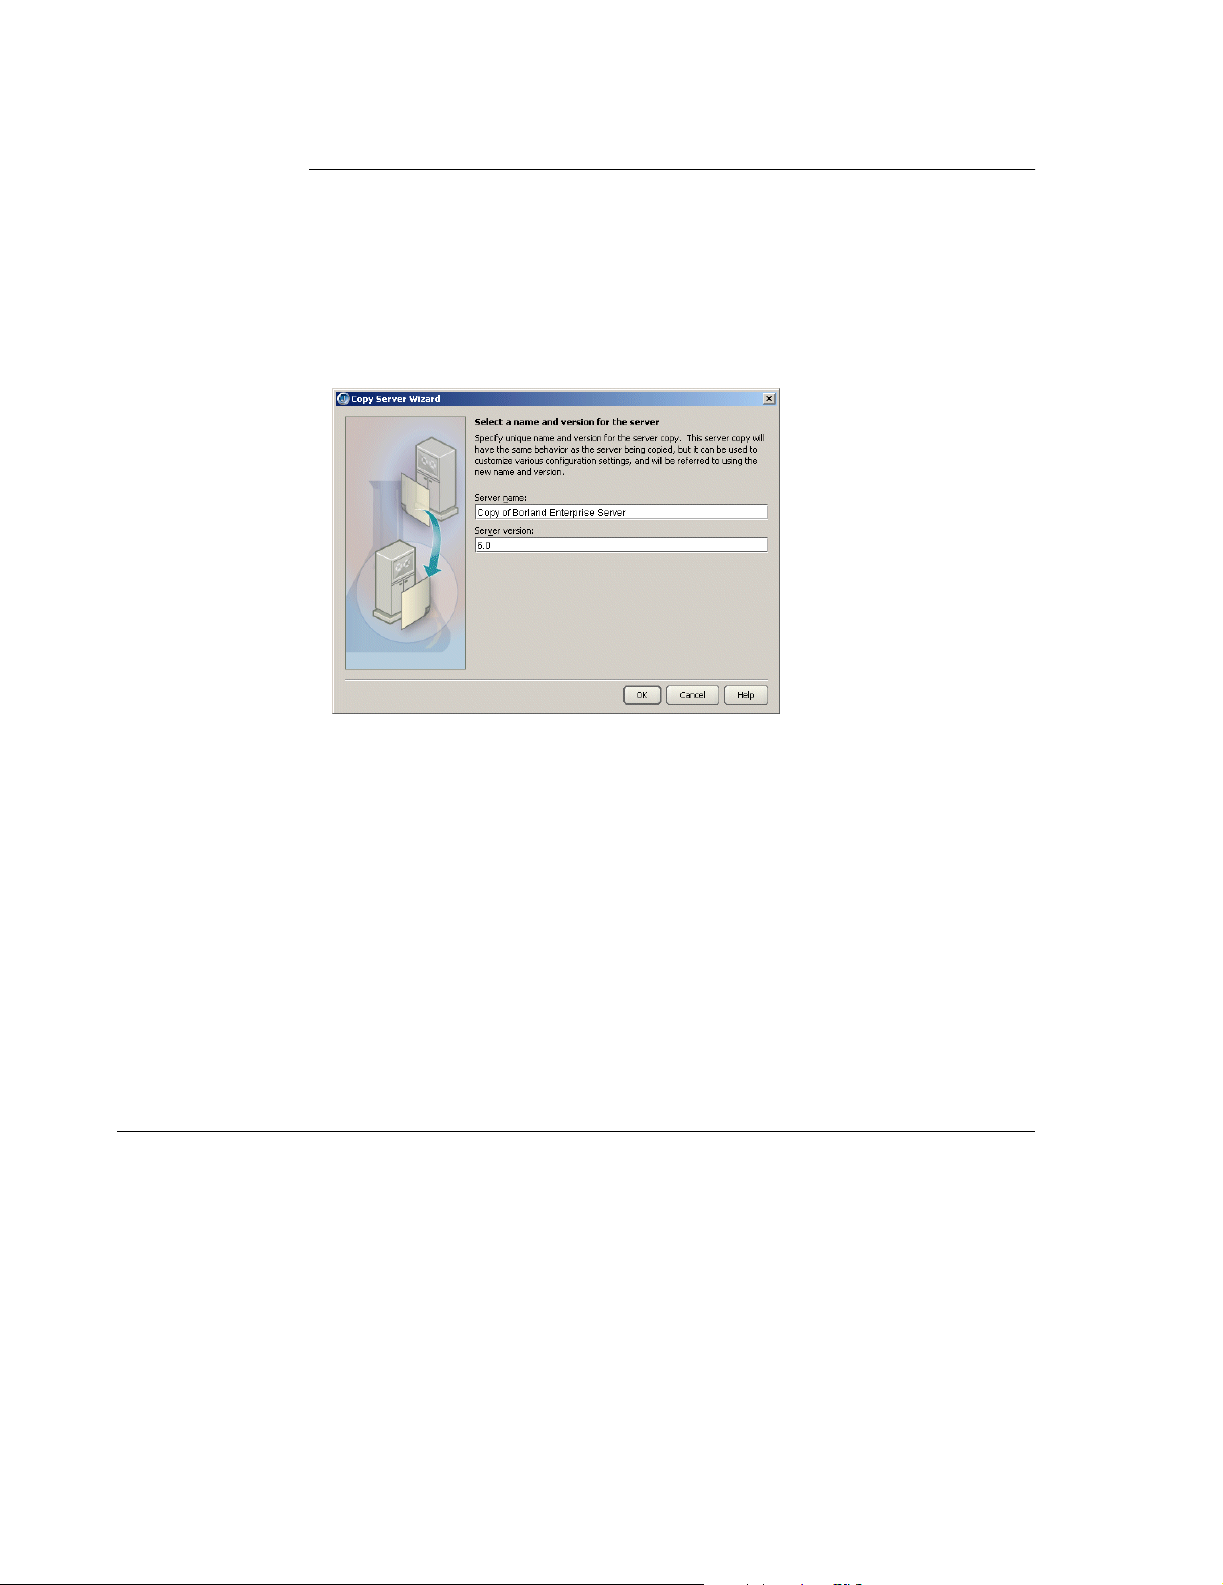
3 Click the Copy button at the bottom of the left pane to display the Copy Server
wizard:
4 Specify the name you want to use to identify this server configuration in the Name
For This Server field.
5 Specify the server version in the Version For This Server field.
6 Click OK.
7 Select your new configuration in the left pane of the Configure Servers dialog box
and make the changes to the settings you need using the General and Custom
pages.
Copying a server configuration also creates copies of that server’s tools. You could,
therefore, create a duplicate server configuration and modify just the server’s tools as
the only difference between the two configurations. As another example, you could
have the copied configuration refer to a different home directory if you have slightly
different versions of that server installed. You can also delete a server configuration in
the Configure Servers dialog box.
Adding a service pack
If you want to add a service pack to your application server configuration, follow these
steps:
1 Choose Enterprise|Configure Servers.
2 Select your server from the list of servers in the pane on the left side of the dialog
box.
3 Click the General tab, then the Class tab, if it isn’t already selected.
4 Click Add.
5 Navigate to the location of the service pack JAR file.
6 Click OK twice to close all dialog boxes.
22 Developing Applications for J2EE Servers
Page 29

The created libraries
When you configure the server settings, one or more libraries are created for you
automatically in your JBuilder home directory that contain all the application server files
you will need for enterprise bean development with the application server of your
choice. These are the libraries created for you, listed by application server:
Borland Enterprise Server 6.0.1
■
Borland Enterprise Server 6.0 Client: All JARs needed to run a client.
■
Borland Enterprise Server 6.0 Servlet: Used for web applications.
Borland Enterprise Server 5.2.1
■
Borland Enterprise Server 5.2.1 Client: All JARs needed to run a client.
■
Borland Enterprise Server 5.2.1 Servlet: Used for web applications.
WebLogic 8.1
■
WebLogic 8.1 Client: All JARs needed to run a client.
■
WebLogic 8.1 Deploy: JARs needed to run the WebLogic 8.1 deploy tool.
■
WebLogic 8.1 Servlet: Used for web applications.
The created libraries
WebLogic 7.x
■
WebLogic 7.x Client: All JARs needed to run a client.
■
WebLogic 7.x Deploy: JARs needed to run the WebLogic 7.x deploy tool.
■
WebLogic 7.x Servlet: Used for web applications.
WebSphere 5.x
■
WebSphere 5.x Client: JARs needed to run a client.
■
WebSphere Application Server 5.x Ext Dirs: JARs used during server startup.
■
WebSphere Application Server 5.x EJB Deploy: JARs used to compile enterprise
beans and create stubs.
■
WebSphere Application Server 5.x Servlet: Used for web applications.
WebSphere 4.0 Single Server
■
WebSphere AES 4.0 Client: JARs needed to run a client.
■
WebSphere AES 4.0 Ext Dirs: JARs used during server startup.
■
WebSphere AES 4.0 EjbDeploy: JARs used to compile enterprise beans and
create stubs.
■
WebSphere AES 4.0 SeAppInstaller: JARs used to run the WebSphere 4.0
deploy tool (SeAppInstaller).
■
WebSphere AES 4.0 Servlet: Used for web applications.
WebSphere 4.0 Advanced Edition
■
WebSphere AE 4.0 Client: JARs needed to run a client.
■
WebSphere AE 4.0 Ext Dirs: JARs used during server startup.
■
WebSphere AE 4.0 XmlConfig: JARs used to run the WebSphere 4.0 AE deploy
tool.
■
WebSphere AE 4.0 EjbDeploy: JARs used to compile enterprise beans can
create stubs.
■
WebSphere AE 4.0 Servlet: Used for web applications.
Chapter 4: Configuring the target server settings 23
Page 30
Selecting a server
JBoss 3.x+
■
■
Tomcat
■
■
Selecting a server
JBuilder can target multiple servers. You can choose a single application server for all
stages of EJB and web application development, or you can choose different servers
for different aspects of development. For example, you can select one server to use to
develop enterprise beans and another to develop web applications.
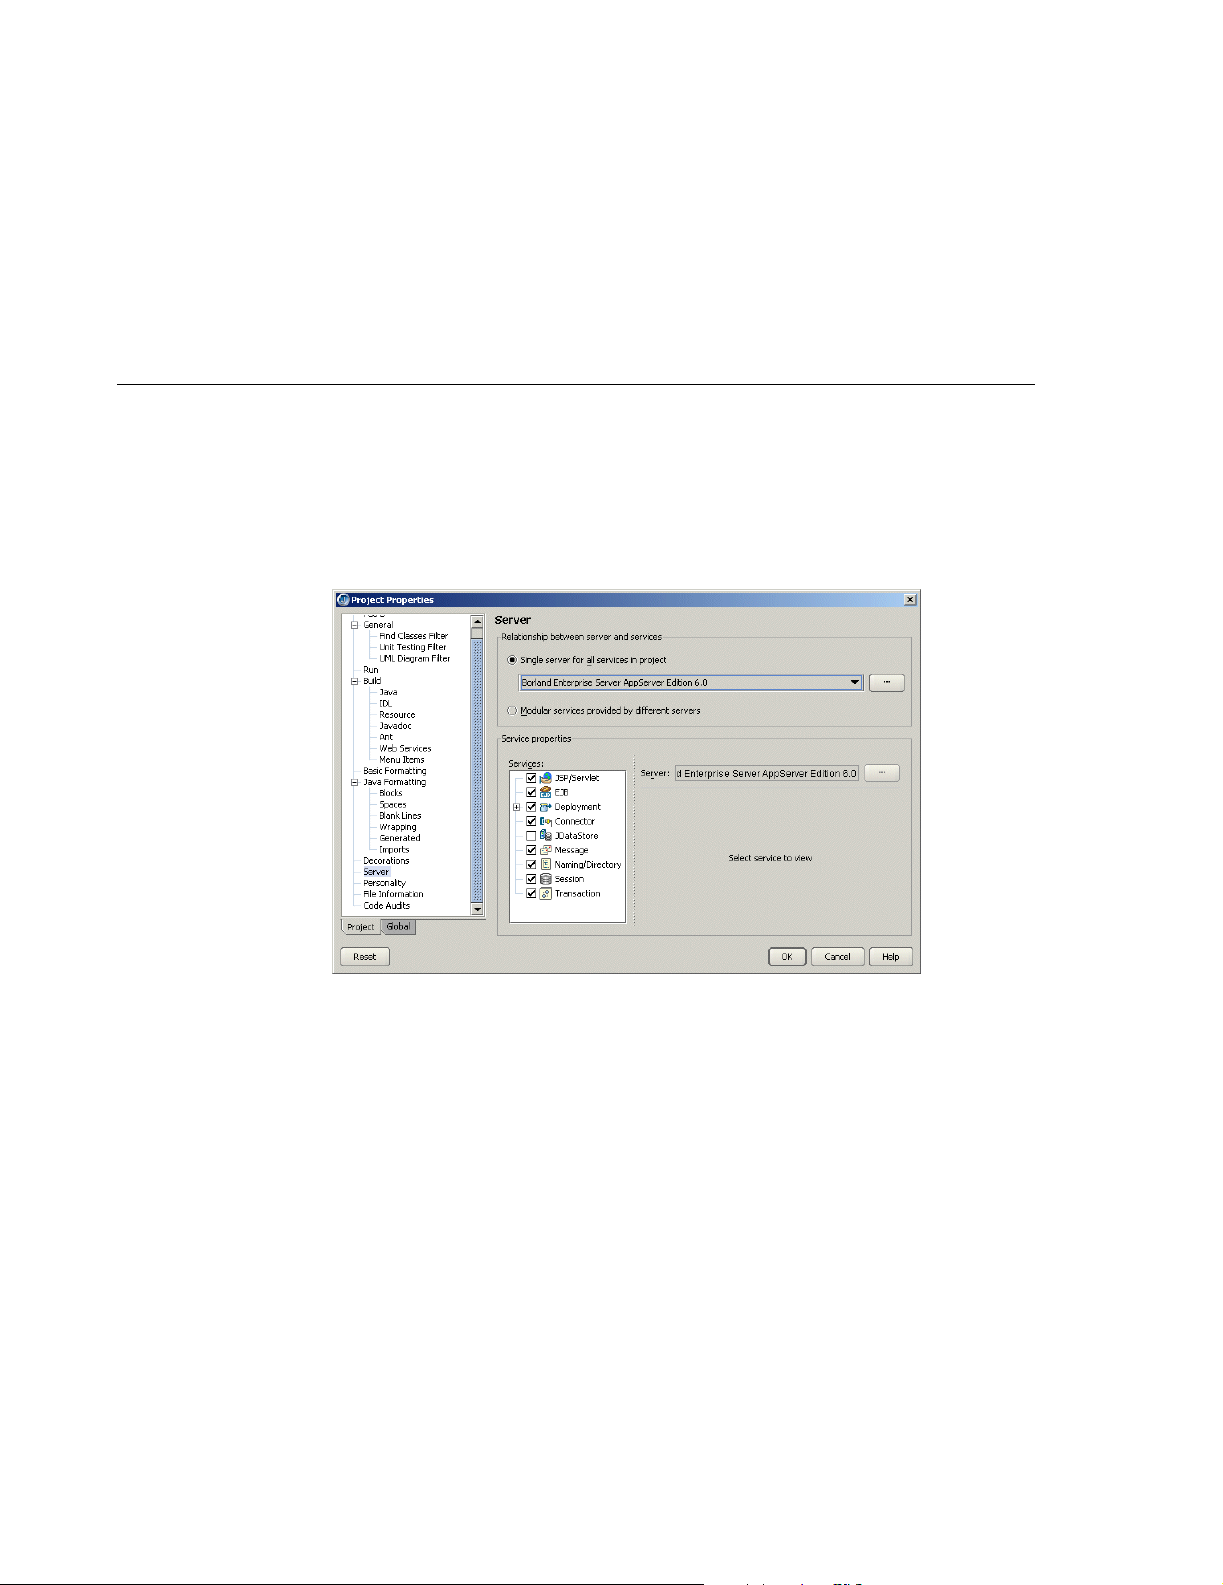
To select one or more servers to use for your project,
1 Choose Project|Project Properties.
2 Select Server in the dialog box tree. The Server page is displayed:
JBoss 3.x+ Client: JARs needed to run a client.
JBoss 3.x+ Servlet: Used for web applications.
Tomcat 4.1 Servlet: Used for web applications.
Tomcat 5.0 Servlet: Used for web applications.
3 Decide whether you want to use a single server for all aspects of development or
different servers to handle different areas of development.
■
To use a single server,
1 Select the Single Server For All Services In Project option and select the
server from the drop-down list.
2 If you want to make changes to the configuration settings for the server, click
the ellipsis (…) button and edit the settings you want on the General and
Custom pages. Click OK.
You can also use this dialog box to select a different server.
3 If you don’t want a particular service started when the server starts up,
uncheck the check box next to the service in the Services list. This feature
currently applies only to the Borland Enterprise Server as it is the only one
which allows you to start and stop selected services.
If you uncheck the Deployment or Client JAR Creation services, the
corresponding menu items will be disabled on the JBuilder Enterprise menu. If
you uncheck the JSP/Servlet service, web server support is disabled. If you
uncheck the Naming/Directory service for Tomcat, naming service support is
disabled. If you uncheck the Deployment service, vendor-specific descriptors
won’t be generated and all deploy options will be disabled.
24 Developing Applications for J2EE Servers
Page 31

Selecting a server
■
To use different servers for different services,
1 Select the Modular Services Provided By Different Servers option.
2 Check the check boxes next to all the services for which you want to specify
an application server in the Services list.
3 Click one of the checked services to select it in the Services list.
4 In the Service Properties For Project group box, use the Server drop-down list
to select the server you want to use for this service.
If server-specific properties are available for the server you selected for the
particular service you are working with, they will appear below the Server
drop-down list. If the Deployment service is selected, a Build Target For
Deploying To Server drop-down list appears on the Service Properties For
Project panel. Select the type of build you want to occur. If the EJB service is
selected, you’ll see read-only information appear that is intended to help you
decide which server is appropriate for your needs.
If you select the JSP/Servlet service, the Default Runtime Host Name and
Default Runtime Port Number fields are available to you. The default values
refer to the global server configuration. If you change these values, they are
used for all server run configurations created after you made the change.
If you expand the Deployment service node, you can select from several
subnodes that have accompanying properties. The properties vary depending
on which is your selected server. All servers have a Build Target For
Deploying To Server field, however. Select your desired build option from the
drop-down list.
For Borland Enterprise Server only
The Deployment jndi-definitions.xml option determines whether the
definitions.xml
Uncheck it if you don’t want it included.
file is included in any of the deployment actions you select.
jndi-definitions.xml is an XML
jndi-
deployment descriptor for EJB 2.0 resources.
For WebLogic 7.x – 8.1
If you expand the WebLogic Deployment service node and select the WARs
node, the service properties include a Map Project Webapps At Runtime
option. When this option is selected (the default value) all web applications in
the project deploy from the web application directory and not as a WAR when
the server starts up.
If you expand the WebLogic Deployment service node and select the EARs
node, the service properties include a Map Project EJB Modules At Runtime
option. When this option is selected (the default value) all EJBs in the project
deploy from the EJB directory and not as a EAR when the server starts up.
All the WebLogic Deployment service nodes have Deploy As Archive and
Deploy As Exploded Directory options. Checking the Deploy As Archive option
enables the archive to be deployed. Checking the Deploy As Exploded
Directory option means the archive is exploded into a directory as its contents
are deployed instead.
If you select the EJB service, the service properties include a combo box with
options to deploy data sources for all EJB modules in the project. These are
the options:
■
Map Project Data Sources: Maps data sources for all EJB modules in
config.xml for the domain specified in the server configuration. DataSource
entries are removed when the server shuts down.
■
Map And Persist Project Data Sources: Maps data sources for all EJB
modules in
config.xml for the domain specified in the server configuration.
Chapter 4: Configuring the target server settings 25
Page 32

Setting up JDBC drivers
Data Source information is persisted in config.xml. DataSource entries are
removed when the server shuts down.
■
Do Not Map Project Data Sources: Does not map any data sources.
Note that JBuilder also adds the JDBC driver (if it can be located in the
project’s required libraries) to the server’s classpath at start up time. All data
sources created by JBuilder are transactional data sources.
5 If you want to make changes to the configuration settings for the server
selected for the service, click the ellipsis (…) button and edit the settings you
want on the General and Custom pages. Click OK.
6 Repeat these steps for each service you want access to.
4 Click OK.
If you neglect to select one ore more servers for a project, the Server page of the
Project Properties dialog box appears when you start an EJB wizard from the object
gallery. All EJB projects must have one or more selected servers.
Setting up JDBC drivers
To enable JBuilder’s EJB wizards and EJB designer to access a database, you must
install the JDBC driver supplied by the database vendor and set up the driver in
JBuilder. Install a JDBC driver following the vendor’s instructions.
To begin setting up the driver in JBuilder, select Enterprise|Enterprise Setup to display
the Enterprise Setup dialog box. Select Database Drivers in the tree to display the
Database Drivers page. Use this page to add a new database driver to JBuilder. See
the following section for step-by-step instructions.
Creating the .library and .config files
There are three steps to adding a database driver to JBuilder:
1 Creating a library file which contains the driver’s classes, typically a JAR file, and
any other auxiliary files such as documentation and source.
2 Deriving a .config file from the library file which JBuilder adds to its classpath at
start-up.
3 Adding the new library to your project, or to the Default project if you want it
available for all new projects.
The first two steps can be accomplished from the Database Drivers page:
1 Open JBuilder and choose Enterprise|Enterprise Setup. Click the Database Drivers
tab which displays .config files for all the currently known database drivers.
2 Click Add to add a new driver, then New to create a new library file for the driver.
The library file is used to add the driver to the required libraries list for projects.
Note You can also create a new library under Tools|Configure|Libraries, but since you
would then have to use Enterprise Setup to derive the .config file, it is simpler to do
it all here.
3 Type a name and select a location for the new file in the Create New Library dialog
box.
4 Click Add, and browse to the location of the driver. You can select the directory
containing the driver and all it’s support files, or you can select just the archive file
for the driver. Either will work. JBuilder will extract the information it needs.
26 Developing Applications for J2EE Servers
Page 33

Updating projects with the latest server settings
5 Click OK to close the file browser. This displays the new library at the bottom of the
library list and selects it.
6 Click OK. JBuilder creates a new .library file in the JBuilder /lib directory with the
name you specified (for example,
Database Drivers page which displays the name of the corresponding .config file in
the list which will be derived from the library file (for example,
7 Select the new .config file in the database driver list and click OK. This places the
.config file in the JBuilder
8 Close and restart JBuilder so the changes to the database drivers will take effect,
and the new driver will be put on the JBuilder classpath.
Important If you make changes to the .library file after the .config file has been derived, you must
re-generate the .config file using Enterprise Setup, then restart JBuilder.
Now that JBuilder can see the database driver, you must add the database driver
library to the Required Libraries list in Project|Properties, or Project|Default Properties.
/lib/ext directory.
InterClient.library). It also returns you to the
InterClient.config).
Adding the JDBC driver to projects
Projects run from within JBuilder use only the classpath defined for that project.
Therefore, to make sure the JDBC driver is available for all new projects that will need
it, define the library and add it to your default list of required libraries. This is done from
within JBuilder using the following steps:
1 Start JBuilder and close any open projects.
2 Choose Project|Default Project Properties.
3 Select the Required Libraries tab on the Paths page, then click the Add button.
4 Select the new JDBC driver from the library list and click OK.
5 Click OK to close the Default Project Properties dialog box.
Note You can also add the JDBC driver to an existing project. Just open the project, then
choose Project|Properties and use the same process as above.
Updating projects with the latest server settings
If a server configuration has been modified since a project was last opened, JBuilder
updates it with the latest server settings for the project’s selected server(s). So, for
example, if you have modified server settings for one project and you have others that
aren’t open that use the same server configuration, the next time you open those other
projects, your modified server settings will be in force automatically. If you want to use
a similar but unique server configuration for a particular project, create a duplicate
configuration using the Copy button, and use the Copy Servers wizard to edit it to your
needs.
Be aware that this automatic updating of projects with the latest server settings can
occur only with server configurations modified in JBuilder 9 or higher. If you attempt to
transfer server libraries from a previous JBuilder version, your projects won’t be
updated with them. You can still tell JBuilder to update the project manually:
1 Right-click the project node of the project you want to update in the project pane and
choose Properties.
2 Select the Servers page.
3 Click the ellipsis (…) button next to your selected single server or the separate
service servers and make your changes.
4 Click OK to close the dialog box.
Chapter 4: Configuring the target server settings 27
Page 34

Updating from an earlier version of JBuilder
Updating from an earlier version of JBuilder
Previous versions of JBuilder supported an older module format. Your old modules will
be automatically converted to the new module format in JBuilder X. Once the
conversion has taken place, you will not be able to share modules between JBuilder X
and above and an earlier version of JBuilder.
28 Developing Applications for J2EE Servers
Page 35

Chapter5Using JBuilder with Borland servers
This chapter explains how to set up and use Borland servers with JBuilder. JBuilder
supports Borland Enterprise Server AppServer Editions 5.2.1 and 6.0.1.
Configuring Borland servers in JBuilder
Chapter
5
To configure JBuilder settings to target your preferred Borland server, you use the
Configure Servers dialog box (Enterprise|Configure Servers). See the instructions
below for either the Borland Enterprise Server AppServer Edition 6.0 or the Borland
Enterprise Server AppServer Edition 5.2.1.
Borland Enterprise Server AppServer Edition 6.0
To configure JBuilder settings to target Borland Enterprise Server AppServer
Edition 6.0,
1 Choose Enterprise|Configure Servers to display the Configure Servers dialog box.
2 Select Borland Enterprise Server AppServer Edition 6.0 from the User Home folder
in the left pane.
The right side of the dialog box displays the default settings for the server. The
General page has fields that all servers have in common, while the Custom page
has fields that are specific to the selected server. In some cases, modifying a
Custom setting will update a setting on the General page.
3 Select the Enable Server option at the top of the dialog box.
Checking this option enables the fields for the selected application server. You won’t
be able to edit any fields until it is checked. The Enable Server check box also
determines whether this server will appear in the list of servers when you select a
server for your project using Project|Project Properties|Servers.
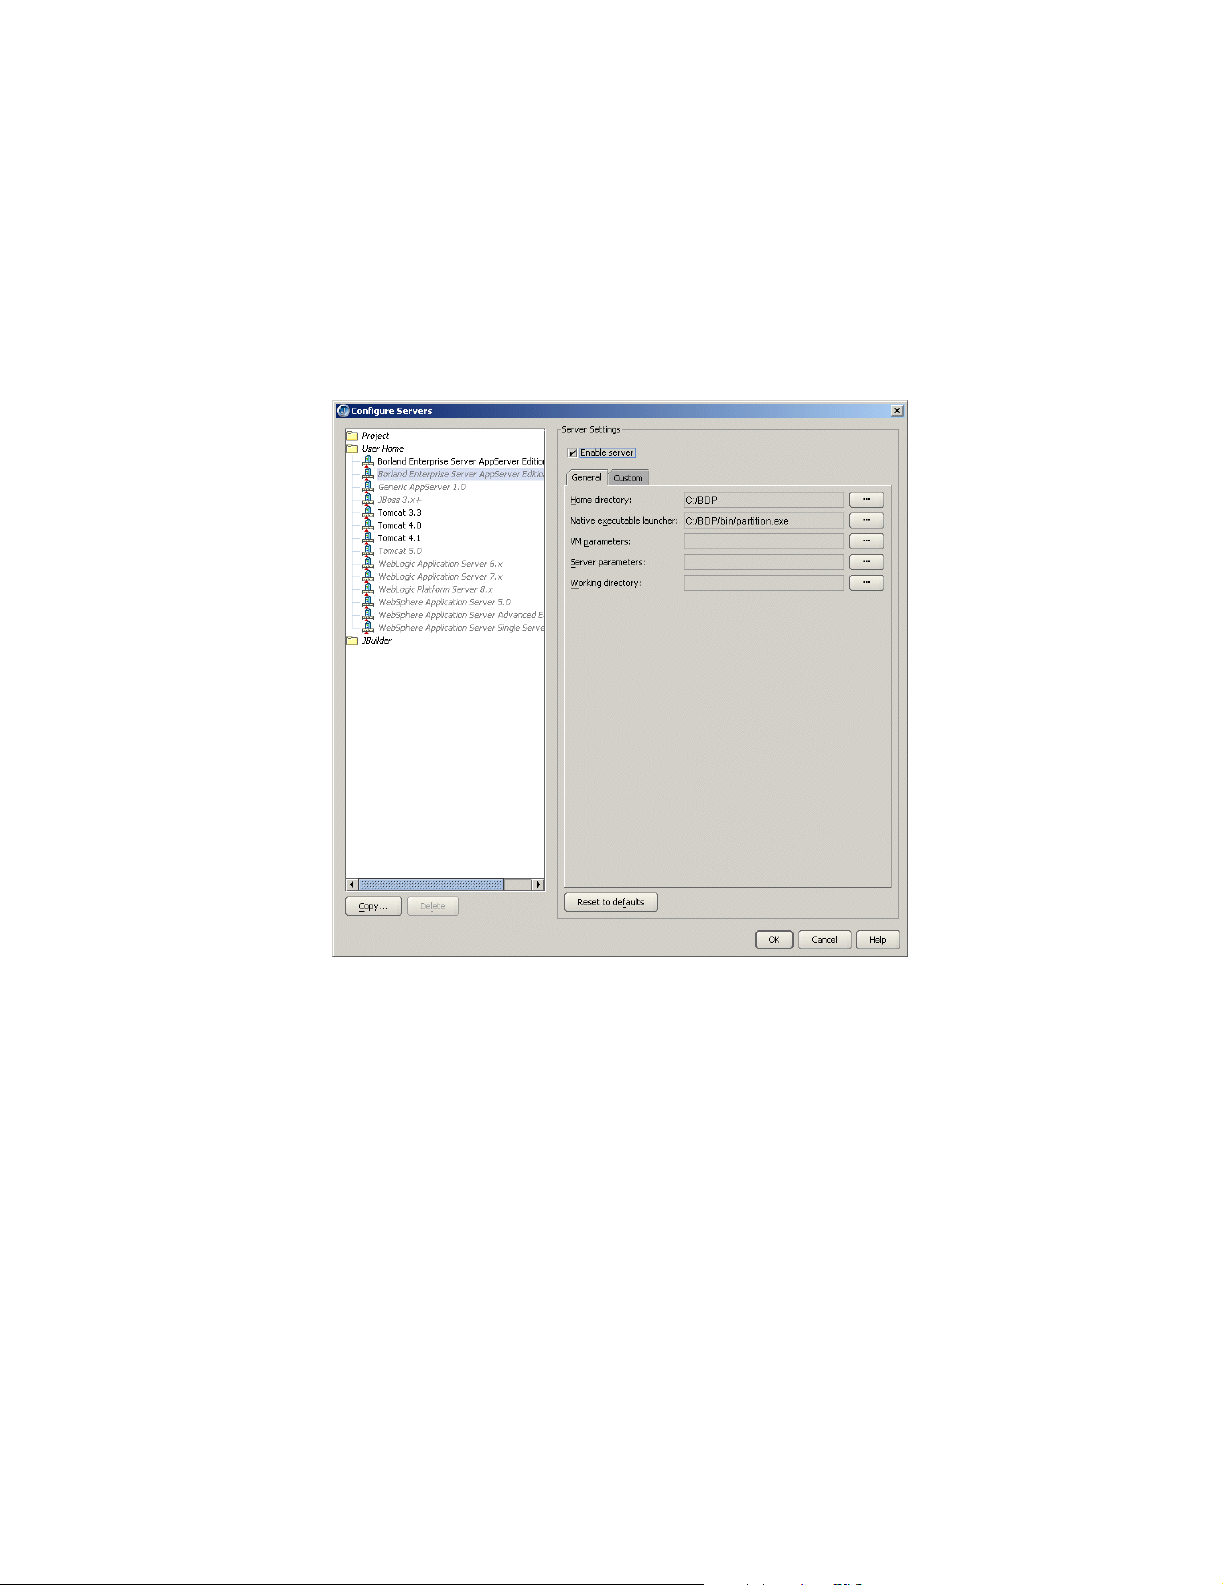
■
Check the General tab to view and change (if required) default directories and
parameter settings for the server. If JBuilder’s default settings are not
appropriate, edit any of the settings as needed. To change settings, click the
ellipsis (…) button next to the field and make your changes.
Chapter 5: Using JBuilder with Borland servers 29
Page 36
Configuring Borland servers in JBuilder
■
Home Directory: The directory where Borland Enterprise Server AppServer
Edition 6.0 is installed. The default is
accurate, use the ellipsis (…) button to select the correct directory.
■
Native Executable Launcher: The native executable used to run this server. The
default is
■
VM Parameters: The parameters you want to pass to the virtual machine.
■
Server Parameters: The parameters you want to pass to the server.
■
Working Directory: The name and location of a working directory.
partition.exe in the Home Directory’s bin folder.
The General tab will look similar to this:
Borland/BDP. If the default directory is not
4 Click the Custom tab to view and change (if required) fields unique to the server.
Change or fill in these fields:
■
JDK Installation Directory: The directory where the JDK version required by the
server is located. JBuilder fills this field in automatically, depending on the value
you specified for the Home Directory on the General page. For the Borland
Enterprise Server AppServer Edition 6.0, this is the
your project will automatically be updated to use JDK 1.4.2.
■
Server Name: The identifier of your machine.
■
Configuration Name: The name of the configuration that manages the partition.
For more information see “Configurations, partitions, partition services, and J2EE
APIs” on page 34.
■
Partition Name: The name of the partition in which the module is run. For more
information see “Configurations, partitions, partition services, and J2EE APIs” on
page 34.
■
Add A Management Agent Item To The Enterprise Menu: Adds a Management
Agent item to the JBuilder Enterprise menu, so you can start the Management
Agent quickly from within JBuilder IDE.
■
Server Realm: The realm of the server. For more information about the server
realm, see your Borland Enterprise Server documentation.
30 Developing Applications for J2EE Servers
jdk/1.4.2 folder. Note that
Page 37
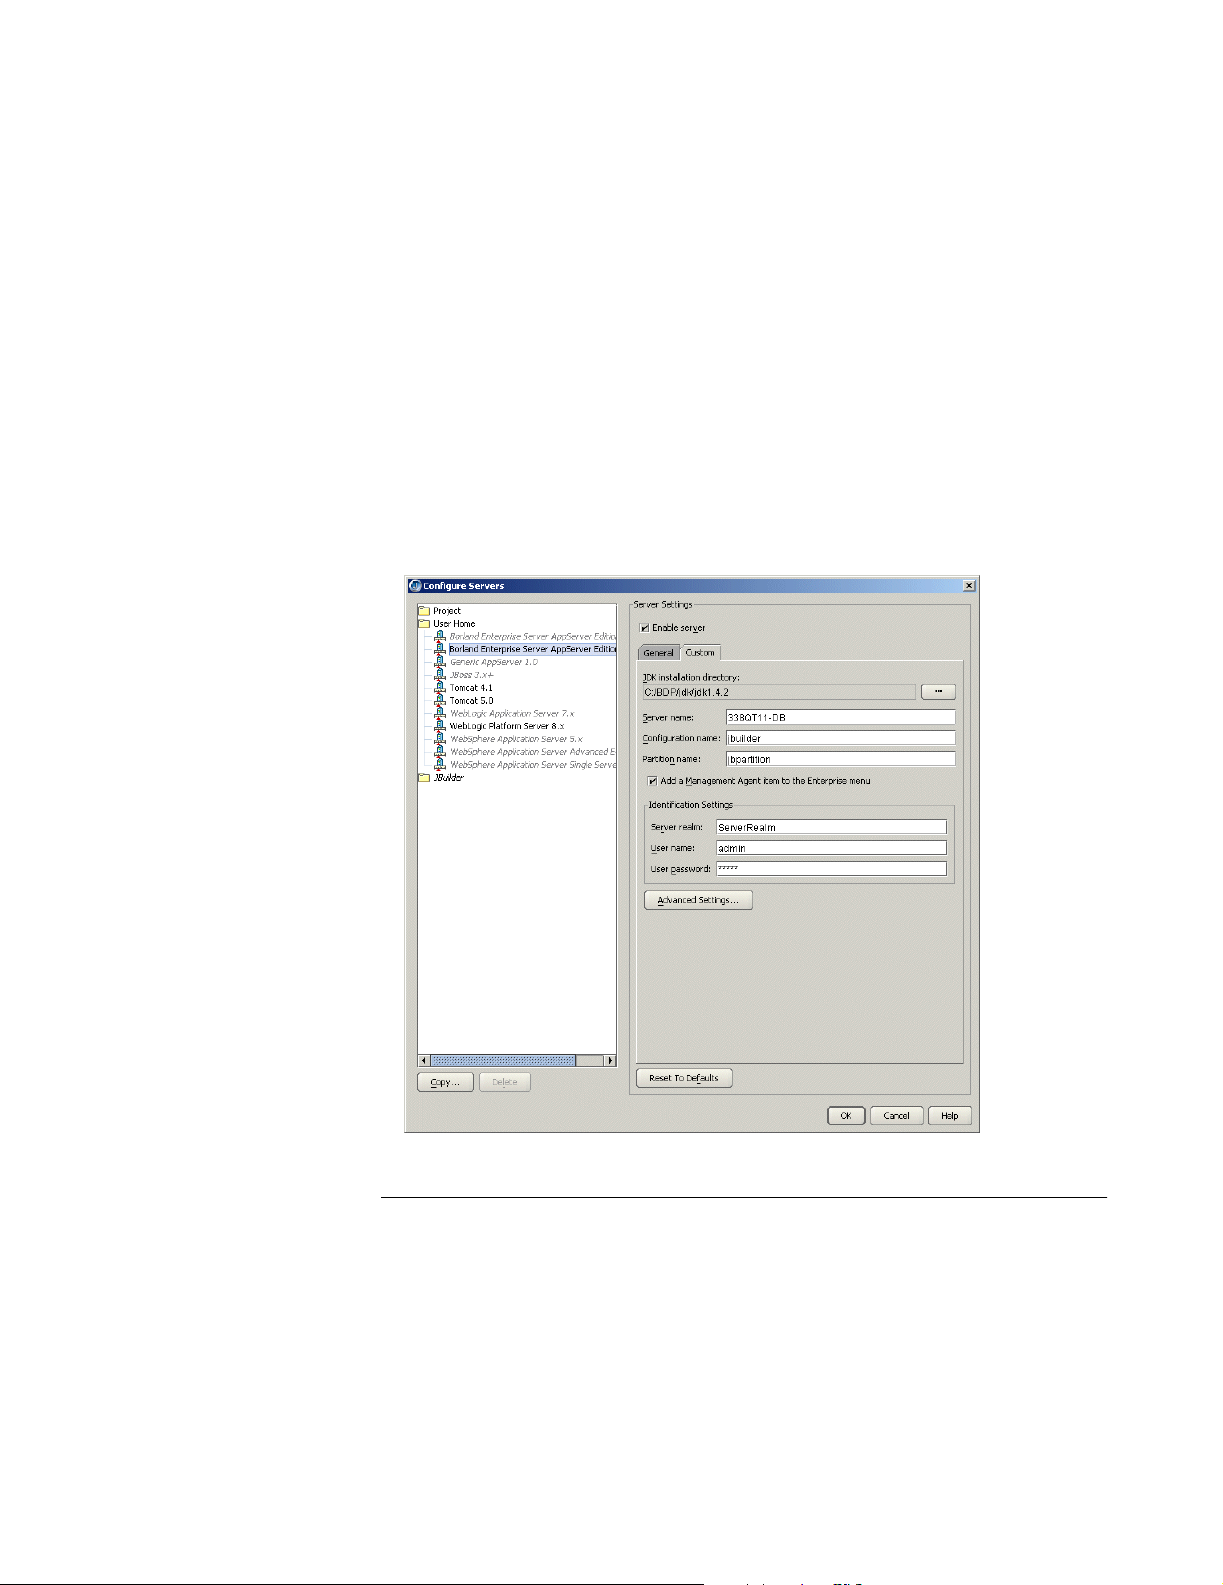
Configuring Borland servers in JBuilder
■
User Name: The name you use to identify yourself to the server. The default
value is
■
User Password: The password you use to identify yourself to the server. The
default fault is
■
Advanced Settings: Click this button to display the Advanced Settings dialog box.
admin.
admin.
Use this dialog box to change the number of the port used by the Management
Agent and to select the Use Security option. The management port is used in
JBuilder to detect the server during startup and deployment. Change the
management port only if you are deploying to a remote server with a
management port that is different from the default. When you change the port
number, ensure that you entered the correct port number as configured in the
server, as the server won’t start up without the correct port number. The port and
security settings you choose must match the settings of your server. JBuilder
updates the values in this dialog box whenever the Home Directory changes. The
values are read from the Borland Enterprise Server property files. Changing the
port number while you have the Management Agent started in JBuilder
automatically shuts down the Management Agent.
The Custom tab will look similar to this:
Borland Enterprise Server AppServer Edition 5.2.1
To configure JBuilder settings to target Borland Enterprise Server AppServer
Edition 5.2.1,
1 Choose Enterprise|Configure Servers to display the Configure Servers dialog box.
2 Select Borland Enterprise Server AppServer Edition 5.2.1 from the User Home
folder in the left pane.
The right side of the dialog box displays the default settings for the selected server.
The General page has fields that all servers have in common, while the Custom
page has fields that are specific to the selected server. In some cases, modifying a
Custom setting will update a setting on the General page.
Chapter 5: Using JBuilder with Borland servers 31
Page 38
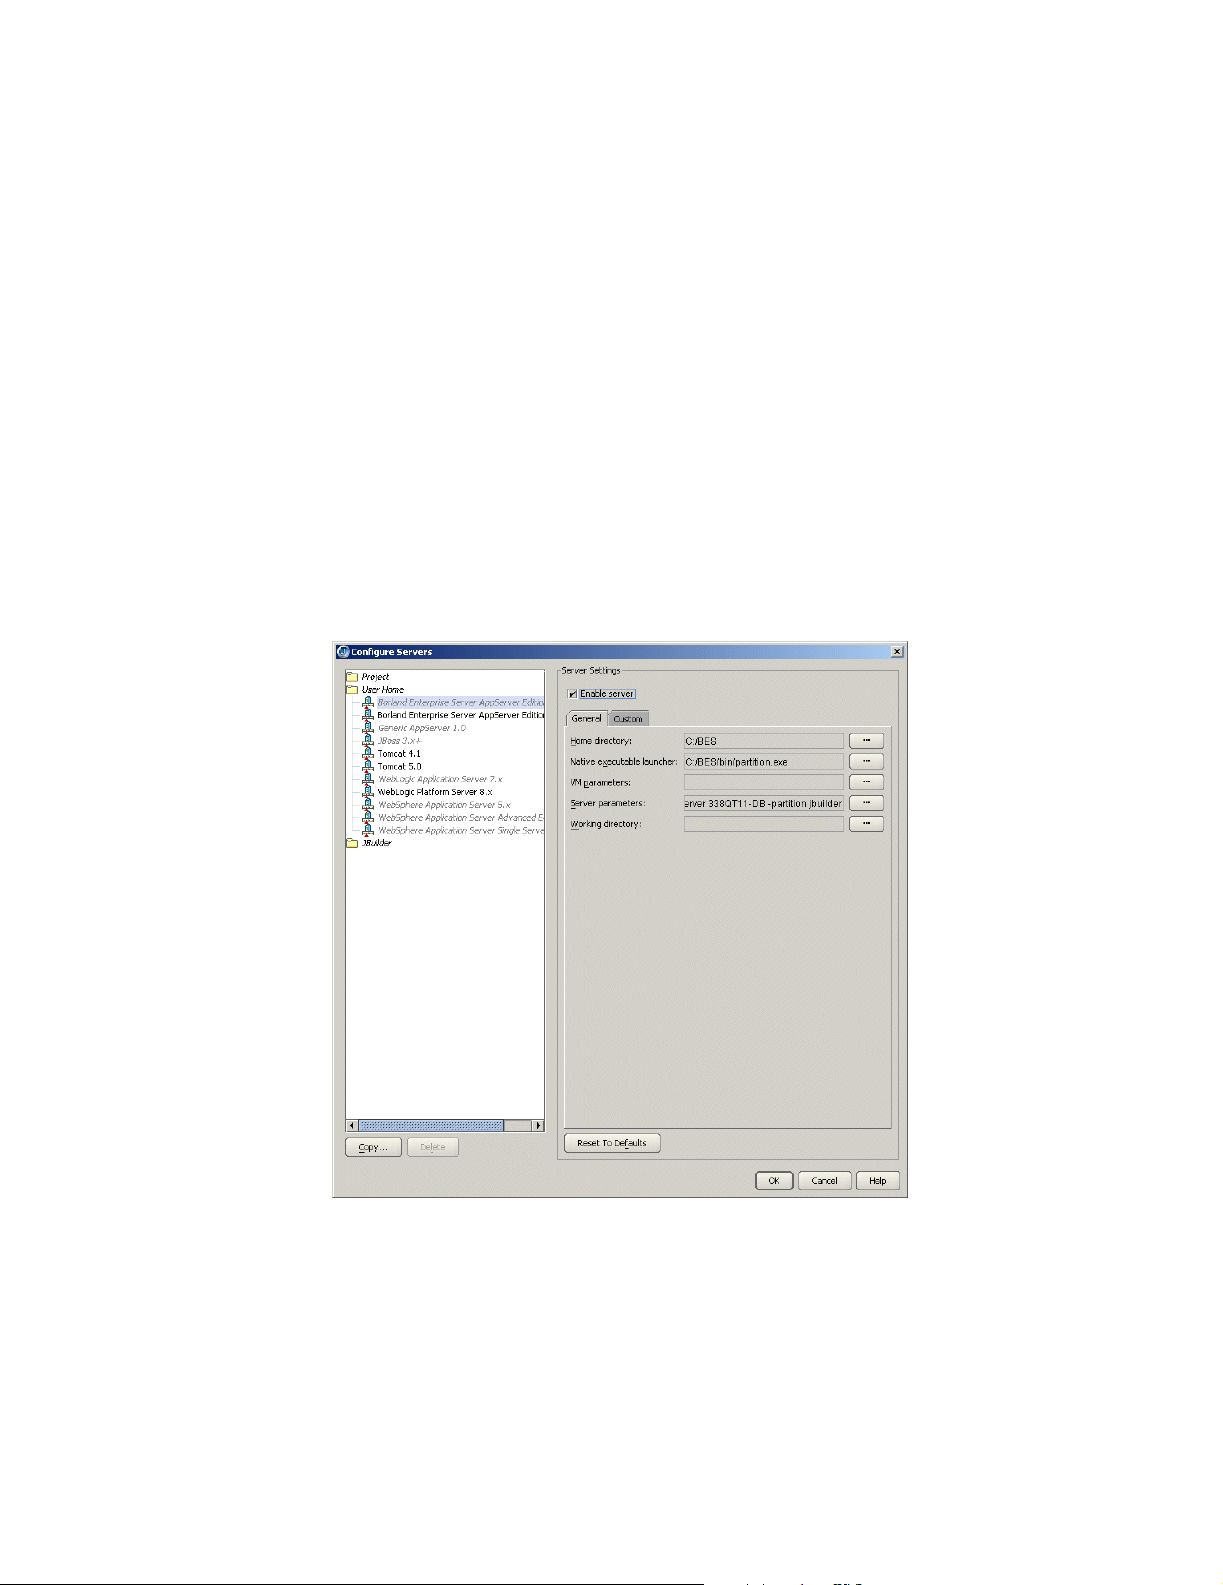
Configuring Borland servers in JBuilder
3 Select the Enable Server option at the top of the dialog box.
Checking this option enables the fields for the selected application server. You won’t
be able to edit any fields until it is checked. The Enable Server check box also
determines whether this server will appear in the list of servers when you select a
server for your project using Project|Project Properties|Servers.
4 Check the General tab to view and change (if required) default directories and
parameter settings for the server. If JBuilder’s default settings are not appropriate,
edit any of the settings as needed. To change settings, click the ellipsis (…) button
next to the field and make your changes.
■
Home Directory: The directory where Borland Enterprise Server AppServer
Edition 5.2.1 is installed. The default is
accurate, use the ellipsis (…) button to select the correct directory.
■
Native Executable Launcher: The native executable used to run this partition.
The default is
■
VM Parameters: The parameters you want to pass to the virtual machine.
■
Server Parameters: The parameters you want to pass to the server. The default
-partition jbuilder -server <server_name>.
is
■
Working Directory: The name and location of a working directory.
The General tab will look similar to this:
BES. If the default directory is not
partition.exe in the Home Directory’s bin folder.
5 Click the Custom tab to view and change (if required) fields unique to the server.
Change or fill in these fields:
■
JDK Installation Directory: The directory where the JDK version required by the
server is located. JBuilder fills this field in automatically, depending on the value
you specified for the Home Directory on the General page. For the Borland
Enterprise AppServer Edition 5.2.1, the directory is
Home Directory. Note that this version of the Borland Enterprise Server can use
either JDK 1.3 or JDK 1.4.
■
Server Name: The name of the server you are configuring. By default, JBuilder
specifies the identifier of your machine.
32 Developing Applications for J2EE Servers
jdk/jdk1.4.1 directory in the
Page 39
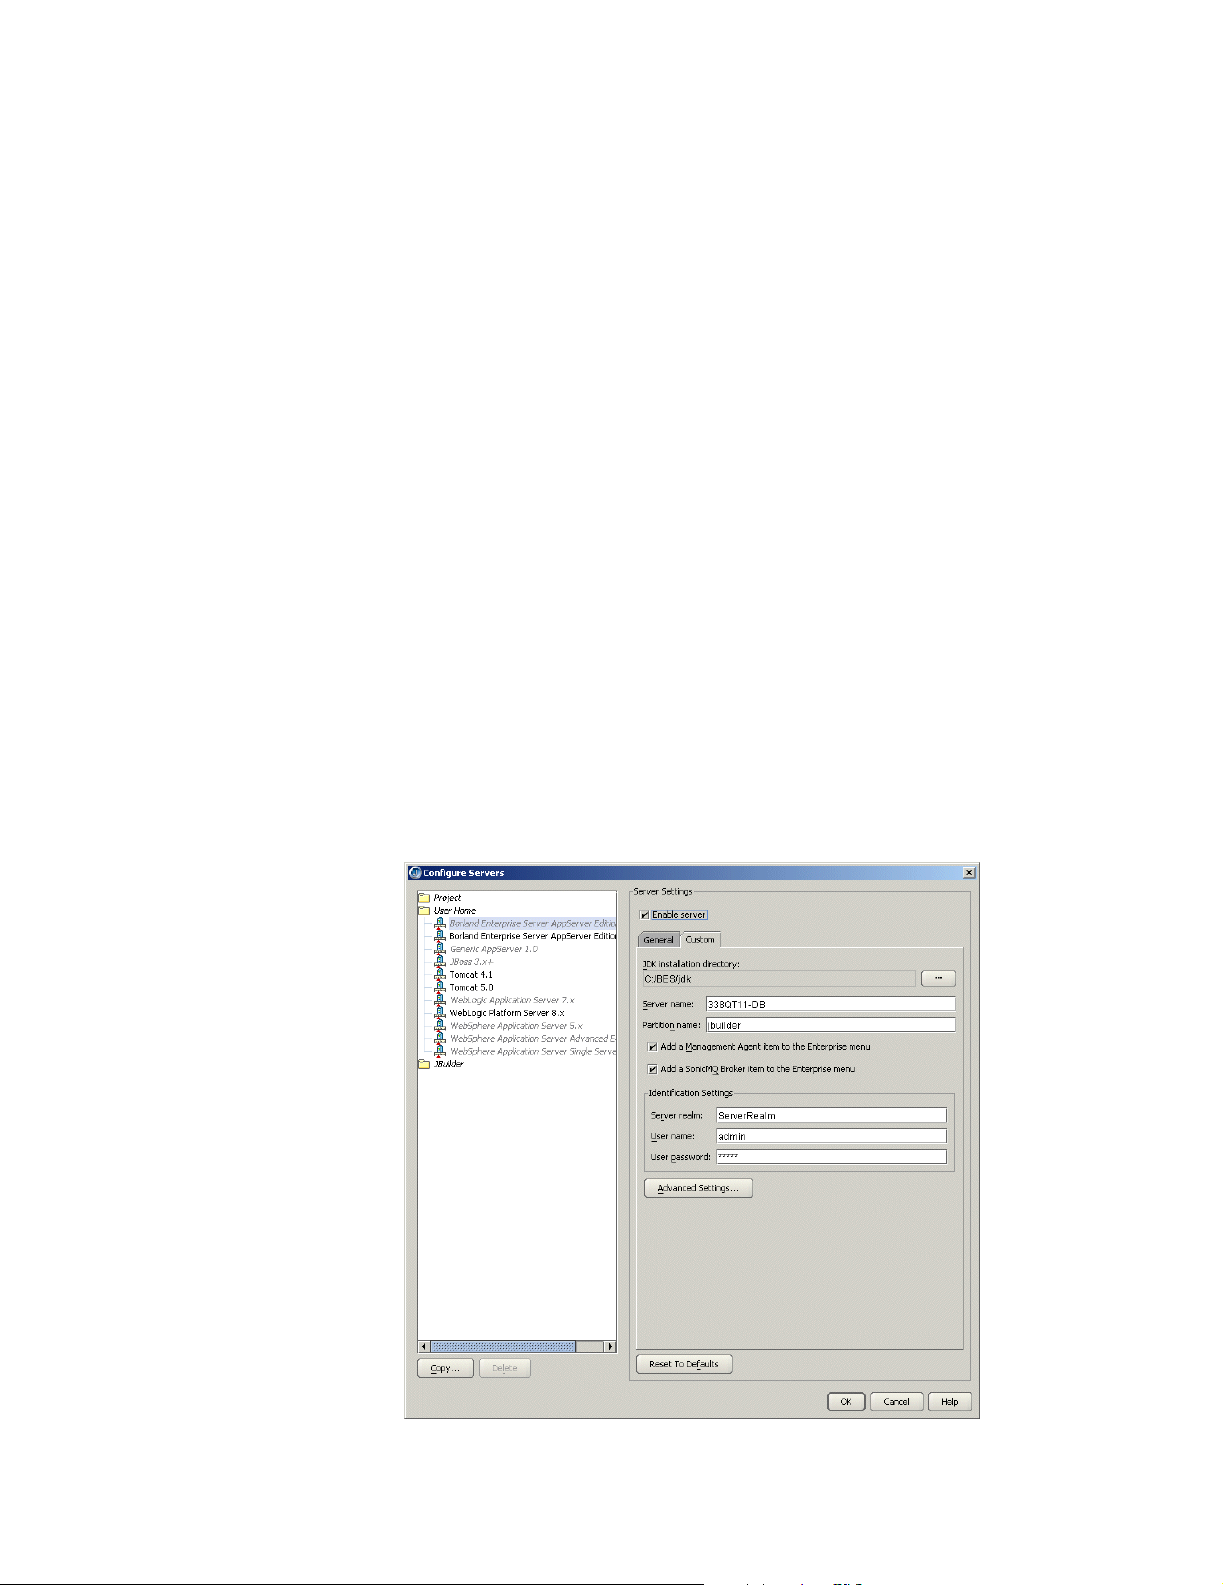
Configuring Borland servers in JBuilder
■
Partition Name: The name of the partition in which the server is run. For more
information about partitions, see “Configurations, partitions, partition services,
and J2EE APIs” on page 34.
■
Add A Management Agent Item To The Enterprise Menu: Adds a Management
Agent item to the JBuilder Enterprise menu, so you can start the Management
Agent quickly from within JBuilder IDE.
■
Add A SonicMQ Broker Agent Item To The Enterprise Menu: Adds the SonicMQ
Broker Agent item to the JBuilder Enterprise menu, so you can start the SonicMQ
Broker Agent quickly from within JBuilder IDE.
■
Server Realm: The realm of the server. For more information about the server
realm, see your Borland Enterprise Server documentation.
■
User Name: The name you use to identify yourself to the server. The default
value is
■
User Password: The password you use to identify yourself to the server. The
default fault is
■
Advanced Settings: Click this button to display the Advanced Settings dialog box.
admin.
admin.
Use this dialog box to change the number of the port used by the Management
Agent and to select the Use Security option. The management port is used in
JBuilder to detect the server during startup and deployment. Change the
management port only if you are deploying to a remote server with a
management port that is different from the default. When you change the port
number, please ensure that you entered the correct port number as configured in
the server, as the server won’t start up without the correct port number. The port
and security settings you choose must match the settings of your server. JBuilder
updates the values in this dialog box whenever the Home Directory changes. The
values are read from the Borland Enterprise Server property files. Changing the
port number while you have the Management Agent started in JBuilder
automatically shuts down the Management Agent.
The Custom tab will look similar to this:
Chapter 5: Using JBuilder with Borland servers 33
Page 40
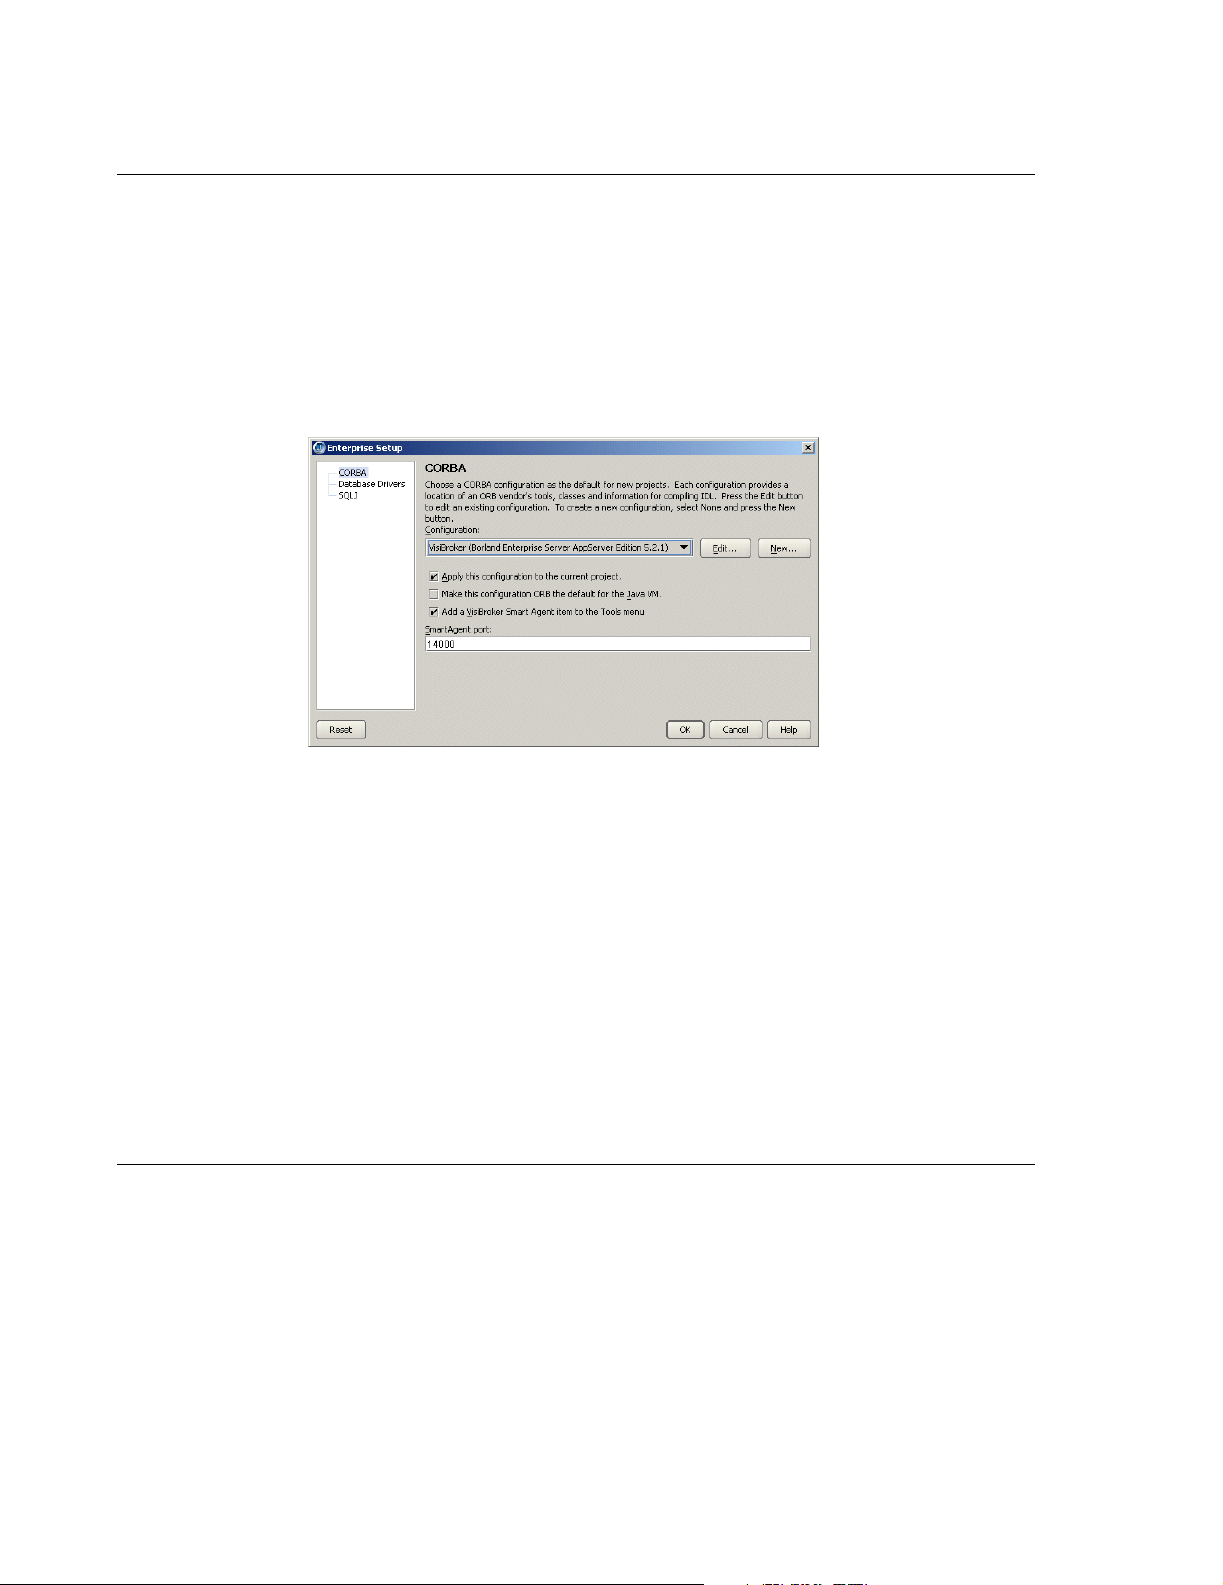
Making the ORB available to JBuilder
Making the ORB available to JBuilder
You use the CORBA node of the Enterprise Setup dialog box (Enterprise|Enterprise
Setup) to set up the Borland Enterprise Server for use with VisiBroker. For Borland
Enterprise Server AppServer Editions 6.0 and 5.2.1, the server will create its own
VisiBroker configuration called “VisiBroker <server name and version>.” The default
VisiBroker configuration won’t be changed.
You also use this dialog box to set the VisiBroker Smart Agent port to a unique number.
All client/server communication takes through the Smart Agent port. To start the Smart
Agent from the Tools menu, check the Add The VisiBroker Smart Agent Item To The
Tools Menu option. This option is selected by default. The CORBA node of the
Enterprise Setup dialog box looks like this:
To make the ORB available to JBuilder, you must start the VisiBroker Smart Agent with
the Enterprise|VisiBroker Smart Agent command. This handles the initial bootstrap
issues such as how the client locates the naming service and so on.
For Borland Enterprise Server AppServer Edition 5.2.1/6.0: If you choose
Enterprise|Borland Enterprise Server Management Agent, the VisiBroker Smart Agent
is started as part of the process. When you are working with the Borland Enterprise
Server AppServer Edition 5.2.1/6.0, you must start the Borland Enterprise Server
Management Agent instead of the VisiBroker Smart Agent. If you don’t start it, it is
automatically started for you when you start the server within JBuilder. Note that
starting the server automatically might take longer because the server searches for any
running agents. The most efficient way to start the Management Agent is to start it
yourself.
For more information on setting up the ORB for use within JBuilder, see “Setting up
JBuilder for CORBA applications” on page 47.
Configurations, partitions, partition services, and J2EE APIs
The architecture of the Borland Enterprise Server AppServer Edition 6.0 and 5.2.1
varies significantly. The Borland Enterprise Server AppServer Edition 6.0 introduces
the concept of management hubs and configurations. A management hub, also known
as the server control unit, controls, by server (or machine identifier), one or more
configurations. A configuration, in turn, manages one or more running partitions, or
processes. A configuration is based on an XML configuration file that resides in the
configuration’s root directory. This file determines the order of partition startup. A
configuration can have multiple partitions. Because each partition is a separate
process, an application’s functions can be distributed across multiple processes.
In the Borland Enterprise Server AppServer Edition 5.2.1, a server, also a machine
identifier, manages a partition. A server can also have multiple partitions. And, as with
34 Developing Applications for J2EE Servers
Page 41

Configurations, partitions, partition services, and J2EE APIs
Borland Enterprise Server AppServer Edition 6.0, because each partition is a separate
process, an application’s functions can be distributed across multiple processes. For
either edition, when you use the Configure Servers dialog box to configure the server,
all these pieces are seamlessly set up for use in JBuilder.
For more information on the Borland Enterprise Server architecture, refer to the
documentation, available from the Help menu of the Borland Management Console.
In both editions, partitions provide containers and services for hosting your
applications. Any or all of a partition’s containers and services can be enabled or
disabled. Additionally, a partition can be cloned (copied) on the same configuration or
server or on another enterprise configuration or server located on the same local area
network. Cloning a partition can save significant time in the deployment process
because it not only copies all of the deployed modules, but also copies all the
associated service configurations settings which can require a considerable amount of
time and effort to complete.
Application components are hosted in either the web container or EJB container, or
simply in the partition itself (in the case of connectors). You can deploy application
EARs or smaller archives to partitions. The partitions are “smart” and will place your
application components in the proper containers. Since you may create as many
partitions as you wish, you can also have as many container instances as you wish.
Borland provides up to two different containers per partition instance:
■
Web container (Tomcat 4.x or 5.0): for hosting JSPs and servlets, and
■
EJB container (Borland): for hosting EJB components
Each partition also provides Partition Services and J2EE APIs as Partition Services.
These services and APIs are:
■
Naming Service: In Borland Enterprise Server, the Naming Service is managed by
the VisiBroker ORB.
■
JDataStore: Borland’s all-Java database.
■
JDBC: For getting connections to and modeling data from databases.
■
Java Mail: A Java email service.
■
JTA: The Java transactional API.
■
JAXP: The Java API for XML parsing.
■
JNDI: The Java Naming and Directory interface.
■
RMI-IIOP: Remote method invocation (RMI) carried out via internet inter-ORB
protocol (IIOP).
JBuilder, by default, uses a partition named
jbpartition and a configuration named
jbuilder as a deployment target for Borland Enterprise Server AppServer Edition 6.0.
For Borland Enterprise Server AppServer Edition 5.2.1, the partition name is
jbuilder.
If the configuration or partition doesn’t exist, one will be created for you automatically.
For both editions, the default partition shares the same port number with Tomcat and
JDataStore services. Additionally, in both editions, the server name is the same as the
machine identifier.
You can start multiple partitions using multiple JBuilder run configurations. To create
multiple run configurations, follow these steps:
1 Choose Run|Configurations, then click New.
2 Change the Run Type to Server. The displayed server is the server selected for the
project in Project Properties|Server.
3 In the Category tree, select Server|Command Line.
Chapter 5: Using JBuilder with Borland servers 35
Page 42
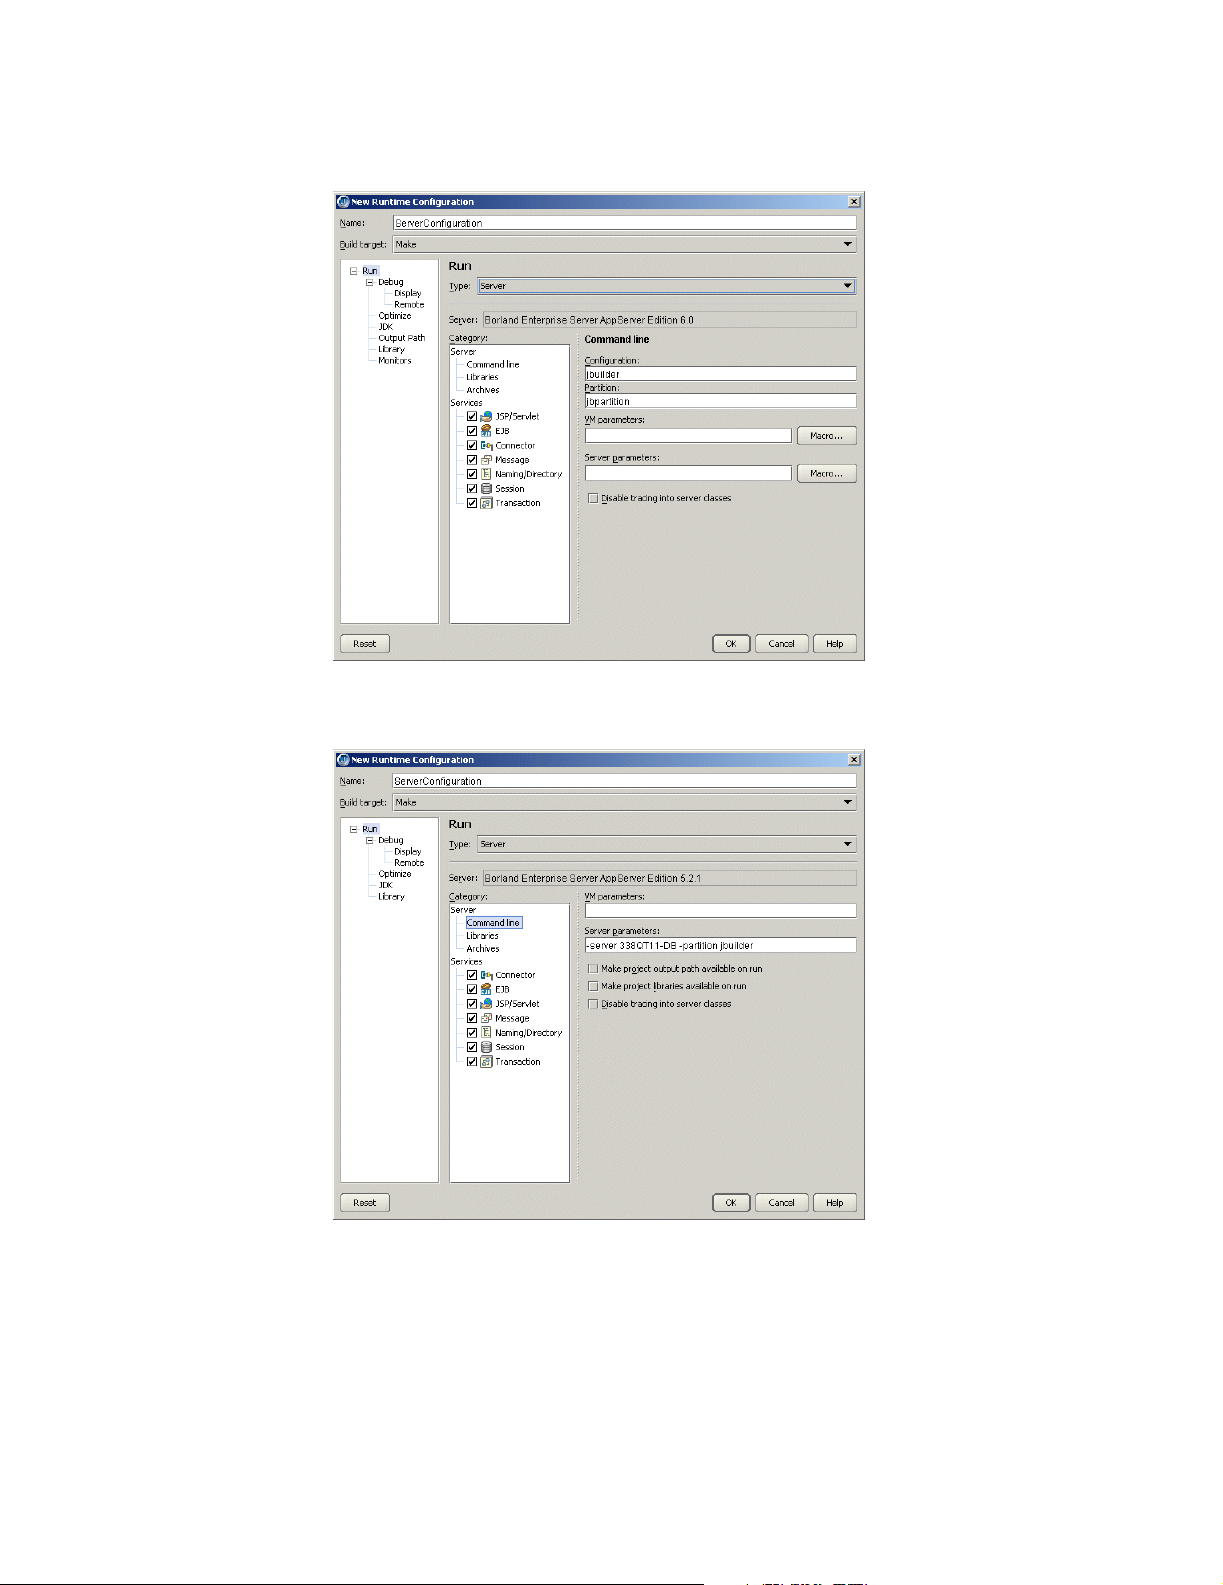
Configurations, partitions, partition services, and J2EE APIs
4 For Borland Enterprise Server 6.0, change the Partition And Configuration Name to
the one you want to use. The Command Line page looks like this:
For Borland Enterprise Server 5.2.1, edit the Server Command Line parameters and
change the partition name to the one you want to use, as show in the following
figure:
5 Click OK to close the New Runtime Configuration dialog box and save the
configuration.
6 Repeat these steps to create additional run configurations to run other partitions.
Before starting up the partition, make sure you have configured unique port numbers
for Tomcat and JDataStore services.
Also ensure that you have the naming service enabled for only one of the partitions to
avoid naming service conflicts. To disable the naming service for a partition, edit the
36 Developing Applications for J2EE Servers
Page 43
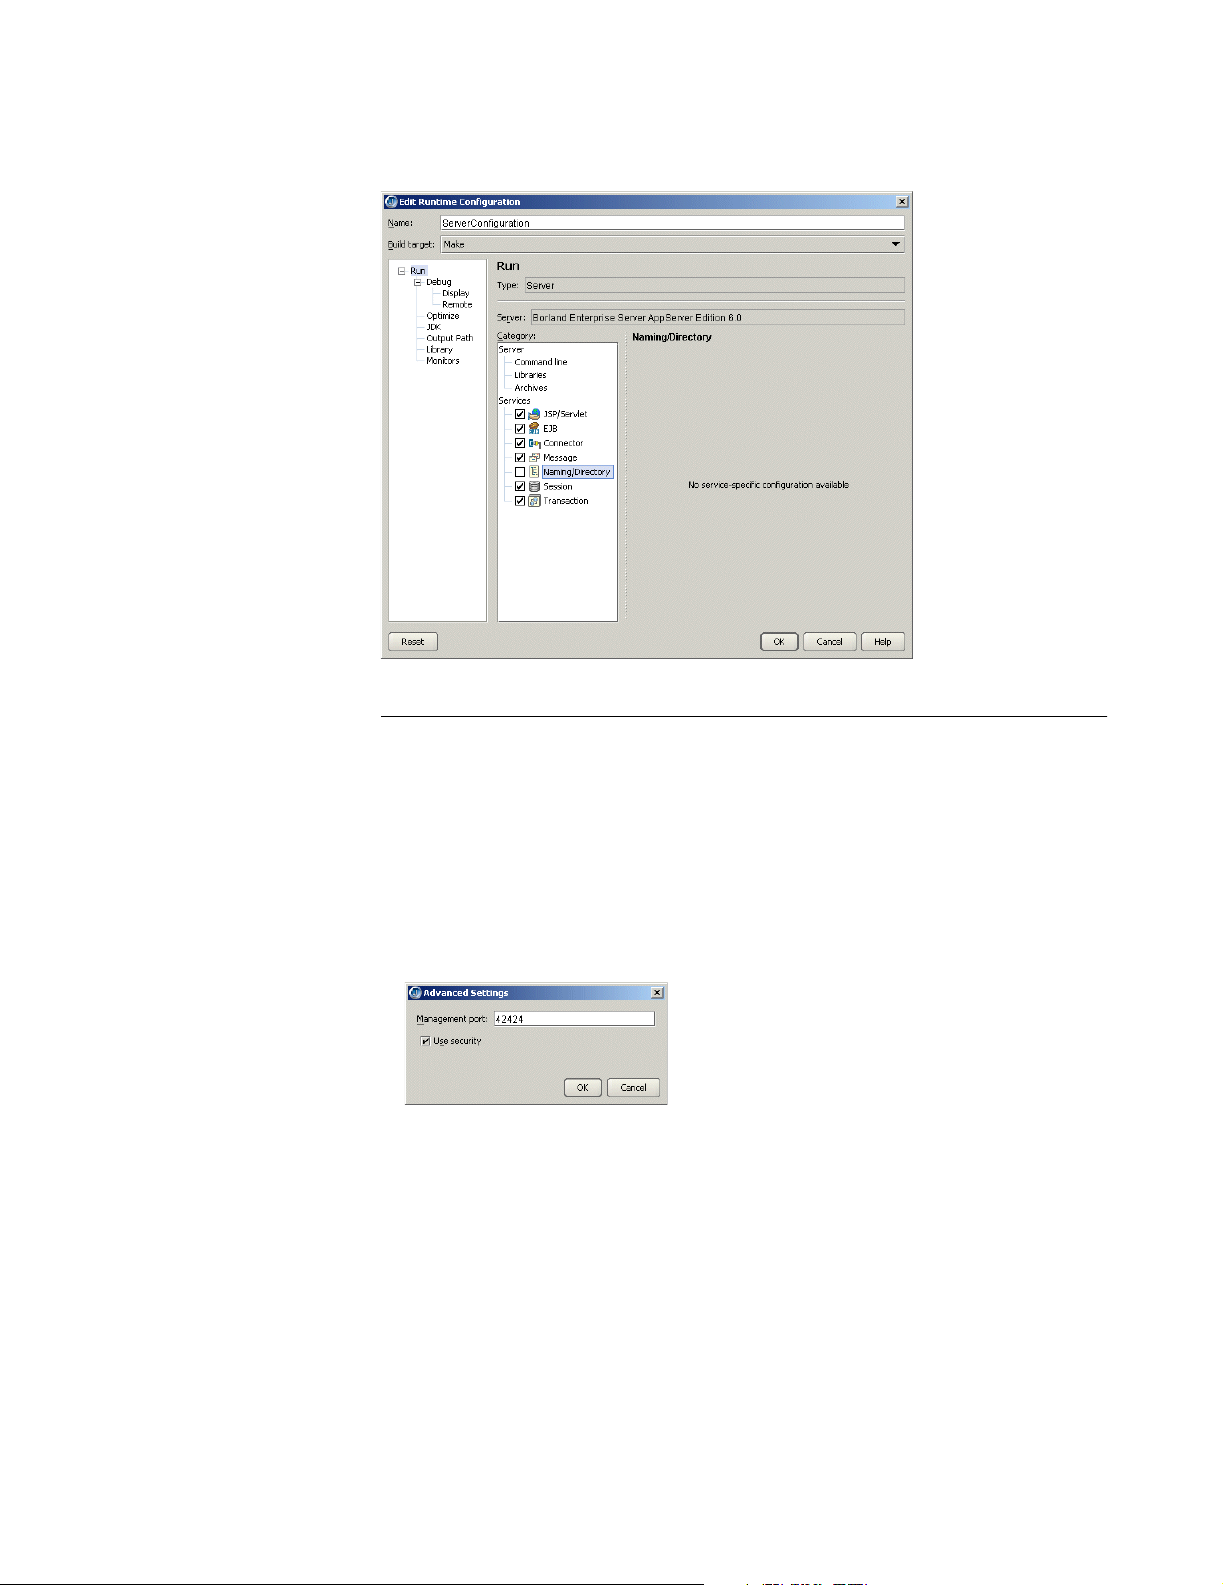
Configurations, partitions, partition services, and J2EE APIs
run configuration for the partition (Edit Runtime Configuration dialog box) and uncheck
the naming service option, as shown in the following figure:
Changing the management port
The management agent manages all partitions. The default management port, set on
the Advanced Settings dialog box for both Borland Enterprise Server AppServer
Editions 6.0 and 5.2.1, is 42424. You can change the management port used by
JBuilder, or the one used by the server.
To change the port used by JBuilder,
1 Choose Enterprise|Configure Servers and chose Borland Enterprise Server
AppServer Edition 6.0 or 5.2.1 from the User Home Folder on the left.
2 Click the Custom tab, then the Advanced Settings button.
3 Change the port in the Management Port field, as shown in the following figure:
4 Click OK two times.
To change the management port used by the server,
1 Open the Borland Management Console.
2 Double-click Installations.
3 For Borland Enterprise Server 6.0, choose Wizards|Configure Agents. For Borland
Enterprise Server 5.2.1, right-click the server you want to change the port for.
4 Select Update Ports.
5 Use the Port Configuration wizard to change the Management Port number. The
User Port value is equal to the Smart Agent Port in JBuilder.
After you change the management port, the management agent will shutdown if it was
started in JBuilder.
Chapter 5: Using JBuilder with Borland servers 37
Page 44
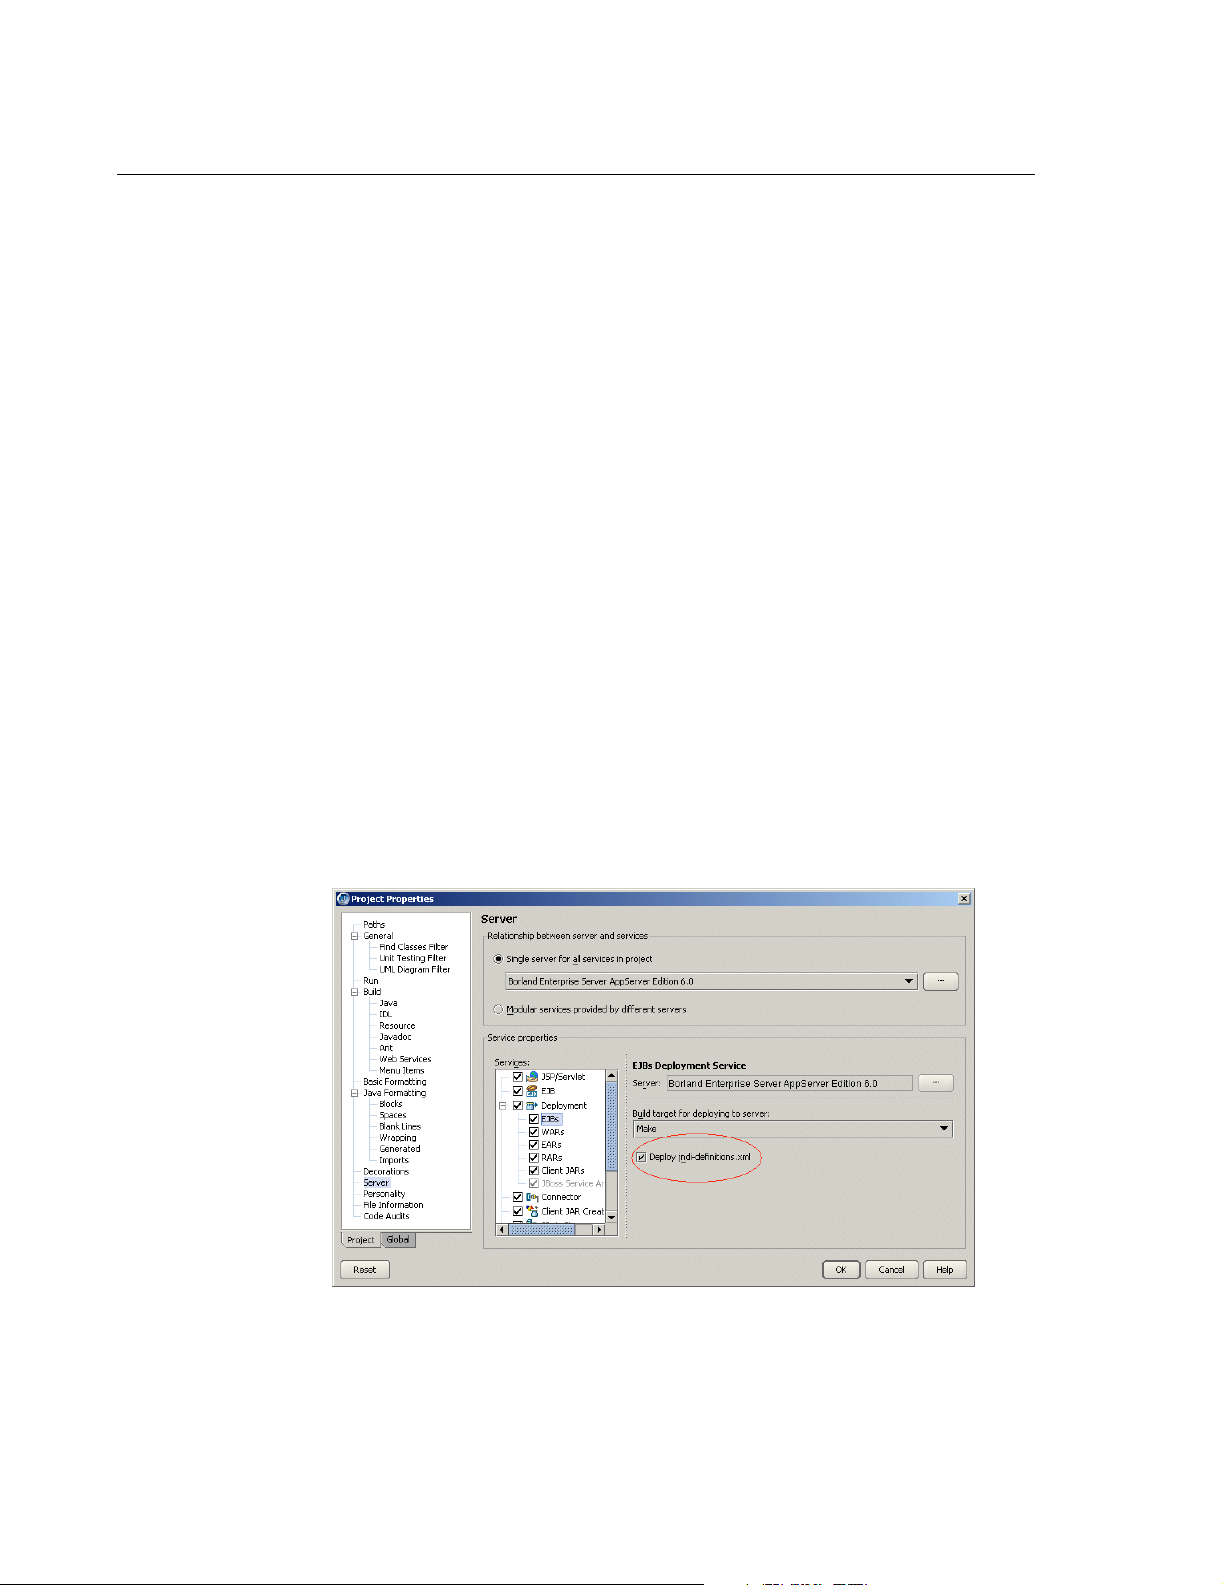
Starting the configuration or server
Starting the configuration or server
Before any server related actions (server startup, deployment, and so on) are
performed, you must start the management agent with Enterprise|Borland Enterprise
Server Management Agent (use the version of this command that matches the version
of the Borland Enterprise Server AppServer Edition your project is targeted for.). For
the Borland Enterprise Server 6.0, this will start the management hub. For Borland
Enterprise Server 5.2.1, this starts the server.
For both editions, after the management agent has started up, you can launch the
partition by right-clicking the EJB or web module in the project pane and selecting Run
Using Defaults. You can also create a Server run configuration and run the project
using that configuration.
Running the partition in JBuilder will
■
Create the partition (and configuration for Borland Enterprise Server 6.0), if not
already present. The partition name (and the configuration name for Borland
Enterprise Server 6.0) used in this step is derived from the run configuration used to
start up the server. If you are starting the configuration or server using the default
configuration, the partition name as configured in the application server properties
will be used.
■
Deploy any resources defined in jndi-definitions.xml (if present) to the root of the
partition directory. For the Borland Enterprise Server AppServer Edition 6.0, this
directory is:
only, the
Borland Enterprise Server AppServer Edition 5.2.1, it is:
servers\SERVER_NAME\partitions\PARTITION_NAME\
This file will be created if your project contains an EJB 2.0 module with data
sources/messaging resources defined.
Note This action can be turned off by unchecking the Deploy jndi-definitions.xml option in
the Deployment EJBs Services properties on the Server node of the Project
Properties dialog box.
PARTITION_NAME\dars\jbuilder.dar. For Borland Enterprise Server 6.0
jndi-definitions.xml file is packaged into a .dar file and deployed. For the
APPSERVER_HOME\var\
.
■
Copy selected libraries to the partition’s lib directory. All archives in this directory
will be added to the partition’s classpath when the partition is started up.
The directory on the server for Borland Enterprise Server AppServer Edition 6.0 is
APPSERVER_HOME\var\domains\base\configurations\CONFIGURATION_NAME\mos\
PARTITION_NAME\lib.
directory is
38 Developing Applications for J2EE Servers
APPSERVER_HOME\var\servers\SERVER_NAME\partitions\PARTITION_NAME\lib.
For the Borland Enterprise Server AppServer Edition 5.2.1, the
Page 45
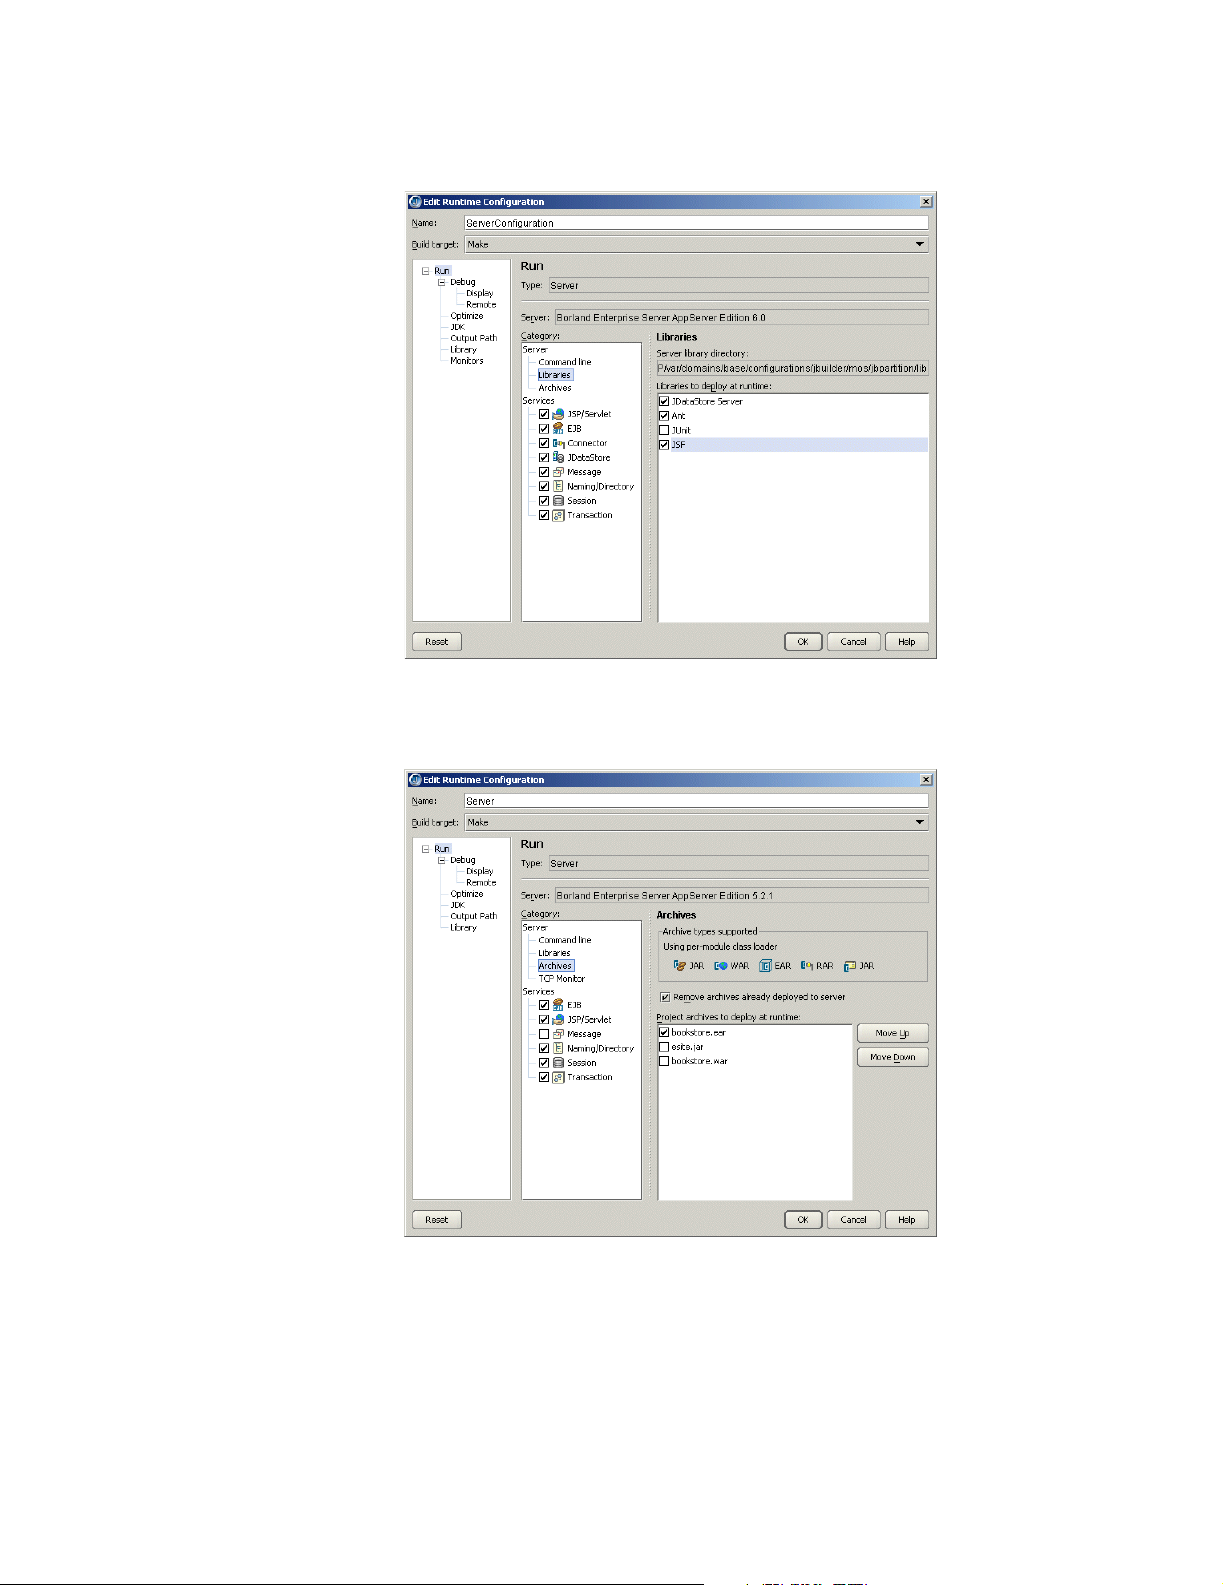
Starting the configuration or server
The libraries to be copied can be set with the Libraries To Deploy At Runtime list on
the Edit Runtime Configuration dialog box for the server run configuration:
■
Remove any archives deployed to the partition, if this option is selected. This can be
set from the Archives Server category on the Edit Runtime Configuration dialog box
for the server run configuration. If you want to have a clean partition, select the
Remove Archives Already Deployed To Server option.
■
Deploy archives if selected. By default all deployable archives in the project are
selected. To change this, click the Archives Server category in the Server run
configuration (Edit Runtime Configuration dialog box) and unselect any archives that
you do not wish to deploy.
■
Start the partition. When partition startup is complete, you should see the partitions
listed in the message pane for Borland Enterprise Server AppServer Edition 6.0 or
the message ‘Partition <PARTITION_NAME> has been started’ for Borland
Enterprise Server AppServer Edition 5.2.1. Archives deployed at startup should be
loaded and accessible.
Chapter 5: Using JBuilder with Borland servers 39
Page 46

Remote deploying
Note By default, all services associated with a partition are started. This could cause the
partition to take a longer time to start. To reduce startup time, uncheck the services that
you don’t require in the Server run configuration.
Remote deploying
To prepare to remote deploy EJBs, WARs, and EAR modules for the Borland
Enterprise Server AppServer Edition 6.0, follow these steps.
1 Choose Enterprise|Configure Servers.
2 Select Borland Enterprise Server AppServer Edition 6.0 from the left side of the
dialog box.
3 Click the Custom tab and set the Server, Configuration, and Partition names to
match that of the remote server.
4 Click the Advanced Settings button and make sure the Management Port matches
your server configuration.
5 Click OK two times.
6 Choose Enterprise|Enterprise Setup.
7 Select the CORBA node to display the CORBA page, and set the Smart Agent Port
to match that of your server configuration.
8 Click OK.
To prepare to remote deploy EJBs, WARs, and EAR modules for the Borland
Enterprise Server AppServer Edition 5.2.1, follow these steps.
1 Choose Enterprise|Configure Servers.
2 Select Borland Enterprise AppServer Edition 5.2.1 from the left side of the dialog
box.
3 Click the Custom tab and set the Server and Partition names to match that of the
remote server.
4 Click Advanced Settings and make sure the Management Port matches your server
configuration.
5 Click OK two times.
6 Choose Enterprise|Enterprise Setup.
7 Select the CORBA node to display the CORBA page, and set the Smart Agent Port
to match that of your server configuration.
8 Click OK.
Now you are ready to deploy. There are two ways to deploy EJBs, WARs, and EAR
modules using JBuilder:
■
Deploying to the server using the Borland Enterprise Server Deployment Wizard
(Enterprise|Server Deployment). This is a Borland Enterprise Server tool and
requires that the management agent is running. On the first page of the wizard,
select the modules to deploy. The wizard then detects all partitions on the server,
even if they have not been started. Select the appropriate partition from the list and
click Finish to deploy the archive. If the partition has already been started, restart the
partition to access the deployed archive.
■
Deploying to the server using the context menu option on any deployable node.
Right-click the deployable node to see the Deploy commands. Choose Deploy. You
can also select multiple deployable nodes, right-click them, and use the context
menu that appears to deploy more than one module.
40 Developing Applications for J2EE Servers
Page 47

Remote debugging
Before you can debug your application remotely, you need to configure the partition.
You can do this before you start the server or while the server and partition are already
running. See these sections for more information:
■
“Preparing to remote debug partitions that are not managed in JBuilder” on page 41
■
“Preparing to remote debug partitions that are managed in JBuilder” on page 41
■
“Preparing to remote debug before the Borland Enterprise Server AppServer Edition
5.2.1 is running” on page 42
■
“Preparing to remote debug when the Borland Enterprise Server AppServer Edition
5.2.1 is already running” on page 42
Once the configuration is complete and the server and partition are started, follow the
instructions in “Remote debugging in JBuilder” on page 43.
Remote debugging for Borland Enterprise Server 6.0
Preparing to remote debug partitions that are not managed in JBuilder
To prepare to remote debug partitions that are not managed in JBuilder,
1 Start the Borland Management Console.
2 Start the server.
3 Locate the partition you wish to debug.
4 Right-click the partition and choose Properties.
5 Select the Partition Settings tab.
6 Check the Enable JPDA Remote Debugging option.
7 Set the transport address field to 3999.
8 Uncheck the Suspend Partition Until Debugger Attaches option.
9 Click OK.
Remote debugging
Preparing to remote debug partitions that are managed in JBuilder
To prepare to remote debug partitions that are managed in JBuilder, you have two
options:
Starting the server/configuration/partition outside of JBuilder
1 Shut down the server.
2 Open the file <APPSERVER_HOME>/var/domains/base/configurations/configuration.xml.
3 Look for the JPDA element and edit attribute values as follows:
enable-jpda-debug="true"
jpda-transport-address="3999"
jpda-suspend="false"
4 Start the server/configuration/partition outside of JBuilder.
Starting the management agent/partition in JBuilder
1 Shut down the server.
2 Open the file <APPSERVER_HOME>/var/domains/base/configurations/configuration.xml.
Chapter 5: Using JBuilder with Borland servers 41
Page 48

Remote debugging
3 Look for the JPDA element and edit attribute values as follows:
enable-jpda-debug="true"
jpda-transport-address="3999"
jpda-suspend="false"
4 Choose Run|Configurations, select the server run configuration, and click the Edit
button.
5 Set the following server parameters: -jpda:address=3999
6 Start the management agent/partition in JBuilder.
Remote debugging for Borland Enterprise Server 5.2.1
Preparing to remote debug before the Borland Enterprise Server AppServer Edition 5.2.1 is running
To set up for remote debugging before you start the Borland Enterprise Server
AppServer Edition 5.2.1,
1 Start the Borland Management Console.
2 Click the Installations button.
3 Locate the server you will start. Expand the node and locate the partition you wish to
debug in JBuilder.
4 Click the partition node in the structure pane.
5 Search for and set the debug parameters as follows in the content pane (set the
values that are in bold-faced type):
partition.enable_jpda_debug=true
partition.jpda.transport_address=3999
partition.jpda.suspend=false
6 Click Apply Changes.
Preparing to remote debug when the Borland Enterprise Server AppServer
Edition 5.2.1 is already running
To set up for remote debugging when the Borland Enterprise Server AppServer Edition
5.2.1 is already running,
1 Start the Borland Management Console.
2 Click the Servers button.
3 Expand the Enterprise Servers node and locate the partition you want to debug.
4 Right-click and select Configure.
5 Choose the JPDA tab.
6 Check the Enable JPDA Remote Debugging option.
7 Set the transport address field to 3999.
8 Uncheck the Suspend Partition Until Debugger Attaches option.
9 Click Apply Changes.
42 Developing Applications for J2EE Servers
Page 49
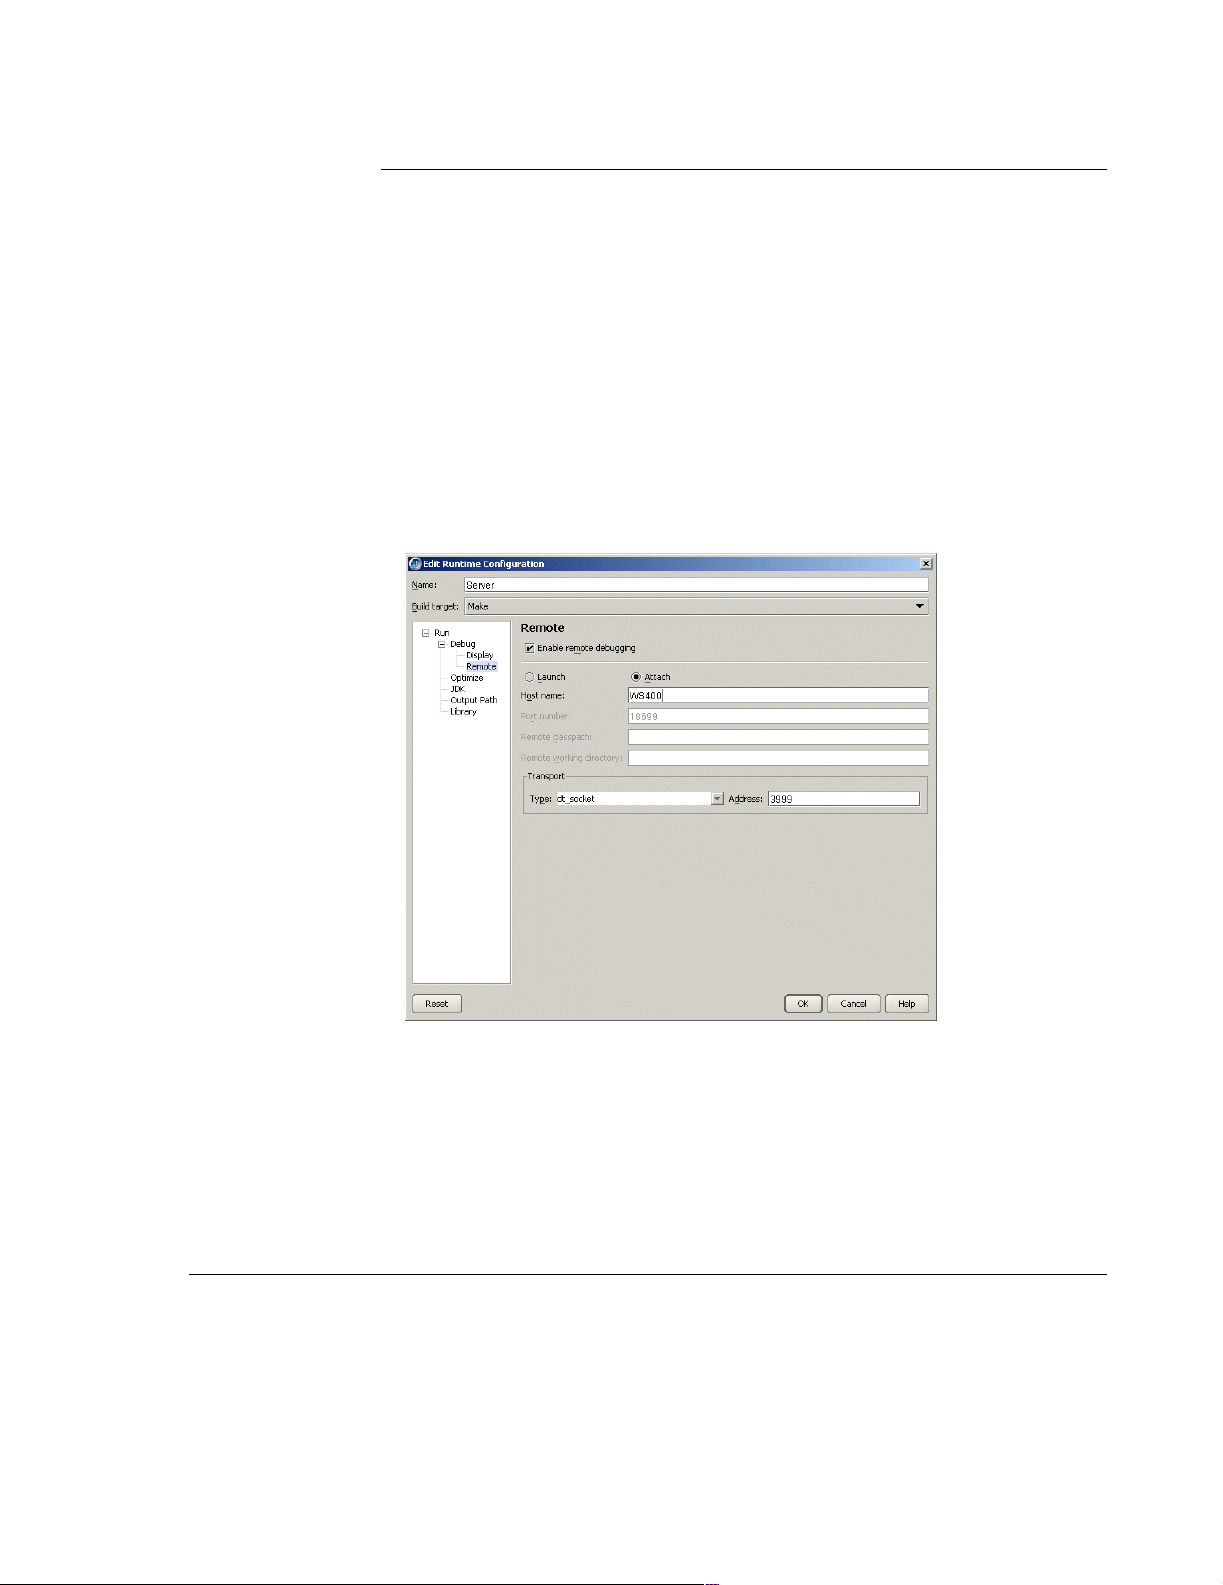
Web module workarounds
Remote debugging in JBuilder
Once either edition of the Borland Enterprise Server AppServer and the partition have
been started, follow these steps from within JBuilder:
1 In the project from which you want to launch the remote debug session, choose
Run|Configurations. If you have not yet created a Server type run configuration,
click New. In the New Runtime Configuration dialog box, set the Type to Server. If
you have already created a Server run configuration, select it and choose Edit.
2 Select the Debug|Remote node.
3 Check the Enable Remote Debugging option.
4 Select the Attach option.
5 Enter the name of the machine on which the server is running in the Host Name
field.
6 Make sure the Transport Type is set to dt_socket and the Address is set to 3999.
The dialog box will look similar to this:
7 Click OK to close the dialog box.
8 Set a breakpoint in the process you want to debug.
9 Deploy that process to the running partition.
10 Click the down arrow next to the Debug Project button on the toolbar and select the
Server configuration you just created or edited. The debugger launches, attaches to
the partition running remotely, and stops at the breakpoint.
Web module workarounds
The default application server install includes ROOT.war, which contains the default
context. If you deploy an EAR that contains a default context, you must delete
(or rename its extension) so that it does not load and cause a conflict. If deploying
WARs (with the container classloader policy), the resulting WAR is automatically
copied to the partition as
<context-root>!ROOT!</context-root> element in the web-borland.xml file that
is the
designates the context as root, not the file name.
ROOT.war
ROOT.war, in which case there is no conflict. Please note that it
Chapter 5: Using JBuilder with Borland servers 43
Page 50

Displaying the Borland Management Console in JBuilder
If you are working on a named context but have the root context in an already deployed
archive, the internal web browser in JBuilder will attempt to load once that archive is
loaded by the container, because the root context can potentially match any URL.
You’ll then probably get a “Document not found” error. To prevent this, remove
ROOT.war if you’re not using it or overwriting it.
Displaying the Borland Management Console in JBuilder
You can display the Borland Management Console in JBuilder. Choose View|Panes|
BES Console.
International issues
The Borland Enterprise Server AppServer Editions 6.0 and 5.2.1 do support Japanese
characters in the JNDI name.
Borland servers and JDataStore 7.0
The Borland Enterprise Servers 5.2.1 and 6.0 do not support JDataStore 7.0.1,
although JBuilder does. When you are running applications that access JDataStore
databases, be sure you are using the JDataStore 6.x or older file format and
JDataStore libraries that ship with the server. Databases created using JDataStore 7.0
cannot be used with Borland Enterprise Server 5.2.1 and 6.0.
44 Developing Applications for J2EE Servers
Page 51

Chapter
6
Chapter6Using JBuilder’s CORBA tools
This chapter explains the CORBA (Common Object Request Broker Architecture) tools
available in JBuilder, including the VisiBroker ORB and IDL compilers.
The Common Object Request Broker Architecture (CORBA) allows distributed
applications to interoperate (application to application communication), regardless of
what language they are written in or where these applications reside.
The CORBA specification was adopted by the Object Management Group to address
the complexity and high cost of developing distributed object applications. CORBA
uses an object-oriented approach for creating software components that can be reused
and shared between applications. Each object encapsulates the details of its inner
workings and presents a well defined interface, which reduces application complexity.
The cost of developing applications is reduced, because once an object is
implemented and tested, it can be used over and over again.
The Object Request Broker (ORB) connects a client application with the objects it
wants to use. The client program does not need to know whether the object
implementation it is in communication with resides on the same computer or is located
on a remote computer somewhere on the network. The client program only needs to
know the object’s name and understand how to use the object’s interface. The ORB
takes care of the details of locating the object, routing the request, and returning the
result.
Note The ORB itself is not a separate process. It is a collection of libraries and network
resources that integrates within end-user applications, and allows your client
applications to locate and use objects.
JBuilder supports the VisiBroker ORB and the OrbixWeb ORB. JBuilder also provides
tools to configure other third-party ORBs.
How JBuilder and the VisiBroker ORB work together
The VisiBroker ORB provides a complete CORBA ORB runtime and supporting
development environment for building, deploying, and managing distributed Java
applications that are open, flexible, and inter-operable. The VisiBroker ORB is part of
the Borland Enterprise Server. Objects built with the VisiBroker ORB are easily
accessed by Web-based applications that communicate using OMG’s Internet InterORB Protocol (IIOP) standard for communication between distributed objects through
Chapter 6: Using JBuilder’s CORBA tools 45
Page 52

How JBuilder and the VisiBroker ORB work together
the Internet or through local intranets. The VisiBroker ORB has a native
implementation of IIOP to ensure high-performance and inter-operability.
The VisiBroker ORB incorporates the following compilers for working in a Java
environment:
■
java2iiop
The
java2iiop compiler allows you to stay in an all-Java environment. The java2iiop
compiler takes your Java interfaces and generates IIOP-compliant stubs and
skeletons. Part of the advantage of using the
use of extensible structs, you can pass Java serialized objects by value.
■
java2idl
The
java2idl compiler turns your Java code into IDL, allowing you to generate client
stubs in the programming language of your choice. In addition, because this
compiler maps your Java interfaces to IDL, you can re-implement Java objects in
another programming language that supports the same IDL.
When you develop distributed applications with JBuilder and the VisiBroker ORB, you
must first identify the objects required by the application. You will then usually follow
these steps:
1 Write a specification for each object using the IDL wizard to generate the Interface
Definition Language (IDL) file. IDL is the language an implementer uses to specify
the operations an object will provide and how they should be invoked.
2 Use the IDL compiler to generate the client stub code and server Portable Object
Adapter (POA) servant code.
3 Write the client program code.
4 Write the server object code.
5 Compile the client and server code.
6 Start the server.
7 Run the client program.
For in-depth information on using the VisiBroker ORB to create distributed applications,
see the VisiBroker documentation in the
installation.
For more information about Common Object Request Broker Architecture (CORBA),
some useful links are:
■
http://www.borland.com/books — Books on Borland products and related
technologies
■
“A White Paper: Java, RMI, and CORBA” at http://www.omg.org/news/whitepapers/
wpjava.htm
■
CORBA/IIOP Specification in Introduction to OMG’s Specifications at
http://www.omg.org/gettingstarted/specintro.htm
■
CORBA Basics at http://www.omg.org/gettingstarted/corbafaq.htm
java2iiop compiler is that, through the
doc directory of your Borland Enterprise Server
RMI
Another way to invoke methods on remote Java objects is to use Remote Method
Invocation (RMI). The Borland Enterprise Server provides capabilities equivalent to
RMI, but, in addition, allows you to create Java objects that communicate with all other
objects that are CORBA compliant even if they are not written in Java. For an example
of a Java interface that describes an RMI remote interface, see the sample file
Account.java in the examples/vbe/rmi-iiop/Bank directory of your Borland Enterprise
Server installation.
46 Developing Applications for J2EE Servers
Page 53
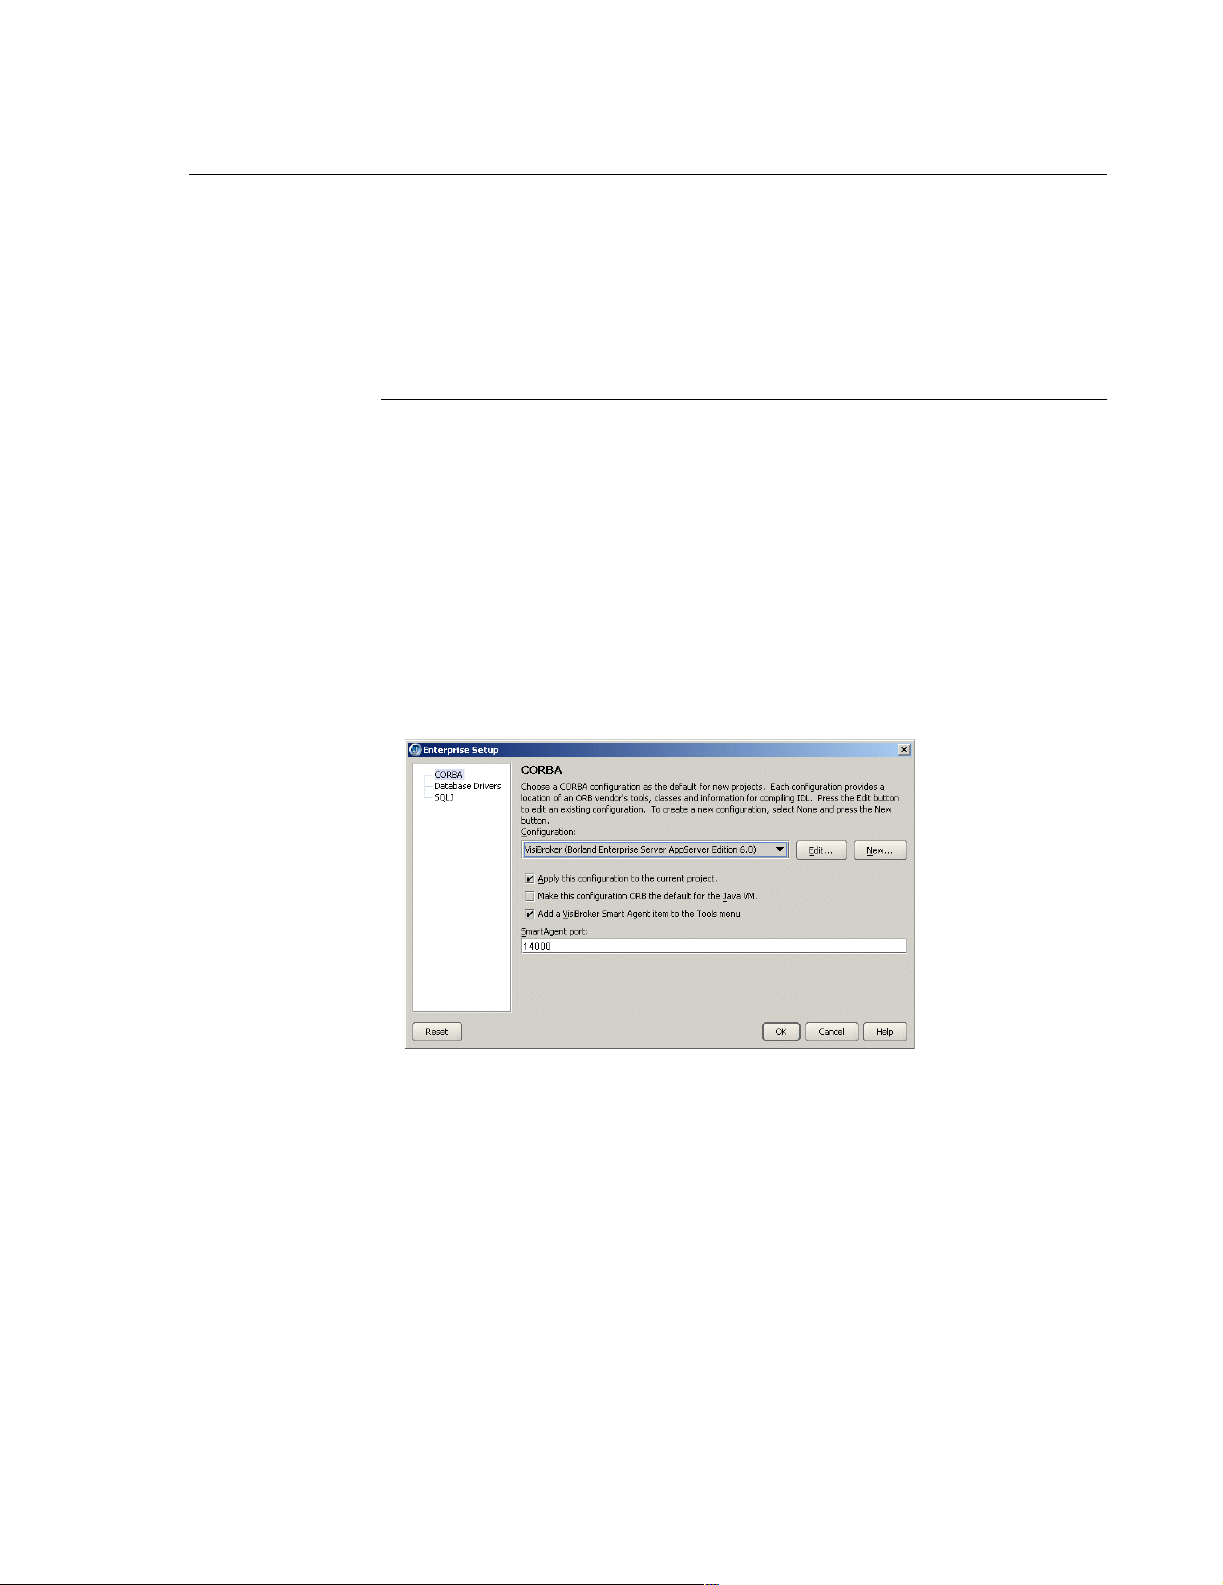
Setting up JBuilder for CORBA applications
Setting up JBuilder for CORBA applications
This section explains how to set up JBuilder with the VisiBroker ORB or OrbixWeb so
that you can create, run, and deploy CORBA applications. You can also configure
other, third-party ORBs. More information on the VisiBroker ORB is available in the
directory of your Borland Enterprise Server installation. Consult the OrbixWeb
documentation for information on particular features of that ORB.
Configuring VisiBroker when the Borland Enterprise Server
is installed
Follow the steps in this section to set up JBuilder for use with VisiBroker when the
Borland Enterprise Server AppServer Edition 6.0 is already installed, configured and
the target server for your project. Note that the server creates its own VisiBroker
configuration. For information on configuring Borland Enterprise Server, see Chapter 5,
“Using JBuilder with Borland servers.”
To configure VisiBroker when the Borland Enterprise Server is installed,
1 Choose Enterprise|Enterprise Setup to display the Enterprise Setup dialog box.
Select the CORBA page. The parameters in this dialog box allow JBuilder to see the
ORB.
2 Select the VisiBroker (Borland Enterprise Server AppServer Edition 6.0) option from
the Configuration drop-down list.
The Enterprise Setup dialog box will look similar to this:
doc
3 Click OK to close the dialog box. You do not have to complete other configuration
steps; JBuilder is now configured for use with VisiBroker.
4 Click OK to save the configuration.
Important In the runtime configuration for your CORBA application, you need to add the following
parameters to the VM Parameters field in the Edit Runtime Configuration dialog box
(Run|Configurations|Edit):
-Dvbroker.agent.port=14000
-Dborland.enterprise.licenseDir=C:/<BES_install>/var
-Dborland.enterprise.licenseDefaultDir=C:/<BES_install>/license
You’ve now completed setting up your system to use the VisiBroker version installed
with the Borland Enterprise Server AppServer Edition 6.0. Before running your
application, choose Tools|VisiBroker Smart Agent to start the Smart Agent. (Note that it
is also automatically started when you start the Management Agent with the Enterprise|
Borland Enterprise Server Management Agent command.)
Chapter 6: Using JBuilder’s CORBA tools 47
Page 54
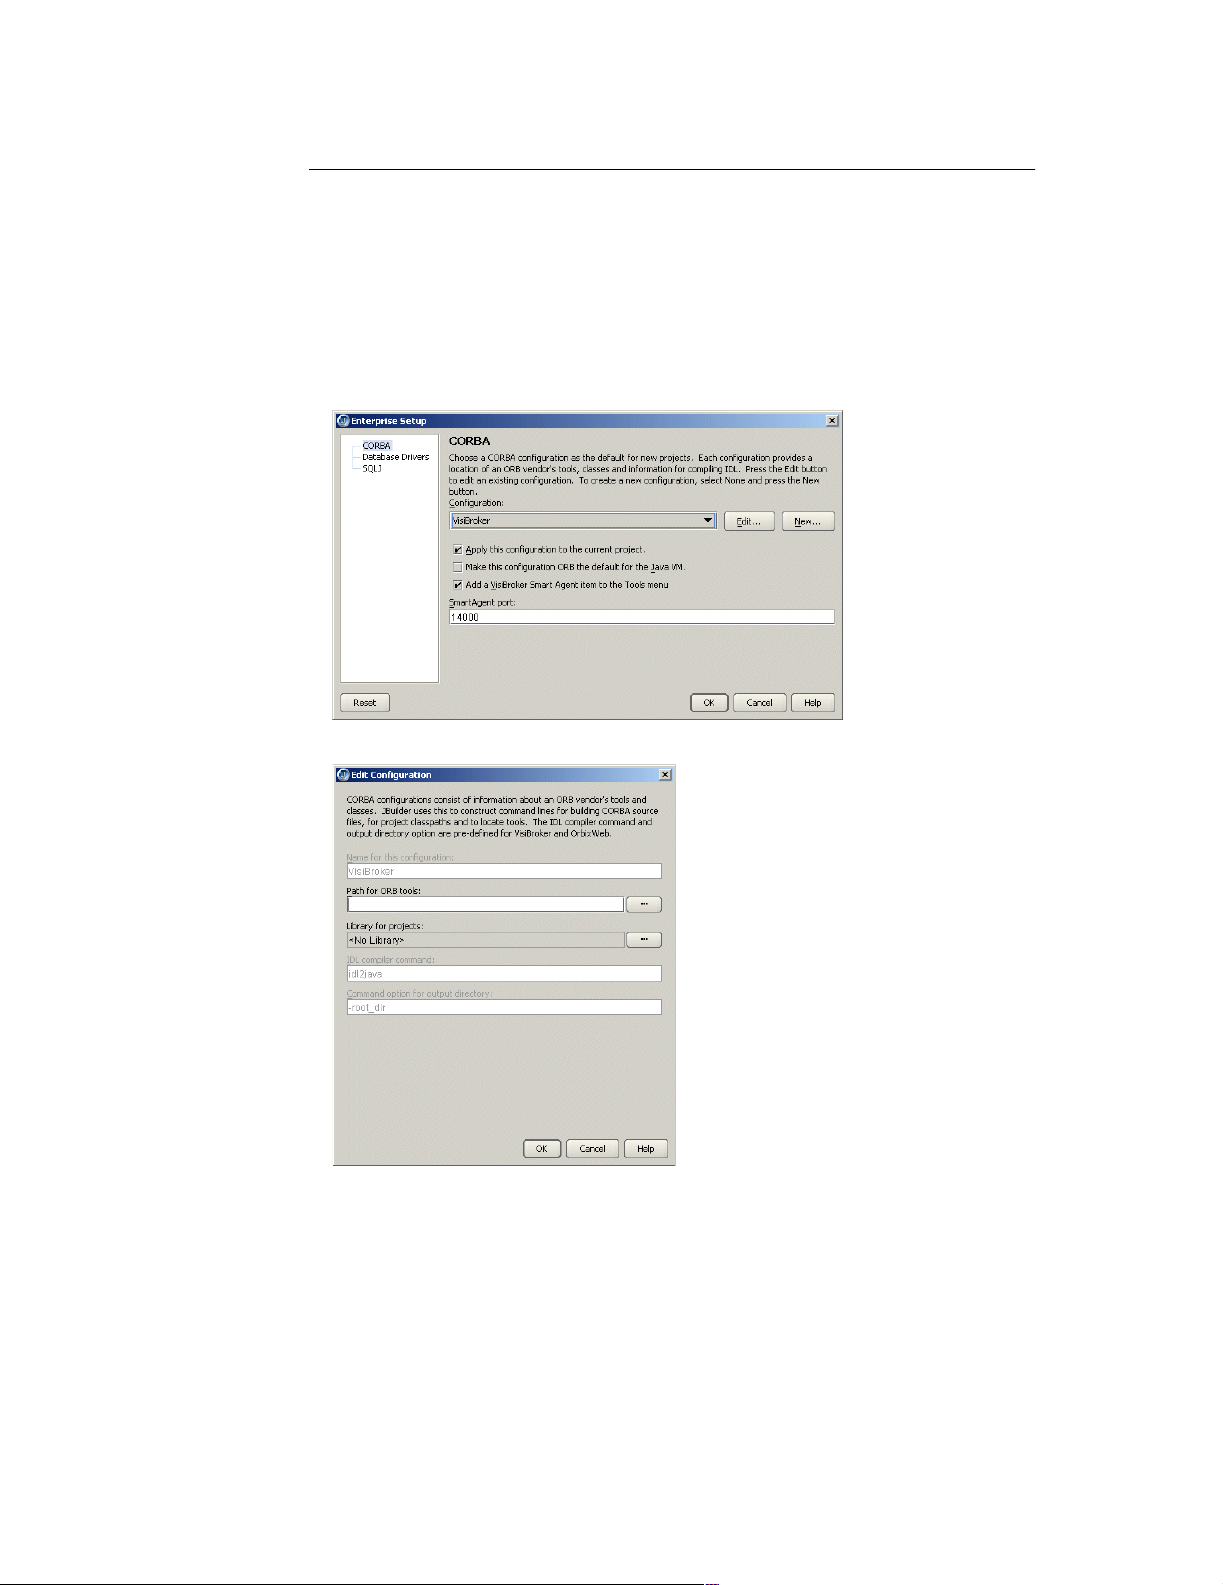
Setting up JBuilder for CORBA applications
Configuring VisiBroker stand-alone
Follow the steps in this section to set up JBuilder for use with VisiBroker stand-alone;
that is, without targeting your project for the Borland Enterprise Server AppServer
Edition 6.0.
To configure VisiBroker stand-alone,
1 Choose Enterprise|Enterprise Setup to display the Enterprise Setup dialog box.
Select the CORBA page. The parameters in this dialog box allow JBuilder to see the
ORB.
2 Select the VisiBroker option from the Configuration drop-down list.
3 Click the Edit button to display the Edit Configuration dialog box.
4 The Path For ORB Tools field allows JBuilder to access ORB tools. Click the ellipsis
(…) button next to the Path For ORB Tools field to browse to the directory
containing the ORB tools. Point to the directory that contains the
This is the
bin directory of your Borland Enterprise Server installation.
osagent.exe file.
48 Developing Applications for J2EE Servers
Page 55
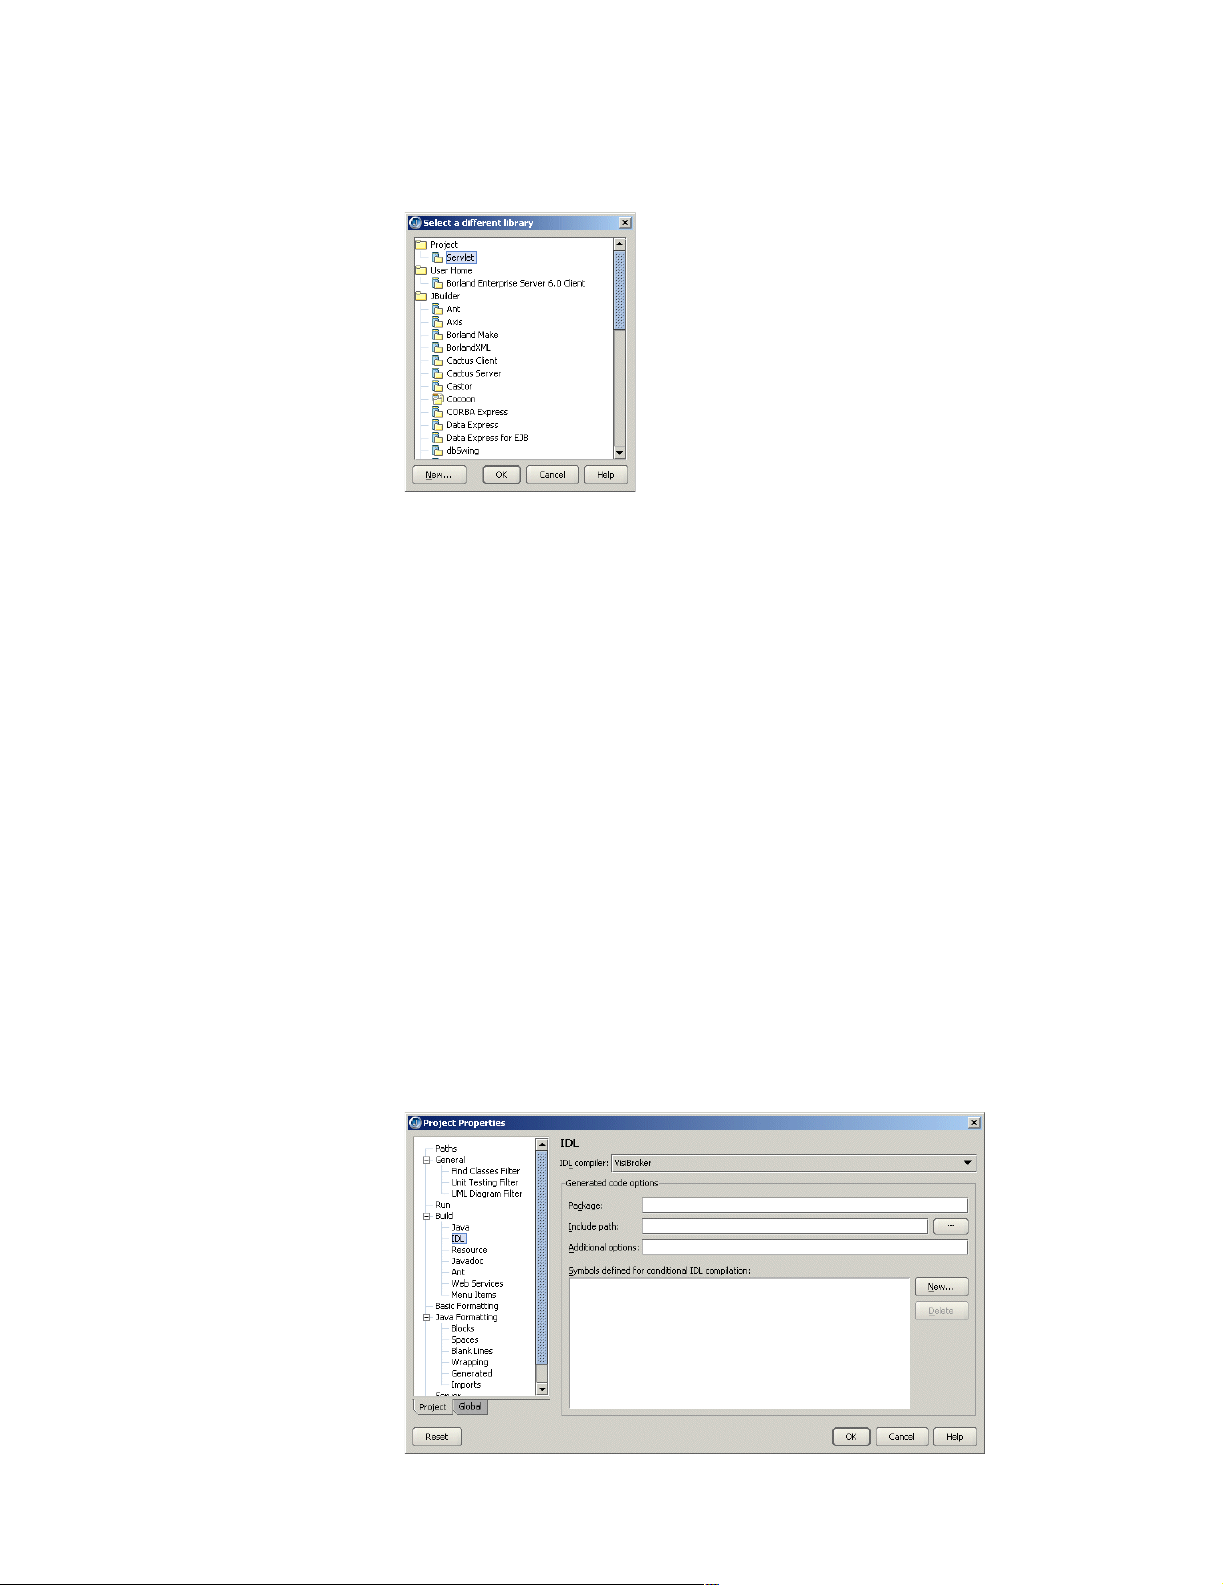
Setting up JBuilder for CORBA applications
5 The Library For Projects field defines the library location of the ORB tools. To define
the library location, click the ellipsis (…) button next to the Library For Projects field.
This displays the Select A Different Library dialog box.
The library is necessary for compiling the generated stubs and skeletons and for
executing an application. For VisiBroker, browse to the Borland Enterprise Server
6.0 Client library, then click OK two times.
6 In the Enterprise Setup dialog box, leave the Apply This Configuration To The
Current Project option selected in order to set this ORB configuration for the current
project, as well as the default project.
7 Set the Make This Configuration’s ORB The Default For The Java VM option to use
the selected ORB as the default ORB for the Java VM.
8 Select the Add A VisiBroker Smart Agent Item To The Tools Menu option to enable
the Smart Agent to run as a JBuilder service during development. This option will be
disabled if the Smart Agent is not necessary.
9 Select a port on which to run the Smart Agent. The default port of 14000 will work on
most systems.
Note When running the project, you can use a JBuilder macro in the VM Parameters field
on the Edit Runtime Configuration dialog box for the application. This macro allows
the project to be used on another machine where the Smart Agent is configured for
a different port. The syntax is:
-Dvbroker.agent.port=($SmartAgentPort)
10 Click OK to save the configuration.
You also need to pass options to the IDL compiler.
To pass options to the IDL compiler when configuring VisiBroker stand-alone,
1 Choose Project|Project Properties|Build|IDL to display the IDL Build page, which will
look similar to this:
Chapter 6: Using JBuilder’s CORBA tools 49
Page 56
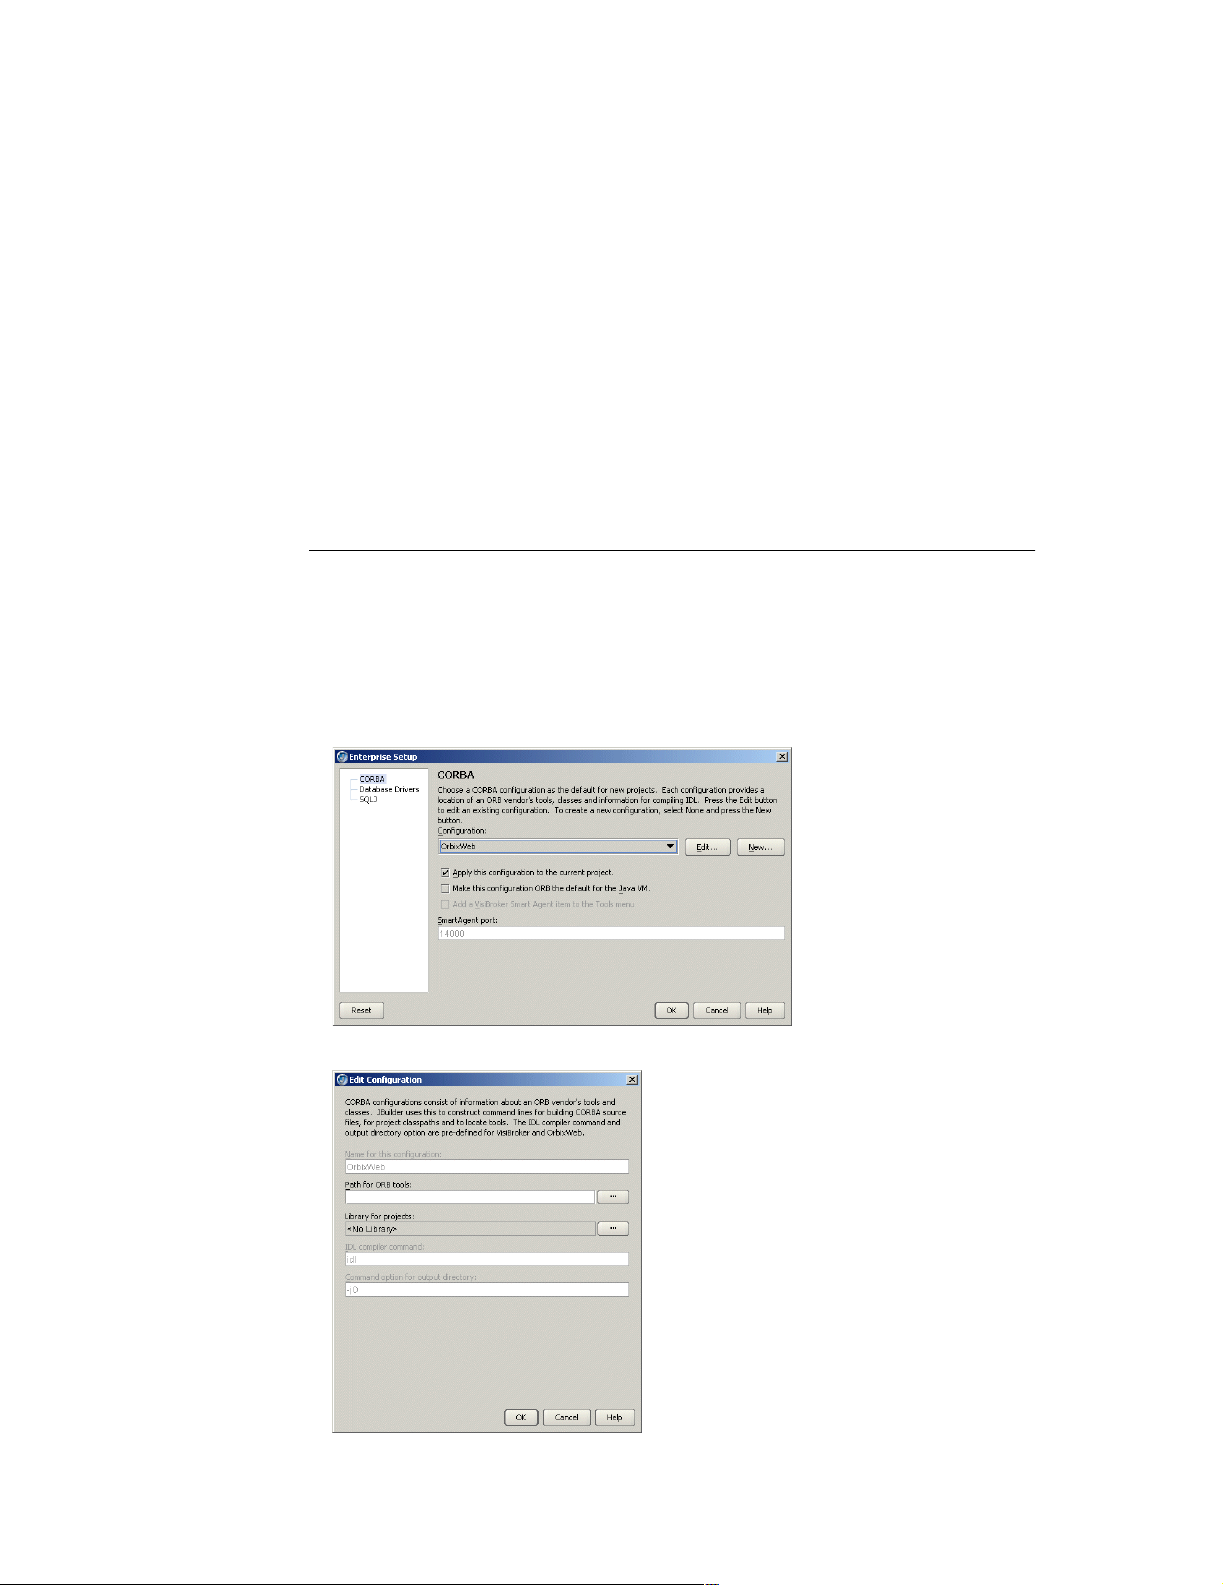
Setting up JBuilder for CORBA applications
2 Make sure VisiBroker is selected as your IDL compiler.
3 Enter the following options into the Additional Options field:
-VBJprop borland enterprise.licenseDir=<visibroker license directory>
-VBJjavavm<jdk1.4.1 java or javaw path>
The license directory is <BES_install>\var\servers\SERVER_NAME\adm. The <server
directory>
using Enterprise|Configure Servers. You can find the server name on the Custom
page of the Configure Servers dialog box.
4 Click OK to close the Project Properties dialog box.
You must still perform one step: starting the VisiBroker Smart Agent. This handles the
initial bootstrap issues such as how the client locates the naming service and so on. To
start the Smart Agent, choose Tools|VisiBroker Smart Agent.
You’ve now completed setting up your system to use the JBuilder CORBA features.
is same as the server name assigned when you configured the server
Configuring the OrbixWeb ORB
Follow the steps in this section to set up JBuilder for use with the OrbixWeb ORB.
To configure the OrbixWeb ORB,
1 Choose Enterprise|Enterprise Setup to display the Enterprise Setup dialog box.
Select the CORBA page. The parameters in this dialog box allow JBuilder to see the
ORB.
2 Select the OrbixWeb option from the Configuration drop-down list.
3 Click the Edit button to display the Edit Configuration dialog box.
50 Developing Applications for J2EE Servers
Page 57
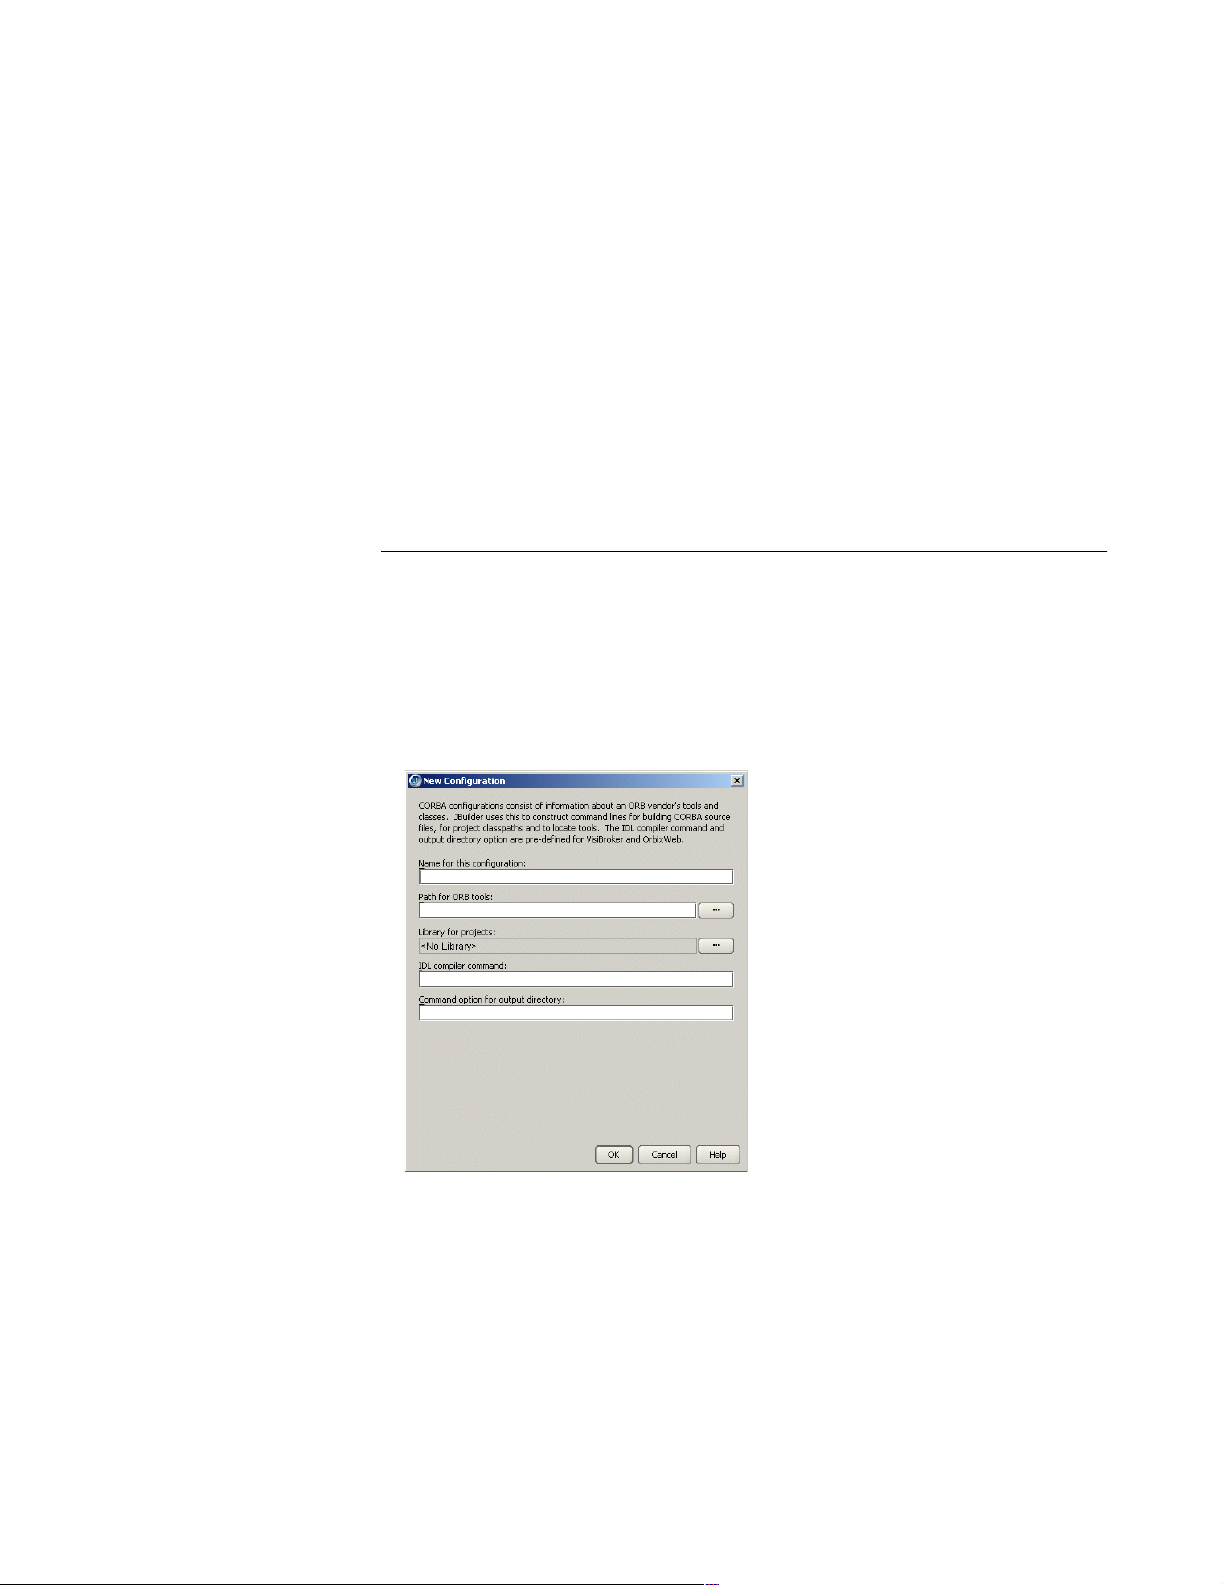
Setting up JBuilder for CORBA applications
4 The Path For ORB Tools field allows JBuilder to access ORB tools. Click the ellipsis
(…) button next to the Path For ORB Tools field to browse to the directory
containing the ORB tools.
5 The Library For Projects field defines the library location of the ORB tools. To define
the library location, click the ellipsis (…) button next to the Library For Projects field.
This displays the Select A Different Library dialog box. The library is necessary for
compiling the generated stubs and skeletons and for executing an application.
Choose the library and click OK two times.
6 In the Enterprise Setup dialog box, leave the Apply This Configuration To The
Current Project option selected if this ORB configuration should be applied to the
current project as well as the default project.
7 Set the Make This Configuration’s ORB The Default For The Java VM option to use
the selected ORB as the default ORB for the Java VM.
8 Click OK to save the configuration.
Adding a new configuration
Follow the steps in this section to create a new configuration for a third-party ORB.
To configure a third-party ORB,
1 Choose Enterprise|Enterprise Setup to display the Enterprise Setup dialog box.
Select the CORBA page. The parameters in this dialog box allow JBuilder to see the
ORB.
2 Select the None option from the Configuration drop-down list, then click the New
button. The New Configuration dialog box is displayed.
3 Enter a name for the configuration in the Name For This Configuration field.
4 Enter the path for the ORB tools in the Path For ORB Tools field. Click the ellipsis
(…) button to browse to the directory containing the ORB tools.
5 Click the ellipsis (…) button next to the Library For Projects field to display the
Select A Different Library dialog box. You use this dialog box to browse to the library
Chapter 6: Using JBuilder’s CORBA tools 51
Page 58
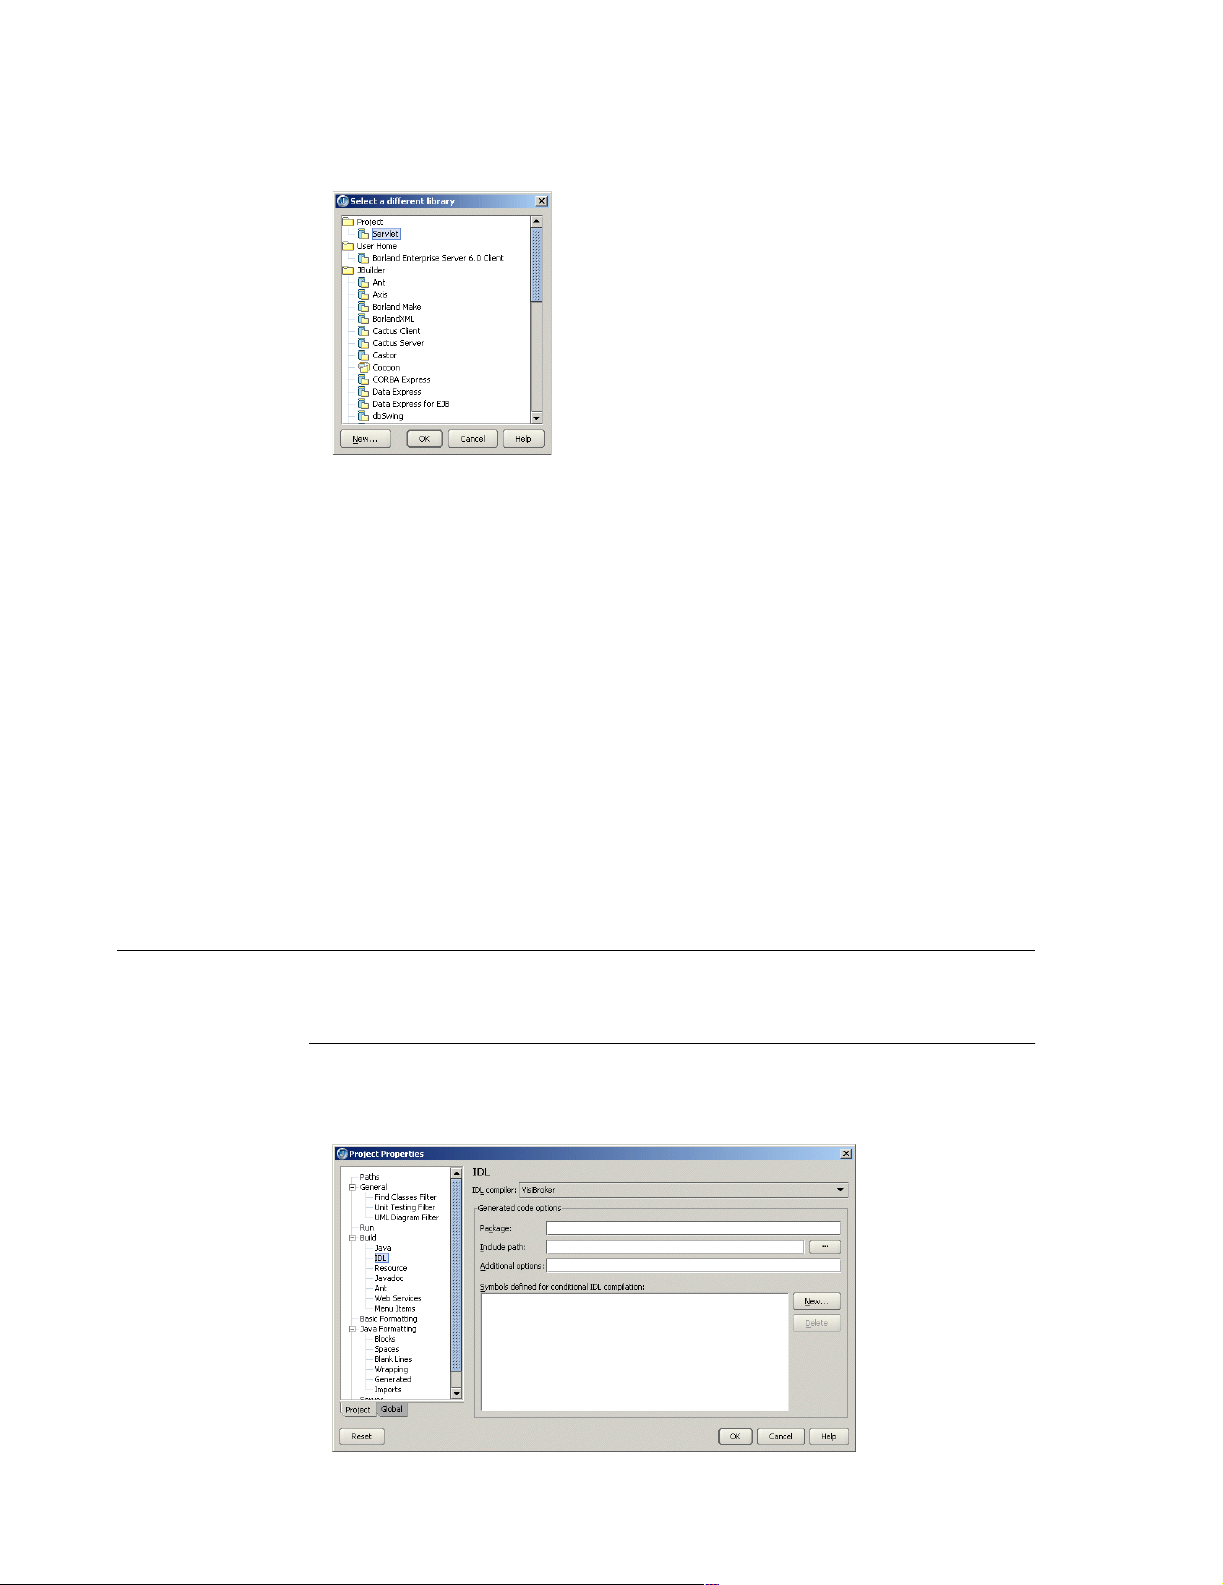
Setting and viewing ORB build properties
location of the ORB tools. The library is necessary for compiling the generated stubs
and skeletons and for executing an application.
a To add a library that is not displayed in the Select A Different Library dialog box,
click the New button.
b In the New Library wizard, enter a name for the new library in the Name field.
c Select a location for the library: the JBuilder directory, the project directory, or
your home directory.
d Click Add to browse to the library (JAR) file.
e Click OK until you return to the New Configuration dialog.
6 Enter the command for the IDL compiler in the IDL Compiler Command field.
7 Enter the IDL compiler command option that specifies the output directory in the
Command Option For Output Directory field.
8 Click OK to close the New Configuration dialog box.
9 In the Enterprise Setup dialog box, leave the Apply This Configuration To The
Current Project option selected in order to set this ORB configuration for the current
project, as well as the default project.
10 Click OK to save the new configuration.
Setting and viewing ORB build properties
This section explains how to set and view build properties for the installed ORB.
Setting VisiBroker ORB properties
To set and view properties for the java2iiop and java2idl compilers in the JBuilder
development environment,
1 Choose Project|Project Properties|Build|IDL. The IDL page is displayed.
52 Developing Applications for J2EE Servers
Page 59
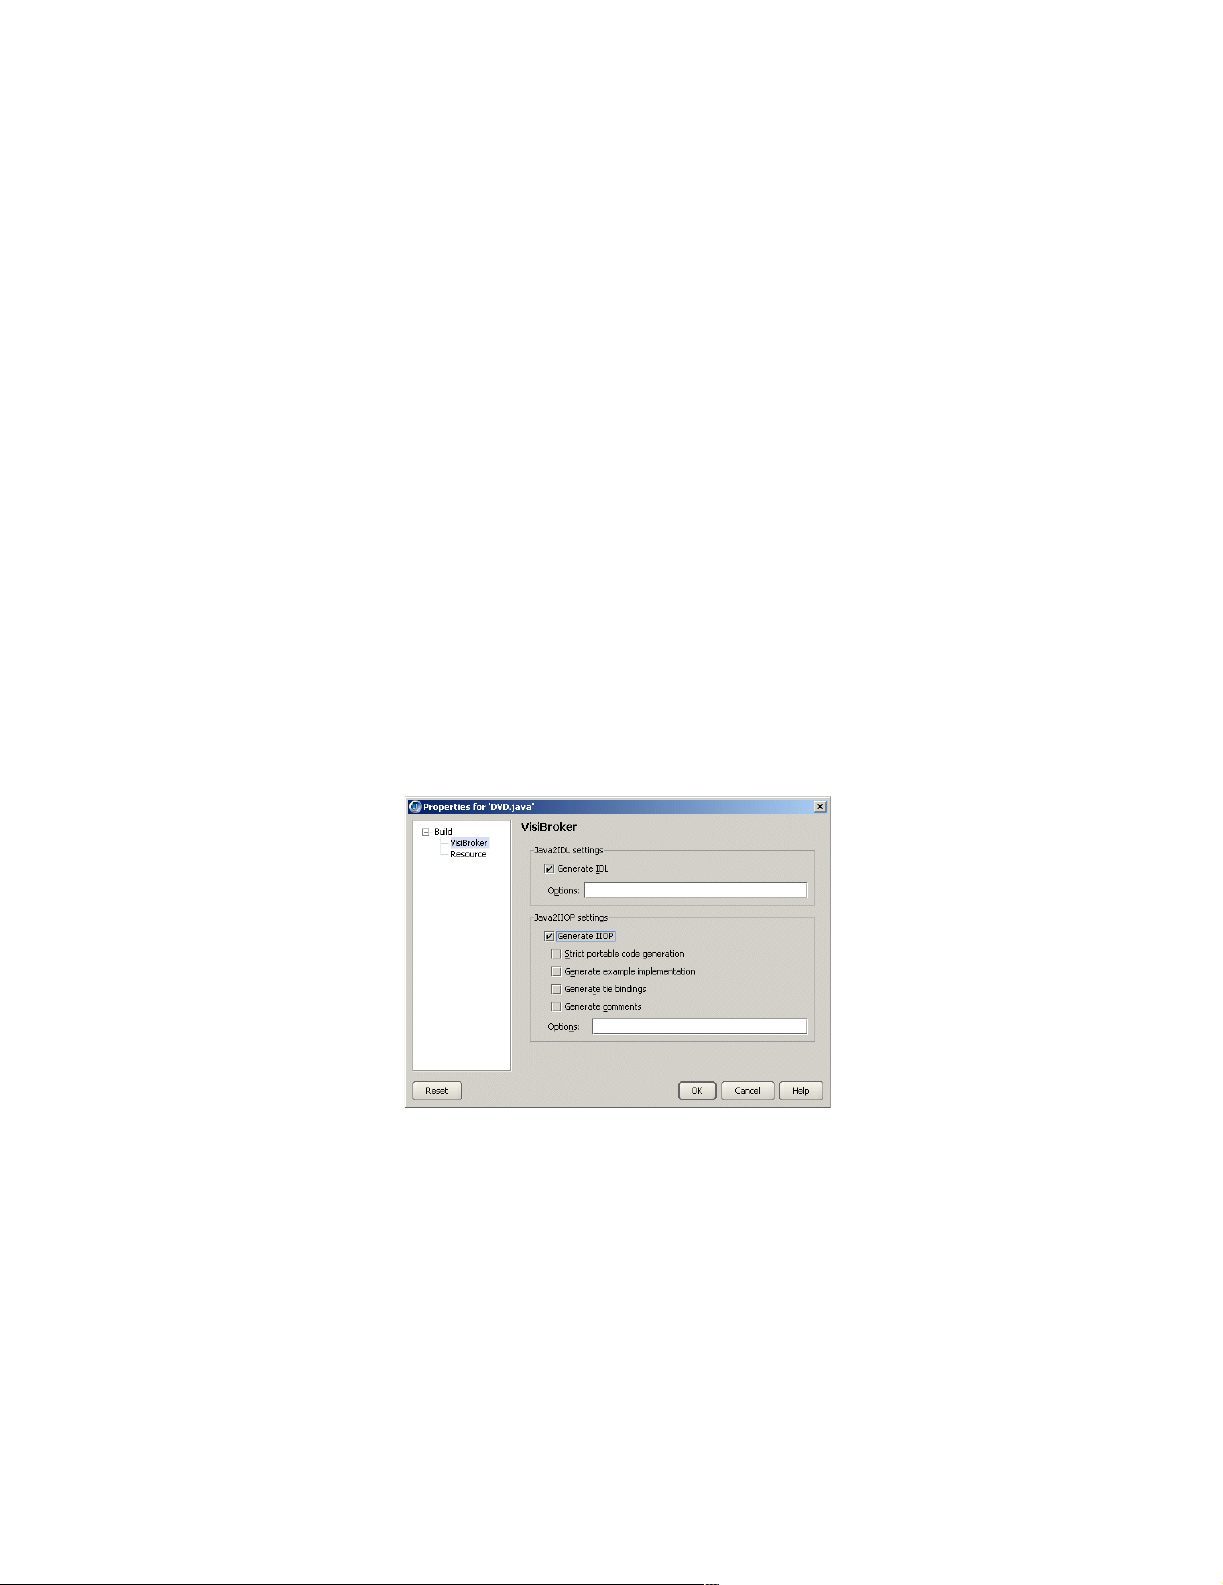
Setting and viewing ORB build properties
Make sure the IDL Compiler field is set to VisiBroker or VisiBroker (Borland
Enterprise Server AppServer Edition 6.0 and 5.2.1).
2 Set the Generated Code Options as needed:
■
In the Package field, enter the name of the package to generate code in. The
package name for definitions is prepended with the specified package name. If a
directory with the specified package name does not exist, it will be created. If the
package directory exists, its contents will be updated. Code is generated that
uses CORBA package resolution rules.
■
In the Include Path field, enter the location where other files that are referenced
from IDL files reside. Click the ellipsis (…) button beside this field to open a dialog
box that lets you browse the directory structure for the location of the files.
■
In the Additional Options field, enter any additional options for your IDL compiler,
as you would enter them when running the compiler from the command line.
■
The Symbols Defined For Conditional IDL Compilation list displays symbols that
have been defined for conditional IDL compilation. Click the New button to
display the Define New Symbol dialog box where you can define a new
conditional symbol. To remove a symbol from the list, select it then choose the
Delete button.
3 Choose the Paths node of the Project Properties dialog box. Make sure the
Required Libraries list includes the Borland Enterprise Server 6.0 Client.
4 Click OK to close the Project Properties dialog box.
5 Once you’ve created a Java interface file in your JBuilder project, right-click the file
in the project pane and choose Properties.
6 On the Build|VisiBroker node, select the Generate IDL and Generate IIOP options.
The dialog box should look like this:
■
Select the Java2IDL Generate IDL option to generate an Interface Definition
Language (IDL) file from a Java file or a class file. To support the distribution of
objects implemented in a variety of programming languages, an IDL file is used to
define the services offered by a particular distributed object.
■
Enter any Java2IDL command line options in the Options field. See the Borland
Enterprise Server VisiBroker documentation for command line options.
■
The Java2IIOP Generate IIOP Interface option generates an Internet InterORB
(Object Request Broker) Protocol (IIOP) compatible Java interface file from a
Java interface or class file. This is done by creating a new Java interface that
extends
org.omg.Corba.object. This Java interface can be used to describe
CORBA interfaces in place of using an Interface Definition Language (IDL) file to
describe the interfaces. The IIOP protocol maintains a basic set of functionality to
ensure inter-operability between client applications and server-based objects in a
Common Object Request Broker Architecture (CORBA).
Chapter 6: Using JBuilder’s CORBA tools 53
Page 60
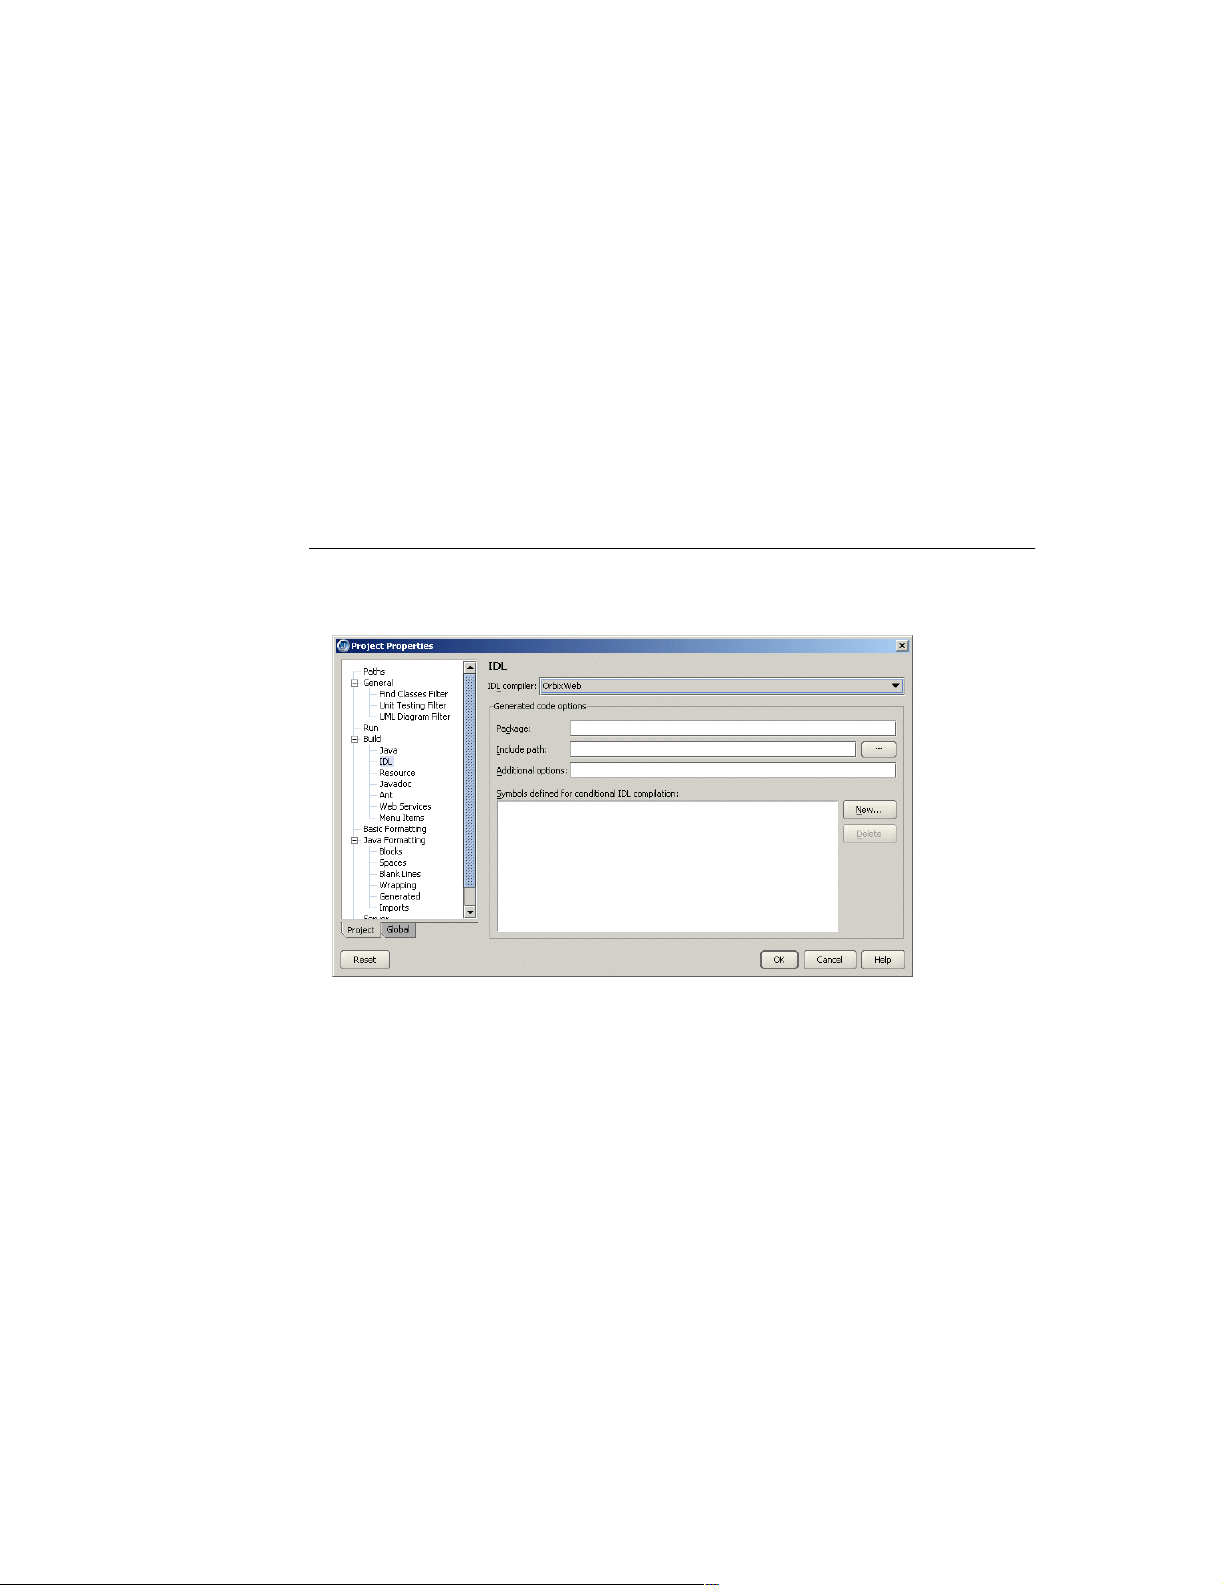
Setting and viewing ORB build properties
■
Set the Java2IIOP Strict Portable Code Generation (Java2IIOP) option to enable
generation of portable stubs, that is, stubs that contain code not specific to
VisiBroker.
■
Set the Java2IIOP Generate Example Implementation option to enable
generation of example implementation code.
■
Set the Java2IIOP Generate Tie Bindings option to enable generation of tie
classes.
■
Set the Java2IIOP Generate Comments option to enable generation of
comments in the source code.
■
Enter any Java2IIOP command line options in the Options field. See the Borland
Enterprise Server VisiBroker documentation for command line options.
7 Click OK to close the dialog box.
Setting build properties for the OrbixWeb or other third-party ORBs
To set and view properties for a configured ORB,
1 Choose Project|Project Properties|Build|IDL. The IDL page is displayed.
Make sure the IDL Compiler field matches the ORB you selected in the Enterprise
Setup dialog box.
2 Set the Generated Code Options as needed:
■
In the Package field, enter the name of the package to generate code in. The
package name for definitions is prepended with the specified package name. If a
directory with the specified package name does not exist, it will be created. If the
package directory exists, its contents will be updated. code is generated that
uses CORBA package resolution rules.
■
In the Include Path field, enter the location where other files that are referenced
from IDL files reside. Click the ellipsis (…) button beside this field to open a dialog
box that lets you browse the directory structure for the location of the files.
■
In the Additional Options field, enter any additional options for your IDL compiler,
as you would enter them when running the compiler from the command line.
■
The Symbols Defined For Conditional IDL Compilation list displays symbols that
have been defined for conditional IDL compilation. Click the New button to
display the Define New Symbol dialog box where you can define a new
conditional symbol. To remove a symbol from the list, select it then choose the
Delete button.
54 Developing Applications for J2EE Servers
Page 61
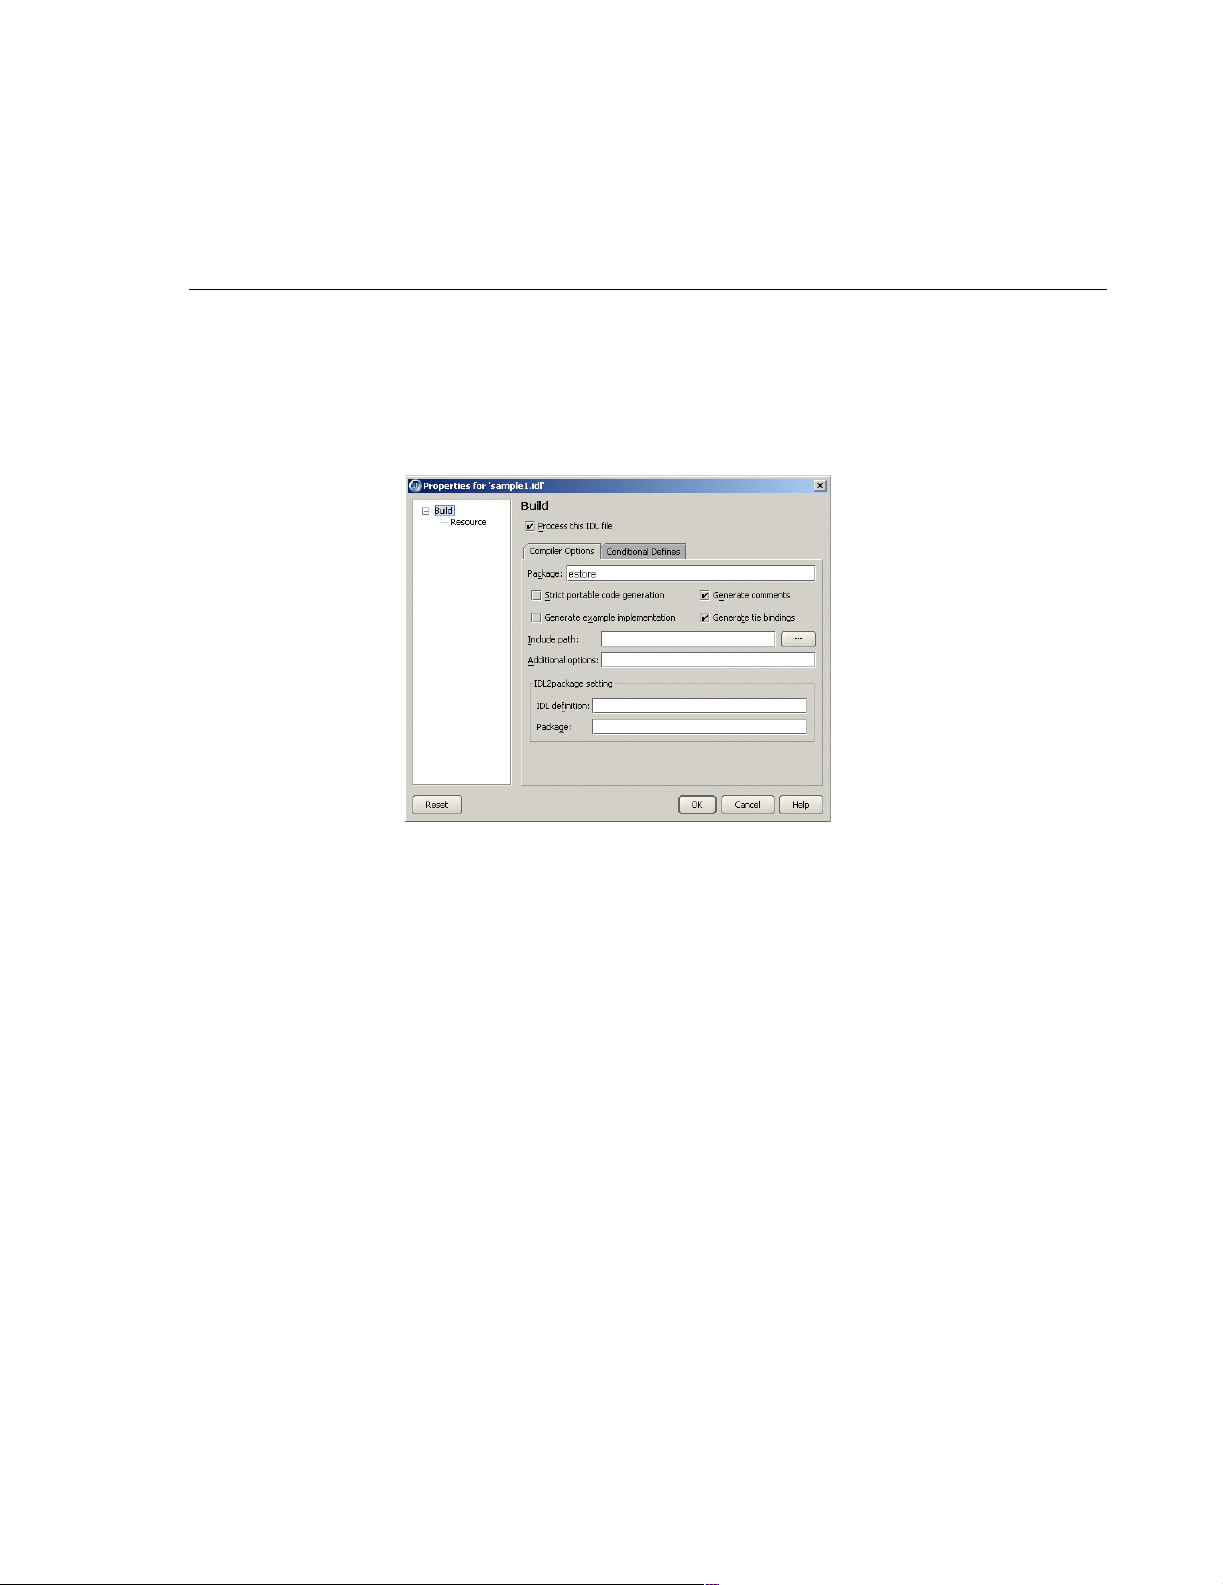
3 Choose the Paths node in the Project Properties dialog box. Make sure the
Required Libraries list includes the libraries specific to the ORB you’re working with.
4 Click OK to close the Project Properties dialog box.
Setting and viewing IDL build properties
This section explains how to set and view build properties for an IDL file. You must first
create an IDL file. You can use the Sample IDL wizard, available on the Enterprise|
CORBA page of the object gallery (File|New).
To set and view IDL build properties,
1 Right-click an IDL file in the project pane and choose Properties. The Compiler
Options page of the Build node (Properties dialog box) is displayed:
Setting and viewing IDL build properties
■
Set the Process This IDL File option to set compiler options, add the compiled
files and/or packages to the current project, and view compiler output.
■
Enter the package for generated code in the Package field. The package name
for definitions is prepended with the specified package name. If a directory with
the specified package name does not exist, it will be created. If the package
directory exists, its contents will be updated. When this option is not set,
idl2java
generates code using the CORBA package resolution rules.
■
Select the Strict Portable Code Generation option to generate code that can run
on any CORBA-compliant ORB. This means that any VisiBroker-specific code
will not be generated, including code that generates smart stubs. Selecting this
option also suppresses the generation of
toString() and bind() methods. When
this option is selected, the compiler generates skeleton code using the Dynamic
Skeleton Interface (DSI).
If not selected, the portable stubs will not be generated. VisiBroker-specific
extensions and optimizations will be present in the code that is generated.
Generated stubs will specifically be for use in VisiBroker ORB environments.
■
Select the Generate Example Implementation option to generate example
classes when the IDL file is compiled. If not selected, the generation of example
classes will be suppressed.
■
Select the Generate Comments option to generate comments in the code. If not
selected, comments will be suppressed in the generated code.
■
Select the Generate Tie Bindings option to generate _tie classes when the IDL
file is compiled. If this option is not selected, the generation of
_tie classes will be
suppressed.
Chapter 6: Using JBuilder’s CORBA tools 55
Page 62
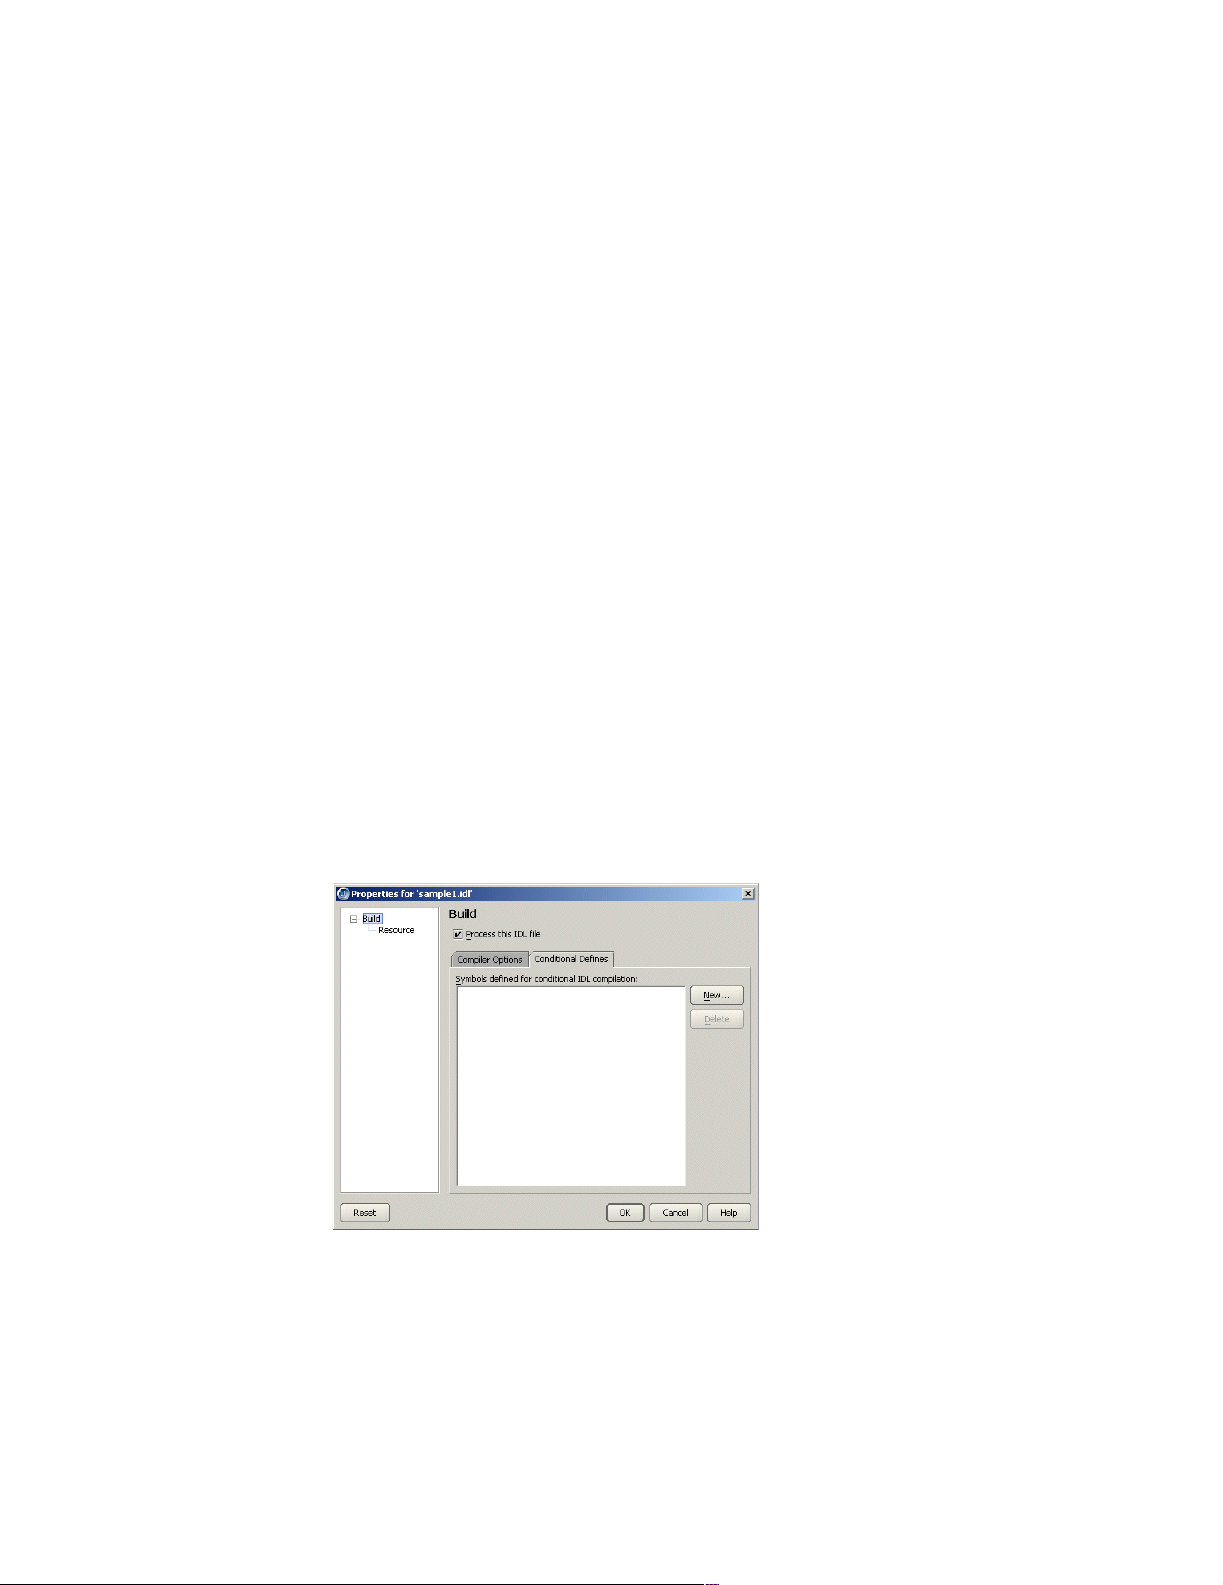
Setting and viewing IDL build properties
The tie mechanism offers an alternative when it is not convenient or possible to
have your implementation class inherit from the VisiBroker skeleton class. Object
implementation classes must inherit from the VisiBroker skeleton class. Java
does not allow multiple class inheritance and you may want your implementation
class to inherit from a different class.
Inheritance is easier to use than the tie mechanism because implementation
objects look and behave just like object references. If an implementation object
happens to be in the same process as a client using it, operation invocations
involve less overhead because no transport, indirection, or delegation of any kind
is required.
The tie mechanism provides a
org.omg.CORBA.Object. The delegator implementation class does not provide any
semantics of its own. It simply delegates every call to the real implementation
class, which can be implemented separately and can inherit from whichever class
it wishes.
Operations class defines all of the methods that must be implemented by the
The
object implementation. This class acts as the delegate object for the associated
_tie class when the tie mechanism is used.
■
Click the ellipsis (…) button next to the Include Path field to display the Select
Directory dialog box, where you can select a directory to search for the list of files
to include in the build. You must select a directory that contains an
■
Enter options not available in this dialog box in the Additional Options field.
■
The IDL2package Setting options are the equivalent of the command line
parameter
::CORBA,the generated is code is placed in the org.omg.CORBA package. When this
option is not set, the generated code uses the CORBA package resolution rules.
■
IDL Definition — The definition in scope of IDL.
■
Package — The Java package into which to place the IDL definition.
2 Click the Conditional Defines tab to set symbols defined for conditional compilation.
delegator implementation class that inherits from
.idl file.
-idl2package idl pkg. If any part of the IDL file is in the scope
■
The Symbols Defined for Conditional IDL Compilation list displays a list of
symbols defined for conditional IDL compilation.
■
Click the New button to display the Define New Symbol dialog box, where you to
define a symbol name for conditional IDL compilation, for example
def
.
■
Choose a symbol and click the Delete button to delete the selected symbol from
the list of symbols defined for conditional compilation.
56 Developing Applications for J2EE Servers
#define name
Page 63
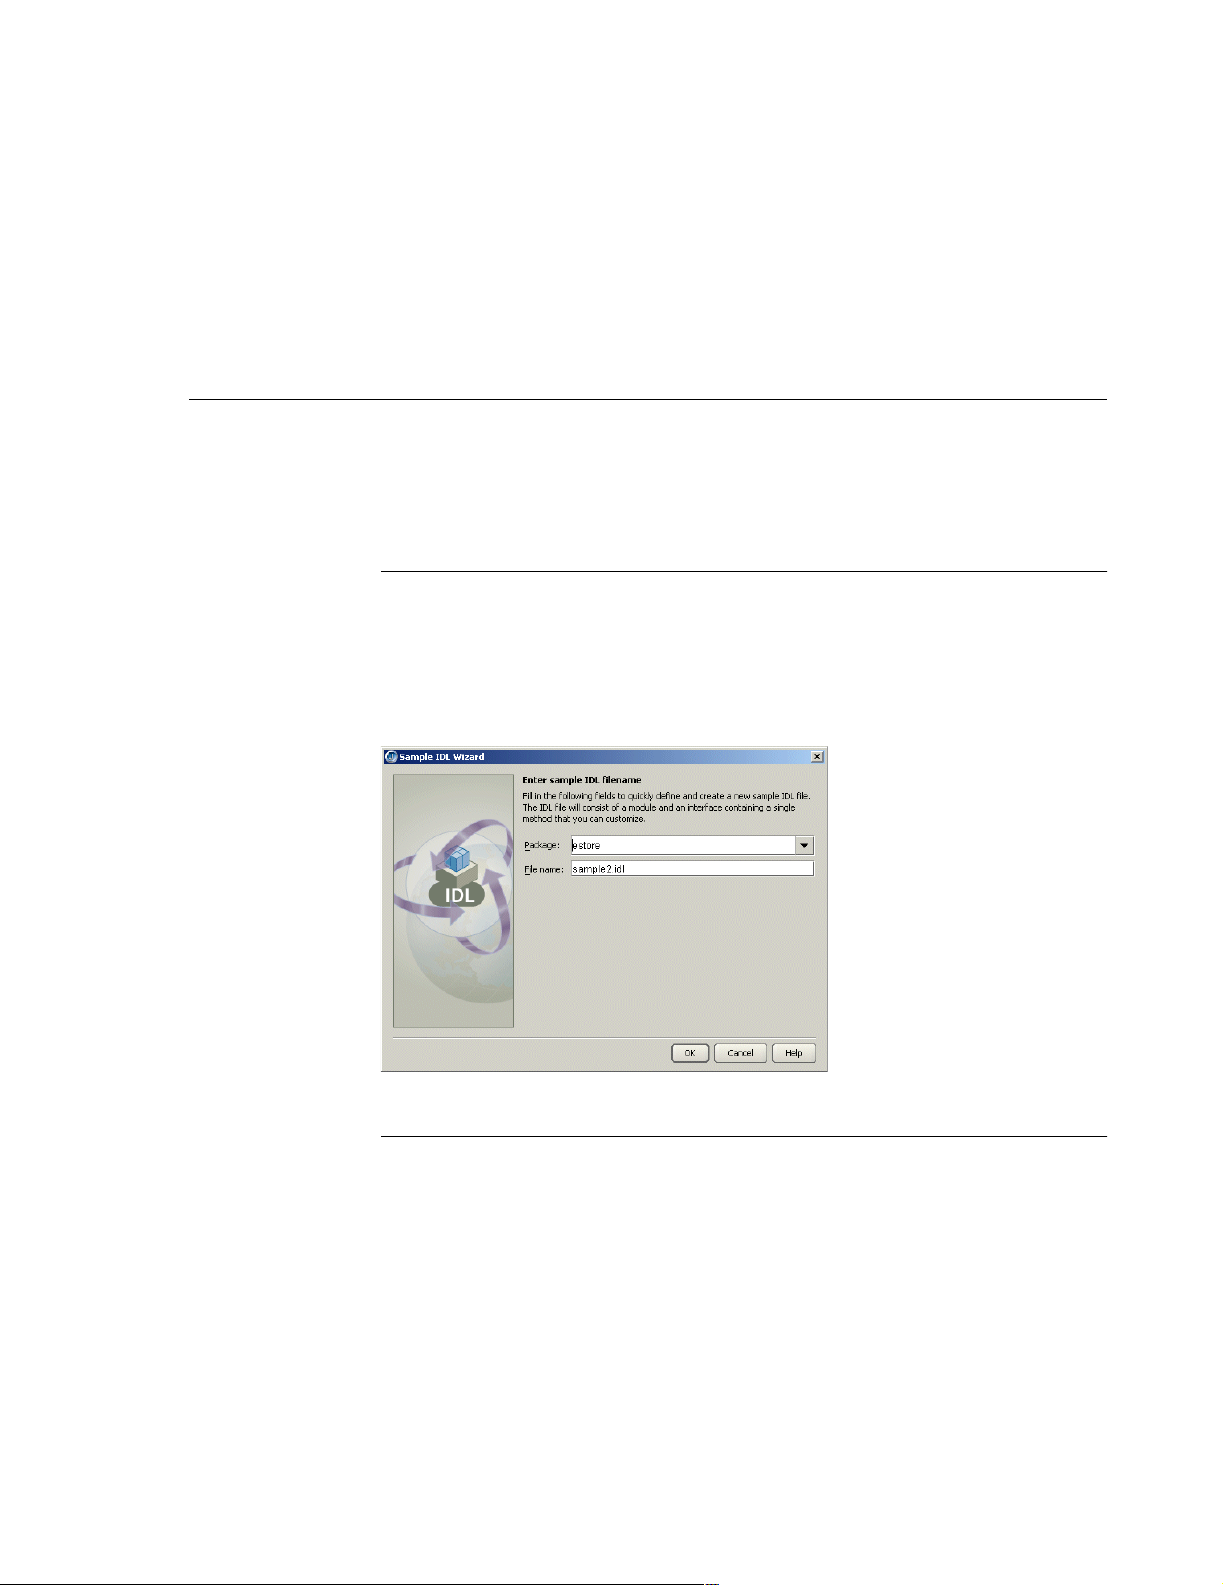
3 Click the OK button to set the options to be used by the VisiBroker idl2java
compiler, when the IDL file is compiled. Set the correct options so that when
compiled, Java interface definitions and Java client and server stubs and skeletons
are generated in a subdirectory of the project with the same name as the project.
When the Process This IDL File option is not checked, selecting OK saves the
selected options, but does not call the
compiled. This means that the client stubs and server skeletons are not generated
when the IDL file is compiled.
Using the CORBA wizards
This section describes the JBuilder wizards that are available for CORBA
development. Wizards provide quick and easy development of IDL files and CORBA
client and server interfaces. These wizards are available only if your project is
configured for use with CORBA (Enterprise|Enterprise Setup|CORBA).
Sample IDL wizard
The Sample IDL wizard creates a simple IDL file that may be used to experiment with
the various CORBA tools that take an IDL file as input. The generated IDL file will
consist of a module and an interface containing a single method that can be
customized. This wizard is available on the Enterprise|CORBA page of the object
gallery (File|New).
The Sample IDL wizard looks like this:
Using the CORBA wizards
idl2java compiler when the IDL file is
CORBA Client Interface wizard
The CORBA Client Interface wizard produces a layer over idl2java-generated code
allowing a client application to easily invoke the interface methods of a running CORBA
server. You will be able to invoke methods in the interface that will be executed on a
CORBA server when you are connected to an Object Request Broker (ORB). This
wizard is only available if you have an IDL file in your project. It is available on the
Enterprise|CORBA page of the object gallery (File|New).
Chapter 6: Using JBuilder’s CORBA tools 57
Page 64
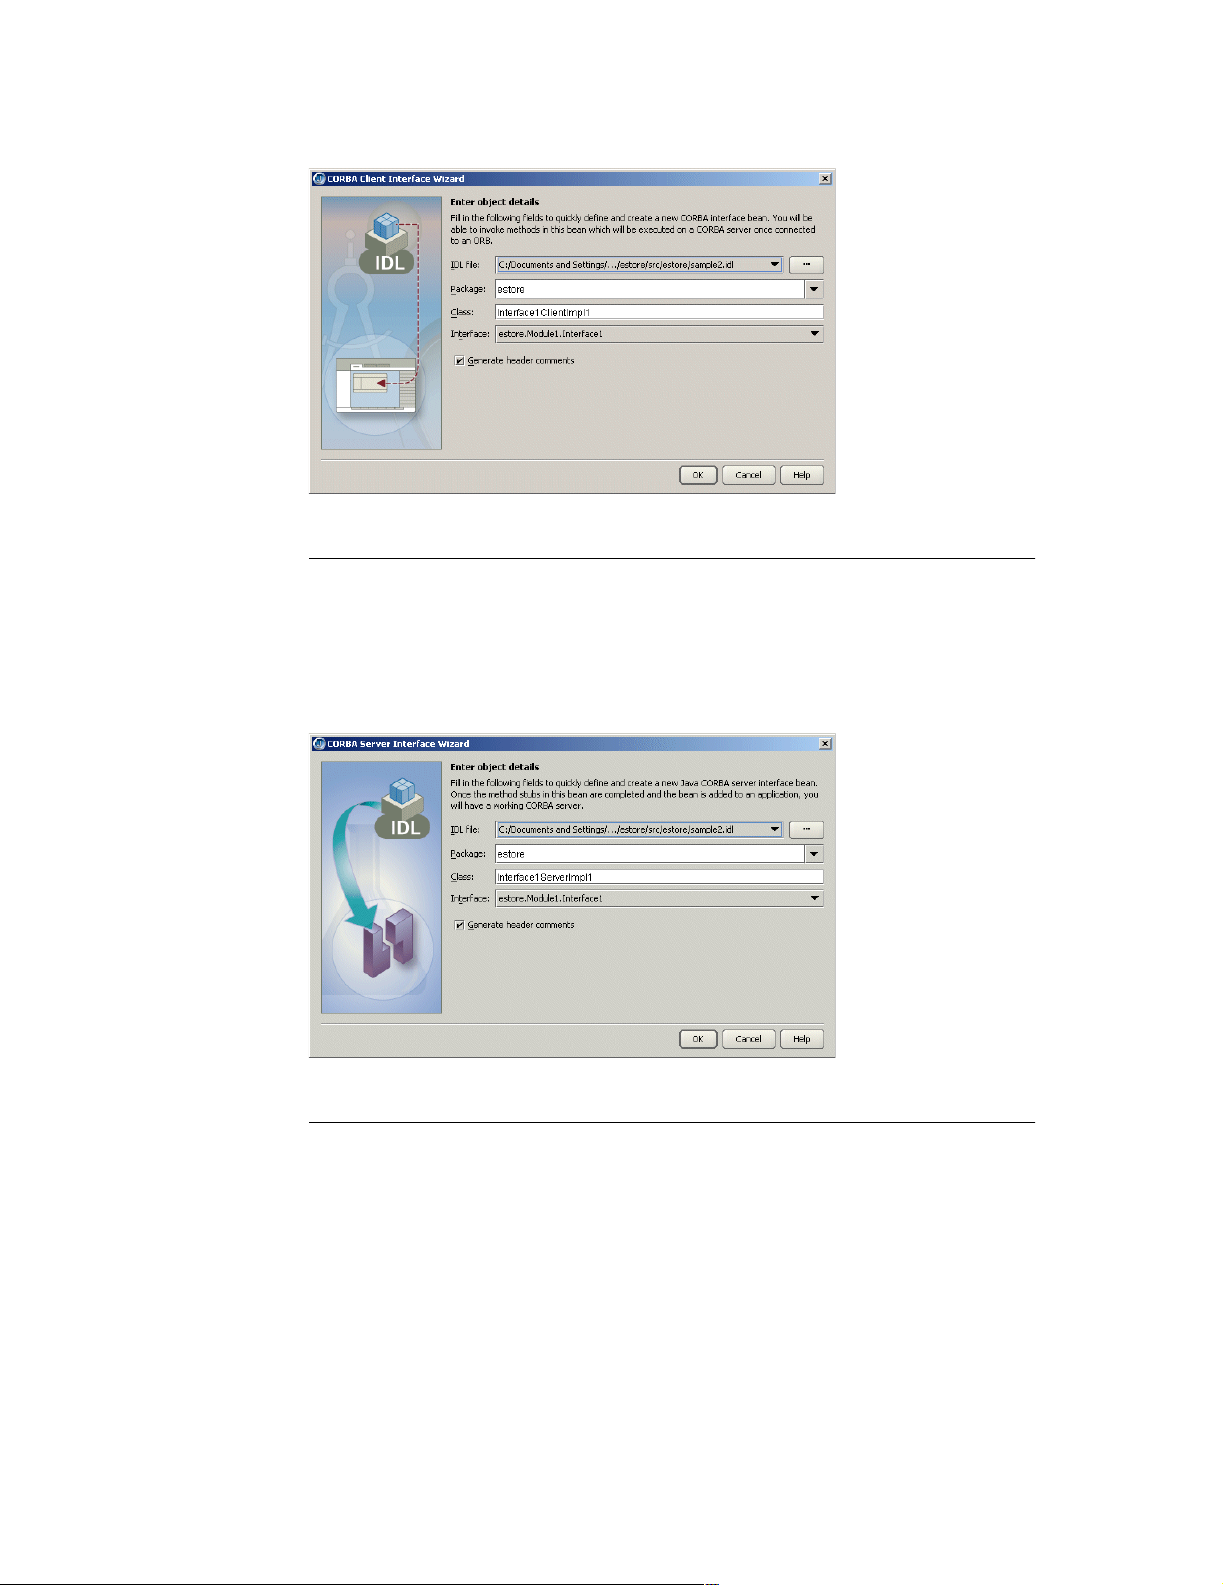
Using the CORBA wizards
The CORBA Client Interface wizard looks like this:
CORBA Server Interface wizard
The CORBA Server Interface wizard lets you define and create a new Java CORBA
server interface bean. Complete the method stubs and add the bean to an application
to create a working CORBA server for that interface. This wizard is only available if you
have an IDL file in your project. It is available on the Enterprise|CORBA page of the
object gallery (File|New).
The CORBA Server Interface wizard looks like this:
HTML CORBA Client wizard
The HTML CORBA Client wizard produces a JSP or HTML client application that
provides input to a CORBA server. This wizard is only available if you have an IDL file
in your project and a web server is selected. It is available on the Enterprise|CORBA
page of the object gallery (File|New).
58 Developing Applications for J2EE Servers
Page 65
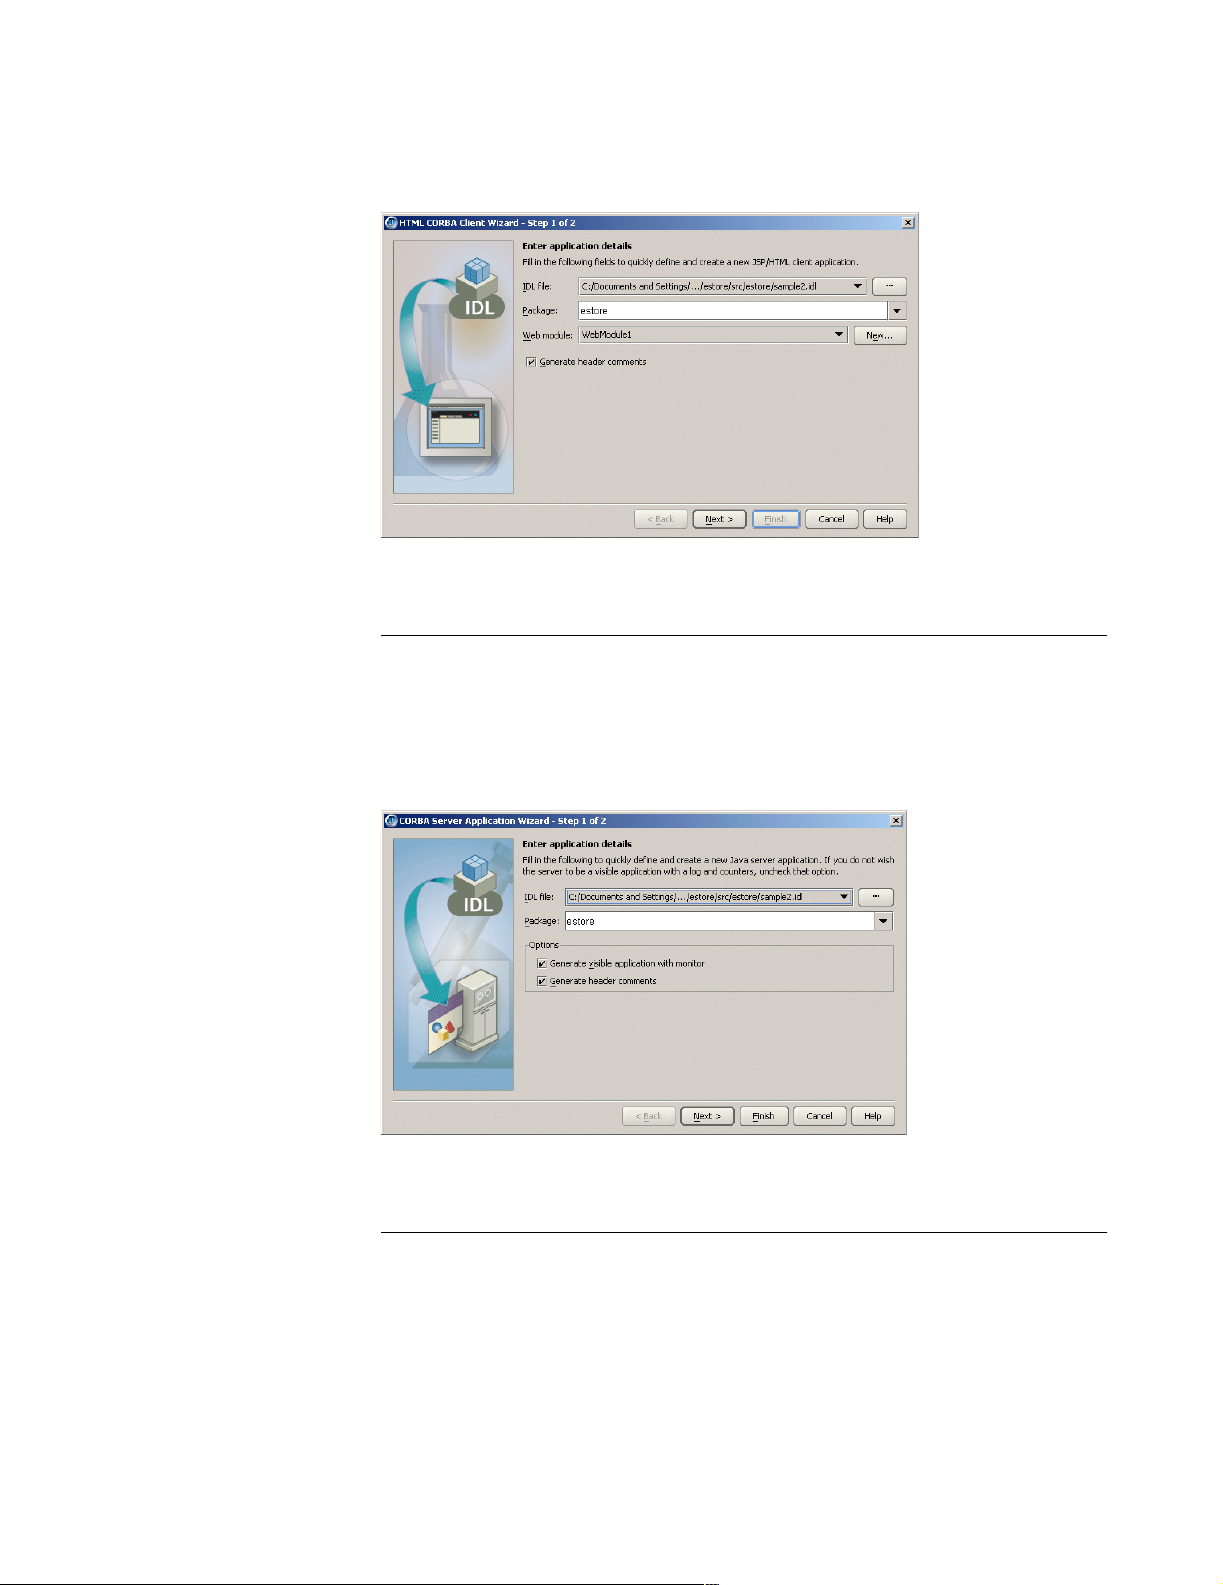
Using the CORBA wizards
The Enter Application Details page of the HTML CORBA Client wizard looks like this.
This page of the wizard allows you to select an existing web module or create a new
one.
The final page of the wizard is where you create a runtime configuration.
CORBA Server Application wizard
The CORBA Server Application wizard produces an application that provides a
complete default implementation for a CORBA server. This wizard is only available if
you have an IDL file in your project. It is available on the Enterprise|CORBA page of
the object gallery (File|New).
The Enter Application Details page of the CORBA Server Application wizard looks like
this:
The final page of the wizard is where you create a runtime configuration.
Use CORBA Interface wizard
This Use CORBA Interface wizard creates a client CORBA application. It will create a
reference to a CORBA client interface that was built earlier, or it will create one. This
wizard is only available if you have an IDL file in your project and a
the editor. It is available from the Edit menu.
Chapter 6: Using JBuilder’s CORBA tools 59
.java file open in
Page 66
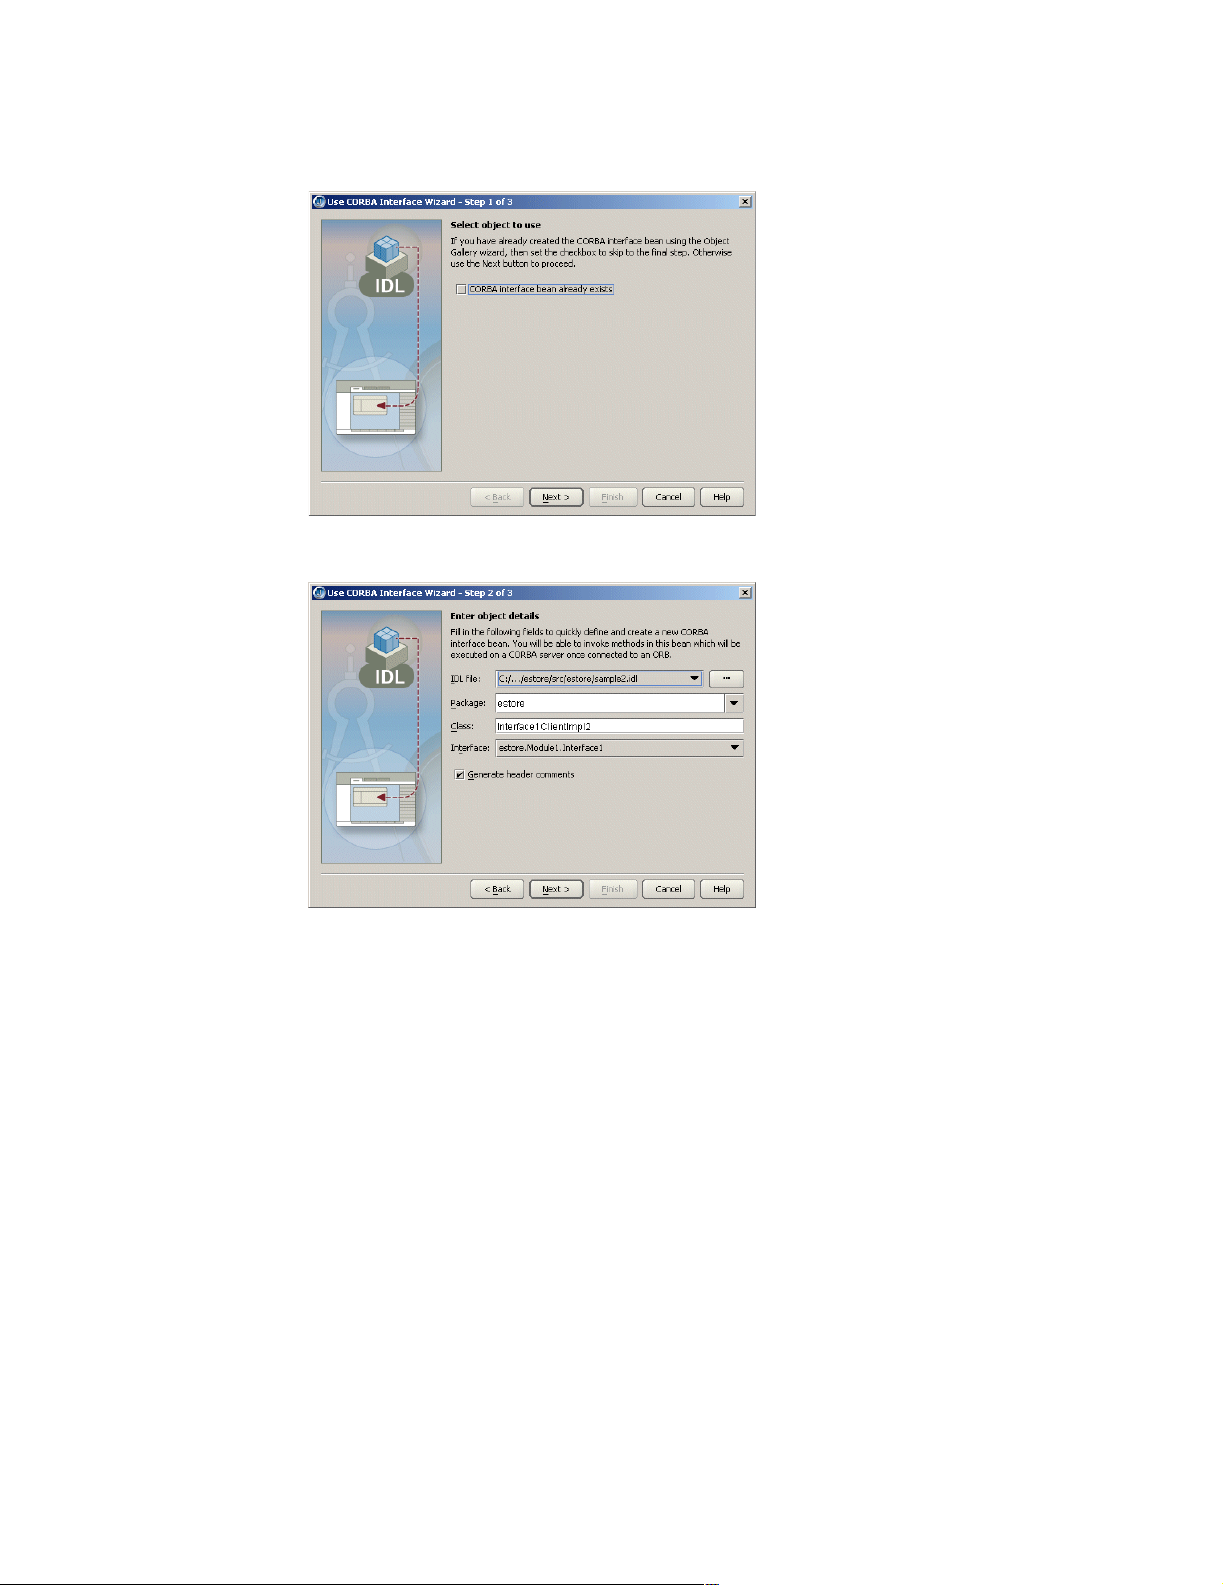
Using the CORBA wizards
The first page of the Use CORBA Interface wizard, where you choose whether to use
an existing client interface, looks like this:
The second page of the wizard, where you define and create the new CORBA interface
bean looks like this:
The final page of the wizard is where you create a runtime configuration.
60 Developing Applications for J2EE Servers
Page 67

Chapter
7
Chapter7Using JBuilder with BEA WebLogic
servers
This chapter explains how to use to set up and use BEA WebLogic servers with
JBuilder. JBuilder supports WebLogic Server 7.x and WebLogic Platform 8.1.
Service packs
JBuilder requires WebLogic 7.0 with Service Pack 5 for proper operation. For
WebLogic 8.1, you will need Service Pack 3.
Configuring JBuilder for WebLogic servers
To configure JBuilder settings to target WebLogic servers,
1 Choose Enterprise|Configure Servers.
The Configure Servers dialog box appears.
2 Select the WebLogic server you want to configure by clicking it in the pane on the
left.
The right side of the dialog box lists the default settings for the selected server. The
General page has fields that all WebLogic servers have in common, while the
Custom page has fields that are specific to the selected server. In some cases,
modifying a Custom setting will update a setting on the General page.
3 Check the Enable Server check box at the top of the dialog box.
Checking this option enables the fields for the selected application server. You won’t
be able to edit any fields until it is checked. The Enable Server check box also
determines whether this server will appear in the list of servers when you select a
server for your project using the Servers page of the Project|Project Properties
dialog box.
JBuilder provides default settings for the selected server. If JBuilder’s default
settings are not appropriate, edit any of the settings as needed. Some servers
require you to enter settings in addition to the defaults. Clicking the OK button in this
Chapter 7: Using JBuilder with BEA WebLogic servers 61
Page 68

Configuring JBuilder for WebLogic servers
dialog box when not all required values are set or selecting another server while the
current one is enabled displays a message dialog box that informs you about the
missing settings.
4 If you want to change any of the settings, click the ellipsis (…) button next to the field
and make your changes. Assuming you installed WebLogic Platform 8.1 into a
BEA_HOME directory with the name
bea/weblogic81/server
[drive]:/bea/weblogic71/server.
For WebLogic Platform 8.1 and WebLogic Server 7.x, the working directory is set
when you set the domain directory using the Custom page. For now, you can leave
it unchanged.
5 Click the Custom tab to view fields unique to the server. Change or fill in these
fields:
■
BEA Home Directory: The BEA Home Directory is the directory into which you
installed the WebLogic Server and that contains the file
assigns a default value for the BEA Home Directory that varies depending on the
version of the WebLogic Server installed.
■
JDK Installation Directory: For WebLogic Platform 8.1, the directory is <bea
home>/jdk141_04
■
Domain Directory: Use the ellipsis (…) button to select a directory as your domain
directory. The domain directory is the directory where your WebLogic domain is
stored. For WebLogic 7.x, this is
user_projects/domains/mydomain. Setting the domain directory sets the working
directory value on the General page. For more information about WebLogic
domains, see your WebLogic documentation.
■
User Name: The user name you use to authenticate yourself to the server. This
field appears for WebLogic Platform 8.1 and WebLogic Server 7.x.
■
Password: The password you use to authenticate yourself to the server.
■
Server Name: The name you specify is used as a VM parameter for starting the
server. JBuilder suggests a default name of “myserver.”
■
Listen Address: Specifies a listen address for this server. The host value must be
either the DNS name or the IP address of the server. If you do not specify a
Listen Address, the server uses either the machine’s DNS name or its IP
address.
■
Listen Port: Specifies the non-SSL listen port for this server. If you do not specify
a Listen Port, the server uses 7001 as the default.
■
Version: Select the combination of WebLogic version and service pack you are
configuring from the drop-down list.
The Custom page of the Enterprise|Configure Servers dialog box for WebLogic
7.x and 8.x now includes Listen Address and Listen Port fields. If you edit fields
such as User Name, Server Name, Listen Address, and so on, the corresponding
entries in the Server Deployment dialog box and the node deployment dialog box
are updated accordingly.
■
Add An Admin Console Item To The Enterprise Menu: Checking this check box
adds the WebLogic Admin Console item to JBuilder’s Enterprise menu. You must
also fill in the next field, Web Browser Path, to have the menu item added.
bea, your home directory should be [drive]:/
. For WebLogic Server 7.x, you home directory should be
registry.xml. JBuilder
. For WebLogic 7.x, the directory is <bea home>/jdk131_010.
user_projects/mydomain. For WebLogic 8.1, it is
62 Developing Applications for J2EE Servers
Page 69
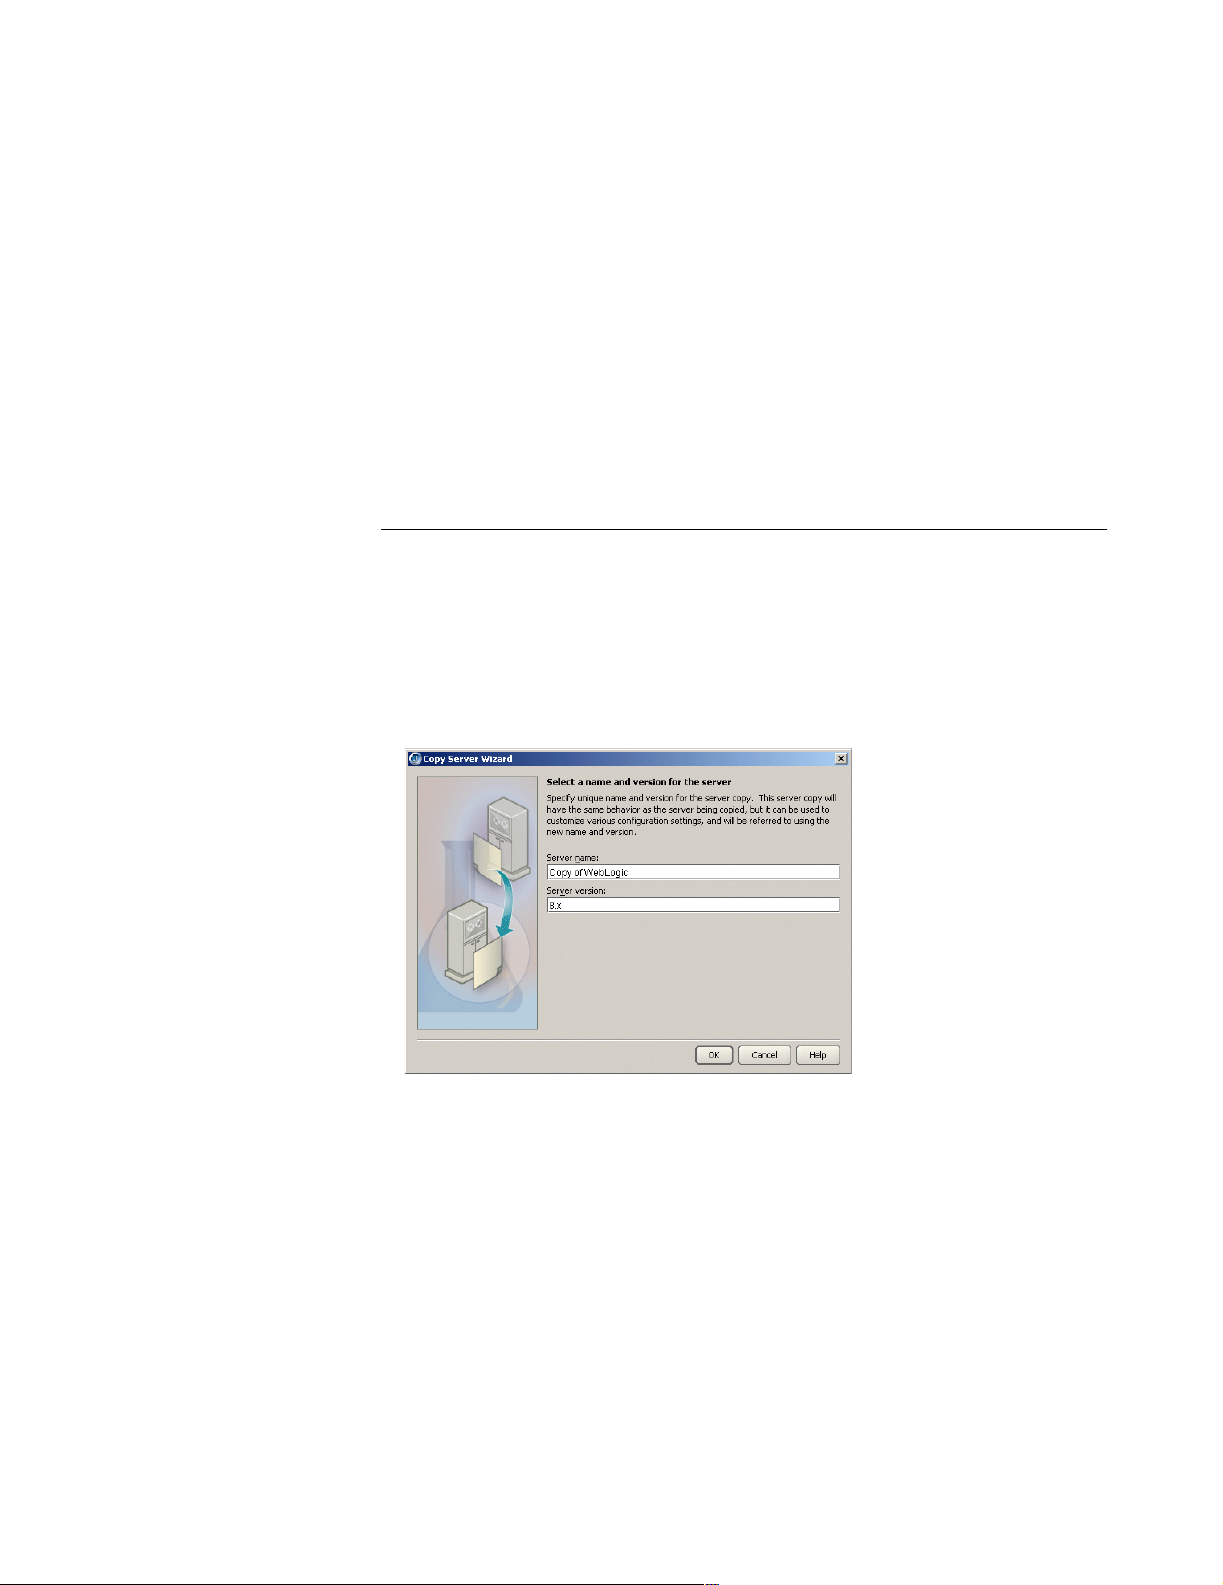
Configuring JBuilder for WebLogic servers
■
Web Browser Path: Specify the path and file name of the web browser of your
choice. For example, you might specify
iexplore.exe
■
Add A Configuration Wizard Item To The Enterprise Menu: Adds a WebLogic
if you want to use Microsoft’s Internet Explorer.
c:/program files/Internet Explorer/
Configuration Wizard item to the JBuilder Enterprise menu. When you select this
menu item, the BEA WebLogic Configuration wizard begins, which guides you
through the steps of configuring the domain for your use.
■
Use External Compiler: Check this check box if you want to use an external
compiler to generate stub files instead of JBuilder’s compiler, bcj. WebLogic
Platform 8.1 uses the appc compiler, while earlier versions use the ejbc compiler.
■
Path: Specify the fully-qualified name of the compiler you want to use. You can
use the ellipsis (…) button to navigate to the compiler location.
6 Choose OK to close the dialog box.
Creating a duplicate configuration to edit
Once you’ve created a server configuration, you might find you’d like to have a similar
one, but with some slight differences. Follow these steps to create a duplicate
configuration you can then edit:
1 Choose Enterprise|Configure Servers to display the Configure Servers dialog box.
2 Select the server configuration you would like to duplicate from the left pane.
3 Click the Copy button at the bottom of the left pane to display the Copy Server
wizard:
4 Specify the name you want to use to identify this server configuration in the Name
For This Server field.
5 Specify the server version in the Version For This Server field.
6 Click OK.
7 Select your new configuration in the left pane of the Configure Servers dialog box
and make the changes to the settings you need using the General and Custom
pages.
Copying a server configuration also creates copies of that server’s tools. You could,
therefore, create a duplicate server configuration and modify just the server’s tools as
the only difference between the two configurations.
Chapter 7: Using JBuilder with BEA WebLogic servers 63
Page 70
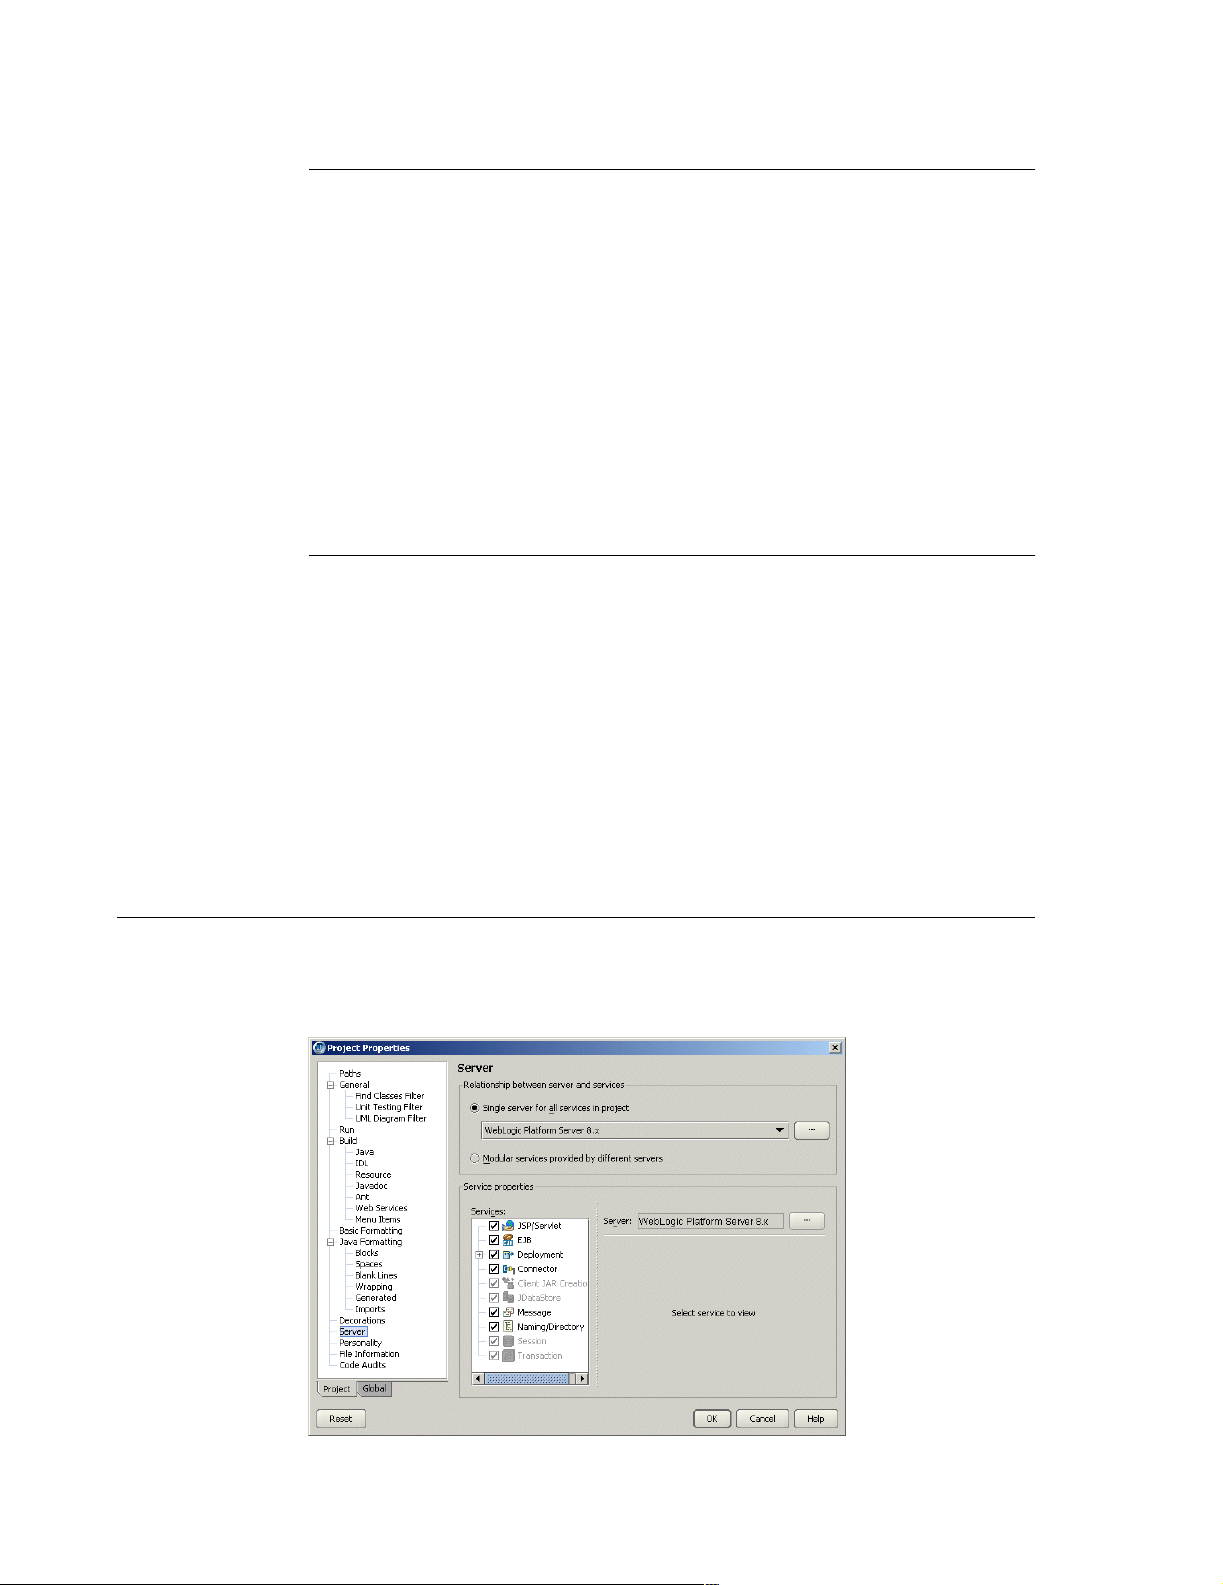
Selecting a server
Created libraries
When you configure JBuilder to target a WebLogic server, required libraries are
created for you that contain all the application server files you will need for enterprise
bean development. These are the libraries created for you, listed by WebLogic server
version:
WebLogic Platform 8.1
■
WebLogic 8.1 Client: All JARs needed to run a client.
■
WebLogic 8.1 Deploy: JARs needed to run the WebLogic 8.1 deploy tool.
WebLogic Server 7.x
■
WebLogic 7.x Client: All JARs needed to run a client.
■
WebLogic 7.x Deploy: JARs needed to run the WebLogic 7.x deploy tool.
Adding a service pack
If you want to add a service pack to your application server configuration, follow these
steps:
1 Choose Enterprise|Configure Servers.
2 Select your server from the list of servers in the pane on the left side of the dialog
box.
3 Click the General tab, then the Class tab, if they are not already selected.
4 Click Add.
5 Navigate to the location of the service pack JAR file.
6 Click OK twice to close all dialog boxes.
Selecting a server
If you are working with more than one version of WebLogic Server and have configured
JBuilder for all versions, you must select which version you want to use for your current
project. Choose Project|Project Properties and select Server in the tree to display the
Server page.
64 Developing Applications for J2EE Servers
Page 71

Selecting a server
You can click the Help button on this page for assistance using this page to select a
server.
JBuilder can target multiple servers. You can choose a single application server for all
stages of EJB and web application development, or you can choose different servers
for different aspects of development. For example, you can select one server to use to
develop enterprise beans and another to develop web applications.
Decide whether you want to use a single server for all aspects of development or
different servers to handle different areas of development.
■
To use a single server,
a Select the Single Server For All Services In Project option and select the server
from the drop-down list.
b If you want to make changes to the configuration settings for the server, click the
ellipsis (…) button and edit the settings you want on the General and Custom
pages. Click OK.
You can also use this dialog box to select a different server.
■
To use different servers for different services,
a Select the Modular Services Provided By Different Servers option.
b Check the check boxes next to all the services for which you want to specify an
application server in the Services list.
c Click one of the checked services to select it in the Services list.
Note that the web module won’t be deployed automatically if it is part of an EAR.
d In the Service Properties For Project group box, use the Server drop-down list to
select the server you want to use for this service.
If server-specific properties are available for the server you selected for the
particular service you are working with, they will appear below the Server dropdown list. If the Deployment service is selected, a Build Target For Deploying To
Server drop-down list appears on the Service Properties For Project panel.
Select the type of build you want to occur. If the EJB service is selected, you’ll
see read-only information appear that is intended to help you decide which server
is appropriate for your needs.
If you select the JSP/Servlet service, the Default Runtime Host Name and Default
Runtime Port Number fields are available to you. The default values refer to the
global server configuration. If you change these values, they are used for all
server run configurations created after you made the change.
If you expand the Deployment service node, you can select from several
subnodes that have accompanying properties. The properties vary depending on
which is your selected server. All servers have a Build Target For Deploying To
Server field, however. Select your desired build option from the drop-down list.
If you expand the WebLogic Deployment service node and select the WARs
node, the service properties include a Map Project Webapps At Runtime option.
When this option is selected (the default value) all web applications in the project
deploy from the web application directory and not as a WAR when the server
starts up.
If you expand the WebLogic Deployment service node and select the EARs
node, the service properties include a Map Project EJB Modules At Runtime
option. When this option is selected (the default value) all EJBs in the project
deploy from the EJB directory and not as a EAR when the server starts up.
All the WebLogic Deployment service nodes have Deploy As Archive and Deploy
As Exploded Directory options. Checking the Deploy As Archive option enables
the archive to be deployed. Checking the Deploy As Exploded Directory option
Chapter 7: Using JBuilder with BEA WebLogic servers 65
Page 72

Working in JBuilder
means the archive is exploded into a directory as its contents are deployed
instead.
If you select the EJB service, the service properties include a Datasource
Mapping combo box with options to deploy (auto-deploy) data sources for all EJB
modules in the project. These are the options:
■
Map Project Datasources: Maps data sources for all EJB modules in
config.xml for the domain specified in the server configuration. Datasource
entries are removed when the server shuts down.
■
Map And Persist Project Datasources: Maps data sources for all EJB modules
config.xml for the domain specified in the server configuration. Data Source
in
information is persisted in
config.xml. Datasource entries are removed when
the server shuts down.
■
Do Not Map Project Datasources: Does not map any data sources.
e If you want to make changes to the configuration settings for the server selected
for the service, click the ellipsis (…) button and edit the settings you want on the
General and Custom pages. Click OK.
f Repeat these steps for each service you want access to.
Click OK when you are finished with the dialog box to select your specified server for
your current project.
If you neglect to select one ore more servers for a project, the Server page of the
Project Properties dialog box appears when you start an EJB wizard from the object
gallery. Use this page to select your server. All EJB projects must have one or more
selected servers.
Working in JBuilder
JBuilder supports WebLogic servers in all areas of development. This section
describes some of the WebLogic-specific features available to you.
Using existing code
If you already have existing WebLogic EJB 2.0 deployment descriptors for enterprise
beans you created previously, you can create a new EJB module that contains the
descriptors. You have two options:
■
Use the EJB Module From Descriptors wizard, which creates a new EJB module
that contains the deployment descriptors.
■
Use the Project For Existing Code wizard, which creates a new JBuilder project
containing one or more new EJB modules that contain the deployment descriptors.
See “Creating an EJB module from existing deployment descriptors” in Developing
Applications with Enterprise JavaBeans for complete information.
66 Developing Applications for J2EE Servers
Page 73
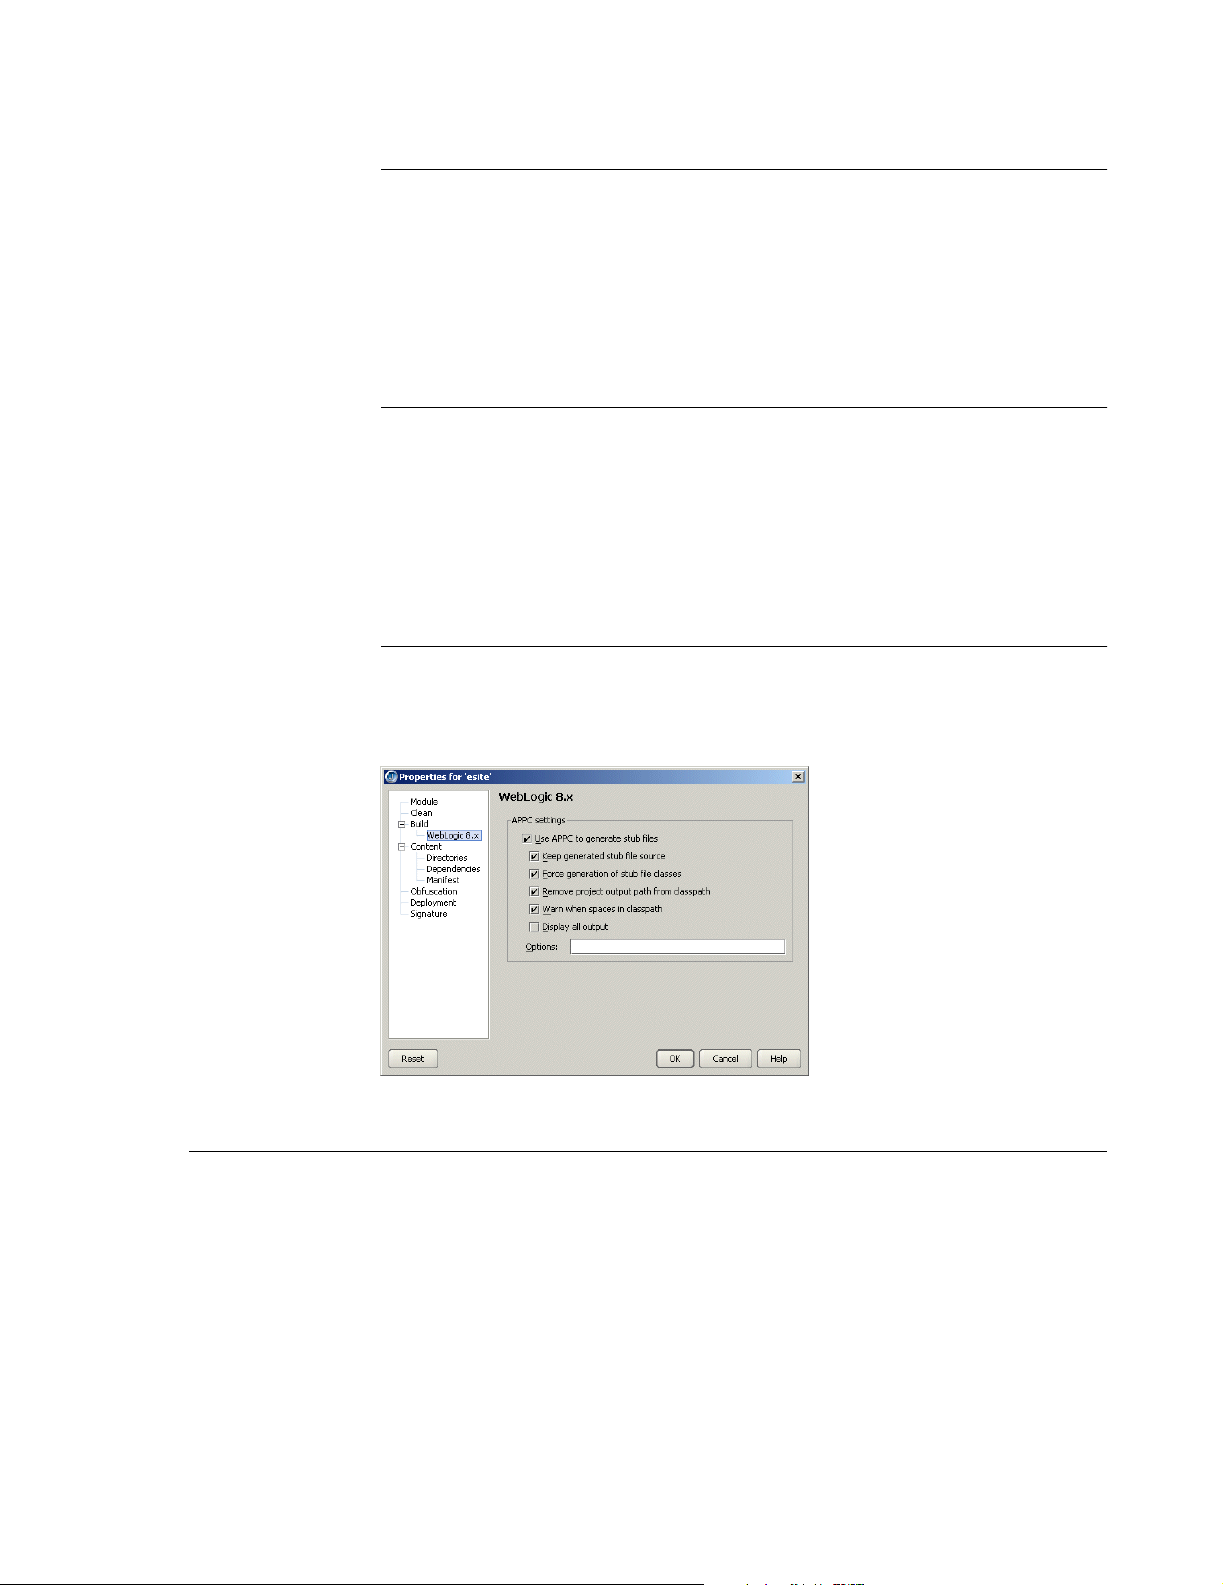
Starting the server
Creating WebLogic entity beans in JBuilder
JBuilder’s EJB designer has support for WebLogic-specific features. The entity bean
inspector includes options such as optimistic concurrency and field groups. There is a
WebLogic version of the Table Map Editor. When creating relationships between entity
beans, there are WebLogic versions of the relationship inspector and a special
WebLogic RDBMS Relation Editor. For information about using these tools, see
“Adding WebLogic table references” and “Specifying a WebLogic 7.x – 8.x relationship”
in Developing Applications with Enterprise JavaBeans.
Using the DD Editor
The DD Editor has several WebLogic-specific pages for information that applies only to
WebLogic servers. For information about using the DD Editor to edit J2EE modules,
see Chapter 11, “Editing J2EE deployment descriptors.” Whenever a WebLogicspecific page is displayed in the DD Editor, you can press F1 for help on that particular
page. You’ll also find it convenient to have a copy of your server’s documentation
handy to look up the type of information your server requires in the deployment
descriptors.
Compiling
To set APPC or EJBC options for compiling your WebLogic beans, right-click the EJB
module node in the project pane, choose Properties and select the Build|WebLogic
page. This page contains the options for your WebLogic compiler. Here, for example,
are the APPC options for WebLogic Platform 8.1:
Starting the server
To prepare to start the server from within JBuilder, create a server runtime
configuration. Follow these steps:
1 Choose Run|Configurations.
2 In the dialog box that appears, click the New button.
Chapter 7: Using JBuilder with BEA WebLogic servers 67
Page 74
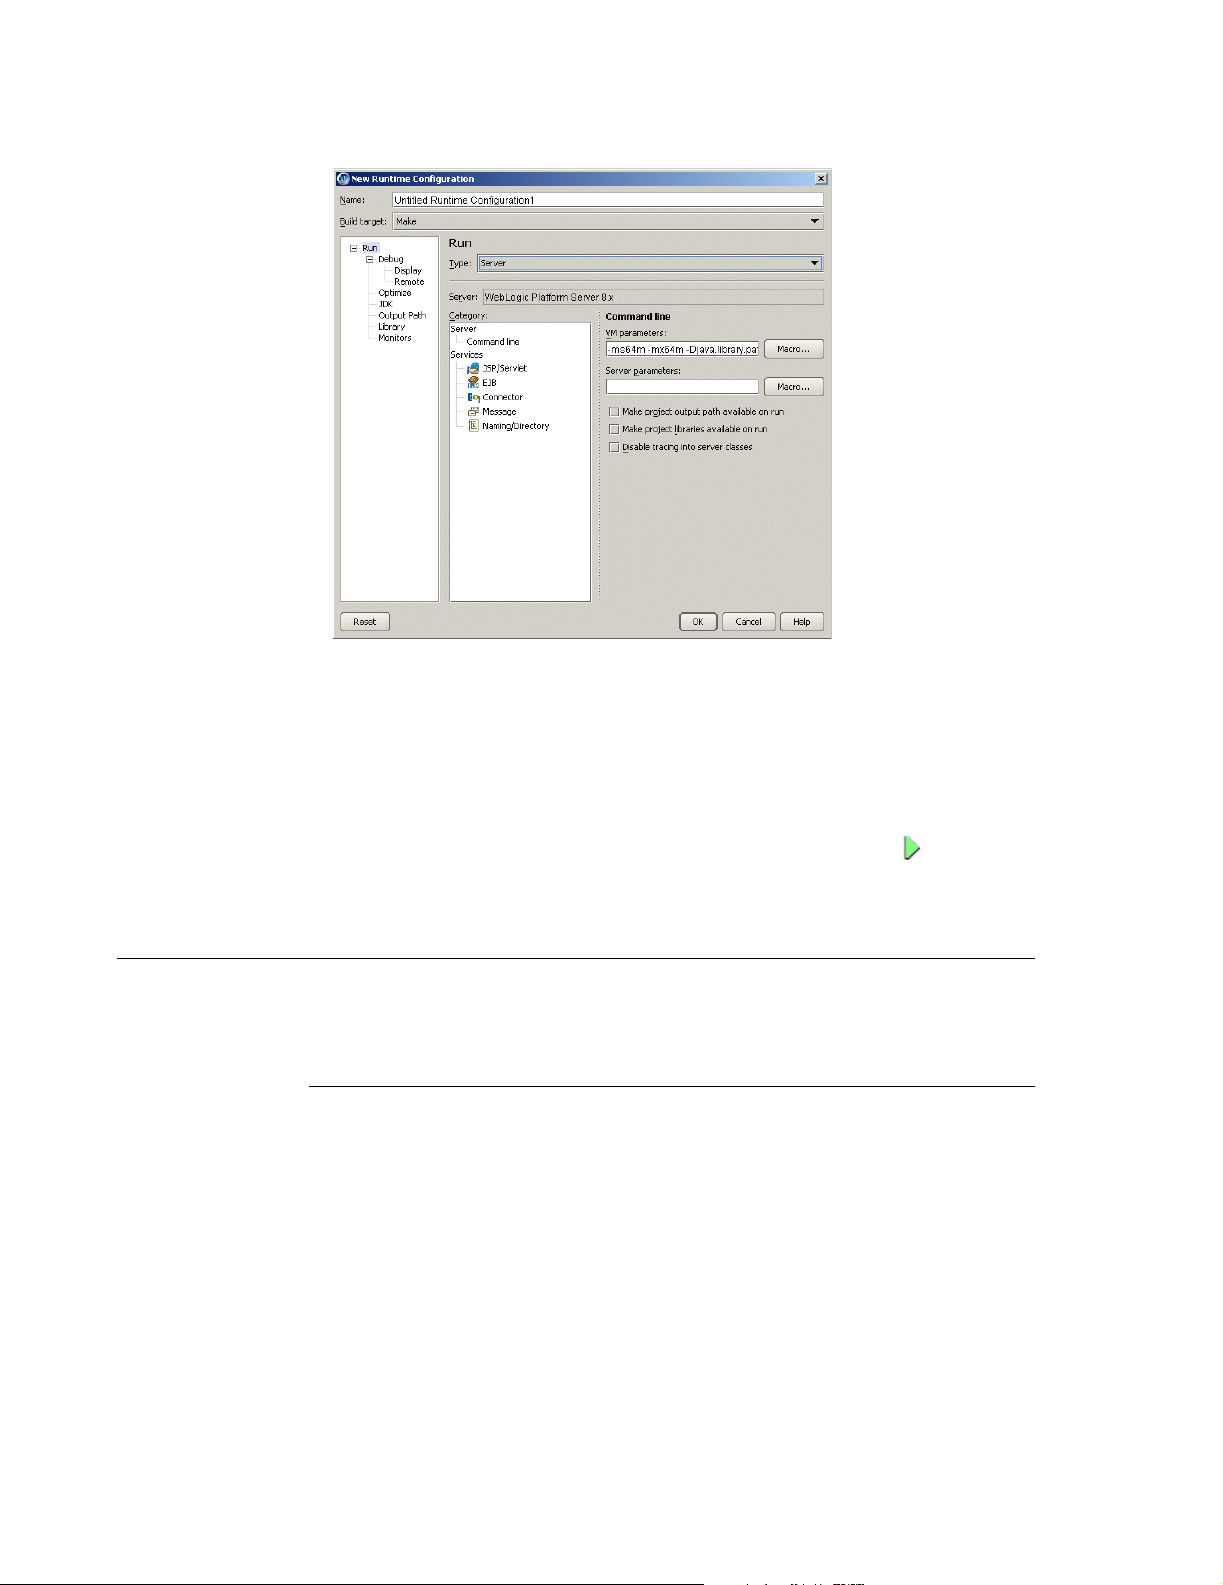
Remote deploying
3 Select Server from the Type drop-down list.
4 In the Name field, enter a name, such as Server or something that will identify the
run configuration.
5 Fill in the VM Parameters and Server Parameters needed to run the server. If you’ve
selected a target application server as described in “Selecting a server” on page 64,
default values are already in place. If the default values aren’t adequate, you may
find the Macro buttons helpful in building the command line you need.
6 Click OK two times.
To start the server, click the down-arrow next to the Run Project icon ( ) and select
the server run configuration you just created.
Remote deploying
To deploy a deployable module to a remote server, follow these instructions for your
version of WebLogic Server:
WebLogic Application Sever 7.x and WebLogic Platform Server 8.1
Choose one of these options:
■
Using the Enterprise|Server Deployment command:
a Choose Enterprise|Server Deployment to display the WebLogic Deploy Settings
b From the Action drop-down list, select Deploy.
c Select the archive to deploy from the drop-down Archive To Deploy list or browse
d Set the Admin URL to the remote server, such as <HOST NAME>:<port number>.
e Enter the User Name and Password that matches the remote server
f Choose OK.
dialog box.
to the archive you want to deploy using the ellipsis (…) button.
configuration.
68 Developing Applications for J2EE Servers
Page 75

Remote deploying
■
Deploying from the project pane:
a Right-click the module you want to deploy in the project pane and choose
Properties.
b Select Deployment in the tree to display the Deployment page.
c Set the Admin URL to Set the Admin URL to the remote server, such as <HOST
NAME>:<port number>
d Right-click the module you want to deploy in the project pane and choose Deploy
.
Options|Deploy.
Deploying J2EE modules as an exploded directory
You can deploy WebLogic 7.x and 8.x J2EE modules as an exploded directory. You
can set this option at the project-wide level, at the module level, or at deployment time.
To set this option at the project level,
1 Choose Project|Project Properties and select the Server page.
2 Open the Deployment node in the tree on the left to see the types of J2EE module
modes.
3 Select the type of module node(s) you want to explode at deployment time.
4 Check the Deploy As Exploded Directory option on the module type page that
appears.
5 When you are done selecting the types of modules you want to explode at
deployment time, choose OK to close the dialog box.
To set this option at the module level,
1 Right-click the module you want to deploy as an exploded directory and choose
Properties.
2 Select the Deployment page.
3 On the WebLogic 8.x page that appears, check the Deploy As Exploded Directory
check box.
4 Choose OK to close the dialog box.
To set this option at deployment time,
1 Choose Enterprise|Server Deployment to display the WebLogic Deploy Settings
dialog box.
2 Check the Deploy As Exploded Directory check box.
3 Choose OK to close the dialog box.
Mapping EJB project modules at runtime
EJB project modules can be mapped at runtime. Mapping EJB modules modifies your
domain config file by adding an application tag to it. The advantage to doing this is that
the module is not deployed as an archive. You would want to use this feature only for
development and not during production. Follow these steps:
1 Choose Project|Project Properties.
2 Select the Server page.
3 Open the Deployment node in the tree on the left to see the types of J2EE module
modes.
4 Check the EJB node in the tree on the Server page and EJB module deployment
properties appear.
Chapter 7: Using JBuilder with BEA WebLogic servers 69
Page 76
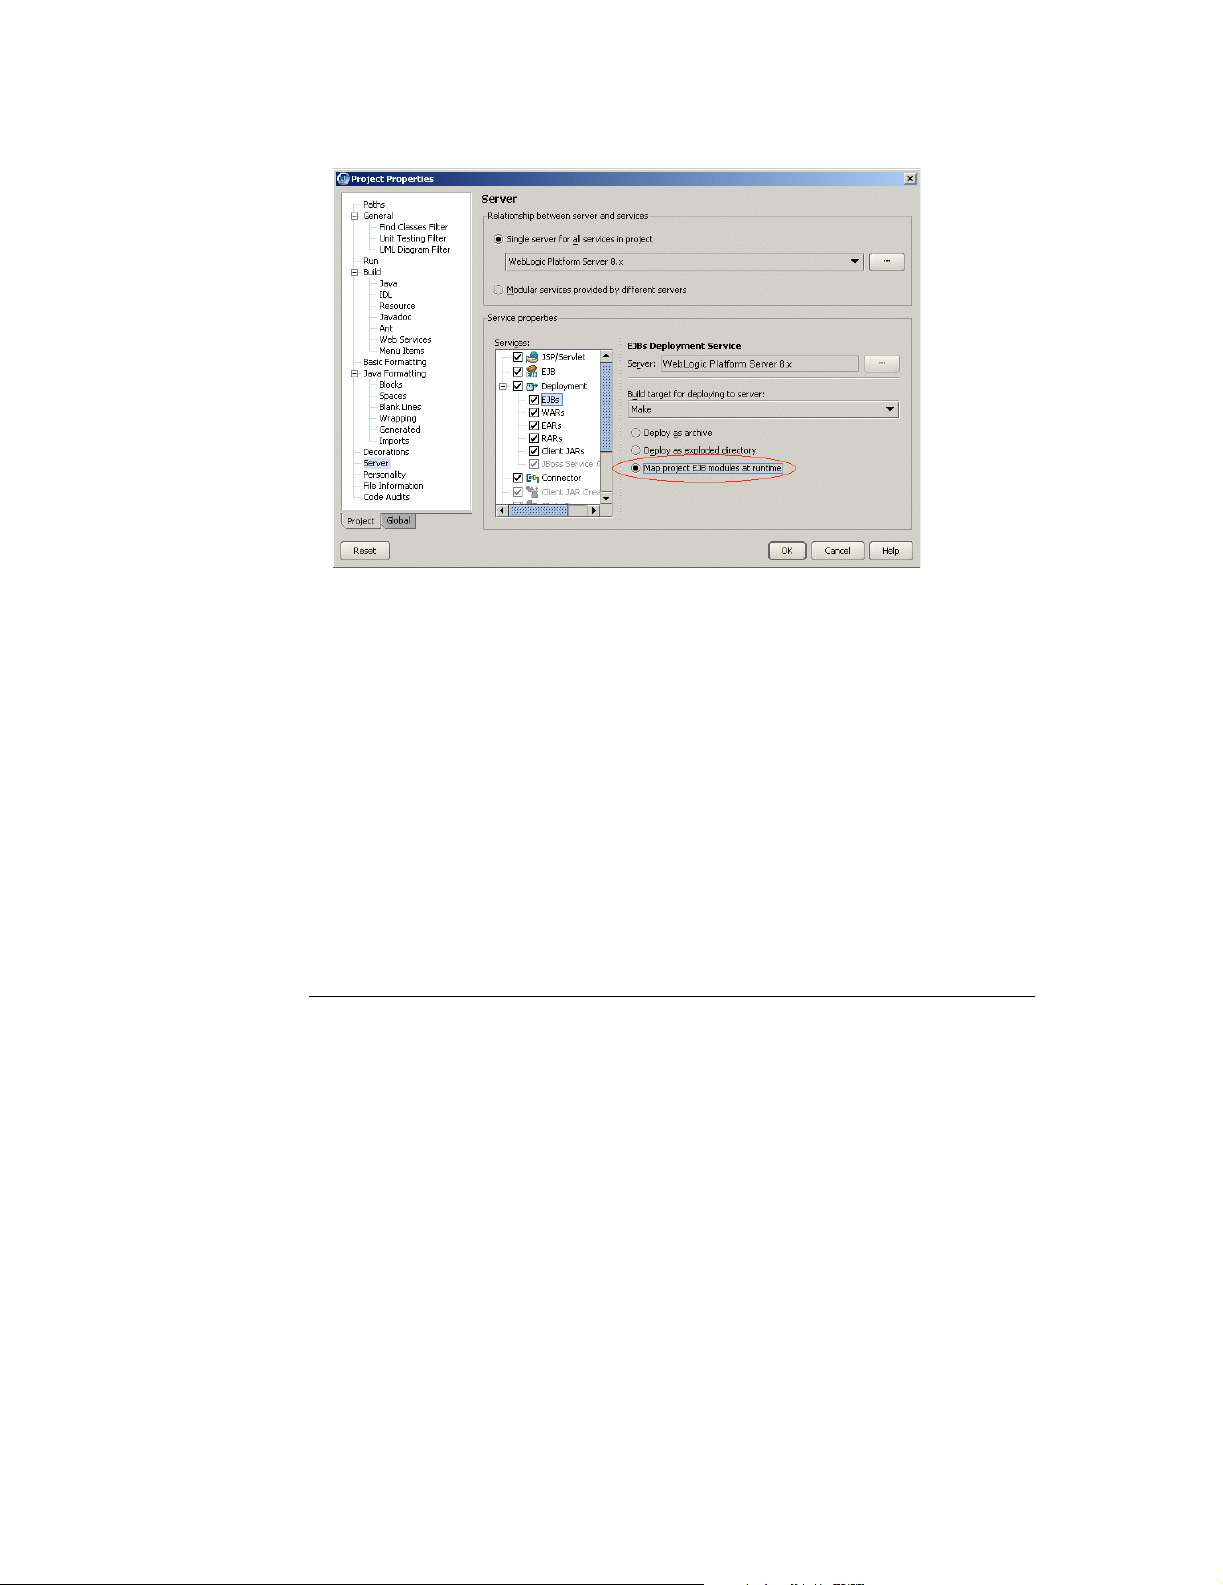
Remote deploying
5 Select the Map Project EJB Modules At Runtime option:
6 Choose OK to close the dialog box.
EJB modules that are included in EARs won’t be mapped at runtime. If you try to
deploy a module (either EJB or web) that has been mapped, JBuilder displays a
warning. If you try to map a module (either EJB or web) that has been already
deployed, the deployment will fail and JBuilder displays a warning. You’ll also get a
warning if you right-click a module, choose Properties, and in the Build options page
select Never from the Build <Module> Directory drop-down list and then attempt to
deploy as an exploded directory or to map an EJB or web module.
Redeploying individual classes
For WebLogic 8.x only, once you have mapped an EJB project module at runtime as
explained in the previous section, you can then redeploy individual classes from the
module directory:
1 Right-click the class you want to redeploy (reload) in the project pane.
2 Choose Redeploy.
WebLogic 8.x Platform Server deployment features
The OpenTool for WebLogic 8.x Platform Server has improved deployment features.
You can now deploy submodules so you can deploy a module that has been newly
added to an EAR or redeploy it.
Use the deploy options on the context menu when you right-click the archive and choose
Properties. You can also access the deployment options when you choose Enterprise|
Server Deployment and choose from the actions on the drop-down Action list.
There are two additional options on the context menu that appears when you right-click
the archive and choose Deploy Options: Deactivate and Activate. Deactivate suspends
deployed components, leaving staged data in place for subsequent reactivation. To
reactivate a deactivated component, choose Activate. To totally remove the application
and any staged data from the server, choose Undeploy.
JBuilder now allows WebLogic Server 7.x and 8.x EAR, WAR, RAR, and EJB modules
to be deployed as an exploded directory. To permit this, follow these steps.
1 Choose Enterprise|Server Deployment to display the WebLogic Deploy Settings
dialog box.
2 Check the Deploy As Exploded Directory option.
3 Choose OK to close the dialog box.
70 Developing Applications for J2EE Servers
Page 77

A few WebLogic Server properties, such as field groups and other CMP WebLogicspecific properties, were previously accessed only through the EJB Designer. You can
now access them through the EJB DD Editor as well.
Remote debugging
To prepare to debug remotely, launch the WebLogic Server with debug parameters. To
do this, modify
parameters to the JAVA_OPTIONS variable:
-Xdebug
-Djava.compiler=NONE
-Xrunjdwp:transport=dt_socket,server=y,address=3999,suspend=n
Within JBuilder, follow these steps:
1 In the project from which you want to launch the remote debug session, click Run|
Configurations. If you have not yet created a server type run configuration, click
New and select type Server. If you have already created a server type run
configuration, select it and choose Edit.
2 Select Debug|Remote in the tree.
3 Check the Enable Remote Debugging option.
4 Enter the host name (the name of the machine on which the server is running.)
5 Click OK.
6 Click the down arrow next to the Debug Project icon ( ) on the JBuilder toolbar
and select the debug run configuration you just created or edited. You will now be
able to set breakpoints in Java code, such as in EJBs, servlets, and so on.
Remote debugging
startWebLogic.sh in your domain directory and add the following
Remote debugging of JavaServer Pages
To debug JSPs remotely, open the project containing the web application you want to
debug and follow these steps,
1 Expand the web application node in the project and expand the deployment
descriptors node under the web application node.
2 Double-click weblogic.xml and add the following descriptor elements:
<jsp-descriptor>
<jsp-param>
<param-name>keepgenerated</param-name>
<param-value>true</param-value>
</jsp-param>
<jsp-param>
<param-name>debug</param-name>
<param-value>true</param-value>
</jsp-param>
<jsp-param>
<param-name>precompile</param-name>
<param-value>true</param-value>
</jsp-param>
<jsp-param>
<param-name>compileFlags</param-name>
<param-value>-g</param-value>
</jsp-param>
</jsp-descriptor>
3 Rebuild project and deploy the web application (as a WAR).
Chapter 7: Using JBuilder with BEA WebLogic servers 71
Page 78

Updating projects with the latest server settings
4 Launch the WebLogic server with debug parameters. To do this, modify
startWebLogic.sh in your domain directory and add the following parameters to the
JAVA_OPTIONS variable:
-Xdebug
-Djava.compiler=NONE
-Xrunjdwp:transport=dt_socket,server=y,address=3999,suspend=n
Note that these steps can be done on a local machine provided WebLogic is set up
and configured in JBuilder.
On the local machine, follow these steps:
1 Transfer the project to the local machine where you wish to debug the JSP and
open the project in JBuilder.
2 Under the source path for the project (normally <PROJECT_ROOT>/src), create a
directory named
default, you can obtain this setting from the General page of the Project Properties
dialog box.
3 Copy the JSP(s) you want to debug to the directory you just specified.
4 Open the JSP(s) and set breakpoints where required.
5 Choose Run|Configurations.
6 Click the New button, select the Application from the drop-down list, and click the
Debug tab.
7 Check the Enable Remote Debugging option.
8 Enter the host name of the remote server in the Host Name field and set the Build
Target to None. Accept all other default settings.
9 Attach to the remote server by clicking on the debug project icon in the toolbar.
10 Load your JSP in a web browser. The debugger stops at breakpoints in the JSP.
jsp_servlet. If you need to use a source path other than the
Updating projects with the latest server settings
Every time you open a project, JBuilder updates it with the latest server settings for the
project’s selected server(s). So, for example, if you have modified server settings for
one project and you have others that use the same server configuration, the next time
you open those other projects, your modified server settings will be in force
automatically. If you want to use a similar but unique server configuration for a
particular project, create a duplicate configuration using the Copy button, and use the
Copy Servers wizard to edit it to your needs.
Be aware that this automatic updating of projects with the latest server settings can
occur only with server configurations modified in JBuilder 9. If you attempt to transfer
server libraries from a previous JBuilder version, your projects won’t be updated with
them. You can still tell JBuilder to update the project manually:
1 Right-click the project node of the project you want to update in the project pane and
choose Properties.
2 Select the Servers page.
3 Click the ellipsis (…) button next to your selected single server or the separate
service servers and make your changes.
4 Click OK to close the dialog box.
72 Developing Applications for J2EE Servers
Page 79

Chapter
8
Chapter8Using JBuilder with IBM WebSphere
servers
This chapter explains how set up and use IBM WebSphere servers with JBuilder.
JBuilder supports WebSphere Application Server 4.0.7 Single Server, WebSphere
Application Server 4.0.7 Advanced Edition, and WebSphere Application Server 5.0.2.4,
5.1.0.4.
Configuring JBuilder for WebSphere servers
To configure JBuilder settings to target WebSphere servers,
1 Choose Enterprise|Configure Servers.
The Configure Servers dialog box appears.
2 Select the WebSphere server you want to configure by clicking it in the pane on the
left.
The right side of the dialog box lists the default settings for the selected server. The
General page has fields that all servers have in common, while the Custom page
has fields that are specific to the selected server. In some cases, modifying a
Custom setting will update a setting on the General page.
3 Check the Enable Server check box at the top of the dialog box.
Checking this option enables the fields for the selected application server. You won’t
be able to edit any fields until it is checked. The Enable Server check box also
determines whether this server will appear in the list of servers when you select a
server for your project using the Servers page of the Project|Project Properties
dialog box.
JBuilder provides default settings for the selected server. If JBuilder’s default
settings are not appropriate, edit any of the settings as needed. Some servers
require you to enter settings in addition to the defaults. Clicking the OK button in this
dialog box when not all required values are set or selecting another server while the
current one is enabled displays a message dialog box that informs you about the
missing settings.
Chapter 8: Using JBuilder with IBM WebSphere servers 73
Page 80

Configuring JBuilder for WebSphere servers
4 If you want to change any of the settings, click the ellipsis (…) button next to the field
and make your changes. If you installed WebSphere into
WebSphere
AppServer
, the default Home Directory is [drive]:/Program Files/WebSphere/
. Otherwise, the Home Directory becomes whichever directory you specify.
5 Click the Custom tab to view fields unique to the server. Change or fill in these
fields:
For WebSphere Application Server 4.0.7:
■
IBM JDK Installation Directory: Where the IBM installation of the JDK is installed.
JBuilder uses this field to locate the proper version of the JDK the server
requires. This field is set when you specify the Home Directory, so it should be
java directory of the Home Directory; for example, the directory would be
the
[drive]:/Program Files/WebSphere/AppServer/java if [drive]:/Program Files/
WebSphere/AppServer
■
DB2 Installation Directory: The directory in which DB2 is installed on your
system. Usually this is in
■
Add An Administrator’s Console Item to The Enterprise Menu: Checking this
check box adds the WebSphere Admin Console item to JBuilder’s Enterprise
menu so you have quick access to it from the JBuilder IDE.
■
Add an Application Assembly Tool Item to The Enterprise Menu: Checking this
check box adds the WebSphere Application Assembly item to JBuilder’s
Enterprise menu so you have quick access to this tool from the JBuilder IDE.
For WebSphere Application 5.0.2.4, 5.1.0.4:
■
JDK Installation Directory: Where the IBM installation of the JDK is installed. This
field is set when you specify the Home Directory, so it should be the
directory of the Home Directory; for example,
AppServer/java
■
Embedded Message Path: The directory where WebSphere’s messaging
.
software is located. This field is set by default and is usually in the
MQ
directory. So, if you installed WebSphere into [drive]:/Program Files/
WebSphere
WebSphere MQ
, the Embedded Messaging Path would be [drive]:/Program Files/Ibm/
. You can, however, specify any path directly that contains the
messaging software.
■
Cell Name: The cell name is set by default. It is read in from your local server
configuration. You can edit this field, but you will seldom need to do so. For more
information about cells, see your WebSphere documentation.
■
Node Name: The node name is set be default. It is read in from your local server
configuration. You can edit this field, but you will seldom need to do so. For more
information about nodes, see your WebSphere documentation.
■
Server Name: The server name which you are configuring. It is read in from your
local server configuration. JBuilder suggests a default name, which you can
change to meet your needs.
■
Add An Administrative Console Item To The Enterprise Menu: Checking this
check box adds the WebSphere Admin Console item to JBuilder’s Enterprise
menu so you have quick access to it from the JBuilder IDE. You must also fill in
the next field, Web Browser Path, to have the menu item added.
■
Web Browser Path: Specify the path and file name of the web browser of your
choice. For example, you might specify
iexplore.exe
■
Add An Application Assembly Item To The Enterprise Menu: Checking this check
if you want to use Microsoft’s Internet Explorer.
box adds the WebSphere Application Assembly item to JBuilder’s Enterprise
menu so you have quick access to this tool from the JBuilder IDE.
[drive]:/Program Files/
is your Home Directory.
[drive]:/SQLLIB.
java
[drive]:/Program Files/WebSphere/
Ibm/WebSphere
c:/Program Files/Internet Explorer/
74 Developing Applications for J2EE Servers
Page 81

■
■
6 Choose OK to close the dialog box and configure JBuilder.
When you configure JBuilder to target a WebSphere server, required libraries are
created for you. To see a list of the WebSphere libraries, see “The created libraries” on
page 23.
Selecting a server
If you are working with more than one version of WebSphere Application Server and
have configured JBuilder for all versions, you must select which version you want to
use for your current project. Choose Project|Project Properties and choose Server.
See “Selecting a server” on page 24 for more information.
Selecting a server
Add An Administrative Scripting Item To The Enterprise Menu: Checking this
check box adds the WebSphere Administrative Scripting item to JBuilder’s
Enterprise menu so you have quick access to this tool from the JBuilder IDE.
This step is optional. Click the CMP Mapping button to display the CMP Mapping
page. Use this page to view and possibly change the container-managed
persistence (CMP) mappings JBuilder uses. By examining the tables on this
page, you can see the mappings JBuilder is using. Usually you will not need to
change any of these mappings, especially if you are using the more common
database drivers. You can, however, edit these mappings if you are using other
drivers, want to do your own type mappings, and so on. For more information
about editing mappings and aliases, click the Help button.
Generating WebSphere deployment descriptors for WebSphere 4.0
When you are using the Enterprise JavaBean 1.x wizard or the EJB 1.x Entity Modeler
to create entity beans that target WebSphere 4.0 Advanced Edition, the wizards do not
generate the
your bean, EjbDeploy, which is called during the build process, will generate them for
you. You can then modify the mapping and run Make again to keep the mapping in the
JAR.
If you’ve used the Entity Modeler to create your entity beans and the field names in
your bean don’t map directly to columns in the database, you can choose to have
JBuilder create WebSphere CMP deployment descriptors that override the default
EjbDeploy behavior:
1 Right-click the EJB module node in the project pane when WebSphere 4.0
Advanced Edition is your selected server.
2 Choose Properties on the context menu.
3 Select the Build|WebSphere page.
4 Check the Generate CMP Descriptors check box.
5 Make your changes:
The list of Data Mapping Files contains the default mapping files that are used to
map Java primitive types to database types. You can modify, add, and remove
mapping files. The Database Type Substitution In Generated Descriptors list
displays the substitutions JBuilder makes if the Java primitive types can’t be directly
mapped to a type in the database. You can modify this list. For example, you might
want another Java type to be substituted for a particular original type in a specified
database. Or you can add additional substitutions to the list.
6 Click OK.
When you compile your bean, the two deployment descriptors (
Schema.dbxmi are generated for entity beans with container-managed persistence for
Map.mapxmi and Schema.dbxmi deployment descriptors. When you build
Map.mapxmi and
Chapter 8: Using JBuilder with IBM WebSphere servers 75
Page 82
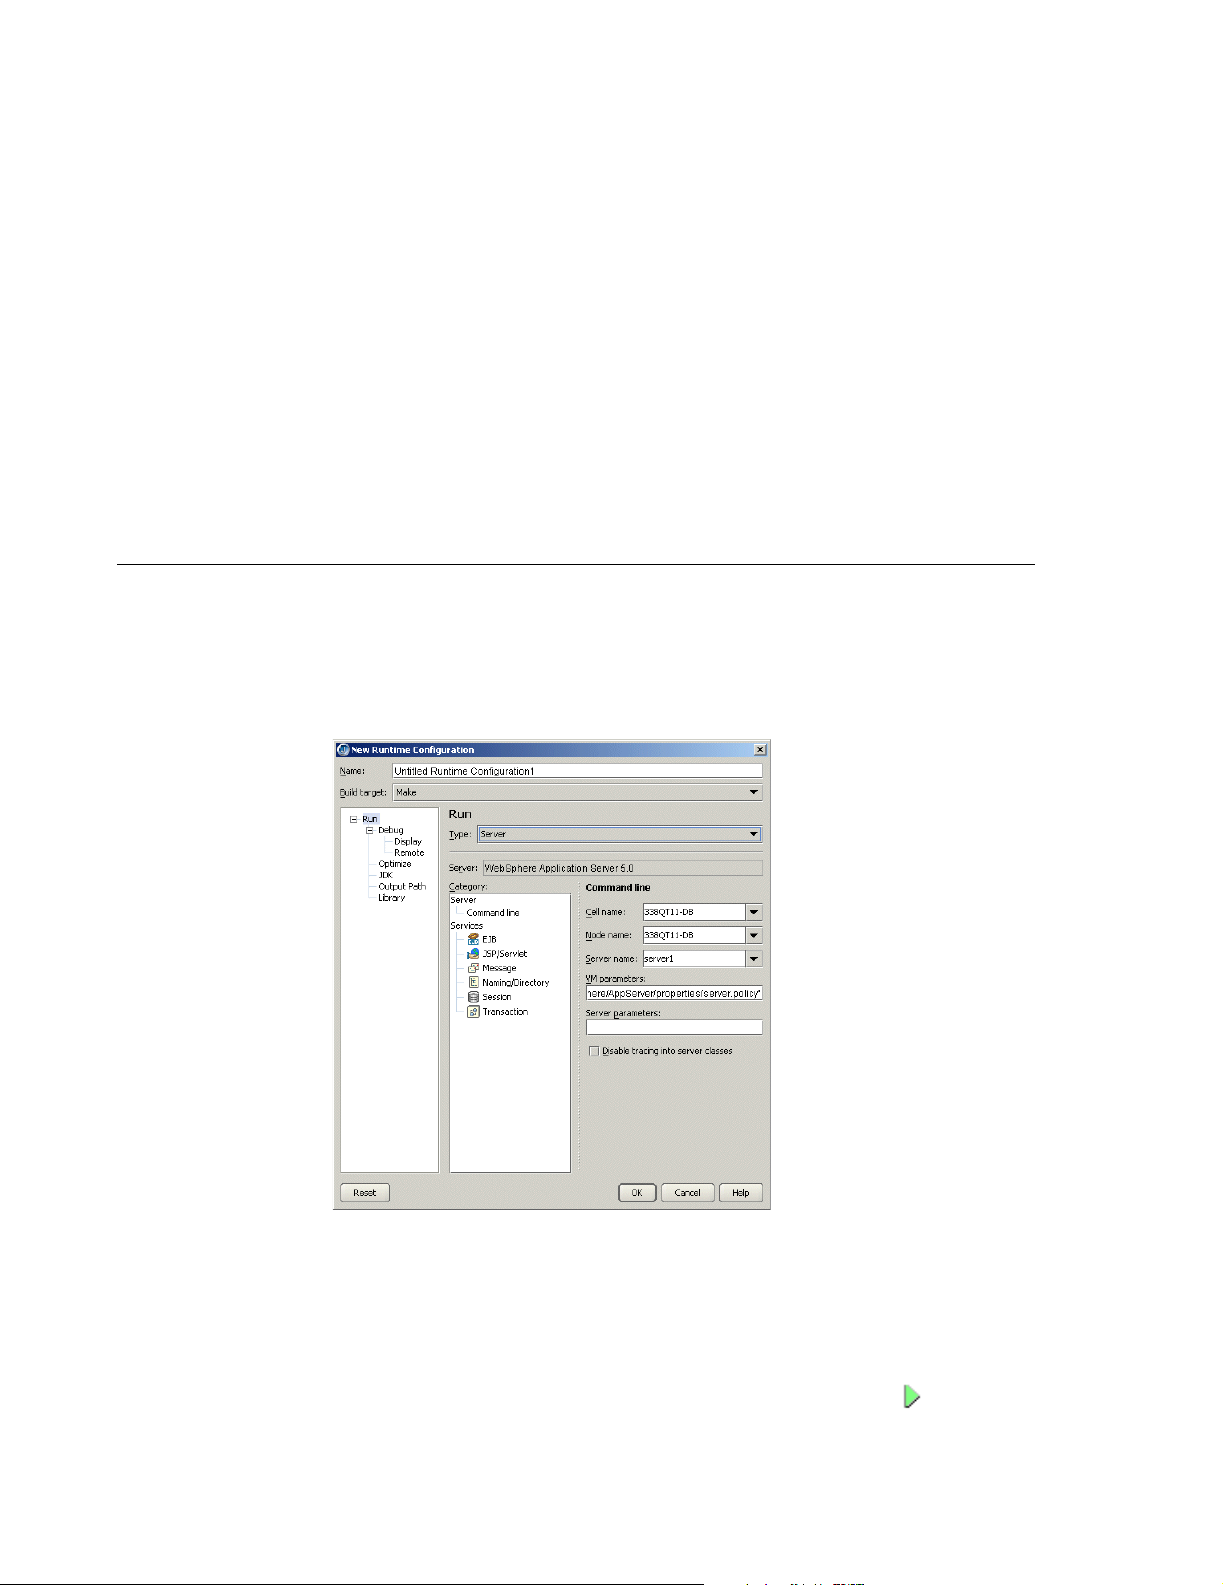
Starting the server
the WebSphere 4.0 Advanced Edition only. If you are using one edition of WebSphere
4.0 and change your target server to the other version, you must recompile your project
to ensure JBuilder generates the correct deployment descriptors for you.
If the database schema name used is different from the username, manually modify
Schema.dbxmi file as follows:
the
1 Make the project to generate the CMP descriptors.
2 Double-click the EJB module node in the project pane to open the EJB module
viewer.
3 Click the source view for Schema.dbxmi.
4 Add the following line above the last line of the source:<RDBSchema:RDBSchema
xmi:id="RDBSchema_1" name="<your_schema_name>" database="<database_id>"
tables="<table_id>"/>
5 Rebuild the project to incorporate the change.
Starting the server
To prepare to start the server from within JBuilder, create a server runtime
configuration. Follow these steps:
1 Choose Run|Configurations.
2 In the dialog box that appears, click the New button.
3 Select Server from the Type drop-down list.
4 In the Name field, enter a name, such as Server or something that will identify the
run configuration.
5 Fill in the VM Parameters and Server Parameters needed to run the server. If you’ve
selected a target application server as described in “Selecting a server” on page 75,
default values are already in place.
6 Click OK.
To start the server, click the down-arrow next to the Run Project icon ( ) and select
the server run configuration you just created.
76 Developing Applications for J2EE Servers
Page 83

Deploying
Deploying
By default in WebSphere 5.x, the stdout and stderr streams are redirected to log files at
application server startup. To view the output in JBuilder when you start the server in
JBuilder:
1 Start the server.
2 Start the Administrative Console from the JBuilder Enterprise menu.
3 Choose Servers|Application Servers|<server_name>|Process Definition|
ProcessLogs.
4 On the Configuration page, set the Stdout File Name and the Stderr File Name to
Console.
The following sections describe deploying to both the WebSphere Application Server
5.x and the WebSphere Application Server 4.0.
Using the DD Editor
The DD Editor has several WebSphere-specific pages for information that applies only
to WebSphere servers. For information about using the DD Editor to edit J2EE
modules, see Chapter 11, “Editing J2EE deployment descriptors.” Whenever a
WebSphere-specific page is displayed in the DD Editor, you can press F1 for help on
that particular page. You’ll also find it convenient to have a copy of your server’s
documentation handy to look up the type of information your server requires in the
deployment descriptors.
To prepare to deploy a deployable module, follow the steps outlined for your version of
WebSphere:
WebSphere Application Server 5.x
This section explains how to deploy remotely and locally to the WebSphere Application
Server 5.x.
Remote deploying
WebSphere Application Server 5.x supports remote deployment using the Deployment
Manager version of the application server. The Deployment Manager must be
configured to manage the remote server instance. Please refer to your server
documentation for more information.
Once you have configured your Deployment Manager to manage the remote server
instance, you can deploy to the remote server instance in JBuilder if you follow these
steps:
1 Right-click the archive node you want to deploy in JBuilder’s project pane and
choose Properties.
2 Select Deployment in the tree to display the Deployment page and make sure the
General tab is selected.
3 Set the Cell Name to the Deployment Manager’s cell name.
4 Set the Node Name to the remote server node name.
5 Set Server Name to the remote server name.
6 Click the Connection tab.
7 Set the Connection Type field to SOAP or RMI.
Chapter 8: Using JBuilder with IBM WebSphere servers 77
Page 84

Deploying
8 Set the Host field to the host name where the Deployment Manager is running.
9 Set the Port field to the port number of the Deployment Manager.
10 Set the User Name and Password fields if they are required; for example, if security
is enabled.
Deploying locally
To deploy locally to a server which is not running,
1 Right-click the node you want to deploy in JBuilder’s project pane and choose
Properties.
2 Select Deployment in the tree and click the Connection tab.
3 Set the Connection Type to NONE.
If the connection type is set to NONE, deployment actions performed while the server
is running won’t start or stop the deployed module.
WebSphere Server 4.0
If you are using WebSphere 4.0 Advanced Edition, you must create an EAR group that
contains your beans. You then deploy the EAR group. For more information about
creating EAR groups, see “Creating an EAR file” in Developing Applications with
Enterprise JavaBeans.
Enterprise|Server Deployment displays a WebSphere Deployment dialog box.
Configure your deployment settings with this dialog box. JBuilder passes the settings
you specify on to the WebSphere deployment tool. The deployment tool for
WebSphere 4.0 differs depending on the version of the server you are using. For the
Single Server, WebSphere’s deployment tool is SEAppInstaller. For the Advanced
Edition, the deployment tool is XmlConfig. Therefore, the appearance of the Deploy
Settings dialog box will vary between these two WebSphere Server 4.0 editions.
If your target application server is WebSphere 4.0 Advanced Edition and you want an
XML file to be generated as input to the WebSphere XMLConfig utility, check the
Generate XML check box. If this option isn’t checked, the file won’t be created. If you
make your own modifications to the generated XML file (named
deploy_<selectednode>.xml and appearing under the EJB module node or EAR group),
uncheck this option to be sure you don’t lose your changes. If you use the Deployment
Options on the context menu (right-click the EJB module and choose Deployment
Options <jar name>.jar to see the deployment commands), the generated XML file is
deploy.xml. It appears under the project node.
Remote deploying
Follow these steps to use the WebSphere Deploy Settings dialog box to deploy to a
remote server:
1 Choose Enterprise|Server Deployment.
2 Select the Deploy action.
3 Specify these options in the Options field:
-nameServiceHost<host name> -nameServicePort<port number>
4 Set the Primary Node and Server Name to match your server configuration.
5 Click OK.
78 Developing Applications for J2EE Servers
Page 85

Enabling remote debugging
You can also deploy a module to a remote server from JBuilder’s project pane:
1 Right-click the module you wish to deploy.
2 Select Properties.
3 Select Deployment in the tree to display the Deployment page.
4 Specify these options in the Options field:
-nameServiceHost<host name> -nameServicePort<port number>
5 Set the Primary Node and Server Name to match your server configuration.
6 Right-click the module in the project pane and choose Deploy Options|Deploy.
Deploying locally
These are the deploy options you’ll find on the Deploy Options context menu:
■
Deploy — Deploys a JAR to the currently running container of the project application
server. If the Build Target option is Make for the current runtime configuration
(Choose Run|Configurations, select the current runtime configuration, and click Edit
then click Server and select Deployment in the tree of services to see the Build
Target), this option will “make” the JAR’s contents before deploying it to the
container.
■
Redeploy — Deploys a JAR again to the currently running container. If the Build
Target option is Make for the current runtime configuration (Choose Run|
Configurations, select the current runtime configuration, and click Edit then click
Server and select Deployment in the tree of services to see the Build Target), this
option will “make” the JAR’s contents before redeploying it to the container.
■
Undeploy — Undeploys an already deployed JAR in the running container.
■
List Deployments — Lists all JARs deployed in the running container.
■
Stop Container — Stops the container. This option appears for WebSphere 4.0
Advanced Edition only. When a deployed EJB changes, the container must be
stopped and then restarted for the changes to register.
■
Start Container — Starts the container. This option appears for WebSphere 4.0
Advanced Edition only.
Enabling remote debugging
The steps to enable remote debugging of a bean running on a WebSphere server vary
depending on which version of WebSphere you are using.
Note You won’t be able to debug JSPs in a remote debug session.
WebSphere Application Server 5.x
Follow these steps to enable remote debugging for WebSphere Application Server 5.x:
1 Launch the server with the -script option:
WEBSPHERE_HOME/bin/startserver -script
This command should write a script called start_<server name> in the
WEBSPHERE_HOME/bin directory.
Chapter 8: Using JBuilder with IBM WebSphere servers 79
Page 86

Enabling remote debugging
2 Edit the launch script and add the following remote debug parameters to the java
command line:
3 Launch the server using the script.
4 In JBuilder, choose Project|Project Properties. If you have not yet created a server
run configuration, choose New and create a new configuration of type Server. If you
already have a server run configuration, choose Edit.
5 Select Debug|Remote in the tree and check the Enable Remote Debugging and
Attach options and click OK.
Click the down arrow next to the Debug Project icon ( ) on the JBuilder toolbar and
select the debug run configuration you just created or edited. You will now be able to
set breakpoints in Java code, such as in EJBs, servlets, and so on.
WebSphere Single Server 4.0
If you are using WebSphere Single Server 4.0, follow these steps to enable remote
debugging:
1 Launch the server with the -script option:
This command should write a script called launch in the WEBSPHERE_HOME/bin
directory.
2 Edit the launch script and add the following remote debug parameters to the java
command line:
3 Launch the server using the script.
4 In JBuilder, choose Project|Project Properties. If you have not yet created a server
run configuration, choose New and create a new configuration of type Server. If you
already have a server run configuration, choose Edit.
5 Select Debug|Remote in the tree.
6 Check the Enable Remote Debugging and Attach options and click OK.
Click the down arrow next to the Debug Project icon ( ) on the JBuilder toolbar and
select the debug run configuration you just created or edited. You will now be able to
set breakpoints in Java code, such as EJBs, servlets, and so on.
-Xdebug
-Djava.compiler=NONE
-Xrunjdwp:transport=dt_socket,server=y,address=3999,suspend=n
WEBSPHERE_HOME/bin/startserver -script
-Xdebug
-Djava.compiler=NONE
-Xrunjdwp:transport=dt_socket,server=y,address=3999,suspend=n
WebSphere Server Advanced Edition 4.0
WebSphere Server Advanced Edition 4.0 launches another Java virtual machine for
debugging, so you must follow instructions so you can debug your enterprise beans:
1 Start the WebSphere Server 4.0.
2 Start the WebSphere Server 4.0 console application (which you’ll find at
<ws4_ae home>\bin\adminclient.bat if you’re running on Windows.)
3 When the console application appears, expand the tree on the left until you see the
Application servers node. Select this node.
4 In the panel on the right side of the console, click the JVM Settings tab. Click the
Advanced Settings button. (You might need to scroll the panel to see this button.)
80 Developing Applications for J2EE Servers
Page 87
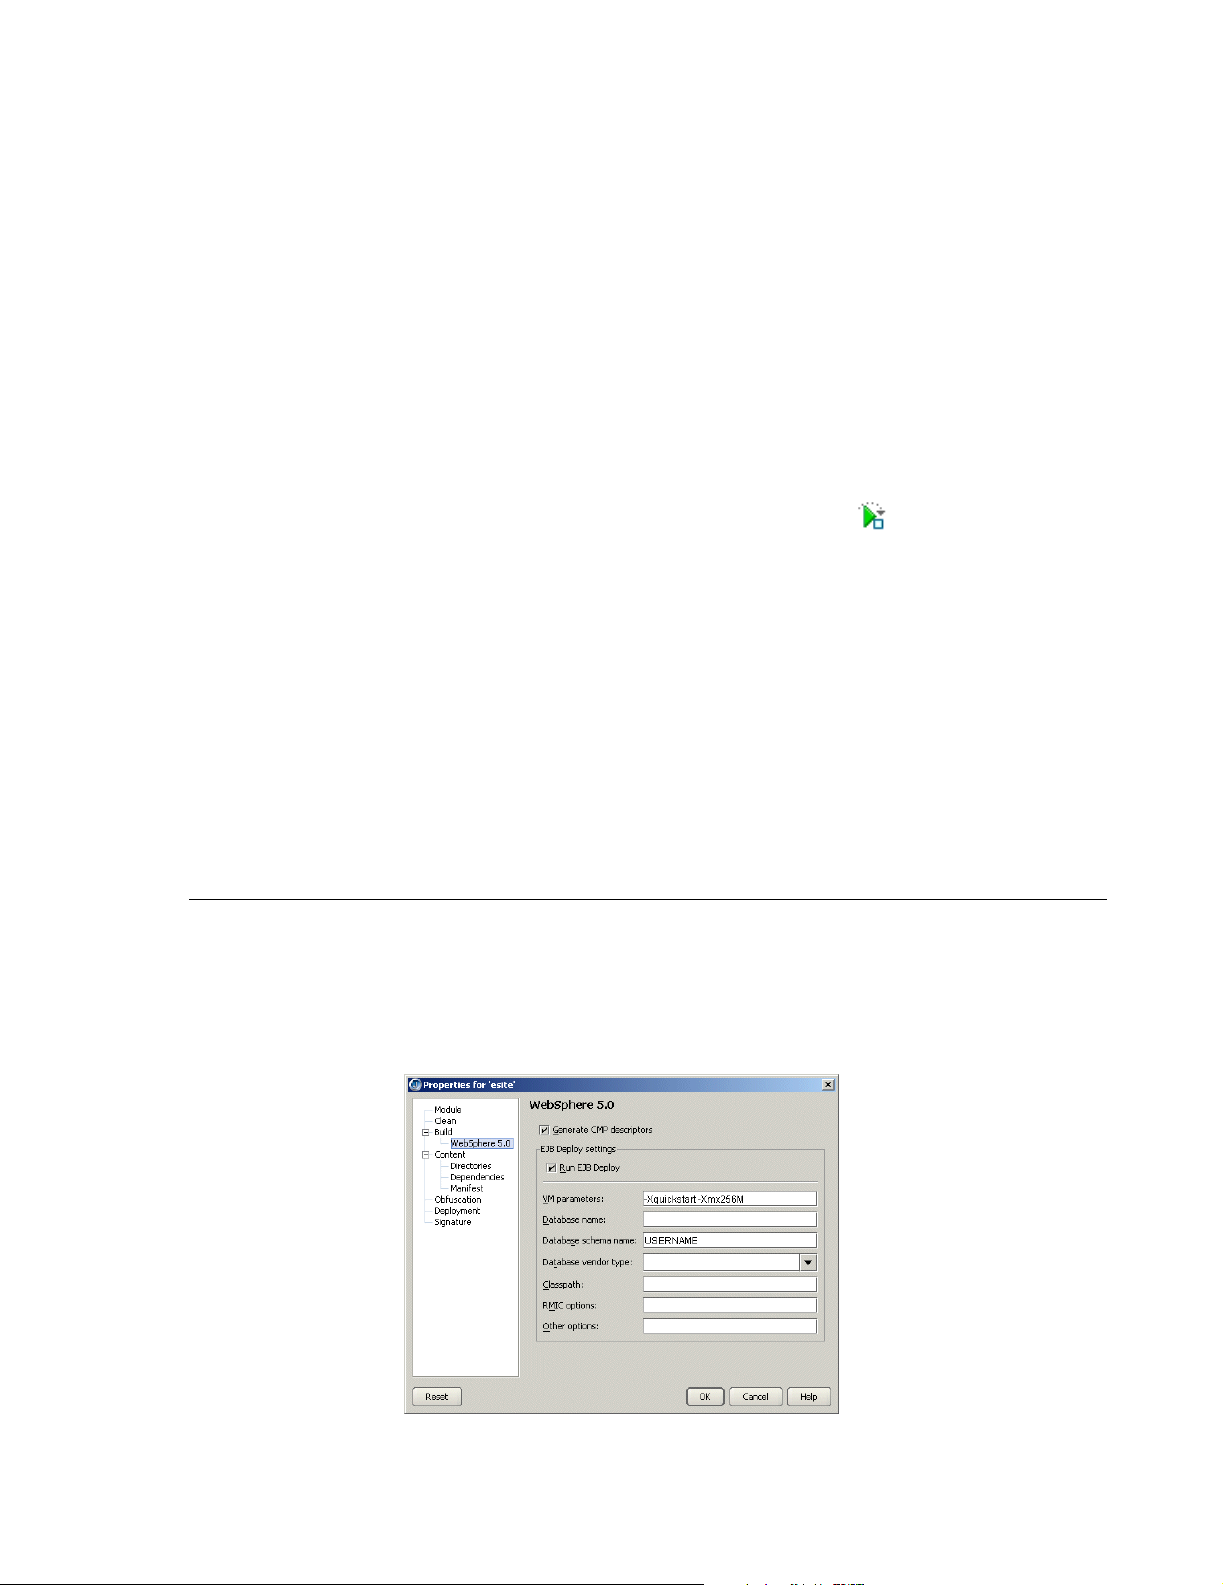
Container-managed persistence (CMP) 1.1 and 2.0 in WebSphere 5.x
5 In the dialog box that appears, enter the following VM options:
-Xdebug
-Djava.compiler=NONE
-Xrunjdwp:transport=dt_socket,server=y,address=3999,suspend=n
6 If you start the server outside of JBuilder, choose Run|Configurations and click the
New button in the dialog box that appears. In the Configuration Name field, specify a
name for the new run configuration server for debugging on your application server.
7 Select Debug|Remote and make these changes on the Debug page:
a Check the Enable Remote Debugging check box.
b Select the Attach option.
c In the Port Number field, enter the port number you noted during the server
startup process.
d Click OK twice to close all dialog boxes.
8 Click the down arrow next to the Debug Project icon ( ) on the JBuilder toolbar
and select the debug run configuration you just created or edited.
You will be attaching to the application server process. Now you can deploy your
web applications and you’ll be able to stop at breakpoints you set in the bean, JSPs,
or servlets.
To start the server in debug mode within JBuilder, follow these steps:
■
Choose Run|Configurations.
■
Select the Command node and enter the remote debug port number in the Debug
Transport Address field.
Now clicking the debug toolbar button launches the server in debug mode and attaches
to it, all in one session.
Container-managed persistence (CMP) 1.1 and 2.0 in WebSphere 5.x
You can set the schema name and database vendor type as properties on EJB module
nodes:
1 Right-click the EJB module and choose Properties.
2 Select Build|WebSphere 5.x in the tree.
3 Enter your schema and database vendor information in this dialog box:
4 Click OK.
Chapter 8: Using JBuilder with IBM WebSphere servers 81
Page 88
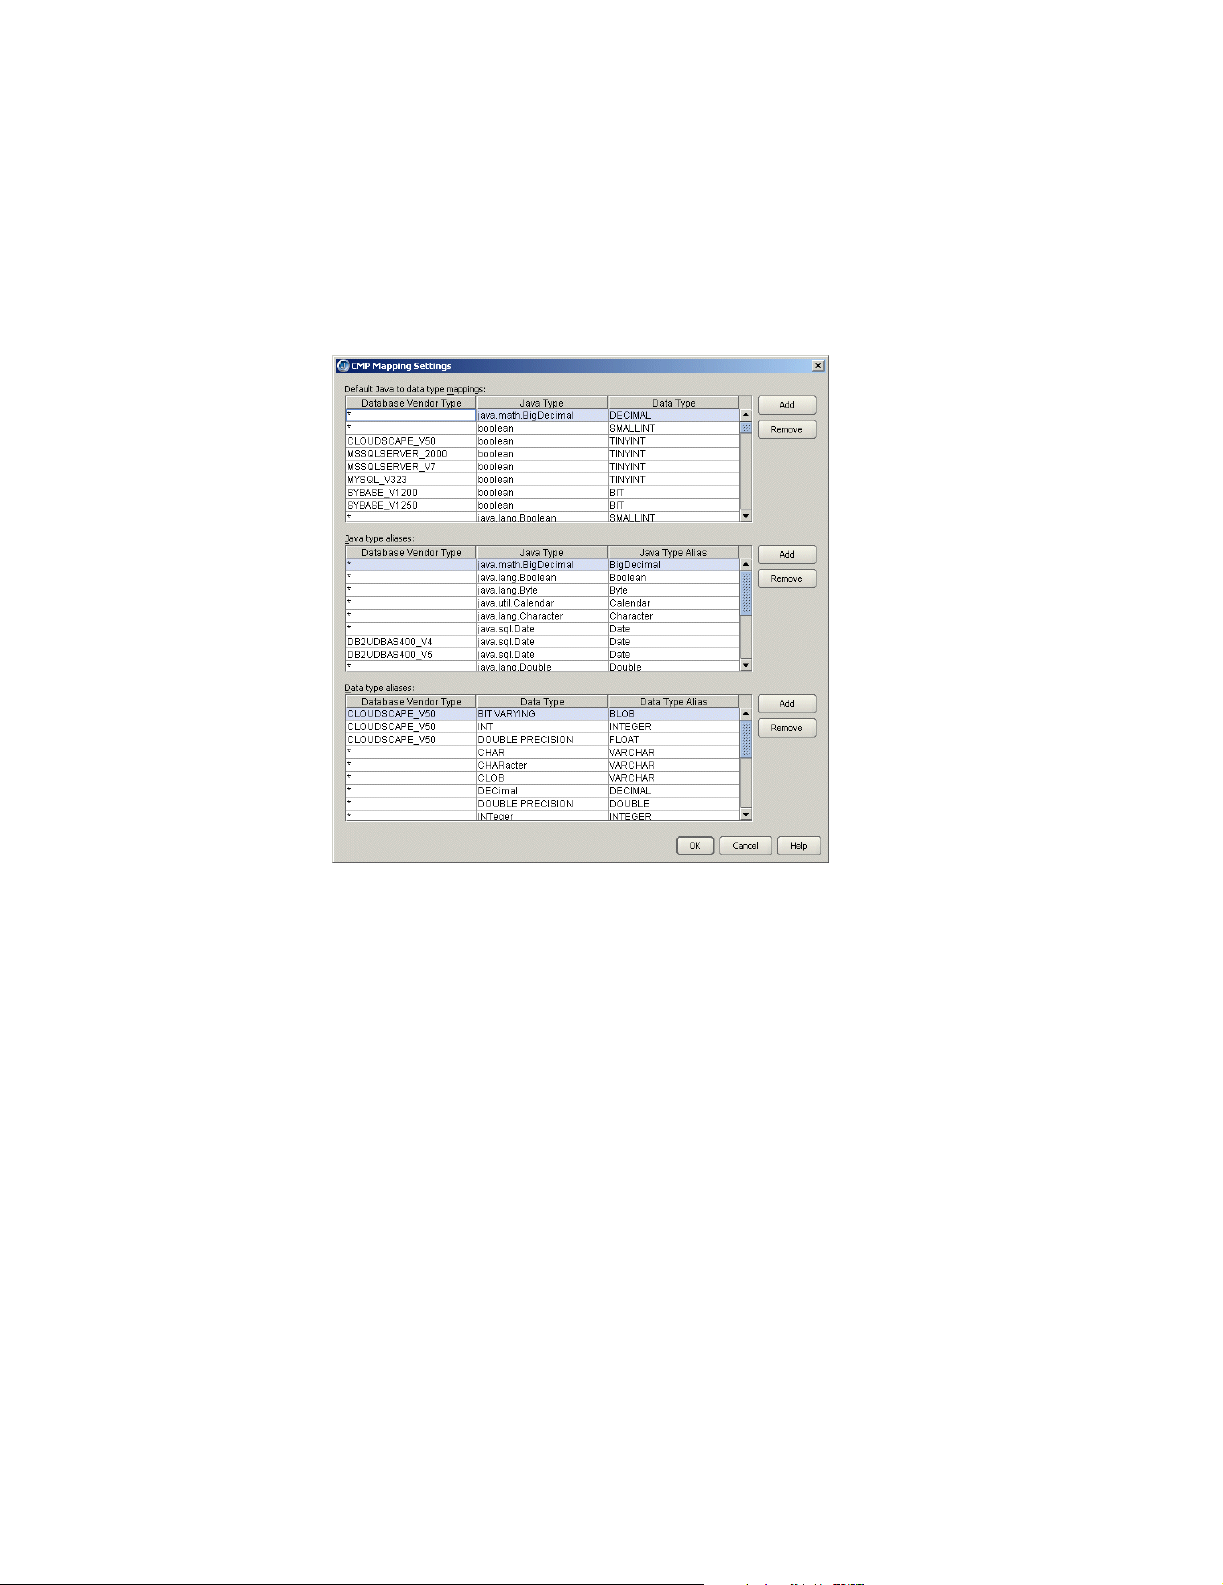
Container-managed persistence (CMP) 1.1 and 2.0 in WebSphere 5.x
To change the default CMP mapping behavior such as the Java to database type
mappings,
1 Choose Enterprise|Configure Servers.
2 Select WebSphere Application Server 5.x in the list of application servers.
3 Click the Custom button.
4 Click the CMP Mapping button.
5 Make your changes in the CMP Mapping Settings dialog box that appears:
6 Click OK.
These are your options:
■
Default Java To Data Type Mappings: This list is used if JBuilder is unable to
resolve the database schema type for a CMP field. This could happen if the JDBC
driver fails to report a type for a database column or if the corresponding column (as
defined in the CMP field mapping) is missing.
■
Java Type Aliases: This list is used to translate between actual Java types in the
bean and types defined in IBM database type mapping files.
■
Data Type Aliases: This list is used to translate between database vendor types (as
reported by the JDBC driver) and types defined in IBM database type mapping files.
82 Developing Applications for J2EE Servers
Page 89

Chapter9Using JBuilder with JBoss servers
This chapter explains how set up and use the JBoss application server with JBuilder.
JBuilder officially supports JBoss 3.2.5 and JBoss 3.0.8.
Configuring JBuilder for the JBoss application server
Chapter
9
To configure JBuilder settings to target JBoss servers,
1 Choose Enterprise|Configure Servers.
The Configure Servers dialog box appears.
2 Select the JBoss 3.x+ server by clicking it in the pane on the left.
The right side of the dialog box lists the default settings for the selected server. The
General page has fields that all servers have in common, while the Custom page
has fields that are specific to the selected server. In some cases, modifying a
Custom setting will update a setting on the General page.
3 Check the Enable Server check box at the top of the dialog box.
Checking this option enables the fields for the selected application server. You won’t
be able to edit any fields until it is checked. The Enable Server check box also
determines whether this server will appear in the list of servers when you select a
server for your project using the Servers page of the Project|Project Properties
dialog box.
JBuilder provides default settings for the selected server. If JBuilder’s default
settings are not appropriate, edit any of the settings as needed. Some servers
require you to enter settings in addition to the defaults. Clicking the OK button in this
dialog box when not all required values are set or selecting another server while the
current one is enabled displays a message dialog box that informs you about the
missing settings.
4 If you want to change any of the settings, click the ellipsis (…) button next to the field
and make your changes. If you installed JBoss into
the default Home Directory would be
[drive]:/jboss325/jboss-3.2.5.
[drive]:/jboss325, for example,
Chapter 9: Using JBuilder with JBoss servers 83
Page 90
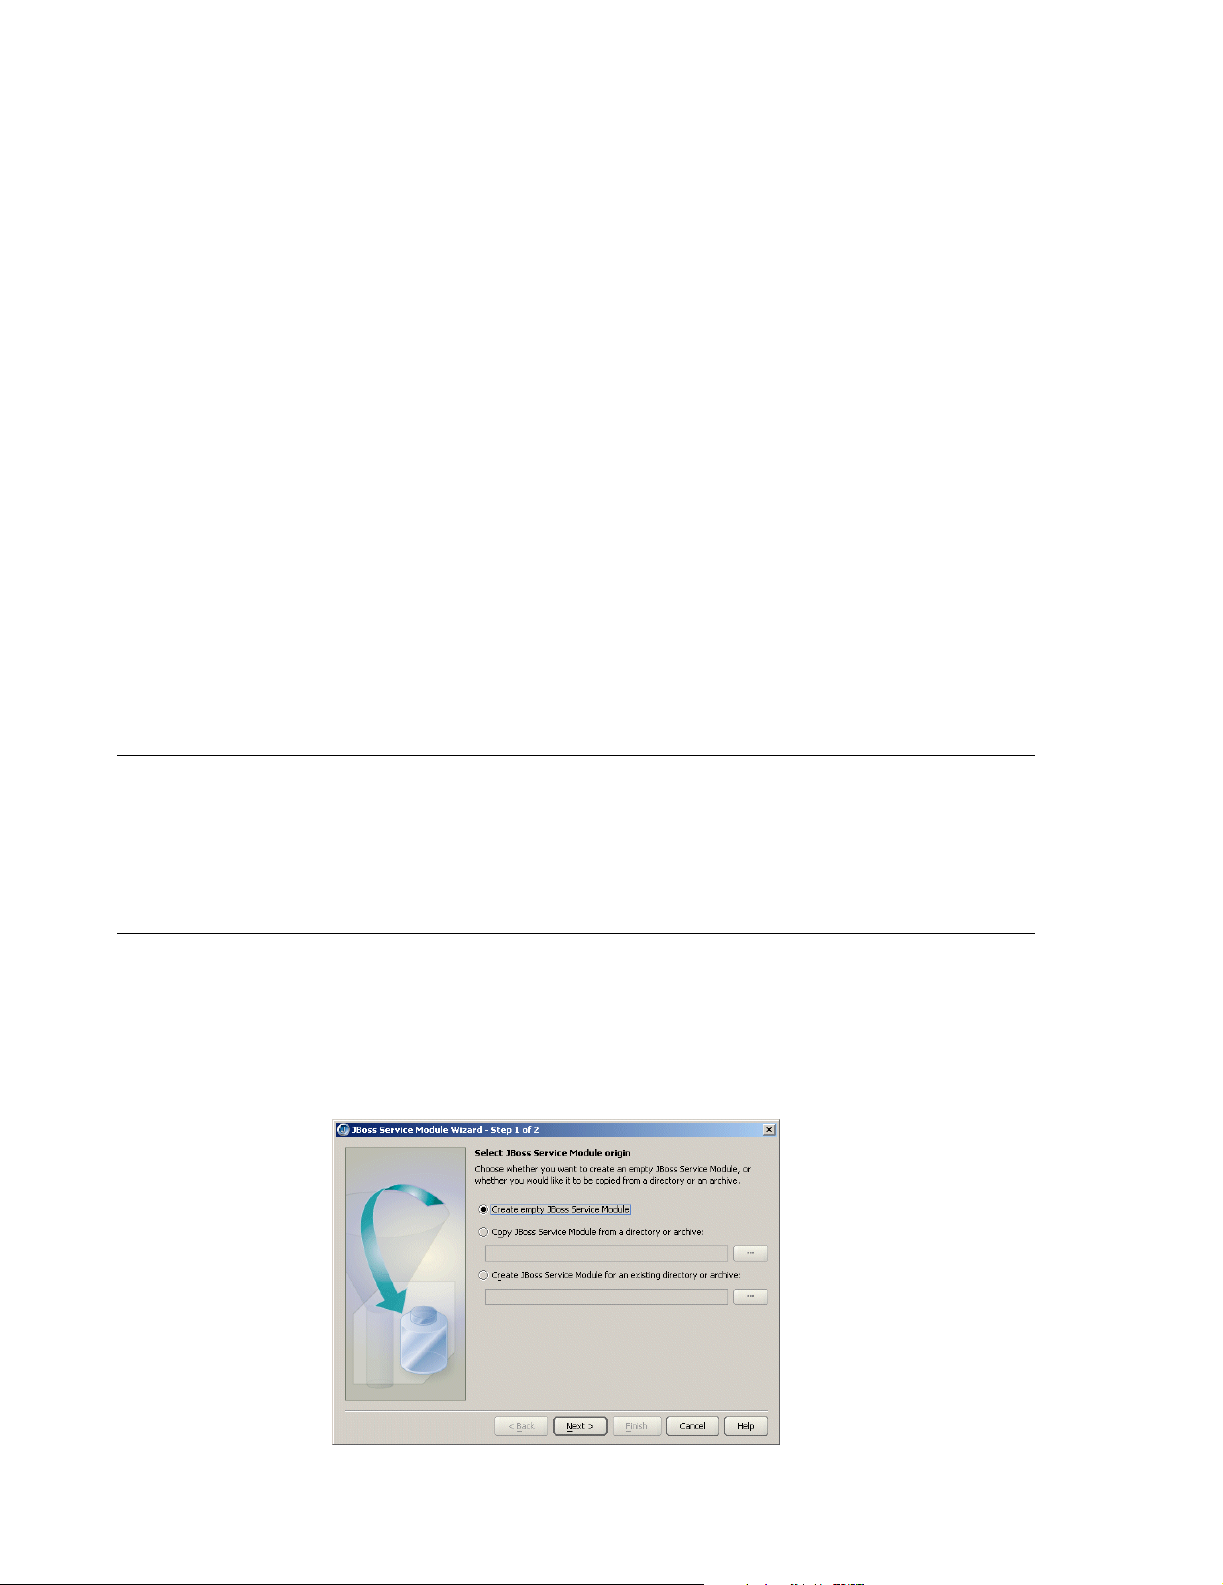
Selecting a server
5 Click the Custom tab to view fields unique to the server. Change or fill in these fields:
■
Server Version: Your choices are server version 3.2.5 and 3.0.8. These are the
versions of JBoss JBuilder officially supports.
■
Configuration Name: Specify the configuration you want to begin using. You can
select a configuration from the drop-down list, or type in your own configuration
name. The configuration you specify must exist in the
server directory, which is a
subdirectory of the Home directory.
■
Deployment Path: Specify the path used to deploy your modules. By default, the
deployment path will be in the
deploy subdirectory of the directory you specified
as the Configuration Name.
■
Include System Modules When Listing Deployments: JBuilder can list all your
deployed modules. If you wish to see the system modules such as the web
container or the EJB container and other services that are a core part of the
JBoss server, check this option.
■
Include Disabled Modules When Listing Deployments. JBuilder can list all your
deployed modules. If you wish to see modules which are currently disabled,
check this option. A disabled module is simply one that has been renamed to
<module name>.disabled when you chose to disable it within JBuilder using the
Disable deployment option.
6 Choose OK to close the dialog box and configure JBuilder.
When you configure JBuilder to target a JBoss server, required libraries are created for
you. To see a list of the JBoss libraries, see “The created libraries” on page 23.
Selecting a server
If you are working with more than one version of JBoss Application Server and have
configured JBuilder for all versions, you must select which version you want to use for
your current project. Choose Project|Project Properties and select Server in the tree to
display the Server page. See “Selecting a server” on page 24 for more information.
Creating a JBoss service module
You can use JBoss to create a service module for extending the JBoss server. A
service module contains the definition of a service. Once you compile the service
module, a service archive (SAR) is created, ready to be deployed to JBoss.
To begin creating a JBoss service module within JBuilder, follow these steps:
1 Choose File|New|Enterprise and double-click the JBoss Service Module wizard. The
wizard appears:
84 Developing Applications for J2EE Servers
Page 91
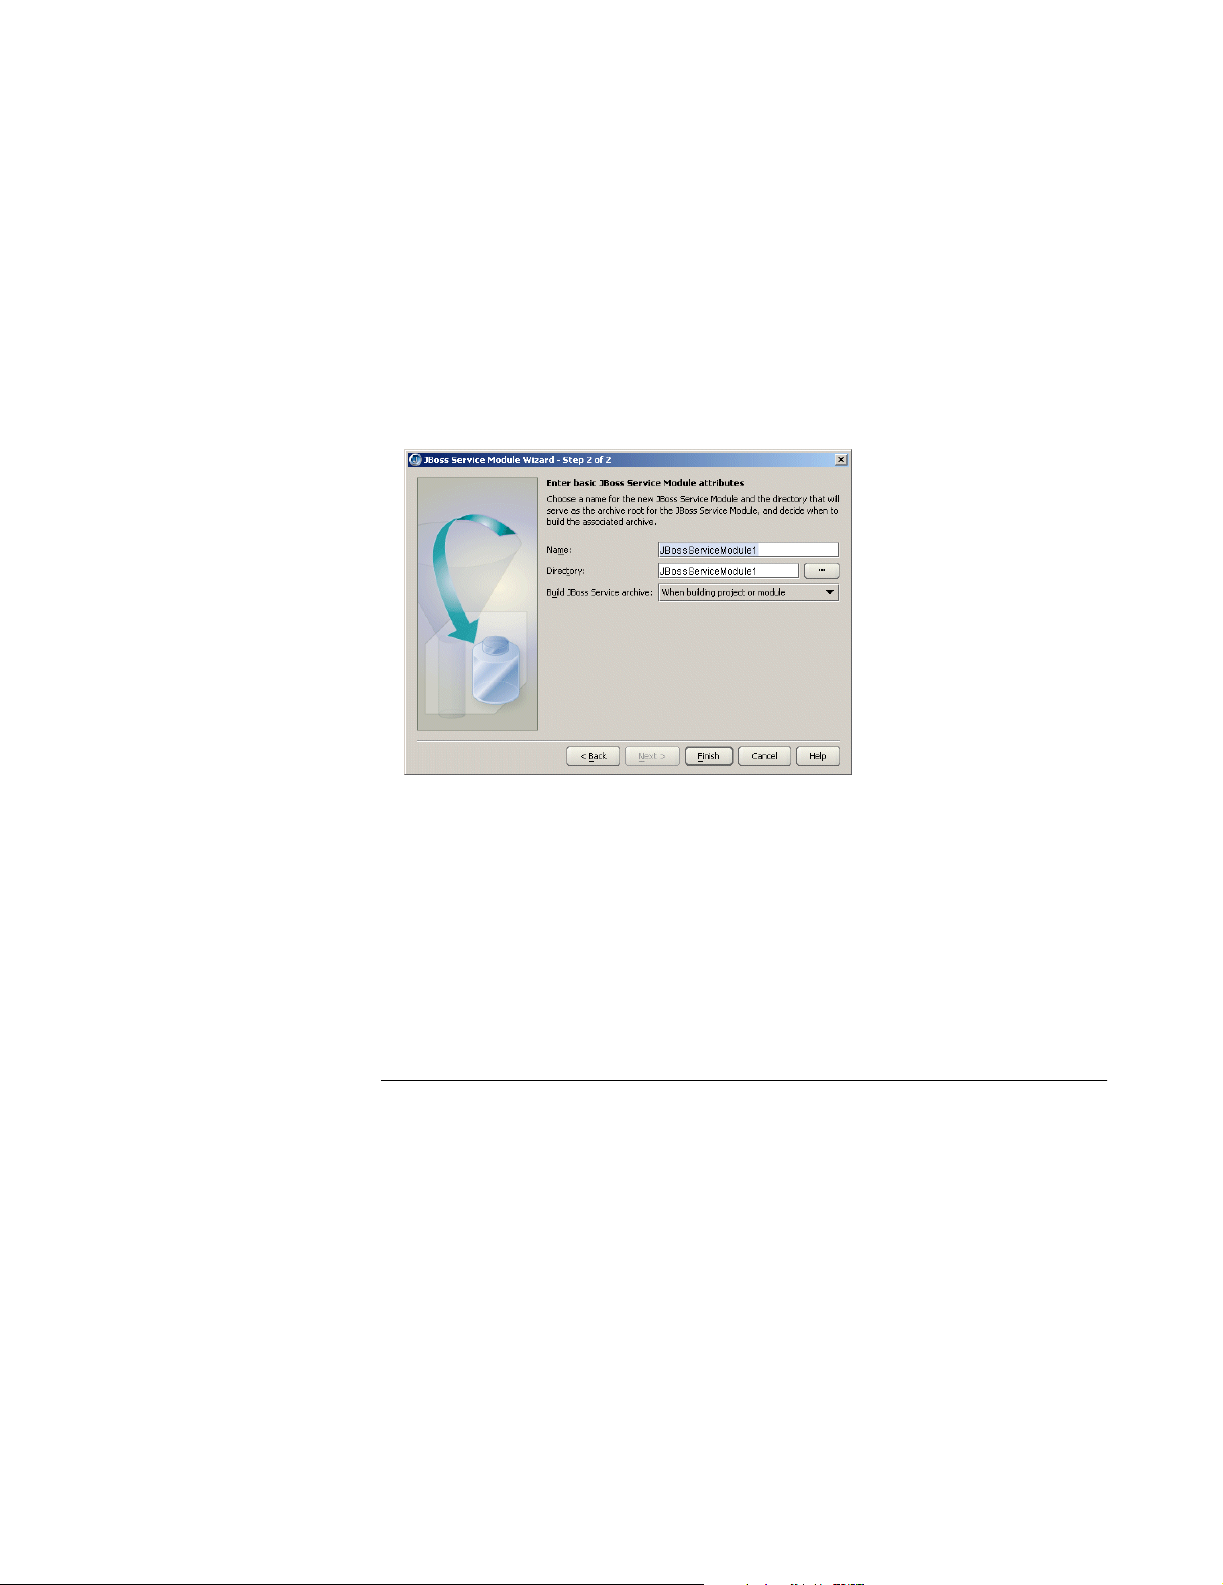
Creating a JBoss service module
2 Decide whether you are creating an empty JBoss service module that you will fill in
later, if you are copying an existing JBoss service module from a directory or
archive, if you are creating a JBoss module node that represents a service module
in a directory outside your project, or if you are creating a JBoss service node that
represents an archive (.sar).
Because your selection determines the behavior of the wizard, the next sections
describe how to use the wizard depending on the task you want to accomplish.
If you want to create a new empty JBoss service module,
1 Select the Create Empty JBoss Service Module option on the first page of the JBoss
Service Module wizard.
2 Click Next to see Step 2:
3 Specify a name to identify the new service module in the Name field. The default will
be the name of the selected directory.
4 Specify a directory name for the Directory field. This is the directory that will contain
the module. By default, the wizard uses the same name for the directory as the
name you specified in the Name field. You can use the ellipsis (…) button to
navigate to a directory you want to use instead, if you choose.
5 From the Build JBoss Service Archive drop-down list, select when you want the
JBoss service archive to be built.
6 Choose Finish.
Copying an existing JBoss service module
You can use an existing JBoss service module by copying it to your current project with
the JBoss Service Module wizard:
1 Select the Copy JBoss Service Module From A Directory Or Archive option on the
first page of the JBoss Service Module wizard.
2 Use the ellipsis (…) button to browse to the location of the directory or archive that
contains the module or archive you want to copy to the your project.
Chapter 9: Using JBuilder with JBoss servers 85
Page 92
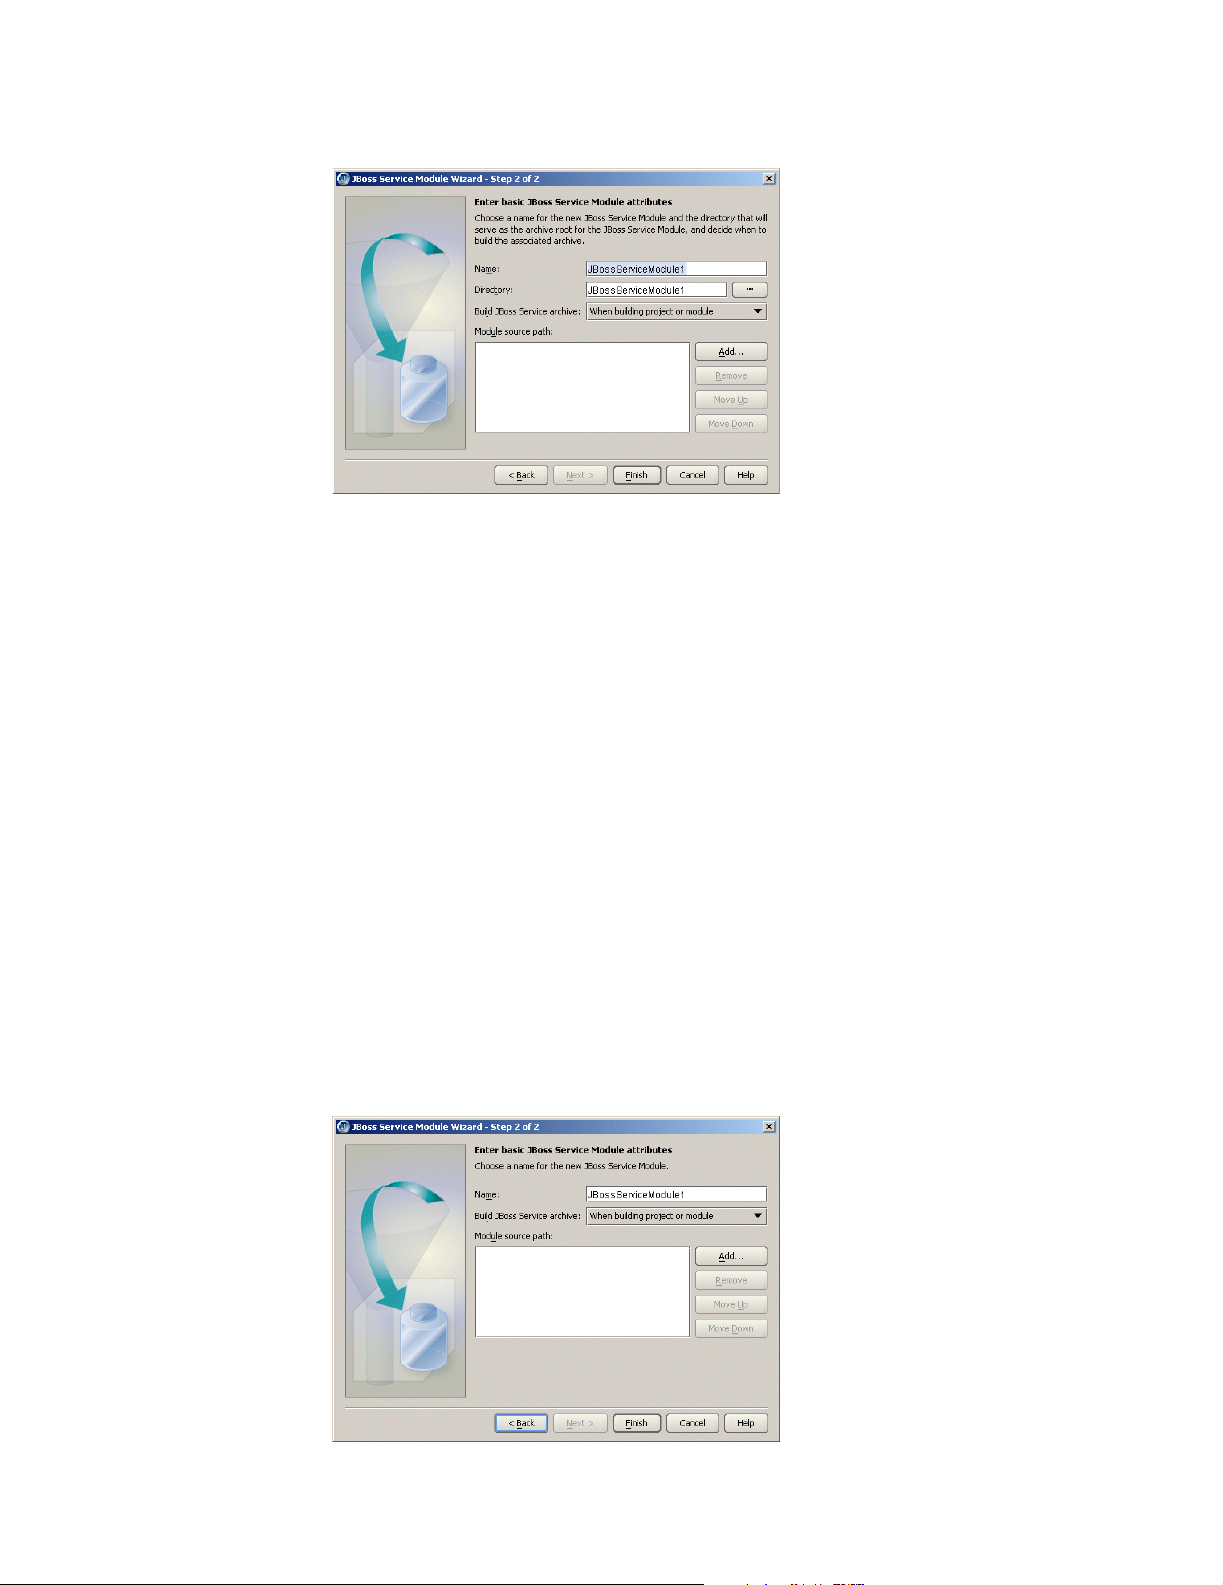
Creating a JBoss service module
3 Click Next.
4 Specify a name to identify the new module in the Name field.
5 Specify a directory name for the Directory field. By default, the wizard uses the
same name for the directory as the name you specified in the Name field. You can
use the ellipsis (…) button to navigate to a directory you want to use instead, if you
choose.
6 You might want to add Java source paths that are necessary to build a module. It
isn’t absolutely necessary to add the source paths in this wizard, however. You can
also add additional source path directories to your project directly. If you choose to
add the source path directories using the JBoss Service Module wizard, the
directories you specify will be added to your project source path. If you choose to
add to the module’s source path, click the Add button and navigate to the Java
source file directories you want to add. Continue until all source file directories are
added. You can order the source file directories using the Move Up and Move Down
buttons on the page, and you can select a previously added source file directory and
delete with the Remove button.
7 Choose Finish.
You can use an existing module in a directory outside your project; you don’t have to
copy it to your current project:
1 Select the Create A JBoss Service Module For An Existing Directory Or Archive on
the first page of the JBoss Service Module DD Editor.
2 Use the ellipsis (…) button to browse to the location of the directory that contains the
module.
3 Click Next.
86 Developing Applications for J2EE Servers
Page 93
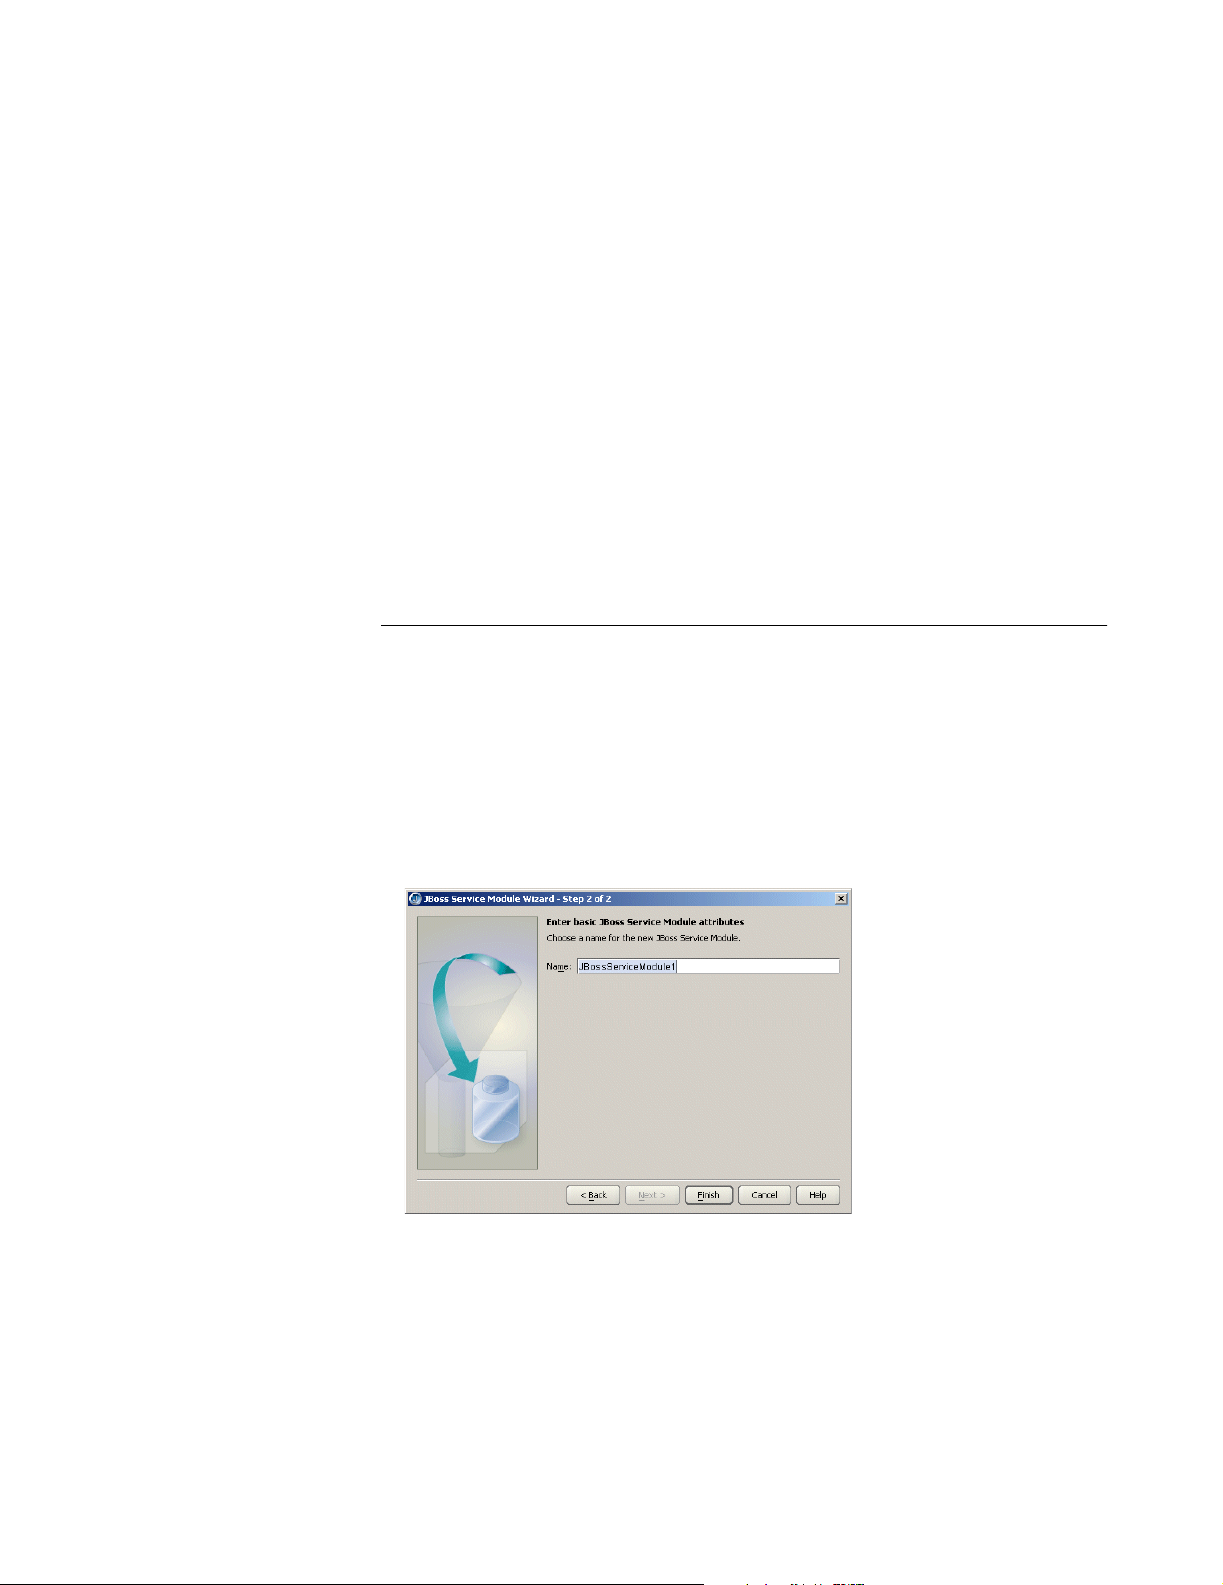
Creating a JBoss service module
4 Specify a name to identify the new JBoss service module in the Name field.
5 From the Build JBoss Service Archive drop-down list, select when you want the
service archive to be built.
6 Use the Add button to add the source path for any Java files associated with the
module.
You might want to add Java source paths that are necessary to build a module. It
isn’t absolutely necessary to add the source paths in this wizard, however. You can
also add additional source path directories to your project directly. If you choose to
add the source path directories using the JBoss Service Module wizard, the
directories you specify will be added to your project source path. If you choose to
add to the module’s source path, click the Add button and navigate to the Java
source file directories you want to add. Continue until all source file directories are
added. You can order the source file directories using the Move Up and Move Down
buttons on the page, and you can select a previously added source file directory and
delete with the Remove button.
7 Choose Finish.
Creating a JBoss service node for an existing service module
archive (SAR) in a directory outside your project
You can create a JBoss service module archive node that is outside your current
project. Although you will be able to view the contents of the archive using the JBoss
Service Module DD Editor, you won’t be able to edit it. The module node will be read
only. You also won’t be able to build it, but you will be able to deploy it.
1 Select the Create A JBoss Service Module For An Existing Directory Or Archive on
the first page of the JBoss Service Module DD Editor.
2 Use the ellipsis (…) button to browse to the location of the directory that contains the
module.
3 Click Next.
4 Specify a name to identify the new module in the Name field.
5 Choose Finish.
Chapter 9: Using JBuilder with JBoss servers 87
Page 94
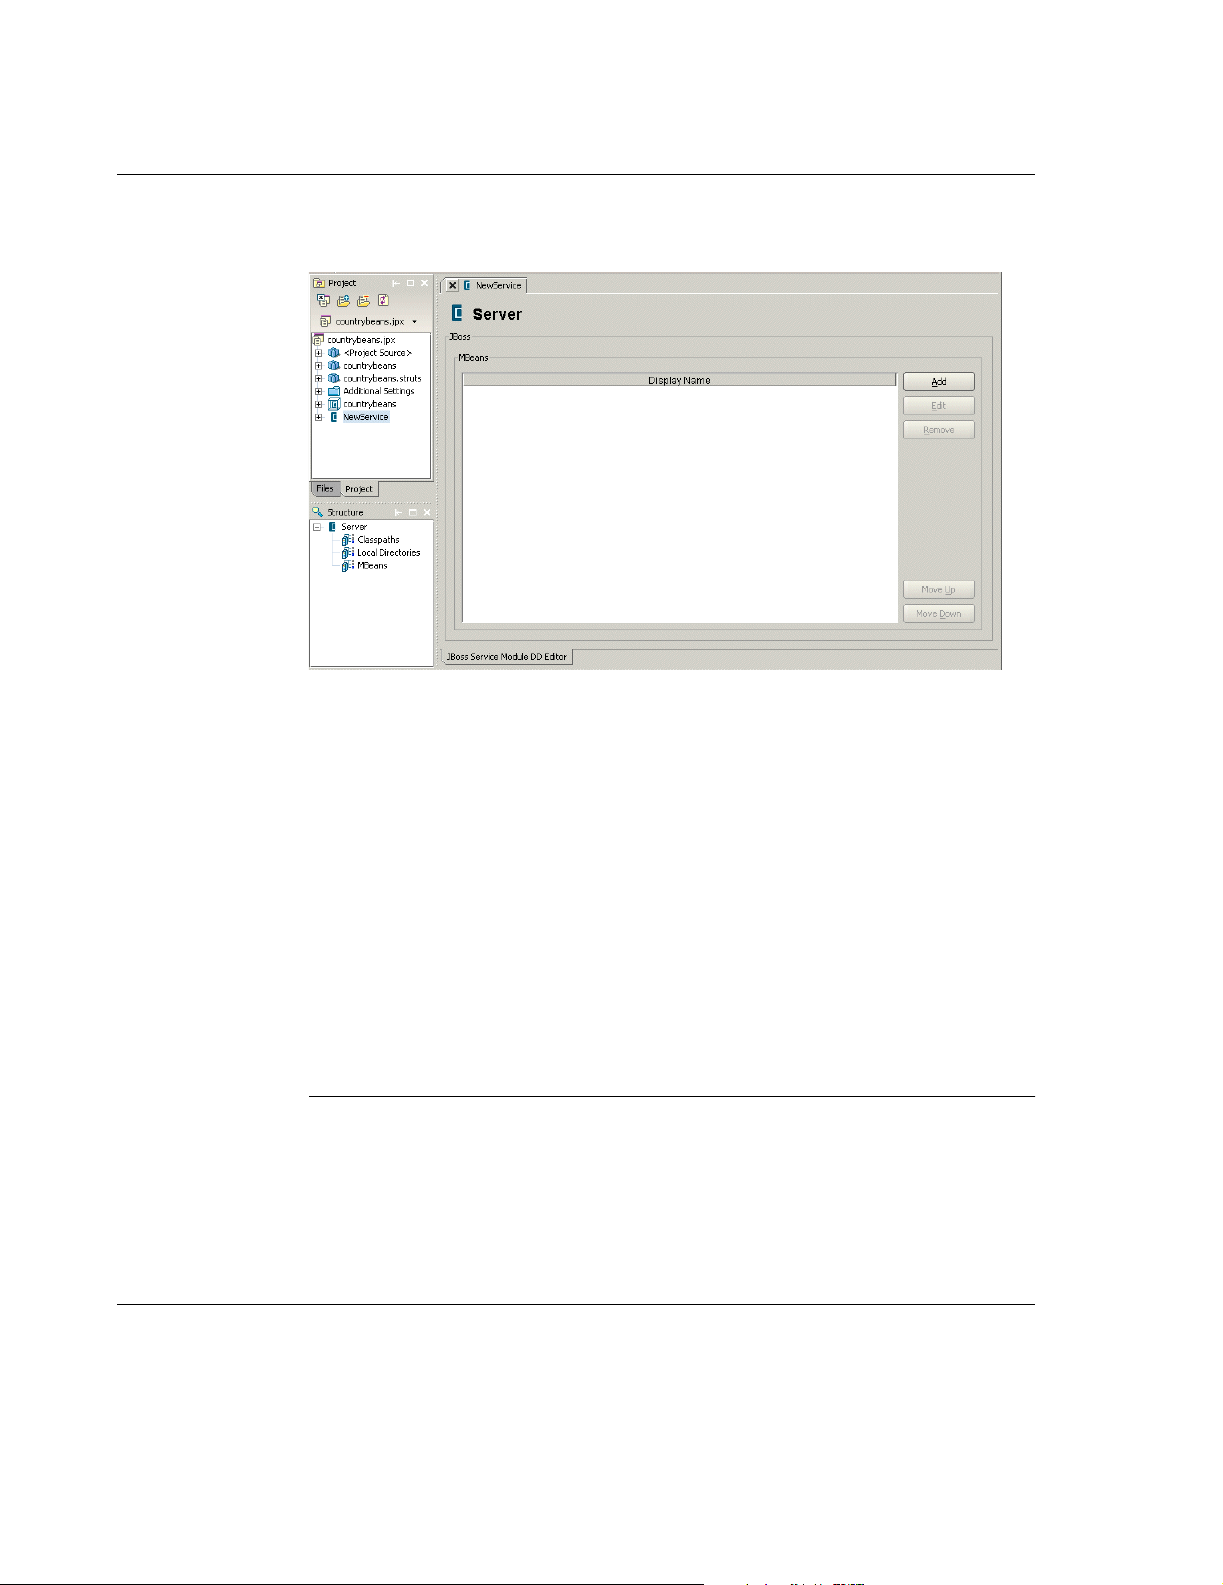
Editing the JBoss service module deployment descriptor
Editing the JBoss service module deployment descriptor
Once you’ve created a JBoss service module, you edit the module’s deployment
descriptor using JBuilder’s JBoss Service Module DD Editor. To display the editor,
double-click the new service module that appears in the project pane:
Now you can customize the service module deployment descriptor (
with the values you need for your new service. The JBoss Service Module DD Editor
works just like the other J2EE DD Editors in JBuilder. To learn how to add pages and
edit them in the DD Editor, see Chapter 11, “Editing J2EE deployment descriptors.”
In the structure pane, you can see that there are JBoss-specific nodes for Classpaths,
Local Directories, and MBeans. Add a Classpath, Local Directory, or MBean by rightclicking the category of the item you are adding and choosing Add on the context menu
that appears. Then double-click that new entry in the structure pane to display a page
for it in the JBoss Service Module DD Editor. For assistance filling in the fields on these
pages, display the page and press F1. You’ll find JBoss documentation useful in filling
in the fields, too.
At any time you can view the
the service module node in the project pane to see the Deployment Descriptors node
and then expand that node too. The
click it to see the it in the content pane. You can edit the file by hand, if you wish.
jboss-service.xml descriptor in its source form. Expand
jboss-service.xml node becomes visible. Double-
jboss-service.xml)
MBeans
All JBoss services are in MBeans. So your service module will have one or more
MBeans. Once you’ve added an MBean entry to the module, expand the entry in the
structure pane to see Attributes, Depends Items, and Depends Lists nodes. Add
entries to these categories by right-clicking them and choosing Add. Press F1 for help
filling in the fields.
Starting the server
To prepare to start the server from within JBuilder, create a server runtime
configuration. Follow these steps:
1 Choose Run|Configurations.
2 In the dialog box that appears, click the New button.
88 Developing Applications for J2EE Servers
Page 95
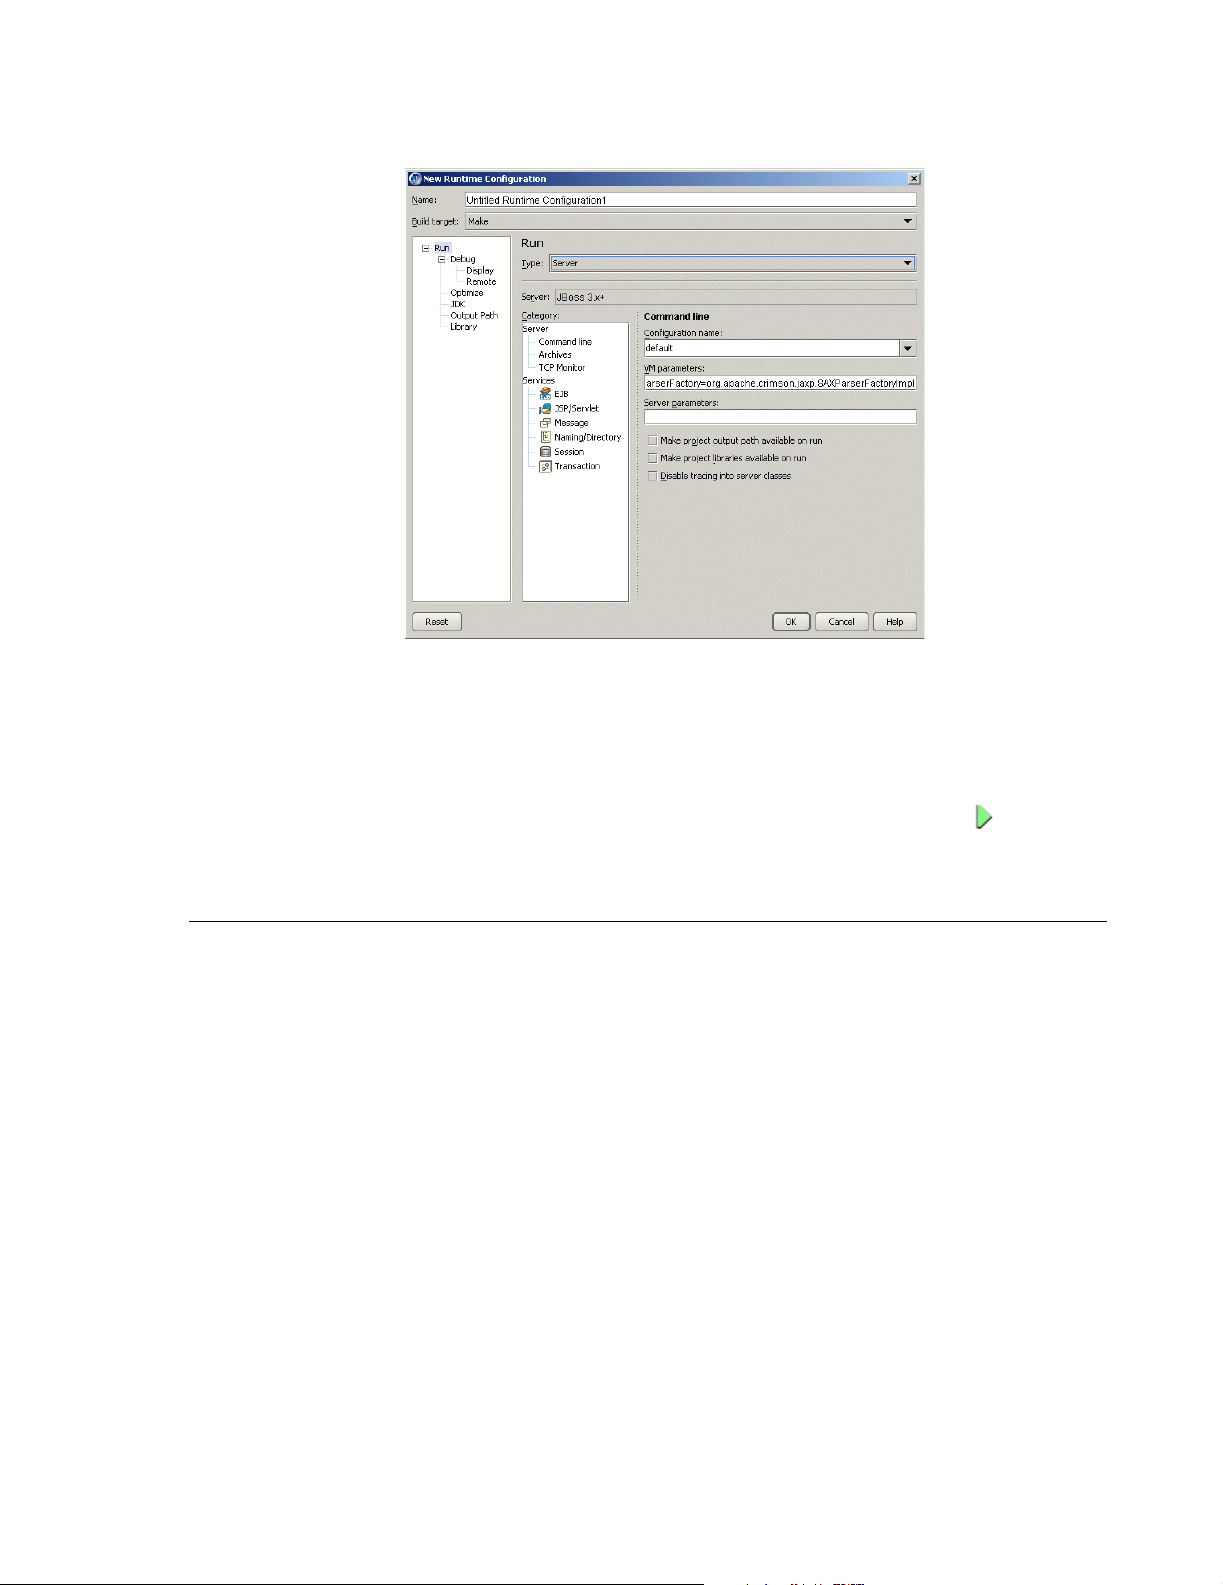
3 Select Server from the Type drop-down list.
Deploying locally
4 In the Name field, enter a name, such as Server or something that will identify the
5 Fill in the VM Parameters and Server Parameters needed to run the server. If you’ve
6 Click OK.
To start the server, click the down-arrow next to the Run Project icon ( ) and select
the server run configuration you just created.
Deploying locally
To deploy a deployable module to a local server, choose one of these options:
■
■
run configuration.
selected a target application server as described in “Selecting a server” on page 84,
default values are already in place.
Using the Enterprise|Server Deployment command:
a Choose Enterprise|Server Deployment to display the JBoss 3.x+ Deploy Settings
dialog box.
b From the Action drop-down list, select Deploy.
c Select the archive to deploy from the drop-down Archive To Deploy list or browse
to the archive you want to deploy using the ellipsis (…) button.
d Specify the correct deployment path for JBoss Server. Accept the default value or
browse to the correct directory using the ellipsis (…) button.
e Choose OK.
Deploying from the project pane:
a Right-click the module you want to deploy in the project pane and choose Properties.
b Select Deployment in the tree to display the Deployment page.
c Specify the correct deployment path for JBoss Server. Accept the default value or
browse to the correct directory using the ellipsis (…) button.
d Choose OK.
e Right-click the module you want to deploy in the project pane and choose Deploy
Options|Deploy.
Chapter 9: Using JBuilder with JBoss servers 89
Page 96

Deploying exploded web modules
Both the Server Deployment dialog box and the Deployment page of the Project|
Project Properties dialog box have these two options:
■
Include System Modules When Listing Deployments
■
Include Disabled Modules When Listing Deployments
These options allow you to fine tune what you see when you list deployments using
either the List Deployments action in the Server Deployment dialog box or when you
right-click a module and choose Deploy Options|List Deployments. Listed deployments
appear in a tree in the message pane. A system module is one that extends the server
and provides a service your modules can use. A disabled module is one you mark as
Disabled by right-clicking the module and choosing Deploy Options|Disable. When a
module is disabled, it is simply renamed to <module>.disabled. To enable a module
again, right-click the module and choose Deploy Options|Enable.
Deploying exploded web modules
To deploy exploded modules, follow these steps:
1 Create a web module in a directory with the name <modulename>.<fileext>, such as
Module1.war, for example.
2 Ensure that the directory that contains the web module is at least one level below
the project directory. So, for example, if your project is created in a directory named
Project1, you might create your module in a directory named Project1/deploy/
<modulename>.<fileext>.
3 Edit the jboss-service.xml file in your JBoss configuration directory (<CONFIG_NAME>/
conf
). Add the parent directory of your module directory (such as Project1/deploy) to
the URL attribute element under the mbean named
jboss.deployment:type=DeploymentScanner,flavor=URL. For example, deploy/,file://
C:/Project1/deploy/
4 Start the server.
. Be that you add to the existing URL attribute (deploy/).
Remote debugging
Within JBuilder, follow these steps:
1 In the project from which you want to launch the remote debug session, click Run|
Configurations. If you have not yet created a server type run configuration, click
New and select type Server. If you have already created a server type run
configuration, select it and choose Edit.
2 Select Debug|Remote in the tree.
3 Check the Enable Remote Debugging option.
4 Enter the host name (the name of the machine on which the server is running.)
5 Specify the correct port number for the remote server.
6 Click OK.
7 Click the down arrow next to the Debug Project icon ( ) on the JBuilder toolbar
and select the debug run configuration you just created or edited. You will now be
able to set breakpoints in Java code, such as in EJBs, servlets, and so on.
90 Developing Applications for J2EE Servers
Page 97

JSP debugging
JSP debugging
Tomcat or Jetty do not support JSP source debugging, but you can remedy this
problem with the following steps:
1 Download Tomcat 4.0 from jakarta.apache.org/tomcat.
2 Browse to the lib directory of the Tomcat server install.
3 Search for the jasper-compiler.jar and the jasper-runtime.jar in your JBoss
installation and replace them with the
runtime.jar
For more information about JSP debugging, see “Debugging JSPs” in the “JavaServer
Pages (JSP)” chapter of the Developing Web Applications.
found in the Tomcat 4.0 server’s lib directory.
jasper-compiler.jar and the jasper-
Chapter 9: Using JBuilder with JBoss servers 91
Page 98

92 Developing Applications for J2EE Servers
Page 99

Chapter
10
Chapter10Using JBuilder with Tomcat
Web Development is a
feature of JBuilder
Developer and
JBuilder Enterprise
Tip If you want to use an earlier version of Tomcat, you can download the binary
Both Java servlets and JavaServer Pages (JSP) run inside web servers. Tomcat, the
JavaServer Pages/Java Servlets reference implementation, is included with JBuilder.
Although it might differ from your production web server, Tomcat allows you to develop
and test your servlets and JSPs within the JBuilder development environment. This
chapter explains how to work with Tomcat running inside JBuilder.
When you install JBuilder, two versions of Tomcat, 4.1.30 and 5.0.27, are automatically
installed in your JBuilder directory. By default, they are automatically configured. You
can examine the configuration with the Configure Servers dialog box (Enterprise|
Configure Servers).
Tomcat 4.is the JDK 1.4 Lightweight Edition. This edition does not contain an XML
parser (JDK 1.4 has one built in) and a few other publicly available components. You
can download the full edition from
Servers dialog box to point to it.
In JBuilder Enterprise, Tomcat 5.0 is the default server. To change the default for your
project, see “Setting up servers within JBuilder” on page 20. Tomcat 5.0 supports JSR45, allowing you to debug non-Java source, both locally and remotely. For more
information, see “Debugging non-Java source” in Building Applications with JBuilder.
distribution locally and use the Configure Servers dialog box (Enterprise|Configure
Servers) to configure it.
http://jakarta.apache.org/ and use the Configure
Chapter 10: Using JBuilder with Tomcat 93
Page 100
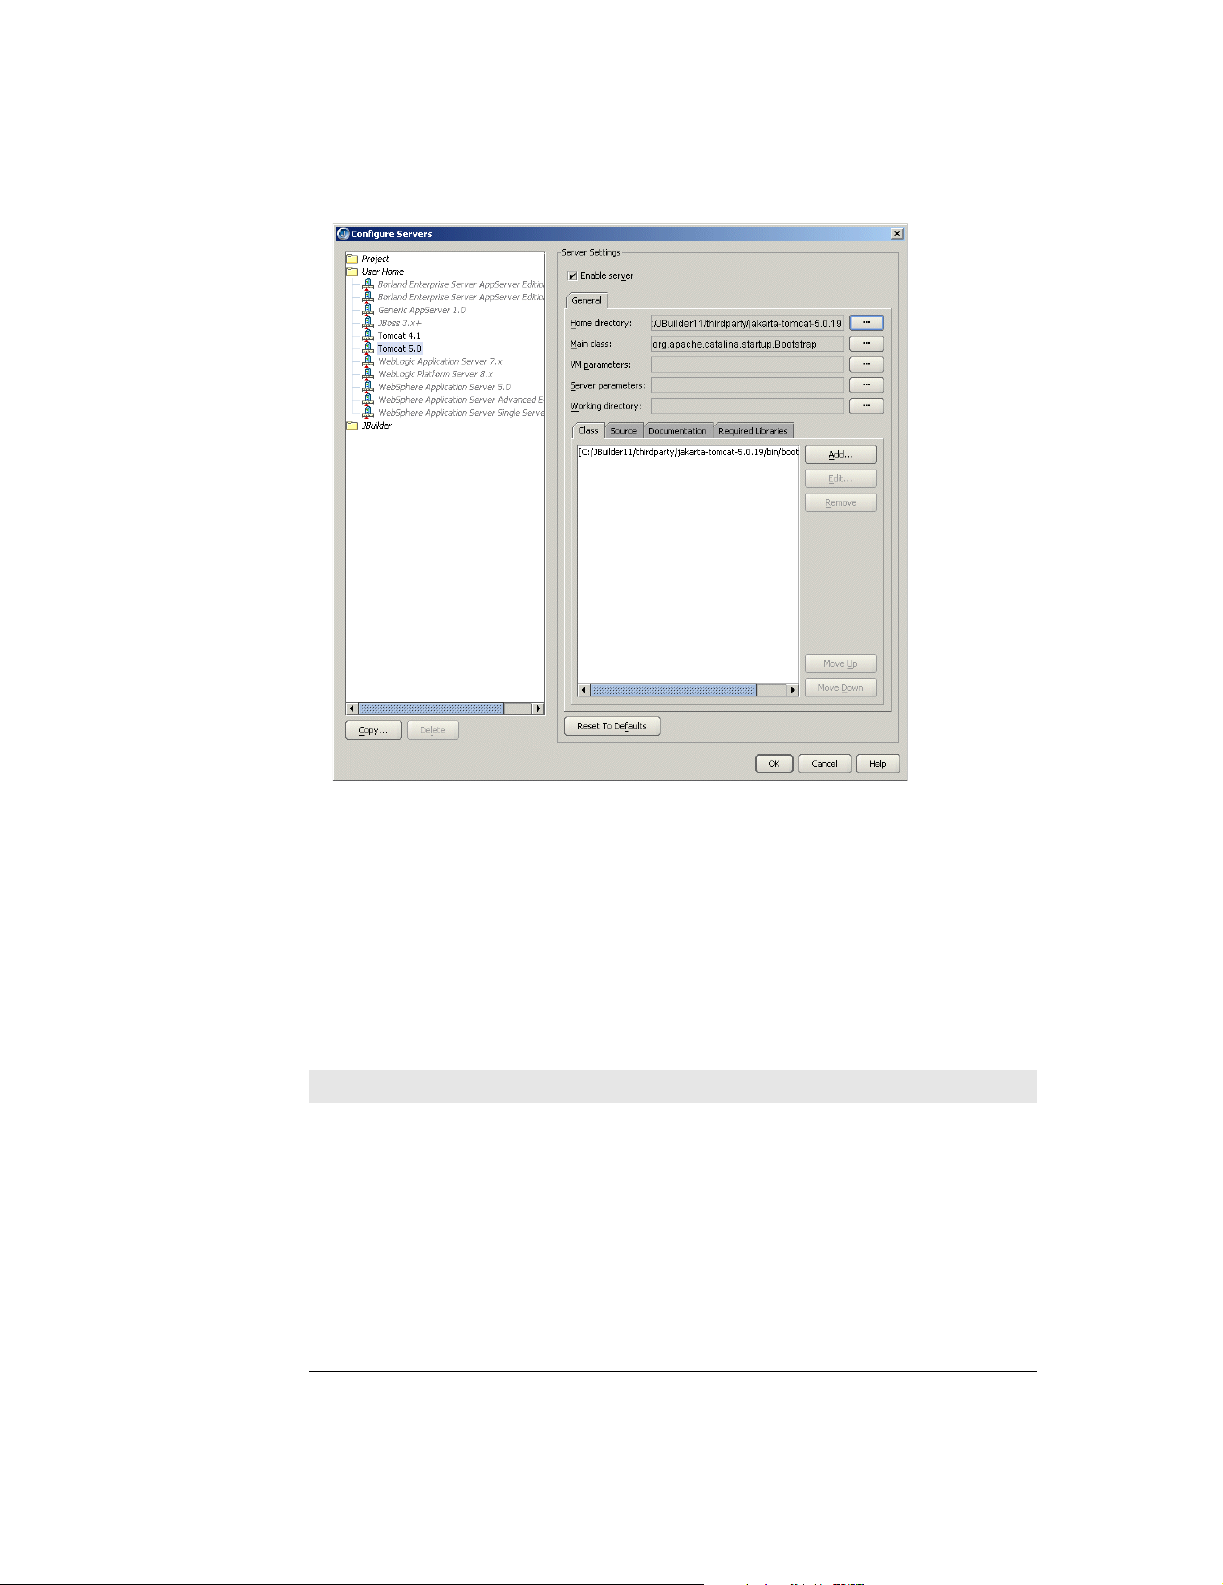
Using JBuilder with Tomcat
To view Tomcat configurations,
1 Choose Enterprise|Configure Servers. The Configure Servers dialog box is
displayed.
Note In the tree on the left side of the dialog box, entries in gray have not yet been
configured. Entries in red are invalid.
2 Choose one of the Tomcat installations from the User Home folder. The Enable
Server option at the top of the right side of the dialog box is automatically checked.
You do not need to change any settings.
3 Click OK to close the dialog box.
If you have installed Tomcat to another directory and want to run Tomcat from that
directory instead of the default, you can change the settings to point to that directory.
The following table explains the settings.
Table 10.1 Configure Servers dialog box settings for Tomcat
Option Description
Home directory Tomcat’s home directory. If you’re reconfiguring one of the Tomcat
Main class The main class for starting the Tomcat web server.
VM parameters The parameters to pass to the Java VM running the web server.
Server parameters The parameters to pass to the web server.
Working directory The working directory.
Class The location of Tomcat class files.
Source The location of Tomcat source files.
Documentation The location of Tomcat documentation files.
Required Libraries The libraries that Tomcat requires.
versions installed with JBuilder, this will be in the
thirdparty
directory.
<jbuilder>/
94 Developing Applications for J2EE Servers
 Loading...