

Page 1
Page 2
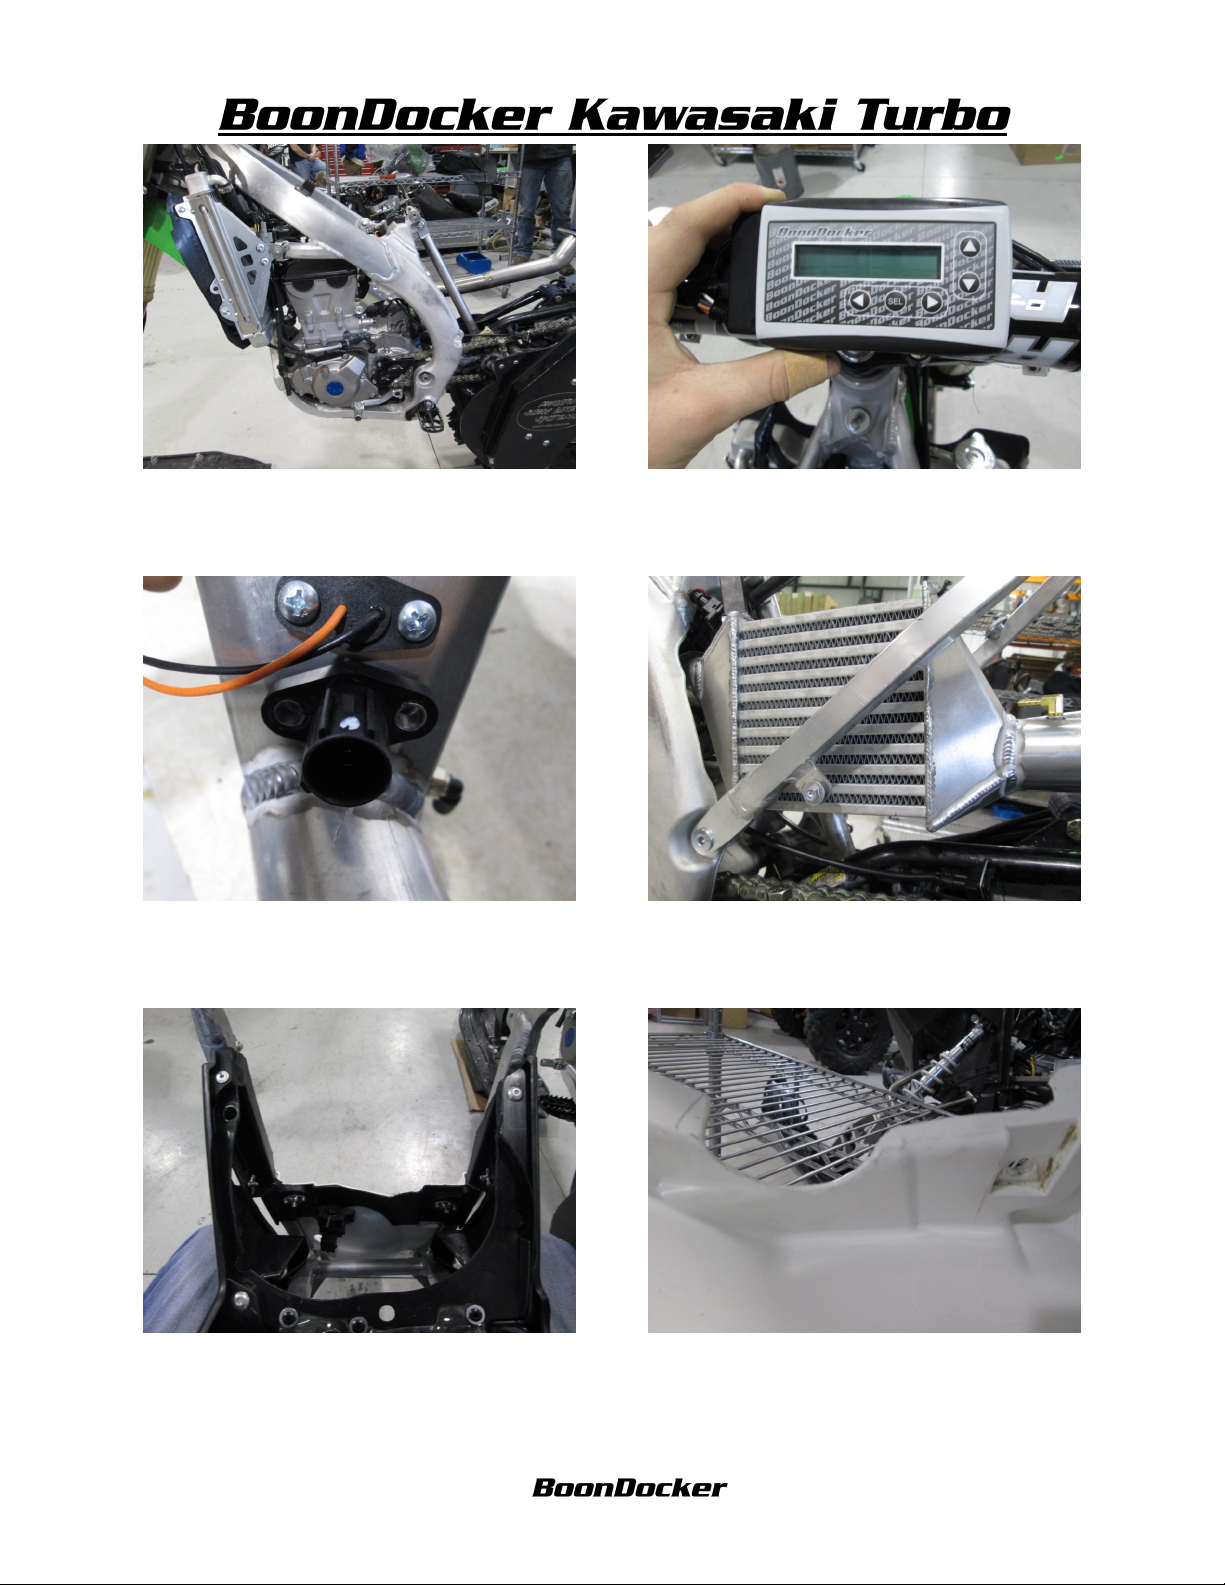
1. Remove seat, side panels, tank, silencer, sub
frame, fender & air box.
2. Route control box from handle bars along
wire harness. Mount to the handlebars. Zip tie
wire harnesses together away from hot parts.
Ground on the frame to a good ground.
3. Remove air temp sensor & o-ring from the
stock air box and install on intercooler with 2
self tapping screws. NOTE do not over tighten
screws.
5. Cut out air box to fit over the intercooler and
manifold. Place in sub frame to check its fit and
reinstall airbox to frame and install sub frame
4. Install intercooler with silicone pieces on both
ends with 2 hose clamps on each end. Plug in
both air temp sensors.
6. Cut rear fender on left side to fit around actuator and actuator bracket.
back into place. (the top is facing down)
Revised 1/23/2014 Page 2 of 6
www.boondockers.com………………..... ……….………………....877-522-7805
Page 3

7. Drill 3/4 hole size on left of rear fender to fit
feed line through
8. Drill 2 13/64 size holes to fit a zip tie through
to mount boost solenoid. Make sure the seat &
all related parts will clear the lines & solenoid.
9. Install oil filter cover. Make sure the filter is
installed correctly. Install oil pressure feed line
Route through frame and manifold as shown.
11. Install exhaust inlet with clamp. Leave loose
for fitting purposes.
10. Install oil drain line. Install 2 oil seal rings
between stator cover & banjo fitting on the Mag
cover for sealing purposes and mount hose loom
clamp on transmission housing as shown.
12. Mount turbo. Actuator bracket hooks to left
side of sub frame. You possibly will have to
loosen the actuator nuts for fitting purposes.
Revised 1/23/2014 Page 3 of 6
www.boondockers.com………………..... ……….………………....877-522-7805
Page 4

13. Place exhaust gasket in-between inlet and
turbo & install exhaust bracket. Put bolts and
nuts into place.
14. Mount exhaust bracket to right rear fender.
Leave loose for mounting. Install muffler and
put inlet bolts into place with nut on. Tighten
actuator, exhaust brackets & exhaust inlet.
15. Route oil feed line through sub frame to the
left side and through the 3/4 hole. Make sure
rubbing won’t occur.
17. Install actuator solenoid lines. Follow the
control box instructions for proper installation.
Revised 1/23/2014 Page 4 of 6
www.boondockers.com………………..... ……….………………....877-522-7805
16. Route oil drain line to the right of Timbersled frame and hook to turbo. Zip tie to frame
and tighten clamp.
18. If you have black Polly line you will need to
remove the line carefully from quick connections & install fuel line. If cutting stock fuel line
cut on straight of the line elsewhere might leak.
Page 5

19. Trim left side of rear panel to fit over actuator.
20. Cut left side of rear panel to fit air filter.
21. Install side panels, and seat. 22. Start bike, check oil pressure and check for
leaks. You might have to cut co length.
23. Don’t exceed 12 pounds of boost. 24.
Revised 1/23/2014 Page 5 of 6
www.boondockers.com………………..... ……….………………....877-522-7805
Page 6

25.
26.
27.
29.
28.
30.
Revised 1/23/2014 Page 6 of 6
www.boondockers.com………………..... ……….………………....877-522-7805
 Loading...