

Page 1

Page 2
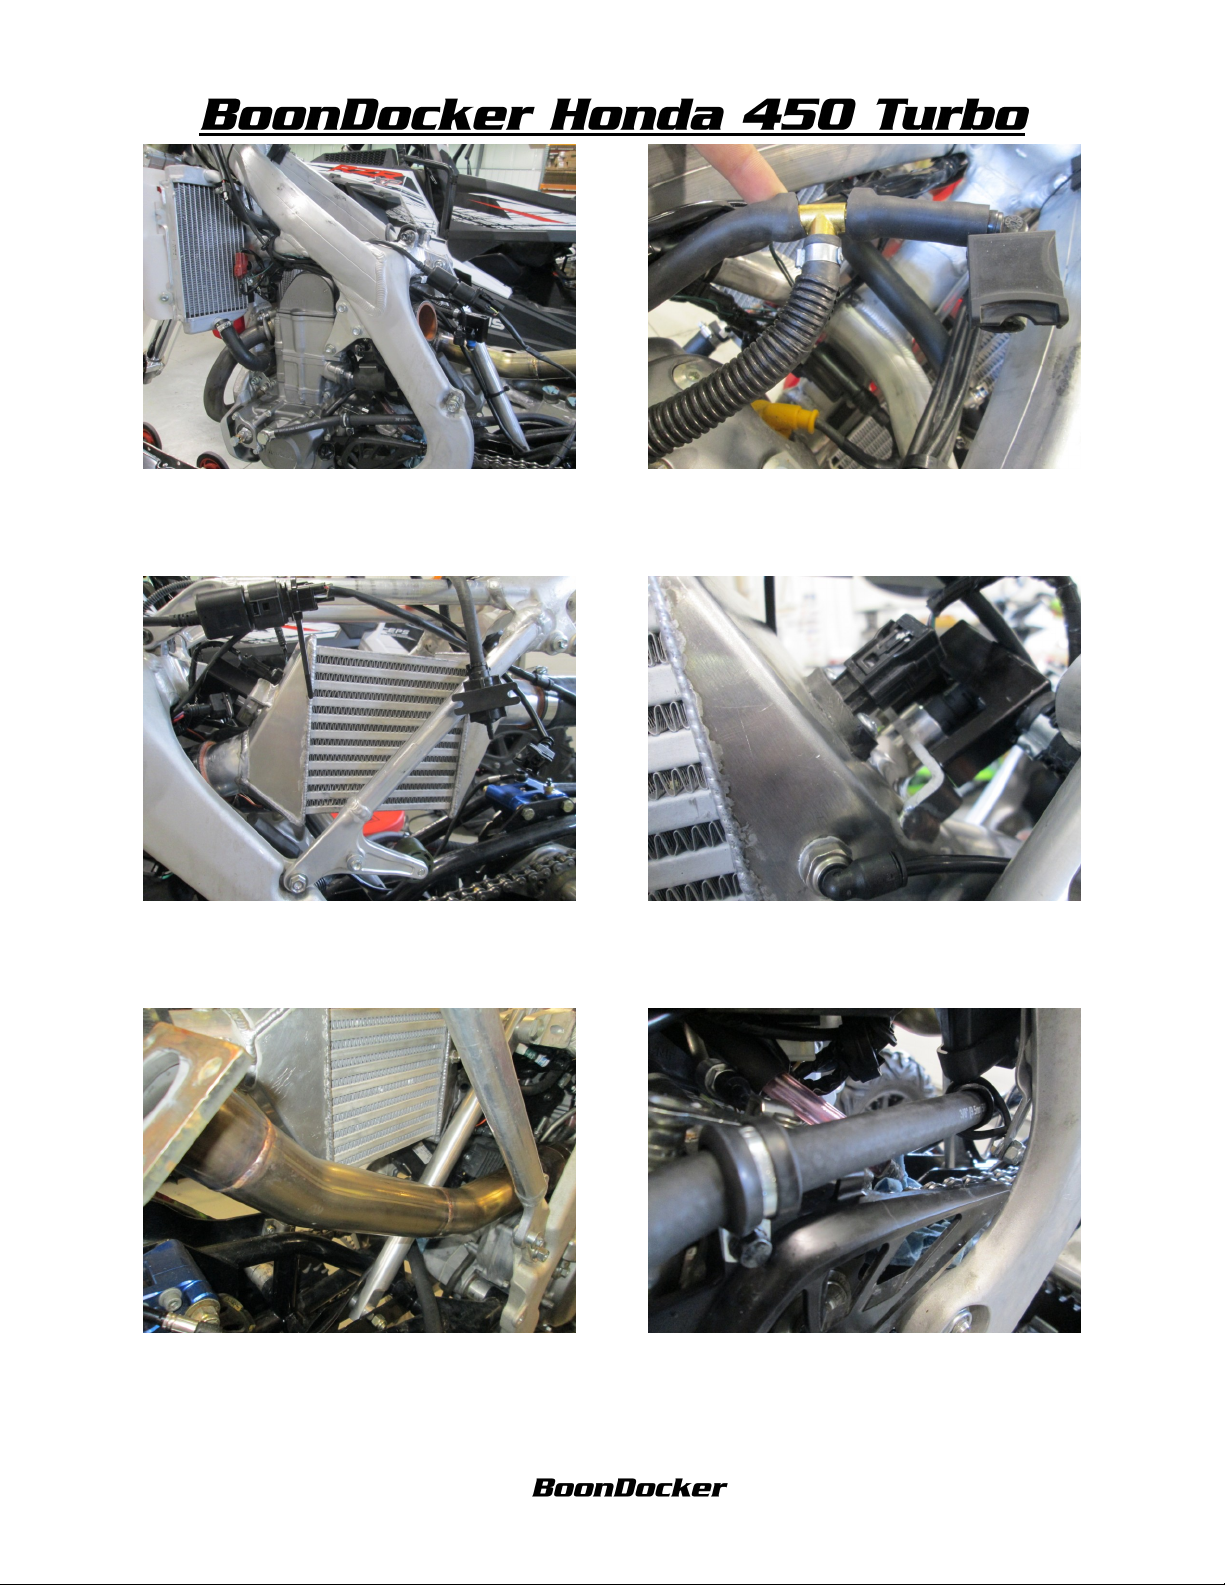
1. Remove the seat, tank, side panels, sub frame
and air box. Remove air temp sensor from air
box. Install the control box now.
2. Cut fuel line 2” from hose end. Put a clamp on
each cut end and insert brass T fitting on auxiliary injector line face towards the back of the
bike. Route under frame.
3. When installing the intercooler the 2” long
piece of silicone tube goes between the throttle
body & intercooler. 3” piece goes between the
turbo & intercooler.
5. Install exhaust inlet with the clamp placed at
the end of the manifold. Leave clamp loose till
turbo and brackets are tightened in place.
4. Put injector in place with silicone before installing intercooler and face the plug towards the
throttle body. Install the temp sensor so the plug
is facing upward (as shown).
6. Place oil drain line like shown with the brackets shown through the frame. Use chain guard
bolt to fasten the bracket down. Also to the
bracket just under the ECU with a bolt & nut.
Revised 2/28/2014 Page 2 of ?
www.boondockers.com………………..... ……….………………....877-522-7805
Page 3

7. On the banjo bolt 2 copper washers on the
inside, 1 on the outside by the bolt head. Route
along right side of Timbersled frame to the
turbo.
8. Route oil feed line along drain line till the
back of the intercooler. Use smaller bolt and
copper washers them tighten down on oil filter
cover.
9. Drill a 3/4” hole on the rear fender for the
feed line to go through.
10. Trim fender like shown to fit around intercooler and exhaust inlet (this is from the front of
the fender view).
11. Trim fender as shown to clear the waste gate
actuator rod.
12. Trim fender to fit around the actuator and
bracket.
Revised 2/28/2014 Page 3 of ?
www.boondockers.com………………..... ……….………………....877-522-7805
Page 4

13. Install gasket between flanges, put the bolts
and nuts loosely on. Tighten the silicone clamp
down and the exhaust bolts down after step #15.
14. Run feed line along the left side of inter-
cooler up to the 3/4” hole drilled & zip tie in
place.
15. Place muffler as shown with the Bracket. Put
nuts on the muffler evenly do not tighten yet.
Place a bolt on the exhaust and actuator bracket
to fasten turbo to the frame. Tighten evenly.
17. Place clamp around the muffler and support.
As you tighten down. Keep it aligned and in
place. You may have to lift on the muffler to
align correctly. Tighten all turbo bolts.
16. Place muffler support bracket in place leave
bolts loose until the muffler bracket clamp is
tightened.
18. Route drain line, install line to turbo drain &
zip tie the line to the timber sled frame (as
shown). Tighten hose clamp for drain.
Revised 2/28/2014 Page 4 of ?
www.boondockers.com………………..... ……….………………....877-522-7805
Page 5

19. Zip tie boost solenoid to the oil feed line
above intercooler.
20. Trim right fender to assure proper fitment
around turbo and muffler. NOTE: you have to
leave the tab part on the fender to ensure the side
panel to fit correct.
21. Trim left side panel to fix around actuator
and bracket. (Inside View)
23. Once you have the seat, tank and panels installed start the bike to check if oil is coming out
22. Route feed line through hole in the fender to
the feed line fitting on the top of the turbo.
24.
of the oil feed line, turn off bike and finish installing the line.
Revised 2/28/2014 Page 5 of ?
www.boondockers.com………………..... ……….………………....877-522-7805
 Loading...