

Page 1
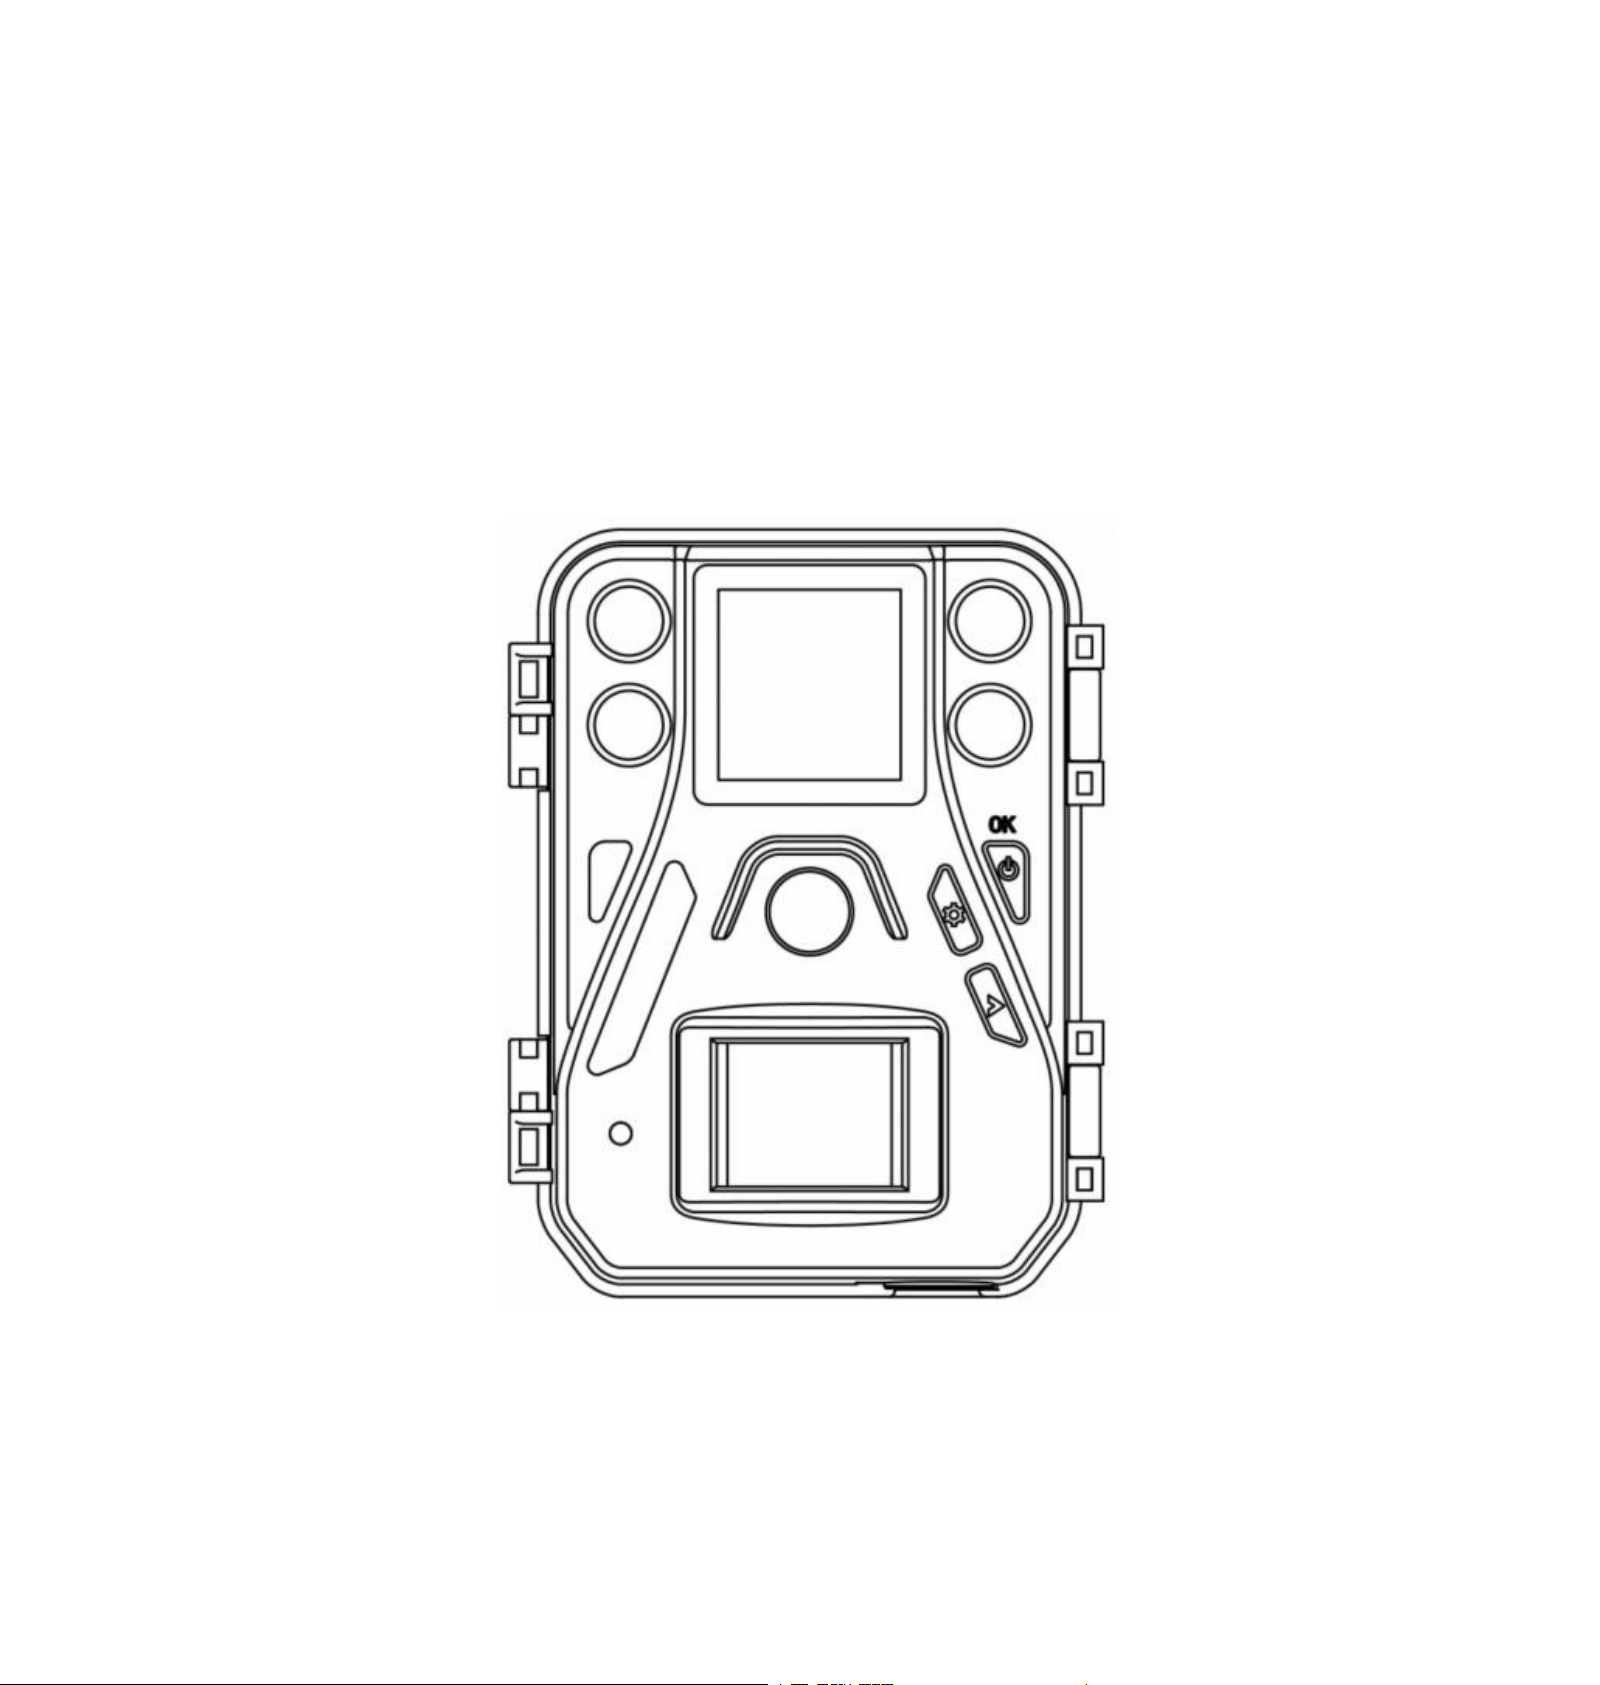
Infrared Digital Scouting Camera
User Manual
SG520
Page 2

Page 3

Table of Contents
1.Getting Started
2 .Camera Operation
2.1 Batteries / Power Supply
2.2 SD Card Information
2.3 Camera Modes
2.4 Trigger Mode
3. Camera Setup Settings and Display
3.1 Settings Interface & Display
3.2 Manual Image / Video Capturing
3.3 Manage Images and/or Videos
............................................................................
...................................................................
............................................
...................................................
................................................................
...................................................................
......................................
.................................
...........................
................................
1
3
3
3
4
5
7
7
8
8
3.4 Camera Setup Options
4 .Trouble Shooting
5. PIR Detection Zone
6.Technical Specifications
7. Parts List
...................................................................................
...................................................................
...............................................................
................................................
......................................................
8
11
12
13
14
Page 4

Page 5
Page
1
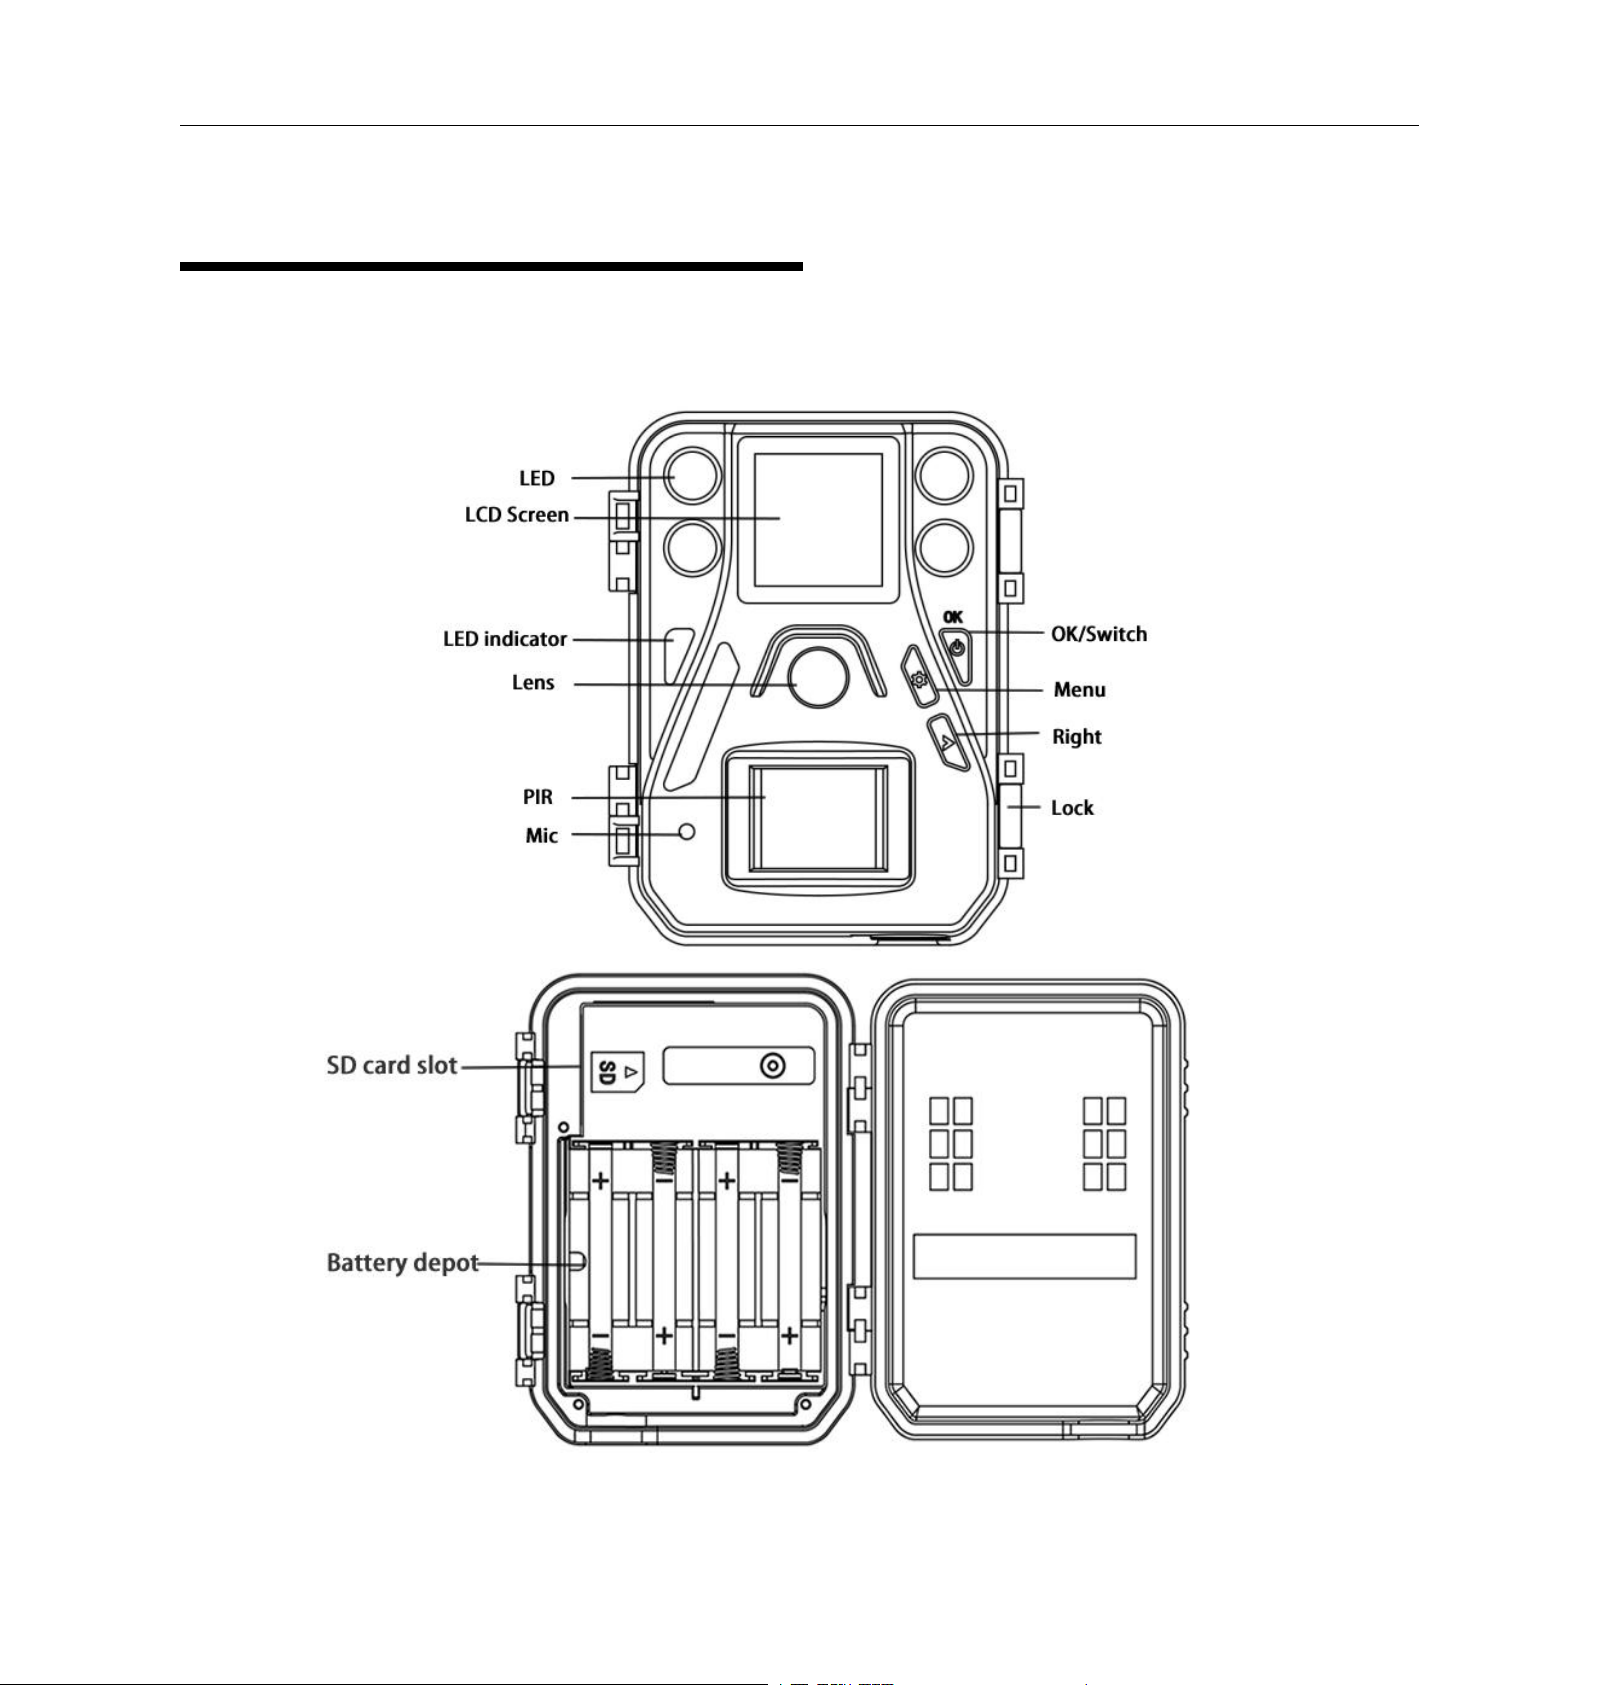
1.Getting Started
Boly Trail Camera-SG520
Page 6
Boly Trail Camera-SG520
Page
2
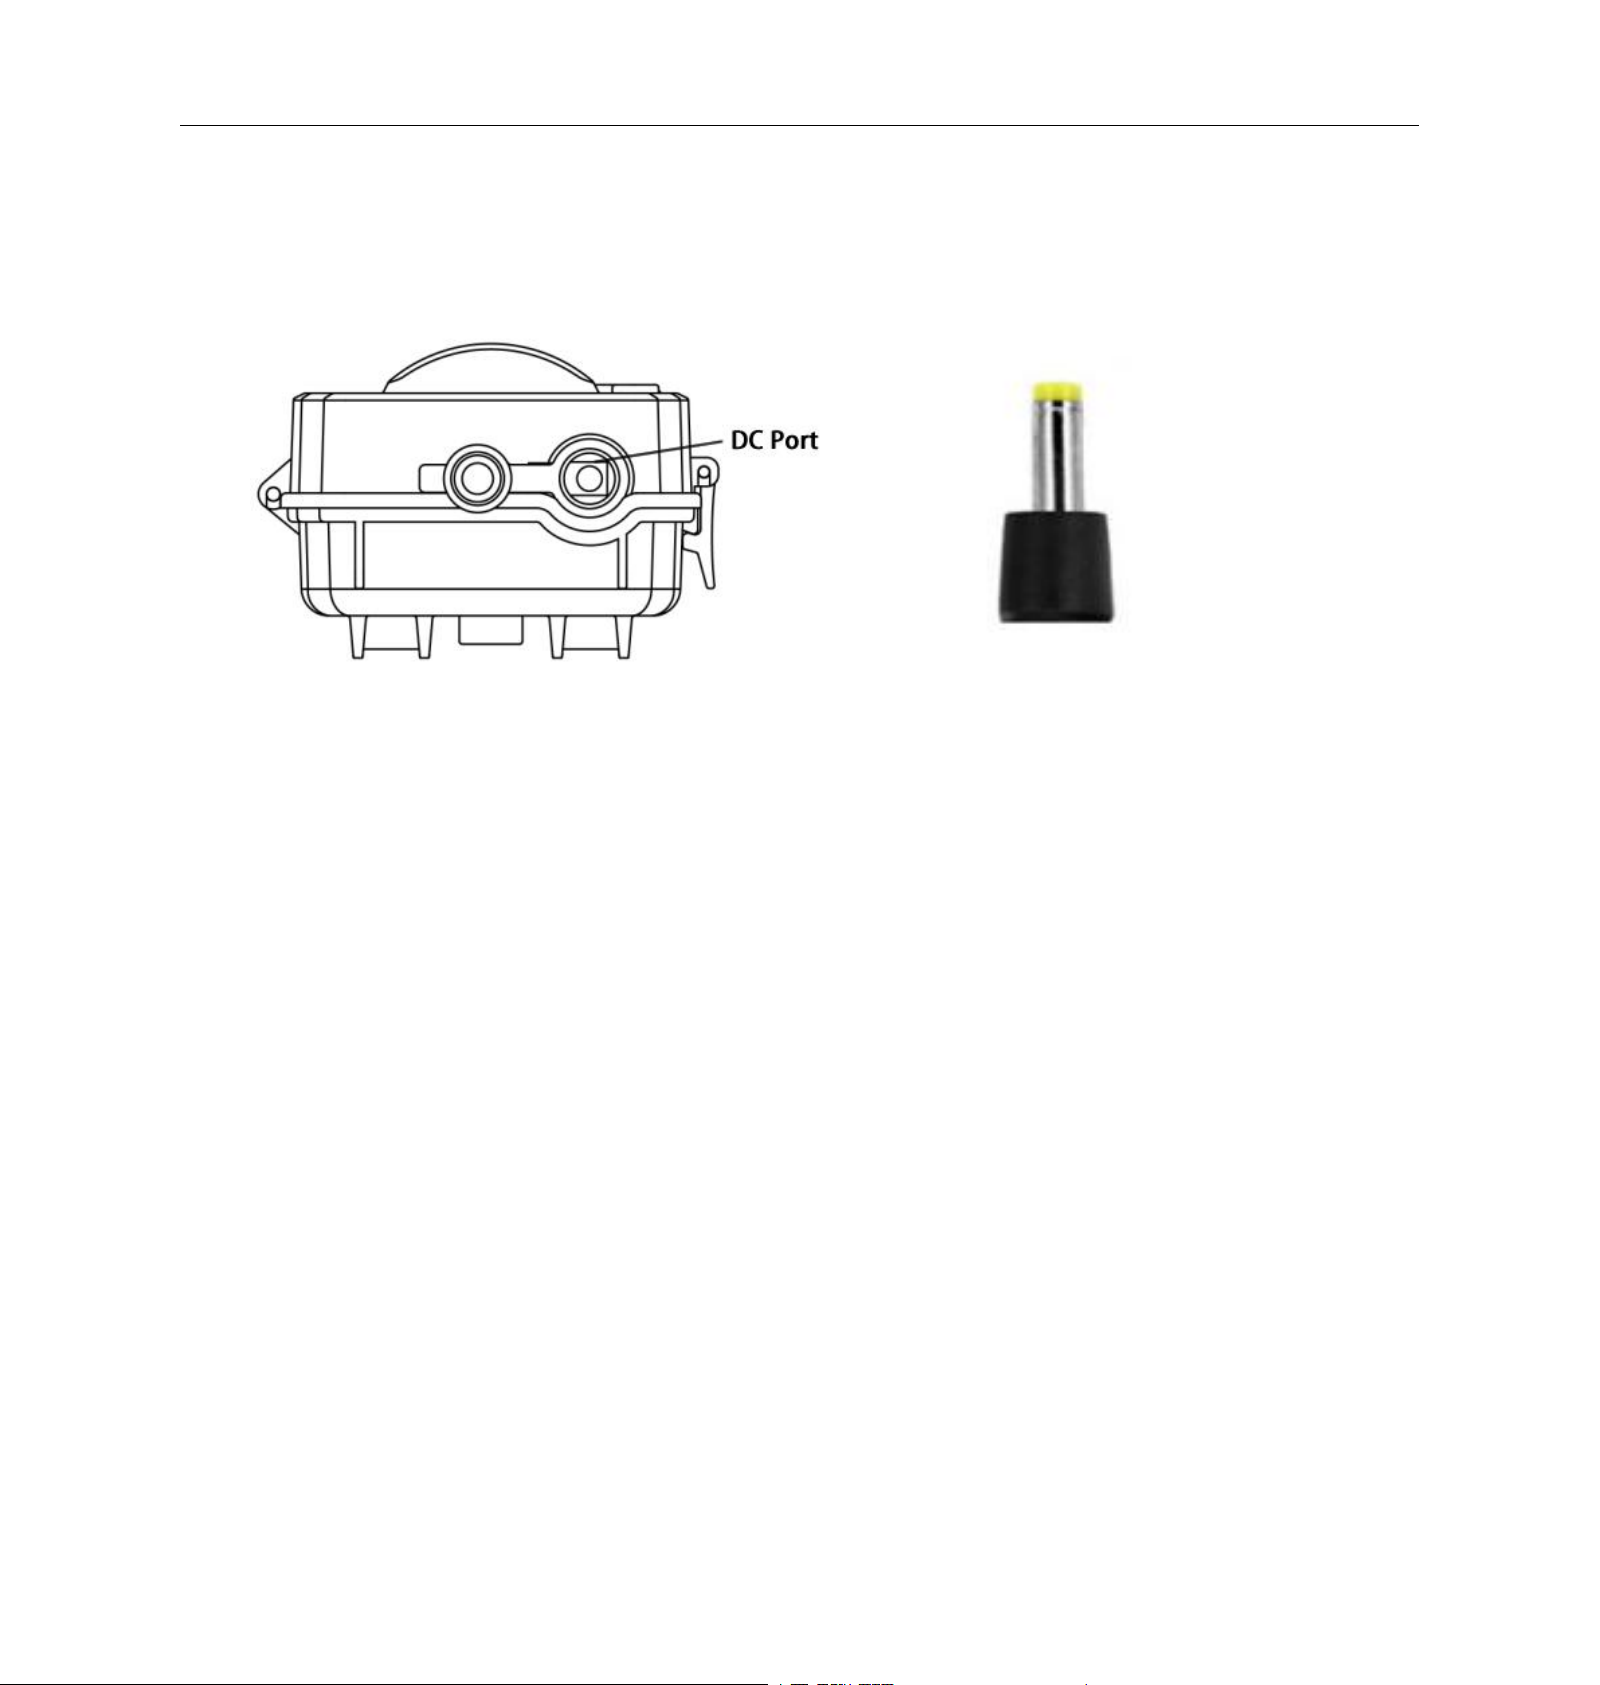
External AC/DC connector 4*1.7mm
Page 7

Page
3
2 .Camera Operation
The camera is powered by four AA batteries - high-density,
high-performance, rechargeable alkaline or NiMH batteries are
recommended. When the batteries are low, the camera will
beep twice and automatically shut down.
A DC 6-Volt, 2 Amp external power supply adapter can also be
used to power the camera (not included).
To take full advantage of the latest technologies, we
recommend Class 10 SD cards or better, which have fast
transfer speeds and long durability for extensive shooting in the
most extreme outdoor conditions. Secure Digital High Capacity
(SDHC) PRO cards work with SDHC compatible devices only.
Please check that your product is compatible with SDHC cards.
Insert the SD card into the camera before turning on
the camera
This camera requires the use of a removable SD card and has
no built-in internal memory. The camera will not function if the
SD card is not properly inserted.
Make sure the SD card is unlocked before inserting it
into the camera
2.1 Batteries / Power Supply
Boly Trail Camera-SG520
2.2 SD Card Information
Page 8

Boly Trail Camera-SG520
Page
4
The camera will operate properly with a locked SD card
inserted, but the card will not be able to store captured images
or videos taken by the camera.
Do not remove the SD card while the camera is on
Removing the SD card, while the camera is on, risks damaging
the internal components of the camera.
If you experience any problems with an inserted SD
card
Try reformatting the SD card, using the camera’s main settings
option.
The different modes are accessed by pressing the OK button,
marked on the camera:
To turn on the camera, press and hold the OK button, until the
display screen activates. In this mode, you can customize the
camera settings or play back pictures and videos the camera has
taken on the LCD display. If the camera is left alone for more
than 10 seconds, the camera will automatically switch to
Hunting Mode, which is described below.
Hunting Mode
2.3 Camera Modes
ON Mode
The camera will take pictures or videos when motion is
detected and/or at specific time intervals, according to the
Page 9

Boly Trail Camera-SG520
Page
5
OFF Mode
programmed settings. Hunting mode is automatically activated
if the camera is turned on and left alone for 20 seconds. Before
entering Hunting Mode, the front (red) LED light will
continuously blink for approximately 10 seconds, and then turn
off. This delay time allows you to adjust the camera’s position
before the camera becomes active if needed. To “wake” the
camera and access the camera menu functions, press and hold
the OK button, until the display becomes active.
To turn off the camera when the display screen is active, press
and hold the OK button until the screen powers off. The camera
will still consume a small amount of battery power while in OFF
mode, so it is recommended to remove the batteries if the
camera will not be used for a long period of time.
2.4 Trigger Mode
PIR Triggering: The default setting is on, which means the
camera is only active when motion is detected. If PIR sensitivity
is set to OFF, the camera stops responding to motion.
Timer Triggering: The default setting is OFF, which means
timer triggering is disabled. When the timer triggering interval
is set to a non-zero value, the camera starts to work at a preset
Page 10

Boly Trail Camera-SG520
Page
6
interval. Users need to set the PIR sensitivity to OFF if they
want the camera to work only at preset intervals.
PIR and Timer Triggering: For both PIR triggering and Timer
triggering, users need to set PIR sensitivity to low, normal, or
high based on the external environment, and set the Timer
interval to a desired non-zero value. The camera will capture
pictures or videos in a preset time interval even if there is no
motion detected; the camera will also capture pictures and
videos if motion is detected.
Page 11
Boly Trail Camera-SG520
Page
7
To update the camera settings, turn the camera on or place it in
ON mode by pressing and holding down the OK button until
the display screen activates.
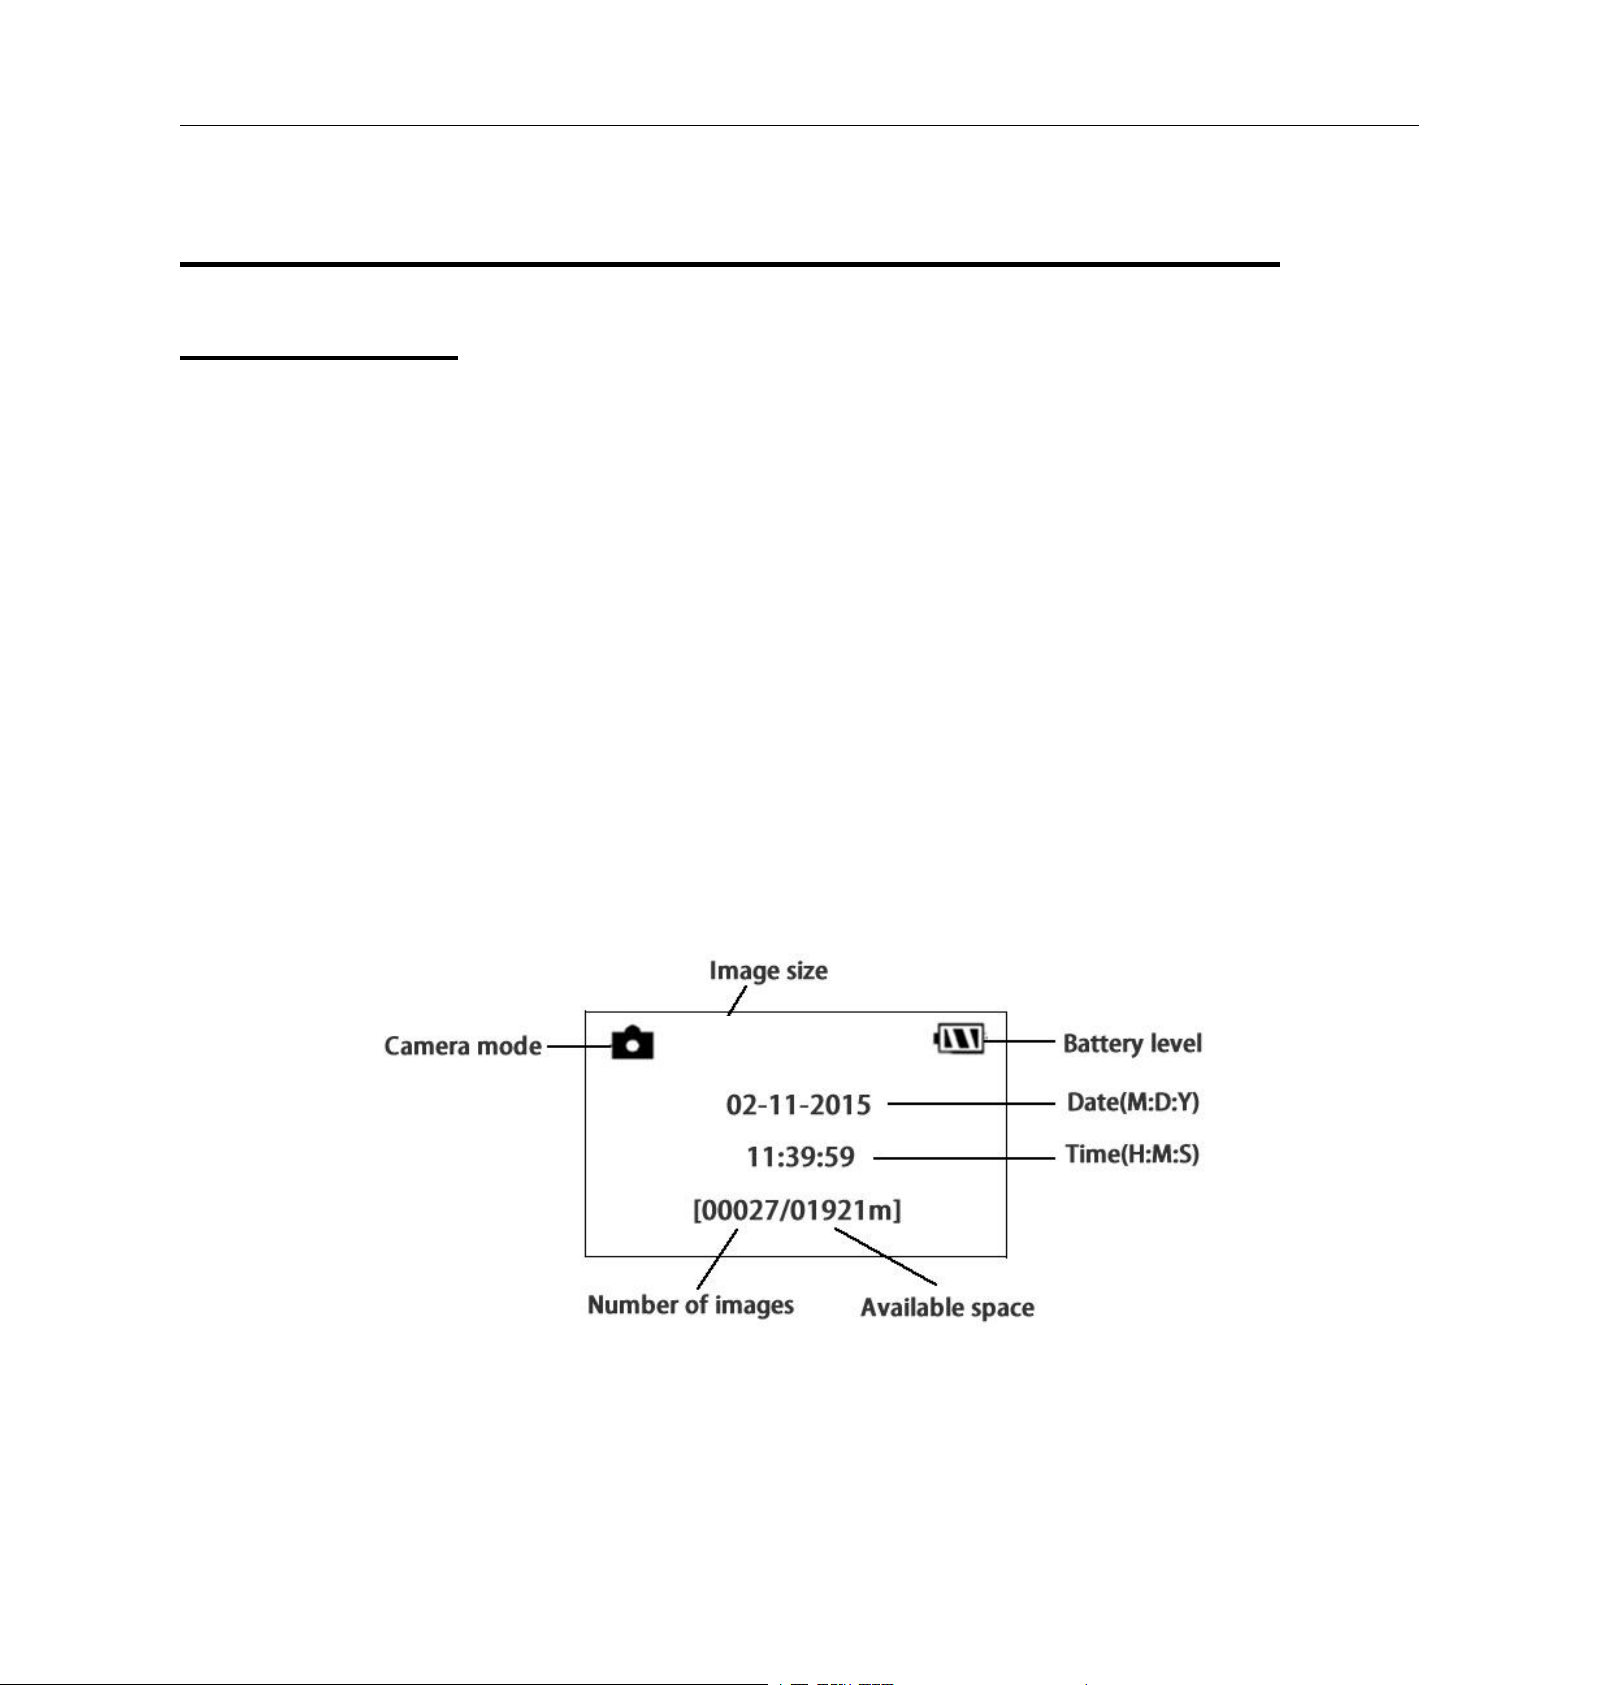
When the camera is in ON Mode, the screen will activate and
display the following:
16M
3. Camera Setup Settings and Display
3.1 Settings Interface & Display
Page 12

Boly Trail Camera-SG520
Page
8
Place the camera in ON mode and press ► to manually capture
photos or record video. Press ► once to take a picture, when the
CAMERA MODE option is Photo. When the CAMERA MODE
option is Video, press ► to start recording and press ► again to
stop recording.
Place the camera in ON mode and press the OK button to view
images or videos.
The latest image or video will be shown on the LCD screen.
When the display screen is active, press the OK button to cycle
through the pictures and videos taken.
NOTE: Videos cannot be viewed directly through the camera.
To view the camera settings menu, press and hold the OK
button until the display screen activates, then press MENU
button. Press the OK button to scroll through the different
camera options and use the ► button to change the option
settings.
After changing EACH setting in the Setup menu, you must
3.2 Manual Image / Video Capturing
3.3 Manage Images and/or Videos
3.4 Camera Setup Options
Page 13

Boly Trail Camera-SG520
Page
9
press OK or the camera will retain the previous setting.
Main Menu
Description
Language
Choose language you need. It supports six
languages: English, Swedish Finnish, German,
French,Spanish, Czech Swedish.
Default: English
Camera Mode
There are three camera modes: Photo, Video and
Pic+Video.
Default: Photo
Set Clock
Set the camera’s date and time. You can change the
date and time of the device by setting this parameter
when necessary, e.g., after every battery change. The
date format is month/day/year; the time format is
hour: minute: second.
Photo Size
Choose the image size: 5MP, 10MP or 16MP.
Default: 16MP
Photo Burst
Choose the number of continuous photos taken after
the camera is triggered.
Default: 1
Video Size
Choose the video size: 1920x1080 , 1280x720 or
640x480.
Default: 1920x1080
Video Length
Choose the duration of video recordings. It has three
values: 10s, 30s, and 60s.
Default: 10s
Time Lapse
If time lapse is on, the camera will capture images or
videos at a preset time interval regardless of whether
motion is detected. The default setting is off, which
means the timer function is disabled. Changing this
parameter to a non-zero value turns on Time Lapse
Page 14

Boly Trail Camera-SG520
Page
10
mode, and the camera will take photos at the given
time interval. NOTE: If the PIR Trigger is set to off,
then Time Lapse can’t be set to off.
Default: OFF
PIR Trigger
Choose the sensitivity of PIR. The higher the
sensitivity, the more easily the motion sensor will be
triggered. It is recommended to use Normal mode.
The sensitivity of the PIR is dependent on the
temperature. A higher temperature leads to lower
sensitivity.
Default: Normal
PIR Interval
This parameter means how long the PIR sensor will
be inactive after it is triggered in hunting mode.
During this time the PIR of the device will not react
to any motion.
Default: 10 Sec
Recycle Storage
In hunting mode, when the SD card is full, the first
images or videos will be replaced by new pictures or
videos, so you don't need to retrieve your memory
card manually. But in SETUP mode, the SD card
can’t recycle storage.
Default: On
Format SD
Deletes all images and videos in the SD card. Make
sure you have made a backup of important data
before selecting this option.
Version
Contains version information.
Default Settings
Restore all camera settings to default values.
Page 15
Page
11
4 .Troubleshooting
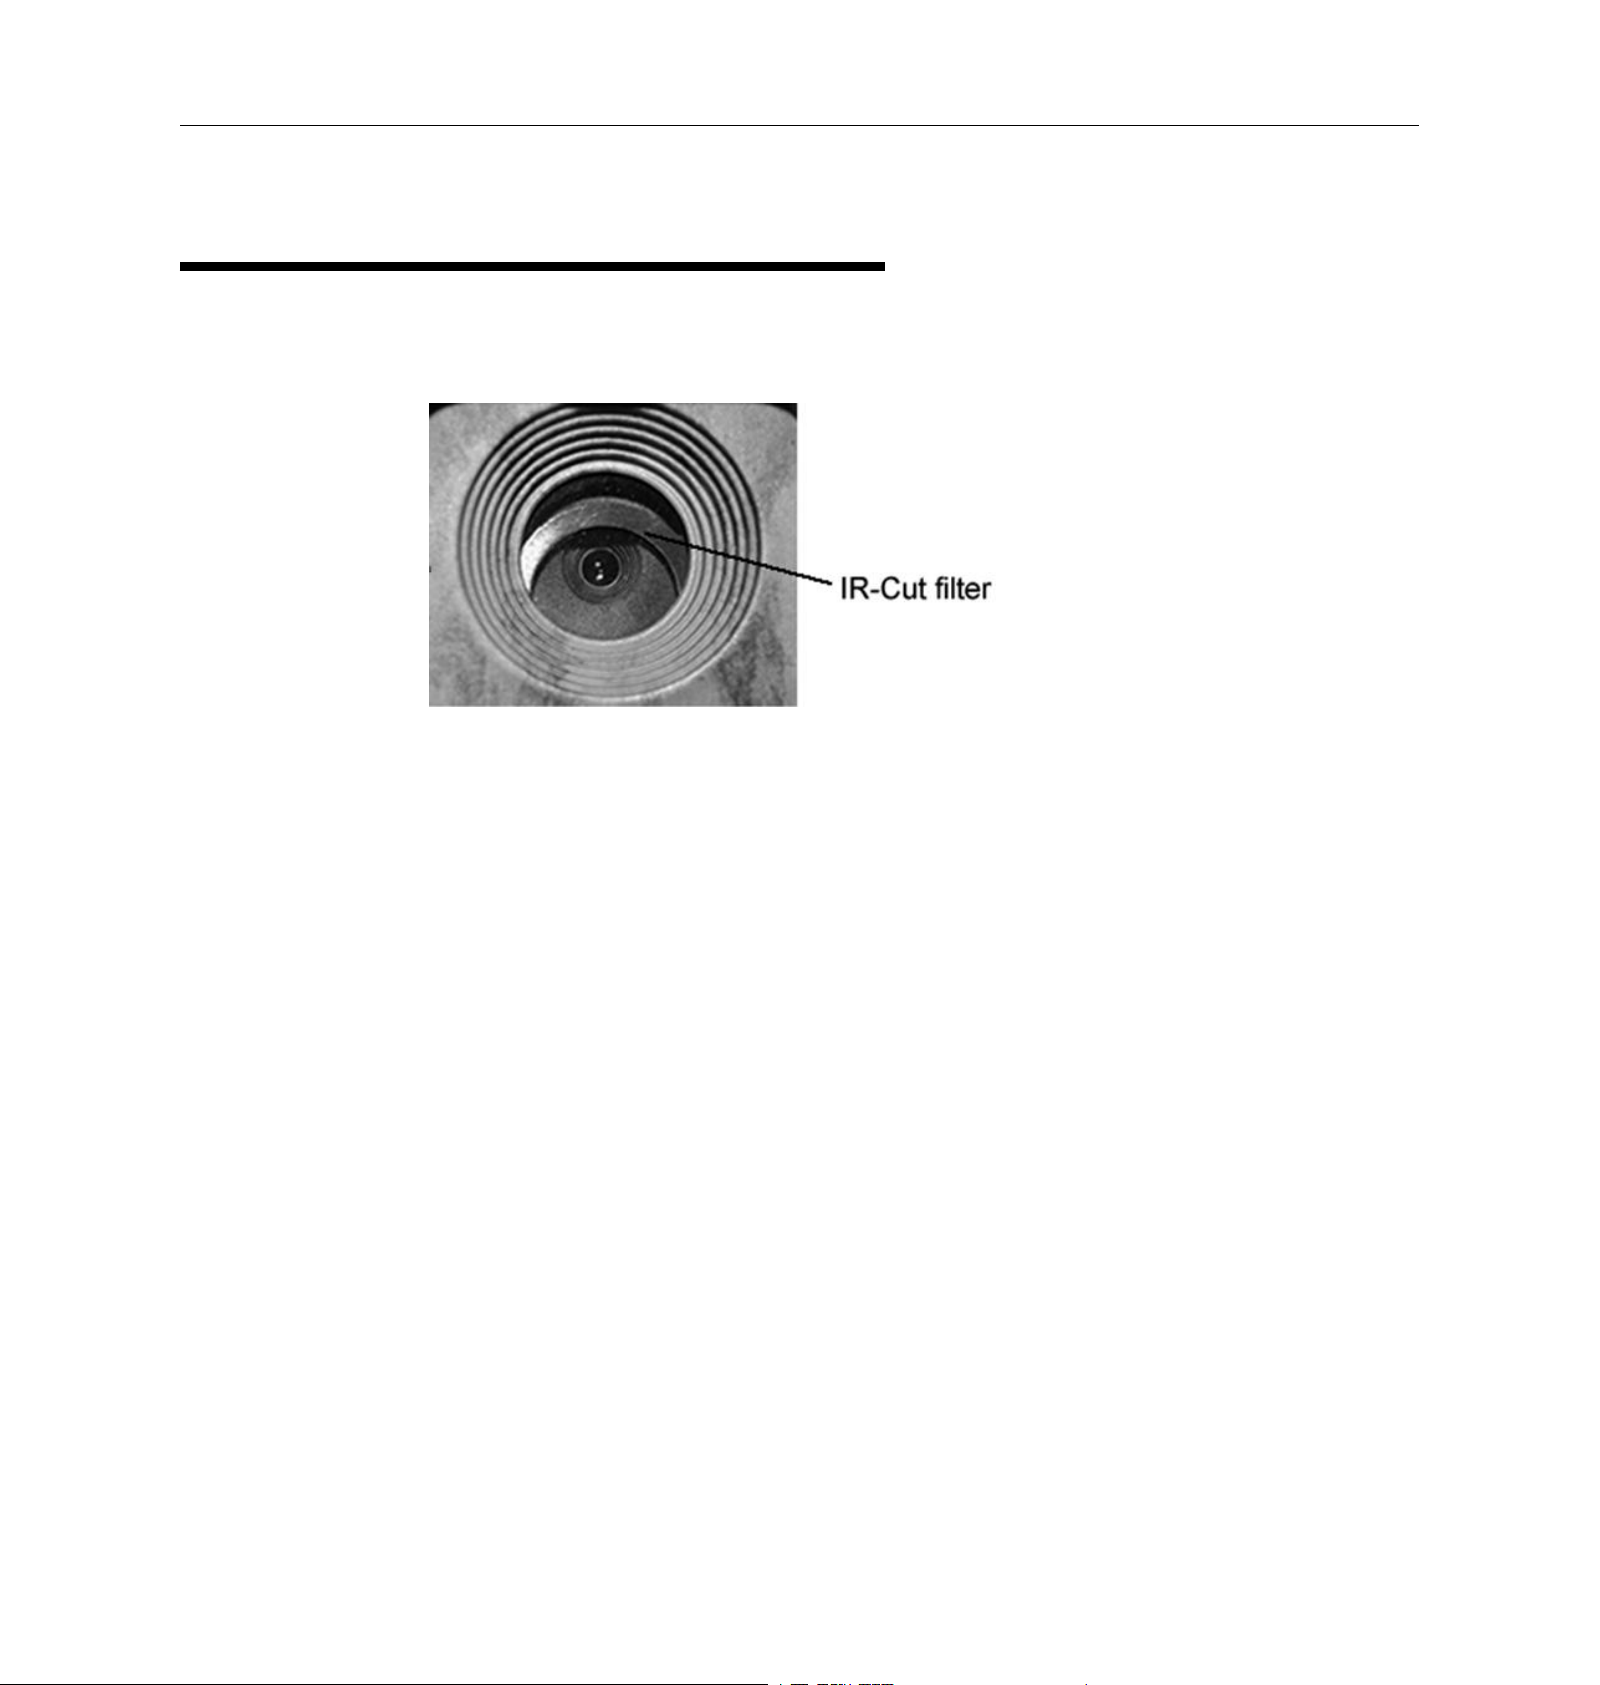
1. There is something in front of the camera lens. Is the
camera broken?
A: The camera is not broken. What’s in front of the lens is
called an IR-cut filter. When the camera is powered on,
the IR-cut will be reset and cover the lens. Only when the
camera is powered off, will the IR-cut be at a random
place.
2. The camera is not working anymore.
A: Most likely, no SD card has been inserted in the camera
when it is turned on. Please make sure a working SD card
has been inserted in the camera before it is turned on.
3. The display screen suddenly turned black.
A: If the camera is left alone once turned on, after a brief
period of time, the camera will activate the On/Hunting
mode. Press and hold down the OK button until the screen
activates, if you wish to access the TEST/SETUP mode on
the camera.
Boly Trail Camera-SG520
Page 16
Page
12
5. PIR Detection Zone
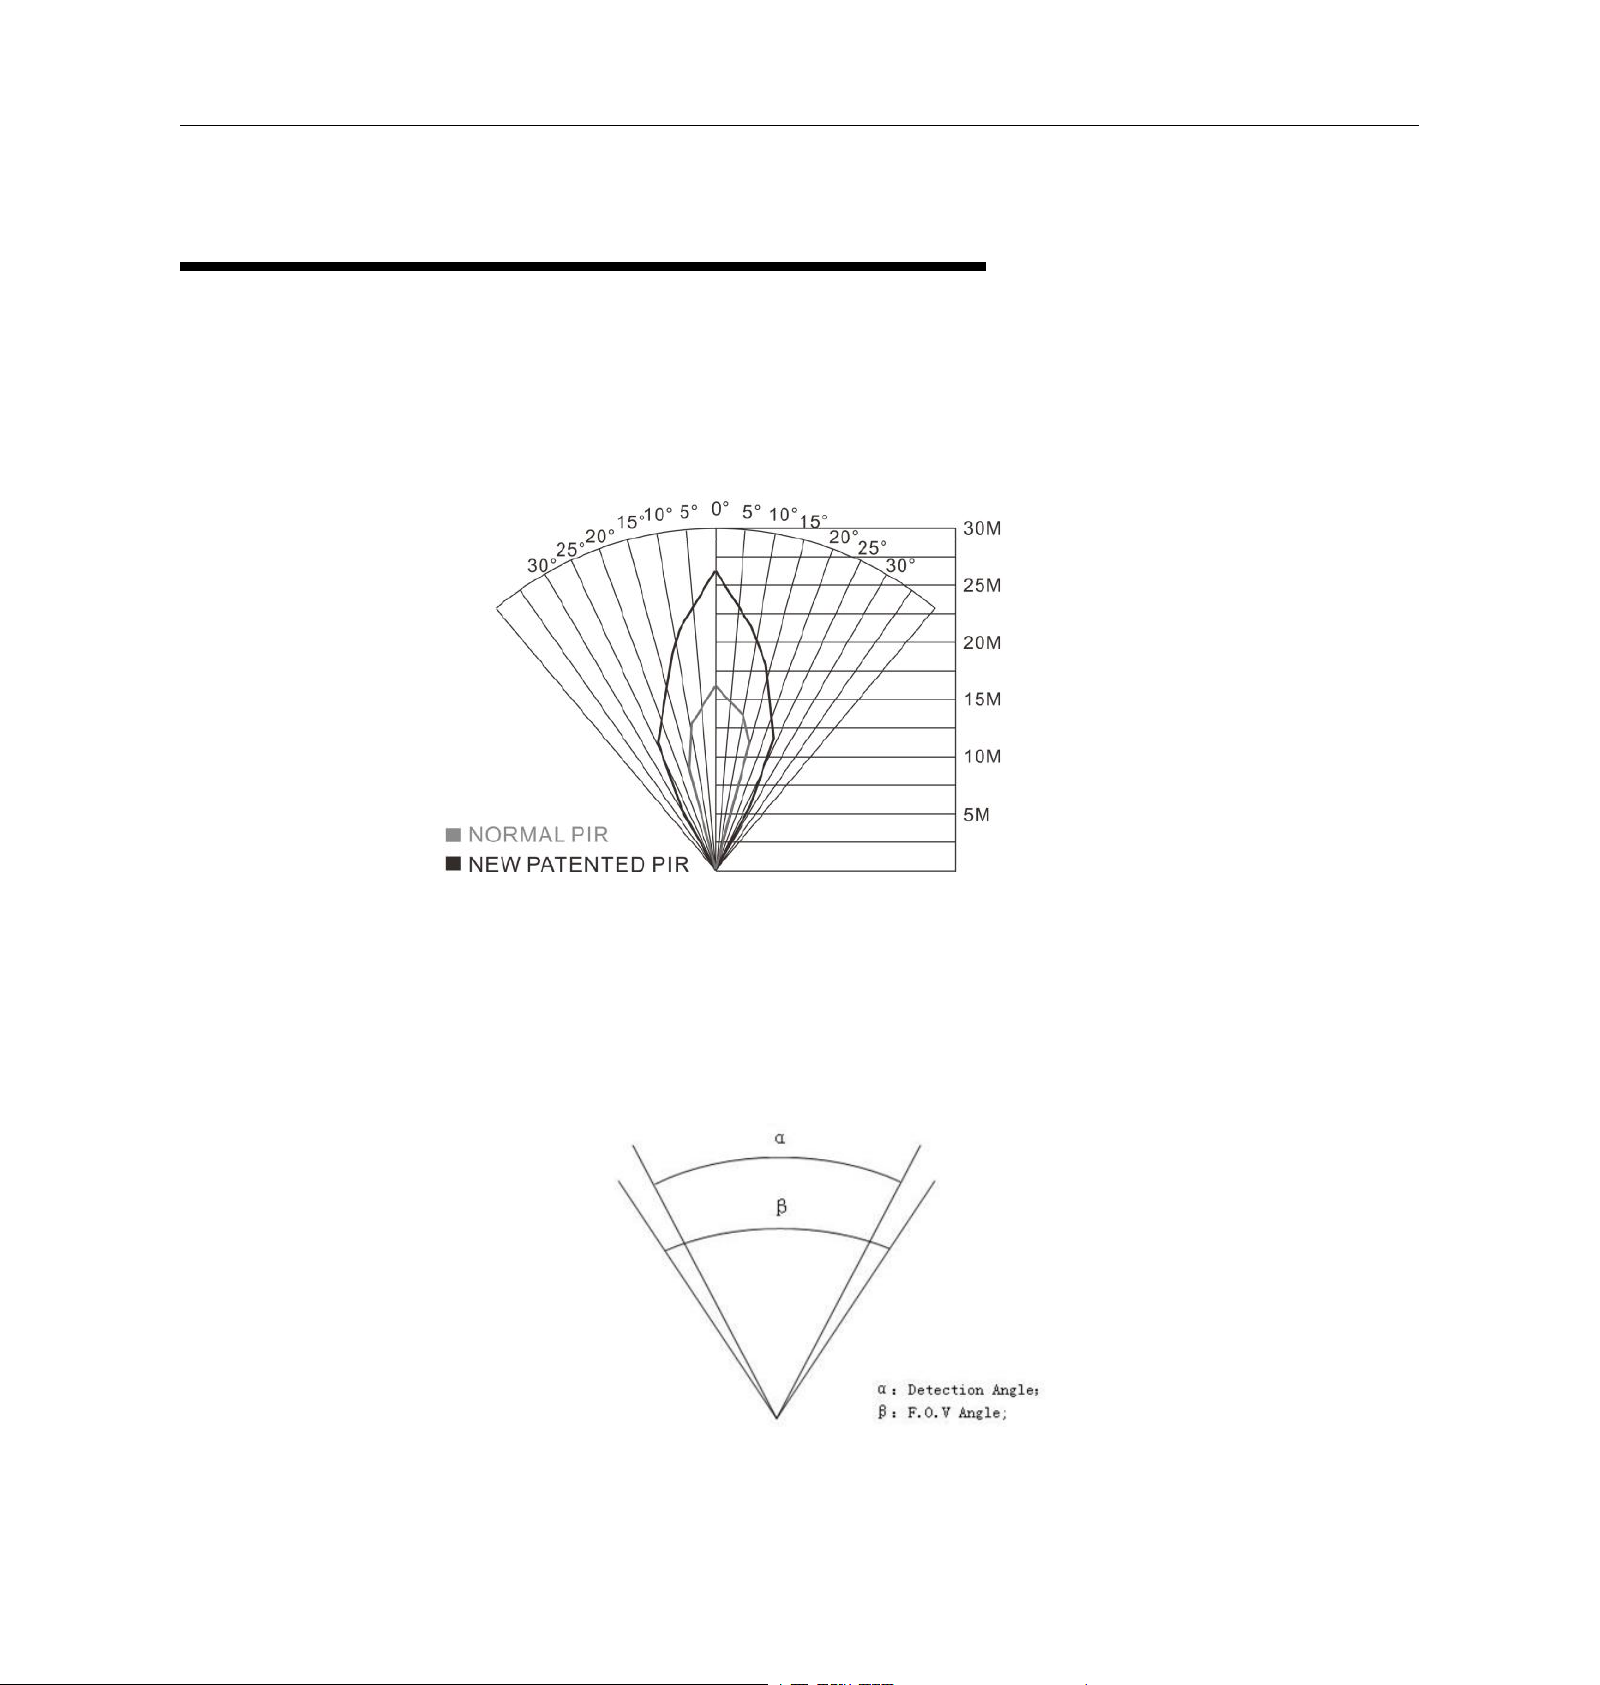
This camera uses a new PIR design, which is patented.
The new PIR’s detection range can reach 85ft in good
environments. The following picture compares the
detection zones of a normal PIR and the new PIR.
The PIR detection angle (α) is just smaller than the field of
view (FOV) angle (β). The advantage of this design is that
it can reduce the empty picture rate and capture most, if
not all, motions.
Boly Trail Camera-SG520
Page 17

Boly Trail Camera-SG520
Page
13
Image Sensor
5MP CMOS Sensor
10MP, 16MP Interpolation
Lens
F/NO=2.2
FOV(Field of View)=55°
PIR detection range
85ft
Display Screen of
Remote Control
1.44” LCD
Memory Card
Up to 32 GB
Image Resolution
16MP=4896×3264
10MP = 3648 ×2736
5MP = 2560×1920
Video Resolution
1920×1080(20fps)
1280x720
640×480
PIR Sensitivity
Adjustable (High/Normal/Low)
Trigger Time
<0.7s
Weight
180g(without battery)
Operation/Storage
Tem.
-20 - +60°C / -30 - +70°C
Power Supply
4×AA
Sound Recording
Available
Mounting
Rope/Belt/Python lock
Dimensions
107 x76 x40 mm
Operation Humidity
5% - 90%
Security
Authentication
FCC, CE, RoHS
6.Technical Specifications
Page 18
7. Parts List
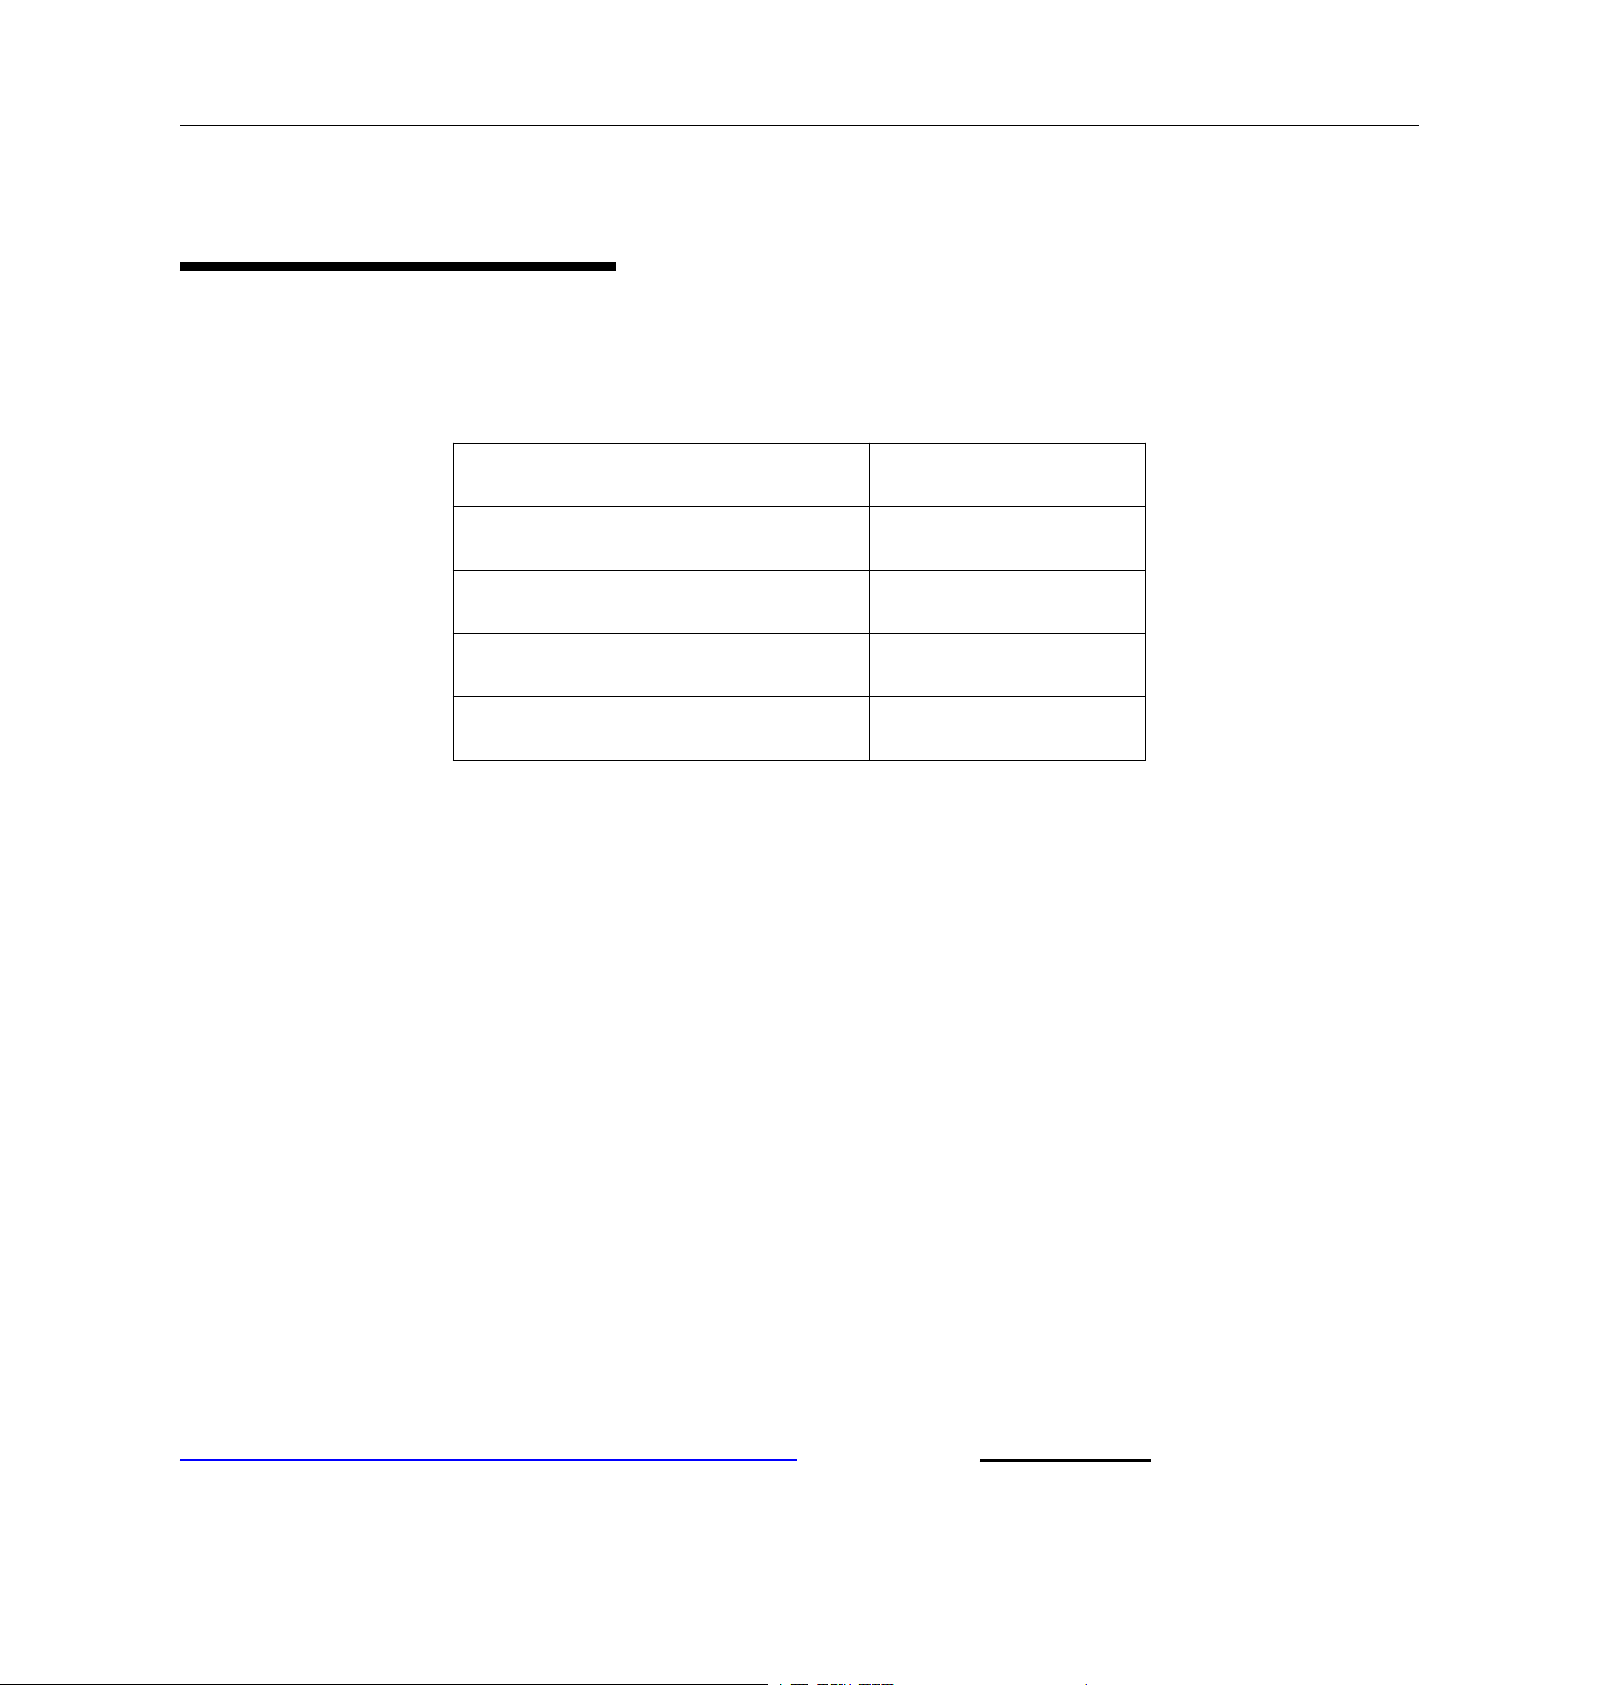
Part Name
Quantity
Camera
One
Belt
One
User Manual
One
Warranty Card
One
For more details about our product or software, please visit our website(s) at:
http://www.bolymedia.com/index/Support or https://bolyinc.com
Boly Trail Camera-SG520
 Loading...