

Page 1
Installation Instructions
Precision Sport Shifter
1997 - 2007 C5 & C6
Chevrolet Corvette
(see www.bmracing.com for the latest vehicle fitment applications and model years)
Part Number 45044
©2012, 2006, 2005 by B&M Racing and Performance Products
This B&M Precision Sport Shifter has been designed to work on most 1997 and up C5 & C6 Corvette
model vehicles. It has been engineered to greatly reduce shift throw and improve shifter feel. Check
the parts and tools lists at the beginning of these instructions for the supplied parts and the tools required
to install your B&M Precision Sport Shifter. Installation of this B&M Precision Sport Shifter can be
accomplished by anyone with minimal mechanical experience.
INTRODUCTION
This B&M Precision Sport Shifter can be installed in less than an hour and a half by carefully following the instructions. Read all instructions first to familiarize yourself with the parts, tools, and procedures. This kit contains all the parts necessary to install the shifter .
PARTS
B&M Shifter
Gasket
Spacer (2)
Washer (4)
M6 Bolt
1/4"-20 Bolt (4)
& Washer (4)
Printed in the U.S.A.
9500812-03
Page 2
Socket(7, 10mm
7/16" 11/32" & 3/8")
TOOLS
Socket Drive
Extension
Small Flatblade
Screwdriver
Vise Grips
Needlenose pliers
Channel Locks
Allen wrench (3/32")
C5 CORVETTE DISASSEMBLY
(GO TO STEP 10 FOR C-6 DISASSEMBLY)
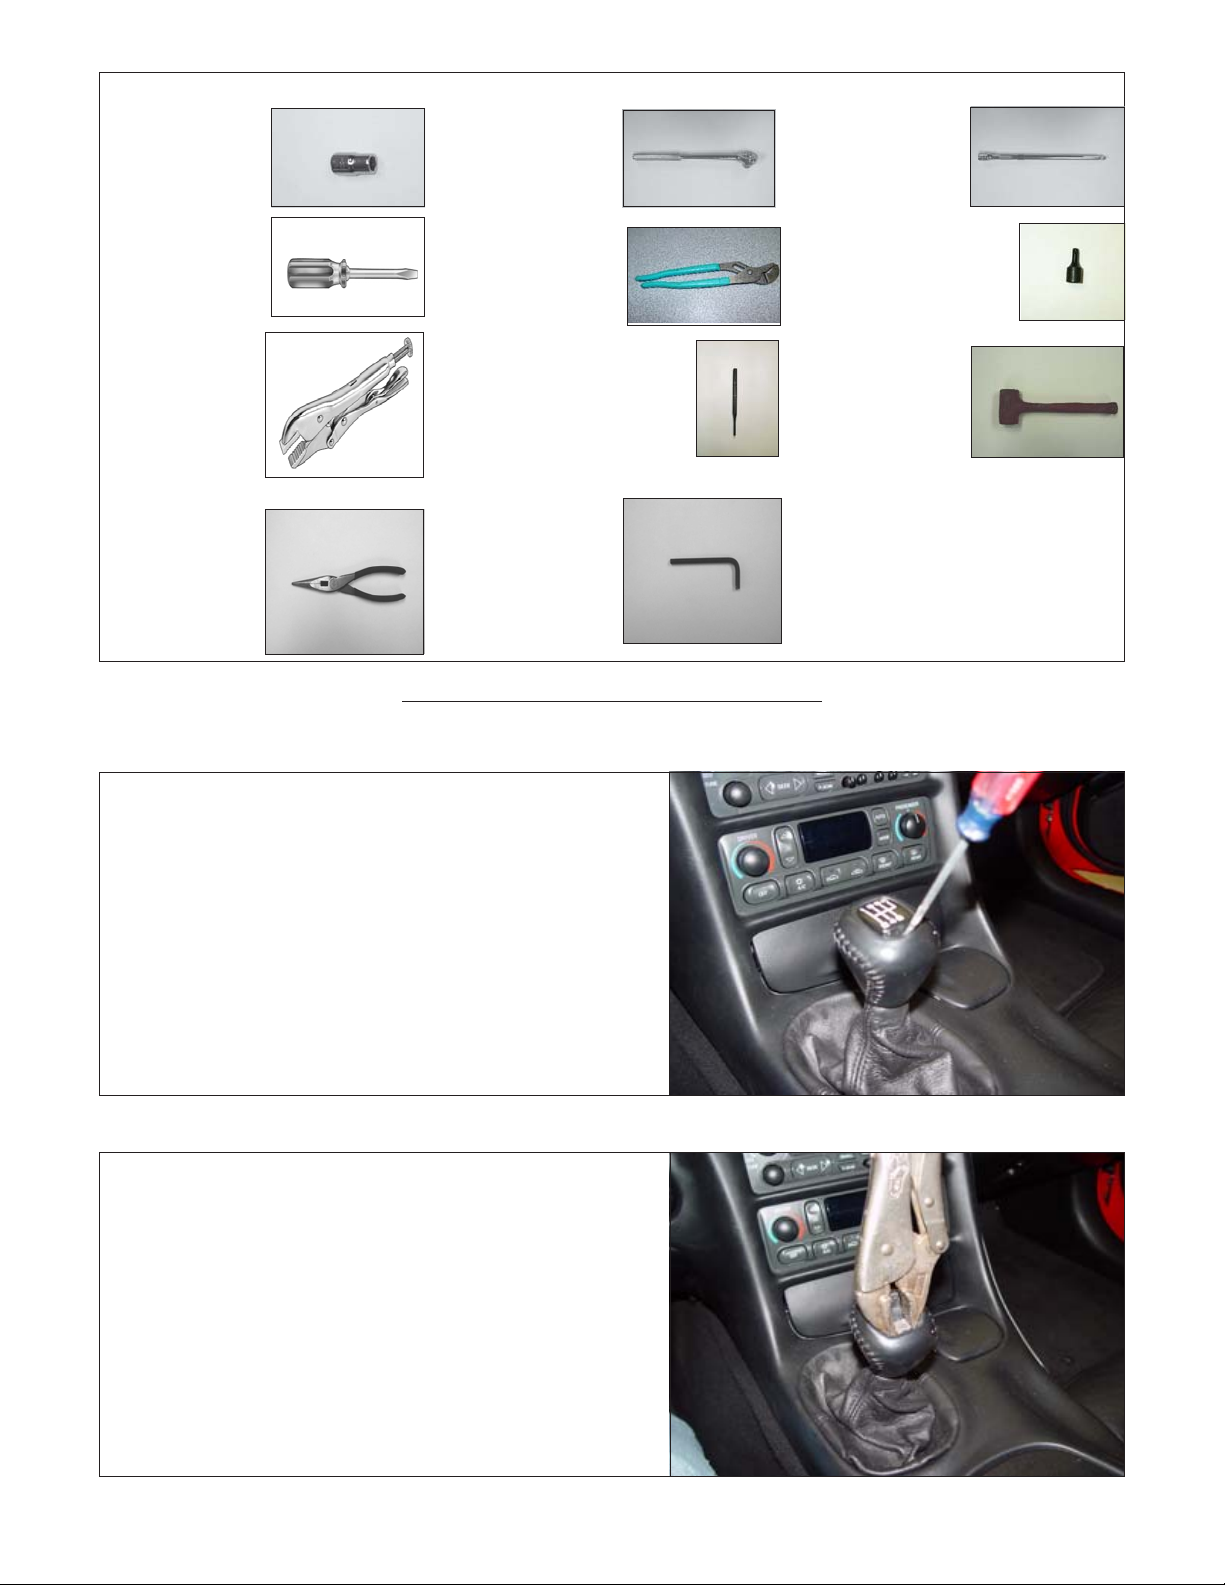
STEP 1. Pry up on rear of gear shift insert and remove.
Punch
T-15 & T-40
Torx Socket
Hammer
TOOL: Small Flatblade Screwdriver
STEP 2. Remove small metal insert.
TOOL: Vise Grips
Page 3

STEP 3. Remove knob.
STEP 4. Remove traction control panel and disconnect all wires.
TOOL: Small Flatblade Screwdriver
STEP 5. Remove (2) retaining nuts and wire connectors.
TOOLS: Socket(10 mm), Drive, and Extension.
STEP 6. Remove panel next to ignition key (temperature sensor)
and remove screw.
TOOLS: Small Flatblade Screwdriver, Ratchet,
Extension, T-15 Torx Socket
Page 4
STEP 7. Remove bolts beside lighter and under ashtray.
TOOLS: Ratchet, Extension, T-15 Torx Socket
STEP 8. Remove small inserts at rear of rear center console
and remove (2) nuts.
TOOLS: Small Flatblade Screwdriver, Ratchet,
Extension, T-15 Torx Socket
STEP 9. Slide rear center console back enough to remove
front center console. Remove front center console.
NOTE: FOR C5 GO TO STEP 19
C6 CORVETTE DISASSEMBLY
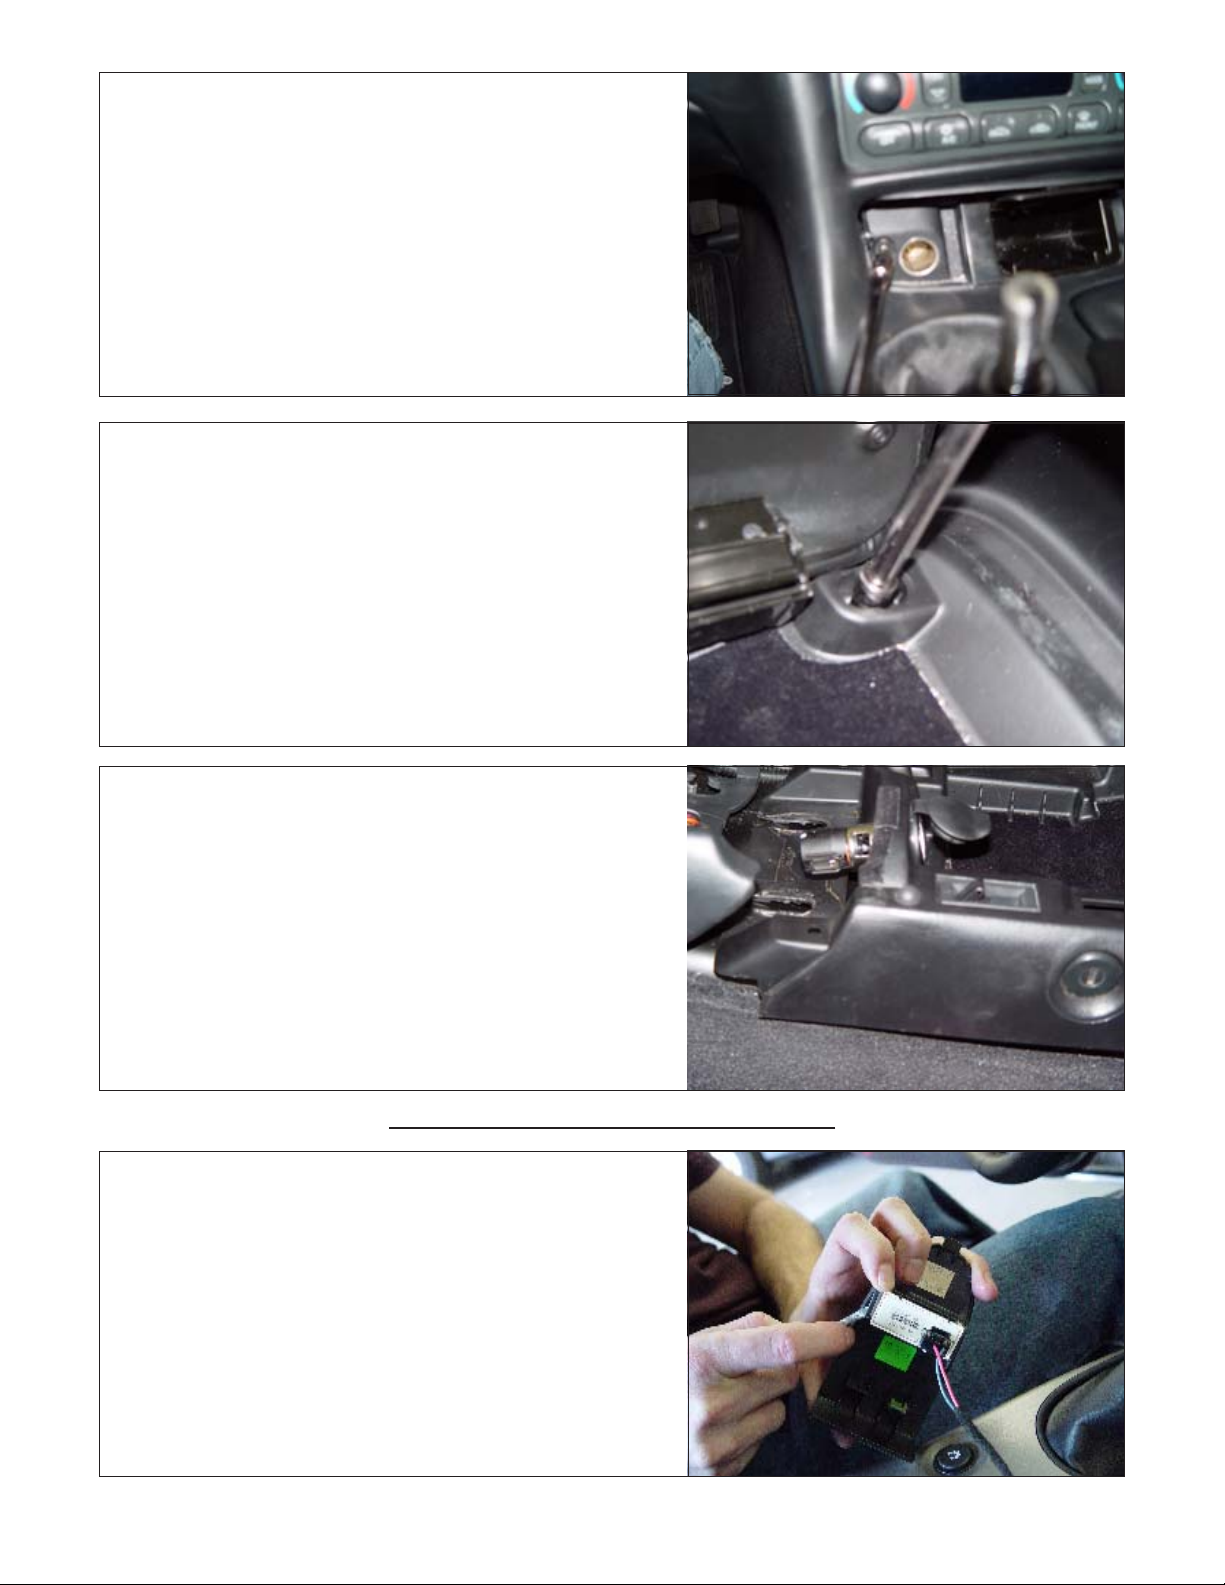
STEP 10.Remove panel for passenger air bag and remove
module.
TOOLS: Small Flatblade Screwdriver
Page 5
STEP 11. Remove (1) nut holding down console.
TOOLS: Ratchet, Extension, Socket (10mm)
STEP 12. Remove (4) bolts securing arm rest and remove
arm rest.
TOOLS: Ratchet, Extension, T-15 Torx Socket
STEP 13. Remove (2) screws under passenger airbag panel.
TOOLS: Ratchet, Extension, Socket (7mm)
STEP 14. Pull up on sleeve around emergency brake
uncovering bolts attaching center console.
Page 6

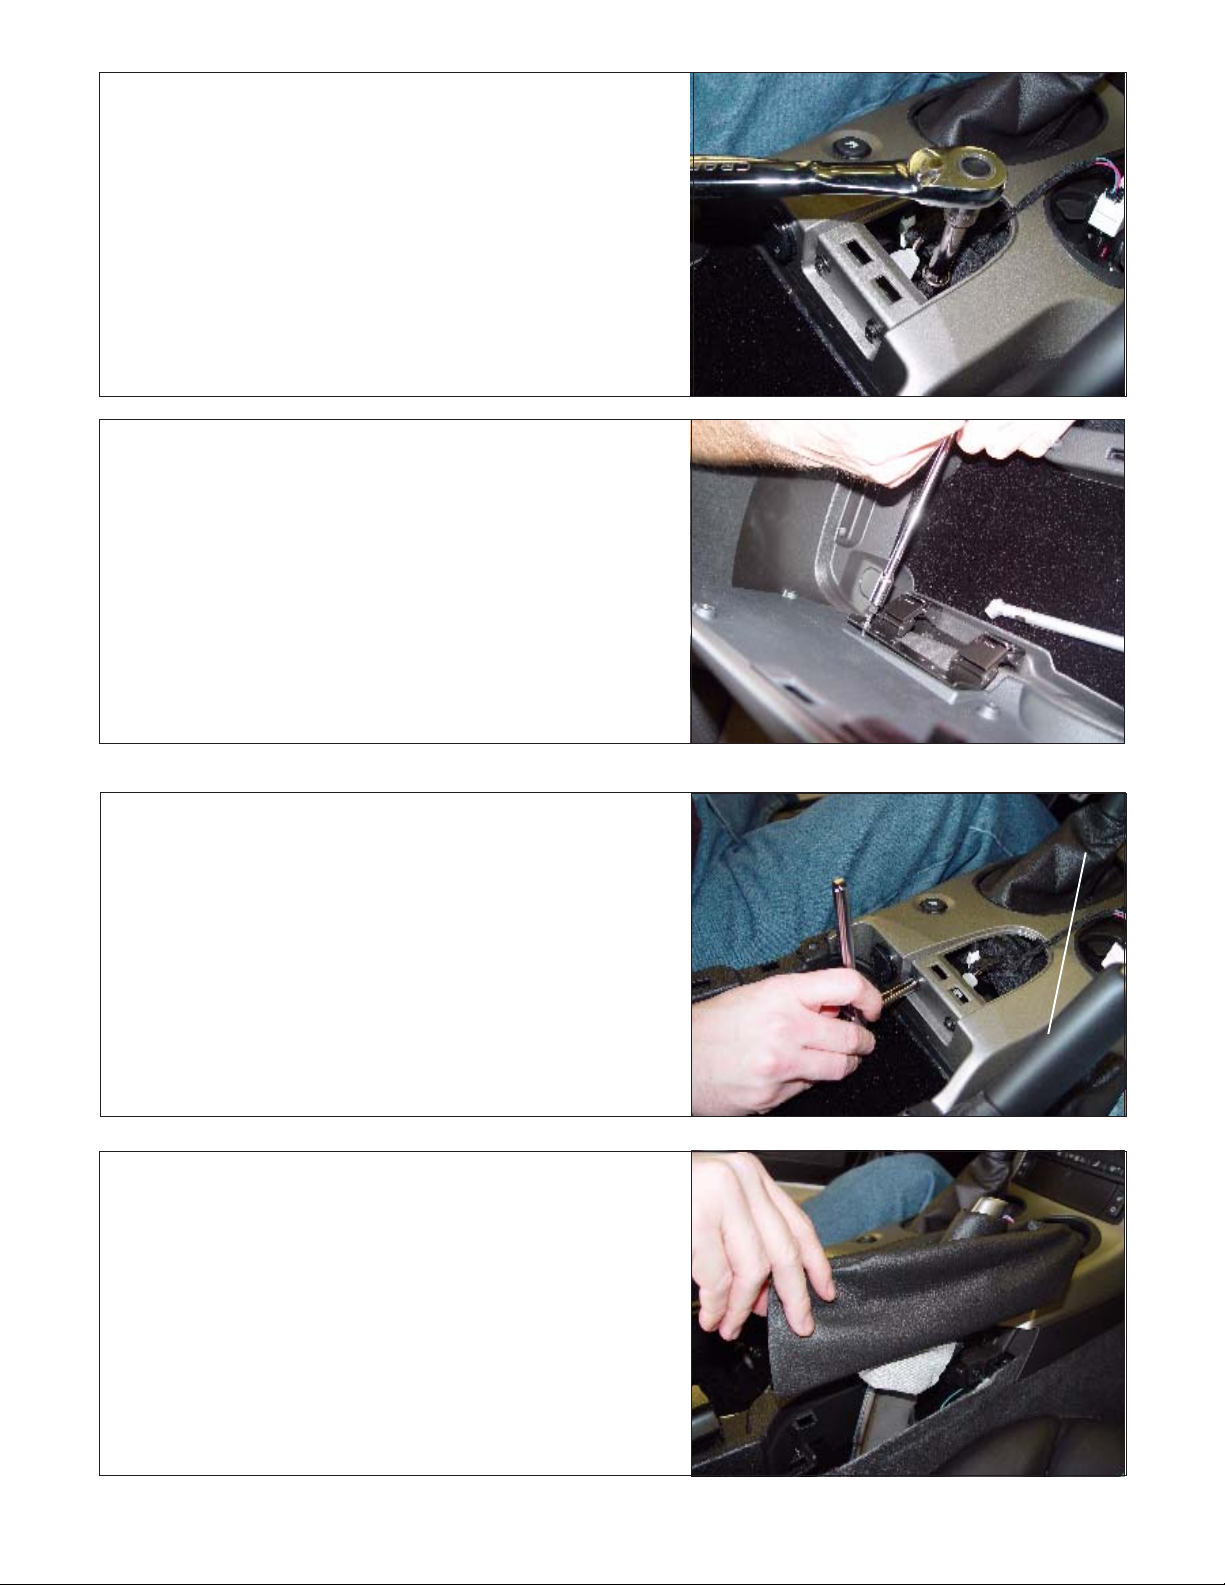
STEP 15. Remove (2) bolts holding down front center console.
TOOLS: Ratchet, Extension, Socket (7mm)
STEP 16. Remove passenger side panel and lift up on front
center console.
STEP 17. Lift leather boot out of console.
STEP 18. Remove screw securing knob and lift out front center
console. Be sure to remove connector wires.
TOOL: Ratchet, Extension, T-20 Torx Socket
Page 7

STEP 19. Remove foam and (4) nuts securing rubber.
TOOLS: Ratchet, Extension, Socket (10mm)
STEP 20. Remove (4) bolts securing shifter and remove from
vehicle.
NOTE: Shifter shown out of car for clarity only.
STEP 21. Gently remove pivot cup from bottom of stick.
For extra protection, use a towel between the
channel locks.
TOOL: Channel Locks
C5/C6 CORVETTE ASSEMBLY
STEP 22. Grease B&M Shifter pivot ball and snap original pivot
cup into shifter.
Page 8

STEP 23. Remove old rubber gasket completely and install
new gasket.
TOOL: Flathead screwdriver or gasket scraper
STEP 24. Install B&M shifter,
For C-5: slot in shifter should be toward rear of car.
For C-6: Unassemble top of shifter and rotate 180° so
that slot faces forward and reassemble.
(see diagram)
Test shifter through all gears.
TOOLS: Ratchet, Extension,
Socket (7/16")
(11/32"), 3/32" Allen Wrench.
SLOT
Top of
Shifter
C5/C6 OPTIONAL INSTALLATION
NOTE: The following steps are to install the optional spacer and
washer that is provided in the kit. A much more solid shifting feel
is obtained if installing the provided spacer and washer because
it replaces the much softer stock bushings. These steps are not
necessary on Z06 model vehicles as it is already solid mounted.
IMPORTANT: The installation of the spacer and washer will
transmit more noise and vibration than the softer rubber bushings. If a quieter and less vibration transmitting shift quality is
preferred over a more solid and direct shift feel, then DO NOT
proceed with these optional (A-F) installation steps.
STEP A. See top-right picture for indication of working area.
Remove "L" pin from the stock shifter. With the shifter
still in neutral and E-brake in the ON position, insert
the "L" pin into the pin hole of the shifter base. The "L"
pin is used to keep everything aligned. If done
correctly, shifter should not be able to shift
out of neutral position.
Stock Rubber Bushing
Press "L" pin down into
shifter base pin hole
"L" pin
on stock shifter
Page 9

STEP B. Remove bolts (2) securing shifter base to vehicle.
TOOLS: Ratchet, Extension, T-40 Torx Socket
STEP C. Remove stock rubber bushings and spacer.
TOOL: Small Flatblade Screwdriver
STEP D. Install the provided spacers underneath base as
shown.
CAUTION! Be careful not to allow spacers to fall under transmission shifter base because of the difficulty of retrieving spacer.
Use necessary precautions.
STEP E. Place (2) provided washers on top of each spacer and
thread bolts securing shifter base to vehicle.
TOOLS: Ratchet, Extension, T-40 Torx Socket
.
B&M Spacer
Page 10

STEP F. Remove "L" pin from pin hole and test shifter through
each gear.
STEP 25. Reinstall foam and (4) nuts securing rubber.
TOOLS: Ratchet, Extension, Socket (10mm)
GO TO STEP 35 FOR C5 REINSTALLATION
C6 CORVETTE REINSTALLATION
STEP 26. Reinstall front center console and install M6 screw
securing knob. Be sure to reinstall connector wires.
TOOL: Ratchet, Extension, T-20 Torx Socket
Page 11

STEP 27. Reinstall leather boot into console.
STEP 28. Reinstall passenger side panel and lift up on front
center console.
STEP 29. Reinstall (2) bolts holding down front center console.
TOOLS: Ratchet, Extension & Socket (7mm)
STEP 30. Reinstall sleeve around emergency brake.
Page 12

STEP 31. Reinstall (1) nut holding down console.
TOOLS: Ratchet, Extension, Socket (10mm)
STEP 32. Reinstall (2) screws under passenger airbag panel.
TOOLS: Ratchet, Extension, Socket (7mm)
STEP 33. Reinstall panel for passenger air bag and
reinstall module.
TOOLS: Small Flatblade Screwdriver
STEP 34. Reinstall (4) bolts securing arm rest.
TOOLS: Ratchet, Extension, T-15 Torx Socket
GO TO STEP 41 FOR C6
Page 13

C5 CORVETTE REINSTALLATION
STEP 35. Reinstall front center console and slide rear center
console into place.
STEP 36. Reinstall (2) nuts and small inserts at rear of rear
center console.
TOOLS: Small Flatblade Screwdriver Ratchet,
Extension & Socket (10mm)
STEP 37. Reinstall bolts beside lighter and under ashtray.
TOOLS: Ratchet, Extension, T-15 Torx Socket
STEP 38. Reinstall screw next to ignition key and
replace panel.
TOOLS: Ratchet, Extension, T-15 Torx Socket
Page 14

STEP 39. Reinstall (2) retaining nuts and wire connectors.
TOOLS: Socket(10 mm), Drive, and Extension.
STEP 40. Reinstall traction control panel and connect all wires.
TOOL: Small Flatblade Screwdriver
STEP 41. Reinstall knob.
STEP 42. Reinstall metal insert into knob and shift pattern
indicator.
TOOLS: Hammer & Punch
Be sure all the parts have been securely tightened and
shifter engages into each gear.
Page 15

STEP 43. Ensure that all gears can be smoothly and fully
engaged without binding or rough movement.
Correct any problems prior to operating the vehicle.
STEP 44. Enjoy!
 Loading...