

Page 1
Installation Instructions
Bracket and Lever Kit
Ford E40D/4R100 Transmission
Part No. 40505
© 2012 B&M Racing & Performance Products
This B&M Bracket and Lever Kit allows any B&M Shifter to be used on a vehicle equipped
with a Ford E40D/4R100 automatic transmission. Both selector shaft and selector lever are
made of T6 Aluminum for strength and durability. To extend the life of this kit, the selector
shaft and the selector lever have been hard anodized to prevent wear and corrosion. Check
the parts and tools lists at the beginning of these instructions for the supplied parts and the
tools required to install your B&M Bracket and Lever Kit. Installation of the B&M Bracket and
Lever Kit can be accomplished by anyone with minimal mechanical experience.
INTRODUCTION
This B&M Bracket and Lever Kit can be installed in less than an hour by carefully following
the instructions. Read all instructions fi rst to familiarize yourself with the parts, tools, and
procedure.
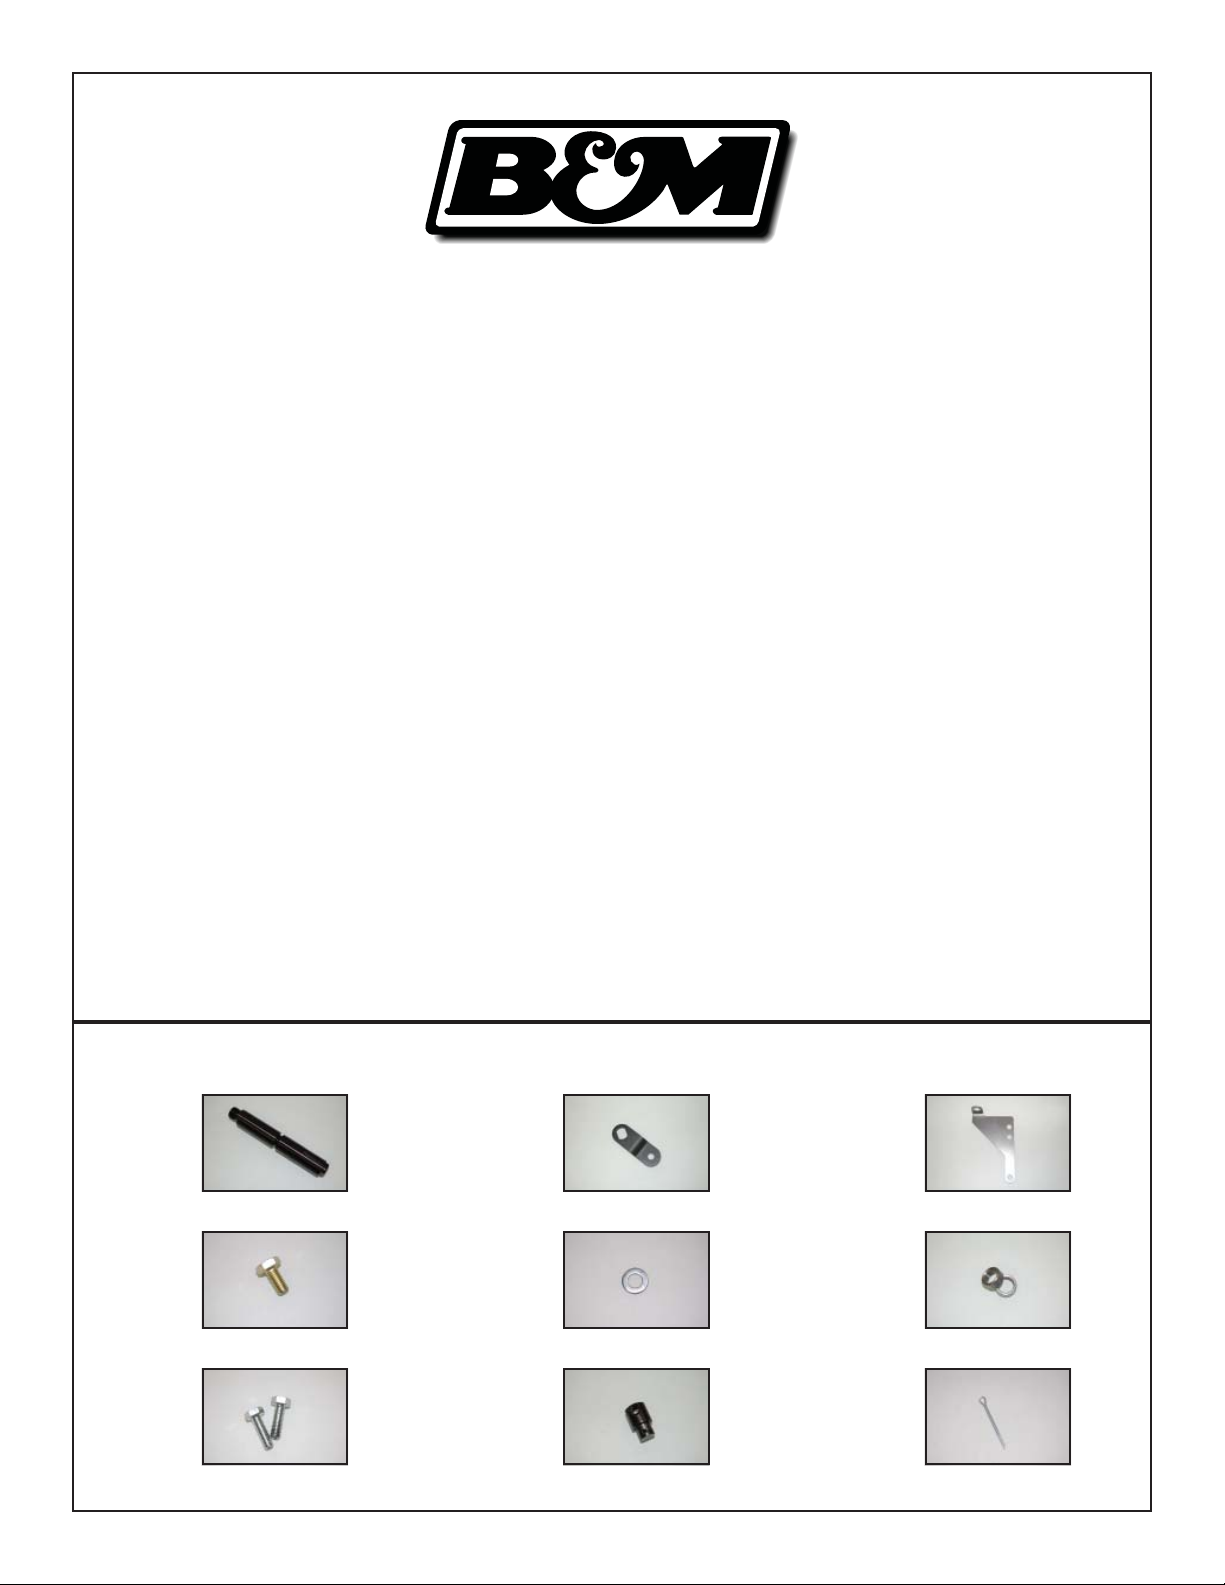
PARTS
SELECTOR SELECTOR CABLE
SHAFT LEVER BRACKET
M10 M10 SPACER
BOLT WASHER X2
M8 CABLE COTTER
BOLT SWIVEL PIN
X2
9500879-00
Page 2

TOOLS
DRIVE EXTENSION SOCKET
1/4”, 3/8” 1/4”, 3/8” 8MM
1/4”
SOCKET SOCKET DIAGONAL
10MM 13MM CUTTERS
1/4”, 3/8” 1/4”, 3/8”
PLASTIC WRENCH TORQUE
MALLET 17MM, 21MM WRENCH
STEP 1. Drain transmission fl uid.
STEP 2. Disconnect shift linkage
from transmission shift lever.
STEP 3. Remove two (2) bolts and remove
Neutral Position Sensor.
NOTE: On some applications, Neutral
Position Sensor will be rotated 180 degrees
by design. The kit is designed to adapt to
both versions. Sensor to be installed in same
orientation as removed.
TOOLS:
Drive, Extension, & Socket (8mm).
Page 3

STEP 4. Remove the transmission pan, and
then remove oil fi lter from valve body.
TOOLS: Drive, Extension, & Socket (10mm).
STEP 5. Remove one (1) bolt and remove
detent spring.
TOOLS: Drive, Extension, & Socket (8mm).
STEP 6. Remove Selector Shaft/Lever Retaining
Pin.
TOOL: Diagonal Cutters.
* use diagonal cutters, and transmission case
for leverage, to pry pin out from case.
DO NOT CUT PIN.
STEP 7. Remove nut on inner end of shaft.
TOOLS: 21mm Wrench, and
(optional: 17mm wrench).
* optional: use left hand to keep shaft
from rotating, while using the 21mm
wrench to loosen nut.
Page 4

STEP 8. Remove selector shaft from case.
STEP 9. Slide B&M Selector Shaft into case.
Engage B&M Shaft with inner shift
lever and install nut. Use B&M Selector
Lever to visualize position of selector
shaft.
When inner shift lever is in the park
position, the selector lever should be
pointed downwards and to the left.
(Refer to picture on the right).
STEP 10. Install Selector Lever Retaining Pin.
TOOL: Plastic Mallet
* DO NOT HAMMER PIN ALL THE WAY
INTO THE CASE!
Pin should stick out from case
approximately 1/4” for future removal.
STEP 11. Install Detent Spring.
Page 5

STEP 12. Verify inner shift lever moves through
every position.
STEP 13. Replace the oil fi lter. We recommend that
you use a new fi lter unless the vehicle has very low
mileage. Replace the oil pan gasket with a new
gasket. Replace the original bolts except for the two
that secure the cable bracket. The cable bracket is
installed with the supplied bolts with spacers between
the bracket and the pan. Tighten the oil pan bolts to
12-16 ft-lbs.
TOOLS: Torque Wrench, Drive, Extension,
& sockets (10 & 13mm).
STEP 14. With selector shaft in neutral position,
Install Neutral Position Sensor. (NOTE:
replace Neutral Position Sensor in same
orientation as found before removal).
Align sensor to neutral position before
tightening two (2) 8mm bolts.
* Use selector lever to rotate Selector
Shaft to neutral position.
STEP 15. Secure B&M Selector Lever onto B&M
Selector Shaft with M10 bolt and M10
washer.
TOOL: Wrench (17mm).
Page 6

STEP 16. Fill transmission with proper amount
of transmission fl uid.
STEP 17. Remove two rubber boots, one large nut,
and a large lockwasher from threaded
end of shifter cable.
STEP 18. Route the cable from the shifter to the
transmission as explained in the shifter
installation instructions. Avoid sharp
bends and route the cable away from the
hot engine exhaust parts. Cable may be
secured up and out of the way with nylon
cable ties.
STEP 19. Slide end of cable into cable
bracket, install lockwasher and large
nut over end of cable. Tighten both large
nuts to hold cable in this position. Install
two rubber boots onto end of cable.
Page 7

STEP 20. Move the transmission selector lever all of the way
forward to the park position. Then move the lever rearward two
positions to the neutral position. Install the swivel on to end of
cable and adjust until the small end of swivel slides freely in and
out of the selector lever. Move the shifter through all of the gear
positions and check that the swivel slips freely in and out of the
selector lever in each gear position. Note: Swivel may have to be
adjusted one turn in either direction. Install cotter pin into swivel
and spread key ends.
STEP 21. Start the engine and shift the transmission through all
of the gear positions and then to neutral. Check the
transmission fl uid level, and add more fl uid if necessary
to bring it up to the proper level. Be sure that the
shifter operates smoothly and that the transmission
shifts to the correct gear.
STEP 22. INSTALL COMPLETE! ENJOY!
Technical service calls, correspondence, and warranty
questions should be directed to the following address:
B&M Racing and Performance Products
100 Stony Point Rd., Ste. 125
Santa Rosa, CA 95401
Phone (707) 544-4761
Monday-Friday 7AM to 5PM PST
 Loading...