


BlueStar BSP244BCCPLT, RNB24GV2LCCPLT, RNB244BV2LCCPLT, RNB366BV2LCCPLT, RNB304BV2LCCPLT Maintance Manual
...USE & CARE MANUAL
Freestanding Ranges
RCS (Open/Sealed)
RNB
Platinum™
Precious Metals
1
750355
BlueStar® Freestanding Range Use & Care Manual
MODELS RCS, RNB, Platinum, Precious Metals
THIS APPLIANCE WAS DESIGNED FOR EASE OF INSTALLATION AND OPERATION. HOWEVER, WE RECOMMEND THAT YOU READ ALL SECTIONS OF THIS MANUAL BEFORE YOU BEGIN INSTALLATION. INSTALLATION MUST BE PERFORMED BY AN APPROVED GAS INSTALLER OR GAS SERVICE TECHNICIAN OR THE WARRANTY IS VOID. IN THE COMMONWEALTH OF MASSACHUSETTS A LICENSED PLUMBER OR GAS FITTER CAPABLE OF REVIEWING AND PERFORMING THE MANUFACTURER’S INSTALLATION CHECKLIST
SHOULD INSTALL THIS APPLIANCE. THE INSTALLATION CHECKLIST IS INCLUDED AT THE REAR OF THIS BOOKLET.
DO NOT REMOVE PERMANENTLY AFFIXED LABELS, WARNINGS OR DATA PLATES FROM YOUR APPLIANCE.
THIS MAY VOID THE MANUFACTURER’S WARRANTY AND/OR HINDER EFFECTIVE SERVICING AND
MAINTENANCE.
THESE INSTRUCTIONS ARE TO REMAIN WITH THE APPLIANCE AND THE CONSUMER IS TO RETAIN THEM FOR FUTURE REFERENCE.
WARNING: If the information in this manual is not followed exactly, a fire or explosion may result causing property damage, personal injury or death.
-Do not store or use gasoline or other flammable vapors and liquids in the vicinity of this or any other appliance.
-WHAT TO DO IF YOU SMELL GAS
Do not try to light any appliance
Do not touch or activate any electrical switch
Do not use any phone in your building
Immediately call your gas supplier from a neighbor’s phone. Follow the gas supplier’s instructions.
If you cannot reach your gas supplier, call the fire department - Installation and service must be performed by a qualified
installer, service agency or the gas supplier.
NOTE: WARRANTY SERVICE MUST BE PERFORMED BY AN AUTHORIZED SERVICE AGENT. YOU MAY REQUEST WARRANTY SERVICE BY CALLING 800-449-8691. YOU MAY ALSO REQUEST SERVICE VIA THE INTERNET BY SUBMITTING THE SERVICE REQUEST FORM AT WWW.BLUESTARCOOKING.COM
In the Commonwealth of Massachusetts, gas connections must be performed by a licensed plumber or licensed gas fitter.
 WARNING: This product can expose you to chemicals including carbon monoxide which is known to the state of California to cause birth defects or other reproductive harm. For more information go to www.P65Warnings.ca.gov
© Copyright 2019 Prizer –Painter Stove Works, Inc. All specifications are subject to change without prior notification
2
IMPORTANT SAFETY INSTRUCTIONS
SAVE THESE INSTRUCTIONS
Read all instructions before using your appliance. Follow these important safety precautions to reduce the risk of fire, electric shock, personal injury or property damage.
Do not remove permanent labels, warnings or data plates including the serial number from your appliance. Removal may void the manufacturer’s warranty and/or hinder effective servicing and maintenance.
If the information in this manual is not followed exactly, a fire or explosion may result causing property damage, personal injury or death.
Do not store gasoline, aerosol cans, sealed containers or any flammable vapors and liquids in the vicinity of this or any other appliance.
Do NOT operate the convection fan during the initial pre-heat of the oven or while broiling.
If You Smell Gas
Do not try to light any appliance.
Do not touch or activate any electrical switch.
Do not use any phone in your building.
Immediately call your gas supplier from outside your home. Follow the gas supplier’s instructions.
If you cannot reach your gas supplier, call the fire department.
Installation must be performed by an approved gas installer or gas service technician or the warranty is void. In the Commonwealth of Massachusetts a licensed plumber or gas fitter capable of reviewing and performing the manufacturer’s installation should install this appliance.
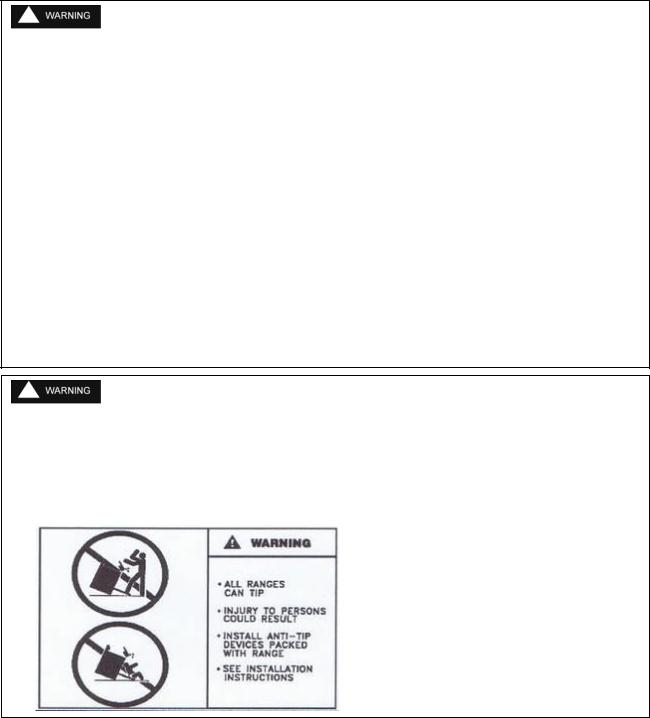
Tipping Hazard
A child or adult can tip the range over which may cause serious personal injury or death.
Make sure the anti-tip bracket is securely installed.
Ensure the anti-tip bracket is engaged when the range is moved.
Do not operate the range without the anti-tip bracket in place.
3

GENERAL SAFETY INSTRUCTIONS
SAVE THESE INSTRUCTIONS
Your appliance should be installed by a qualified gas installation technician. Have the technician show you the exact location of the gas shutoff valve on the incoming gas line so you know how to turn off the gas if necessary.
Never use this appliance as a space heater to warm a room. Doing so may result in carbon monoxide poisoning and overheating of the oven.
Do not touch the hot surfaces of the range including the burners, burner grates, cooktop, backguard, oven and oven door interior.
Before any maintenance or repairs are performed, disconnect the appliance from the electric supply.
In the event of a power failure, do not attempt to operate the appliance or light any of the burners. This is a gas fired appliance that uses electrical components such as the ignition and safety devices.
Do not attempt to repair or replace any part of this appliance unless specifically instructed to do so in this manual. In-warranty service must be performed by an authorized service agency.
Only use this appliance for the intended purposes described in this user manual.
This appliance should be operated with a properly sized and operational ventilation hood.
The ventilation and flue ways of this appliance must remain unobstructed at all times.
Additional care should be exercised if your appliance is equipped with a high-shelf. During heavy or continued use this shelf may become hot. Do not place combustible materials or plastics on this shelf.
Do not sit, stand, or climb on any part of the appliance including the oven door and cooktop. Serious injury may occur.
Do not store items of interest to children above the appliance.
Never leave the appliance unattended during use. Boil-overs may occur, causing spills which may ignite.
IMPORTANT SAFETY INFORMATION
SAVE THESE INSTRUCTIONS
KEEP FLAMMABLE MATERIALS AWAY FROM THE RANGE AND OVEN BURNER
BlueStar’s Platinum™ Series PowR Oven™ uses open flame technology. Flammable materials inside the oven when the oven is in use may ignite.
Do not store flammable materials on, in or near the appliance. Keep the appliance area clean and free of combustible materials, gasoline and other flammable vapors and liquids, aerosol and sealed containers like baby food jars. Check before each use to make sure that no hazardous materials are in the area.
Never wear loose fitting clothing or garments with loose sleeves or strings while using this appliance.
Use care when reaching over the range or into the oven.
Do not let cooking grease accumulate in or near the range or inside the oven, since it may ignite.
Clean the grease drip trays and ventilation hood filters frequently to prevent grease build-up.
4

IN THE EVENT OF FIRE, TAKE THE FOLLOWING STEPS TO PREVENT INJURY AND FIRE SPREADING
Do not use water on grease fires. Never pick up a flaming pan. Turn off the controls and smother the flaming pan with a fitted lid, cooking sheet or large flat tray.
If there is a fire in the oven, turn off the oven and keep the oven door closed.
It is recommended you purchase a multi-purpose dry chemical or foam-type fire extinguisher for your home. Store it in close proximity to your appliance.
COOKTOP SAFETY INSTRUCTIONS
The push-in and turn control knobs on this appliance are designed to be child-safe, however are not a guarantee of safe operation.
Do not leave children alone or unattended in the kitchen while the appliance is in use.
When flaming liquor or other spirits, and if your appliance is installed under a ventilation hood, TURN THE FAN OFF. The draft created could cause the flames to spread.
Turn pot and pan handles inward so they do not extend over adjacent burners or the front of the range to reduce the risk of burns, igniting flammable materials, and spillage.
After use do not touch the range surface until completely cooled.
Never leave the surface burners unattended at medium or high heat settings. Foods, especially oily foods, may ignite resulting in fire that could spread to surrounding cabinets.
Never leave oil unattended while frying. If allowed to heat beyond its smoking point, oil may ignite resulting in fire that may spread to surrounding cabinets. Use a deep fry thermometer whenever possible to monitor oil temperature and operate with safe limits.
To avoid oil spillover and fire, use a minimum amount of oil when shallow pan-frying and avoid cooking frozen foods with excessive amounts of ice.
Use proper pan size and avoid pans that are unstable or easily tipped. Select cookware that is
matched to the size of the burner. Burner flames should be adjusted so that they do not extend
IMPORTANT SAFETY INFORMATION
beyond the bottom of the pan. Excessive flames may be hazardous.
When using glass/ceramic cookware, make sure it is suitable for cooktop service. Some materials SAVE THESE INSTRUCTIONS
may break because of sudden change in temperature.
Do not use cookie sheets or aluminum foil to cover the grates or line any part of the cooktop. Doing so may result in carbon monoxide build-up and poisoning, over heating the cooktop surfaces, or a potential fire hazard.
5

OVEN SAFETY INSTRUCTIONS
Do NOT operate the convection fan during the initial pre-heat of the oven or while broiling.
The Platinum™ Series oven operates with an OPEN FLAME. Improper use of the oven may result in a FIRE HAZARD. Please review page 28 for more safety instructions.
Do NOT cover the bottom of the oven floor with aluminum foil or any oven liner.
Only use dry potholders. Moist or damp potholders on hot surfaces may result in steam burns. Do not allow potholders to touch hot burner areas. Do not use a towel or other bulky material as a potholder.
Do NOT heat unopened food containers or jarred products like baby food in the oven. The built-up pressure may cause the container to explode.
Keep the oven door closed at all times when lighting the oven and broiling. Open only to insert or remove food.
Do NOT cover an entire oven rack with any material such as aluminum foil. It will block airflow throughout the oven and may cause carbon monoxide poisoning. Aluminum foil linings may trap heat, creating a fire hazard.
Do NOT use a silicone mat on the bottom of the oven. This will block airflow throughout the oven and may cause carbon monoxide poisoning.
Do NOT place any pot, pan or food directly on the oven floor when baking.
Do NOT put your face near the infrared broiler.
Do NOT store food, pots or pans, cooking equipment or containers in the oven when not in use.
Keep the oven free from grease buildup. Grease in the oven may ignite.
6
THANK YOU & WELCOME
Thank you for your purchase and welcome to the BlueStar® Family!
BlueStar® ranges are designed for discerning home chefs who demand restaurant-quality results in their own kitchens. As the owner of a new BlueStar® range you can look forward to years of culinary excellence. You will prepare meals with the speed and accuracy of a professional chef right in your own kitchen. All equipment is designed and manufactured to the highest quality standards in the industry specifically to meet the needs of the world’s most demanding chef: you. From simmering to sautéing, baking and broiling these versatile ranges provide the flexibility you need in any cooking application. Please review and familiarize yourself with this Use & Care Guide which includes operating and cleaning instructions as well as tips for getting the most out of your range.
Since 1880, we have been handcrafting the highest quality ranges at our Pennsylvania factory. If your range ever needs attention, please be sure to use a BlueStar® certified service provider recommended by our sales service team. Our service team can be reached at 1-800-449-8691 or serviceteam@bluestarcooking.com.
Please take a few moments now to fill in the Service Information on PAGE 8 for your future reference. In the event you require parts or service, this information will be needed to ensure you receive the highest quality service we can provide.
We hope you enjoy your new range,
The BlueStar® Team
PLEASE NOTE: ALL RANGES SHOULD BE INSPECTED UPON ARRIVAL. PER THE WARRANTY ANY COSMETIC ISSUES MUST BE REPORTED TO YOUR DEALER WITHIN 7 DAYS OF DELIVERY. THE PERFROMANCE CHECKLIST MUST BE COMPLETED BY THE CERTIFIED INSTALLER WITHIN 15 DAYS OF INSTALLATION AND SUBMITTED.
7

SERVICE INFORMATION
Date of Purchase
Model Number
Serial Number
Dealer Name
Dealer Phone
Dealer Address
Date of Installation
Installer Name
Installer Phone
Installer Address
Your installer should complete the Performance Checklist, found in the Installation Manual or page 45 of this manual, before leaving your residence. Mail the completed checklist to: Warranty Department Prizer-Painter Stove Works Inc. 318 June Avenue, Blandon, PA 19510.
NOTE: WARRANTY SERVICE MUST BE PERFORMED BY AN AUTHORIZED SERVICE AGENT. YOU MAY REQUEST WARRANTY SERVICE BY CALLING 800-449-8691. YOU MAY ALSO REQUEST SERVICE VIA THE INTERNET BY SUBMITTING THE SERVICE REQUEST FORM AT WWW.BLUESTARCOOKING.COM
In the Commonwealth of Massachusetts, gas connections must be performed by a licensed plumber or licensed gas fitter.
8

GETTING STARTED
We know you are excited to start cooking and baking with your new BlueStar® range. Before you begin, it is essential that you follow these steps for safe and optimal use.
Become familiar with all the parts of your range.
Remove and properly discard all temporary labels and packaging material from the cooktop, burners, burner grates, oven exterior, oven interior, oven rack glides and oven racks. Remove all: cardboard, zip ties, paper and plastic sheathing used as packaging.
ATTENTION
Do not remove zip ties beneath the burners. These are needed to hold the igniter wires in place.
Wash all removable parts including ring grates, top grates, oven racks, and oven rack glides in hot, soapy water. Rinse well and dry thoroughly. See the Care and Cleaning section.
Register your appliance by mailing the Performance Checklist, completed by your installer, and mail to the below address. The Performance Checklist can be found in the Installation Manual or on page 45 of this manual or online at www.bluestarcooking.com/support/product-registration/.
Warranty Department
Prizer-Painter Stove Works Inc.
318 June Avenue
Blandon, PA 19510
Perform the Oven Burn-Off procedure before using your oven the first time. The Oven Burn-Off
ATTENTION |
removes all factory oils and residue. |
Season your griddle or French Top before first use
Do NOT operate the convection fan during the initial pre-heat of the oven or while broiling.
9

COOKTOP
BURNERS
BEFORE YOU BEGIN
ATTENTION
Each of your burners has a specific BTU (British Thermal Unit) rating. Before disassembly, note the location of each burner. If a burner is replaced in the wrong position it may not function correctly.
Become familiar with the location of your burners. Below are the standard burner configurations.
Platinum Series Ranges: 24”, 30”, 36”, 48” and 60”
RNB Series Ranges: 24”, 30”, 36”, 48” and 60”
10
.
Precious Metals Series Ranges: 30” and 36”
RCS Series Ranges (Open Burner): 30” and 36”
RCS Series Ranges (Sealed Burner): 24”, 30” and 36”
11

BURNER OPERATION
Push in and turn the control knob counter clockwise to HIGH to start the ignition process. The igniter will spark and make a clicking sound. The clicking will stop after the burner ignites. The initial ignition may take a few seconds. You may hear multiple clicks before it ignites.
After ignition, turn the knob to your desired setting.
Turn the knob to OFF to extinguish the burner. The flame may linger for several seconds until all the gas in the feeder tube is burned off.
ATTENTION
CAUTION
If the burner does not ignite, see the Before Calling for Service section for possible causes and
solutions.
Burners have a re-ignite feature in case the flame is extinguished for any reason. It may take several seconds for the burner to re-ignite.
Never operate the burner with the knob set between the HIGH and OFF position. The flame
will NOT re-ignite in this position and a gas leak could occur.
BURNER SETTINGS
Burners can be set to any setting between LOW/SIMMER and HIGH.
The flame should be adjusted to not wrap around the bottom edge of any pot or pan using the knob.
ATTENTION
If the flame is set too high in relation to the edge of the pot or pan, you might scorch the backguard or other areas around your range
Do not leave empty non-stick pans on the French Top as the heat may damage the coating and the French Top surface.
At the HIGH setting, flames should appear as a defined cone with a dark blue center and light blue outside. Some yellow/orange flame may be seen depending on the type of gas and the supply line.
RING GRATES AND TOP GRATES
OPEN BURNER MODELS TIP: When placing the top grate back on the burner support, locate the sides with the raised edges and ensure they are positioned to the left/right side of the burner. Insert the ring grate into the top grate by aligning the small notch in the top grate with the small indents in the ring grate.
If the top grate is unsteady, remove both the top & ring grates, and adjust the four screws in the corners underneath the top grate accordingly to even out the top grate.
SEALED BURNER MODELS TIP: When placing the top grate back on the cooktop, locate the pin on the bottom of the grate and place inside the positioning holes of the cooktop.
Simmer Burner (some models)
The SIMMER burner gives you a choice of simmer settings from SIMMER to HIGH. The SIMMER setting can be used to gently melt chocolate and hold delicate sauces at low temperatures.
For the lowest simmer setting, push in and turn the knob to HIGH to ignite the burner, then turn counter clockwise to the SIMMER setting on the knob.
o For burners without the SIMMER setting marked on the control knob, push in and turn the control knob to HIGH to initially ignite the burner, then turn the knob counterclockwise past the LOW indicator until the knob stops.
For best simmer results only use the simmer burner. To locate the simmer burner on your range, reference the burner configurations in this manual. The simmer burner is located in the back left position of most ranges.
12

ATTENTION |
Your ring grates, top grates and burner heads may darken over time with use. This is normal. |
|
TIP: To prevent your burners from darkening at an uneven rate, rotate the ring grate and top grates between more and less active burners.
BURNER CLEANING
Ring Grates and Top Grates
TIP: Clean spills as soon as possible to prevent sticking and build up.
When burner is cool, remove the ring grate, top grate and center filler grate (30” models only).
Wash in hot, soapy water. Rinse well and dry thoroughly to prevent rusting.
Handle gently to prevent nicks/chips, which can lead to rusting
TIP: If you have a nick or chip you can season the area to prevent rusting. Nicks or chips are not covered under warranty.
Put corn oil or other high smoke point oil on a paper towel and rub onto rusted area.
Wipe away excess oil and replace the part on the range.
ATTENTION
Do not submerge the burner grates in water for extended periods of time. Prolonged exposure to moisture may cause rusting.
For heavy soiling, use a commercially available oven cleaner. Follow the cleaner manufacturer’s instructions.
CAUTION
Make sure the cleaning chemicals do not contact any stainless steel or painted surface on your appliance.
Reinstall grates in cooktop and make sure they are seated properly, and do not move unsteadily from side to side.
Burner Caps (Sealed Burner Models Only)
Burner caps locations are specific to the valves on the front of the unit. If burner caps are removed for ATTENTION cleaning or other purposes, they must be re-installed in the same location they were removed from.
Failure to do so may result in a burner that will not light or possibly have a high flame.
TIP: Clean spills as soon as possible to prevent sticking and build-up, and to keep the burner ports clear.
For fresh spills, make sure burner is cool and clean with a cloth and hot water.
Burner Heads (Open Burner Models Only)
Burner head locations are specific to the valves on the front of the unit. If burner heads are removed for ATTENTION cleaning or other purposes, they must be re-installed in the same location they were removed from.
Failure to do so may result in a burner that will not light or possibly have a high flame.
TIP: Clean spills as soon as possible to prevent sticking and build-up, and to keep the burner ports clear.
For fresh spills, make sure burner is cool and clean with a cloth and hot water. If needed, the burner head can be removed for cleaning:
When cool, remove the ring grate and top grate.
13

Lift the burner head up and slide the burner head unit including the venturi tube up and slightly toward the back of the range so it clears the metal bar.
Disconnect the orange igniter wire from its connector.
Gently clean the exterior of the burner head with warm, soapy water. DO NOT submerge the burner head in water. Rinse well and dry thoroughly.
If the burner ports are clogged, use a push pin, safety pin or other metallic device to carefully clear the hole. Do NOT use a toothpick or any object that could become stuck in the hole.
Replace the burner head by sliding the burner head unit underneath the metal bar; be sure the air shutter of the venturi tube slides over and is centered on the gas valve jet.
Reconnect the orange igniter wire to the connector.
Set the burner head in place.
Replace the top grate and ring grate.
ATTENTION
If the igniter wire is wet, you will hear clicking and the burner will not ignite. Wait and try again.
It will light after drying.
Burner might ignite but clicking may continue until igniter dries.
WOK COOKING
Every burner is wok fitted and can be used for wok cooking without a separate wok ring (open burner units only).
TIP: For best results, use your range’s highest BTU rated burner for stir-frying, which are located in the front of the range.
When burner is cool, remove the ring grate from your selected burner.
Position your curved-bottom wok on the open burner cradle of the top grate.
14

INTEGRATED GRIDDLE (SOME MODELS)
Before You Begin
You must season your integrated griddle before using. The seasoning process prevents food from sticking and the griddle from rusting. After seasoning, with time and use, your griddle will darken and develop a rich blue/black color, which is normal.
|
If you purchased a cast iron griddle separately, do NOT follow the seasoning directions. |
|
ATTENTION |
||
|
||
|
|
|
Seasoning Your Integrated Griddle |
||
ATTENTION |
The complete seasoning process takes approximately 90 minutes and requires attention. |
|
Remove and discard all temporary factory labels and packaging, including stainless steel griddle cover.
Wipe off any factory oils and residue with a soft cloth.
Using a dry cotton towel, apply a light coating of high smoke point oil such as corn oil to the griddle’s cooking surface. Smoke point of the oil must be over 450°F.
Use a different dry cotton towel and wipe away the excess oil.
Push in and turn the griddle burner control knob counter clockwise to the 300°F setting.
Allow griddle to preheat for 30 minutes. Note: As the griddle heats, it will likely change color to varying shades of blue/black. This is normal and part of the seasoning process.
WARNING |
Griddle is very hot! Use care with next steps to prevent burns. Do not remove griddle from cooktop. |
|
|
After 30 minutes at 300°F, use a dry cotton towel and remove the excess oil from the griddle’s surface.
Using a clean, dry cotton towel, apply another coat of corn oil to the griddle’s surface.
Increase the heat setting on the griddle to 325°F. Wait 15 minutes.
Increase the heat setting on the griddle to 350°F. Wait 15 minutes.
Increase the heat setting on the griddle to 375°F. Wait 15 minutes.
ATTENTION Do NOT heat the griddle beyond 375°F during the seasoning process.
Turn the griddle burner knob to OFF. The griddle is still hot.
While the griddle is hot, and with extreme care, use a clean, dry cotton towel to remove excess oil.
Your griddle is now ready for use.
TIP: If food begins sticking to the griddle over time, repeat the seasoning process as needed.
Integrated Griddle Operation
Push in and turn the griddle burner knob counter clockwise to the desired temperature setting.
Allow griddle to pre-heat 20-30 minutes before cooking, for optimal performance.
Turn off griddle when not in use.
Do NOT bang the griddle plate with metal utensils as this will damage the griddle surface.
ATTENTION |
Avoid gouging the griddle surface. |
|
15
 Loading...