

Blue Rhino GCT904W Owner's Manual
OWNER’S MANUAL
MANUEL D’UTILISATION
MANUAL DEL USUARIO
Save these instructions for future reference.
If you are assembling this unit for someone else, give this manual to him or her to read and save for future
reference.
The use and installation of this product must conform to local codes. In absence of local codes, use the
National Fuel Gas Code, ANSI Z223.1/NFPA 54, CAN/CGA-B149.1, Natural Gas and Propane Installation Code.
California Proposition 65: Chemicals known to the State of California to cause cancer, birth defects, or other
reproductive harm are created by the combustion of propane.
Certified Under / Homologué par / Certificado por:
ANS Z21.72b (2002) • CSA 11.2b (2002) Camp Stoves
Conserve estas instrucciones para futuras consultas.
Si está montando esta unidad para otra persona, entréguele este manual para futuras consultas.
El uso e instalación de este producto ha de realizarse de acuerdo con los códigos locales. Si no existen
códigos locales, use las normas siguientes: Código Nacional para Gas y Combustibles, ANSI Z223.1/NFPA 54,
CAN/CGA-B149.1, Código de Instalación de Propano y Gas Natural.
Propuesta 65 de California: La combustión del propano crea productos químicos considerados por el Estado
de California como causantes de cáncer, malformaciones congénitas u otros daños reproductivos.
Conservez ces instructions afin de pouvoir les consulter ultérieurement.
Si vous êtes en train d’assembler cet appareil pour une autre personne, veuillez lui fournir le manuel afin
qu’elle puisse le lire et le consulter plus tard.
L’utilisation et l’installation de cet appareil doivent être conformes aux codes locaux. En l’absence de codes
locaux, suivez le Code national du gaz et des combustibles, les normes ANSI Z223.1/NFPA 54, CAN/CGA-
B149.1 et le Code d’installation du gaz naturel et du propane.
Proposition 65 de Californie: L’État de la Californie reconnait que la combustion du propane produit des
émanations et des résidus chimiques qui provoquent le cancer, des malformations congénitales et sont
nocifs pour le système reproductif.
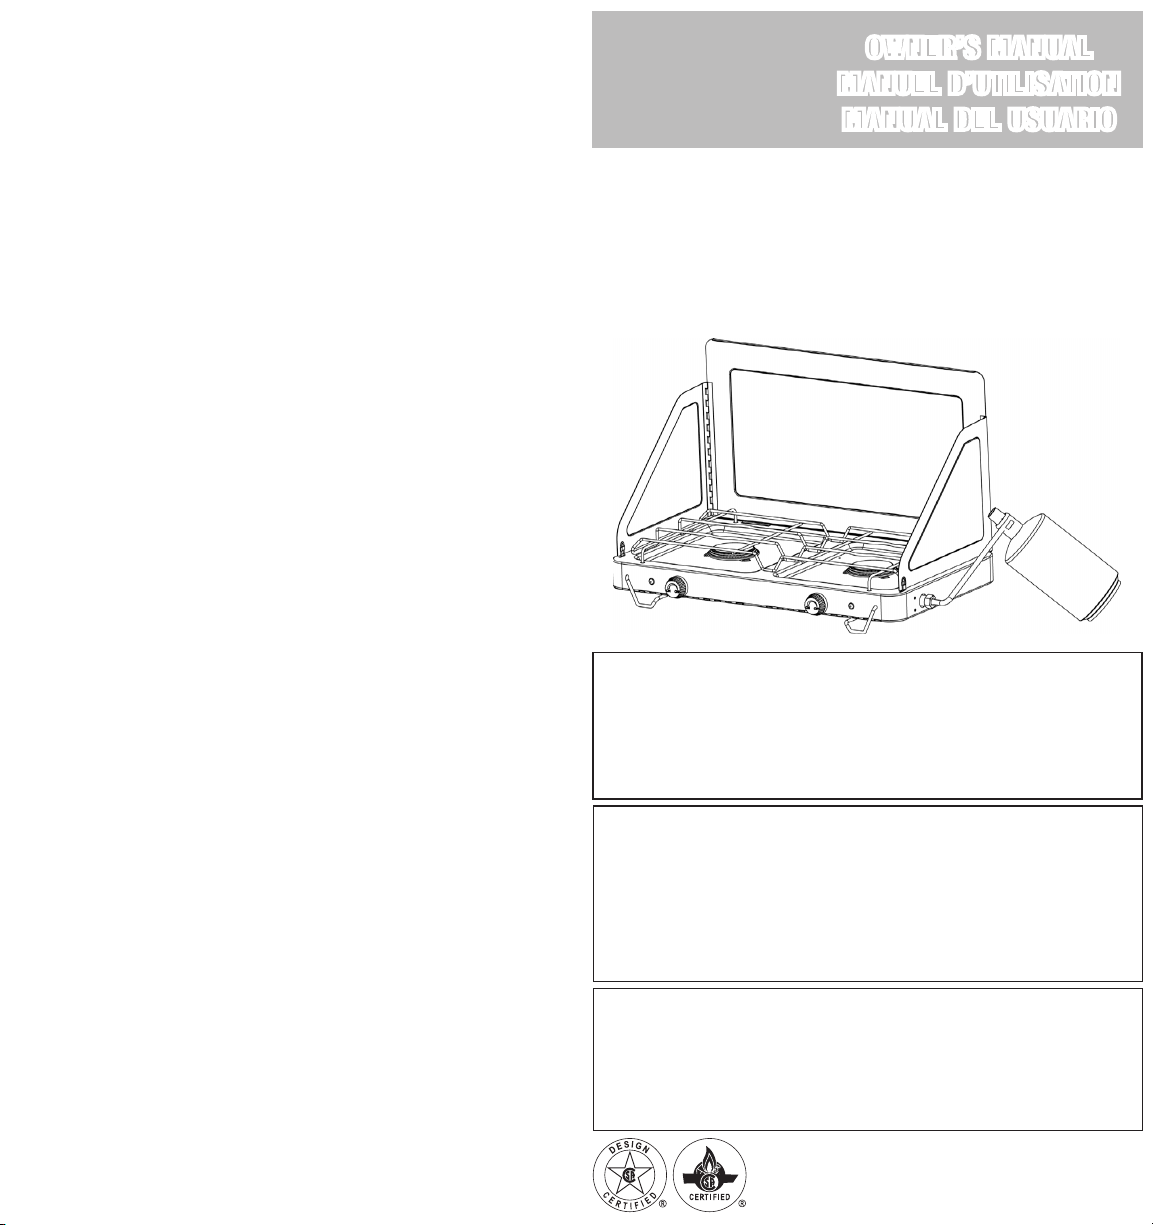
Outdoor LP Gas Camp Stove
Réchaud de camping d’extérieur au propane
Cocinilla de campamento a gas propano
líquido para exteriores
Model No. / Modèle nº / Modelo no. GCT904W
Manufactured in China for / Fabriqué en Chine pour / Fabricado en China:
Blue Rhino Global Sourcing, Inc
Winston-Salem, NC USA
1.800.762.1142, www.bluerhino.com
© Blue Rhino Global Sourcing, Inc. All Rights Reserved. / Tous droits réservés. / Reservados todos los derechos.
4. Usando guantes resistentes al calor, coloque un
encendedor de butano largo o una cerilla larga
encendida cerca del lado del quemador. (figura 6)
a. Gire la perilla de control en sentido antihorario a
la posición “ON” (encendido).
b. Aleje la cerilla o encendedor de butano largo.
5. Si el quemador no se enciende en 5 segundos,
gire la perilla de control del quemador a
“OFF” (apagado), espere 5 minutos y repita el
procedimiento de encendido.
6. Después de encender el quemador observe su
llama y asegúrese de que todos los orificios estén
encendidos y que la altura de la llama corresponda
a la del diagrama. (figura 7)
7. Repita los pasos 6 a 6 para los otros quemadores.
PRECAUCIÓN: Si la llama del quemador se
apaga durante el funcionamiento, cierre el
gas (“OFF”) inmediatamente y espere que la
zona quede despejada de gas antes de volver
a encenderlo.
Apagado:
1. Gire la perilla de control a la posición “OFF”
(apagado).
2. Remueva el tanque de gas propano líquido y
guárdelo en un lugar apropiado.
Uso por primera vez
1. Verifique que todos los empaques, etiquetas y
envolturas de protección han sido removidos de
la cocinilla.
2. Remueva todo aceite de fabricación que encuentre
en la unidad antes de usar la cocinilla por primera
vez, encendiendo la cocinilla por lo menos por 5
minutos en la graduación “ON” (encendido). Esto
realizará una “limpieza por calor” en las piezas
internas de la unidad y hará que los olores se
disipen.
Cocción
1. Encienda el (los) quemador(es) siguiendo las
instrucciones de encendido.
2. Use guantes de protección para colocar cazerolas o
ollas en la parrilla de cocción.
3. Use guantes de protección y tenacillas de mango
largo para colocar los alimentos en las cazerolas o
en las ollas sobre los quemadores encendidos.
4. Ajuste los controles a la temperatura deseada.
5. Haga la cocción de los alimentos hasta que
la temperatura interna del alimento se haya
alcanzado.
6. Apague la cocinilla de campamento girando la
perilla de control a la posición “OFF” (apagado).
Remueva el tanque de gas propano y guárdelo en
un lugar apropiado.
Limpieza y cuidado
PRECAUCIÓN: Todas las operaciones de
limpieza y mantenimiento deben realizarse
con la cocinilla fría y con el suministro de
combustible del tanque de propano líquido
desconectado.
PRECAUCIÓN: NO limpie ninguna pieza de esta
cocinilla en un horno de limpieza automática.
El calor extremo dañará el terminado.
PRECAUCIÓN: Mantenga la cocinilla de
campamento limpia y libre de materiales
combustibles, gasolina y otros vapores y
líquidos inflamables.
PRECAUCIÓN: NO obstruya el flujo de
combustión y aire de ventilación.
Avisos
1. No use productos de limpieza abrasivos pues
dañarán este aparato.
2. No utilice nunca productos limpiahornos para
limpiar cualquier pieza de la cocinilla.
3. Nunca use ninguna pieza de esta cocinilla en un
horno de limpieza automática. El calor extremo
dañará el terminado.
Inspección
Esta cocinilla de campamento debe inspeccionarse
con regularidad para garantizar la seguridad del
producto y una larga vida útil.
ADVERTENCIA: NO trate de limpiar esta
cocinilla de campamento a menos que las
llamas estén COMPLETAMENTE apagadas y la
unidad esté fría al tacto.
1. Revise el quemador para comprobar que esté
seguro.
2. Revise el tubo venturi para asegurarse de que está
limpio y libre de nidos de arañas.
3. Revise las conexiones de gas para asegurar que
no hayan fugas.
4. Revise los componentes en busca de señales de
daño o corrosión.
5. Si detecta daño en cualquiera de los componentes,
NO opere el producto hasta que se hayan realizado
las reparaciones.
Limpieza de las superficies
ADVERTENCIA: NO intente limpiar esta cocinilla
de campamento a menos que las llamas estén
COMPLETAMENTE apagadas y la unidad esté
fría al tacto.
ADVERTENCIA: NO use limpiador de horno ni
limpiadores abrasivos, ya que estos causarán
daño al producto.
1. Limpie las superficies con un detergente suave de
lavado de platos o con soda de hornear.
2. En superficies de limpieza difícil, use un
desengrasador a base de cítricos y un cepillo de
nylon.
3. Enjuague las superficies con agua limpia.
Limpieza del quemador
1. Apague el gas con la perilla de control y remueva
el tanque de gas propano líquido.
2. Remueva el regulador.
3. Remueva las rejillas del quemador.
4. Remueva el quemador.
5. Limpie el orificio de entrada del quemador con un
cepillo pequeño de limpiar botellas o con chorro de
aire comprimido.
6. Remueva de la superficie del quemador todo
residuo de comida o suciedad.
7. Limpie cualquier puerto que encuentre tapado
con un alambre rígido, tal como un sujetapapeles
abierto.
8. Examine el quemador para detectar daños – como
rajaduras o huecos. Si encuentra algún daño
reemplace el quemador.
9. Vuelva a instalar el quemador. Vuelva a conectar
el encendedor y coloque nuevamente el resguardo
contra el viento y el regulador.
10. Vuelva a colocar la rejilla del quemador.
11. Haga una prueba de fugas.
GCT904W-OM-102 EFS
WARNING
FOR YOUR SAFETY:
For Outdoor Use Only
(outside any enclosure)
DANGER
If you smell gas -
1. Do not attempt to
light appliance.
2. Extinguish any open
flame.
3. Disconnect from fuel
supply.
DANGER
CARBON MONOXIDE
HAZARD
• This appliance can
produce carbon
monoxide which has
no odor.
• Using it in an
enclosed space can
kill you.
• Never use this
appliance in an
enclosed space such
as a camper, tent, car
or home.
WARNING
FOR YOUR SAFETY:
Do not store or use
gasoline or other liquids
with flammable vapors
in the vicinity of this or
any other appliance.
DANGER: Failure to follow these
instructions, dangers, warning and cautions in
this manual may result in serious bodily injury
or death, or in a fire or an explosion causing
damage to property.
WARNING:
Improper installation, adjustment,
alteration, service or maintenance can
cause injury or property damage.
Read the installation, operation and
maintenance instructions thoroughly before
installing or servicing this equipment.
Do NOT operate, light or use this appliance
within 8 feet of walls, structures or
buildings.
Keep all combustible items and surfaces
at least 21 inches (53 cm) away from the
camp stove at all times. DO NOT use this
camp stove or any gas product under
any overhead or near any unprotected
combustible constructions.
This camp stove is NOT for commercial use.
This camp stove is for use with liquid
propane (LP) gas only. The conversion to
or attempted use of natural gas in this LP
gas camp stove is dangerous and will void
your warranty.
LP gas Characteristics:
a. LP gas is flammable and hazardous if
handled improperly. Become aware of
the characteristics before using any LP
gas product.
b. LP gas is explosive under pressure,
heavier than air and settles and pools in
low areas.
c. LP gas in its natural state has no odor.
For your safety, an odorant is added that
smells like rotten cabbage.
d. Contact with LP gas can cause freeze
burns to skin.
Do not store spare LP cylinder within 10
feet (3.05 m) of this appliance.
An LP cylinder not connected for use shall
not be stored in the vicinity of this or any
other appliance.
LP gas tank needed to operate. Only tanks
marked “propane” may be used.
The LP gas tank used with the camp
stove must be constructed and marked in
accordance with the Specifications for LPgas cylinders of the U.S. Department of
Transportation (DOT) or Transport Canada,
CAN/CSA 339.
LP gas tank must be arranged for vapor
withdrawal.
LP gas tank must remain upright or at a
45º angle. Do not use when laying LP gas
tank flat, as this will cause damage to your
camp stove and void your warranty.
Dented or rusted LP gas tanks may be
hazardous and should be checked by your
LP gas supplier prior to use.
The LP gas tank should not be dropped or
handled roughly.
LP gas tanks must be stored outdoors out
of the reach of children and must not be
stored in a building, garage or any other
enclosed area. Your tank must never be
stored where temperatures can reach over
125°F.
Never attempt to attach this camp stove
to the self-contained LP gas system of a
camper trailer, motor home or house.
Do not install or use in or on boats or
recreational vehicles.
The use of alcohol, prescription or nonprescription drugs may impair the
consumer’s ability to properly assemble
and safely operate the appliance.
Never use charcoal, lighter fluid, lava rocks,
gasoline, kerosene or alcohol with this
product.
Your camp stove has been checked at all
factory connections for leaks. Recheck all
connections, as movement in shipping can
loosen connections.
Check for leaks even if your unit was
assembled for you by someone else.
Do not operate if gas leak is present. Gas
leaks may cause a fire or explosion.
You must follow all leak-checking
procedures before operating. To prevent fire
or explosion hazard when testing for a leak:
a. Always perform leak test before lighting
the camp stove and each time the tank is
connected for use.
b. No smoking. Do not use or permit
sources of ignition in the area while
conducting a leak test.
c. Conduct the leak test outdoors in a well-
ventilated area.
d. Do not use matches, lighters or a flame
to check for leaks.
e. Do not use camp stove until any and all
leaks are corrected. If you are unable
to stop a leak, disconnect the LP gas
supply. Call a gas appliance serviceman
or your local LP gas supplier.
Do not use in an explosive atmosphere.
Keep camp stove area clear and free from
combustible materials, gasoline and other
flammable vapors and liquids.
It is essential to keep the camp stove’s
valve compartment, burners and circulating
air passages clean. Inspect camp stove
before each use.
Do not alter camp stove in any manner,
doing so will void your warranty.
Do not use the camp stove unless it is
COMPLETELY assembled and all parts are
securely fastened and tightened.
This camp stove should be thoroughly
cleaned and inspected on a regular basis.
Use only the regulator provided. The
replacement regulator shall be that
specified by the manufacturer.
Use only Blue Rhino Global Sourcing, Inc.
factory authorized parts. The use of any
part that is not factory authorized can
be dangerous. This will also void your
warranty.
Do not touch metal parts of camp stove
until it has completely cooled (about
45 min.) to avoid burns, unless you are
wearing protective gear (pot holders,
gloves, BBQ mittens, etc.).
When cooking, fire extinguishing materials
shall be readily accessible. In the event
of an oil/grease fire, do not attempt to
extinguish with water. Use type BC dry
chemical fire extinguisher or smother with
dirt, sand or baking soda.
Do not use camp stove in high winds.
Never lean over the camp stove when
lighting.
Do NOT use this camp stove if any part
has been under water. Immediately call a
qualified service technician to inspect the
appliance and to replace any part or control
system and any gas control which has been
under water.
Do not leave a lit camp stove unattended,
especially keep children and pets away
from camp stove at all times.
Do not attempt to move the camp stove
when in use. Allow the camp stove to cool
before moving or storing.
Storage of camp stove indoors is
permissible only if the tank is disconnected,
removed from the camp stove and properly
stored outdoors.
Do not attempt to disconnect the gas
regulator from the tank or any gas fitting
while the camp stove is in use.
Disconnect LP gas tank when not in use.
Always use your camp stove on a hard,
non-combustable, level surface. An asphalt
or blacktop surface may not be acceptable
for this purpose.
Do not use directly on wooden decks or
wooden picnic tables.
English – 1 English – 2 English – 3 English – 4 English – 5 English – 6
Keep all electrical cords away from a hot
camp stove.
Do not use camp stove for indoor cooking
or heating. TOXIC fumes can accumulate
and cause asphyxiation.
After a period of storage and/or nonuse,
check for leaks and burner obstructions.
Always use a meat thermometer to ensure
food is cooked to a safe temperature.
Never cover entire cooking area with
aluminum foil.
Do not store a spare LP gas tank under or
near this appliance.
Use protective gloves when assembling this
product.
Do not force parts together as this can
result in personal injury or damage to the
product.
Death, serious injury or damage to property
may occur if the above is not followed
exactly.
Assembly Instructions
For Easiest Assembly:
• To avoid losing any small components, assemble
your product on a hard, level surface that does
not have cracks or openings.
• Clear an area large enough to layout all
components.
• Follow all steps in order to properly assemble
your product.
To complete assembly you will need:
• (1) Leak Detection Solution (Instructions on how
to make solution are included in “Operating
Instructions” section)
• (1) 14.1 oz LP gas tank.
Typical assembly: approximately 5 minutes.
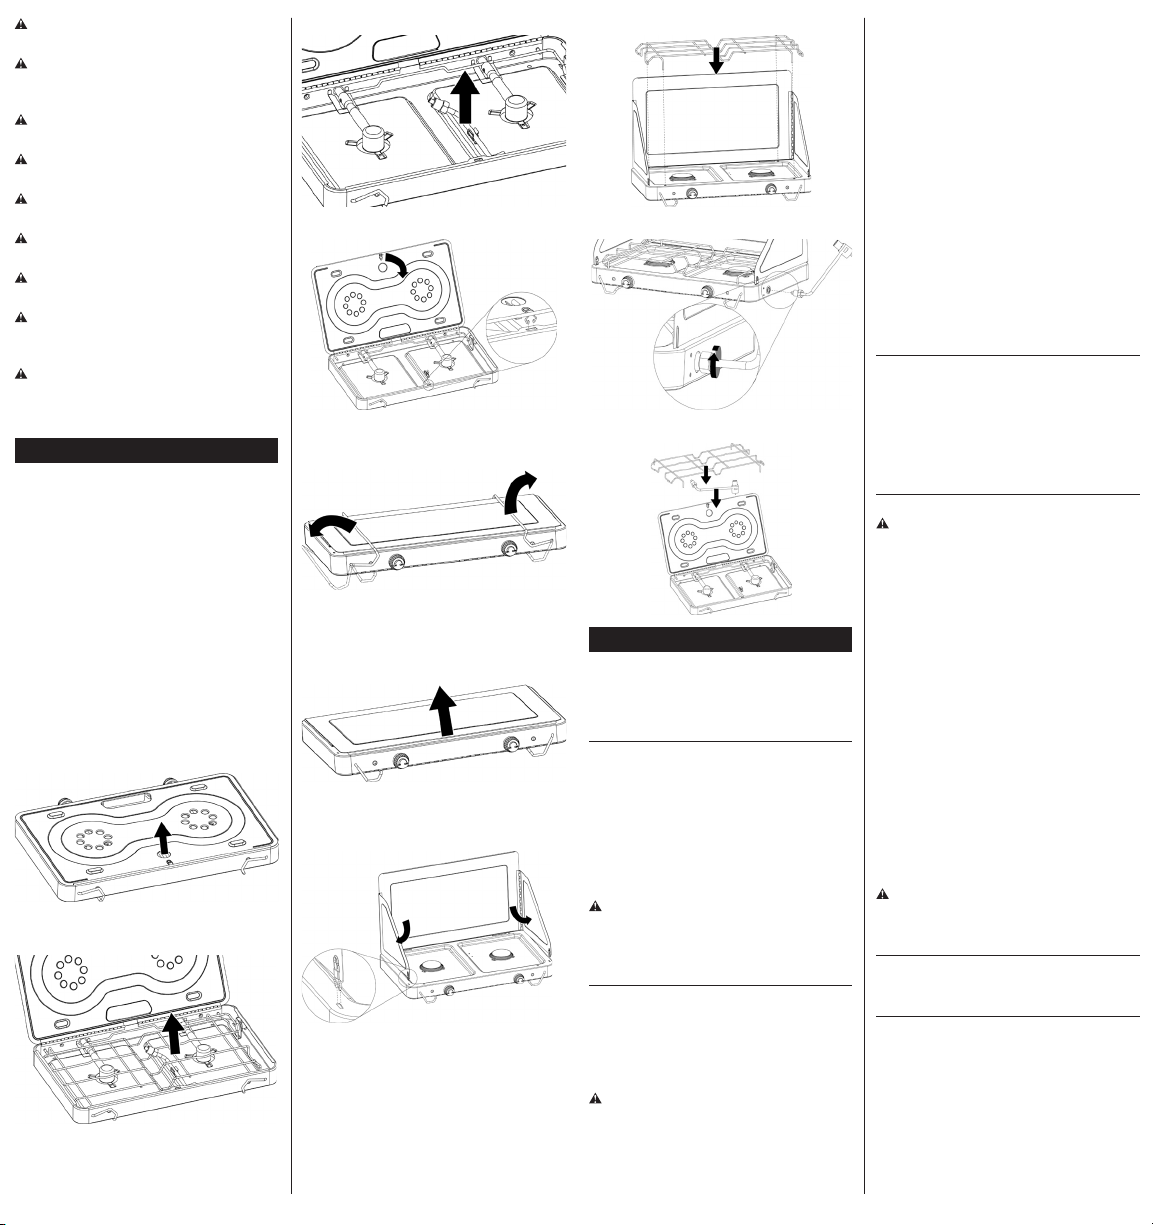
1. Lift Bottom Panel
2. Remove Cooking Grid
3. Remove Regulator
4. Close Bottom Panel
5. Unfold Legs
6. Lift Lid
7. Unfold Wind Guard Side Panels
8. Insert Cooking Grid
9. Attach Regulator
10. When Not In Use
Operating Instructions
This camp stove is designed to operate with a one
pound 7-3/8” high disposable / 14.1 oz. propane gas
tank (DOT 39 Cylinder).
DO NOT ATTEMPT TO REFILL ANY ONE POUND
(14.1 oz.) PROPANE GAS TANKS!
Connecting Gas Tank
1. Make sure the control knobs are in the “OFF”
position. (Figure 1)
2. Lubricate the threads of the regulator valve
with petroleum jelly, insert the gas tank into the
regulator valve and hand-tighten firmly. (Figure 2)
3. LP gas tank must be kept at a 45º angle. (Figure 3)
4. Test for leaks.
To maximize use and prevent damage to the
camp stove and it’s components, you must
keep the LP gas tank a 45 degree angle. Not
doing so will void your warranty.
Checking for Leaks
Burner Connection
1. Make sure the regulator is securely fastened to the
burner. (Figure 4)
If your unit was assembled for you, visually check
the connection between the burner and regulator.
WARNING: Failure to inspect this connection or
follow these instructions could cause a fire or
an explosion which can cause death, serious
bodily injury or damage to property.
2. If the burner pipe does not rest flush to the
regulator please contact 1.800.762.1142 for
assistance.
Regulator / 1lbs. LP Gas Tank Connection
1. Make 2-3 oz. of leak solution by mixing one part
liquid dishwashing soap with three parts water.
2. Make sure control knob is “OFF”. (Figure 1)
3. Spoon several drops of solution, or use squirt
bottle, at the burner to regulator connection and the
LP gas tank to regulator connection. (Figures 4 & 5)
4. Inspect the solution at the connections, looking
for bubbles.
If NO bubbles appear, the connections are secure.
If bubbles appear, you have a leak.
a. Loosen and retighten the connections, making
sure the connections are secure.
b. Retest with solution.
If you continue to see bubbles after several
attempts, disconnect propane source and
contact 1.800.762.1142 for assistance.
First Use
1. Make sure all labels, packaging and protective
films have been removed from the camp stove.
2. Remove manufacturing oils before cooking on this
camp stove for the first time, by operating the
camp stove for at least 5 minutes on “ON”. This
will “heat clean” the internal parts and dissipate
odors.
Lighting
DO NOT expose the camp stove to flammable
vapors or liquids during lighting.
1. Make sure all labels, packaging and protective
films have been removed from the camp stove.
2. Make sure there are no obstructions of airflow to
the unit. Spiders and insects can nest within and
clog the burner / venturi tube at the orifice.
A clogged burner tube can lead to a fire
beneath the appliance.
3. Control knobs must be in the “OFF” position.
(Figure 1)
4. Wearing heat reistant gloves, position a lit long
match or lit long butane lighter near the side of the
burner. (Figure 6)
5. Turn control knob clockwise to “ON”.
6. If ignition does not occur in 5 seconds, turn burner
control knob “OFF”, wait 5 minutes and repeat
lighting procedure.
7. After lighting, observe the burner flame. Make sure
all burner ports are lit and flame height matches
illustration. (Figure 7)
8. Repeat steps 4-7 for second burner.
CAUTION: If burner flame goes out during
operation, immediately turn the control knobs
“OFF” and let the gas clear for about 5 minutes
before re-lighting.
Turning Off
1. Turn control knobs to the “OFF” position.
2. Remove LP gas tank and properly store tank.
Cooking
1. Ignite burner(s) per lighting instructions.
2. Wear protective gloves to place pots and/or pans
onto burner grid.
3. Wear protective gloves and use long handled tongs
to place food into the pots and/or pans above the
lit burner(s).
4. Adjust controls to desired temperature.
5. Cook until desired internal food temperatures are
achieved.

6. Turn camp stove “OFF” by turning control knob
45º
60º
1/2"
12.7 mm
6.4mm
0mm
1/4"
0"
to the “OFF” position. Remove LP gas tank and
properly store tank.
Figure 1
Figure 2
Figure 3
Match
Flame
Figure 5
Figure 6
Figure 7
Cleaning Surfaces
WARNING: Do NOT attempt to clean this camp
stove unless the flames are COMPLETELY out
and unit is cool to the touch.
WARNING: Do NOT use oven cleaner or abrasive
cleaners as they will damage this product.
1. Wipe surfaces clean with mild dishwashing
detergent or baking soda.
2. For stubborn surfaces use a citrus based degreaser
and a nylon scrubbing brush.
3. Rinse clean with water.
Cleaning Burner
1. Turn gas “OFF” at the control knobs and remove
LP gas tank.
2. Remove regulator.
3. Remove cooking grid.
4. Remove burners.
5. Clean inlet of burners with small bottle brush or
compressed air.
6. Remove all food residue and dirt on burner
surfaces.
7. Clean any clogged ports with a stiff wire (such as
an opened paper clip).
8. Inspect burners for any damage (cracks or holes). If
damage is found, replace with new burner(s) from
the manufacturer.
9. Reinstall burners. Reconnect regulator.
10. Replace cooking grid.
11. Preform leak test.
Product Registration
For faster warranty service, register your product
immediately at www.bluerhino.com or call
1.800.762.1142.
This Limited Warranty is in lieu of all other express
warranties. Vendor disclaims all warranties for
products that are purchased from sellers other than
authorized retailers or distributors, including the
warranty of merchantability or the warranty of fitness
for a particular purpose. VENDOR ALSO DISCLAIMS
ANY AND ALL IMPLIED WARRANTIES, INCLUDING
WITHOUT LIMITATION THE IMPLIED WARRANTIES OF
MERCHANTABILITY AND FITNESS FOR A PARTICULAR
PURPOSE. VENDOR SHALL HAVE NO LIABILITY TO
PURCHASER OR ANY THIRD PARTY FOR ANY SPECIAL,
INDIRECT, PUNITIVE, INCIDENTAL, OR CONSEQUENTIAL
DAMAGES. Vendor further disclaims any implied or
express warranty of, and assumes no responsibility
for, defects in workmanship caused by third parties.
This Limited Warranty gives the purchaser specific
legal rights; a purchaser may have other rights
depending upon where he or she lives. Some
jurisdictions do not allow the exclusion or limitation
of special, incidental or consequential damages, or
limitations on how long a warranty lasts, so the above
exclusion and limitations may not apply to everyone.
Vendor does not authorize any person or company
to assume for it any other obligation or liability in
connection with the sale, installation, use, removal,
return, or replacement of its equipment, and no such
representations are binding on Vendor.
Blue Rhino Global Sourcing, Inc
Winston-Salem, North Carolina USA
(800) 762-1142
Troubleshooting
Please visit www.bluerhino.com or call
1.800.762.1142.
Figure 4
Cleaning and Care
CAUTION: All cleaning and maintenance should
be done when camp stove is cool and with the
fuel supply disconnected.
CAUTION: DO NOT clean any camp stove part
in a self cleaning oven. The extreme heat will
damage the finish.
CAUTION: Keep camp stove clear and free from
combusitble materials, gasolline and other
flammable vapours and liquids.
CAUTION: Do NOT obstruct the flow of
combustion and ventilation air.
Notices
1. Abrasive cleaners will damage this product.
2. Never use oven cleaner to clean any part of
camp stove.
Inspecting
This camp stove should be inspected on a regular
basis to ensure product safety and longer product life.
WARNING: Do NOT attempt to clean this camp
stove unless the flames are COMPLETELY out
and unit is cool to the touch.
1. Check burner to make sure it is secure.
2. Check venturi to make sure it is clear and free of
spider nests.
3. Check all gas connections for leaks.
4. Check components for any signs of damage or rust.
5. If damage to any component is detected, do NOT
operate until repairs are executed.
Limited Warranty
Blue Rhino Global Sourcing, Inc (“Vendor”) warrants
to the original retail purchaser of this product, and to
no other person, that if this product is assembled and
operated in accordance with the printed instructions
accompanying it, then for a period of one (1) year from
the date of purchase, all parts in such product shall
be free from defects in material and workmanship.
Vendor may require reasonable proof of your date
of purchase. Therefore, you should retain your sales
slip or invoice. This Limited Warranty shall be limited
to the repair or replacement of parts, which prove
defective under normal use and service and which
Vendor shall determine in its reasonable discretion
upon examination to be defective. Before returning any
parts, you should contact Vendor’s Customer Service
Department using the contact information listed below.
If Vendor confirms, after examination, a defect covered
by this Limited Warranty in any returned part, and if
Vendor approves the claim, Vendor will replace such
defective part without charge. If you return defective
parts, transportation charges must be prepaid by you.
Vendor will return replacement parts to the original
retail purchaser, freight or postage prepaid.
This Limited Warranty does not cover any failures or
operating difficulties due to accident, abuse, misuse,
alteration, misapplication, improper installation or
improper maintenance or service by you or any
third party, or failure to perform normal and routine
maintenance on the product as set out in this owner’s
manual. In addition, the Limited Warranty does not
cover damage to the finish, such as scratches, dents,
discoloration, rust or other weather damage, after
purchase.
 Loading...