

Page 1
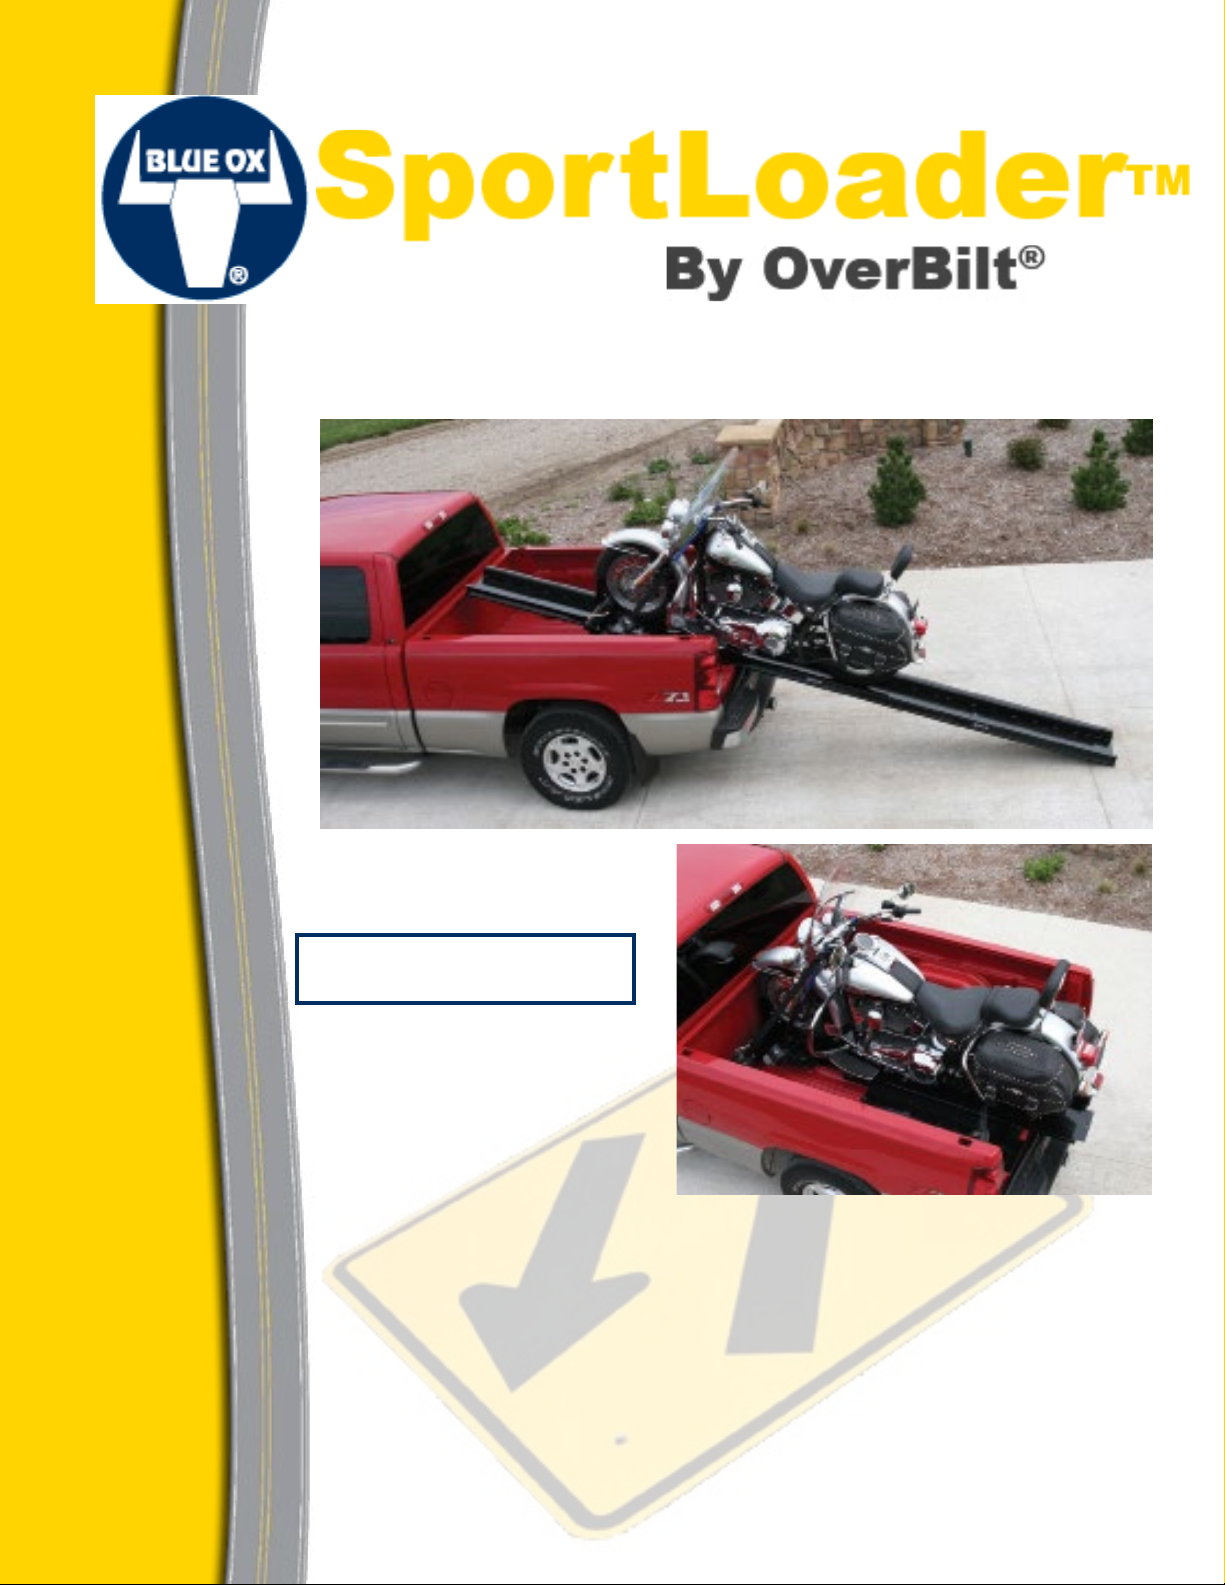
SportLoader
TM
By OverBilt
Owner’s Manual
®
Serial Number
SC3000
(for long box
pickups)
SC3001
(for short box
pickups)
THANK YOU
for purchasing an OverBilt® SportLoaderTM
from Blue Ox®. We’ve organized this manual to
make your installation simple and as troublefree as possible. Please read it thoroughly before
proceeding. Remember to keep your sales
receipt and this manual in a safe place so that
both are available for future use if necessary.
Page 2

SportLoaderTM from Overbilt®
WARRANTY INFORMATION
One Year Warranty
Automatic Equipment Manufacturing Company (“Automatic”) warrants to the original retail purchaser that each product
manufactured by Automatic shall be free from defect in material and workmanship under normal use and service for a period
of one year from the date of delivery. In the case of equipment used for commercial or rental purposes, such warranty period
is limited to 30 days from the date of delivery to the original retail purchaser.
During said one-year period (30 days in the case of equipment used for commercial or rental purposes), Automatic will repair
or replace any parts which (a) shall be returned to an authorized dealer, distributor, or the factory, with transportation charges
prepaid, and (b) after examination by Automatic, are found to be defective. This limited warranty will not cover, in any way, any
alleged damages caused by incorrect or improper installation, improper use, modication or neglect of product, or failure of the
user to follow the guidelines contained in the instructional material provided by Automatic.
REPAIR OR REPLACEMENT AS SET FORTH IN THIS LIMITED WARRANTY IS THE SOLE
EXCLUSIVE REMEDY OF THE PURCHASER. AUTOMATIC SHALL NOT BE LIABLE FOR ANY INCIDENTAL
OR CONSEQUENTIAL DAMAGES FOR BREACH OF ANY EXPRESS OR IMPLIED WARRANTY ON THIS
PRODUCT. EXCEPT TO THE EXTENT PROHIBITED BY APPLICABLE LAW, ANY IMPLIED WARRANTY
OF MERCHANTABILITY OR FITNESS FOR A PARTICULAR PURPOSE ON THIS PRODUCT IS LIMITED IN
LENGTH TO THE DURATION OF THIS WARRANTY.
Some states do NOT allow the exclusion of incidental or consequential damages, or allow limitations on how long an
implied warranty lasts, so the previous limitations or exclusions may NOT apply to you. This warranty gives you specic
legal rights and you may also have other rights which vary from state to state.
Automatic reserves the right to make changes or add improvements to its products at any time without any
obligation to make such changes to previously manufactured equipment.
No liability is assumed for bodily injury that may be inicted on the operator, spectator or general public who is in the
general area while this equipment is in use.
IMPORTANT
Coverage and performance under the foregoing limited warranty is conditioned upon the original retail purchaser completing
and returning the customer registration card to Automatic or registering via our website www.blueox.us within ten days of
delivery date and upon the original serial number being visible on the product and unaltered. Automatic will NOT honor any
warranty claims unless the warranty registration card is on le at Automatic’s factory in Pender, Nebraska. Some states do
NOT allow exclusions or limitations of warranty coverage based on the return of the registration card to the manufacturer, so
the above limitations may NOT apply to you.
Blue Ox® Division
Automatic Equipment Mfg. Co.
P.O. Box P
Pender, Nebraska 68047
24/7 Customer Care (402) 385-3051 or Toll Free (888) 425-5382
I 09/06
Page 3

Product Information & Table of Contents
Equipment Information Record
Date Purchased: _______________________
Purchased From: _______________________
Address: ______________________________
State: ______________ Zip Code: _________
Phone Number of Dealership: ____________
Installed By: __________________________
Service #: _____________________________
Model #: ______________________________
Serial #: ______________________________
Notes: ________________________________
______________________________________
___________________________________________________________________________
___________________________________________________________________________
Table of Contents
Page I
Warranty Information
Page II
Equipment Information Record
24/7 Customer Care Information
Safety Warning
Page 1
Product Information
!
WARNING
Improper installation and/or operation can
create a hazard which can cause serious
injury, property damage or death. Improper
installation and/or operation will void the
warranty.
At Blue Ox® we pride ourselves in
oering exceptional customer service
to our valued customers.
If you have any questions, comments,
or concerns please feel free to contact
Page 2
Welcome to Blue Ox
Unpacking
Page 3
Parts List
Pages 4-5
Installation
Pages 6-7
Loading
a member of our 24/7 Customer Care
Team by calling (402) 385-3051 or
toll free at (888)425-5382.
DEALERS AND INSTALLERS:
PLEASE give the instructions to the customer so
they fully understand the setup, operation, and
safety precautions of this carrier.
II09/06
Page 4
SportLoader
TM
Motorcycle Carrier
from Overbilt®
Description of your product.
The SportLoaderTM allows you to take your motorcycle along
anywhere that you roam.
provides ample power to load motorcycle into
your pickup truck and safely unload. There are no
cables to worry about.
This powerful 12-volt motor and removable
corded control makes loading and unloading your
motorcycle a snap. The SportLoader requires a
12-volt (lawn and garden tractor) battery, which is
not included.
The new Overbilt®
SportLoader™
manufactured by Blue Ox® is
the safest and most effective
method for transporting
your motorcycle using your
pickup truck. The motorcycle
is loaded safely and easily
into the bed of your pickup
truck. The SportLoader can
be installed on virtually
any pickup, short or long
bed versions. As with many
products manufactured by Blue Ox, minimal
installation is required.
An electric motor with a positive gear drive
“I love my SportLoaderTM – no
death defying ride up the ramps,
no trailers, no hassles. I’m able to
load my bike by myself with ease.
I now take my bike more places
and when I’m done – I just take it
out of the pickup. ere are no
modications and installation
was a breeze!”
SportLoader is equipped
with a hand crank that
clamps and holds the tire of
the motorcycle as it sits in
the tire cradle. Tie-downs
are required for holding the
motorcycle in position for
transport.
The SportLoader lift features
a durable powder-coated
nish that prolongs product
Page 1 of 7
life and prevents rusting. Your motorcycle sits
approximately one inch off the bed of the pickup
truck—keeping your motorcycle well protected
and it’s center of gravity as low as possible.
09/06
Page 5

Welcome to the Blue Ox® Experience.
Congratulations on purchasing your SportLoader™. e SportLoader design uses the latest technology and
the highest quality materials. e SportLoader is designed to load and haul a motorcycle in the back of your
pickup truck.
BEFORE using the Overbilt® SportLoader™ manufactured by Blue Ox®, READ THESE INSTRUCTIONS
THOROUGHLY. You will nd operating instructions, installation instructions, and safety precautions
enclosed in this owner’s manual. Read these instructions carefully and precisely follow these instructions.
REMEMBER, proper installation and use of this product is the sole responsibility of the user. Improper
installation, use or maintenance may result in malfunction or property damage. Please ll out your warranty
card and mail it back to Blue Ox, or register your product(s) at www.blueox.us. For future reference, your
serial number is located on the back cover of this manual and it is located on your SportLoader tire cradle.
Unpacking your SportLoader
TM
Remove the SportLoader from the shipping carton, referencing the parts list on this page or diagram on
page 3. Verify that you have all of the parts BEFORE you start the installation process. If you do NOT,
please contact a Blue Ox dealer or distributor or you can contact a member of Blue Ox’s 24/7 Customer
Care Team at (402)385-3051 or toll free at (888) 425-5382 to order replacement parts. DO NOT use
homemade or non-typical parts.
Parts List
Ref. No. Qty. Part # Description
1 1 61-6155 (SC3000) Weldment Ramp 104” (long box)
61-6195 (SC3001) Weldment Ramp 86” (short box)
2 1 61-6156 Tire Cradle
3 1 61-6152 Weldment, Ramp Extension Mid
4 1 61-6153 Weldment, Ramp Extension End
5 1 61-6190 Bully Jack, Weldment (SC9012)
6* 4 201-0295 5/16-18 x 1 Flat Soc Hs Screw
7* 4 202-0002 5/16-18 Hex Nut, ZP
8* 4 203-0009 5/16 Lock Washer, ZP
9* 4 203-0002 5/16 Flat Washer, ZP
10* 2 270-0061 Cargo Buckle
11* 2 201-0691 7/16-14 x 1 Hex Head Bolt Grade 5
12* 2 202-0002 7/16-14 Hex Nut, ZP
13* 2 203-0003 7/16 Flat Washer, ZP
14* 2 203-0011 7/16 Lock Washer, ZP
15 1 294-0891 Winch, 12volt, No Sprocket
16* 1 294-0892 Solenoid, 12volt
17* 2 201-0691 3/8-16 x 1 1/4 Hex Head Bolt
18* 2 202-0003 3/8-16 Hex Nut
19* 2 203-0004 3/8 Flat Washer
SC3000, SC3001
20* 2 203-0010 3/8 Lock Washer
21* 1 229-0705 Gear, 8DP-14.5PA, 20T, 2.75OD, 1.25
22* 2 209-0141 Bearing, 5/8 Flange, Navigator
23* 8 229-0707 Wheel 3
24 2 229-0520 Pin, 1/2 x 2 5/8 EFF
25 2 84-0001 Quick Pin Assembly
26 1 294-0899 Corded Control
* Not visible in the drawing.
09/06
Page 2 of 7
Page 6

Parts Drawing
Main Ramp and Tire Cradle
Figure 1-D
26
Figure 1-A
Figure 1-B
Mid Ramp Extension
5
15
2
1
3
24
Corded Control
See page 2 for complete parts list.
Figure 1-E
2
5
Pivot Tube
(packaged separately)
1
Figure 1-C
Ref.# Oty. Part # Description
3
4
1 1 Pivot Tube
2 6 201-0034 3/8-16 x 1 Carr. Bolt Grd. 5, ZP
3 6 203-0003 3/8 Flat Washer, ZP
4 6 202-0090 3/8-16 Hex Nylon Insert Lock Nut, ZP
5 1 102-6651 Ramp Adjustor Plate
6 12 290-0450 Plastic Washer (not shown)
25
4
End Ramp Extension
Parts List
Page 3 of 7
09/06
Page 7

Installation
1. Remove the tailgate from your pickup
according to manufacturer’s instructions.
NOTE: The tailgate cannot be reinstalled
unless the SportLoader™ is removed from
the box of your pickup truck.
2. Slide the pivot tube onto the OEM tailgate
mount on the left or driver’s side of truck
bed (Figure 2A). Slide the slotted end over
the OEM tailgate mount (Figure 2B) on the
right (passenger’s) side of truck bed.
3. Rotate pivot tube until the ramp adjustor
plate (afxed to the pivot tube) does not
obstruct the loading of the main ramp
assembly into the bed. Figure 3 shows the
tailgate pivot tube once in place.
Figure 2-A
4. Put the main ramp into pickup truck box.
See main ramp in diagram on page 3 or
shown in Figure 5 with tire cradle ( 616155 for long bed and 61-6195 for short
bed). Slide until it is ONLY approximately
one inch from the front of the bed of
the pickup truck box. The electric motor
side of the main ramp should be on the
passenger’s side of the pickup truck bed.
5. Insert and tighten six 3/8”-16x1” bolts,
3/8” at washers, and 3/8”-16 nylon hex
lock nuts (bolts 201-0034, at washers
203-0003, nylon insert lock nut 202-0090)
to fasten main ramp to pivot tube (Figure
4). Reference the pivot tube instructions
included in the pivot tube packaging.
Figure 2-B
Figure 3
!
Be sure to put ALL bolts in ALL ramps.
Failure to do so could result in personal
CAUTION
injury and/or property damage.
09/06
Figure 4
Page 4 of 7
Page 8

6. Install battery (12-volt lawn and garden
tractor style battery, not included). Remove
the strap and then the lid from the battery
holster to place a 12-volt battery inside.
7. Slide the ramp extensions onto the main
ramp. The mid ramp extension slides on
rst (Figure 6). The illustration on page 3
shows these as 61-6152 (mid extension)
and 61-6153 (end extension).
8. Insert the ½-inch pins (229-0520). One
pin fastens the mid ramp and end ramp
extensions to each other. The other pin
fastens this assembled ramp extension to
the main ramp. Figure 7 shows the ramp
extensions fastened with the ½-inch pin.
9. Attach corded control to the electrical
connection near the battery and motor.
Make sure the cord is away from ALL
moving parts. If it is NOT clear of the
rack, damage could occur.
Figure 5
Figure 6
!
Be sure to install the 2 tethered pins
and clips in the ramps. FAILING to do
so could result in personal injury and/or
bystanders. The operator is the only
person who needs to hold the ramp so
it does NOT slam into the ground or
Page 5 of 7
CAUTION
property damage. (Figure 7)
KEEP YOUR HANDS AWAY
FROM MOVING PARTS.
Make sure area around the
SportLoaderTM is clear of all
truck bed when operated.
Figure 7
09/06
Page 9

Loading
1. While using the corded control, hold the
ramp to prevent uncontrolled tilting of the
SportLoader. Press the button to start
lowering the SportLoader. As the cradle
nears the ground, let it rest on the ground
(Figure 8). Do NOT let it push into the
ground. You could cause damage to your
SportLoader.
2. Verify that the clamp (tire backing plates)
is slightly wider than the width of the tire.
Verify the motorcycle is in neutral and roll
it carefully onto the cradle (Figure 9).
3. Use the hand crank to close the clamp and
hold the tire in place (Figure 10).
4. Two CargoBuckles are mounted to the
tire cradle. (Figure 11) To further stabilize
the motorcycle during loading, secure an
“S” hook to handlebar and ratchet tight on
both sides.
Figure 8
Figure 9
5. Operate the SportLoader by using the
removable corded control switch. As
the bike moves up the ramp, control the
pivoting movement until the main ramp
assembly comes to rest in the pickup bed
(Figure 12).
6. After the main ramp assembly is resting
on pickup bed, use the corded control to
move the motorcycle forward until it stops
short of the front of the pickup bed.
7. Remove and store ramp extensions in
back of pickup.
8. Use tie-downs to strap down the rest of the
bike. Installation and loading is complete.
Use additional tie downs (not included)—
securing the bike to the pickup bed in a
minimum of four additional places.
9. Periodically check straps during travel to
make sure straps are secure.
Figure 10
Figure 11
09/06
Page 6 of 7
Page 10

Figure 12
Figure 14
Wiring Schematic
Figure 13
CAUTION
Tie down your motorcycle in a
minimum of four additional locations.
TROUBLESHOOTING
• If the second of the two ramp extensions
does not install properly during assembly,
verify that they are in the correct positions.
See page 3 for an illustration and pages 4
and 5 for the installation.
• In the unlikely event that the gear for the
cradle on the main ramp should slip, simply
torque the center adjustment bolt to 20 ft.
lbs. to prevent future occurrences. See
Figure A below for the location.
Page 7 of 7
• If necessary, stop the bike short of the
ramp pin when loading. Remove the pin
and load the bike. Do this if one tire covers
the ramp pin needing to be removed when
taking aprt the ramp.
Figure A
09/06
Page 11

Don’t trust your equipment to just any carrier.
Instead, rely on strong, durable carriers from
the company synonymous with safe, reliable
RVing. Blue Ox®.
Serial Number
Customer Service Commitment
Blue Ox® is focused on providing exemplary customer service, as observed in our mission
statement guiding principles. In accordance with this objective, Blue Ox® is proud to provide
services such as repairs and general maintenance of Blue Ox® products at over 150 RV Rallies.
Look for our Destination America or Blue Ox® Racing service crews at the next rally or race you
attend. If you miss them, you may nd an informative, personalized note explaining any service
they may have provided your Blue Ox® products in your absence.
Blue Ox® also oers educational seminars at rallies and through our Parks & Resort teams. In
addition, Blue Ox® customers visiting our factory may take advantage of free use of the well-
equipped Blue Ox® RV Park.
© 2005, 06 Blue Ox
Printed in the USA
292-2781
Blue Ox • One Mill Road, Industrial Park • Pender, Nebraska 68047
Phone: (402) 385-3051 • Fax: (402) 385-3360 • www.blueox.us
 Loading...