

Blue Microphones SNOWFLAKE User Manual
Portable Professional USB mic
What is the Snowflake?
The Snowflake is a high-quality condenser
microphone designed to give you professional
results with very little effort. Simply connect
it to your computer’s USB port, follow the
prompts and you’ll have high-fidelity sound in
no time! The Snowflake has its own digital
converter and specially-designed preamplifier,
both optimized to work in conjunction with
Blue’s precision-machined capsule to make sure
that you always get the best sound possible
into your computer.
Snowflake Suggested Applications
The compact Snowflake was designed with
the traveler in mind. Because you just connect
it to your USB port, it offers a wide range of
applications coupled with an ease of use
never before offered in a professional-quality
microphone. Some suggested applications
include podcasting, internet conferencing,
internet telephony, narration, dictation, field
recording, lecture recording, baby monitoring,
and of course, our favorite, recording your
own music!
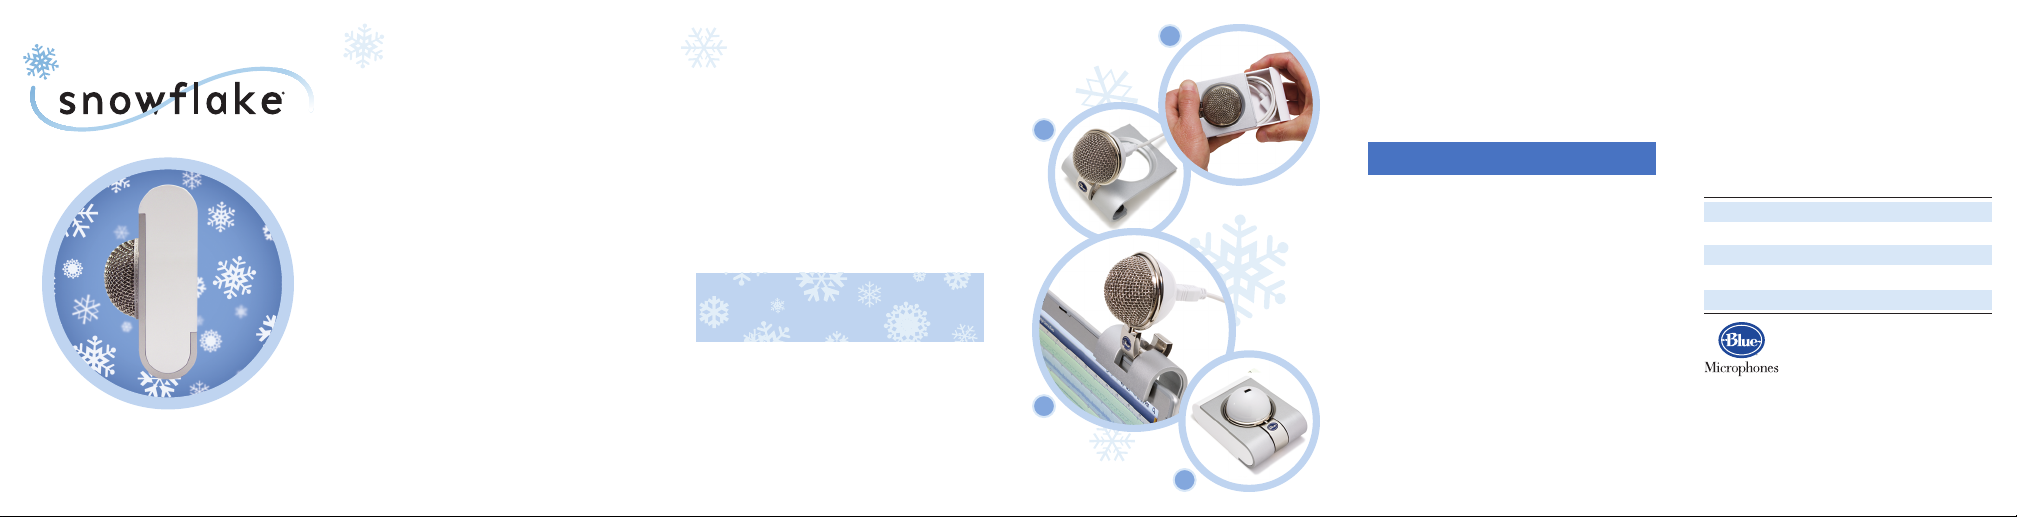
Where do you put it?
The Snowflake’s unique design allows you to
place it on a desk or flat surface near your
computer, or mounted to the screen of most
laptops. Gently grasp the top and bottom
halves of the Snowflake mounting box and
slide them away from each other
You’ll find the USB cable snugly fit inside. The
top half of the mount can then be positioned
on any flat surface
(figure 2), or hung over
the back of most laptops
Snowflake capsule also pivots back and forth
and rotates side-to-side for optimal positioning.
NOTE: Forceful positioning of the capsule
swivel can result in damage not covered
by the warranty.
When not in use, just disconnect the USB
cable and store it in the mounting box, sliding
both haves together to close. When traveling
with the Snowflake, gently swivel the active
side of the round capsule head (with the metal
grille) so that it faces down and into the box
(figure 4). This will help protect the precision
capsule from damage.
(figure 1).
(figure 3). The
1
What do you connect it to?
Simply connect the Snowflake to the USB port
on your Macintosh or Windows computer.
Make sure that the active, on-axis side of the
diaphragm (again, the side with the metal grille)
2
is facing the desired source.
Snowflake Setup
Macintosh Setup Procedure:
1. For OSX users: in the Apple menu, open
System Preferences
2. Double-click
3. Click on the
4. Double click
Choose a device for sound input
5. Set input volume to the appropriate level.
6. Exit
System Preferences
.
Sound
preference file.
Input
tab.
Blue USB Snowflake Mic
dialog box.
.
under
Windows Setup Procedure (Vista)
1. Under
Start Menu,
then select
2. Select
Recording
flake
is selected as
next to icon
3. Click on
4. Exit control panel.
Properties
set your input level, click
open the
Sound
.
tab; insure that
(Disable alternate mic if necessary).
Control Pane,
Working
with check mark
; select the
Apply
Specifications
Transducer Type:
Polar Pattern:
Frequency Response:
Sample Rate/Word Length:
Maximum SPL (THD 0.5%):
Pressure Gradient
Cardioid
35Hz – 20kHz
44.1 kHz/16 bit
120 dB SPL
Blue Snow-
Levels
, then
tab,
OK.
Windows Setup Procedure
(Win98/XP/NT):
1. Under
Start Menu,
3
4
Audio Devices
2. Select
Audio
USB Mic
3. Click on
4. Exit control panel.
is selected as
Volume
volume level.
open the
control panel.
tab; insure that
default device
; select appropriate
Sounds and
Blue Snowflake
.
5706 Corsa Ave., Suite 102, Westlake Village, CA 91362
www.bluemic.com
In keeping with our policy of continued product improvement, Baltic Latvian
Universal Electronics (BLUE) reserves the right to alter specifications without
prior notice.
© 2008 Blue Microphones, LLC. All Rights Reserved. Blue Microphones, Blue
Oval and Snowflake are registered trademarks of Blue Microphones.
Macintosh is a registered trademark of Apple Computer, Inc. Windows is a
registered trademark of Microsoft, Inc.
 Loading...