

Page 1

Page 2

DIABLO II OFFICIAL GAMESPOT GAME GUIDE
2
Copyright 2000 GameSpot, a division of ZD Inc.
All rights reserved. Reproduction in whole or in part in any form
or in any medium without express permission of GameSpot is
prohibited. GameSpot, videogames.com, VideoGameSpot,
Computer Gaming World, Electronic Gaming Monthly, Expert
Gamer and EGM are trademarks or registered trademarks of
ZD Inc.
Diablo II and its characters are trademarks of Blizzard
Entertainment. All titles, items, characters, and products
described or referred to in this guide are trademarks of their
respective companies.
ISBN: 1-58422-153-4
Some tables provided by
BradyGAMES
Page 3

DIABLO II OFFICIAL GAMESPOT GAME GUIDE
3
C
ONTENTS
INTRODUCTION.........................................................7
C
HAPTER 1 - AMAZON SKILLS AND STRATEGIES.............9
AMAZON ATTRIBUTES.........................................................................9
AMAZON EQUIPMENT.........................................................................10
APPLYING AMAZON SKILL POINTS - BOW.............................................11
APPLYING AMAZON SKILL POINTS - JAVELIN.......................................13
AMAZON SKILLS...............................................................................15
CHAPTER 2 - BARBARIAN SKILLS AND STRATEGIES......21
BARBARIAN ATTRIBUTES...................................................................21
THE BARBARIAN IN COMBAT..............................................................22
APPLYING BARBARIAN SKILL POINTS..................................................25
BARBARIAN SKILLS..........................................................................27
CHAPTER 3 - NECROMANCER SKILLS AND STRATEGIES...33
NECROMANCER ATTRIBUTES...............................................................33
USING THE NECROMANCER.................................................................34
NECROMANCER'S OFFENSE.................................................................35
APPLYING NECROMANCER SKILL POINTS
..............................................36
N
ECROMANCER SKILLS......................................................................38
CHAPTER 4 - PALADIN SKILLS AND STRATEGIES..........44
PALADIN'S ATTRIBUTES
....................................................................44
T
HE PALADIN'S ROLE.......................................................................45
ZEAL WITH CONCENTRATION AND MIGHT..............................................45
HOTKEYS: A MUST FOR THE
PALADIN.................................................46
A
PPLYING PALADIN SKILL POINTS......................................................47
PALADIN SKILLS
.............................................................................49
Page 4

DIABLO II OFFICIAL GAMESPOT GAME GUIDE
4
CHAPTER 5 - SORCERESS SKILLS AND STRATEGIES......55
SORCERESS A
TTRIBUTES..................................................................55
F
IRE VS. COLD VS. LIGHTNING..........................................................56
HIT
-AND-RUN TECHNIQUES..............................................................56
F
EEL THE WARMTH...........................................................................57
APPLYING S
ORCERESS SKILL POINTS..................................................57
S
ORCERESS S
KILLS..........................................................................60
CHAPTER 6 - A
CT I WALK-THROUGH.........................66
ACT
I, QUEST I: DEN OF EVIL.........................................................67
A
CT I, Q
UEST II: SISTERS' BURIAL GROUNDS....................................70
A
CT
I, QUEST III: THE SEARCH FOR CAIN........................................73
A
CT
I, QUEST IV: THE FORGOTTEN TOWER........................................79
A
CT
I, QUEST V: TOOLS OF THE TRADE.............................................81
A
CT
I, QUEST VI: SISTERS TO THE SLAUGHTER..................................84
CHAPTER
7 - ACT II WALK-THROUGH.......................90
ACT
II, QUEST I: RADAMENT'S LAIR.................................................91
ACT II, QUEST II: THE HORADRIC STAFF.........................................95
A
CT
II, QUEST III: TAINTED SUN..................................................102
A
CT
II, QUEST IV: ARCANE SANCTUARY..........................................105
A
CT
II, QUEST V: THE SUMMONER..................................................109
ACT II, QUEST VI: THE SEVEN TOMBS.............................................111
CHAPTER 8 - ACT III WALK-THROUGH....................117
A
CT III, QUEST I: THE GOLDEN BIRD.............................................118
A
CT
III, QUEST II: BLADE OF THE OLD RELIGION............................121
A
CT III, QUEST III: KHALIM'S WILL...............................................123
A
CT III, QUEST IV: LAM ESEN'S TOME...........................................129
A
CT
III, QUEST V: THE BLACKENED TEMPLE.....................................132
ACT III, QUEST VI: THE GUARDIAN................................................135
Page 5

DIABLO II OFFICIAL GAMESPOT GAME GUIDE
5
CHAPTER 9 - ACT IV WALK-THROUGH.....................139
ACT IV, QUEST I: THE FALLEN ANGEL.............................................140
ACT IV, QUEST II: HELL'S
FORGE..................................................143
A
CT IV, QUEST III: TERROR'S END...............................................147
APPENDIX A - EXPERIENCE POINTS.........................153
A
PPENDIX B - SHRINES.........................................157
REFILLING (RECHARGES).................................................................157
HEALTH (RECHARGES).....................................................................157
MANA (RECHARGES)........................................................................157
MANA RECHARGE (RECHARGES)..........................................................157
ARMOR (RECHARGES)......................................................................157
COMBAT (RECHARGES).....................................................................157
RESIST FIRE (RECHARGES).............................................................158
RESIST COLD (RECHARGES).............................................................158
RESIST POISON (RECHARGES
)..........................................................158
R
ESIST LIGHTNING (RECHARGES)......................................................158
SKILL (RECHARGES)........................................................................158
RECHARGE (RECHARGES).................................................................158
STAMINA (RECHARGES)....................................................................158
EXPERIENCE (DOES NOT
RECHARGE).................................................158
P
ORTAL (DOES
NOT RECHARGE).......................................................158
M
ONSTER (DOES N
OT RECHARGE).....................................................159
F
IRE (DOES N
OT RECHARGE)..........................................................159
P
OISON (DOES NOT RECHARGE).......................................................159
EXPLODING (DOES N
OT RECHARGE)..................................................159
G
EM (DOES N
OT RECHARGE)............................................................159
APPENDIX C - POTIONS........................................160
HEALING......................................................................................160
MAN............................................................................................160
ANTIDOTE....................................................................................160
Page 6

D IABLO II OFFICIAL G AMES POT G AME G UIDE
6
APPENDIX C CONTINUED
REJUVENATION.............................................................................160
FULL REJUVENATION......................................................................160
STAMINA......................................................................................160
THAWING......................................................................................161
OIL.............................................................................................161
FULMINATING................................................................................161
EXPLODING...................................................................................161
RANCID GAS.................................................................................161
CHOKING GAS................................................................................161
STRANGLING GAS...........................................................................161
APPENDIX D - WEAPONS AND ARMOR STATISTICS......162
WEAPONS STATISTICS.....................................................................162
ARMOR STATISTICS.......................................................................166
APPENDIX E - GEMS AND SKULLS..............................168
AMETHYST....................................................................................168
TOPAZ.........................................................................................168
SAPPHIRE.....................................................................................169
EMERALD......................................................................................169
RUBY..........................................................................................169
DIAMOND.....................................................................................170
SKULL.........................................................................................170
APPENDIX F - UNIQUE MONSTERS.............................171
ACT 1..........................................................................................171
ACT 2.........................................................................................172
ACT 3.........................................................................................172
ACT 4.........................................................................................173
APPENDIX G - TABLES...........................................174
Page 7

7
S
ince the beginning of time, the forces of order and chaos have been engaged in an eternal
struggle to decide the fate of all creation. That struggle has now come to the mortal
realm... and neither man, demon, nor angel will be left unscathed...
Diablo, the Lord of Terror and the youngest of three prime evils, awoke from his long sleep with
plans to free his exiled brothers, Mephisto and Baal. But, a nameless hero stood in Diablo's way,
confronting the Lord of Terror in the hellish labyrinth beneath Tristram. Diablo's spirit could never
be truly destroyed, so the hero made the noblest sacrifice of all. He took the spirit of Diablo into
himself, hoping that his own strength of will could contain the demon within.
The hero could never have known that his selfless act would not only ensure Diablo's victory, but
irrevocably damn his soul for all time.
Welcome to GameSpot's official Diablo II game guide. Within this mammoth guide, you'll discover a wealth of statistics, strategies, and solutions for one of the most popular games of all-time,
Blizzard's incredible Diablo II.
Inside this comprehensive official Diablo II game guide, you'll find:
◗◗◗ The Amazon: This section introduces you to the Amazon character class, covering attributes,
skills selection, and strategies. Here you'll find suggestions on choosing your skills to improve
your Amazon character.
◗◗◗
The Barbarian: Head here for an introduction to the Barbarian character class, with strategies
for applying attribute points, acquiring skills, and perfecting combat techniques. The section
also includes suggestions for choosing your skills to improve your Barbarian character.
Page 8

DIABLO II OFFICIAL GAMESPOT GAME GUIDE
8
◗◗◗ The Necromancer: This section introduces you to the Necromancer character class,
covering summoning minions and applying attribute and skill points. Inside you'll also find
suggestions for choosing skills to become a Necromancer like no other!
◗◗◗
The Paladin: Here, you'll find an introduction to the Paladin character class, featuring
strategies for applying attribute points, acquiring skills, learning importance of hotkeys, and
supporting fellow party members. The section also includes suggestions on choosing skills
and improving your Paladin character.
◗◗◗
The Sorceress: Head here for an introduction to the Sorceress character class, complete with
strategies for selecting attributes, acquiring spells, applying skill points, and perfecting
combat techniques. Inside you'll find suggestions on choosing skills and improving your
Sorceress character.
◗◗◗
Act I walk-through: This section features a complete walk-through for Diablo II's Act I. The
walk-through sections include solutions to all quests, the location of important quest items,
and vital information on monsters, townspeople, and dealing with boss creatures.
◗◗◗
Act II walk-through: This section includes a complete walk-through for Diablo II's Act II.
◗◗◗
Act III walk-through: This section includes a complete walk-through for Diablo II's Act III.
◗◗◗
Act IV walk-through: This section includes a complete walk-through for Diablo II's Act IV.
◗◗◗
Experience points chart: The chart depicts the experience points needed for each level up
to 99.
◗◗◗
Shrines: Look here for a list of Diablo II shrines and their functions.
◗◗◗
Potions: This section explains the various potions you'll discover in Diablo II.
◗◗◗
Weapon and armor statistics: This section includes charts revealing the base statistics for
Diablo II's common weapons and armor.
◗◗◗
Gems and skulls: Here, you'll find the magical properties for Diablo II's gems and skulls,
including their effects when socketed in a weapon, shield, or helm.
◗◗◗
Unique monsters: This section includes the list of unique monsters encountered in Diablo II,
their unique attributes, and their location.
Page 9
9
"Skilled with the spear and the bow. She is a very versatile fighter..."
With skills in bow, crossbow, javelin, and spear, the Amazon is absolutely fierce with ranged
weaponry. The power of the Amazon lies in specializing her skills. Choose your route early either spear or bow - and advance through that particularly skill tree. Attempting to become both
a spear and bow player weakens the Amazon's overall power. Choosing the spear route can give
the Amazon both thrown and melee weapon power. Hit-and-run attacks prove effective, but you'll
definitely want ranged weaponry in your arsenal to dish out damage from long range.
AMAZON ATTRIBUTES
Like the Barbarian, the Amazon is primarily a weapons-based combat
class (unlike the Sorceress with her spells and the Necromancer with
his minions) with an affinity for ranged weapons, though melee combat
is certainly plausible. Thus, strength and dexterity will be extremely
important to the Amazon player, whether you take the bow or javelin
skill route. You'll need the strength to wear the toughest armor and
pound out increased damage. Dexterity increases the Amazon's chance
to hit and her defensive rating.
Diablo II is extremely customizable. There's really no right or wrong way to develop your character's attributes or skills - it's solely up to you! You choose your character's attributes; you choose
your character's skills; and, through finding items and gold, you choose your character's equipment. Use these tips and strategies in the character class sections as suggestions on how to
mold your character. Keep in mind that there are thousands and thousands of combinations and
no right or wrong way to proceed through the game.
Amazon Initial
Attributes
Strength: 20
Dexterity: 25
Vitality: 20
Energy: 15
Page 10

DIABLO II OFFICIAL GAMESPOT GAME GUIDE
10
As a general guideline, for every five attribute points you receive (from each level
advance), you could place two into strength, two into dexterity, and one into vitality (or
every other one into energy). Once you reach level 10 or so, you'll likely want to start pumping
more into energy as you approach the higher skills available in the bow, javelin, and passive skill
trees. If you desire the some of the best armor, such as plate mail, raise your strength around
65, then concentrate on the other attributes - which, by this time, will be vitality and energy.
AMAZON EQUIPMENT
With skills sets focusing specifically on bows and crossbows or javelin and spears, it's important
for the Amazon player to make a selection early to maximize skill choices. This section examines
the Amazon's possibilities and the useful skills along each route.
THE BOW AND CROSSBOW ROUTE
Choose the bow and crossbow skills should you desire to emphasize pure ranged weaponry. The magic arrow skill is especially useful, both early and throughout the entire game. The more points
added to the magic arrow, the cheaper the mana cost. By its 13th
tier, magic arrow is free, though it's cheap and efficient at sixth or
seventh tier. Magic arrow is nice because it doesn't require arrow
ammunition, which could prove helpful in a pinch.
You'll find both the cold and fire arrows useful; the higher cold arrow skills can freeze opponents
as well as inflict cold damage. Slowing opponents down is often as useful as inflicting damage
points. You'll likely want to select both cold and fire arrows for the early and mid game; use the
cold arrows against fire-enchanted unique enemies, while employing fire arrows against the coldenchanted unique enemies.
TIP: The Amazon's bow skills can provide fire- and ice-enchanted arrows. Instead of attempt-
ing to acquire all the skills, use gems to alleviate additional skill needs. For instance, if you wish
to study skills in fire arrows (and subsequent exploding arrows and immolation arrows), try to find
sapphires to place in a socketed bow to provide cold damage. Then again, if you choose to
acquire the cold-arrow skills, such as cold arrow and ice arrow, try to find rubies to use in a socketed bow.
Amazon Initial
Equipment
Weapon: Javelin (30)
Armor: Buckler
Page 11

DIABLO II OFFICIAL GAMESPOT GAME GUIDE
11
Critical strike is an important passive Amazon skill used in both ranged and melee attacks don't neglect critical strike even if you're a bow player! Critical strike works best around level 6
or 7, where you've raised the chance for double damage to approximately 50 percent.
Be prepared to use a lot of hit-and-run tactics with ranged weaponry. With bows, you can't afford
to get trapped inside a horde of monsters. Use inner sight to decrease a monster group's
defense rating and slow missiles to slow down enemy ranged attacks. Penetrate and pierce are
also important higher-level bow skills (though in the magic portion of the Amazon's skill tree).
THE JAVELIN AND SPEAR ROUTE
Selecting the javelin or spear route offers both melee and ranged opportunities with skills associated with each style of play. The jab and critical strike combination is the Amazon's melee bread
and butter. As mentioned in the bow section, boost critical strike up to its sixth or seventh level to
inflict double damage approximately 50 percent of the time. Couple this with the fast jab attack
(and eventually with a powerful weapon), and you can dish out significant damage. Jab also
operates at the same speed regardless of your weapon's speed; for instance, if you are holding a
slow pike, jab performs at the same level of quickness as if you were holding a basic spear.
The Amazon's javelin skills emphasize both poison- and lightning-based attacks, with separate
skills for thrusts and thrown strikes. Lightning is the most powerful elemental attack and should
certainly be explored by the javelin Amazon player. Poison can prove effective, but lightning is
typically more efficient; though you'll likely place points in the poison skills, use more in the lightning-based attacks.
Even with the powerful throwing skills, a javelin-based Amazon player will likely come back to jab
and the passive critical strike time and time again. A strong Amazon player can take out tough,
Act IV bosses with a beefy jab and critical strike rating (assuming a powerful thrusting weapon is
being held). Be ready to cycle through other skills, particularly the throwing lightning skills, should
you desire to switch to ranged combat and knock down enemy health from the safety of long
range.
APPLYING AMAZON SKILL POINTS - BOW
You receive a skill point each time you advance a level (plus you'll receive more from completing
particular quests, such as the Den of Evil quest in Act I). It's important to plan your skill choices
Page 12

DIABLO II OFFICIAL GAMESPOT GAME GUIDE
12
ahead. Some high-level skills have multiple prerequisites, meaning you must follow
two paths down the tree to reach that particularly skill. Further, it can be a tough decision
whether or not to add multiple points into a particular skill - and how many should you add?
Naturally, your skill choices will follow your playing style. As a norm, for your first time through,
you should concentrate on either the bow or javelin skills. That way, you can beef up particular
skills in that tree and not waste points on weapons you aren't using all the time. Out of all the
character classes, the Amazon is perhaps the most specialized, at least on the first time through
the game. Wasting points on unneeded skills, at least at that time, can prove costly when you
reach the tougher unique enemies and boss monsters in acts three and four.
There's certainly no right or wrong way to choose skills. All skills can prove useful under the right
circumstances, with the right equipment, and for the particular player. Keep in mind that some
skills have two prerequisite skills. Even if you reach a particular skill's prerequisite level - such as
level 18 and the guided arrow - you must also have already acquired multiple shot and cold
arrow to use the new skill. Plan ahead and consider hoarding skill points until the higher skills
appear.
In this section, you'll find a 30 skill point example for an Amazon player specializing in bow and
crossbow weapons. This is simply a guideline, and it's very likely you'll find better combinations
to suit your personal style.
Magic arrow - 7 skill points
Inner sight - 1 skill point
Critical strike - 6 points
Cold arrow - 2 points
Fire arrow - 2 points
Slow missiles - 1 point
Dodge - 1 point
Avoid - 2 points
Evade - 2 points
Decoy - 1 point
Ice arrow - 2 point
Penetrate - 2 points
Pierce - 1 point
Page 13

DIABLO II OFFICIAL GAMESPOT GAME GUIDE
13
This is only one of thousands of possibilities for a high-level Amazon (30 skill points,
not counting skill points you would receive completing quests or boosted by magical items).
Magic arrow is a useful skill, especially to raise to higher levels; magic arrow actually costs less
mana the higher the skill level. Raise the skill to around seven or eight, and it barely costs any
mana to use the magical arrow (which is useful, since it won't use regular arrow ammunition).
Cold and fire arrow provide nice alternatives, depending on the current opponent, with an
emphasis on cold witnessed by the selection of ice arrow. The selection of slow missions and
decoy not only supply decent defensive magic, but pave the way for valkyrie, a must have once
you're above level 30, at the next skill point.
Early in the game, you can use magic arrow in combination with fire arrow to eliminate most
early beasts. Place inner sight on a hotkey so you can quickly access the skill; inner sight
decreases a target's defense and affects all monsters within a certain radius. Start pumping
points into critical strike; eventually, you'll want the skill up to five or six, so you're doing double
damage approximately 50 percent of the time.
During the middle game, you're still employing magic arrow, certainly at a low cost by this point,
along with cold, fire, and ice arrow. Penetrate helps increase your attack rating for all ranged
attacks, and slow missiles can provide some safety in dangerous situations against ranged
attackers.
Late in the game, pierce, a passive skill, provides a chance that your ranged attack will hit its target and continue to hit through others. You're still using magic arrow along with your elemental
attacks. You should have powerful bow weaponry at this point, potentially with gems and other
magical properties to further increase damage.
APPLYING AMAZON SKILL POINTS J
AVELIN
If you aren't concentrating on bow skills, you're going javelin. As stated previously, there's no
right or wrong way to make these selections. Some players might excel one way, while others
choose a completely different set of skills. You could even finish the game pumping all your
points into a single skill - though expect quite a challenge! Keep in mind, in most instances, it's
beneficial to plan ahead and aim for certain skills. Consider holding points until you reach a certain level, so you can distribute lots of points immediately into your preferred or favorite skills at
this new level.
Page 14

DIABLO II OFFICIAL GAMESPOT GAME GUIDE
14
In this section, you'll find skill examples for an Amazon player specializing in javelin and
spear weapons (30 skill points shown). Once again, this is simply a guideline, and it's very likely you'll find better combinations to suit your personal style.
Jab - 6 points
Critical strike - 6 points
Magic arrow - 1 point
Inner sight - 1 point
Power strike - 1 point
Dodge - 2 points
Slow missiles - 1 point
Poison javelin - 1 point
Lightning bolt - 3 points
Avoid - 2 points
Decoy - 1 point
Charged strike - 1 point
Evade - 2 points
Plague javelin - 1 point
Lightning fury - 1 point
Naturally, this is just one of many possibilities for a high-level, javelin-oriented Amazon player.
This example includes 30 skill points, not counting skill points you would receive completing
quests or by using unique or magical items. Jab is the javelin player's bread and butter; once you
reach level 6, it ceases to include a damage modifier penalty. Critical strike is also a must; at
level 6, you're inflicting double damage approximately half the time. Magic arrow can be used as
a simple, unlimited ranged attack (it doesn't cost much either). Finally, this guideline focused on
the lightning attacks, the most powerful element and one that will likely inflict more carnage than
the poison-based skills. Further, you're just one skill point away from selecting valkyrie.
In the early game, you'll concentrate on jab and using magic arrow for your ranged attack. Be
sure to employ inner sight when you approach difficult areas to decrease enemies' defense ratings. Continue to boost jab and critical strike to easily defeat most early beasts. You should continue to increase these skills throughout the middle game as well.
Page 15

DIABLO II OFFICIAL GAMESPOT GAME GUIDE
15
During the middle game, you'll switch off jab with your lightning attacks, including
power strike and lightning bolt. You may also use the poison attacks, though it's likely you
will concentrate on the lightning element. Your increased jab and critical strike will continue to
serve you well; don't forget to employ inner sight inside each difficult and crowded enemy area.
In the late game, the jab and critical strike combination is still living strong, especially with a powerful spear or javelin. Lighting fury, gained at level 30, is extremely powerful and capable of taking on multiple targets. Continue to switch through the lightning attacks (for thrown spears) and
jab for melee combat.
AMAZON SKILLS
The Amazon's skills are separated into javelin and spear skills, bow and crossbow skills, and
passive and magic skills.
JAVELIN AND SPEAR SKILLS
This section covers the Amazon's javelin and spear skills, offering each skill's description, level
prerequisite, skill prerequisite, and useable mouse button.
JAB
Description: Attack with multiple rapid thrusts using a javelin or spear weapon
Level prerequisite: 1
Skill prerequisite: None
Mouse button: Left or right
POWER STRIKE
Description: Add lightning damage to javelin and spear weapon attacks
Level prerequisite: 6
Skill prerequisite: Jab
Mouse button: Left or right
POISON JAVELIN
Description: Magically enhances your thrown javelin to leave a trail of poison clouds
Level prerequisite: 6
Skill prerequisite: None
Mouse button: Left or right
Page 16

DIABLO II OFFICIAL GAMESPOT GAME GUIDE
16
IMPALE
Description: Increases attack damage but rapidly degrades the weapon
Level prerequisite: 12
Skill prerequisite: Jab
Mouse button: Left or right
LIGHTNING BOLT
Description: Magically converts your thrown javelin into a bolt of lightning
Level prerequisite: 12
Skill prerequisite: Poison javelin
Mouse button: Left or right
CHARGED STRIKE
Description: Adds lightning damage to javelin and spear weapons and releases charged bolts on
impact
Level prerequisite: 18
Skill prerequisite: Power strike, lightning bolt
Mouse button: Left or right
PLAGUE JAVELIN
Description: Magically enhances your thrown javelin to release clouds of poison upon impact
Level prerequisite: 18
Skill prerequisite: Lighting bolt
Mouse button: Left or right
FEND
Description: Rapidly attacks multiple hand-to-hand targets
Level prerequisite: 24
Skill prerequisite: Impale
Mouse button: Left or right
LIGHTNING STRIKE
Description: Adds lightning damage to javelin and spear weapons and releases chain lightning
upon impact
Level prerequisite: 30
Skill prerequisite: Charged strike
Mouse button: Left or right
Page 17

DIABLO II OFFICIAL GAMESPOT GAME GUIDE
17
LIGHTNING FURY
Description: Changes a thrown javelin into a powerful bolt of lightning that splits on impact
Level prerequisite: 30
Skill prerequisite: Plague javelin
Mouse button: Left or right
BOW AND CROSSBOW SKILLS
This section covers the Amazon's bow and crossbow skills, offering each skill's description, level
prerequisite, skill prerequisite, and useable mouse button.
MAGIC ARROW
Description: Creates a magical arrow or bolt that does extra damage
Level prerequisite: 1
Skill prerequisite: None
Mouse button: Left or right
FIRE ARROW
Description: Magically enhances your arrows or bolts with fire - always hits
Level prerequisite: 1
Skill prerequisite: None
Mouse button: Left or right
COLD ARROW
Description: Magically enhances your arrow or bolts by adding cold damage and a slowing effect;
cold arrows only do half of their regular damage - always hits
Level prerequisite: 6
Skill prerequisite: None
Mouse button: Left or right
MULTIPLE SHOT
Description: Magically splits one arrow or bolt into many
Level prerequisite: 6
Skill prerequisite: Magic arrow
Mouse button: Left or right
Page 18

DIABLO II OFFICIAL GAMESPOT GAME GUIDE
18
EXPLODING ARROW
Description: Shoot an arrow or bolt that explodes on contact, damaging all enemies nearby
- always hits
Level prerequisite: 12
Skill prerequisite: Fire arrow, multiple shot
Mouse button: Left or right
ICE ARROW
Description: Magically enhances your arrow or bolt to freeze your enemies - always hits
Level prerequisite: 18
Skill prerequisite: Cold arrow
Mouse button: Left or right
GUIDED ARROW
Description: Gives your arrows and bolts the intelligence to track your target or seek one of its
own - always hits
Level prerequisite: 18
Skill prerequisite: Cold arrow, multiple shot
Mouse button: Left or right
STRAFE
Description: Magically splits on arrow into several that target multiple nearby enemies
Level prerequisite: 24
Skill prerequisite: Guided arrow
Mouse button: Left or right
IMMOLATION ARROW
Description: Enhances arrows or bolts to cause severe fire damage and creates a pyre upon
impact - always hits
Level prerequisite: 24
Skill prerequisite: Exploding arrow
Mouse button: Left or right
FREEZING ARROW
Description: Magically enhances your arrow or bolt to freeze entire groups of monsters - always
hits
Level prerequisite: 30
Skill prerequisite: Ice arrow
Mouse button: Left or right
Page 19

DIABLO II OFFICIAL GAMESPOT GAME GUIDE
19
PASSIVE AND MAGIC SKILLS
This section covers the Amazon's passive and magic, offering each skill's description, level
prerequisite, skill prerequisite, and useable mouse button.
INNER SIGHT
Description: Illuminates nearby enemies, making them easier to hit for you and your party
Level prerequisite: 1
Skill prerequisite: None
Mouse button: Right
CRITICAL STRIKE
Description: A chance that your attacks will do double damage
Level prerequisite: 1
Skill prerequisite: None
Mouse button: Passive
DODGE
Description: A chance that you will dodge a melee attack when standing or attacking
Level prerequisite: 6
Skill prerequisite: None
Mouse button: Passive
SLOW MISSILES
Description: Illuminates nearby enemies and slows their ranged attacks
Level prerequisite: 12
Skill prerequisite: Inner sight
Mouse button: Right
AVOID
Description: A chance that you will elude a missile attack when standing or attacking
Level prerequisite: 12
Skill prerequisite: Dodge
Mouse button: Right
Page 20

DIABLO II OFFICIAL GAMESPOT GAME GUIDE
20
PENETRATE
Description: Increases your attack rating for all ranged attacks
Level prerequisite: 18
Skill prerequisite: Critical strike
Mouse button: Passive
DECOY
Description: Creates a duplicate of yourself that draws fire from enemies
Level prerequisite: 24
Skill prerequisite: Slow missiles
Mouse button: Right
EVADE
Description: A chance that you will elude a melee or missile attack when walking or running
Level prerequisite: 24
Skill prerequisite: Avoid
Mouse button: Passive
VALKYRIE
Description: Summons a powerful valkyrie warrior to fight alongside the Amazon
Level prerequisite: 30
Skill prerequisite: Decoy, evade
Mouse button: Right
PIERCE
Description: Your missiles have a chance to pass through enemies that they hit
Level prerequisite: 30
Skill prerequisite: Penetrate
Mouse button: Passive
Page 21
21
"He is unequaled in close-quarters combat and mastery of weapons..."
For melee warfare, there's no better choice than the impressive Barbarian. The Barbarian skill
tree offers masteries in various hand-to-hand weapons and powerful damage enhancers, including bash, double swing, leap attack, and whirlwind. If you desire to seek out the best hand-tohand weapons, get the best armor, and fight toe-to-toe with Diablo II's fiercest creatures, select
the Barbarian and prepare for intense melee combat.
BARBARIAN ATTRIBUTES
It's little surprise that strength takes precedence among the
Barbarian's statistics. You receive five attribute points per level, and
you should pump at least two into strength each time you gain a
new level. You want to reach the 60s as quickly as possible, so
your Barbarian can wear suits of strong armor; don't neglect dexterity, though, which determines chance to hit and defensive rating.
You're going toe-to-toe with most monsters; you'll need defense,
and you must hit the beasts more than they hit you.
Vitality and energy aren't as important initially, especially if you're using the find potion skill to
search corpses for healing potions - it's possible to remain healthy with the abundance of potions
alone. Early in the game, put extra points into vitality with some into energy every so often. As a
Barbarian, you should have enough strength to take on most enemies without the need of manausing skills. Once you reach some of the higher levels and gain access to the more powerful
skills, such as double swing, leap attack, and, eventually, whirlwind, you should start diverting
more points into energy to keep your mana supply high.
Barbarian Initial
Attributes
Strength: 30
Dexterity
: 20
V
itality: 25
Energy
: 10
Page 22

DIABLO II OFFICIAL GAMESPOT GAME GUIDE
22
TIP: Mana-stealing weapons can turn a high-level Barbarian into a juggernaut.
Cherish each mana-stealing magical weapon you find. Seek out skulls, which can be used in
socketed weapons to steal both life and mana from the enemy. A Barbarian with mana-stealing
weaponry and the whirlwind skill is a devastating combination - the more monsters to whirlwind,
the better!
THE BARBARIAN IN COMBAT
The Barbarian doesn't shy away from getting his hands dirty - the
Barbarian excels in close-quarters combat with multiple hand-tohand weapons. This section details the Barbarian in combat and
how to improve the Barbarian's destructive power by acquiring
mastery skills, war cries, and special attacks, such as leap attack.
WEAPON MASTERY
A Barbarian can specialize in one of six different weapon-types - sword, axe, mace, pole arm,
throwing, spear - through use of the skill tree. It's possible to find dominant weapons in each category, so you could succeed with any route. Don't limit yourself to a single weapon mastery; if
you pump a bunch of points into sword mastery, but later find some unique axes, you may have
to decide to either waste an excellent axe or the improved sword mastery.
Further, the biggest improvement is gained by simply putting one point into each skill (nearly 30
percent to damage rating). Be ready to improve multiple weapon masteries, but don't go overboard. Swords and axes are plentiful and powerful in the early game; pole arms can be powerful
late-game weapons. Maces carry 150 percent damage to the undead. With sufficient mace mastery, you can buzz through Diablo II's second act and its abundance of undead monsters.
TIP: If you have a choice between a socketed weapon full of gems or a weapon with inherent
magical properties, it's often best to use the gem-socketed weapon. The socketed weapon will
be less expensive to repair, a constant concern for the aggressive Barbarian. If you aren't careful, you could run out of gold keeping up with the high cost of magical item repair.
You'll eventually want to combine your weapons mastery with a skill like double swing, which
enhances the Barbarian's ability to carry a one-handed weapons in each hand. When two
weapons are equipped, double swing attacks two targets if possible or one target twice. An
improved weapon mastery skill combined with dual-weapon (of that mastery type) double swing
is a powerful combination.
Barbarian Initial
Equipment
Weapon: Hand axe
Armor
: Buckler
Page 23

DIABLO II OFFICIAL GAMESPOT GAME GUIDE
23
TIP: You can actually carry two two-handed swords - one an each hand. You can't
hold two two-handed axes this way, but you can use the swords. Keep this in mind should you
desire this route and wish to improve sword mastery and double swing skills.
Knockback weapons can be useful in many situations, but could pose problems late in the game,
especially against life-stealing creatures or if you're already overwhelmed with beasties. The
Barbarian's double swing and other bonuses to damage and attack rating often mean your best
course of action is to get toe-to-toe, assault quickly, and finish off the beast as quickly as possible. Knocking back the creature could just prolong the battle and open you to damage from other
creatures.
THE BARBARIAN WAR CRIES
Perhaps the most useful war cry isn't technically a war cry the find potion skill can save the Barbarian in a pinch and
especially save the Barbarian loads of gold best used to
improve or repair weapons and armor. Dump at least three
skill points into find potion over time; with so many monsters
to fight, you'll be scoring free potions with unparalleled success. This particularly comes in handy during Diablo II's
fourth and toughest act; the Barbarian can often find full rejuvenation potions replenishing both health and mana points.
Three points into find potion should be sufficient, but if you
near five or six, you'll have a 50 percent chance of finding a potion in each corpse.
TIP: A corpse can only be searched once by find potion or find item. Once you've searched
the corpse, the corpse is no longer a useable item - even by a Necromancer in your party who
might wish to use the corpse to raise a skeleton!
Other decent Barbarian war cries include shout, which raises you and your party's defensive rating, and taunt, which taunts an enemy creature into fighting you. Taunt can be especially useful
when dealing with a dungeon's riff raff (such as Act I's fallen or carvers). Often these little creatures run from you on sight or after you've killed off their shaman leader. Use taunt to keep them
close, so you don't have to run out searching for them.
Barbarian Innate Abilities
Left-hand attack - The
Barbarian can choose to
place a weapon in the lefthand slot.
Left-hand throw
- The
Barbarian can choose to
place a thrown weapon in the
left-hand slot.
Page 24

DIABLO II OFFICIAL GAMESPOT GAME GUIDE
24
The higher level war cries, such as battle command and battle orders, are best used
in multiplayer games. If you're choosing to play the Barbarian through the single-player
game, without party assistance, you're likely better off using the skill points for more offensivebased skills, such as double swing, leap attack, and whirlwind. Further, you can stack some of
the war cries to compound their improvements to you and your party.
TIP: Choosing what skills to select isn't the only decision you have to make. Often it's wiser to
save your skill points and keep them unused. Then, once you reach a particular prerequisite
level (6, 12, 18, 24, or 30), use them all to improve one of the higher-level skills. For instance,
you could save up the skills you earn by advancing the first five levels of the game, then use one
in bash and the rest in double swing (double swing requires bash). This is just one example of
thousands of possibilities.
BARBARIAN LEAP AND LEAP ATTACK
The Barbarian's leap and leap attack skills are a must - not only because they're a prerequisite
for the Barbarian's über-skill, whirlwind, but because they are extremely handy defensive and
offensive skills respectively.
To be blunt, leap can save your butt in a dire situation. Since the Barbarian excels at close-range
melee combat, it's highly likely that the Barbarian will become overwhelmed with enemy attackers. With a click of the mouse button, the Barbarian can leap away to safety. The amount of
points into leap determines the radius of the jump. One point should be sufficient, but if you
desire a larger leap, use more skill points, though you're likely to see more benefits by using
those points in offensive skills.
TIP: You can also use leap to jump across gaps in the walkway, such as two catwalks sepa-
rated by otherwise impassable land.
Leap attack is devastating and functions like a ranged attack. If you're within an enemy's range
and successfully click on the monster, your Barbarian's leap attack blow will connect. Placing
additional skill points into leap attack increases radius (how far you can leap from) and damage
potential. Its mana cost is relatively high, however, especially for Barbarian players not concentrating on the energy attribute. Don't overuse the attack if you must conserve mana. Leap attack
is best used when there are one or two tough creatures remaining; in a crowd, leap attack can
work, but the action is so chaotic it's difficult to remain aware of what's occurring around you.
With only a few monsters to content with, though, you can perform the leap attack, then retreat
quickly and follow up with another without even being touched.
Page 25

DIABLO II OFFICIAL GAMESPOT GAME GUIDE
25
TIP: Leap attack is particularly devastating in player vs. player multiplayer
killing!
BATTLING TOUGH BEASTS
It's likely the Barbarian will have the weapons and strength to take on most of the unique enemies and boss monsters head on, but don't neglect to use skills to your advantage. A good technique when approaching a unique enemy, boss, or simply tough monster is to use shout to raise
your defenses, then use a combination of leap attack and double swing as a hit-and-run burst.
You must keep mana reserves high (or have high energy points) with mana potions, or you'll run
out fairly quickly.
By the time you reach Diablo, you should possess most of the offensive skills except whirlwind if you can advance to level 30 before facing Diablo, though, do so! Whirlwind is a huge asset
against the game's boss creature. Using leap to avoid Diablo's fire and lightning attack, then following up with whirlwind, is a effective combination.
APPLYING BARBARIAN SKILL POINTS
You receive a skill point each time you advance a level (plus, you'll receive more from completing
particular quests, such as the Den of Evil quest in Act I). It's important to plan your skill choices
ahead. Some high-level skills have multiple prerequisites, meaning you must follow two paths
down the tree to reach that particularly skill. Further, it can be a tough decision whether or not to
add multiple points into a particular skill - and how many should you add?
Your skills will reflect your personal playing style. If you prefer to scare off monsters in hopes of
facing them in smaller groups, you may opt for the Barbarian's war cries. If you enjoy mace
weapons, you may bump up the Barbarian's mace mastery significantly. Then again, you might
prefer double swing or even double throw in combination with leap and leap attack.
There's no right or wrong - but you do have the potential to be wasteful. Think ahead and don't
arbitrarily stick points in skills you may not use. There's one instance where you would place
points in a skill you might not use, which is if that skill leads to another more useful skill. Much
like a technology tree in a strategy game, Diablo II's skill tree has branches and prerequisites.
For instance, double swing requires level 6 and bash. You must have both to put a point in double swing! Plan ahead and remember that each time you reach a specific level (6, 12, 18, 24,
30), additional skills become available as long as you have met other skill prerequisites.
Page 26

DIABLO II OFFICIAL GAMESPOT GAME GUIDE
26
Below is a basic guideline (with an emphasis on single-player) for an offensive character with 30 skill points, one received for each level of advancement (keep in mind, you
will receive more from solving quests and, potentially, from magical items).
NOTE: The plan presented below is one of thousands and thousands of potential combina-
tions. For the most part, the plan is presented to illustrate the reasoning behind skill choices and
isn't meant to be the only, the best, or even one of the best ways to spend your points. Everyone
will have their personal preference - which was certainly the case around Blizzard's development
offices where virtually every member of the QA team had their own personal style!
Find potion - 3 skill points
Howl - 1 skill point
Taunt - 1 skill point
Shout - 1 skill point
Bash - 3 skill points
Stun - 1 skill point
Concentrate - 1 skill point
Leap - 1 skill point
Leap attack - 3 skill points
Double swing - 3 skill points
Sword mastery - 6 skill points
Axe mastery - 1 skill point
Pole arm mastery - 1 skill point
Iron skin - 1 skill point
Increased stamina - 1 skill point
Increased speed - 1 skill point
Whirlwind - 1 skill point
Again, this is only a suggestion and an example of useful offensive and defensive skills. This
Barbarian would excel with sword weapons (with the potential to switch to axe and pole arm with
effectiveness); have excellent combat power with bash, double swing, leap attack, and whirlwind;
and also possess decent defensive tools, such as iron skin, and increased stamina and speed.
Bash could be used in the early game as a secondary attack (when mana is available). Find
potion will keep the Barbarian healthy (with greater potential late in the game) and howl will
frighten monsters away keeping the Barbarian from becoming overwhelmed.
Page 27

DIABLO II OFFICIAL GAMESPOT GAME GUIDE
27
As you near the middle game, leap and double swing take charge as both a primary
and secondary function (left and right mouse button). Switch to shout as you approach
tough areas to boost your defenses and wait until late in the game to increase pole arm mastery if desired.
Late in the game, you're mixing double swing with leap attack. Further, your increased speed
and stamina let you retreat more easily to set up your ranged leap attack. Don't neglect the early
skills, though, such as shout, which will continually be used when preparing for difficult fights.
Once you reach level 30, your choice should be whirlwind, used in combination with leap attack
and double swing. Be prepared to keep your Barbarian's mana levels high to offset these costly
attacks.
BARBARIAN SKILLS
The Barbarian's skills are separated into war cries, combat masteries, and combat skills.
WAR CRIES
This section covers the Barbarian's war cry skills, offering each skill's description, level prerequisite, skill prerequisite, and useable mouse button.
HOWL
Description: Sends nearby monsters scrambling away in fear
Level prerequisite: 1
Skill prerequisite: None
Mouse button: Right
FIND POTION
Description: Use on the corpse of a slain monster to possibly find a healing, mana, or rejuvena-
tion potion
Level prerequisite: 1
Skill prerequisite: None
Mouse button: Right
TAUNT
Description: Enrages a monster into relentlessly attacking
Level prerequisite: 6
Skill prerequisite: Howl
Mouse button: Right
Page 28

DIABLO II OFFICIAL GAMESPOT GAME GUIDE
28
SHOUT
Description: Warns of impending danger and improves the defense rating of you and your party
Level prerequisite: 6
Skill prerequisite: Howl
Mouse button: Right
FIND ITEM
Description: Use on the corpse of a slain monster to find hidden treasures
Level prerequisite: 12
Skill prerequisite: Find potion
Mouse button: Right
BATTLE CRY
Description: Fearsome cry that decreases enemies defense rating and damage
Level prerequisite: 18
Skill prerequisite: Taunt
Mouse button: Right
BATTLE ORDERS
Description: Improve the maximum mana, life, and stamina of you and your party
Level prerequisite: 24
Skill prerequisite: Shout
Mouse button: Right
GRIM WARD
Description: Target a corpse to create frightening totems that cause enemies to flee if they get
close
Level prerequisite: 24
Skill prerequisite: Find item
Mouse button: Right
WAR CRY
Description: Injure and stun all nearby enemies
Level prerequisite: 30
Skill prerequisite: Battle cry, battle orders
Mouse button: Right
Page 29

DIABLO II OFFICIAL GAMESPOT GAME GUIDE
29
BATTLE COMMAND
Description: Increases party members' skill level
Level prerequisite: 30
Skill prerequisite: Battle orders
Mouse button: Right
COMBAT MASTERIES
This section covers the Barbarian's combat mastery skills, offering each skill's description, level
prerequisite, skill prerequisite, and useable mouse button.
SWORD MASTERY
Description: Improves sword fighting skill
Level prerequisite: 1
Skill prerequisite: None
Mouse button: Passive
AXE MASTERY
Description: Improves axe fighting skill
Level prerequisite: 1
Skill prerequisite: None
Mouse button: Passive
MACE MASTERY
Description: Improves mace fighting skill
Level prerequisite: 1
Skill prerequisite: None
Mouse button: Passive
POLE ARM MASTERY
Description: Improves pole arm fighting skill
Level prerequisite: 6
Skill prerequisite: None
Mouse button: Passive
Page 30

DIABLO II OFFICIAL GAMESPOT GAME GUIDE
30
THROWING MASTERY
Description: Improves thrown weapon fighting skill
Level prerequisite: 6
Skill prerequisite: None
Mouse button: Passive
SPEAR MASTERY
Description: Improves spear fighting skill
Level prerequisite: 6
Skill prerequisite: None
Mouse button: Passive
INCREASED STAMINA
Description: Increases your stamina
Level prerequisite: 12
Skill prerequisite: None
Mouse button: Passive
IRON SKIN
Description: Improves defense rating
Level prerequisite: 18
Skill prerequisite: None
Mouse button: Passive
INCREASED SPEED
Description: Increases walk and run speed
Level prerequisite: 24
Skill prerequisite: Increased stamina
Mouse button: Passive
NATURAL RESISTANCES
Description: Increases resistances to elemental and poison damage
Level prerequisite: 30
Skill prerequisite: Iron skin
Mouse button: Passive
Page 31

DIABLO II OFFICIAL GAMESPOT GAME GUIDE
31
COMBAT SKILLS
This section covers the Barbarian's combat skills, offering each skill's description, level prerequisite, skill prerequisite, and useable mouse button.
BASH
Description: Powerful blow that increases the damage done to enemies and knocks them back
Level prerequisite: 1
Skill prerequisite: None
Mouse button: Left or right
LEAP
Description: Leap away from danger or into the fray
Level prerequisite: 6
Skill prerequisite: None
Mouse button: Left or right
DOUBLE SWING
Description: When two weapons are equipped, attacks two targets if possible or one target twice
Level prerequisite: 6
Skill prerequisite: Bash
Mouse button: Left or right
STUN
Description: Stuns your target for a short time and increases your chance to hit
Level prerequisite: 6
Skill prerequisite: Bash
Mouse button: Left or right
DOUBLE THROW
Description: Lets you throw two different throwing weapons at the same time
Level prerequisite: 12
Skill prerequisite: Double swing
Mouse button: Left or right
Page 32

DIABLO II OFFICIAL GAMESPOT GAME GUIDE
32
LEAP ATTACK
Description: Leaps to and attacks target enemy in one swift assault
Level prerequisite: 18
Skill prerequisite: Leap
Mouse button: Left or right
CONCENTRATE
Description: Attack that is not interruptible and improves attack and defense rating
Level prerequisite: 18
Skill prerequisite: Stun
Mouse button: Left or right
FRENZY
Description: Each successful attack increases your overall speed
Level prerequisite: 24
Skill prerequisite: Double throw
Mouse button: Left or right
WHIRLWIND
Description: A whirling dance of death that cuts a path through the legions of your enemies
Level prerequisite: 30
Skill prerequisite: Leap attack, concentrate
Mouse button: Left or right
BERSERK
Description: Powerful but reckless attack that increases damage and attack rating but decreases
defense rating
Level prerequisite: 30
Skill prerequisite: Concentrate
Mouse button: Left or right
Page 33
33
"Summoning undead minions and cursing his enemies are his specialties..."
Unlike the Barbarian, Amazon, and Paladin combat classes, the Necromancer doesn't like to get
his hands dirty. The Necromancer eschews hand-to-hand or ranged combat and lets summoned
creatures do the fighting for him. The Necromancer can summon skeletons, skeleton magi,
golems, and, eventually, other creatures in the game (except for the boss monsters). A collection
of poison and bone spells gives the Necromancer some offensive and defensive power, while the
Necromancer's curses can cause devastating effects on enemy monsters.
NECROMANCER ATTRIBUTES
Even though you likely aren't participating in much hand-to-hand
melee combat, you'll still want to raise the Necromancer's strength
to wear decent armor. Other points should be diverted into vitality
and energy. Dexterity carries little importance, and it's likely you
won't want to worry about the attribute for quite some time. A good
five-point guideline would be to place two points into strength, two
into energy, and one into vitality. After advancing another level,
switch off and place two into vitality and one into energy. Once your
strength is high enough to wear decent armor, concentrate more heavily on vitality and energy.
Energy will be important for the Necromancer, even though you only have a single initial cost in
summoning a skeleton, golem, or monster. The expenses add up quickly, though, especially to
maintain an entourage of beasts. Further, the Necromancer's skills require more mana than
most. Maintaining energy will become extremely important as you work through the middle and
late game, where you must rely heavily on skills and summoning to advance past the legions of
tough monsters.
Necromancer
Initial Attributes
Strength: 15
Dexterity
: 25
V
itality: 15
Energy
: 25
Page 34

DIABLO II OFFICIAL GAMESPOT GAME GUIDE
34
TIP: To raise skeletons, the Necromancer must cast the spell on the
corpse of a dead monster. You can only use fresh corpses, meaning a Barbarian can't have
used find potion or find item on the corpse. Also, using the Necromancer's corpse explosion
spell renders the corpse useless - at least for raising skeletons and skeleton magi. If you're participating in a party, make sure to alert the Barbarian player when you wish to use the corpses
for summoning.
USING THE NECROMANCER
This section covers some general strategies in using the
Necromancer effectively, including the importance of skeleton
mastery, the iron golem, and using the Necromancer in combat.
SKELETON MASTERY
VS
. RAISE SKELETON
The great Necromancer debate: What's better - more weak skeletons or fewer strong skeletons?
The debate's much deeper than that, however; for skeleton mastery doesn't only improve the life
and damage potential of your skeletons, but future revived monsters as well. That alone makes
skeleton mastery more important than raise skeleton. Don't feel the need to go overboard with
raise skeleton. It's a sight to behold when a Necromancer is accompanied by dozens of skeletons or skeleton magi, but if those skeletons are crumbling after just a few enemy blows, what
good are they?
You'll still want to put multiple skill points into raise skeleton and raise skeleton magi, especially if
you're emphasizing the summoning skills. But don't neglect skeleton mastery. If you can't decide
whether or not to increase raise skeleton or skeleton mastery, put the point into the mastery.
When you reach revive and are ready for a second Diablo II play through on nightmare difficulty,
the bonus points into skeleton mastery will increase the power of your revived monsters. Further,
your improved legions of skeletons and skeleton magi will last longer, freeing up your mana supply for bone spear, golems, and curses.
IRON MAIDEN AND IRON GOLEM
Though you'll be far into the game before acquiring both skills, they're extremely compatible and
come in handy during the tough battles of the fourth act. Iron maiden causes cursed monsters to
take damage when it harms others. It's a very inexpensive skill with additional skill points
Necromancer Initial
Equipment
Weapon: Wand (+1 to
raise skeleton)
Armor
: None
Page 35

DIABLO II OFFICIAL GAMESPOT GAME GUIDE
35
increasing the percentage of damage returned and the duration in seconds. Iron
golem works similarly; if raised above skill level 1, the iron golem contains thorns, which
cause damage to the attacking unit. Combine both skills, and you'll have monsters practically
killing themselves as they attack the durable iron golem.
Another important element to remember about the iron
golem is that the summoned monster reflects the properties
of the item used to create it. For instance, if you use a
magical sword with cold damage to create the golem, the
iron golem will cause cold damage. Don't throw away
swords, armor, and shields that you find during the game.
Store them in your stash and, once you acquire iron golem,
use them to create specialized golems. Use armor to create more durable golems and weaponry
to create more damaging golems. Most importantly, though, don't forget to combine iron golem
(at least skill level 2) with iron maiden for a stellar late-game one-two combination.
TIP: The Necromancer works well in multiplayer, especially if you're on a slower connection.
The summoned creatures operate on the server, meaning there's no latency for your summoned
beasts to do their dirty work. If you're lagged, your skeletons, skeleton magi, golems, and other
beasts will continue to fight for you.
NECROMANCER'S OFFENSE
It's unlikely you will choose traditional Barbarian weaponry for your Necromancer - you'll find the
Necromancer's wands, with their bonuses to Necromancer skills, much more rewarding. Without
these powerful weapons, the Necromancer must rely on his summoned minions and bone and
poison spells to fend off dangerous enemy monsters.
Use a combination of bone armor (for defense) and teeth (for offense) early in the game.
Combine your attacks with the amplify damage curse to increase the Necromancer's damage
potential. Once you reach bone spear, though, use it exclusively as your primary attack; bone
spear can pierce through enemy monsters, causing damage to multiple creatures. Bump bone
spear up with any extra skill points and combine your offense with constant bone armor defense,
amplify damage, and weaken.
Necromancers' Innate
Abilities
Unsummon - All
Necromancers can dispel
their own summoned pets.
Page 36

DIABLO II OFFICIAL GAMESPOT GAME GUIDE
36
A
PPLYING NECROMANCER SKILL POINTS
You receive a skill point each time you advance a level (plus, you'll receive more from completing particular quests, such as the Den of Evil quest in Act I). It's important to plan your skill choices ahead. Some high-level skills have multiple prerequisites, meaning you must follow two paths
down the tree to reach that particularly skill. Further, it can be a tough decision whether or not to
add multiple points into a particular skill - and how many should you add?
NOTE: Blizzard employees affectionately referred to the Necromancer as "The General" for
his ability to command legions of skeletons, skeleton magi, golems, and revived monsters.
There's no right or wrong choice in skill selection. What works for one player might seem foreign
to someone else. A player might have success simply pouring points into raise skeleton and
summoning more than a dozen skeletons to fight alongside him. Others may concentrate on poison and bone spells to improve the Necromancer's ability in combat. Still others may find curses
the most useful area of the Necromancer's skill tree.
Take time to analyze the Necromancer's skill tree and study its branches and prerequisites.
Realize early that revive, a level 30 favorite, requires a dedication to the summoning branch of
the skill tree - you must follow both the skeleton and golem path to reach revive. Planning ahead
can keep you from wasting points in skills you might not use. These points are precious; wasting
a point will gnaw at you like a wasted opportunity!
Following is an example (with an emphasis on single-player) for an offensive character with 30
skill points, advancing up to and past level 30 (keep in mind, you will receive more from solving
quests and, potentially, from magical items).
Skeleton mastery - 4 points
Raise skeleton - 3 points
Teeth - 1 point
Bone armor - 1 point
Amplify damage - 1 point
Poison dagger - 1 point
Corpse explosion - 1 point
Raise skeleton mage - 3 points
Golem mastery - 1 point
Page 37

DIABLO II OFFICIAL GAMESPOT GAME GUIDE
37
Clay golem - 1 point
Blood golem - 1 point
Bone spear - 3 points
Weaken - 1 point
Iron maiden - 3 points
Iron golem - 3 points
Summon resist - 1 point
Revive - 1 point
This Necromancer is concentrating on the summoning skills, selecting nearly every one.
Skeleton mastery is important, especially if you put multiple points into raise skeleton and raise
skeleton mage and if you plan on using revive upon reaching level 30. Skeleton mastery raises
not only the health and damage of your skeletons, but also improves your revived monsters as
well. Upon acquiring the revive skill, you'll reap the rewards of the improved skeleton mastery.
Bone spear (increased), teeth, and poison dagger provide the Necromancer with some basic
offense. Bone spear is especially powerful and likely the Necromancer's primary offense late in
the single-player game. Amplify damage and weaken provide a nice one-two punch of curses weaken the enemies' attack, then switch on amplify damage, so you're inflicting more damage
per blow.
The golems are a plus, particularly blood golem and iron golem. If you can keep the
Necromancer's health up, the blood golem will continue to heal itself during each kill (the life
steal goes to the blood golem if you're fully healed or to you if you're damaged). These blood
golem kills just create corpses, which you can use to summon skeletons and skeleton mages.
The iron golem skill, if increased higher than level 1, does thorn damage - any enemy hitting the
iron golem incurs damage.
Early in the game, you'll use bone armor for defense along with raise skeleton (+1 to raise skeleton is provided by the Necromancer's wand) and teeth for offense. Be sure to employ amplify
damage when you encounter large groups. Upon reaching levels 6 through 12, you'll start to use
clay golem, corpse explosion, weaken, and have additional skeletons to fight by your side.
Bone spear and blood golem take precedence in the middle game, though you'll still fall back on
early skills like bone armor, raise skeleton, and amplify damage. By the time you reach the late
game, you're ready to implement the iron golem and iron maiden combination. You're still using
bone spear and casting amplify damage and weaken as necessary.
Page 38

DIABLO II OFFICIAL GAMESPOT GAME GUIDE
38
TIP: Life tap, overlooked in the example, is an excellent way to keep your
minions healthy and definitely a wise alternative to replace a skill, or skills, chosen in this
section's example. When cast on a group of monsters, the life tap curse causes life to be transferred from the cursed monster to its attacker - if you're using plenty of minions, this is an essential way to keep them healthy!
NECROMANCER SKILLS
The Necromancer's skills are separated into summoning skills, poison and bone skills,
and curses.
SUMMONING SKILLS
This section covers the Necromancer's summoning skills, offering each skill's description, level
prerequisite, skill prerequisite, and useable mouse button.
SKELETON MASTERY
Description: Increases life and damage of raised skeletons and revived creatures
Level prerequisite: 1
Skill prerequisite: None
Mouse button: Passive
RAISE SKELETON
Description: Cast on the corpse of a slain monster to raise a skeleton warrior that fights for you
Level prerequisite: 1
Skill prerequisite: None
Mouse button: Right
CLAY GOLEM
Description: Raises a golem from the earth to fight for your side
Level prerequisite: 6
Skill prerequisite: None
Mouse button: Right
GOLEM MASTERY
Description: Enhances speed and life of all your golems
Level prerequisite: 12
Skill prerequisite: Clay golem
Mouse button: Passive
Page 39

DIABLO II OFFICIAL GAMESPOT GAME GUIDE
39
RAISE SKELETON MAGE
Description: Cast on the corpse of a slain monster to raise a skeleton mage
that fights for you
Level prerequisite: 12
Skill prerequisite: Raise skeleton
Mouse button: Right
BLOOD GOLEM
Description: Creates a golem that shares with you the life it steals and damage it receives
Level prerequisite: 18
Skill prerequisite: Clay golem
Mouse button: Right
SUMMON RESIST
Description: Increases the resistances of all summoned creatures
Level prerequisite: 24
Skill prerequisite: Golem mastery
Mouse button: Passive
IRON GOLEM
Description: Transforms a metallic item into a golem that gains the properties of that item
Level prerequisite: 24
Skill prerequisite: Blood golem
Mouse button: Right
FIRE GOLEM
Description: Creates a golem that converts the damage it receives from fire into life
Level prerequisite: 30
Skill prerequisite: Iron golem
Mouse button: Right
REVIVE
Description: Returns a monster to life to fight by your side
Level prerequisite: 30
Skill prerequisite: Raise skeletal mage, iron golem
Mouse button: Right
Page 40

DIABLO II OFFICIAL GAMESPOT GAME GUIDE
40
POISON AND BONE SPELLS
This section covers the Necromancer's poison and bone skills, offering each skill's
description, level prerequisite, skill prerequisite, and useable mouse button.
TEETH
Description: Fires a barrage of summoned barbed teeth
Level prerequisite: 1
Skill prerequisite: None
Mouse button: Left or right
BONE ARMOR
Description: Creates an orbited shield of bone that absorbs melee damage
Level prerequisite: 1
Skill prerequisite: None
Mouse button: Right
POISON DAGGER
Description: Adds poison to your dagger attacks
Level prerequisite: 6
Skill prerequisite: None
Mouse button: Left or right
CORPSE EXPLOSION
Description: Cast on the corpse of a slain monster, and it explodes, damaging nearby enemies
Level prerequisite: 6
Skill prerequisite: Teeth
Mouse button: Right
BONE WALL
Description: Creates an impassable barrier of bone and debris
Level prerequisite: 12
Skill prerequisite: Bone armor
Mouse button: Right
Page 41

DIABLO II OFFICIAL GAMESPOT GAME GUIDE
41
POISON EXPLOSION
Description: Cast on the corpse of a slain monster to release poison gas that damages nearby
enemies
Level prerequisite: 18
Skill prerequisite: Poison dagger, corpse explosion
Mouse button: Right
BONE SPEAR
Description: Summons a deadly spike of bone to impale your enemies
Level prerequisite: 18
Skill prerequisite: Corpse explosion
Mouse button: Left or right
BONE PRISON
Description: Creates a barrier of fossilized bone around target
Level prerequisite: 24
Skill prerequisite: Bone wall, bone spear
Mouse button: Right
POISON NOVA
Description: Releases an expanding ring of concentrated poison
Level prerequisite: 30
Skill prerequisite: Poison explosion
Mouse button: Right
BONE SPIRIT
Description: Raises a spirit of the restless undead that tracks its target or finds one of its own
Level prerequisite: 30
Skill prerequisite: Bone spear
Mouse button: Left or right
CURSES
This section covers the Necromancer's curses skills, offering each skill's description, level prerequisite, skill prerequisite, and useable mouse button.
Page 42

DIABLO II OFFICIAL GAMESPOT GAME GUIDE
42
AMPLIFY DAMAGE
Description: Curses a group of enemies, increasing the nonmagic damage it receives
Level prerequisite: 1
Skill prerequisite: None
Mouse button: Right
DIM VISION
Description: Curses a group of enemies, reducing its vision radius
Level prerequisite: 6
Skill prerequisite: None
Mouse button: Right
WEAKEN
Description: Curses a group of enemies, reducing the amount of damage it inflicts
Level prerequisite: 6
Skill prerequisite: Amplify damage
Mouse button: Right
IRON MAIDEN
Description: Curses a group of enemies, causing it to harm itself when harming others
Level prerequisite: 12
Skill prerequisite: Amplify damage
Mouse button: Right
TERROR
Description: Curses a group of enemies, causing it to run in fear
Level prerequisite: 12
Skill prerequisite: Weaken
Mouse button: Right
CONFUSE
Description: Curses enemies, forcing them to attack random targets
Level prerequisite: 18
Skill prerequisite: Dim vision
Mouse button: Right
Page 43

DIABLO II OFFICIAL GAMESPOT GAME GUIDE
43
LIFE TAP
Description: Curses a group of enemies so that damaging it gives the attacker life
Level prerequisite: 18
Skill prerequisite: Iron maiden
Mouse button: Right
ATTRACT
Description: Curses an enemy to become the target of all nearby enemies; this curse cannot be
overridden by another curse
Level prerequisite: 24
Skill prerequisite: Confuse
Mouse button: Right
DECREPIFY
Description: A curse that slows and weakens your enemies and causes them to take amplified
damage
Level prerequisite: 24
Skill prerequisite: Terror
Mouse button: Right
LOWER RESIST
Description: Curses an enemy to take more damage from all magical attacks; lowers resistances
of monsters and lowers maximum resistance of hostile players
Level prerequisite: 30
Skill prerequisite: Life tap, decrepify
Mouse button: Right
Page 44
44
"He is a natural party leader, holy man, and blessed warrior..."
As the Diablo II description states, the Paladin is the ultimate party support. In multiplayer
games, having a Paladin around is a must; his offensive and defensive auras affect the entire
party (within a particular radius), certainly a bonus against the tougher monsters you'll face in
multiplayer games. Some might think the Paladin isn't very strong on his own, but under the
guidance of a patient, hotkey-adept player, the Paladin holds up well throughout the single-player
game and can be more than just aura support in multiplayer games.
PALADIN'S ATTRIBUTES
A Paladin should start with strength and dexterity to improve melee
combat, which will start to pay strong dividends by the time you're
implementing zeal and concentration. Put other spare points into
vitality to keep your health and stamina high. Energy, though, isn't
as important to the Paladin. While the combat skills require mana,
the auras are all simply turned on and off and don't use mana upon
activation.
Thus, it's not as important to the Paladin to significantly increase the energy attribute, at least not
until the higher levels, when the more powerful combat skills come into play. Most players could
probably get by with an energy attribute of 30 to 40 and concentrate all other points on strength,
dexterity, and vitality. For a multiplayer character where the Paladin will likely serve as party support, mana is even less needed as, for the most part, the Paladin will simply be using offensive
and defensive auras to assist the party.
Paladin Initial
Attributes
Strength: 25
Dexterity
: 20
V
itality: 25
Energy
: 15
Page 45

DIABLO II OFFICIAL GAMESPOT GAME GUIDE
45
T
HE PALADIN'S ROLE
The Paladin's wide array of auras makes him, arguably, Diablo II's
most varied unit - certainly the most selfless unit. The auras affect
the Paladin as well as any party members within range. In a multiplayer game, there's nothing more desirable than having a Paladin
head into combat with you. Early on, the Paladin can use might
and prayer to bolster attack and damage ratings and generate
healing for the party. Later on, the elemental resistances prove essential against unique and specific bosses. And in the late game, spell casters and Barbarians heavily reliant on mana will
praise your existence as you help them regenerate mana quicker with meditation.
Successful use of the Paladin's auras can turn an average party into a formidable party. It's obviously worthwhile to recruit a Paladin player into your group, as the offensive and defensive auras
can make difficult combat situations much easier by increasing damage and defense. Supporting
the party doesn't mean the Paladin has to stand back while others fight. Once well equipped, the
Paladin can stand up against Diablo II's tougher creatures, especially using offensive auras, such
as holy freeze and shock. and combat skills, such as zeal in combination with concentration.
TIP: The resistance skills (resist cold, resist fire, resist lightning), when active, boost the play-
er's natural resistance to the particular element. While it's important to acquire each skill, some
players may choose not to increase the skill beyond its first point. The reason is that once you
reach level 30, you have access to the salvation skill, which decreases all elemental damage
done to you and your party - it works like all these resists in one. Though you should acquire
each resistance, save extra points for other auras and combat skills and improve salvation once
you reach and pass level 30.
ZEAL WITH CONCENTRATION AND MIGHT
Once acquired, zeal will likely become your Paladin's primary attack. Zeal lets multiple adjacent
monsters be hit in a single attack. Increasing the zeal skill increases your attack rating (5 percent
with each level, starting at 10 percent) and adds an additional hit (starting at 2). Also, zeal doesn't cost much mana - only 2 - so, even using zeal frequently, you won't have to pour a lot of
attribute points into energy. Hoard mana potions to use as needed and seek out mana steal
weapons (or skulls to use in a socketed hand-to-hand weapon).
Paladin Initial
Equipment
Weapon: Short sword
Armor
: Buckler
Page 46

DIABLO II OFFICIAL GAMESPOT GAME GUIDE
46
Zeal works well in combination with concentration, an offensive aura that increases
damage done and decreases the chance that the attack will be interrupted. This lets zeal
function with little or no interruption, increasing successful hits and, subsequently, damage
dealt. Each point into the concentration skill increases damage, not the interrupt chance, but the
added damage will only benefit zeal and its increased attack.
Also, zeal performs well with might, an offensive aura that increases the damage done by you
and your party. However, skill point for skill point, concentration elevates the damage potential
higher, though carries a higher prerequisite level and higher prerequisite skills.
Zeal and concentration will serve you well against the tough bosses you'll face late in the game.
You must concentrate on switching auras as needed, though; specifically the elemental resistance. For instance, Diablo attacks primarily with a fire and lightning attack. Prepare your resist
fire and resist lightning auras and use them as needed. With resist lightning, the Paladin actually
has a better chance of surviving Diablo's vicious lightning attack than even a sturdy Barbarian.
HOTKEYS: A MUST FOR THE PALADIN
Get used to the function keys (F1-F8) and get used to them quickly! Managing the hotkeys is
essential for a successful Paladin, whether you're emphasizing single- or multiplay. Most of the
Paladin's offensive and defensive auras work best in particular situations. For instance, switch to
resist fire against fire-enchanted enemies and resist cold against cold-enchanted enemies. By
assigning these auras to a function key, you can quickly load them into your right mouse button
and activate the aura in a second.
You'll want to switch offensive auras as frequently, so you can use holy fire, holy freeze, and holy
shock as desired. During melee combat (and using zeal), you'll want to switch to concentration
and gain its damage and attack bonuses. This constant switching could be overwhelming unless
you learn to use the hotkeys and memorize what you've placed in each.
You could assign offensive skills to the first four function keys and defensive skills to the second
four or vice versa. Be prepared to have a hand near the function keys at all times, usually conveniently positioned over the number keys, which you'll press to use belt items such as healing,
mana, and rejuvenation potions as well as town portal scrolls.
Page 47

DIABLO II OFFICIAL GAMESPOT GAME GUIDE
47
TIP: The use of hotkeys is important for all classes, though
even more so for the aura-based Paladin. As you gain skills, you'll have more and more
options for each situation. Assign your preferred offensive and defensive skills to the hotkeys,
so you can quickly switch them to the desired mouse button. When facing off against large
groups of monsters, each second you save fumbling for the correct skill is another second you'll
have to defend yourself from the assault.
APPLYING PALADIN SKILL POINTS
You receive a skill point each time you advance a level (plus, you'll receive more from completing
particular quests, such as the Den of Evil quest in Act I). It's important to plan your skill choices
ahead. Some high-level skills have multiple prerequisites, meaning you must follow two paths
down the tree to reach that particularly skill. Further, it can be a tough decision whether or not to
add multiple points into a particular skill - and how many should you add?
Your choice of skills will depend on your personal preference. Do you prefer defensive or offensive auras? What do you feel are the most important combat skills for the Paladin? Are you playing multiplayer or single player? There's no right or wrong in choosing skills; you should cater the
skills to your personal style. If you prefer to dish out lots of damage, concentrate on the combat
skills and offensive auras. Conversely, if you prefer to withstand pounding damage, concentrate
on the defensive auras.
Activate the Paladin's skill tree inside Diablo II (defaults to the T key) and carefully examine its
branches. Study which skills lead to which skills and understand that some of the more powerful
skills carry two prerequisites. Plan your path in advance and select your most desired and useful
skills. Refrain from using points on skills you don't plan to use; only choose these skills if they're
a prerequisite for a more desirable skill.
Following is an example (with an emphasis on single-player) for an offensive character with 30
skill points, one for each level of advancement up to and above level 30 (keep in mind you will
receive more from solving quests and, potentially, from magical items).
NOTE: The plan presented below is one of thousands and thousands of potential combina-
tions. For the most part, the plan is presented to illustrate the reasoning behind skill choices and
isn't meant to be the only, the best, or even one of the best ways to spend your points. Everyone
will have their personal preference - which was certainly the case around Blizzard's development
offices where virtually every member of the QA team had their own personal style!
Page 48

DIABLO II OFFICIAL GAMESPOT GAME GUIDE
48
Prayer - 1 point
Might - 2 points
Sacrifice - 2 points
Holy fire - 1 point
Blessed aim - 1 point
Resist fire - 1 point
Resist cold - 1 point
Resist lightning - 1 point
Holy freeze - 3 points
Thorns - 1 point
Cleansing - 1 point
Zeal - 5 points
Concentration - 2 points
Blessed hammer - 1 point
Vengeance - 2 points
Meditation - 1 point
Conversion - 1 point
Holy shock - 2 points
Salvation - 1 point
This setup gives the Paladin decent combat ability coupled with a solid collection of offensive
and defensive auras. The zeal and concentration combination should service the Paladin's melee
combat needs, while the resistances auras can be switched on the fly for protection against particular enemies. Holy freeze is essential against monster groups; when active, the aura freezes
nearby monsters setting them up nicely for your zeal assault.
Early in the game, you're implementing might, an aura that increase damage, and sacrifice to
inflict plenty of melee damage - at the expense of health. Use prayer to regenerate health points
from mana at a slow rate; be sure to keep potions around if you plan on using sacrifice
frequently.
Cleansing, zeal, and potentially holy bolt (should you choose the skill, though it's not very efficient in single-player games) will help through Act II and its poisonous undead heavy dungeons.
Zeal should become your primary attack once acquired, while you use the right mouse button to
continually switch through offensive and defensive auras as needed.
Page 49

DIABLO II OFFICIAL GAMESPOT GAME GUIDE
49
Vengeance, zeal, and concentration perform well in the late game against the tough
bosses. Don't neglect other offensive and defensive auras, though; be sure to use them as
needed, particularly the resistances. Implement holy freeze and holy shock against groups of
enemies and finish off the tougher beasts with a steady dose of zeal.
A Paladin supporting a multiplayer party would likely select different skills. Zeal and concentration might not carry such importance as other party members may be performing most of the
combat needs. Should you desire to go full support, use skill points in the offensive and defensive auras and affect all party members. Meditation is a particular party favorite; the prerequisite
level 24 skill boosts mana recovery for all friendly units within a radius.
PALADIN SKILLS
The Paladin's skills are separated into offensive auras, defensive auras, and combat skills.
OFFENSIVE AURAS
This section covers the Paladin's offensive auras, offering each skill's description, level prerequisite, skill prerequisite, and useable mouse button.
MIGHT
Description: Aura increases the damage done by you and your party
Level prerequisite: 1
Skill prerequisite: None
Mouse button: Right
HOLY FIRE
Description: Aura damages nearby enemies with heavenly flames
Level prerequisite: 6
Skill prerequisite: Might
Mouse button: Right
THORNS
Description: Aura reflects damage done to you back to your attacker
Level prerequisite: 6
Skill prerequisite: None
Mouse button: Right
Page 50

DIABLO II OFFICIAL GAMESPOT GAME GUIDE
50
BLESSED AIM
Description: Aura increases attack rating of you and your party
Level prerequisite: 12
Skill prerequisite: Might
Mouse button: Right
CONCENTRATION
Description: Aura increases damage done and decreases the change that the attack will be inter-
rupted for you and your party
Level prerequisite: 18
Skill prerequisite: Blessed aim
Mouse button: Right
HOLY FREEZE
Description: Aura freezes nearby enemies
Level prerequisite: 18
Skill prerequisite: Holy fire
Mouse button: Right
HOLY SHOCK
Description: Aura causes pulses of electricity to damage nearby enemies
Level prerequisite: 24
Skill prerequisite: Holy freeze
Mouse button: Right
SANCTUARY
Description: Aura damages the undead and knocks them back
Level prerequisite: 24
Skill prerequisite: Thorns, holy freeze
Mouse button: Right
FANATICISM
Description: Aura increases attack speed and attack rating for you and your party
Level prerequisite: 30
Skill prerequisite: Concentration
Mouse button: Right
Page 51

DIABLO II OFFICIAL GAMESPOT GAME GUIDE
51
CONVICTION
Description: Aura reduces the defenses and resistances of nearby monsters
Level prerequisite: 30
Skill prerequisite: Sanctuary
Mouse button: Right
DEFENSIVE AURAS
This section covers the Paladin's defensive auras, offering each skill's description, level prerequisite, skill prerequisite, and useable mouse button.
PRAYER
Description: Aura slowly regenerates the life of you and your party
Level prerequisite: 1
Skill prerequisite: None
Mouse button: Right
RESIST FIRE
Description: Aura decreases fire damage for you and your party
Level prerequisite: 1
Skill prerequisite: None
Mouse button: Right
DEFIANCE
Description: Aura boosts the defensive rating for you and your party
Level prerequisite: 6
Skill prerequisite: None
Mouse button: Right
RESIST C
OLD
Description: Aura decreases cold damage for you and your party
Level prerequisite: 6
Skill prerequisite: Resist fire
Mouse button: Right
CLEANSING
Description: Aura reduces the length of time you and your party will remain poisoned or cursed
Level prerequisite: 12
Skill prerequisite: Prayer
Mouse button: Right
Page 52

DIABLO II OFFICIAL GAMESPOT GAME GUIDE
52
RESIST LIGHTNING
Description: Aura decreases lightning damage for you and your party
Level prerequisite: 12
Skill prerequisite: Resist cold
Mouse button: Right
VIGOR
Description: Aura increases stamina recovery rate, maximum stamina, and speed for you and
your party
Level prerequisite: 18
Skill prerequisite: Defiance, cleansing
Mouse button: Right
MEDIATION
Description: Aura boosts mana recovery for you and your party
Level prerequisite: 24
Skill prerequisite: Cleansing
Mouse button: Right
REDEMPTION
Description: Aura attempts to redeem the souls of slain enemies giving life and mana to you
Level prerequisite: 30
Skill prerequisite: Vigor
Mouse button: Right
SALVATION
Description: Aura decreases fire, cold, and lightning damage done to you and your party
Level prerequisite: 30
Skill prerequisite: None
Mouse button: Right
COMBAT SKILLS
This section covers the Paladin's combat skills, offering each skill's description, level prerequisite,
skill prerequisite, and useable mouse button.
Page 53

DIABLO II OFFICIAL GAMESPOT GAME GUIDE
53
SACRIFICE
Description: Increased accuracy and damage at the cost of one's own wellness
Level prerequisite: 1
Skill prerequisite: None
Mouse button: Left or right
SMITE
Description: Bashes your enemies with your shield to stun them temporarily
Level prerequisite: 1
Skill prerequisite: None
Mouse button: Left or right
HOLY BOLT
Description: A bolt of divine energy that damages undead enemies or heals allies
Level prerequisite: 6
Skill prerequisite: None
Mouse button: Left or right
ZEAL
Description: Lets multiple adjacent monsters be hit in a single attack
Level prerequisite: 12
Skill prerequisite: Sacrifice
Mouse button: Left or right
CHARGE
Description: Charge and attack target with shield bash
Level prerequisite: 12
Skill prerequisite: Smite
Mouse button: Left or right
VENGEANCE
Description: Fire, lightning, and cold are added to each successful attack
Level prerequisite: 18
Skill prerequisite: Zeal
Mouse button: Left or right
Page 54

DIABLO II OFFICIAL GAMESPOT GAME GUIDE
54
BLESSED HAMMER
Description: Creates an ethereal hammer that spirals outwards damaging enemies it hits;
150 percent damage to undead
Level prerequisite: 18
Skill prerequisite: Holy bolt
Mouse button: Left or right
CONVERSION
Description: Converts monsters to fight against other foul demons and beasts
Level prerequisite: 24
Skill prerequisite: Vengeance
Mouse button: Left or right
HOLY SHIELD
Description: Enhances your shield with divine power
Level prerequisite: 24
Skill prerequisite: Charge, blessed hammer
Mouse button: Right
FIST OF HEAVEN
Description: A bolt of lightning hits the target, and holy bolts target other nearby enemies
Level prerequisite: 30
Skill prerequisite: Blessed hammer, conversion
Mouse button: Left or right
Page 55
55
"She has mastered the elemental magicks - fire, lightning, ice..."
Wish to eschew melee combat for dazzling and quite powerful spells? The Sorceress and her
wide array of elemental spells fulfills the role of chief magic user. Perhaps the most difficult class
to use, particularly in the early game without access to high amounts of mana and powerful
spells, the Sorceress takes patience and lots and lots of mana. A Sorceress without mana is like
a Barbarian without a hand-to-hand weapon.
SORCERESS ATTRIBUTES
Mana, mana, and more mana. To support the high cost of spell casting, the Sorceress needs a large supply of mana - the more the better. You can't necessarily neglect the other attributes, though.
Strength is important if you wish to outfit the better armors; the
Sorceress starts at lowly 10, meaning you have quite a ways to go
before you can protect yourself with the more durable plate mails.
Dexterity's importance isn't great unless you plan to wield attack
weapons. Some players prefer to use ranged weaponry with the Sorceress, since you're typically
away from the battle casting spells anyhow; combining the spell assault with long-range attacks
could prove effective.
But, you can't ignore the energy attribute. Put as many attribute points as you can afford into
mana - which might not be much early on. Vitality is troublesome early in the game; with a starting score of 10, the Sorceress is quite weak and must employ hit-and-run attacks to survive
against Act I beasts that the Barbarian chops through like crumbling wood. The Sorceress'
warmth skill can help alleviate energy attribute point concerns - warmth, a passive skill,
Sorceress Initial
Attributes
Strength: 10
Dexterity
: 25
V
itality: 10
Energy
: 35
Page 56

DIABLO II OFFICIAL GAMESPOT GAME GUIDE
56
increases the rate at which mana regenerates. If you've boosted the warmth skill
somewhat, you can divert future attribute points into another statistic. Then again, more
mana certainly can't hurt.
FIRE VS. COLD VS. LIGHTNING
The Sorceress' skills are split into three elemental spells: fire, cold, and lightning. Though it's
possible to experiment with each path, it's likely to your advantage to choose a particular path or, perhaps better, two paths - and place emphasis on that particular element. You'll face all sorts
of beasts during the game, some that carry fire resistance, others that feature cold resistance,
and others that have lightning resistance. At some point in the game, a particular elemental spell
won't be as effective as it was a moment ago; if the unique beast you're clashing with carries 75
percent resistance to cold, don't expect your glacial spike to be as effective.
The cold spells work well because they cause cold damage and
slow down the target. Though the damage might not be as great
as that from a different element, you can slow down the target
and follow up the blast with lightning or fire attacks. Cold works
especially well in multiplayer games where the freezing effect can
slow down groups of monsters for you and your party to chew
through with weapons, spells, and minions.
So, which should you choose? Eventually you can have them all, naturally, but to start out, you
should choose cold (for its freezing effect) and a secondary element, either fire or lightning, and
boost up the particular element's best attack spells by adding on additional skill points. The
choice is up to you, obviously, which makes Diablo II such a deep and diverse game.
HIT-AND-RUN TECHNIQUES
If you're eschewing hand-to-hand weapons, choosing to carry the staffs and war staffs that supply bonuses to Sorceress skills, you'll want to stay far away from monsters. The Sorceress
requires more of a finesse game. Attack with your spells, then back off and regenerate your
mana, either automatically with warmth or with mana potions. Once replenished, resume your
attack and repeat as necessary.
Sorceress Initial
Equipment
Weapon: Short staff
(+1 to fire bolt)
Armor
: None
Page 57

DIABLO II OFFICIAL GAMESPOT GAME GUIDE
57
A bow might be a viable weapon for the Sorceress, if you haven't found a staff or
war staff with impressive bonuses to Sorceress skills. Since you're fighting from long range
anyhow, use the bow to cause damage in conjunction with your spells. If you're implementing
the staff, the extra damage must come from hand-to-hand combat, not recommended for the frail
Sorceress.
Once you reach the powerful elemental spells - meteor, blizzard, and thunder storm - it's possible
to lure the beasts into a showering trap. For instance, when running away from the beasts, cast
meteor or blizzard in your path. Once the beasts reach the area, the spell takes effect, dropping
the flaming rocks or ice shards right into their laps.
NOTE: In multiplayer games, it's important to watch out for other players trying to steal the
loot off a monster you just killed! Use the Alt key to display any items, such as gold, weapons,
armor, potions, and so on, currently located on the view screen. Some Blizzard employees called
players that hang around looking for items to steal "ninjas." Look out for the ninjas, especially
when a monster just dropped a gem, skull, unique, or rare item!
FEEL THE WARMTH
As previously stated, a Sorceress will have a hard time recovering from a depleted supply of
mana. Without mana potions or town potion scrolls, you're often left with a single last resort - run!
Warmth, a passive Sorceress skill that can be acquired from level one, helps alleviate some
mana issues.
Though it doesn't increase your maximum supply, warmth does increase the rate at which your
mana regenerates. In a single-player game, the Sorceress will need as much mana as possible
to survive the tougher areas of the game. Warmth's boost to mana regeneration is extremely
helpful in keeping the Sorceress' mana level high. Increased to its fourth level, warmth regenerates mana 66 percent faster. Over fourth level, the skill points become less cost effective (the
jumps in percentage are smaller). If you're unsure where to place a point, bolstering warmth's
passive effects certainly can't hurt.
APPLYING SORCERESS SKILL POINTS
You receive a skill point each time you advance a level (plus you'll receive more from completing
particular quests, such as the Den of Evil quest in Act I). It's important to plan your skill choices
ahead. Some high level skills have multiple prerequisites meaning you will have to follow two
Page 58

DIABLO II OFFICIAL GAMESPOT GAME GUIDE
58
paths down the tree in order to reach that particularly skill. Further, it can be a tough decision whether or not to add multiple points into a particular skill - and how many should you
add?
Where you place skill points is up to you - there's no right or wrong here. Some players may prefer the fire spells over the cold and lightning spells; you may wish to get to meteor and keep
pumping in the skill points. Then again, you might select the freezing benefits of cold over the
damaging effects of lightning. How you place your skill points is entirely up to you, and the game
can be completed no matter how you place your points - just expect a tougher or easier game
depending on your selections!
The following section is simply a guideline, an example of what you could choose with 30 skill
points (up and beyond level 30, not including additional skill points from quests and magical
items). Obviously, this isn't your only or even best choice - it's highly dependent on your personal
style. There are thousands and thousands of skill combinations; this example is presented only
to illustrate a style of play and examples of how skills co-exist with one another.
Warmth - 4 points
Ice bolt - 2 points
Fire bolt - 2 points
Charged bolt - 2 points
Frozen armor - 1 point
Static field - 1 point
Frost nova - 1 point
Ice blast - 2 points
Lightning - 2 points
Glacial spike - 5 points
Nova - 2 points
Chain lightning - 2 points
Thunder storm - 2 points
Blizzard - 1 point
Lightning mastery - 1 point
Page 59

DIABLO II OFFICIAL GAMESPOT GAME GUIDE
59
This Sorceress chose to power cold and lightning spells over their fire counterparts,
choosing blizzard and thunder storm over the fiery devastation of the meteor spell.
Acquiring warmth and increasing its skill helps the Sorceress recover mana more quickly (66
percent faster at skill level 4), while the basic bolts provide different means of attack early in the
game (these extra points placed here could be used, instead, for more powerful fire spells, for
instance).
The cold spells work well because not only are you inflicting damage, but you're, potentially,
freezing your enemy, leaving it vulnerable for further attack. It's the lightning spells, though, that
can be the most devastating, especially combined with lightning mastery, available upon reaching level 30, which reduces the mana cost of all your lightning spells by 15 percent initially (if you
choose this route, it's worth it to improve the skill up to level 5; after that, the reduction bonus
slows down considerably).
Use the various elemental bolts early in the game along with frozen armor to protect yourself; the
cold armors are worth the skill points. If you become overwhelmed, the chilling effects can slow
down monster attacks, giving you an opportunity to escape and prepare spells. The Sorceress
will have a tougher time earlier in the game than the stronger Barbarian or dexterous Amazon,
particularly against quick, ranged attackers like Blood Raven in Act I. Start putting extra points
into warmth, as you'll be using mana all throughout the game and anything that helps you regenerate mana faster is worth the expense.
By the middle of the game, you're implementing lightning and glacial spike with abandon. If
you're choosing the fire route, you're using fire ball as your primary weapon. Consider acquiring
the cold armors to keep you better protected. As you reach the late game, you're concentrating
on the most powerful - and expensive - spells of each elemental, including thunder storm, blizzard, and meteor. Use these to clear out rooms of monsters as you flee to safety; cast these
spells as you run away and lure the monsters underneath their devastating showers.
NOTE: Naturally the skill selections presented in this section's example could shift wildly
based on your personal style. You may prefer lightning damage over cold and place a bulk of
points inside chain lightning instead of glacial spike. Then again, perhaps you prefer the element
of fire over cold and lightning! The beauty of Diablo II lies in the many ways you can personalize
your character both in skills and equipment.
Page 60

DIABLO II OFFICIAL GAMESPOT GAME GUIDE
60
S
ORCERESS SKILLS
The Sorceress' skills are separated into cold spells, fire spells, and lightning spells.
COLD SPELLS
This section covers the Sorceress' cold spells, offering each skill's description, level prerequisite,
skill prerequisite, and useable mouse button.
ICE BOLT
Description: Creates a magical bolt of ice that damages and slows the target
Level prerequisite: 1
Skill prerequisite: None
Mouse button: Left or right
FROZEN ARMOR
Description: Increases your defense rating and freezes enemies that hit you
Level prerequisite: 1
Skill prerequisite: None
Mouse button: Right
FROST NOVA
Description: Creates an expanding ring of ice that damages and slows all nearby enemies
Level prerequisite: 6
Skill prerequisite: None
Mouse button: Right
ICE BLAST
Description: Cast a magical ball of ice that damages and freezes your enemy
Level prerequisite: 6
Skill prerequisite: Ice bolt
Mouse button: Left or right
SHIVER ARMOR
Description: Increases your defense rating; freezes and damages enemies that hit you
Level prerequisite: 12
Skill prerequisite: Frozen armor, ice blast
Mouse button: Right
Page 61

DIABLO II OFFICIAL GAMESPOT GAME GUIDE
61
GLACIAL SPIKE
Description: Creates a magical ice comet that freezes or kills nearby enemies
Level prerequisite: 18
Skill prerequisite: Ice blast
Mouse button: Left or right
BLIZZARD
Description: Summons massive shards of ice to destroy your enemies
Level prerequisite: 24
Skill prerequisite: Glacial spike, frost nova
Mouse button: Right
CHILLING ARMOR
Description: Increases defense and discharges an ice bolt in retaliation against ranged attackers
Level prerequisite: 24
Skill prerequisite: Shiver armor
Mouse button: Right
FROZEN ORB
Description: Creates a magical globe that sprays a torrent of ice bolts to lay waste to your
enemies
Level prerequisite: 30
Skill prerequisite: Blizzard
Mouse button: Left or right
COLD MASTERY
Description: Enhances your cold attacks by piercing through your enemy's resistances to cold
Level prerequisite: 30
Skill prerequisite: None
Mouse button: Passive
LIGHTNING SPELLS
This section covers the Sorceress' lightning spells, offering each skill's description, level prerequisite, skill prerequisite, and useable mouse button.
Page 62

DIABLO II OFFICIAL GAMESPOT GAME GUIDE
62
CHARGED BOLT
Description: Creates multiple, randomly directed bolts of electrical energy
Level prerequisite: 1
Skill prerequisite: None
Mouse button: Left and right
STATIC FIELD
Description: Creates an electric field that reduces the life of all nearby enemies by one third
Level prerequisite: 6
Skill prerequisite: None
Mouse button: Right
TELEKINESIS
Description: Use the power of your mind to pick up items; use objects and knock back enemies
Level prerequisite: 6
Skill prerequisite: None
Mouse button: Right
NOVA
Description: Creates an expanding ring of lightning to shock nearby enemies
Level prerequisite: 12
Skill prerequisite: Static field
Mouse button: Right
LIGHTNING
Description: Creates a powerful lightning bolt to lay waste to your enemies
Level prerequisite: 12
Skill prerequisite: Charged bolt
Mouse button: Left or right
CHAIN L
IGHTNING
Description: Creates a bolt of lightning that arcs through several targets
Level prerequisite: 18
Skill prerequisite: Lightning
Mouse button: Left or right
Page 63

DIABLO II OFFICIAL GAMESPOT GAME GUIDE
63
TELEPORT
Description: Instantly moves to a destination within your line of sight
Level prerequisite: 18
Skill prerequisite: Telekinesis
Mouse button: Right
THUNDER STORM
Description: Summons a deadly thunder storm that strikes your enemies with bolts of lightning
Level prerequisite: 24
Skill prerequisite: Nova, chain lightning
Mouse button: Right
ENERGY SHIELD
Description: Creates a magical shield that consumes mana instead of health when you take dam-
age
Level prerequisite: 24
Skill prerequisite: Chain lightning, teleport
Mouse button: Right
LIGHTNING MASTERY
Description: Reduces the mana cost of your lightning spells
Level prerequisite: 30
Skill prerequisite: None
Mouse button: Passive
FIRE SPELLS
This section covers the Sorceress' fire spells, offering each skill's description, level prerequisite,
skill prerequisite, and useable mouse button.
FIRE BOLT
Description: Creates a magical flaming missile
Level prerequisite: 1
Skill prerequisite: None
Mouse button: Left or right
Page 64

DIABLO II OFFICIAL GAMESPOT GAME GUIDE
64
WARMTH
Description: Increases the rate at which you recover your mana
Level prerequisite: 1
Skill prerequisite: None
Mouse button: Passive
INFERNO
Description: Creates a continuous jet of flame to scorch your enemies
Level prerequisite: 6
Skill prerequisite: None
Mouse button: Right
BLAZE
Description: Creates a wall of fire in your wake to scorch your enemies
Level prerequisite: 12
Skill prerequisite: Inferno
Mouse button: Right
FIRE BALL
Description: Creates an explosive sphere of fiery death to engulf your enemies
Level prerequisite: 12
Skill prerequisite: Fire bolt
Mouse button: Left or right
FIRE
WALL
Description: Creates a wall of flame that blocks or burns your enemies
Level prerequisite: 18
Skill prerequisite: Blaze
Mouse button: Right
ENCHANT
Description: Enchants equipped weapon or targeted character or minion; adds fire damage to
melee weapons; adds one-third fire damage to ranged weapons
Level prerequisite: 18
Skill prerequisite: Warmth, fire ball
Mouse button: Right
Page 65

DIABLO II OFFICIAL GAMESPOT GAME GUIDE
65
METEOR
Description: Summons a meteor from the heavens to crush and incinerate your enemies
Level prerequisite: 24
Skill prerequisite: Fire wall, fire ball
Mouse button: Right
FIRE MASTERY
Description: Increases all fire damages caused by your spells
Level prerequisite: 30
Skill prerequisite: None
Mouse button: Passive
HYDRA
Description: Summon a multiheaded beast of flame to reduce your enemies to ashes
Level prerequisite: 30
Skill prerequisite: Enchant
Mouse button: Right
Page 66
66
D
iablo II's single- and multiplayer adventure begins in the rogue encampment. Kashya's
rogue scouts currently patrol the surrounding wilderness and have encountered an evil
rising from the ashes. In Act I, you'll explore the area surrounding the rogue encampment.
Your journey takes you into the rogue burial grounds to defeat Blood Raven and to ruined
Tristram to rescue the wise Horadrim sage, Deckard Cain. Your (and your party if applicable)
quests eventually take you into the catacombs to face an evil known as Andariel, whose presence could signal the return of Diablo.
The rogue encampment, like other future towns, contains several
nonplayer characters that both offer quests and assist with
weapons, armor, healing items, and repair. In the rogue encampment you'll find:
Akara: Speak with Akara upon each return to the rogue encamp-
ment to instantly regenerate your health and mana points. Akara
also offers trade in healing potions, scrolls, and magical staffs and
wands.
Kashya: The leader of the rogues offers the Blood Raven quest.
Complete this quest, and Kashya provides a free rogue mercenary;
further, you can spend gold to hire other rogues as needed.
Charsi: The blacksmith offers weapons and armor for buying and selling. You'll also find a selec-
tion of magical items. Charsi also serves an important role, especially to Barbarians - Charsi
repairs damaged weapons and armor for a gold fee.
Act I Waypoints
Rogue Encampment
Cold Plains
Stony Field
Dark Wood
Black Marsh
Outer Cloister
Jail Level 1
Inner Cloister
Catacombs Level 2
Page 67

DIABLO II OFFICIAL GAMESPOT GAME GUIDE
67
Gheed: Find Gheed for a secondary source of weapons, armor,
and magical items. Also, players can gamble with Gheed on magical items, which
will either be magical, rare, unique or set items.
Warriv: Once you complete the sixth quest in Act I, Warriv will transport you east into Act II.
Deckard Cain: You can choose to rescue Deckard Cain in the third quest of Act I. If you rescue
Cain, he'll identify items for free (for the remainder of the game). If you skip quest three, Cain will
automatically be rescued once the sixth quest is activated, and he'll charge for item identification.
ACT I, QUEST I: DEN OF EVIL
Diablo II's first quest in Act I is activated by speaking with Akara. You can speak with Akara
before leaving town and receive the quest. Alternatively, you can explore the blood moor (the
area just outside of town) and activate the quest after gaining experience, levels, and skills. Also,
should you find the den of evil (located in the blood moor) and enter, the quest automatically
becomes active in your quest log.
ACT I, QUEST I OBJECTIVE FROM AKARA
"There is a great evil in the wilderness. Kashya's rogue scouts have informed me that a cave
nearby is filled with shadowy creatures and horrors from beyond the grave. I fear that these creatures are massing for an attack against our encampment. If you are sincere about helping us,
find the dark labyrinth and destroy the foul beasts. May the Great Eye watch over you."
ACT I, QUEST I LOCATION
The den of evil is located in the blood moor, which is the area adjacent to the rogue encampment. Simply follow the maps from the rogue encampment to the blood moor and locate the
entrance to the den of evil.
RECOMMENDED LEVEL TO COMPLETE ACT I, QUEST I
The den of evil contains many sturdy creatures in a tight, enclosed space. Though you could
head into the den of evil immediately, the quest will be much easier if you take time to explore
the blood moor and gain experience, levels, skills, and equipment. At a minimum, you should
strive to be at least level 2 or 3 before venturing into the den of evil.
Act I Bestiary: Many undead occupy the areas and dungeons around the rogue encampment,
centered most in the burial grounds, but expect to find skeletons, skeleton archers, zombies,
ghouls, and hungry dead in many Act I areas. The Act I undead aren't especially tough (just wait
until you play nightmare difficulty, though). The undead carry resistance to poison, however; if
you're specializing in poison weapons or skills, keep in mind it might take a little longer to finish
off the resistant undead.
Page 68
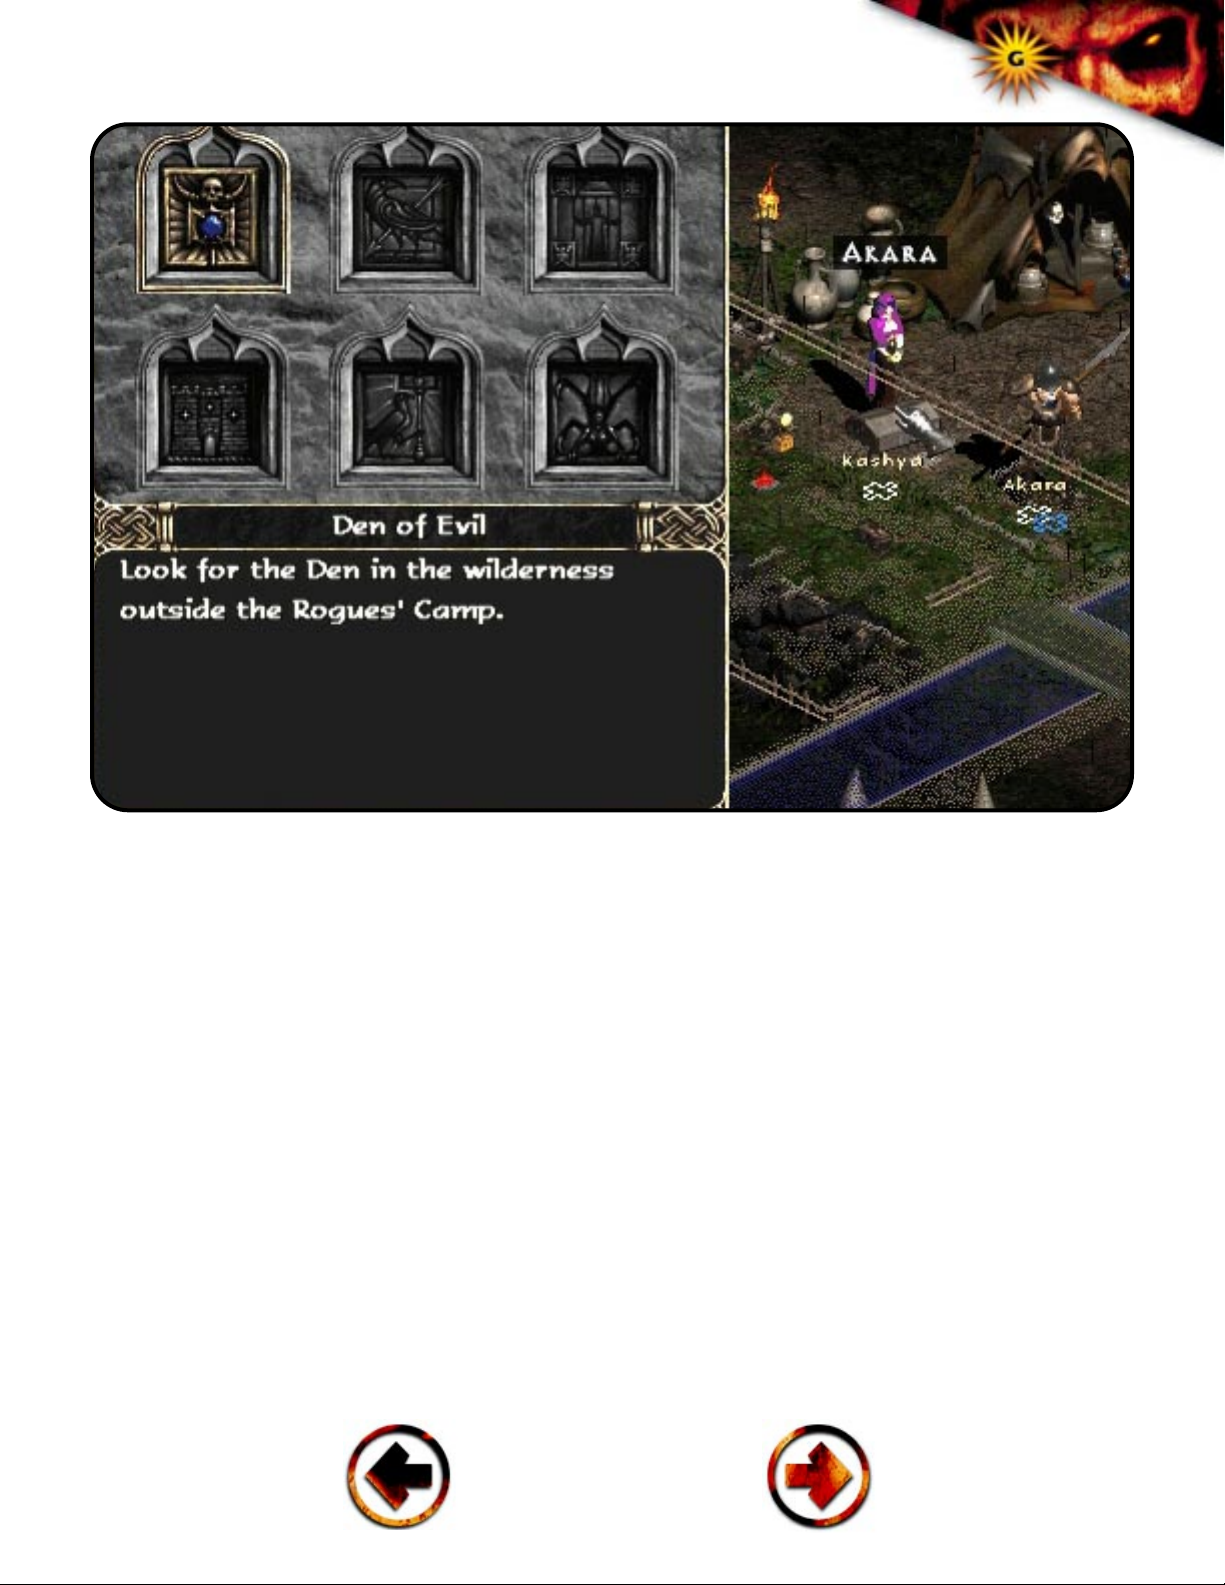
DIABLO II OFFICIAL GAMESPOT GAME GUIDE
68
Acquire the den of evil quest by speaking with Akara in the rogue encampment.
ACT I, QUEST I LOG ENTRY #1: LOOK FOR THE DEN IN THE WILDERNESS OUTSIDE THE ROGUES' CAMP.
Explore the blood moor, the area of wilderness adjacent to the rogue encampment. Take time to
battle the creatures encountered here. Locate chests and loose boulders, then search dead
rogues for additional gold or items.
Don't head into the cold plains just yet. The creatures are tougher there, and you should instead
take the time to gain experience, levels, and skill points from the blood moor and the den of evil.
Once you've achieve level 2 or 3, you should be well prepared to take on the "shadowy creatures" inhabiting the forsaken cavern. Scout the blood moor until you locate a cave entrance
positioned away from the map's edges; place your cursor over the entrance to discover its destination - the den of evil.
Page 69

DIABLO II OFFICIAL GAMESPOT GAME GUIDE
69
TIP: Search the blood moor, and other maps in Diablo II, for shrines.
Each shrine activates a power-up that can enhance various aspects of your character and
also replenish health, mana, or stamina. There are many types of shrines (all covered in the
shrine section of this game guide). Should you locate an experience shrine, which enhances
level advancement by providing 50 percent more experience per kill, make sure you're near a
large amount of creatures, or better, near a dungeon entrance. It's wasteful to activate the experience shrine without creatures nearby to exploit its use.
ACT I, QUEST I LOG ENTRY #2: KILL ALL THE MONSTERS IN THE DEN.
As soon as you enter the den of evil, you're provided with your next objective in the quest log.
Just as Akara said, it's time to rid the den of the massing evil creatures. Explore the den, a single-level dungeon, and eliminate all the creatures inside.
ACT I, QUEST I LOG ENTRY #3: MONSTERS REMAINING: 5
Your quest log will update you once you're nearing completion of the den of evil quest. Once five
monsters remain inside the den of evil, a quest entry notification appears on the screen. Your
quest log will continue to count down until there's one monster remaining. Expect to encounter a
few unique and champion creatures inside the den. Be prepared for a tough fight if you decide to
proceed into the den before taking time to gain experience, levels, skills, and equipment.
NOTE: Sometime during your exploration of act I, you'll encounter your first "Champion"
monster; these enhanced versions of standard monsters typically travel in small packs (with
other similar type champions). The champion attribute provides several modifies to the standard
monster - these include double minimum and maximum damage, double to hit, 20 percent
increased velocity, 120 percent increased attack rate, six times hit points, level plus four, and
experience points times three.
UNIQUE MONSTER: Inside the den of evil, you'll find Corpsefire, a unique monster with a spec-
tral hit attack. Spectral hit provides 20 percent elemental resistances to the unique monster, plus
the monster's damage includes a random elemental attack in addition to standard damage.
Corpsefire also has double change to hit and is quite durable - expect quite a battle!
ACT I, QUEST I LOG ENTRY #4: RETURN TO AKARA FOR A REWARD.
The lighting inside the den changes once the final monster is eliminated. Your quest log indicates
a new objective - head back to Akara to receive your reward for completing the den of evil quest.
Exit the den of evil and return to the rogue encampment. Alternatively, you could use a town portal scroll, but you're so close to town it's wiser to save the scroll.
Page 70

DIABLO II OFFICIAL GAMESPOT GAME GUIDE
70
ACT I, QUEST I COMPLETED FROM AKARA
"You have cleansed the Den of Evil. You've earned my trust and may yet restore my faith in
humanity. Your reward is training in the skill of your choice."
ACT I, QUEST I REWARD
Follow your quest log and return to the rogue encampment to speak with Akara once you have
eliminated all the monsters in the den of evil. Akara provides a significant reward for completing
the first quest - Akara rewards the player with a bonus skill point. It's one of a very few opportunities to gain an additional skill point (other than the one you gain from leveling up), so honor the
reward with a wise skill selection or enhancement!
TIP: In a multiplayer game, the +1 skill point award is given to all players who complete the
quest - which are all players (and party members) who were in the den when the last monster
was killed. Keep in mind, however, that players cannot receive the +1 skill award multiple times.
ACT I, QUEST II:
S
ISTERS' BURIAL GROUNDS
Activate Diablo II's second quest, sisters burial grounds, by speaking with Kashya in the rogue
encampment after completing the den of evil quest. Alternatively, you can explore the wilderness
around the rogue encampment and discover the burial grounds area just off the cold plains.
Discover the cemetery here to activate the sisters' burial grounds quest.
ACT I, QUEST II OBJECTIVE FROM KASHYA
"My rogue scouts have reported an abomination in the Monastery graveyard! Apparently,
Andariel is not content on taking only our living. Blood Raven, one of our finest captains in the
battle against Diablo at Tristram, was also one of the first corrupted by Andariel. Now, you'll find
her in the Monastery graveyard raising our dead as zombies! We cannot abide this defilement! If
you truly our ally you will help us destroy her!"
ACT I, QUEST II LOCATION
Blood Raven can be found in the cemetery amongst a horde of undead skeletons and zombie
creatures. The cemetery is located in the burial grounds, which can be found by following the
maps from the rogue encampment to the blood moor to the cold plains and finally to the burial
grounds. You'll know you're close to Blood Raven when you hear her distinct taunt.
Page 71
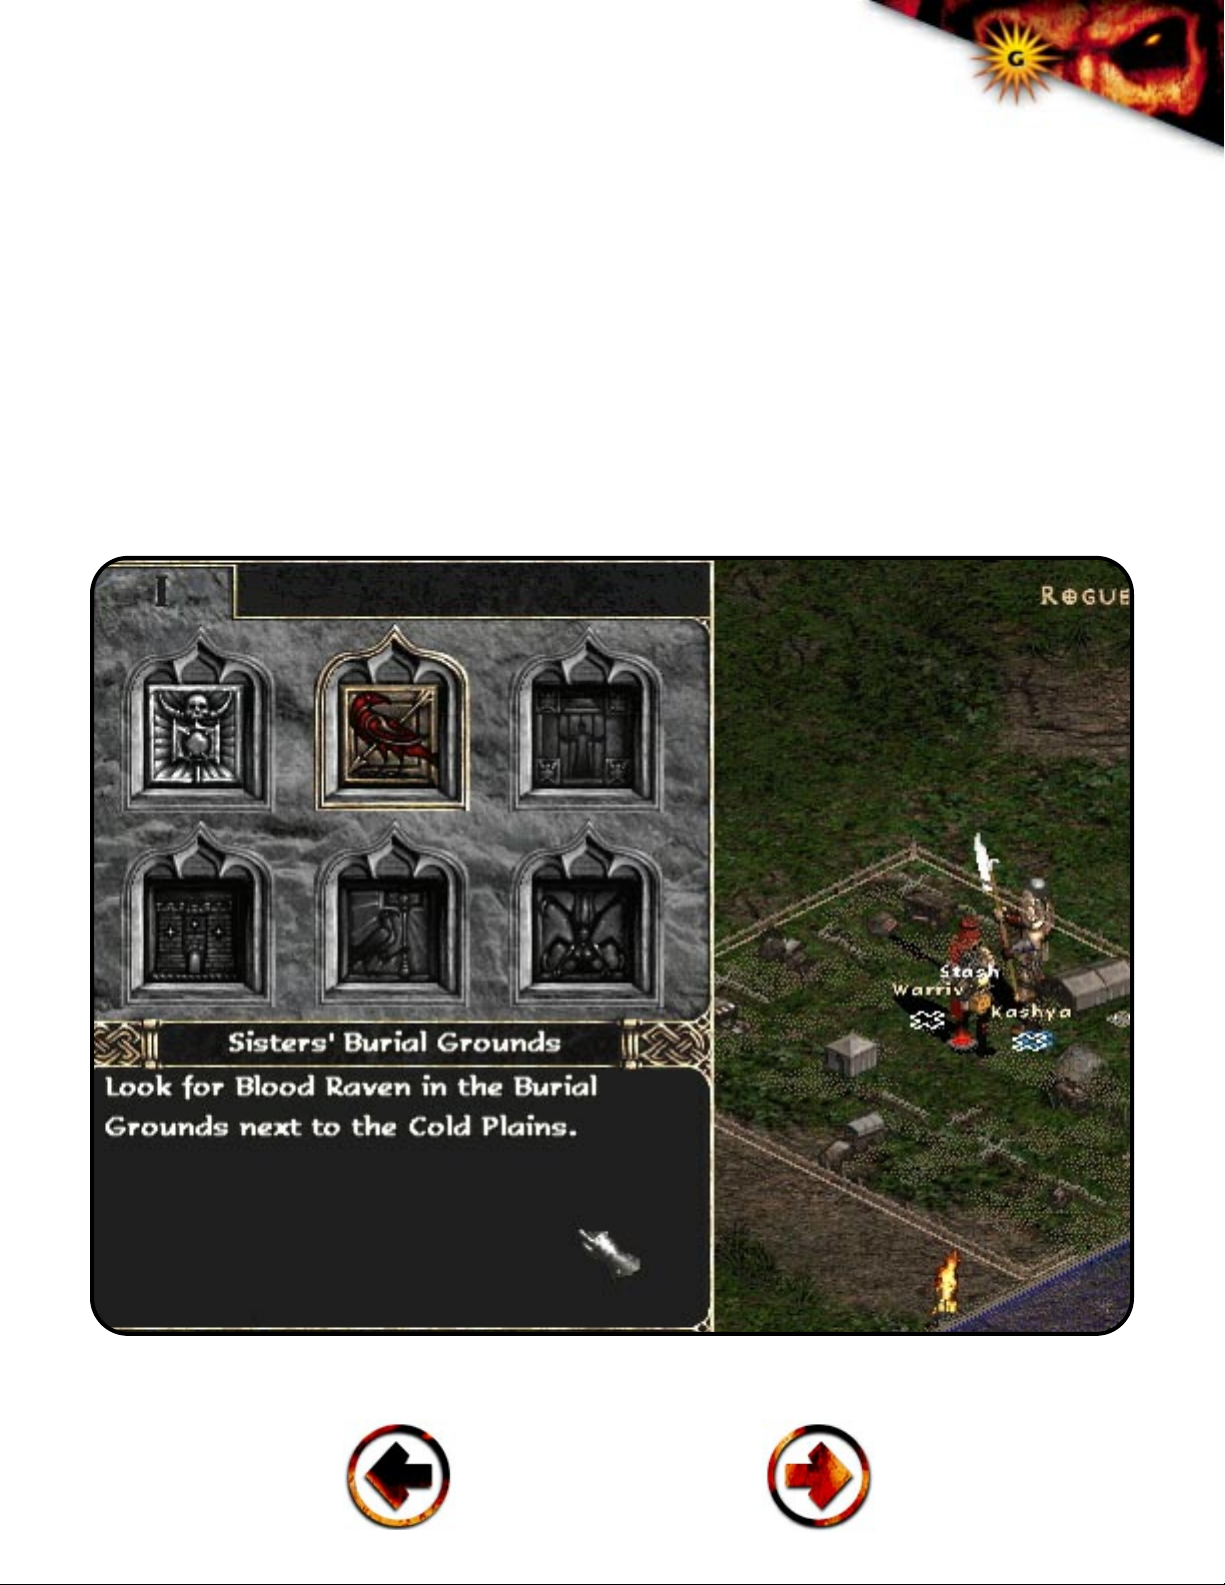
DIABLO II OFFICIAL GAMESPOT GAME GUIDE
71
UNIQUE MONSTER: Search the cold plains for Bishibosh, a fire-enchanted unique
monster with magic resistance. Magic resistance gives Bishibosh 75 percent resistance to
elemental attacks. Fire enchanted gives Bishibosh 75 percent resistance to fire damage, double to hit chance, and additional fire damage.
RECOMMENDED LEVEL TO COMPLETE ACT I, QUEST II
Blood Raven offers a significant challenge. Not only is she fast and tough with her arrow and
flame arrow attacks, but she continues to summon undead skeletons and zombies to protect her.
Before heading into the burial grounds' cemetery, an area overflowing with undead creatures,
take time to explore the cold plains (and perhaps even the stony field) thoroughly to gain experience, levels, skills, and equipment. You should strive to be around level 4 or 5 before taking on
Blood Raven.
Speak with Kashya after completing the den of evil to learn about blood raven.
Page 72

DIABLO II OFFICIAL GAMESPOT GAME GUIDE
72
TIP: Clubs and maces offer 150 percent damage against undead crea-
tures, which could prove useful in the fight against the skeleton, zombie, and hungry dead
in the cemetery.
Act I Bestiary: One of the tougher Act I beasts you'll encounter are in the "Wendigo" class. These
lumbering beasts, the brute, gargantuan beast, and yeti, are durable (especially the brute and
yeti). Furthermore, the yeti possesses 20 percent resistance to cold.
ACT I, QUEST II LOG ENTRY #1: LOOK FOR THE BLOOD RAVEN IN THE
BURIAL GROUNDS NEXT TO THE COLD PLAINS
.
If you receive the quest from Kashya, you're told to explore the cold plains and search for the
entrance to the burial grounds. The cold plains lead to both the burial grounds and the stony field
area. Though not necessary, it's possible to explore the stony field and gain additional experience, levels, and items for your battle in the burial grounds. The creatures found in the stony
field provide quite a challenge, however; be prepared if you decide to bypass the burial grounds
for the dangers that lie beyond!
ACT I, QUEST II LOG ENTRY #2: KILL BLOOD RAVEN.
NOTE: Blood Raven possesses 50 percent resistance to magic, cold, fire, lightning,
and poison.
You'll find Blood Raven near the center of the burial grounds, likely surrounded by many skeletons, zombies, and hungry dead. Maces and clubs could help against the undead-heavy force,
but you must still deal with Blood Raven, who's very quick and retreats often to attack with
ranged weapons. Blood Raven also raises additional undead creatures; keep that in mind if you
leave her alone to amass stronger undead protection. A weak Sorceress will likely have the
toughest time with Blood Raven; it's difficult to deal with her ranged attack. Hit and run and heal
as necessary. Get a clean shot on Blood Raven with your spells and avoid the undead as much
as possible. Combat-oriented classes should have a less difficult time, as you can get inside her
ranged attacks and confront her head-on.
UNIQUE MONSTER: Search the optional dungeon, the crypt, inside the burial grounds for
Bonebreaker, who's extra strong and possesses magic resistance. Extra strong increases minimum and maximum damage three-fold and adds 25 percent damage to each hit. Bonebreaker's
magic resistance gives him a 75 percent resistance to elemental attacks.
Page 73

DIABLO II OFFICIAL GAMESPOT GAME GUIDE
73
TIP: When you defeat Blood Raven, the resulting lightning effects destroy all the
monsters in the cemetery. If you want to receive additional experience, fight the undead creatures first, then deal with Blood Raven. Zombies and hungry dead are quite durable and could
be tough if you're a low-level character. Should you choose not to deal with the undead, defeat
Blood Raven as soon as possible to clear out the cemetery.
ACT I, QUEST II LOG ENTRY #3: RETURN TO KASHYA FOR A REWARD.
Defeating Blood Raven triggers her death animation (with lightning effects) that clears out
remaining undead monsters in the cemetery. Return to the rogue encampment and speak with
Kashya, who initially gave you the quest. Use a town portal scroll if you wish, but be sure to
replenish your supply; town portal scrolls are essential in times of extreme danger.
ACT I, QUEST II COMPLETED MESSAGE FROM KASHYA
"I can hardly believe you defeated Blood Raven! Though she was once my closest friend, I pray
that her tortured spirit remains banished forever. You have earned my respect, stranger...and the
allegiance of the rogues. I have placed several of my best warriors at your disposal."
Act I Bestiary: You may encounter tiny spike fiends, which include the razor spine, thorn beast,
and the quill rat, scattered around the Act I landscape. There's nothing extraordinary about the
critters, though some launch the painful quills as a ranged weapon. Scan the screen and spot
when quills are striking you from offscreen. Seek out the offending spike fiend and eliminate him
and its friends!
ACT I, QUEST II REWARDS
After you return to the rogue encampment and speak with Kashya, the Hire choice is added to
her dialogue menu. For acts I, II, and III, you can hire mercenaries from Kashya. Additionally,
Kashya provides you with a free mercenary to use immediately. For multiplayer, all players who
were in the cemetery when Blood Raven was killed receive the award upon returning to Kashya.
ACT I, QUEST III:
T
HE SEARCH FOR CAIN
To activate Diablo II's third quest in Act I, you must complete the sisters' burial ground quest and
return to the rogue encampment and speak with Akara.
Page 74

DIABLO II OFFICIAL GAMESPOT GAME GUIDE
74
Act I Bestiary: Fallen and carvers crowd the wilderness surrounding the rogue
encampment. Though the small demonic creatures aren't especially tough, they're usually
accompanied by a shaman, which possesses a fire attack and the ability to raise dead fallen or
carvers. If you notice fallen or carvers being resurrected, scout around quickly for the shaman
and eliminate it. You don't receive extra experience for killing raised fallen or carvers (and their
similar relatives later in Act I); raised creatures are just troublesome. Eliminate the shaman
quickly to reduce the extra work.
ACT I, QUEST III OBJECTIVE FROM AKARA
"It is clear that we are facing an Evil difficult to comprehend, let alone combat. There is only one
Horadrim Sage, schooled in the most arcane history and lore, who could help us...his name is
Deckard Cain. You must travel to Tristram, I pray that he still lives. Tristram is too far to journey
by foot... Cain would likely be dead when you arrived. However, there is a magical portal that will
take you there instantly. To open it, one must stand within the circle of Cairn Stones and touch
them in a certain order. The proper order can be found in the runes written on the bark of the
Tree of Inifuss. You must find the sacred Tree of Inifuss and bring back its bark. I will translate
the runes to unlock the Stones' mystic pattern."
UNIQUE MONSTER: Search the stony field for Rakanishu, who's lightning enchanted and extra
fast. Extra fast doubles attack rate, and lightning enchanted supplies lightning damage while
making Rakanishu 75 percent more resistant to lightning attack. Lightning damage is extremely
powerful, especially this early in the game (if this is your first play through). Don't venture into the
stony field and face off against Rakanishu unless you're well-prepared! He's not alone either;
he's surrounded by other fallen shamen and a host of pesky fallen.
ACT I, QUEST III LOCATION
The third quest in the Act I is divided into several segments, each located in a different area of
the wilderness. Your first goal is to locate the Tree of Inifuss to recover the bark scroll, which
contains the runes that reveal the correct order of cairn stones to open the portal to Tristram.
The Tree of Inifuss is found in the dark wood. From the rogue encampment, head into the blood
moor, then the cold plains, into the stony field, into the underground passage (levels 1 and 2)
and into the dark wood. The cairn stones can be found in the stony field.
TIP: Explore the burial grounds, central to the sisters' burial grounds quest and explore the
crypt and mausoleum. Though the areas aren't essential to complete quests, you will find plenty
of creatures to gain experience and chests to accumulate gold and equipment.
Page 75

DIABLO II OFFICIAL GAMESPOT GAME GUIDE
75
RECOMMENDED LEVEL TO COMPLETE ACT I, QUEST III
The underground passage and dark wood are dangerous areas in Act I. Take time to gain experience, levels, skills, and equipment before diving headfirst into this long, tough quest. Spend
time in the optional dungeons (crypt and mausoleum in the burial grounds and the cave in the
stony field) to advance levels and gain more powerful equipment. Ideally, you should be level 6
or 7 before venturing into Tristram to free Deckard Cain.
UNIQUE MONSTER: Explore the optional dungeon, the cave, inside the stony field for a unique
beast, the cold enchanted ranger Coldcrow. Cold enchantment supplies Coldcrow with cold damage (in addition to standard damage), a 75 percent resistance to cold attack, double chance to
hit, and a +20 freeze duration.
ACT I, QUEST III LOG ENTRY #1: GO THROUGH THE UNDERGROUND
PASSAGE TO THE DARK WOOD
, SEARCH FOR THE TREE OF INIFUSS, AND
RECOVER THE SCROLL
.
Once you receive the quest from Akara (you must complete the sisters' burial grounds quest
first), head out of the rogue encampment into the blood moor. Follow the blood moor and locate
the entrance to the cold plains. The cold plains can take you to the burial grounds or the stony
field - head into the stony field. It's possible that you'll spot the cairn stones on your travels; to
discover the correct sequence of the stones, you need the bark scroll off the Tree of Inifuss. You
may also spot the moldy tome in the stony field - it activates the fourth quest in Act I. Once you
are in the stony field, look for the entrance to the underground passage, level 1, positioned
against the outer wall.
TIP: The wilderness surrounding the rogue encampment can be a confusing place. If you're
having trouble locating the important quest landmarks, find the path, or road, and remain on it,
following it to its destination. Most of the landmarks in Act I can be found near or at the end of
the roads.
Follow the underground passage through two subterranean levels. Exit the tunnel into the dark
wood. Search the dark wood for an unusual tree, which will be clearly marked on the automap;
it's the Tree of Inifuss, which Akara revealed contains the cairn stones runes that can open the
portal into Tristram. Once you locate the tree, click on it and grab the dropped bark scroll. Place
the scroll into your inventory.
Page 76
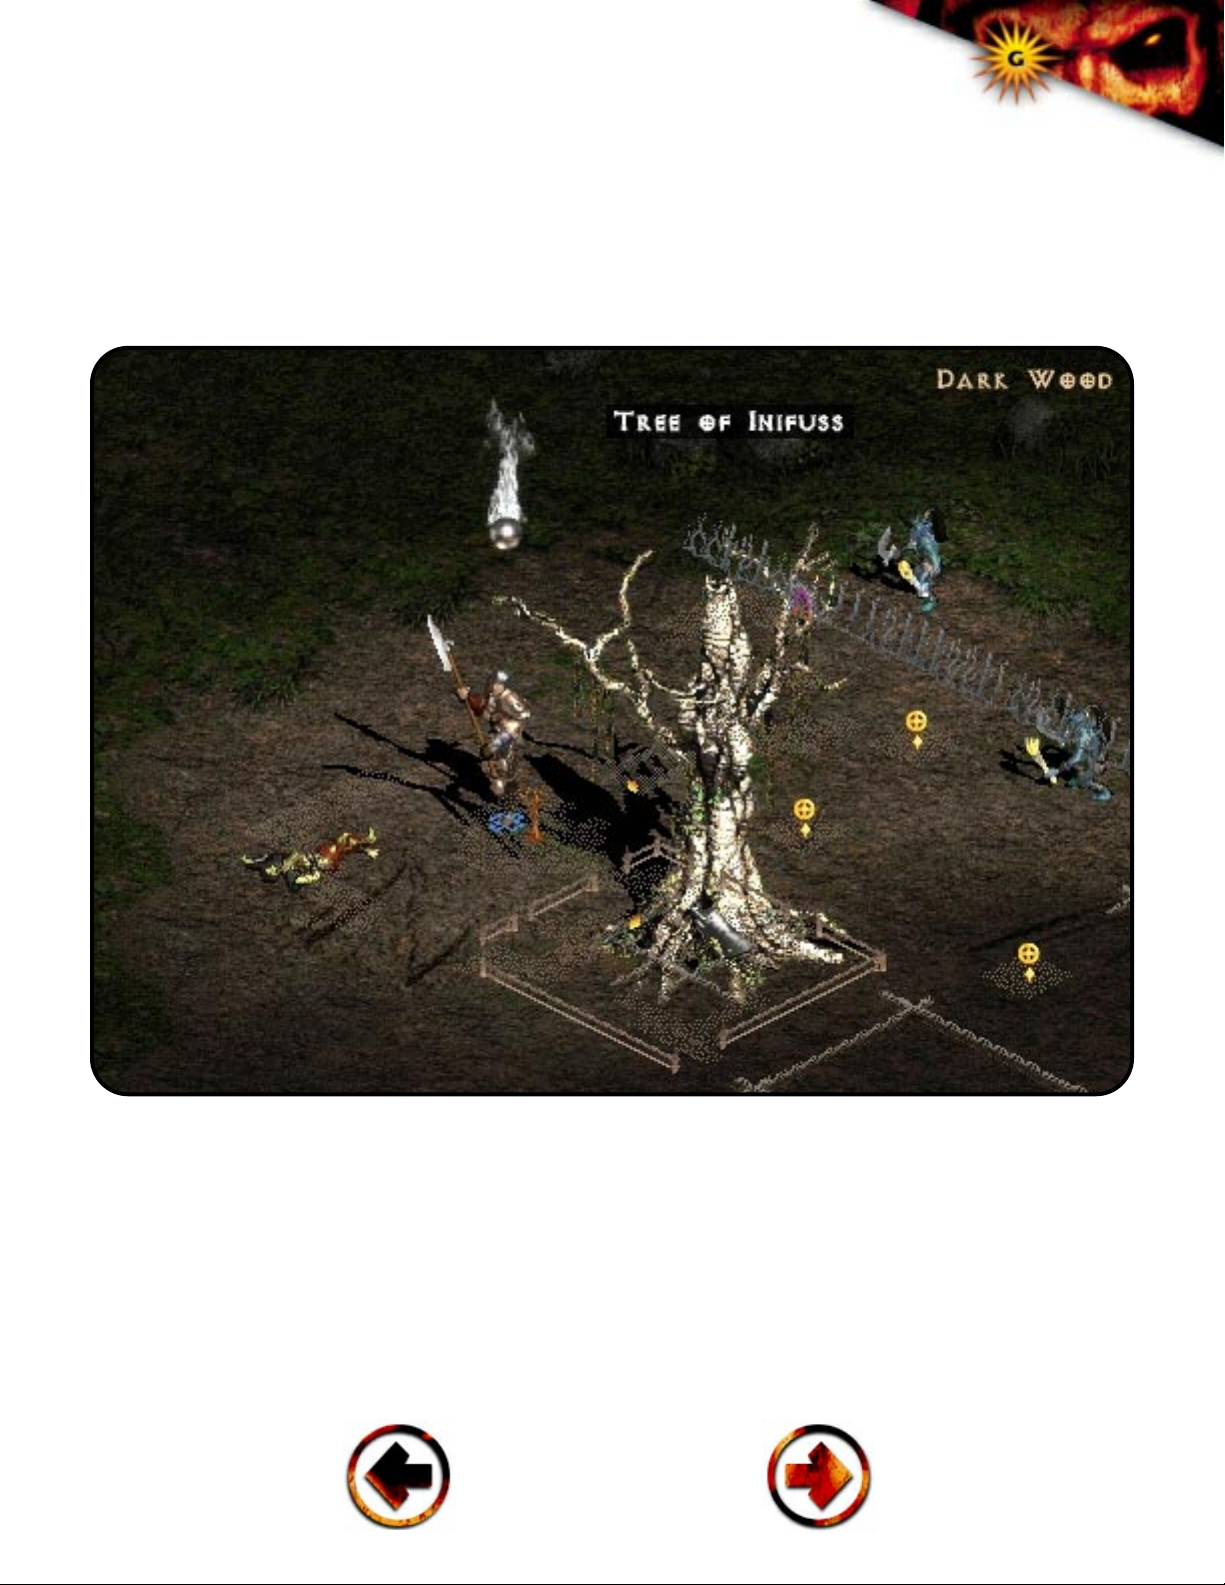
DIABLO II OFFICIAL GAMESPOT GAME GUIDE
76
Act I Bestiary: Corrupt rogues litter the landscape surrounding the rogue encamp-
ment. The corrupt rogues appear in many formats (hunter, lancer, and archer - depending
on the weapon held - prefixed each with black, dark, or vile) and resemble the tough Act I possess Blood Raven and The Countess. Alone the corrupt rogues aren't too tough, but they're
often in groups - further, the archers are often supporting the hunter and lancer melee rogues!
Lure the hunter and lancers away from the ranged attackers if possible.
Locate the Tree of Inifuss in the dark wood.
ACT I, QUEST III LOG ENTRY #2: TAKE THE SCROLL OF INIFUSS TO AKARA.
With the bark scroll in hand, it's time to return to the rogue encampment and show the scroll to
Akara. You're fairly far from town, so it's much more likely that you'll want to use a shortcut,
either a town portal scroll or a waypoint. Since your next destination (after the rogue
Page 77

DIABLO II OFFICIAL GAMESPOT GAME GUIDE
77
encampment) is the stony field, a town portal won't be as cost effective as simply
finding the waypoint. If you are healthy enough (and have health potions available), consider exploring dark wood to locate the waypoint and defeat the native creatures. Tristram is
tough; the higher your level and the better your equipment, the easier your journey to Tristram
will be.
UNIQUE MONSTER: In the dark wood, you'll encounter Treehead Woodfist, an extra fast and
extra strong unique monster. Extra fast doubles Treehead's (and its minions) attack rate, while
extra strong increases damage and to-hit percentage by 25.
The bark scroll is useless until you return and show it to Akara. Once inside the rogue encampment, approach Akara and speak with her. Akara translates the runes and returns the scroll to
you. Right-click on it to read the correct sequence of cairn stones to open the portal to Tristram.
ACT I, QUEST III LOG ENTRY #3: GO TO THE CAIRN STONES IN THE STONY FIELD.
Touch the stones in the order found on the scroll. Enter the portal to Tristram, but beware the
danger that lies ahead.
Once you return the bark scroll to Akara, you have the information required to activate the portal
to Tristram. Locate the cairn stones formation, positioned in the stony field. Open your inventory
while standing near the cairn stones. Right-click on the bark scroll to watch the correct sequence
of stones. Click on the cairn atones in the correct order to open a portal to Tristram. Should you
enter the incorrect sequence, the portal will not be opened. Start over again and complete the
full, correct sequence to open the portal.
ACT I, QUEST III LOG ENTRY #4: FIND AND RESCUE D
ECKARD CAIN.
Tristram is deadly - be prepared! Search Tristram to locate Cain's gibbet near the monster-infested center. Deckard Cain is currently kept in a hanging cage. Defeat the monsters surrounding
the cage and touch the cage to release the Horadrim sage. Once Cain is rescued, a town portal
opens to the rogue encampment. Follow Cain or remain and finish off the tough monsters crowding Tristram.
TIP: The third quest in Act I, the search for Cain, isn't necessary to complete in your eventual
goal to advance to Act II. However, there are some important consequences if you choose not to
rescue Deckard Cain yourself. If you choose not to rescue Cain, rogues automatically rescue him
when quest six is activated. Should rogues rescue him, Deckard Cain will charge you to identify
Page 78
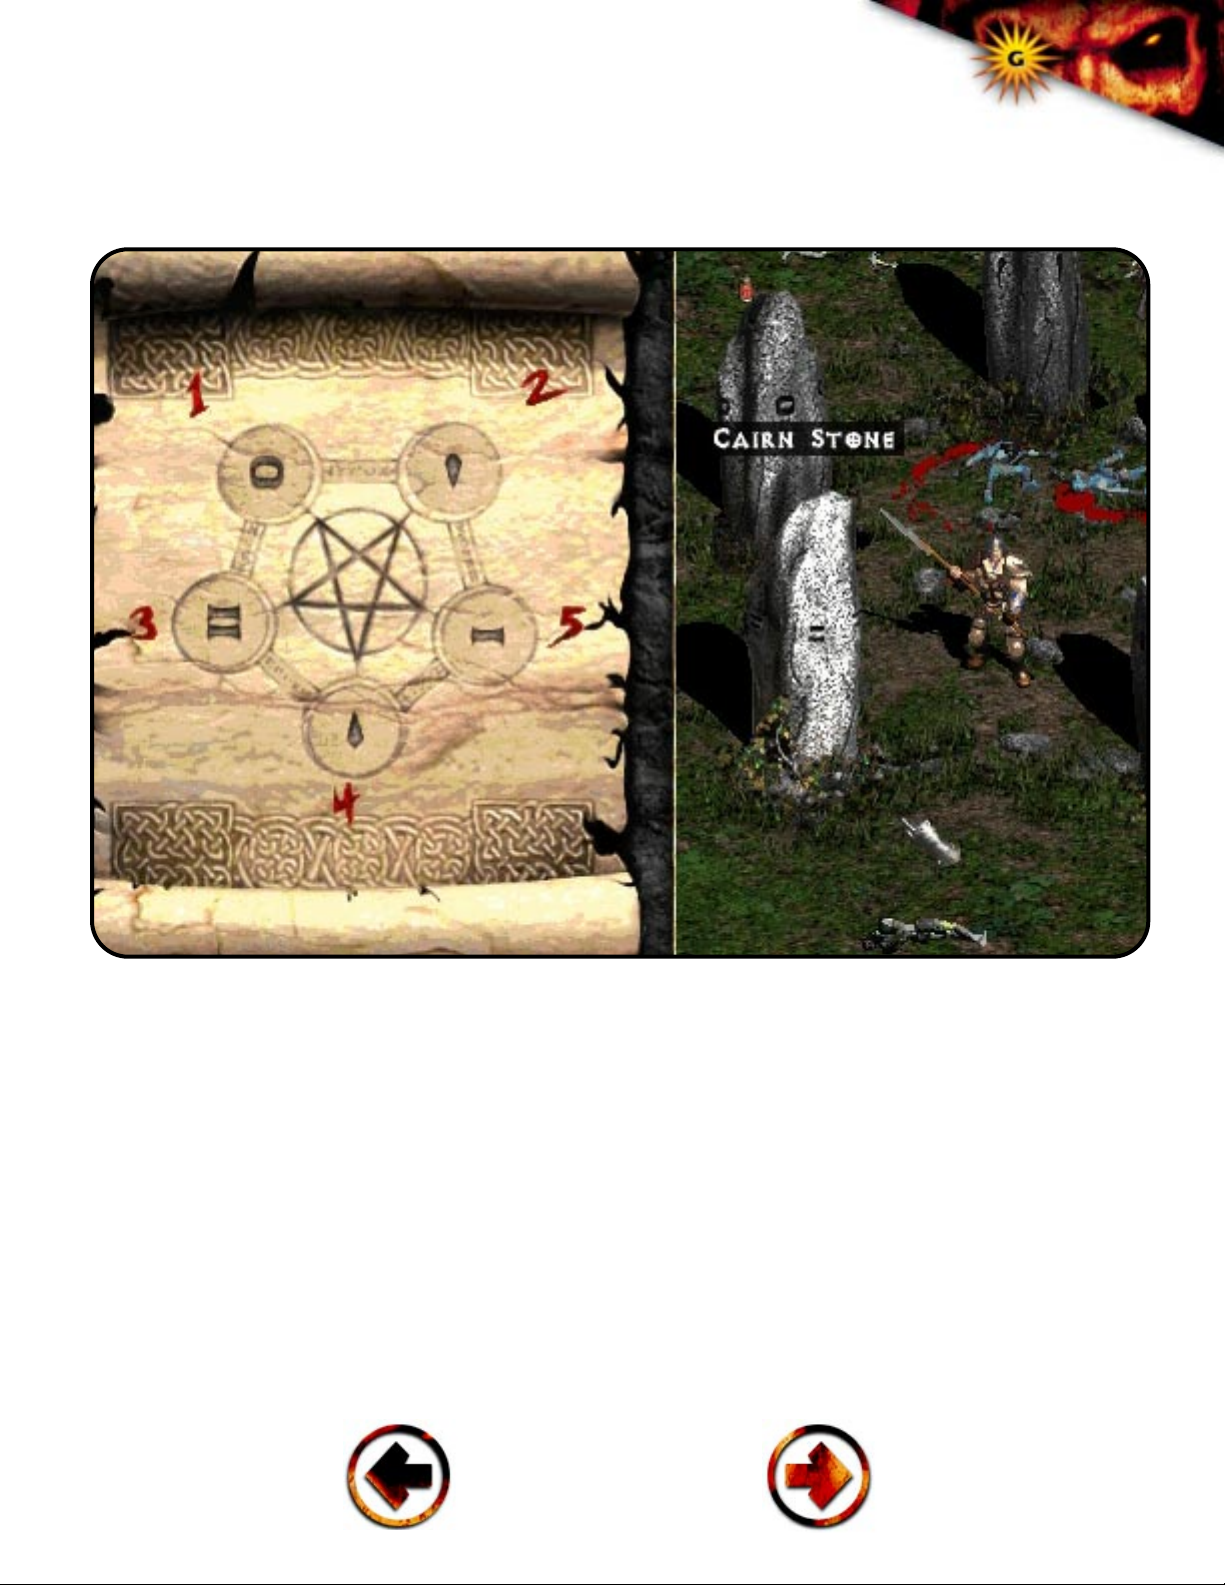
DIABLO II OFFICIAL GAMESPOT GAME GUIDE
78
items in the remainder of the Act I and all of acts II, III, and IV. If you do rescue
Cain, though, he'll identify items for free. There's no need to rush through Act I - take the
time to rescue Cain and reap the rewards of free item identification!
The bark scroll reveals the correct order of cairn stones to open the portal to Tristram.
UNIQUE MONSTER: You'll find cursed Griswold defending Deckard Cain's cage in Tristram.
ACT I, QUEST III LOG ENTRY #5: VISIT CAIN AND AKARA IN THE ROGUE ENCAMPMENT.
Rescuing Deckard Cain opens a town portal to the rogue encampment. Follow Cain into the portal to return to town. Locate Cain in the rogue encampment and speak with him to learn his story.
Cain reveals "our greatest fears," that Diablo has once again been set loose upon the world.
Diablo was slain beneath Tristram, and although there was a great celebration for the hero who
slew the lord of terror, the hero became increasingly depressed and eventually quite disturbed
Page 79

DIABLO II OFFICIAL GAMESPOT GAME GUIDE
79
and tormented. Eventually, the hero simply left; shortly thereafter, Tristram was
attacked by demons. Cain theorizes that Diablo has taken possession of the hero who
sought to slay him, which, if true, would make Diablo more powerful than ever before.
After speaking with Cain, locate Akara and initiate conversation to receive your reward for rescuing the Horadrim sage.
ACT I, QUEST III REWARDS
Completing the search for Cain grants both immediate and long-term rewards. Speak with Akara
and receive a magic ring. Rescuing Deckard Cain also means he won't charge the player to
identify magic items for the remainder of the game. Simply return to town (via town portal, waypoint, or walking) and locate Deckard Cain. Speak with him and select Identify Items, and he'll
identify all items in your inventory at no cost. Fail to complete the search for Cain quest by the
time the sixth quest in Act I is activated means that Deckard Cain will charge for item identification for the remainder of the game.
ACT I, QUEST IV: THE FORGOTTEN TOWER
To activate the fourth quest in Act I, locate the moldy tome, which you'll find in the stony field.
The moldy tome appears on the automap, appearing like a smaller version of its real self on the
game screen. Scout the stony field and locate the moldy tome. The quest is activated as soon as
you click on the moldy tome and read its contents. You can also activate the quest by locating
the entrance to the forgotten tower, found in the black marsh.
ACT I, QUEST IV OBJECTIVE FROM THE MOLDY TOME
"...And so it came to pass that the Countess, who once bathed in the rejuvenating blood of a
hundred virgins, was burned alive. And the castle in which so many cruel deeds took place feel
rapidly to ruin. Rising over the buried dungeons in that god-forsaken wilderness, a solitary tower,
like some monument to Evil, is all that remains. The Countess' fortune was believed to be divided among the clergy, although some say that more remains unfound, still buried alongside the
rotting skulls that bear mute witness to the inhumanity of the human creature."
ACT I, QUEST IV LOCATION
You'll find the moldy tome, which activates the quest, in the stony field. The tower entrance,
which can also activate the quest, is located in the black marsh. To reach the black marsh from
the rogue encampment, head into the blood moor, then the cold plains, then the stony field
(where the moldy tome is located), through the underground passages, into the dark wood, and
Page 80

DIABLO II OFFICIAL GAMESPOT GAME GUIDE
80
finally into the black marsh. Naturally, your journey can be shortened considerably
by activating the waypoints, particularly the one in the dark wood during your search for the
Tree of Inifuss. Finally, your eventual target, the Countess, is found inside the tower cellar,
level 5.
RECOMMENDED LEVEL TO COMPLETE ACT I, QUEST IV
Five dungeon levels inside the forgotten tower provide quite a challenge, especially considering
your nearest waypoint lies back in the black marsh. Unless you're prepared to use many town
portal scrolls, advance to around level 8 or 9 before venturing inside the forgotten tower. The
tower cellar levels provide a lot of area to spend eliminating monsters and gaining experience.
Don't rush through the tower; take the time to eliminate as many creatures as possible to gain as
much experience, levels, and equipment as possible.
ACT I, QUEST IV LOG ENTRY #1: LOOK FOR THE TOWER IN THE BLACK MARSH BEYOND THE DARK WOOD.
After activating the quest in the stony field by reading the moldy tome, use the waypoints to
return to the dark wood (if you activated the waypoint during the search for Cain quest). Once in
the dark wood, locate the path into the black marsh and find the forgotten tower entrance along
the rocky boundary. Alternatively, you can simply follow the path from the stony field into the
black marsh; from the stony field, head into the underground passage, emerge in the dark wood,
and enter the black marsh.
Once inside the forgotten tower, explore the dungeon cellar levels and continue to descend until
you reach the bottom floor, level 5. Don't rush through the tower; take time to acquire experience
points and advance levels before your confrontation with the Countess. Backtracking out of the
tower cellar levels can be fairly time consuming, so be prepared to use town portal scrolls to
return to town for healing (speak with Akara), identifying new items (speak with Deckard Cain, if
you completed quest three), trading found items for gold, and purchasing new weapons, armors,
potions, and scrolls.
ACT I, QUEST IV LOG ENTRY #2: DISPOSE OF THE EVIL COUNTESS.
As soon as you enter level 5 of the tower cellar dungeon, you receive a new entry in your quest
log: Eliminate the Countess. The Countess is a powerful unique dark hunter and located in a
dead-end room of the fifth tower cellar level. Behind the Countess lies a special chest activated
as soon as you eliminate the evil dark hunter. Attempt to lure out the beasts protecting the
Countess before confronting her. The Countess' close-range fire attacks are deadly; if you're not
equipped with range or spell weaponry, prepare to use hit and run attacks to stay alive and
healthy.
Page 81

DIABLO II OFFICIAL GAMESPOT GAME GUIDE
81
UNIQUE MONSTER: The Countess is fire enchanted, giving her fire damage and a
75 percent resistance to fire attacks.
Completing the fourth quest in Act I isn't necessary to advance into Act II, but with five levels of
tower cellar to explore, you'd miss out on an enormous amount of experience and potential
equipment. Bypassing quests such as "The Forgotten Tower" could make completing Act I more
difficult because you won't be powerful enough to take on the first act's final boss, Andariel.
Further, to activate quest five, you must complete "The Forgotten Tower".
ACT I, QUEST IV REWARD
Though you won't receive any rewards in the rogue encampment for defeating the Countess, a
special chest, located in the tower room which houses the Countess, activates upon the
Countess' death offering a wealth of reward.
Act I Bestiary: Beware of the ghosts and wraiths in Act I; these spectral beasts can drain mana
with hits, potentially deadly to a mana-dependent character such as the sorceress. Ghosts and
wraiths are damage resistant (20 and 30 percent respectively), magical resistant (20 and 30 percent respectively) and poison resistant (both 50 percent).
ACT I, QUEST V: TOOLS OF THE TRADE
To activate the fifth quest in Act I, speak with Charsi, the blacksmith, in the rogue encampment.
You must have completed quest four, the forgotten tower, to activate the fifth quest.
ACT I, QUEST V OBJECTIVE FROM CHARSI
"When I fled the Monastery, I left behind my Horadric Malus, an enchanted smithing hammer. If
you retrieve it for me, I will use its magic to strengthen your equipment."
ACT I, QUEST V LOCATION
Completing this quest is quite an undertaking and takes you far from the rogue encampment into
the wilderness and finally into the monastery and its barracks. To reach the monastery, you must
first return to the black marsh. If you've previously activated the waypoints in the black marsh or
dark wood, which is positioned just adjacent to the black marsh, use the waypoint system to
instantly travel from the rogue encampment into the black marsh. Should you need to make the
journey on foot, head from the rogue encampment into the blood moor, to the cold plains, the
stony field, through the underground passage, into the dark wood, and finally the black marsh.
Page 82
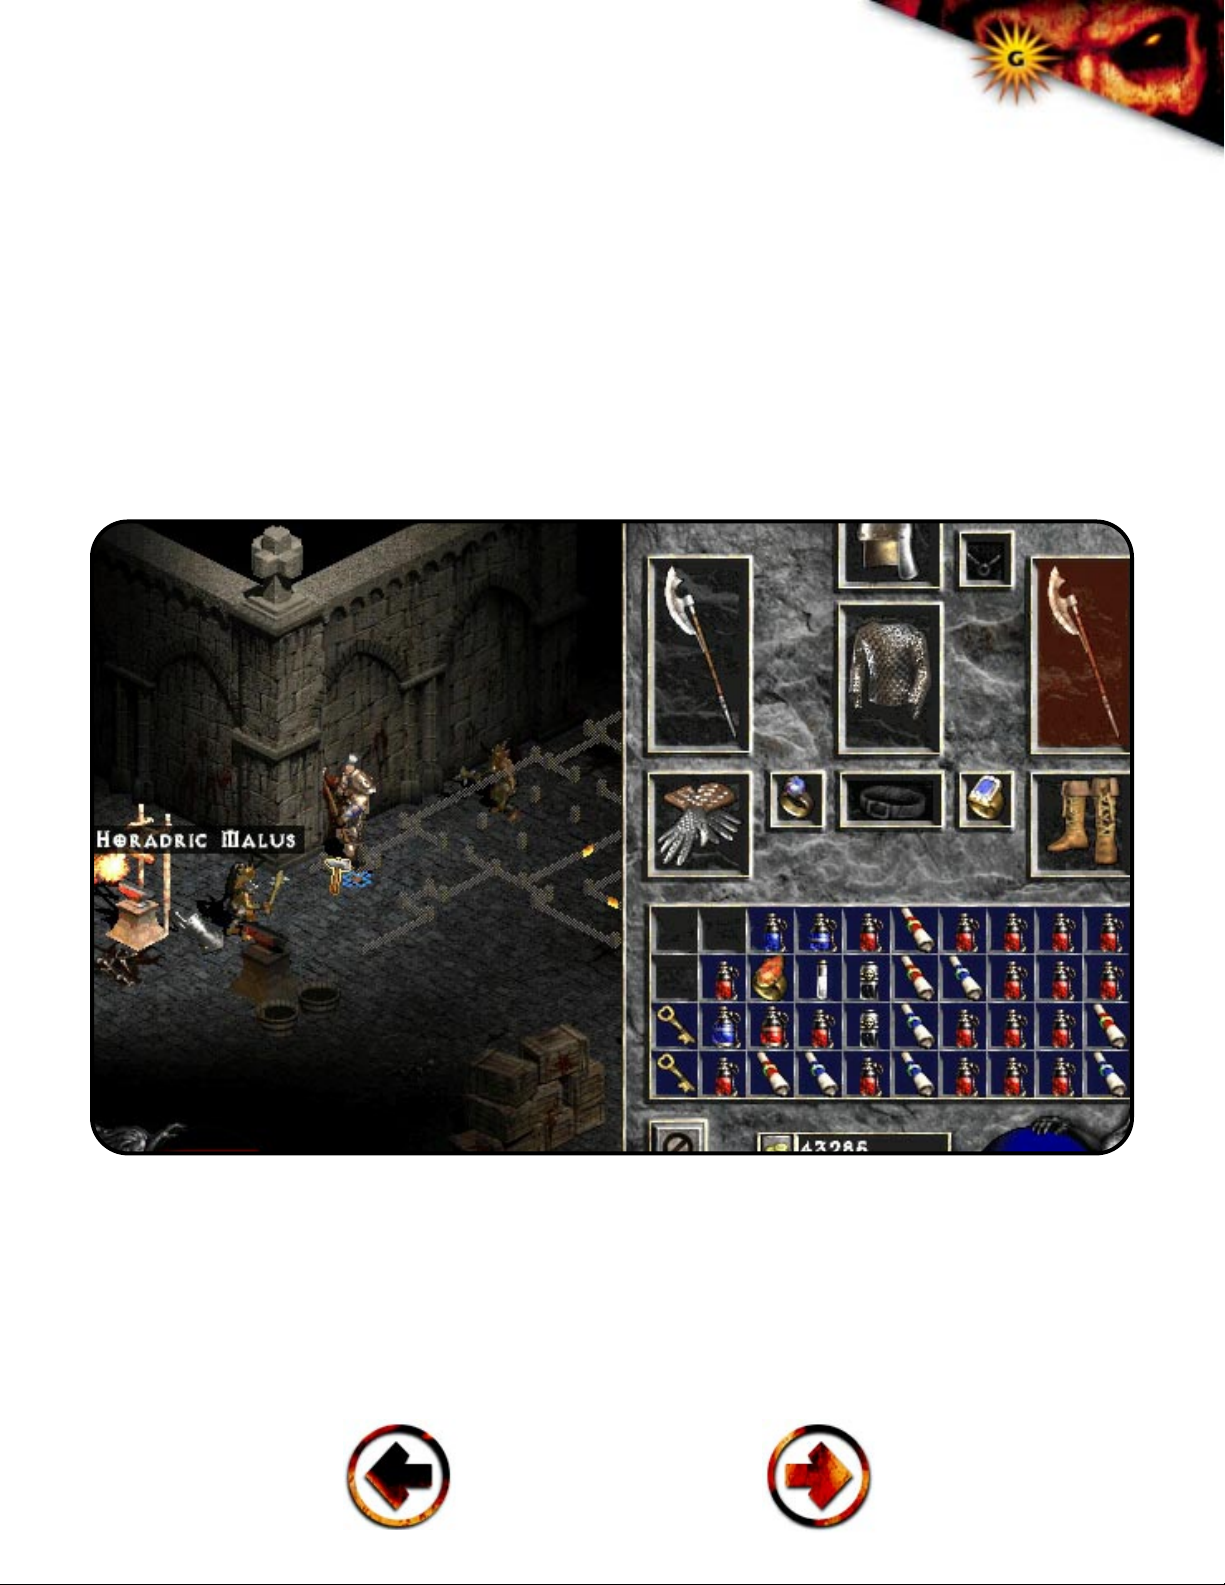
DIABLO II OFFICIAL GAMESPOT GAME GUIDE
82
From the black marsh, locate the entrance into the Tamoe highland then into the
monastery gate, the outer cloister, and finally the barracks. You'll find the Horadric malus
protected by the Smith in the barracks.
RECOMMENDED LEVEL TO COMPLETE ACT I, QUEST V
Recovering the Horadric malus is a long, difficult journey that takes you through several dangerous new areas, the Tamoe highlands, monastery gate, outer cloister, and barracks. Activate the
waypoint in the outer cloister to make a return to the rogue encampment (for healing, identifying
items, or buying and selling items) much easier. Otherwise, be prepared with town portal scrolls
in case the danger becomes too great. Ideally, you should strive to be between level 10 and 12
before taking the journey into the monastery.
You'll find the Horadric malus in the monastery barracks, protected by the unique monster, the Smith.
NOTE: The tools of the trade quest will only be activated if your character is level 8 or higher.
Though you could possibly complete the quest at level 8, recovering the Horadric malus will
prove quite difficult.
Page 83

DIABLO II OFFICIAL GAMESPOT GAME GUIDE
83
ACT I, QUEST V LOG ENTRY #1: LOOK FOR THE HORADRIC MALUS IN THE MONASTERY BARRACKS. BEWARE OF THE SMITH THAT GUARDS IT.
Make the journey into the monastery, which lies adjacent to the Tamoe highlands. Use the waypoint system to journey from the rogue encampment into the black marsh. From there, proceed
into the Tamoe highlands, through the monastery gate, and into the outer cloister. Locate the
waypoint in the outer cloister before proceeding into the barracks; that way, you can retreat out
of the barracks and use the waypoint to return to the rogue encampment without using town portal scrolls. Alternatively, just stock up on town portal scrolls and use them once inside the barracks to prepare for your battle against the Smith.
UNIQUE MONSTER: The intimidating Smith protects the Horadric malus. The Smith is extra
strong, giving him additional damage and to hit-percentage.
The Smith protects the forge setpiece that contains Charsi's Horadric malus. The Smith, a large
unique monster, is classified as extra strong, making him quite durable to your weaponry. His
size and strength make him a bit sluggish, however; your best option is to use hit-and-run (or
ranged, as the case may be) attacks against him. Trying to stand in toe to toe will prove quite difficult because of the Smith's durability. As you should against any unique boss monster, attempt
to clear out the area of lower beasts and minions before tackling the tough boss.
Once you take down the Smith, locate the forge behind his starting location and grab the
Horadric malus. Make sure you have the inventory slots available to hold the hammer weapon.
ACT I, QUEST V LOG ENTRY #2: RETURN THE HORADRIC MALUS TO CHARSI.
After defeating the Smith, you can recover the Horadric malus from the forge. Use a town portal
scroll to head back into the rogue encampment and speak with Charsi. Alternatively, use the
waypoint in the outer cloister to instantly travel back into the rogue encampment.
ACT I, QUEST V LOG ENTRY #3: CHARSI WILL IMBUE AN ITEM WITH MAGICAL POWER.
Returning the Horadric malus to Charsi activates the final entry in the fifth's quest log. Charsi
tells you, "Oh, thanks so much for returning the Horadric Malus. I will now imbue one of your
items with magical power." Speak with Charsi and carefully select one of your items to receive
magical abilities. Naturally, you should choose something useful to your current character. For
Page 84

DIABLO II OFFICIAL GAMESPOT GAME GUIDE
84
instance, if you're a Barbarian using skill points in sword mastery, you should imbue
a sword. Or, if you're an Amazon concentrating on bow and crossbow skills over javelin
and spear skills, you should select a bow or crossbow to imbue.
ACT I, QUEST V REWARD
Upon returning the Horadric malus to Charsi, she will add magical abilities to one item, which
could include a weapon, shield, gloves, boots, armor, or helmet. You can't imbue unique, rare,
set, thrown, or jewelry items. In multiplayer games, everyone in the party when the Horadric
malus is returned receives the reward.
Act I Bestiary: You'll find Goatmen scattered around Act I - moon clan, night clan, and blood clan.
Expect quite a fight as each carries double-digit hit-points and they're frequently in groups.
TIP: It's not mandatory to return the Horadric malus to Charsi or receive the reward. In fact,
you can hold onto the Horadric malus and your reward until a later act where you would have
access to bigger and more powerful weapons, armor, and items. Certainly choosing to receive
the reward and imbue the item now will make the battle against Andariel, which completes the
sixth quest and Act I, potentially easier.
ACT I, QUEST VI:
S
ISTERS TO THE SLAUGHTER
Activate the sixth quest in Act I by speaking with Deckard Cain, who will appear in the rogue
encampment if you rescue him from Tristram in the third quest or by the rogues once you complete the other quests.
ACT I, QUEST VI OBJECTIVE FROM CAIN
"It is certain that we face the demon queen Andariel, who has corrupted the rogue sisterhood
and defiled their ancestral monastery. This does not bode well for us, my friend. Ancient Horadric
texts record that Andariel and the other lesser evils once overthrew the three prime evils, Diablo,
Mephisto, and Baal banishing them from Hell to our world. Here, they caused mankind untold
anguish and suffering before they were finally bound within the soulstones. Andariel's presence
here could mean that the forces of Hell are once again aligned behind Diablo and his brothers. If
this is true, then I fear for us all. You must kill her before the Monastery becomes a permanent
outpost of hell and the way east lost forever."
Page 85
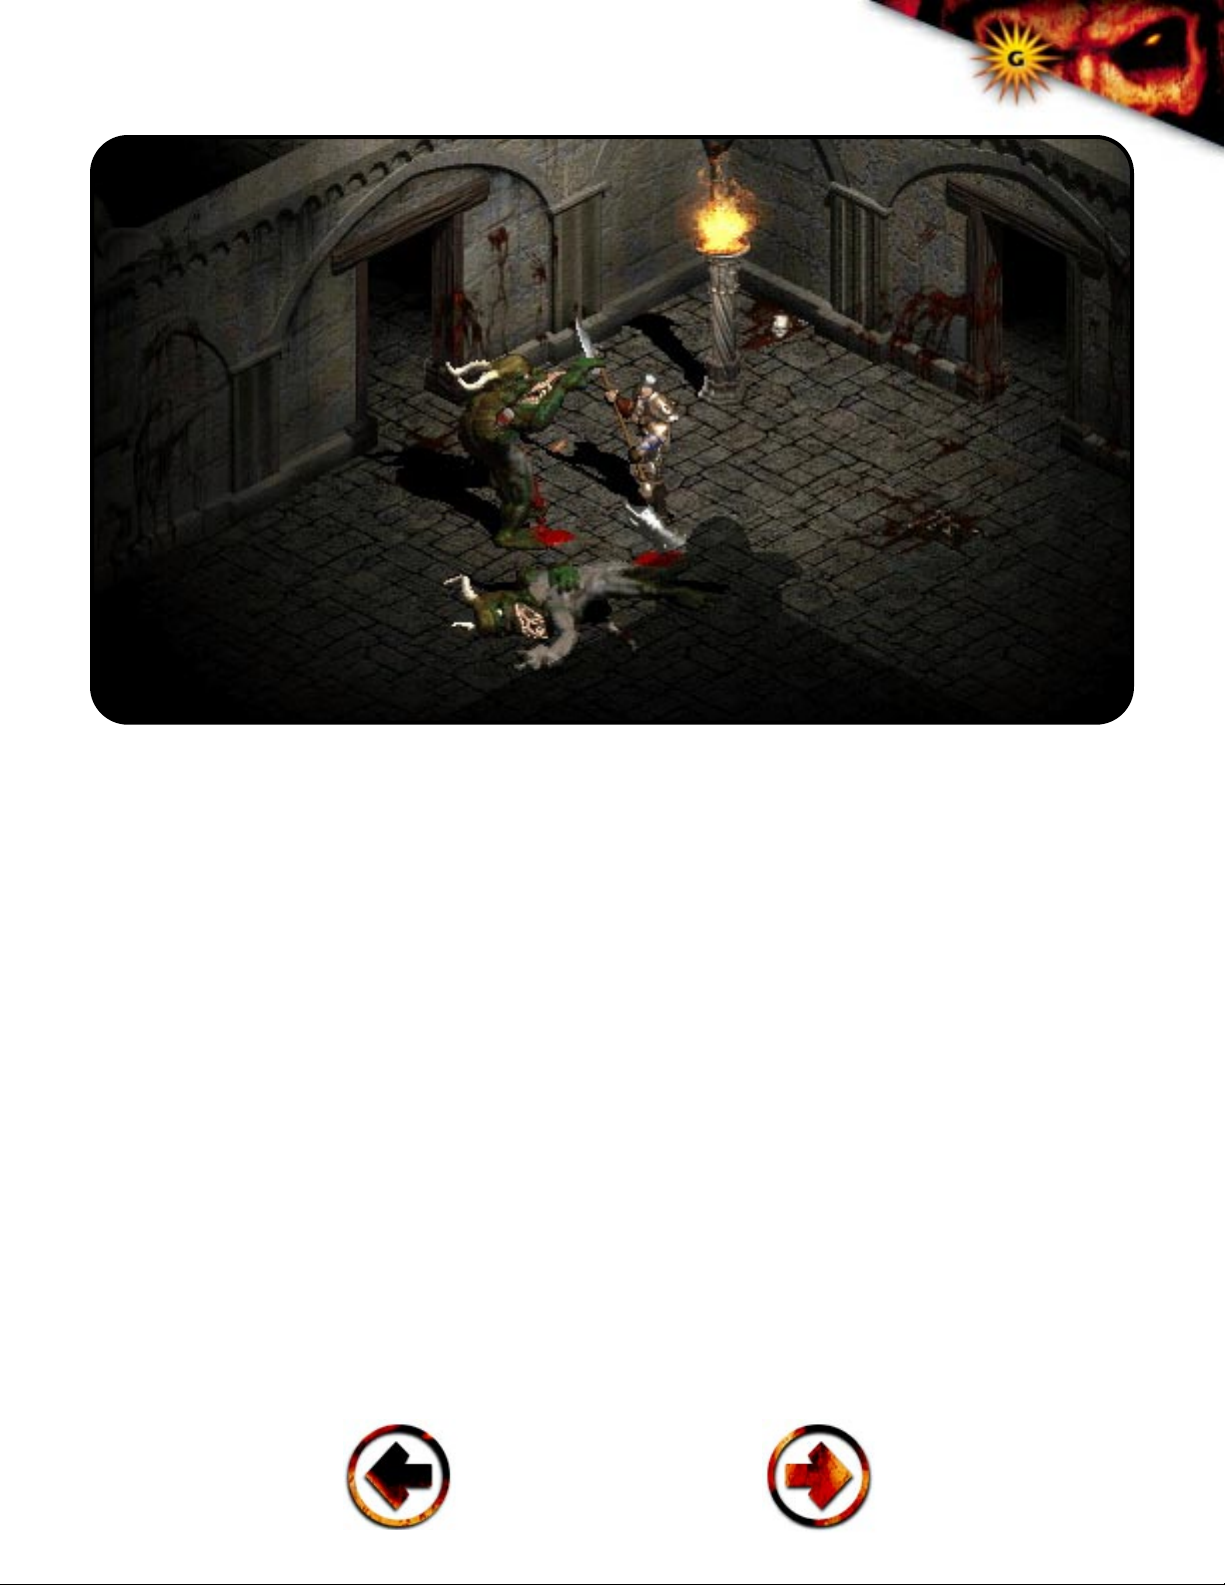
DIABLO II OFFICIAL GAMESPOT GAME GUIDE
85
Prepare for tough fights as you battle your way through the jail levels.
ACT I, QUEST VI LOCATION
Andariel can be found deep inside the cathedral catacombs beyond the monastery. It's a long
journey from the rogue encampment (and even from the monastery barracks), but one that
should prepare you well for Andariel - the long journey lets you gain experience and advance
levels to give you a fighting chance against the powerful Act I boss.
UNIQUE MONSTER: On the first level of the jail (enter through the barracks), you'll find Pitspawn
Fouldog, a cursed, cold-enchanted unique tainted. With a 75 percent resistance to cold attacks,
don't expect cold-enchanted weapons to have much effect on Pitspawn. The unique tainted can
also dish out heavy cold damage; prepare to take countermeasures if you're frozen, either with a
thawing potion or simply retreating!
To reach Andariel, you must first return to the monastery. Use the waypoint system to return to
the outer cloister, positioned between the barracks and monastery gate. Head into the barracks
and venture through the jail (three levels), into the inner cloister (a waypoint's located here),
through the cathedral, and into the catacombs (four levels). Andariel can be found on the fourth
level of the catacombs.
Page 86

DIABLO II OFFICIAL GAMESPOT GAME GUIDE
86
The full journey from the rogue encampment to Andariel is as follows: Rogue
Encampment to the blood moor to the cold plains to the stony plain to the underground
passages (two levels) to the dark wood to the black marsh to the Tamoe highlands to the
monastery gate to the outer cloister to the barracks to the jail (three levels) to the inner cloister to
the cathedral to the catacombs (four levels).
RECOMMENDED LEVEL TO COMPLETE ACT I, QUEST VI
Andariel is extremely powerful and certainly the toughest foe you have faced thus far. Since the
journey to Andariel takes you through many areas and dungeons, you should have plenty of
opportunity to improve your character's experience, level, skills, and equipment. You should ideally be around level 15 before facing off against the powerful Act I boss. Consider exploring any
areas you have overlooked thus far, such as the optional dungeons in the stony field (the cave)
and the burial grounds (the crypt and mausoleum) before venturing into the barracks. Naturally,
advancing additional levels could potentially make the battle even easier as long as you have
adequate weapons, armor, and useful skills.
UNIQUE MONSTER: Search for Flame Spike the Crawler inside the inner cloister. Flame Spike's
cursed and fire enchanted, giving him a 75 percent resistance to fire attack as well as bonuses to
fire damage.
ACT I, QUEST VI LOG ENTRY #1: FIND ANDARIEL'S LAIR IN THE DEPTHS OF THE MONASTERY CATACOMBS.
Activate the quest from Deckard Cain, then use the waypoint system to travel from the rogue
encampment to as far as possible. If you completed the previous quests, you should have activated the waypoints in either the black marsh or the outer cloister. Follow the maps from either
into the monastery and its barracks. Work your way through the crowded jail and catacombs levels until you reach the fourth level of the catacombs, where you'll find Andariel's lair.
ACT I, QUEST VI LOG ENTRY #2: KILL ANDARIEL.
As soon as you reach the fourth level of the catacombs, a new entry appears in your quest log Andariel is nearby, and it's your duty to eliminate the abomination and clear the path east into the
second act of Diablo II. When you reach the fourth level of the catacombs, consider using a town
portal scroll to return to the rogue encampment to replenish your health, mana, and healing
potions. You should also prepare yourself for the battle with Andariel by improving your weapons
and armor.
Page 87
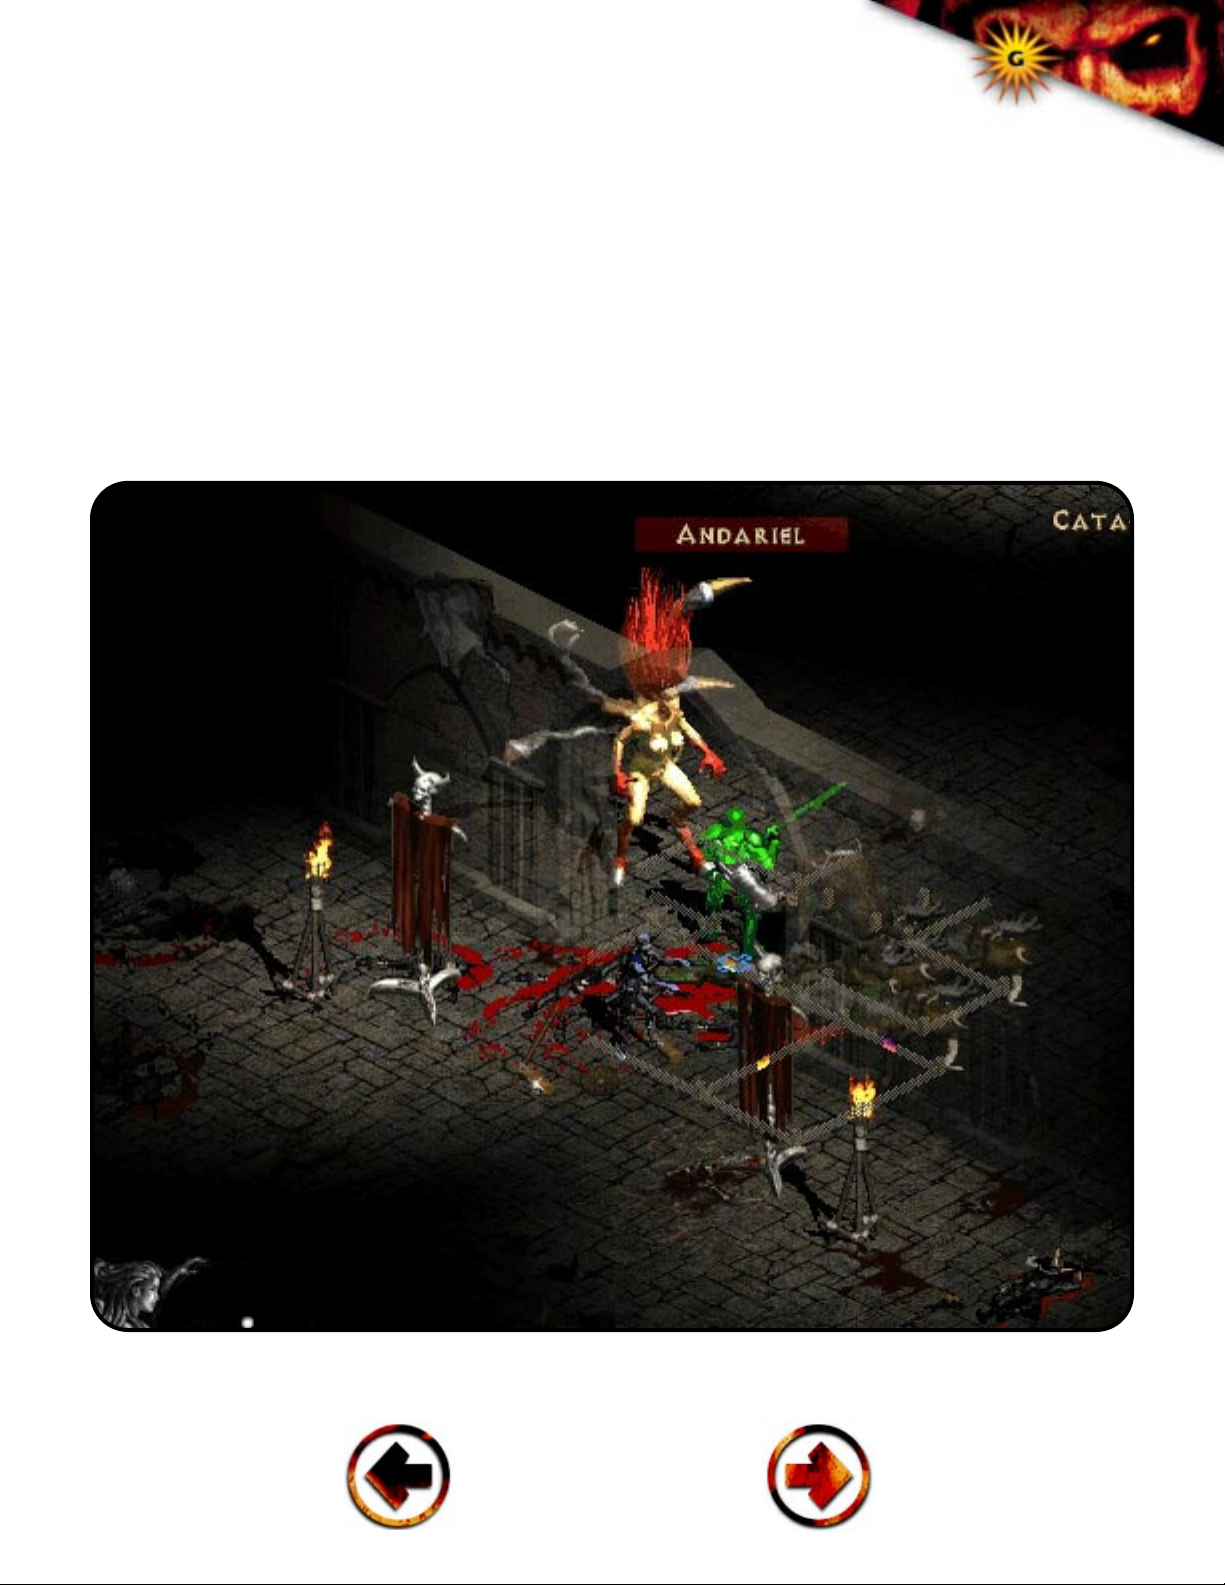
DIABLO II OFFICIAL GAMESPOT GAME GUIDE
87
UNIQUE MONSTER: Though the cathedral area is somewhat short, you'll still face
off against a tough beast. Search for the unique monster Bone Ash, who's cold enchanted,
extra strong, and carries magic resistance. The combination creates quite a monster! Don't
expect elemental attack to have much effect. If you're relying on such attacks, be prepare to hit
and run with abandon. Should you go toe-to-toe with a melee attack, carry plenty of healing
potions and retreat occasionally to replenish your health and mana and to wait out a frozen state.
Andariel implements a poison attack, so it's possible to improve your odds by using pieces of
armor that carries a resistance to poison. Also, any items that reduce the duration of poison
effects can also help alleviate the damaging results of Andariel's attacks.
Face off against Andariel to complete Diablo II's first act.
Page 88

88
DIABLO II OFFICIAL GAMESPOT GAME GUIDE
Andariel isn't immune to anything specific, so all attacks will be effective. It's defending yourself against her aggression that is often the problem. Make sure you're wellstocked with healing potions; if you're heavily dependent on mana, take along mana or rejuvenation potions to keep your mana supply high.
NOTE: Andariel possesses a 50 percent resistance to fire, lightning, and cold. She also pos-
sesses an 80 percent resistance to poison.
Perhaps the most important aspect of your battle against Andariel is to make every attempt to
clear out the creatures protecting her before advancing against Andariel herself. Lure the creatures away from Andariel and eliminate them before advancing against the Act I boss. Trying to
take on Andariel while all the other minions are thrashing about and causing you damage will be
much more difficult than taking on Andariel alone.
ACT I, QUEST VI LOG ENTRY #3: RETURN TO WARRIV TO TAKE THE CAR-
AVAN EAST.
After defeating Andariel, clear out her lair and collect the discarded items and gold. Finish off any
remaining creatures on the fourth level catacombs if you wish and return to the rogue encampment through the town portal created upon Andariel's death.
Act I Bestiary: Encountered a throbbing nest and not sure what to do? That's likely a foul crow
nest, which you'll find during your travels in Act I. The foul crow nests periodically spurts out foul
crow, which aren't especially tough (single-digit hit-points) but could overwhelm an unprepared
character. When you spot the foul crow nest, eliminate it quickly to avoid additional foul crows.
TIP: Before speaking with Warriv and heading east, take time to explore more of Act I, includ-
ing any optional dungeons or quests you overlooked before defeating Andariel. Act II's dangers
are considerably greater; if you can spend time gaining more levels (and potentially better equipment), don't hesitate to do so. At a minimum, you should be level 15 or higher before taking the
caravan east.
ACT I, QUEST VI COMPLETED MESSAGE FROM CAIN
"This is a great victory indeed, but many more battles await. I will accompany you on your journey, lending what assistance I can... Remember, Diablo is still out there, seeking something in
the desert. I'm afraid this nightmare will not end until you find what it is he seeks."
Page 89

DIABLO II OFFICIAL GAMESPOT GAME GUIDE
89
ACT I, QUEST VI REWARD
Other than the items dropped upon Andariel's death, you also receive a town portal returning
you back to the rogue encampment. Upon your return, speak with Deckard Cain and the others.
Head over to Warriv and speak with him to discover a new choice in his dialogue menu: Go East.
Select it, watch the Act II cinematic, and prepare for the next stage in your adventure!
Page 90
90
A
fter defeating Andariel and taking Warriv's caravan east, you arrive at the desert town of
Lut Gholein. The desert contains far more dangers than the wilderness that surrounded
the rogue encampment.
Your quests in Act II begin with Atma, a kind woman who
recently lost her husband and son to a demon making its lair
in Lut Gholein's sewer system. Discovering a way inside Tal
Rasha's tomb consumes most of the other Act II quests. In
piecing together the Horadric staff, said to be the key to entering Tal Rasha's tomb, you'll explore dungeons filled with
undead creatures, caverns overflowing with rampant bug
infestations, and an unusual world found beneath Lut
Gholein's palace.
Lut Gholein, like other towns, is occupied by several nonplayer
characters to offer quests and information and assist with weapons, armor, healing items, and
repair. Explore Lut Gholein to find:
Atma: Speak with Atma to receive the first quest in Act II, Radament's Lair. Radament is a
demon occupying the sewers beneath Lut Gholein and killed Atma's family.
Geglash: Geglash offers conversation and information.
Greiz: Use Greiz to hire mercenaries to assist your battles and quests in Act II.
Act II Waypoints
Lut Gholein
Sewers level 2
Dry hills
Halls of the Dead level 2
Far Oasis
Lost City
Palace Cellar level 1
Arcane Sanctuary
Canyon of the Magi
Page 91

DIABLO II OFFICIAL GAMESPOT GAME GUIDE
91
Elzix: Talk with Elzix to purchsae new weapons, armor, or magical weapons or
armor. Check with Elzix upon each return back to Lut Gholein to examine his current inventory. Also, players can gamble with Elzix on magical items, which will either be magical, rare,
unique or set items.
Lysander: Should you need healing and attacking potions (such as gas and exploding potions),
speak with Lysander. He also offers keys for sale should you discover any locked chests.
Fara: Find Fara upon each return to Lut Gholein for she will instantly heal your wounds and
replenish your mana supply. You can also purchase new weapons, armor, and magical weapons
and armor from Fara. Lastly, use Fara to repair damaged weapons and armor.
Drognan: Speak with Drognan if you need healing potions, town portal, and identity scrolls as
well as magic items, such as wands and staffs.
Meshif: Talk with Meshif at the end of Act II to take the transport into Act III. Meshif can also pro-
vide additional information and dialogue about current quests.
Deckard Cain: Cain follows you from the rogue encampment and can be used to identify items
(for free, if you rescued him during the third quest of Act I).
ACT II, QUEST I: RADAMENT'S LAIR
Activate the first quest in Act II by speaking with Atma in Lut Gholein. Completing this first quest
not only offers a substantial rewards, it also provides an easy bridge into the second - and most
important - quest in he act.
ACT II, QUEST I OBJECTIVE FROM ATMA
"In the sewers below our city, there lurks a horrid creature that hungers for human flesh. The
creature has killed many, including my son and my husband. If you destroy it, I will reward you.
Please be careful though, that beast has taken enough from us already. The sewer entrance is
through the trap door just up the street."
ACT II, QUEST I LOCATION
The sewers below Lut Gholein can be accessed in a couple of locations. You can use the trap
door inside town to reach the sewers. Or, look for the entrance at the edge of town that also
leads directly into the dangerous sewers. Radament will be found on the sewers' third level.
Page 92

DIABLO II OFFICIAL GAMESPOT GAME GUIDE
92
Act II Bestiary: The undead inhabiting Act II are significantly more impressive than their Act
I counterparts. Most include resistances to various elements and poison and some employ
powerful ranged weaponry. For instance, prepare to encounter the bone mage, burning dead
mage, and horror mage in fire, ice, poison, and lightning varieties. Each carries 50 percent resistance to poison (a staple of the undead) while others carry resistances to their respective elements. You'll find them employing special elemental attacks (depending on their type) and often
supporting melee undead, making them even more deadly and tough to reach.
RECOMMENDED LEVEL TO COMPLETE ACT II, QUEST I
Assuming you met the recommendation of level 15 upon defeating Andariel, you're in fairly good
shape to head into the sewers and seek out Radament. Ideally, you should be around level 16 or
17 before facing off against the sewer boss. Should you desire to level up, head out into the
desert surrounding Lut Gholein before diving into the sewers.
ACT II, QUEST I LOG ENTRY #1: FIND RADAMENT'S LAIR IN THE LUT GHOLEIN SEWERS.
Activate the quest by speaking with Atma, then locate your preferred entrance into the sewers either through the trap door inside Lut Gholein or the entrance just on the edge of town. Both are
sufficient and will take you to your eventual goal, Radament's lair on the third sewer level.
There's a lot of undead in the sewers. If you plan on using melee attacks, equip clubs or maces
(which do extra damage against undead monsters). Also, many undead creatures have poison
effects (including gas emissions upon death); wearing armor with poison resistance could help
considerably in keeping you healthy. Stock up on healing potions while in Lut Gholein to prepare
for your exploration of the large sewers.
UNIQUE MONSTER: Radament is extra fast, giving him bonuses to attack rate and velocity.
Carefully explore the second level of the sewers to locate the waypoint marker. Once you reach
the waypoint, head back into Lut Gholein and replenish your supply of potions and improve your
weaponry by speaking with Fara or Elzix. Radament's highly magic resistant and, if you let him
cast spells, will continue to raise additional undead warriors. Cold weapons and spells can be
used to slow down his actions while you finish him off with more powerful spells or melee and
ranged weapons.
Page 93
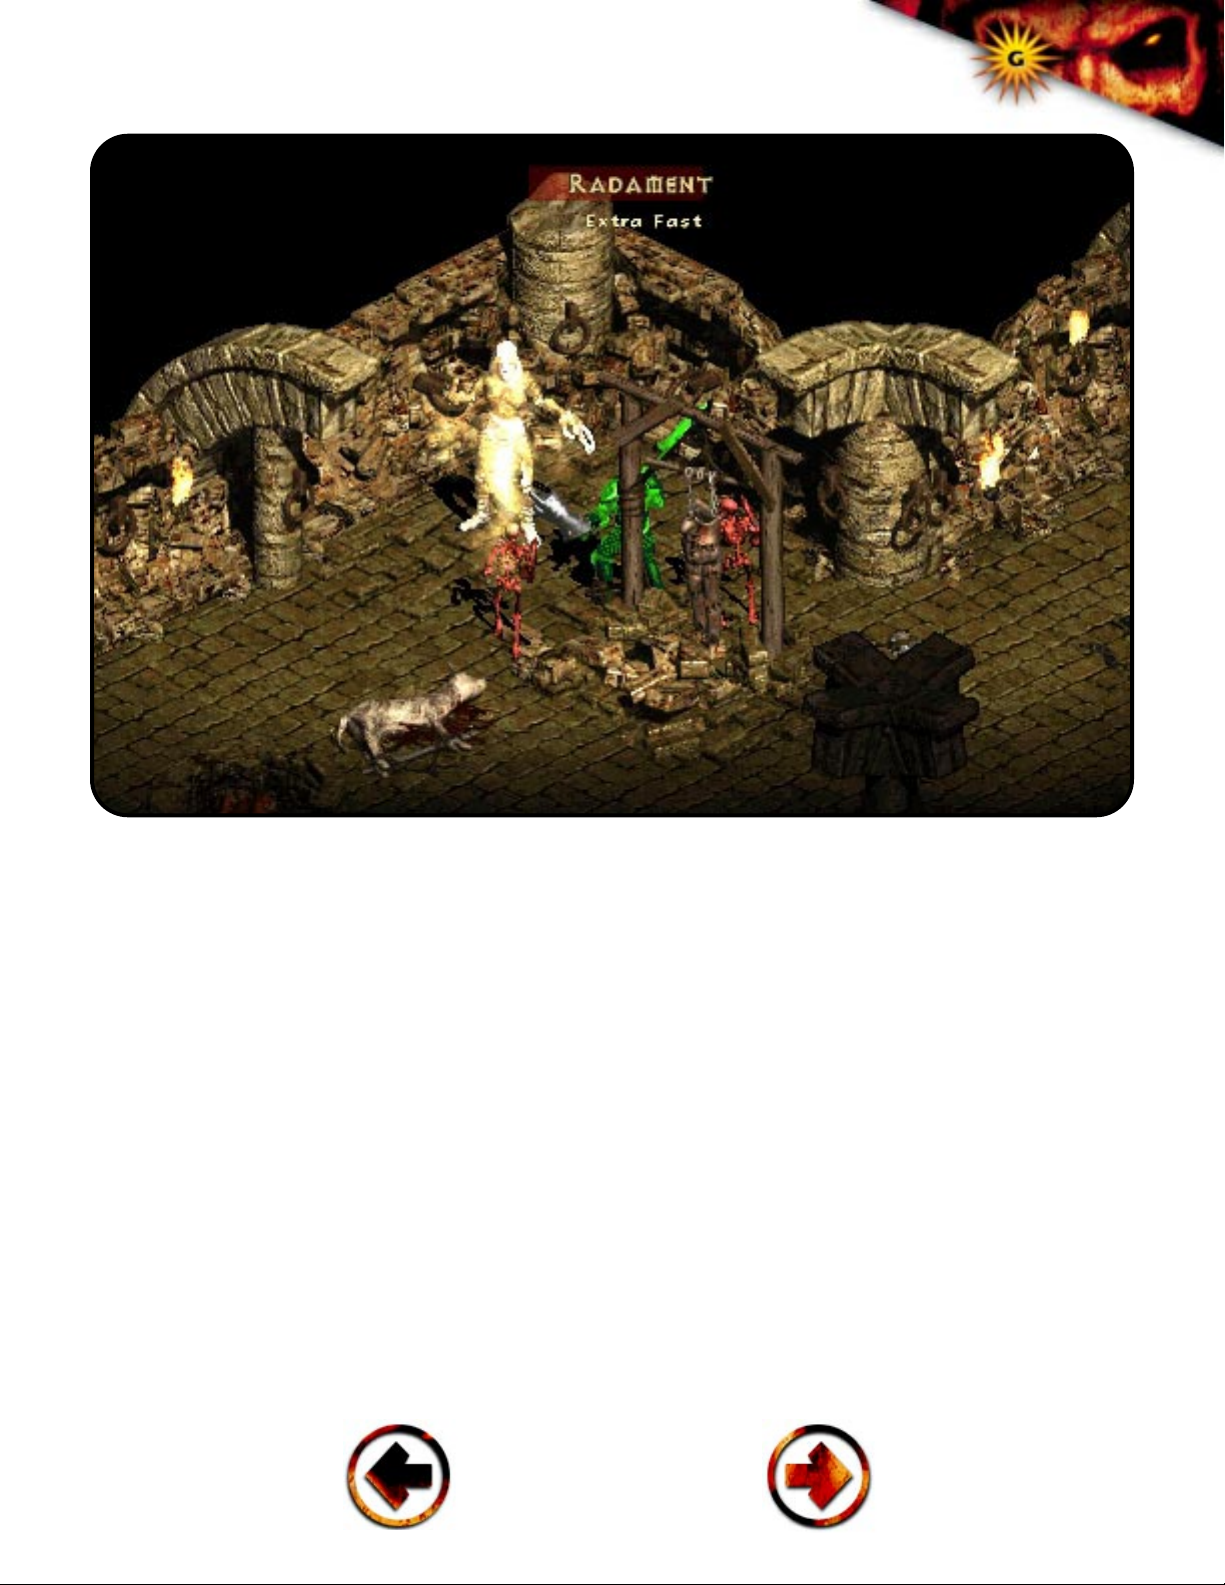
DIABLO II OFFICIAL GAMESPOT GAME GUIDE
93
Attack Radament quickly before the sewer boss starts raising the undead.
Act II Bestiary: Most of the dungeons in Act II contain mummies and greater mummies (hollow
one, unraveler, and so on) that operate much like the fallen and carvers in Act I. The greater
mummy will raise dead mummies (for which you won't receive experience in a second kill). To
make matters especially tough, the greater mummies are typically holed up behind a large wall of
mummy warriors. Eliminate the greater mummies as quickly as possible, not only to prevent the
raising of mummies, but to avoid the greater mummies' ranged spell, the unholy bolt.
ACT II, QUEST I LOG ENTRY #2: KILL RADAMENT.
Once you reach the third sewer level, your quest log is updated with a new entry - Radament's
lair is near, and it's time to terminate the demonic beast that killed Atma's husband and son.
Clear out most of the sewer's third level, but realize that a large force of undead mummies and
zombies will protect Radament. Further, Radament can raise the undead, blocking your path to
the sewer boss even more.
Page 94

DIABLO II OFFICIAL GAMESPOT GAME GUIDE
94
Melee fighters will likely have to pummel their way through the chunk of undead warriors to
reach Radament. Ranged players can stay out of Radament's range and work on terminating
the bulk of undead that surround the sewer boss. Spell casters might have an easier time, but
Radament is magic resistant, posing additional problems. Cold spells and weapons could be an
option, if they're available. Slowing down Radament's spell casting and his speed (he's extra
fast) can keep him within your melee attacks and spells and prevent him from raising additional
undead. Be prepared to protect yourself against poison effects unless you've boosted your resistance with a piece of magic armor or jewelry.
ACT II, QUEST I LOG ENTRY #3: RETURN TO ATMA FOR A REWARD.
Defeating Radament offers several rewards and important items. First, grab the book of skill
dropped upon Radament's death. Use the book to receive an additional skill point to use on the
skill tree. Second, look for the chest inside Radament's lair (you may have to defeat additional
undead to reach the chest). Inside, you'll find the Horadric scroll, an integral part of Act II's second quest - plus, picking up the Horadric scroll sets the second quest in motion.
Return up to the sewers' second level and use the waypoint to return to Lut Gholein. Naturally,
you can forgo the waypoint system and simply use a town portal scroll to appear in town, but
there's no reason to return to the sewers' third level, so it's unlikely you'd want to return. If you
found the waypoint on the sewers' second level, it's the best and most cost-efficient option.
ACT II, QUEST I COMPLETED MESSAGE FROM ATMA
"They say that the taste of vengeance is bittersweet, but I find it to my liking. In addition to my
undying gratitude, I have spoken on your behalf with the rest of the townspeople. The merchants
have agreed to show their gratitude by offering their wares at lower rates."
ACT II, QUEST I REWARD
Pick up the book of skill dropped by Radament upon his death. Use the book to receive a free
skill point to use on the skill tree. Speak with Atma, and the Lut Gholein merchants give discounts on their merchandise. For multiplayer games, the discounts are given to all players who
were in Radament's lair when he was killed. Finally, search for the marked chest in Radament's
lair to acquire the Horadric scroll, an important piece of Act II's second quest and one that will set
the quest in motion.
Page 95

DIABLO II OFFICIAL GAMESPOT GAME GUIDE
95
A
CT II, QUEST II: THE HORADRIC STAFF
The second quest in Act II (also, the most important in the act) can be activated by locating any
pieces of the Horadric staff and returning them to Deckard Cain in Lut Gholein. The easiest way
to activate the quest is by completing the first quest in Act II, Radament's lair, and obtaining the
Horadric scroll from the marked chest on the third level of the sewers. Return the scroll to
Deckard Cain to activate the quest.
Act II Bestiary: The "Swarm" monster class can be found in some of Act II's outer deserts. These
tight clusters of insects - including Act II's itches, black locusts, and plague bugs - are highly
resistant to physical damage with 60, 70, and 80 percent damage resistance respectively.
ACT II, QUEST II OBJECTIVE FROM CAIN
"Ahh... The lost Horadric Scroll! What a fortunate turn of events... As the last living Horadrim, I
alone have knowledge of its meaning. Now, to read the Horadric runes it bears... Hmmm... The
Horadric Mages, after binding Baal within Tal Rasha, magically sealed off his Burial Chamber
from the mortal realm. Those same Mages also crafted fearsome Horadric Staves and imbued
them with the special power to open the Chamber's hidden door. After nearly losing one to the
thievery of a rogue sorcerer, they divided all the Horadric Staves into two parts - wooden shaft
and metal headpiece - hiding them separately to safeguard them. The Horadrim foresaw our current plight and designed the hiding places to reveal themselves to worthy heroes like you. Collect
both parts of a Horadric Staff and unite them using a Horadric Cube. Then, you may enter Tal
Rasha's Burial Chamber."
ACT II, QUEST II LOCATION
The Horadric staff quest takes you all through the Act II maps. In fact, many elements of the
Horadric staff quest overlap with other quests you'll discover throughout the act.
The Horadric staff carries several important pieces, all located in a different area of Act II.
The Horadric Scroll: Though the scroll doesn't form part of the eventual staff, it's still the easiest
way to activate the quest. Locate the Horadric scroll in a marked chest near Radament's lair on
the third sewer level. Take the scroll to Deckard Cain to activate the Horadric staff quest.
Page 96
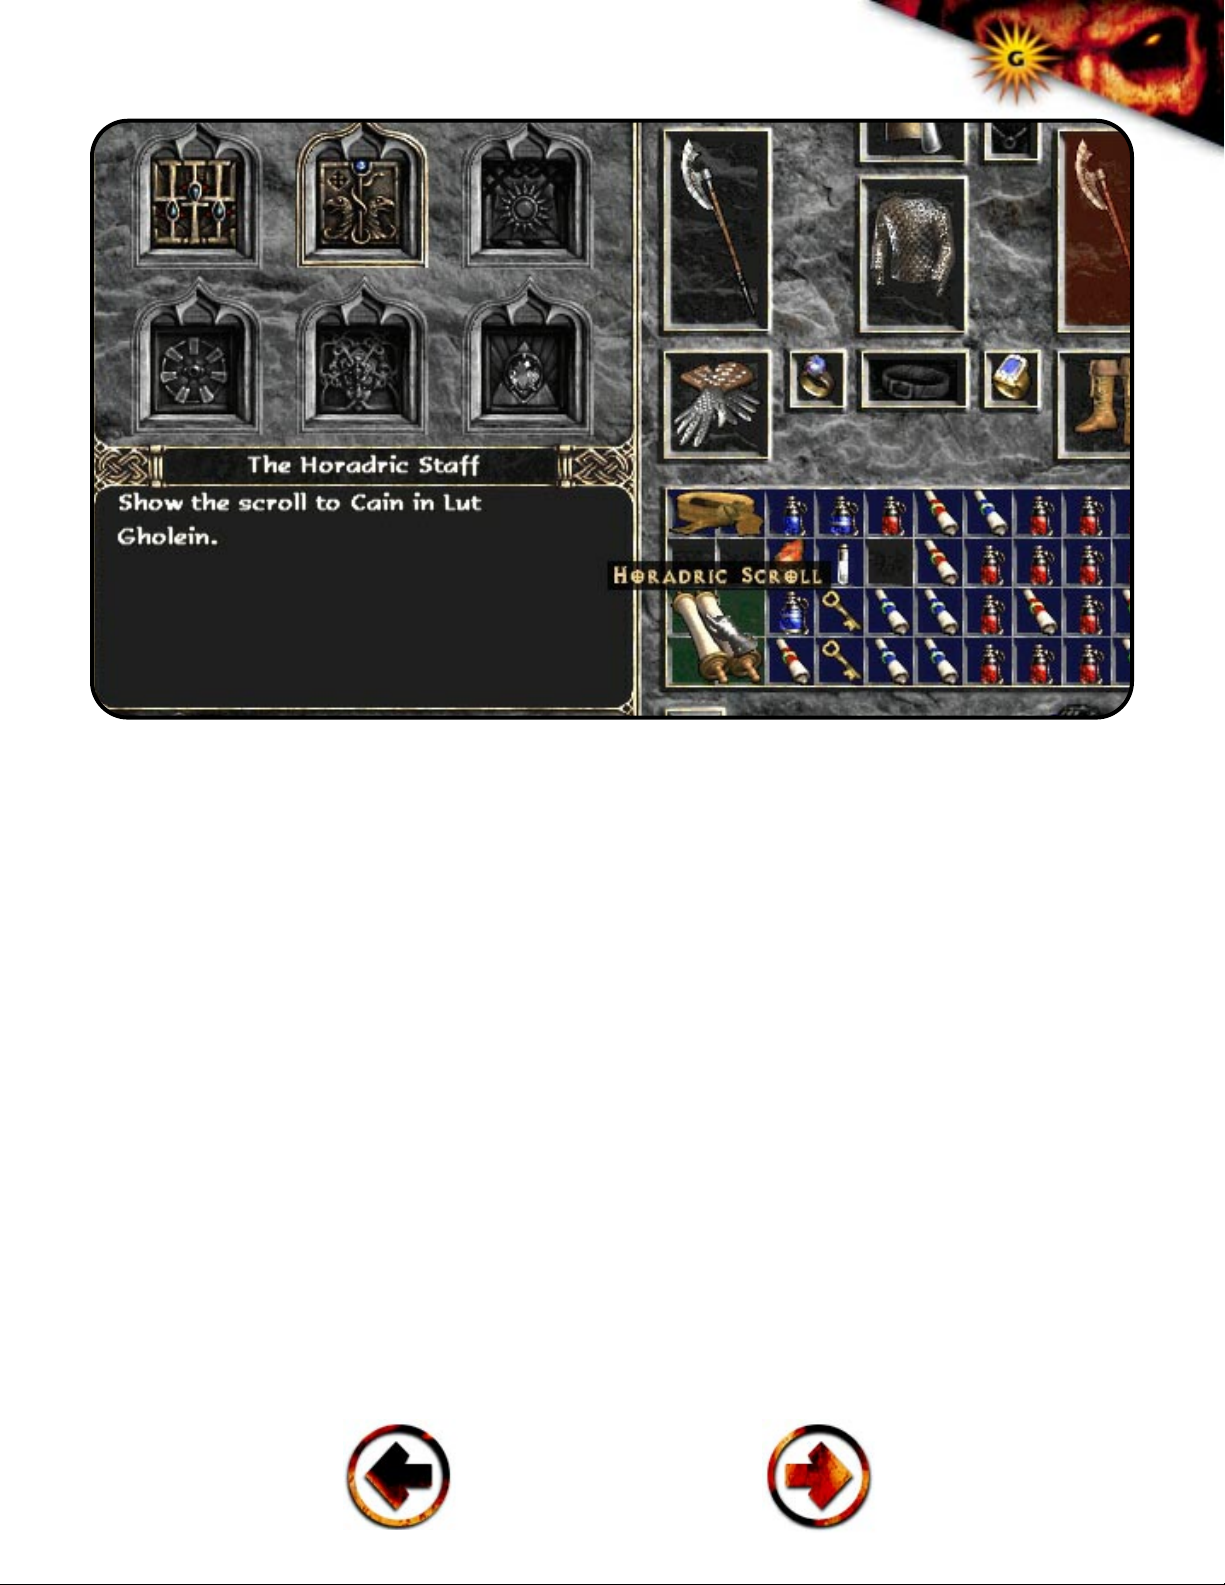
DIABLO II OFFICIAL GAMESPOT GAME GUIDE
96
Show the Horadric scroll to Cain to learn more about your quest.
The Horadric Cube: The cube is used to transmute the parts of the Horadric staff into a complete
whole. You can also use the Horadric cube to hold inventory items and transmute other items
(other than the staff items) into better items - you'll find some basics of transmuting with the
Horadric cube described later in this section. Locate the Horadric cube inside the halls of the
dead, level 3. To reach the halls of the dead dungeon starting in Lut Gholein, head into the rocky
waste, then the dry hills, then locate the staircase into the second portion of the dry hills, and find
the entrance into the halls of the dead. Descend to the third level to find the Horadric cube.
UNIQUE MONSTER: Inside the halls of the dead, level 3 protecting the Horadric cube, you'll
encounter Bloodwitch the Wild, an extra strong (increasing damage by three-fold and to hit percentage) and cursed huntress
The Horadric Shaft (also known as The Staff of Kings): The wooden shaft Deckard Cain spoke of in
the quest objective, the Horadric shaft, can be found in a marked chest inside the maggot lair,
level 3. To reach the maggot lair starting in Lut Gholein, head into the rocky waste, then the dry
hills, and into the far oasis. You'll find the entrance to the maggot lair in the far oasis area.
Page 97

DIABLO II OFFICIAL GAMESPOT GAME GUIDE
97
Horadric Amulet: Also known as the metal headpiece that Deckard Cain spoke of in
the quest objective, the Horadric amulet is found on the claw viper altar. You must destroy
the claw viper altar to acquire the Horadric amulet. Locate the claw viper altar (and hence, the
Horadric amulet) inside the claw viper temple, level 2. To reach the temple from Lut Gholein, proceed into the rocky waste, then the dry hills, then into the far oasis, then the lost city, then the
lost city's second area (use the staircase), then the valley of the snakes, and finally the claw
viper temple. Descend to the second level of the claw viper temple to find the altar and the
amulet.
RECOMMENDED LEVEL TO COMPLETE THE SEGMENTS
OF
ACT II, QUEST II
Since the second quest in Act II is divided into segments, it's important to realize that each segment offers unique challenges and escalating character strength. Many of this quest's goals
overlap with other quests in Act II; realize that before attempting to complete all the goals in the
second quest. Further, follow the order presented in the second quest log to basically follow the
level of difficulty in the quest. To finish the halls of the dead, you should be around level 17 or 18;
look to be level 18 or 19 before venturing inside the maggot's lair; and strive to be level 19 or 20
before exploring the lost city. Naturally, these are just recommendations, and if you spend additional time gaining experience, levels, and skills, you could have an easier time completing the
dungeons. On the other hand, it's possible to complete the quest at a lower level, but expect
quite a challenge.
UNIQUE MONSTER: Search the far oasis for Beetleburst, who's magic resistant (a 75 percent
resistance against elemental attack).
Act II Bestiary: The leapers! Though small and relatively harmless, these tiny critters can put up
quite a fight! The sand leaper, tomb creaper, and cave leaper are quite agile and can actually
leap over your character making melee attack (and even other means of attack) quite difficult. In
numbers, be prepared for a lot of back and forth attacking. One positive note, though, is that the
leapers can potentially take damage with each leap making your job easier if you can eventually
strike the target!
ACT II, QUEST II LOG ENTRY #1: SHOW THE SCROLL TO CAIN IN LUT GHOLEIN
After you defeat Radament in the sewers, level 3, search for the marked chest and grab the
Horadric scroll inside. Return to Lut Gholein, either via the waypoint on the second sewer level,
Page 98
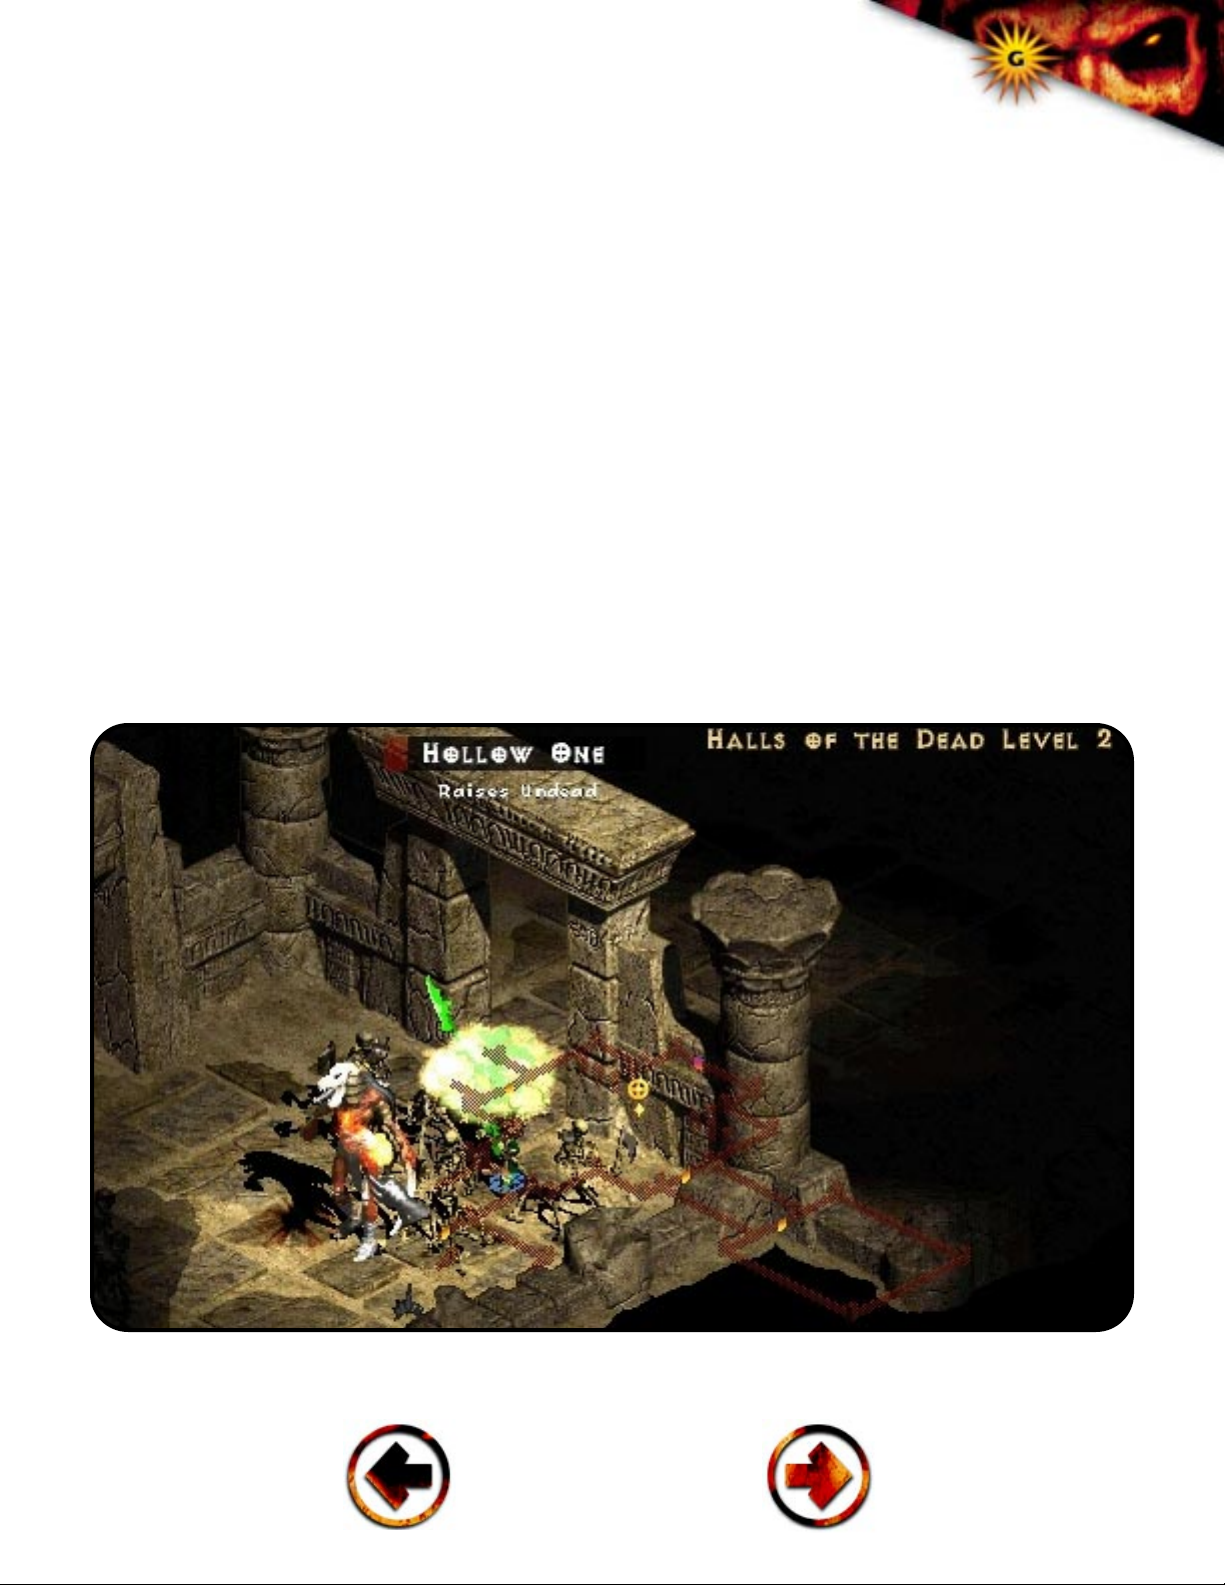
DIABLO II OFFICIAL GAMESPOT GAME GUIDE
98
town portal scroll, or by ascending out of the sewers and back into Lut Gholein.
Speak with Deckard Cain with Horadric scroll in hand to complete the entry and learn the
quest's objective.
ACT II, QUEST II LOG ENTRY #2: SEARCH THE HALLS OF THE DEAD UNDER THE DRY HILLS FOR THE CUBE
Search the maggot's lair under the far oasis for the shaft. Search the claw viper temple for the
headpiece.
Returning the Horadric scroll to Deckard Cain activates the second entry in the second quest's
log. The entry includes all the goals to complete the Horadric staff, which will be used to enter
Tal Rasha's tomb.
The cube should be your first destination, as its location is the closest and least dangerous of the
dungeons; you'll find the cube in the halls of the dead dungeon located in the second area of the
dry hills. Descend into the halls of the dead and locate the marked chest on level three; open the
chest and acquire the Horadric cube inside.
Fight through the halls of the dead to locate the Horadric cube.
Page 99

DIABLO II OFFICIAL GAMESPOT GAME GUIDE
99
The Horadric cube is required to construct the Horadric staff that will open Tal
Rasha's tomb. By placing the Horadric staff's shaft and headpiece into the cube and pressing the transmute button, you'll recreate the Horadric staff, letting you enter the final area of
the act.
Returning the Horadric cube to Deckard Cain reveals its purpose and other uses. Cain will tell
you how to use the cube to restore the staff, but he also indicates its other purpose - the cube
can be used to transmute other items as well. At its basic level, the cube can be used as additional inventory storage. Keep the cube in your main inventory and open it up with a right-click. If
your main inventory is crowded, slide items into the open cube for additional storage space.
Cain reveals that the cube can be used to improve gem quality. By placing gems of inferior quality into the cube and hitting the transmute button, you can create a single gem of higher quality.
You can also combine gems with weapons and even change arrows into bolts. Keep in mind that
the results of transmutation isn't always positive, so don't experiment haphazardly unless you're
willing to potentially lose important items.
Your next goal is the shaft, which lies in the maggot's lair found in the far oasis area of the desert
surrounding Lut Gholein. Descend to the third level of the maggot lair's and find the marked
chest in the dead-end room protected by a horde of sand maggots. These sand maggots offer a
unique challenge. You must eliminate the sand maggots quickly; the sand maggots lay eggs that
sprout sand maggot young. It's easy to get overwhelmed with monsters if you neglect the sand
maggots. Also, look for the sand maggot eggs and destroy them before they sprout the sand
maggot young. The sand maggots also feature a poisonous attack; wear armor with resistances
to poison to help counter the effects.
UNIQUE MONSTER: A unique sand maggot, Coldworm the Burrower, protects the shaft;
Coldworm is cold enchanted and magic resistant making it a tough customer against all elemental attacks; melee attacks should prove much more effective. Clear out Coldworm's lair (littered
with sand maggots, sand maggot young, and eggs) before moving against the unique beast.
The final piece of the staff puzzle lies in the claw viper temple. Locate the claw viper temple by
heading from the far oasis into the lost city section. From the second level of the lost city (just
locate the staircase), proceed into the valley of the snakes, and find the claw viper temple. When
you enter the lost city section for the first time, the sun dims, and the desert falls under darkness
- this also activates the third quest in Act II, which contains the same goal as locating the
Horadric amulet.
Page 100
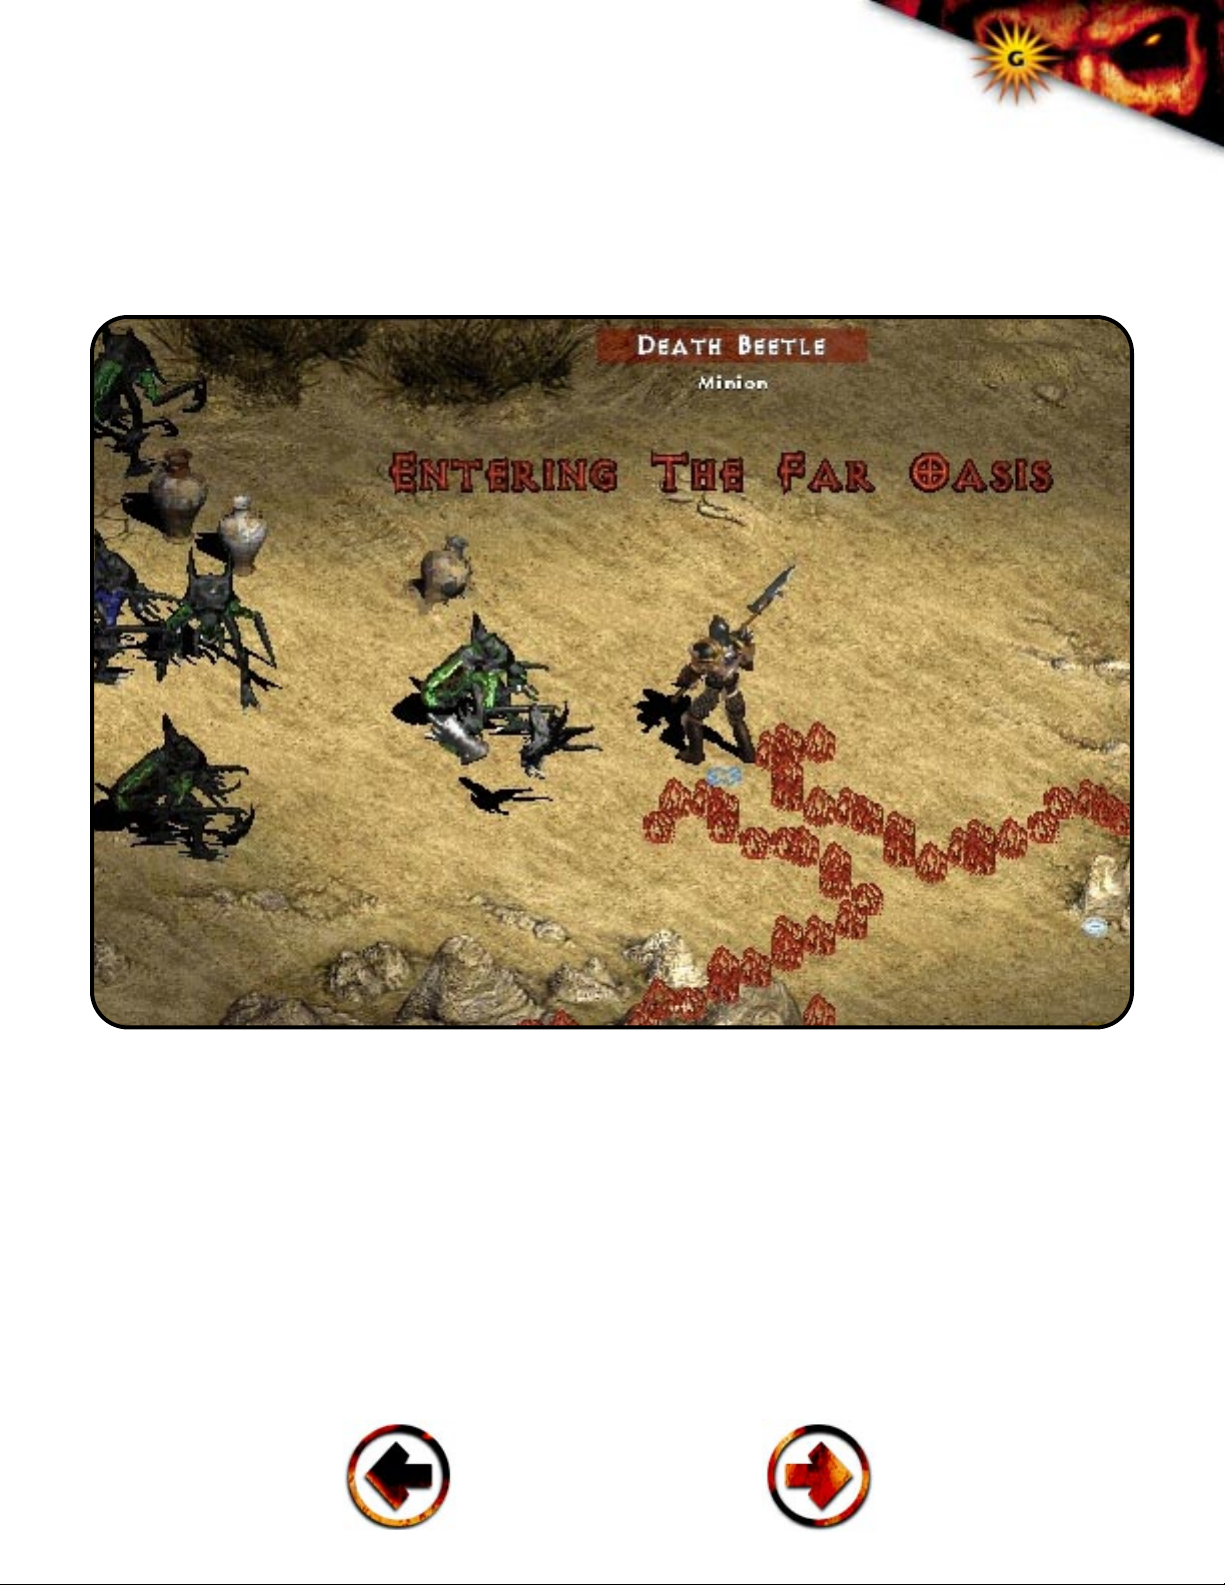
DIABLO II OFFICIAL GAMESPOT GAME GUIDE
100
Act II Bestiary: The gigantic Blunderbore are impressive beasts - and quite durable!
Each Blunderbore type - which include the blunderbore, gorbelly, and mauler - feature stun
and knockback attacks. Attempting to duke it out with these mammoth creatures could prove
deadly. Carry plenty of healing potions and prepare to take defensive (and evasive) measures at
a moment's notice.
Proceed into the far oasis to locate the maggot's lair.
TIP: Should you desire additional exploration (as well as additional experience and items),
locate the ancient tunnels area inside the lost city section of the desert. Exploring the ancient
tunnels area isn't necessary to complete any quests; use the ancient tunnels to improve your
character for the tough battles ahead. Thorough exploration of the desert surrounding Lut
Gholein will reveal another optional dungeon: the stony tomb, which contains the unique monster
Creeping Feature, who's extra strong and cold enchanted - don't expect cold weapons to work
against the durable beast!
 Loading...