

Page 1
사용 및 장착 설명서
www.blaupunkt.com
Car Radio CD MP3 WMA
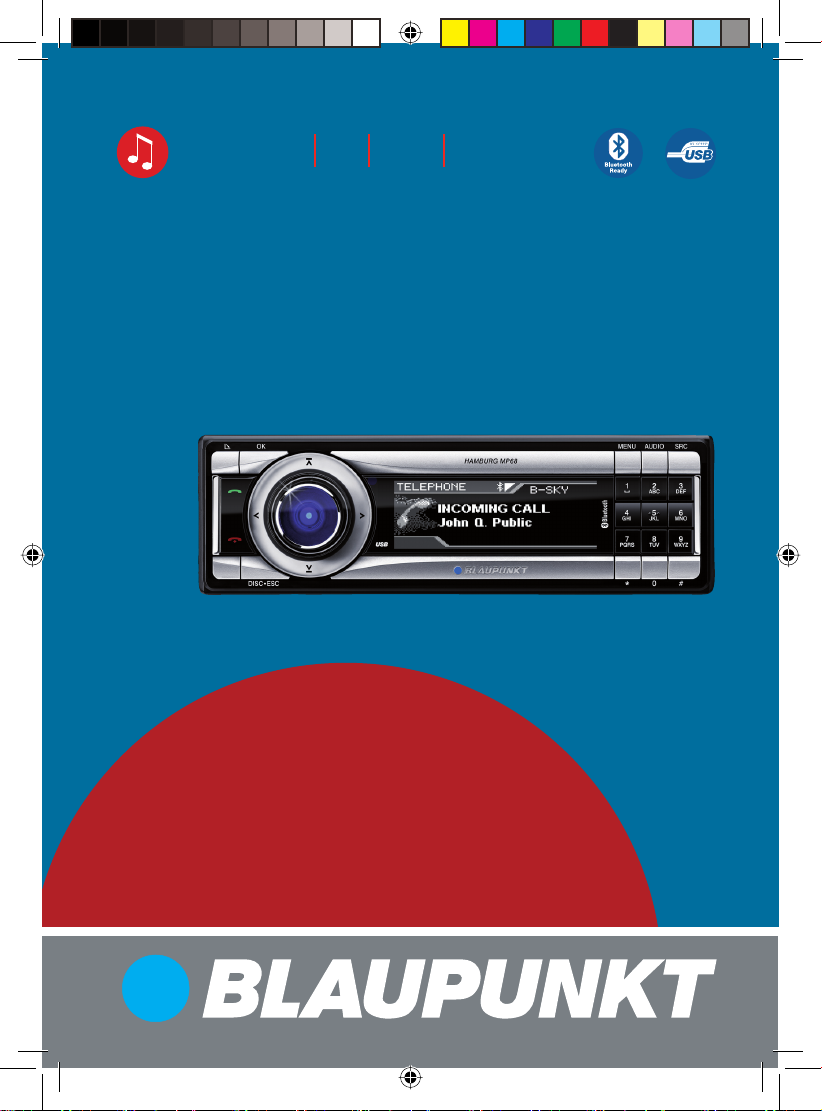
Hamburg MP68 7 648 012 310
Operating and installation instructions
Mode d’emploi et de montage
Instrucciones de manejo e instalación
Instruções de serviço e de montagem
操作及安裝手冊
사용 및 장착 설명서
01BA_HamburgMP68us_gb.indd 101BA_HamburgMP68us_gb.indd 1 14.03.2008 10:48:39 Uhr14.03.2008 10:48:39 Uhr
Page 2

2
01BA_HamburgMP68us_gb.indd 201BA_HamburgMP68us_gb.indd 2 14.03.2008 10:48:41 Uhr14.03.2008 10:48:41 Uhr
Page 3

Contents
한국어
Contents
About these instructions ..................6
Safety Notes ......................................7
Scope of delivery ..............................8
Optional equipment
Command and Control (C‘n‘C) ......8
Steering wheel remote control .......8
Bluetooth/USB interface ................ 8
iPod®/USB interface ....................... 9
Amplifi er .........................................9
CD changers ...................................9
Device description .......................... 10
What can the device do? .................10
Controls ........................................... 10
Theft protection .............................. 12
Device card ...................................... 12
Detaching/attaching the control panel .. 12
Startup ............................................ 13
Switching the device on/off ............. 13
Adjusting the volume ....................... 13
Muting the device ............................ 13
Overview of the menu operation ..... 14
Changing the switch-off time
(OFFTIMER) ..................................... 15
Resetting the device (NORMSET) .... 15
USB port .......................................... 16
Connecting the USB cable ...........16
Connecting the USB medium ....... 16
What characteristics do USB
media have to have? ..................... 16
Selecting the USB as audio source ... 17
....................... 8
Handling CDs ................................... 17
What features do MP3 or WMA
CDs have to have? ........................ 17
Inserting and removing a CD ........ 18
Selecting the CD as audio source .. 18
Tuner mode ..................................... 19
Set the device to the region Europe,
USA or Thailand ...............................19
Starting tuner mode ........................19
The tuner display .....................................19
Setting the waveband/memory
bank ................................................. 20
Tuning into a station ........................ 20
Station seek tuning ...................... 20
Tuning into stations manually ....... 20
Selecting stored stations ............. 21
Storing stations ............................... 21
Storing stations manually ............. 21
Searching and storing stations
automatically (TRAVELSTORE) ..... 21
Changing the seek tuning
sensitivity (SENS) ............................ 22
Scanning all receivable stations
(BANDSCAN) ................................... 22
CD mode (audio) ............................. 23
Starting the audio CD mode ............ 23
The audio CD display .................................23
The CD menu ................................... 23
Functions in the CD mode (audio) ..24
FRANÇAIS ENGLISHESPAÑOL
PORTUGUÊS
中文
한국어
3
01BA_HamburgMP68us_gb.indd 301BA_HamburgMP68us_gb.indd 3 14.03.2008 10:48:41 Uhr14.03.2008 10:48:41 Uhr
Page 4

Contents
CD/USB mode (MP3/WMA) ...........25
Starting the CD/USB mode .............. 25
The MP3 display .......................................25
Functions in the CD/USB mode
(MP3/WMA) ..................................... 26
The MP3 menu ................................. 27
The Browse mode ............................ 27
The browse display ...................... 27
Selecting tracks in Browse mode .. 27
The Playlist mode ............................28
The Playlist display ....................... 28
Selecting tracks in Playlist mode ..28
C‘n‘C mode ...................................... 29
Starting C‘n‘C mode ........................29
The C‘n‘C display ......................................29
Functions in C‘n‘C mode ................. 30
The C‘n‘C menu ............................... 31
CD-changer mode ...........................32
Switching to CD changer mode ....... 32
Selecting a CD .................................32
The CD changer display .............................32
Functions in the CD changer mode...33
The CD changer menu .....................33
Bluetooth streaming mode ............. 34
Registering Bluetooth players .......... 34
Starting the Bluetooth
streaming mode ............................... 35
The Bluetooth streaming display .....35
Functions in the Bluetooth
streaming mode ............................... 35
AUX mode ....................................... 36
Adjusting the rear AUX input mode..36
Connecting other external audio
sources ............................................ 37
Switching the external audio
source on/off and selecting it ...... 37
Naming external audio sources
(AUX EDIT) ................................... 37
Mixing an external audio source
with another audio source
(MIX AUX) ..................................... 38
Managing several C‘n‘C devices ......39
Bluetooth phone call ....................... 40
Bluetooth preparation ..................... 40
How is a Bluetooth connection
established? .................................... 40
Opening the Bluetooth menu ........... 40
Registering the cell phone ............... 41
Determining the master telephone .. 41
Managing registered Bluetooth
devices ............................................. 42
Unregister all registered
Bluetooth devices ......................... 42
Managing registered Bluetooth
devices in the device list .............. 42
Answering/rejecting a phone call ....43
Making a phone call (DIAL NEW) ..... 43
Ending a call ....................................
44
Redirecting an ongoing phone
call to the cell phone .......................44
Storing and calling a phone number
in the phone book of the device ...... 44
Storing phone numbers ................ 44
Calling a phone number ...............45
Editing an entry ............................ 45
Deleting entries ............................ 46
The phone book of the cell phone ... 46
Downloading a phone book .........46
Calling an entry in the phone book .........47
4
01BA_HamburgMP68us_gb.indd 401BA_HamburgMP68us_gb.indd 4 14.03.2008 10:48:42 Uhr14.03.2008 10:48:42 Uhr
Page 5

Contents
한국어
Calling a phone number from the
history .............................................. 47
Speed dial ........................................ 48
Changing the PIN (PIN NUM) ........... 48
Changing the Bluetooth name
of the device (RAD NAME) ............... 49
Sound settings ................................50
Opening the Audio menu ................. 50
Adjusting bass, treble and volume
distribution ...................................... 50
Selecting a sound presetting
(PRESETS) ....................................... 50
Equalizer settings ............................51
Which equalizer setting is the
correct one? ................................. 51
Changing equalizer settings
(EBASS, ETREBLE, EMIDDLE,
EXBASS) ....................................... 52
User settings ................................... 53
Opening the System menu ............... 53
Changing the welcome text
(ON MSG) ........................................ 53
Changing time settings .................... 53
Switching time display on/off
(OFF CLK) .................................... 53
Selecting 12h/24h time display
(CLK MODE) ................................. 54
Setting the time (CLK SET) .......... 54
Changing volume presettings ..........54
Adjusting power-on volume
(ON VOL/LAST VOL).....................54
Changing volume presettings
for TEL and MUTE ........................55
Activating/deactivating the
signal tone (BEEP ON) ................. 55
Setting the speed-dependent
volume increase (AUTO SND) .......56
Changing display settings ................ 56
Adjusting the display viewing
angle (ANGLE) .............................. 56
Changing the day/night
brightness (D-DAY/D-NIGHT) ........ 57
Mixing the color for the display
illumination (DISP COL) ............... 57
Selecting the colour of the
display illumination from the
colour scan (COL SCAN) .............. 57
Switching the continuous
colour change for the display
illumination on/off (CON SCAN) .. 58
Changing the scan time
(SCANTIME) ..................................... 58
Additional settings..........................59
Confi guring the preamplifi er output
for the subwoofer (SUBOUT) ...........59
Activating/deactivating demo
mode ................................................ 59
Displaying version numbers ............. 59
Updating the device software .......... 60
Technical data ................................. 61
Service ............................................ 62
Warranty .........................................62
Glossary .......................................... 63
Index ...............................................64
Factory settings ..............................67
Installation instructions ...............???
FRANÇAIS ENGLISHESPAÑOL
PORTUGUÊS
中文
한국어
5
01BA_HamburgMP68us_gb.indd 501BA_HamburgMP68us_gb.indd 5 14.03.2008 10:48:42 Uhr14.03.2008 10:48:42 Uhr
Page 6
About these instructions
About these instructions
These instructions contain important information to easily and safely install and operate the device.
•
Read these instructions carefully and
completely before using the device.
•
Keep the instructions at a location so that
they are always accessible to all users.
•
Always pass on the device to third parties together with these instructions.
In addition, observe the instructions of the
devices used in conjunction with this device.
Symbols used
These instructions employ the following
symbols:
DANGER!
Warns about injuries
DANGER!
Warns about accidents
The CE mark confi rms the compliance with EU directives.
Identifi es a sequencing step
쏅
Identifi es a listing
•
Use as directed
This device is intended for installation and
operation in a vehicle with 12 V vehicle system voltage and must be installed in a DIN
slot. Observe the 'performance limits in the
technical data. Repairs and installation, if
necessary, should be performed by a specialist.
Declaration of conformity
The Blaupunkt GmbH declares that the
Hamburg MP68 device complies with the
basic requirements and the other relevant
regulations of the directive 1999/5/EG.
DANGER!
Warns about hearing loss
CAUTION!
Warns about laser beam
CAUTION!
Warns about damaging the CD
drive
6
01BA_HamburgMP68us_gb.indd 601BA_HamburgMP68us_gb.indd 6 14.03.2008 10:48:43 Uhr14.03.2008 10:48:43 Uhr
Page 7
Safety Notes
한국어
Safety Notes
The device was manufactured according to
the state of the art and established safety
guidelines. Even so, dangers may occur if
you do not observe the safety notes in these
instructions.
If you are installing device
yourself
You may only install the device yourself if
you are experienced in installing car sound
systems and are very familiar with the electrical system of the vehicle. For this purpose, observe the installation instructions
at the end of these instructions.
Observe the following!
CAUTION!
The device contains a Class 1
laser that can cause injuries to
your eyes.
Do not open the device and do not per-
ü
form any modifi cations.
In operation
•
Operate the device only if traffi c situation permits it! Stop at a suitable location to perform extensive settings.
•
Remove or attach the control panel only
while the vehicle is standing an.
•
To protect your hearing, always listen at
a moderate volume.
During mute phases (e.g. when changing Travelstore, CD changer), changing
the volume is not audible until after the
mute phase. Do not increase the volume
during this mute phase.
•
Always listen at a moderate volume so
that you can always hear acoustic warning signals (e.g. police).
Cleaning notes
Solvents, cleaning and scouring agents as
well as dashboard spray and plastics care
product may contain ingredients that will
damage the surface of the device.
•
Use only a dry or slightly moistened
cloth for cleaning the device.
•
If necessary, clean the contacts of the
control panel regularly using a soft cloth
moistened with cleaning alcohol.
Disposal note
Do not dispose of your old unit in
the household trash!
Use the return and collection systems available to dispose of the old
device.
Do not discard the depleted battery
of the remote control in the household trash, but return it to the corresponding collection centres.
FRANÇAIS ENGLISHESPAÑOL
PORTUGUÊS
中文
한국어
7
01BA_HamburgMP68us_gb.indd 701BA_HamburgMP68us_gb.indd 7 14.03.2008 10:48:43 Uhr14.03.2008 10:48:43 Uhr
Page 8
Scope of delivery
Scope of delivery
The scope of delivery includes:
1 Hamburg MP68
1 Operating/installation instructions
1 Cloth case for the control panel
1 Support frame
2 Disassembly tools
1 USB connecting cable
1 Microphone for Bluetooth phone calls
1 Microphone connecting cable (for plug
housing chamber D)
1 Plug housing chamber D
1 Connecting cable chamber A (power
supply and more)
1 Connecting cable chamber B (loud-
speaker)
1 Connecting cable chamber C1 (Line-
Out)
1 Set of small parts
1 Handheld remote control
2 Batteries (type AAA)
Optional equipment
(not part of the scope of delivery)
Use only accessories approved by Blaupunkt.
Command and Control (C‘n‘C)
This device supports the command-andcontrol interface (C‘n‘C) of Blaupunkt. The
C‘n‘C interface allows an even more convenient control of devices and data carriers that
are connected via a C‘n‘C-capable interface
with the car sound system (see also Bluetooth/USB interface and iPod®/USB interface).
Note
Please note that the current software of
this device may not yet offer any C‘n‘C
support. In this case, the menu items
"CDC ON" and "C‘N‘C EDIT" are not available in the "Syst" system menu.
Your device can be rendered C‘n‘C-capable by means of a software update. Information about the availability of this software and the download can be found
under www.blaupunkt.com. To install
new software, please read the section
"Updating the device software" in the
chapter "Additional settings".
Steering wheel remote control
A steering wheel remote control allows for
safely and conveniently operating the basic
functions of your car sound system from the
steering wheel.
You cannot switch the device on/off using
the remote control!
You can fi nd out from your Blaupunkt dealer or on the Internet at www.blaupunkt.com
which remote controls can be used with
your car sound system.
Bluetooth/USB interface
For Bluetooth applications, such as wireless
hands-free calling and Bluetooth streaming,
you can connect a Bluetooth interface. The
Bluetooth/USB interface provides an additional USB connection.
8
01BA_HamburgMP68us_gb.indd 801BA_HamburgMP68us_gb.indd 8 14.03.2008 10:48:44 Uhr14.03.2008 10:48:44 Uhr
Page 9

Scope of delivery
한국어
The Bluetooth/USB interface is also available in a C‘n‘C-capable version or can be rendered C‘n‘C-capable with a software update.
Information about the Bluetooth/USB interface is available at your Blaupunkt specialised dealer or on the Internet under
www.blaupunkt.com.
iPod®/USB interface
With the iPod® interface or the iPod®/USB
interface, you can connect an iPod® to the
radio device and conveniently control the
playback via the radio device. The iPod®/
USB interface provides an additional USB
connection.
The iPod®/USB interface is also available in
a C‘n‘C-capable version or can be rendered
C‘n‘C-capable with a software update.
Information about the iPod®/USB interface is available at your Blaupunkt specialised dealer or on the Internet under
www.blaupunkt.com.
FRANÇAIS ENGLISHESPAÑOL
PORTUGUÊS
中文
Amplifi er
You can use all Blaupunkt and Velocity amplifi ers.
CD changers
You can connect the following Blaupunkt CD
changers:
CDC A 03, CDC A 08 and IDC A 09.
9
01BA_HamburgMP68us_gb.indd 901BA_HamburgMP68us_gb.indd 9 14.03.2008 10:48:44 Uhr14.03.2008 10:48:44 Uhr
한국어
Page 10
Device description
Device description
What can the device do?
In addition to the tuner, the device features
an integrated CD player for playing audio
CDs and MP3/WMA CDs. The built-in Bluetooth module and the microphone connector allow the hands-free use of a phone
via the car sound system. In addition, the
following external audio sources can be
connected and used:
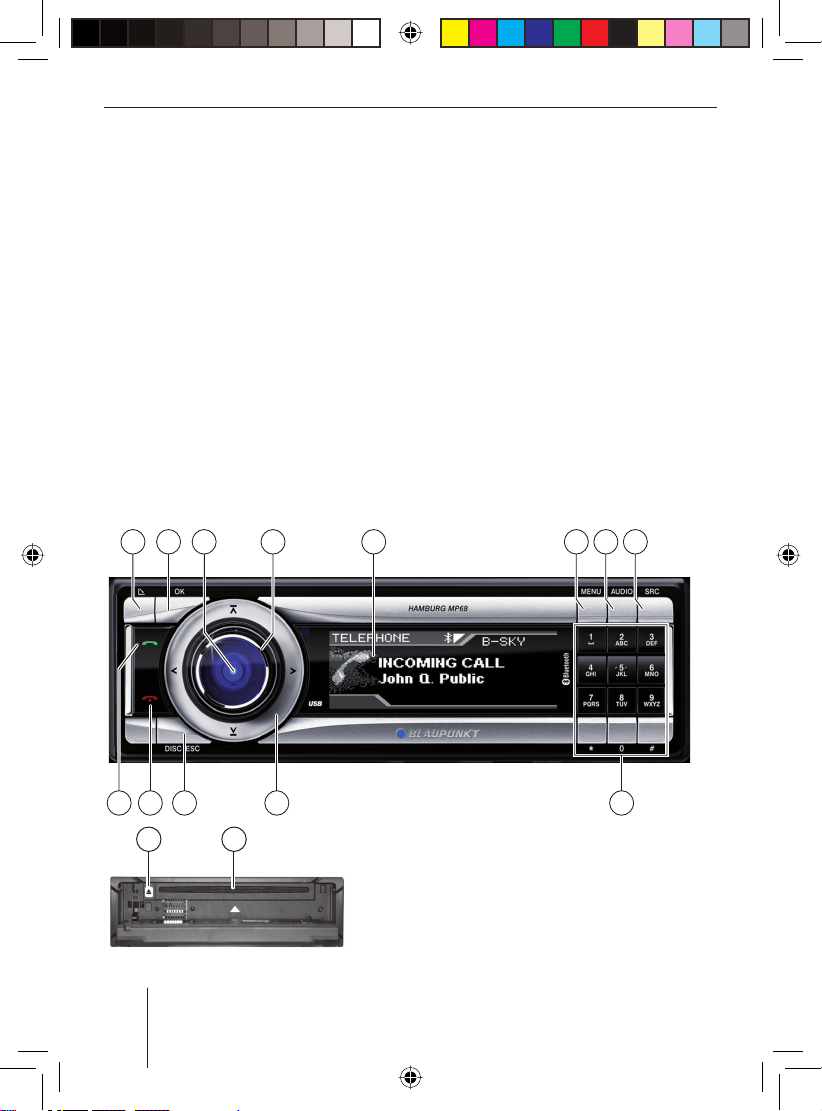
Controls
1
Blaupunkt interfaces
•
Either a CD changer or an external
•
audio source, e.g. MiniDisc or MP3
player, via the rear AUX socket (REARAUX-IN socket)
USB medium (player, stick or disk) with
•
MP3 or WMA fi les
•
Navigation device or telephone
(Tel/Navi Line-In)
For further details, please read the installation instructions.
6 7 852 43
13 12
14 15
10
01BA_HamburgMP68us_gb.indd 1001BA_HamburgMP68us_gb.indd 10 14.03.2008 10:48:45 Uhr14.03.2008 10:48:45 Uhr
1011 9
Page 11
Device description
한국어
1 button
for folding out the control panel
2 OK button
In menus: Calling up menu items and
confi rming settings (press short)
Scanning tracks/radio stations
(SCAN function; press for longer than
2 seconds)
3 On/Off button
Switch-on, muting sound (press short)
Switch-off (press for longer than
2 seconds)
4 Volume control
5 Display
6 MENU button
Calling up a menu
7 AUDIO button
Calling up the audio menu for sound
settings
8 SRC button
Selecting an audio source
9 Alphanumeric keys
Radio mode (0 - 9): Selecting stored
stations (press short), storing stations
(press for longer than 2 seconds)
In menus: Entering, for example, PIN
codes, phone numbers and names
: Rocker switch and as well as
and
In menus and in radio mode: Selecting
submenus and menu items/functions
In other operating modes (e.g. CD or
MP3 mode): Selecting track, CD and
directory
; DIS/ESC button
Exiting the menu and changing to the
display of the audio source, selecting
the display mode (e.g. MP3 browse
mode in MP3 display)
< button (Reject button)
Rejecting/ending an incoming call
= button (Answer button)
Making/answering a call
> button
Ejecting CD from CD drive
? CD drive
FRANÇAIS ENGLISHESPAÑOL
PORTUGUÊS
中文
한국어
11
01BA_HamburgMP68us_gb.indd 1101BA_HamburgMP68us_gb.indd 11 14.03.2008 10:48:46 Uhr14.03.2008 10:48:46 Uhr
Page 12

Theft protection
Theft protection
Device card
In case of a theft, the device card on the
back of these instructions together with the
purchase receipt is your proof of ownership.
Please enter the serial number of the device
on the card. The serial number is located on
the side of the device and poss. also on the
original box.
Detaching/attaching the control
panel
You can detach the control panel to protect
against theft.
CAUTION!
Damage to the control panel
Impacts and dirt can damage the control
panel.
Transport the control panel only in its
ü
case so that it is protected against impacts and the contacts are protected
against dirt.
Do not touch the contacts on the rear
ü
side with your fi ngers.
To detach the control panel,
press the
쏅
The control panel opens to the front.
Remove the control panel from the
쏅
brackets by carefully pulling it out.
To re-attach the control panel,
carefully push the control panel into the
쏅
brackets until it engages and fold it back
into the slot.
Note:
The device is worthless to a thief without the control panel. Always take the
control panel with you when leaving the
vehicle. Do not keep the control panel
inside the vehicle - not even in a hiding
place.
button 1.
12
01BA_HamburgMP68us_gb.indd 1201BA_HamburgMP68us_gb.indd 12 14.03.2008 10:48:48 Uhr14.03.2008 10:48:48 Uhr
Page 13

Startup
한국어
ü
Startup
This chapter contains information about
switching the device on and off, adjusting
the volume, performing menu settings, and
resetting the device to the factory settings.
It also provides information about connecting a USB medium and correctly inserting a
CD in the device.
The devices mutes itself while it changes
the CD in the CD changer or the audio
source. During this mute phase, the volume may be changed, but it is not audible. Do not increase the volume during
a mute phase.
ü
Always set the device to a moderate
volume.
FRANÇAIS ENGLISHESPAÑOL
Switching the device on/off
The device is switched on or off with the ignition. The introductory animation starts
and can be cancelled with the OK button
2. The device plays the audio source you
previously listened to.
To manually switch on the device,
쏅
press the On/Off button
3.
To switch off the device,
쏅
press and hold the On/Off button
3 for
approx. 2 seconds.
Note:
To protect the vehicle battery if the igni-
tion is switched off, the device automati-
cally switches off after one hour.
Adjusting the volume
DANGER!
High volume
Excessive volume can damage your hearing and you may fail to hear acoustic warning signals!
쏅
Turn the volume control
4.
The current volume is shown on the display
and used for all audio sources.
Note:
The volume can also be changed during
a phone call/navigation announcement
using the volume control
4 for the du-
ration of the phone call or the announcement.
Muting the device
쏅
Briefl y press the On/Off button 3.
The display shows "MUTE".
To cancel the mute function,
쏅
briefl y press the On/Off button
again.
OR:
쏅
Turn the volume control
4.
3
PORTUGUÊS
中文
한국어
13
01BA_HamburgMP68us_gb.indd 1301BA_HamburgMP68us_gb.indd 13 14.03.2008 10:48:48 Uhr14.03.2008 10:48:48 Uhr
Page 14

Startup
Overview of the menu operation
The different basic settings of the device
and many functions of the different operating modes are available via menus:
•
In the System menu, you perform the
basic settings for the device (e.g. dis-
play brightness and colour, power-on
volume and volume for traffi c announce-
ments, telephone calls and more, time,
scan time and settings for C‘n‘C and
AUX mode).
•
In the Audio menu, you perform sound
settings (e.g. bass, treble, volume dis-
tribution, equalizer).
•
In the menu of the respective operating
mode (e.g. tuner or CD mode), you can
perform settings for the current operat-
ing mode and select functions.
To open a menu,
쏅
press the MENU button
By default, the menu of the current operat-
ing mode is opened, e.g. the tuner menu, if
the device is in tuner mode when you press
the MENU button
6.
Note:
You cannot call up the menu if the device
is muted ("MUTE").
6.
A
E
B
C
D
A Option of the selected menu item
B Selected menu item
C Menu items of the selected menu
D Arrows indicate in which direction you
can scroll in the menu
E Menu selection
To select a different menu,
쏅
press the rocker switch
or :.
It switches from the menu of the current operating mode to the System or Audio menu.
The Tuner menu is also available in all the
other operating modes.
To select and call up a menu item in the current menu,
쏅
press the rocker switch
쏅
Press the OK button
or :.
2.
14
01BA_HamburgMP68us_gb.indd 1401BA_HamburgMP68us_gb.indd 14 14.03.2008 10:48:49 Uhr14.03.2008 10:48:49 Uhr
Page 15

Startup
한국어
You can exit a menu as follows:
You confi rm a setting with the OK but-
•
2 and go back one higher menu
ton
level.
Text input (e.g. your personal wel-
come text) should always be confi rmed
with the OK button
2 to save the text
change.
•
The DIS•ESC button
; returns you di-
rectly to the display of the active audio
source.
Text inputs are not automatically saved.
Pressing the DIS•ESC button
; cancels
the text input without saving it. All other
settings are saved.
Every menu features the menu item
•
"EXIT". If you select "EXIT" and press the
OK button
2, you return to the higher-
level menu.
If no selection or setting is performed in a
menu for approx. 8 seconds, the display automatically returns to the display of the audio source (in the Bluetooth menu, this time
is approx. 30 seconds). Your settings - with
the exception of text inputs - are saved.
Changing the switch-off time
(OFFTIMER )
If you remove the control panel, the device
automatically switches off after 15 seconds. This switch-off time can be changed:
쏅
Press the MENU button
Press the
쏅
rocker switch : to open
the "Syst" system menu.
6.
Press the rocker switch
쏅
or : to
select the "OFFTIMER" function.
Press the OK button
쏅
Press the rocker switch
쏅
2.
or : to
adjust the switch-off time between
15 and 30 seconds.
Press the OK button
쏅
2 to select a dif-
ferent function, or press the DIS•ESC
; to exit the menu.
button
Resetting the device (NORMSET )
You can reset the device to the factory
settings (see appendix A1). Your personal settings. e.g. your welcome text, will be
deleted in the process.
쏅
Press the MENU button
Press the
쏅
rocker switch : to open
the "Syst" system menu.
쏅
Press the rocker switch
select the "NORMSET" function.
쏅
Press and hold down the OK button
for longer than 4 seconds.
"NORM ON" briefl y appears on the display.
The factory settings are restored. The radio briefl y switches off and automatically on
again during the process.
Note:
If you press and hold down the OK but-
2 for less than 4 seconds, "NORM
ton
OFF" is displayed. Your personal settings
are retained. Press the OK button
select a different function, or press the
DIS•ESC button
6.
or : to
2
2 to
; to exit the menu.
FRANÇAIS ENGLISHESPAÑOL
PORTUGUÊS
中文
한국어
15
01BA_HamburgMP68us_gb.indd 1501BA_HamburgMP68us_gb.indd 15 14.03.2008 10:48:49 Uhr14.03.2008 10:48:49 Uhr
Page 16

Startup
USB port
You can connect the following USB media
to the device and use them as audio source:
USB stick
•
USB hard disk (max. 800 mA)
•
MP3 player with USB port
•
The device can play MP3 or WMA formats
(WMA version 9, without DRM copy protection only).
Note:
Blaupunkt cannot guarantee the proper
functioning of all USB media available on
the market!
Connecting the USB cable
To connect a USB medium, the supplied
USB cable must be connected to the rear of
the device before installing the car sound
system. For further details, please read the
installation instructions.
The USB cable can then be routed, for example, to the glove compartment or a suitable
place of the center console.
Connecting the USB medium
Note:
Always switch off the device before con-
necting or disconnecting your USB me-
dium! The USB medium is correctly reg-
istered/unregistered only with switching
on/off.
쏅
Switch of the car sound system by hold-
ing the On/Off button
longer than 2 seconds.
3 pressed for
Connect the USB medium with the USB
쏅
cable.
What characteristics do USB media have
to have?
The device recognises the USB medium
only if it is a mass storage with the following features:
File system FAT16 or FAT32,
no NTFS!
ID3 tags Version 1 or 2
Format
Number Max. 1,500 fi les (folders
Naming of
fi les
Bit rate MP3: 32 to 320 kbps
Under Windows 2000/XP, the FAT32 formatting creates a maximum partition size of
32 GB. If you are using a USB medium with
more than 32 GB, it may result in read errors
for additional partitions.
If a large number of fi les is stored on your
USB medium, the speed of the fi le search
may be reduced.
Only MP3 or WMA fi les,
folders, playlists
and tracks) per folder
File extension ".wma"/
".mp3"
Max. 24 characters (more
characters are possible,
but they reduce the max.
number of fi les)
No special characters or
umlauts
WMA: 32 to 192 kbps
16
01BA_HamburgMP68us_gb.indd 1601BA_HamburgMP68us_gb.indd 16 14.03.2008 10:48:50 Uhr14.03.2008 10:48:50 Uhr
Page 17

Startup
한국어
Selecting the USB as audio source
Press the SRC button
쏅
8 repeatedly un-
til "USB" appears on the display.
The display briefl y shows "READING". The
playback starts.
If USB is selected as audio source, the MP3
display is shown. For further details, please
read the chapter "CD/USB mode (MP3/
WMA)".
Handling CDs
The device can play the following CD formats:
•
Audio CD with the CompactDisc logo
(some CDs with copy protection cannot
be played)
Note
Blaupunkt cannot guarantee the proper
functioning of copy-protected CDs!
•
CD-R or CD-RW with MP3 or WMA fi les
(WMA version 9, without DRM copy pro-
tection only)
Note:
The quality of self-burnt CDs fl uctuates
due to different CD blanks, burner soft-
ware, and burn speeds. For this reason,
it is possible that the device cannot play
some self-burnt CDs.
What features do MP3 or WMA CDs have
to have?
The device can only play and display MP3 or
WMA CDs with the following features:
CD format ISO 9660 (Level 1 or 2)
or Joliet
ID3 tags Version 1 or 2
Format
Only MP3 or WMA fi les,
folders, playlists
Number Max. 999 tracks
in 99 folders
Naming of
fi les
File extension ".wma"/
".mp3"
Max. 16 characters (more
characters are possible,
but they reduce the max.
number of fi les)
No special characters or
umlauts
Bit rate MP3: 32 to 320 kbps
WMA: 32 to 192 kbps
FRANÇAIS ENGLISHESPAÑOL
PORTUGUÊS
中文
한국어
If you cannot play a CD-R/CD-RW:
•
Use blanks from a different manufactur-
er or a different colour.
•
Reduce the burn speed.
17
01BA_HamburgMP68us_gb.indd 1701BA_HamburgMP68us_gb.indd 17 14.03.2008 10:48:50 Uhr14.03.2008 10:48:50 Uhr
Page 18

Startup
Inserting and removing a CD
CAUTION!
Damaging the CD drive
Labelled or shaped CDs can damage the CD
drive.
Do not insert any mini CDs (8 cm diame-
ü
ter) or shape CDs damage.
Insert only circular CDs with a 12-cm
ü
diameter.
ü
Do not attach labels to CDs since the
label may detach during operation.
Note:
Label CDs only by using a marker since
it does not contain any caustic materials.
Permanent markers can damage CDs.
쏅
Press the
button 1.
The control panel opens.
If a CD is in the drive, press the
쏅
>.
button
The CD is ejected.
Remove the CD.
쏅
If you do not remove the CD, it is automatically pulled in again after a few seconds.
쏅
Insert the CD with its printed side up-
permost into the CD drive
? until you
feel some resistance.
The CD is automatically drawn in.
Close the control panel.
쏅
The display briefl y shows "READING". Next,
the following appears:
•
The audio CD display if an audio CD is
inserted.
•
The MP3 display if an MP3 or WMA CD
is inserted.
The CD starts playing.
Selecting the CD as audio source
You can select an inserted CD as audio
source:
쏅
Press the SRC button
8 repeatedly
until "CD" (for audio CD) or "MP3" (for
MP3 CD) appears on the display.
Note:
The CD mode can be selected only if a
readable CD is inserted.
To operate the audio CD display, please read
the chapter "CD mode (audio)".
To operate the MP3 display, please read the
chapter "CD/USB mode (MP3/WMA)".
18
01BA_HamburgMP68us_gb.indd 1801BA_HamburgMP68us_gb.indd 18 14.03.2008 10:48:50 Uhr14.03.2008 10:48:50 Uhr
Page 19

Tuner mode
한국어
Tuner mode
This device can receive radio stations in the
FM and AM frequency ranges.
Set the device to the region
Europe, USA or Thailand
The device is set to the frequency ranges and station technologies of the region
in which it was purchased. You can adjust
this setting to the different frequency ranges and station technologies of Europe, the
United States or Thailand. To do so, the device must be switched off :
쏅
Simultaneously press the AUDIO button
7 and the
on the device.
The display shows "TUNER AREA" and the
current setting as well as a list of available
options.
쏅
Press the rocker switch
switch between the regions EUROPE,
USA and THAILAND.
쏅
Confi rm the setting with the OK
button
Note:
The tuner functions described in these
operating instructions refer to the region
America (tuner setting "USA").
button 9 while switching
*
or : to
2.
Starting tuner mode
Press the SRC button 8 repeatedly
쏅
until "TUNER" appears on the display.
The playback starts immediately with the
previously played station if the vehicle is
within the reception area of this station.
The tuner display
A C
A Waveband/memory bank
B Bluetooth status
C Display area for frequency and time
D Menu selection
E Options of the current menu
In the tuner display, 3 menus are available in
the menu selection:
•
List: This menu is displayed by default in
Tuner mode. The List menu displays the
adjusted frequency and time. In addition, the frequencies stored the station
buttons are displayed in a list.
•
Tune: The Tune menu provides functions
for adjusting stations, scanning stations
and automatic station storage.
B
ED
FRANÇAIS ENGLISHESPAÑOL
PORTUGUÊS
中文
한국어
19
01BA_HamburgMP68us_gb.indd 1901BA_HamburgMP68us_gb.indd 19 14.03.2008 10:48:51 Uhr14.03.2008 10:48:51 Uhr
Page 20

Tuner mode
Band: The Band menu allows selecting
•
the waveband or the memory bank.
You can switch between the menus with
the rocker switch
or :.
Setting the waveband/ memory
bank
You can adjust and set radio stations of the
FM and AM wavebands.
The FM and AM wavebands each feature 2
memory banks: FM and FMT as well as AM
and AMT. Each of the 4 memory banks features 10 memory locations.
쏅
Press the
open the "Band" menu.
쏅
Press the rocker switch
select the desired waveband or memo-
ry bank.
쏅
Press the OK button
The desired waveband or memory bank is
adjusted. After a short period of time, the
display automatically returns to the "List"
menu.
You can now perform the following actions
in this waveband/memory bank:
•
Tuning into a station
•
Storing stations
rocker switch : twice to
or : to
2.
Tuning into a station
There are 3 ways of tuning into a station :
Tuning into stations automatically
•
(station seek tuning)
•
Tuning into stations manually
Selecting stored stations
•
Station seek tuning
Press the # button of the alphanumer-
쏅
9.
ic keys
"SEEK" and the current frequency appear
on the display.
쏅
Press the rocker switch
If you press and hold the rocker switch
:, automatic seek tuning skips the
or
stations found until you release the rocker
switch again.
Note:
You can also activate the "SEEK" function by using the
open the "Tune" menu and pressing the
OK button
The tuner searches for the next receivable
station in the current waveband. The adjusted sensitivity of the station seek tuning
(section "Changing the seek tuning sensitivity") is taken into consideration.
Tuning into stations manually
쏅
Press the # button of the alphanumer-
ic keys
"SEEK" and the current frequency appear
on the display.
2.
9.
or :.
rocker switch : to
20
01BA_HamburgMP68us_gb.indd 2001BA_HamburgMP68us_gb.indd 20 14.03.2008 10:48:51 Uhr14.03.2008 10:48:51 Uhr
Page 21

Tuner mode
한국어
Press the rocker switch or : to
쏅
change the frequency in small incre-
ments.
Note:
You can also activate the "SEEK" func-
tion by using the
rocker switch : to
open the "Tune" menu and pressing the
OK button
2.
Selecting stored stations
Select the desired waveband or mem-
쏅
ory bank.
Press one of the station buttons
쏅
9.
0 - 9
Or in the List menu:
Press the rocker switch
쏅
or : to
select a frequency from the list.
Press the OK button
쏅
2.
The stored station is called up, provided
that it can be received at the current vehicle position.
The frequency of the station appears on the
external display.
Storing stations
There are 2 ways of storing a station:
•
Storing stations manually
•
Searching and storing stations automat-
ically (Travelstore)
Storing stations manually
After tuning into a station, it can be stored
as follows:
Press one of the station buttons 0 - 9
쏅
9
for approx. 2 seconds to which you want
to assign the station.
Or in the List menu:
쏅
Press the rocker switch
or : to
select a memory location in the list.
쏅
Press and hold down the OK button
2
for approx. 2 seconds.
The list displays the frequency at the selected memory location. The station was
stored.
Searching and storing stations
automatically (TRAVEL STORE)
You can automatically search for and store
the 10 FM or AM stations offering the
strongest reception in the region in the FMT
or AMT memory bank. Stations that were
previously stored in the FMT or AMT memory bank are automatically deleted.
쏅
Select the desired FM or AM waveband.
쏅
Press the
the "Tune" menu.
rocker switch : to open
The "SEEK" function is selected.
Press the rocker switch
쏅
or : to
select the "T-STORE" function.
"TRAVEL STORE" appears on the display.
Press the OK button
쏅
2.
The tuner starts with the automatic seek
tuning. After the storing is completed, the
radio plays the station at memory location 1
of the FMT or AMT level.
FRANÇAIS ENGLISHESPAÑOL
PORTUGUÊS
中文
한국어
21
01BA_HamburgMP68us_gb.indd 2101BA_HamburgMP68us_gb.indd 21 14.03.2008 10:48:52 Uhr14.03.2008 10:48:52 Uhr
Page 22

Tuner mode
Changing the seek tuning
sensitivity (SENS )
The seek tuning sensitivity determines
whether the automatic station seek tuning
locates only strong stations or also weaker
stations. You can adjust the seek tuning sensitivity separately for the FM and AM wavebands.
쏅
Select the waveband for which you want
to set the seek tuning sensitivity.
쏅
Press the MENU button
6.
The Tuner menu opens. The "SENS" function is selected.
쏅
Press the OK button
Press the rocker switch
쏅
2.
or : to ad-
just the sensitivity between "SENS LOW
1" (lowest sensitivity) and "SENS HIGH
6" (highest sensitivity).
쏅
Press the OK button
2 to select a dif-
ferent function, or press the DIS•ESC
; to exit the menu.
button
Scanning all receivable stations
(BANDSCAN )
You can scan all receivable stations of a
waveband. The scan time can be set as described in the chapter "User settings".
Select the waveband (FM, AM) whose
쏅
receivable stations you want to scan.
쏅
Press the
the "Tune" menu.
The "SEEK" function is selected.
쏅
Press the rocker switch
select the "BANDSCAN" function.
rocker switch : to open
or : to
"BAND SCAN" briefl y appears on the display.
Press the OK button
쏅
2.
"SCAN" and the current frequency appear
on the display.
The tuner is searching for stations. As soon
as the tuner has located a station, it is
played.
To continue listening to the currently
scanned station,
쏅
press the OK button
2.
After a complete search of the frequency
band, scanning stops. The previously set
station is played.
22
01BA_HamburgMP68us_gb.indd 2201BA_HamburgMP68us_gb.indd 22 14.03.2008 10:48:53 Uhr14.03.2008 10:48:53 Uhr
Page 23

CD mode (audio)
한국어
CD mode (audio)
Audio CDs are played in the CD mode (audio). How to insert and remove CDs is described in the chapter "Startup".
Starting the audio CD mode
You can select an inserted CD as audio
source:
A
8 repeatedly
B
Press the SRC button
쏅
until "CD" appears on the display.
The playback starts.
Note:
As long as the CD is in the drive, the de-
vice stores track and playing time of the
previously played CD. After calling up
the audio source, the playback starts at
the point where it was interrupted.
The audio CD display
C Random playback (MIX) or repeat func-
tion (RPT)
D Playing time or time
The CD menu
The CD menu provides functions such as
MIX and REPEAT (see the lower table on the
next page).
To select a function and its desired option in
the CD menu,
쏅
press the MENU button
The CD menu opens.
쏅
To select the desired function, press the
rocker switch
쏅
Press the OK button
쏅
Press the
rocker switch : to switch
on the selected option, or the
: to switch if off.
switch
Press the OK button
쏅
ferent function, or press the DIS/ESC
; to exit the menu.
button
6.
or :.
2.
rocker
2 to select a dif-
FRANÇAIS ENGLISHESPAÑOL
PORTUGUÊS
中文
한국어
CD
A Bluetooth status
B Display area for track number and CD
text (album, artist, track name if available and switched on)
23
01BA_HamburgMP68us_gb.indd 2301BA_HamburgMP68us_gb.indd 23 14.03.2008 10:48:53 Uhr14.03.2008 10:48:53 Uhr
Page 24

CD mode (audio)
Functions in the CD mode (audio)
The functions of the following table can be called directly on the CD display by touching a
button.
Function Action Display/description
Selecting
tracks
Fast search Press and hold the
Scanning
tracks
Playing time/
time
The functions of the following table can be called up in the CD menu. For further details,
please read the preceding section "The CD menu".
Function Menu item Options
Random playback
Repeating
tracks
Display CD
text
Switching
scrolling text
on/off
Press the rocker switch
or :.
rocker switch
:.
Press the OK button
or
2
for longer than 2 seconds.
Press the DIS•ESC but-
;.
ton
MIX
"MIX CD"
"MIX CD"
REPEAT
"REPEAT TRACK"
"REPEAT TRACK"
CD-TEXT
: The display shows CD text.
: The display does not show CD text.
SCROLL
: The track information appears as scrolling text.
: The track information does not appear as scroll-
ing text.
: Playing the next track
: Repeats the track. Press again: Plays the
previous track
Audibly scanning a track forward or back
"SCAN": Scans all tracks on the CD (scan
time can be adjusted: chapter "User settings"). Press again briefl y: Switches scan
off
Change between display of playing time and
time.
: Mixing the tracks on the CD.
: Regular playback.
: Repeat the current track.
: Regular playback.
24
01BA_HamburgMP68us_gb.indd 2401BA_HamburgMP68us_gb.indd 24 14.03.2008 10:48:54 Uhr14.03.2008 10:48:54 Uhr
Page 25

CD/USB mode (MP3/WMA)
한국어
CD/USB mode
(MP3 /WMA )
In CD/USB mode, you can play CD-Rs or CDRWs or a USB medium with MP3 or WMA
tracks.
The chapter "Startup" describes what you
must observe when connecting and disconnecting USB media. It also contains information about inserting and removing CDs.
Starting the CD/USB mode
You can select an already inserted CD-R or
CD-RW or a connected USB data carrier as
audio source:
Press the SRC button
쏅
til "CD" or "MP3" or "USB" appears on
the display.
The playback starts.
Note:
The USB mode can be selected only if
a valid USB medium is connected.
8 repeatedly un-
The MP3 display
A
A MP3 source ("CD MP3" or "USB")
B Bluetooth status
C Current directory
D Display area for the fi le names as well
as artist, album or track
E Random playback (MIX) or repeat func-
tion (RPT)
F Playing time
You can switch between the following modes
with the DIS•ESC button ;:
•
MP3 display
•
Browse mode
•
Playlist mode (if playlist is available on
USB/CD)
B C
E DF
1
FRANÇAIS ENGLISHESPAÑOL
PORTUGUÊS
中文
한국어
1 Album and artist can be displayed only if they are stored in the ID3 tags of the MP3 track.
25
01BA_HamburgMP68us_gb.indd Abs5:2501BA_HamburgMP68us_gb.indd Abs5:25 14.03.2008 10:48:54 Uhr14.03.2008 10:48:54 Uhr
Page 26

CD/USB mode (MP3/WMA)
Functions in the CD/USB mode (MP3/WMA)
The functions of the following table can be called directly on the MP3 display by touching a
button.
Function Action Response
Selecting
folders
Selecting
tracks
Fast search Press and hold the
Scanning
tracks
The functions of the following table can be called up in the MP3 menu. For further details,
please read the following section, "The MP3 menu".
Function Menu item Options
Random playback
Repeating
tracks
Displaying
track information
Switching
scrolling text
on/off
Press the rocker switch
or :.
Press the rocker switch
or :.
: Selecting the next folder
: Selecting the previous folder
: Playing the next track
: Repeats the track. Press again: Plays the
previous track
Audibly scanning a track forward or back
rocker switch
:.
Press the OK button
for longer than 2 seconds.
or
"SCAN": Scans all tracks on the CD/USB
2
(scan time can be adjusted: chapter "User
settings"). Press again briefl y: Switches
scan off
MIX "MIX FOLDER": Mix tracks of the current folder.
"MIX ALL": Mix all the tracks.
REPEAT "REPEAT TRACK": Repeat the current track.
"REPEAT FOLDER": Repeat the current folder.
DISPLAY "ARTIST": Display the artist.
"ALBUM": Display the album.
"SONG": Display the track names.
SCROLL
: The track information appears as scrolling text.
: The track information does not appear as scroll-
ing text.
26
01BA_HamburgMP68us_gb.indd Abs5:2601BA_HamburgMP68us_gb.indd Abs5:26 14.03.2008 10:48:55 Uhr14.03.2008 10:48:55 Uhr
Page 27

CD/USB mode (MP3/WMA)
한국어
The MP3 menu
To select a function and its desired option in
the MP3 menu,
press the MENU button
쏅
6.
The MP3 menu opens.
To select the desired function, press the
쏅
rocker switch
Press the OK button
쏅
To select the desired option among sev-
쏅
eral options, press the rocker switch
:.
or
Press the
쏅
on the selected option, or the
: to switch if off.
switch
Press the OK button
쏅
or :.
2.
rocker switch : to switch
rocker
2 to select a dif-
ferent function, or press the DIS•ESC
; to exit the menu.
button
The Browse mode
In the Browse mode, tracks and directories
are displayed the same way they are stored
on the MP3 data carrier. This allows you to
purposefully search for and open a specific directory and select a track stored in that
directory without having to interrupt the
current playback.
The browse display
A B
E D C
A Marked directory or track
(open or playback with
:)
rocker switch
B Directory
C Up and down arrows indicate in which
direction you can scroll
D Currently playing track
E Track
Selecting tracks in Browse mode
쏅
During MP3/WMA playback, press the
DIS•ESC button
; repeatedly until
Browse mode is displayed.
It shows all folders and tracks stored on the
data carrier.
To select a track or folder,
쏅
press the rocker switch
or : to
scroll through the tracks and folders.
Fast scrolling is achieved by pressing the
rocker switches for a longer time.
쏅
Press the rocker switch
: to change
up to a higher-level folder.
FRANÇAIS ENGLISHESPAÑOL
PORTUGUÊS
中文
한국어
27
01BA_HamburgMP68us_gb.indd Abs5:2701BA_HamburgMP68us_gb.indd Abs5:27 14.03.2008 10:48:55 Uhr14.03.2008 10:48:55 Uhr
Page 28

CD/USB mode (MP3/WMA)
Press the rocker switch : to open a
쏅
folder or to play a track.
The fi les are played back in the order in
which they were physically stored on the
data carrier. This order is also displayed in
the Browse mode.
Note:
Fast searching is not available in Browse
mode.
The Playlist mode
The device can play playlists that were created with an MP3 manager, such as WinAmp
or Microsoft Media Player. The playlists must
be stored in the root folder of the data carrier. The following playlist formats are valid:
M3U, PLS, WPL, ASX and RMP.
The Playlist display
A
Selecting tracks in Playlist mode
During MP3/WMA playback, press the
쏅
DIS•ESC button
; repeatedly until
Playlist mode is displayed.
It shows all playlists stored in the root folder
of the data carrier.
To select a track from a playlist,
press the rocker switch
쏅
or : to
scroll through the playlists.
Fast scrolling is achieved by pressing the
rocker switches for a longer time.
Press the
쏅
rocker switch : to open a
playlist.
Press the rocker switch
쏅
or : to
scroll through the tracks of the playlist.
Press the
쏅
rocker switch : to play a
track.
The tracks are played in the order in which
they are stored in the playlist. This order is
also displayed in the Playlist mode.
Note:
Fast searching is not available in Playlist
mode.
C B
A Playlist
B Up and down arrows indicate in which
direction you can scroll
C Marked playlist
(open with
rocker switch :)
28
01BA_HamburgMP68us_gb.indd Abs5:2801BA_HamburgMP68us_gb.indd Abs5:28 14.03.2008 10:48:56 Uhr14.03.2008 10:48:56 Uhr
Page 29

C‘n‘C mode
한국어
C‘n‘C mode
In C‘n‘C mode, you access devices that are
connected via a C‘n‘C interface.
Note:
For details about connecting a C‘n‘C in-
terface and the required settings, please
read the chapter "AUX mode".
Starting C‘n‘C mode
Press the SRC button 8 repeatedly
쏅
until the name of the device connected
via C‘n‘C appears on the display.
The playback starts.
Note:
The C‘n‘C mode can be selected only if a
suitable device is connected via a C‘n‘C
interface.
The C‘n‘C display
A
B C
E Display area for the fi le names as well
as artist, album or track
F Random playback (MIX) or repeat func-
tion (RPT)
G Playing time
You can switch between the following modes
with the DIS•ESC button
•
C‘n‘C display
•
Browse mode
;:
Note
In the C‘n‘C mode, you can select tracks
and directories as well as playlists in
Browse mode. Playlist can be selected as
directories in Browse mode and opened.
For further details, please read the section "The Browse mode" in the chapter
"CD/USB mode (MP3/ WMA)".
FRANÇAIS ENGLISHESPAÑOL
PORTUGUÊS
中文
한국어
F DEG
A Name of audio source
B Bluetooth status
C Name of current directory
D Directory and track number
29
01BA_HamburgMP68us_gb.indd Abs4:2901BA_HamburgMP68us_gb.indd Abs4:29 14.03.2008 10:48:57 Uhr14.03.2008 10:48:57 Uhr
Page 30

C‘n‘C mode
Functions in C‘n‘C mode
The functions of the following table can be called directly on the C‘n‘C display by touching
a button.
Function Action Response
Selecting
folders
Selecting
tracks
Fast search Press and hold the
Scanning
tracks
The functions of the following table can be called up in the C‘n‘C menu. For further details,
please read the following section, "The C‘n‘C menu".
Function Menu item Options
Random playback
Press the rocker switch
or :.
Press the rocker switch
or :.
: Selecting the next folder
: Selecting the previous folder
: Playing the next track
: Repeats the track. Press again: Plays the
previous track
Audibly scanning a track forward or back
rocker switch
:.
Press the OK button
for longer than 2 seconds.
or
"SCAN": Scans all tracks on the device (scan
2
time can be adjusted: chapter "User settings"). Press again briefl y: Switches scan off
MIX "MIX FOLDER": Mix tracks of the current folder.
"MIX ALL": Mix all the tracks.
1
"MIX MAG"
"MIX SONG"
: Mix the tracks of all CDs in the CD changer.
2
: Mix all the tracks with the same track
name.
2
"MIX ALBUM"
: Mixx all the tracks with the same album
name.
1 Option is only available if CD changer is connected via C‘n‘C interface.
2 Option is only available if iPod® is connected via C‘n‘C interface.
30
01BA_HamburgMP68us_gb.indd Abs4:3001BA_HamburgMP68us_gb.indd Abs4:30 14.03.2008 10:48:58 Uhr14.03.2008 10:48:58 Uhr
Page 31

C‘n‘C mode
한국어
Function Menu item Options
Repeating
tracks
REPEAT "REPEAT TRACK": Repeat the current track.
"REPEAT FOLDER": Repeat the current folder.
"REPEAT DISC"
1
: Repeat the current CD.
"REPEAT ALL": Repeat all the tracks.
Displaying
track information
Switching
scrolling text
on/off
DISPLAY "ARTIST": Display the artist.
"ALBUM": Display the album.
"SONG": Display the track names.
SCROLL
: The track information appears as scrolling text.
: The track information does not appear as
scrolling text.
FRANÇAIS ENGLISHESPAÑOL
Press the
The C‘n‘C menu
To select a function and its desired option in
the C‘n‘C menu,
쏅
press the MENU button
The C‘n‘C menu opens.
쏅
To select the desired function, press the
rocker switch
쏅
Press the OK button
쏅
To select the desired option among sev-
eral options, press the rocker switch
:.
or
1 Option is only available if CD changer is connected via C‘n‘C interface.
6.
or :.
2.
쏅
on the selected option, or the
switch
Press the OK button
쏅
ferent function, or press the DIS•ESC
button
rocker switch : to switch
rocker
: to switch if off.
2 to select a dif-
; to exit the menu.
31
01BA_HamburgMP68us_gb.indd Abs4:3101BA_HamburgMP68us_gb.indd Abs4:31 14.03.2008 10:48:58 Uhr14.03.2008 10:48:58 Uhr
PORTUGUÊS
中文
한국어
Page 32

CD-changer mode
CD-changer mode
You can connect the following CD changers
to the device.
Blaupunkt CDC A03
•
•
Blaupunkt CDC A08
•
Blaupunkt IDC A09
How to insert CDs in the CD changer maga-
zine is described in the instructions of your
CD changer.
Note:
For details about connecting a CD chang-
er and the required settings, please read
the chapter "AUX mode".
Switching to CD changer mode
Note:
To be able to select the CD changer as
audio source, at least one CD must be in
the magazine.
To select a connected CD changer as audio
source,
쏅
press the SRC button
until "CDC" appears on the display.
If you select a CD changer as audio source
for the fi rst time, "MAG SCAN" appears on
the display until the CD changer is operational.
The CD changer display appears. The playback starts.
> repeatedly
Selecting a CD
To select a CD, press the rocker switch
쏅
or :.
"LOADING CD" briefl y appears on the display. The selected CD starts playing.
The CD changer display
B
A
D CE
A Bluetooth status
B Track number
C CD number
D Random playback (MIX) or repeat func-
tion (RPT)
E Playing time or time
32
01BA_HamburgMP68us_gb.indd 3201BA_HamburgMP68us_gb.indd 32 14.03.2008 10:48:59 Uhr14.03.2008 10:48:59 Uhr
Page 33

CD-changer mode
한국어
Functions in the CD changer mode
Function Action Display/response
Selecting
tracks
Fast search Press and hold the
Scanning
tracks
Playing time/
time
The functions of the following table can be called up in the CD changer menu. For further
details, please read the following section "The CD changer menu".
Function Menu item Options
Random playback
Repeating
tracks
The CD changer menu
To select a function and its desired option in
the CD changer menu,
쏅
press the MENU button
The CD changer menu opens.
쏅
To select the desired function, press the
rocker switch
쏅
Press the OK button
Press the rocker switch
or :.
: Playing the next track
: Repeats the track. Press again: Plays the
previous track
Audibly scanning a track forward or back
rocker switch
:.
Press the OK button
for longer than 2 seconds.
or
"SCAN": Scans all tracks of all CDs (scan
2
time can be adjusted: chapter "User settings"). Press again briefl y: Switches scan
off
Press the DIS•ESC but-
;.
ton
Change between display of playing time and
time.
MIX "MIX CD": Mix the tracks on the current CD.
"MIX ALL": Mix all the tracks.
REPEAT "REPEAT TRACK": Repeat the current track.
"REPEAT DISC": Repeat the current CD.
To select the desired option, press the
쏅
6.
rocker switch
쏅
Press the
on the selected option, or the
: to switch if off.
switch
쏅
Press the OK button
or :.
rocker switch : to switch
2 to select a dif-
ferent function, or press the DIS•ESC
or :.
2.
; to exit the menu.
button
rocker
FRANÇAIS ENGLISHESPAÑOL
PORTUGUÊS
中文
한국어
33
01BA_HamburgMP68us_gb.indd 3301BA_HamburgMP68us_gb.indd 33 14.03.2008 10:48:59 Uhr14.03.2008 10:48:59 Uhr
Page 34

Bluetooth streaming mode
Bluetooth streaming mode
Devices such as MP3 players can also be
connected to the device via Bluetooth if
they feature the corresponding equipment.
The transfer of audio contents, such as music, via Bluetooth is referred to as Bluetooth
streaming.
For additional information about Bluetooth
technology, please refer to the chapter
"Bluetooth phone call".
Registering Bluetooth players
The device can be registered with up to 5
Bluetooth cell phones or other devices such
as MP3 players. If you register a sixth one,
the Bluetooth device registered fi rst is unregistered.
For additional information about managing more registered Bluetooth devices, see
the chapter "Bluetooth phone call", section
"Managing registered Bluetooth devices".
To register a Bluetooth player,
쏅
press the MENU button
Press the
쏅
rocker switch : to open
the "Syst" system menu.
쏅
Press the rocker switch
the "BT" menu item is selected.
쏅
Press the OK button
menu item.
The "PAIR" menu item is selected.
쏅
Press the OK button
menu item.
쏅
Press the rocker switch
the "NOMADIC" menu item is selected.
6.
or : until
2 to call up the
2 to call up the
or : until
Press the OK button
쏅
2.
"START PAIRING" briefl y appears on the display. If necessary, you can enter the PIN
number of the Bluetooth player:
Enter the number sequence by press-
쏅
ing the corresponding buttons of the
9.
keys
After entering one digit, the device automatically switches to the next one. To correct any entry errors, select the corresponding digit by pressing the rocker switch
: again.
or
After entering the complete PIN number,
press the OK button
쏅
2.
Note:
Entering the PIN of the device (default
"1234") may be required in the Bluetooth player to be registered. To do so,
follow the instructions of the Bluetooth
player.
The car sound system independently establishes a Bluetooth connection to the
Bluetooth player that was registered last
and is available. After the connection is established, "DEVICE CONNECTED" briefly appears on the display. If no connection
could be established, then "CONNECTION
FAILED" is displayed.
Note:
The time required for the connection is
dependent upon the Bluetooth player
and can differ from device to device.
34
01BA_HamburgMP68us_gb.indd 3401BA_HamburgMP68us_gb.indd 34 14.03.2008 10:49:00 Uhr14.03.2008 10:49:00 Uhr
Page 35

Bluetooth streaming mode
한국어
Starting the Bluetooth streaming
mode
Press the SRC button 8 repeatedly un-
쏅
til "STREAMING" appears on the display.
The playback starts.
Notes:
•
The Bluetooth streaming mode can
be selected only if a suitable Bluetooth device is connected.
•
If the phone book of a connected
cell phone is being transferred in the
Bluetooth streaming mode, the audio
transfer is interrupted for the duration of the phone book download.
•
If the connection is lost in Bluetooth
streaming mode, "CONNECTION
LOST" appears on the display. Press
the OK button
connection, or press the DIS•ESC
button
source. If the Bluetooth player is out
of range when pressing the OK but-
2, "CONNECTION FAILED - DE-
ton
VICE NOT FOUND" is displayed. The
device then automatically returns to
the audio source heard last. If the
2 to re-establish the
; to return to the last audio
connection must be re-established
from Bluetooth player, "CONNECTION
FAILED - PLAY FROM THE DEVICE VIA
BLUETOOTH" is displayed.
The Bluetooth streaming display
B
A
C
A Bluetooth status
B Track information
C Time
FRANÇAIS ENGLISHESPAÑOL
PORTUGUÊS
中文
한국어
Functions in the Bluetooth streaming mode
Function Action Display/response
Selecting
tracks
01BA_HamburgMP68us_gb.indd 3501BA_HamburgMP68us_gb.indd 35 14.03.2008 10:49:01 Uhr14.03.2008 10:49:01 Uhr
Press the rocker switch
or :.
: Playing the next track
: Repeats the track. Press again: Plays the
previous track
35
 Loading...