

Page 1
www.blaupunkt.com
Car Radio SD USB MP3 WMA
Brisbane SD48 7 648 000 310
Victoria SD48 7 648 001 310
Bedienungs- und Einbauanleitung
Operating and installation instructions
Mode d’emploi et de montage
Istruzioni d’uso e di installazione
Gebruiksaanwijzing en inbouwhandleiding
Bruks- och monteringsanvisning
Instrucciones de manejo e instalación
Instruções de serviço e de montagem
Betjenings- og monteringsvejledning
Instrukcja obsługi i montażowa
Návod k obsluze a k montáži
Návod na obsluhu a inštaláciu
Инструкция по эксплуатации и установке
Page 2
2 3
1
4
6
5
7
8
9
14
12
1113
10
2
Page 3

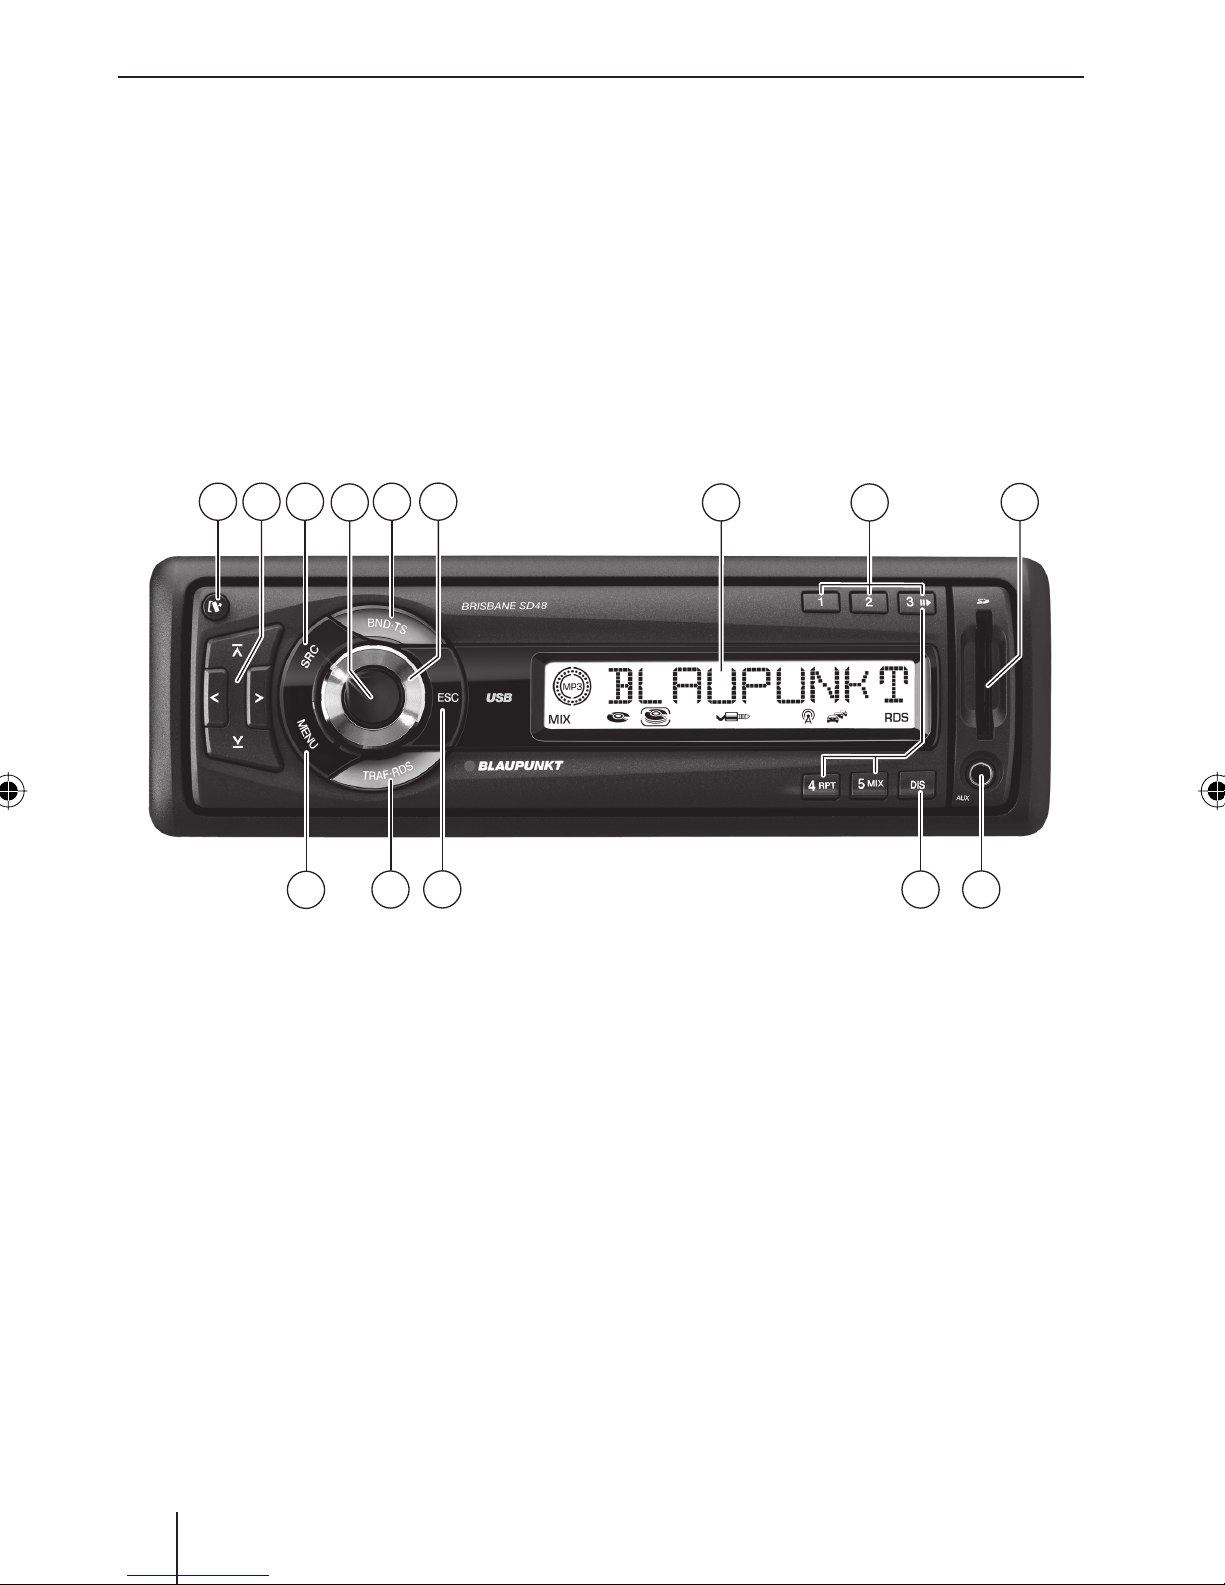
Controls
1 button for removing the control pan-
el (release panel)
2 Arrow buttons
3 SRC button for source selection be-
tween Radio, SD, USB and CD changer
or AUX and FRONT-AUX (if connected).
4 Button to switch the device on/off and
operate the volume mute feature.
5 BND•TS button
Short press: Selects the FM memory
banks and the MW and LW wavebands.
Long press: Starts the Travelstore function.
6 Volume control
: Front AUX-IN socket for connecting ex-
ternal audio sources (e.g. portable CD
players).
; DIS button
< ESC button
= TRAF•RDS button
Short press: Switches traffi c information standby on/off.
Long press: Switches convenient RDS
function on/off.
> MENU button
Short press: Calls up the menus for the
settings. Confi rming menu settings.
Long press: Starts the scan function.
7 LCD display
8 Keys 1 - 5
9 Slot for SD/MMC cards
40
Page 4

Contents
About these instructions .................. 43
Symbols used................................43
Use as directed ..............................43
Declaration of conformity ................ 43
For your safety ................................44
If you are installing device yourself .... 44
Observe the following! ....................44
Cleaning instructions ...................... 44
Disposal note ................................44
Scope of delivery .............................45
Optional equipment
(not part of the scope of delivery) ....45
Warranty .........................................46
Service ........................................... 46
Detachable control panel .................47
Theft protection.............................47
Detaching the control panel ............. 47
Attaching the control panel .............. 47
Switching on/off ..............................48
Switching on/off using button 4 .... 48
Switching on/off via vehicle ignition ... 48
Switching off with detachable
control panel .................................48
Radio mode .....................................51
Adjusting the tuner.........................51
Switching to radio mode .................51
Convenient RDS functions ............... 52
Selecting the waveband/
memory bank ................................ 52
Tuning into a station ....................... 53
Adjusting the sensitivity of
the station seek tuning (SENS) ........53
Storing stations ............................. 53
Storing stations automatically
(Travelstore) .................................54
Listening to stored stations ............. 54
Scanning receivable stations (SCAN) ...54
Setting the scanning time
(SCAN TIME) .................................54
Programme type (PTY) .................. 55
Confi guring the display ................... 56
Traffi c information ...........................56
Switching traffi c information
priority on/off ............................... 56
Skipping a traffi c announcement ......57
Setting the volume for traffi c
announcements .............................57
ENGLISH
Timeout function .............................48
Adjusting the volume .......................49
Setting the power-on volume ...........49
Quickly reducing the volume (MUTE) ....49
Switching the confi rmation
beep on/off (BEEP) ........................50
Muting during telephone mode ........50
Telephone Audio/Navigation Audio ... 50
MP3/WMA mode ............................. 58
Preparation of an MP3/WMA
data carrier ...................................58
Switching to MP3 mode .................. 59
Confi guring the display ................... 60
Selecting a directory ...................... 60
Selecting tracks .............................60
Fast searching (audible) .................. 60
Repeating individual tracks or
whole directories (REPEAT) ............. 60
Random track play (MIX) .................61
Scanning tracks (SCAN)..................61
Interrupting playback (PAUSE) ......... 61
41
Page 5

Contents
CD-changer mode ............................ 62
Switching to CD-changer mode ........62
Selecting CDs ................................ 62
Selecting tracks .............................62
Fast searching (audible) .................. 62
Confi guring the display ................... 62
Repeating individual tracks or
whole CDs (REPEAT) ......................62
Random track play (MIX) .................63
Scanning all tracks on all CDs (SCAN) ...63
Interrupting playback (PAUSE) ......... 63
Clock Time ......................................64
Displaying the time ........................ 64
Setting the time .............................64
Selecting 12/24-hour clock mode .... 64
Displaying the time with device
and ignition switched off .................64
External audio sources .....................73
Rear AUX-IN input ..........................73
Front AUX-IN socket ....................... 74
Mixing an external audio source with
another audio source (MIX AUX) .......74
Factory settings (Normset)............... 75
Technical data ................................. 76
Installation instructions .................484
Sound ............................................. 65
Equalizer ...................................... 65
Setting the left/right volume
distribution (BALANCE) ..................68
Adjusting the front/rear volume
distribution (FADER) ......................68
Equalizer presettings (PRESETS) .....68
X-BASS ........................................... 69
Adjusting the X-BASS boost .............69
Adjusting E-XBASS ......................... 70
Display ............................................71
Adjusting the display brightness ....... 71
Setting the display illumination
colour ..........................................71
42
Page 6
About these instructions
About these instructions
These instructions contain important
•
information to easily and safely install
and operate the device.
Read these instructions carefully and
•
completely before using the device.
•
Keep the instructions at a location so
that they are always accessible to all
users.
•
Always pass on the device to third parties together with these instructions.
In addition, observe the instructions of the
devices used in conjunction with this device.
Symbols used
Use as directed
This device is intended for installation and
operation in a vehicle with 12 V vehicle system voltage and must be installed in a DIN
slot. Observe the 'performance limits in the
technical data. Repairs and installation, if
necessary, should be performed by a specialist.
Declaration of conformity
The Blaupunkt GmbH declares that the devices Victoria SD48 and Brisbane SD48
comply with the basic requirements and
the other relevant regulations of the directive 89/336/EWG.
ENGLISH
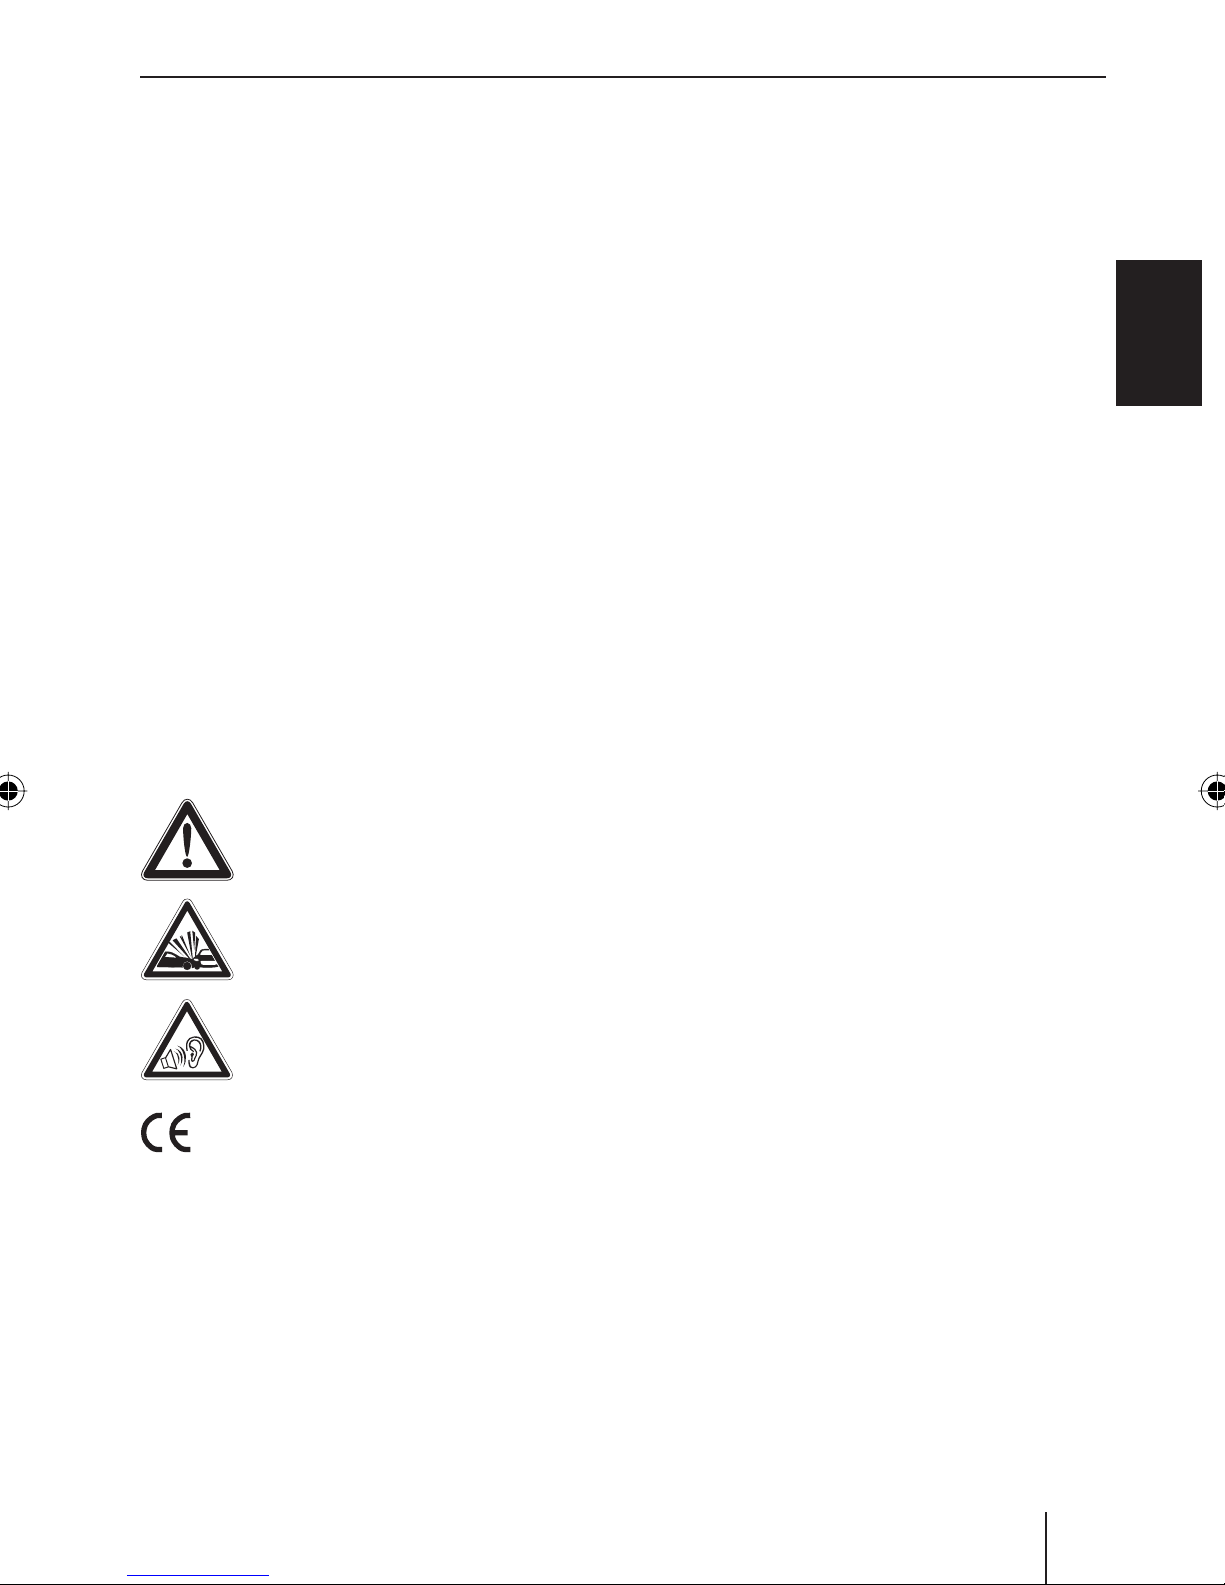
These instructions employ the following
symbols:
DANGER!
Warns about injuries
DANGER!
Warns about accidents
DANGER!
Warns about hearing loss
The CE mark confi rms the compliance with EU directives.
Identifi es a sequencing step
쏅
Identifi es a listing
•
43
Page 7
For your safety
For your safety
The device was manufactured according to
the state of the art and established safety
guidelines. Even so, dangers may occur if
you do not observe the safety notes in these
instructions.
If you are installing device
yourself
You may only install the device yourself if
you are experienced in installing car sound
systems and are very familiar with the electrical system of the vehicle. For this purpose, observe the installation instructions
at the end of these instructions.
Observe the following!
•
To protect your hearing, always listen at
a moderate volume. During mute phases (e.g. while the CD changer is changing the CD), changing the volume is not
detectable until after this mute phase.
Do not increase the volume during this
mute phase
•
Always listen at a moderate volume so
that you can always hear acoustic warning signals (e.g. police).
After operation
•
The device is worthless to a thief without the control panel. Always remove
the control panel whenever you leave
the vehicle.
•
Transport the control panel so that it is
protected against impacts and the contacts cannot become dirty.
DANGER!
Increased risk of injury from
connector
In case of an accident, the protruding connector in the front AUX-IN socket may cause
injuries. The use of straight plugs or adapters can lead to an increased risk of injury.
For this reason, we recommend using
•
angled jack plugs, e.g. the Blaupunkt
accessories cable (7 607 001 535).
In operation
Operate the device only if traffi c situa-
•
tion permits it! Stop at a suitable location to perform extensive settings.
Remove or attach the control panel only
•
while the vehicle is standing an.
Cleaning instructions
Solvents, cleaning and scouring agents as
well as dashboard spray and plastics care
product may contain ingredients that will
damage the surface of the device. Use only
a dry or slightly moistened cloth for cleaning the device.
Disposal note
Do not dispose of your old unit in the
household trash!
Use the return and collection systems available to dispose of the old device.
44
Page 8

Scope of delivery
Scope of delivery
The scope of delivery includes:
1 Car sound system
1 Support frame
2 Disassembly tools
1 Guide pin
1 USB connecting cable
1 Operating instructions
Optional equipment
(not part of the scope of delivery)
Use only accessories approved by
Blaupunkt.
Remote control
iPod/USB interface
The iPod interface or iPod/USB interface
allows connecting the iPod or iPod Mini to
the radio device and conveniently controlling the playback via the radio device. The
iPod/USB interface provides an additional
USB connection.
ENGLISH
Amplifi er
You can use all Blaupunkt and Velocity
amplifi ers.
CD changers
You can connect the following Blaupunkt
CD changers:
CDC A 03, CDC A 08 and IDC A 09.
The steering wheel and/or handheld remote control allows you to access the most
important functions of your car sound system safely and conveniently.
You cannot switch the device on/off using
the remote control!
You can fi nd out from your Blaupunkt dealer
or on the Internet at www.blaupunkt.com
which remote controls can be used with
your car sound system.
Bluetooth/USB interface
For Bluetooth applications, such as wireless
hands-free calling and Bluetooth streaming,
you can connect a Bluetooth interface. The
Bluetooth/USB interface provides an additional USB connection.
45
Page 9

Warranty Service
Warranty
We provide a manufacturer's warranty
for products bought within the European
Union. For devices purchased outside the
European Union, the warranty terms issued
by our respective responsible domestic
agency are valid.
The warranty terms can be called up under
www.blaupunkt.com or requested directly
from:
Blaupunkt GmbH
Hotline
Robert-Bosch-Str. 200
D-31139 Hildesheim
Service
In some countries, Blaupunkt offers a repair
and pick-up service.
Information about the availability of this
service in your country can be found at
www.blaupunkt.com.
If you want to take advantage of this service, you may request a pick-up service for
your device via the Internet.
46
Page 10

Detachable control panel
Detachable control panel
Theft protection
The device is equipped with a detachable
control panel (fl ip-release panel) to protect
your equipment against theft. The device
is worthless to a thief without this control
panel.
Protect your device against theft by taking
the control panel with you whenever you
leave your vehicle. Do not leave the control
panel inside your vehicle - not even in a hiding place.
The control panel has been designed to be
easy to use.
Notes:
Never drop the control panel.
•
Never expose the control panel to di-
•
rect sunlight or other heat sources.
Detaching the control panel
1
Press the button 1.
쏅
The locking mechanism of the control panel
is unlocked. The device switches off.
쏅
Pull the control panel straight out of the
device and to the left.
All the current settings are saved.
Attaching the control panel
Push the control panel into the guides
쏅
of the device from the left to the right.
ENGLISH
Avoid direct skin contact with the
•
control panel’s electrical contacts. If
necessary, clean the contacts with a
lint-free cloth moistened with cleaning alcohol.
Note:
When attaching the control panel, make
sure you do not push on the display.
쏅
Carefully push on the left side of the
control panel until it clicks into place.
47
Page 11

Switching on/off Timeout function
Switching on/off
There are various ways of switching the device on/off:
Switching on/off using button 4
To switch on the device, press button
쏅
4.
쏅
To switch off the device, press and
hold down button 4 for longer than
two seconds.
The device switches off.
Note:
To protect the vehicle battery, the device will switch off automatically after
one hour if the ignition is off.
Timeout function
The device features a time-out function
(time window). For example, if you press
the MENU button > and select a menu
item, the device switches back after approx. 8 seconds after the last button activation. The settings performed are saved.
Switching on/off via vehicle
ignition
The device will switch on/off simultaneously with the ignition if the device is correctly
connected to the vehicle’s ignition and you
did not switch the device off and back on by
pressing button 4.
Switching off with detachable
control panel
Detach the control panel.
쏅
The device switches off.
48
Page 12
Adjusting the volume
Adjusting the volume
You can adjust the volume in steps from
0 (off) to 50 (maximum).
To increase the volume,
turn the volume control 6 clockwise.
쏅
To decrease the volume,
turn the volume control 6 counter-
쏅
clockwise.
Setting the power-on volume
You can set the power-on volume. You
can adjust it manually or select the "LAST
VOL" setting. If you enable "LAST VOL",
the volume which was set the last time you
switched off the device is re-enabled.
Press the MENU button >.
쏅
The display shows "MENU".
쏅
Press the
until "ON VOLUME" appears on the display.
Press the
쏅
just the power-on volume and
adjust the power-on volume using the
쏅
or buttons 2.
or button 2 repeatedly
button 2 to manually ad-
Note:
To protect your hearing, the power-on
volume is limited to the value "38" for
the setting "LAST VOL". If the "LAST
VOL" setting is selected and the volume was set higher than "38" before
switch-off, the value "38" will be used
at switch-on.
Quickly reducing the volume
(MUTE)
You can quickly reduce the volume to a preset level (Mute).
쏅
Briefl y press button 4.
"MUTE" appears on the display.
Cancelling mute
To return to your previously set volume
level,
쏅
briefl y press button 4 again.
Adjusting the mute level
You can adjust the mute level.
쏅
Press the MENU button >.
The display shows "MENU".
ENGLISH
OR:
Press the
쏅
"LAST VOL" setting.
When you have fi nished making your changes,
press the MENU button >.
쏅
To exit the menu,
press the ESC button <.
쏅
button 2 to select the
쏅
Press the
edly until "MUTE LVL" appears on the
display.
쏅
Press the button
menu.
"MUTE" and the currently set value are displayed.
쏅
Adjust the mute level using the button
or 2.
or button 2 repeat-
2 to open the sub-
49
Page 13

Adjusting the volume
When you have fi nished making your changes,
press the MENU button >.
쏅
To exit the menu,
press the ESC button <.
쏅
Switching the confi rmation beep
on/off (BEEP)
The system will output a confi rmation beep
for some functions if you keep a button
pressed down for longer than two seconds,
for instance, when assigning a radio station
to a station preset button. You can switch
the beep on or off.
쏅
Press the MENU button >.
The display shows "MENU".
Muting during telephone mode
If your car sound system is connected with
a cell phone or navigation system, the car
sound system is muted when a call is incoming or during a voice output of the navigation. The call or the voice output is played
back via the loudspeakers of the card sound
system. In order for this feature to work, the
mobile telephone or navigation system must
be connected to the car sound system as
described in the installation instructions.
You can fi nd out from your Blaupunkt dealer
which navigation systems can be used with
your car sound system.
If a call is incoming or a navigation announcement takes place, the display shows
"TELEPHONE".
쏅
Press the
until "BEEP ON" or "BEEP OFF" appears
on the display.
쏅
Press the
submenu.
쏅
Switch the beep on or off using the
button 2. "OFF" means beep off,
"ON" means beep on.
When you have fi nished making your changes,
press the MENU button >.
쏅
To exit the menu,
press the ESC button <.
쏅
or button 2 repeatedly
button 2 to call up the
Telephone Audio/Navigation
Audio
During a telephone call or a voice output of
the navigation, no traffi c announcements
are switched through.
You can set the volume level at which the
telephone calls or navigation announcements are mixed in.
쏅
Press the MENU button >.
The display shows "MENU".
쏅
Press the
until "TEL VOL" appears on the display.
쏅
Press the
submenu.
"TELVOL" and the currently set value are
displayed.
or button 2 repeatedly
button 2 to call up the
50
쏅
Set the desired volume with the
button 2.
or
Page 14

Adjusting the volume Radio mode
When you have fi nished making your changes,
press the MENU button >.
쏅
To exit the menu,
press the ESC button <.
쏅
Notes:
If the volume listened to is higher than
•
the set "TEL VOL" value, telephone
calls or navigation announcements
are played back at the volume listened to.
Using the volume control 6, you can
•
adjust the volume for telephone calls
and navigation announcements directly during the playback.
Radio mode
Adjusting the tuner
To ensure proper functioning of the tuner,
the device must be set for the region in
which it is being operated. You can select
between Europe (EUROPE), America (USA)
and Thailand (THAI). The tuner is factoryset to the region in which it was sold. If you
experience problems with your radio reception, please check this setting.
The radio functions described in these operating instructions refer to the tuner setting EUROPE.
쏅
Switch off the device by pressing button 4.
ENGLISH
쏅
Hold the buttons 1 8 and DIS ;
pressed at the same time and switch on
the device again with the button 4.
The current setting is displayed.
쏅
Select your tuner region with the
or
button 2.
To save the setting and to exit the menu,
press the MENU button >.
쏅
Switching to radio mode
If you are in SD, USB, CD changer or AUXIN mode,
press the BND•TS button 5
쏅
or
press the SRC button 3 repeatedly
쏅
until "TUNER" appears on the display.
51
Page 15

Radio mode
Convenient RDS functions
This device is equipped with an RDS (Radio
Data System) radio receiver. Many FM stations broadcast a signal that not only carries the programme but also additional
information such as the station name and
programme type (PTY).
The station name appears on the display as
soon as the tuner receives it.
The convenient RDS functions AF
(Alternative Frequency) and REGIONAL extend your radio’s range of functions.
AF: If the RDS function is activated, the
•
radio automatically tunes into the best
receivable frequency for the station
that is currently set.
REGIONAL: At certain times, some ra-
•
dio stations divide their programme
into regional programmes providing
different content. You can use the REG
function to prevent the car radio from
switching to alternative frequencies
that are transmitting different programme content.
Note:
REGIONAL must be activated/deactivated (REG ON/OFF) separately in the
menu.
Switching the RDS function on/off
If you want to use the RDS functions (AF
and REGIONAL),
press and hold down the TRAF•RDS
쏅
button = for longer than two seconds.
The RDS function is active if RDS appears
on the display.
To deactivate,
쏅
press and hold down the TRAF•RDS
button = for longer than two seconds.
The RDS symbol disappears from the display.
Switching REGIONAL on/off
쏅
Press the MENU button >.
The display shows "MENU".
쏅
Press the
until "REG ON" or "REG OFF" appears
on the display.
Press the button
쏅
menu.
To switch REGIONAL on/off,
press the
쏅
Press the MENU button >.
쏅
To exit the menu,
press the ESC button <.
쏅
or button 2 repeatedly
2 to open the sub-
button 2.
Selecting the waveband/memory
bank
This device can receive programmes broadcast over the FM frequency range as well as
the MW and LW (AM) wavebands. There are
three memory banks available for the FM
waveband (FM1, FM2 and FMT) and one
for each of the MW and LW wavebands.
Five stations can be stored in each memory
bank.
To switch between the FM memory banks
(FM1, FM2 and FMT) and the MW and LW
wavebands,
briefl y press the BND•TS button 5.
쏅
52
Page 16
Radio mode
Tuning into a station
There are various ways of tuning into a station:
Automatic station seek tuning
Press the
쏅
The radio tunes into the next receivable
station.
Tuning into stations manually
You can also tune into stations manually.
Note:
You can only tune into stations manually if the convenient RDS function and
RDY are deactivated.
Press the
쏅
Browsing through broadcasting
networks (FM only)
If radio stations provide several programmes, you have the option of browsing
through these so-called "broadcasting networks".
or button 2.
or button 2.
Adjusting the sensitivity of the
station seek tuning (SENS)
You can choose whether the radio should
only tune into stations providing good reception or whether it can also tune into
those with a weak reception.
쏅
Press the MENU button >.
The display shows "MENU".
쏅
Press the
until "SENS" and the currently set value
appears on the display.
"SENS HI6" means that the tuner is set to
the highest sensitivity setting. "SENS LO1"
means it is set to the lowest sensitivity setting.
쏅
Press the button
menu.
Set the desired sensitivity level using
쏅
the
When you have fi nished making your changes,
press the MENU button >.
쏅
or button 2.
or button 2 repeatedly
2 to open the sub-
ENGLISH
Note:
The convenient RDS function and PTY
must be activated before you can use
this feature.
Press the
쏅
to the next station on the broadcasting
network.
Note:
When using this feature, you will only
be able to switch to stations that you
have received once before already. To
receive the stations, use the Scan or
Travelstore function.
or button 2 to switch
To exit the menu,
쏅
press the ESC button <.
Note:
You can set different sensitivity levels
for FM and AM (MW/LW).
Storing stations
Storing stations manually
Select the desired memory bank (FM1,
쏅
FM2, FMT) or one of the wavebands
(MW or LW).
Tune into the desired station.
쏅
53
Page 17

Radio mode
쏅
Press and hold down one of the station
buttons 1 - 5 8 for longer than two
seconds to assign the station to that
button.
Storing stations automatically
(Travelstore)
Starting SCAN
Press and hold down the MENU button
쏅
> for longer than two seconds.
Scanning begins. "SCAN" and the station
name or the frequency appear intermittently on the display.
You can automatically store the fi ve stations offering the strongest reception in the
region (only FM). The stations are stored in
the FMT memory bank.
Note:
Any stations that were previously
stored in this memory bank are deleted
in the process.
쏅
Press and hold down the BND•TS button 5 for longer than two seconds.
The storing procedure begins. "FM TSTORE"
appears on the display. After the process
has completed, the radio will play the station that is stored in memory location 1 of
the FMT memory bank.
Listening to stored stations
Select the memory bank or waveband.
쏅
Press the station button 1 - 5 8 of the
쏅
desired station.
Scanning receivable stations
(SCAN)
Cancelling the SCAN and continuing to
listen to a station
Press the MENU button >.
쏅
Scanning stops and the radio continues
playing the station that it tuned into last.
Setting the scanning time
(SCAN TIME)
Press the MENU button >.
쏅
The display shows "MENU".
Press the
쏅
until "SCAN TIME" appears on the display.
Press the button
쏅
menu.
"SCAN" and the currently set value are displayed.
Set the desired scan time using the
쏅
button 2.
or
When you have fi nished making your changes,
press the MENU button >.
쏅
or button 2 repeatedly
2 to open the sub-
You can use the scan function to play all the
receivable stations briefl y. You can set the
scanning time from 5 to 30 seconds in the
menu (in increments of 5 seconds).
54
To exit the menu,
press the ESC button <.
쏅
Note:
The adjusted scan time also applies to
scan processes in MP3/WMA mode.
Page 18

Radio mode
Programme type (PTY)
Besides transmitting the station name,
some FM stations also provide information on the type of programme that they are
Switching PTY on/off
The radio mode must be activated.
쏅
The display shows "MENU".
broadcasting. Your car radio can receive
and display this information.
쏅
For example, the programme types can be:
CULTURE TRAVEL JAZZ
쏅
SPORT NEWS POP
ROCK CLASSICS
쏅
You can use the PTY function to select stations of a particular programme type.
When you have fi nished making your chang-
PTY-EON
If you specify the programme type and start
seek tuning, the radio will switch from the
current station to a station of the selected
es,
쏅
To exit the menu,
쏅
programme type.
Press the MENU button >.
Press the
or button 2 repeatedly
until "PTY ON" or "PTY OFF" appears on
the display.
Press the
button 2 to display the
submenu.
Press the
button 2 to switch PTY
ON or OFF.
press the MENU button >.
press the ESC button <.
ENGLISH
Notes:
If the tuner does not fi nd a station
•
that corresponds to the selected programme type, you will hear a beep
and "NO PTY" appears briefl y in the
display. The radio will then retune to
the station that it received last.
If the tuned radio station or another
•
station on the broadcasting network
broadcasts your selected programme
type at a later point in time, the radio
will automatically switch from the currently tuned station or from SD mode,
USB mode or CD-changer mode to
the station whose programme type
matches the one you selected.
If you do not want to use the PTY EON
•
switching, disable PTY. First, switch
to radio mode with the SRC 3 or
BND•TS button 5.
Selecting the PTY language
You can select the language for the display
of the programme types. Options include
"DEUTSCH", "ENGLISH" and "FRANÇAIS".
쏅
Press the MENU button >.
The display shows "MENU".
쏅
Press the
or button 2 repeatedly until "PTY LANG" appears on the
display.
쏅
Press the
button 2 to display the
submenu.
The currently set language is displayed.
쏅
Set the desired language using the
or
button 2.
When you have fi nished making your changes,
press the MENU button >.
쏅
55
Page 19

Radio mode Traffi c information
To exit the menu,
press the ESC button <.
쏅
Selecting a programme type and
starting seek tuning
PTY must be activated (ON).
Press the
쏅
The current programme type appears briefly on the display.
During the display time, press the
쏅
button 2 to change to a different
program type.
Press the
쏅
seek tuning.
The radio will then tune into the next station that it fi nds that corresponds to your
selected programme type. If the tuner does
not fi nd a station that corresponds to the
selected programme type, you will hear a
beep and "NO PTY" appears briefl y in the
display. The previously used frequency is
adjusted again.
or button 2.
or
or button 2 to start
Traffi c information
Your device is equipped with an RDS-EON
receiver. EON stands for Enhanced Other
Network. Whenever a traffi c announcement
(TA) is broadcast, the system switches automatically from a station that does not provide traffi c reports to the appropriate traffi c
information station within the broadcasting
network that does.
Once the traffi c announcement has been
played, the system will switch back to the programme that you were listening to before.
In addition, the device offers the option of
receiving traffi c announcements even during the operation of SD, USB, CD changer
and external sources (AUX-IN). For this purpose, activate the priority for the traffi c information.
Switching traffi c information
priority on/off
Briefl y press the TRAF•RDS button
쏅
=.
Confi guring the display
In radio mode, you have the option of displaying the station name or frequency of the
current station or the waveband or memory
bank and the time.
To switch between the display options,
press the DIS button ;.
쏅
56
The priority for traffi c announcements is activated if the display shows the traffi c jam
symbol.
Notes:
You will hear a warning beep,
if you leave the reception area of a
•
traffi c information station that the
system is tuned into while you are
in the SD, USB, CD changer or AUX
mode, and the subsequent automatic
seek tuning cannot fi nd a new traffi c
information station.
if you retune the radio from a traffi c in-
•
formation station to a station that does
not broadcast traffi c information.
Page 20

Traffi c information
If you hear the warning beep, you can
either switch off traffi c information priority or tune into a station that broadcasts traffi c information.
Skipping a traffi c announcement
"TRAFFIC" is displayed during a traffi c announcement. To cancel a traffi c announcement without switching off the priority of
traffi c information:
During the traffi c announcement, press
쏅
the TRAF•RDS button = once.
The previously active audio source is played
again. If a traffi c announcement is broadcast again, the device automatically switches it through again.
Notes:
If the volume listened to is higher than
•
the set volume for traffi c announcements, then traffi c announcements
are played back one volume level
higher.
Using the volume control 6, you can
•
also adjust the volume during a traffi c announcement for the duration of
that announcement.
You can adjust the volume distribu-
•
tion for traffi c announcements during
a traffi c report. For further information, please read the "Sound" chapter.
ENGLISH
Setting the volume for traffi c
announcements
Press the MENU button >.
쏅
The display shows "MENU".
Press the
쏅
until "TA VOLUME" appears on the display.
Press the
쏅
menu.
"TA VOL" and the currently set value are displayed.
Set the desired volume using the
쏅
button 2.
When you have fi nished making your changes,
or button 2 repeatedly
button 2 to open the sub-
or
press the MENU button >.
쏅
To exit the menu,
press the ESC button <.
쏅
57
Page 21

MP3/WMA mode
MP3/WMA mode
You can play fi les with music data stored
on SD/MMC cards (Secure Digital or
Multimedia Card) and USB data carriers in
MP3 or WMA format using this car sound
system. The operation for playing MP3 and
WMA fi les is identical.
Notes:
WMA fi les with Digital Rights
•
Management (DRM) from online music shops cannot be played with this
device.
WMA fi les can only be played back
•
safely if they were created with
Windows Media Player version 8 or
later.
File system FAT16 or FAT32,
no NTFS!
ID3 tags Version 1 or 2
Files
Number 1,500 fi les (directories
Naming of
fi les
Only MP3 or WMA fi les,
directories, playlists
and tracks) per directory
File extension ".wma"/
".mp3"
Max. 24 characters
(more characters are
possible, but it reduces
the max. number of fi les)
No special characters or
umlauts
Preparation of an MP3/WMA
data carrier
Preparation of an SD/MMC card
You can write data onto the SD/MMC cards
with the help of a standard SD/MMC card
reader and your PC.
Note:
Blaupunkt cannot guarantee the correct functioning of all SD/MMC cards
available on the market and, for this
reason, recommends the use of SD/
MMC cards manufactured by "SanDisk"
or "Panasonic".
For a perfect access to SD/MMC cards, observe the information in the following table
when saving MP3/WMA titles on the SD/
MMC card:
Bit rate MP3: 32 to 320 kbps
WMA: 32 to 192 kbps
You can name each directory using a PC.
The name of the directory is then shown on
the display of the device.
If you like your fi les to be in the specifi c order, save the fi les on the card in the desired
sequence in which you want to play them
later.
58
Page 22

D01
D02
D03
D04
A
MP3/WMA mode
Switching to MP3 mode
Inserting/removing SD/MMC card
Insert the SD/MMC card with its la-
쏅
belled side to the left and its contacts
fi rst into the card slot 9 until it clicks
into place.
T001
T002
T003
T004
T005
T001
T002
T003
T004
T005
T006
T001
T002
T003
T004
T005
T006
T007
T008
T009
T010
T011
B
A Directories
B Tracks · Files
Preparing a USB data carrier
For the device to recognise a USB data carrier, it must be specifi ed as mass storage
device and formatted using the FAT16 or
FAT32 fi le system and contain MP3 or WMA
fi les.
You can create up to 1,000 directories on a
USB data carrier. You can use this device to
access directories individually. The directory depth is unlimited.
You can store up to 10,000 fi les in every
directory.
You can now select the SD/MMC card as audio source with the SRC button 3.
To remove the SD/MMC card,
push on the SD/MMC card until it dis-
쏅
engages.
Pull the SD/MMC card out of the card
쏅
slot 9.
Starting MP3 mode of SD/MMC cards
Press the SRC button 3 repeatedly
쏅
until the display shows "SD CARD".
The playback starts.
Connect USB data carrier and start MP3
mode
To be able to connect a USB data carrier
(e.g. a USB stick or USB hard disk), the
supplied USB cable must be connected to
the rear side of the device as described in
the installation instructions. This cable can
be routed, for example, to the glove compartment or a suitable place of the center
console.
Note
ENGLISH
Note
Blaupunkt cannot guarantee the proper functioning of all USB data carriers
available on the market.
Always switch off the device before
connecting or disconnecting the USB
data carrier so that the data carrier is
correctly registered and unregistered.
Connect the USB data carrier with the
쏅
USB cable.
59
Page 23

MP3/WMA mode
As soon as a USB data carrier is connected,
it can be selected with the SRC button 3.
The display shows "USB".
Confi guring the display
You can display various types of information on the current track:
File name or track name
•
Artist
•
Album name
•
Play time (PLAY)
•
Time (CLK)
•
Note:
File names and ID3 text with more than
9 characters are displayed as scrolling
text.
To switch between the different display
options,
press the DIS button ;.
쏅
Notes:
Artist and album name are a compo-
•
nent of the MP3 ID3 tags of version 1
and can only be displayed if they were
stored with the MP3 fi les. For further
details, please read the instructions
for your PC-MP3 software.
Artist and album name are each
•
displayed for approx. 10 seconds.
Afterwards, the fi le name is displayed
again.
If artist and album name are not avail-
•
able, the fi le name is displayed.
Selecting a directory
To move up or down to another directory,
press the
쏅
several times.
or 2 button once or
Selecting tracks
To move up or down to another track in the
current directory,
press the
쏅
several times.
or 2 button once or
Fast searching (audible)
To fast search backwards or forwards,
press and hold down the
쏅
2 for longer than two seconds.
Seek tuning continues as long as you hold
the button pressed.
or button
Repeating individual tracks or
whole directories (REPEAT)
You can repeatedly play the current track or
all tracks in the current directory.
Press the button 4 RPT 8 repeatedly
쏅
until the desired function appears on
the display:
"RPT TRACK" (current track)
•
"RPT DIR"
•
(all tracks in the current directory)
"RPT OFF" (end repeat)
•
As long as the repeat function is active, the
display shows the RPT symbol.
60
Page 24

MP3/WMA mode
Random track play (MIX)
You can play either all tracks in the current
directory or all tracks on the MP3 data carrier in random order.
Press the 5 MIX button 8 repeatedly
쏅
until the desired function appears on
the display:
"MIX DIR"
•
(all tracks in the current directory)
"MIX ALL"
•
(all tracks on the MP3 data carrier)
•
"MIX OFF"
(end playback in random order)
As long as the random playback function is
active, the display shows the MIX symbol.
Cancelling scan and continuing listening
to a track
쏅
Briefl y press the MENU button >.
The currently scanned track will then continue to be played normally.
Interrupting playback (PAUSE)
Press the 3 button 8.
쏅
"PAUSE" appears on the display.
Cancelling pause
Press the 3
쏅
Playback is continued.
button 8.
ENGLISH
Scanning tracks (SCAN)
You can scan (briefl y play) all the tracks on
the MP3 data carrier.
Press the MENU button > for longer
쏅
than 2 seconds.
The display intermittently shows "SCAN"
and the fi le name. The titles of the MP3 data
carrier are scanned in ascending order.
Note:
You can set the scanning time. For further information on setting the scanning time, please read the section entitled "Setting the scanning time" in the
"Radio mode" chapter.
61
Page 25

CD-changer mode
CD-changer mode
Notes:
Information about handling CDs, in-
•
serting CDs and operating the CD
changer can be found in the operating instructions supplied with your
CD changer.
•
Before connecting a CD changer,
check whether the "CDC ON" setting
has been select in the menu. For further details, please read the section
"Adjusting the rear AUX-IN input" in
the chapter "External audio sources".
Switching to CD-changer mode
Press the SRC button 3 repeatedly
쏅
until the display shows "CDC/AUX-IN".
If a CD changer is connected, the display
shows "CHANGER". The device starts playing the fi rst CD that the CD changer detects.
Selecting tracks
To move up or down to another track on the
current CD,
press the or 2 button once or
쏅
several times.
Fast searching (audible)
To fast search backwards or forwards,
press and hold down the
쏅
2 for longer than two seconds.
Seek tuning continues as long as you hold
the button pressed.
or button
Confi guring the display
Three options are available for the display in
CD changer mode:
Track number and playing time
•
Track number and time
•
CD number and track number
•
To switch between the different display options,
Selecting CDs
To move up or down to another CD,
press the
쏅
several times.
Note:
The device will ignore empty CD slots in
the changer and slots containing invalid
CDs.
or 2 button once or
press the DIS button ;.
쏅
Repeating individual tracks or
whole CDs (REPEAT)
You can repeatedly play the current track or
all tracks on the current CD.
Press the button 4 RPT 8 repeatedly
쏅
until the desired function appears on
the display:
"RPT TRACK" (current track)
•
"RPT DISC"
•
(all tracks on the current CD)
"RPT OFF" (end repeat)
•
62
Page 26

CD-changer mode
As long as the repeat function is active, the
display shows the RPT symbol.
Random track play (MIX)
You can play either all tracks on the current
CD or all CDs in the magazine in random order.
Press the 5 MIX button 8 repeatedly
쏅
until the desired function appears on
the display:
"MIX CD"
•
(all tracks on the current CD)
"MIX ALL" (all CDs in the magazine)
•
"MIX OFF"
•
(end random order)
As long as the random playback function is
active, the display shows the MIX symbol.
Interrupting playback (PAUSE)
Press the 3 button 8.
쏅
"PAUSE" appears on the display.
Cancelling pause
Press the 3
쏅
Playback is continued.
button 8.
ENGLISH
Scanning all tracks on all CDs
(SCAN)
To scan all the tracks of all inserted CDs in
ascending order for approx. 10 seconds
each,
press the MENU button > for longer
쏅
than 2 seconds.
The display changes between "SCAN" and
the track number. All CDs in the magazine
are scanned in ascending order.
Cancelling Scan and continuing listening
to a track
Briefl y press the MENU button >.
쏅
The currently scanned track will then continue to be played normally.
63
Page 27

Clock Time
Clock Time
Displaying the time
You can display the time in the tuner, SD,
USB and CD changer mode.
Press the button DIS ; repeatedly un-
쏅
til the time appears.
Setting the time
To set the time,
press the MENU button >.
쏅
The display shows "MENU".
Press the
쏅
until "CLOCK SET" appears on the display.
Press the
쏅
menu.
The currently set time appears on the display. The hours fl ash and can be adjusted.
Adjust the hours with the
쏅
ton 2.
Once the hours are set,
press the
쏅
The minutes fl ash.
Adjust the minutes with the
쏅
ton 2.
When you have fi nished making your changes,
press the MENU button >.
쏅
or button 2 repeatedly
button 2 to open the sub-
or but-
button 2.
or but-
Selecting 12/24-hour clock
mode
Press the MENU button >.
쏅
The display shows "MENU".
쏅
Press the
until "24 H MODE" or "12 H MODE" appears on the display.
쏅
Press the
submenu.
쏅
Press the
tween the modes.
When you have fi nished making your changes,
쏅
press the MENU button >.
To exit the menu,
쏅
press the ESC button <.
or button 2 repeatedly
button 2 to call up the
button 2 to switch be-
Displaying the time with device
and ignition switched off
To display the time when the device is off
and the vehicle ignition is on,
쏅
press the MENU button >.
The display shows "MENU".
쏅
Press the
until "CLOCK OFF" or "CLOCK ON" appears on the display.
쏅
Press the
submenu.
쏅
Press the
display between ON and OFF.
or button 2 repeatedly
button 2 to call up the
button 2 to switch the
To exit the menu,
press the ESC button <.
쏅
64
When you have fi nished making your changes,
쏅
press the MENU button >.
To exit the menu,
쏅
press the ESC button <.
Page 28

Sound
Sound
For every source (radio, SD, USB, CD
changer or AUX-IN), you can perform individual and separate settings for the sound
(bass, middle and treble) and the equalizer.
The X-Bass and volume distribution settings
(balance and fader) apply to all the audio
sources.
Equalizer
This device features a digital 3-band equalizer. This equalizer allows for selecting one
frequency each for bass, treble and middle and to adjust the level for the selected
frequency. In addition, you can adjust the
quality factor for bass and middle.
Some settings feature an "E" (for
"ENHANCED"), e.g. "E-BASS". These settings
are performed in the "ENHANCED" submenu.
Note:
The table does not contain all the settings that are possible in the menus
"AUDIO" and "ENHANCED".
Adjusting BASS
To adjust the level of the bass,
쏅
press the MENU button >.
The display shows "MENU".
쏅
Press the
or button 2 repeatedly
until "AUDIO" appears on the display.
Press the
쏅
button 2 to call up the
audio menu.
"BASS" appears on the display.
ENGLISH
Equalizer settings
The table below shows the bass, treble and
equaliser setting options in the "AUDIO"
menu.
BASS TREBLE ENHANCED
Level
(GAIN)
Frequency
(FREQ)
Quality fac-
tor (QFAC)
-7 to +7 -7 to +7 – -7 to +7 -
––
––
Press the
쏅
button 2 to call up the
submenu.
"BASS" and the currently set value for the
level are displayed.
Audio
E-BASS E-MIDDLE E-TREBLE
60 Hz, 80 Hz,
100 Hz or
200 Hz
1.0, 1.25, 1.5
or 2.0
0.5 kHz,
1.0 kHz,
1.5 kHz or
2.5 kHz
–
10 kHz,
12.5 kHz,
15 kHz or
17.5 kHz
0.5, 0.75, 1.0
or 1.25
Basic settings Advanced settings
65
Page 29

Sound
Press the or button 2 to change
쏅
the value.
When you have fi nished making your changes,
press the MENU button >.
쏅
Adjusting E-BASS
To set the frequency and the quality factor
of the bass,
press the MENU button >.
쏅
The display shows "MENU".
To exit the menu,
press the ESC button <.
쏅
Adjusting TREBLE
To adjust the level of the treble,
press the MENU button >.
쏅
The display shows "MENU".
쏅
Press the
or button 2 repeatedly
until "AUDIO" appears on the display.
Press the
쏅
button 2 to call up the
audio menu.
"BASS" appears on the display.
쏅
Press the
or button 2 repeatedly
until "TREBLE" appears on the display.
Press the
쏅
button 2 to call up the
submenu.
"TREBLE" and the currently set value for the
level are displayed.
쏅
Press the
or button 2 repeatedly
until "AUDIO" appears on the display.
Press the
쏅
button 2 to call up the
audio menu.
"BASS" appears on the display.
쏅
Press the
or button 2 repeatedly
until "ENHANCED" appears on the display.
Press the
쏅
button 2 to call up the
submenu.
"E-BASS" appears on the display.
Press the
쏅
button 2 to call up the
submenu.
"FREQ" and the currently set value are displayed.
Press the
쏅
or button 2 to select between "FREQ" (frequency) and
"QFAC" (quality factor).
Press the
쏅
or button 2 to change
the value.
When you have fi nished making your changes,
press the MENU button >.
쏅
To exit the menu,
press the ESC button <.
쏅
66
Press the
쏅
or button 2 to change
the selected setting.
When you have fi nished making your changes,
press the MENU button >.
쏅
To exit the menu,
press the ESC button <.
쏅
Page 30

Sound
Adjusting E-TREBLE
To adjust the frequency of the treble,
press the MENU button >.
쏅
The display shows "MENU".
쏅
Press the
or button 2 repeatedly
until "AUDIO" appears on the display.
Press the
쏅
button 2 to call up the
audio menu.
"BASS" appears on the display.
쏅
Press the
or button 2 repeatedly
until "ENHANCED" appears on the display.
Press the
쏅
button 2 to call up the
submenu.
"E-BASS" appears on the display.
Press the
쏅
or button 2 repeatedly until "E-TREBLE" appears on the
display.
Press the
쏅
button 2 to call up the
submenu.
"FREQ" (frequency) and the currently set
value are displayed.
Press the
쏅
or button 2 to change
the selected setting.
When you have fi nished making your changes,
press the MENU button >.
쏅
To exit the menu,
press the ESC button <.
쏅
Adjusting E-MIDDLE
To set the gain, the frequency and the quality factor of the middle,
쏅
press the MENU button >.
The display shows "MENU".
쏅
Press the
or button 2 repeatedly
until "AUDIO" appears on the display.
Press the
쏅
button 2 to call up the
audio menu.
"BASS" appears on the display.
쏅
Press the
or button 2 repeatedly
until "ENHANCED" appears on the display.
Press the
쏅
button 2 to call up the
submenu.
"E-BASS" appears on the display.
Press the
쏅
or button 2 repeatedly until "E-MIDDLE" appears on the
display.
Press the
쏅
button 2 to call up the
submenu.
"GAIN" and the currently set value are displayed.
Press the
쏅
or button 2 to select
between "GAIN", "FREQ" (frequency)
and "QFAC" (quality factor).
Press the
쏅
or button 2 to change
the selected setting.
When you have fi nished making your changes,
ENGLISH
press the MENU button >.
쏅
To exit the menu,
press the ESC button <.
쏅
67
Page 31

Sound
Setting the left/right volume
distribution (BALANCE)
press the MENU button >.
쏅
The display shows "MENU".
Press the
쏅
until "AUDIO" appears on the display.
Press the
쏅
audio menu.
"BASS" appears on the display.
Press the
쏅
edly until "BALANCE" appears on the
display.
Press the
쏅
submenu.
"BAL" and the currently set value are displayed.
Press the
쏅
the volume distribution right (R)/left
(L).
When you have fi nished making your changes,
쏅
press the MENU button >.
To exit the menu,
쏅
press the ESC button <.
or button 2 repeatedly
button 2 to call up the
or button 2 repeat-
button 2 to call up the
or button 2 to adjust
Press the
쏅
until "FADER" appears on the display.
Press the
쏅
submenu.
"FADER" and the currently set value are displayed.
쏅
Press the
the volume distribution front (F)/rear
(R).
When you have fi nished making your changes,
쏅
press the MENU button >.
To exit the menu,
쏅
press the ESC button <.
or button 2 repeatedly
button 2 to call up the
or button 2 to adjust
Equalizer presettings (PRESETS)
This device features an equalizer in which
the settings for the music genres "POP",
"ROCK" and "CLASSIC" are already programmed.
To select an equalizer preset,
쏅
press the MENU button >.
The display shows "MENU".
쏅
Press the
until "AUDIO" appears on the display.
or button 2 repeatedly
Adjusting the front/rear volume
distribution (FADER)
Press the MENU button >.
쏅
The display shows "MENU".
Press the
쏅
until "AUDIO" appears on the display.
Press the
쏅
audio menu.
"BASS" appears on the display.
68
or button 2 repeatedly
button 2 to call up the
쏅
Press the
audio menu.
"BASS" appears on the display.
쏅
Press the
until "ENHANCED" appears on the display.
쏅
Press the
submenu.
"E-BASS" appears on the display.
button 2 to call up the
or button 2 repeatedly
button 2 to call up the
Page 32

Sound X-Bass
Press the or button 2 repeat-
쏅
X-BASS
edly until "PRESETS" appears on the
display.
X-BASS allows you to increase the bass at
low volume. The selected X-Bass settings
Press the
쏅
call up the submenu.
The current presetting is displayed.
Press the
쏅
the selected setting. Select "P-EQ OFF"
to switch off the equalizer.
When you have fi nished making your changes,
press the MENU button >.
쏅
button 2 repeatedly to
or button 2 to change
are effective for all audio sources (radio,
SD, USB, CD changer or AUX-IN).
You have two options of adjusting X-BASS:
You can adjust the X-BASS boost and the
cut-off frequency to be boosted. The XBASS boost can be changed in both submenus, "X-BASS" and "E-XBASS". The following table shows the setting options in
the "AUDIO" menu.
ENGLISH
To exit the menu,
press the ESC button <.
쏅
Audio
X-BASS ENHANCED
E-XBASS
Boost
(GAIN)
Frequency
(FREQ) –
0 to 3
400 Hz,
800 Hz,
2400 Hz, FLAT
Adjusting the X-BASS boost
The X-BASS boost can be set to levels 0
(X-Bass function off) to 3.
쏅
Press the MENU button >.
The display shows "MENU".
쏅
Press the
until "AUDIO" appears on the display.
or button 2 repeatedly
쏅
Press the
button 2 to call up the
audio menu.
"BASS" appears on the display.
69
Page 33

X-Bass
Press the or button 2 repeatedly
쏅
until "X-BASS" appears on the display.
Press the
쏅
submenu.
button 2 to call up the
Press the
쏅
button 2 to call up the
submenu.
"X-BASS" and the currently set value are
displayed.
쏅
Press the
or button 2 repeatedly
until the desired setting appears on the
display.
When you have fi nished making your changes,
쏅
press the MENU button >.
To exit the menu,
쏅
press the ESC button <.
Adjusting E-XBASS
In the "E-XBASS" submenu, you can also adjust the cut-off frequency in addition to the
X-BASS boost. You can select whether the
increase should affect the entire X-BASS
frequency range (setting "FLAT") or purposefully only one of three X-BASS frequencies (400 Hz, 800 Hz, 2400 Hz).
"E-BASS" appears on the display.
Press the
쏅
or button 2 repeatedly until "E-XBASS" appears on the
display.
Press the
쏅
button 2 to call up the
submenu.
"GAIN" and the currently set value are displayed.
Press the
쏅
or button 2 to select
between "GAIN" (X-BASS boost) and
"FREQ" (frequency).
Press the
쏅
or button 2 to change
the selected setting.
When you have fi nished making your changes,
press the MENU button >.
쏅
To exit the menu,
press the ESC button <.
쏅
쏅
Press the MENU button >.
The display shows "MENU".
쏅
Press the
or button 2 repeatedly
until "AUDIO" appears on the display.
쏅
Press the
button 2 to call up the
audio menu.
"BASS" appears on the display.
쏅
Press the
or button 2 repeatedly
until "ENHANCED" appears on the display.
70
Page 34

Display
Display
If you switch on the vehicle illumination,
the display brightness switches day mode
to night mode. This requires that your car
sound system is connected as described in
the installation instructions. Your vehicle
must feature the corresponding connection
option.
Adjusting the display brightness
You can adjust the display brightness separately for night (DIM NIGHT) and day (DIM
DAY) in steps ranging from 1 to 16.
Press the MENU button >.
쏅
The display shows "MENU".
쏅
Press the
until "DIM DAY" or "DIM NIGHT" appears
on the display.
Press the
쏅
submenu.
"DAY" or "NIGHT" and the currently set value
are displayed.
Press the
쏅
the brightness.
When you have fi nished making your changes,
press the MENU button >.
쏅
or button 2 repeatedly
button 2 to call up the
or button 2 to adjust
Setting the display illumination
colour
For the display illumination, you can select a colour from the RGB spectrum (redgreen-blue) or mix using the colours red
and green, select a colour during the colour scan or switch on a constant colour
change.
Mixing the color for the display
illumination (DISP COL)
To customise the display illumination to suit
your tastes you can either mix a colour yourself using the three primary colours red,
green and blue (RGB) or from the colours
red and green (RG).
쏅
Press the MENU button >.
The display shows "MENU".
쏅
Press the
edly until "DISP COL" appears on the
display.
Press the
쏅
menu or the
RG menu.
The display shows "4096 COL" for the RGB
menu or "256 COL" for the RG menu.
Press the
쏅
menu for mixing your own colour.
or button 2 repeat-
button 2 to open the RGB
button 2 to open the
button 2 to open the
ENGLISH
To exit the menu,
press the ESC button <.
쏅
Either "R", "G", and "B" or "R" and "G" are
displayed with the current values. The setting for "R" is activated. You can adjust a
value from 0 to 16 each for every available
colour component.
71
Page 35

Display
Press the or button 2 to switch
쏅
between the colour components.
Press the
쏅
or button 2 to adjust
the value of a colour component.
When you have fi nished making your changes,
press the MENU button >.
쏅
To exit the menu,
쏅
press the ESC button <.
Selecting the colour of the display
illumination from the colour scan
(COL SCAN)
쏅
Press the MENU button >.
The display shows "MENU".
쏅
Press the
or button 2 repeatedly until "COL SCAN" appears on the
display.
쏅
Press the
button 2 to start the col-
our seek.
The device starts changing the display illumination colour. During the colour scan, the
display intermittently shows "SCANNING"
and "OK (MENU)".
Switching the constant colour change
for the display illumination on/off
(SCAN)
You can select a constant colour change as
the colour of the display illumination. If the
colour change is activated, the display colour changes constantly. The colour change
is switched on or off in the menu.
쏅
Press the MENU button >.
The display shows "MENU".
쏅
Press the
or button 2 repeatedly
until "SCAN ON" or "SCAN OFF" appears on the display.
Press the
쏅
button 2 to call up the
submenu.
Press the
쏅
button 2 to toggle between ON (colour change on) or OFF
(colour change off).
When you have fi nished making your changes,
press the MENU button >.
쏅
To exit the menu,
press the ESC button <.
쏅
Note:
You can cancel the colour scan by
pressing the
or button 2 without
adjusting a new display colour.
To select the currently set colour,
쏅
press the MENU button >.
To exit the menu,
쏅
press the ESC button <.
72
Page 36

External audio sources
External audio sources
External audio sources, such as portable
CD players, MiniDisc players or MP3 players, can be connected to the device in two
ways.
1.
To the rear AUX-IN input (if no CD
changer is connected to the device).
2.
To the front AUX-IN socket.
Note:
The Blaupunkt Bluetooth/USB interface can also be connected via the
rear AUX-IN input. The menu offers the
menu items "C‘N‘C", "CDC ON/OFF"
and "BLUETOOTH", which are used
for the settings and functions of the
Bluetooth/USB interface. These menu
items are explained in the operating
instructions of the Bluetooth/USB interface.
ton 2 to input the character of the
current position, and the
button
2 to change to the next position
An adapter cable is needed to con-
•
nect an external audio source to
the rear AUX-IN input. You can obtain this cable (Blaupunkt no.:
7 607 897 093) from your Blaupunkt
dealer.
Adjusting the rear AUX-IN input
Depending on which device you connect
with the rear AUX-IN input, you must select
the corresponding setting in the menu:
•
"CDC ON" for CD changer and other external audio sources.
•
"CDC OFF" for the Blaupunkt Bluetooth/
USB interface.
To check the setting and change it, if necessary,
ENGLISH
Rear AUX-IN input
The rear AUX-IN input can be selected with
the SRC button 3. The display then shows
"CDC/AUX-IN".
Notes:
•
For the rear AUX-IN input, you can enter a separate name that is shown on
the display if you select the connected audio source. To do so, call up the
"AUX EDIT" menu item in the menu. In
the submenu, press the
or but-
쏅
press the MENU button >.
The display shows "MENU".
쏅
Press the
or button 2 repeatedly
until "CDC ON" or "CDC OFF" appears
on the display.
To save the setting,
쏅
press the
button 2 to open the sub-
menu.
쏅
Press the
button 2 to change between the settings "CDC ON" and "CDC
OFF".
73
Page 37

External audio sources
When you have fi nished making your changes,
press the MENU button >.
쏅
To exit the menu,
press the ESC button <.
쏅
Front AUX-IN socket
As soon as an audio source is connected to
the front AUX-IN socket, it can be selected
with the SRC button 3. "FRONT AUX" then
appears on the display.
Mixing an external audio source
with another audio source
(MIX AUX)
You can play back an external audio source
together with any other audio source at
the same time. The simultaneous playback
must be activated in the menu for the desired external audio source.
For the settings "FRONT AUX" and "REAR
AUX", the audio source connected via the
Front-AUX-IN socket or the rear AUX-IN input is played back together with the currently selected audio source (e.g. radio
or SD card). With the "MIX OFF" setting,
only the currently selected audio source is
played back.
쏅
Press the MENU button >.
The display shows "MENU".
쏅
Press the
until "MIX AUX" appears on the display.
쏅
Press the
submenu.
쏅
Press the
"FRONT AUX", "REAR AUX" and "MIX
OFF".
or button 2 repeatedly
button 2 to call up the
button 2 to select from
74
Page 38

Factory settings
Factory settings
(Normset)
You can reset the device to the factory settings.
Notes:
Your personal settings are deleted
•
during reset (Normset).
The setting "CDC ON" or "CDC OFF" is
•
not changed by the reset.
Press the MENU button >.
쏅
The display shows "MENU".
쏅
Press the
edly until "NORMSET" appears on the
display.
To reset the device to the factory settings,
or button 2 repeat-
Factory settings:
Volume of traffi c announcements (TA VOL)
Power-on volume
(ON VOL)
Volume of muting
(MUTE LEVEL)
Volume of telephone/navigation announcement
(TEL VOL)
Seek tuning sensitivity
(SENS)
Scan time (SCAN TIME) 10
Programme type (PTY) OFF
30
20
0
25
HI6
ENGLISH
press the MENU button > for longer
쏅
than 4 seconds.
"NORM ON" appears on the display and the
device is reset.
Note:
If you press the MENU button > for
less than 4 seconds, the device is not
reset and the display shows "NORM
OFF". Your settings are retained.
PTY language
(PTY LANG)
Time display (CLOCK) OFF
Time (CLOCK SET) 0:00
Time display mode
(CLOCK MODE)
Confi rmation beep
(BEEP)
Regional function (REG) OFF
Display brightness DAY 15,
RDS ON
ENGLISH
24H
ON
NIGHT 12
75
Page 39

Technical data
Technical data
Amplifi er
Output power: 4 x 26 watt sine
according to
DIN 45 324 at
14.4 V
4 x 50 watt
max. power
Tuner
Wavebands in Europe:
FM: 87.5 - 108 MHz
MW: 531 - 1 602 kHz
LW : 153 - 279 kHz
Wavebands in the US:
FM: 87.7 - 107.9 MHz
AM: 530 - 1710 kHz
Input sensitivity
AUX-IN input
(rear): 2 V / 6 kΩ
AUX-IN input
(front): 500 mV / 6 kΩ
Tel./Navi input: 10 V / 1 kΩ
Weight
0.8 kg
Wavebands THAI:
FM: 87.5 - 108 MHz
MW: 531 - 1 602 kHz
FM frequency response:
35 - 16,000 Hz
SD card/MMC
Frequency range: 20 - 20,000 Hz
Pre-amp out
4 channels: 2 V
76
Subject to changes!
Page 40

Einbauanleitung • Installation instructions • Notice de montage • Istruzioni di installazione •
Inbowhandleiding • Monteringsanvisning • Instrucciones de instalación • Instruções de montagem • Monteringsvejledning • Instrukcja montażowa • Návod k montáži • Montážny návod •
Инструкция по установке
Einbauanleitung
Sicherheitshinweise
Für die Dauer der Montage und
des Anschlusses beachten Sie bitte folgende Sicherheitshinweise.
• Minuspol der Batterie abklemmen!
Dabei die Sicherheitshinweise des
Kfz- Herstellers beachten.
• Beim Bohren von Löchern darauf
achten, dass keine Fahrzeugteile beschädigt werden.
• Der Querschnitt des Plus- und Minus-
2
kabels darf 1,5 mm
schreiten.
• Fahrzeugseitige Stecker nicht an
das Radio anschließen!
Die für Ihren Fahrzeugtyp erforder-
lichen Adapterkabel erhalten Sie im
BLAUPUNKT-Fachhandel.
• Je nach Bauart kann Ihr Fahrzeug
von dieser Beschreibung abweichen. Für Schäden durch Einbauoder Anschlussfehler und für Folgeschäden übernehmen wir keine
Haftung.
Sollten die hier aufgeführten Hin-
weise für Ihren Einbau nicht passen, so wenden Sie sich bitte an
Ihren Blaupunkt-Fachhändler, Ihren
Fahrzeughersteller oder unsere
Telefon-Hotline.
Bei Einbau eines Amplifi er oder
Changers müssen unbedingt erst die
Gerätemassen angeschlossen werden,
nicht unter-
bevor die Stecker für die Line-In- oder
Line-Out-Buchse kontaktiert werden.
Fremdgerätemassen dürfen nicht an
der Autoradiomasse (Gehäuse) angeschlossen werden.
Installation instructions
Safety instructions
When carrying out installation
work and making connections please
observe the following safety instructions:
• Disconnect the negative terminal of
the battery! When doing so, please
observe the vehicle manufacturer’s
safety instructions.
• Make sure you do not damage vehi-
cle components when drilling any
holes.
• The cross sections of the positive
and negative cables must not be less
2
than 1.5 mm
• Do not connect the vehicle’s plug
connectors to the radio!
You can obtain the adapter cable re-
quired for your vehicle type from any
BLAUPUNKT dealer.
• Depending on the model, your vehi-
cle may differ from the description
provided here. We accept no responsibility for any damages due to incorrect installation or connection or for
any consequential damages.
.
484
Page 41

If the information provided here is
not suitable for your specifi c installation requirements, please contact
your Blaupunkt dealer, your vehicle
manufacturer or our telephone hotline.
When installing an amplifi er or changer,
you must fi rst connect the device earth
connections before connecting the
plugs for the line-in or line-out jacks.
Earth connection of external devices
may not be connected to earth of car
sound system (housing).
Notice de montage
connexion et en cas de dommages
consécutifs.
Si les indications décrites ici ne s’ap-
pliquent au montage que vous voulez
effectuer, adressez-vous à votre revendeur Blaupunkt, votre constructeur automobile ou notre service
d’assistance téléphonique.
Pour le montage d’un amplifi cateur ou
changeur, les masses d’appareil doivent être d’abord connectées avant de
connecter les fi ches pour les connecteurs Line In ou Line Out.
Les masses des appareils externes ne
doivent pas être raccordées à la masse de l'autoradio (boîtier).
Consignes de sécurité
Respecter les consignes de sécurité suivantes pendant la durée du
montage et du branchement.
• Débrancher le pôle (-) de la batterie !
Respecter les consignes de sécurité
du constructeur automobile !
• Veiller à n’endommager aucune piè-
ce du véhicule en perçant des trous.
• La section du câble (+) et (-) ne doit
pas dépasser 1,5 mm
• Ne pas brancher les connecteurs
du véhicule sur la radio !
Les câbles d’adaptation nécessai-
res pour le type de véhicule sont
disponibles auprès des revendeurs
BLAUPUNKT.
• En fonction du modèle, votre véhi-
cule peut différer de cette description. Nous déclinerons toute responsabilité en cas de dommages causés
par des erreurs de montage ou de
2
.
Istruzioni di
installazione
Note di sicurezza
Durante il montaggio e l’allacciamento osservate per favore le seguenti
istruzioni sulla sicurezza.
• Staccate il polo negativo della batte-
ria! Nel fare ciò osservate le istruzioni
di sicurezza del fabbricante d’auto.
• Quando praticate dei fori, fate at-
tenzione a non danneggiare nessuna
parte dell’autovettura.
• La sezione dei cavi positivi e nega-
tivi non deve essere mai inferiore
2
a 1,5 mm
• Non collegate alla radio le spine
in dotazione di autovettura!
Richiedete ad un negoziante specia-
lizzato in articoli BLAUPUNKT il cavo
.
485
Page 42

di adattamento richiesto per il vostro
modello di autovettura.
• A seconda del modello il Suo veicolo
può differire da questa descrizione.
Non forniamo garanzia per danni
derivanti da errori di montaggio o
di collegamento e per danni conseguenti.
• De dwarsdoorsnede van de plusen minkabel mag niet minder dan
2
1,5 mm
• Stekker aan de voertuigkant niet
aan de radio aansluiten!
De voor uw voertuig vereiste adap-
terkabel is bij de BLAUPUNKT-vakhandel verkrijgbaar!
zijn.
Se le indicazioni qui elencate non
sono adatte al Suo montaggio, La preghiamo di rivolgersi al Suo rivenditore Blaupunkt, al fabbricante dell’auto
o alla nostra hotline telefonica.
Quando vengono montati un amplifi catore o un multilettore CD, bisogna
innanzi tutto allacciare le masse degli
apparecchi prima di eseguire la connessione delle spine con le prese line-in e
line-out.
Le masse di altri apparecchi non devono essere collegate alla massa dell'autoradio (involucro).
Inbowhandleiding
Adviezen voor de
veiligheid
• Afhankelijk van de uitvoering kan uw
auto afwijken van deze beschrijving.
Voor schade door fouten in montage
of aansluiting en schade als gevolg
daarvan aanvaarden wij geen aansprakelijkheid.
Mochten de hier vermelde aanwijzin-
gen voor de montage voor u niet van
toepassing zijn, dan kunt u contact
opnemen met uw Blaupunkt-vakhandel, uw autofabrikant of onze telefoon-hotline.
Bij inbouw van een versterker of cd-wisselaar moeten eerst de massacontacten
van de apparaten worden verbonden
voordat de stekkers voor de line-in- of
line-out-bussen worden aangesloten.
De massa van andere apparaten mag
niet aan de massa van de autoradio
(huis) worden aangesloten.
Wilt u dedurende het monteren en aansluiten de volgende veiligheidsadviezen
in acht nemen.
• De minpool van de batterij afklemmen! De veiligheidsadviezen van de
fabrikant in acht nemen.
• Bij het gaten boren erop letten dat
geen voertuigonderdelen worden
beschadigd.
486
Monteringsanvisning
Skyddsanvisningar
Vänligen beakta följande skyddsanvisningar under pågående montage
och anslutning.
• Lossa polskon från batteriets minus-
pol! Följ därvid fordonstillverkarens
skyddsanvisningar.
Page 43

• Se till att inga av fordonets komponenter skadas i samband med borrning av hål.
• Plus- och minuskabelns ledningsa-
2
rea måste vara minst 1,5 mm
.
• Fordonets stickkontakt får inte
anslutas till radion!
Din BLAUPUNKT fackhandel tillhan-
dahåller för resp fordonstyp erforderlig adapterkabel.
• Beroende på konstruktionstyp kan
fordonet avvika från denna beskrivning. Vi frånsäger oss allt ansvar för
skada eller följdskada pga. felaktig
montering eller anslutning.
• Desemborne el polo negativo de la
batería. Observe las normas de seguridad dadas por el fabricante del
vehículo.
• Al perforar agujeros, asegúrese de
no dañar ninguna pieza del vehículo.
• La sección transversal del cable positivo y del cable negativo no debe
2
ser menor de 1,5 mm
.
• ¡No conecte a la radio los conecto-
res ubicados en el vehículo!
Los cables adaptadores necesarios
para su vehículo los encontrará en el
comercio especializado en artículos
de la marca BLAUPUNKT.
Om här givna monteringsanvisning-
ar ej stämmer överens med faktiska
förhållanden, vänligen kontakta
Blaupunkt fackhandel, representant
för fordonets tillverkare eller vår telefonkundtjänst.
Vid montering av förstärkare eller cdväxlare måste först apparatstommen
jordas, innan stickpropparna ansluts till
in- eller utgångarna (hylstag line-in resp
line-out).
Jord från andra apparater får inte
anslutas till bilradions jord (höljet).
Instrucciones de
instalación
Normas de seguridad
• Dependiendo del modelo, es posible
que su vehículo varíe un poco con
respecto a la descripción aquí dada.
Tenga en cuenta que no asumimos
ninguna responsabilidad por los daños debidos a un montaje o conexión
incorrectos ni por los daños resultantes.
Si las instrucciones aquí dadas no
son aptas para el montaje en su vehículo, póngase en contacto con su
proveedor de artículos Blaupunkt o
con el fabricante del vehículo, o llame a nuestro teléfono de atención al
cliente.
En caso de montar un amplifi cador o un
cambiadiscos, es necesario conectar la
puesta a tierra de las unidades antes de
establecer el contacto de los conectores
para las hembrillas Line-In y Line-Out.
Durante el montaje y la conexión
es imprescindible observar las siguientes normas de seguridad.
No deben conectarse masas de otros
equipos a la masa de la radio (carcasa).
487
Page 44

Instruções de
montagem
Instruções de segurança
Durante a montagem e a ligação
do aparelho, queira respeitar as seguintes instruções de segurança.
• Separar o pólo negativo da bateria!
Respeitar ao mesmo tempo as instruções de segurança do fabricante
do automóvel.
• Quando se procede à furagem de
buracos, prestar atenção para não
serem danifi cadas quaisquer partes
do veículo.
• As secções transversais dos cabos
positivo e negativo não devem ser
2
inferiores a 1,5 mm
.
de se conectar as fi chas às tomadas Line
In ou Line Out.
A massa de aparelhos externos não
deve ser ligada à massa do auto-rádio
(caixa).
Monteringsvejledning
Sikkerhedshenvisninger
Under monteringen og tilslutningen skal følgende sikkerhedshenvisninger iagttages.
• Batteriets negative pol skal afbry-
des! Herved skal bilfabrikantens sikkerhedshenvisninger iagttages.
• Vær opmærksom på, at ingen bildele
ødelægges under boringen af huller.
• Não ligar as fi chas existentes do
lado do automóvel ao auto-rádio!
Os cabos adaptadores necessários
para o seu automóvel podem ser
adquiridos nos revendedores da
BLAUPUNKT.
• O seu veículo pode divergir desta
descrição em função do modelo.
Não assumimos qualquer responsabilidade por erros de montagem ou
de ligação nem por danos daí decorrentes.
Caso as presentes instruções não se-
jam adequadas para a montagem no
seu veículo, dirija-se ao revendedor
da Blaupunkt, ao fabricante do seu
veículo ou à nossa linha verde.
• Tværsnittet af plus- og minuskablet
2
må ikke underskride 1,5 mm
• Bilens stik må ikke tilsluttes radio-
en!
De nødvendige adapterkabler til din
biltype kan købes hos BLAUPUNKTspecialforretningen.
• Alt efter konstruktion kan bilen afvige fra denne beskrivelse. For skader
på grund af monterings- eller tilslutningsfejl og for følgeskader overtager vi intet ansvar.
Hvis de her anførte henvisninger
til monteringen ikke skulle passe,
kontakt din Blaupunkt-specialforretning, bilfabrikanten eller vor telefonhotline.
.
No caso de montagem de um amplifi cador ou leitor multi-CD, é imprescindível
ligar primeiro os aparelhos à terra antes
488
Ved montering af en forstærker eller et
Multi CD-apparat skal apparaternes stel
Page 45

først tilsluttes, før stikkene for tilslutningerne Line-In eller Line-Out sættes i.
Eksterne enheders stelforbindelse
må ikke sluttes til bilradioens stelforbindelse (kabinet).
Instrukcja montażowa
taktować się z autoryzowanym sprzedawcą produktów Blaupunkt, producentem pojazdu lub zadzwonić do
naszej infolinii.
Przy montażu wzmacniacza lub zmieniarki należy koniecznie najpierw podłączyć masy urządzeń, zanim połączona
zostanie wtyczka do gniazda Line-In lub
Line-Out.
Wskazówki bezpieczeństwa
Podczas montażu i podłączania należy
przestrzegać poniższych wskazówek
bezpieczeństwa.
• Odłączyć biegun ujemny akumulatora! Przestrzegać wskazówek bezpieczeństwa producenta pojazdu.
• Przy wierceniu otworów uważać, aby
nie uszkodzić któregoś z urzą dzeń
pokładowych pojazdu.
• Przekrój kabla plusowego i minusowego nie może być mniejszy niż
1,5 mm
• Nie podłączać wtyczek samocho-
du do radia!
Odpowiedni dla danego typu pojaz-
du przewód-adapter można nabyć
u autoryzowanego sprzedawcy produktów BLAUPUNKT.
• Zależnie od marki i modelu, konstrukcja Państwa pojazdu może niekiedy
odbiegać od podanego tu opisu. Firma
Blaupunkt wyklucza wszelką odpowiedzialność za szkody spowodowane
błędnym montażem i instalacją urządzenia.
W przypadku, gdy podane tu wska-
zówki nie znajdują zastosowania w
Państwa pojeździe, prosimy skon-
2
.
Do masy radioodtwarzacza (obudowa) nie wolno podłączać masy obcych
urządzeń.
Návod k montáži
Bezpečnostní pokyny
Během montáže a připojení
dodržujte prosím následující bezpečnostní pokyny.
• Odpojte záporný pól akumuláto-
ru! Přitom dodržujte bezpečnostní
pokyny výrobce vozidla.
• Při vrtání otvorů dbejte na to, abyste
nepoškodili žádné díly vozidla.
• Průřez kabelu plus a minus pólu
2
musí být minimálně 1,5 mm
• Konektory od vozidla nepřipojujte
k rádiu!
Adaptérový kabel potřebný pro vaše
vozidlo obdržíte ve specializované
prodejně BLAUPUNKT.
• V závislosti na konstrukci se může
postup u vašeho vozidla od zde
popsaného postupu lišit. Za škody
způsobené montáží nebo připojením
nepřebíráme žádné ručení.
.
489
Page 46

Pokud zde uvedené pokyny pro
montáž neodpovídají vašemu vozidla, obraťte se na specializovaného
prodejce Blaupunkt, výrobce vozidla
nebo naši horkou linku.
Při montáži zesilovače nebo měničů,
předtím než budou konektory zapojeny
do zdířek Line-in nebo Line-out, musí
být nejprve bezpodmínečně připojeny
kostry přístrojů.
Kostry jiných přístrojů nesmí být připojeny na kostru autorádia (kryt přístroje).
Montážny návod
borným pripojením nepreberáme
záruku.
Ak by tu uvedené pokyny na montáž
nezodpovedali vášmu vozidlu, obráťte sa prosím na špecializovaného
predajcu fy Blaupunkt, výrobcu vášho vozidla alebo na našu zákaznícku
linku.
Pri montáži zosilňovača alebo meniča
je bezpodmienečne nutné najprv zapojiť kostru prístroja, než sa nakontaktujú
zástrčky do zásuvky Line-In alebo LineOut.
Kostry cudzích prístrojov sa nesmú
napojiť na kostru (schránku) autorádia.
Bezpečnostné pokyny
Počas montáže a zapojenia rešpektujte následné bezpečnostné pokyny.
• Odpojte záporný pól akumulátora!
Rešpektujte pri tom bezpečnostné
pokyny výrobcu vozidla.
• Pri vŕtaní otvorov dávajte pozor na
to, aby sa nepoškodili žiadne diely
vozidla.
• Prierez kábla kladného a záporného
2
pólu nesmie byť menší ako 1,5 mm
• Koncovky elektroinštalácie vozid-
la sa do rádia nesmú zapojiť!
Potrebný kábel s adaptérom pre vaše
vozidlo obdržíte v špecializovaných
predajniach BLAUPUNKT.
.
Инструкция по
установке
Указания по технике
безопасности
Во время монтажа и подсоединения
соблюдайте, пожалуйста, следующие
указания по технике безопасности.
• Отсоедините минусовую клемму
аккумулятора! Соблюдайте при
этом правила техники безопасности завода-изготовителя Вашего автомобиля.
• При сверлении отверстий следите
за тем, чтобы не повредить компоненты автомобиля.
• V závislosti od konštrukcie sa môže
postup pri vašom vozidle od tu popísaného postupu líšiť. Za škody
spôsobené montážou alebo neod-
490
• Сечение плюсового/минусового
кабелей должен быть не меньше
2
1,5 мм
.
Page 47

• Не включайте в аудиосистему ав-
томобильные штекеры!
Необходимые для Вашего типа авто-
мобиля адаптерные кабели Вы можете приобрести в авторизованном
сервисном центре Blaupunkt.
• Ваш автомобиль может - в зависимости от конструкции - отклоняться
от данного описания. Завод-изготовитель аудиосистемы не несет
ответственности за повреждения
и-за ошибок при монтаже или подключении, а также за косвенный
ущерб.
Если перечисленные здесь указа-
ния для Ваших условий монтажа не
подходят, то обратитесь, пожалуйста, в авторизованный сервисный
центр Blaupunkt или продавцу
Вашего автомобиля.
При установке усилителя или чейнджера перед соединением штекеров
гнезд линейного входа и выхода сначала нужно в обязательном порядке
подключить массы устройств.
Запрещается подключение масс
посторонних устройств к массе аудиосистемы (корпусу).
491
Page 48

Mitgelieferte Montage- und
Anschlussteile
Supplied Mounting Hardware
Materiel de montage fourni
Componenti di fi ssaggio comprese
nella fornitura
Meegeleverde montagematerialen
Medföljande monteringsdetaljer
Ferretería de montaje suministrada
Elementos de fi xação fornecidos
Medleverede monterings- og tilslut-
ningsdele
Dołączone części montażowe i
połączeniowe
Přiložené montážní díly a přípojné
svorky
Dodávané montážne a pripojovacie
dielce
Поставляемые в комплекте
компоненты для установки и
подсоединения
Als Sonderzubehör erhältlich
Available as an optional accessory
Disponible en option
Reperibili come accessori extra
Als speciale accessoire verkrijgbaar
Tillval
De venta como accesorios especiales
Disponíveis como acessórios opcio-
nais
Fås som specialtilbehør
Dostępne jako wyposażenie dodat-
kowe
Jako zvláštní příslušenství můžete
obdržet
Ako osobitné príslušenstvo dosta-
nete
Поставляется как дополнительная
принадлежность
Preamp./Sub./Center - out
cable
A
B
492
7 607 001 512
A
7 607 621 . . .
Page 49

Einbausätze
Installation kits
Kits de montage
Set di montaggio
Inbouwsets
Monteringssatser
Juegos de montaje
Kits de montagem
Indbygningssæt
Zestawy montażowe
Montážní soupravy
1.
12V
2.
Montážne súpravy
Установочные комплекты
7 608 . . . . . .
ca. 10 mm
3.
0°- 30°
+/– 10°
+/– 10°
493
Page 50

4. 6. Ausbau / Removal / Démontage /
Smontaggio / Demontage /
Urmontering / Desmontaje /
Desmontagem / Udbygning /
Demontaż / Demontáž / Demontáž /
Демонтаж
antenna connection
5.
A
USB connection
USB cable
182
53
1-20
1.
2.
165
B
8 613 150 002
2.
494
3.
7.
12V
Page 51

8.
C-1 C-2 C-3
10
13
7
4
1
6
C
3
2
157
9
11
5
8
3
B
A
3157
AB
1 NC 1 Speaker out RR+
2 Radio Mute 2 Speaker out RR–
3 NC 3 Speaker out RF+
4 Permanent +12V 4 Speaker out RF–
5 Aut. antenna * 5 Speaker out LF+
6 Illumination 6 Speaker out LF–
16 19
12
15
18
20
14
17
8642
8642
10 Ampere
*
Aut. antenna
FB +12V / RC +12V
+12V Amplifier
Summe
Sum
Somme
Somma
Som
Summa
Suma
Soma
Celkem
Súčet
Сумма
150 mA
7 Kl.15/Ignition 7 Speaker out LR+
8 Masse/GND 8 Speaker out LR–
C1 C2 C3
1 Line Out LR 7 Telefon NF in + 13 CDC-Data In
2 Line Out RR 8 Telefon NF in – 14 CDC-Data Out
3 Line Out / Ground 9 Radio Mute 15 Permanent +12V
4 Line Out LF 10 SW Supply - RC +12V * 16 SW Supply +12V *
5 Line Out RF 11 Remote Control 17 Bus - Masse/GND
SW Supply +12V
6
12 RC - GND 18 CDC/AUX1 Audio IN-GND
Amp. *
19 CDC/AUX1 Audio IN-L
20 CDC/AUX1 Audio IN-R
CD-Changer / AUX IN
Amplifi er
Optional
(Remote Control Eye)
495
Page 52

9.
Preamp./Sub./Center - out cable
7 607 001 512
+12V
A
7
5
3
1
8
6
4
2
Radio Mute
Radio Mute
+
R
L
F
L
F
R
R
R
+
+
+
Änderungen vorbehalten!
Subject to changes!
Sous réserve de modifi cations!
Modifi che riservate!
Wijzigingen voorbehouden!
Ändringar förbehålles!
Modifi caciones reservadas!
Sob reserva de alterações!
Ret til ændringer forbeholdes!
Zmiany techniczne zastrzeżone!
Změny vyhrazeny!
Zmeny vyhradené!
Завод-изготовитель оставляет за собой право на внесение изменений!
-
-
-
-
4 Ohm
4 Ohm
4 Ohm
4 Ohm
Amplifi er
+12V
Relais
+12V
Kl. 15 +12V
1
2
V
496
Page 53

© 2007 All rights reserved by Blaupunkt. This material may be reproduced, copied or distributed for personal
use only.
This product is protected by certain intellectual property rights of Microsoft. Use or distribution of such technology
outside of this product is prohibited without a license from Microsoft.
Bitte den ausgefüllten Gerätepass sicher aufbewahren!
Please keep the fi lled-in radio pass in a safe place!
Prière de conserver soigneusement la carte d’autoradio remplie !
Tenete per favore il libretto di apparecchio, debitamente riempito, in un
posto sicuro!
Bewaar de ingevulde apparaatpas op een veilige plaats!
Vänligen förvara ifyllt apparatpass på säker plats!
¡Favor guardar el documento del aparato debidamente llenado en un lugar
seguro!
Por favor, guardar o cartão preenchido do aparelho num lugar seguro!
Det udfyldte apparatpas opbevares et sikkert sted!
Prosimy przechowywać metrykę radia w bezpiecznym miejscu!
Vyplněný dokument o přístroji prosím bezpečně uschovejte!
Vyplnený dokument o prístroji prosím bezpečne uschovajte!
Пожалуйста, храните заполненный паспорт устройства в надежном месте!
497
Page 54

Country: Phone: Fax: WWW:
Germany (D) 0180-5000225 05121-49 4002 http://www.blaupunkt.com
Austria (A) 01-610 39 0 01-610 39 391
Belgium (B) 02-525 5444 02-525 5263
Denmark (DK) 44 898 360 44-898 644
Finland (FIN) 09-435 991 09-435 99236
France (F) 01-4010 7007 01-4010 7320
Great Britain (GB) 01-89583 8880 01-89583 8394
Greece (GR) 210 94 27 337 210 94 12 711
Ireland (IRL) 01-46 66 700 01-46 66 706
Italy (I) 02-369 62331 02-369 62464
Luxembourg (L) 40 4078 40 2085
Netherlands (NL) 00 31 24 35 91 338 00 31 24 35 91 336
Norway (N) +47 64 87 89 60 +47 64 87 89 02
Portugal (P) 2185 00144 2185 00165
Spain (E) 902 52 77 70 91 410 4078
Sweden (S) 08-7501850 08-7501810
Switzerland (CH) 01-8471644 01-8471650
Czech. Rep. (CZ) 02-6130 0446 02-6130 0514
Hungary (H) 76 889 704 –
Poland (PL) 0800-118922 022-8771260
Turkey (TR) 0212-335 07 23 0212-346 00 40
USA (USA) 800-950-2528 708-6817188
Brasil
(Mercosur) (BR) 0800 7045446 +55-19 3745 2773
Malaysia
(Asia Pacifi c) (MAL) +604-6382 474 +604-6413 640
(dt, gb, fr, it, nl, sw, es, pt, dk, pl, cz, sk, ru)
Gerätepass
Name: .....................................................................
Typ: ....................................................................
Serien-Nr: BP ................................................................
7 648 . . .
11/07 - CM-AS/SCS1
8622405675
Blaupunkt GmbH, Robert-Bosch-Straße 200, D-31139 Hildesheim
498
 Loading...