

Page 1
3.0.0 User Manual – Rev A
Page 2

2
©"2016"Blamsoft,"Inc."All"rights"reserved."
Overview
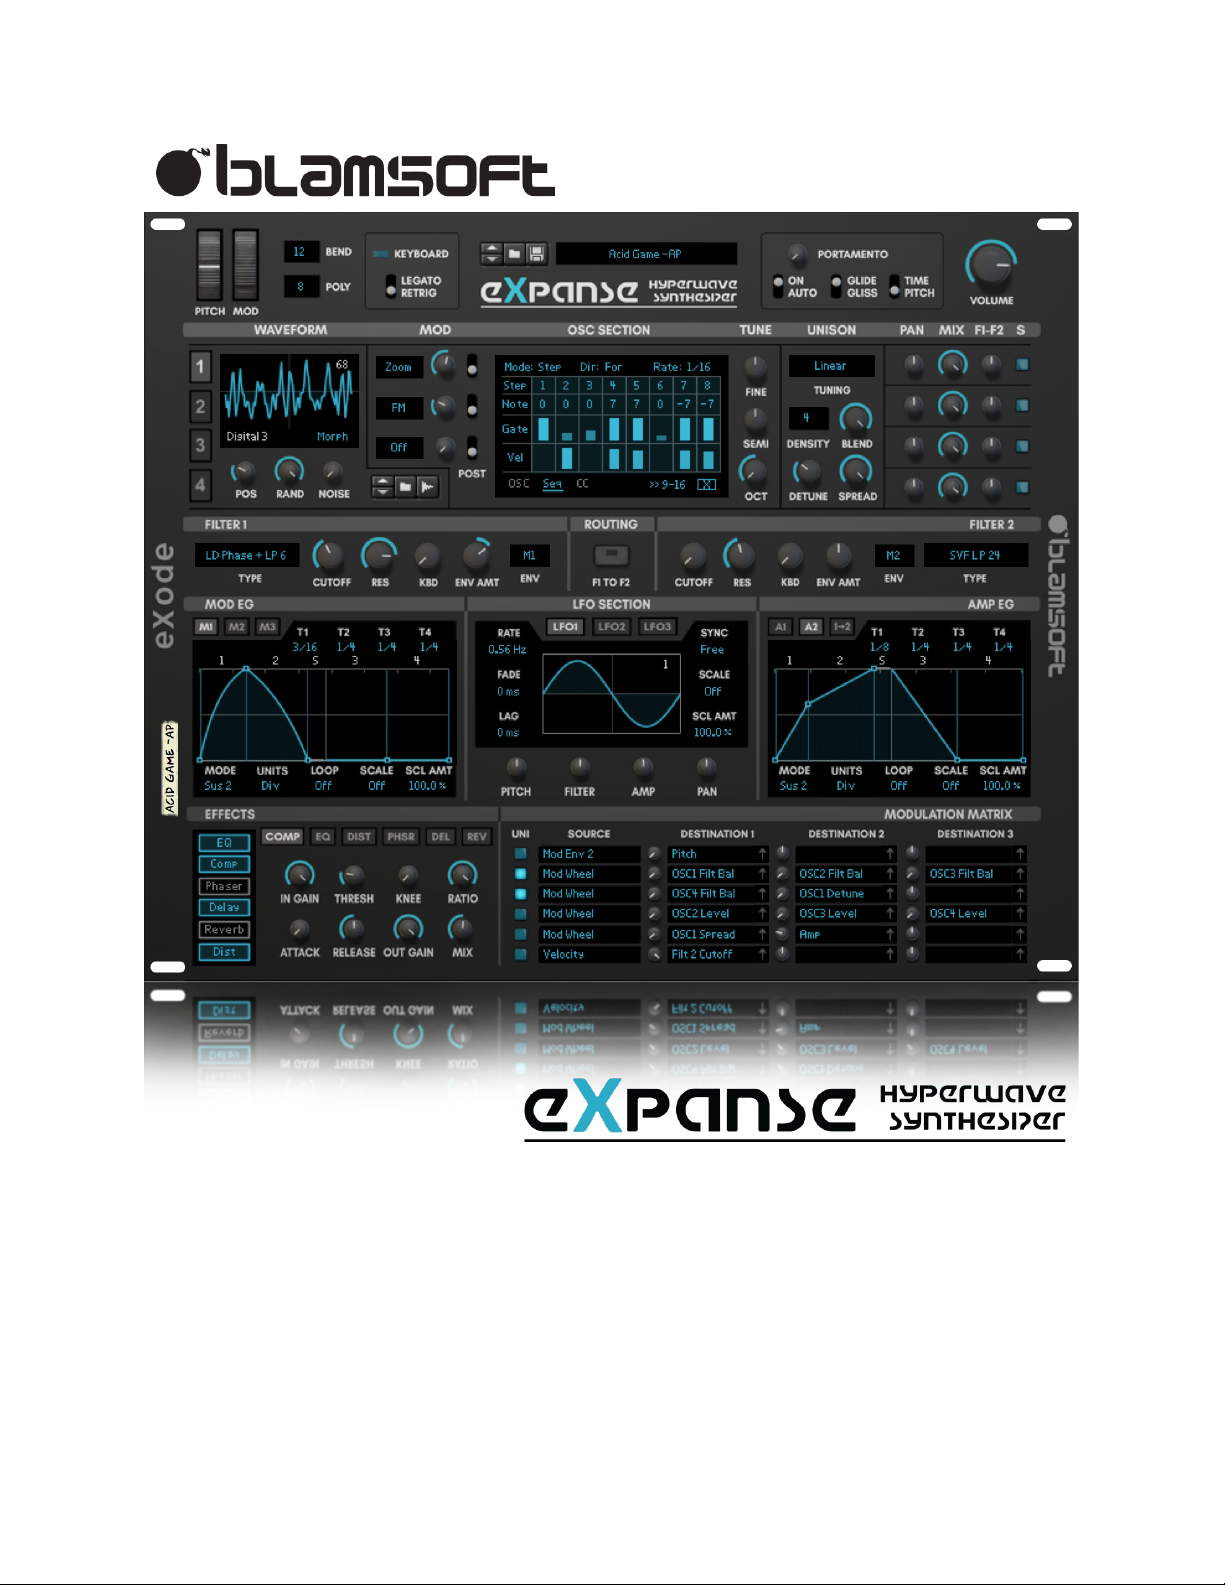
Expanse brings wavetable synthesis in Reason to the next level. At the heart of Expanse are
four wavetable oscillators with waveform modifiers, an additive engine, and modern unison
capabilities. There are two multi-mode filters with tons of modes each offering their own
unique sonic flavor. Three LFOs with many unique waveforms and five powerful graphical
envelopes offer modulation capabilities. The Mod Matrix destinations cover the entire synth.
Six pristine onboard effects allow you to do all your sound design “in the box”. And a flexible
sequencer tops it off. The sound quality of Expanse will make your previous favorite synth cry
as it gathers virtual dust. You will love the experience of creating sounds once you have
learned Expanse’s powerful features.
Page 3
3
©"2016"Blamsoft,"Inc."All"rights"reserved."
Structure
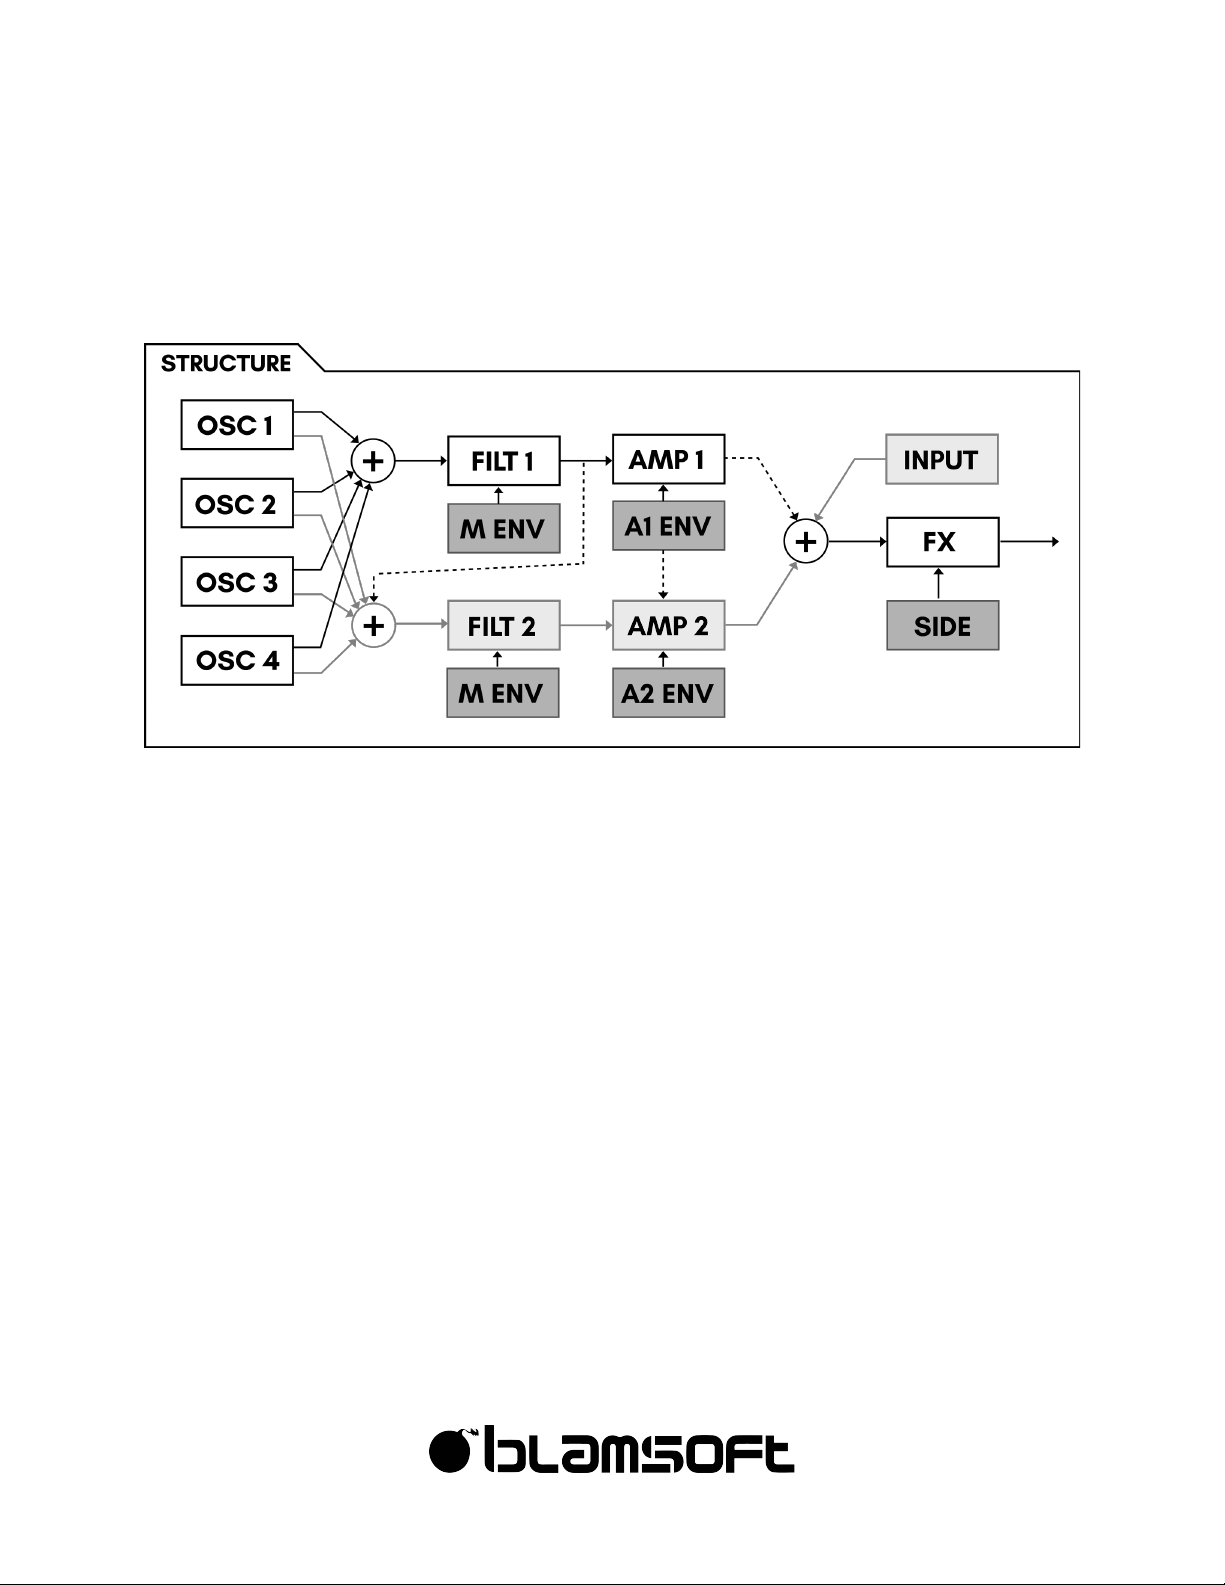
Knowing the structure is the first step to understanding Expanse.
Oscillators
Four oscillators are mixed together into two parallel signals.
Filters
The parallel signals from the oscillators go to Filter 1 and Filter 2. It is possible to route the
output of Filter 1 into Filter 2.
Envelopes
There are three mod envelopes and two amp envelopes. Each filter’s cutoff frequency is
controlled by one of the envelopes.
LFOs
The three LFOs have their own dedicated modulation targets and can be used as sources in
the Mod Matrix.
Page 4

4
©"2016"Blamsoft,"Inc."All"rights"reserved."
Amps
The filter outputs each go to an amplifier. The amps have their own amp envelopes to control
their gain. It is possible for Amp 1’s Envelope to control Amp 2. When Filter 1 is routed to Filter
2, Amp 1 is not connected.
Mod Matrix
In the Mod Matrix, you can modulate destination parameters using various modulation
sources.
Effects
There are six onboard effects. An external input can be connected to the effects section. A
sidechain input can be connected to the compressor effect.
Sequencers
The Sequencers allows you to create note, gate, and velocity patterns as well as modulation
(CC) patterns.
Page 5
5
©"2016"Blamsoft,"Inc."All"rights"reserved."
Sections
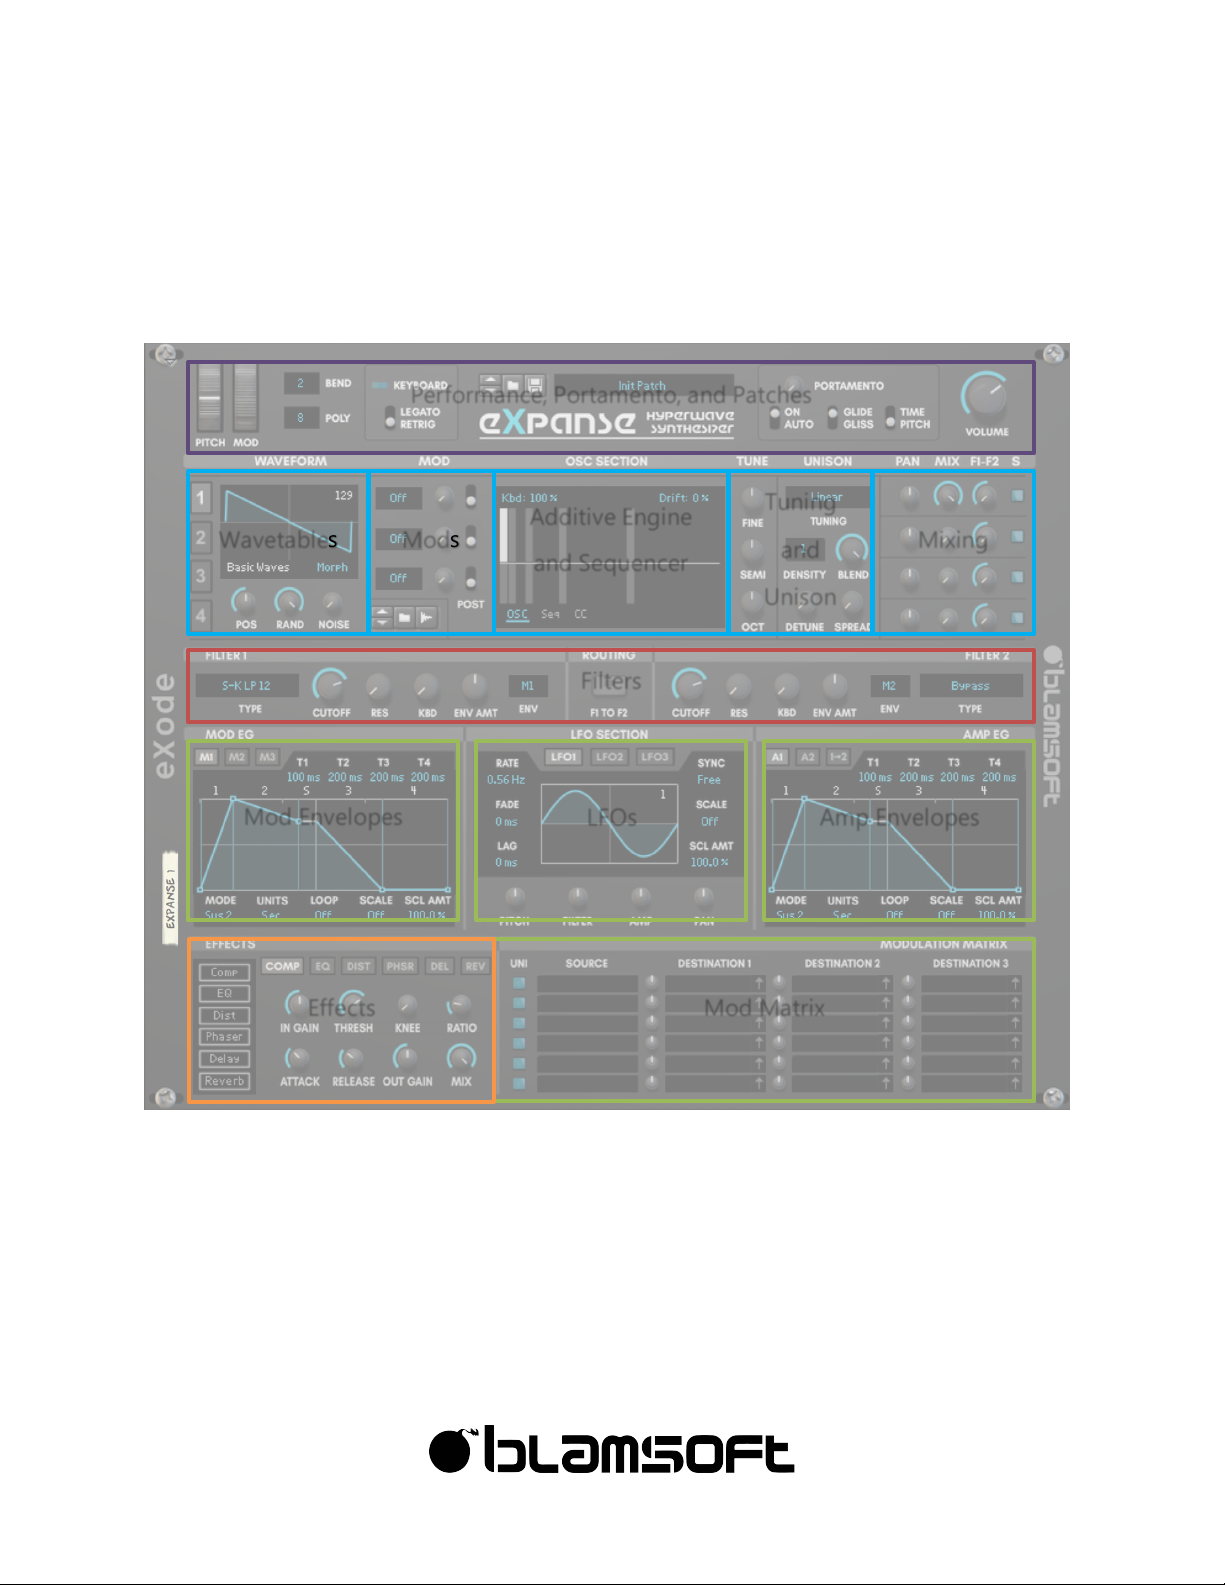
Getting familiar with the overall layout is the second step to learning Expanse.
The blue sections all relate to the oscillators, and the green sections all relate to modulation.
Wavetables
Additive Engine
and Sequencer
Tuning
and
Unison
Mixing
Filters
Mod Envelopes
LFOs Amp Envelopes
Mod Matrix
Effects
Performance, Portamento, and Patches
Mods
Page 6
6
©"2016"Blamsoft,"Inc."All"rights"reserved."
Performance/Polyphony
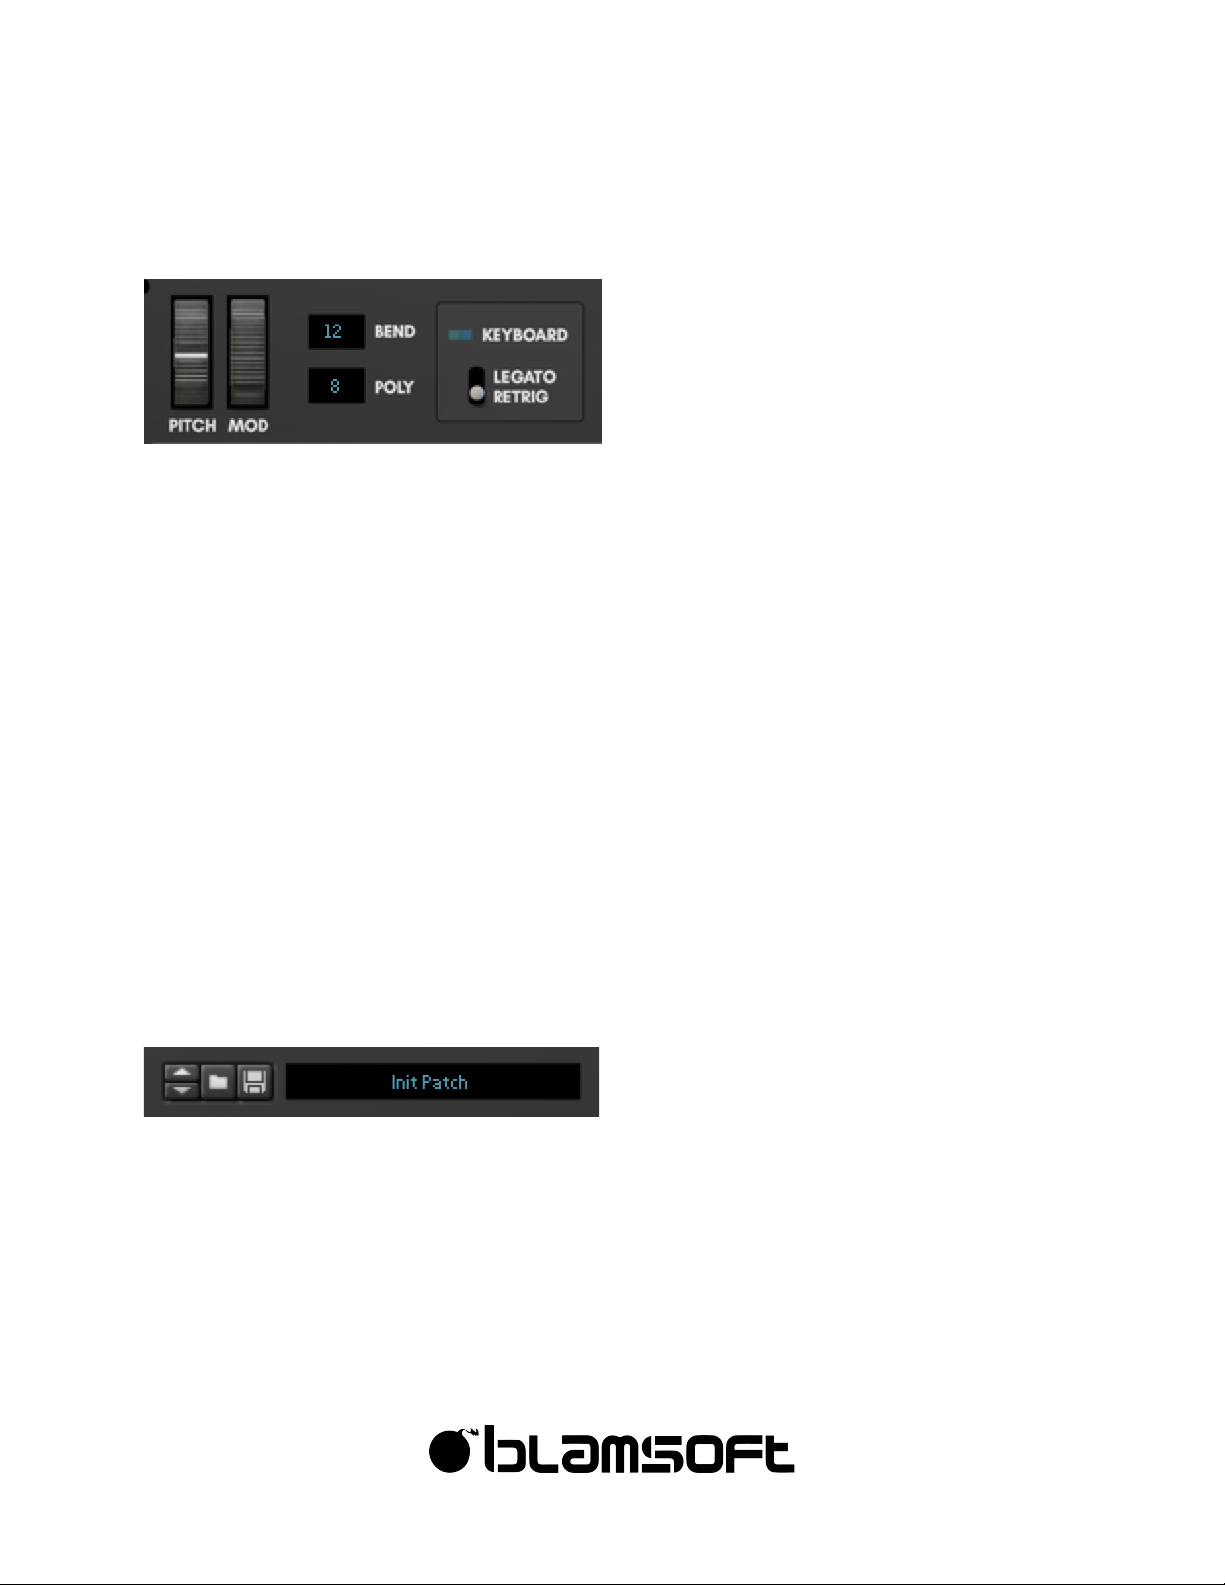
This upper left section includes parameters found on almost every modern synth.
• Pitch Wheel – Controls the pitch during performance, also is available in the Mod Matrix.
• Mod Wheel – Performance control that is routable in the Mod Matrix
• Polyphony – Adjusts how many simultaneous notes can be played by setting the number
of synth voices. A synth voice is active when its amp envelope is not zero.
• Pitch Bend Range – Adjusts the range of the pitch wheel effect in semitones
• Legato/Retrigger – When set to Legato and polyphony is set to 1, envelopes do not
retrigger if notes are continuously played with no breaks
Tip: You can set the pitch bend range to 0 and use the pitch wheel as a performance
parameter after assigning it in the Mod Matrix.
Patches
You can browse the factory sound bank, or save and load your own patches in the upper
middle section.
Page 7
7
©"2016"Blamsoft,"Inc."All"rights"reserved."
Portamento/Volume
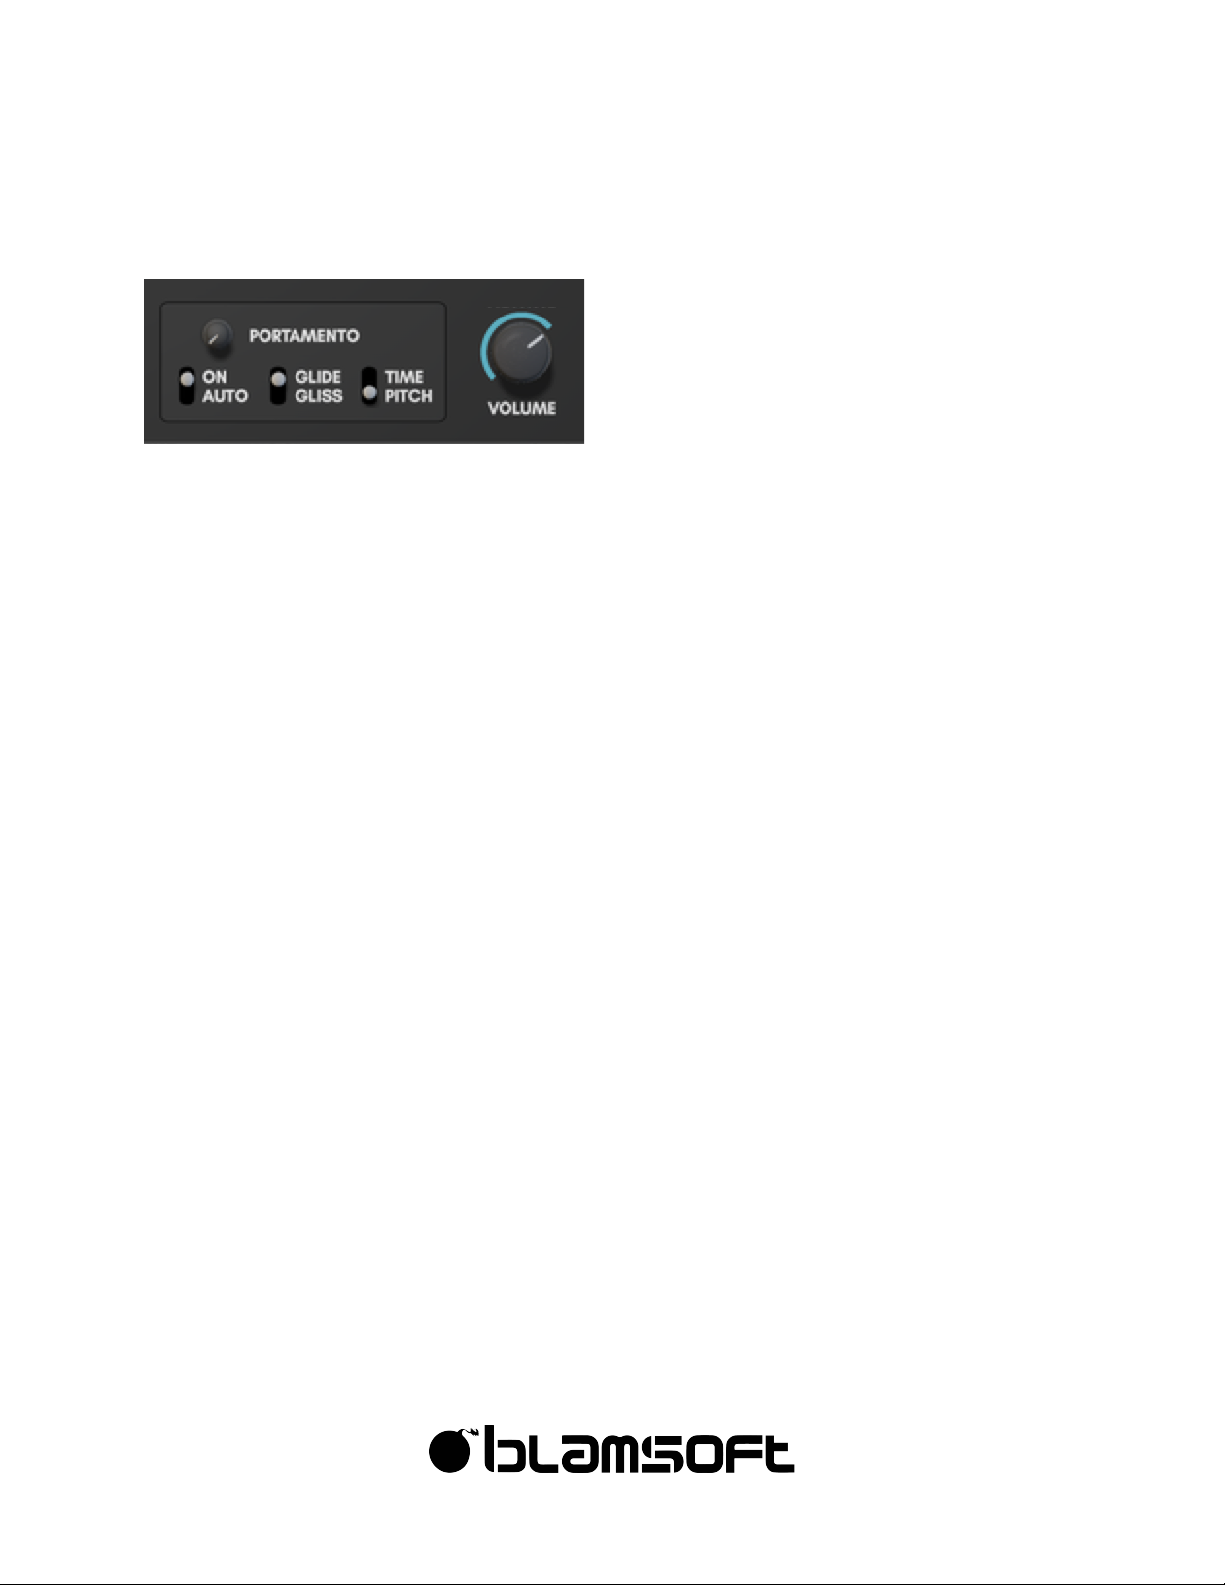
The upper left section offers Portamento control and output volume adjustment. Portamento
provides a gliding of pitch between notes.
The Portamento section provides some neat features that aren’t commonly available.
• On/Auto – When set to On, portamento affects every note change. When set to Auto,
portamento only affects legato playing, the first key press does not have portamento.
• Glide/Gliss – When set to Glide, portamento is a typical smooth sliding of pitch. When set
to Gliss, portamento occurs in semitone steps. It is easier to hear this effect at higher
pitches
• Time/Pitch – This affects the speed of the portamento glide. When set to Time, the glide
takes an equal amount of time for all notes. When set to Pitch, the glide time depends on
the distance between notes because the pitch changes at a constant rate.
You most likely are familiar with the volume control. If not, turn it up, see what happens!
Page 8
Oscillators
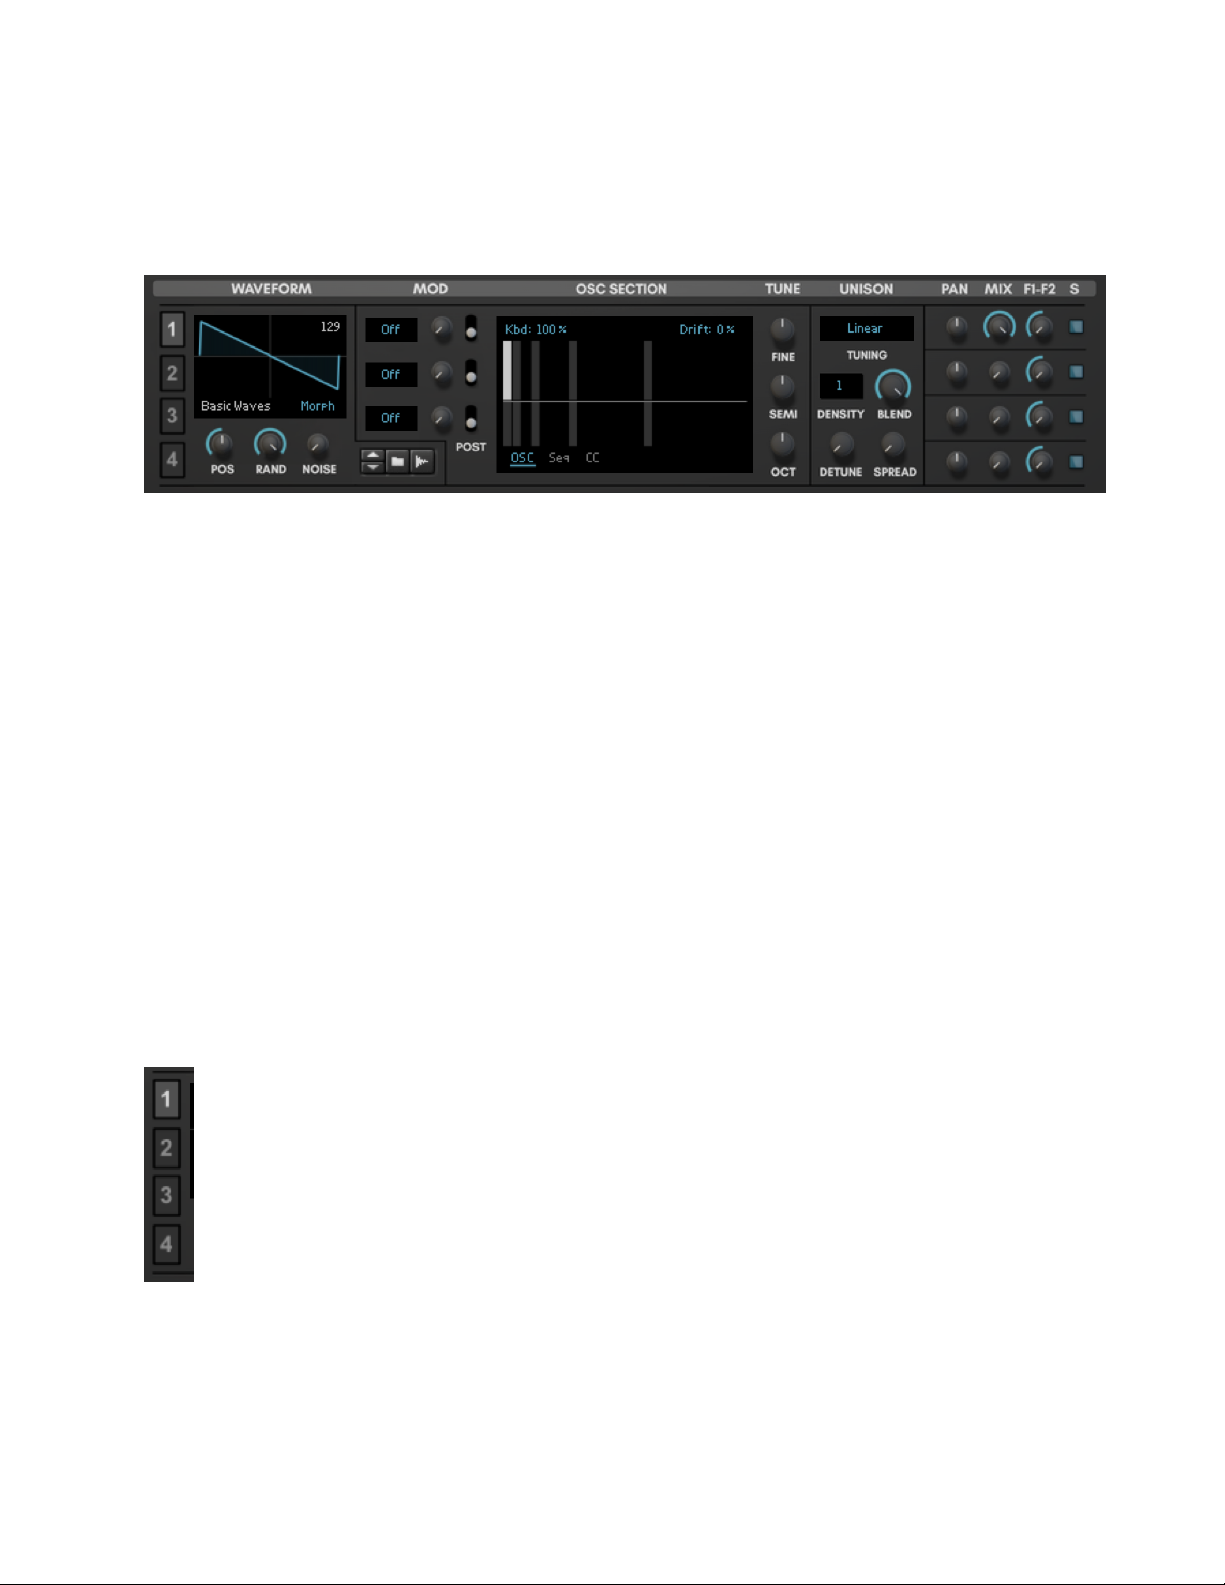
Expanse features wavetable oscillators. This type of oscillator is based on a set of
predetermined single-cycle waveforms. Single-cycle means one period of oscillation. A table
consists of 256 single cycle waveforms that can be individually selected using the position
control. There are 67 tables that come in the Expanse sound bank. Wavetables in the Serum-
compatible format can be loaded externally. In addition, wavetables can be created by
sampling an external oscillator at a low pitch. The raw wavetables can be manipulated using
the mods (modifiers), translating them into other unique waveforms that can sound quite
different from the original. Each oscillator has up to 3 modifiers that can be active
simultaneously. An Additive Engine allows you to duplicate the waveform at harmonic
multiples of the original. Unison allows multiple detuned copies of the waveform to be played
simultaneously. Finally, there are mixing controls. The oscillators can be routed to either, or
both, of the two filters.
Selecting Oscillator 1-4
On the far left of the Oscillators section, there are buttons to select oscillator 1, 2, 3, or 4. You
can think of these as pages or tabs. When an oscillator is chosen, the controls (except for the
mix section) change to the selected oscillator.
Page 9
9
©"2016"Blamsoft,"Inc."All"rights"reserved."
Wavetable
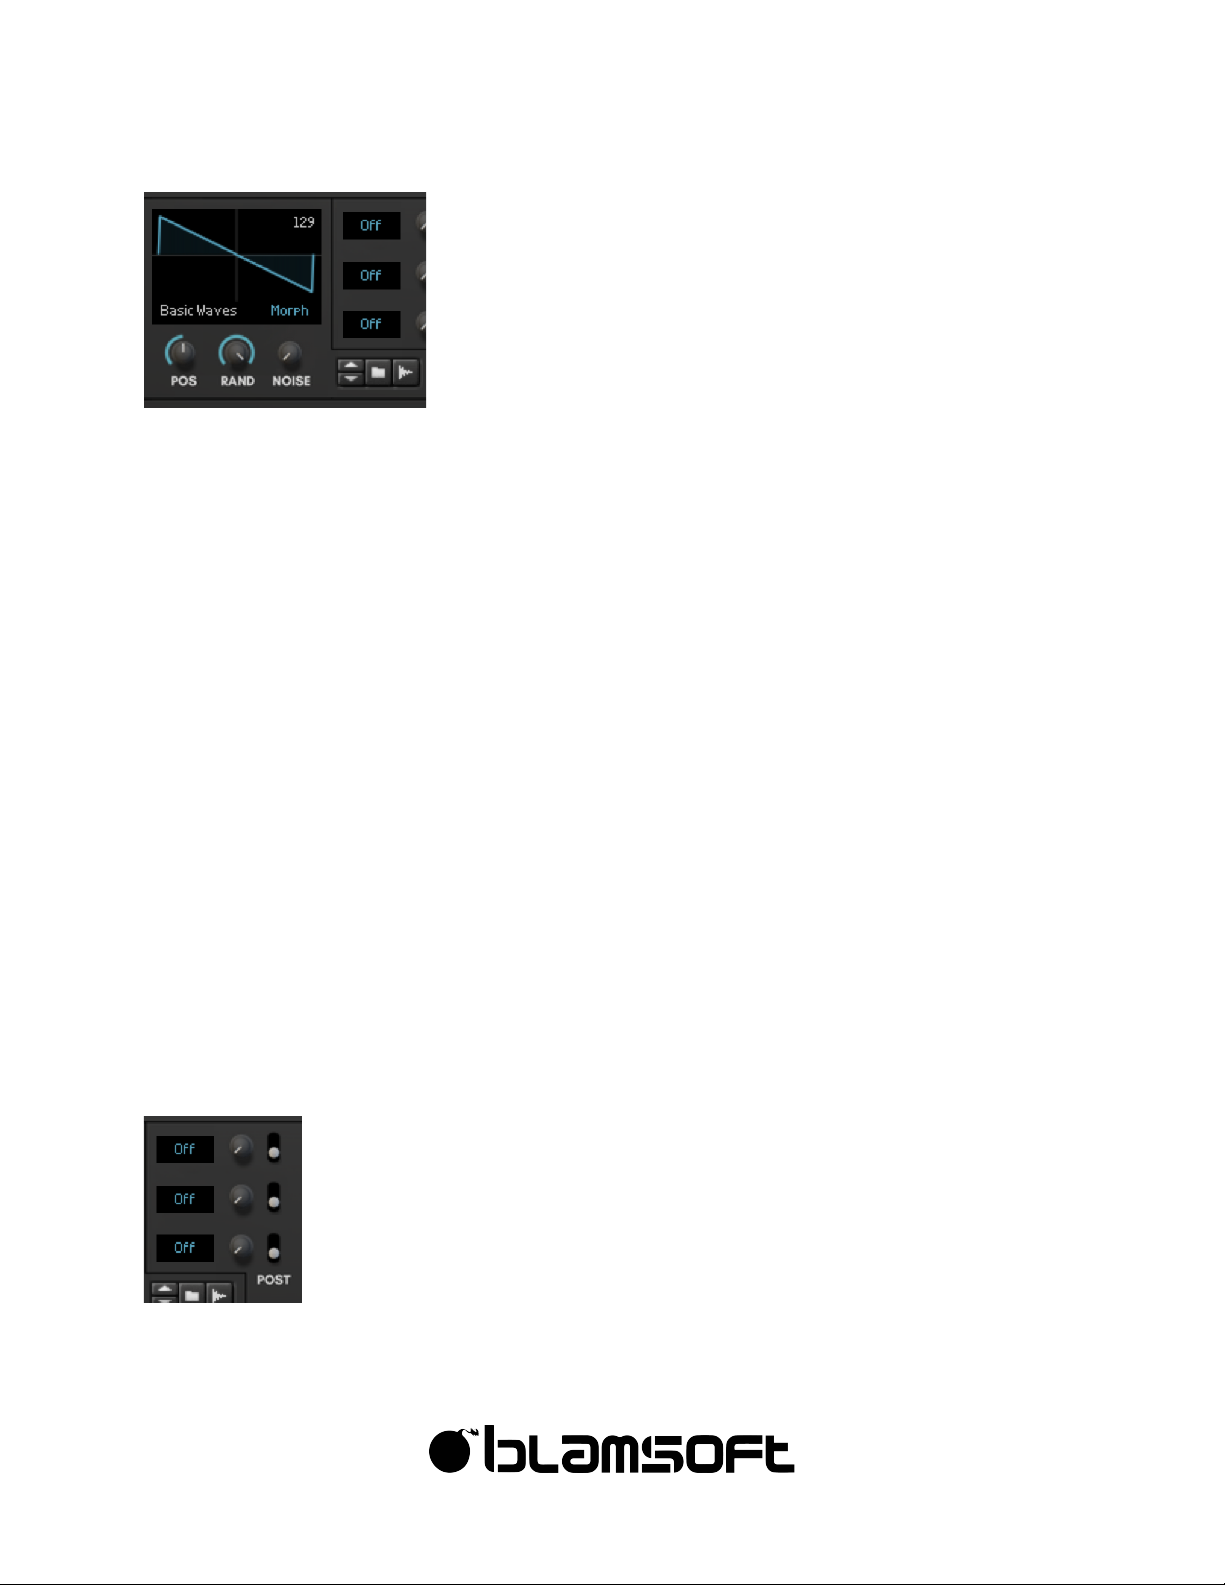
The current waveform for the oscillator is shown on the left side of the Oscillators section.
Keep in mind that this display shows the effect of Mods and the Additive Engine. You don’t
necessarily see the wavetable raw waveform.
• Position – Position moves through the individual frames of the table. If you’re not familiar
with wavetables, you can think of it as adjusting the waveform shape.
• Random – This determines how random the starting phase of the oscillator waveform will
be. This is usually not noticeable unless you are using a unison density of more than 1.
When using unison, you can turn Random down to create a Laser Zap effect.
• Noise – This control cross-fades the oscillator waveform with white noise.
• Sample Browser – You can browse for one of the wavetables included in the sound bank
Wavetables folder, load your own Serum-compatible wavetable, or create a wavetable by
sampling a synth. See the Wavetables section for more details.
• Import setting – This can be set to spectral morph, crossfade, or off. This setting only
applies when there are less than 256 frames in a wavetable. See the Wavetables section
for more details.
Mods
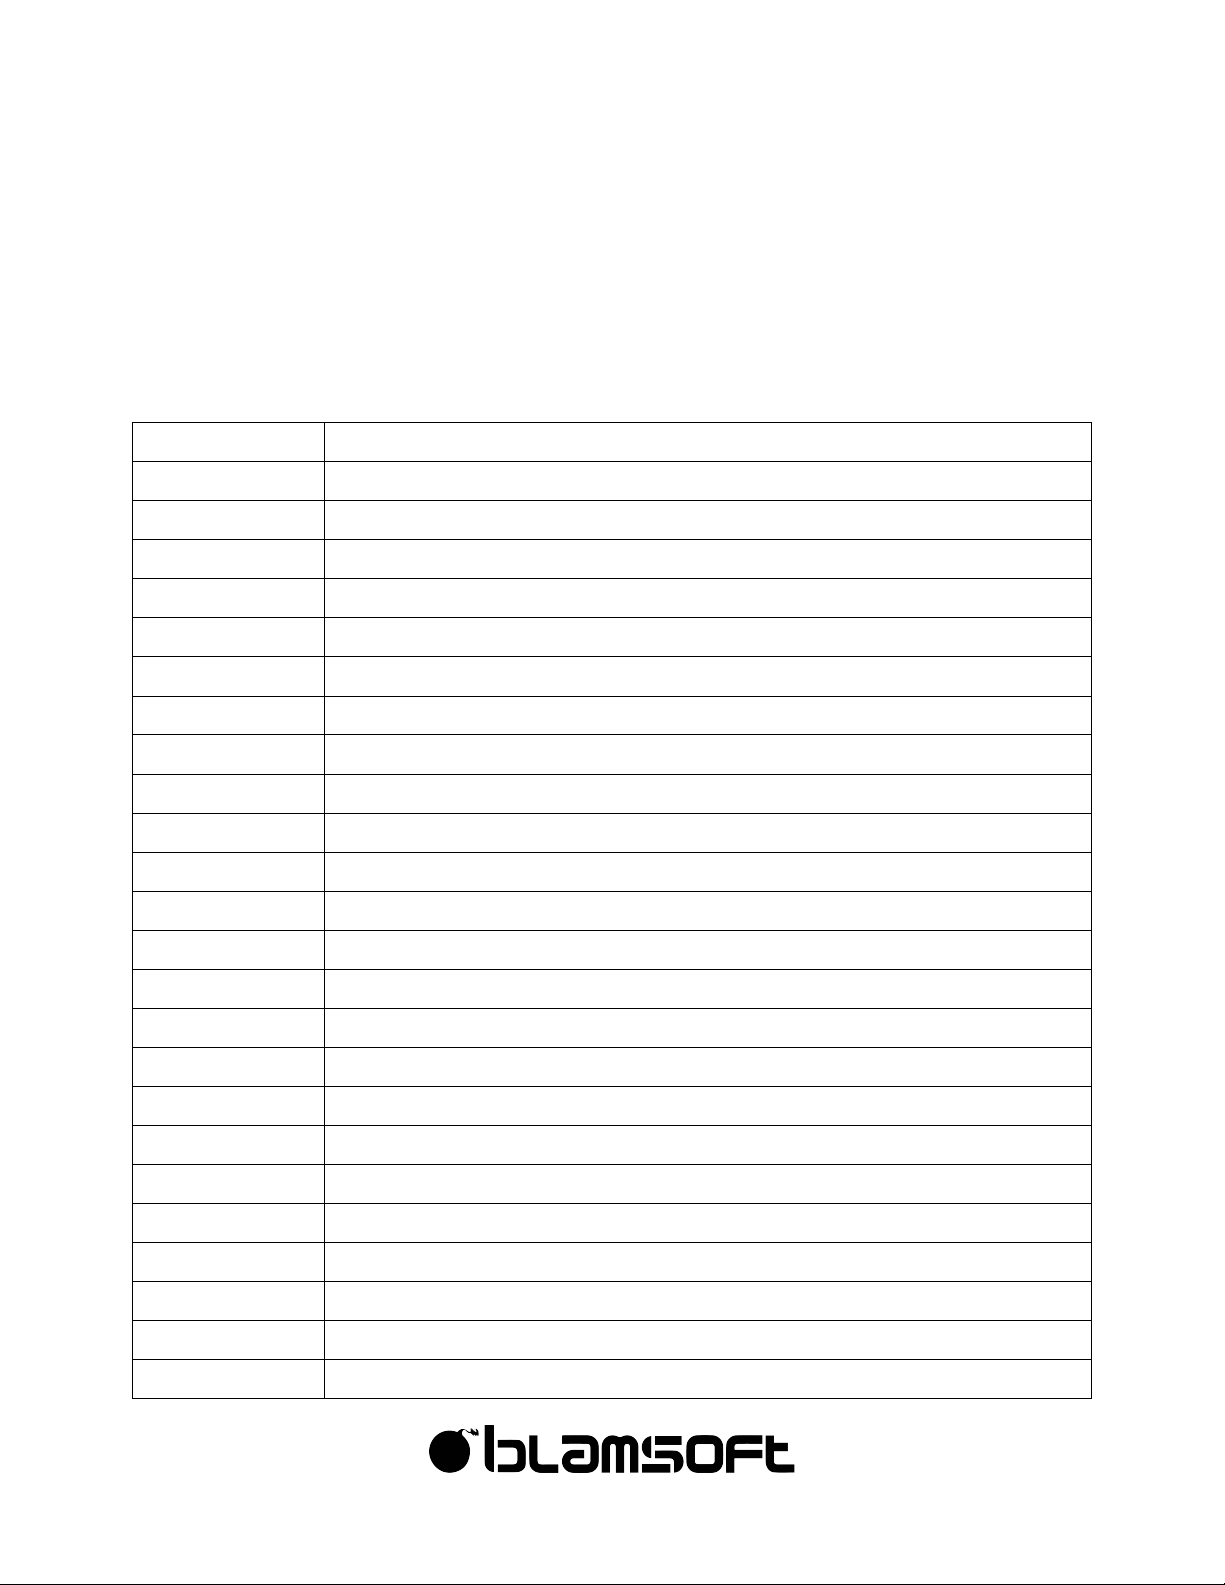
The Mods (modifiers) transform the raw waveform from the wavetable. The three Mods
process the waveform in order (except for when using the post settings).
Page 10
10
©"2016"Blamsoft,"Inc."All"rights"reserved."
• Mod Selection – Selects one of the Mod algorithms
• Amount – Controls how much the Mod affects the waveform or a key parameter of the
Mod
• Pre/Post Harmonics – When Post is enabled, the Mod processes the waveform after the
Additive Engine
There are a wide variety of Mods to choose from:
Off
No modification
FM
Frequency Modulation
PD
Phase Distortion
RM
Ring Modulation
Sync
Hard Sync
Inv
Invert part of the waveform
Rev
Reverse part of the waveform
Dec
Sample rate reduction (decimation)
Quan
Quantization (bit depth reduction)
Clip
Apply gain and hard clip
Fold
Apply gain and foldback
Sat
Apply gain and saturate
Pinch
Inverse saturation
Gate
Zeroes out part of the waveform like a PWM
Juno
Zeroes out parts of the waveform like a PWM at 2x frequency
Mirror
Reversing Sync
Zoom
Zooms into the beginning part of the waveform
Wrap
Apply gain and wrap around from top to bottom
LP
Low pass filter
HP
High pass filter
Phase
Adjusts phase, effectively rotates waveform
In
Contracts waveform toward the center
Out
Expands waveform toward the edges
Sine
Applies a sine amplitude shaper
Odd
Keeps odd harmonics
Page 11
11
©"2016"Blamsoft,"Inc."All"rights"reserved."
Even
Keeps even harmonics
Pluck (Mod 3)
Creates a Karplus-Strong pluck. Oscillator noise amount is useful with this
mode.
FM Routing
(Mod 3)
Creates an inter-oscillator frequency modulation connection
RM Routing
(Mod 3)
Creates an inter-oscillator ring modulation connection
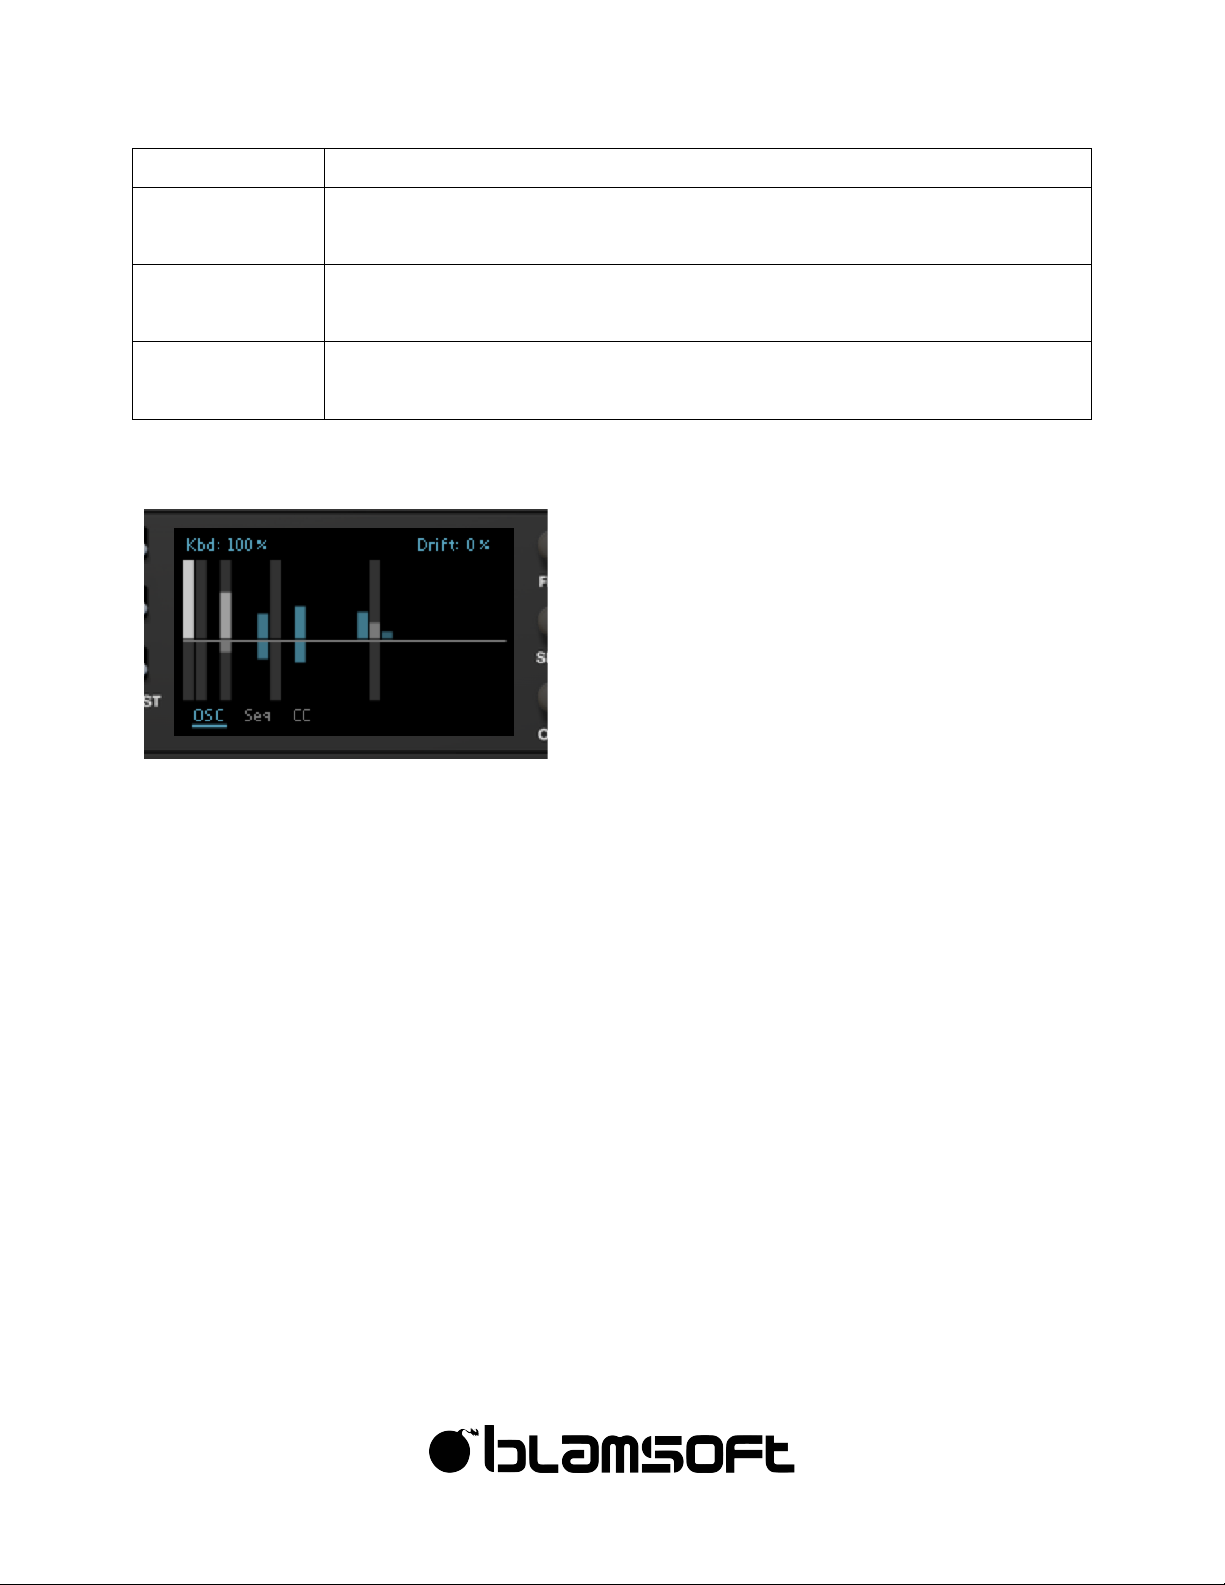
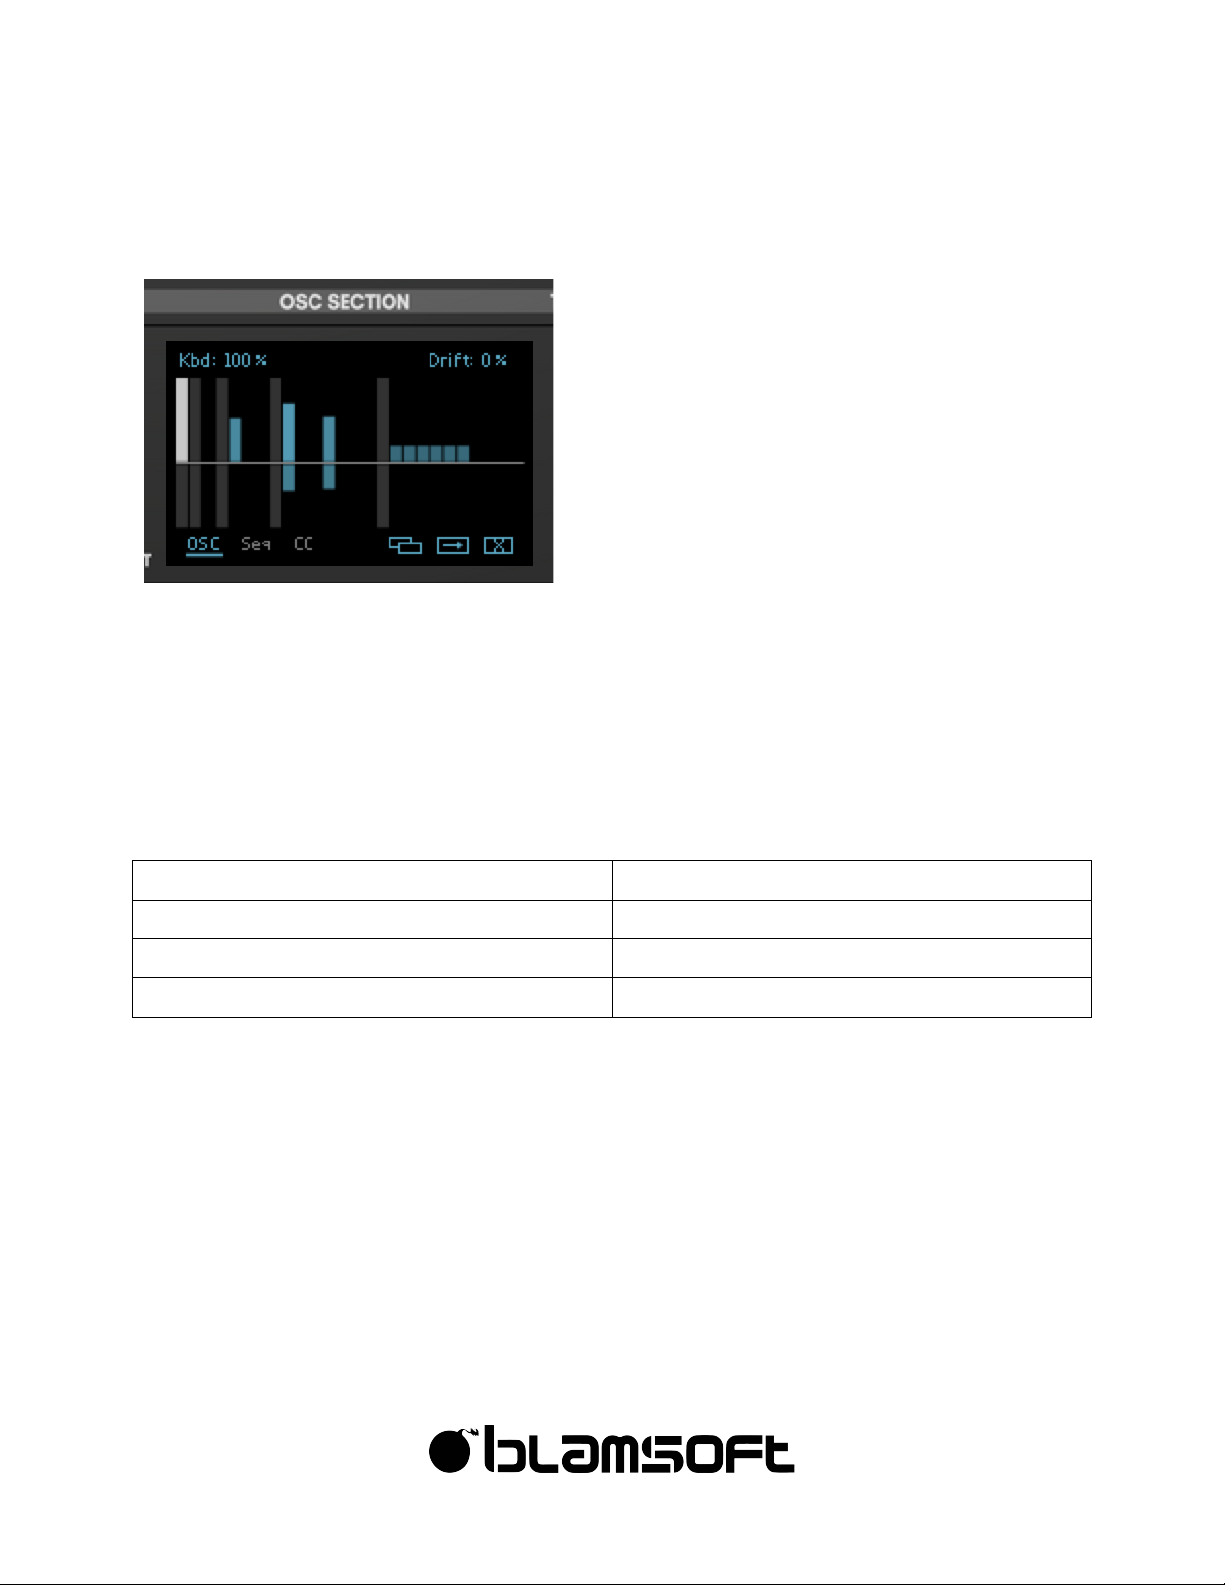
Additive Engine
The Additive Engine duplicates and layers the base waveform at harmonic frequencies.
Commonly, in additive synthesis the base waveform is a sine wave. In Expanse, the base
waveform is the wavetable raw waveform with Mods applied (except for when Mods are
configured as post-Additive). You can edit the layering by dragging the bars in the display.
The bars above the middle adjust the magnitude of the waveform at that frequency. The bars
below the middle adjust the phase. The light gray bars represent octaves. For more details,
see the Additive Engine Theory section.
Ctrl/Cmd click, Shift drag
The harmonic bars can be reset to default or adjusted more precisely using the standard
Reason modifier keys.
Copy, Paste, and Reset
By using alt-click on the display, you have the option of copying or resetting all the oscillator
settings (except for the wavetable). Copy copies the settings from the current oscillator to the
Page 12
12
©"2016"Blamsoft,"Inc."All"rights"reserved."
clipboard. Paste transfers the settings from the clipboard into the current oscillator. Reset sets
the current oscillator settings to their default values.
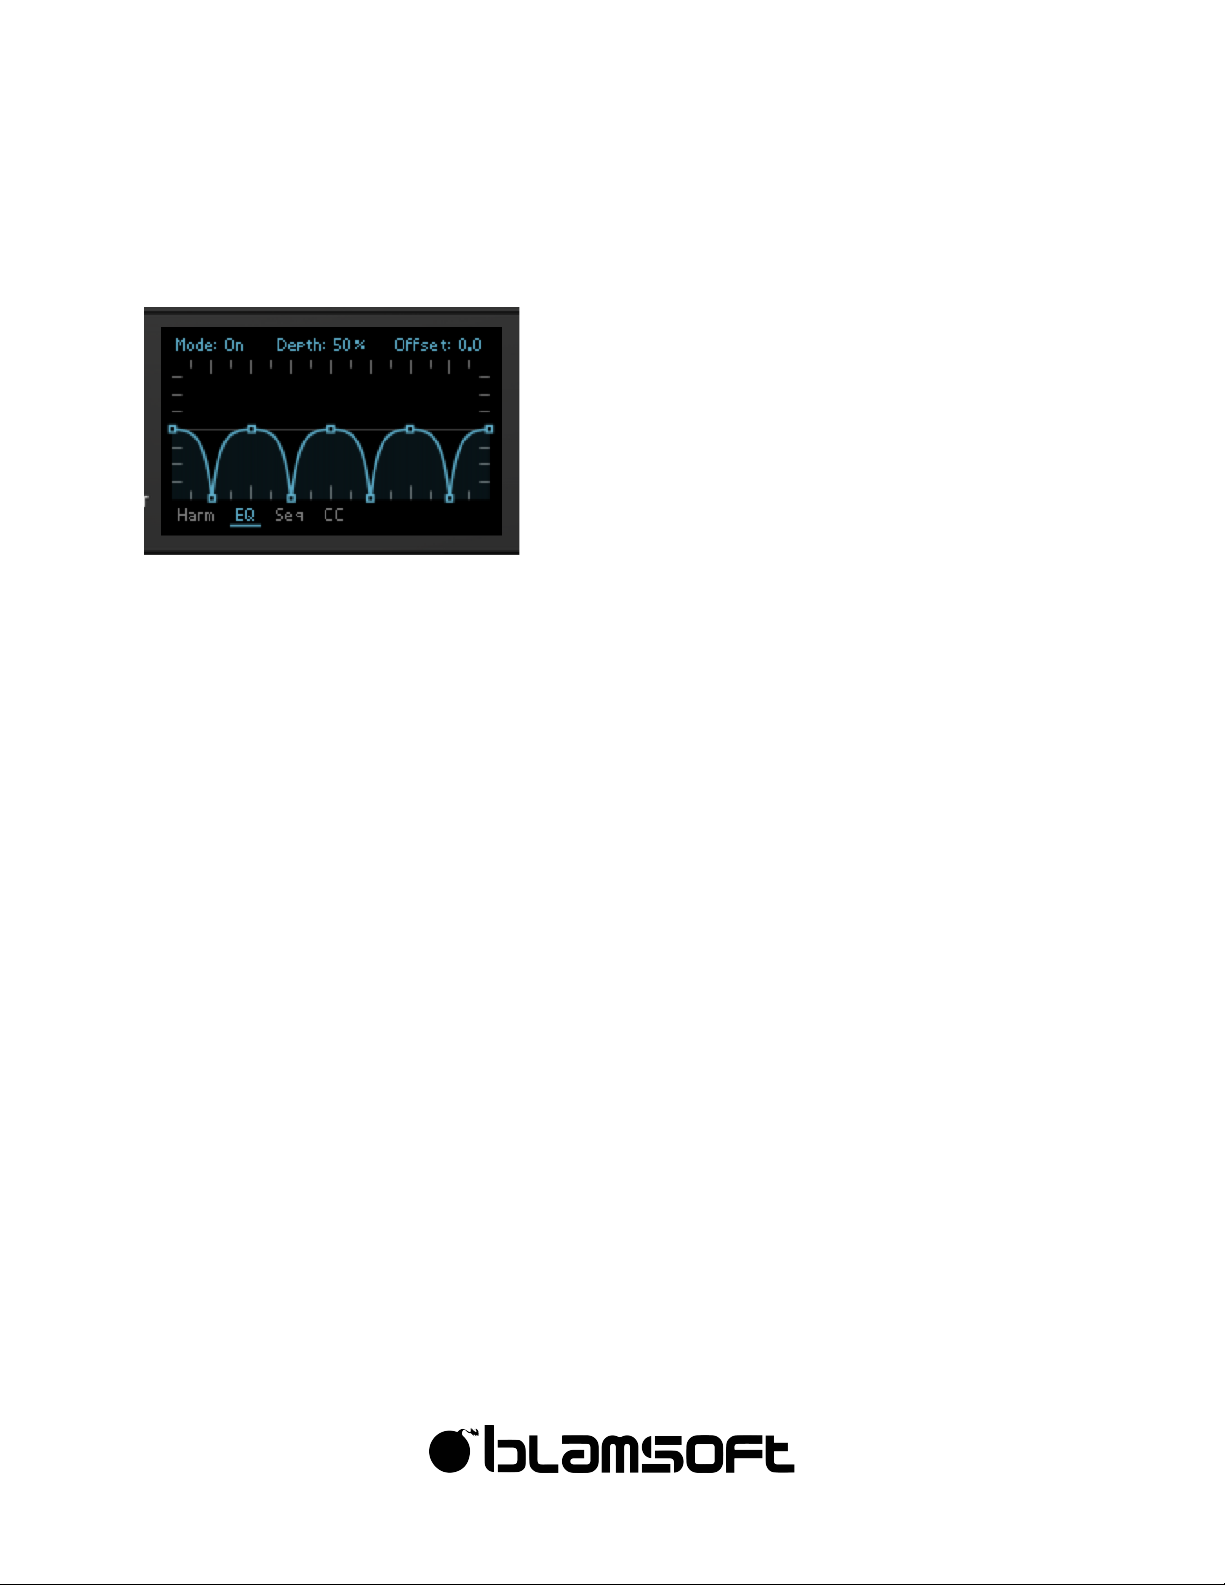
Spectral EQ
The Spectral EQ allows you to shape the spectrum of the oscillator. You can draw curves using
the editor, creating your own filter curve. Here is a summary:
• Double-click to add or remove points
• Drag the segments to adjust the curve
• Shift drag to snap to a horizontal increment
• Ctrl/Cmd drag to snap to a vertical increment
• You can snap to both a horizontal and vertical increment using both Shift and Ctrl/Cmd
• Shift drag on a curve adjusts the two adjacent points
The EQ has Offset (frequency in octaves) and Depth (gain) settings with modulation capability
for each. You can route Keyboard to EQ Offset to achieve a consistent mod across the
keyboard. There are presets in an Alt-click menu.
Page 13
13
©"2016"Blamsoft,"Inc."All"rights"reserved."
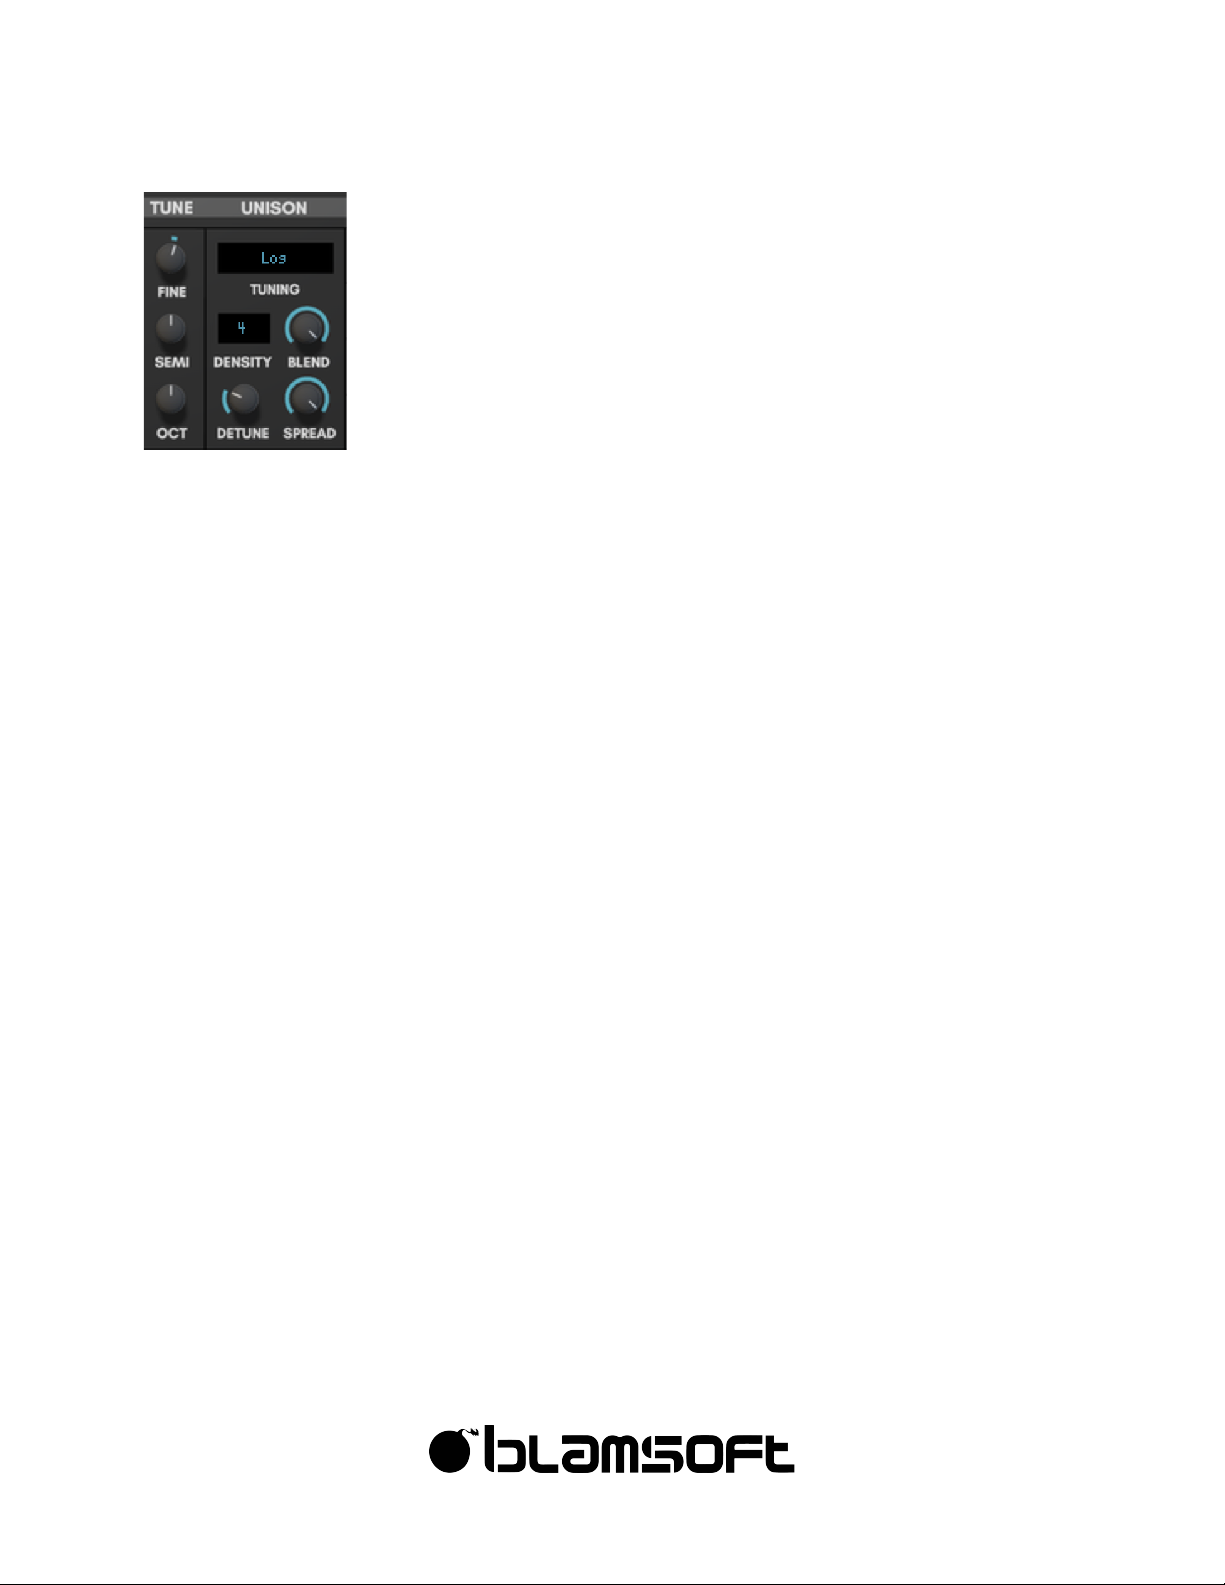
Tuning/Unison
The oscillators have basic tuning controls combined with advanced unison features. The basic
tuning controls are:
• Fine – Fine tune in the range of -0.5 to 0.5 semitones.
• Semi – Semitone offset of -11 to +11 semitones
• Octave – Octave offset of -3 to +3 octaves
Unison creates multiple copies of the oscillator waveform that are slightly out of tune with one
another. By adjusting these out of tune waveform copies, you can create thick sounds with a
wide stereo field. The unison controls are:
• Tuning – This controls the intonation spacing of waveform copies. The single note settings
use various math equations to determine the spacing. The choices are Cubic, Squared,
Exponential, Linear, Logarithmic, and Square Root. As the setting is moved from Cube
towards Square Root, the spacing goes from clustered near the root pitch to widely
spaced away from the root pitch. There are also dual note settings that allow some
waveforms to play a fourth, fifth, or octave interval from the fundamental pitch.
• Density – This sets the number of simultaneous waveforms that are playing
• Blend – When Density is odd there is always a root pitch waveform playing. This
determines the volume mix of the root pitch versus the other copies. When Density is
even, this determines the volume mix of the two waveforms nearest to the root pitch
versus the other copies.
• Detune – This setting controls how far in pitch the waveform copies are from the root
pitch
• Spread – Each waveform copy has its own panning. As this control is turned up, the
panning of the waveform copies is spread across the stereo field.
Page 14
14
©"2016"Blamsoft,"Inc."All"rights"reserved."
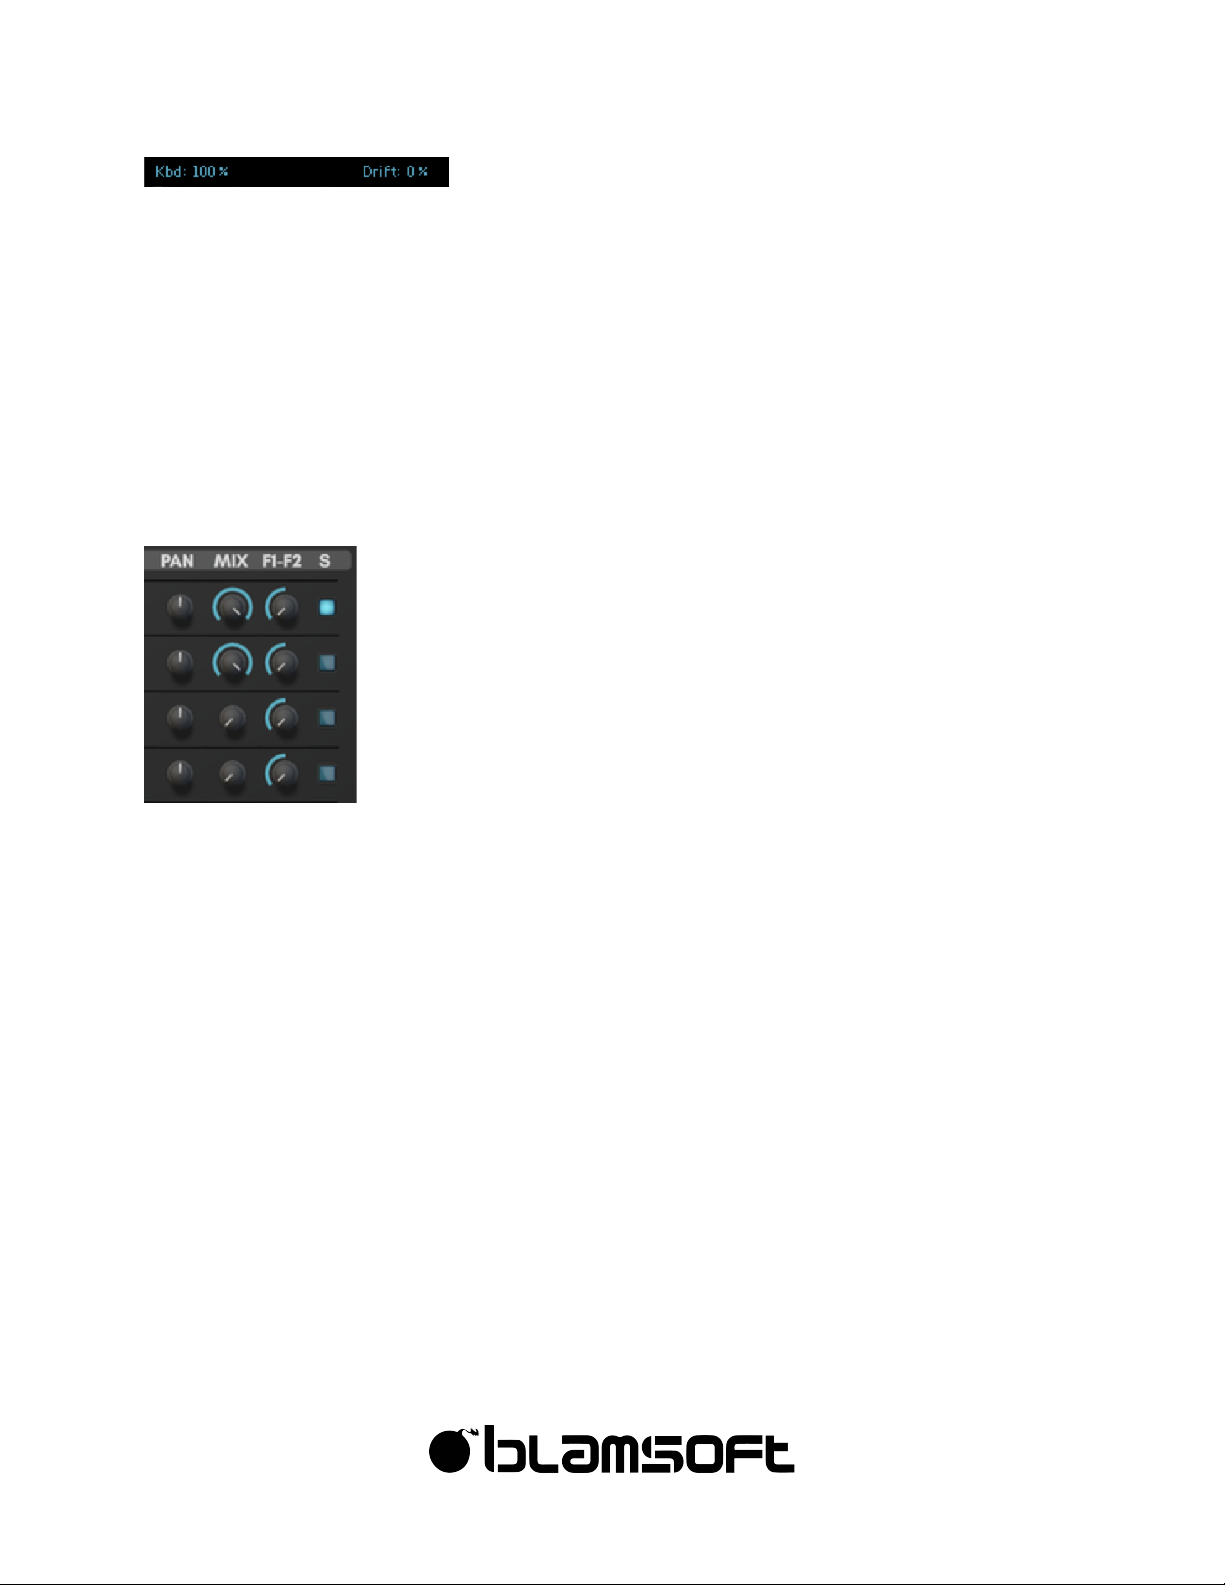
There are also two tuning controls in the main display.
• Keyboard Tracking – This setting controls much the oscillator tracks the keyboard notes,
from not tracking to tracking exactly at 100%.
• Drift – Drift creates instability in the oscillator tuning, this can be used subtly to give an
analog feel or more drastically to make an oscillator unpredictably out of tune. Note, this
setting is most effective with low density settings and more than one oscillator in the mix.
Mixing
The four oscillators can be mixed without using the oscillator pages. Each oscillator has its own
controls.
• Pan – Adjusts the pan of the oscillator from left to right
• Mix – Sets the volume level of the oscillator
• F1-F2 – Adjusts the mix of the oscillators into Filter 1 or Filter 2. When turned all the way to
the left, the oscillator goes 100% into Filter 1 and 0% into Filter 2. When in the middle, the
oscillator goes 50% into Filter 1 and 50% into Filter 2. When turned all the way to the right,
the oscillator goes 0% into Filter 1 and 100% into Filter 2.
• Solo – Allows you to solo a single oscillator and mute the others
Page 15
15
©"2016"Blamsoft,"Inc."All"rights"reserved."
Wavetables
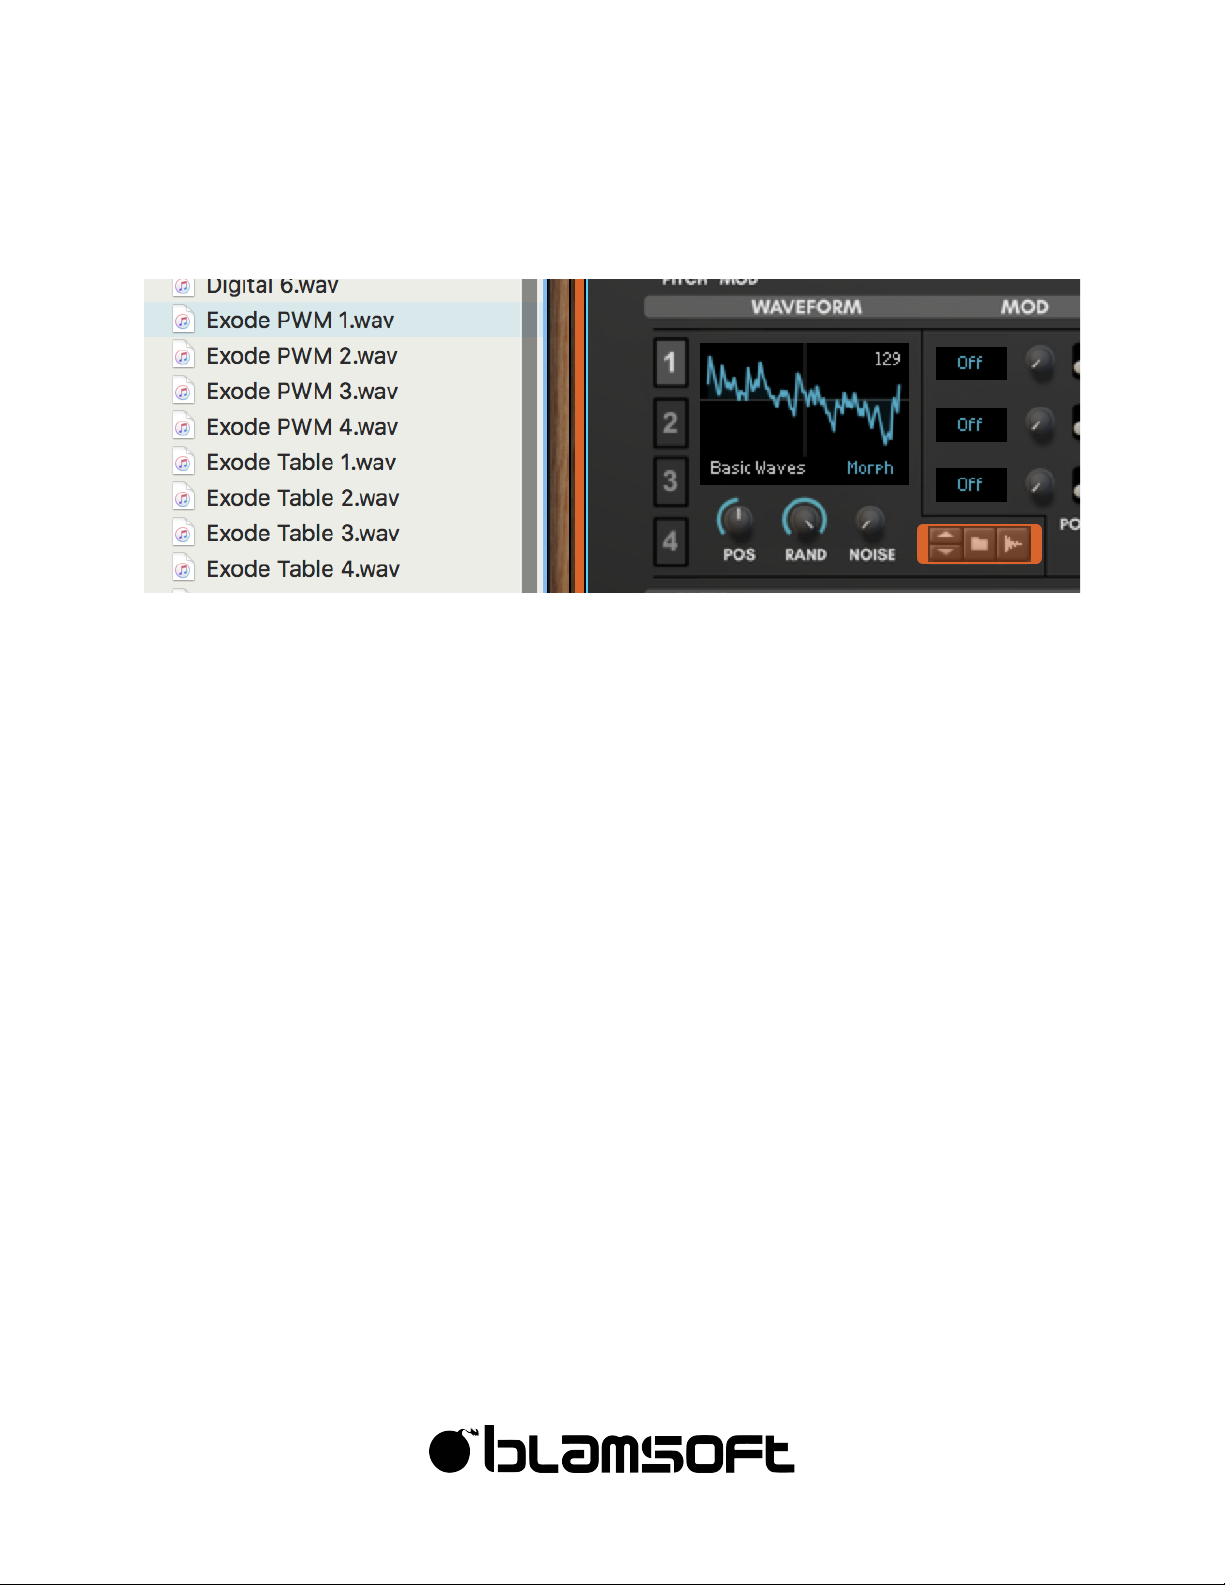
Using the browser, you can load wavetables into Expanse’s oscillators. You are not limited to
the wavetables provided by Blamsoft. Wavetables in a Serum-compatible format can be
directly loaded into Expanse. You can also make your own Serum-compatible wavetables
using Serum or other audio software, or programming environments that offer wav file
output. The format is as follows.
- 2048 samples per single-cycle
- Maximum of 256 frames (positions), less than 256 frames will be morphed or
crossfaded according to the import setting.
- For example, a 256 frame wavetable has exactly 524288 samples. If you use a powerful
audio editor, such as Audacity, you can see the exact number of samples in the file.
You load any sample into Expanse and it will do its best to create a wavetable. Low notes with
a steady pitch work best.
Import Setting
When there are less than 256 frames in the Serum-compatible wavetable, extra frames are
created that make a smooth transition between original frames. You can also limit the number
of frames that are used so a jumpy wavetable can be made smooth. The Spectral Morph
Page 16
16
©"2016"Blamsoft,"Inc."All"rights"reserved."
settings results in a smooth transition of frequency domain components, Crossfade results in a
smooth transition in the time domain, or Off provides no transitions.
Sampling an Oscillator
You can sample an oscillator to create a wavetable. Expanse processes an audio sample and
extracts the periodic waveforms present in the file. For Expanse to do this well, there are some
things you can do to help. Here is the procedure for creating a wavetable, other settings will
work but not in all cases.
1 Create a steady pitched note on the oscillator you want to sample. Low notes are best.
These are the ideal notes.
Sample Rate
Note
44100
F0 – MIDI Note 17
88200
F1 – MIDI Note 29
96000
Gb/F#1 – MIDI Note 30
176400
F2 – MIDI Note 41
192000
Gb/F#2 – MIDI Note 42
2 Make the clip several seconds long, it is recommended to use at least 10 seconds.
3 Use “Bounce in place” and “Bounce clips to new samples” to quickly create a sample
that can be loaded into Expanse.
See the Creating Wavetables tutorial on the Blamsoft website for more details.
Page 17
17
©"2016"Blamsoft,"Inc."All"rights"reserved."
Filters
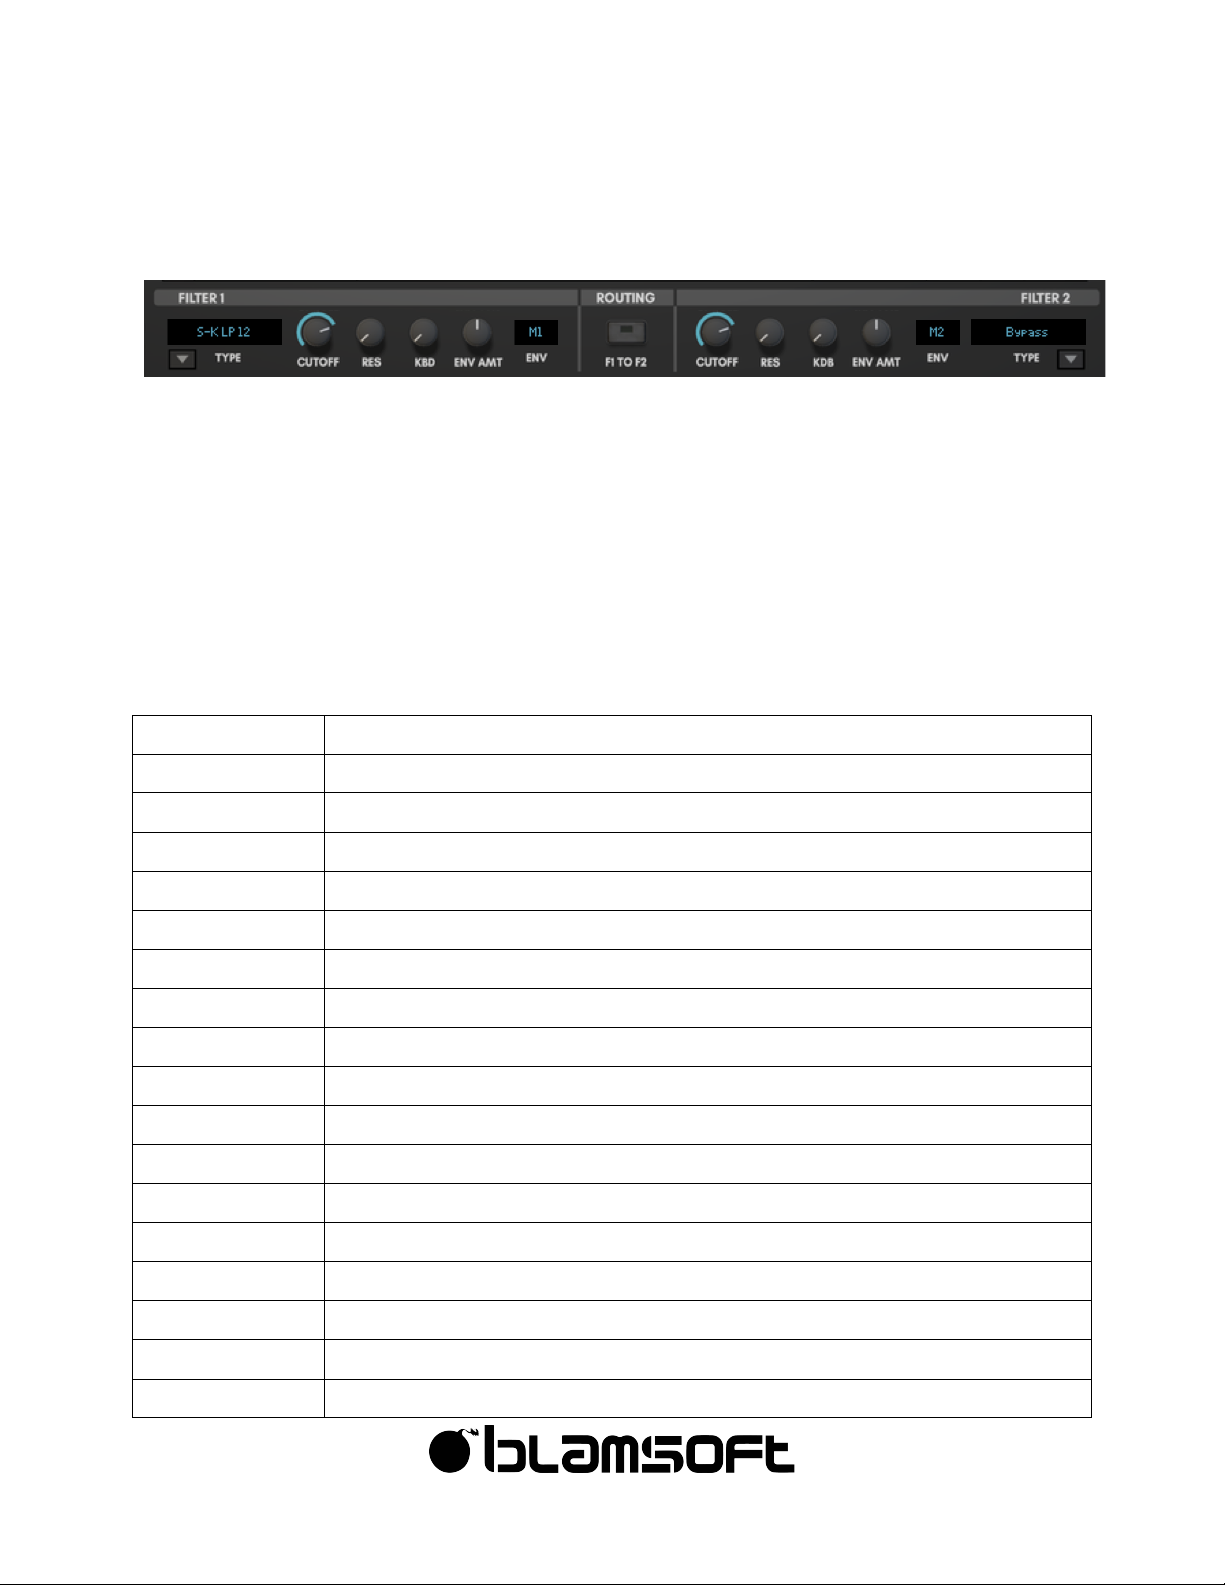
Expanse features two multi-mode filters. The filters typically process the oscillator audio in
parallel. But they can also be routed in series. There are many filters types available, each with
a unique flavor.
Type
Many standard analog filter types are available with different topologies. There are also some
less common filter types. The arrow buttons allow you to select the type from a popup menu.
Bypass
Passthrough
S-K LP 12
Sallen-Key 12 dB rolloff lowpass (2 pole)
S-K HP 6
Sallen-Key 6 dB rolloff highpass (1 pole)
SVF LP 12
State Variable 12 dB rolloff lowpass (2 pole)
SVF LP 24
State Variable 24 dB rolloff lowpass (4 pole)
SVF BP 6
State Variable 6 dB rolloff bandpass (2 pole)
SVF BP 12
State Variable 12 dB rolloff bandpass (4 pole)
SVF HP 12
State Variable 12 dB rolloff highpass (2 pole)
SVF HP 24
State Variable 24 dB rolloff highpass (4 pole)
SVF Peak 12
State Variable standard peak filter
SVF Peak 24
State Variable stronger peak filter
LD LP 6
Ladder 6 dB rolloff lowpass (1 pole)
LD LP 12
Ladder 12 dB rolloff lowpass (2 pole)
LD LP 18
Ladder 18 dB rolloff lowpass (3 pole)
LD LP 24
Ladder 24 dB rolloff lowpass (4 pole)
LD BP 6
Ladder 6 dB rolloff bandpass (2 pole)
LD BP 12
Ladder 12 dB rolloff bandpass (4 pole)
LD HP 6
Ladder 6 dB rolloff highpass (1 pole)
Page 18
18
©"2016"Blamsoft,"Inc."All"rights"reserved."
LD HP 12
Ladder 12 dB rolloff highpass (2 pole)
LD HP 18
Ladder 18 dB rolloff highpass (3 pole)
LD HP 24
Ladder 24 dB rolloff highpass (4 pole)
LD HP 12 + LP 6
Ladder 12 dB rolloff highpass (2 pole) with 6 dB rolloff lowpass (1 pole)
LD HP 18 + LP 6
Ladder 18 dB rolloff highpass (3 pole) with 6 dB rolloff lowpass (1 pole)
LD Notch
Ladder notch (2 pole)
LD Notch + LP 6
Ladder notch (2 pole) with 6 dB rolloff lowpass (1 pole)
LD Phase
Ladder phase shifter (3 pole)
LD Phase + LP 6
Ladder phase shifter (3 pole) with 6 dB rolloff lowpass (1 pole)
Dual Reso 1
Dual resonators with 1 octave spacing, resonance controls bandwidth
Dual Reso 2
Dual resonators with 2 octave spacing, resonance controls bandwidth
Dual Reso 3
Dual resonators with fixed bandwidth, resonance controls spacing
Comb FB
Feedforward comb
Comb FF
Feedback comb
AM
Amplitude modulation with a sine wave
Controls
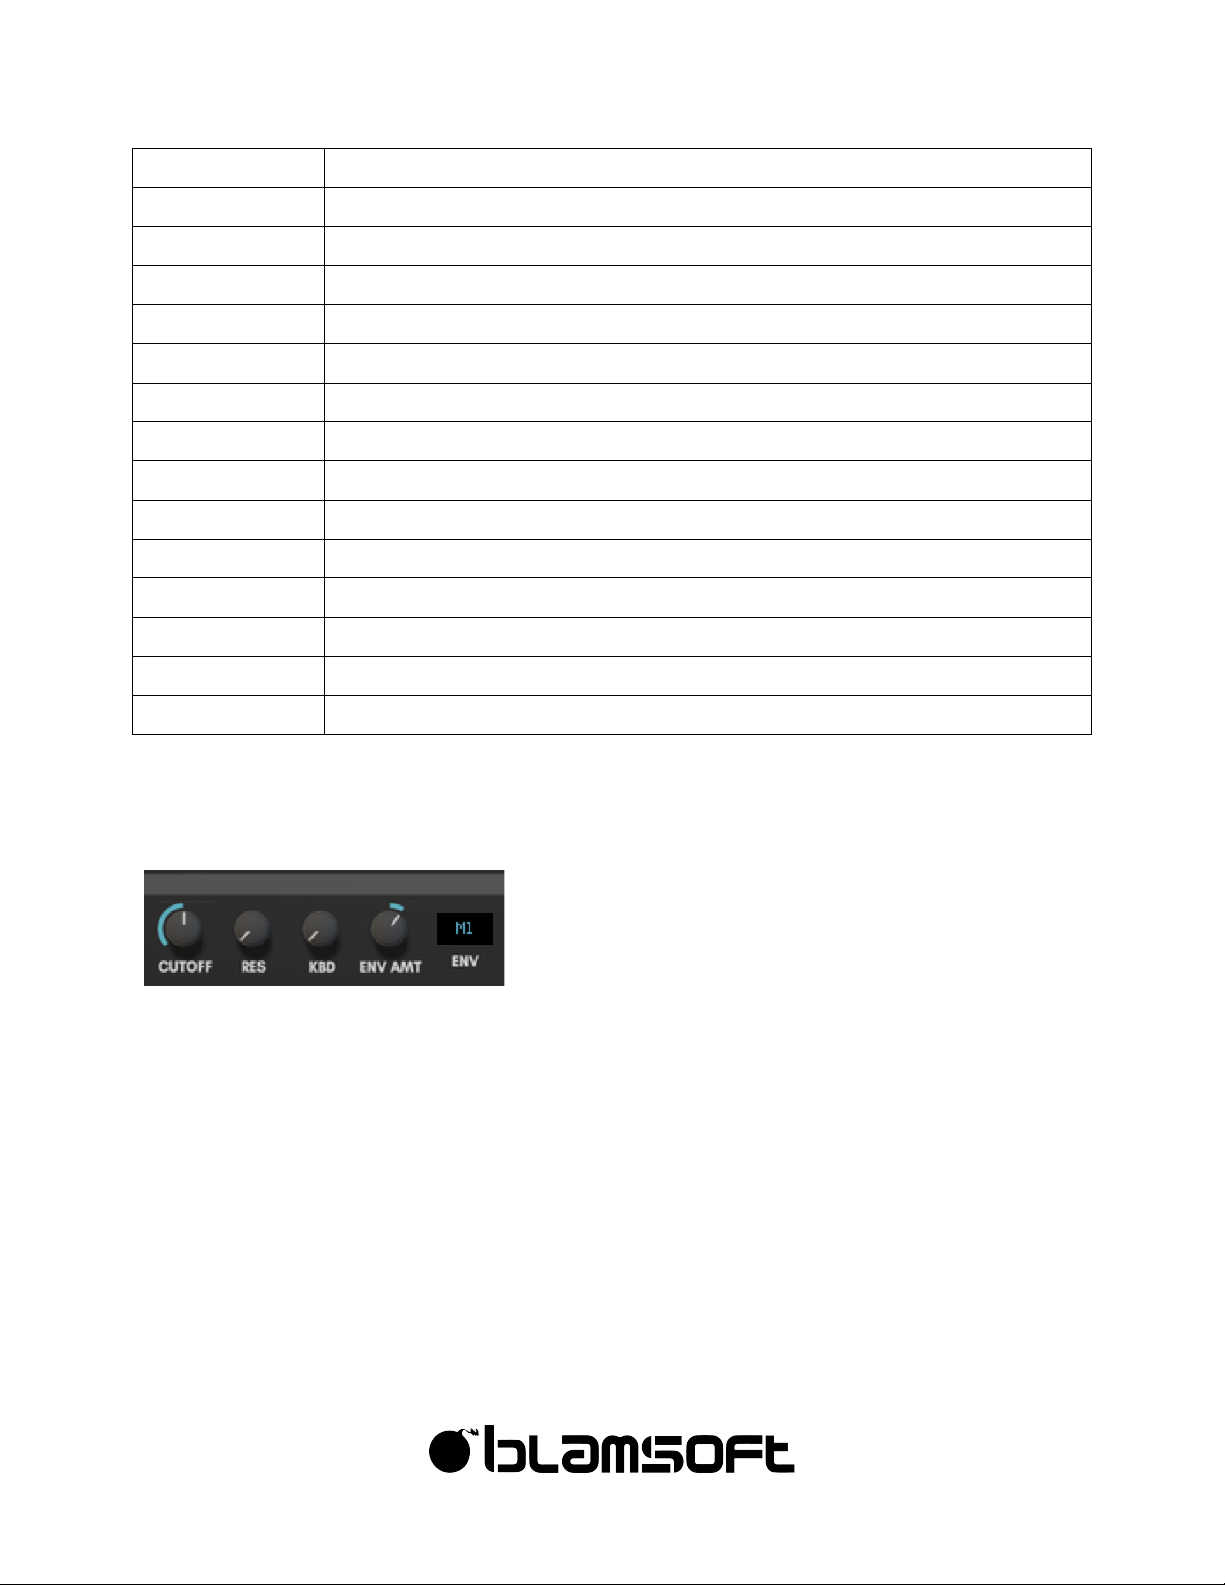
The filter has several knobs to control parameters and another display to select the envelope.
• Cutoff – Sets the transition point from the passband to the rejection band for lowpass and
highpass filters. Sets the mid frequency for bandpass and notch filters. Adjusts phase shift
in phase filters. Adjusts delay time in comb filters.
• Resonance – Creates a peaking in the frequency response of all analog style filters.
Controls bandwidth or spacing in resonator filters. Adjusts feedback in comb filters.
• Keyboard Amount – Controls how much the cutoff frequency tracks the keyboard. At 0%,
the cutoff frequency does not track the keyboard. At 100%, the cutoff frequency tracks the
keyboard matching the keyboard semitones.
Page 19
19
©"2016"Blamsoft,"Inc."All"rights"reserved."
• Envelope Amount – Sets the amount that the chosen Mod Envelope affects the cutoff
frequency
• Envelope selection – One of the five envelopes can be chosen to control the cutoff
frequency while playing a note. Note that the chosen envelope is scaled by that envelope’s
scale settings.
Routing
The filters can be routed in parallel or series (see the Structure section). When F1 to F2 is
enabled, Filter 1 is routed through Filter 2. Amp 1 is disconnected in this case and only Amp 2
is used.
Page 20
20
©"2016"Blamsoft,"Inc."All"rights"reserved."
Envelopes
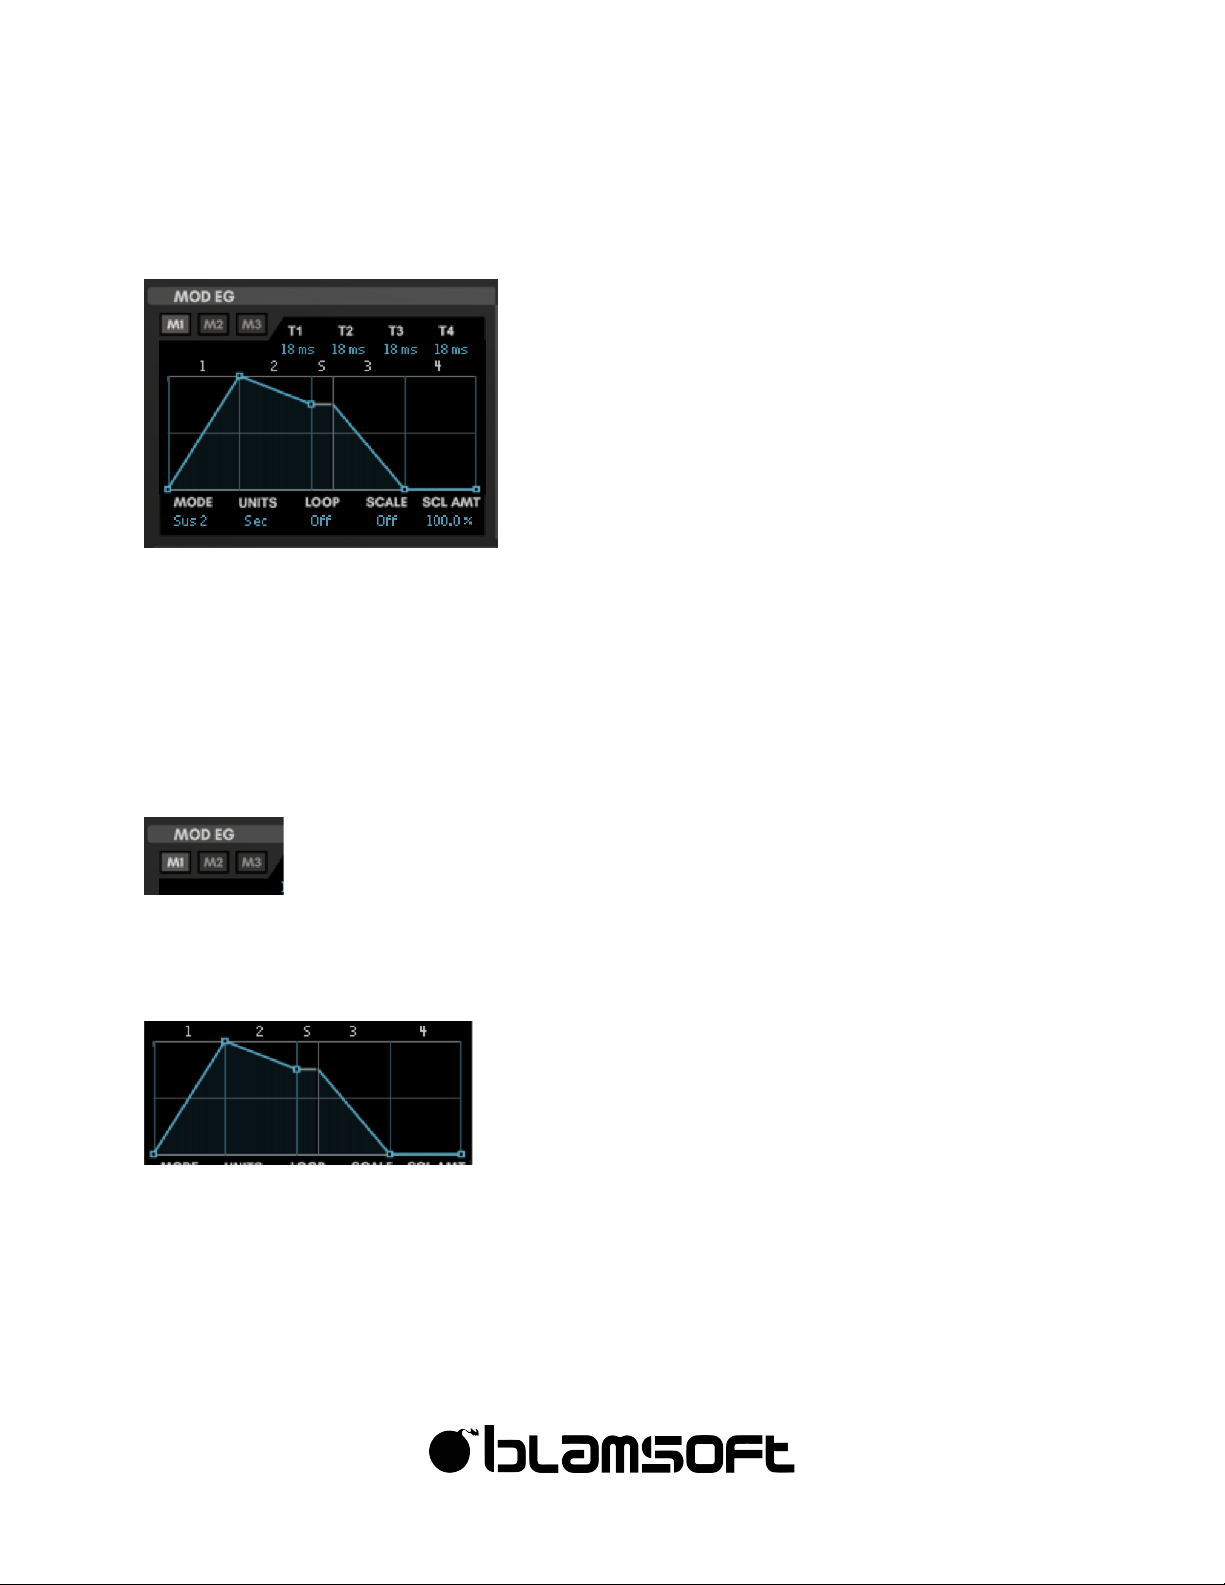
Expanse has a total of five envelopes. Three are mod envelopes for general purpose
modulation. There are also two amp envelopes. These envelopes control volume but also can
be used from the mod matrix. Each envelope has four stages. Any of the five envelopes can
be selected in the filter to control cutoff frequency.
Page Selection
You can select one of the envelopes for editing using the buttons in the upper left corner.
Graphical Interface
The level and time of each stage can be adjusted by clicking and dragging the points at the
end of each stage. The beginning level can also be adjusted by dragging the zero-time point.
By clicking and dragging in the middle of each stage you can adjust the stage curve.
Page 21
21
©"2016"Blamsoft,"Inc."All"rights"reserved."
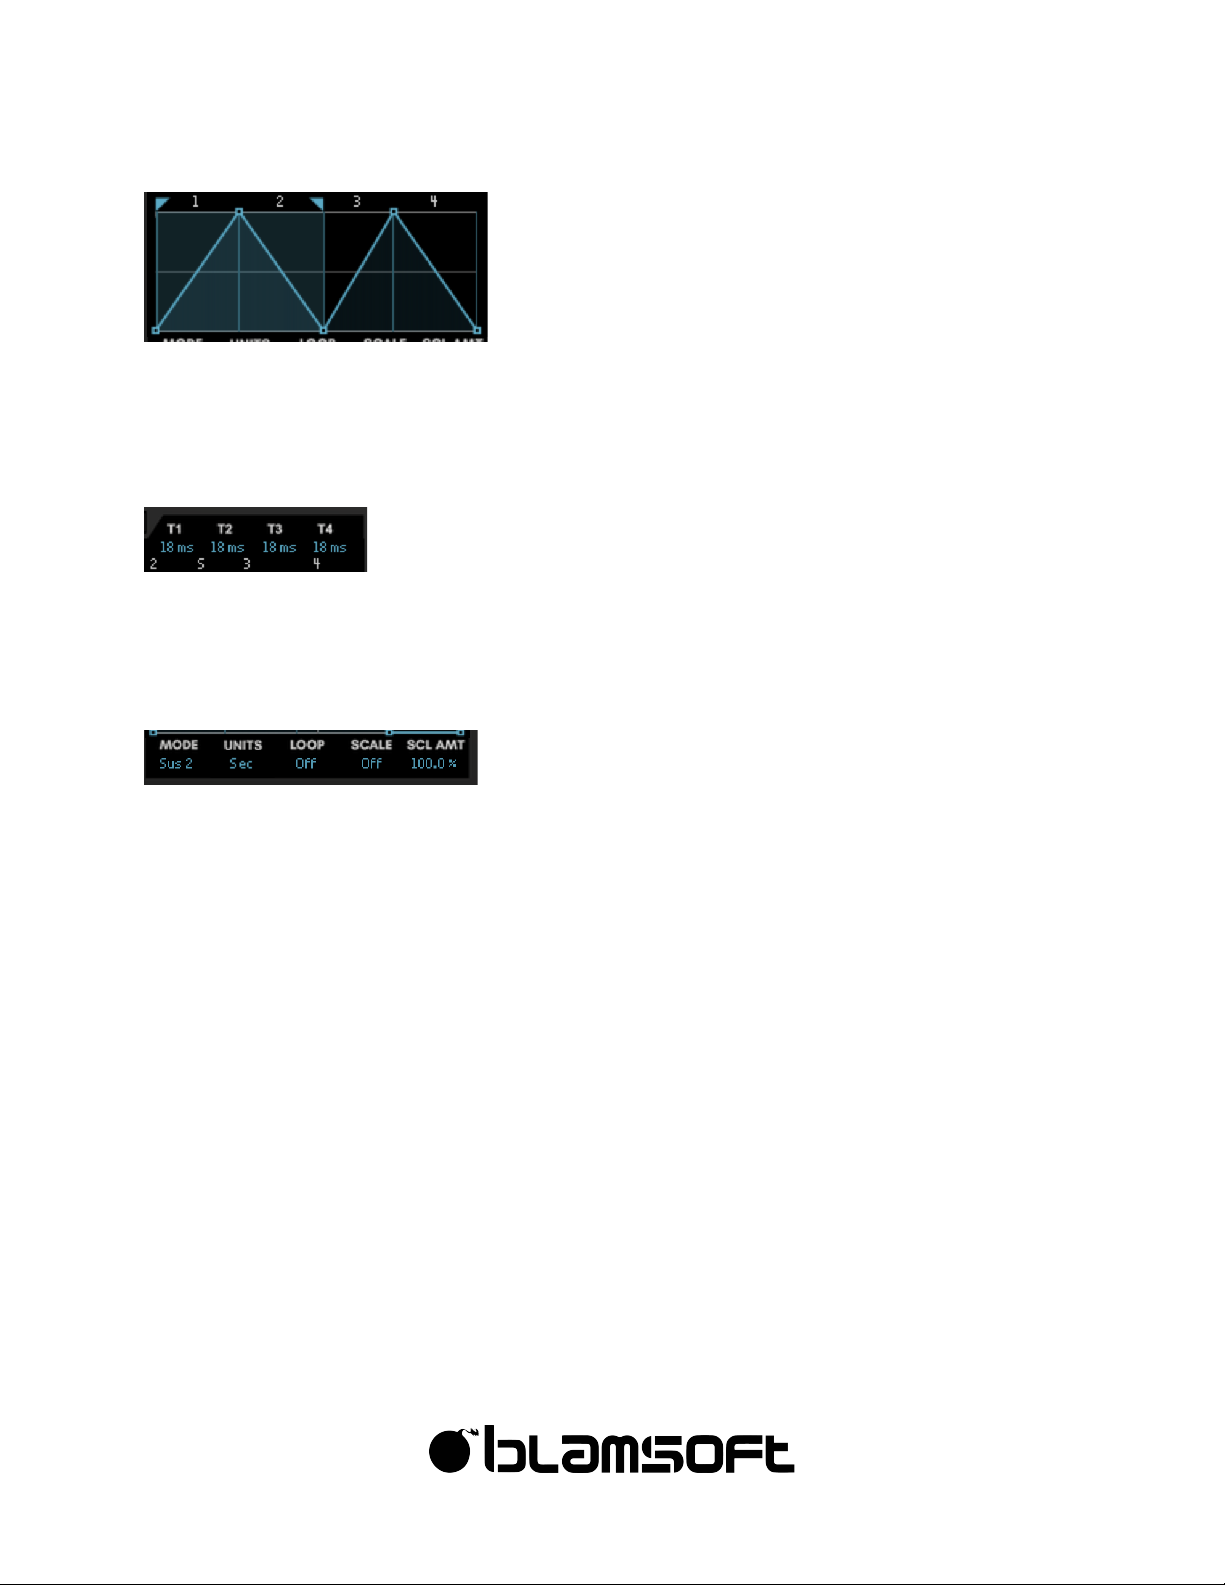
Loop Markers
When the envelope is in one of the loop modes, the loop markers can be dragged to set the
loop start and end.
Stage Times
If you need a more precise time than can be adjusted in the graphical interface, you can use
the time value controls. Click and drag up and down to adjust the time.
Controls
Mode – This sets the sustain stage or enters shot mode.
• Sus 0-4 – Sets the sustain point to the end of the indicated stage number
• Sus Off – No sustain stage
• Shot – The envelope plays all the way through with no sustain even if the key is released
• Editor – See editor mode section below
Units – This sets how the times are measured.
• Sec – Times are measured in seconds
• Div – Times are measure in beat divisions
Loop – Controls whether the envelope is looping and can also set the loop time.
• Off – No looping
• Reset – Constant looping between the loop markers with the times as configured. Loop
resets to the beginning when a key is pressed.
Page 22

22
©"2016"Blamsoft,"Inc."All"rights"reserved."
• LFO – Constant looping between the loop markers with the times as configured. For
seconds units, the loop starts at a random time in the loop when a key is pressed. For beat
divisions units, the loop is synced to the transport.
• ALR (Attack-Loop-Release) – When a key is pressed, the stages prior to the loop are
played, then looping occurs between the loop markers. After the key is released any
stages after the loop are played. The times are as configured.
• Beat Divisions – Constant looping between the loop markers with time adjusted so that the
loop fits in the selected beat division.
Scale – Scale can be used so that the envelope strength is proportional to the scale amount.
For example, the mod wheel can increase and decrease the strength of the envelope. The
scaled envelope is available in the mod matrix and is applied to the filter envelopes. Note,
when an envelope is selected as the scale source, that envelope does not have it’s own scaling
applied.
• Off – No scaling
• Mod Wheel – See Performance Section
• Velocity – MIDI Velocity
• A. Touch – MIDI Aftertouch
• Keyboard – MIDI Note Number
• Random – Random number that is different for each key press
• M1 Env – Mod Envelope 1
• M2 Env – Mod Envelope 2
• M3 Env – Mod Envelope 3
• A1 Env – Amp Envelope 1
• A2 Env – Amp Envelope 2
• CC 1 – CC Sequencer 1
• CC 2 – CC Sequencer 2
Scale Amount – Controls how much the envelope is scaled by the scaling source.
Page 23
23
©"2016"Blamsoft,"Inc."All"rights"reserved."
Amp Envelope Override
You can have Amp Envelope 1 control Amp 2 by turning on “1 to 2”.
Ctrl/Cmd click, Shift drag
The envelopes can be reset to default or adjusted more precisely using the standard Reason
modifier keys.
Time modifier shortcuts
• Use Alt+Shift while dragging to keep the total time the same while the shape changes.
• Use Ctrl/Cmd+Shift drag on the time display to change the total time without changing
the shape.
Copy, Paste, and Reset
By using alt-click on the display, you have the option of copying or resetting all of the
envelope settings. Copy copies the settings from the current envelope to the clipboard. Paste
transfers the settings from the clipboard into the current envelope. Reset sets the current
envelope settings to their default values.
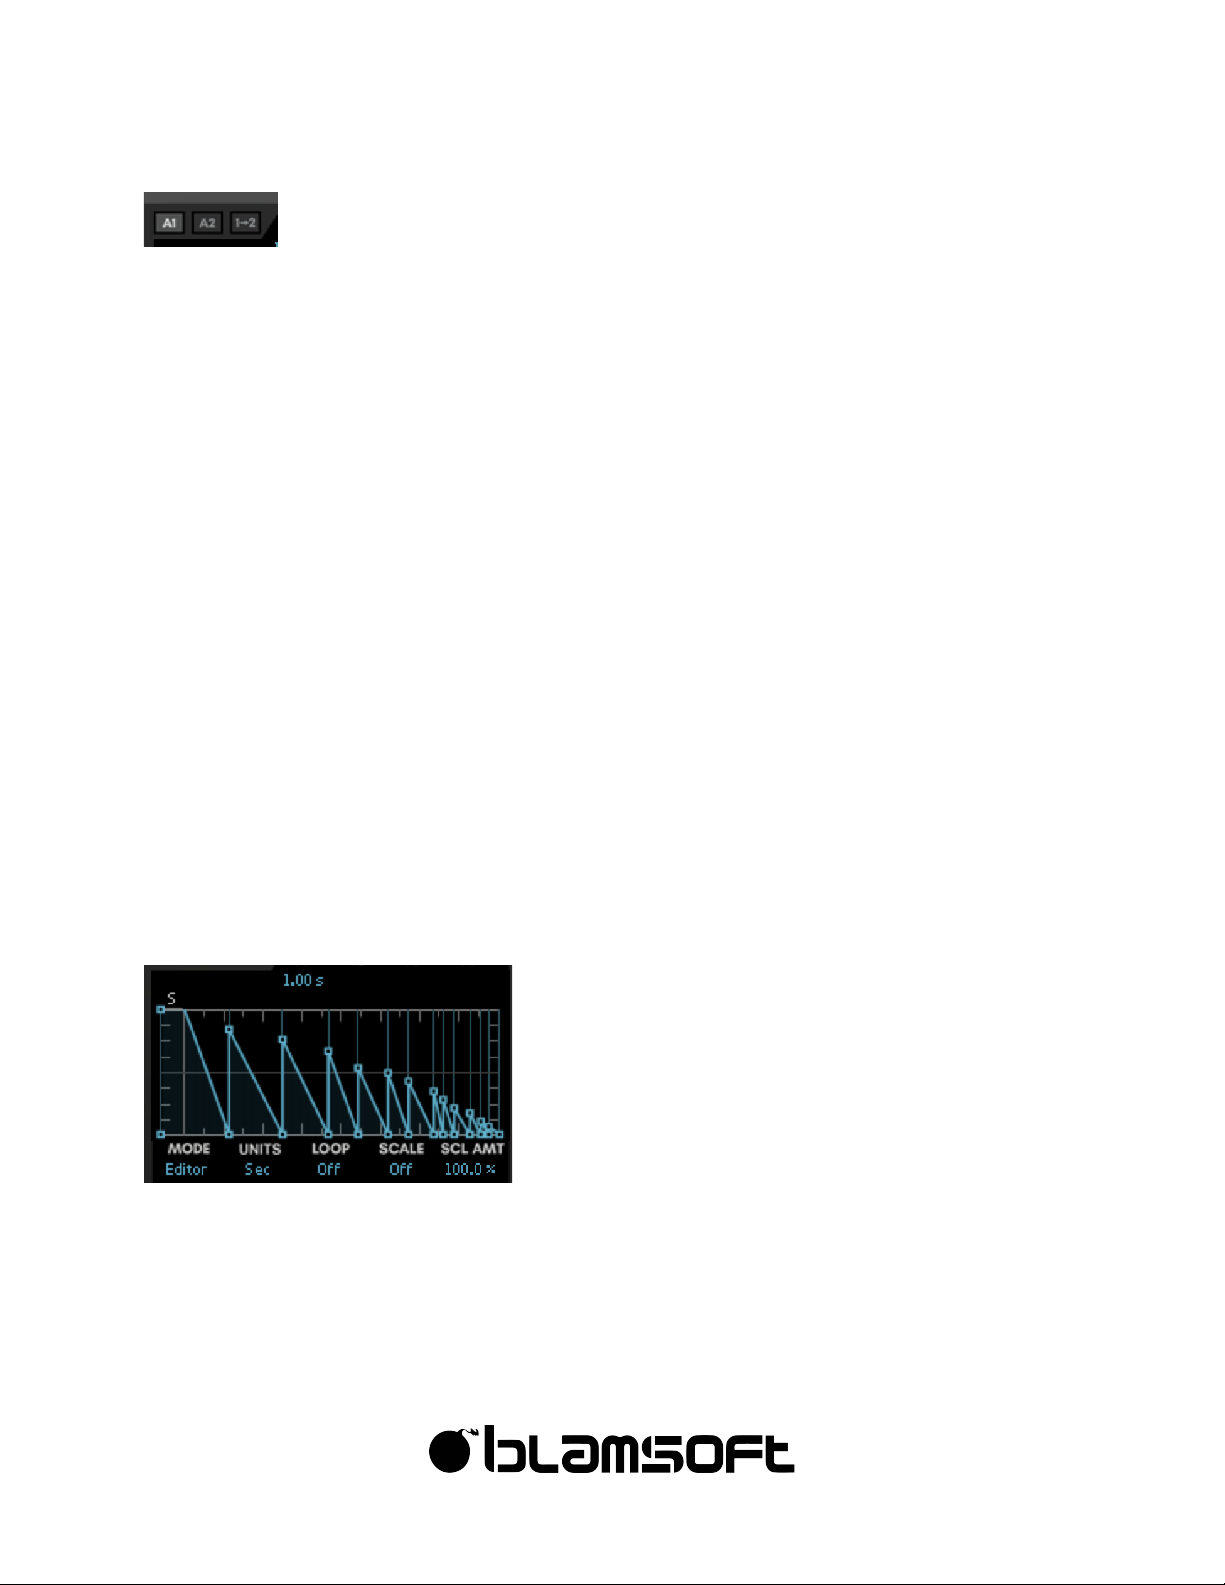
Editor Mode
This mode allows you to make your own envelope by adding, removing, and adjusting stages.
It features powerful modifier key combinations for editing. Here is a summary:
• Double-click to add or remove points
• Drag the segments to adjust the curve
• Drag the sustain point to the desired stage
• Shift drag to snap to a time increment
Page 24

24
©"2016"Blamsoft,"Inc."All"rights"reserved."
• Ctrl/Cmd drag to snap to a level
• Alt+shift drag to snap to triplets
• You can snap to both a time and level using both Shift and Ctrl/Cmd
• Shift drag on a curve adjusts the two adjacent points
There are presets in an Alt-click menu.
You can create a custom wavetable using the envelope editor mode. You have an option of
selecting envelopes in the waveform display. You can still use the envelopes in the classic
mode even when their editor is used in a wavetable.
Page 25
25
©"2016"Blamsoft,"Inc."All"rights"reserved."
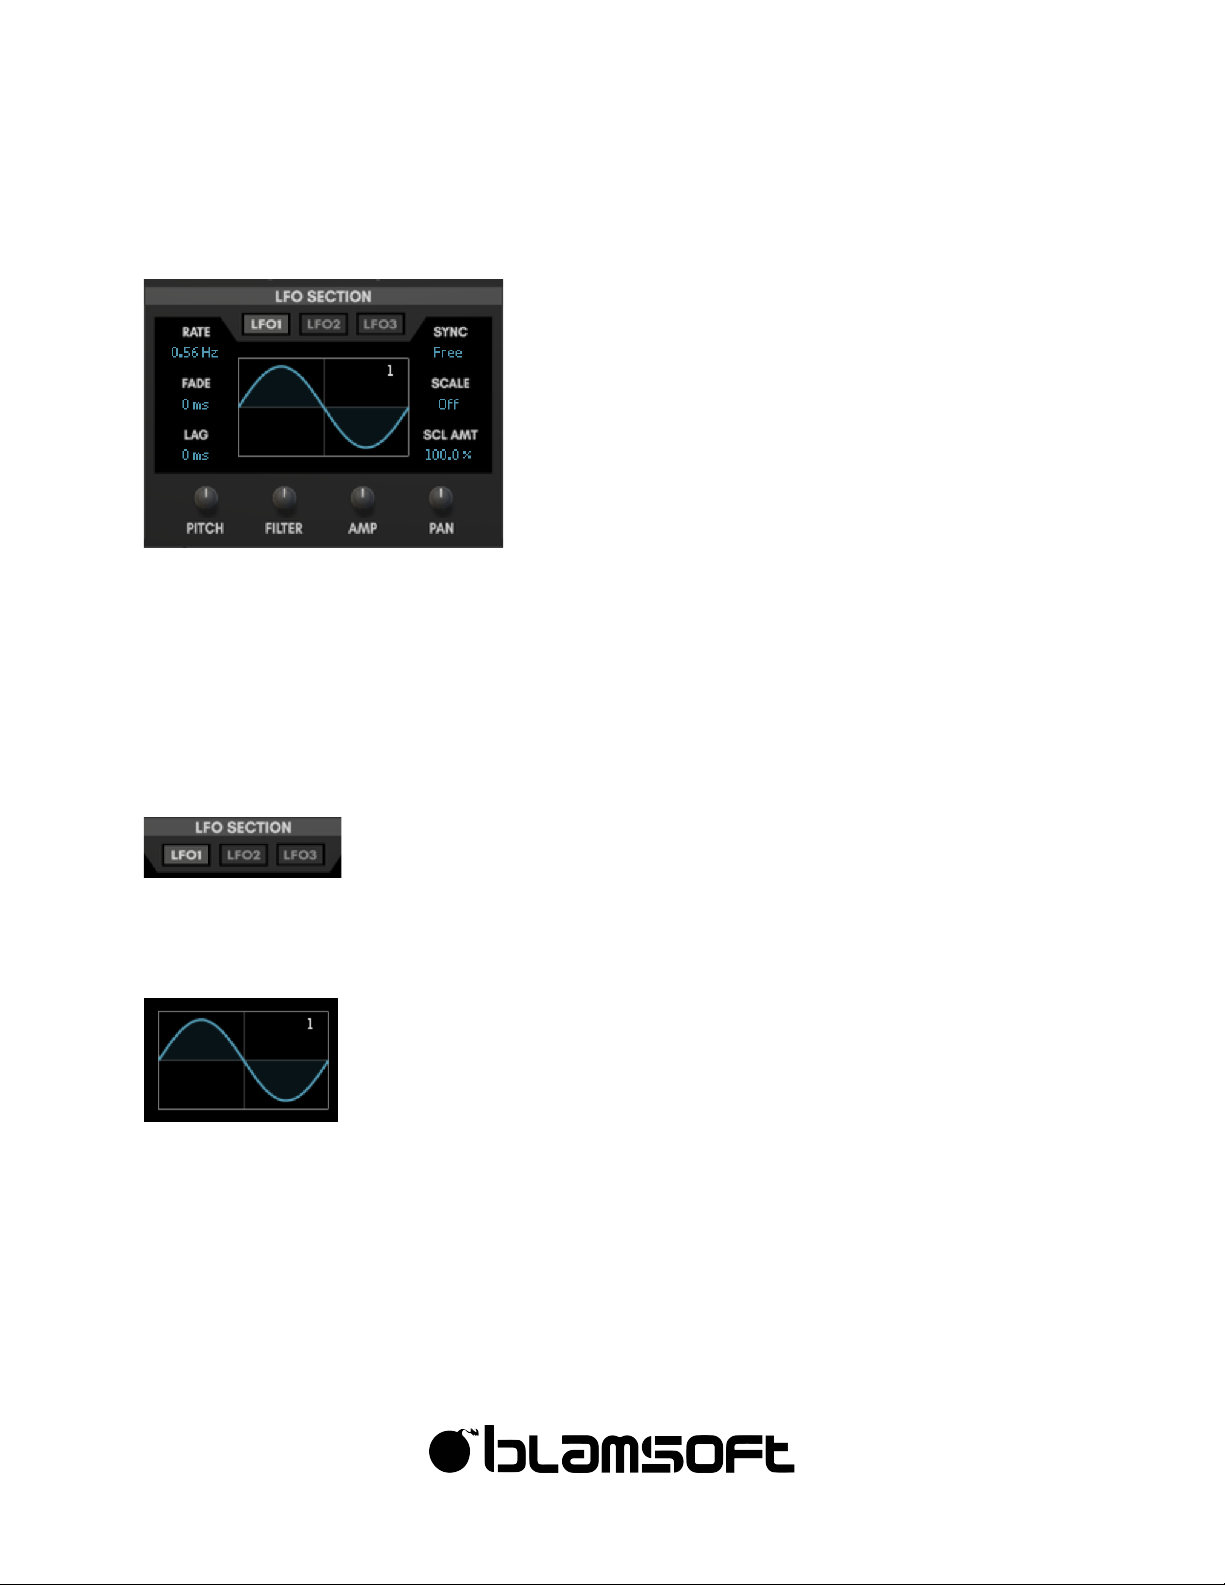
LFOs
Expanse has three LFOs with 64 possible waveforms. The LFOs have hard-wired targets as well
as the ability to be routed in the Mod Matrix. The free running modes can be either
monophonic or polyphonic. When polyphonic, different notes can have a different position in
the LFO waveform.
Page Selection
You can select one of the LFOs for editing using the buttons in the upper middle.
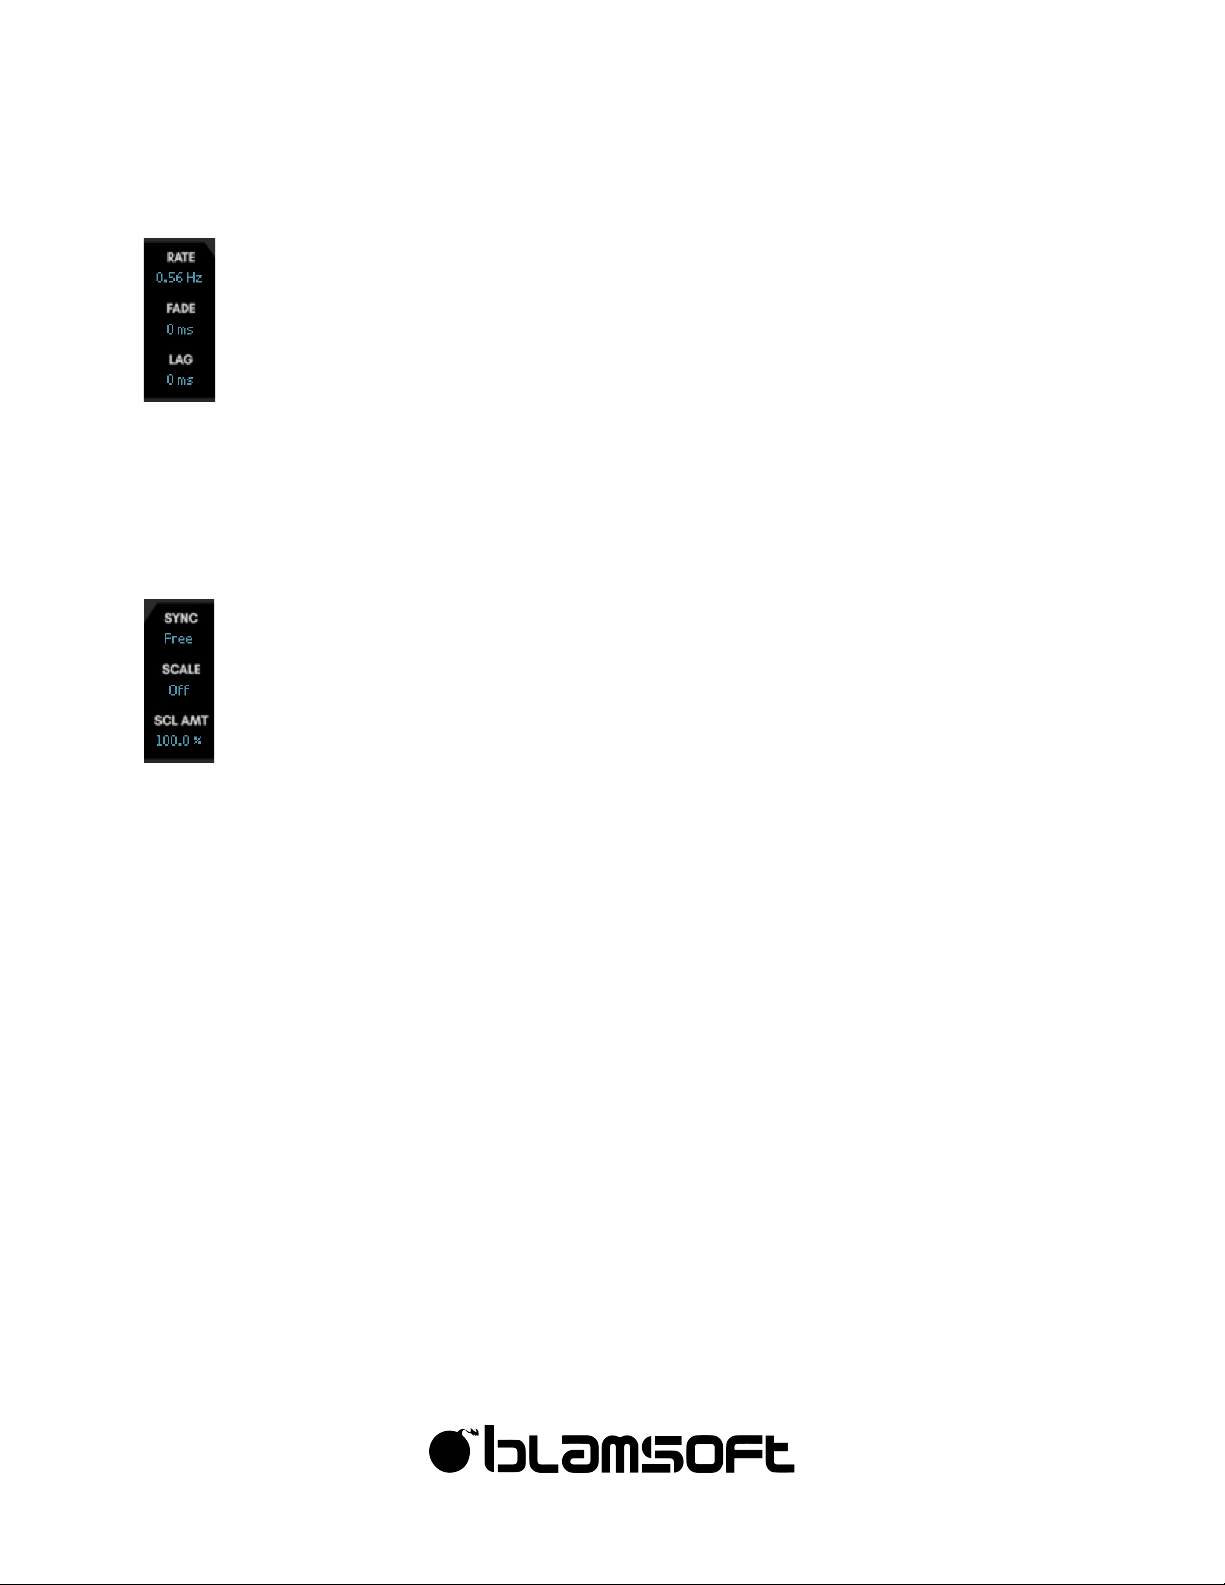
Waveform Selection
Click and drag up and down on the waveform display to scroll through the available shapes.
The basic shapes come first followed by more unusual shapes. Note that shape 26 is very
similar to a Sample and Hold. Some shapes are designed to be used as rhythmic patterns and
are best used with a slow synced beat division. Use shift-drag on the display for finer selection
and ctrl/cmd click to reset to the default sine waveform.
Page 26
26
©"2016"Blamsoft,"Inc."All"rights"reserved."
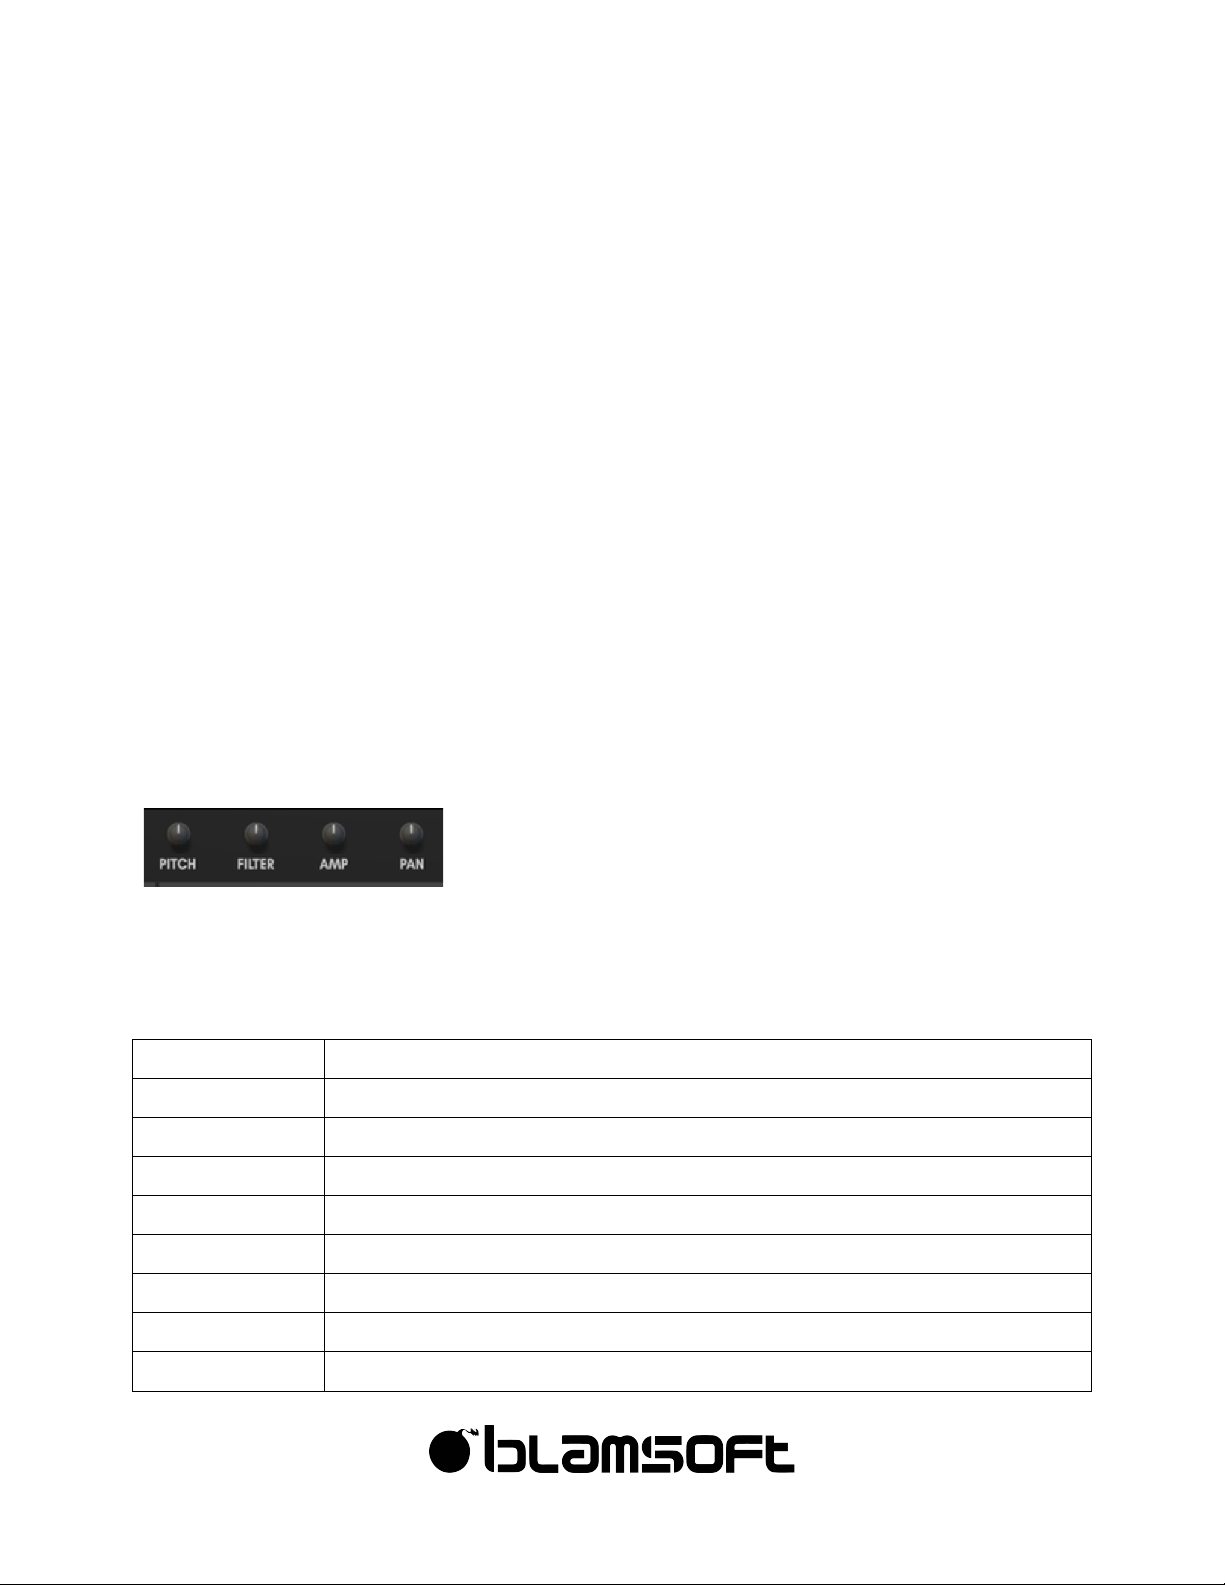
Left Side Controls
Rate – Adjusts the rate/speed of the LFO when in a free running mode
Fade – Sets the time it takes for the LFO to fade in when a key is pressed
Lag – Lag causes a smoothing of the LFO waveform. Turn up the Lag for more smoothing.
Right Side Controls
Sync – Sets the free running mode or synced beat division
• Free – In this mode, the LFO is monophonic and free running with a speed set by the Rate
control
• Key Reset – In this mode, the LFO is monophonic and free running with a speed set by the
Rate control. A key press resets the envelope waveform position.
• Poly – In this mode, the LFO is polyphonic (each note has its own LFO) and free running
with a speed set by the Rate control
• Poly Reset – In this mode, the LFO is polyphonic (each note has its own LFO) and free
running with a speed set by the Rate control. A key press resets the envelope waveform
position.
• Beat Division – The beat divisions will sync the LFO rate to the beat. In these settings, the
LFO is monophonic.
Scale – Scale can be used so that the LFO strength is proportional to the scale amount. For
example, the mod wheel can increase and decrease the strength of the LFO. The scaled LFO is
available in the mod matrix and is applied to the hard-wired LFO targets. Note, when an
envelope is selected as the scale source, that envelope does not have it’s own scaling applied.
Page 27
27
©"2016"Blamsoft,"Inc."All"rights"reserved."
• Off – No scaling
• Mod Wheel – See Performance Section
• Velocity – MIDI Velocity
• A. Touch – MIDI Aftertouch
• Keyboard – MIDI Note Number
• Random – Random number that is different for each key press
• M1 Env – Mod Envelope 1
• M2 Env – Mod Envelope 2
• M3 Env – Mod Envelope 3
• A1 Env – Amp Envelope 1
• A2 Env – Amp Envelope 2
• CC 1 – CC Sequencer 1
• CC 2 – CC Sequencer 2
Scale Amount – Controls how much the LFO is scaled by the scaling source.
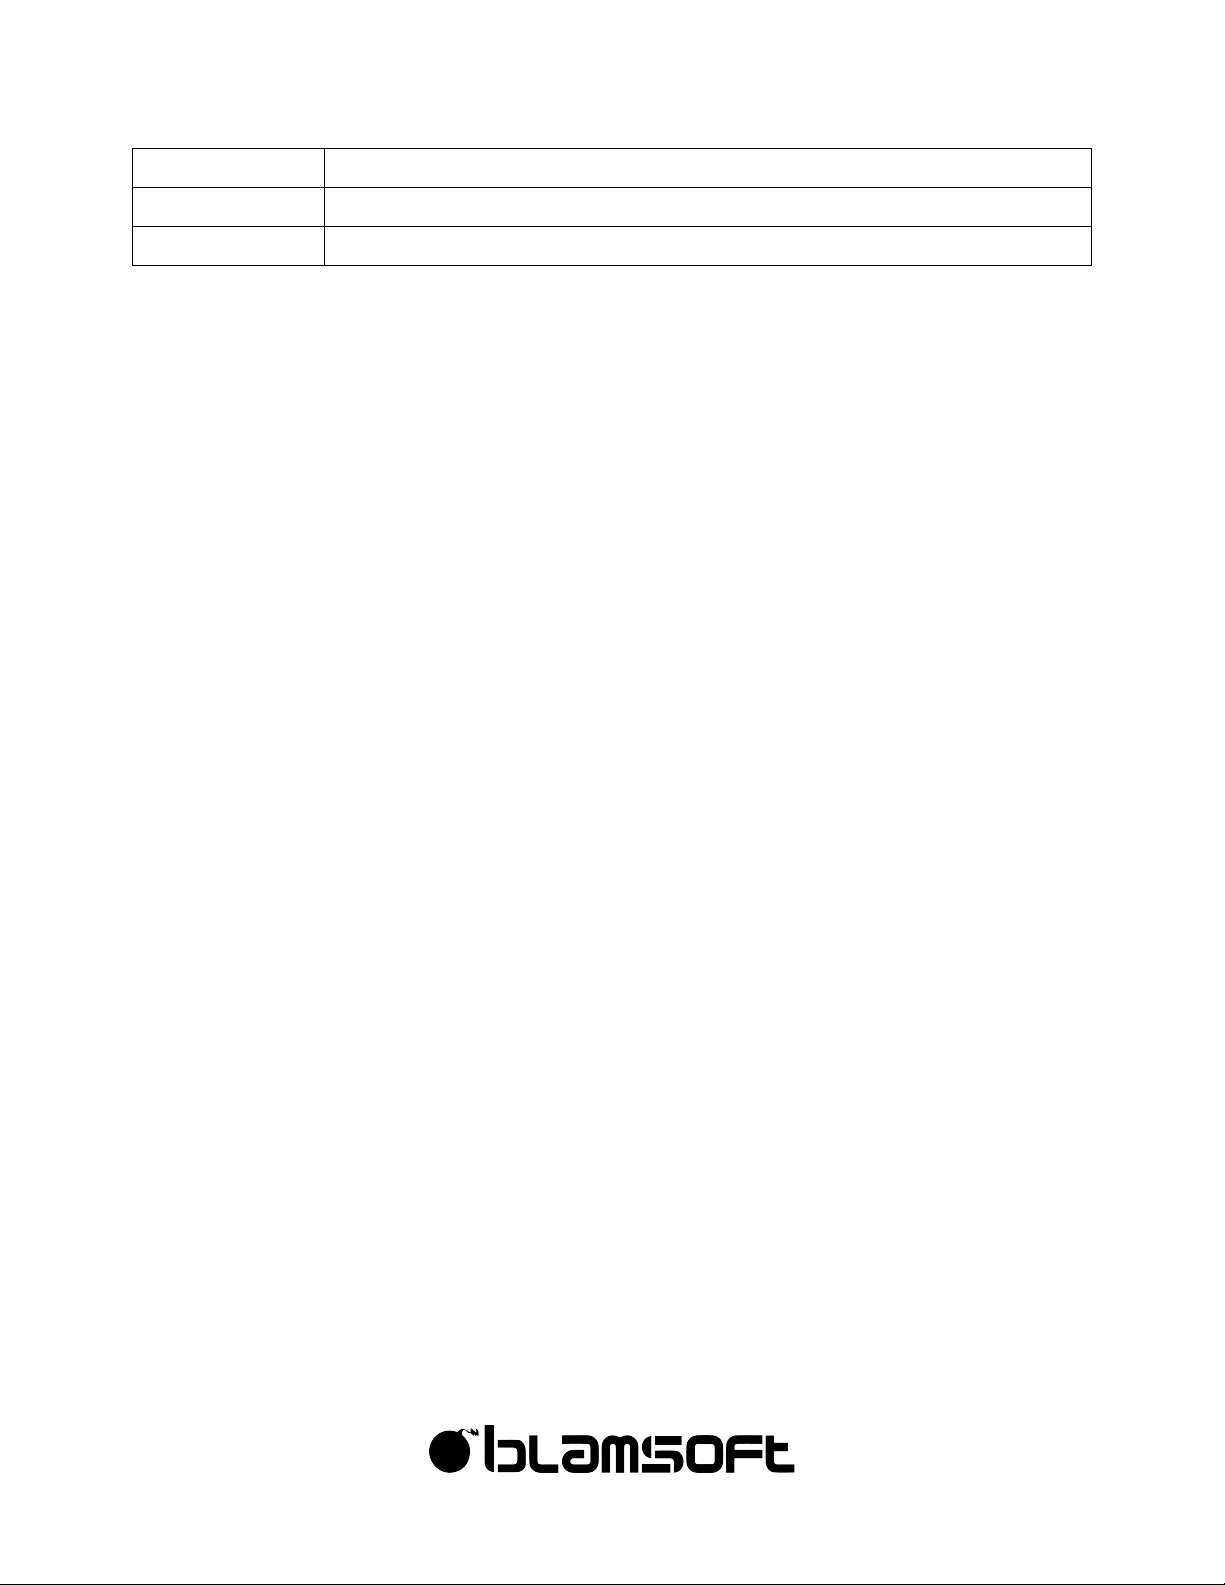
Targets
Each LFO has four hard-wired targets. The scale settings are applied to the LFO when
modulating the targets. Note that turning the knob to the left applies an inverted LFO
waveform.
LFO 1: Pitch
Oscillator pitch
LFO 1: Filter
Cutoff frequency of both Filter 1 and Filter 2
LFO 1: Amp
Output volume
LFO 1: Pan
Output pan
LFO 2: 1 Pitch
Oscillator 1 pitch
LFO 2: 1 Pos
Oscillator 1 wavetable position
LFO 2: 2 Pitch
Oscillator 2 pitch
LFO 2: 2 Pos
Oscillator 2 wavetable position
LFO 3: Filter 1
Cutoff frequency of Filter 1
Page 28
28
©"2016"Blamsoft,"Inc."All"rights"reserved."
LFO 3: Filter 2
Cutoff frequency of Filter 2
LFO 3: 1 Mod 1
Oscillator 1 Mod 1 amount
LFO 3: 2 Mod 1
Oscillator 2 Mod 1 amount
Page 29
29
©"2016"Blamsoft,"Inc."All"rights"reserved."
Amps
Recall from the structure diagram that there is an amp connected to the output of each filter.
The amps are not directly seen on Expanse’s user interface but are controlled by the amp
envelopes. When Filter 1 is routed to Filter 2, Amp 1 is not connected. See the Envelopes
section for more details.
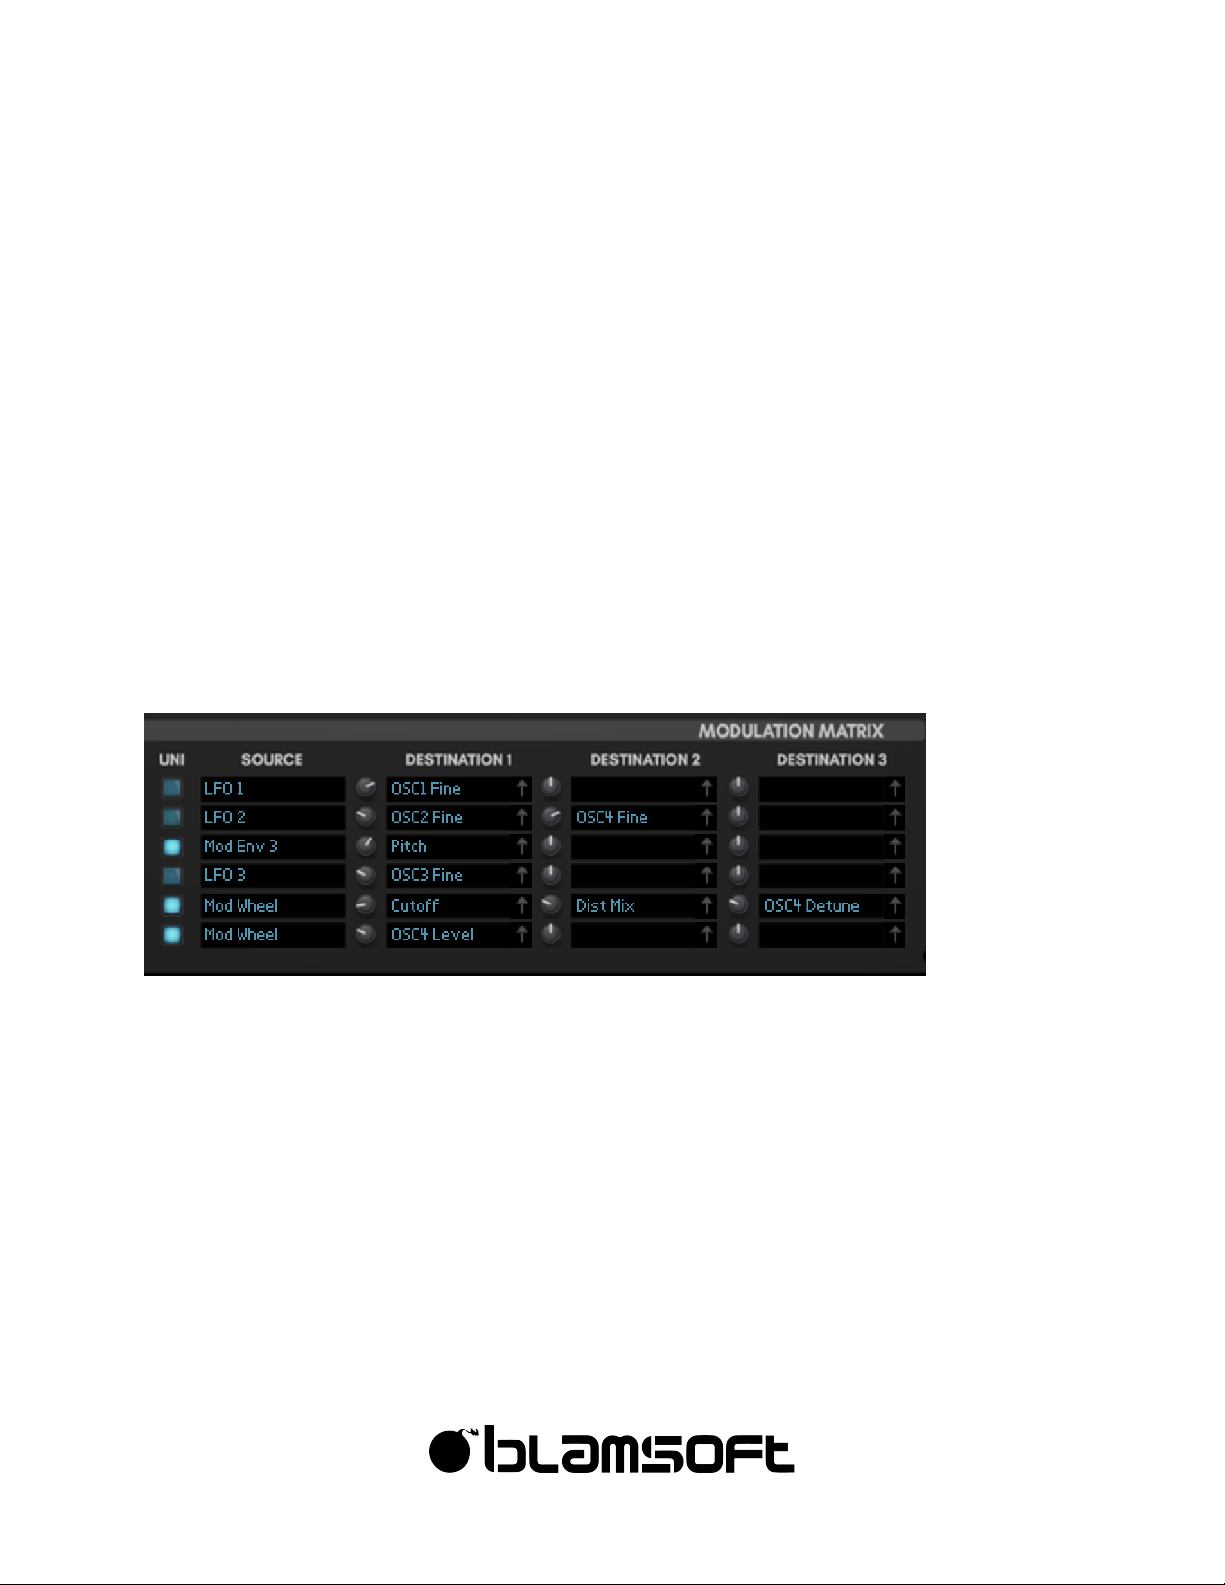
Mod Matrix
The Mod Matrix allows you to make connections between sources and destinations for
controlling some parameter of the synth that affects the sound.
Each row contains a set of connections from a single source to up to three destinations.
• Unipolar – When unipolar is enabled, the modulation source is zero or positive. If not, the
source is bipolar, meaning negative, zero, or positive. Unipolar is used to create
modulation that goes at or above the current setting of the destination. Otherwise, it will
go below the current setting of the destination.
• Source – Selects the modulation source for the row
• Destinations – The destinations are modulated with an effect controlled by the amount
knobs.
Page 30

30
©"2016"Blamsoft,"Inc."All"rights"reserved."
Drag-Connect
Click and drag from the arrows in the destination displays to a knob/control on the synth to
set that parameter as a destination. This can save you a lot of time when making connections.
Notes about Sources
Most of the time, modulation sources are polyphonic, meaning each note being played has its
own separate modulation value. When a synthesizer plays multiple notes, each separate note
with its individual oscillators, envelopes, and modulation is commonly referred to as a voice.
Sometimes, modulation sources are monophonic, like the LFOs in monophonic mode or some
of the sequencer modes.
• Mod Wheel, Pitch Bend, Aftertouch, Velocity – Common MIDI performance values
• Keyboard – The MIDI key currently held for the voice
• Random – A random number for a voice generated at each key press
• Noise – A noise source
• LFOs – You can get the LFO’s unmodified value. Or Scaled means that the LFO is scaled
by it’s own scale settings, see the LFOs section. You can also have the LFO scaled 100% by
the Mod Wheel, Aftertouch, or Velocity.
• Envelopes – You can get the envelope’s unmodified value. Or Scaled means that the
envelope is scaled by it’s own scale settings, see the Envelopes section. You can also have
the envelope scaled 100% by the Mod Wheel, Aftertouch, or Velocity.
• Sequencer – Note is the note value in the Note Sequencer. Gate*Vel refers to the idea that
the source will have gate lengths controlled by the gate values and a strength of the
velocity values.
• CC – CC from the CC Sequencer.
• CV Inputs – These are available to get input from other devices in Reason connected to
the back.
Notes about Destinations
There are many destinations available. The destinations almost always directly correspond to a
control available in the user interface. There are a few special cases:
• Matrix R Amt D – These destinations can be to scale the modulation to a destination. R
refers to the row number and D refers to the destination number. Because there is not a
Page 31
31
©"2016"Blamsoft,"Inc."All"rights"reserved."
dedicated scale setting like some synths, you can use this to scale the modulation. This is
another possible way to do scaling besides the LFO or envelope’s individual scale settings
and Scaled sources.
• CV Outputs – These allow for control of other Reason devices.
As was the case with the sources, most modulation destinations polyphonic. However, the
effects destinations are all monophonic and in some situations a destination will be
monophonic depending on its settings. Whenever a destination is monophonic, the
modulation source of the most recently played note (most recent voice) is used.
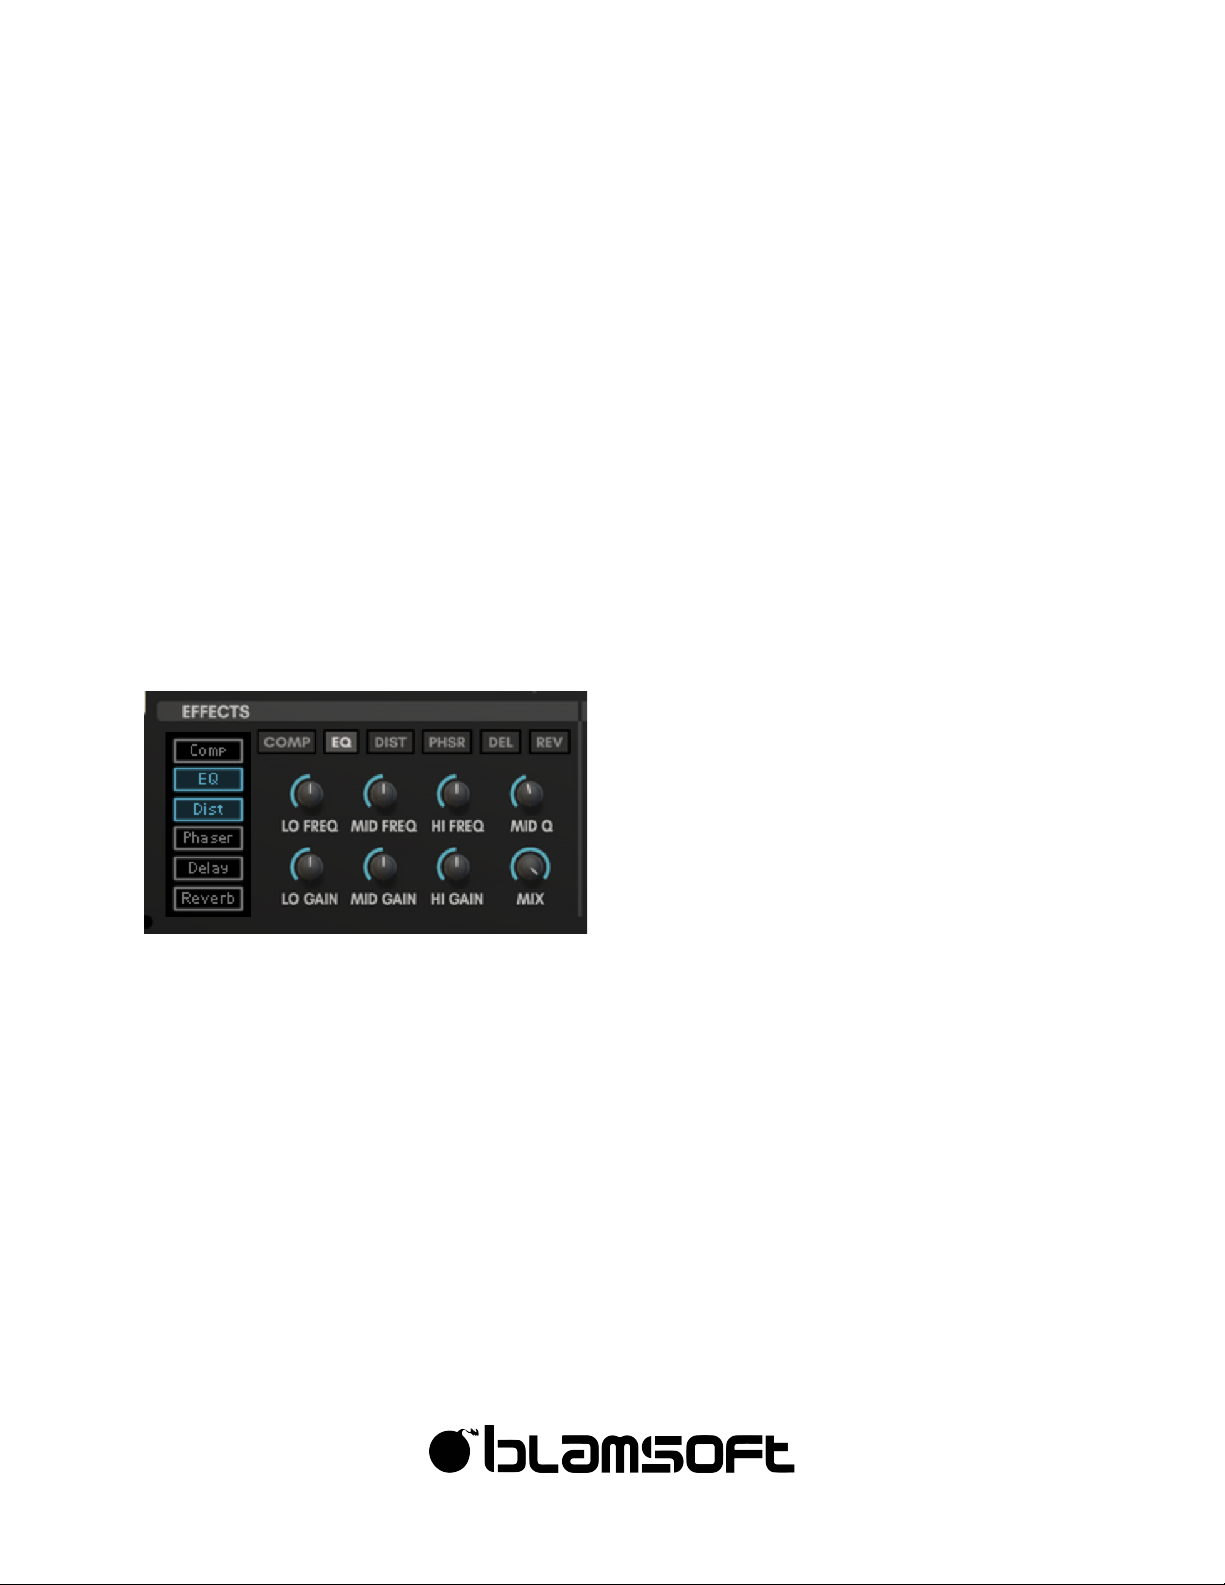
Effects
Expanse has six high quality effects that allow you to design great sounds “in the box”. You
can re-order the effects using the display on the side, greatly expanding the possibilities.
The included effects are compressor, equalizer, distortion, phaser, delay, and reverb.
• Compressor – Allows you to control the dynamics of the synth output. You can also add
pumping effects using the sidechain input.
• EQ – With the EQ, you can fine tune the spectrum of the output.
• Distortion – Allows you to create grit or bit crushing effects.
• Phaser – This offers the classic effect with a wide range of options
• Delay – Delay provides various echo effects
• Reverb – Adds a hall-like space to the sound
Page 32
32
©"2016"Blamsoft,"Inc."All"rights"reserved."
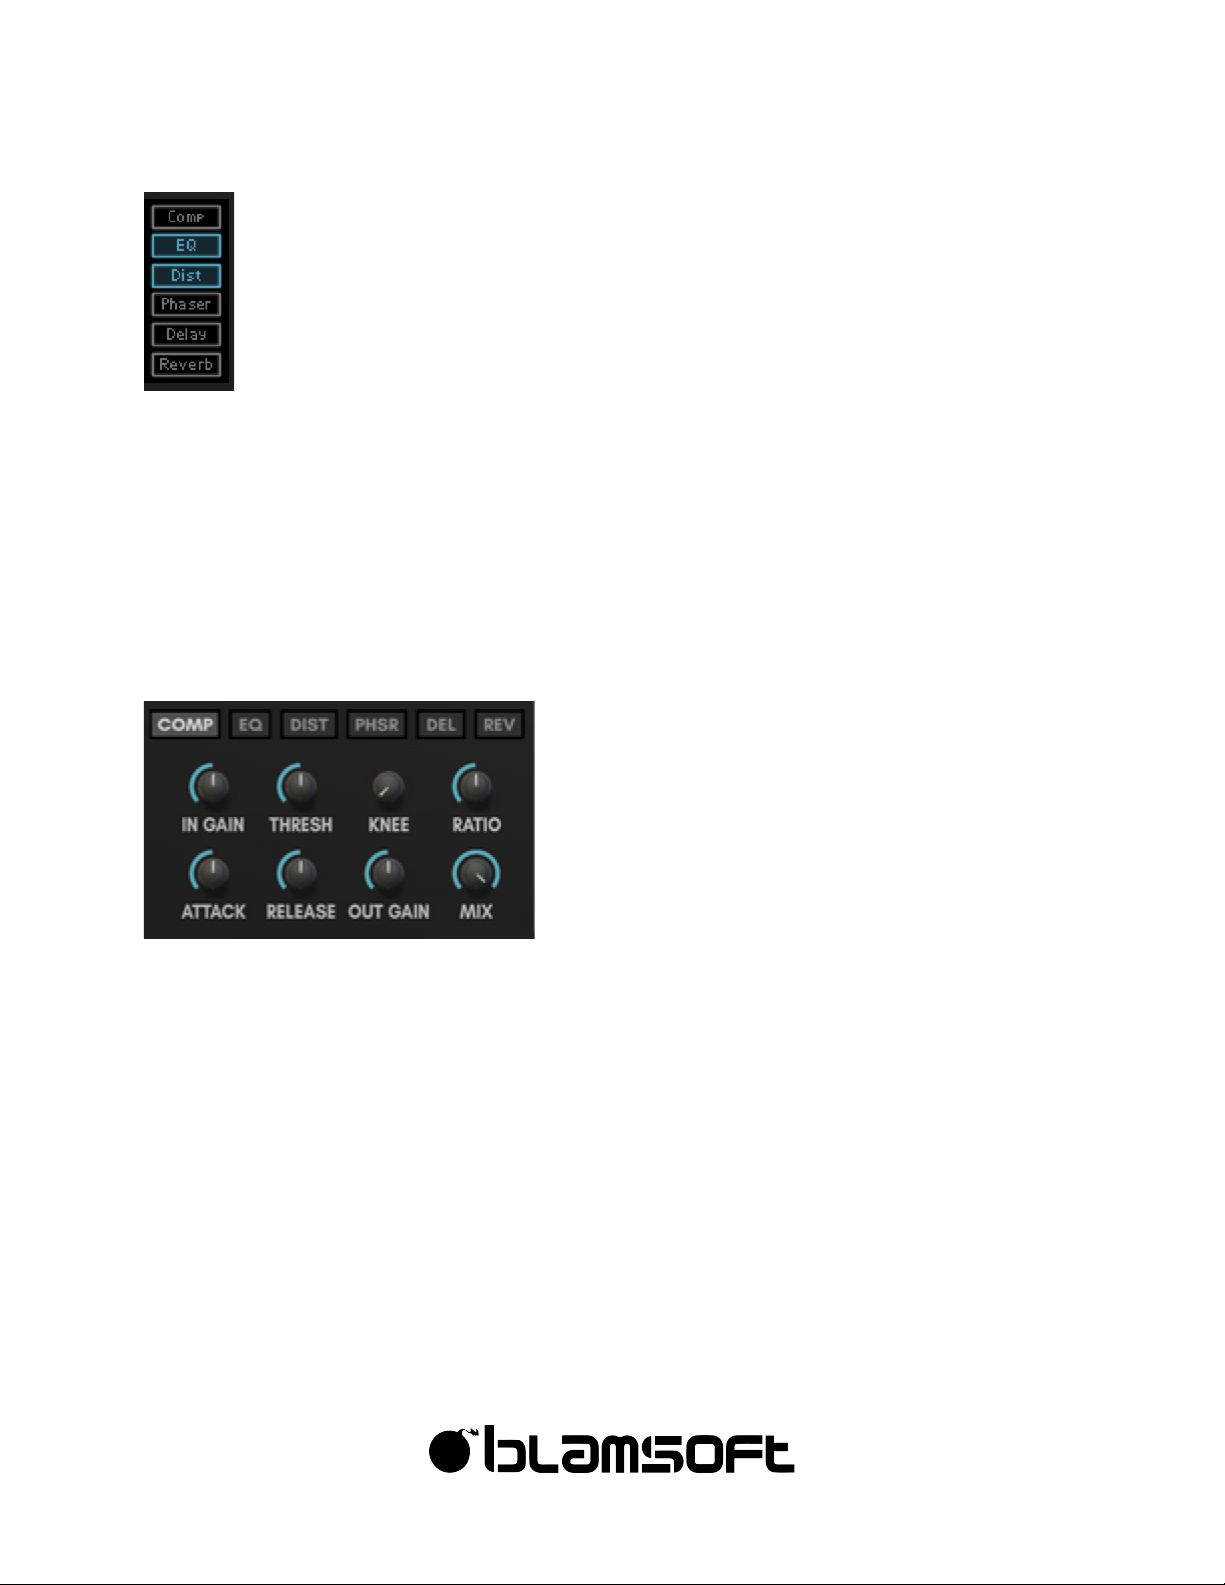
Enable/Ordering
The display on the left hand side allows you to click on each effect to enable/disable it. You
can drag the effect to change the order in the effects chain.
Each effect include eight controls. One common control is Mix, which adjusts the wet/dry mix
on all effects.
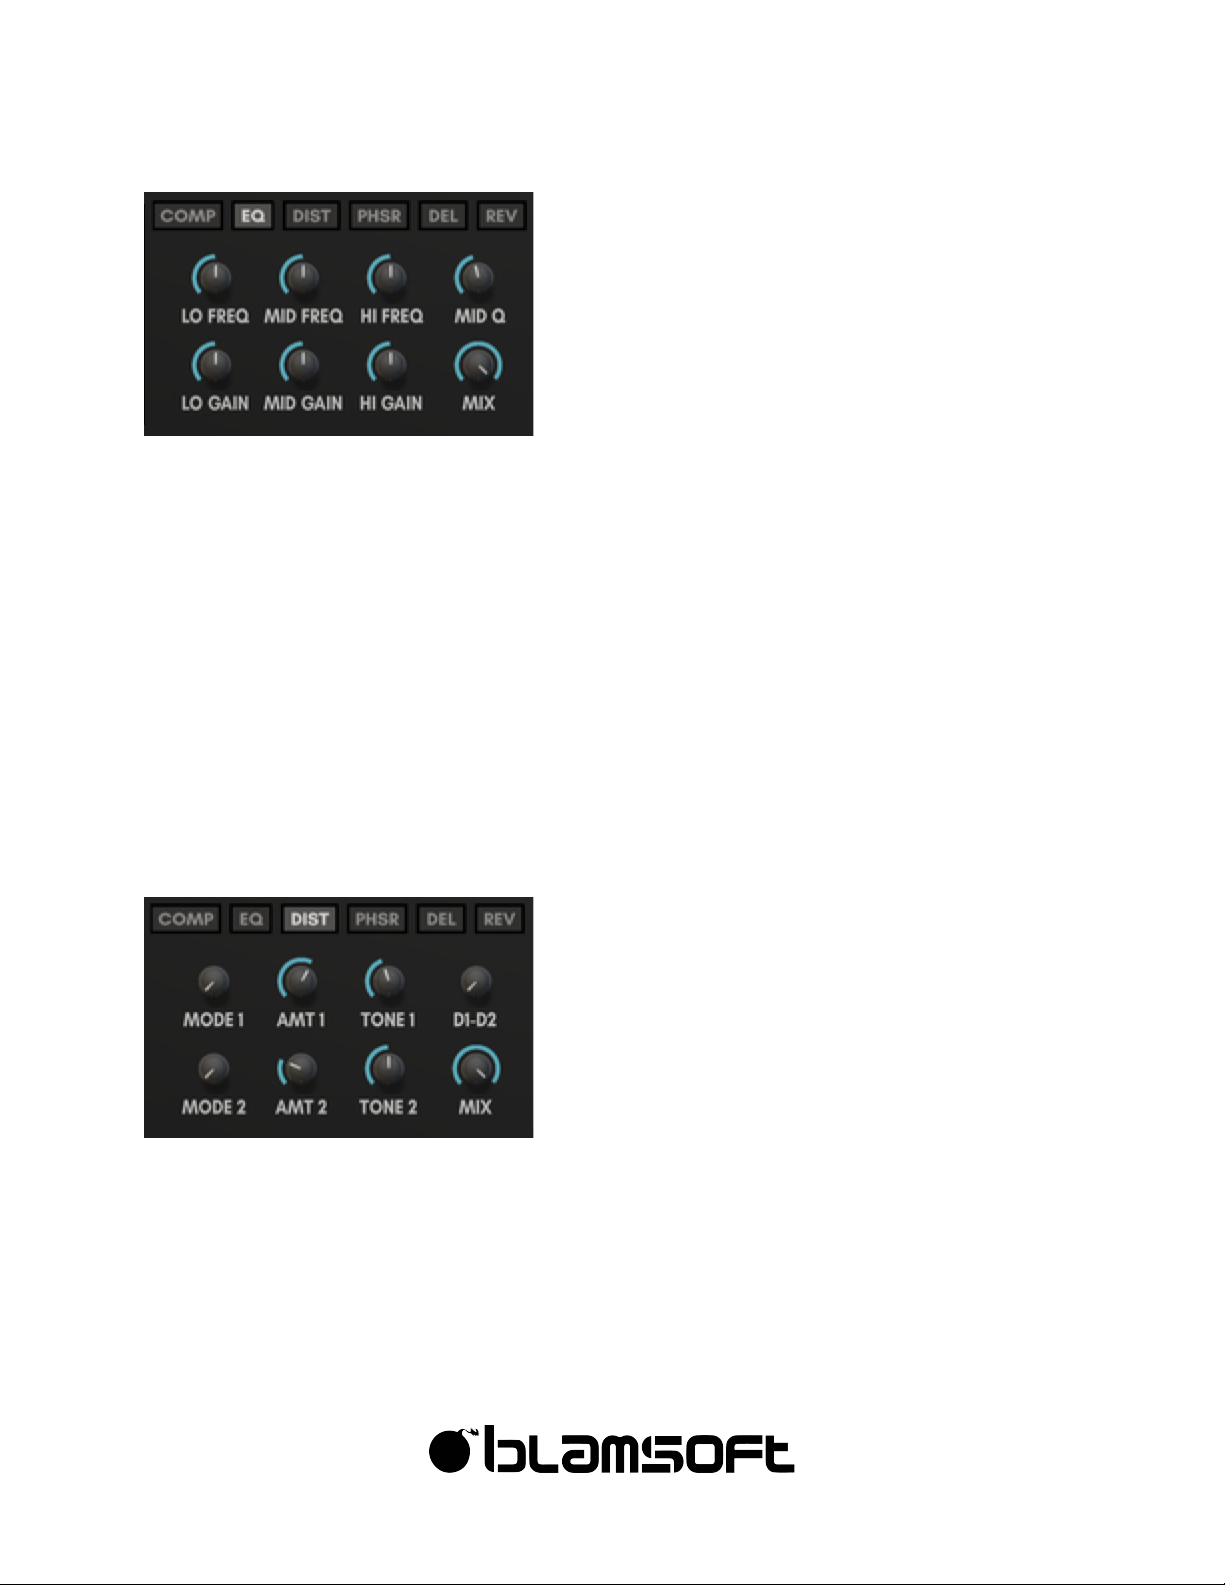
Compressor
The compressor can smooth out amplitude changes by quieting loud signals.
• Input Gain – Controls the input gain to the compressor
• Threshold – Controls the threshold at which the compressor starts to compress the signal
• Knee – Allows you to create a soft knee that provides smoother compression
• Ratio – Ratio determines how much the signal gets squashed
• Attack – The length of time that the compressor takes to engage when the level is above
the threshold
• Release – The length of time that the compressor takes to release when the level is below
the threshold
• Output Gain – Controls the output gain to the compressor
• Mix – Sets the wet/dry mix for the effect
Page 33
33
©"2016"Blamsoft,"Inc."All"rights"reserved."
Equalizer
The EQ is a three band parametric EQ.
• Low Freqeuncy – Low shelf transition frequency
• Mid Freqeuncy – Center of mid range boost
• High Frequency – High shelf transition frequency
• Mid Q – Sets the width of the midrange boost or cut
• Low Gain – Low shelf gain
• Mid Gain –Mid range boost or cut gain
• High Gain – High shelf gain
• Mix – Sets the wet/dry mix for the effect
Distortion
There are two distortion effects that run in parallel and can be cross faded using the D1-D2
knob.
• Mode 1 – Mode of distortion 1
• Amount 1 – Strength of the effect of distortion 1
Page 34
34
©"2016"Blamsoft,"Inc."All"rights"reserved."
• Tone 1 – A simple filter that can darken or brighten the sound. Turning the knob to the left
of center creates lowpass filtering. Turning the knob to the right of center creates highpass
filtering.
• D1-D2 – A cross fader between distortion 1 and distortion 2
• Mode 2 – Mode of distortion 2
• Amount 2 – Strength of the effect of distortion 2
• Tone 2 – A simple filter that can darken or brighten the sound. Turning the knob to the left
of center creates lowpass filtering. Turning the knob to the right of center creates highpass
filtering.
• Mix – Sets the wet/dry mix for the effect
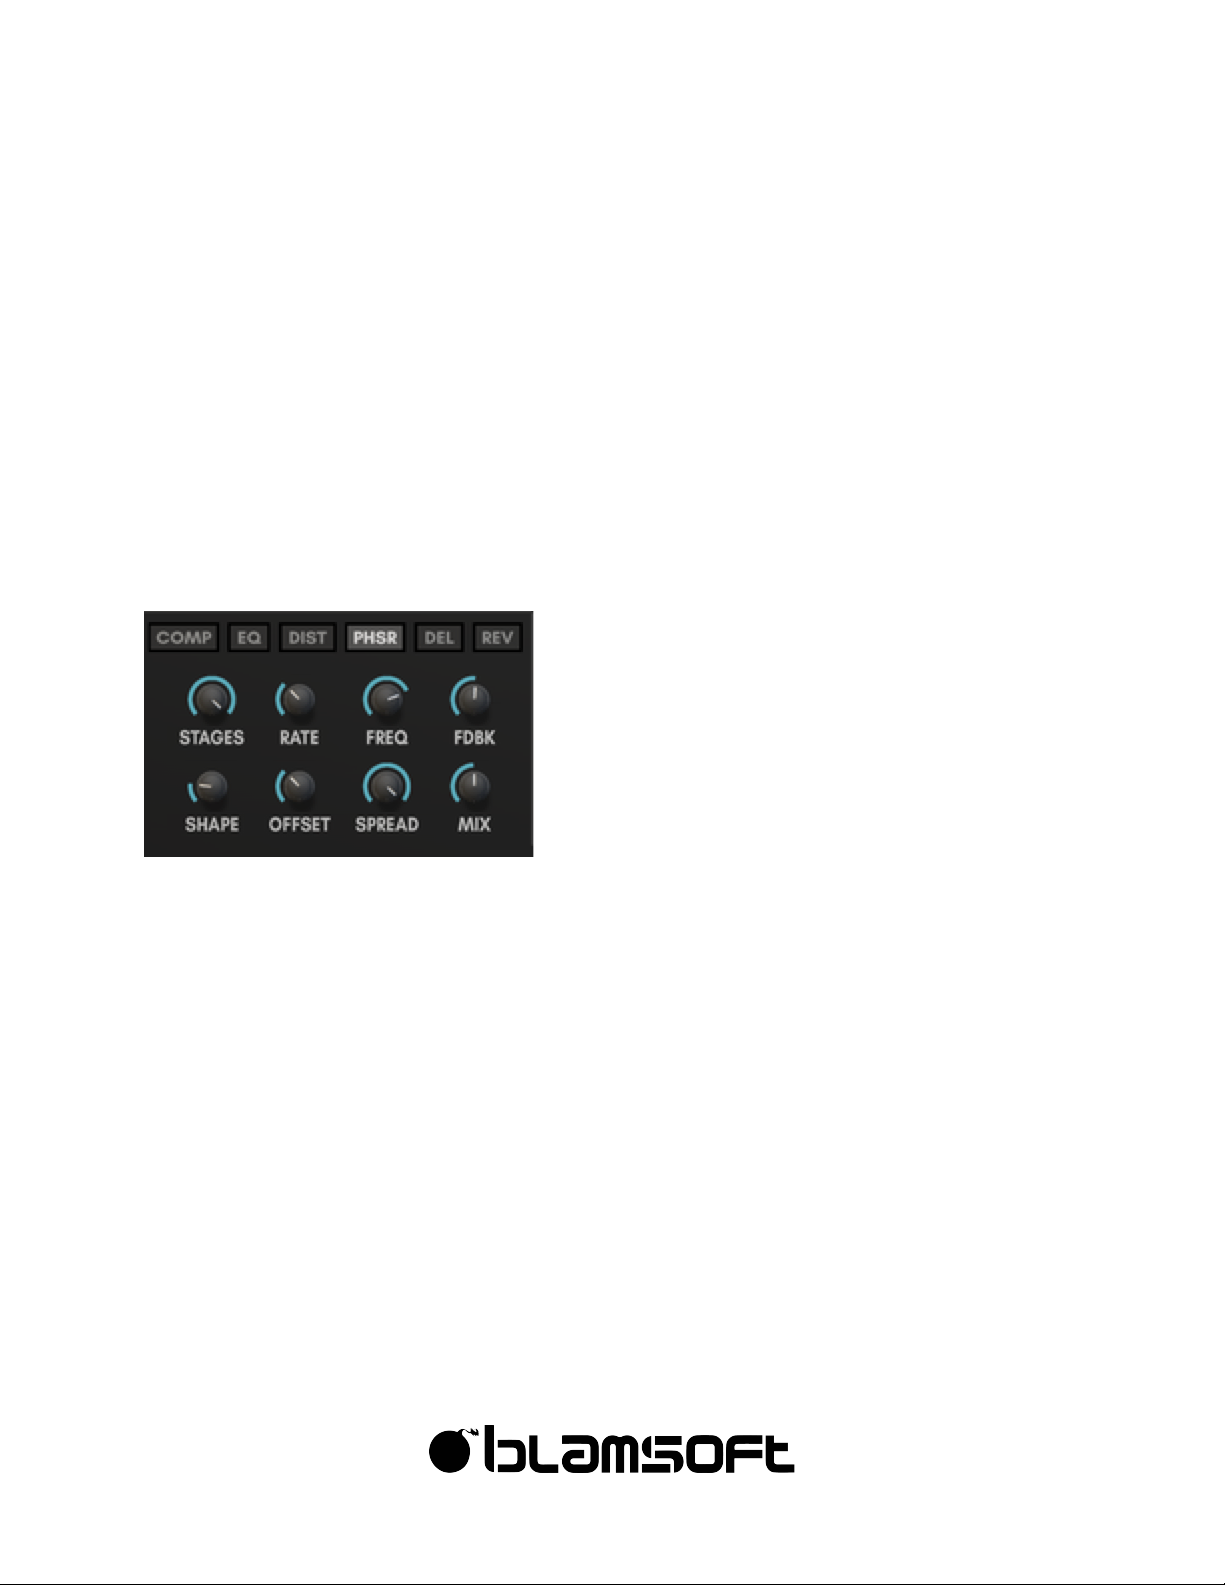
Phaser
The phaser is a six stage phaser with feedback.
• Stages – Number of all-pass filters in the effect
• Rate – Rate of the LFO that controls the frequency of the all-pass filters
• Frequency – Frequency range of the effect, controlling the low end frequency of the LFO.
When the LFO is off, it directly controls the frequency
• Feedback – Amount of feedback present in the effect
• Shape – Shape of the LFO
• Offset – LFO offset between the left and right panned effects
• Spread – Panning amount of the left and right panned effects
• Mix – Sets the wet/dry mix for the effect
Page 35
35
©"2016"Blamsoft,"Inc."All"rights"reserved."
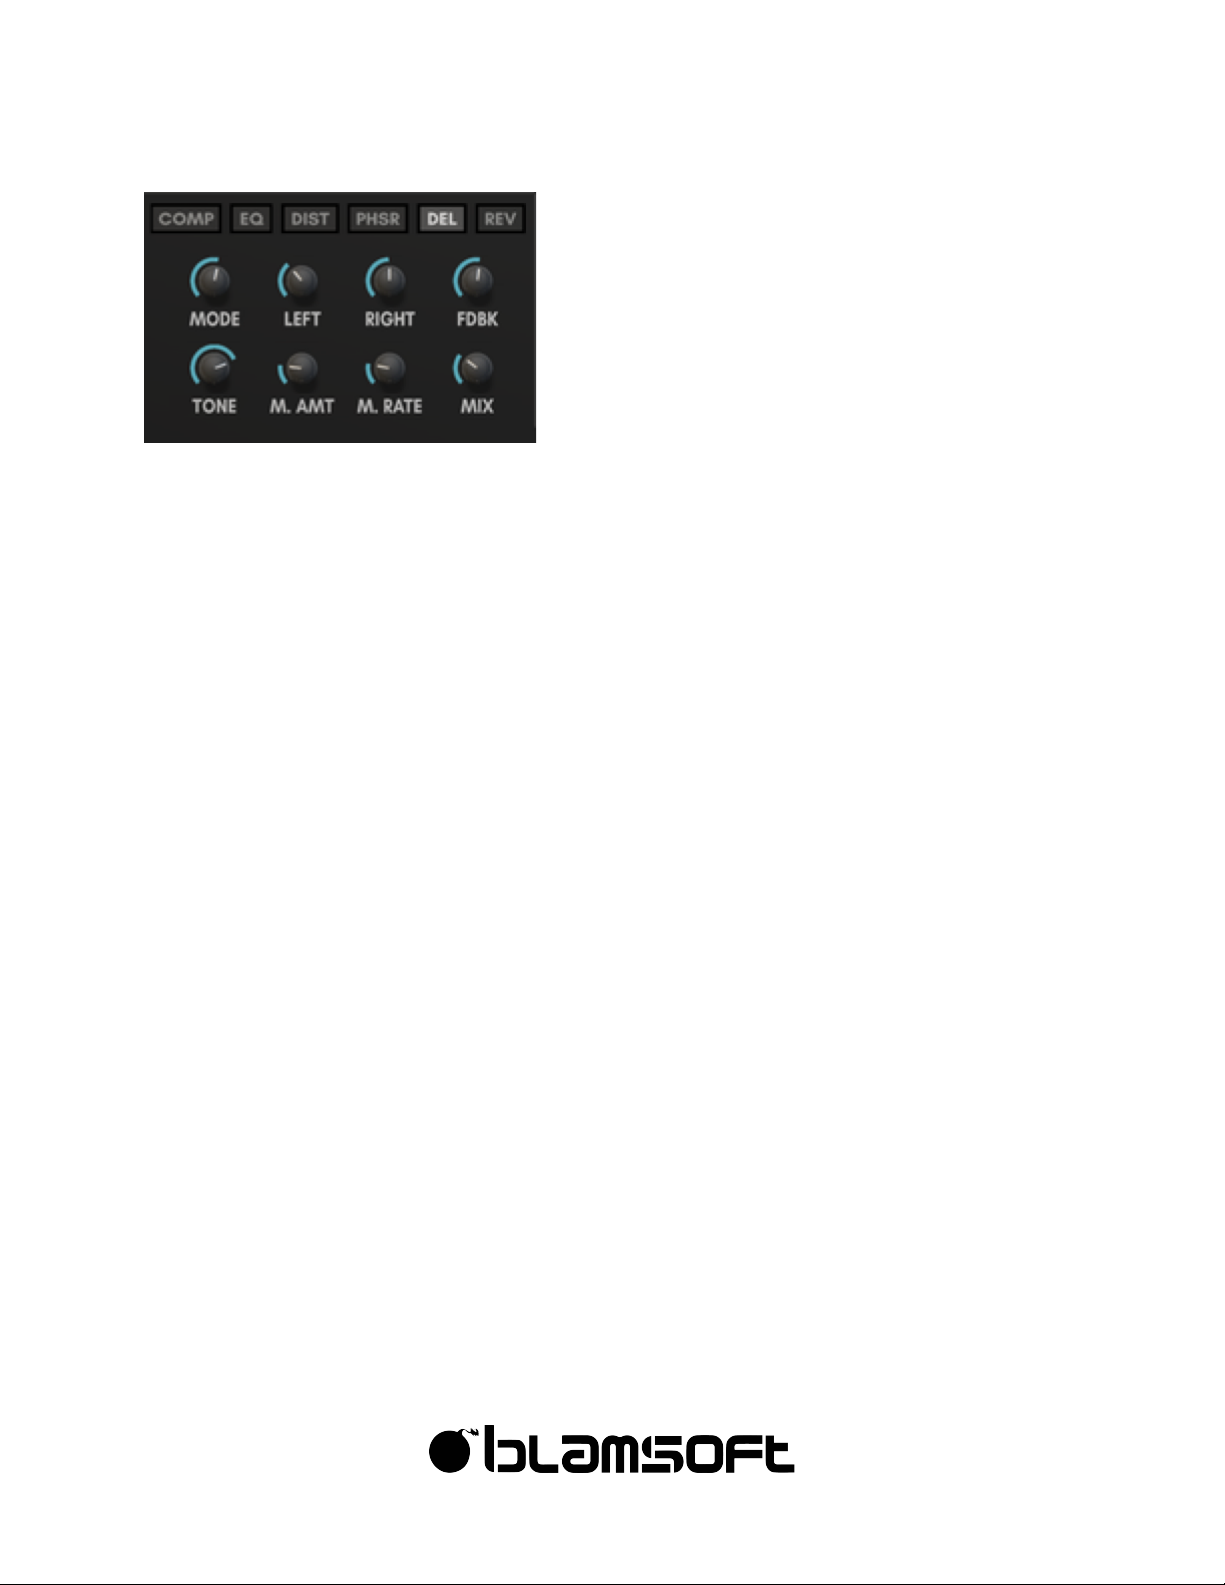
Delay
The delay effect offers a repeating echo. Also, short times can be used to create a chorus
effect. It has quite a few parameters that can spice it up a bit.
• Delay Mode – Spread determines width of panning of left and right
o Normal - Left and right delay times are independent, Spread controls panning
o Ping Pong – Echoes bounce between left and right channels starting with left,
spread controls panning
o Reverse – Reverse echoes with independent delay times
• Left – Adjusts the delay time for the left channel
• Rate – Adjusts the delay time for the right channel
• Feedback – Controls how fast the echoes decay
• Tone – Adjusts filtering inside the feedback path. Turning the knob to the left of center
creates lowpass filtering. Turning the knob to the right of center creates highpass filtering.
• Feedback Pan – Adjusts panning in the feedback path
• Mod Amount – Turning up the Mod Amount creates a changing delay time with a slight
offset between left and right delay times
• Mod Rate – Adjusts the rate of the modulation set by Mod Amount
• Mix – Sets the wet/dry mix for the effect
Page 36
36
©"2016"Blamsoft,"Inc."All"rights"reserved."
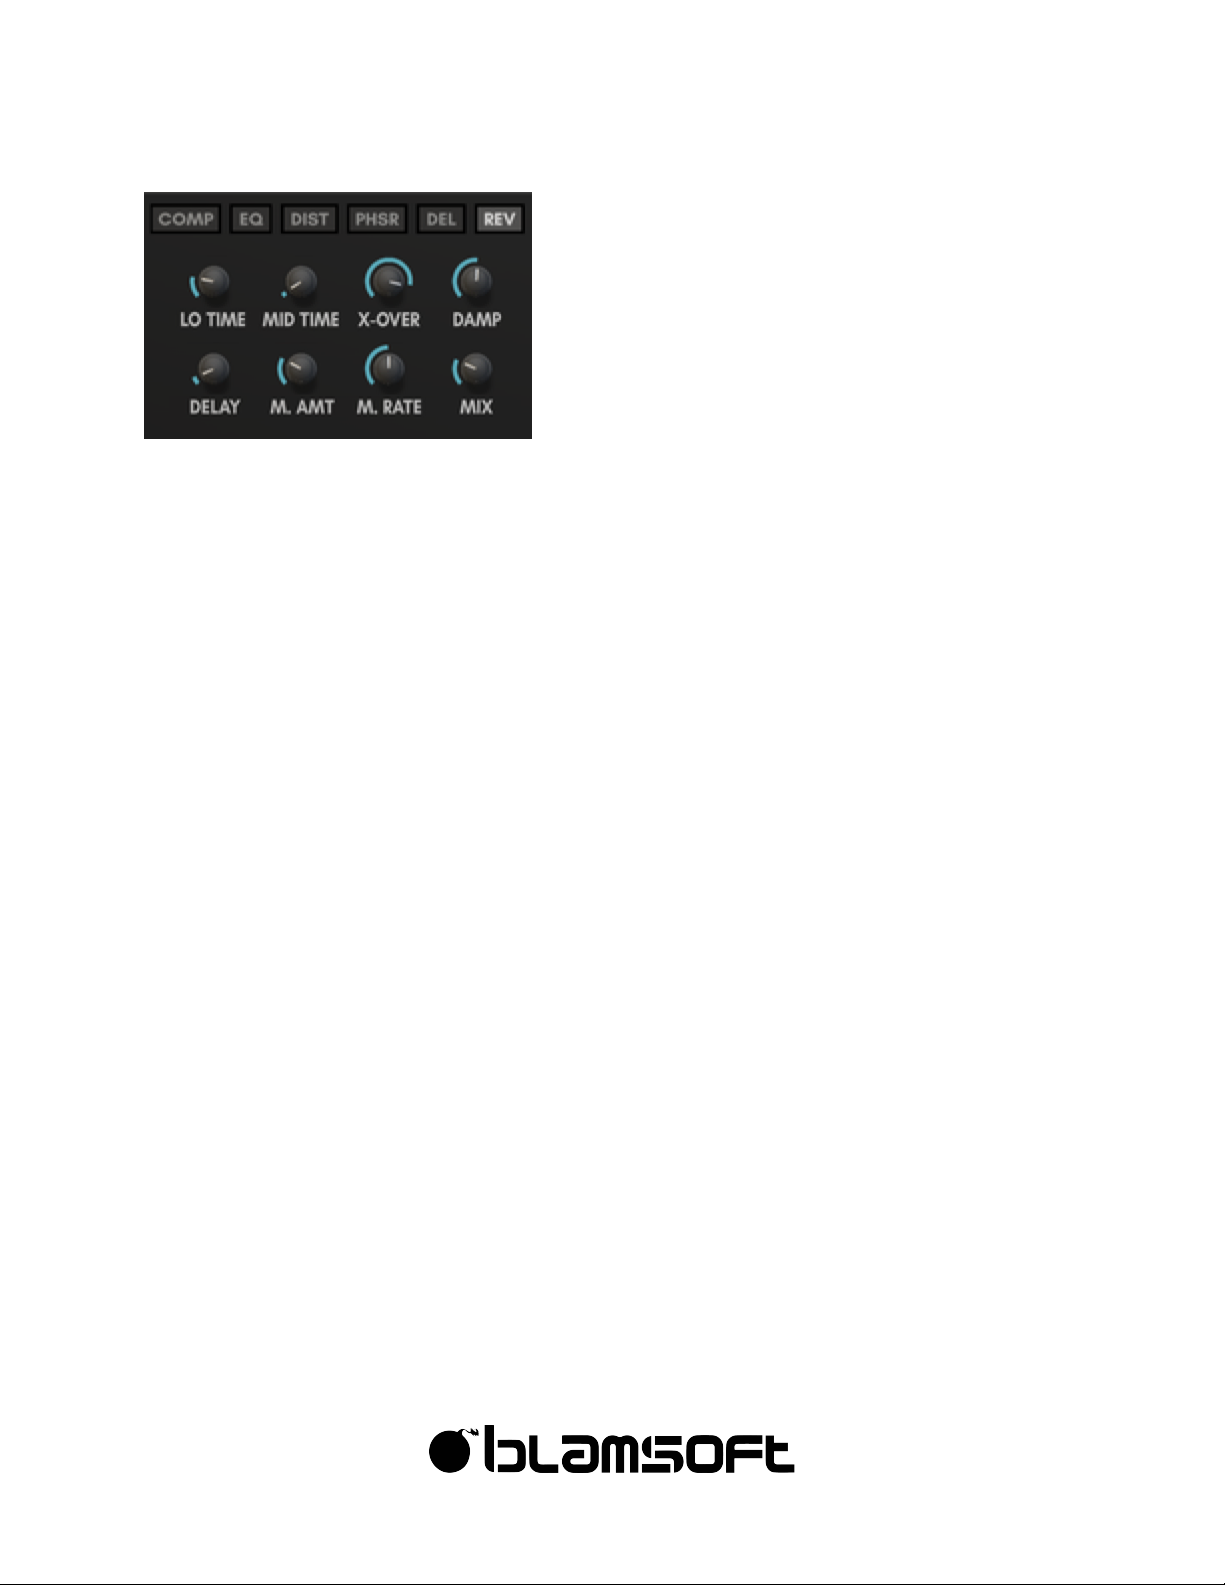
Reverb
The reverb effect adds a hall-like spatialization effect to the sound.
• Low Time – Adjusts the T60 decay time for the low-range frequencies
• Mid Time – Adjusts the T60 decay time for the mid-range frequencies
• Crossover – Adjusts the cross-over frequency between mid and low range
• Damping – Sets the frequency of high frequency damping
• Delay – Adds a delay to the signal to simulate a larger space
• Mod Amount – Adds subtle variation in the decay times
• Mod Rate – Adjusts the modulation rate of the decay times
• Mix – Sets the wet/dry mix for the effect
Page 37
37
©"2016"Blamsoft,"Inc."All"rights"reserved."
Sequencers
There are two separate Sequencers in Expanse, the Note/Gate Sequencer and the CC
Sequencer. The Note/Gate Sequencer directly modifies the incoming MIDI notes for the synth.
The CC Sequencer can create modulation values for uses similar to an LFO or envelope. Each
sequencer is capable of sixteen individual steps.
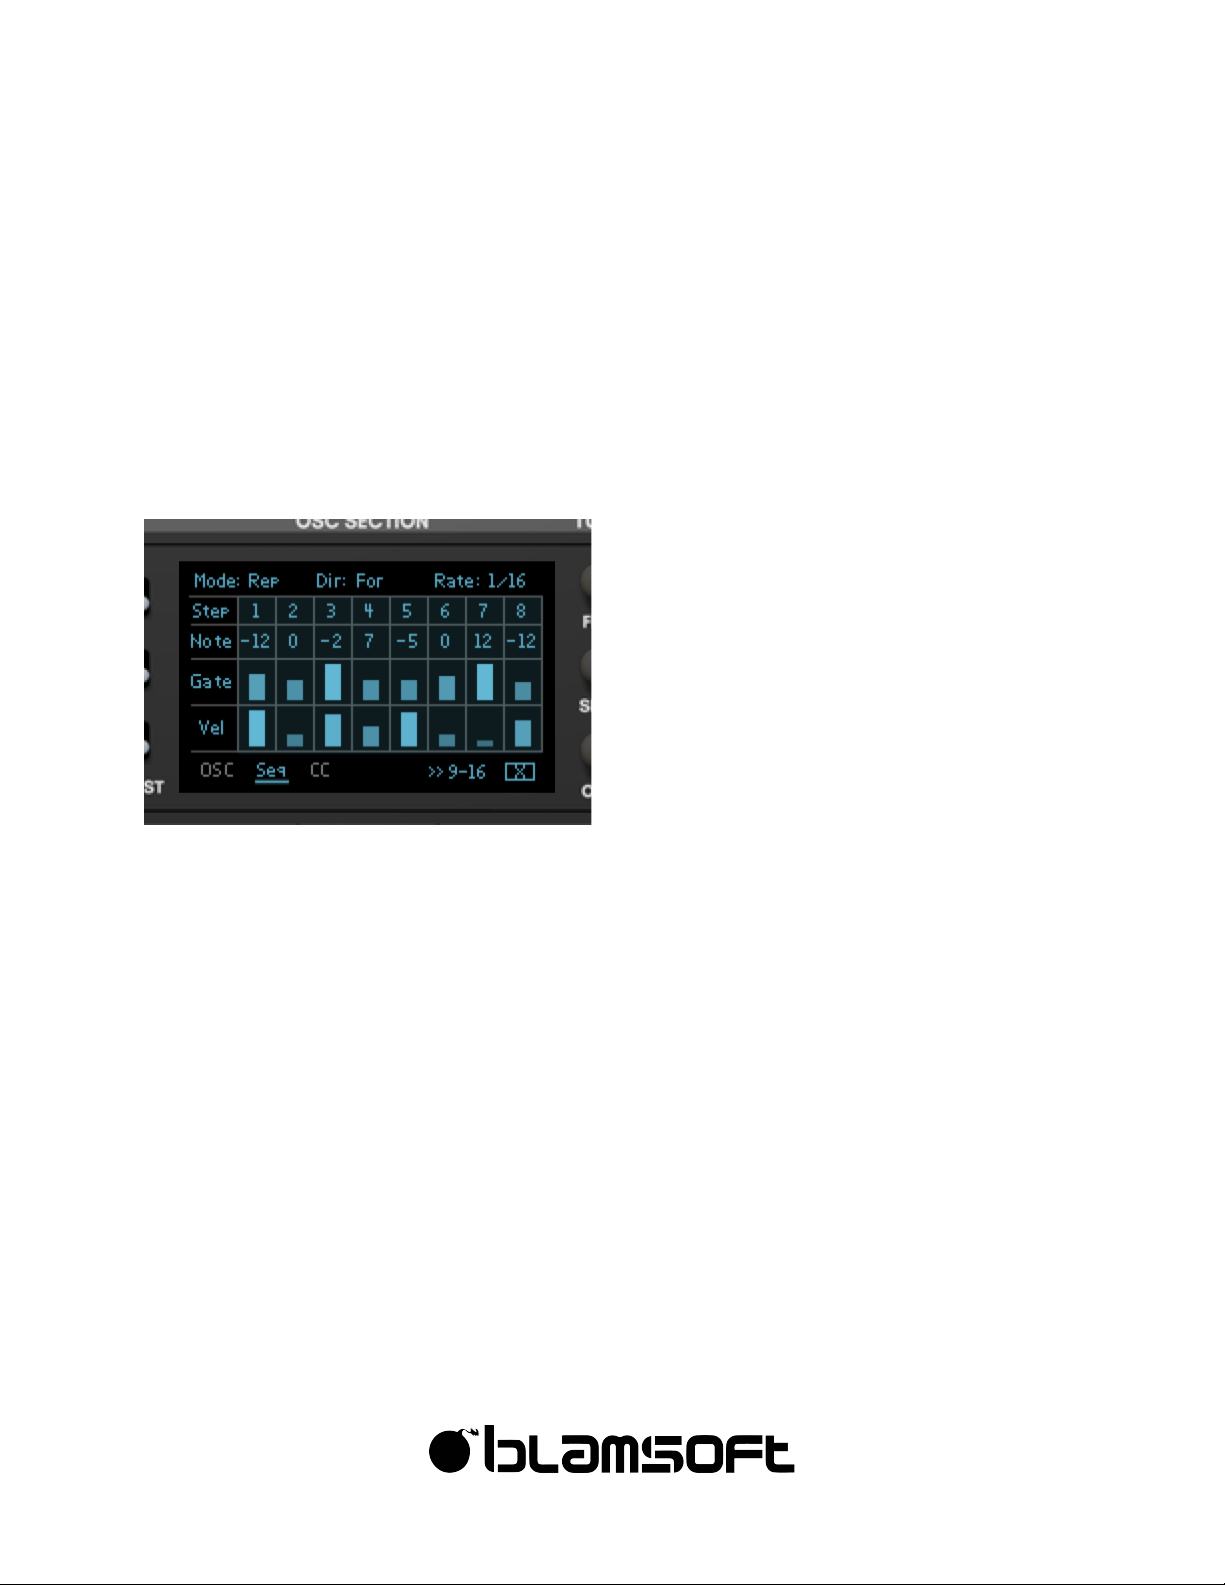
Note/Gate Sequencer
You can choose the length of the sequence by clicking on the step numbers. The arrows at
the bottom select the step range shown on the display. Use the Alt-click menu to randomize,
shift, or reset values. The X button resets the sequencer.
Mode
• Off – Sequencer is off
• Repeat – Sequencer repeats its pattern indefinitely
• Step – Sequencer steps each time a new note is played
• Shot – Sequencer plays its entire sequence and stops
• Run – Sequencer continues to run in time with the transport
Direction
• Forward – Sequence plays from left to right
• Reverse – Sequence plays from right to left
Page 38
38
©"2016"Blamsoft,"Inc."All"rights"reserved."
• Pendulum 1 – Sequence plays back and forth repeating the end steps
• Pendulum 2 – Sequence plays back and forth not repeating the end steps
• Random – Steps are chosen randomly
Rate
Located on the 1-8 page, this is the beat division for each step in the sequence (with the
exception of step mode).
Swing
Located on the 9-16 page, this is the swing amount
Values
• Note – MIDI note offset
• Gate – Length of the gate of the step
• Velocity – Velocity of the step, useful for velocity scaling
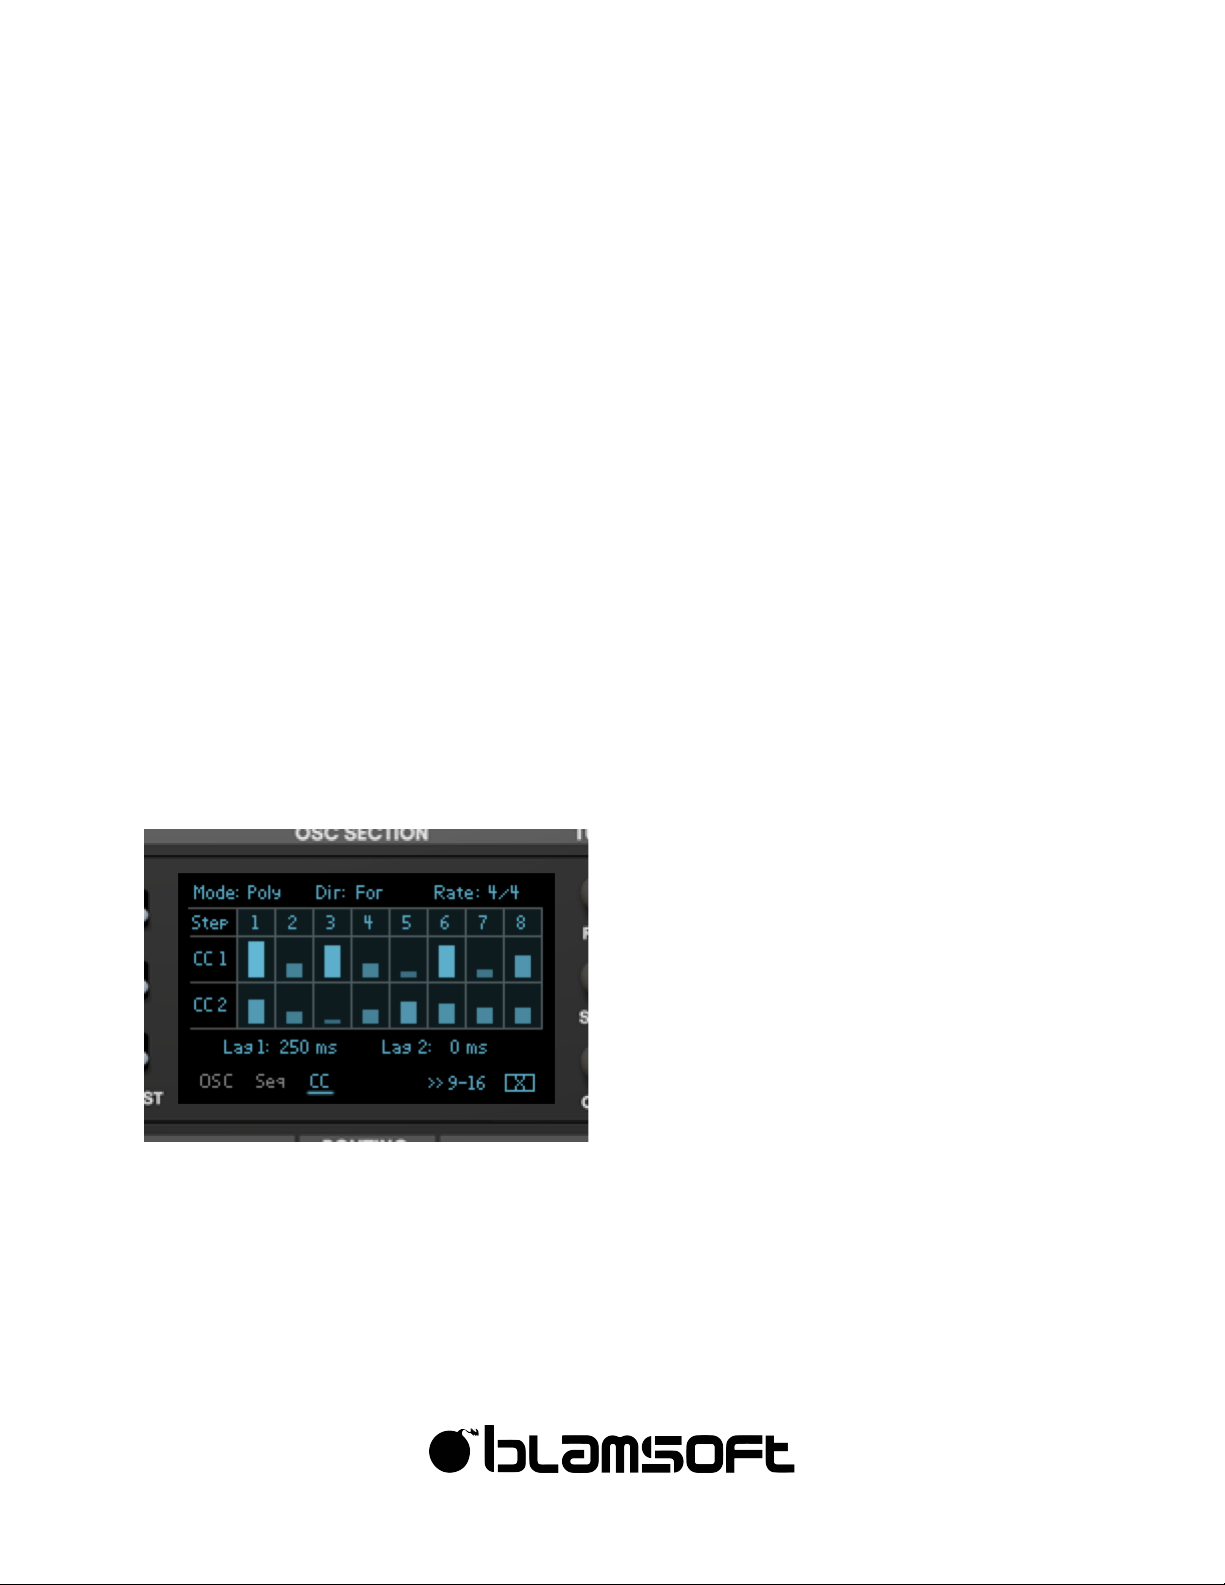
CC Sequencer
Like the Note/Gate sequencer, you can choose the length of the sequence by clicking on the
step numbers. The arrows at the bottom select the step range shown on the display. Use the
Alt-click menu to load preset waveforms, or randomize, shift, or reset values. The X button
resets the sequencer.
Page 39

39
©"2016"Blamsoft,"Inc."All"rights"reserved."
Mode
• Off – Sequencer is off
• Mono – Sequencer repeats its pattern indefinitely with monophonic values
• Poly – Sequencer repeats its pattern indefinitely with polyphonic values
• Step - Sequencer steps each time a new note is played
• Shot – Sequencer plays its entire sequence and stops
• LFO – Sequencer runs continuously
Direction
• Forward – Sequence plays from left to right
• Reverse – Sequence plays from right to left
• Pendulum 1 – Sequence plays back and forth repeating the end steps
• Pendulum 2 – Sequence plays back and forth not repeating the end steps
Values
• CC 1 – Modulation output available in the mod matrix
• CC 2 – Modulation output available in the mod matrix
Lag
Lag lowpass filters the values creating a smoothing effect.
Page 40
40
©"2016"Blamsoft,"Inc."All"rights"reserved."
Connections
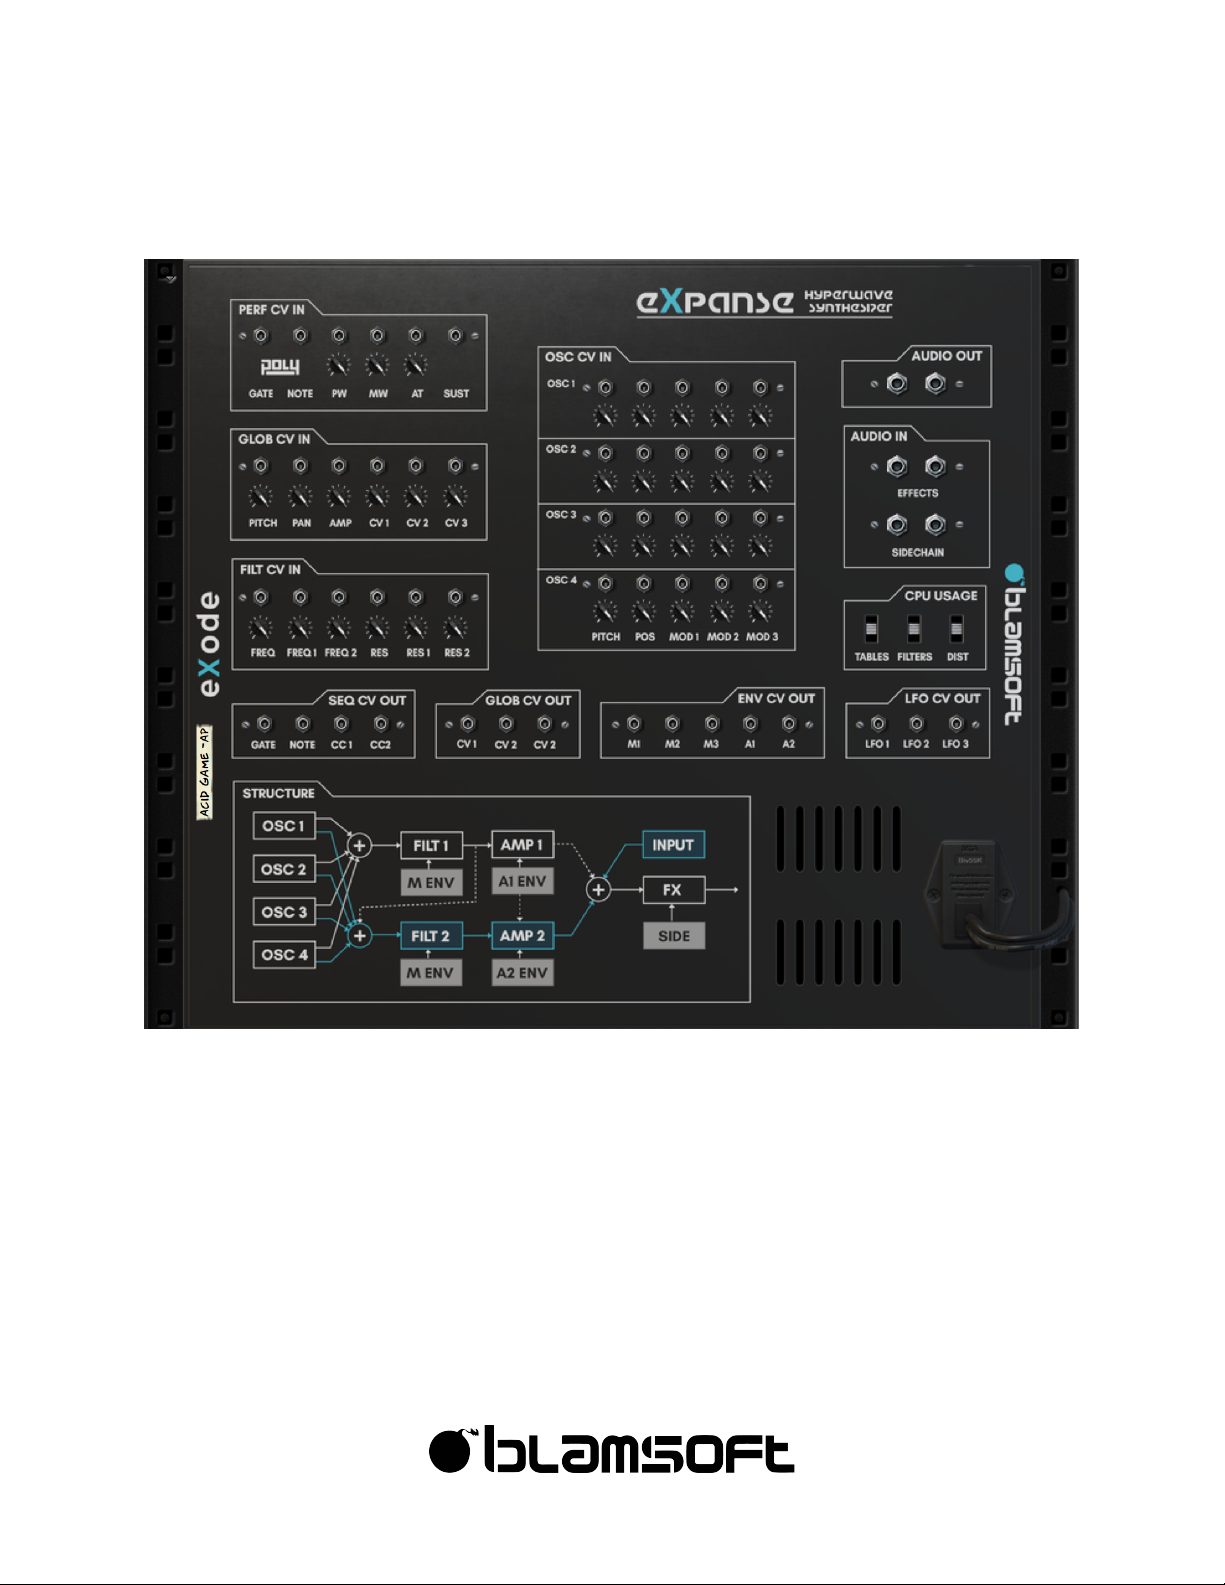
Performance CV Inputs
The Performance CV Input group lets you control Expanse with an external triggering device
such as the Matrix Pattern Sequencer. Expanse supports the PolyCV protocol for polyphonic
triggering.
• Gate – Controls triggering velocity
• Note – Controls triggering note
• PW – Pitch Wheel input
• MW – Mod Wheel input
• AT – Aftertouch input
Page 41

41
©"2016"Blamsoft,"Inc."All"rights"reserved."
• Sust – Sustain pedal input
Global CV Inputs
The Global CV Input group lets you control a few essential parameters of Expanse and route
CV inputs into the Mod Matrix
• Pitch – Controls the pitch of all oscillators
• Pan – Controls the pan of the output
• Amp – Controls the volume
• CV 1,2,3 – These inputs are available as Mod Matrix sources
Filter CV Inputs
The Filter CV Input group lets you control the cutoff frequency and resonance of both filters
together or independently.
Oscillator CV Inputs
The Oscillator CV Input group lets you control Expanse’s oscillators. There is a row for each
oscillator.
• Pitch – Controls pitch of the oscillator
• Pos – Controls wavetable position of the oscillator
• Mod 1,2,3 – Controls the amount for all three oscillator mods
Sequencer CV Outputs
The Sequencer CV Output group has outputs for Gate and Note from the Note Sequencer,
and CC 1 and CC2 from the CC Sequencer.
Envelope CV Outputs
The Envelope CV Output group has an output for each of the five envelopes. When
polyphony is greater than one, the envelope for the most recent note played (most recent
voice) is used.
Page 42

42
©"2016"Blamsoft,"Inc."All"rights"reserved."
LFO CV Outputs
The LFO CV Output group has an output for each of the three LFOs. When the LFOs are in
polyphonic mode, the envelope for the most recent note played (most recent voice) is used.
Global CV Outputs
The Global CV Output group lets you tap an output from a Mod Matrix destination. This is
useful for obtaining the Sequencer outputs or the Keyboard source.
Audio Inputs
The Audio Inputs group lets you route audio into the effects section. The main inputs go into
the effects chain input; the sidechain inputs go into the compressor level detector.
Audio Outputs
The Audio Outputs group has the main audio outputs for connecting to a mix channel or
other effects.
Page 43
43
©"2016"Blamsoft,"Inc."All"rights"reserved."
Sound Design Tips
Oscillator Mod
A single oscillator mod is often enough to change the character of a wavetable completely, so
be sure to experiment with different mods and see how they affect the wavetables. Zoom can
be used to create more basic waveforms out of complex wavetables. Once you have zoomed
in and gotten a wave that you like, you can then apply the Wrap mod to get some very
interesting results.
Scale
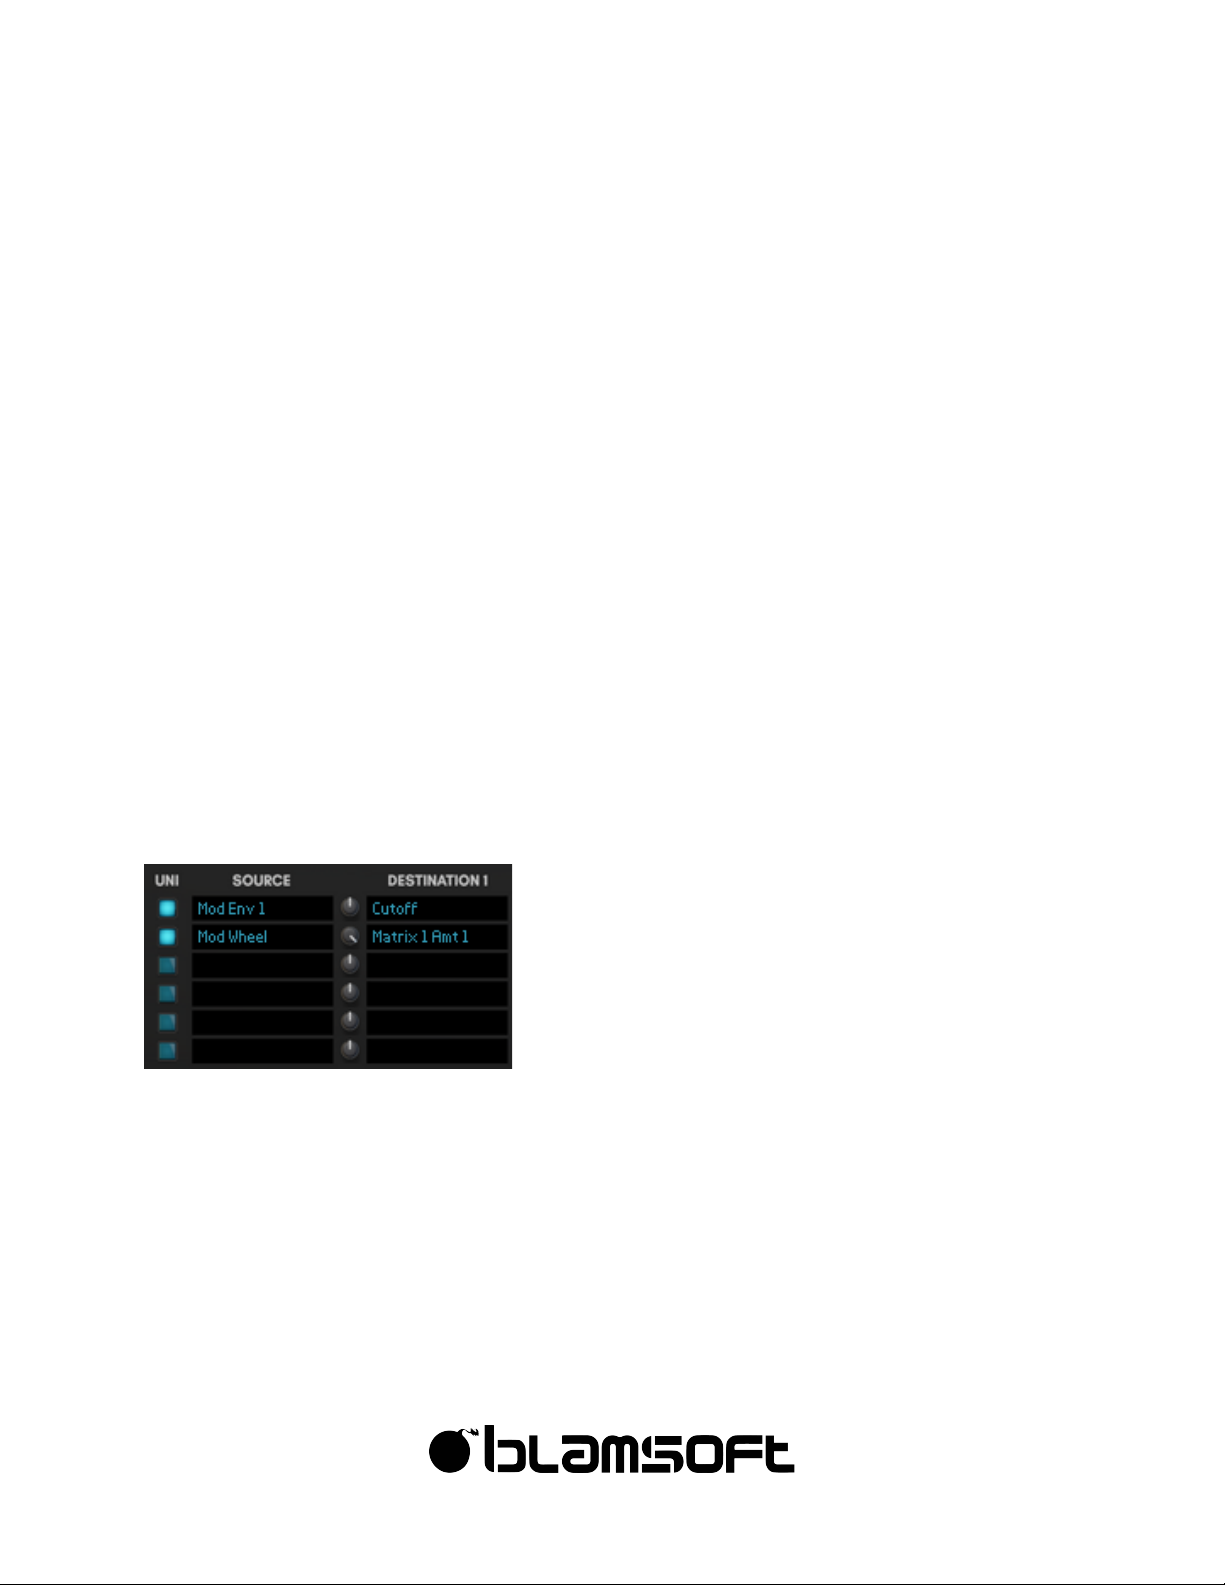
The LFOs and envelopes in Expanse have built in scales with various sources, and a scale
depth setting. Expanse offers modulation with or without scales via the Mod Matrix. In addition
to the built-in scale, the Mod Matrix amount can be used as a destination which acts as a
scale. These destinations are named Matrix 1 Amt 1, Matrix 1 Amt 2, etc. In the example,
Expanse is set up to make the Mod Env 1 modulate the Filter Cutoff frequency, with the
modulation scaled by the Mod Wheel.
Pitch Modulation
In Expanse, the coarse tuning destinations (Pitch, OSC 1,2,3,4 Pitch) are tuned so that you can
achieve octaves with the right settings. A destination amount of 25% will result in one octave
in range, while 50% will be two octaves, and 100% will be four octaves. You can always use
another destination to amplify pitch modulation beyond two octaves.
Page 44
44
©"2016"Blamsoft,"Inc."All"rights"reserved."
Oscillator Phase
To have complete control over oscillator phase, set the Random amount to zero, then use the
Phase mod. If you have multiple oscillators set at specific phases, you can use the Mod Matrix
to route Random to the Phase oscillator mod amount to create random phases with set
offsets.
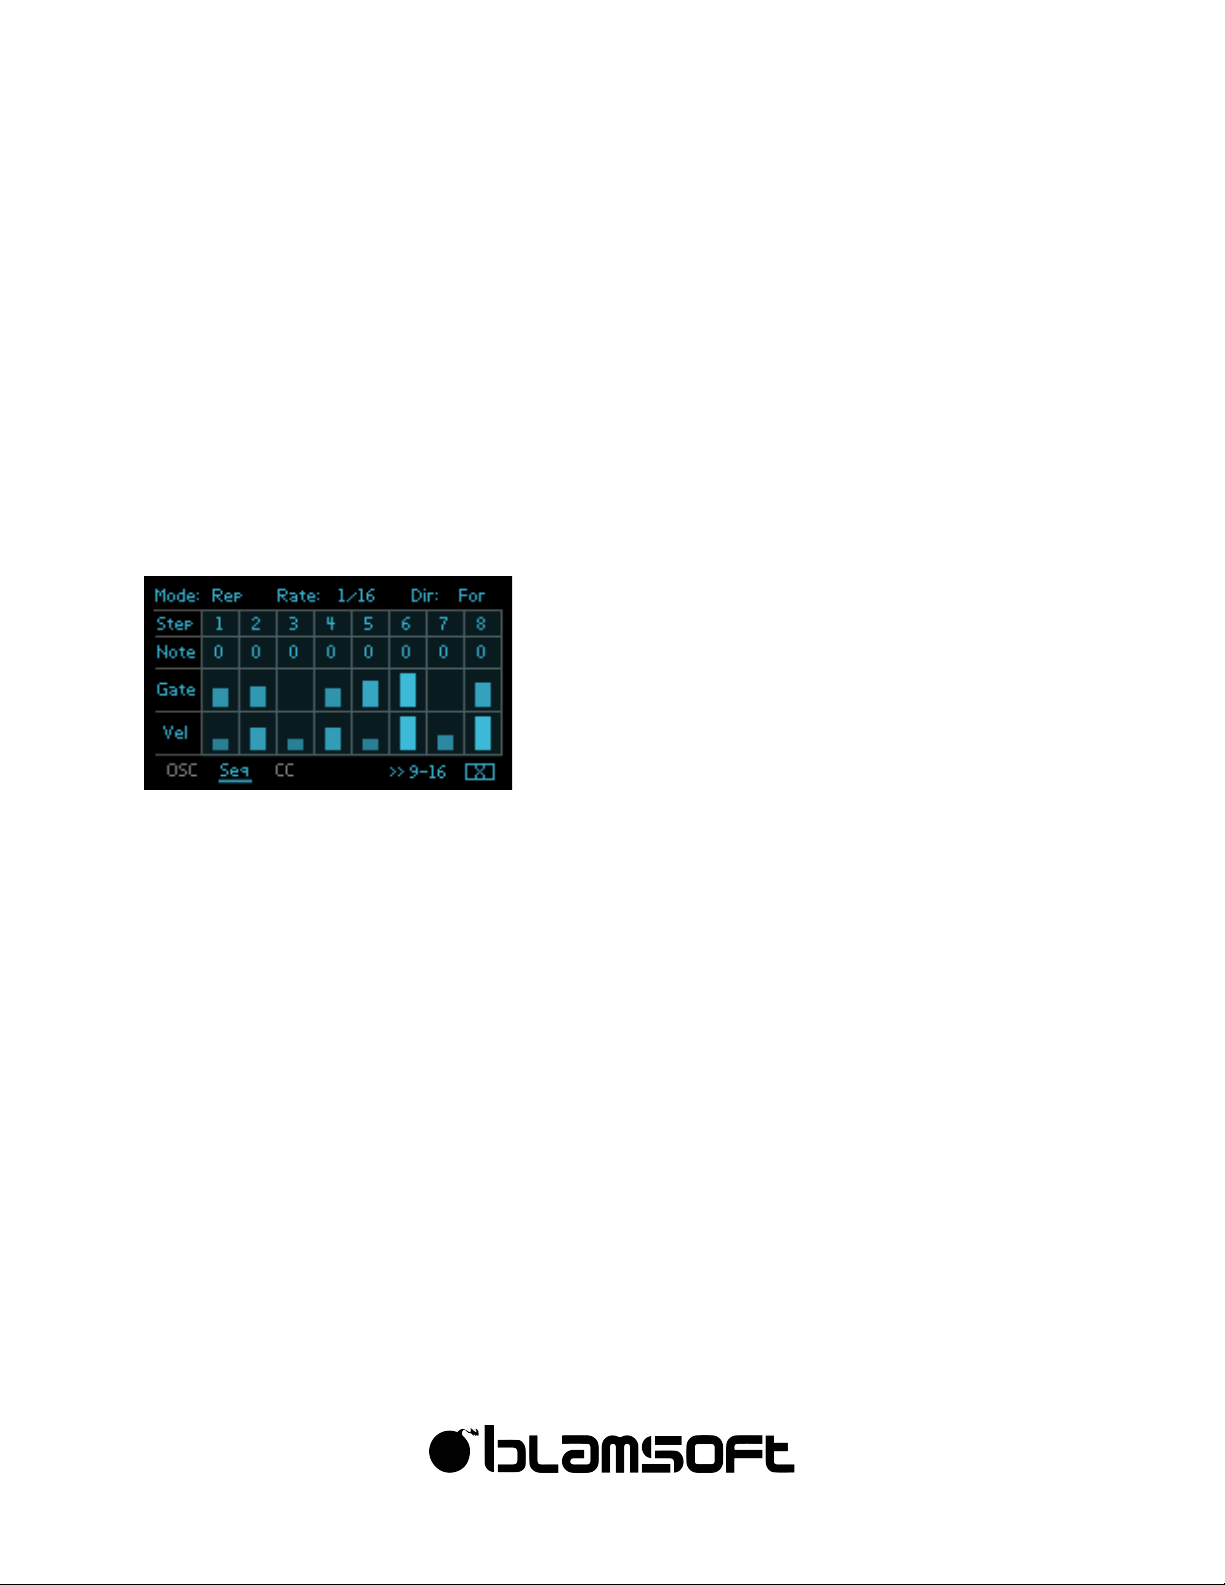
Chord Gate
Expanse comes with a 16 step Note/Gate sequencer that offers various playing modes. If
polyphony is greater than one, and all the note values is left to “0” the sequencer will basically
function as a chord gate.
Trance Gate
You can use the Note/Gate Sequencer in Expanse as a classic trance gate by routing the Seq
Gate*Vel source to the Amp destination. The Gate and Velocity in the sequencer will then
dictate how the Gate operates. This allows for a lot of variation, and most importantly, can
help make your trance gate more dynamic.
CC Sequencer
There are many LFO shapes within Expanse, but you can create interesting LFOs with the CC
Sequencer as well. Set the mode to LFO and optionally use lag to smooth the output.
Rhythmic LFO
Some of the LFO shapes in Expanse were designed to function as rhythmic patterns for
modulating parameters such as the filter. Therefore, these patterns function best with a
moderately slow LFO speed, synced to tempo host (4/4 and 1/2 is a good start). Experiment to
find out which suits your sound the best.
Page 45
45
©"2016"Blamsoft,"Inc."All"rights"reserved."
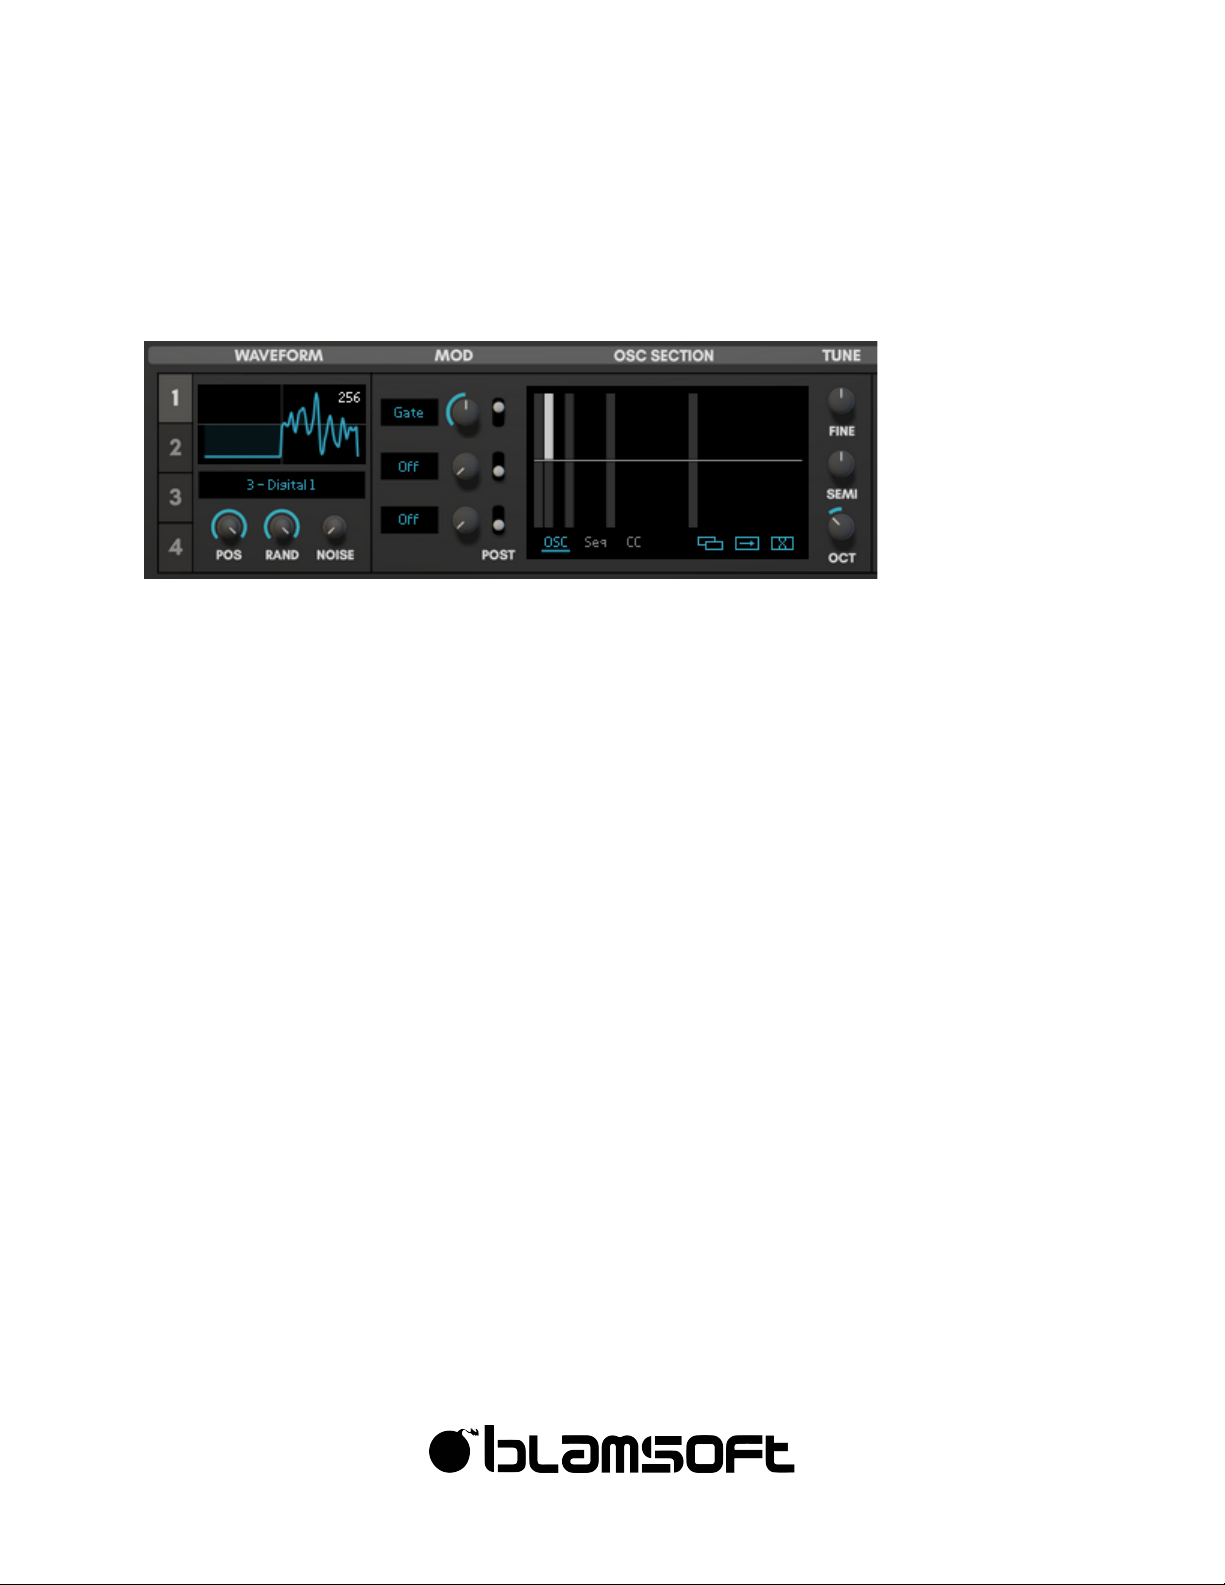
Sub Squarify
This technique allows you to spoof a -1 octave square wave in addition to the main waveform.
This technique can be very useful to achieve extra bottom and depth in your presets.
1. Set the octave to that of your desired sub oscillator
2. Now for the selected waveform draw the 2nd partial to full amplitude, while setting the 1st
partial to 0 amplitude
3. Select the "Gate" mod, and set the switch to "Post Harmonics"
4. Set the Mod Amt to 50%
Page 46
46
©"2016"Blamsoft,"Inc."All"rights"reserved."
Additive Engine Theory
The Additive Engine lets you duplicate the wavetable waveform at multiples of the
fundamental frequency. The duplicated waveforms are summed to create the final waveform.
For example, if you play an A4 on the keyboard, the fundamental frequency is 440 Hz. This is
harmonic 1 on the display. The harmonics further to the right are multiples of the harmonic 1
frequency.
A4 Harmonic Frequences:
Harmonic 1
1*440 = 440 Hz
Harmonic 2
2*440 = 880 Hz
Harmonic 3
3*440 = 1320 Hz
Harmonic n
n*440 Hz
Page 47
47
©"2016"Blamsoft,"Inc."All"rights"reserved."
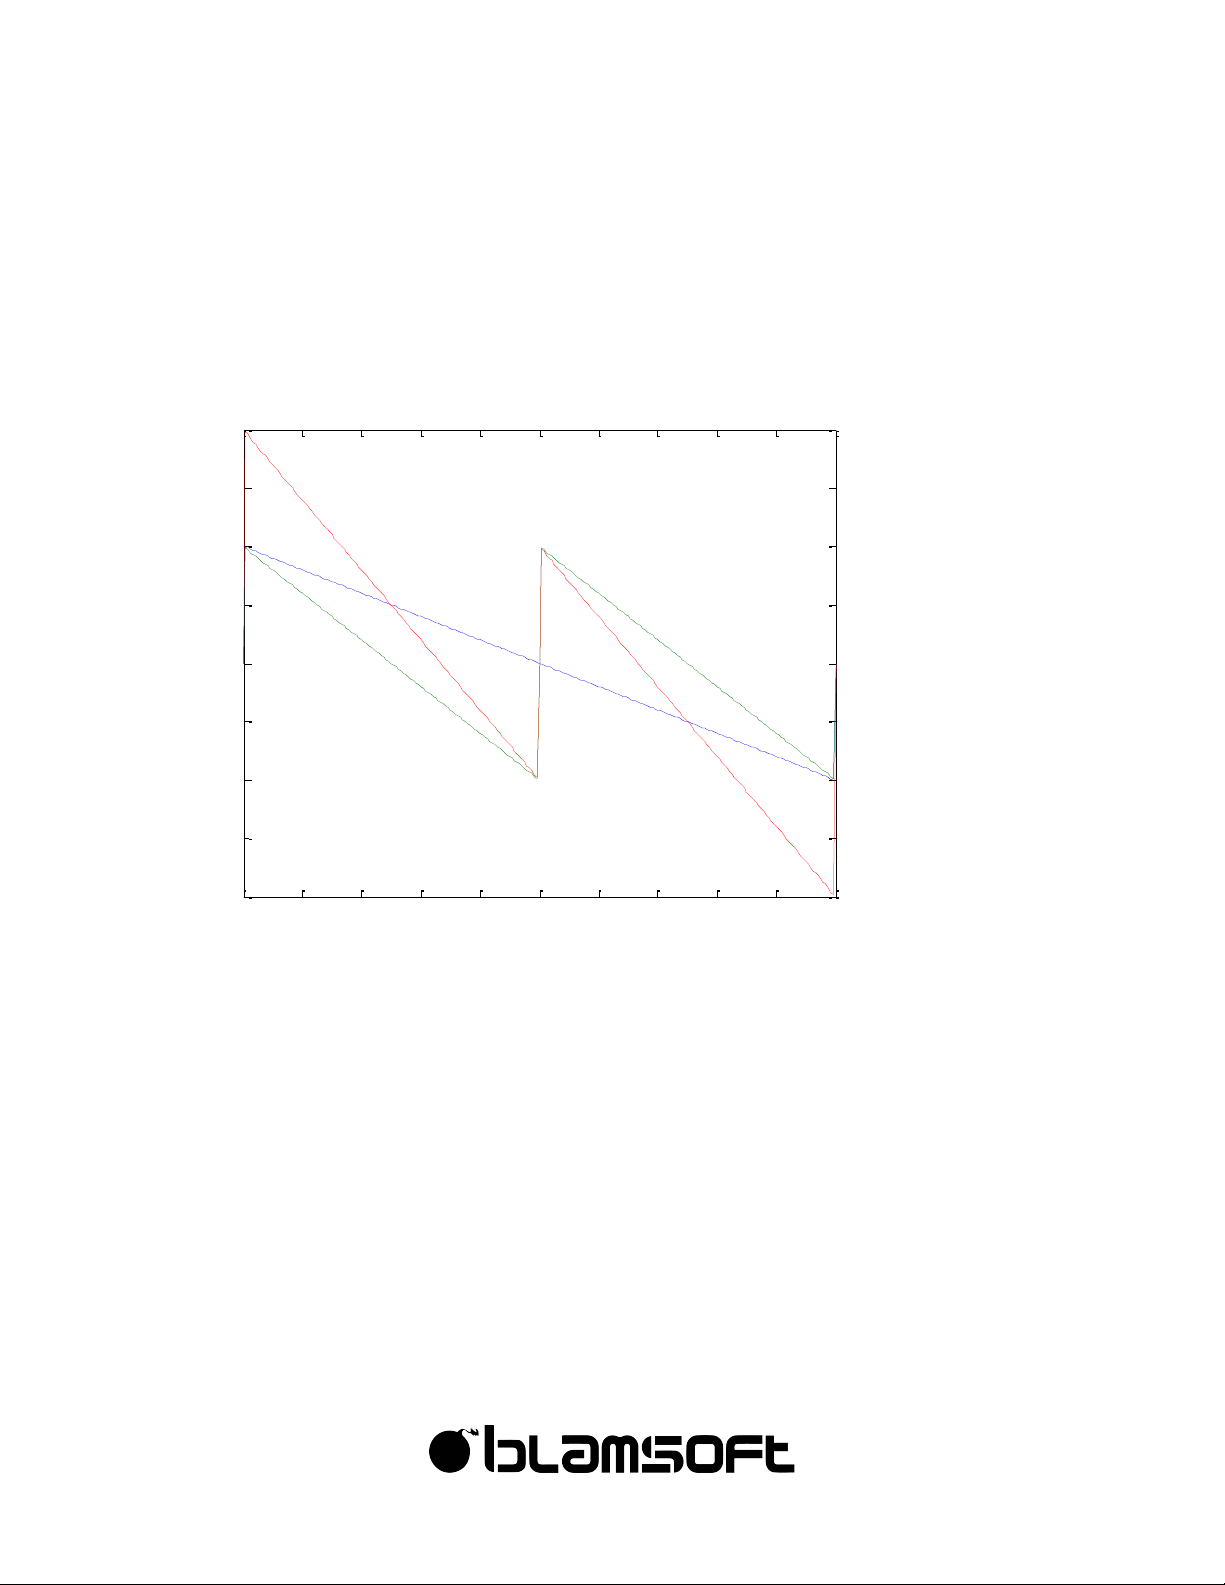
In the following plot, there is a sawtooth with two harmonic frequencies enabled in the
Additive Engine. The blue sawtooth is at the fundamental frequency. The green sawtooth is at
the harmonic 2 frequency, twice the fundamental. When these two waveforms are summed
they result in the red waveform. In Expanse, the summed waveform is scaled to be between -1
and 1.
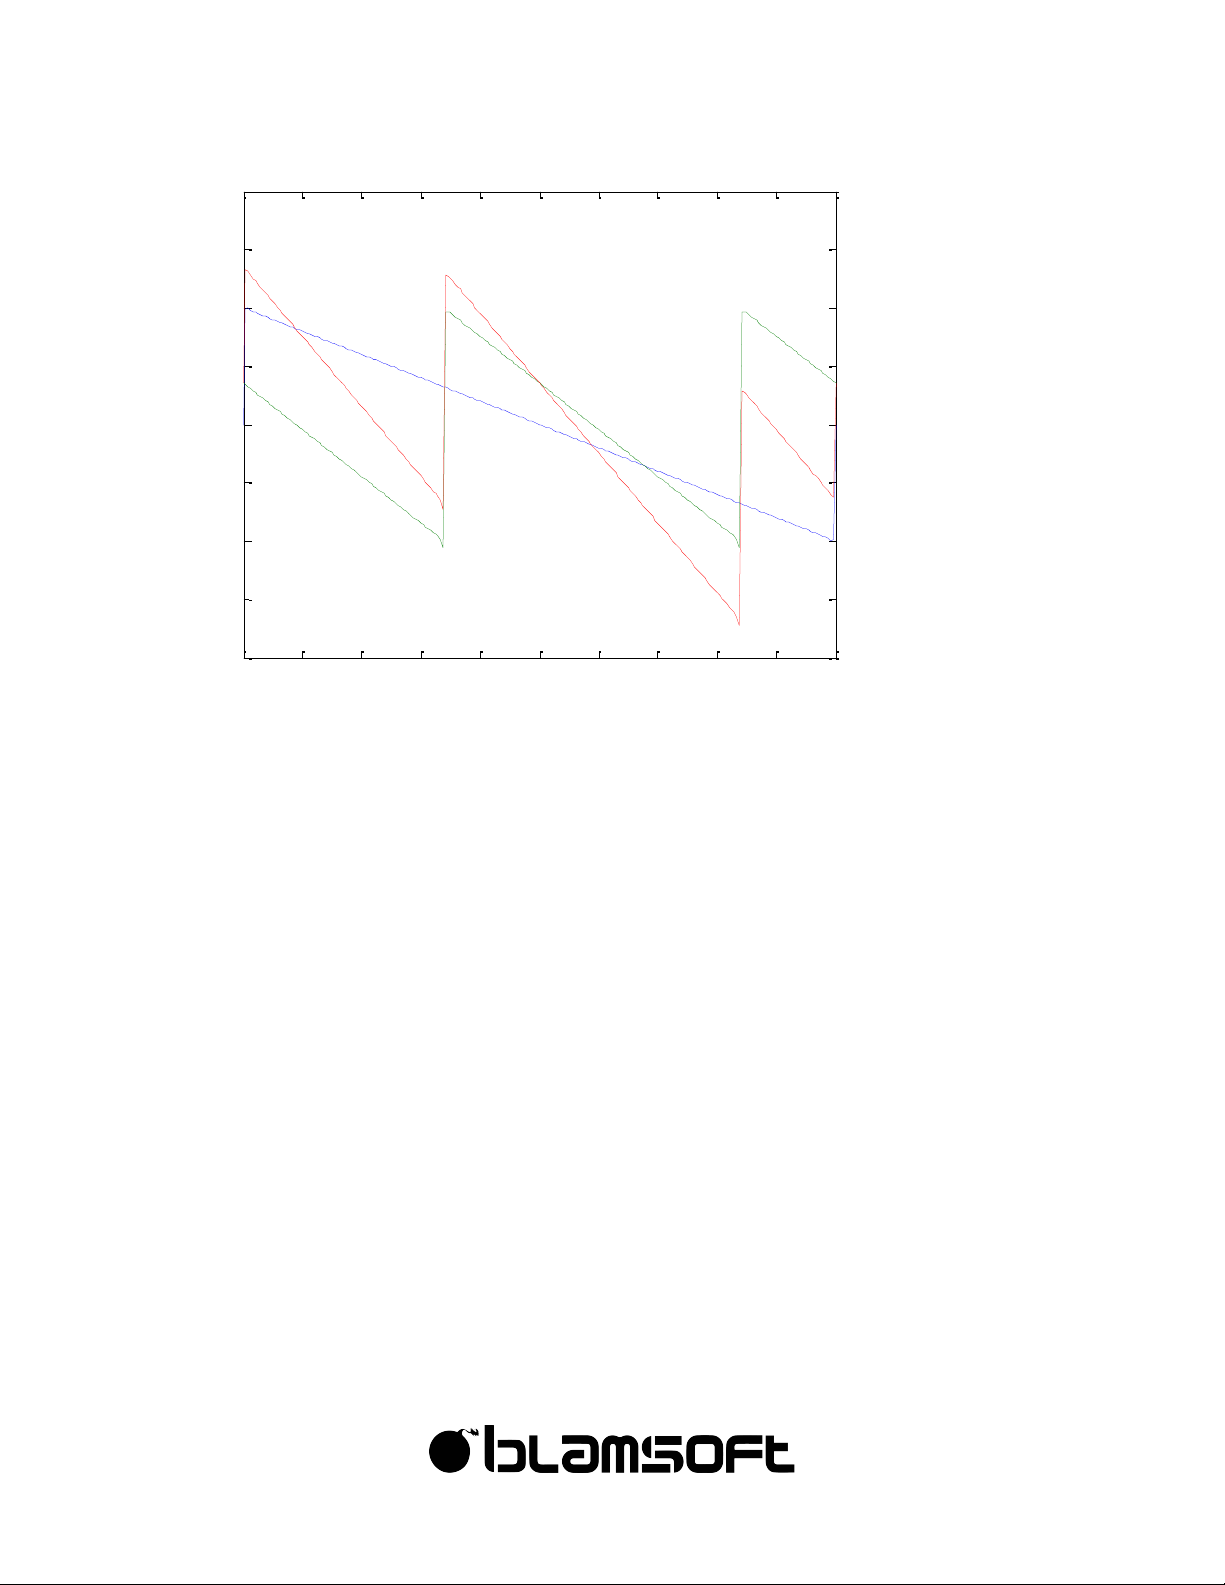
The lower area of the Additive Engine adjusts the phase of that particular harmonic. In the
following plot, harmonic 2, the green sawtooth, has had its phase changed to 58 degrees. It
has in effect been shifted to the left compared to the blue one, so the first peak is now outside
the plot area. When the two sawtooths are summed they create a different final waveform.
0 0.5 1 1.5 2 2.5 3 3.5 4 4.5 5
x 10
-3
-2
-1.5
-1
-0.5
0
0.5
1
1.5
2
Page 48
48
©"2016"Blamsoft,"Inc."All"rights"reserved."
0 0.5 1 1. 5 2 2. 5 3 3.5 4 4. 5 5
x 10
-3
-2
-1.5
-1
-0.5
0
0.5
1
1.5
2
Page 49
49
©"2016"Blamsoft,"Inc."All"rights"reserved."
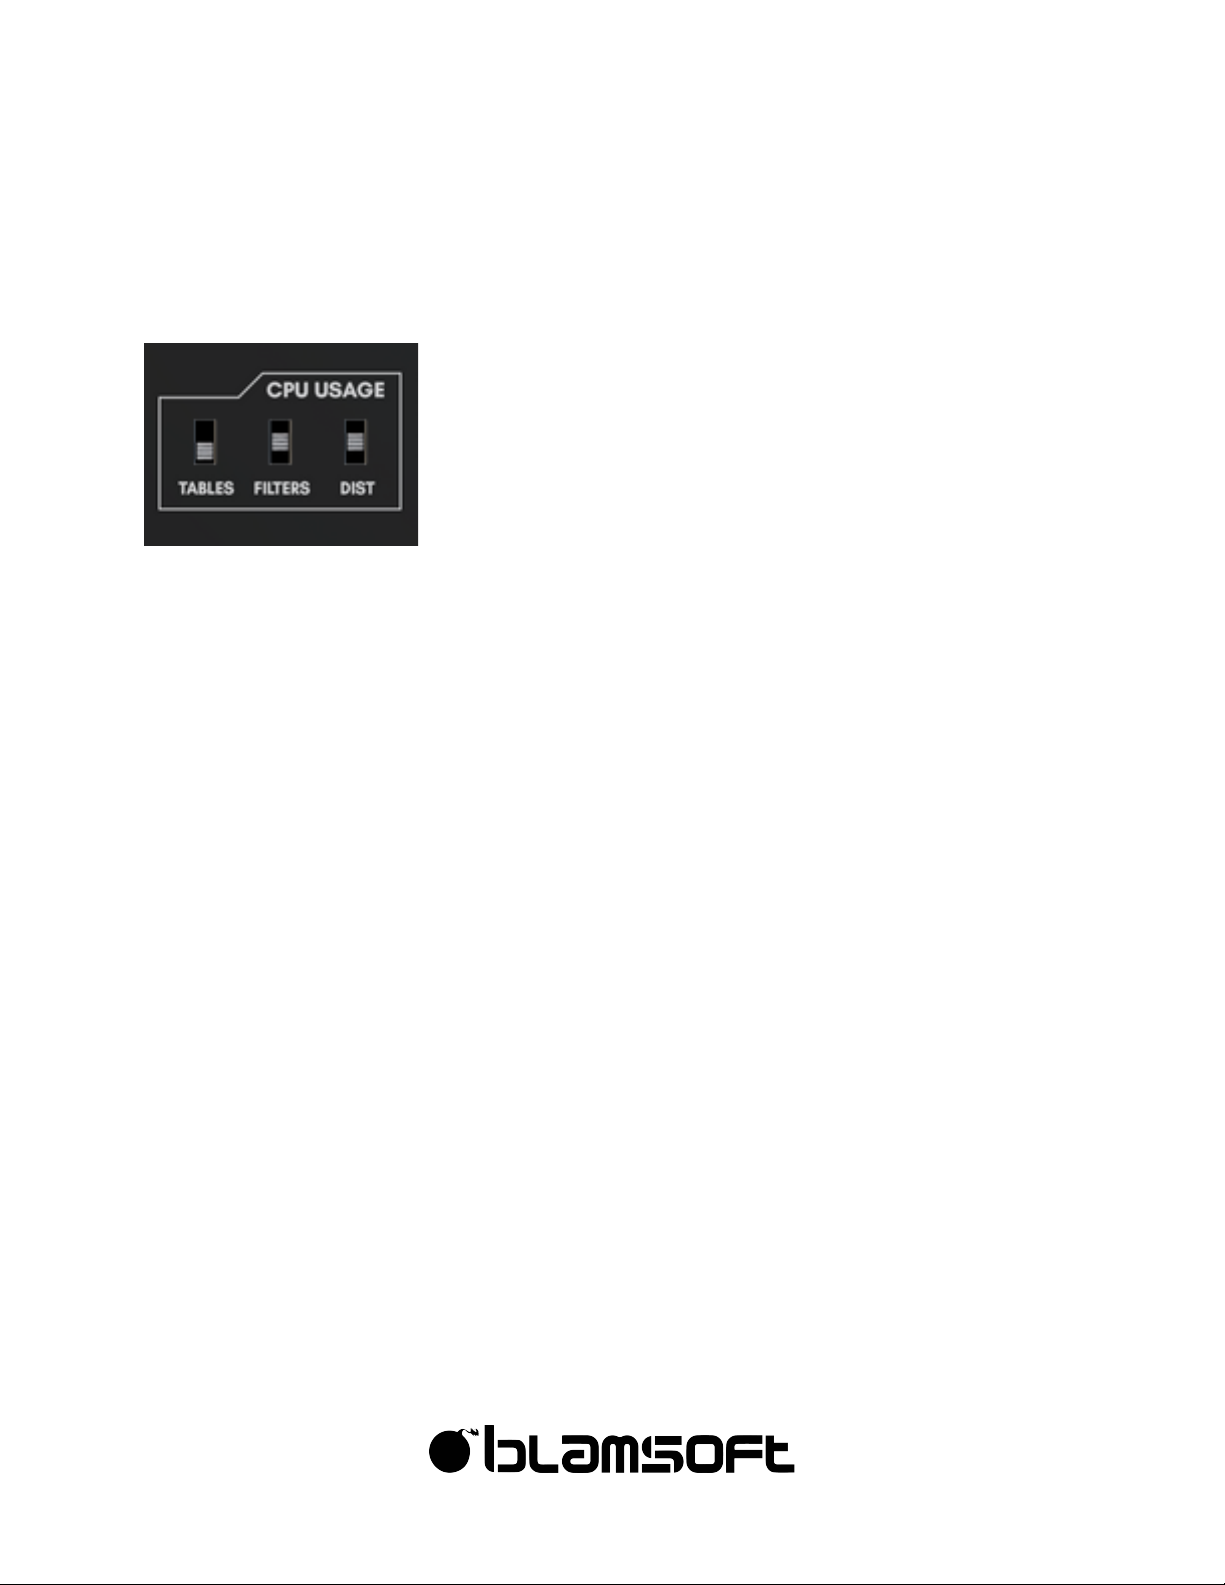
CPU Usage
Expanse has three switches that control CPU usage.
• Tables – Lowering this setting can help if there is a lot of oscillator modulation in a patch.
Note, if the wavetable contains a lot of high frequency content, lowering this setting can
make very low notes sound dull. This setting can be increased for monophonic bass
sounds.
• Filters – Lowering this setting generally can improve CPU usage. Note that some “air” may
be lost from the filter sound when in low mode.
• Distortion – This setting can improve CPU usage when the distortion effect is used. Note,
the distortion effect may sound harsher depending on the input.
Note: There is a Low CPU folder in the factory sound bank that has all switches set to Low.
There are two other ways to reduce CPU usage.
• Reduce Polyphony – This can help with sounds that have long release tails
• Use a lower maximum oscillator density – Unison is a common cause of high CPU usage
Page 50

50
©"2016"Blamsoft,"Inc."All"rights"reserved."
Credits
• Andrew Best – Design, DSP, Programming, Graphic Design
• Daniel Thiel – Concept, Design, Graphic Design, Wavetables
Sound Design
The initials in the preset name let you know who designed it:
• EX - Daniel Thiel (eXode)
• AZ - Sami Rabia (Aiyn Zahev)
• TP – Tom Pritchard
• NR - Navi Retlav
• ND - Nicolas Delmotte (odharmonix)
• AP - Ariel Proksa
• AB - Andrew Best
You can search for presets in Reason’s browser using the initials with a dash in front. For
example, “-EX”.
Page 51

51
©"2016"Blamsoft,"Inc."All"rights"reserved."
Software Licenses
Faust Audio Effect Library
Copyright (c) 2015 Julius O. Smith III
Permission is hereby granted, free of charge, to any person obtaining
a copy of this software and associated documentation files (the
"Software"), to deal in the Software without restriction, including
without limitation the rights to use, copy, modify, merge, publish,
distribute, sublicense, and/or sell copies of the Software, and to
permit persons to whom the Software is furnished to do so, subject to
the following conditions:
The above copyright notice and this permission notice shall be
included in all copies or substantial portions of the Software.
Any person wishing to distribute modifications to the Software is
asked to send the modifications to the original developer so that they
can be incorporated into the canonical version. This is, however, not
a binding provision of this license.
THE SOFTWARE IS PROVIDED "AS IS", WITHOUT WARRANTY OF ANY KIND,
EXPRESS OR IMPLIED, INCLUDING BUT NOT LIMITED TO THE WARRANTIES OF
MERCHANTABILITY, FITNESS FOR A PARTICULAR PURPOSE AND NONINFRINGEMENT.
IN NO EVENT SHALL THE AUTHORS OR COPYRIGHT HOLDERS BE LIABLE FOR ANY
CLAIM, DAMAGES OR OTHER LIABILITY, WHETHER IN AN ACTION OF CONTRACT,
TORT OR OTHERWISE, ARISING FROM, OUT OF OR IN CONNECTION WITH THE
SOFTWARE OR THE USE OR OTHER DEALINGS IN THE SOFTWARE.
Page 52

52
©"2016"Blamsoft,"Inc."All"rights"reserved."
Fastapprox
Copyright (c) 2011, Paul Mineiro
All rights reserved.
Redistribution and use in source and binary forms, with or without
modification, are permitted provided that the following conditions
are met:
* Redistributions of source code must retain the above copyright notice,
this list of conditions and the following disclaimer.
* Redistributions in binary form must reproduce the above copyright notice,
this list of conditions and the following disclaimer in the documentation
and/or other materials provided with the distribution.
* Neither the name of Paul Mineiro nor the names of its contributors
may be used to endorse or promote products derived from this software
without specific prior written permission.
THIS SOFTWARE IS PROVIDED BY THE COPYRIGHT HOLDERS AND CONTRIBUTORS "AS IS"
AND ANY EXPRESS OR IMPLIED WARRANTIES, INCLUDING, BUT NOT LIMITED TO, THE
IMPLIED WARRANTIES OF MERCHANTABILITY AND FITNESS FOR A PARTICULAR PURPOSE
ARE DISCLAIMED. IN NO EVENT SHALL THE COPYRIGHT HOLDER OR CONTRIBUTORS BE
LIABLE FOR ANY DIRECT, INDIRECT, INCIDENTAL, SPECIAL, EXEMPLARY, OR
CONSEQUENTIAL DAMAGES (INCLUDING, BUT NOT LIMITED TO, PROCUREMENT OF
SUBSTITUTE GOODS OR SERVICES; LOSS OF USE, DATA, OR PROFITS; OR BUSINESS
INTERRUPTION) HOWEVER CAUSED AND ON ANY THEORY OF LIABILITY, WHETHER IN
CONTRACT, STRICT LIABILITY, OR TORT (INCLUDING NEGLIGENCE OR OTHERWISE)
ARISING IN ANY WAY OUT OF THE USE OF THIS SOFTWARE, EVEN IF ADVISED OF
THE POSSIBILITY OF SUCH DAMAGE.
 Loading...