

Blackstar ID:Core Stereo 40 V3, ID:Core Stereo 20 V3, ID:Core Stereo 10 V3, ID:Core Stereo 10 V3 Cream Owner`s manual

ID:CORE STEREO 10 V3, ID:CORE STEREO 20 V3,
ID:CORE STEREO 40 V3
Owner’s Manual
Designed and Engineered by
Blackstar Amplication UK

IMPORTANT SAFETY INSTRUCTIONS
1. Read these instructions.
2. Keep these instructions.
3. Heed all warnings.
4. Follow all instructions.
5. Do not use this apparatus near water.
6. Clean only with dry cloth.
7. Do not block any ventilation openings.
8. Install in accordance with the manufacturer’s instructions.
9. Do not install near any heat sources such as radiators, heat registers, stoves, or
other apparatus (including ampliers) that produce heat.
10. Do not defeat the safety purpose of the polarized or grounding-type plug. A
polarized plug has two blades with one wider than the other. A grounding type
plug has two blades and a third grounding prong. The wide blade or the third
prong are provided for your safety. If the provided plug does not t into your
outlet, consult an electrician for replacement of the obsolete outlet.
11. Protect the power cord from being walked on or pinched particularly at plugs,
convenience receptacles, and the point where they exit from the apparatus.
12. Only use attachments/accessories specied by the manufacturer.
13. Unplug this apparatus during lightning storms or when unused for long periods
of time.
14. Refer all servicing to qualied service personnel. Servicing is required when the
apparatus has been damaged in any way, such as power-supply cord or plug is
damaged, liquid has been spilled or objects have fallen into the apparatus, the
apparatus has been exposed to rain or moisture, does not operate normally, or
has been dropped.
“TO COMPLETELY DISCONNECT THIS APPARATUS FROM THE AC MAINS,
DISCONNECT THE POWER-SUPPLY CORD PLUG FROM THE AC RECEPTACLE.”
“WARNING: TO REDUCE THE RISK OF FIRE OR ELECTRIC SHOCK, DO NOT
EXPOSE THIS APPARATUS TO RAIN OR MOISTURE. THE APPARATUS SHALL
NOT BE EXPOSED TO DRIPPING OR SPLASHING AND THAT OBJECTS FILLED
WITH LIQUIDS, SUCH AS VASES, SHALL NOT BE PLACED ON APPARATUS.”
USA / Canada
This symbol is intended to alert the user to the presence of important
operation and maintenance (servicing) instructions in the literature
accompanying the appliance.
This symbol is intended to alert the user to the presence of
uninsulated “dangerous voltage” within the product’s enclosure that
may be of sucient magnitude to constitute a risk of electric shock
to persons.
3

English
Warning!
Important safety information!
READ THE FOLLOWING INFORMATION CAREFULLY. SAVE ALL
INSTRUCTIONS FOR FUTURE REFERENCE!
Follow all warnings and instructions marked on the product!
Danger! High internal operating voltages.
Do not open the equipment case. There are no user serviceable parts in this
equipment. Refer all servicing to qualied service personnel.
Clean only with a dry cloth.
Condensation can form on the inside of an amplier if it is moved from a cold
environment to a warmer location. Before switching the unit on, it is recommended
that the unit be allowed to reach room temperature.
Unauthorised modication of this equipment is expressly forbidden by Blackstar
Amplication Ltd.
Never push objects of any kind into ventilation slots on the equipment casing.
Do not expose this apparatus to rain, liquids or moisture of any type.
Avoid placing vessels lled with liquid on top of the amplier.
Do not place this product on an unstable trolley, stand or table. The product may
fall, causing serious damage to the product or to persons!
Do not cover or block ventilation slots or openings.
This product should not be placed near a source of heat such as a stove, radiator,
or another heat producing amplier.
Use only the supplied power cord which is compatible with the mains voltage
supply in your area.
Power supply cords should always be handled carefully and should be replaced if
damaged in any way.
Never break o the earth (ground) pin on the power supply cord.
The power supply cord should be unplugged when the unit is to be unused for long
periods of time.
Before the unit is switched on, the loudspeaker should be connected as described
in the handbook using the lead recommended by the manufacturer.
Always replace damaged fuses with the correct rating and type.
Never disconnect the protective mains earth connection.
High loudspeaker levels can cause permanent hearing damage. You should
therefore avoid the direct vicinity of loudspeakers operating at high levels. Wear
hearing protection if continuously exposed to high levels.
If the product does not operate normally when the operating instructions are
followed, then refer the product to a qualied service engineer.
The U.S. Government's Occupational Safety and Health Administration (OSHA) has
specied the following permissible noise level exposures:
Duration Per Day In Hours Sound Level dBA, Slow Response
8 90
6 92
4 95
3 97
2 100
1½ 102
1 105
½ 110
¼ or less 115
According to OSHA, any exposure in excess of the above permissible limits could
result in some hearing loss.
Ear plug protectors in the ear canals or over the ears must be worn when operating
this amplication system in order to prevent a permanent hearing loss if exposure is
in excess of the limits as set forth above. To ensure against potentially dangerous
exposure to high sound pressure levels, it is recommended that all persons
exposed to equipment capable of producing high sound pressure levels such as
this amplication system be protected by hearing protectors while this unit is in
operation.
All electrical and electronic products should be disposed of separately
from the municipal waste stream via designated collection facilities
appointed by the government or the local authorities.
English
54
English
Introduction
Thank you for purchasing this Blackstar ID:CORE V3 amplifier. Like all our products,
this amp is the result of countless hours of painstaking Research and Development
by our world-class design team. Based in Northampton (UK), the Blackstar team are
all experienced musicians themselves and the sole aim of the development process
is to provide guitarists with products which are the ultimate tools for self-expression.
All Blackstar products are subjected to extensive laboratory and road testing to
ensure that they are truly uncompromising in terms of reliability, quality and above
all TONE.
ID:CORE represents a truly ground-breaking achievement, combining unique
innovations, an intuitive, traditional control set and the versatility of programmability.
ID:CORE is one of the world’s bestselling digital amplifiers which has set the modern
standard for compact, powerful, versatile amps.
Please read through this handbook carefully to ensure you get the maximum benefit
from your new Blackstar product.
If you like what you hear and want to find out more about the Blackstar range of
products please visit our website at www.blackstaramps.com.
Thanks!
The Blackstar Team
Features
Since 2007, Blackstar has led the way in the innovation of guitar amplification.
ID:CORE represents the culmination years of technical Research and Development.
These amps have an intuitive control set like a traditional amp, but have the versatility
of programmability. The unique controls allow you, the guitarist, to custom design
your own sound.
The Voice control has six different settings – Clean Warm, Clean Bright, Crunch,
Super Crunch, OD 1, OD 2. When used together with Blackstar’s patented ISF
control you can get the exact tone you’re thinking of.
The effects section delivers studio quality Super Wide Stereo modulation, delay and
reverb effects simultaneously that you can store with your sound.
Deep editing and storing of patches is simple using the Blackstar ARCHITECT
software. Patches can be shared, uploaded and downloaded via the online
community. By connecting a USB cable, you can simultaneously send both direct
and processed audio to a computer for recording purposes.
Blackstar’s ARCHITECT software also includes its new CAB RIG LITE platform,
which is a next-generation advanced speaker simulator that reproduces the sound
and feel of guitar speaker cabs in incredible detail.
The LINE IN / STREAMING input allows you to connect your ID:CORE V3 to a
music device or drum machine to play along with. You can also use a suitable TRRS
3.5mm cable for easy input / output Live Streaming with a compatible device.
By using the unique Voice control and the patented ISF, ID:CORE amplifiers allow
unparalleled flexibility and ease of use, enabling you to design the sound in your
head and deliver it at home, in the studio or in rehearsal.
English
6
7
AU
K
English
Factory Reset
The default factory patches and settings can be restored to your amplier at any
time. Simply hold down the MOD, DLY and REV switches simultaneously, whilst
switching on the amplier.
The voice LED will count down to indicate that a factory reset is imminent. If any of
the MOD, DLY and REV switches are released before the Voice LEDs have switched
o, then the operation is cancelled and the amplier will remain unaected.
Finally, switch the amplier power o to complete the process. When powered on,
your amplier will be restored to the factory default settings.
IMPORTANT NOTE:
This process will overwrite any user saved patches and settings.
Front Panel
1. Input
Plug your guitar in here.
Always use a good quality screened guitar lead.
2. Voice
The Voice control changes the preamp voicing, ranging from ultra clean to extremely
overdriven.
Clean Warm – Classic clean with Plate Reverb, Dynamic
Clean Bright – ‘Boutique Clean with Spring Reverb’, will break up when pushed hard
Crunch – Classic Crunch sound with medium gain overdrive
Super Crunch – A modern driven gain with more punch than Crunch
OD 1 – Hot-rodded Master Volume overdrive perfect for those smooth solos
OD 2 – A tight metal rhythm tone with Mid boosted overdrive
This setting is saved when you store a patch.
3. Gain
The Gain control adjusts the amount of overdrive or distortion. Low settings (counter
clockwise) will deliver a clean sound on the edge of break-up. As the Gain control is
turned clockwise the sound will become more overdriven, moving through beautiful
crunch tones until, at its maximum position, a full distorted tone is achieved. This
setting is saved when you store a patch.
4. Volume
This controls the preamp volume. High levels of volume will introduce the effect of
valve power amp distortion and compression. This is a global setting and not saved
when storing a patch.
English
8
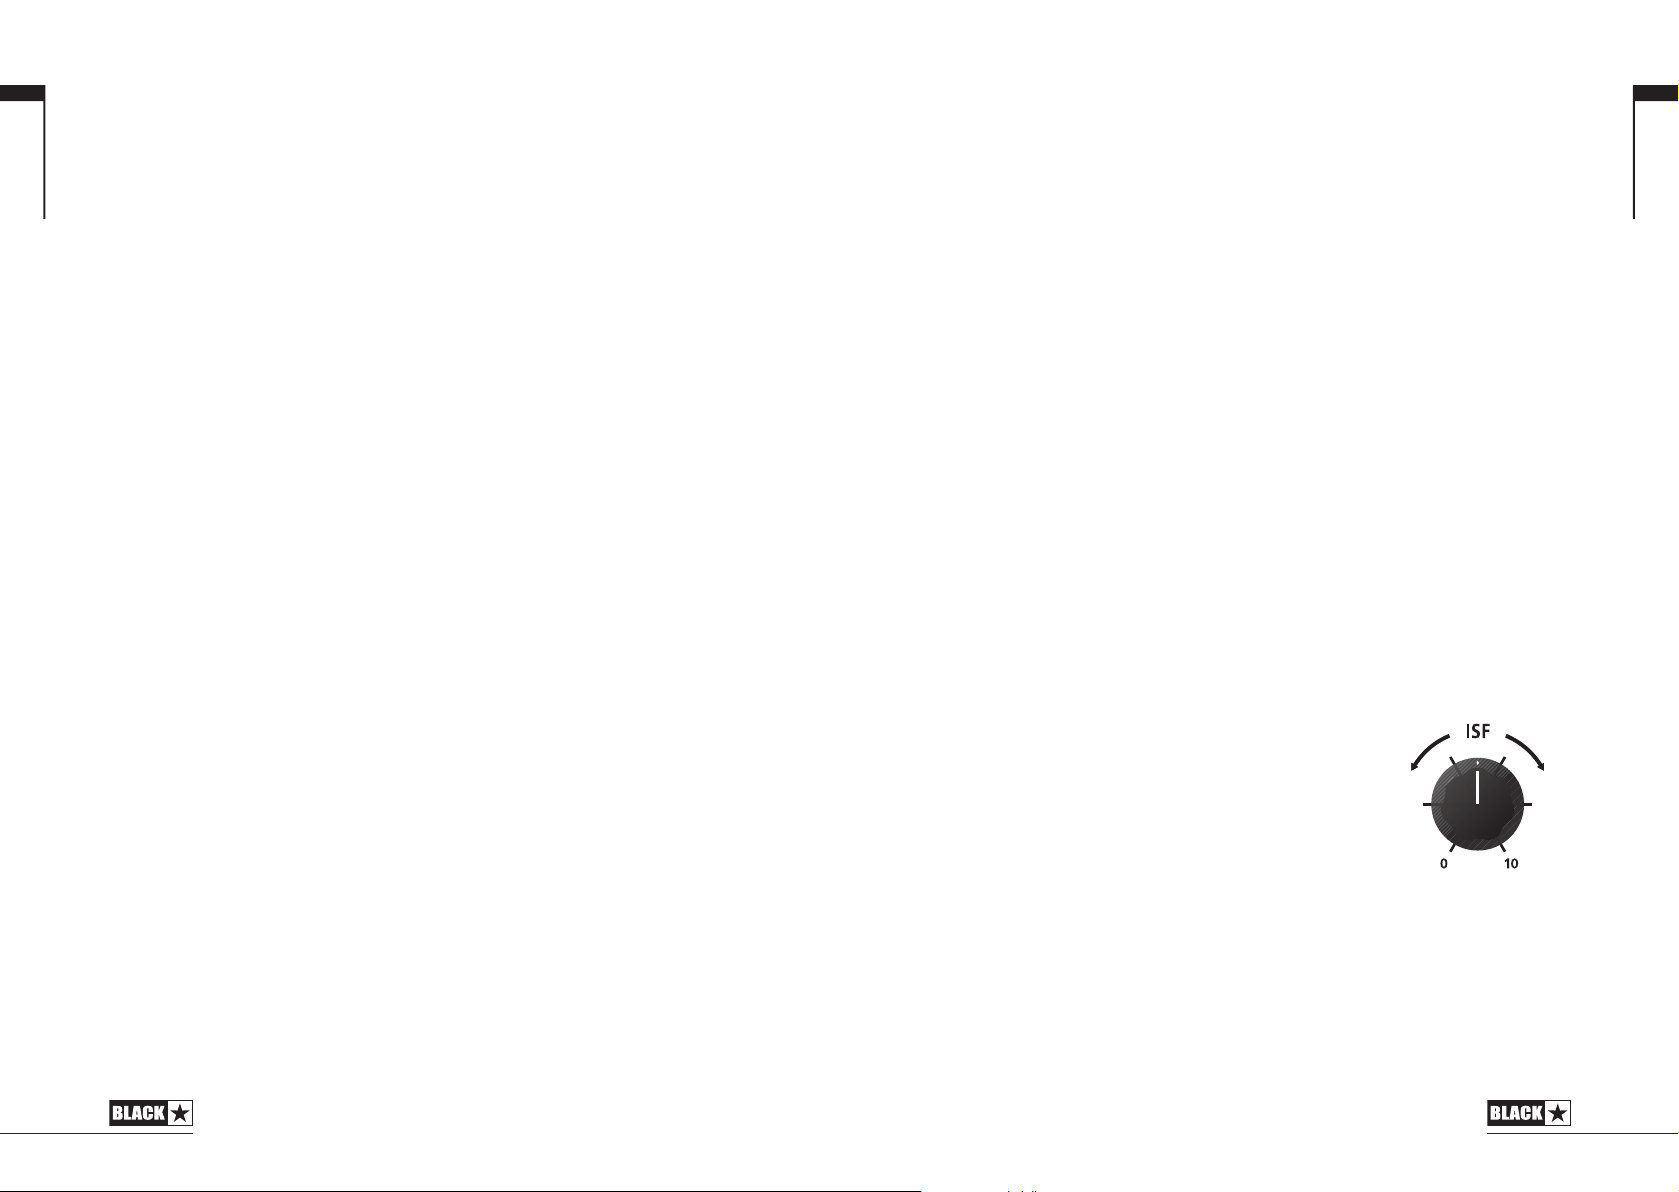
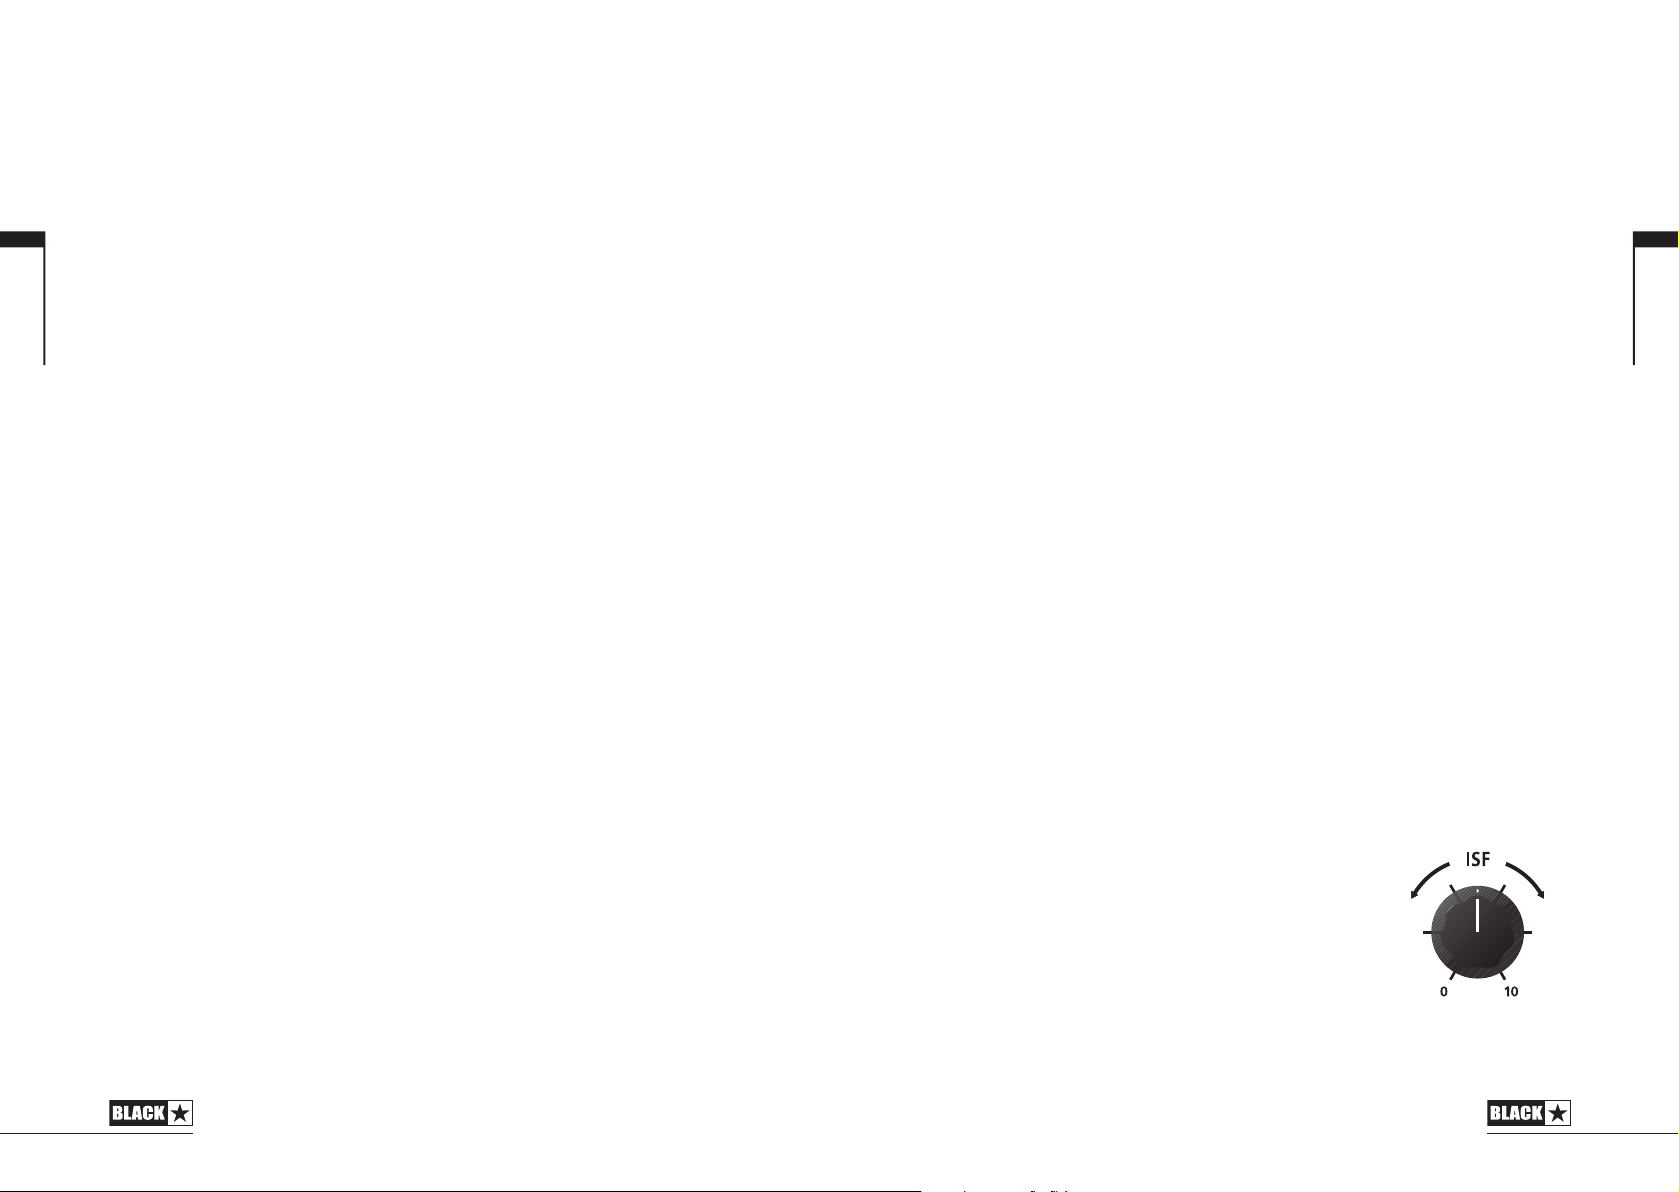
5. ISF
The patented ISF control allows you to choose the exact
tonal signature you prefer. Fully counter clockwise has
a more American characteristic with a tight bottomend and more aggressive middle, and fully clockwise
has a British characteristic which is more ‘woody’ and
less aggressive. This leads to a very familiar, musical
response. This setting is saved when you store a patch.
6. MOD (Modulation)
Press this switch to turn the stereo modulation effect on, off, or focus the effect for
editing. This setting is saved when you store a patch.
7. DLY (Delay)
Press this switch to turn the stereo delay effect on, off, or focus the effect for editing.
This setting is saved when you store a patch.
US
9

English
8. REV (Reverb)
Press this switch to turn the stereo reverb effect on, off, or focus the effect for
editing. This setting is saved when you store a patch.
For all three effect switches/buttons, the LED shows what state the effect is in:
LED Eect State Description
LED not on Eect o Eect not active
LED red Eect on but not ‘focused’ for editing Eect is active, but not aected by the front
LED green Eect on and ‘focused’ for editing Eect active and aected by the front panel
panel eect controls
eect controls
Repeatedly pressing each effect switches on the front panel has the following effect:
Current Eect State Next Eect State
Eect o Turns the eect on and ‘focuses’ the eect. Any previously focused eect
Eect on but not ‘focused’ Focuses the eect. Any previously focused eect reverts to an ‘on’ state
Eect on and ‘focused’ Turns the eect o. If any other eect(s) are on, the previously ‘focused’ eect
reverts to an ‘on’ state
resumes being ‘focused’
NOTE: Only one effect may be ‘focused’ at any time.
9. Effect Type
This changes the effect type and edits a parameter of the currently ‘focused’ effect
(modulation, delay, or reverb).
Each segment represents a different effect (four for each type of effect). An
LED shows which effect type is currently active. The distance travelled through
the ‘segment’ modifies an effect parameter. The Effects Table below shows the
modifiable parameters.
This setting is saved when you store a patch.
11. Tap
The Tap switch is used to set the rate/time of the current ‘focused’ effect. The time
between each press of the tap button defines the rate set.
Once set, the Tap LED will flash in time with the set rate of the currently ‘focused’
effect.
The Effects Table below shows the modifiable parameters:
Effects Table
Eect Segment Parameter Level Parameter Tap Parameter
MODULATION
Phaser Mix Depth Speed
Chorus / Flanger Morph Mix Speed
Envelope Sensitivity Depth -
Tremolo Frequency modulation depth Amplitude modulation depth Speed
DELAY
Linear Feedback Delay level Time
Analogue Feedback Delay level Time
Tape Feedback Delay level Time
Multi Feedback Delay level Time
REVERB
Room Size Reverb level -
Hall Size Reverb level -
Spring Size Reverb level -
Plate Size Reverb level -
This setting is saved when you store a patch.
English
10. Effect Level
This modifies an effect parameter. For modulation and delay effects, turning the Level
control while holding down the Tap button (11) modifies the rate/time of the effect.
The Effects Table below shows the modifiable parameters.
This setting is saved when you store a patch.
12. Power Switch
This switch is used to turn the amplifier on and off; the white dot marks the ON
position.
13. USB
Plug a USB cable in here to connect the amplifier to a Windows PC or Mac.
Blackstar’s ARCHITECT software offers a host of features and can be downloaded
from: www.architect.blackstar.co.uk
See the USB Audio section on page 15 for more information.
NOTE: The amplifier will appear on a personal computer as an audio capture device
within recording software.
1110
English
14. Manual
Press this switch to toggle between Patch and Manual Mode. When the amplifier
is in Manual Mode, the sound will reflect the current physical position of the knobs.
This is applicable to the Voice, Gain, Volume and ISF knobs. Any effects that are
active when switching to Manual Mode will be turned off.
While in Manual Mode any of the controls can still be modified by the Blackstar
ARCHITECT software but this means that the sound will not represent the positions
of the knobs on the front panel
15. Footcontroller (ID:CORE STEREO 20, 40 only)
Connect a Blackstar FS-11 footcontroller (not supplied) to control your ID:CORE in
one of the following modes:
FS-11/FS-18 Switch 1 Switch 2
Default Mode Toggles between 2 patches,
Alternative Mode Patch down Patch up
selectable via ARCHITECT
Toggles all saved patch eects
on/o
English
Patch Mode
Patch mode is indicated by the Manual LED (14) being unlit. See Programmability
section on page 14 for more information.
Tuner Mode
Holding Reverb (8) switch for one second will engage the tuner. The Recall Indicator
LED (18) will flash continuously to indicate the amplifier is in Tuner Mode. The
amplifier output will be muted whilst in Tuner Mode.
The Voice LEDs will indicate the closest note to the note being played.
Clean Warm String 1 (E)
Clean Bright String 2 (A)
Crunch String 3 (D)
Super Crunch String 4 (G)
OD 1 String 5 (B)
The MOD, DLY and REV LEDs act as indicators to show how close the played note
is to the tuned note.
MOD LED red Note is sharp (above pitch)
DLY LED green Note is in tune
REV LED red Note is at (below pitch)
All other LEDs on the front panel will be off in Tuner Mode.
Pressing any button will exit Tuner Mode.
In Alternative Mode (selected via ARCHITECT) patches will cycle on a ʻloopʼ.
e.g switching up from OD2 will move to Clean Warm.
When in Manual Mode, the effect of any footcontroller switch will depend on its last
state. Pressing Switch 1 will return the amplifier to Patch Mode. Pressing Switch 2
will toggle the effects off and on without returning to Patch Mode.
16. Line In/ Streaming
Play audio from your phone, MP3 player, tablet or laptop through the ID:CORE using
a stereo 3.5mm AUX cable (not supplied). Adjust the player’s volume to match that
of your guitar to enable you to play along.
Use your ID:CORE as an interface to play, live stream, practice and record on your
mobile device. Unlike a standard audio 3.5mm TRS jack that only allows audio to be
sent from your device, (e.g. to your headphones), the TRRS jack on your ID:CORE
allows audio to be sent and received at the same time. This allows you to playback
audio from your device and send audio to your device from your ID:CORE. This
feature allows you to use apps such as GarageBand and Instagram live with a
single cable.
Left Audio In
T ip
Right Audio In
R ing
Ground
R ing
Streaming Out
S leeve
TRRS cable
To use your ID:CORE amplifier as your Livestream Interface:
1. Connect your TRRS cable to your amplifiers Line IN / Streaming socket (see
diagram above).
2. Connect the opposite end of the TRRS cable to your devices 3.5mm input.
NOTE: Apple iPhone / Tablet users: To connect to your mobile device, use a
Lightning to 3.5mm adaptor (It is advised to use an official Apple manufactured
cable / Adaptor for guaranteed compatibility)
3. Open an Audio recording software or Camera application on your phone.
1312

English
4. Press record to test your levels are loud and clear. Use the channel ‘Gain’ controls
on your amplified to set the level sent to your phone.
5. Test and adjust your channel controls and effects for optimum sound on your
Blackstar amplifier.
6. Record High quality videos, Audio memos and Livestream (direct to Instagram
Live, Facebook, YouTube, Twitch and more) straight from your amplifier.
17. CAB RIG/ Headphone Out
CAB RIG LITE is a next-generation advanced speaker simulator that reproduces the
sound and feel of guitar speaker cabs in incredible detail.
This output also emulates the tonal characteristics of a guitar speaker cabinet and
provides a natural tone for connection to headphones, a recording device, PA
system or mixing desk.
To make full use of the Super Wide Stereo effects, use a ‘Stereo 3.5mm jack to two
Mono Jacks’ splitter lead to feed two channels of the recording device or mixer.
Always use a good quality screened lead.
Turning the Volume knob will control the Emulated Output level.
NOTE: The Amplifier speakers will mute when a cable is connected to the CAB
RIG/ Output jack.
18. Recall Indicator
The Recall Indicator shows if there is a mismatch between the current value of a
parameter within the amplifier and the corresponding physical front panel control.
For example, when you change to a different patch the controls on the front panel
may not always reflect the setting you are hearing.
To prevent unexpected level jumps in the control you are adjusting, the front panel
knobs will have no effect on the sound until the knob reaches the current parameter
value. Once reached the Recall Indicator flashes twice and the knob ‘takes control’
of the value and can increase or decrease the value.
The recall indicator will flash each time the physical knob ‘passes through’ the
currently active value that you are hearing.
Recall is active for Gain, Volume and ISF.
When the Tuner is active the Recall Indicator will flash continuously.
Rear Panel
1. DC Input
The supplied detachable DC power supply is connected here. Always ensure the
Power Switch (12) is in the OFF position before connecting the power supply. The
lead should only be connected to a power outlet that is compatible with the voltage,
power and frequency requirements stated on the power supply. If in doubt seek
advice from a qualified technician.
Optionally, your ID:CORE can also be powered by Blackstar’s PB-1 PowerBank
(not supplied). The PB-1 provides portable power for between 4-8 hours with your
ID:CORE, depending on usage.
Programmability
Storing Patches
Your ID:CORE amplifier stores 6 patches (1 patch per Voice setting).
To store the current sound as a patch press and hold the Manual switch for two
seconds. The currently selected Voice LED will flash to indicate the patch has been
stored.
Storing a patch will overwrite any previous patch in that location.
Patches can also be stored via Blackstar’s ARCHITECT software.
NOTE: Each patch on your ID:CORE must use the Voice setting assigned to that
patch i.e. the Clean Warm patch uses the Clean Warm voice.
Recalling Patches
When in Patch Mode turn the Voice control to choose the desired Voice patch.
Patches can also be recalled via the Blackstar ARCHITECT software or a connected
footcontroller (ID:CORE STEREO 20, 40 only).
NOTE:To recall a patch, the Manual LED must be off to indicate Patch Mode.
Turning the Voice control while the Manual LED is on (in Manual Mode) will only
select the indicated voice.
USB Audio
Standard audio drivers are used to connect the amplifier to a PC or Mac. No specific
drivers are required. For a guide on low-latency USB recording visit:
www.blackstaramps.com/usbrecording
NOTE: Always connect the amplifier via a main USB port, often found on the rear
of the computer.
The amplifier will appear as an audio capture device within recording software.
The USB audio signal output level from your ID:CORE amplifier can be controlled
independently of your amplifier’s speaker volume by holding down the Tap switch
(11) whilst turning the Gain control (3) on the front panel (see the Advanced Features
section on page 16). This will allow you to achieve a strong recording signal level
whilst monitoring the output at a lower, more comfortable level, or even silently if you
prefer; simply turn the amplifier speaker volume to zero using the Volume control
on the front panel.
The audio output via USB from your amplifier directly to your computer is carried
across four independent, simultaneous channels:
Channel 1: Stereo emulated, left channel – The fully processed guitar sound, with
speaker cabinet emulation. Contains the left channel of the Super Wide Stereo
effects.
Channel 2: Stereo emulated, right channel - The fully processed guitar sound, with
speaker cabinet emulation. Contains the right channel of the Super Wide Stereo
effects.
English
14
15
English
Channel 3: Preamp output – The preamp sound of the Voice and EQ stage, taken
before the effects, and without any speaker cabinet emulation. Ideal for use with
your own effects and cabinet emulation plugins from your recording software/DAW.
Channel 4: Unprocessed guitar signal – The signal as it comes out of your guitar.
Record this signal for later use during Reamping (see ‘Reamping’ section below).
These audio streams can be recorded simultaneously within your chosen recording
software/DAW.
TIP: To record a truly Super Wide Stereo-effected sound – which is faithfully
recreated when playing back your recorded tracks on any stereo speakers – pan
the stereo emulated left channel 100% left in the mix, and pan the right channel
100% right.
Your ID:CORE amplifier can also receive audio input from your computer:
Channel 1: Line input, left channel – Used for audio monitoring or MP3/backing
track playback. Playback through the left internal speaker.
Channel 2: Line input, right channel – Used for audio monitoring or MP3/backing
track playback. Playback through the right internal speaker.
Channel 3: Reamping input – Send a pre-recorded unprocessed guitar signal to
your amplifier for Reamping, when in Reamping mode.
Channel 4: Unused
Reamping
The amplifier can be switched into Reamping Mode via the Blackstar ARCHITECT
software. This is a non-storable setting and will be switched off either when the USB
cable is removed, or when the amplifier power is switched off.
When activated, Reamping Mode allows the amplifier to accept a pre-recorded, dry
guitar signal via USB and return a fully processed audio signal. This return signal can
then be captured using recording software on the connected PC or Mac.
Advanced Features
Your ID:CORE amplifier has further advanced features which are aimed at more
in-depth users who enjoy getting the most from their amplifier. These features do
not have independent controls on the front panel of the amplifier, but instead are
accessed by using the Tap switch (11) as a ‘shift key’ and using other controls to
access these features.
Independent Music Playback Volume – Tap + Volume
Under most circumstances, the volume of your music playback via the MP3/
Line Input is effectively controlled directly from your playback device. For quieter
environments and general convenience you can also further reduce the music
playback volume of your ID:CORE amplifier by simply holding down the Tap switch
(11) whilst turning the Volume control (4) on the front panel.
USB Recording Level – Tap + Gain
As stated in the USB Audio section (see page 15), the output level of the USB
audio signal from your ID:CORE amplifier can be controlled independently of your
amplifier’s speaker volume by holding down the Tap switch (11) whilst turning the
Gain control (3) on the front panel.
Effect Speed/Time – Tap + Effects Level
As stated in the Effect Level section (see page 10), the speed/time of the modulation
and delay effects can be controlled by holding down the Tap switch (11) whilst
turning the Effect Level control (10) on the front panel. This can be very useful for
setting a specific accurate effect tempo instead of using the Tap switch.
Firmware Update
Firmware updates are initiated via the Blackstar ARCHITECT software. A new
version of the Blackstar ARCHITECT software will be released whenever an update
is available.
Important note: Always connect the amplifier to a main USB port (usually found on
the on the rear of your PC or Mac) when updating the firmware. Never use a front
mounted USB port, USB hub or a USB extension cable. Doing so may result in a
failed update, which could cause your amplifier to become unresponsive.
When the amplifier is connected (via USB) to a version of the Blackstar ARCHITECT
software containing newer firmware, a message will be displayed prompting you to
install the latest files. Whilst updating, the amplifier controls will be unresponsive.
Front panel voice LEDs will cycle to indicate data activity during the update process.
The amplifier power should not be switched off during a firmware update. If the
amplifier is switched off during an update, the controls may be unresponsive after
the power is reapplied and the amplifier will produce no sound. The voice LEDs will
cycle to indicate that the amplifier contains no valid firmware.
If you are experiencing problems with the firmware update process the amplifier
can be forced to power up in Update Mode. Hold down the Manual (14) & MOD (6)
switches simultaneously, whilst switching on the amplifer to enter this mode with the
voice LEDs cycling to indicate Update Mode. Connect the amplifier to the Blackstar
ARCHITECT software to begin a firmware updae.
The amplifier must be connected to the Blackstar ARCHITECT software to
reinstall valid firmware. The update process will start automatically if the Blackstar
ARCHITECT software detects that the amplifier is in this state.
English
16
17

English
Technical Specification
ID:CORE STEREO 10 V3
Power: 2 x 5 Watts (Stereo 10 Watts)
Weight (kg): 3.7
Dimensions (mm): 340(W) x 265(H) x 185(D)
ID:CORE STEREO 20 V3
Power: 2 x 10 Watts (Stereo 20 Watts)
Weight (kg): 5.2
Dimensions (mm): 375(W) x 292(H) x 185(D)
Footcontroller (not supplied): FS-11 or FS-18 footcontroller
ID:CORE STEREO 40 V3
Power: 2 x 20 (Stereo 40 Watts)
Weight (kg): 6.2
Dimensions (mm): 434(W) x 336(H) x 185(D)
Footcontroller (not supplied): FS-11 or FS-18 footcontroller
1918
Deutsch
Warnung!
Wichtige Sicherheitshinweise!
LESEN SIE DIE FOLGENDEN INFORMATIONEN SORGFÄLTIG DURCH.
HEBEN SIE DIE ALLE ANLEITUNGEN FÜR REFERENZWECKE AUF!
Beachten Sie alle Warnungen und folgen sie den auf dem Produkt ange
brachten Anweisungen!
Öffnen Sie niemals das Gehäuse. Es befinden sich keine vom Anwender aus
tauschbaren Teile im Gerät. Lassen Sie alle Wartungsarbeiten von qualifiziertem
Fachpersonal ausführen.
Verwenden Sie zum Reinigen des Geräts ausschließlich ein trockenes Tuch.
Im Inneren von Verstärkern kann sich Kondensfeuchtigkeit bilden, wenn der
Verstärker aus einer kalten in eine wärmere Umgebung gebracht wird. Warten Sie
vor dem Einschalten, bis das Gerät Raumtemperatur erreicht hat.
Unautorisierte Modifikationen am Gerät sind von Blackstar Amplification Ltd. aus
drücklich untersagt.
Setzen Sie das Gerät niemals Regen oder Feuchtigkeit aus.
Platzieren Sie das Gerät nicht auf instabilen Rollwagen, Ständern oder Tischen.
Andernfalls könnte das Gerät herunterfallen und schwere Schäden am Produkt oder
Verletzungen verursachen.
Dieses Gerät darf nur an gut belüfteten Standorten betrieben werden und darf nicht
an Orten ohne ausreichende Luftzirkulation wie in einem Regal betrieben werden.
Dieses Produkt darf nicht in der Nähe von Wärmequellen wie Öfen, Heizkörpern
oder einem anderen Wärme produzierenden Verstärker betrieben werden.
Verwenden Sie ausschließlich das mitgelieferte, mit dem Stromnetz in Ihrer Region
kompatible Netzkabel.
Netzkabel müssen sehr sorgfältig behandelt werden und müssen bei jeglichem
Defekt umgehend ausgetauscht werden.
Entfernen Sie niemals den Erdungskontakt des Netzkabels.
Wenn Sie das Gerät längere Zeit nicht verwenden, ziehen Sie das Netzkabel.
Geräte der Schutzklasse 1 dürfen nur an eine geerdete Steckdose angeschlossen
werden.
Der Stecker des Netzkabels muss jederzeit gut erreichbar sein.
Vor dem Einschalten müssen die Lautsprecher wie im Handbuch beschrieben mit
den vom Hersteller empfohlenen Kabeln angeschlossen werden.
Ersetzen Sie beschädigte Sicherungen immer durch Sicherungen gleichen Typs.
Manipulieren Sie niemals den Schutzleiter des Netzsteckers.
Hohe Lautsprecherpegel können zu dauerhaften Hörschäden führen. Halten Sie
sich nicht in direkter Nähe von mit hoher Lautstärke betriebenen Lautsprechern
auf. Falls Sie längere Zeit hohen Lautstärken ausgesetzt sind, verwenden Sie einen
Gehörschutz.
-
Falls das Gerät trotz bestimmungsgemäßer Verwendung nicht normal funktioniert,
wenden Sie sich an einen qualifizierten Service-Techniker.
-
Deutsch
Das amerikanische Amt für Sicherheit und Gesundheitsschutz am Arbeitsplatz
(OSHA) hat folgende Grenzwerte für Lärmbelastung festgelegt:
Dauer pro Tag in Stunden Lärmpegel in dBA, langsame Ansprechzeit
8 90
6 92
4 95
-
3 97
2 100
1½ 102
1 105
½ 110
¼ oder weniger 115
Laut OSHA kann jede Belastung oberhalb der angegebenen Grenzwerte zu einem
partiellen Hörverlust führen.
Wird dieses Verstärkersystem bei Pegeln oberhalb der angegebenen Grenzwerte
betrieben, muss ein Gehörschutz (Ohrstöpsel oder Gehörschutzkopfhörer) getragen
werden, um einem dauerhaften Gehörschaden vorzubeugen. Um sich gegen die
potenziellen Gefahren hoher Schalldruckpegel zu schützen, sollten alle Personen,
die Geräten mit hohen Schalldruckpegeln (wie z. B. diesem Verstärker) ausgesetzt
sind, für die Dauer des Betriebs einen Gehörschutz tragen.
Elektrische und elektronische Geräte dürfen nicht im Hausmüll,
sondern nur den staatlichen bzw. kommunalen Vorgaben entsprechend entsorgt werden.
2120
Deutsch
Einleitung
Vielen Dank, dass Sie sich für diesen Blackstar ID:CORE V3 Verstärker entschieden
haben. Dieser Amp ist wie alle unsere Verstärker das Ergebnis unzähliger Stunden
akribischer Arbeit durch unser erstklassiges Entwickler-Team. Die erfahrenen
Musiker des Blackstar-Teams aus Northampton (UK) verfolgen ein einziges Ziel:
Gitarristen das bestmögliche Equipment zur Verfügung zu stellen, damit diese sich
optimal selbstverwirklichen können.
Alle Blackstar-Produkte wurden sowohl während der Entwicklung als auch im
Live-Betrieb auf Herz und Nieren getestet, um sicherzustellen, dass sie in puncto
Zuverlässigkeit, Qualität und SOUND absolut kompromisslose Ergebnisse liefern.
Der ID:CORE V3 ist eine wirklich bahnbrechende Neuvorstellung, die einzigar
tige Innovationen mit intuitiv-traditionellen Bedienelementen und einer vielseitigen
Programmierbarkeit kombiniert. Der ID:CORE ist einer der weltweit meistverkauften
Digitalverstärker und hat den Standard für kompakte, leistungsfähige und vielseitige
Verstärker gesetzt.
Bitte lesen Sie dieses Handbuch aufmerksam durch, um Ihr neues Blackstar-
Produkt optimal nutzen zu können.
Wenn Sie mehr über die Blackstar-Produktreihe erfahren möchten, besuchen Sie
unsere Webseite unter www.blackstaramps.com.
Vielen Dank!
Das Blackstar-Team
Merkmale
Seit 2007 haben Blackstar sehr viel für die Innovation von Gitarrenverstärkern
getan. Der ID:CORE V3 ist nun das Ergebnis jahrelanger technischer Forschung
und Entwicklung. Diese Verstärker bieten die gewohnt intuitiven Bedienelemente
eines traditionellen Amps, sind aufgrund ihrer Programmierbarkeit aber deutlich
vielseitiger. Mit den einzigartigen Bedienelementen können Sie Ihren ganz
persönlichen Gitarrensound kreieren.
Der Voice-Regler bietet sechs unterschiedliche Einstellungen – Clean Warm, Clean
Bright, Crunch, Super Crunch, OD 1 und OD 2. In Verbindung mit dem für Blackstar
patentierten ISF-Regler erzielen Sie genau den gewünschten Sound.
-
Die Effekt-Sektion erzeugt extrem breite Stereo-Modulations-, Delay- und ReverbEffekte in Studio-Qualität, die Sie zusammen mit Ihren Sounds abspeichern können.
Mit Hilfe unserer Architect Software gestaltet sich die tiefgreifende Editierung ebenso
wie das Speichern von Patches extrem einfach. Patches können über die Online
Community hochgeladen, heruntergeladen und ausgetauscht werden. Durch
Anschluss eines USB-Kabels können Sie gleichzeitig das Direkt- wie das bearbeitete
Audiosignal für die Aufnahme an den Computer senden.
Die Blackstar ARCHITECT Software enthält zudem Cab Rig Lite, unsere moderne
und fortschrittliche Lautsprechersimulation, die den Sound und das Spielgefühl einer
Gitarrenlautsprecherbox unglaublich detailliert nachbildet.
Über den Eingang LINE IN / STREAMING können Sie Ihren ID:CORE V3 mit einem
Musikgerät oder einer Drum-Maschine verbinden, um zu einer Begleitung zu spielen.
Zudem können Sie ein geeignetes 3,5 mm TRRS-Kabel für die einfache Ein- und
Ausgabe eines Live-Streamings über ein kompatibles Mobilgerät verwenden.
Dank der beispiellosen Flexibilität und Benutzerfreundlichkeit des einzigartigen
Voice- und des patentierten ISF-Reglers lassen Sie mit den ID:CORE V3
Verstärkern Ihren Wunsch-Sound zuhause, im Studio, online und in der Bandprobe
Wirklichkeit werden.
Deutsch
2322
Deutsch
USAUK
Factory Reset
Die Werks-Patches und -Einstellungen können im Verstärker zu jeder Zeit wiederhergestellt werden. Halten Sie die Tasten MOD, DLY und REV gleichzeitig gedrückt,
während Sie den Verstärker einschalten.
Über die Voice-LEDs wird nun angezeigt, dass die Werkseinstellungen wiederherg
estellt werden. Wenn Sie eine der Tasten MOD, DLY und REV loslassen, bevor die
Voice-LEDs alle Farben durchlaufen haben und erloschen sind, wird der Vorgang
abgebrochen und der Verstärker wird nicht zurückgesetzt.
WICHTIGER HINWEIS:
Durch diesen Vorgang werden alle vom Anwender gespeicherten Patches und
Einstellungen überschrieben.
Vorderseite
1. Input
Hier schließen Sie Ihre Gitarre an.
Verwenden Sie in jedem Fall hochwertige
-
geschirmte Gitarrenkabel.
2. Voice
Der Voice-Regler verändert das Preamp-Voicing im Bereich von extrem clean bis
extrem übersteuert.
Clean Warm – Klassischer Clean-Sound mit Plattenhall und Dynamik
Clean Bright –
Crunch – Klassischer Crunch-Sound mit mittlerem Gain-Overdrive
Super Crunch – Moderner Sound mit übersteuertem Gain und mehr Druck im
Vergleich zu Crunch
OD 1 – „Aufgebohrter“ Overdrive-Sound über das Master Volume für
singende Soli
OD 2 – Straffer Rhythmus-Sound für Metal mit mittenbetontem Overdrive
Diese Einstellung wird beim Sichern eines Patches gespeichert.
3. Gain
Mit dem Gain-Regler steuern Sie den Grad der Übersteuerung bzw. Verzerrung.
Niedrige Einstellungen (gegen den Uhrzeigersinn) liefern cleane bis angezerrte
Sounds. Wenn der Gain-Regler im Uhrzeigersinn aufgedreht wird, nimmt der
Verzerrungsgrad mehr und mehr zu und wechselt von crunchigen Sounds bis hin zu
stark verzerrten Sounds in der Extremposition. Diese Einstellung wird beim Sichern
eines Patches gespeichert.
„Boutique Clean mit Spring Reverb“, übersteuert bei hartem Anschlag
Deutsch
4. Volume
Dieser Regler steuert die Aussteuerung des Preamps. Hohe Einstellungen für Volume
sorgen für Verzerrungs- und Kompressionseffekte wie bei einer Röhrenendstufe.
Hierbei handelt es sich um eine globale Einstellung, die nicht in den Patches
gespeichert wird.
5. ISF
Mit dem ISF-Regler finden Sie immer die gesuchte
Klangfärbung. Bei Einstellungen gegen den
Uhrzeigersinn besitzt der Amp einen „amerikanischen“
Sound-Charakter mit einem knackigen Bassfundament
und aggressiveren Mitten. Bei Einstellungen im
Uhrzeigersinn erzeugt der Amp einen „britischen“
Sound, der deutlich erdiger und weniger aggressiv
klingt. Das führt letztlich zu einem vertrauten,
musikalischen Verhalten. Diese Einstellung wird beim
Sichern eines Patches gespeichert.
2524

Deutsch
6. MOD (Modulation)
Mit diesem Schalter (de-)aktivieren Sie den Modulationseffekt oder wählen ihn zur
Editierung aus. Diese Einstellung wird beim Sichern eines Patches gespeichert.
7. DLY (Delay)
Mit diesem Schalter (de-)aktivieren Sie den Delay-Effekt oder wählen ihn zur
Editierung aus. Diese Einstellung wird beim Sichern eines Patches gespeichert.
8. REV (Reverb)
Mit diesem Schalter (de-)aktivieren Sie den Reverb-Effekt oder wählen ihn zur
Editierung aus. Diese Einstellung wird beim Sichern eines Patches gespeichert.
Die Tasten-LEDs der drei Effekt-Schalter geben den
Status des jeweiligen Effekts an:
LED Eekt-Status Beschreibung
LED inaktiv Eekt aus Eekt inaktiv
LED rot Eekt an, aber nicht für die Editierung aus
LED grün Eekt an und für die Editierung ausgewählt Eekt ist aktiv und wird über die Eekt-
gewählt
-
Eekt ist aktiv, wird aber nicht über die
Eekt-Regler auf der Front gesteuert
Regler gesteuert
Ein wiederholtes Drücken der Effekt-Schalter auf der Vorderseite hat den folgenden Effekt:
Aktuelle Eect Staat Weiter Eect Staat
Eekt aus Aktiviert den Eekt und setzt ihn in den „Fokus“. Der bisherige „Fokus“-Eekt
Eekt aktiv, aber nicht im
„Fokus“
Eekt aktiv und im „Fokus“ Schaltet den Eekt aus. Wenn ein (oder mehrere) andere(r) Eekt aktiv ist,
wird in den Status „On“ geschaltet
Setzt den Eekt in den Fokus. Der bisherige „Fokus“-Eekt wird in den
Status „On“ geschaltet
bleibt der bisherige „Fokus“-Eekt weiterhin im „Fokus“
ANMERKUNG: Es kann immer nur ein Effekt im „Fokus“ sein.
9. Effekt-Typ
Hier wählen Sie den Effekt-Typ und editieren einen Parameter des aktuellen „Fokus“Effekts (Modulation, Delay oder Reverb).
Jedes Segment steht für einen anderen Effekt (vier für jeden Effekt-Typ). Eine
LED zeigt, welcher Effekt-Typ momentan aktiv ist. Der Regelweg innerhalb des
„Segments“ verändert den jeweiligen Effekt-Parameter. In der Effekt-Tabelle weiter
unten sind alle einstellbaren Parameter aufgelistet:
Diese Einstellung wird beim Sichern eines Patches gespeichert.
In der Effekt-Tabelle weiter unten sind alle einstellbaren Parameter aufgelistet:
Diese Einstellung wird beim Sichern eines Patches gespeichert.
11. Tap-Taster
Der Tap-Taster dient zur Eingabe der Rate/Time des Effekts, der sich aktuell im
„Fokus“ befindet. Die Dauer zwischen jedem Drücken des Tap-Tasters bestimmt
die Rate-Einstellung.
Nach der Einstellung blinkt die Tap-LED in der Geschwindigkeit, die für den Effekt
im „Fokus“ eingegeben wurde.
In der folgenden Effekt-Tabelle sind alle einstellbaren Parameter aufgelistet:
Effekt-Tabelle
Eekt Segment-Parameter Level-Parameter Tap-Parameter
MODULATION
Phaser Mix Depth Speed
Flanger Feedback Depth Speed
Chorus Mix Depth Speed
Tremolo Tiefe der Frequenz-
DELAY
Linear Feedback Delay-Pegel Time
Analogue Feedback Delay-Pegel Time
Tape Feedback Delay-Pegel Time
Multi Feedback Delay-Pegel Time
REVERB
Room Size Reverb-Pegel -
Hall Size Reverb-Pegel -
Spring Size Reverb-Pegel -
Plate Size Reverb-Pegel -
Modulation
Tiefe der Amplituden-
Modulation
Speed
Diese Einstellung wird beim Sichern eines Patches gespeichert.
12. Power-Schalter
Mit diesem Schalter wird der Verstärker ein- bzw. ausgeschaltet: Der weiße Punkt
markiert die Position ON.
Deutsch
10. Effekt-Level
Dieser Regler verändert einen Effekt-Parameter. Bei Modulations- und DelayEffekten können Sie mit dem Level-Regler bei gehaltenem Tap-Taster (11) die
Rate/Time des Effekts verändern.
2726

Deutsch
13. USB
Hier schließen Sie ein USB-Kabel an, um den Verstärker mit einem
Windows PC oder einem Mac zu verbinden. Die ARCHITECT-Software
von Blackstar bietet zahlreiche Funktionen und kann unter dem Link
www.architect.blackstar.co.uk heruntergeladen werden.
Lesen Sie dazu den Abschnitt USB Audio auf Seite 15.
ANMERKUNG: Der Verstärker wird innerhalb der Aufnahme-Software auf dem
Computer als Audio-Interface angezeigt.
14. Manual
Drücken Sie diese Taste, um zwischen den Modi Patch und Manual umzuschalten.
Im Manual-Modus entspricht der Sound den aktuellen physikalischen Positionen der
Regler. Dies gilt für die Regler Voice, Gain, Volume und ISF. Alle Effekte, die beim
Umschalten in den Manual-Modus aktiv sind, werden abgeschaltet.
Im Manual-Modus können alle Regler auch weiterhin über die Blackstar ARCHITECT
Software gesteuert werden. Das hat aber zur Folge, dass der Sound nicht den
physikalischen Positionen der Regler auf der Front entspricht.
Patch-Modus
Der Patch-Modus ist dann aktiv, wenn die Manual-LED (14) nicht leuchtet.
Weitere Informationen dazu finden Sie im Abschnitt „Programmierung“ auf Seite 14.
Tuner-Modus
Durch gleichzeitiges Drücken der Tasten Tap (11) und Manual (14) für eine Sekunde
aktivieren Sie den Tuner. Die LED der Recall-Anzeige (18) blinkt dauerhaft und zeigt
so, dass der Tuner-Modus aktiv ist. Der Verstärkerausgang wird stummgeschaltet,
wenn der Tuner-Modus aktiv ist.
Über die Voice-LEDs wird die Note angezeigt, die der gespielten Note am nächsten
kommt.
Clean Warm Saite 1 (E)
Clean Bright Saite 2 (A)
Crunch Saite 3 (D)
Super Crunch Saite 4 (G)
OD 1 Saite 5 (B)
15. Fußschalter (nur ID:CORE STEREO 20 und ID:CORE STEREO 40)
Schließen Sie einen (optional erhältlichen) Blackstar FS-11 Fußschalter an, um Ihren
ID:CORE in einem der folgenden Modi zu steuern:
FS-11/FS-18 Taster 1 Taster 2
Voreinstellung Schaltet zwischen zwei Patches um,
Alternative-Modus Nächstes Patch Vorheriges Patch
die Sie über ARCHITECT auswählen
Schaltet alle gespeicherten PatchEekte an oder aus
Deutsch
Im (über ARCHITECT ausgewählten) Alternative-Modus werden die Patches in der
Schleife umgeschaltet. Wenn Sie bspw. im Modus OD2 nach oben schalten, wird
die Voice Clean Warm aktiviert.
Im Manual-Modus hängt die Funktion der Taster des Fußschalters vom ihrem letzten
Status ab. Durch Drücken von Taster 1 versetzen Sie den Verstärker wieder in den
Patch-Modus. Durch Drücken von Taster 2 schalten Sie die Effekte ein bzw. aus,
ohne in den Patch-Modus zu wechseln.
16. Line In / Streaming
Hier schließen Sie Ihr Telefon/Smartphone, MP3-Player, Tablet oder Laptop mit
einem (nicht im Lieferumfang enthaltenen) 3,5 mm AUX-Kabel an, um Audiomaterial
über den ID:CORE wiederzugeben. Zum Üben passen Sie die Lautstärke der ex
-
ternen Quelle an den Pegel Ihrer Gitarre an.
Mit Hilfe eines 3,5 mm TRRS-Miniklinkenkabels können Sie Ihren ID:CORE V3 als
Interface zum Einspielen, Streamen, Üben und Aufnehmen auf Ihrem Mobilgerät
nutzen. Im Gegensatz zu herkömmlichen 3,5 mm TRS-Miniklinkenkabeln, die lediglich die Audioausgabe von Ihrem Gerät erlauben (z. B. zur Ansteuerung eines
Kopfhörers), können Audiosignale nach Anschluss eines TRRS-Miniklinkenkabels an
Ihrem ID:CORE V3 gleichzeitig ausgegeben und empfangen werden. Auf diese Weise
können Sie Audiomaterial von Ihrem externen Gerät wiedergeben und das Signal des
ID:CORE V3 auf das externe Gerät speisen. Dank dieser Funktion können Sie Apps
wie GarageBand und Instagram Live nach Anschluss eines einzigen Kabels nutzen.
Left Audio In
T ip
Right Audio In
R ing
Ground
R ing
Streaming Out
S leeve
Über die LEDs MOD, DLY und REV wird dargestellt, inwieweit die gespielte Note von
der Referenzstimmung abweicht.
MOD-LED rot Note (Stimmung) ist zu hoch
DLY-LED grün Note ist korrekt gestimmt
REV-LED rot Note (Stimmung) ist zu tief
Alle anderen LEDs auf der Vorderseite sind im Tuner-Modus inaktiv.
Durch Drücken einer beliebigen Taste verlassen Sie den Tuner-Modus.
TRRS cable
So verwenden Sie Ihren ID:CORE V3 Verstärker als Interface für Live-Streaming:
1. Schließen Sie das 3,5 mm TRRS-Kabel an der Buchse LINE IN / STREAMING
Ihres ID:CORE V3 an (siehe Abbildung oben).
2928
 Loading...