

Page 1
Installation and Operation Manual
Videohub Hardware Control
Mac OS X
Windows
September 2014
™
™
Page 2

Welcome
Thank you for purchasing your Videohub control!
We hope you share our dream for the television industry to become truly creative
by allowing anyone to have access to the highest quality video.
Videohub Master Control, Videohub Smart Control and our GPI and Tally Interface
are simple to install. We've extracted the relevant pages from the Videohub manual
so you don't need to read too much. All the information in this mini manual can also
be found in the Videohub manual.
Previously, high end television and post production required investing in millions of
dollars of hardware, and professional SDI routers have always been way too costly for
most people to afford. HD-SDI is even more expensive and, until now, only the largest
post production and television facilities could afford HD-SDI routing. Videohub
changes all that, even enabling you to pipe 2K film around your studio just like
video. Now, Videohub Control makes it even easier to route video using dedicated
broadcast quality hardware control panels that are also affordable. We hope you get
years of use from it and have lots of fun connecting everyone in your facility together!
This instruction manual contains all the information you’ll need to install your
Videohub Control and GPI and Tally Interface, although it’s always a good idea to ask
a technical assistant for help if you are not sure what IP addresses are, or if you don’t
know much about computer networks. Videohub Control is easy to install, however,
there are a few slightly technical preferences you will need to set after you install it.
We think it should take you approximately 5 minutes to complete installation.
Please check our website at www.blackmagicdesign.com and click the support page
to download the latest updates to this manual and Videohub software including the
Blackmagic Videohub Hardware Panel Setup. Lastly, please register your Videohub
Control when downloading software updates so we can keep you updated when new
software is released. We are constantly working on new features and improvements,
so we would love to hear from you!
Grant Petty
CEO Blackmagic Design
Page 3
Contents
Videohub Hardware Control Manual
4 Getting Started
Introducing Videohub Controllers 4
Videohub Master Control 4
Videohub Smart Control 4
GPI and Tally Interface 4
Connecting USB to Setup the Control Panel 5
Plugging into an Ethernet Network 5
Control Panel Button Diagnostics 6
Installing the Videohub Software 7
Mac OS X installation 7
Windows installation 7
Setting up your Videohub Controller 8
Configuring Videohub Master Control 9
Configuring Videohub Smart Control 10
Setting up the GPI and Tally Interface 12
Configuring the GPI and Tally Interface 12
Labeling Pushbuttons 13
14 Using Videohub Master Control
About Routing Levels 14
How to Select Sources and Destinations 14
20 Using Videohub Smart Control
Using Videohub Smart Control as a Cut-Bus Controller 20
Using Videohub Smart Control as an XY Controller 20
21 Using GPI and Tally Interface
Configuring GPIs 21
Configuring Tally 21
23 Help
24 Warranty
Page 4
4
Getting Started
Videohub Master Control
Videohub Smart Control
Getting Started
Introducing Videohub Controllers
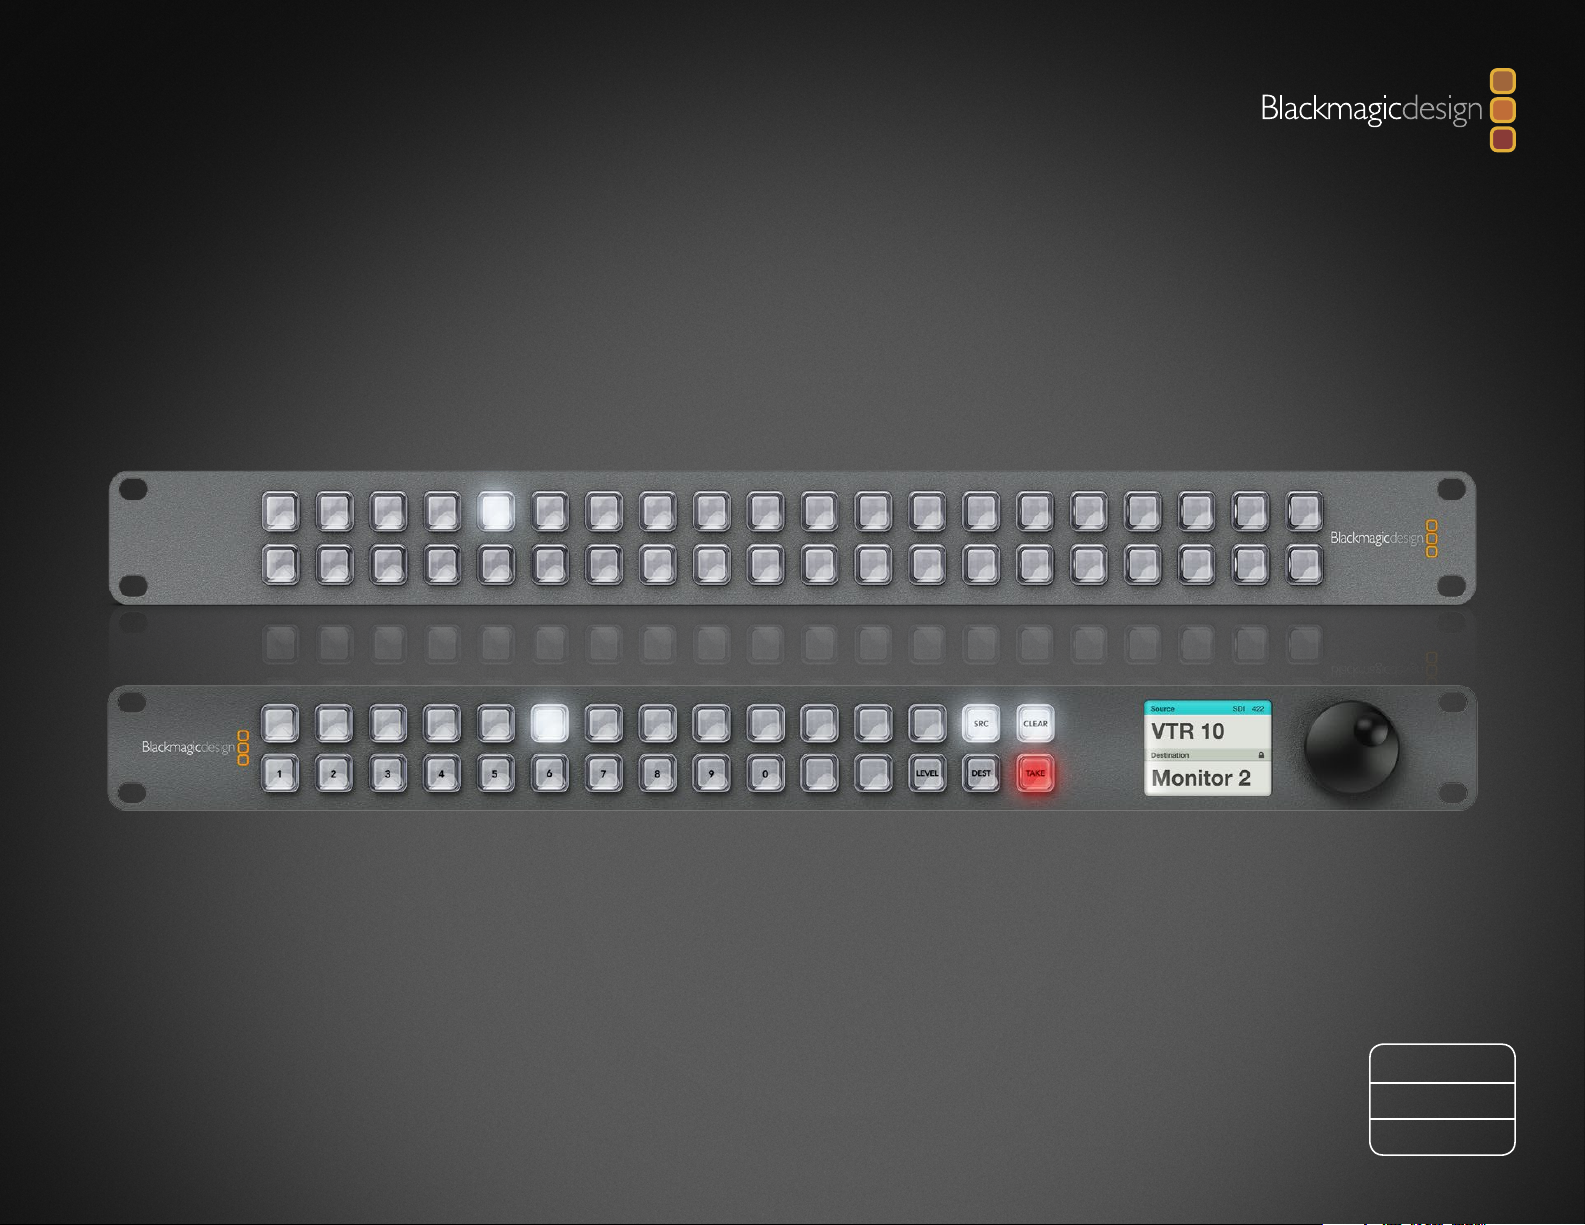
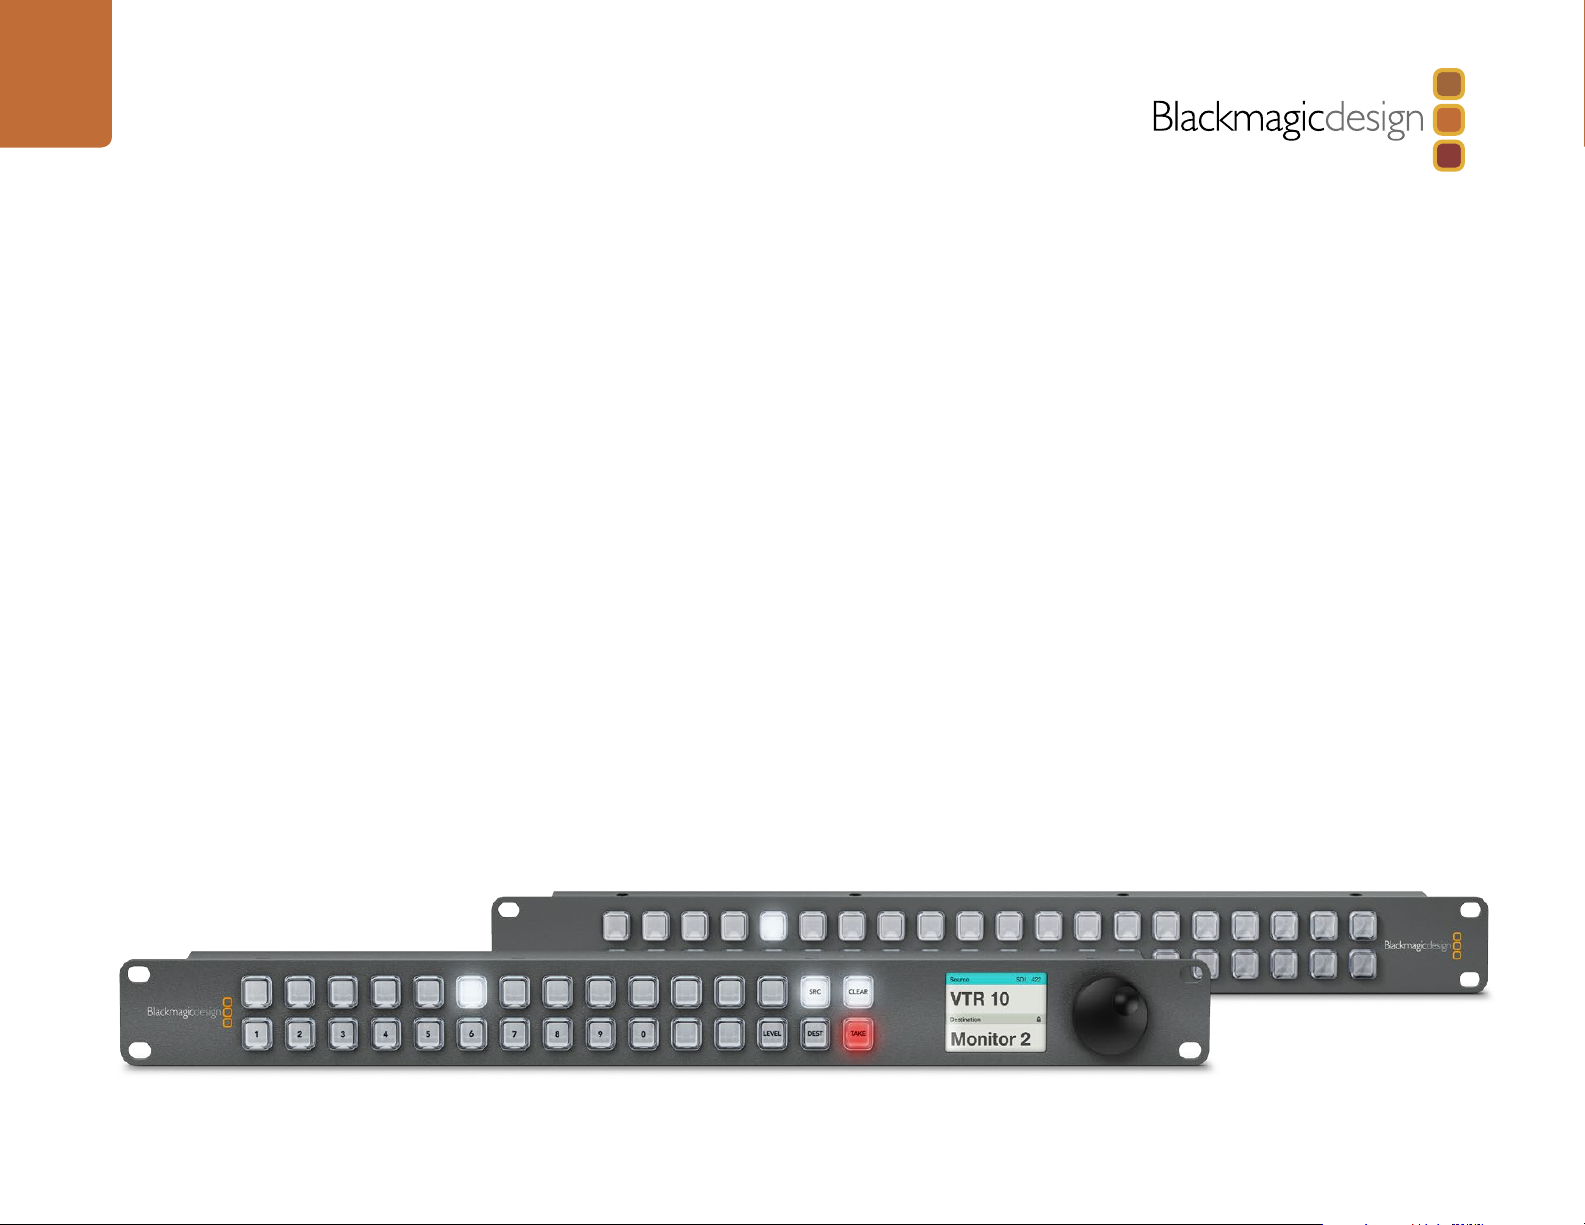
Videohub Master Control
Videohub Master Control is a rack-mountable control panel with 30 backlit pushbuttons, LCD, scroll
wheel and Ethernet connectivity designed to perform Videohub crosspoint switching without using a
computer. Videohub Master Control can control all sources and destinations for any size of Videohub
router, as well as RS-422 deck control.
Videohub Master Control uses port labels to aid in fast selection of equipment using software. 15 buttons
can be configured and labeled to provide fast selection of common equipment types, e.g., cameras,
decks and monitors. It also includes a loop through Ethernet port for connecting to additional control
panels, Videohub routers or other network devices.
Only 1 rack unit high and less than an inch thick, you can rack-mount Videohub Master Control at the
front or at the rear of the rack to leave space for other equipment.
GPI and Tally Interface
Videohub Smart Control
Videohub Smart Control is a rack-mountable control panel with 40 backlit pushbuttons and Ethernet
connectivity, which works with all models of Videohub. It can be configured to work with one or many
SDI destination devices. Once configured for your SDI equipment and Videohub router, Videohub Smart
Control no longer requires a computer and can immediately change SDI routes as desired.
When configured for a single SDI destination, such as a monitor or deck, the pushbuttons can instantly
switch between 40 different SDI sources on the same Videohub router. When configured for multiple
SDI destinations, destination buttons become gold, source buttons become white and the lower right
button can be configured as a take button and illuminates red. Macro buttons illuminate green when
enabled and each one can be configured to perform up to 16 simultaneous crosspoint switches.
Only 1 rack unit high and less than an inch thick, you can rack-mount Videohub Smart Control at the
front or at the rear of the rack to leave space for other equipment. If you don’t have a rack, then you can
leave it in a safe place on the floor!
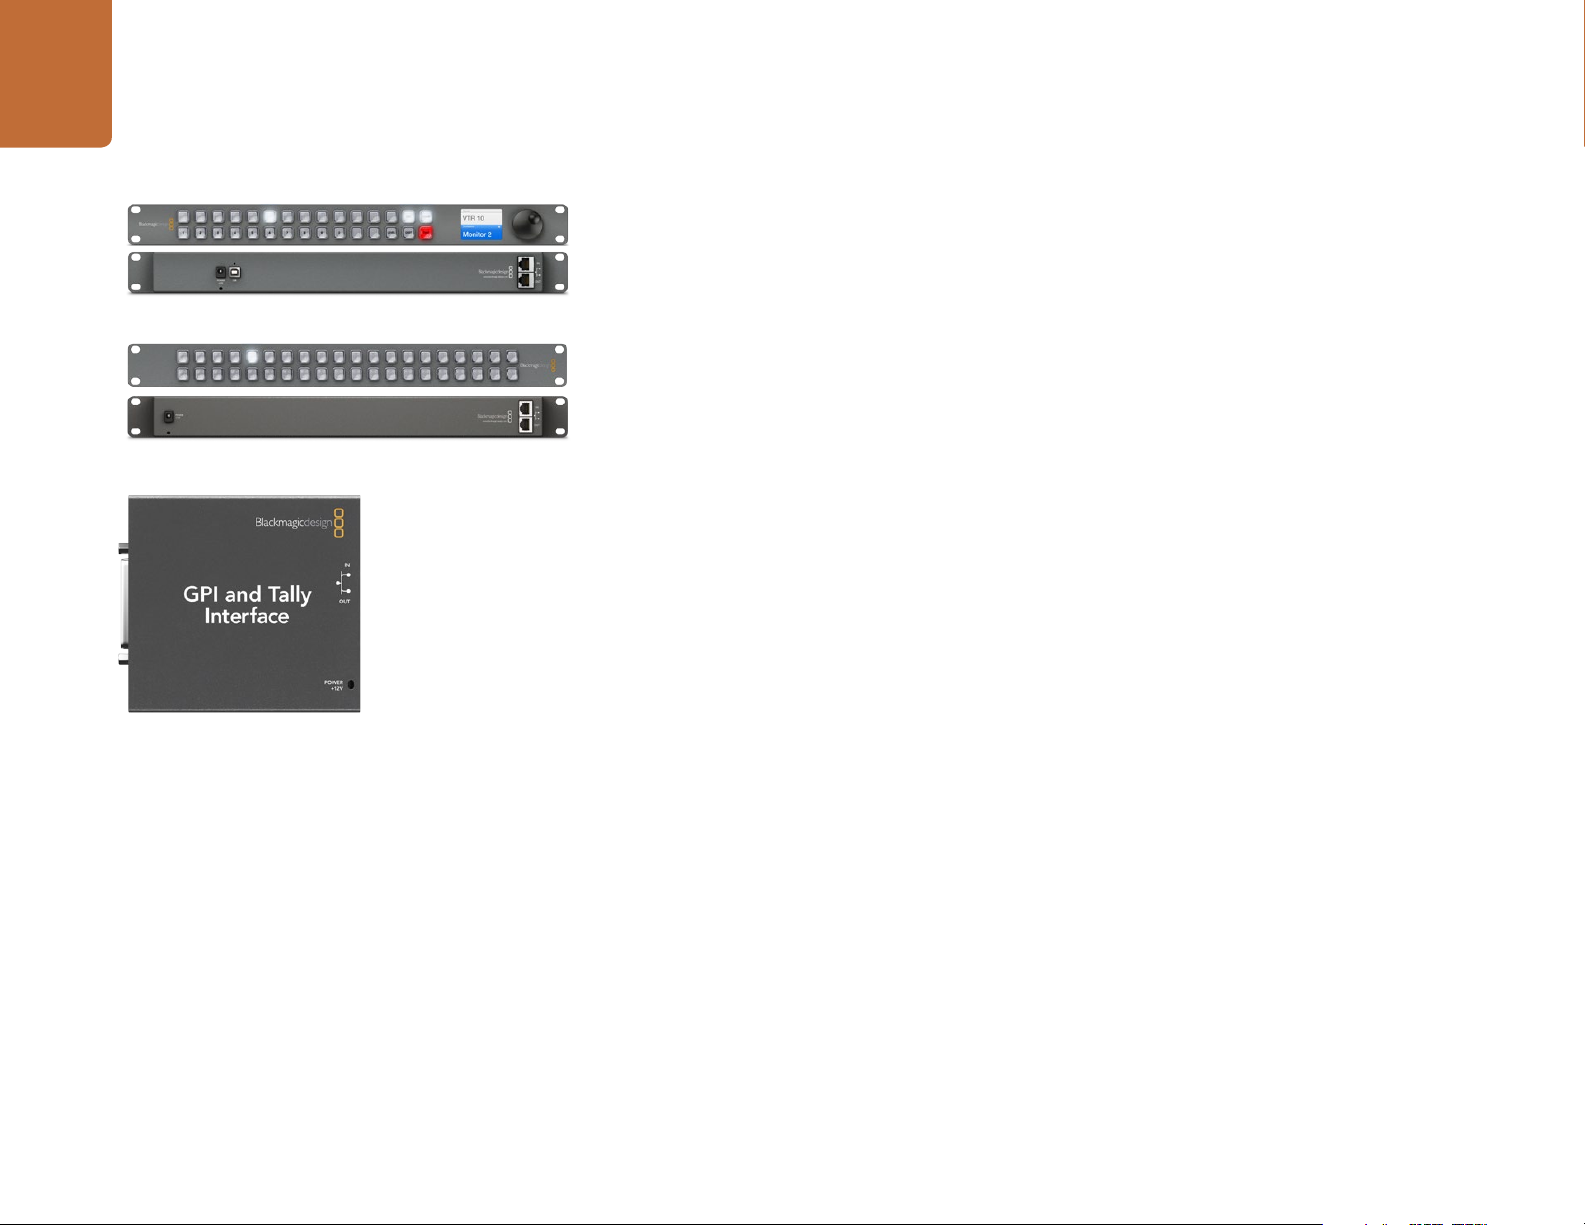
GPI and Tally Interface
GPI and Tally Interface is a low cost alternative for multi-camera productions where a Camera Control Unit
(CCU) operator needs to switch video from one of several cameras being controlled to a single monitor.
It features 8 configurable GPIs and 8 configurable GPOs. The GPIs send commands to your Videohub by
ethernet to switch the selected camera to the operator's monitor under certain crosspoint conditions.
The GPOs send a tally signal to your cameras or other devices under certain crosspoint conditions.
Page 5
5
13 16 19 SRC MENU
14 17 20 DEST VIDEO
15 18
1 4 7 10
2 5 8 11
3 6 9 12 CLEAR TAKE
SD/HD/3G/6G-SDI OUT
17 19 1 3
18 20 2 4
5 7 9 11 13 15 17 19
6 8 10 12 14 16 18 20
Getting Started
Side view of Videohub Smart Control showing the mini-B type
USB port
Connecting USB to Setup the Control Panel
A USB 2.0 connection to a computer is used to configure the network settings of the Videohub Controller.
Be aware that the USB port of the Videohub Smart Control is inaccessible once it is installed in a rack.
If you are likely to reconfigure Videohub Smart Control network settings periodically, then it may be
convenient to permanently connect a USB cable to the unit before installing Videohub Smart Control
in a rack.
Plugging into an Ethernet Network
In most facilities, Videohub is usually shared via an Ethernet network switch so it can be controlled by
computers on the network as well as by Videohub control panels.
Videohub Master Control and Videohub Smart Control
Videohub Master Control and Videohub Smart Control connect to any Videohub via standard Ethernet
networking and can be powered over Ethernet or with an external power supply.
If your Ethernet switch does not provide power over Ethernet, use the included universal power supply.
To connect a Videohub control panel to the local area IP based network:
1 3 5 7 9 11 13 15
RS-422
REF IN
2 4 6 8 10 12 14 16
CNTRL
USB 2.0ETHERNET
SD/HD/3G/6G-SDI IN
Videohub Smart Control connected to a Smart Videohub
20x20 via an Ethernet Network Switch.
Step 1. Connect the included power supply to your Videohub control panel. You can skip this step if
your network switch provides power over Ethernet. No problem will be caused by connecting
the power supply and power over Ethernet at the same time.
Step 2. Use the network In port on your Videohub control panel to connect to your network switch
with a standard RJ45 Ethernet cable.
Step 3. You might also wish to connect another network device to the network Out port on your
Videohub control panel, such as a Videohub router, another Videohub control panel or other
network devices such as a computer or VoIP phone. The Out port does not provide power
over Ethernet and any network device connec ted to this port will require its own power supply.
Page 6
6
Getting Started
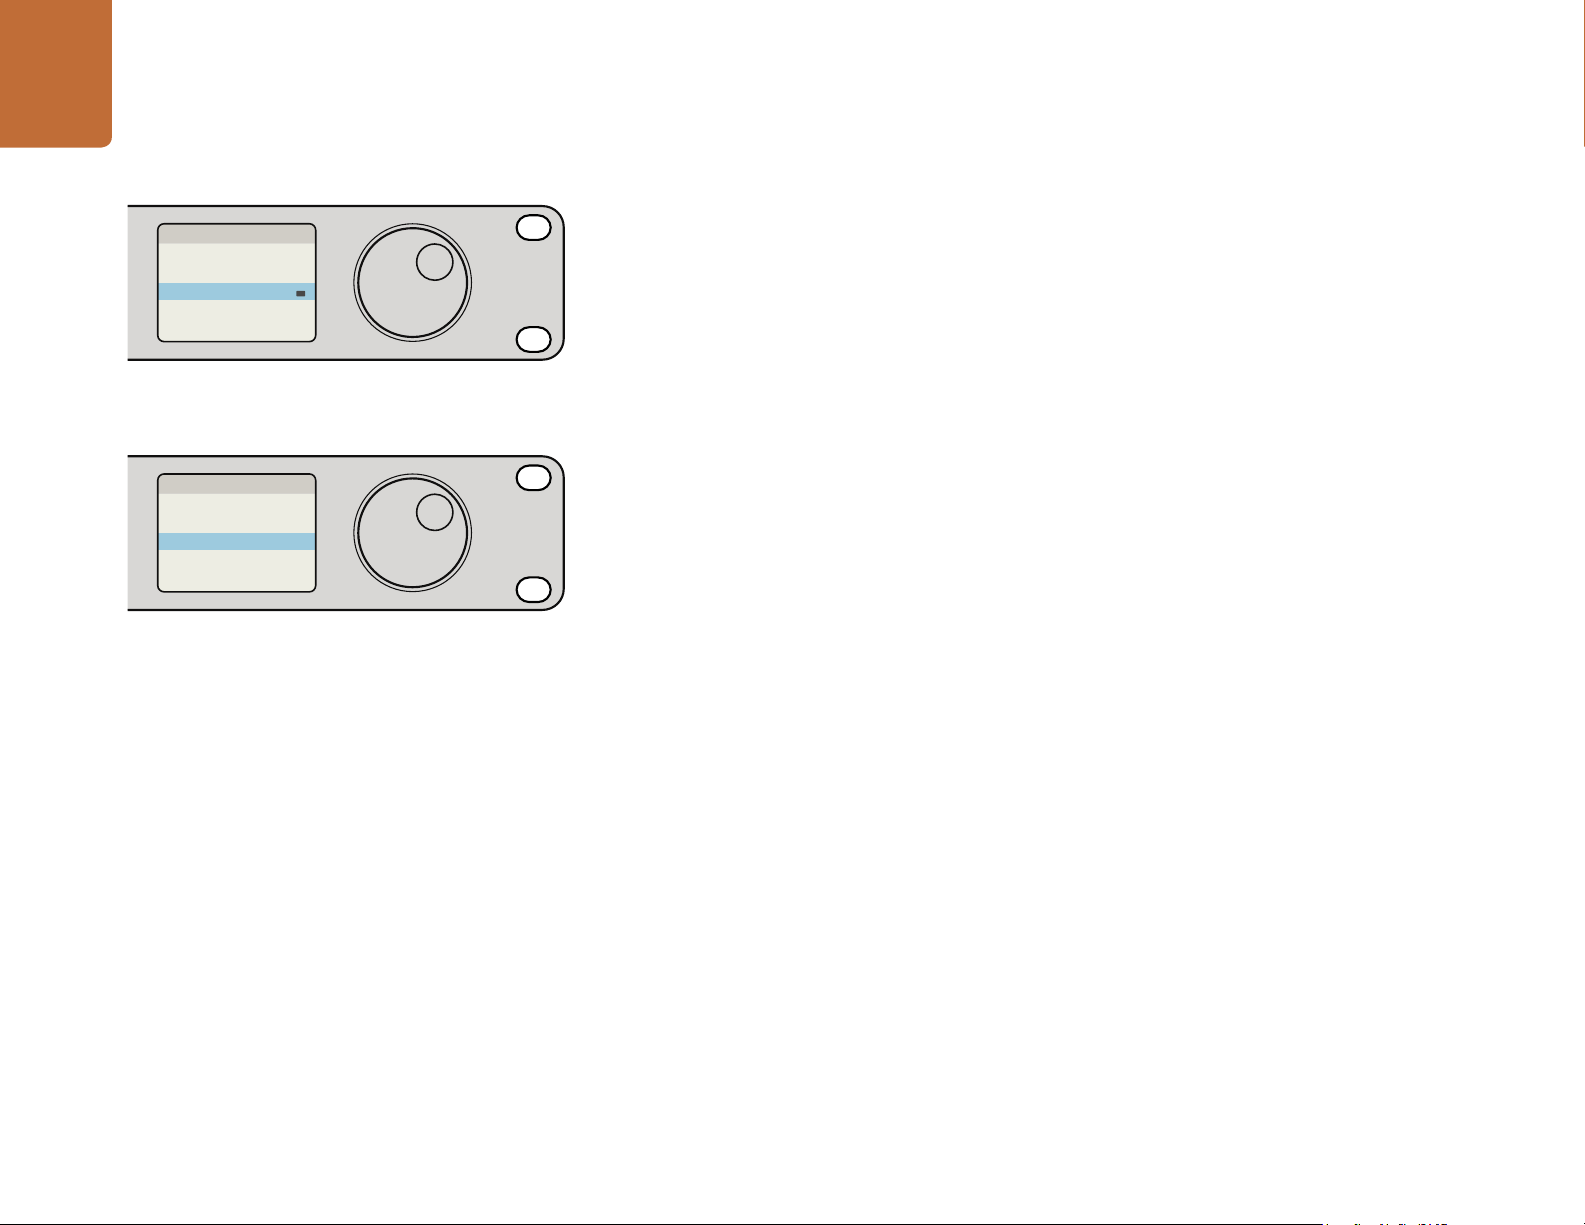
Control Panel Button Diagnostics
When power is first connected to a Videohub control panel, all the buttons will display their test lights
in the following sequence: red, green, blue and white.
Videohub control panel is attempting to acquire an IP address.
IP address has been acquired and control panel is attempting
to connect to the Videohub Ser ver.
Videohub Ser ver is running an incompatible software or
firmware version.
Control panel has successfully connected to the Videohub
Server.
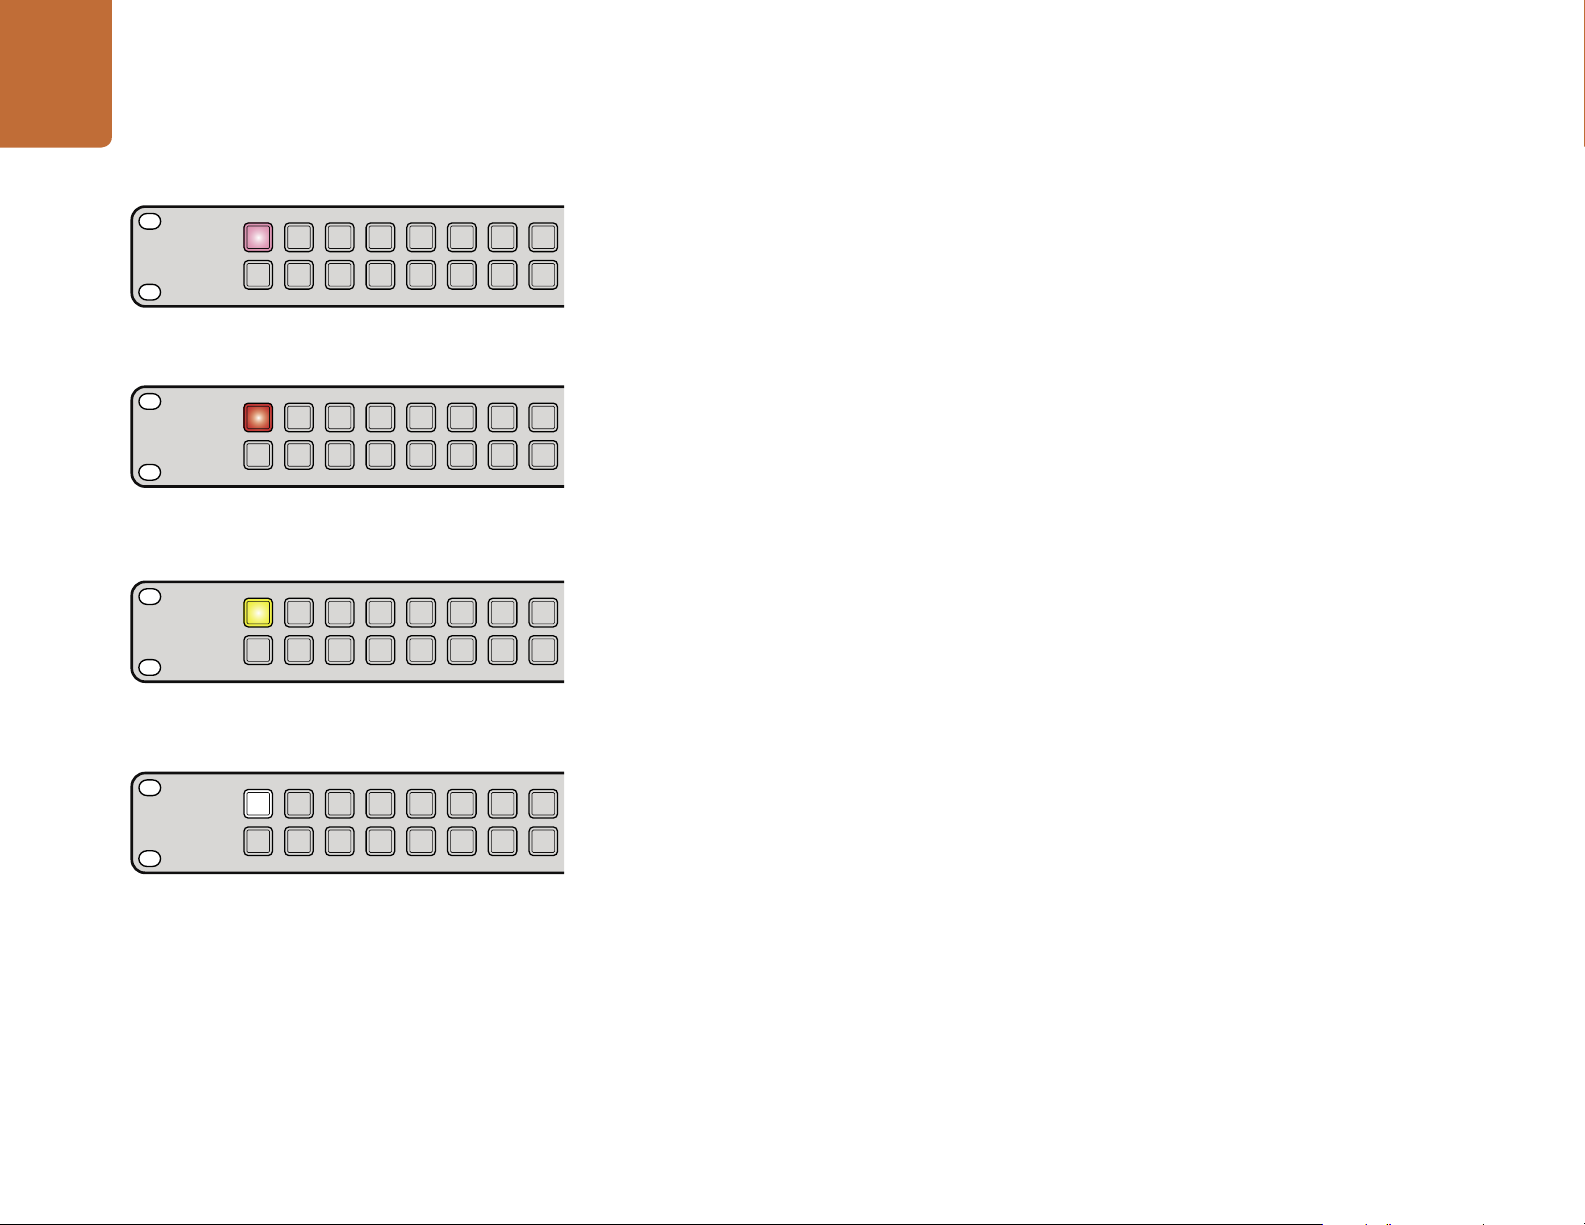
The top left button of a Videohub control panel indicates its network status, using the following
diagnostic display:
Pink flashing light - unit is attempting to acquire an IP address. The button should quickly become
red if the unit is set to use a static IP address, or if the unit successfully acquires an IP address from the
DHCP server.
Red flashing light - unit has acquired an IP address and is attempting to connect to the Videohub Server.
Make sure the Videohub Server computer is powered on and connected via Ethernet.
Yellow flashing light - unit has connected to a Videohub Server computer but the Videohub Server is
running an incompatible software or firmware version. Update Videohub with the latest version of the
Videohub software and firmware and then power cycle the Videohub control panel.
No flashing light - unit has successfully connected to the Videohub Server and is ready to control the
Videohub if solid white, or solid white and gold, lights can be seen.
If the top left button took several minutes to turn red, the unit has failed to acquire an IP address and
has eventually provided itself with a self-assigned AutoIP address in the 169.254.xxx.xxx format. Unless
you wish to use an AutoIP address, disconnect and firmly reconnect the network cables to ensure they
are properly connected, check for faulty network cables and make sure the DHCP server has spare IP
addresses available. Unplug and reconnect all power sources from the Videohub control panel so it will
request a new IP address from the DHCP server. The button should quickly become red.
The unit will only perform these diagnostics when it is not selected in the Videohub Hardware Panel
Setup software.
Page 7
7
Getting Started
Installing the Videohub Software
Videohub software runs on the latest Mountain Lion and Mavericks versions of Mac OS X. On the Windows
platform, the software runs on both 32 and 64-bit versions of Windows 7 and Windows 8.
Mac OS X installation
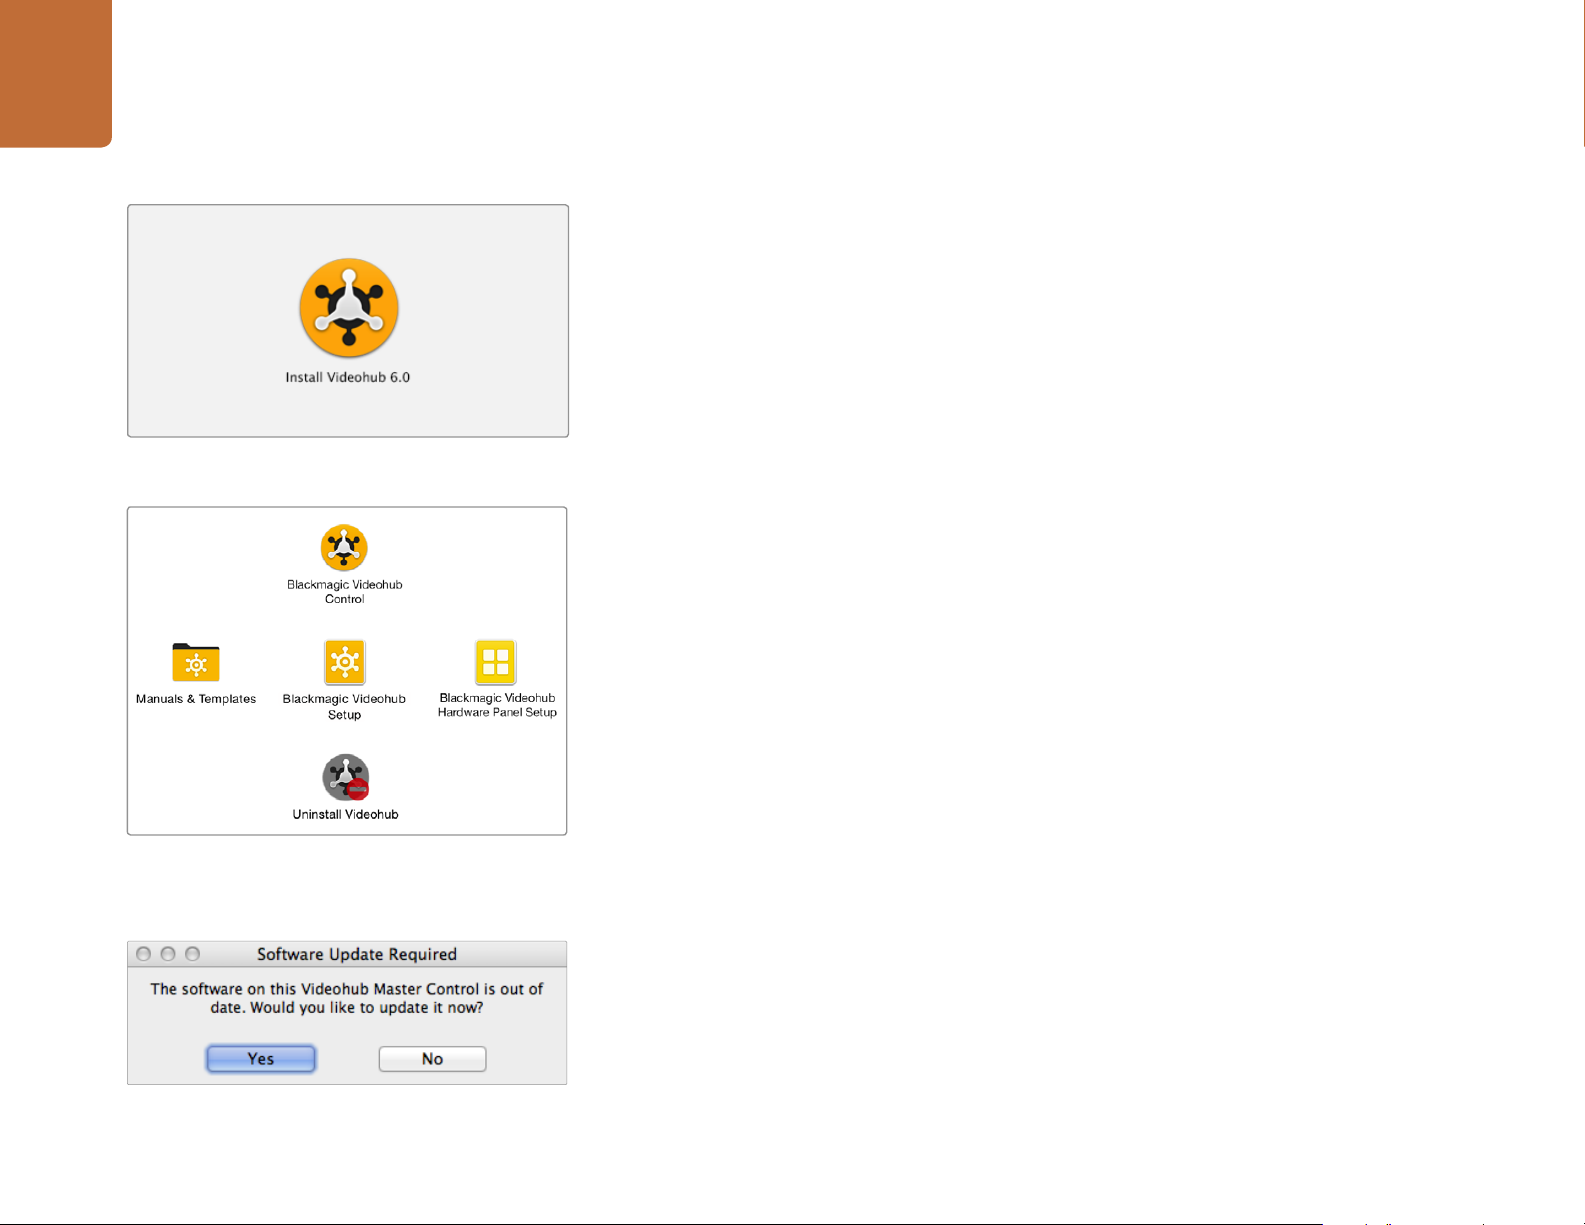
Step 1: Double click the installer file from the supplied media or from your downloads folder if you
downloaded the software from the Blackmagic Design website.
Step 2: Follow the install prompts and Mac OS X will automatically install the software.
Double click the installer and follow the prompts.
The Blackmagic Videohub folder contains the three
Videohub applications.
A folder called "Blackmagic Videohub" will be created within your Applications folder. The following
three applications are contained within the folder: Videohub Control, Videohub Setup and Videohub
Hardware Panel Setup.
Windows installation
Step 1. Double click the installer file from the supplied media or from your downloads folder if you
downloaded the software from the Blackmagic Design website.
Step 2. Follow the install prompts and accept the terms in the License Agreement and Windows will
automatically install the software.
Click the Windows Start button and then All Programs>Blackmagic Design>Videohub. The following
three applications are contained within the folder: Videohub Control, Videohub Setup and Videohub
Hardware Panel Setup.
Updating the Software in your Videohub Controller
Follow these steps to check if your Videohub control panel's internal software is up to date:
Step 1. Connect your Videohub control panel to the computer via USB 2.0.
Step 2. Launch Blackmagic Videohub Hardware Panel Setup.
Step 3. If a software update is required, the following message will appear: "Software Update
Required. The software on this Videohub Control is out of date. Would you like to update it
now?" Click Yes. The update will take about 2 minutes to complete.
Step 4. The message "Software Update Complete" should appear at completion of the update.
Click OK to dismiss the message. Settings can be changed now if desired and this is a good
opportunity to give each Videohub control panel a unique name.
This message will appear if a internal software
update is required.
Step 5. You can now unplug the USB cable from your Videohub control panel.
Page 8
8
Getting Started
Setting up your Videohub Controller
Configuring Videohub Hardware Panel Setup
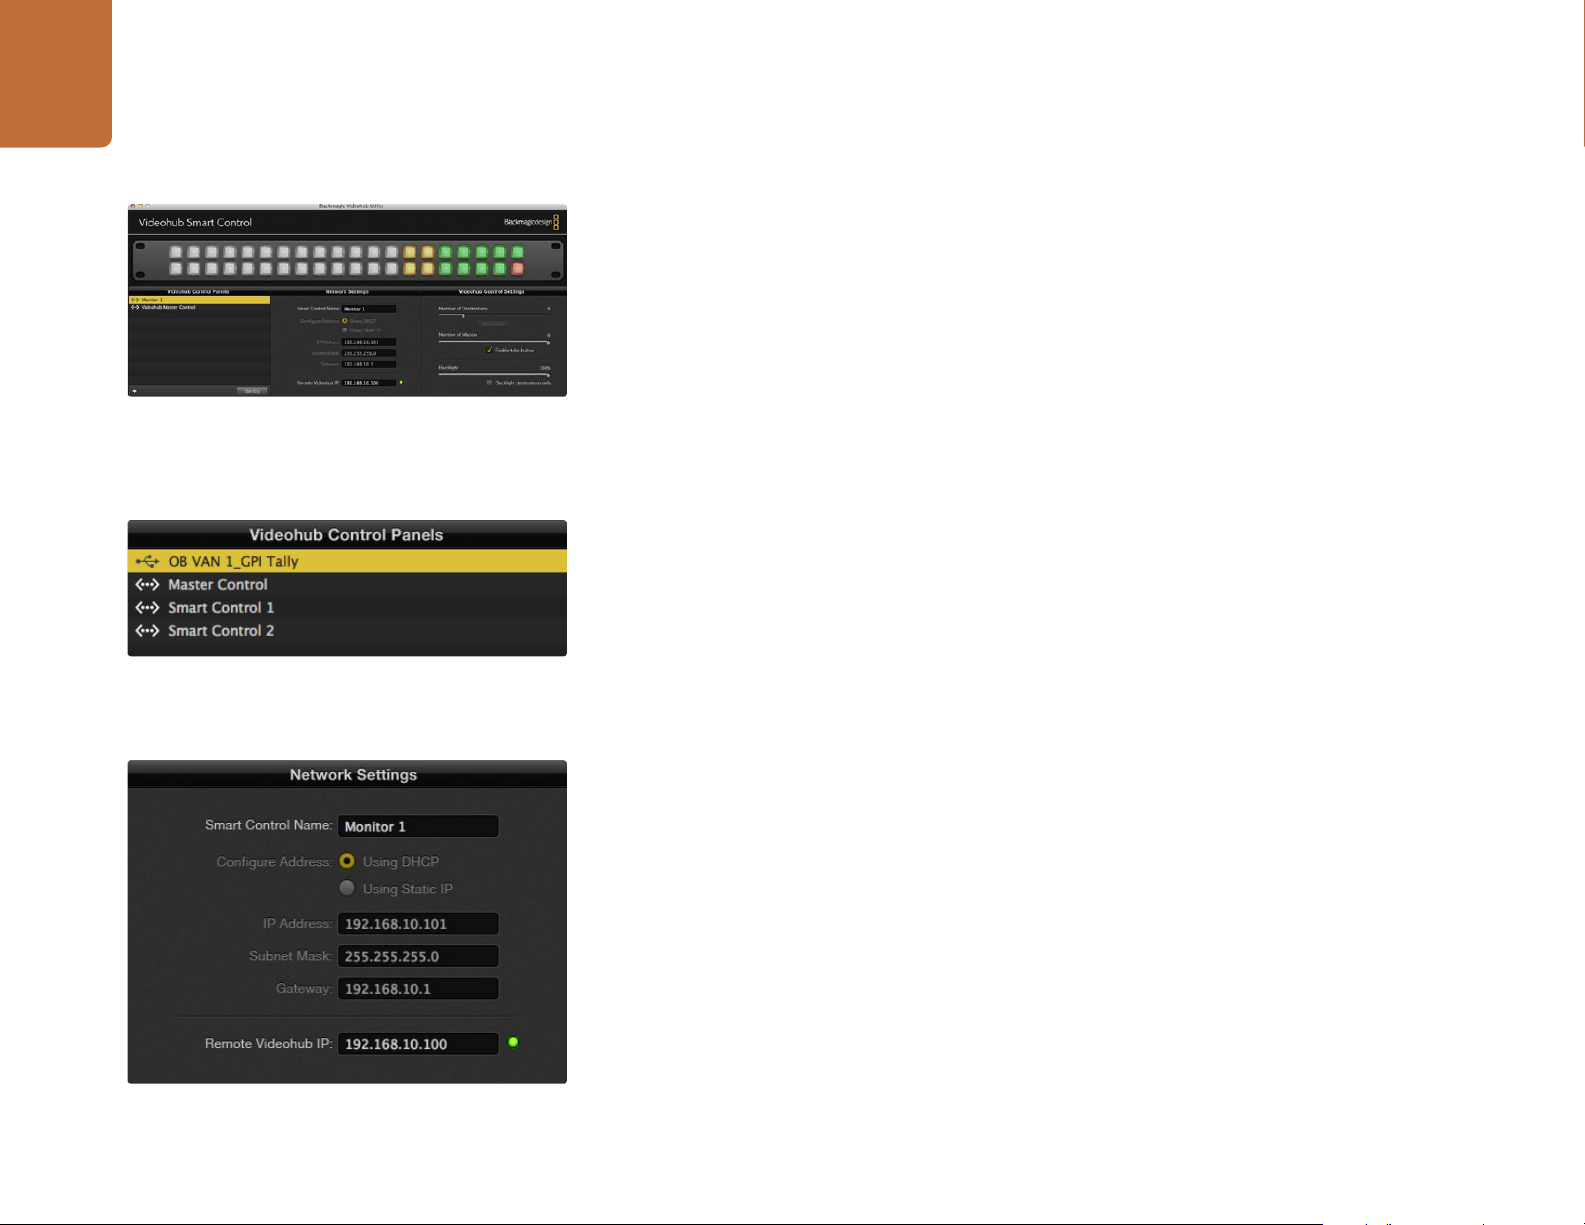
When you launch Blackmagic Videohub Hardware Panel Setup, any Videohub control panels discovered
on the network will be listed in the Videohub Control Panels pane next to an Ethernet network icon. If
several Videohub control panels are listed, but you don't know which one is which, select one of them and
then press Identify. This will cause all the buttons of the selected Videohub control panel to flash white.
The Blackmagic Videohub Hardware Panel Setup
automatically searches your network for any
Videohub control panels.
Any Ethernet or USB connected control units will be listed in
the Videohub Control Panels pane with a corresponding icon.
Select the desired Videohub control panel and you will be able to change its name and control settings.
Network settings will remain grayed out and can only be changed via USB.
If the desired Videohub control panel is not found on the network, the unit might not have received an
IP address via DHCP. To manually configure the unit with appropriate network settings:
Step 1. Connect the Videohub control panel to your computer via a USB 2.0 cable.
Step 2. Launch Blackmagic Videohub Hardware Panel Setup. If the utility prompts you to update the
software, follow the prompts to complete the update.
Step 3. The USB-connected panel will be automatically selected in the Videohub Control Panels pane
and will display a USB icon next to its name. You can change all name, network and control
settings for the USB-connected unit. When you are finished, the USB cable can be removed.
If your Videohub control panel is selected in the control utility, the pushbuttons on the unit will light up
to match what is displayed in the software interface.
Network Settings
Each Videohub control panel requires an IP address to communicate with Videohub via your IP network.
When configuring a Videohub control panel via USB, you can choose DHCP or Static IP. DHCP automatically
obtains all the network settings for your Videohub control panel and is the easier choice.
If you decide to use a static IP address, please ask your system administrator for a spare IP address to
avoid creating a conflict on your network. You will then need to complete the IP address, subnet mask and
gateway details for your Videohub control panel. You must use a static IP address if you are connecting
directly to an Ethernet-equipped Videohub, such as Compact Videohub, without using a network switch.
Blackmagic Videohub Hardware Panel Setup network
settings.
You will also need to complete the IP details for the remote Videohub that you wish to control with your
Videohub control panel. The remote Videohub is the Videohub Server. This could refer to a Videohub Server
computer or an integrated Videohub Server onboard a Videohub model such as Universal Videohub 72.
Page 9
9
Getting Started
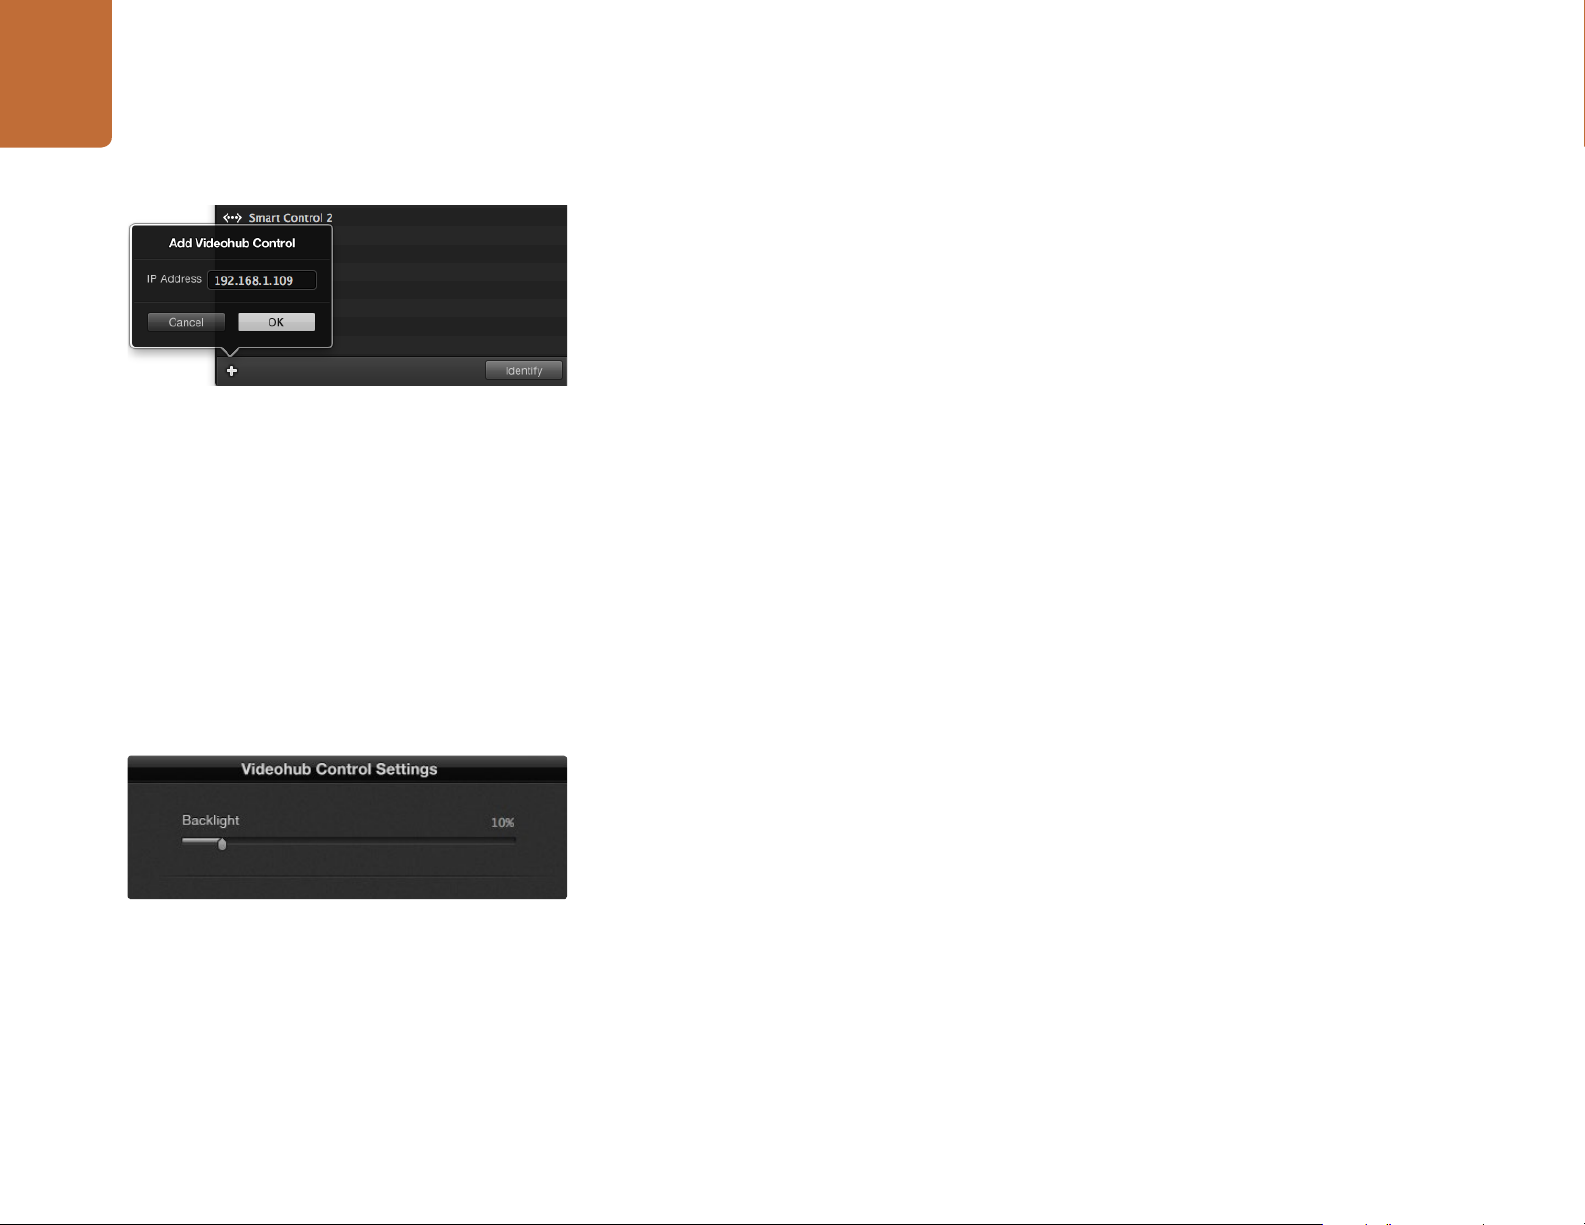
You can manually add a Videohub control panel, by IP
address, to the list of Videohub Control Panels.
Add Videohub Control
If you already know the IP address of a Videohub control panel but it hasn't automatically appeared in
the Videohub Control Panels pane, you can add the unit manually.
Step 1. Press the + (add device) button at the bottom of the Videohub Control Panels pane.
Step 2. Type in the IP address of the Videohub Control Panel and press OK.
Step 3. The Videohub Control Panel will appear in the list with any other devices that are connected
to the Videohub.
If the Blackmagic Videohub Hardware Panel Setup does not find a Videohub control panel at the
specified address, you can use the Utility to manually add a Videohub control panel when connected
via Ethernet or USB.
Load/Save Settings
You can apply settings from an already configured Videohub control panel to other units. Once you have
set up your Videohub Control Panel's settings, choose File>Save Settings. This is useful if you want to set
up several units the same way, or keep a back up of your settings. After loading pre-configured settings
on another control panel, you only need to update network settings, including the control panel name.
You can adjust the brightness of all backlit buttons in
Videohub Master Control.
Configuring Videohub Master Control
Videohub Hardware Panel Setup software lets you customize the hardware features of each Videohub
control panel.
Backlight
Adjust the backlight slider as desired to vary the brightness of all backlit buttons.
Creating Button Labels
15 of the buttons can be labeled within the control utility to provide fast selection of common equipment
types such as cameras, VTRs and monitors. If you haven't done so already, you should standardize the
port labels on your Videohub router before labeling any buttons on your Videohub control unit.
Please refer to the Videohub Manual for detailed information on customizing your labels.
Page 10

10
Getting Started
You are now ready to label the Videohub Master Control buttons.
Step 1. Launch the Videohub Hardware Panel Setup and select your Videohub Master Control from
the Panels pane.
Step 2. Click one of the 15 buttons in the picture of the panel. Enter a text label so it partially matches
the labels of SDI and deck control ports that you previously entered for your router.
Step 3. Click OK and continue labeling the other buttons as desired.
Step 4. You can immediately test the buttons as you program them and verify the SDI routes are valid.
Click on the desired button to edit its label.
Blackmagic Videohub Smart Control configured with
multiple destinations.
You can refer to page 13 for instructions on how to label the physical pushbuttons.
Configuring Videohub Smart Control
Videohub Hardware Panel Setup lets you customize the hardware features of each Videohub control panel.
Number of Destinations
Videohub Smart Control can be configured as a Cut-Bus controller or as an XY controller. When configured
as a Cut-Bus controller, every button represents an SDI source and there is only one destination. Use this
configuration when dedicating a Videohub Smart Control to a single destination device such as a monitor.
When configured as an XY controller, Videohub Smart Control can work with up to 20 destinations. The
source buttons will illuminate white and the destination buttons will illuminate gold. Use this configuration
if you don’t intend to dedicate a Videohub Smart Control unit to each destination device.
Cut-Bus Configuration
Step 1. Drag the Number of Destinations slider to 1.
Step 2. Click on the Destination button. In the Router SDI Out A field, enter the number of the
Videohub output port to which the destination device is connected. If your destination device
is receiving dual link HD-SDI or dual stream 3D, you will also need to enter an output port
number into the Router SDI Out B field. There is a Router Remote field if your Videohub is
also routing RS-422 deck control to the destination device.
Step 3. Click OK to confirm. All the buttons will become white, indicating that they are all sources.
Step 4. Click on each white button in the software interface to configure the source buttons.
Enter the number of the Videohub port to which the SDI
device is connected.
Step 5. In the Router SDI In A field, enter the number of the Videohub input port to which the source
device is connected. If your destination device is receiving dual link HD-SDI or dual stream 3D,
you will also need to enter an input port number into the Router SDI In B field. There is a Router
Remote field if your Videohub is also routing RS-422 deck control from the source device.
Step 6. Click OK to confirm.
Page 11

11
Getting Started
Click on the desired Destination button to configure it.
XY Controller Configuration
Step 1. Drag the Number of Destinations slider to the desired number.
Step 2. You can now configure the destination buttons by clicking on each gold button in the software
interface. In the Router SDI Out A field, enter the number of the Videohub output port to
which the destination device is connected. If your destination device is receiving dual link
HD-SDI or dual stream 3D, you will also need to enter an output port number in to the Router
SDI Out B field. There is also a Router Remote field if your Videohub is also routing RS-422
deck control to the destination device.
Step 3. Click OK to confirm. If you increase the number of destination buttons, there will be a matching
decrease in the number of available source buttons.
Step 4. Click on each white button in the software interface to configure the source buttons.
Step 5. In the Router SDI In A field, enter the number of the Videohub input port to which the source
device is connected. If your destination device is receiving dual link HD-SDI or dual stream 3D,
you will also need to enter an input port number into the Router SDI In B field. There is also a
Router Remote field if your Videohub is also routing RS-422 deck control from the source device.
Step 6. Click OK to confirm.
Number of Macros
Macros allow you to make up to 16 crosspoint routing changes simultaneously with a single button press.
Up to 16 crosspoint routes can be changed by a single macro.
The Take button illuminates red in the lower right corner.
Step 1. Drag the Number of Macros slider to enable up to 10 macro buttons. As you increase the number
of macro buttons, there will be a matching decrease in the number of available source buttons.
Step 2. Click a green macro button to reveal the corresponding Macro window and enter up to 16
pairs of sources and destinations.
Step 3. When finished, click OK to save the routes and close the window.
Take Button
When the Enable Take Button checkbox is active, the lower right button on the control interface turns red.
Use this if you want a confirmation option to come up before your route change takes place. Press the red
take button to confirm your route change. The take button can be used with both Cut-Bus and XY controller
configurations and can also be used with macros.
Backlight
Adjust the backlight slider to vary the brightness of the backlit buttons as desired. Enable Backlight
Destinations Only if you wish to disable the backlighting of the white source buttons.
Page 12

12
Getting Started
Setting up the GPI and Tally Interface
The GPI and Tally Interface is configured using Videohub Hardware Panel Setup software. Before you
can use the GPI and Tally Interface, you may need to install the latest version of the software.
Step 1. Connect the power adapter to the GPI and Tally Interface.
You will need to reconfigure your GPI and Tally
Interface to work with Videohub.
GPI and Tally Interface connected via USB.
Step 2. Connect the GPI and Tally Interface to your computer with a USB Type A to B cable.
Step 3. Open the software and it will detect whether your GPI and Tally Interface has been configured
for a Videohub before. If it has the software will open without any need for changes. Otherwise
a message will tell you your GPI and Tally Interface has been configured for use with an
ATEM Switcher and will need to be reconfigured for use with Videohub. Click Yes. After a
few moments the GPI and Tally Interface will be reconfigured as a Videohub client.
Configuring the GPI and Tally Interface
If your Videohub does not have an ethernet port, or if it is only accessible over a network:
Step 1. Connect a USB type A to B cable from your GPI and Tally Interface to your computer.
Step 2. Connect an ethernet cable from the ethernet IN port on your GPI and Tally Interface to your
ethernet switcher.
Step 3. Open the Videohub Hardware Panel Setup.
Step 4. You should see your GPI and Tally Interface with a USB icon next to it in the Videohub Control
Panels pane. Give your GPI and Tally Interface a unique name so it can be easily recognized.
To do so, click inside the GPI and Tally Name field and type a name.
Step 5. Check the option to configure your IP address either Using DHCP or a Static IP. Depending
on your setup, you may choose either so it's probably a good idea to check with your network
administrator to see which is the better option.
Enter a GPI and Tally Name and the IP address of the
Videohub you want to connect to.
Step 6. In the Remote Videohub IP field, enter the IP address of the Videohub you want to connect to.
A red light next to the field will turn green and the LED on the GPI and Tally interface will
illuminate when a connection has been established.
If you do not know the IP address of your Videohub:
Step 1. Connect the Videohub to your computer via USB.
Step 2. Launch the Videohub software and click on Videohub Server Preferences.
Step 3. Note down the IP address in the Remote Videohub IP address field.
Page 13

13
Getting Started
For Videohub Smart Control and Smart Videohub, remove the
8 screws, lift off the face plate and then the button caps.
Labeling Pushbuttons
Videohub Master Control and Videohub Smart Control have removable face plates, which provide access
to the pushbuttons for labeling.
Included with the software installer is a Videohub Control Labels folder containing both PDF and Adobe
Illustrator template files. You can print and use either of these files for labeling the buttons. The Illustrator
file contains text boxes so you can add your text labels before printing them out. If you don’t have Adobe
Illustrator, you can just fill out and print the PDF file labels. Then cut out the square labels so they are
ready to be inserted into the buttons.
To remove the face plate:
Step 1. Power off the unit, disconnect all cables and lay it flat with the buttons facing upwards.
Step 2. Using a No. 2 Phillips head screwdriver, remove the 8 screws found on the top and bottom
sides of the faceplate.
Step 3. Gently lift the face plate off the unit. If you have a Videohub Master Control, take care not to
pull on the data cable that connects the scroll wheel to the rest of the unit.
Step 4. The button caps can be easily lifted off with your fingers. Remove the clear cap from a button
that you wish to label, while taking care to avoid lifting the silicon button membrane.
For Videohub Master Control, remove the 8 screws, lift off the
face plate and carefully allow the face plate to lie down next to
the rest of the unit. Then remove the button caps.
Lightly press the four corners of the square label into the
rounded corners of the clear cap.
Step 5. Loosely place the printed label into the upturned clear cap.
Step 6. Use a pointy device, such as the tip of a screwdriver, to lightly press the four corners of the
square paper label into the four rounded corners of the clear cap.
St e p 7. Reinstate the clear cap containing the printed label. As the clear cap is pressed down onto
its silicon button, the paper label will be pushed forward, and neatly held flat against the
window of the clear cap. Repeat for as many buttons as you wish to label.
Step 8. Lower the face plate back into position, making sure the Blackmagic Design logo is the correct
way up. If you have a Videohub Master Control, make sure the data cable tucks neatly into place.
St e p 9. Reinstate the eight screws.
Congratulations! Your Videohub control unit is now ready to use!
Page 14

Using Videohub Master Control
14
Using Videohub Master Control
VTR 10
Destination
Monitor 2
SDI 422Source
0
About Routing Levels
If your Videohub does not feature RS-422 remote deck control, Videohub Master Control will always
show "SDI" on its LCD and you don't need to read anything more about routing levels.
If your Videohub does include RS-422 remote deck control ports, you can use the LEVEL button on
Videohub Master Control to reduce the list of sources and destinations by routing level.
Start by pressing the DEST button. Now press the LEVEL button to cycle through the routing levels:
SDI 422 - Choose this routing level to reduce the list of video equipment to devices with matching labels
for their remote and SDI ports. This level is commonly used with SDI capture cards and VTR decks but
cannot be used with cameras and monitors as they do not have RS-422 remote ports.
SDI - Lists all SDI sources and destinations. Choose this routing level if you want to see all SDI video
equipment, i.e., cameras, monitors, capture cards and VTR decks, regardless of RS-422 connections.
422 - Choose this routing level if you want to reduce the list of video equipment to all devices with
RS-422 deck control. This will list sources and destinations by the names of their RS-422 remote ports,
regardless of whether there are any associated SDI ports and regardless of whether any associated SDI
ports have matching labels or not. This level is commonly used with SDI capture cards and VTR decks
but also lists remote control panels and servers used to control decks.
How to Select Sources and Destinations
Videohub Master Control provides several ways to select and switch your destinations and sources
quickly, depending upon whether you have customized the port labels on your Videohub router or if
you just want to enter port numbers directly.
SRC CLEAR
LEVEL DEST
1 2 3 4 5 6 7 8 9 0
Front panel showing a new source has been selected.
SDI 422Source
TAKE
EDIT 1
Destination
VTR 1
Choose the SDI 422 routing level if you only want to see SDI
video equipment with RS-422 deck control. In this example,
the capture card (Edit 1) and the deck ( VTR 1) are listed
because they both have SDI and RS-422 ports.
SDISource
EDIT 1
Destination
VTR 1
Choose the SDI routing level if you want to see all SDI video
equipment. In this example, the capture card (Edit 1) and the
deck ( VTR 1) are listed because they both have SDI ports.
422Source
serial 1
Destination
VTR 1
Choose the 422 routing level if you want to see all equipment
with RS-422 remote deck control, including equipment
with mismatched labels and also remote controllers. In this
example, the capture card (Edit 1) has a mismatched label for
its remote port (serial 1) and is only listed when the routing
level is set to 422.
Videohub Master Control works in the same conceptual way as any other router control. These are the
basic steps you will take, regardless of your method for selecting devices.
Step 1. Press the DEST button to display a destination on the LCD. Use the pushbuttons and/or the
scroll wheel to find the desired destination.
Step 2. Press SRC and use the buttons and/or the scroll wheel to change the source connected to
the destination.
Step 3. Press TAKE to confirm the route change.
Page 15

15
Using Videohub Master Control
SDISource
Input 52
Destination
Output 88
If you've chosen to keep the default labels for all Videohub
SDI and remote ports, you can simply type the port numbers
to make a routing change. In this example, press DEST and
then type the port number 88. Then press SRC and type the
port number 52. Press TAKE to confirm the route change.
How to select devices by typing the Videohub port numbers
If you've chosen to keep the default labels for all Videohub SDI and remote ports, you can simply type
the port numbers to make a routing change. This method is fast but requires that you remember port
numbers or have devised a system for knowing what equipment is connected to each Videohub port.
Step 1. Press the DEST button. The destination field will be highlighted blue on the LCD.
Step 2. If your Videohub router has RS-422 remote control, press the LEVEL button until you have set
the appropriate routing level for your equipment. Otherwise you can skip this step.
Step 3. Type in the destination port number using the numeric pushbuttons. Each button will flash
gold once as you press it. The destination will be displayed on the LCD. If you make a mistake,
press the white CLEAR button and retype the port number.
Step 4. Press the SRC button. The source field will be highlighted blue on the LCD.
Step 5. Type in the source port number using the numeric pushbuttons. Each button will flash white
once as you press it. The source will be displayed on the LCD. If you make a mistake, press the
white CLEAR button and retype the port number.
Step 6. The TAKE button will flash red, awaiting your confirmation of the route change. Press TAKE and
the route will change immediately. Otherwise, press CLEAR and no route change will take place.
Videohub Master Control returns to its idle state with the latest route displayed on the LCD.
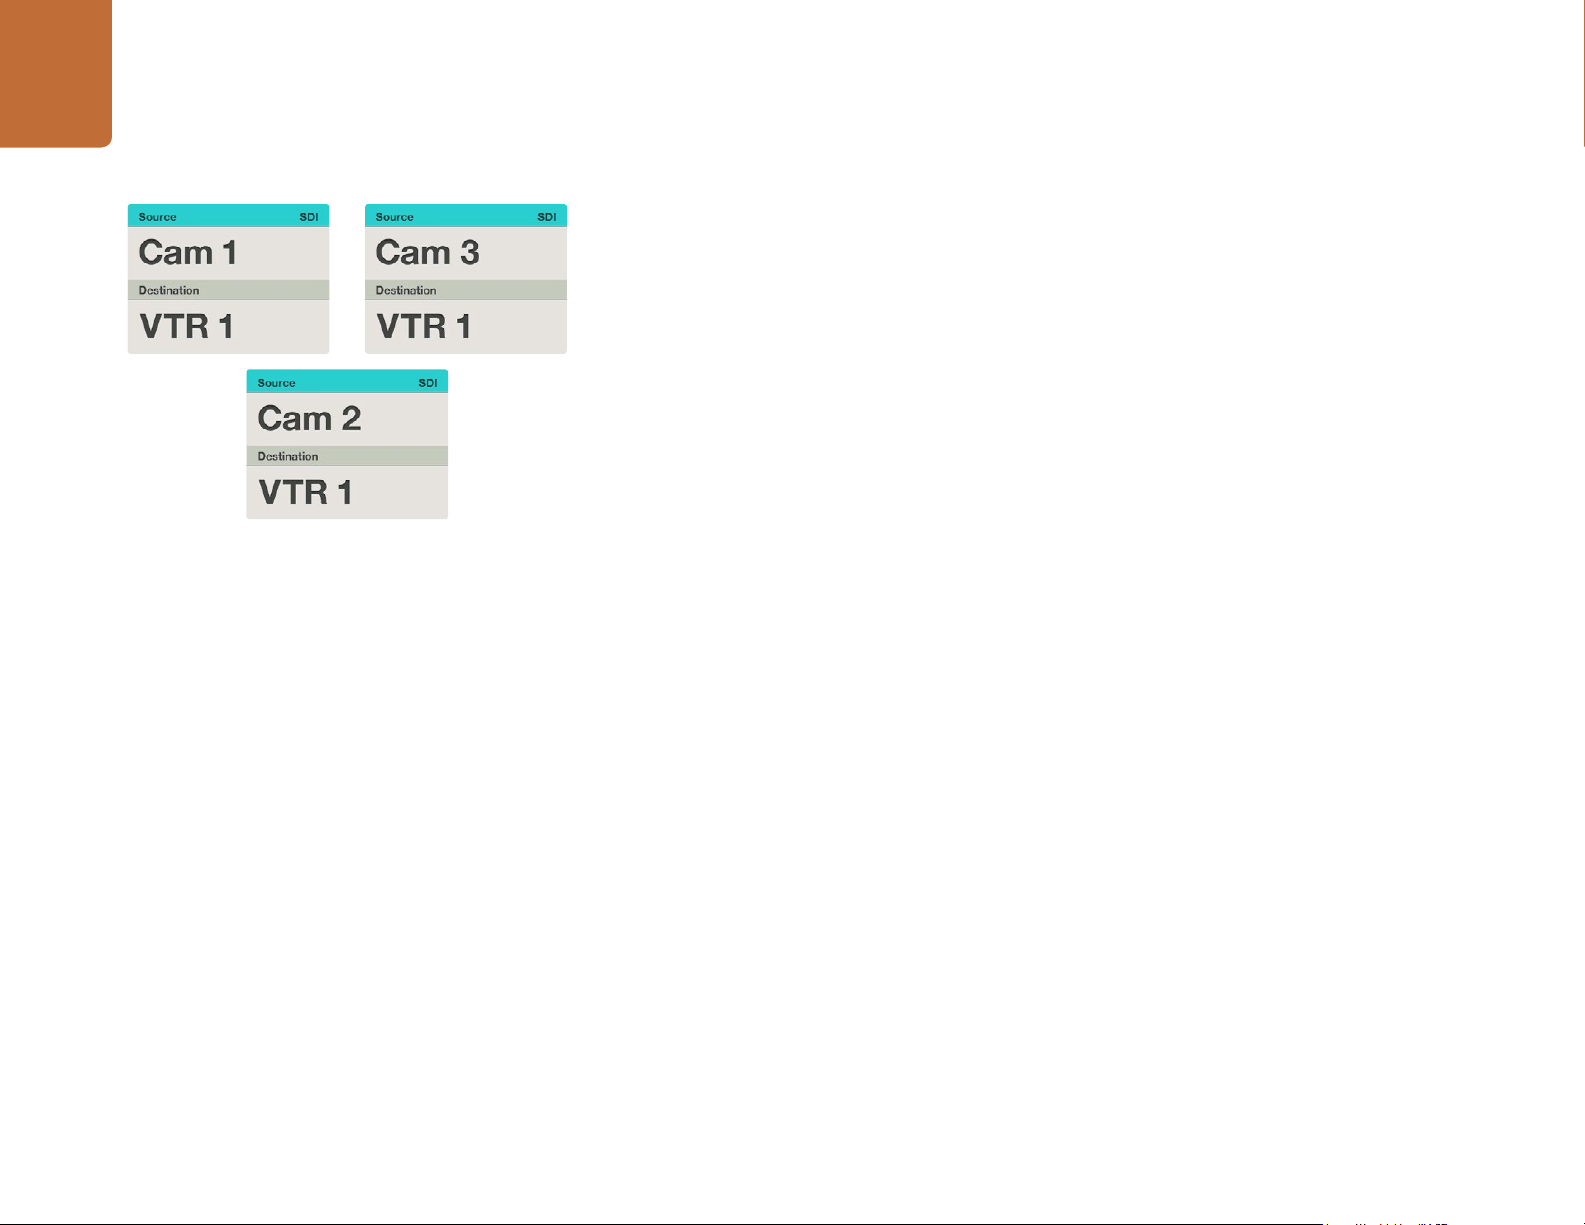
How to select devices with the scroll wheel
Regardless of whether or not you've customized the Videohub port labels, you can always use the scroll
wheel to browse through a list of sources and destinations. This is the slowest method but is useful if
you want to see the list of all available equipment and ports.
In this example, the scroll wheel is being used to list all
sources that can be routed to the destination VTR 1, based
upon the SDI routing level. When the scroll wheel is rotated,
the names of source equipment are progressively displayed
to make it ver y easy to find the desired video source.
Step 1. Press the DEST button. The destination field will be highlighted blue on the LCD.
Step 2. If your Videohub router has RS-422 remote control, press the LEVEL button until you have set
the appropriate routing level for your equipment. Otherwise you can skip this step.
Step 3. Scroll the wheel forwards or backwards until the desired destination is found. The destination
will be displayed on the LCD.
Step 4. Press the SRC button so it lights white. The source field will be highlighted blue on the LCD.
Step 5. Scroll the wheel until the desired source is found. The source will be displayed on the LCD.
Step 6. The TAKE button will flash red, awaiting your confirmation of the route change. Press TAKE
and the route will change immediately. Or press CLEAR and no route change will take place.
Videohub Master Control returns to its idle state with the latest route displayed on the LCD.
Page 16
16
Using Videohub Master Control
How to select devices using the customizable buttons and scroll wheel
If you have customized the Videohub port labels, you can use the customizable buttons and scroll wheel
together to find a short list of sources and destinations. This method is fast and intuitive because you
only have to scroll through a short list of equipment and you don't have to remember any port numbers.
This method is very helpful if you label types of equipment together by name, e.g., VTR, Cam and Mon.
Step 1. Press the DEST button. The destination field will be highlighted blue on the LCD.
Step 2. If your Videohub router has RS-422 remote control, press the LEVEL button until you have set
Step 3. Press a button you have customized for a type of destination equipment, e.g., VTR. The button
Step 4. Scroll the wheel forwards or backwards until the desired destination is found. In this example,
In this example, a customized Cam button has been selected
so only cameras will be listed as sources, on the LCD, when
the scroll wheel is rotated. This provides a fast way to find a
video source because you only have to scroll through a short
list of equipment.
Step 5. Press the SRC button. The source field will be highlighted blue on the LCD.
Step 6. Press a button you have customized for a type of source equipment, e.g., a capture card. The
St e p 7. Scroll the wheel forwards or backwards until the desired source is found. In this example, the
the appropriate routing level for your equipment. Otherwise you can skip this step.
should light up gold.
the destination VTR will be displayed on the LCD. If you make a mistake, press the white
CLEAR button and scroll until the correct destination is displayed.
button should light up white.
source capture card will be displayed on the LCD. If you make a mistake, press the white CLEAR
button and scroll until the correct destination is displayed.
Step 8. The TAKE button will flash red, awaiting your confirmation of the route change. Press TAKE
and the route will change immediately. Otherwise, press CLEAR and no route change will
take place. Videohub Master Control will then return to its idle state with the latest route
displayed on the LCD.
If any button you have customized for either a source or destination flashes but does not stay lit, Videohub
Master Control is preventing you from selecting the button because the equipment type has not been
labeled as a source or destination device or does not match the current routing level. For example,
cameras should not usually be set as destination devices, monitors should not be set as source devices
and won't match the RS-422 routing level. Refer back to Creating Button Labels in Setting Up Videohub
Master Control for steps on how to change this.
Page 17

17
Using Videohub Master Control
How to select devices using the numeric buttons and scroll wheel
If you have customized the Videohub port labels with numbers, you can use the numeric buttons and
scroll wheel together to find a short list of sources and destinations. This method is fast and intuitive
because you only have to scroll through a short list of equipment and you don't have to remember
any port numbers. This method is very helpful if you label groups of equipment together by numbers,
perhaps to represent locations. For example, all the equipment in Studio 3 could be labeled VTR3, Edit
3, Cam 3A, Cam 3B, Mon 3A and Mon 3B etc.
Step 1. Press the DEST button. The destination field will be highlighted blue on the LCD.
Step 2. If your Videohub router has RS-422 remote control, press the LEVEL button until you have set
Step 3. Using the numeric pushbuttons, type the destination number, e.g., 3 for Studio 3. Each numeric
In this example, the numeric button "3" has been selected so
only video sources with a "3" in their label will be listed, on the
LCD, when the scroll wheel is rotated. This provides a fast way
to find a video source because you only have to scroll through
a short list of equipment based upon a group number, e.g.
only list the equipment in Studio 3.
Step 4. Scroll the wheel forwards or backwards until the desired destination is found. In this example,
Step 5. Press the SRC button. The source field will be highlighted blue on the LCD.
Step 6. Using the numeric pushbuttons, type the source number, e.g., 3 for Studio 3. Each numeric
the appropriate routing level for your equipment. Otherwise you can skip this step.
button will flash gold as you press it.
any of VTR 3, Edit 3, Mon 3A or Mon 3B could be displayed on the LCD. If you make a mistake,
press the white CLEAR button and scroll until the correct destination is displayed.
button will flash white as you press it.
St e p 7. Scroll the wheel forwards or backwards until the desired source is found. In this example, any of
VTR 3, Edit 3, Cam 3A or Cam 3B could be displayed on the LCD. If you make a mistake, press
the white CLEAR button and scroll until the correct destination is displayed.
Step 8. The TAKE button will flash red, awaiting your confirmation of the route change. Press TAKE
and the route will change immediately. Otherwise, press CLEAR and no route change will
take place. Videohub Master Control will then return to its idle state with the latest route
displayed on the LCD.
Page 18

18
Using Videohub Master Control
SDISource
Edit 3
Destination
VTR 1
If you know that you want Edit 3 as the source, and VTR 1
as the destination, you can select the route directly without
any scrolling being necessary. In this example, press DEST,
press the customized VTR button and then press 1. VTR 1
will be shown in the destination field. Now press SRC, press
the customized Edit button and then press 3. "Edit 3" will be
shown in the source field. Finally, press TAKE to confirm the
route change.
How to select devices using the customizable and numeric buttons together
If you have customized the Videohub port labels with names and numbers, you can use the customizable
buttons and numeric buttons together to directly select sources and destinations. This method is very
fast and intuitive because you don't have to scroll through a list of equipment and you only have to
remember how many of each type of equipment you have, e.g., two VTRs and four monitors. This method
is very helpful if you label types of equipment by name and number, e.g., VTR 01, VTR 02, Cam 01, Cam
02, Cam 03, Mon 01, Mon 02, Mon 03 and Mon 04.
Step 1. Press the DEST button. The destination field will be highlighted blue on the LCD.
Step 2. If your Videohub router has RS-422 remote control, press the LEVEL button until you have set
the appropriate routing level for your equipment. Otherwise you can skip this step.
Step 3. Press a button you have customized for a type of destination equipment, e.g., VTR. The button
should light gold.
Step 4. Type in the destination equipment number using the numeric pushbuttons, e.g., 07 for VTR 07.
Each numeric button will flash gold as you press it.
Step 5. Press the SRC button. The source field will be highlighted blue on the LCD.
Step 6. Press a button you have customized for a type of source equipment, e.g., a capture card.
The button should light white.
St e p 7. Type in the source equipment number using the numeric pushbuttons, e.g., 03 for the capture
card Edit 03. Each numeric button will flash white as you press it.
Step 8. The TAKE button will flash red, awaiting your confirmation of the route change. Press TAKE
and the route will change immediately. Otherwise, press CLEAR and no route change will
take place. Videohub Master Control will then return to its idle state with the latest route
displayed on the LCD.
If any button you have customized for either a source or destination flashes but does not stay lit, Videohub
Master Control is preventing you from selecting the button because the equipment type has not been
labeled as a source or destination device or does not match the current routing level. For example,
cameras should not usually be set as destination devices, monitors should not be set as source devices
and won't match the RS-422 routing level. Refer back to Creating Button Labels in Setting Up Videohub
Master Control for steps on how to change this.
Page 19
19
Using Videohub Master Control
Source
SDI 422
Edit 1
Destination
0
VTR 1
The destination field shows a lock icon if the destination is
locked.
Source
SDI 422
Edit 1
Destination
VTR 1
The lock icon disappears from the destination field when the
destination is unlocked.
Locking and Unlocking Routes
Videohub Master Control can lock and unlock any route on your Videohub. In contrast to Videohub
Smart Control, Videohub Master Control can also unlock any destinations locked by other people using
their computer, iPad or Videohub Smart Control.
To lock a destination using Videohub Master Control:
Step 1. Set the destination and source using whichever method you prefer. Once the route has been
set, Videohub Master Control will return to its idle state.
Step 2. Press the DEST button. The destination field will be highlighted blue on the LCD.
Step 3. If the desired route is not already displayed on the LCD, use the pushbuttons and/or scroll
wheel to find the destination to be locked.
Step 4. Press and hold the gold DEST button until a lock icon appears in the destination field of the LCD.
Step 5. Press DEST again to return Videohub Master Control to its idle state and the destination field
will revert to gray.
To unlock a destination using Videohub Master Control:
Step 1. Press the DEST button. The destination field will highlighted blue on the LCD.
Step 2. If the desired route is not already displayed on the LCD, use the pushbuttons and/or scroll
wheel to find the destination to be unlocked. The destination field will show a lock icon for
the locked destination.
Step 3. Press and hold the gold DEST button until the lock icon disappears from the destination field
of the LCD.
Step 4. Press DEST again to return Videohub Master Control to its idle state and the destination field
will revert to gray.
Page 20
Using Videohub Smart Control
20
Using Videohub Smart Control
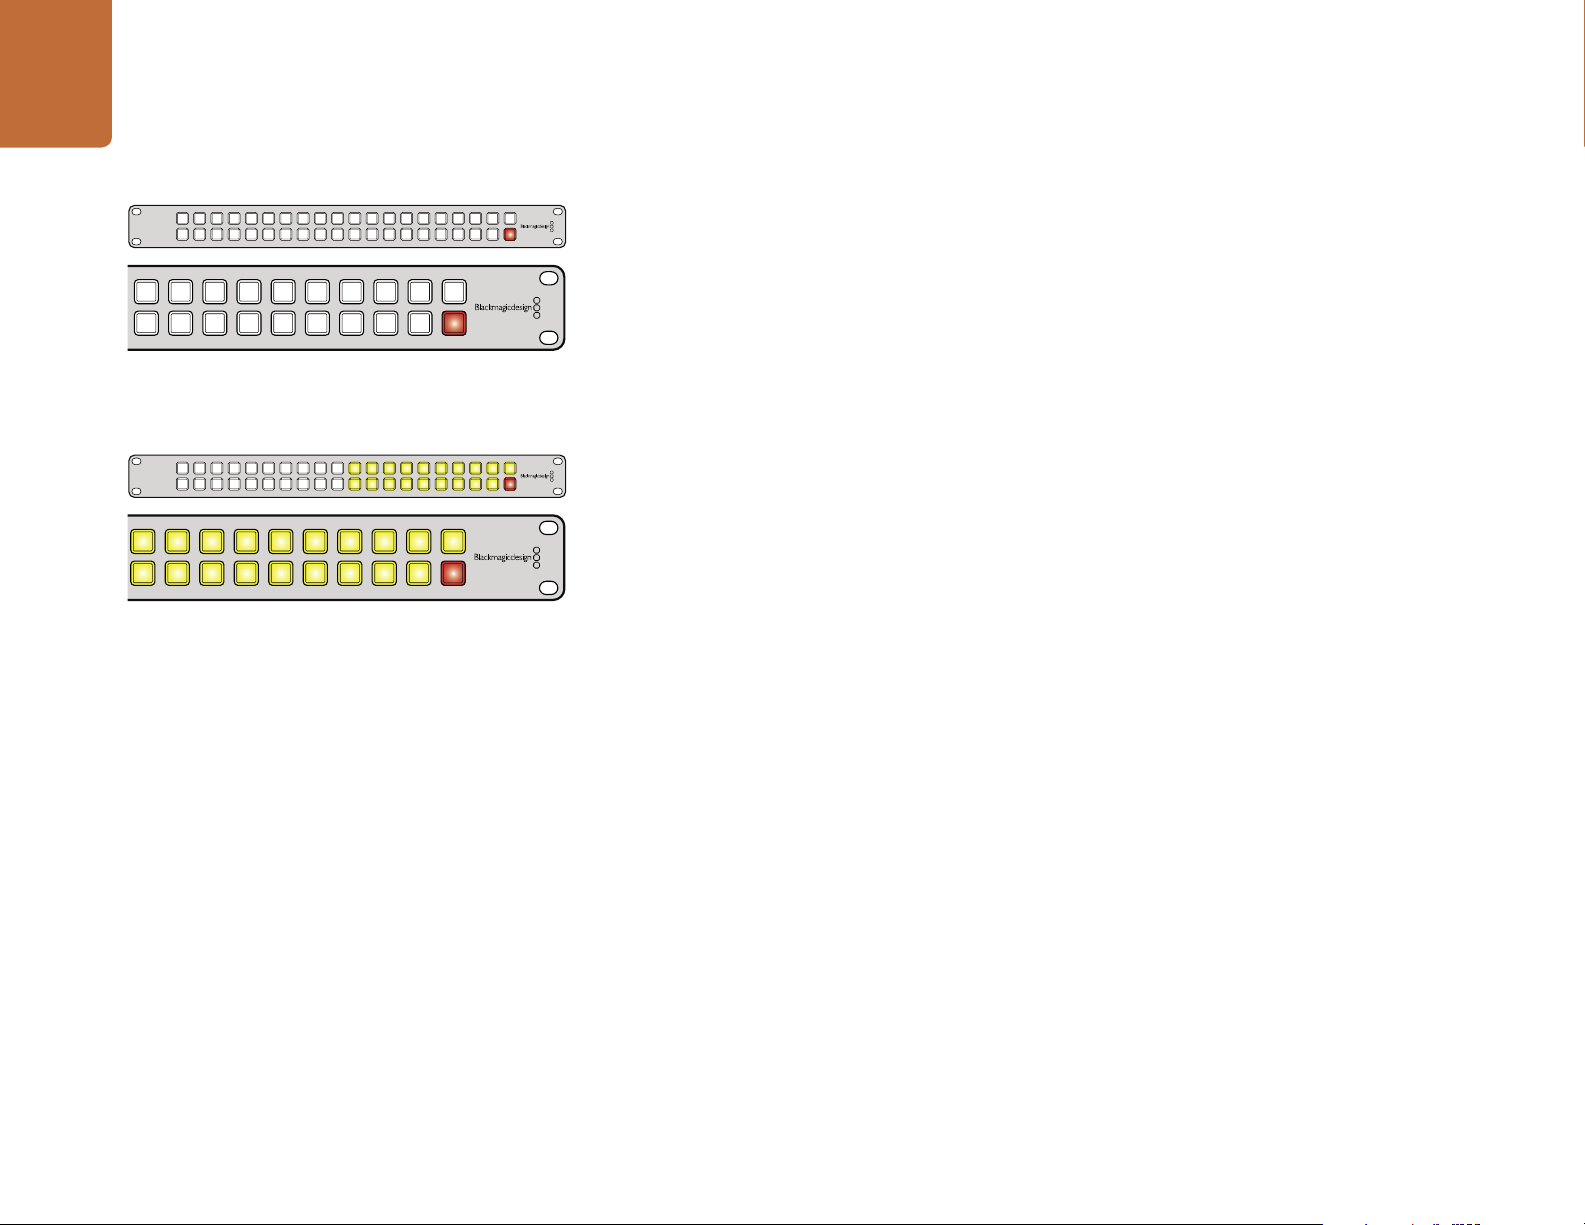
Using Videohub Smart Control as a Cut-Bus Controller
If Videohub Smart Control has been configured as a Cut-Bus controller, the destination device has already
been chosen and you only need to choose a video source.
Step 1. Select a white video source button. The button will light up to distinguish it from the other
Videohub Smart Control configured as a Cut-Bus controller
and with a Take button.
Videohub Smart Control configured as an XY controller and
with a Take button.
Step 2. If the Take button has been enabled, the new source button and the Take button will flash.
Using Videohub Smart Control as an XY Controller
If Videohub Smart Control has been configured as an XY controller, destination buttons light up gold
and source buttons light up white. When working with multiple destinations, always select a destination
button before selecting a source button.
To change routes:
Step 1. Select a gold destination button and it will light up brightly to distinguish itself from the other
sources. The video source will immediately connect and be viewable on the destination device.
The route change will only take place when you confirm by pressing the Take button.
destination buttons. If a video source has previously been connected to this destination, its
button will light up white.
Step 2. To connect a new source to the destination, press the desired video source button. The video
source will immediately be connected and viewable on the destination device. The new source
button will be brightly lit and the previous source button will dim to normal. To change another
route, select another destination button and then select a new source button.
Step 3. If the Take button has been enabled, the new source button and the Take button will flash.
The route change will only take place when you confirm by pressing the Take button.
Locking and Unlocking Routes
To lock a destination, press and hold the desired destination button until it turns blue. The corresponding
source but ton will illuminate. If you attempt to change sources for a locked destination, the destination button
will flash blue. To unlock a destination, press and hold the button until it returns to the standard gold color.
Using Macros
If you press a green macro button, it will simultaneously make the crosspoint changes you have previously
configured in the Videohub Hardware Panel Setup software. Each button can be configured with up
to 16 crosspoint routes. If you have the Take button enabled, the simultaneous change of routes will
only take place when you confirm by pressing the Take button. If for any reason the macro cannot be
performed, the button will flash.
Page 21
Using GPI and Tally Interface
2121
Using GPI and Tally Interface
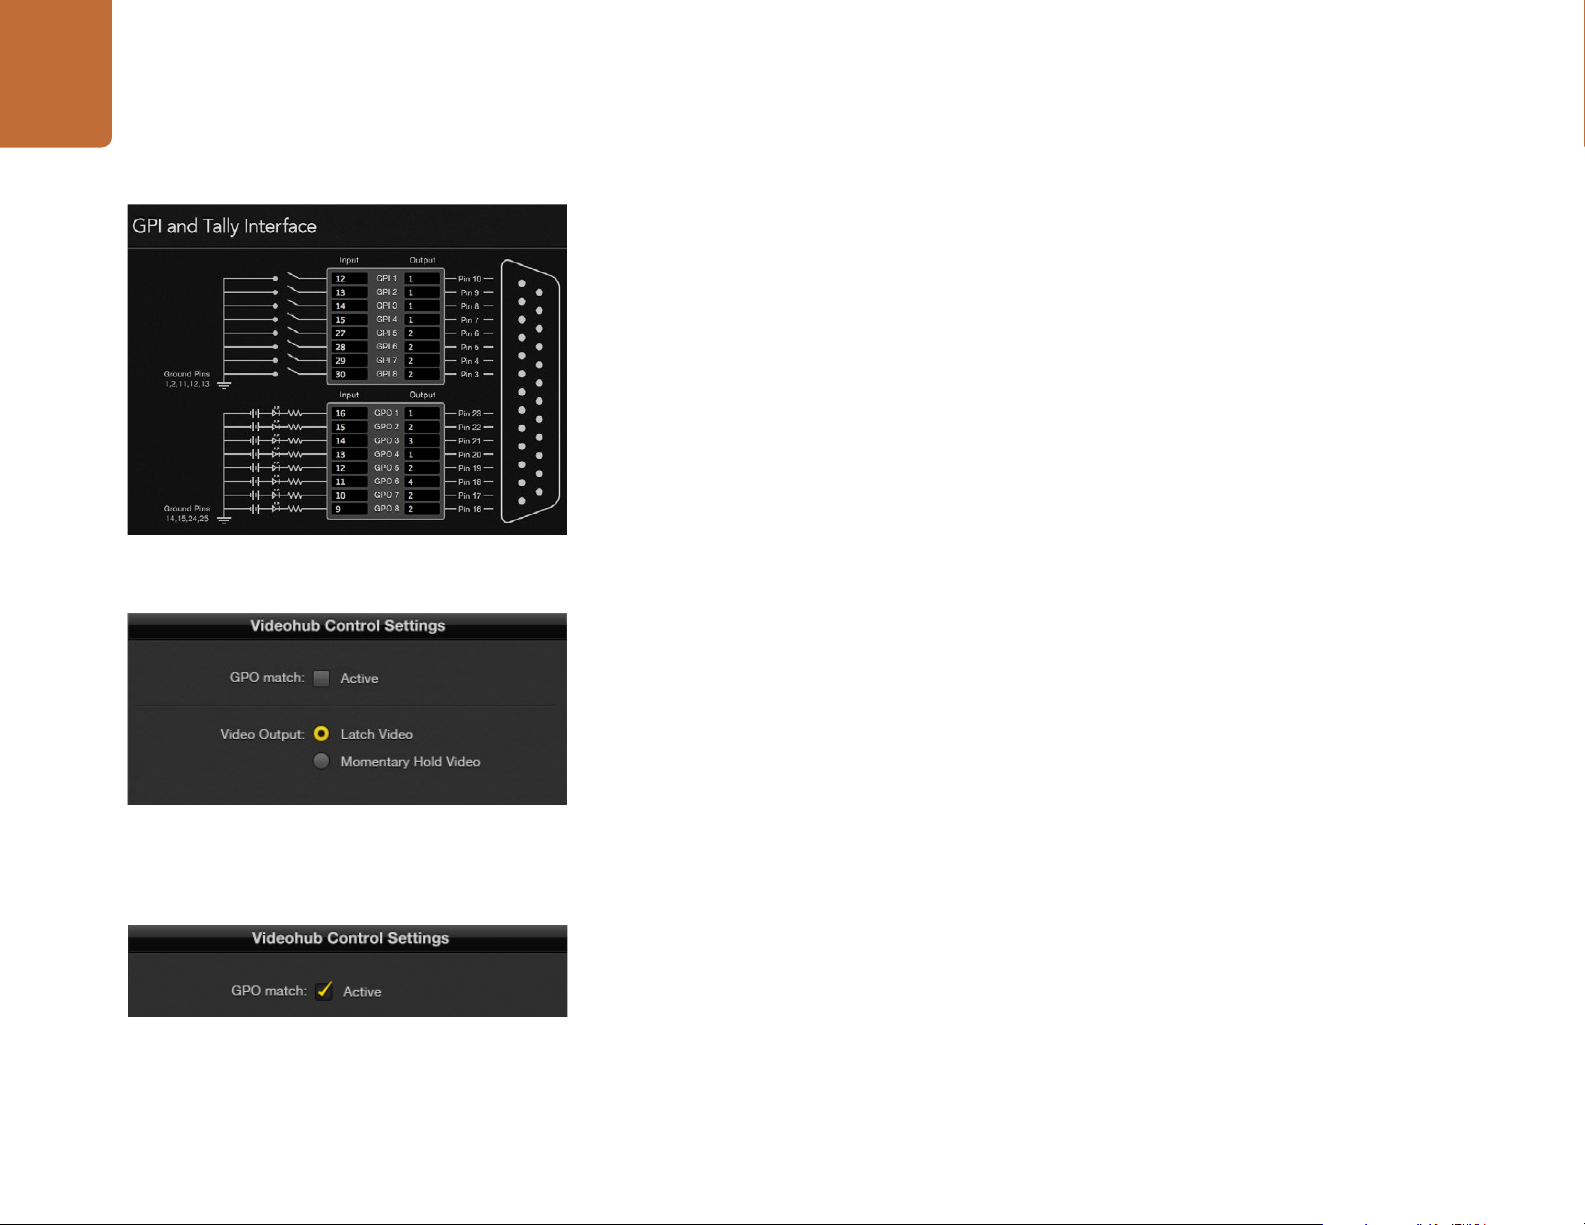
Configuring GPIs
The GPI and Tally Interface has 8 GPIs that provide crosspoint switching. In the example on the left, if
GPI 1 detects a contact closure it will switch Input 12 on your Videohub to Output 1. This means when
you switch the joystick control on your CCU, video going to Input 12 of your Videohub will be previewed
on your monitor.
The crosspoints can be configured in Videohub Hardware Panel Setup simply by clicking inside the Input
and Output fields on the diagram and typing in the Input or Output number.
The Videohub Control Settings pane offers two ways to preview the output from your Videohub.
Latch Video
If you want the output to stay as selected, choose Latch Video. This means you can press the switch
once on your CCU and the input from the selected crosspoint will stay on your monitor until another
Click inside the diagram to change inputs and outputs for GPI
crosspoint switching and Tally.
crosspoint is selected.
Momentary Hold Video
Select this option if you want the output to return to the previous input after you let go of the switch
or joystick control on your CCU. For example, when you press and hold your switch, Input 13 might be
previewed, but will return to displaying Input 12 on your monitor once you release the switch.
Select Latch Video if you want your preview to hold until
another crosspoint is selected. Choose Momentary Hold
Video if you want your preview to rever t back to the previous
crosspoint when you release the control switch.
Enable the GPO match checkbox to replicate the crosspoint
configuration of your GPIs.
Configuring Tally
Tally is usually a lamp on the front of a camera to indicate that it is on air, but its a useful visual indicator and
can be used on any equipment to indicate activity and doesn't have to be used specifically with cameras.
The GPI and Tally Interface has 8 configurable GPOs, which send a tally signal to your cameras or other
devices under certain crosspoint conditions. In the example on the left, GPO 1 is configured so that
when Input 16 on the Videohub is routed to Output 1, GPO 1 will be activated.
The crosspoints can be configured in Videohub Hardware Panel Setup simply by clicking inside the Input
and Output fields on the diagram.
GPO Match
Enable the GPO match checkbox to replicate the configuration of your crosspoints from GPIs to GPOs.
This can be useful if you want to see a tally light activate when changing routes for your GPIs.
When this checkbox is enabled, the GPO half of the diagram will be grayed out and cannot be edited
until the GPO match checkbox is disabled.
Page 22
2222
GPI IN 1
GPI IN 2
GPI IN 3
GPI IN 4
GPI IN 5
GPI IN 6
GPI IN 7
GPI IN 8
GPI OUT
GPI OUT
GPI OUT
GPI OUT
GPI OUT
GPI OUT
GPI OUT
GPI OUT
GPI IN 1
GPI IN 2
GPI IN 3
GPI IN 4
GPI IN 5
GPI IN 6
GPI IN 7
GPI IN 8
GPI OUT
GPI OUT
GPI OUT
GPI OUT
GPI OUT
GPI OUT
GPI OUT
GPI OUT
Using GPI and Tally Interface
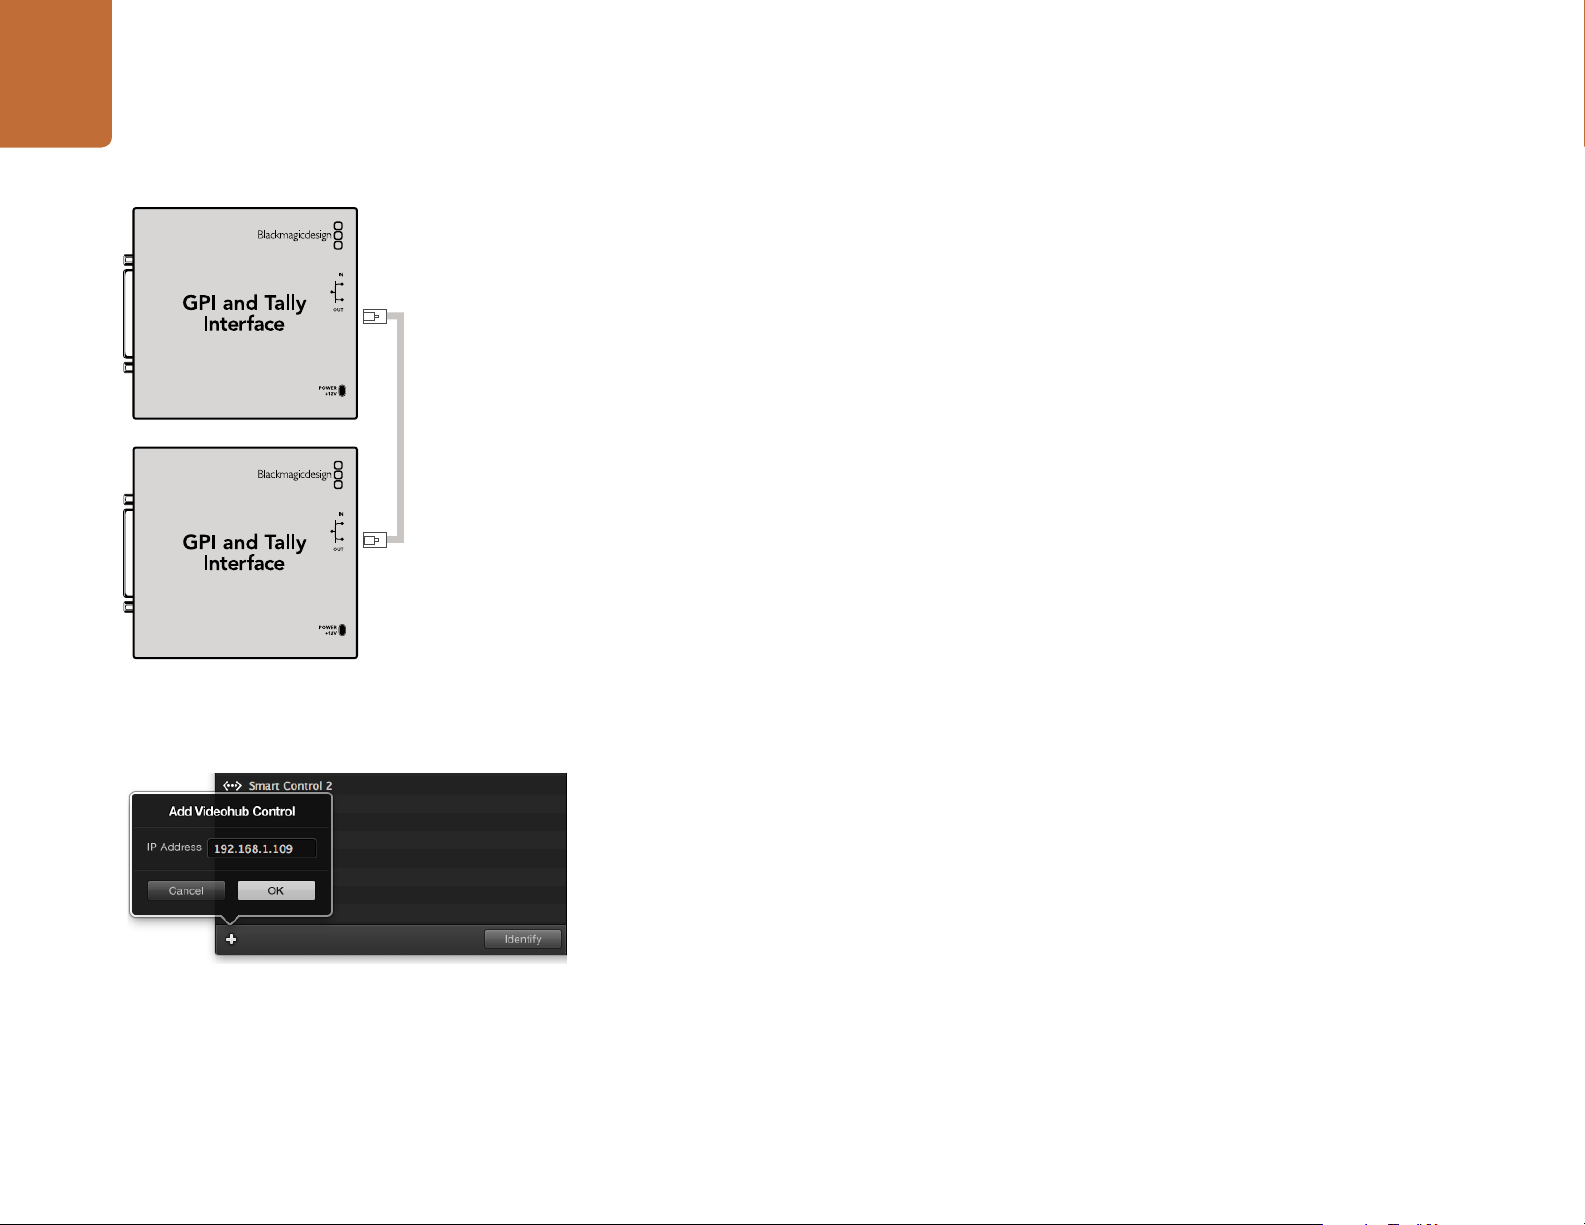
Daisy Chaining Multiple GPI and Tally Interfaces
The GPI and Tally Interface supports 8 GPIs and 8 GPOs at a time, which should be enough for most
live television situations. However, if you have more than 8 cameras then you may want to daisy chain a
second or third GPI and Tally Interface.
The GPI and Tally Interface has two ethernet ports so that you can connect one port to a Videohub and
use the other port to link other GPI and Tally Interfaces together.
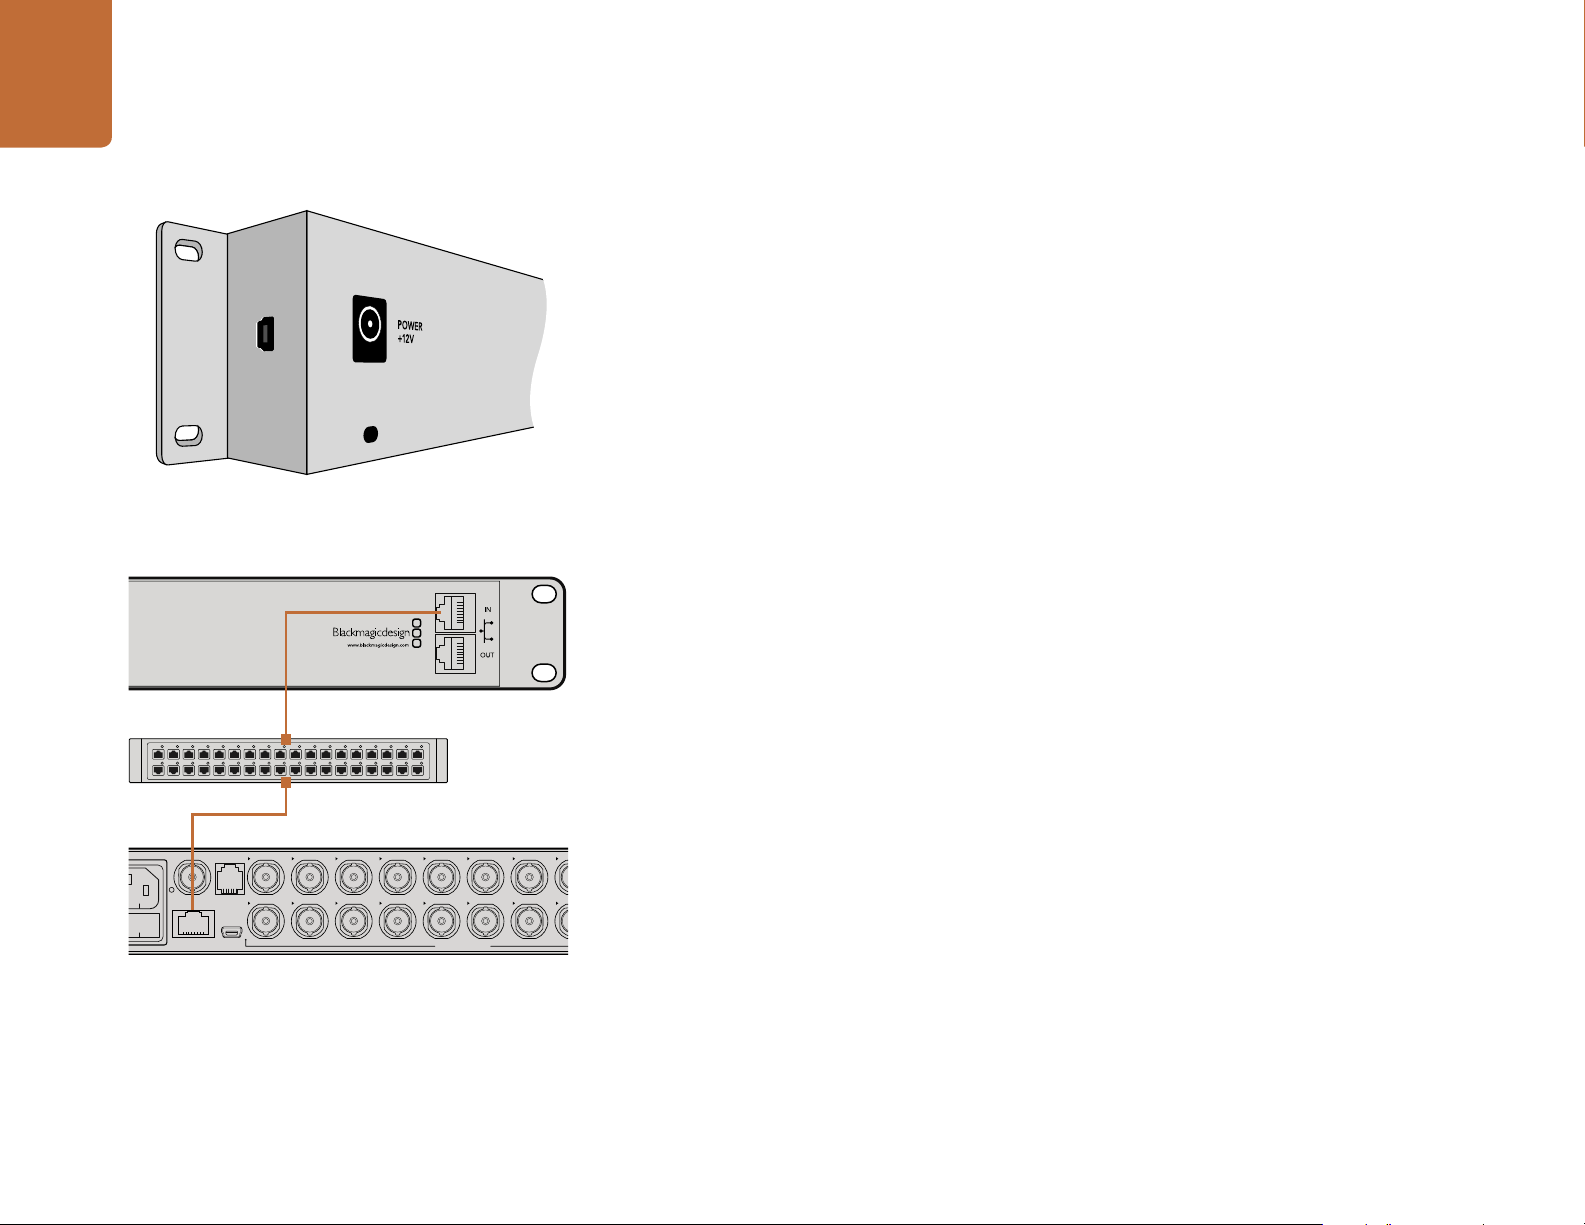
Step 1. Connect power to the first GPI and Tally Interface.
Step 2. Connect a standard RJ45 ethernet cable from your Videohub or network to the ethernet IN
Step 3. Connect power to the second GPI and Tally Interface.
Step 4. Connect a standard RJ45 ethernet cable from the ethernet OUT of the first GPI and Tally
This can be repeated for as many GPI and Tally Interfaces as you need as long as power is supplied to
all units in the chain.
Sometimes it can get confusing to know which GPI and Tally Interface you are working with when you
Daisy chain multiple GPI and Tally Interfaces using ethernet.
Power must be supplied to each individual unit in the chain.
have several connected. Select the GPI and Tally Interface in the Videohub Control Panels pane and click
the Identify button. The LED next to the ethernet IN port on the selected device will light up.
port on the GPI and Tally Interface.
Interface to the ethernet IN port on the second GPI and Tally Interface.
Press the + (add device) button and enter the IP address of a
GPI and Tally Device you want to add. Press the Identify button
to activate the LED on a selected GPI and Tally Interface.
Adding a GPI and Tally Interface Over a Network
You may want to configure a second GPI and Tally Interface but it may be in another location and only
accessible over a network. You can add it to your list manually by entering its IP address into Videohub
Hardware Panel Setup.
If you do not know the IP address of the GPI and Tally Interface you want to add, connect it to a computer
with USB, open Videohub Hardware Panel Setup and note down the IP address in the Network Settings tab.
If you do not have access to the unit because it is in another location, you can find it on the network
using the Bonjour browser. This application will show you all the devices on your network and will give
you the IP address of the GPI and Tally Interface you wish to add.
Step 1. Press the + (add device) button at the bottom of the Videohub Control Panels pane.
Step 2. Type in the IP address of the GPI and Tally Interface and press OK.
Step 3. The second GPI and Tally Interface will appear in the list with any other devices that are
connected to the Videohub.
Page 23

Help
23
Help
Getting Help
The fastest way to obtain help is to go to the Blackmagic Design online support pages and check the
latest support material available for your Blackmagic Design Videohub Control.
Blackmagic Design online support pages
The latest manual, software and support notes can be found at the Blackmagic Design support center at
www.blackmagicdesign.com/support.
Contacting Blackmagic Design support
If you can't find the help you need in our support material, please use the "Send us an email" button to
email a support request. Alternatively, click on the "Find your local support team" button and call your
nearest Blackmagic Design support office.
Checking the version currently installed
To check which version of Videohub Control is installed on your computer, open the Blackmagic Videohub
application. From the "Blackmagic Videohub" menu, select "About Videohub" and note the version
number.
How to get the latest updates
After checking the version of your Videohub Control on your computer, please visit the Blackmagic
Design support center at www.blackmagicdesign.com/support to check for the latest updates. While
it is usually a good idea to run the latest updates, it is a wise practice to avoid updating any software if
you are in the middle of an important project.
Page 24

Warranty
24
Warranty
Limited Warranty
Blackmagic Design warrants that Videohub routers will be free from defects in materials and workmanship
for a period of 36 months from the date of purchase excluding connectors, cables, cooling fans, fiber optic
modules, fuses, keyboards and batteries which will be free from defects in materials and workmanship
for a period of 12 months from the date of purchase. Blackmagic Design warrants that Videohub Master
Control and Videohub Smart Control will be free from defects in materials and workmanship for a period
of 12 months from the date of purchase. If a product proves to be defective during this warranty period,
Blackmagic Design, at its option, either will repair the defective product without charge for parts and
labor, or will provide a replacement in exchange for the defective product.
In order to obtain service under this warranty, you the Customer, must notify Blackmagic Design of the
defect before the expiration of the warranty period and make suitable arrangements for the performance
of service. The Customer shall be responsible for packaging and shipping the defective product to a
designated service center nominated by Blackmagic Design, with shipping charges pre paid. Customer
shall be responsible for paying all shipping changes, insurance, duties, taxes, and any other charges for
products returned to us for any reason.
This warranty shall not apply to any defect, failure or damage caused by improper use or improper or
inadequate maintenance and care. Blackmagic Design shall not be obligated to furnish service under
this warranty: a) to repair damage resulting from attempts by personnel other than Blackmagic Design
representatives to install, repair or service the product, b) to repair damage resulting from improper
use or connection to incompatible equipment, c) to repair any damage or malfunction caused by the
use of non Blackmagic Design parts or supplies, or d) to service a product that has been modified or
integrated with other products when the effect of such a modification or integration increases the time
or difficulty of servicing the product. THIS WARRANTY IS GIVEN BY BLACKMAGIC DESIGN IN LIEU OF
ANY OTHER WARRANTIES, EXPRESS OR IMPLIED. BLACKMAGIC DESIGN AND ITS VENDORS DISCLAIM
ANY IMPLIED WARRANTIES OF MERCHANTABILITY OR FITNESS FOR A PARTICULAR PURPOSE.
BLACKMAGIC DESIGN’S RESPONSIBILITY TO REPAIR OR REPLACE DEFECTIVE PRODUCTS IS THE
WHOLE AND EXCLUSIVE REMEDY PROVIDED TO THE CUSTOMER FOR ANY INDIRECT, SPECIAL,
INCIDENTAL OR CONSEQUENTIAL DAMAGES IRRESPECTIVE OF WHETHER BLACKMAGIC DESIGN
OR THE VENDOR HAS ADVANCE NOTICE OF THE POSSIBILITY OF SUCH DAMAGES. BLACKMAGIC
DESIGN IS NOT LIABLE FOR ANY ILLEGAL USE OF EQUIPMENT BY CUSTOMER. BLACKMAGIC IS
NOT LIABLE FOR ANY DAMAGES RESULTING FROM USE OF THIS PRODUCT. USER OPERATES THIS
PRODUCT AT OWN RISK.
© Copyright 2014 Blackmagic Design. All right s reserved. ‘Blackmagic Design’, ‘DeckLink’, ‘HDLink’, ‘Workgroup Videohub’, ‘Multibridge
Pro’, ‘Multib ridge Ex treme’, ‘Intensit y’ and ‘Lead ing the creative video revolution’ are regis tered trad emarks in th e US and other cou ntries.
All other company and produc t names may be trademarks of their respective companies with which they are associated.
 Loading...