

Black Hawk Electric User Manual
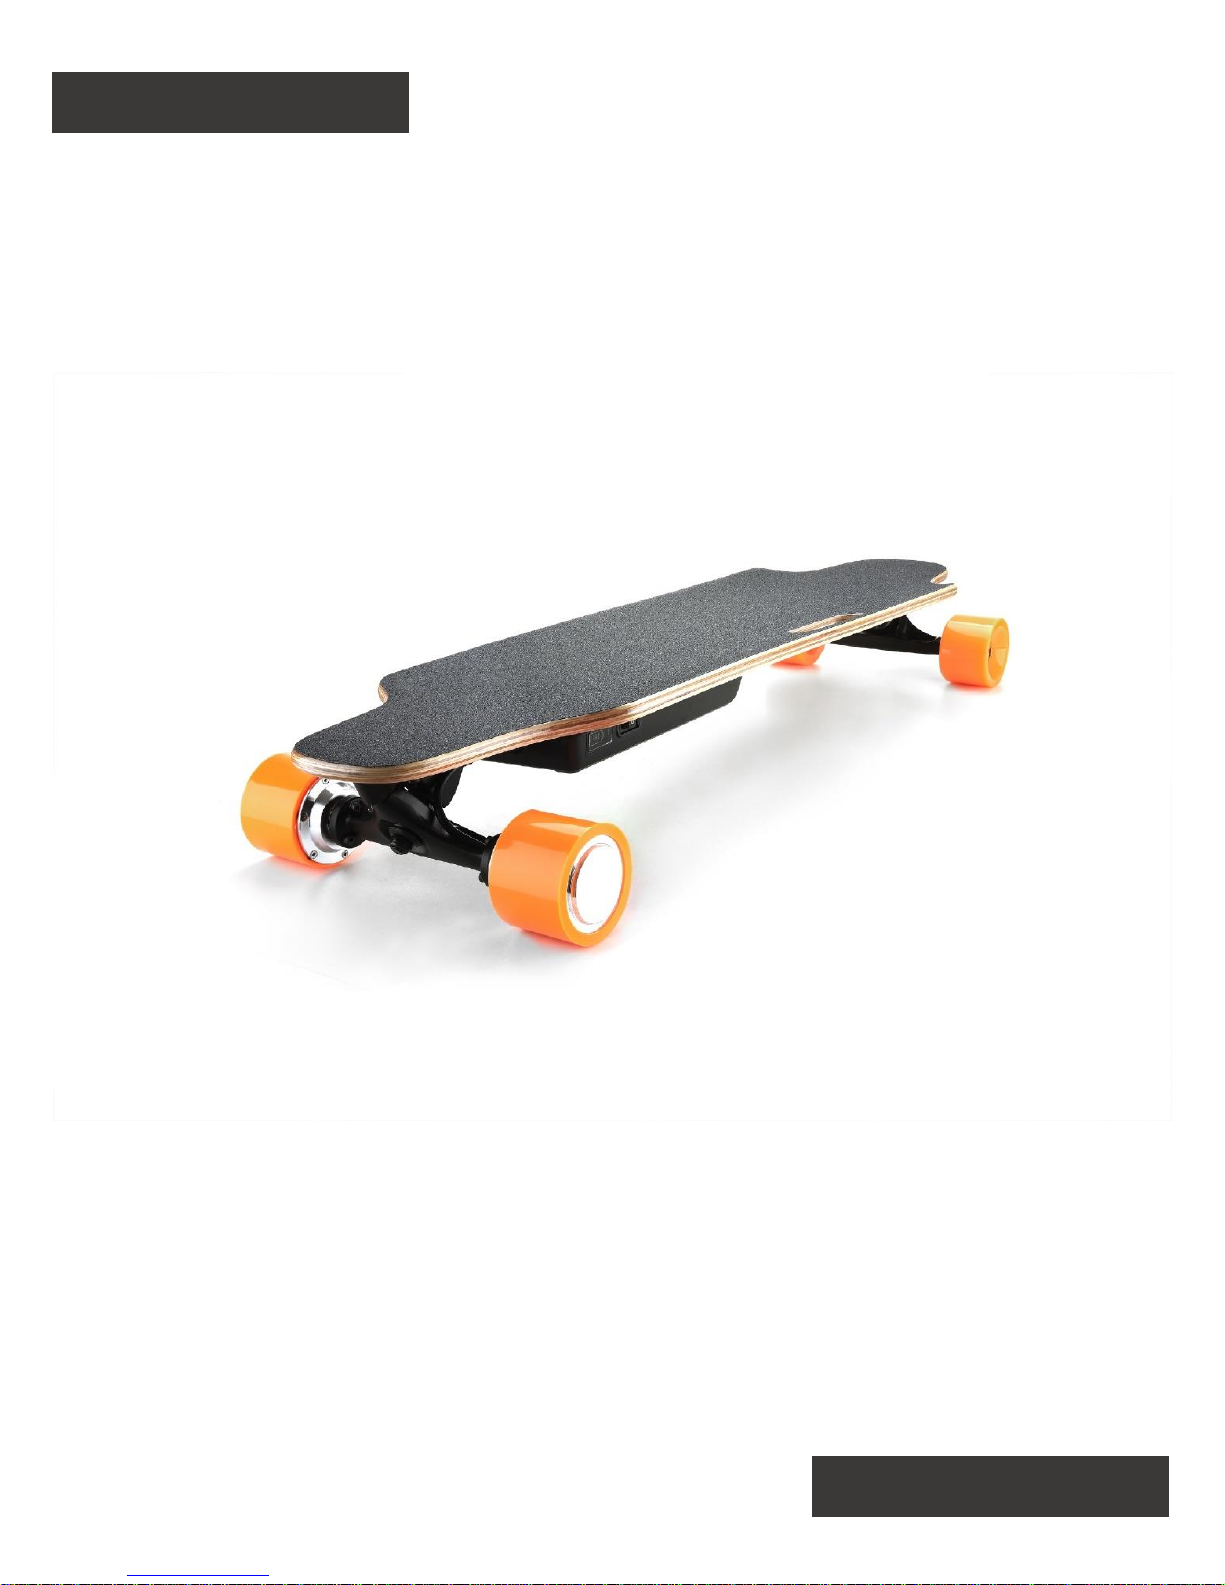
BLACK HAWK
ELECTRIC
Street
Electric
Skateboard
English
User Manual
2
Black Hawk Electric
Contents
Safety Notice………………………………………………3
Components ………………………………………………4
Charging……………………………………………………5
Hand Remote Control and Pairing……………………….6
Basic Operation……………………………………………7
User Safety…………………………………………………8
Battery Safety…………..………………………..……..9-10
Mechanical Maintenance……………………………......11
Skateboard Care………………………………………….13
Specifications……………………………………………..13
Warranty & Guarantee…………………………………...14
3
Black Hawk Electric
Safety Notice
Prior to riding the Black Hawk Electric Skateboard, it is
important to read through this user manual. All instructions
and warnings should be followed to ensure safe operation.
Proper judgement and sensible operation should be applied
at all times when operating the electric skateboard. This
device uses brushless hub motors to accelerate and brake
while in operation. The skateboard is capable of high speeds
and fast acceleration that could result in serious injury or
death if not ridden carefully.
To minimize risk, please read this manual and only operate
the skateboard in safe environments.
Your skateboard can lose power or braking ability at any time
so ensure you only ever ride the skateboard at a comfortable
speed similar to that of a normal un-powered skateboard.
Braking the skateboard manually with enclosed footwear may
be required in an emergency.
Always wear a helmet and ensure protective gear such as
knee pads, elbow pads and wrist guards are considered.
Falling from the skateboard at high speeds can cause
serious injuries so protect yourself with appropriate protective
equipment.
For more information on our product disclaimer please visit
blackhawkelectric.com.au
4
Black Hawk Electric
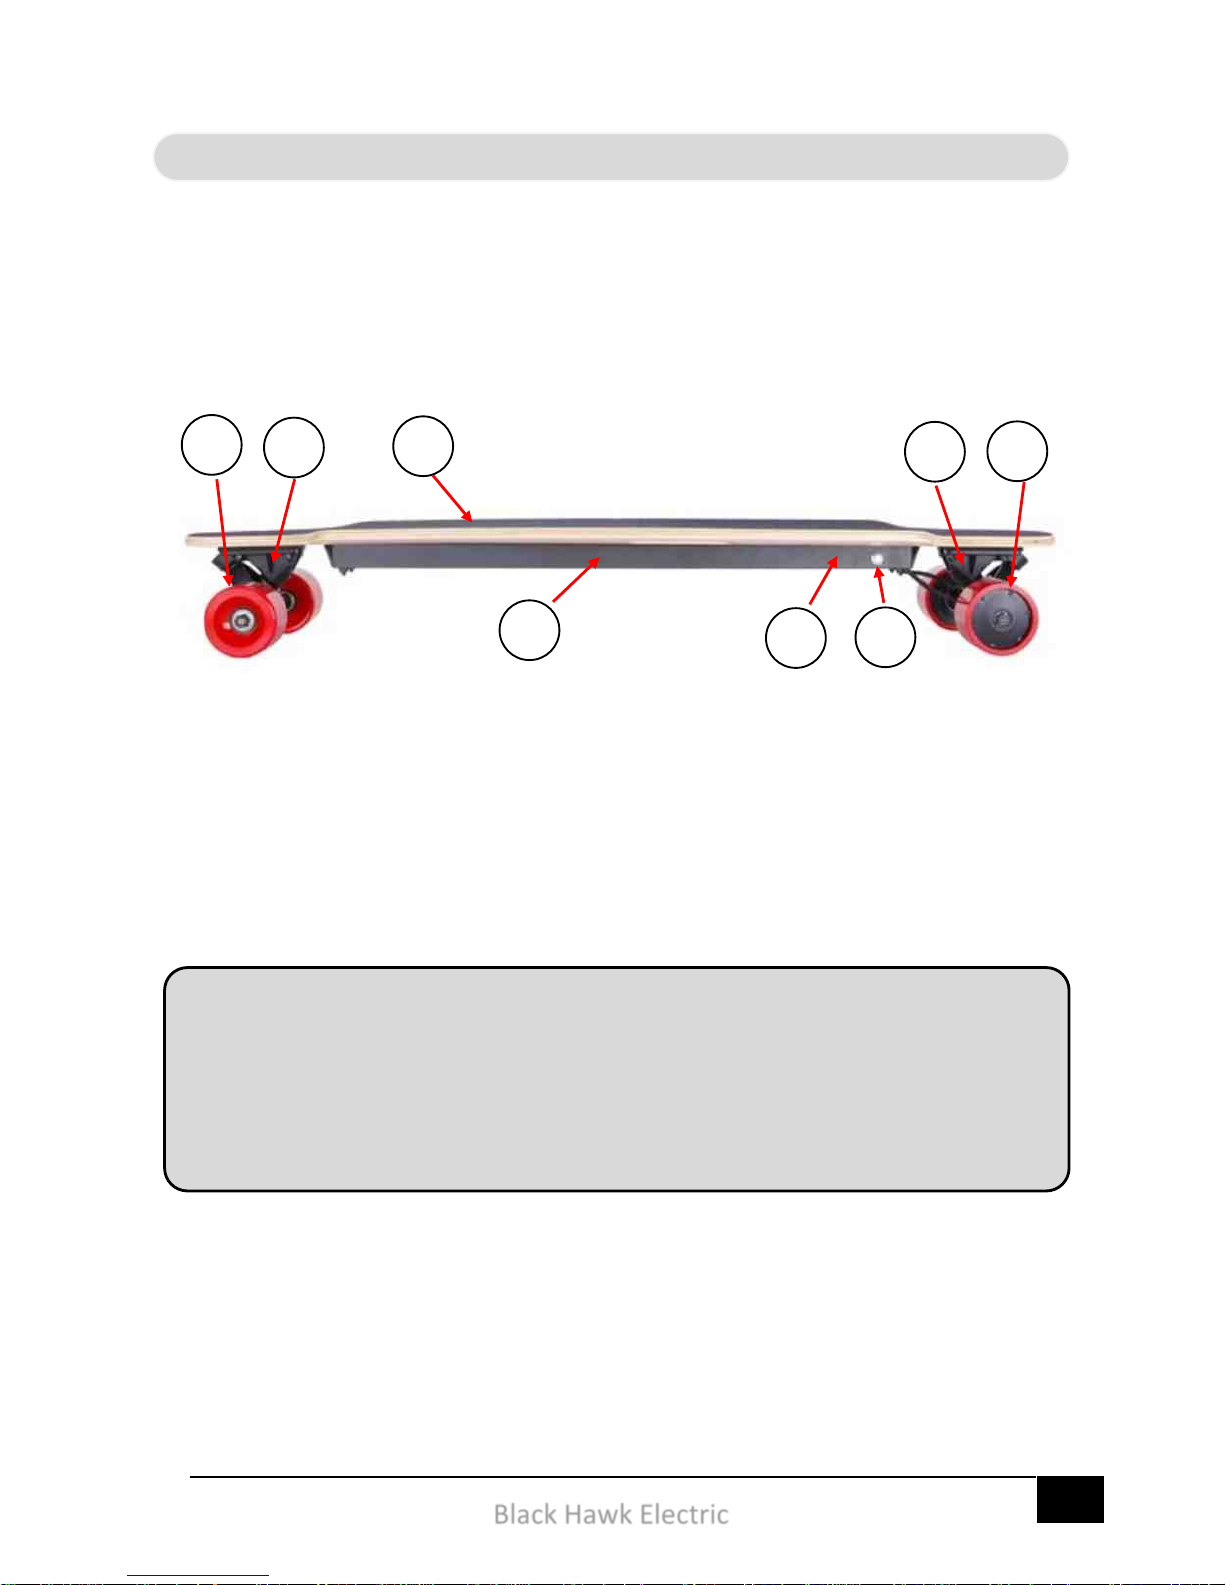
Components
A – Front Wheels
B – Front Trucks
C – Deck
D – Rear Trucks
See below the breakdown of all components:
C B F G E
D
H
A
E – Rear Wheels
F –Battery
G – On/Off Switch
H – Charge Port (on other side)
5
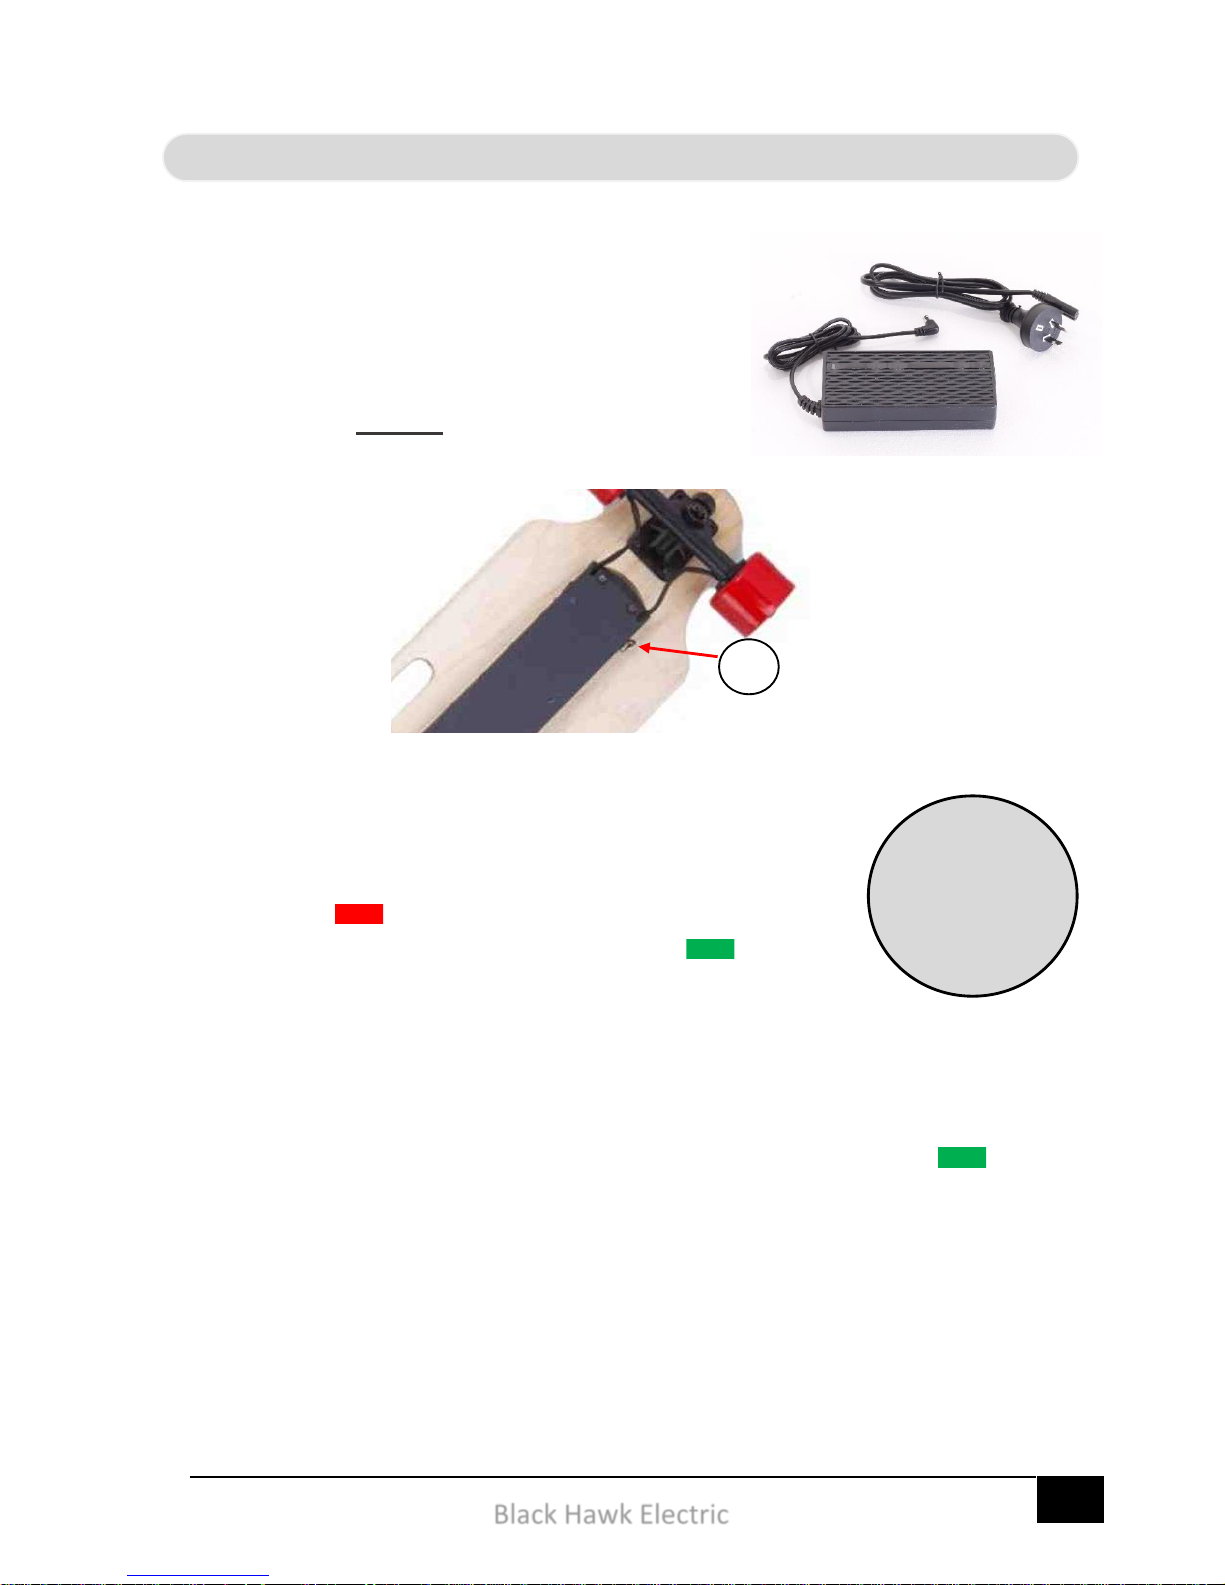
Black Hawk Electric
Charging
Charging of your electric skateboard is made
simple thanks to an intelligent smart-charger and
an on-board Battery Management System, (BMS).
When charging it’s important to connect the
charger and charger cord to the power outlet,
(wall socket) before connecting to the skateboard.
Your charger has two lights to display the charging
status.
A red light means your charger is connected
and charging the battery. A green light means
the charger has finished charging the battery. It can
also mean the charger is not connected.
Charging the hand control is also a simple process thanks to a onepiece USB charging cord. Connect the hand control to a 12V USB
output via the supplied cord and the remote will glow green
when fully charged.
Charging the
Electric
Skateboard
takes 3 hours
from empty
Port
 Loading...