

Black Hawk Blue Ray Assembly Manual
Black Hawk R/C Pilots Blue Ray April 2013
Electric Pylon Racer - original design by Tim Batt
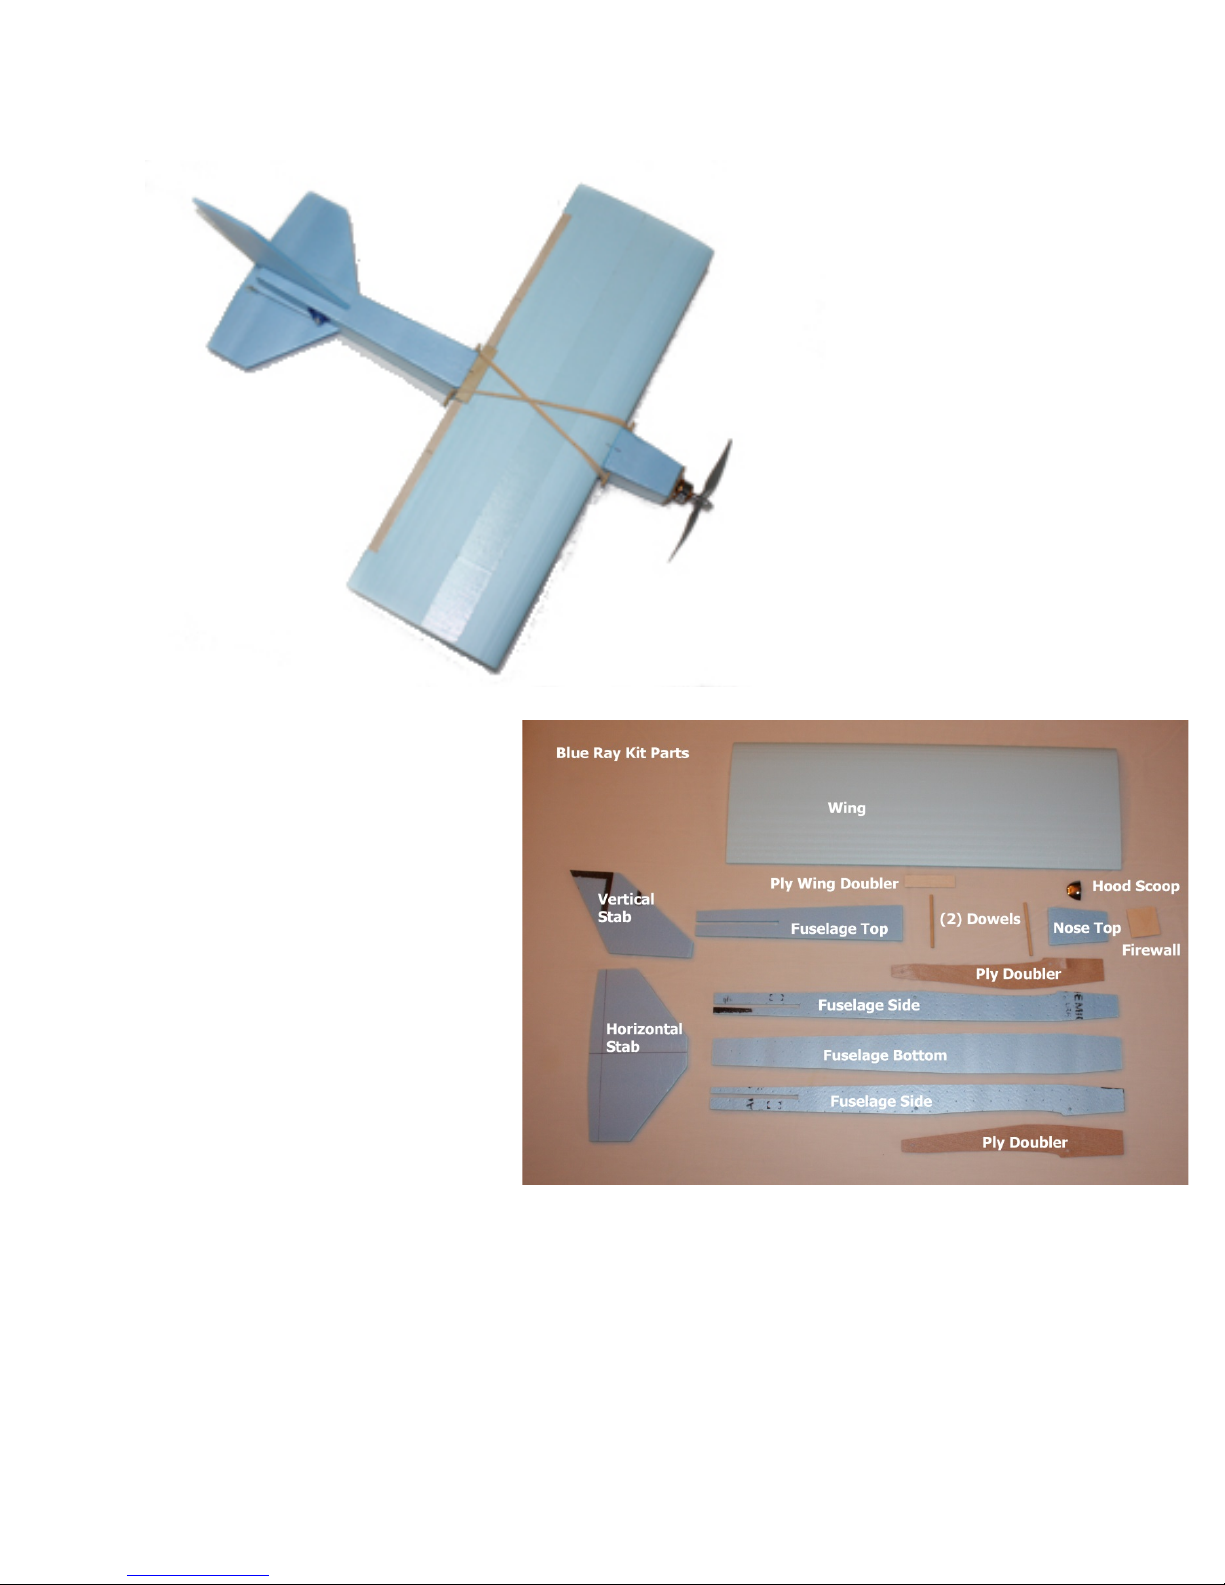
Kit Parts List:
Qty (1) Wing
Qty (1) Ply Wing Doubler
Qty (1) Vertical Stabilizer
Qty (1) Horizontal Stabilizer
Qty (2) Fuselage Sides
Qty (1) Fuselage Bottom
Qty (1) Fuselage Top
Qty (1) Nose Top
Qty (2) Ply Fuse Doublers
Qty (1) Ply Firewall
Qty (2) Dowels
Qty (1) Plastic Hood Scoop
Qty (1) Aileron Drawing
Qty (2) Nose Doublers*
Qty (2) Rear Dowel Doublers*
* not shown in photo
Additional supplies needed to complete this kit:
Aircraft Radio
4 gram (0.14 oz.) Receiver
22 mm stator - 1800 KV Brushless Outrunner Mot or & mounting
20 Amp Electronic Speed Control (ESC)
Deans Ultra Plug or JST connector to connect ESC to battery
Page 1

Li-Po Battery
o 1000 to 1350 mAh
o 2S (7.4 volt) or 3S (11.1 volt)
o 20C or higher recommended
o 130 grams (4.5 oz.) maximum weight
APC 7x5 Thin Electric Propeller (APC p/n LP07050E)
Qty (3) 6 to 8 gram (0.2 to 0.3 oz) ultra-light servos
Qty (3) micro control horns
o Du-Bro #919 or #848 Micro Control Horns or equivalent
Qty (3) micro control horn keepers
o Du-Bro #849 Micro EZ Link for .032 wire
o Du-Bro #920 Micro EZ Link for .047 wire
.032” or .047” diameter wire
Qty (1) 6” servo extension for the eleva tor servo - 32 gauge mi cro wire preferred
Qty (1) “Y” harness for aileron servos or (2) 3” servo extensions if your receiver
allows one aileron servo to be plugged into an alternate channel - 32 gauge micro
wire preferred
(4) #64 rubber bands (#64 Rubber bands are available at any office supply store.)
Hinge Tape
Velcro or double-sided tape
2” or 3" wide strapping tape
5-minute epoxy
Foam safe thick CA and/or low-temp hot glue
o Caution: Foam safe thin CA will generate too much heat when it c ures
and will melt the foam
Introduction:
The BLUE RAY is intended to be a simple-to-build club project. Micro servos, receivers
and electric motors are available at very affordable pri c es. Now is the time to start club
pylon racing!
The completed weight of the BLUE RAY is 8 to 8.5 ounces (228 to 240 grams) without a
battery! The battery adds from 2.2 to 4.0 ounces (62 to 115 grams) for a total readyto-fly weight of 10.2 to 12.5 ounces ( 310 to 355 grams). Typical foamy planes in this
weight class do not do fly well in the wind; however the BLUE RAY handles well in a 10
mph breeze. It has good wind penetration, especially with a 3-cell battery and the
throttle up.
A 1000 to 1300 mAh battery is recommend ed for racing. A smaller battery can be
used, but the flight durat ion is shorter. With the recommended battery, you can get 3
two-minute heat races with a single charge. The BLUE RAY has been flown with a 1700
mAh 3-cell Li-Po battery and it still flies well, but pylon turns get to be sluggish.
If this is to be a club project, the simple fixtures shown in these instructions will make
the assembly quicker and easier. If you are only building one or t wo airplanes,
assemble the fuselage on a flat surfa ce and use a carpenters square or right triangle to
make sure the fuselage sides are perpendicular with the fuselage bottom.
Page 2
Read all of the instructions before starting to assemble your BLUE RAY.
The foam parts can be assembled using either low-temp hot glue , foam safe thick CA or
5-minute epoxy. All three work well with foam. Wood parts can be assembled with
either foam safe CA or 5-minute epoxy. T he fir ew all should only be assembled with
epoxy.
Tip: To keep the aircraft weight light, mix micro-balloons with the epoxy. This will
decrease the pot life of the epoxy, so w ork quickly or use 15-minute or longer epo xy.
Kit Parts:
The Black Hawk R/C Pilots BLUE RAY kit includes a l l of the foam and wood parts
including a precut foam wing. The kit has been cut from blue or pink extruded
polystyrene foam insulation board that is ¼” (6 mm) thick with a plastic film on one or
both sides. The plastic film does not add any appreciable strength to the aircraft
structure. We recommend removing all of the plastic film. If you choose to leave the
plastic film on the parts, cut away the film in the areas that will be glued toget her.
Note: Some parts have lines marked on the film to assist in assembling the aircraft. Do
not remove the plastic film from these parts until you have made the appropriate cuts.
Tip: Rounding the leading edges of the horizontal and vertical stabilizer and the
fuselage corners will require removing the plastic film from the a r eas to be rounded.
It’s easier to remove the film from the entire surface than to just trim it fro m the areas
that are rounded.
Tip: When sanding the foam part, use #220 or finer sandpaper. Coarse sandpaper will
“tear” the foam.
Radio:
Test the radio, servos, ESC and motor. If not already attached, solder male bullet
connectors to the motor wires and female bullet connectors and a male power plug to
the ESC wires. If using a 2.4 GHz radio system, bind the receiver to the transmitter and
setup the radio for the aircraft. Connect all the servos to the radio receiver and make
sure they work before installing them in the aircraft.
Fuselage:
The elevator servo location is mar ked on both fuselage
sides. Decide which side you want to install the
elevator servo in and make the cutout to fit your servo.
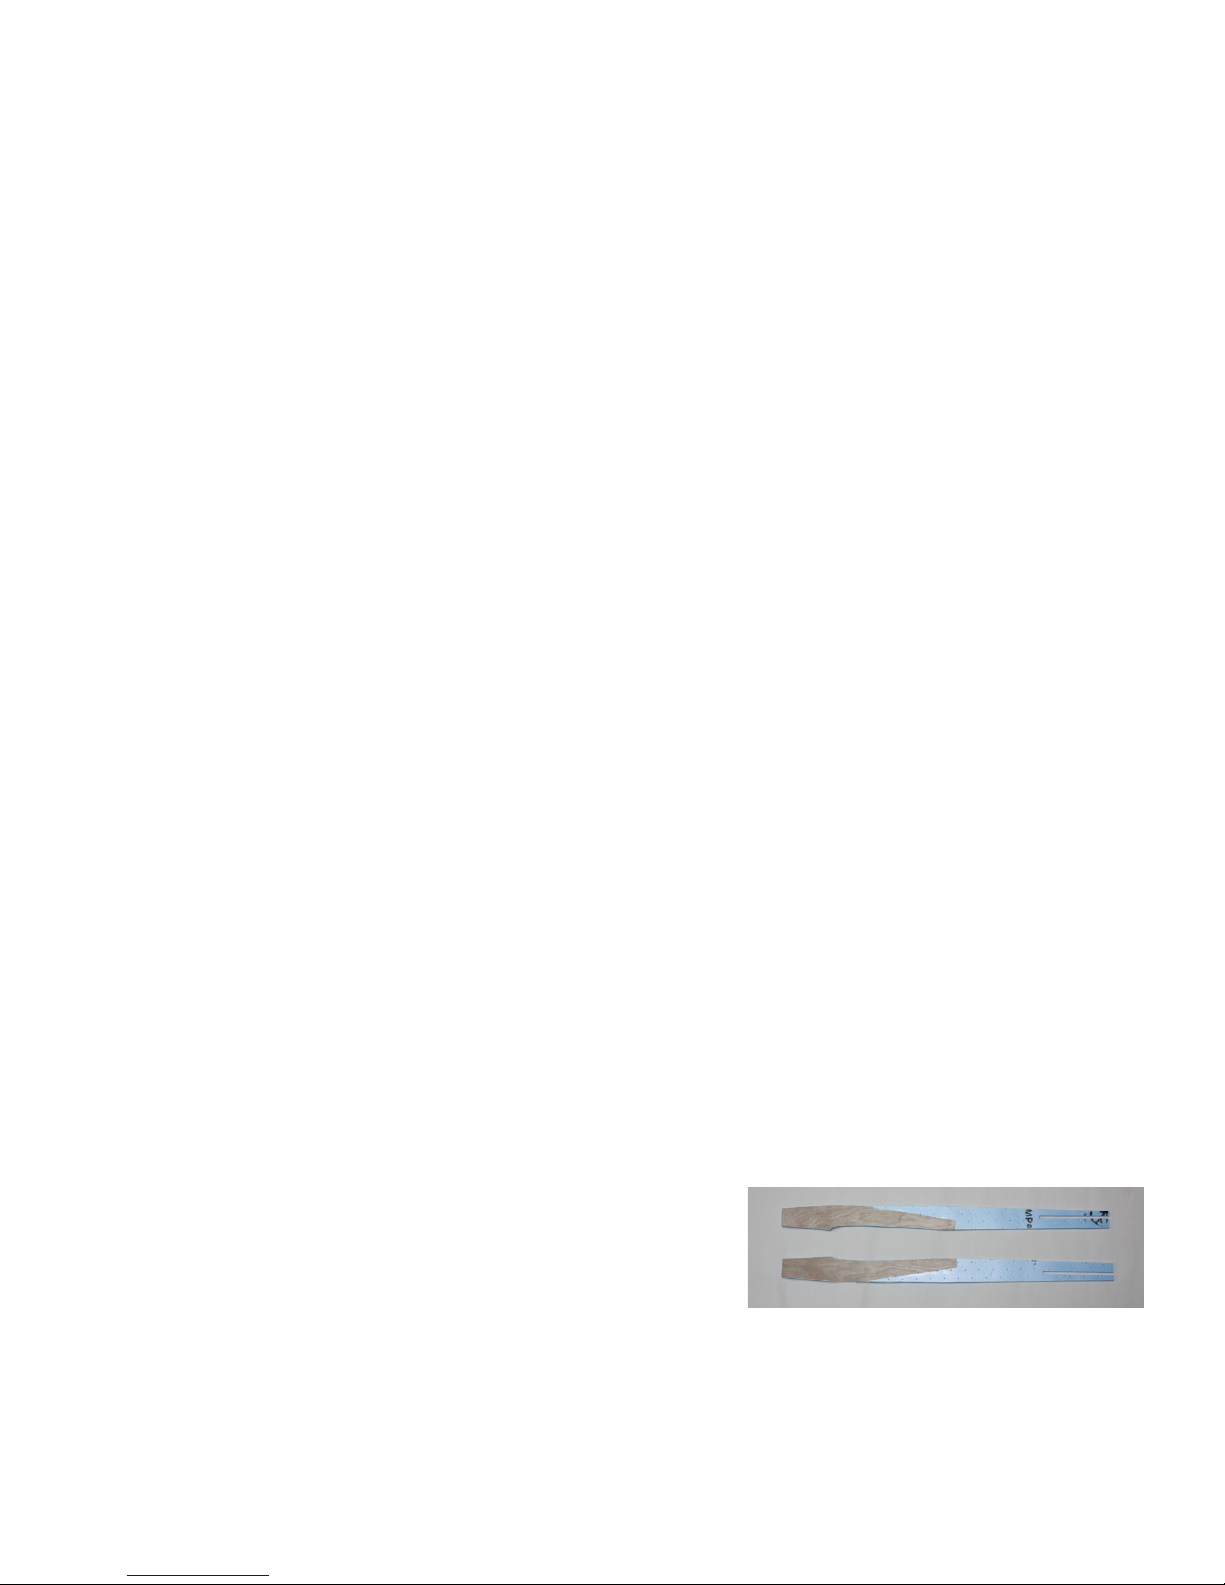
Start the fuselage construction by gluing the plywood fuselage doublers to the inside of
the fuselage side pi eces. Make a RIGHT and a LEFT side! Be sure the holes for the
hold-down dowels are lined up.
Page 3
 Loading...