

Black & Decker GR230C User Manual

1
English
Italiano
Deutsch
Français
Nederlands
Español
Português
Eλληνικά
®
2
Rotary Lawnmower
GR230
User manual
Congratulations!
On your purchase of your Black & Decker rotary
lawnmower.
This user manual provides important operating and
maintenance instructions for all of the rotary mowers
in the Black & Decker GR230C range.
Know your mower
Read all of this manual carefully, observing all
the recommended safety instructions before,
during and after using your mower, and
maintain your mower in good working order.
Familiarise yourself with the controls on your
mower before attempting to operate it, but
above all, be sure you know how to stop
your mower in an emergency.
Retain this user manual and all other
literature supplied with your mower for future
reference.
Safety instructions
Training
• Never allow children or persons who are
unfamiliar with this type of mower to use
it, nor anyone who has not read this user
manual.
360
6m / 20ft
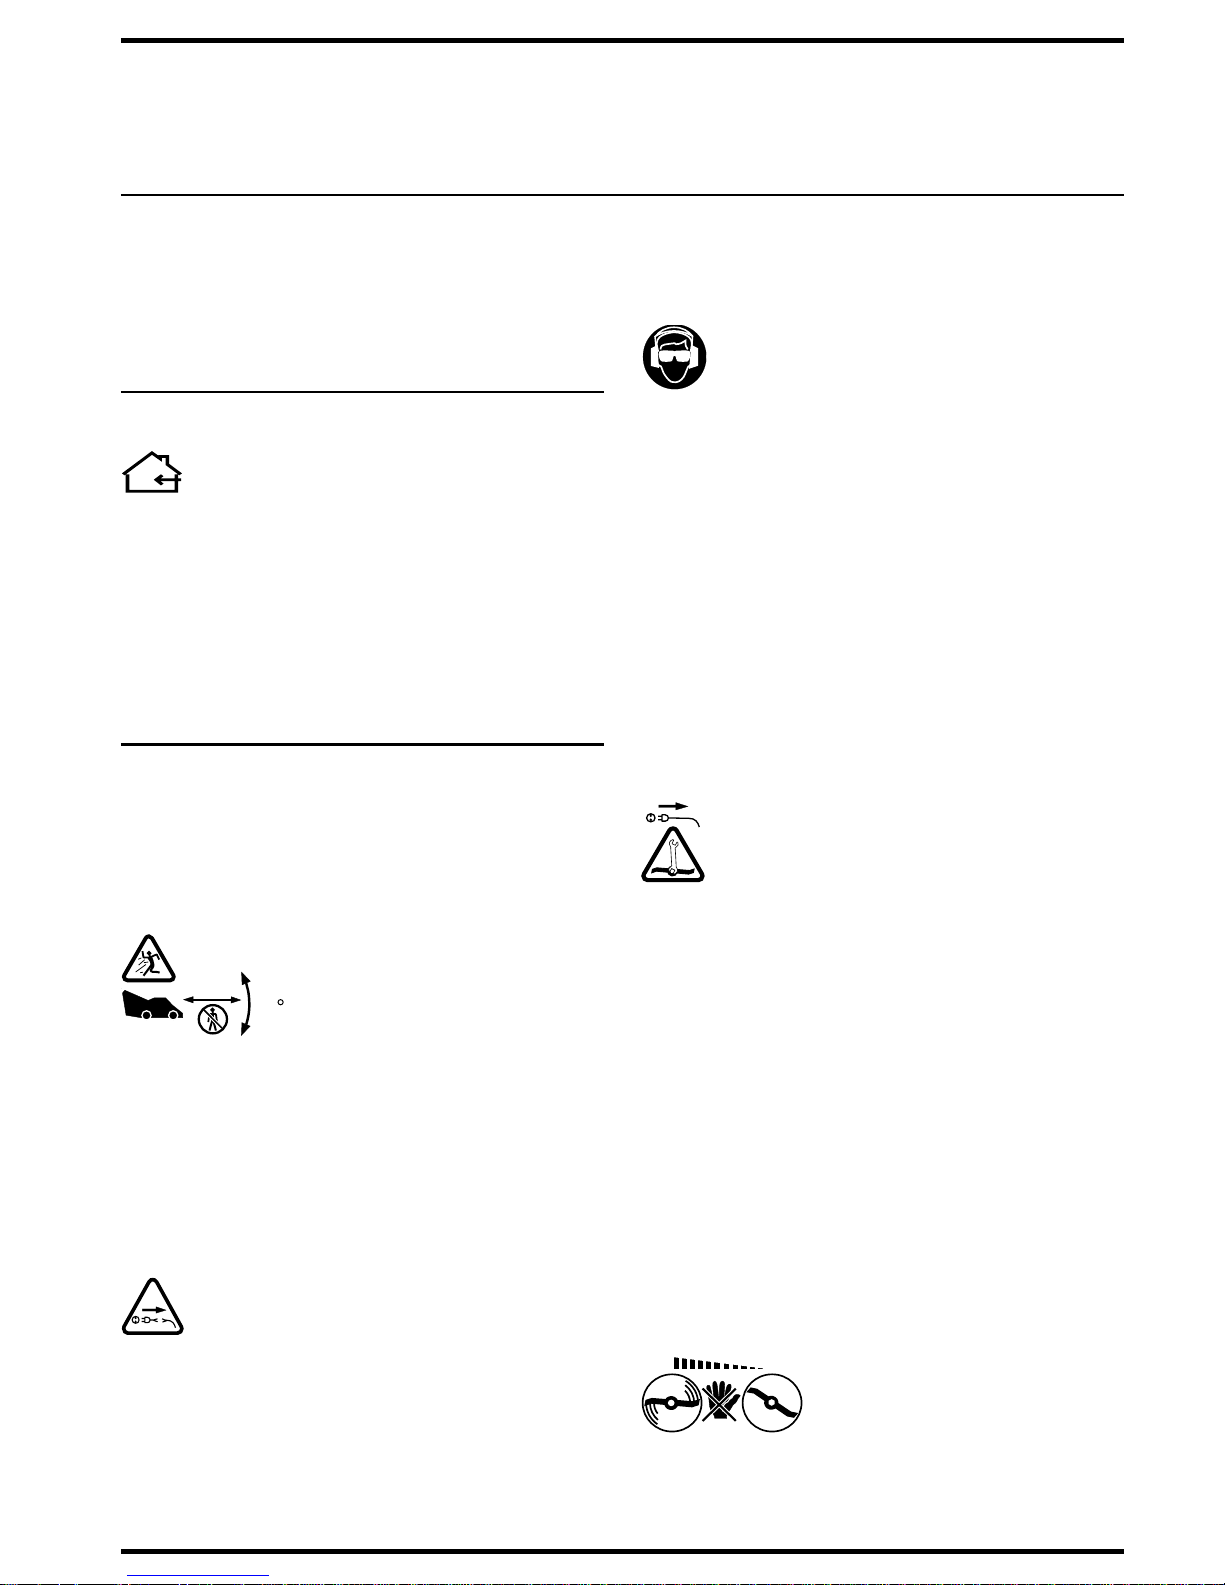
Do not allow children, animals or
other persons near your mower
when in use - always keep them
at least 6m (20ft) away from the
cutting area.
• Remember that the operator is
responsible for accidents or hazards
occurring to other people or their property.
• Your mower is designed for use on AC
(mains) electrical supplies only - do not
attempt to use it on any other supply.
• Plug your mower into a power point -
never a lighting socket.
!
• Never carry your mower by the cable or
jerk the cable to seperate the
connectors. Keep the cable away from
heat sources, oils or sharp edges. Check
the condition of your cable before use
and do not use if damaged.
Preparation
• To protect your feet, always wear stout
shoes or boots - freshly cut grass is
damp and slippery.
• Rubber or man-made footwear will
enhance your safety.
• Do not operate your mower barefoot or
in open sandals.
• Use protective equipment. Wear safety
spectacles or goggles whilst operating
your mower. Use ear protection if the
sound level seems uncomfortable when
using your mower.
• Use a face mask if dusty.
• Wear long trousers to protect your legs -
any debris left on the lawn or cutting path
may be picked up and ejected by the
blades.
• The power supply cable should be
regularly inspected for signs of damage or
ageing, and only used if in good condition.
• Always keep the power supply cable
away from the blades - be aware of its
position at all times.
• Always be sure your mower is in a safe
operating condition.
• Before using your mower, disconnect it
from the electrical supply and visually
check that the blade, blade nut and
cutter assembly are not worn or
damaged. A damaged blade or worn
blade nut is a major hazard and must be
replaced. Also check that the blade nut is
securely fastened.
• Always check that your lawn or cutting
path is clear of all sticks, stones, wire
and other debris. Contact with such
debris may be dangerous or may
damage your mower and could be
thrown by the blade.
Operation
• When tilting the handle downwards (or to
the side) to start your mower, do not tilt it
more than is absolutely necessary.
Always ensure that both hands are in the
operating position and feet are well away
from the blades before returning your
mower to the ground.
Your mower will continue to run
for a short time after releasing
the switch lever. Always allow
your mower to stop on its own.
• Release the switch lever to turn your
mower off and remove the plug from
the mains:

3
ENGLISH
• Whenever you leave your mower
unattended.
• Before checking, cleaning, adjusting
or working on your mower.
• Before clearing a blockage.
• If your mower starts to vibrate
abnormally (check immediately).
• After striking a foreign object, inspect
your mower for damage and make
repairs as necessary.
• Never run your mower whilst lying on its
side or attempt to stop the blade always allow it to stop on its own.
• Do not put hands or feet near or under
rotating parts.
• Keep clear of discharge openings at all
times.
• Start your mower carefully according to
the instructions and with your feet well
away from the blade.
• Do not use your mower in the rain and
do not allow it to get wet. Avoid using
your mower in wet grass, if possible.
• Use your mower only in daylight or good
artificial light.
• Do not pull your mower towards you or
walk backwards when in operation.
• Do not cross gravel paths or roads whilst
the tines are rotating.
• Always be sure of your footing,
particularly on slopes.
• Always cut across the face of slopes, never
up and down. Exercise extreme caution
when changing direction on slopes.
• Do not cut excessively steep slopes and
always wear non-slip footwear.
• Check the grassbox for wear or damage
and replace if necessary. Never use your
mower without the grassbox in place.
• Walk, never run. Do not force your mower.
• Never pick up or carry your mower while
the motor is running.
• Ensure the blade has stopped rotating
and take extreme care before lifting your
mower for and during transportation.
• Never operate your mower with defective
guards or shields.
Maintenance and storage
• Store your mower in a dry place when
not in use, out of the reach of children.
• Do not use solvents or cleaning fluids to
clean your mower - use a blunt scraper
to remove grass and dirt.
• Always disconnect from the electrical
supply before cleaning.
• Do not operate your mower if any parts
are defective; discard all defective parts
and fit new parts before use.
• Keep all nuts, bolts and screws tight to
be sure your mower is in a safe working
condition.
• Use only Black & Decker recommended
replacement parts and accessories.
Black & Decker’s policy is one of continuous
improvement to our products and, as such, we
reserve the right to change product specifications
without prior notice.
Double insulation
Your mower is double insulated.
This means that all external metal parts are
electrically isolated from the power supply.
This is achieved by placing an extra
insulation barrier between the electrical and
mechanical parts. Double insulation means
greater electrical safety and obviates the
necessity of having your mower earthed.
Electrical safety (UK only)
!
Your mower should always be switched off
at the mains before disconnecting any plug
and socket connector or extension cables.
Fuse replacement
If your mower is supplied with cable fitted
with a non-re-wireable plug:
• The plug is fitted with a 13 amp fuse
which is the recommended fuse for
your mower.
• Only use replacement fuses which are
approved to BS1362.
• When changing the fuse in your plug,
always ensure the fuse cover is refitted.
If the fuse cover is missing or damaged
do not use the plug.
Note: Fuses do not give personal protection
against electric shock.
Plug replacement
• Disconnect the plug from the supply.
• Cut off the plug and dispose of
immediately. Insertion of a detatched
plug into a 13 amp socket outlet may
result in electric shock.
4
• Only fit BS1363A approved plugs fitted
with the correctly rated fuse.
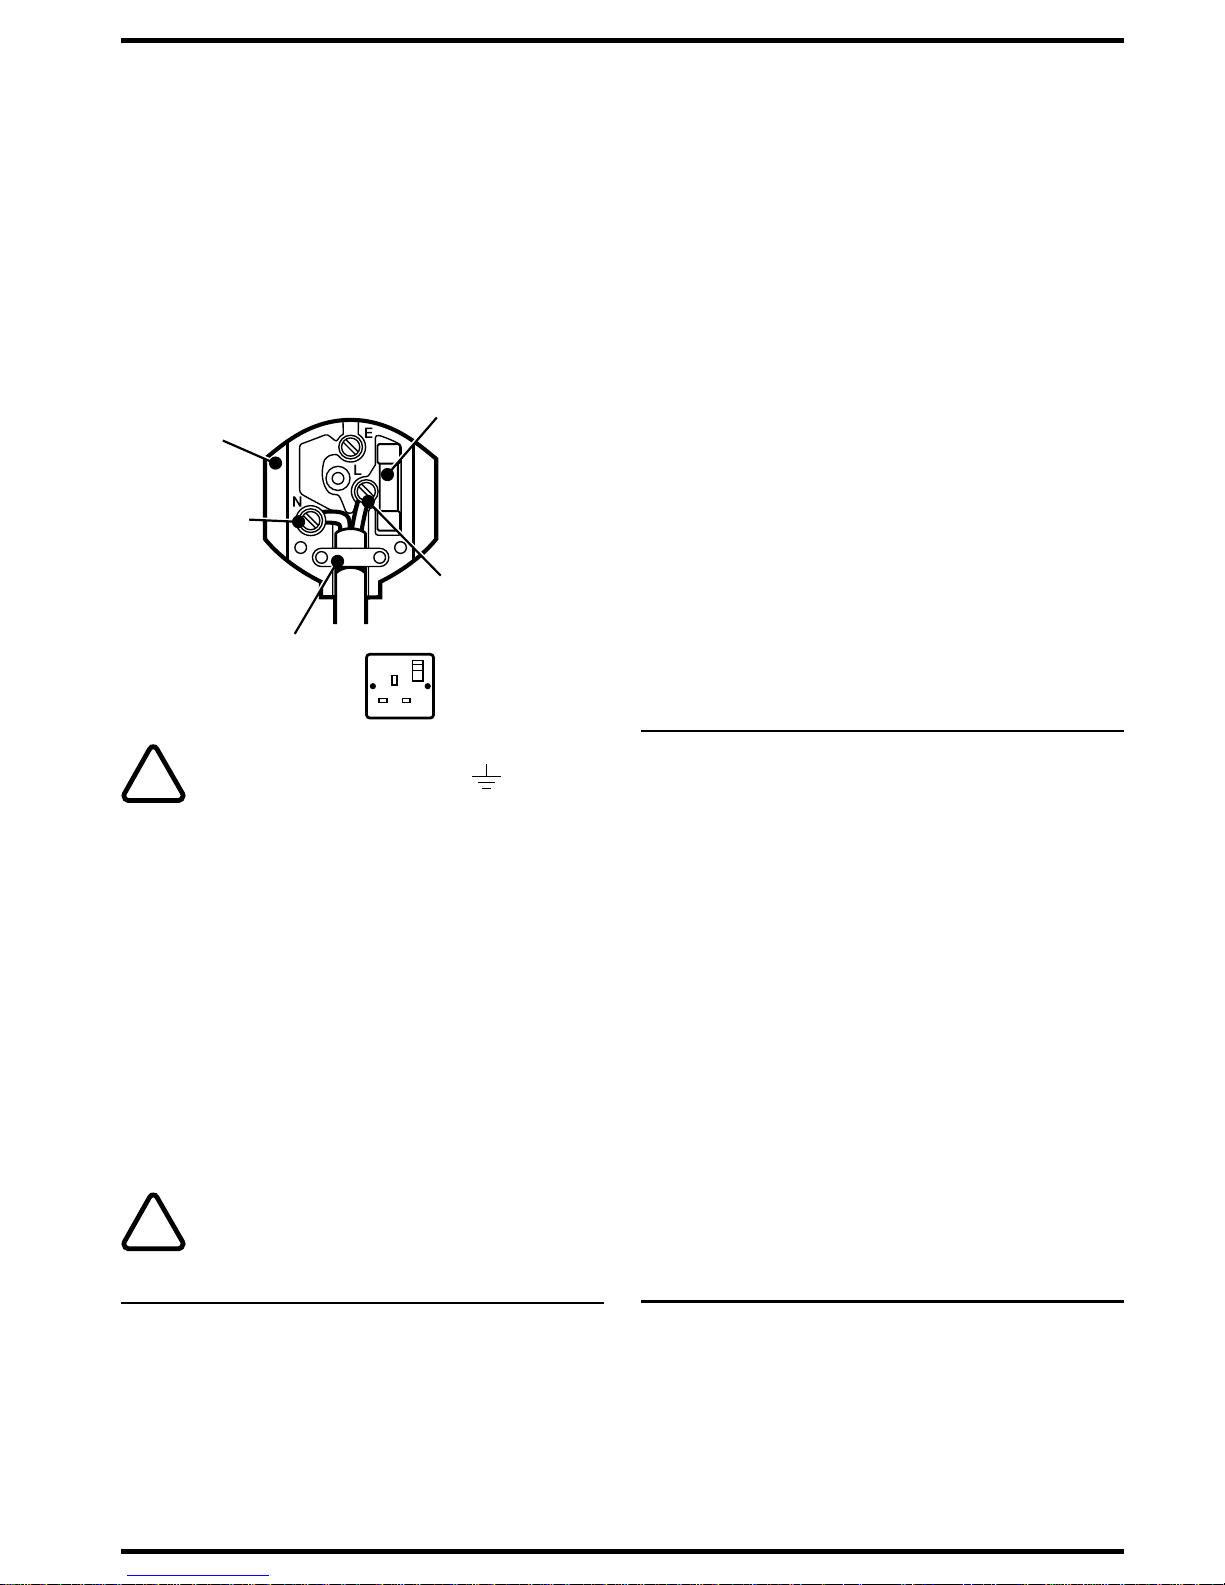
• The cable wire colours, or a letter, will be
marked at the connection points of most
good quality plugs. Attach the wires to
their respective points in the plug (see
below). Brown is for “Live” (L) and blue is
for “Neutral” (N).
• Before replacing the top cover of the
mains plug ensure that the cable restraint
is holding the outer sheath on the cable
firmly and that the two leads are correctly
fixed at the terminal screws.
Fit a
BS1363A
approved
plug
Connect blue
to N (neutral)
Make sure that the
outer sheath of the
cable is held firmly
by the clamp
Fit the
recommended
fuse
Connect brown
to L (live)
240 volts AC only.
Never use a light
socket
!
Warning! Never connect live or neutral wires
to the earth pin marked “E” or .
Note: Do not wire an extension cable directly
into your mower yourself. Instead, take your
mower to your nearest Black & Decker
service agent.
Increased safety can be obtained by having
a qualified electrician install a high sensitivity
(30mA) circuit breaker in the house wiring.
If you do not have such a circuit breaker
installed, or you do not wish to have one
installed, then we strongly recommend that
the electrical power to your mower be
supplied through a high sensitivity residual
current device (RCD). The RCD is designed
to provide a high degree of personal
protection against harmful electric current
should fault conditions occur.
!
Warning! The use of an RCD or other circuit
breaker unit does not release the operator of
your mower from the safety instructions and
safe working practices given in this manual.
Features (Fig. A)
A
Your purchase of a Black & Decker GR230C
range lawnmower gives you a product
combining quality with modern design and
the following features to provide safe,
efficient and easy mowing.
• Lock-off safety switch to prevent
accidental starting of your mower.
• A blade brake (AUTOSTOP) for added
safety. Stops the blade rotating within
3 seconds once the switchbox lever is
released.
• Large handle wing nuts for easy
assembly and storage.
• Three height of cut positions which
provides the flexibility to deal with most
grass conditions.
• The wheels are in line with the outside of
your mowers body which allows cutting
right up to the edge of the lawn.
• Tough, durable plastic deck which will
not rust and contributes to low noise and
low vibration.
• Powerful and efficient induction motor
which gives effective cutting and bagging
in all reasonable conditions and a low
noise level as well as low maintenance.
• Ergonomically designed upswept handle
for comfortable use and ease of pushing.
• Easy grassbox removal.
• Cable restraint helps keep the cable out
of the way and prevents the cable socket
being accidentally pulled and disconnected.
Carton contents
Mower carton containing:
• Mower body.
• 3 part handle assembly.
• 2 part grassbox assembly.
Wheels parts pack containing:
• 4 wheels.
• 4 screw bolts.
• 4 nuts.
• 4 washers.
Loose parts pack containing:
• 1 spanner/scraper.
• 4 handle wing nuts.
• 4 washers.
• 2 bolts.
• User manual including guarantee card.
• Service sheet.
Handle assembly (Fig. B)
Remove all the parts from the carton and
familiarise yourself with the individual parts of
your mower.
With your mower body on a level surface,
assemble the lower handles to your mower
body as follows:

5
ENGLISH
Note: The switch box should be positioned
on the right hand side of your mower when
viewed from the operating position. Ensure
that the electrical supply cables to and from
the switchbox are not damaged or twisted
before you begin to assemble your mower.
B1
• Locate the lower handles (1) over the
grassflap axle (2) and position the flange
on the handles into the rectangular
aperture in the deck (3).
B2
• Fit a plain washer (5) and then fit the
wing nut (6) onto the axle. The plain
washers and wing nuts can be found in
the parts pack. Tighten each wing nut
with hand pressure only.
B3
• Place the upper handle (7) into the cups
of the lower handles and align the holes
in the upper and lower handles. Fit a bolt
(8) through each hole. Fit a plain washer
and then fit the wing nuts onto the bolts.
Tighten each one with hand pressure only.
Note: Do not use a spanner or other
implement to tighten the wing nuts.
Fit the switchbox to the upper handle
as follows:
B4
• Remove the two screws holding the
retaining plate to the main body of
the switchbox.
B5
• Locate the two pins on the switchbox
with the holes in the upper handle.
B6
• Fit the retaining plate over the stem of the
handle using the two screws provided.
Note: Do not overtighten these screws light pressure will be sufficient to hold the
switchbox in position.
Wheel assembly and height of cut
adjustment (Fig. C)
Before wheel assembly adjustment ensure
your mower is disconnected from the mains.
Each of the four wheels has its own means
of height adjustment which gives 3 cutting
height positions.
C1
• Select one of the tapped holes in the
mounting plate (9) and note it as the
other three wheels will have to be
adjusted to the same position.
• Locate the wheel (10), and the screw bolt
(11) into the selected hole and ensure the
washer (12) is present on the bolt
between wheel and cutter deck.
• Position nut (21) behind chosen hole in
the mounting plate.
C2
• Use the spanner provided and turn the
screw bolt in a clockwise direction.
Ensure the wheel is free to rotate.
Using the same height adjustment position
repeat the procedure for each of the other
three wheels.
The bottom tapped hole in the mounting
plate will give a maximum height of cut which
is suitable for coarse or overgrown grass.
The top hole should be used for maintaining
cultivated lawns, and the middle hole is for
intermediate conditions.
We recommend that the middle hole or
bottom hole is selected for the first use of
your lawnmower.
Grassbox assembly (Fig. D)
Read the safety instructions at the beginning
of this manual before using this accessory.
D1
• The grassbox is supplied in two parts
which slot together.
Fitting the grassbox to your mower:
D2
• The spring loaded rear flap (15) is lifted
and the top of the grassbox is placed
over the mounting.
• The rear flap can now be released to lock
the grassbox into position.
Removing the grassboxfrom your mower:
The full grassbox may be removed by raising
the grassflap, freeing the grassbox from its
mounting and resting it on the lawn. The
grassflap can be gently lowered, leaving both
hands free to lift the full grassbox.
How to use your mower (Fig. E)
!
Observe all of the relevant warnings when
using your mower.
We recommend the directional method of
operation to obtain the maximum cutting
performance from your mower and to reduce
the risk of the trailing the extension lead from
entering the cutting path.
E1
• Place the bulk of the supply cable on
the lawn close to the starting point
(see Fig. E1 (a), position 1).
• Hold the handle assembly with both
hands.
6
Your switch box incorporates a cable
restraint. To fix the cable to the restraint,
proceed as follows:
• Bring the socket end of the extension
cable from behind and connect it to your
mower plug.
E2
• Form a loop on your extension cable
close to the switchbox.
E3
• Push the loop through the slot from the
opposite side of the restraint hook,
position the loop over the hook and pull
the cable back through the slot. Your
cable will now be restrained.
• The extension cable should now fall
away from your mower and behind the
operator, ready for use.
!
Warning! Do not attempt to operate your
mower with one hand - you must guide it
with both hands.
E4
• Tilt the handle downwards to slightly raise
the front of your mower and to reduce
the risk of lawn damage whilst starting,
depress the safety lock-off button (16) on
the switchbox and whilst still depressed
pull the switch lever (17) towards you.
Your mower will start and you can now
allow the lock-off button to be released
and lower your mower to its proper
cutting position, and commence cutting.
• Proceed down the cutting area as shown
in Fig. E1 (a), working form position 1
towards position 2 and, on reaching
position 2, turn to the right and proceed
towards position 3. Continue to the end
of the cutting area, turn to the left and
proceed towards position 4. Continue in
the same manner as shown in Fig. E1 (a),
always working away from the cable.
Do not adopt the method as shown in
Fig. E1 (b), working towards the cable, as
this is dangerous practice.
Your mower will continue to operate whilst
you are pulling the switch lever. To stop your
mower release the switch lever.
When you have finished using your mower
we recommend that you clean all debris from
it before putting it away. Refer to the
‘Care and maintenance’ section.
Note: To obtain the best results cut your
lawn or grass area regularly and do not cut
when the grass is wet.
If, when grass cutting, loose grass is seen
to be scattering from beneath your mower,
the grassbag is probably full and should be
emptied.
Blade maintenance
The steel blade is designed to give a fine
finish in long or tough grass. The blade will
continue to cut even when it has become
blunt or burred. There is no need for it to be
razor sharp.
If, however, because of damage or wear the
cutting performance deteriorates, then your
mower may require a new blade, or at least
the existing blade to be sharpened.
We recommend that the steel blade is
sharpened or a new blade fitted at the
beginning of each season.
Replacement blades (cat. no. A6177) are
available from Black & Decker service agents.
!
Warning! When fitting a new blade use only
the Black & Decker replacement part
specified for your mower - do not attempt to
fit any other blade.
Fitting a new blade (Fig. F)
!
Observe all the relevant warnings before
changing the blade.
Warning! Disconnect your mower from the
electrical supply before changing the blade.
F
• Turn your mower over on its side so that
the underside of the cutter cover (2) is
exposed.
• Using a cloth placed over the blade or
heavy duty gloves to protect your hands,
grip the blade and, using the spanner
provided, loosen and remove the nut (21)
from the motor spindle. Turn the nut in an
anti-clockwise direction to loosen it.
• The blade can now be replaced and the
washer and nut reassembled.
Note: Do not remove the impeller (18) for
any reason.
Note: Some mowers are fitted with a clutch
washer, between the blade nut and the blade,
which must be reassembled at all times.
Handy hints
• On long grass, above 10cm (4 inches), use two
cuts to get a close finish. We recommend that
the first cut should be taken with the blade set at
maximum height of cut and the second taken
with it set at medium or close. This will prove to
be easier and give a better overall finish to
your lawn.
7
Care and maintenance
The advice given in this section covers the
general care and maintenance of the main
body of your mower. Advice relating to the
blades is given in “Maintenance of blades”.
!
Warning! Do not use an extension cable
which shows signs of damage. Fit a new
cable completely - do not make any
permanent or temporary repairs.
• Always keep your mower clean and free
from grass cuttings, especially the
underside of the cutter deck and the air
vents.
• Check all electrical cables at regular
intervals, looking for signs of wear,
abrasion or other damage.
• At the end of each cutting session we
recommend that the build up of grass on
the underside of the cutter cover is
removed using a blunt scraper.
• Clean all plastic components with a
damp cloth.
Caution: Do not use solvents or cleaning
fluids as these may damage the plastic
components of your mower.
Fault finding
If your mower does not operate correctly,
use the following table to locate the problem.
!
Warning! Always disconnect your mower
from the electrical supply before carrying out
any inspection.
Symptoms Possible cause Remedy
Motor buzzes Blade jammed. Disconnect from
but blade does the electrical
not move. supply.
Remove
obstruction from
the blade.
No noise and Faulty electrical Disconnect from
blade does connection. the electrical
not move. supply.
Plug your mower
into an alternative
compatible
electrical supply.
Fit a new fuse.
Re-tighten and
check all electrical
connections in
extension cables.
Re-set RCD in
accordance
with instructions.
ENGLISH
What to do if your mower needs
repair
For after sales service please refer to the section
‘Lawnmowers & Garden’ within your local
Yellow Pages.
Unwanted products and the
environment
Should you find one day that your mower
needs replacement, or is of no further
use to you, think of the protection of the
environment. Black & Decker service agents
will accept your old mower and will dispose of
it in an environmentally safe way.
Black & Decker lawn and garden
guarantee
This guarantee provides 36 months parts cover
and 12 months labour (UK), 24 months parts
cover and labour (Australia and New Zealand).
In all cases proof of purchase will be required.
lf your Black & Decker mower becomes defective,
within the guarantee period, due to faulty materials
and workmanship, we guarantee to either replace all
defective parts, or at our discretion, replace your
mower free of charge, provided that:
• Your mower is returned to one of our authorised
repair agents with evidence of purchase.
• Your mower has been used within the
parameters of its consumer classification.
• Your mower has not been used for hire purposes.
• Repairs have not been attempted by anyone
other than our authorised repair agents.
• The failure represents normal wear and tear.
This guarantee is offered as an extra benefit and is
additional to your statutory rights.
Our guarantee policy
Failures due to the following are not covered:
• Replacing worn or damaged blades, nylon line
and chains, or cables damaged during storage
or use. These are regarded as replacement items
which wear during normal usage.
• Failures as a result of sudden impact or obvious
abuse.
• Failures due to usage not in accordance with
instructions and recommendations contained in
this manual.
8
EC Declaration of Conformity
We declare that units:
GR230, GR230C
conform to 89/392/EEC, 89/336/EEC,
73/23/EEC, EN55104, EN55014, EN60335
A weighted sound pressure @ 4m 65dB (A)
A weighted sound power 85dB (A)
Hand/arm weighted vibration <2.5m/s
2
Brian Cooke
Director of Engineering
Spennymoor, County Durham DL16 6JG
United Kingdom
The use of other than genuine Black & Decker
accessories and parts may damage or reduce the
performance of your Black & Decker mower and may
render the guarantee void.
Black & Decker after sales service
(UK, Australia and New Zealand only)
Black & Decker offers a nationwide network of
authorised service agents. The use of other than
genuine Black & Decker accessories and parts may
damage or reduce the performance of your
Black & Decker product and may also endanger the
user. The terms and conditions of the warranty may
also be effected.
It is our aim that all Black & Decker customers should
be totally satisfied with their Black & Decker product
and after sales service, if help or advice is needed
please contact a local Black & Decker authorised
repair agent who will be happy to help. Full details of
our after sales service can be obtained from any of
our Black & Decker authorised repair agents.
Other Black & Decker products
(UK only)
Black & Decker has a full range of outdoor power
tools that make life easy in the garden. If you would
like further information on other products, please
contact the Black & Decker Service Information
Centre at the address towards the back of this
manual, or contact your Black & Decker stockist.
Lawnmowers String trimmers
Chainsaws Lawnrakers
Compost shredders Leafbusters
Blade trimmers Cordless brooms
Cordless trimsaws Cordless shrubbers
Cordless shears Hedgetrimmers
ENGLISH
9
Tosaerba
GR230
Manuale d’istruzioni
Introduzione
Questo manuale fornisce le istruzioni per operare e
per fare la manutenzione di tutti i tosaerba elettrici
Black & Decker della gamma GR230.
Imparare a conoscere la macchina
Leggere attentamente tutto il manuale di
istruzioni e osservare tutte le precauzioni di
sicurezza (avvertenze) prima, durante e dopo
l’utilizzo dell’utensile e mantenerlo sempre in
buone condizioni d’utilizzo.
Familiarizzare con tutti i comandi dell’utensile
prima di iniziare ad usarlo, ma soprattutto
assicurarsi di sapere come spegnerlo in caso
di emergenza.
Conservare questo manuale e tutti i depliants
forniti per ogni riferimento futuro.
Norme di sicurezza
Istruzione
• Non lasciare mai che l’apparecchio venga
utilizzato da bambini o persone che non
abbiano dimestichezza con lo stesso e
che non abbiano letto le istruzioni.
360
6m / 20ft
Non permettere a bambini,
animali o altre persone di
stazionare nelle vicinanze
dell’apparecchio in uso - tenerli
sempre a una distanza minima di
6m dalla zona di taglio.
• Ricordarsi che l’operatore/utente è
responsabile dei pericoli o danni arrecati
a persone o a cose di loro proprietà.
• L’apparecchio è previsto per essere
utilizzato solo con un’alimentazione (rete
elettrica) a corrente alternata. Non
utilizzare fonti di alimentazione diverse.
• Inserire la spina in una presa di
alimentazione
!
• Non trascinare mai l’apparecchio
tirandolo per il cavo né strappare
quest’ultimo per staccare i connettori.
Tenere il cavo lontano da fonti di calore,
olii od oggetti con spigoli taglienti.
Verificarne le condizioni e non impiegarlo
se risulta danneggiato.
Preparazione
• Per proteggere i piedi indossare sempre
scarpe o stivali resistenti - l’erba tagliata
di fresco è umida e scivolosa.
• Impiegare dispositivi di protezione
individuale. Indossare occhiali di
sicurezza durante l’uso dell’apparecchio.
• Indossare una mascherina protettiva se
si genera pulviscolo.
• Indossare protezioni per le orecchie se,
durante l’uso dell’apparecchio, la
rumorosità raggiunge un livello fastidioso.
• L’operatore non deve azionare
l’apparecchio a piedi nudi o con
sandali aperti.
• Indossare pantaloni lunghi per
proteggere le gambe; i detriti rimasti sul
prato o nella zona di taglio possono
venire raccolti e scagliati dalle lame.
• Controllare regolarmente il cavo di
alimentazione per identificare eventuali
segni di danni o usura, e impiegarlo
soltanto se in buone condizioni.
• Tenere sempre il cavo di alimentazione a
distanza dalle lame - e controllarne la
posizione ogni volta.
• Accertarsi che l’apparecchio funzioni
sempre in buone condizioni di sicurezza.
•
Prima di usare l’utensile disinnestarlo dalla
rete elettrica e controllare la lama e le parti
ruotanti per verificare la presenza di
eventuali segni di danni o di logorio. Una
lama danneggiata e dei bulloni allentati
costituiscono elementi di pericolo.
Verificare anche che la lama sia ben
fissata. Controllare frequentemente che
tutte le viti e i bulloni siano ben stretti.
• Controllare sempre che nel prato o nella
zona di taglio non vi siano ramoscelli,
pietre, filo e altri detriti. I denti del rastrello
potrebbero proiettarli all’esterno creando
una situazione pericolosa o
danneggiando l’apparecchio.
Funzionamento
• Quando per l’avviamento si inclina il
manico verso il basso o a lato, non
compiere movimenti più ampi del
necessario. Accertarsi sempre che
entrambe le mani si trovino nella
posizione giusta per l’uso e che i piedi

10
siano ben lontani dalle lame prima di
rimettere in posizione l’apparecchio.
Dopo aver sbloccato la leva di
comando l’apparecchio
continuerà a funzionare
per breve tempo. Aspettare che
si fermi da solo.
• Per spegnere l’apparecchio sbloccare la
leva di comando e staccare la spina dalla
presa di rete:
• Quando si lascia l’apparecchio
incustodito.
• Prima di effettuare operazioni di
controllo. pulizia, regolazione e
intervento sull’apparecchio.
• Prima di togliere un’ostruzione.
• Se l’apparecchio inizia a vibrare in
modo anormale (effettuare un
controllo immediato).
• Dopo aver colpito un corpo estraneo.
Controllare eventuali danni
all’apparecchio ed effettuare le
riparazioni necessarie.
• Non azionare l’apparecchio appoggiato
su un lato né tentare di arrestare le lame
- aspettare sempre che si fermi da solo.
• Non avvicinare le mani o i piedi né
metterli sotto le parti rotanti.
• Tenersi sempre a distanza dalle aperture
di scarico.
• Avviare l’apparecchio con attenzione
seguendo le istruzioni e tenendo i piedi a
debita distanza dalle lame.
• Non usare l’apparecchio quando piove o
in presenza di umidità né, se possibile,
sull’erba bagnata.
• Usare l’apparecchio solo di giorno o in
presenza di una buona illuminazione
artificiale.
• Non tirare verso di sé l’apparecchio né
camminare all’indietro durante l’uso.
• Non attraversare mai sentieri di ghiaia o
strade durante la rotazione delle lame.
• Controllare la sicurezza dei propri punti
d’appoggio, soprattutto sui pendii.
• Tagliare sempre in direzione trasversale
rispetto al pendio, mai in verticale.
Cambiare direzione in pendenza con
estrema cautela.
• Non tagliare su pendii troppo ripidi e
indossare sempre calzature anti-scivolo.
• Non sollevare o trasportare l’apparecchio
con il motore in funzione. Quando si
procede a tale operazione accertarsi
che le lame abbiano smesso di ruotare.
• Per il trasporto sollevare l’unità con
estrema cautela.
• Non utilizzare mai l’apparecchio con
protezioni difettose.
Manutenzione e conservazione
• Riponete la macchina non in uso in un
luogo asciutto e lontano dalla portata
dei bambini.
• Non usate solventi o altre sostanze
chimiche per pulire l’utensile - usate un
raschietto non appuntito per rimuovere
erba e detriti. Disinserite sempre la spina
dalla presa di alimentazione prima di
procedere alla pulizia dell’utensile.
• Non utilizzate la macchina con parti
difettose. Sostituite sempre le parti
difettose prima dell’uso.
• Controllate che tutti i dadi e le viti siano
sempre serrati, per essere sicuri che
l’utensile sia in condizioni efficienti.
• Usate solo parti ed accessori originali
Black & Decker.
Black & Decker si pone l’obiettivo di migliorare
costantemente i suoi prodotti e, a tale scopo, si riserva
il diritto di modificarne le specifiche senza preavviso.
Doppio isolamento
L’apparecchio è dotato di un doppio
isolamento. In altre parole una barriera
supplementare, collocata tra i componenti
elettrici e quelli meccanici, isola
elettricamente dall’alimentazione tutti i
particolari metallici esterni. Il doppio
isolamento offre una maggiore sicurezza
elettrica rendendo superfluo il collegamento
a terra dell’apparecchio.
Sicurezza elettrica
!
Spegnere sempre l’apparecchio dalla rete
prima di staccare qualsiasi spina, presa o
prolunga.
Per aumentare ulteriormente la sicurezza far
installare da un elettricista specializzato un
interruttore ad alta sensibilità (30mA)
nell’impianto domestico.
Se non si desidera tale installazione, oppure
non è stata effettuata, si consiglia
caldamente di alimentare l’apparecchio
mediante un dispositivo per corrente residua
ad alta sensibilità (RCD), ideato per fornire un
elevato grado di protezione personale contro
gli effetti indesiderati della corrente elettrica in
caso di guasti.

11
!
Avvertenza! L’impiego del RCD o di altri
dispositivi interruttori non esenta l’operatore
dall’osservare le istruzioni di sicurezza e le
norme per il funzionamento sicuro contenute
nel presente manuale.
Caratteristiche (Fig. A)
A
L’acquisto di questo tosaerba Black & Decker
GR230 vi offre un prodotto che combina
qualità con un design moderno e le seguenti
caratteristiche che assicurano un lavoro
sicuro, facile ed efficiente:
• Tasto di esclusione interruttore per
evitare accensioni accidentali.
• Freno lama (autostop) per ulteriore
sicurezza. La lama si di ferma entro 3
secondi dal rilascio della leva interruttore.
• Galletti di fissaggio di grandi dimensioni
per un montaggio più semplice.
• Tre posizioni di altezza di taglio che
consentono di affrontare le più diverse
condizioni di erba.
• Le ruote in linea che consentono di
tagliare proprio fino ai bordi del prato.
• Corpo in plastica robusto e durevole che
non arrugginisce e che consente di
contenere il rumore e le vibrazioni.
• Potente motore a induzione, potente ed
efficiente per ottimi risultati di taglio e
raccolta, in condizioni normali, a bassa
rumorosità.
• Impugnatura ribaltabile ergonomica per
facilità di utilizzo.
• Serracavo che aiuta a tenere il cavo
elettrico lontano dalla zona di lavoro e
previene lo scollegamento della spina.
• Black & Decker si riserva di innovare o
modificare le specifiche dell’utensile
senza previo avviso.
Il cartone contiene
Ill cartone contenente il tosaerba include:
• Il corpo tagliaerba
• 3 componenti impugnatura
• 2 componenti sacchetto raccoglierba
Sacchetto con componenti per ruote contenente:
• 4 ruote
• 4 bulloni
• 4 dadi
• 4 rondelle
Sacchetto di parti sciolte contenente:
• 1 chiave - raschietto
• 4 galletti per impugnatura
• 4 rondelle
• 2 bulloni
• 1 manuale istruzioni e scheda di garanzia
• 1 foglio manutenzione
Assemblaggio Impugnatura (Fig. B)
• Rimuovete tutti i componenti dall’imballo
e identificateli secondo la Fig. A.
Ponete il corpo macchina su una superficie
piana e montate le impugnature inferiori
come segue:
Nota: La scatola interruttore deve essere
posizionata sul lato destro della macchina
guardandola dalla posizione dell’operatore.
Assicuratevi che i cavi che arrivano e partono
dalla scatola non siano danneggiati o
attorcigliati prima di iniziare a montare
la macchina.
B1
• Posizionate le impugnature inferiori (1)
sopra l’asse della falda del sacchetto
raccoglierba (2) e posizionate la flangia
sulle impugnature nella apertura
rettangolare sul coperchio (3)
B2
• Inserite una rondella (5) poi inserite il
galletto (6) sull’asse. La rondella ed il
galletto sono contenuti nel sacchetto parti
sciolte. Stringete a mano ogni galletto.
B3
• Posizionate l’impugnatura superiore nelle
coppe dell’impugnatura inferiore ed
allineate i fori. Inserite un bullone in
ciascun foro. Inserite una rondella ed un
galletto e stringeteli a mano.
Nota: Non utilizzate chiavi o pinze per
stringere i galletti.
Montate la scatola interruttore sulla
impugnatura superiore come segue:
B4
• Rimuovete le due viti sulla piastra di
fissaggio sul corpo della scatola
interruttore.
B5
• Allineate i due perni sulla scatola
interruttore con i fori nell’impugnatura
superiore.
B6
• Inserite la piastra di fissaggio
sull’impugnatura e fissatela utilizzando
le due viti in dotazione.
Nota: Non stringete eccessivamente queste
viti - è sufficiente una leggera pressione per
fissare la scatola interruttore.
ITALIANO
12
Assieme ruote e regolazione della
altezza di taglio (Fig. C)
Prima di regolare l’assieme ruote, assicuratevi
che la spina sia scollegata dalla rete elettrica.
Ognuna delle 4 ruote è dotata di regolazione
in altezza che complessivamente
consentono 3 diverse altezze di taglio.
C1
• Selezionare uno dei fori filettati sulla
piastra (9) ed evidenziatelo in quanto le
altre 3 ruote dovranno essere fissate
nella stessa posizione.
• Posizionare la ruota (10), inserire il
bullone (11) nel foro scelto, e verificare
che la rondella (12) sia montata sul
bullone, fra la ruota e il piatto di taglio.
• Posizionare il dado (21) dietro il foro
scelto sulla piastra di montaggio.
C2
• Con la chiave a corredo girare il bullone
in senso orario; verificare che la ruota giri
senza intralci.
Ripetete la stessa procedura per le altre tre
ruote utilizzando fori alla stessa altezza.
Il foro filettato sul lato inferiore della piastra
consente di ottenere la altezza massima di
taglio, adatta per erba dura o troppo cresciuta.
Il foro superiore dovrebbe essere utilizzato per il
mantenimento di giardini coltivati. Il foro
centrale è per le condizioni intermedie.
La prima volta che si utilizza il tosaerba si
consiglia di usare il foro centrale o il foro inferiore.
Montaggio del sacchetto
raccoglierba (Fig. D)
Prima di impiegare questo accessorio
leggere le istruzioni di sicurezza all’inizio del
presente manuale.
D1
Il sacchetto viene fornito in due parti: il telaio
(14) ed il sacchetto stesso (13). Fissate il
sacchetto al telaio nel modo illustrato.
Come agganciare il sacchetto
raccoglierba al tosaerba:
D2
• La falda posteriore caricata a molla (15)
viene sollevata ed i due br acci sul lato
anteriore del sacchetto vengono
posizionati dietro i due manici che salgono
dal bordo posteriore del coperchio.
• Potete rilasciare la falda in modo che fissi
il sacchetto in posizione.
Come rimuovere il sacchetto raccoglierba
al tosaerba:
È possibile rimuovere il sacchetto pieno
sollevando il flap e liberando il sacchetto dal
suo supporto ed appoggiandolo al terreno,
con il flap abbassato, lasciando entrambe le
mani libere per sollevare il sacchetto pieno.
Come utilizzare il tagliaerba (Fig. E)
!
Osservate sempre tutte le norme di
sicurezza durante l’utilizzo del vostro
tagliaerba.
Vi consigliamo di procedere al lavoro
secondo le direzioni indicate per ottenere le
prestazioni migliori dalla vostra macchina e
per ridurre il rischio di essere intralciati dai
cavi di prolunga.
E1
• Ponete la matassa dal cavo elettrico
sul giardino vicino al punto di partenza
(Fig. E1 (a), posizione 1).
• Tenete entrambe le mani sull’impugnatura.
La scatola interruttore contiene un serracavo.
Per fissare il cavo al serracavo, procedete
come segue:
• Inserire da dietro l’estremità del cavo di
prolunga dotata di presa e collegarla alla
spina dell’utensile.
E2
• Formate un anello sul cavo vicino alla
scatola interruttore.
E3
• Inserite l’anello attraverso la fessura
dal lato opposto rispetto al serracavo,
posizionate l’anello sopra al gancio ed
estraete il cavo attraverso la fessura.
Il cavo è cosi serrato.
• Il cavo ora dovrebbe cadere lontano dalla
macchina dietro all’operatore, pronto
all’uso.
!
Attenzione! Non tentate mai di utilizzare la
macchina con una sola mano - guidatela con
entrambe le mani.
E4
• Ruotate l’impugnatura verso il basso per
sollevare leggermente la parte frontale
del tagliaerba per ridurre i rischi di
danneggiare il terreno accendendo
l’utensile. Il tosaerba è dotato di tasto
esclusione interruttore (16) posto sulla
scatola interruttore, tenendolo premuto
tirate verso di voi la leva interruttore (17).
Il motore si accende e potete rilasciare il
tasto esclusione interruttore, abbassate la
macchina in posizione ed iniziate il lavoro.
• Procedete al lavoro come mostrato in
Fig. E1 (a), procedendo dalla posizione 1
verso la posizione 2 dalla quale girerete a
destra raggiungendo la posizione 3.
Continuate fino alla fine dell’area di
lavoro, girate a sinistra e raggiungete la
posizione 4. Continuate sempre nel
modo illustrato dalla Fig. E1 (a),
avanzando sempre lontano dal cavo.
Non utilizzate il metodo illustrato dalla
Fig. E1 (b) in quanto è pericoloso.
La macchina resterà in funzione fino a che
terrete premuta la leva interruttore. Per
fermarla, rilasciate la leva.

13
Avendo terminato di usare il tosaerba,
vi consigliamo di rimuovere tutti i detriti prima
di riporlo. Vi consigliamo di consultare la
sezione “Cura e manutenzione” in questo
manuale.
Nota: Per ottenere i risultati migliori, tagliate
regolarmente l’erba e non tagliate quando
l’erba è umida.
Se, durante il taglio, noterete che dell’erba
viene scagliata dai lati della macchina,
è probabile che il sacchetto sia pieno.
Manutenzione della lama
Le lame in acciaio sono disegnate per dare
buona finitura su erba alta o dura. La lama
continuerà a tagliare anche una volta perso il
filo. Non è necessario che sia affilatissima.
Ma nel caso che le prestazioni siano
sensibilmente ridotte dalle cattive condizioni
della lama allora è consigliabile procedere
alla sostituzione o riaffilatura delle lame.
Consigliamo di riaffilare o sostituire la lama in
acciaio all’inizio di ogni stagione.
Le lame sono disponibili presso rivenditori e
filiali di assistenza Black & Decker.
!
Attenzione! Utilizzare solo lame e parti
Black & Decker specificate per il vostro
modello - non montare mai altre lame.
Montaggio di lame nuove (Fig. F)
!
Osservare sempre tutte le “attenzioni” al
termine dell’uso.
Attenzione! Scollegare la spina dalla presa.
F
• Capovolgere il tosaerba in modo che la
parte inferiore del tosaerba sia rivolta
verso l’alto.
• Usando un panno posto sopra la lama
o dei guanti pesanti per proteggere le
mani, prendere la lama e usando la
chiave fornita allentare e rimuovere il
bullone dall’alberino del motore. Girare il
dado in senso antiorario per allentarlo.
Nota: Non rimuovete per nessun motivo
l’eccitatore (18).
Nota: Alcuni modelli sono forniti con una
rondella posizionata tra la lama e il bullone,
questa rondella deve essere sempre
riposizionata nella giusta posizione.
Consigli e suggerimenti utili
• Sull'erba alta, sopra i 10 cm. fate due tagli per
ottenere un lavoro finito. Si consiglia di fare il
primo taglio con la lama posizionata sulla
ITALIANO
massima altezza di taglio ed il secondo ad una
altezza di taglio intermedia. Questo vi permetterà
di dare al prato un taglio più facile e finito.
Cura e manutenzione
Le note contenute in questo capitolo si
riferiscono alla cura generale del vostro
tagliaerba.
!
Attenzione! Non usare prolunghe che
mostrino segni di deterioramento - sostituire
sempre il cavo completo non effettuare mai
riparazione temporanee o permanenti.
• Tenere sempre pulito l’utensile e libero da
detriti, in particolare la parte inferiore del
copri lama e le scanalature di ventilazione.
• Controllare regolarmente tutti i cavi
elettrici.
• Al termine di ogni sessione di taglio,
rimuovere con una spatola i rimasugli di
erba attaccati sotto al tosaerba.
• Pulire tutti i componenti in plastica con
un panno umido.
Attenzione: Non usare solventi o altri fluidi in
quanto potrebbero danneggiare le parti in
plastica dell’utensile.
Per individuare eventuali guasti
Se l’utensile non lavora bene, usare la
seguente tabella per identificare il problema.
!
Attenzione! Disconnettere sempre il
tosaerba dalla rete elettrica prima di
procedere a qualsiasi ispezione.
Sintomi Possibili cause Rimedi
Il motore gira La lama è Disinnestare l’utensile
ma la lama bloccata. dalla rete elettrica.
non si muove. Togliere ciò che
blocca la lama.
Il motore Il collegamento Disinnestare l’utensile
non gira e le elettrico è dalla rete elettrica.
lame non si difettoso. Inserire la spina in
muovono. una presa diversa.
Inserire un nuovo
fusibile.
Riavvitare e
controllare tutti i
collegamenti elettrici
del cavo e della
della prolunga.
14
ITALIANO
Dichiarazione di conformitá EC
Si dichiara che i prodotti: GR230, GR230C sono
conformi a 89/392/EEC, 89/336/EEC, 73/23/EEC,
EN55104, EN55014, EN60335
Pressione acustica ponderata @ 4m 65dB (A)
Potenza acustica calibrata 85dB (A)
Vibrazioni mano-braccio <2.5m/s
2
Brian Cooke
Direttore di Ricerca e Sviluppo
Spennymoor, County Durham DL16 6JG, United Kingdom
Cosa fare se il vostro tosaerba
necessita di una riparazione
Informazioni su come e dove portare il vostro utensile
per la riparazione sono fornite sulla carta di garanzia.
Si consiglia di conservare la carta di garanzia e il
manuale d’istruzioni in un luogo sicuro.
Prodotti indesiderati e tutela
dell’ambiente
Se, in futuro, il prodotto dovesse necessitare
di sostituzione o non venisse più utilizzato,
la tutela dell’ambiente deve rimanere
comunque un obiettivo fondamentale.
I centri di assistenza Black & Decker
ritireranno i prodotti usati smaltendoli in
modo sicuro dal punto di vista ecologico.
Garanzia sui prodotti per giardino
Black & Decker
La presente garanzia fornisce una copertura di
24 mesi sui particolari e di 12 mesi sulla
manodopera. È necessaria una prova di acquisto.
Se il vostro utensile Black & Decker presenta difetti
nel periodo di garanzia dovuti a materiali difettosi o a
errori di manodopera, noi garantiamo la sostituzione
delle parti difettose o, a nostra discrezione, la
sostituzione gratuita dell’apparecchio, tenendo
presente quanto segue:
• L’apparecchio deve essere restituito a noi o ai
nostri riparatori autorizzati con la prova
dell’avvenuto acquisto.
• Il prodotto è stato utilizzato secondo i parametri
previsti dalla classificazione consumatori.
• Il prodotto non è stato utilizzato per noleggio.
• Nessuno ha cercato di effettuare riparazioni oltre
al nostro personale di assistenza o ai riparatori
autorizzati.
• Il guasto indica una usura normale.
Questa garanzia viene offerta come vantaggio extra e
si aggiunge ai vostri diritti previsti per legge.
La polizza di garanzia
Non sono coperti i guasti dovuti alle cause seguenti:
• Sostituzione di lame consumate o danneggiate,
filo di nylon o cavi danneggiati durante la
conservazione o l’uso. Questi sono considerati
articoli di sostituzione soggetti a usura durante
l’uso normale.
• Danni derivanti da un urto improvviso o da un
abuso evidente.
• Guasti dovuti a uso improprio non conforme alle
istruzioni e alle raccomandazioni previste nelle
istruzioni per l’uso.
L’uso di accessori e ricambi non originali
Black & Decker può danneggiare o ridurre le
prestazioni dell’apparecchio Black & Decker e può
rendere nulla la garanzia.
Assistenza post-vendita
Black & Decker
Black & Decker offre un servizio di assistenza postvendita nazionale. Il nostro obiettivo è di offrire
un’assistenza post-vendita eccellente, riparazioni
rapide, disponibilità massima di ricambi e assistenza
completa per gli accessori.
Nel caso occorra aiuto o consulenza contattare il
responsabile del centro di assistenza Black & Decker
più vicino. Maggiori informazioni sul nostro servizio
post-vendita possono essere richieste presso i nostri
centri di assistenza (l’elenco completo sul dorso del
diagramma particolari è annesso al prodotto).
Altri prodotti Black & Decker
La Black & Decker dispone di una intera gamma di
utensili per esterno che facilitano il lavoro di
giardinaggio. Per ulteriori informazioni, contattare il
centro informazioni Black & Decker all’indirizzo
indicato sul retro-copertina oppure il fornitore
Black & Decker abituale.
Tosaerba, Tagliasiepi, Elettroseghe a catena,
Rastrelli, Bio-trituratori, Aspiratori di foglie,
Tagliaerba a filo di nylon
15
Rasenmäher
GR230
Wir gratulieren!
Zum Erwerb Ihres Rasenmähers von Black & Decker.
Diese Bedienungsanleitung enthält die Betriebs- und
Pflegehinweise für den Rasenmäher GR230 von
Black & Decker.
Machen Sie sich mit dem Gerät
vertraut
Lesen Sie diese Anleitung sorgfältig durch.
Beachten Sie vor, während und nach dem
Arbeiten mit dem Gerät alle
Sicherheitsanleitungen und halten Sie das
Gerät in gutem Betriebszustand.
Machen Sie sich vor dem Arbeiten mit dem
Gerät mit den Bedienungselementen vertraut
und stellen Sie sicher, daß Sie wissen, wie
das Gerät im Notfall ausgeschaltet wird.
Bewahren Sie diese Anleitung und alle
andere mit dem Gerät gelieferte Literatur für
spätere Bezugnahme gut auf.
Sicherheitshinweise
Allgemeines
• Lassen Sie weder Kinder noch Personen,
die mit dieser Art von Gerät nicht vertraut
sind oder die die Bedienungsanleitung
nicht durchgelesen haben, dieses
benutzen.
360
6m / 20ft
Lassen Sie keine Kinder, Tiere
oder andere Personen in die
Nähe des Gerätes, während es in
Betrieb ist - halten Sie sie stets
mindestens 6m vom
Arbeitsbereich entfernt.
• Denken Sie daran, daß Sie als Benutzer
des Gerätes für Verletzungen Dritter oder
Beschädigungen an deren Eigentum
verantwortlich sind.
• Ihre Maschine ist ausschließlich für den
Betrieb mit Netzstrom (Wechselstrom)
ausgelegt. Versuchen sie nicht, das
Gerät mit einer anderen Stromquelle zu
betreiben.
• Schließen Sie das Gerät immer an eine
Netzsteckdose an.
!
• Tragen Sie das Gerät niemals am Kabel
und zerren Sie auch nicht am Kabel, um
dieses aus der Steckdose zu ziehen.
Halten Sie das Kabel fern von
Heizquellen, Öl oder scharfen Kanten.
Prüfen Sie vor dem Einsatz den Zustand
des Kabels und benutzen Sie es nicht,
wenn es beschädigt ist.
Vorbereitung
• Schützen Sie Ihre Füße durch feste
Schuhe oder Stiefel - frisch gemähtes
Gras ist feucht und rutschig.
• Benutzen Sie Schutzkleidung. Tragen Sie
eine Schutzbrille, wenn Sie das Gerät
benutzen.
• Benutzen Sie bei Auftreten von Staub
eine Gesichtsmaske.
• Tragen Sie einen Gehörschutz, wenn
Ihnen der Lärmpegel des Geräts beim
Einsatz unangenehm ist.
• Tragen Sie beim Arbeiten mit dem Gerät
keine Sandalen und gehen Sie auch
nicht barfuß.
• Tragen Sie zum Schutz der Beine eine
lange Hose - Gegenstände, die auf dem
Rasen liegen, könnten vom
Messerbalken erfaßt und
herumgeschleudert werden.
• Das Stromkabel sollte regelmäßig auf
Anzeichen von Beschädigung oder
Alterung geprüft und nur in gutem
Zustand verwendet werden.
• Achten Sie immer auf die Lage des
Stromkabels und halten Sie es vom
laufenden Rasenmähermesser fern.
• Überprüfen Sie, bevor Sie das Gerät ans
Stromnetz anschließen, und mit der
Arbeit beginnen, ob das Messer oder die
Messerschraube beschädigt oder
verschlissen sind. Jedes beschädigte Teil
muß unverzüglich ersetzt werden, da es
eine potentielle Gefahrenquelle darstellt.
Prüfen Sie bitte auch, ob die Messerschraube fest und sicher angezogen ist.
• Vergewissern Sie sich,daß Ihr
Arbeitsbereich immer frei von Steinen,
Draht und anderen Fremdkörpern ist.
Derartige Teile könnten durch die
rotierende Walze herumgeschleudert
werden, bzw. das Gerät beschädigen.
Betrieb des Gerätes
• Wenn Sie zum Starten des Gerätes den
Handgriff nach unten drücken oder den
Rasenmäher seitlich kippen, stellen Sie
vorher sicher, daß Sie einen festen Stand
Bedienungsanleitung
16
haben, mit beiden Händen am Gerät sind
und Ihre Füße ausreichend Abstand zum
Messerbalken haben.
Nach dem Loslassen des
Betriebsschalters läuft das Gerät
kurze Zeit nach. Lassen Sie es
immer von allein auslaufen.
• Ziehen Sie immer den Netzstecker:
• Wenn Sie das Gerät unbeaufsichtigt
lassen.
• Bevor Sie am Gerät irgendwelche
Überprüfungen, Reinigung,
Nachstellungen oder Arbeiten
vornehmen.
• Vor dem Beseitigen einer Störung.
• Wenn das Gerät abnormal zu
vibrieren beginnt (sofort prüfen).
• Wenn der Messerbalken mit einem
Fremdkörper in Berührung
gekommen ist. Untersuchen Sie das
Gerät auf Beschädigungen und
ersetzen Sie ggf. defekte Teile.
• Lassen Sie das Gerät niemals laufen,
wenn es auf der Seite liegt und
versuchen Sie nicht, das Messer zu
stoppen; lassen Sie es immer von allein
auslaufen.
• Halten Sie Hände und Füße von den
rotierenden Teilen fern.
• Halten sie jederzeit von allen
Auslaßöffnungen Abstand.
• Schalten Sie das Gerät vorsichtig und
unter Beachtung der Sicherheitshinweise
ein, und halten Sie Ihre Füße vom
Messerbalken fern.
• Benutzen Sie das Gerät nicht im Regen
und lassen Sie es nicht naß werden.
Benutzen Sie es, wenn möglich, nicht auf
nassem Gras.
• Benutzen Sie das Gerät nur bei
Tageslicht oder guter künstlicher
Beleuchtung.
• Schieben Sie das Gerät immer vorwärts
und gehen Sie beim Einsatz des Gerätes
nicht rückwärts.
• Überqueren Sie bei laufendem Messer
keine Kieselwege oder Straßen.
• Sorgen Sie immer dafür, daß Sie sicher
stehen, besonders an Böschungen.
• Arbeiten Sie in Hanglagen immer quer
zum Gefälle, niemals auf- oder abwärts.
Seien Sie besonders vorsichtig bei
Richtungswechseln.
• Mähen Sie mit dem Gerät keine
übermäßig steilen Böschungen und
tragen Sie immer rutschfeste Schuhe.
• Gehen Sie beim Einsatz des Gerätes
langsam; nicht schnell laufen. Wenden
Sie bei Einsatz keinen übermäßigen
Druck an.
• Heben Sie das Gerät bei laufendem
Motor nie hoch und tragen Sie es dann
auch nicht. Wenn Sie das Gerät zum
Transport hochheben, achten Sie darauf,
daß das Messer nicht mehr läuft.
• Seien Sie beim Hochheben des Gerätes
beim Transport äußerst vorsichtig.
• Nehmen Sie das Gerät niemals in
Betrieb, wenn es beschädigt ist.
Wartung und Lagerung
• Bewahren Sie das Gerät, wenn Sie es
nicht benutzen, an einem trockenen Ort
und außer Reichweite von Kindern auf.
• Benutzen Sie zur Reinigung des
Gerätes keine Reinigungsmittel oder
Reinigungsflüssigkeiten - benutzen Sie
einen stumpfen Schaber, um Gras und
Schmutz zu entfernen. Trennen Sie das
Gerät vor der Reinigung immer von der
Netzversorgung.
• Benutzen Sie das Gerät nicht, wenn
irgendwelche Teile defekt sind; werfen
Sie alle defekten Teile weg und setzen Sie
neue ein, bevor Sie das Gerät benutzen.
• Sorgen Sie dafür, daß alle Muttern und
Bolzen fest angezogen sind, um sicher
zu sein, daß sich das Gerät in gutem
Betriebszustand befindet.
• Benutzen Sie nur von Black & Decker
empfohlene Ersatzteile und Zubehör.
Die Firma Black & Decker bemüht sich um die
ständige Verbesserung ihrer Produkte und behält sich
daher das Recht vor, Produktspezifikationen ohne
vorherige Ankündigung zu ändern.
Doppelisolierung
Dieses Gerät ist doppelt isoliert. Dies
bedeutet, daß alle äußeren Metallteile von
der Stromversorgung elektrisch isoliert sind.
Dies wird dadurch erzielt, daß sich zwischen
den elektrischen und den mechanischen
Bauteilen eine zusätzliche Isolierschicht
befindet. Doppelisolierung bedeutet größere
elektrische Sicherheit und macht die Erdung
der Maschine überflüssig.
Steckdosen im Außenbereich müssen mit
Fehlerstrom-Schutzschaltern (FI-Sicherung)
ausgestattet sein Bitte beachten Sie dies vor
dem Einsatz Ihres Rasenlüfters - sprechen
Sie ggf. mit Ihrem Elektroinstallateur.

17
!
Achtung! Eine FI-Sicherung oder andere
Stromkreisunterbrecher ersetzen keinesfalls
die vorher beschriebenen Sicherheitshinweise
zur Bedienung des Gerätes.
Ausstattung (Abb. A)
A
Ihr neuer Black & Decker Rasenmäher
GR230 verbindet Qualität und modernes
Design mit den folgenden
Ausstattungsmerkmalen für sicheres,
wirkungsvolles und einfaches Rasenmähen.
• Sicherheits-Einschaltsperre, zur
Verhinderung von unbeabsichtigtem
Einschalten des Mähers.
• Messerbreme (AUTOSTOP) stoppt das
Messer innerhalb von 3 Sekunden nach
Loslassen des Betriebsschalters.
• Große Knebelmuttern zur einfachen
Montage und bequemen Aufbewahrung.
• Drei Schnitthöheneinstellungen für
unterschiedliche Rasenbeschaffenheiten.
• Robustes, stabiles Kunststoffgehäuse,
das zur Reduzierung des
Geräuschpegels und Verringerung der
Vibration beiträgt.
• Starker, durchzugskräftiger
Induktionsmotor für leistungsfähiges
Mähen und Grasfangen unter
unterschiedlichsten Bedingungen, sowie
geringe Geräuschentwicklung und
niedriger Wartungsaufwand.
• Ergonomisch geformter Handgriff für
komfortables und leiches Schieben des
Gerätes.
• Einfach zu entnehmender Grasfangkorb.
• Die Kabelzugentlastung hält das
Anschlußkabel aus dem Arbeitsbereich
fern und verhindert ein ungewolltes
Lösen der Steckerverbindung.
Lieferumfang
Der Umkarton enthält:
• Mäher
• 3 Teile für Griffgestänge
• 2 Teile für Grasfangsack
Die Radverpackung enthält:
• 4 Räder
• 4 Stiftschrauben
• 4 Schraubenmuttern
• 4 Unterlegscheiben
Sonstiges:
• Schraubenschlüssel
• 4 Knebelmuttern
• 4 Unterlegscheiben
• 2 Bolzen
• 1 Bedienungsanleitung und Garantiekarte
• 1 Kundendienstkarte
Montage des Handgriffes (Abb. B)
• Entnehmen Sie alle Teile aus dem Karton
und machen Sie sich mit den einzelnen
Teilen des Gerätes vertraut (Abb. A).
Stellen Sie den Mäher auf eine ebene Fläche
und montieren Sie den Handgriff wie folgt:
Achtung: Stellen Sie den Mäher so, daß sich
die Schalterbox aus Sicht der Arbeitsposition
auf der rechten Seite des Mähers befindet.
Versichern Sie sich, daß das Anschlußkabel
nicht beschädigt oder verdreht ist.
B1
• Führen Sie den Unterteil des Handgriffes
(1) über die Achsen der Fangboxklappe
(2) und positionieren Sie dabei den
abgewinkelten Teil des Handgriffes in die
rechtwinkeligen Öffnungen des
Rasenmähergehäuses.
B2
• Zur weiteren Befestigung legen Sie eine
Unterlegscheibe (5) über die Achse und
schrauben danach eine Knebelmutter (6)
auf. Ziehen Sie die Knebelmutter
handfest an.
B3
• Stecken Sie das obere und das untere
Griffteil zusammen und richten Sie die
Löcher gleichmäßig aus. Führen Sie
einen Bolzen durch jedes Loch. Legen
Sie eine Unterlegscheibe über den
Bolzen und schrauben Sie eine
Knebelmutter auf.
Achtung: Die Knebelmuttern nur handfest,
nicht mit einem Werkzeug, festziehen.
Montieren Sie die Schalterbox wie folgt am
oberen Griffteil:
B4
• Entfernen Sie die Schrauben, die die
Klemmplatte mit dem Gehäuse der
Schalterbox verbindet.
B5
• Stecken Sie die Schalterbox, in der sich
zwei Stifte (Schraubdome) befinden, in
die Löcher des oberen Handgriffes.
B6
• Befestigen Sie die vorher von Ihnen
gelöste Klemmplatte mit Hilfe der
vorhandenen Schrauben über dem
Gestänge des Griffes.
Achtung: Ziehen Sie diese Schrauben nicht
zu fest an!
DEUTSCH
18
Montage der Räder und
Schnitthöheneinstellung (Abb. C)
Ziehen Sie vor Einstellung der Schnitthöhe
den Netzstecker, und warten Sie den
Stillstand des Messers ab.
Sie haben die Möglichkeit, eine von
3 verschiedenen Schnitthöhen zu wählen.
C1
• Wählen Sie eine dieser drei Stufen aus
und stellen Sie die anderen drei Räder
auf die gleiche Schnitthöhe ein.
• Setzen Sie das Rad (10) und die
Stiftschraube (11) in das gewählte Loch
ein und stellen Sie sicher, daß die
Unterlegscheibe (12) zwischen Rad und
Schneidfläche auf der Stiftschraube sitzt.
• Bringen Sie die Mutter (21) hinter dem
gewählten Loch in der Befestigungsplatte
in Position.
C2
• Schrauben Sie mit dem mitgelieferten
Schraubenschlüssel die Stiftschraube im
Uhrzeigersinn ein. Stellen Sie sicher, daß
sich das Rad ungehindert drehen kann.
Befestigen Sie die anderen Räder in der
gleichen Weise.
Drehen Sie den Mäher so auf die Seite,
daß die Unterseite des Mäherdecks und
die 3 möglichen Positionen sichtbar sind.
Die unterste Stufe markiert die größte
Schnitthöhe, die oberste Stufe die
kleinste Schnitthöhe.
Wir empfehlen, daß Sie beim ersten
Verwenden des Rasenmähers entweder das
mittlere oder untere Loch wählen.
Einsetzen des Grasfangsackes
(Abb. D)
D1
• Der Fangsack wird in 2 Teilen geliefert:
Fangsack (13) und Rahmen (14). Ziehen
Sie den Fangsack über den Rahmen.
Anbringen des Grasfangsacks am Mäher:
D2
• Zum Einsetzen des Fangsackes in den
Mäher öffnen Sie die Abdeckklappe der
Grasauswurföffnung (15) und hängen
den Fangsack am Mähergehäuse ein.
Abnehmen des Grasfangsacks:
Zum Entleeren des Grasfangsackes, klappen
Sie die Abdeckplatte hoch und heben ihn
dann entweder nach oben und durch das
Griffgestänge heraus, oder setzen ihn,
nachdem Sie ihn vom Rasenmäher gelöst
haben, nach unten auf den Rasen. Wenn Sie
die Abdeckplatte vorsichtig über der
Grasauswurföffnung geschlossen haben,
haben sie nun beide Hände frei, um den
gefüllten Grasfangsack zu entleeren.
Arbeitshinweise (Abb. E)
!
Beachten Sie alle Sicherheitshinweise bei
Betrieb Ihres Gerätes.
Wir empfehlen die Mähweise, wie sie in
Abbildung G dargestellt ist. So erzielen Sie
ein sauberes Schnittbild und verringern die
Gefahr, das Verlängerungskabel mit dem
Mäher zu überfahren.
E1
• Legen Sie das Verlängerungskabel dort,
wo Sie mit dem Rasenmähen beginnen
wollen, neben dem Gerät ab (Abb. E1 (a),
Position 1).
• Fassen Sie den Handgriff immer mit
beiden Händen.
Die Schalterbox Ihres Mähers ist mit einer
Kabelzugentlastung ausgestattet. Das Kabel
wird folgendermaßen befestigt:
• Das mit einer Steckdose versehene
Ende des Kabels mit dem Stecker des
Rasenmähers verbinden.
E2
• Verbinden Sie den Stecker des Mähers mit
der Steckdose des Verlängerungskabels.
E3
• Formen Sie mit dem Kabel kurz hinter der
Steckverbindung eine Schlaufe. Ziehen
Sie die Schlaufe von außen durch den
Schlitz an der Schalterbox, führen Sie sie
um den Haken herum und ziehen Sie das
Kabel fest. Das Kabel ist nun gesichert.
• Das Verlängerungskabel fällt nun
automatisch vom Mäher weg hinter
den Benutzer.
!
Achtung! Versuchen Sie nicht, den Mäher
nur mit einer Hand zu führen - bleiben Sie mit
beiden Händen am Gerät.
E4
• Drücken Sie den Handgriff nach unten,
um das Vorderteil des Mähers leicht
anzuheben. Das läßt den Motor,
besonders bei hohem Gras, leichter auf
seine volle Umdrehungsgeschwindigkeit
kommen. Dann drücken Sie die
Sicherheits-Einschaltsperre (16) am
Schalterkasten und ziehen gleichzeitig
den Starthebel (17). Der Motor läuft an,
Sie können den Sperrknopf, nicht aber
den Starthebel wieder loslassen, und den
Mäher in seine normale Arbeitsposition
zurückkippen, um mit dem Mähen zu
beginnen.
• Verfahren Sie, wie in Abb. E1 (a) gezeigt,
mähen Sie von Position 1 zu Position 2,
drehen dann rechts herum, fahren auf
Position 3 zu, drehen dann nach links
und mähen weiter auf Position 4 zu,
u.s.w. Bewegen Sie sich immer vom
Verlängerungskabel weg. Arbeiten Sie
nicht so, wie in Abb. E1 (b) dargestellt,
d.h. in Richtung des Kabels. Das kann
19
gefährlich sein, da hierbei sehr leicht das
Kabel mit dem Mäher überfahren und
beschädigt werden kann.
Der Motor läuft solange, wie Sie den
Starthebel gezogen halten. Um den Mäher
zu stoppen, lassen Sie den Starthebel
einfach los.
Wenn Sie mit dem Mähen fertig sind,
empfehlen wir, den Mäher zu reinigen, bevor
Sie ihn wegstellen, siehe ‘Pflege und
Wartung’.
Anmerkung: Die besten Schnittergebnisse
erzielen Sie durch regelmäßiges Mähen des
Rasens. Vermeiden Sie es, nasses Gras
zu mähen.
Wenn der Rasenmäher beim Mähen das
gemähte Gras nicht mehr aufnimmt, sondern
auf der gemähten Fläche liegen läßt, ist das
ein Zeichen dafür, daß der Grasfangsack
voraussichtlich voll ist und geleert werden muß.
Pflege des Messerbalkens
Das Stahlmesser ist dazu konzipiert, dem
Gras einen sauberen Schnitt zu verleihen. Es
schneidet z.T. auch noch in stumpfem oder
vergratetem Zustand, muß also nicht
messerscharf geschliffen sein. Sollte jedoch
das Schnittergebnis unbefriedigend werden,
weil das Messer zu stumpf oder beschädigt
ist, sollte es ausgetauscht oder zumindest
geschliffen werden.
Wir empfehlen, das Messer zu Beginn einer
jeden Saison entweder zu schleifen oder
zu erneuern.
Ein Ersatzmesser (A6177) erhalten Sie bei
Ihrem Black & Decker Händler oder dem
Black & Decker Kundendienst.
!
Achtung! Wenn Sie das Messer
austauschen, verwenden Sie ausschließlich
das Black & Decker Original Zubehör, das für
Ihr Gerät entwickelt wurde. Versuchen Sie
nicht, irgendein anderes Messer zu montieren.
Wartung der Messer
Die Stahlmesser sind dazu konzipiert,
langem, starkem Gras einen feinen Schnitt
zu verleihen. Mit diesen Messern kann man
auch dann noch einen gleichmäßigen Schnitt
erreichen, wenn sie schon stumpf geworden
oder etwas vergratet sind. Sie müssen
keinesfalls so scharf wie Rasiermesser sein.
Sollte jedoch das Schnittergebnis aufgrund
von beschädigten oder stumpfen Messern
unbefriedigend werden, sollten Sie Ihren
Rasenmäher mit neuen Messern bestücken
bzw. vorhandene Messer zumindest
nachschärfen.
Wir empfehlen das Schleifen oder die
Erneuerung des Stahlmessers zu
Saisonbeginn.
Ersatzmesser erhalten Sie bei Ihrem
Black & Decker Händler oder beim
Black & Decker Zentral-Kundendienst.
Einsetzen neuer Messer (Abb. F)
!
Achtung! Ziehen Sie den Netzstecker
bevor Sie am Schneidwerkzeug der
Maschine arbeiten.
F
• Drehen Sie den Rasenmäher auf die
Seite, so daß das Messer unter dem
Messergehäuse (2) sichtbar ist.
• Decken Sie, zum Schutz Ihrer Hände,
die Messer mit einem Tuch ab oder
tragen Sie dicke Arbeitshandschuhe.
Halten Sie das Messer fest und lösen
Sie unter Zuhilfenahme des mitgelieferten
Werkzeugs die Mutter (30) von der
Motorwelle.
• Das Messer kann nun ersetzt werden.
Anmerkung: Entfernen Sie auf keinen Fall
das Lüfterrad (18) von der Motorwelle.
Anmerkung: Möglicherweise ist Ihr Mäher
mit einer Unterlegscheibe zwischen
Messerbolzen und Messer ausgerüstet. Bitte
diesen unbedingt nach dem Messerwechsel
wieder mit montieren.
Bedienungshinweise
• Über 10cm hohes Gras sollten Sie in zwei
Arbeitsgängen schneiden, um ein gutes
Schnittergebnis zu erhalten. Im ersten Schnitt mit
der größten Schnitthöhe mähen, im zweiten
Arbeitsgang die endgültig gewünschte Höhe
einstellen.
Wartung und Pflege
Die in diesem Kapitel erwähnten Hinweise
beziehen sich auf die allgemeine Pflege und
Wartung der Hauptbauteile Ihres
Rasenmähers. Spezielle Hinweise zum
Messer finden Sie im Abschnitt “Wartung
der Messer”.
!
Achtung! Nur einwandfreie Kabel
verwenden! Schadhafte Kabel müssen
umgehend ersetzt werden. Nehmen Sie
selbst keine Reparaturen daran vor.
DEUTSCH
20
DEUTSCH
EG Konformitätserklärung
Wir erklären hiermit, daß die folgenden
Elektrowerkzeuge: GR230, GR230C der Richtlinie
89/392/EEC, 89/336/EEC, 73/23/EEC, EN55104,
EN55014, EN60335 entsprechen
Lpa (Schalldruck) @4m 65dB (A)
Lpa (Schalleistung) 85dB (A)
Gewichteter effektivwert der Beschleunigung
<2.5m/s
2
Brian Cooke
Director of Engineering
Black & Decker Ltd, Spennymoor, County Durham
DL16 6JG, United Kingdom
• Halten Sie Ihren Rasenmäher stets
sauber und frei von Grasresten besonders das Messergehäuse (2) und
die Lüftungsschlitze (35). Siehe Abb. A
zur näheren Erläuterung der
angegebenen Bereiche.
• Alle Elektrokabel regelmäßig auf
Anzeichen von Verschleiß, Abrieb oder
andere Beschädigungen überprüfen.
• Wir empfehlen Ihnen, nach jedem
Mähvorgang das Gras, das sich an der
Unterseite der Messerabdeckung
angehäuft hat, mit einer trockenen Bürste
zu entfernen.
• Kunststoffteile können mit einem
feuchten Tuch gereinigt werden.
Anmerkung: Keine Lösungs- bzw. scharfen
Reinigungsmittel verwenden, da diese die
Kunststoffteile Ihres Gerätes beschädigen
könnten.
Fehlersuche
Die folgende Tabelle soll Ihnen als
Orientierungshilfe zur Fehlersuche dienen.
!
Achtung! Immer Netzstecker ziehen.
Symptom Mögliche Abhilfe
Ursache
Motor läuft, aber Messer Hindernis vom
Messer bewegt eingeklemmt. Messer entfernen.
sich nicht.
Kein Geräusch Fehlanschluß. Stromzufuhr
und Messer überprüfen.
bewegt sich nicht. Hauptsicherung
überprüfen.
Was tun, wenn das Gerät zur
Reparatur muss
Information darüber, wie und wohin Sie das Gerät zur
Reparatur oder Wartung schicken können, finden Sie
auf der Rückseite der Ersatzteilliste. Wir empfehlen,
diese gut aufzubewahren.
Produkte und Umwelt
Wenn Sie eines Tages Ihr Gerät durch ein
Neues ersetzen müssen oder Sie es nicht
mehr benötigen, dann denken Sie an den
Umweltschutz. Ihr Black & Decker Service-
center nimmt gerne Ihre alten Geräte an und
entsorgt sie auf umweltverträgliche Weise.
Garantie
Für dieses Produkt leistet der Hersteller Gewähr in
Übereinstimmung mit den Bedingungen, die in den
beiliegenden Unterlagen abgedruckt sind.
Verwenden Sie nur original Black & Decker
Zubehör und Ersatzteile. Mißachtung kann zur
Beschädigung oder Leistungsminderung Ihres
Black & Decker Produktes führen oder Ihre
Garantieansprüche einschränken.
Black & Decker Kundendienst
Black & Decker legt besonderen Wert auf gute und
prompte Ausführung aller Wartungs- und
Reparaturarbeiten, In unserer Kundendienstwerkstatt
arbeiten geschulte Fachkräfte, die Original-Ersatzteile
verfügbar haben. Sollten irgendwelche Defekte an
Ihrem Gerät auftreten, so senden Sie es bitte direkt
an den Black & Decker-Zentralkundendienst. Teilen
Sie uns kurz schriftlich mit, was Sie bemängeln und
Sie erhalten Ihr Gerät in kürzester Zeit repariert zurück.
Andere Produkte von Black & Decker
Die Firma Black & Decker verfügt über ein komplettes
Angebot an Elektrowerkzeugen für draußen, die
Ihnen die Arbeit im Garten erleichtern. Wenn Sie
weitere Information über andere Produkte wünschen,
dann setzen Sie sich bitte direckt mit Black & Decker
oder Ihrem Black & Decker Händler in Verbindung.
Rasenmäher Heckenscheren
Kettensägen Rasenharken
Häcksler Laub- und Abfallsauger
Rasentrimmer
 Loading...