

Page 1
VEA EL ESPAÑOL EN LA CONTRAPORTADA.
SAVE THIS MANUAL FOR FUTURE REFERENCE.
INSTRUCTIVO DE OPERACIÓN, CENTROS DE SERVICIO Y PÓLIZA DE GARANTÍA. ADVERTENCIA:
LÉASE ESTE INSTRUCTIVO ANTES DE USAR EL PRODUCTO.
INSTRUCTION MANUAL
11118888 VVVVOOOOLLLLTTTT AAAARRRREEEEAAAA LLLLIIIIGGGGHHHHTT
TT
CATALOG NUMBER
FS18AL
BEFORE RETURNING THIS PRODUCT
FOR ANY REASON PLEASE CALL
1-800-544-6986
BEFORE YOU CALL, HAVE THE CATALOG No. AND DATE CODE AVAILABLE. IN MOST CASES,
A BLACK & DECKER REPRESENTATIVE CAN RESOLVE THE PROBLEM OVER THE PHONE.
IF YOU HAVE A SUGGESTION OR COMMENT, GIVE US A CALL. YOUR FEEDBACK IS VITAL
TO BLACK & DECKER.
T
T
HANK
HANK
YOU
YOU
FOR
FOR
CHOOSING
CHOOSING
F
F
IRESTORM
IRESTORM
! G
! G
OOTO
TO
WWW
WWW
.F
.F
IRESTORMTOOLS
IRESTORMTOOLS
.
.
COM
COM
/P
/P
RODUCT
RODUCT
R
R
EGISTRA
EGISTRA
TION
TION
TOTOREGISTER
REGISTER
YOUR
YOUR
NEW
NEW
PRODUCT
PRODUCT
.
.
90517816 FS18AL 4/2/07 1:38 PM Page 1
Page 2

2
GENERAL SAFETY RULES
WARNING! Read all instructions. Failure to follow all instructions listed
below may result in electric shock, fire and/or serious injury. The term “power
tool” in all of the warnings listed below refers to your mains-operated (corded)
power tool or battery-operated (cordless) power tool.
SAVE THESE INSTRUCTIONS
1) Work area safety
a) Keep work area clean and well lit.
Cluttered or dark areas invite accidents.
b) Do not operate power tools in explosive atmospheres, such as in the
presence of flammable liquids, gases or dust.
Power tools create sparks which
may ignite the dust or fumes.
c) Keep children and bystanders away while operating a power tool.
Distractions
can cause you to lose control.
2) Electrical safety
a) Power tool plugs must match the outlet. Never modify the plug in any way.
Do not use any adapter plugs with earthed (grounded) power tools.
Unmodified plugs and matching outlets will reduce risk of electric shock.
b) Avoid body contact with earthed or grounded surfaces such as pipes,
radiators, ranges and refrigerators.
There is an increased risk of electric shock if
your body is earthed or grounded.
c) Do not expose power tools to rain or wet conditions.
Water entering a power
tool will increase the risk of electric shock.
d) Do not abuse the cord. Never use the cord for carrying, pulling or unplugging
the power tool. Keep cord away from heat, oil, sharp edges or moving parts.
Damaged or entangled cords increase the risk of electric shock.
e) When operating a power tool outdoors, use an extension cord suitable for
outdoor use.
Use of a cord suitable for outdoor use reduces the risk of electric
shock. When using an extension cord, be sure to use one heavy enough to carry
the current your product will draw. An undersized cord will cause a drop in line
voltage resulting in loss of power and overheating. The following table shows the
correct size to use depending on cord length and nameplate ampere rating. If in
doubt, use the next heavier gage. The smaller the gage number, the heavier the
cord.
Recommended Minimum Wire Size for Extension Cords
Total Length of Cord
25 ft. 50 ft. 75 ft. 100 ft. 125 ft. 150 ft. 175 ft.
7.6 m 15.2 m 22.9 m 30.5 m 38.1 m 45.7 m 53.3 m
Wire Size AWG
18 18 16 16 14 14 12
3) Personal safety
a) Stay alert, watch what you are doing and use common sense when operating
a power tool. Do not use a power tool while you are tired or under the
influence of drugs, alcohol or medication.
A moment of inattention while
operating power tool may result in serious personal injury.
b) Use safety equipment. Always wear eye protection.
Safety equipment such as
dust mask, non-skid safety shoes, hard hat, or hearing protection used for
appropriate conditions will reduce personal injuries.
c) Avoid accidental starting. Ensure the switch is in the off-position before
plugging in.
Carrying power tools with your finger on the switch or plugging in
power tools that have the switch on invites accidents.
d) Remove any adjusting key or wrench before turning the power tool on.
A
wrench or a key left attached to a rotating part of the power tool may result in
personal injury.
90517816 FS18AL 4/2/07 1:38 PM Page 2
Page 3

3
e) Do not overreach. Keep proper footing and balance at all times.
This enables
better control of the power tool in unexpected situations.
f) Dress properly. Do not wear loose clothing or jewelry. Keep your hair,
clothing and gloves away from moving parts.
Loose clothes, jewelry or long hair
can be caught in moving parts. Air vents often cover moving parts and should also
be avoided.
g) If devices are provided for the connection of dust extraction and collection
facilities, ensure these are connected and properly used.
Use of these devices
can reduce dust-related hazards.
4) Power tool use and care
a) Do not force the power tool. Use the correct power tool for your application.
The correct power tool will do the job better and safer at the rate for which it was
designed.
b) Do not use the power tool if the switch does not turn it on and off.
Any power
tool that cannot be controlled with the switch is dangerous and must be repaired.
c) Disconnect the plug from the power source and/or the battery pack from the
power tool before making any adjustments, changing accessories, or storing
power tools.
Such preventive safety measures reduce the risk of starting the
power tool accidentally.
d) Store idle power tools out of the reach of children and do not allow persons
unfamiliar with the power tool or these instructions to operate the power
tool.
Power tools are dangerous in the hands of untrained users.
e) Maintain power tools. Check for misalignment or binding of moving parts,
breakage of parts and any other condition that may affect the power tools
operation. If damaged, have the power tool repaired before use.
Many
accidents are caused by poorly maintained power tools.
f) Keep cutting tools sharp and clean.
Properly maintained cutting tools with sharp
cutting edges are less likely to bind and are easier to control.
g) Use the power tool, accessories and tool bits etc., in accordance with these
instructions and in the manner intended for the particular type of power tool,
taking into account the working conditions and the work to be performed.
Use of the power tool for operations different from those intended could result in a
hazardous situation.
5) Battery tool use and care
a) Ensure the switch is in the off position before inserting battery pack.
Inserting
the battery pack into power tools that have the switch on invites accidents.
b) Recharge only with the charger specified by the manufacturer.
A charger that
is suitable for one type of battery pack may create a risk of fire when used with
another battery pack.
c) Use power tools only with specifically designated battery packs.
Use of any
other battery packs may create a risk of injury and fire.
d) When battery pack is not in use, keep it away from other metal objects like
paper clips, coins, keys, nails, screws, or other small metal objects that can
make a connection from one terminal to another.
Shorting the battery terminals
together may cause burns or a fire.
e) Under abusive conditions, liquid may be ejected from the battery, avoid
contact. If contact accidentally occurs, flush with water. If liquid contacts
eyes, additionally seek medical help.
Liquid ejected from the battery may cause
irritation or burns.
6) Service
a) Have your power tool serviced by a qualified repair person using only
identical replacement parts.
This will ensure that the safety of the power tool is
maintained.
90517816 FS18AL 4/2/07 1:38 PM Page 3
Page 4

4
IMPORTANT SAFETY INSTRUCTIONS FOR FLUORESCENT
AREA LIGHTS
WARNING: Burn hazard.
Do not operate flashlight or charger near flammable liquids
or in gaseous or explosive atmospheres. Internal sparks may ignite fumes causing
personal injury.
WARNING: Shock Hazard. Always remove battery before replacing the lamp.
Replace bulb with same type rated 13 Watts.
Such preventative safety measures
reduce the risk of personal injury.
WARNING:
The lens gets very hot during use. To reduce the risk of burns, do not
touch hot lens. To reduce the risk of fire, keep away from combustible materials while in
operation.
•
To reduce the risk of injury, close supervision is necessary when an appliance is used
near children.
•
Only use attachments recommended or sold by the manufacturer.
•
To reduce the risk of electrical shock, do not put light in water or other liquid. Do not
place or store appliance where it can fall or be pulled into a tub or sink.
•
Use only the charger supplied by the manufacturer to recharge.
•
During or immediately after use, don’t lay area light flat on lens surface.
•
Replace broken bulb in a well ventilated area.
•
Don’t touch lens surface when tube is lit or immediately after use.
•
Handle light with care around any flammable surface.
•
If fluorescent tube has been lit, let it cool for several minutes before changing tube.
•
Vision may be impaired when looking directly into fluorescent light.
•
Do not expose light or charger to wet or damp areas. Do not expose light or charger to
rain or snow.
•
Do not wash light or charger with water or allow water to get inside light or charger.
•
While light is in use, do not cover with cloth or other flammable materials due to
increased risk of fire.
•
Do not operate without lens cover assembly attached.
•
For indoor use only.
•
Do not hang the unit on anything that could become electrically “live”.
CAUTION: When not in use, place tool on its side on a stable surface where it
will not cause a tripping or falling hazard. Some tools with large battery packs will
stand upright on the battery pack but may be easily knocked over.
PROPOSITION 65 WARNING: This product contains chemicals known to the State of
California to cause cancer, birth defects, and other reproductive harm.
Recycle or dispose of light bulb in accordance with applicable state regulations. If light
bulb breaks, thoroughly wash hands and any other surface contacted.
SAVE THESE INSTRUCTIONS
SAFETY GUIDELINES - DEFINITIONS
It is important for you to read and understand this manual. The information it contains
relates to protecting YOUR SAFETY and PREVENTING PROBLEMS. The symbols
below are used to help you recognize this information.
DANGER:
Indicates an imminently hazardous situation which, if not avoided, will
result in death or serious injury.
WARNING:
Indicates a potentially hazardous situation which, if not avoided, could
result in death or serious injury.
CAUTION:
Indicates a potentially hazardous situation which, if not avoided, may
result in minor or moderate injury.
CAUTION:
Used without the safety alert symbol indicates potentially hazardous
situation which, if not avoided, may result in property damage.
90517816 FS18AL 4/2/07 1:38 PM Page 4
Page 5
5
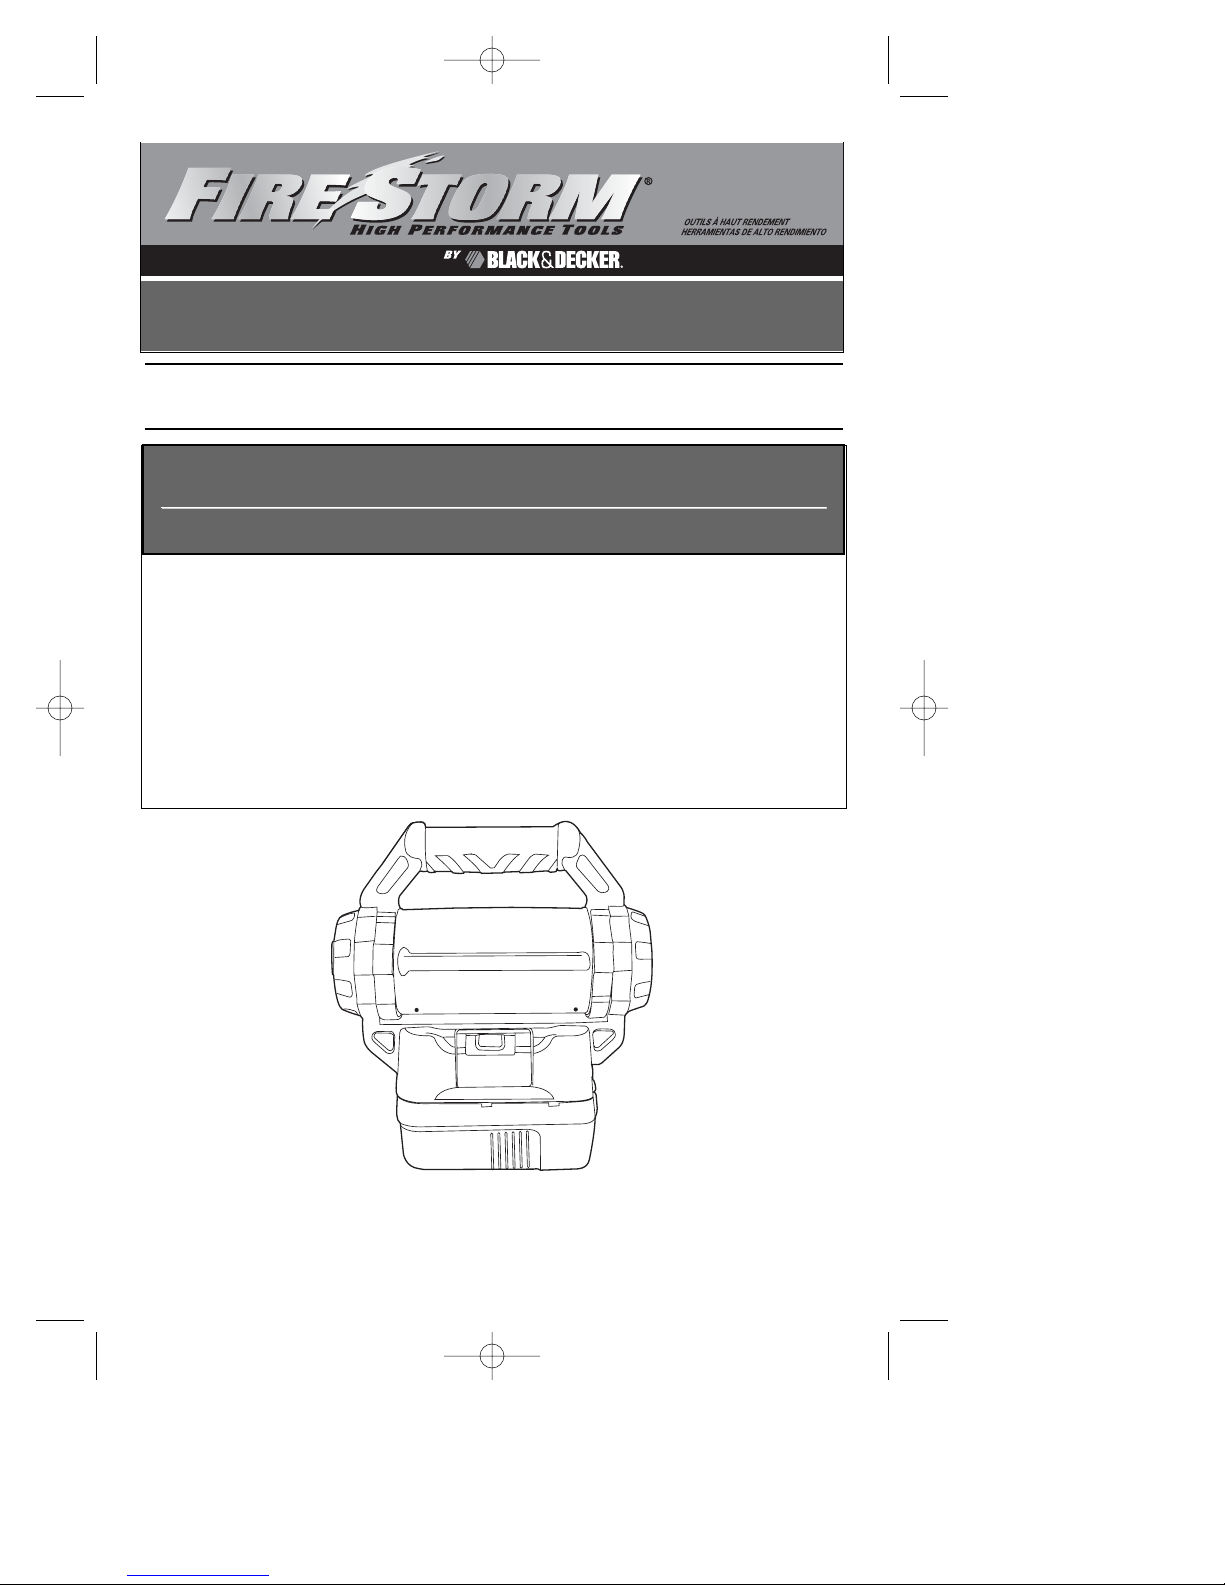
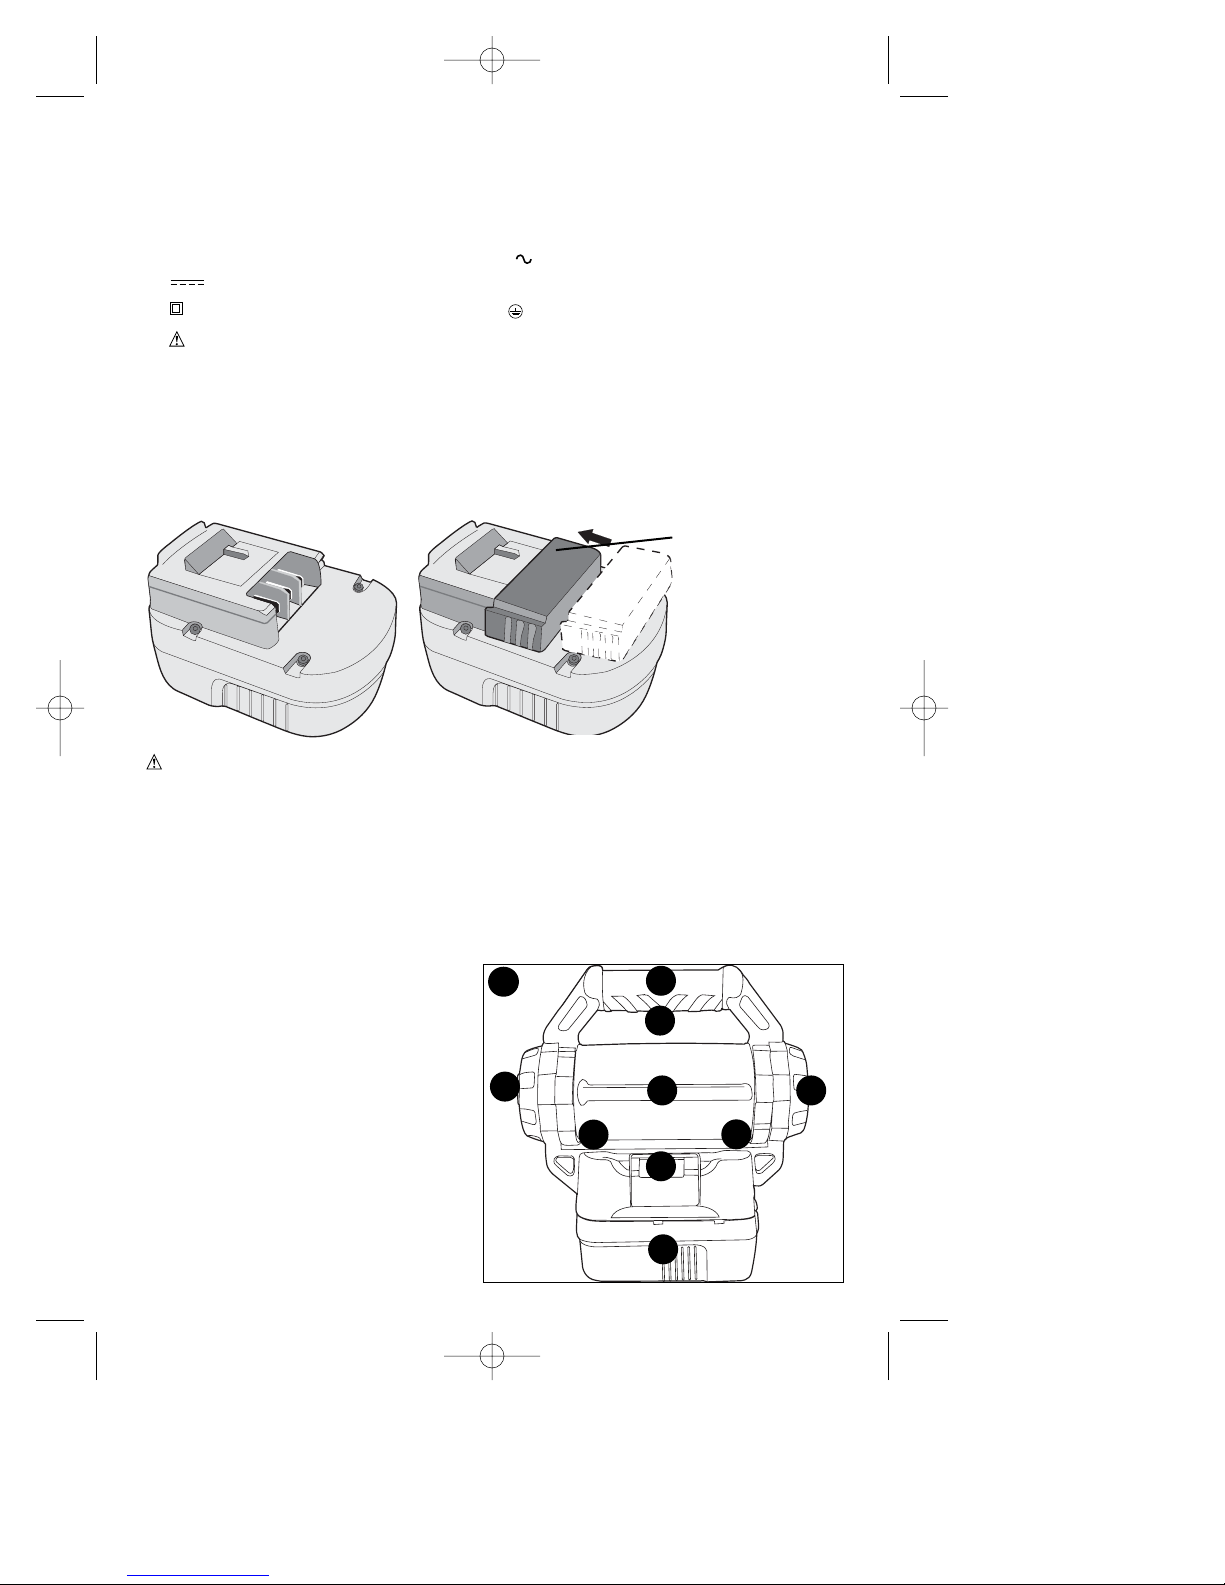
FUNCTIONAL DESCRIPTION
Figure A
1. On/Off Switch
2. Fluorescent Tube
3. Removable Cap
4. Fluorescent Tube Access Screws
5. Handle Release Button
6. Moveable Handle
7. Bungee Cord Hanger
8. Battery (not included)
3
1
2
4
5
6
4
7
8
A
BATTERY CAP INFORMATION
Battery storage and carrying caps are provided for use whenever the battery is out of the
tool or charger. Remove cap before placing battery in charger or tool.
WARNING: Fire hazard. Do not store or carry battery so that metal objects can
contact exposed battery terminals. For example, do not place battery in aprons,
pockets, tool boxes, product kit boxes, drawers, etc., with loose nails, screws, keys, etc.
without battery cap. Transporting batteries can possibly cause fires if the battery
terminals inadvertently come in contact with conductive materials such as keys,
coins, hand tools and the like. The US Department of Transportation Hazardous
Material Regulations (HMR) actually prohibit transporting batteries in commerce or on
airplanes (i.e., packed in suitcases and carry-on luggage) UNLESS they are properly
protected from short circuits. So when transporting individual batteries, make sure that
the battery terminals are protected and well insulated from materials that could contact
them and cause a short circuit.
Battery Cap
Capuchon du bloc-pile
Protector de la batería
• The label on your tool may include the following symbols. The symbols and their
definitions are as follows:
V..................volts A ..................amperes
Hz................hertz W..................watts
min ..............minutes ................alternating current
............direct current
n
o ................no load speed
................Class II Construction
................
earthing terminal
(double insulated)
..............safety alert symbol
.../min ..........revolutions or reciprocations
per minute
90517816 FS18AL 4/2/07 1:38 PM Page 5
Page 6
6
B
C
D
E
FS18AL can accept any of the following 18V slide pack batteries and 18V slide pack
chargers seen in the chart below. Please see the individual charger manuals for all
safety and operating instructions.
18V Slide Pack Batteries
18V Firestorm Battery
18V FSXtreme Battery
18V FSXtreme Battery Silver Series
18V FSXtreme Battery
18V Black & Decker Battery
FSB18
FS180BX
FS18SBX
FS18BX
HPB18
Cat. # Description
18V Slide Pack Chargers
18V Cup Charger
18V Dual Port Charger
18V Radio Charger
18V Three Port Charger
9.6V-18V Fast Charger
9.6V-24V One Hour Charger
9.6V-24V Dual Port One Hour
Charger
FS18C
FS180DC
FS18RC
5104211-00
FSMVC
FS240FC
FS2400DC
Cat. # Description
90517816 FS18AL 4/2/07 1:38 PM Page 6
Page 7

7
IMPORTANT SAFETY INSTRUCTIONS FOR BATTERY PACKS
The battery pack is not fully charged out of the carton. Before using the battery pack and
charger, read the safety instructions below. Then follow charging procedures outlined.
READ ALL INSTRUCTIONS
• Do not incinerate the battery pack even if it is severely damaged or is
completely worn out. The battery pack can explode in a fire.
• A small leakage of liquid from the battery pack cells may occur under extreme
usage or temperature conditions. This does not indicate a failure. However, if the
outer seal is broken and this leakage gets on your skin:
a. Wash quickly with soap and water.
b. Neutralize with a mild acid such as lemon juice or vinegar.
c. If battery liquid gets into your eyes, flush them with clean water for a minimum of
10 minutes and seek immediate medical attention. (Medical note: The liquid is 2535% solution of potassium hydroxide.)
• Charge the battery packs only in Black & Decker chargers.
• DO NOT splash or immerse in water or other liquids.
• Do not store or use the tool and battery pack in locations where the
temperature may reach or exceed 105°F (such as outside sheds or metal
buildings in summer).
DANGER: Electrocution hazard.
Never attempt to open the battery pack for any
reason.
If battery pack case is cracked or damaged, do not insert into charger. Electric shock or
electrocution may result. Damaged battery packs should be returned to service center
for recycling.
IMPORTANT SAFETY INSTRUCTIONS FOR BATTERY
CHARGERS
SAVE THESE INSTRUCTIONS: This manual contains important safety instructions for
battery chargers.
• Before using charger, read all instructions and cautionary markings on charger,
battery pack, and product using battery pack.
DANGER: Electrocution hazard. 120 volts are present at charging terminals. Do not
probe with conductive objects. Electric shock or electrocution may result.
WARNING: Shock hazard.
Do not allow any liquid to get inside charger. Electric
shock may result.
CAUTION: Burn hazard.
To reduce the risk of injury, charge only Black & Decker
nickel-cadmium rechargeable batteries. Other types of batteries may burst causing
personal injury and damage.
CAUTION:
Under certain conditions, with the charger plugged in to the power supply,
the exposed charging contacts inside the charger can be shorted by foreign material.
Foreign materials of a conductive nature such as, but not limited to, steel wool, aluminum
foil, or any buildup of metallic particles should be kept away from charger cavities. Always
unplug the charger from the power supply when there is no battery pack in the cavity.
Unplug charger before attempting to clean.
• DO NOT attempt to charge the battery pack with any chargers other than the
ones in this manual.
The charger and battery pack are specifically designed to work
together.
• These chargers are not intended for any uses other than charging Black &
Decker rechargeable batteries.
Any other uses may result in risk of fire, electric
shock or electrocution.
• Do not expose charger to rain or snow.
• Pull by plug rather than cord when disconnecting charger.
This will reduce risk of
damage to electric plug and cord.
90517816 FS18AL 4/2/07 1:38 PM Page 7
Page 8

8
• Make sure that cord is located so that it will not be stepped on, tripped over, or
otherwise subjected to damage or stress.
• Do not use an extension cord unless it is absolutely necessary.
Use of improper
extension cord could result in risk of fire, electric shock, or electrocution.
• Do not place any object on top of charger or place the charger on a soft surface
that might block the ventilation slots and result in excessive internal heat.
Place the charger in a position away from any heat source. The charger is ventilated
through slots in the top and the bottom of the housing.
• Do not operate charger with damaged cord or plug —
have them replaced
immediately.
• Do not operate charger if it has received a sharp blow, been dropped, or
otherwise damaged in any way.
Take it to an authorized service center.
• Do not disassemble charger; take it to an authorized service center when
service or repair is required.
Incorrect reassembly may result in a risk of electric
shock, electrocution or fire.
• Disconnect the charger from the outlet before attempting any cleaning. This will
reduce the risk of electric shock.
Removing the battery pack will not reduce this
risk.
• NEVER
attempt to connect 2 chargers together.
• The charger is designed to operate on standard household electrical power
(120 Volts). Do not attempt to use it on any other voltage.
This does not apply to
the vehicular charger.
SAVE THESE INSTRUCTIONS FOR FUTURE USE
IMPORTANT CHARGING NOTES
1. Longest life and best performance can be obtained if the battery pack is charged
when the air temperature is between 65°F and 75°F (18°- 24°C). DO NOT charge
the battery pack in an air temperature below +40°F (+4.5°C), or above +105°F
(+40.5°C). This is important and will prevent serious damage to the battery pack.
2. The charger and battery pack may become warm to touch while charging. This is a
normal condition, and does not indicate a problem. To facilitate the cooling of the
battery pack after use, avoid placing the charger or battery pack in a warm
environment such as in a metal shed, or an uninsulated trailer.
3. If the battery pack does not charge properly:
a. Check current at receptacle by plugging in a lamp or other appliance
b. Check to see if receptacle is connected to a light switch which turns power off
when you turn out the lights.
c. Move charger and battery pack to a location where the surrounding air
temperature is approximately 65°F - 75°F (18°- 24°C).
d. If charging problems persist, take the tool, battery pack and charger to your
local service center.
4. The battery pack should be recharged when it fails to produce sufficient power on jobs
which were easily done previously. DO NOT CONTINUE to use under these
conditions. Follow the charging procedure. You may also charge a partially used pack
whenever you desire with no adverse affect on the battery pack.
5. Under certain conditions, with the charger plugged into the power supply, the
exposed charging contacts inside the charger can be shorted by foreign material.
Foreign materials of a conductive nature such as, but not limited to, steel wool,
aluminum foil, or any buildup of metallic particles should be kept away from charger
cavities. Always unplug the charger from the power supply when there is no battery
pack in the cavity. Unplug charger before attempting to clean.
6. Do not freeze or immerse charger in water or any other liquid.
WARNING: Don’t allow any liquid to get inside charger. Electric shock may result.
CAUTION: Never attempt to open the battery pack for any reason. If the plastic
housing of the battery pack breaks or cracks, return to a service center for recycling.
90517816 FS18AL 4/2/07 1:38 PM Page 8
Page 9

9
OPERATING INSTRUCTIONS
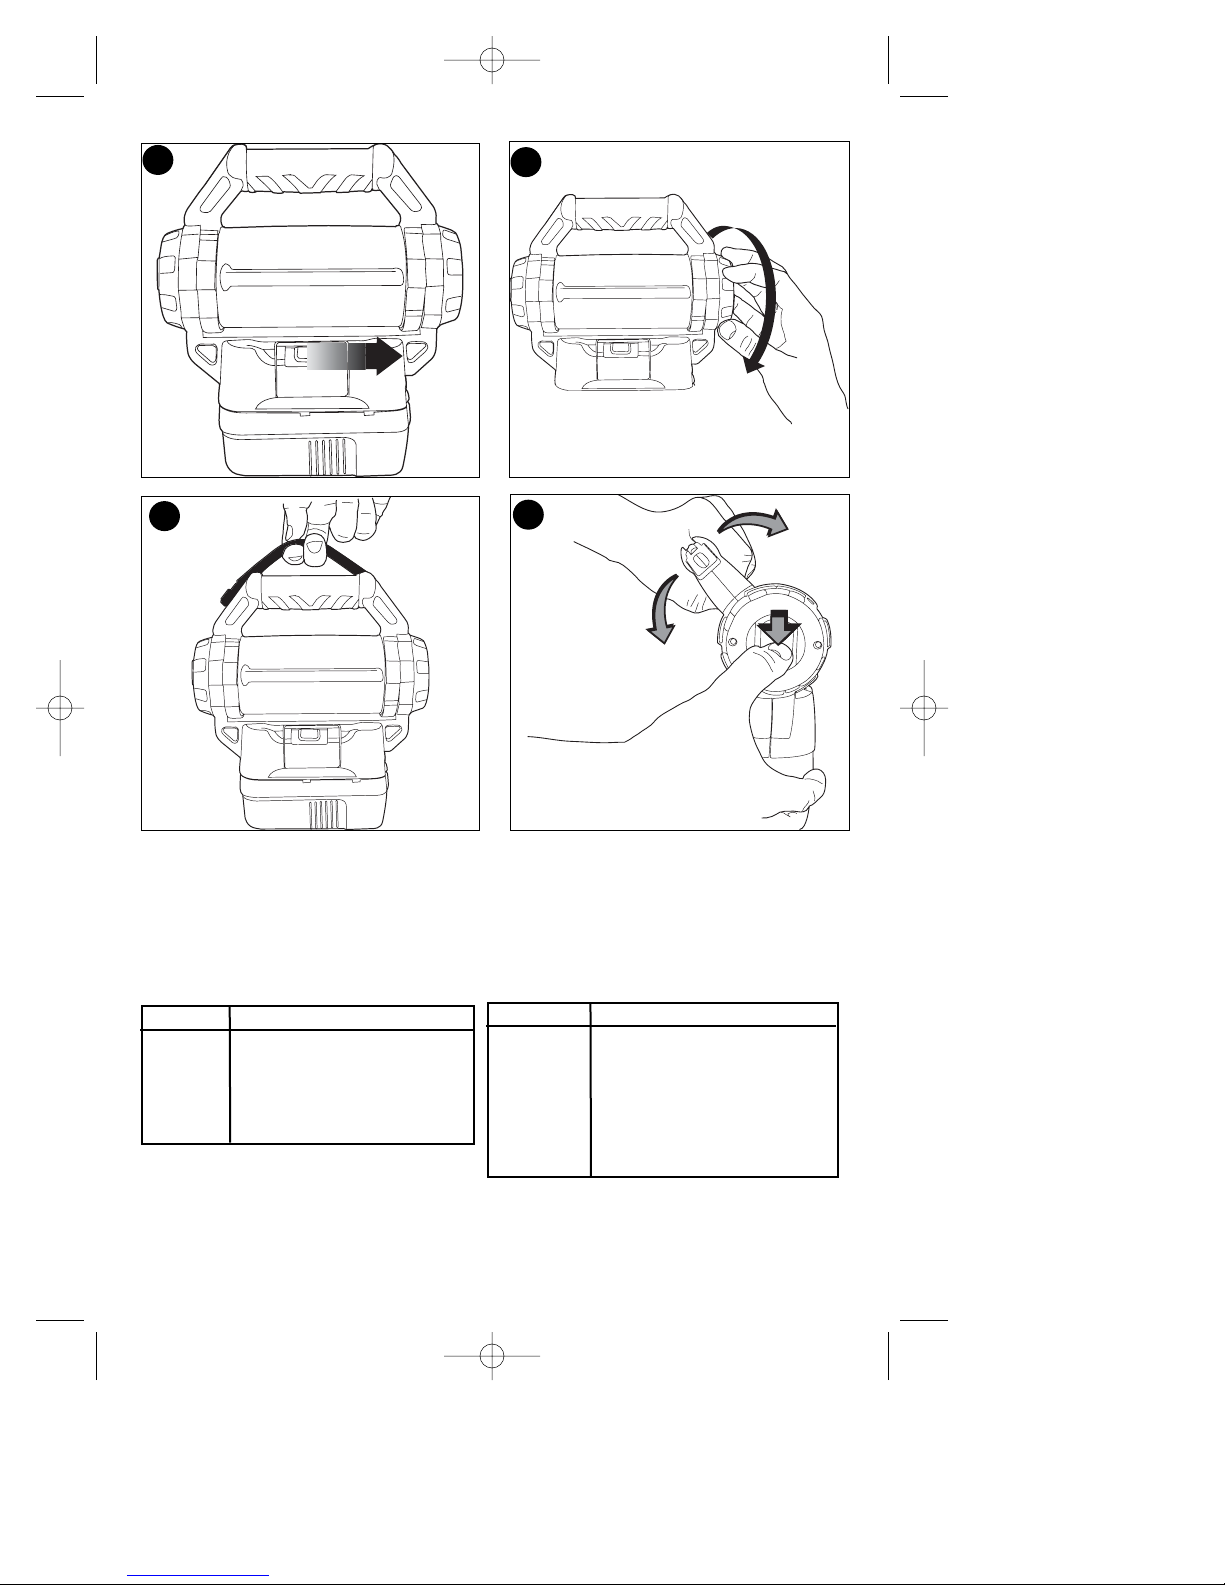
SWITCH (FIG. B)
To turn the light on, slide the switch (1) to the right side. To turn it off, slide the switch back.
CAUTION: Vision may be impaired when looking directly into fluorescent light.
REPLACING THE FLUORESCENT TUBE (FIG. C)
WARNING: Shock Hazard. Disconnect battery pack from tool before replacing
the fluorescent tube. Such preventative safety measures reduce the risk of personal
injury.
CAUTION: If replacing a broken tube, protect your hands before attempting to remove
the tube. Do not remove any pieces of broken glass or tube from the socket area with
bare hands, or personal injury may occur. Replace broken bulb in a well ventilated area.
CAUTION: Burn hazard. Lens or fluorescent tube may be hot immediately after use.
NOTE: Use only DC5273 Replacement Bulb or Sylvania PN CF13DS/E/841 replacement
bulb.
1. Rotate the cap (3) counterclockwise from its original position as shown in figure C.
Set aside
2. Carefully pull the fluorescent tube access cover out of the opening. Set aside.
3. Carefully remove the tube from the socket by gently pulling out from the base.
Check to ensure the socket and the area around the socket is free of dirt, dust
and other contaminants.
4. Insert the new tube in the same orientation as the old tube making sure it is fully
seated. Replace the fluorescent tube access cover that you set aside earlier.
5. Twist the cap back on.
To replace a broken tube:
1. Rotate the cap (3) counterclockwise from its original position as shown in figure C.
2. Carefully pull the fluorescent tube access cover out of the opening. Set aside.
3. Remove the two screws (4) from the clear plastic housing. Rotate the cover upward to
allow access to the broken tube. Wearing protective gloves, remove the broken glass
or tube.
4. Move the clear plastic housing back to the closed position and replace the screws (4).
5. Insert the new tube in the same orientation as the old tube making sure it is fully
seated. Replace the fluorescent tube access cover that you set aside earlier.
6. Twist the cap back on.
BUNGEE CORD (FIG. D)
CAUTION: When bungee cord (7) is in use, do not shake light. Personal injury or
property damage may occur.
CAUTION: When light is hung by the cord, do not shake the light or object that it is
hanging from. Do not hang the light from any electrical wires or anything that it is not
secure. Personal injury or property damage may occur.
CAUTION: Only use the bungee cord for hanging the area light. The bungee cord is
not intended to support additional weight. Do not attach or hang anything additional to the
light or risk of breakage may occur.
The built-in bungee cord (7) nests in the handle (6). This cord can be extended away
from the handle, as shown in Figure D and used to hang the light. The cord can also be
removed from one end if needed.
ROTATING THE LIGHT HOUSING (FIG. E)
The handle can be moved by pressing down on the slide release shown in figure E and
rotating the handle into one of six locked positions. These different handle positions can
be used to carry the light or to lean the light back on the handle for stationary use.
MAINTENANCE
Use only mild soap and damp cloth to clean the tool. Never let any liquid get inside the
tool; never immerse any part of the tool into a liquid.
IMPORTANT: To assure product SAFETY and RELIABILITY, repairs, maintenance and
adjustment (other than those listed in this manual) should be performed by authorized
service centers or other qualified service personnel, always using identical replacement
parts.
90517816 FS18AL 4/2/07 1:38 PM Page 9
Page 10

10
THE RBRC™ SEAL
The RBRC™ (Rechargeable Battery Recycling Corporation)
Seal on the nickel-cadmium battery (or battery pack) indicates that the
costs to recycle the battery (or battery pack) at the end of its useful life
have already been paid by Black & Decker. In some areas, it is illegal to
place spent nickel-cadmium batteries in the trash or municipal solid waste
stream and the RBRC program provides an environmentally conscious
alternative.
RBRC in cooperation with Black & Decker and other battery users, has established
programs in the United States and Canada to facilitate the collection of spent nickelcadmium batteries. Help protect our environment and conserve natural resources by
returning the spent nickel-cadmium battery to an authorized Black & Decker service
center or to your local retailer for recycling. You may also contact your local recycling
center for information on where to drop off the spent battery, or call 1-800-8-BATTERY.
ACCESSORIES
Recommended accessories for use with your tool are available from your local dealer or
authorized service center. If you need assistance regarding accessories, please
call: 1-800-544-6986.
TROUBLESHOOTING
PROBLEM
POSSIBLE CAUSE POSSIBLE SOLUTION
• Light will not illuminate. • Battery not installed properly. • Check battery
installation.
• Battery not charged. • Check battery
charging requirements.
• Light bulb needs replacing. • Replace bulb as
outlined in this manual.
• Battery will not charge. • Battery not inserted into charger. • Insert battery into
charger until red LED
appears.
• Charger not plugged in. • Plug charger into a
working outlet. Refer to
“Important Charging
Notes” for more details.
For assistance with your product, visit our website www.blackanddecker.com for the location of
the service center nearest you or call the BLACK & DECKER help line at 1-800-544-6986.
SERVICE INFORMATION
All Black & Decker Service Centers are staffed with trained personnel to provide
customers with efficient and reliable power tool service. Whether you need technical
advice, repair, or genuine factory replacement parts, contact the Black & Decker location
nearest you. To find your local service location, refer to the yellow page directory under
"Tools—Electric" or call: 1-800-544-6986 or visit www.blackanddecker.com
FULL TWO-YEAR HOME USE WARRANTY
Black & Decker (U.S.) Inc. warrants this product for two years against any defects in
material or workmanship. The defective product will be replaced or repaired at no
charge in either of two ways.
The first, which will result in exchanges only, is to return the product to the retailer from
whom it was purchased (provided that the store is a participating retailer). Returns
should be made within the time period of the retailer’s policy for exchanges (usually 30
to 90 days after the sale). Proof of purchase may be required. Please check with the
retailer for their specific return policy regarding returns that are beyond the time set for
exchanges.
90517816 FS18AL 4/2/07 1:38 PM Page 10
Page 11

11
The second option is to take or send the product (prepaid) to a Black & Decker owned or
authorized Service Center for repair or replacement at our option. Proof of purchase
may be required.Black & Decker owned and authorized Service Centers are listed under
"Tools-Electric" in the yellow pages of the phone directory.
This warranty does not apply to accessories. This warranty gives you specific legal
rights and you may have other rights which vary from state to state or province to
province. Should you have any questions, contact the manager of your nearest Black &
Decker Service Center. This product is not intended for commercial use.
FREE WARNING LABEL REPLACEMENT: If your warning labels become illegible or
are missing, call 1-800-544-6986 for a free replacement.
SPECIAL WARRANTY NOTE TO CONTRACTORS:
FIRESTORMTMbranded products are offered as high end consumer home use tools and
carry a HOME USE WARRANTY. These tools are designed, manufactured and tested
to meet or exceed the needs of the do-it-yourselfer in the execution of projects and
repairs in and around the home. With proper use they will provide the home owner with
step up power and performance well beyond their two year warranty. However, if you
use tools for a living and use FIRESTORMTMbranded products or any of Black &
Decker’s other Consumer Home Use tools ON THE JOBSITE you should know that
they CANNOT BE COVERED UNDER OUR WARRANTY.
See ‘Tools-Electric’
– Yellow Pages –
for Service & Sales
Imported by
Black & Decker (U.S.) Inc.,
701 E. Joppa Rd.
Towson, MD 21286 U.S.A.
90517816 FS18AL 4/2/07 1:38 PM Page 11
www.FireStormTools.com
1-800-544-6986
Page 12

12
LLLLAAAAMMMMPPPPEEEE DDDD’’’’ÉÉÉÉCCCCLLLLAAAAIIIIRRRRAAAAGGGGEEEE DDDDEEEE TTTTRRRRAAAAVVVVAAAAIIIILLLL DDDDEE
EE
11118888 VVVVOOOOLLLLTTTTSSSS
MODE D’EMPLOI
CONSERVER CE MANUEL POUR UN USAGE ULTÉRIEUR.
N° de
catalogue
FS18AL
AVANT DE RETOURNER CE PRODUIT POUR
QUELQUE RAISON QUE CE SOIT, COMPOSER LE
1-800-544-6986
AVANT D’APPELER, AYEZ EN MAIN LE N° DE CATALOGUE ET LE CODE DE DATE. DANS LA PLUPART
DES CAS, UN REPRÉSENTANT DE BLACK & DECKER PEUT RÉSOUDRE LE PROBLÈME PAR
TÉLÉPHONE. SI VOUS AVEZ UNE SUGGESTION OU UN COMMENTAIRE, APPELEZ-NOUS. VOS
IMPRESSIONS SONT CRUCIALES POUR BLACK & DECKER.
M
M
ERCI
ERCIDD
’
’
AAVOIR
VOIR
CHOISI
CHOISI
F
F
IREST
IREST
ORM
ORM
!
!
V
V
ISITEZ
ISITEZ
WWW
WWW
.F
.F
IREST
IREST
ORMT
ORMT
OOLS
OOLS
.
.
COM
COM
/P
/P
RODUCT
RODUCT
R
R
EGISTRA
EGISTRA
TION
TION
POUR
POUR
ENREGISTRER
ENREGISTRER
VOTRE
VOTRE
NOUVEAU
NOUVEAU
PRODUIT
PRODUIT
.
.
90517816 FS18AL 4/2/07 1:38 PM Page 12
Page 13

13
RÈGLES DE SÉCURITÉ CONCERNANT LES OUTILS À PILE
– GÉNÉRALITÉS
AVERTISSEMENT! Lire toutes les directives. Tout manquement aux
directives suivantes pose des risques de choc électrique, d’incendie et/ou de
blessure grave. Le terme « outil électrique » dans tous les avertissements ciaprès se rapporte à votre outil électrique à alimentation sur secteur (avec fil) ou
par piles (sans fil).
CONSERVER LE PRÉSENT GUIDE À TITRE DE RÉFÉRENCE
1) Sécurité du lieu de travail
a) Tenir la zone de travail propre et bien éclairée.
Les endroits sombres sont
souvent des causes d'accidents.
b) Ne pas faire fonctionner d’outils électriques dans un milieu déflagrant, soit
en présence de liquides inflammables, de gaz ou de poussière.
Les outils
électriques produisent des étincelles qui peuvent enflammer la poussière ou les
vapeurs.
c) Éloigner les enfants et les curieux au moment d’utiliser un outil électrique.
Une distraction pourrait vous en faire perdre la maîtrise.
2) Sécurité en matière d’électricité
a) Les fiches des outils électriques doivent correspondre à la prise. Ne jamais
modifier la fiche en aucune façon.
Ne jamais utiliser de fiche d’adaptation avec
un outil électrique mis à la terre. Le risque de choc électrique sera réduit par
l’utilisation de fiches non modifiées correspondant à la prise.
b) Éviter tout contact physique avec des surfaces mises à la terre comme des
tuyaux, des radiateurs, des cuisinières et des réfrigérateurs.
Le risque de choc
électrique est plus élevé si votre corps est mis à la terre.
c) Ne pas exposer les outils électriques à la pluie ou à d'autres conditions où il
pourrait être mouillé.
La pénétration de l’eau dans un outil électrique augmente le
risque de choc électrique.
d) Ne pas utiliser abusivement le cordon d’alimentation. Ne jamais utiliser le
cordon pour transporter, tirer ou débrancher un outil électrique. Tenir le cordon
éloigné de la chaleur, de l’huile, des bords tranchants ou des pièces mobiles.
Les cordons endommagés ou emmêlés augmentent les risques de choc électrique.
e) Lors de l’utilisation d’un outil électrique à l’extérieur, n’utiliser que des
rallonges conçues pour l’extérieur.
L’utilisation d’une rallonge conçue pour
l’extérieur réduit les risques de choc électrique. En cas d’utilisation d’une rallonge,
s’assurer que les valeurs nominales de la rallonge utilisée correspondent bien à
celles de l’outil alimenté. L’usage d’une rallonge de calibre insuffisant causera une
chute de tension entraînant perte de puissance et surchauffe. Le tableau ci-dessous
illustre les calibres à utiliser selon la longueur de rallonge et l’intensité nominale
indiquée sur la plaque signalétique. En cas de doutes, utiliser le calibre suivant. Plus
le calibre est petit, plus la rallonge peut supporter de courant.
Calibre de fil minimum recommandé pour les rallonges
Longueur totale de la rallonge
25 pi 50 pi 75 pi 100 pi 125 pi 150 pi 175 pi
7,6 m 15,2 m 22,9 m 30,5 m 38,1 m 45,7 m 53,3 m
Calibre AWG
18 18 16 16 14 14 12
3) Sécurité personnelle
a) Être vigilant, surveiller le travail effectué et faire preuve de jugement
lorsqu’un outil électrique est utilisé. Ne pas utiliser d’outil électrique en cas
de fatigue ou sous l’influence de drogues, d’alcool ou de médicaments.
Un
moment d’inattention, durant l’utilisation d’un outil électrique, peut se solder par des
blessures graves.
b) Utiliser un équipement de sécurité. Toujours porter une protection oculaire.
L’utilisation d’un équipement de sécurité comme un masque anti-poussières, des
chaussures antidérapantes, un casque de sécurité ou des protecteurs auditifs
lorsque la situation le requiert réduira les risques de blessures corporelles.
90517816 FS18AL 4/2/07 1:38 PM Page 13
Page 14

14
c) Attention de ne pas mettre en marche l’outil accidentellement. S’assurer que
l’interrupteur est en position d’arrêt avant tout branchement.
Transporter un
outil électrique alors que le doigt est sur l’interrupteur ou brancher un outil électrique
alors que l’interrupteur est en position de marche risque de causer un accident.
d) Retirer toute clé de réglage ou clé standard avant de démarrer l’outil.
Une clé
standard ou une clé de réglage attachée à une partie pivotante peut causer des
blessures.
e) Ne pas trop tendre les bras. Conserver son équilibre en tout temps.
Cela
permet de mieux maîtriser l’outil électrique dans les situations imprévues.
f) S’habiller de manière appropriée. Ne pas porter de vêtements amples ni de
bijoux. Maintenir cheveux, vêtements et gants éloignés des pièces mobiles.
Les vêtements amples, bijoux ou cheveux longs pourraient s'enchevêtrer dans les
pièces mobiles.
g) Si des composants sont fournis pour le raccordement de dispositifs de
dépoussiérage et de ramassage, s’assurer que ceux-ci sont bien raccordés et
utilisés.
L’utilisation de ces dispositifs peut réduire les risques engendrés par les
poussières.
4) Utilisation et entretien d’un outil électrique
a) Ne pas forcer un outil électrique. Utiliser l’outil électrique approprié à
l’application.
L’outil électrique approprié effectuera un meilleur travail, de façon plus
sûre et à la vitesse pour laquelle il a été conçu.
b) Ne pas utiliser un outil électrique dont l’interrupteur est défectueux.
Tout outil
électrique dont l’interrupteur est défectueux est dangereux et doit être réparé.
c) Débrancher la fiche du secteur ou le bloc-piles de l’outil électrique avant de
faire tout réglage ou changement d’accessoire, ou avant de ranger l’outil
électrique.
Ces mesures préventives réduisent les risques de démarrage accidentel
de l’outil électrique.
d) Ranger les outils électriques hors de la portée des enfants, et ne permettre à
aucune personne n’étant pas familière avec un outil électrique (ou son manuel
d’instruction) d’utiliser ce dernier
. Les outils électriques deviennent dangereux
entre les mains d’utilisateurs inexpérimentés.
e) Entretenir les outils électriques. Vérifier les pièces mobiles pour s’assurer
qu’elles sont bien alignées et tournent librement, qu’elles sont en bon état et
ne sont affectées par aucun trouble susceptible de nuire au bon
fonctionnement de l’outil électrique. En cas de dommage, faire réparer l’outil
électrique avant toute nouvelle utilisation.
Beaucoup d’accidents sont causés par
des outils électriques mal entretenus.
f) S’assurer que les outils de coupe sont aiguisés et propres.
Les outils de coupe
bien entretenus et affûtés sont moins susceptibles de se coincer et sont plus faciles
à contrôler.
g) Utiliser l’outil électrique, les accessoires, les mèches, etc., conformément aux
présentes directives et suivant la manière prévue pour ce type particulier
d’outil électrique, en tenant compte des conditions de travail et du travail à
effectuer.
L’utilisation d’un outil électrique pour toute opération autre que celle pour
laquelle il a été conçu est dangereuse.
5) Utilisation et entretien du bloc-piles
a) S’assurer que l’interrupteur se trouve à la position d’arrêt avant d’insérer le
bloc-piles.
Insérer un bloc-piles dans un outil électrique dont l’interrupteur est à la
position de marche risque de provoquer un accident.
b) Ne recharger l’outil qu’au moyen du chargeur précisé par le fabricant.
L’utilisation d’un chargeur qui convient à un type de bloc-piles risque de provoquer un
incendie s’il est utilisé avec un autre type de bloc-piles.
c) Utiliser les outils électriques uniquement avec les blocs-piles conçus à cet effet.
L’utilisation de tout autre bloc-piles risque de causer des blessures ou un incendie.
d) Lorsque le bloc-piles n’est pas utilisé, le tenir éloigné des objets métalliques,
notamment des trombones, de la monnaie, des clés, des clous, des vis, etc.,
qui peuvent établir une connexion entre les deux bornes.
Le court-circuit des
bornes du bloc-piles risque de provoquer des étincelles, des brûlures ou un incendie.
e) En cas d’utilisation abusive, le liquide peut gicler hors du bloc-piles, éviter tout
contact. Si un contact accidentel se produit, laver à grande eau. Si le liquide
90517816 FS18AL 4/2/07 1:38 PM Page 14
Page 15

15
entre en contact avec les yeux, obtenir des soins médicaux.
Le liquide qui gicle
hors du bloc-piles peut provoquer des irritations ou des brûlures.
6) Réparation
a) Faire réparer l’outil électrique par un réparateur professionnel en n’utilisant
que des pièces de rechange identiques
. Cela permettra de maintenir une
utilisation sécuritaire de l’outil électrique.
DIRECTIVES DE SÉCURITÉ IMPORTANTES POUR LES
LAMPES D’ÉCLAIRAGE DE TRAVAIL À TUBE FLUORESCENT
AVERTISSEMENT : risque de brûlure.
Ne pas utiliser la lampe de poche ou le
chargeur près de liquides inflammables ou dans un milieu gazeux ou déflagrant. Des
étincelles à l’intérieur du produit peuvent enflammer des vapeurs et causer des blessures
corporelles.
AVERTISSEMENT : risque de choc électrique. Toujours retirer la pile avant de
remplacer l’ampoule. Remplacer l’ampoule par une autre de même type et de 13
watts de puissance.
Ces mesures de sécurité préventives réduisent le risque de
blessures corporelles.
AVERTISSEMENT : la lentille devient très chaude pendant l’utilisation. Pour réduire le
risque de brûlures, ne pas toucher la lentille chaude. Pour réduire le risque d’incendie,
garder à distance de toute matière combustible pendant le fonctionnement.
• Pour réduire les risques de blessures, exercer une étroite surveillance lors de
l’utilisation de l’appareil électrique à proximité d’enfants.
• Utiliser uniquement des accessoires recommandés ou vendus par le fabricant.
• Pour réduire le risque de choc électrique, ne pas immerger la lampe dans l’eau ou
dans tout autre liquide. Ne pas déposer ou ranger l’appareil électrique à un endroit
d’où il pourrait tomber dans une baignoire ou un évier.
• Utiliser uniquement le chargeur fourni par le fabricant.
• Durant son utilisation ou immédiatement après, la lampe d’éclairage de travail ne doit
pas reposer à plat sur la surface de sa lentille.
• Remplacer le tube brisé dans un endroit bien aéré.
• Ne pas toucher à la surface de la lentille une fois le tube allumé ou immédiatement
après qu’il a été éteint.
• Manipuler la lampe soigneusement près de toute surface inflammable.
• Si le tube fluorescent était allumé, le laisser refroidir pendant plusieurs minutes avant
de le changer.
• La vision de l’utilisateur peut être altérée lorsqu’il regarde directement la lampe fluorescente.
• Ne pas exposer la lampe ou le chargeur à un endroit humide ou mouillé. Ne pas
exposer la lampe ou le chargeur à la pluie ou à la neige.
• Ne pas laver la lampe ni le chargeur à l’eau ni laisser l’eau pénétrer à l’intérieur de
ceux-ci.
• Durant l’utilisation de la lampe, ne pas la couvrir d’un chiffon ou de tout autre matériel
inflammable, car cela pourrait créer un risque accru d’incendie.
• Ne pas faire fonctionner la lampe si le couvercle de lentille n’est pas fixé.
• Pour un usage intérieur seulement.
• Ne pas suspendre l’appareil sur une fixation qui pourrait devenir électriquement « active ».
MISE EN GARDE : lorsque inutilisé, placer l’outil sur son côté, sur une surface
stable, où il ne pourra faire trébucher ni tomber quelqu’un. Certains outils dotés de
grands blocs-piles se maintiendront à la verticale, sur leur bloc-piles, mais ils peuvent ainsi
facilement être renversés.
AVERTISSEMENT LIÉ À L’ARTICLE 65 : cet appareil contient des produits
chimiques reconnus par l’État de la Californie comme pouvant être cancérigènes et
entraîner des anomalies congénitales et d’autres dangers relatifs à la reproduction.
Recycler ou éliminer l’ampoule en conformité avec les règlements provinciaux et
étatiques en vigueur. Si l’ampoule se brise, laver soigneusement les mains et toute
surface ayant été en contact avec l’ampoule.
CONSERVER CES DIRECTIVES
90517816 FS18AL 4/2/07 1:38 PM Page 15
Page 16

16
LIGNES DIRECTRICES EN MATIÈRE DE SÉCURITÉ - DÉFINITIONS
Il est important que vous lisiez et compreniez ce mode d’emploi. Les informations qu’il
contient concernent VOTRE SÉCURITÉ et visent à ÉVITER TOUT PROBLÈME. Les
symboles ci-dessous servent à vous aider à reconnaître cette information.
DANGER : Indique une situation dangereuse imminente qui, si elle n’est pas évitée,
causera la mort ou des graves blessures.
AVERTISSEMENT : Indique une situation potentiellement
dangereuse qui, si elle n’est pas évitée, pourrait causer la mort ou de graves blessures.
MISE EN GARDE : Indique une situation potentiellement dangereuse qui, si elle n’est
pas évitée, pourrait causer des blessures mineures ou modérées.
MISE EN GARDE : Utilisé sans le symbole d’alerte à la sécurité, indique une situation
potentiellement dangereuse qui, si elle n’est pas évitée, peut résulter en des dommages à
la propriété.
L’étiquette apposée sur votre outil pourrait comprendre les symboles suivants. Les
symboles et leurs définitions sont indiqués ci-après :
V ..............volts A ................ampères
Hz ............hertz W................watts
min............minutes ..............courant alternatif
..........courant continue non ............régime à vide
..............Construction classe II
............
borne de terre
............
symbole d’alerte à la .../min ........révolutions ou alternance par minute
sécurité
INFORMATION CONCERNANT LE CAPUCHON DU BLOC-PILE
Un capuchon est fourni avec le bloc-pile en vue d’être utilisé chaque fois qu’on retire ce
dernier de l’outil ou du chargeur en vue de le ranger ou de le transporter; enlever le
capuchon avant de remettre le bloc-pile dans le chargeur ou dans l’outil.
AVERTISSEMENT : S’assurer, au moment de ranger ou de transporter un bloc-pile ou
une pile, qu’aucun objet métallique n’entre en contact avec leurs bornes à découvert de
celui-ci. Par exemple, il faut éviter de placer un bloc-pile ou une pile sans capuchon
dans un tablier, une poche, une boîte à outils ou un tiroir (etc.) contenant des objets tels
que des clous, des vis ou des clés, car tout contact entre les bornes à découvert et un
objet métallique comme une clé, une pièce de monnaie, un outil à main. etc. pourrait
causer un incendie. En effet, les règlements américains Hazardous Material
Regulations (HMR) du US Department of Transportation interdisent le transport d’un
bloc-pile ou d’une pile dans tout moyen de transport commercial ou aéronef (que ce soit
dans une valise ou le bagage de cabine) SAUF s’ils sont bien protégés contre les
courts-circuits. On doit donc s’assurer, lorsqu’on transporte un bloc-pile ou une pile
séparément, de bien protéger et isoler les bornes contre tout matériau qui risque
d’entrer en contact avec eux et de causer un court-circuit.
DESCRIPTION FONCTIONNELLE
Figure A
1. Interrupteur Marche/Arrêt
2. Tube fluorescent
3. Capuchon amovible
4. Vis d’accès au tube fluorescent
5. Bouton de dégagement de la poignée
6. Poignée mobile
7. Tendeur élastique pour suspendre l’appareil
8. Pile (non comprise)
90517816 FS18AL 4/2/07 1:38 PM Page 16
Page 17

17
L’appareil FS18AL prend en charge n’importe lequel des blocs-piles coulissants de 18
V qui suivent ainsi que n’importe quel chargeur correspondant, comme indiqué dans le
tableau ci-dessous. Veuillez consulter les modes d’emploi spécifiques à chaque
chargeur pour les mesures en matière de sécurité et les directives de fonctionnement.
Blocs-piles coulissants de 18 V
Pile Firestorm de 18 V
Pile FSXtreme de 18 V
Pile FSXtreme série Silver
de 18 V
Pile FSXtreme de 18 V
Pile Black & Decker de 18 V
FSB18
FS180BX
FS18SBX
FS18BX
HPB18
N° de cat. Description
Chargeurs pour blocs-piles coulissants
de 18 V
Chargeur-cuvette de 18 V
Chargeur à double sortie de 18 V
Chargeur-radio de 18 V
Chargeur à triple sortie de 18 V
Chargeur rapide de 9,6 à 18 V
Chargeur une heure de 9,6 à
24 V
Chargeur une heure à double
sortie de 9,6 à 24 V
FS18C
FS180DC
FS18RC
5104211-00
FSMVC
FS240FC
FS2400DC
N° de cat. Description
DIRECTIVES DE SÉCURITÉ IMPORTANTES POUR LES
BLOCS-PILES
Le bloc-piles n’est pas complètement chargé à la sortie de l’emballage. Avant d’utiliser le
bloc-piles et le chargeur, lire les directives de sécurité ci-après. Respecter ensuite les
consignes de chargement décrites.
LIRE TOUTES LES DIRECTIVES.
• Ne pas incinérer le bloc-piles, même s’il est très endommagé ou complètement
usé, car il peut exploser au contact de flammes.
• Une petite fuite de liquide peut se produire dans les cellules du bloc-piles en
cas d’utilisation ou de conditions de température extrêmes; cela n’indique pas
de défaillance. Toutefois, si le joint d’étanchéité extérieur est rompu et que le liquide
entre en contact avec la peau :
a. laver rapidement la zone touchée au savon et à l’eau;
b. neutraliser l’effet au moyen d’un acide doux comme du jus de citron ou du
vinaigre;
c. si le liquide entre en contact avec les yeux, les rincer abondamment à l’eau
propre, pendant au moins 10 minutes, et consulter immédiatement un médecin.
(Remarque aux fins médicales : le liquide est composé d’une solution de 25 % à
35 % d’hydroxyde de potassium.)
• Charger uniquement les blocs-piles au moyen de chargeurs Black & Decker.
• NE PAS éclabousser le bloc-piles ou l’immerger dans l’eau ou tout autre liquide.
• Ne pas ranger ni utiliser l’outil et le bloc-piles à un endroit où la température
peut atteindre ou dépasser les 40,5 °C (105 °F) (comme dans les remises
extérieures ou les bâtiments métalliques l’été).
DANGER : risque d’électrocution.
Ne jamais ouvrir le bloc-piles pour quelque
raison que ce soit.
Si le boîtier du bloc-piles est fissuré ou endommagé, ne pas l’insérer dans un chargeur.
Une telle pratique pourrait se solder par un choc électrique ou une électrocution. Les
blocs-piles endommagés doivent être envoyés au centre de réparation pour être recyclés.
DIRECTIVES DE SÉCURITÉ IMPORTANTES POUR LES
CHARGEURS DE PILES
CONSERVER CES DIRECTIVES : ce mode d’emploi comprend d’importantes directives
de sécurité pour les chargeurs de piles.
• Avant d’utiliser le chargeur, lire toutes les directives et tous les avertissements figurant
sur le chargeur, le bloc-piles et le produit utilisé avec le bloc-piles.
DANGER: risque d’électrocution. Les bornes de charge présentent une tension de
120 volts. Ne pas sonder les bornes avec des objets conducteurs. En effet, il y a risque
de choc électrique ou d’électrocution.
AVERTISSEMENT : risque de choc électrique.
Éviter la pénétration de tout
liquide dans le chargeur. Cela peut provoquer des chocs électriques.
90517816 FS18AL 4/2/07 1:38 PM Page 17
Page 18

18
MISE EN GARDE : risque de brûlure.
Pour réduire le risque de blessures,
charger seulement des piles rechargeables Black & Decker au nickel-cadmium. D’autres
types de piles peuvent exploser et provoquer des blessures corporelles et des
dommages.
MISE EN GARDE :
dans certaines circonstances, lorsque le chargeur est branché
au bloc d’alimentation, les contacts de chargement exposés à l’intérieur du chargeur
peuvent être court-circuités par des corps étrangers conducteurs tels que, mais sans s’y
limiter, la laine d’acier, le papier d’aluminium, ou toute accumulation de particules
métalliques. Ils doivent donc être maintenus à distance des ouvertures du chargeur.
Débrancher systématiquement celui-ci si aucun bloc-piles n’y est inséré. Débrancher le
chargeur avant tout nettoyage.
• NE PAS charger le bloc-piles au moyen de tout autre chargeur que ceux qui
sont mentionnés dans le présent mode d’emploi.
Le chargeur et le bloc-piles sont
spécialement conçus pour être utilisés ensemble.
• Ces chargeurs n’ont pas été conçus pour être utilisés à d’autres fins que celles
de charger les piles rechargeables Black & Decker.
Toute autre utilisation risque de
provoquer un incendie, un choc électrique ou une électrocution.
• Protéger le chargeur de la pluie et de la neige.
• Tirer sur la fiche plutôt que sur le cordon pour débrancher le chargeur.
Une telle
pratique réduira le risque d’endommager la fiche et le cordon d’alimentation.
• S’assurer que le cordon est placé à un endroit sécuritaire, de manière à ce que
personne ne marche ni ne trébuche dessus et à ce qu’il ne soit pas endommagé
ni soumis à une contrainte.
• Ne pas utiliser de rallonge à moins que cela ne soit absolument nécessaire.
L’utilisation d’une rallonge inadéquate risque d’entraîner un incendie, un choc
électrique ou une électrocution.
• Ne pas mettre d’objet sur le chargeur ni mettre ce dernier sur une surface molle
pouvant obstruer les fentes de ventilation et ainsi provoquer une chaleur interne
excessive.
Éloigner le chargeur de toute source de chaleur. La ventilation du chargeur
se fait par les fentes pratiquées dans les parties supérieures et inférieures du boîtier.
• Ne pas faire fonctionner le chargeur si la fiche ou le cordon est endommagé;
les
remplacer immédiatement.
• Ne jamais se servir d’un chargeur qui a encaissé un coup brusque, qui est
tombé ou qui est endommagé.
Le faire vérifier dans un centre de réparation autorisé.
• Ne pas démonter le chargeur; l’apporter à un centre de réparation autorisé
lorsqu’un entretien ou une réparation est requise.
Le remontage non conforme du
chargeur comporte des risques de choc électrique, d’électrocution ou d’incendie.
• Débrancher le chargeur avant de le nettoyer. Cela réduira le risque de choc
électrique.
Le risque ne sera pas éliminé en enlevant simplement le bloc-piles.
• NE JAMAIS
tenter de relier deux chargeurs ensemble.
• Le chargeur est conçu pour être alimenté en courant domestique standard
(120 volts). Ne pas utiliser une tension supérieure pour le chargeur.
Cela ne
s’applique pas au chargeur pour poste mobile.
CONSERVER CES DIRECTIVES POUR UN USAGE ULTÉRIEUR
REMARQUES IMPORTANTES POUR LE CHARGEMENT
1. Pour augmenter la durée de vie du bloc-piles et optimiser son rendement, le charger
à une température entre 18 et 24 °C (65 et 75 °F). NE PAS charger le bloc-piles à
des températures inférieures à 4,5 °C (40 °F) ou supérieures à 40,5 °C (105 °F). Ces
consignes sont importantes et permettent d’éviter d’endommager gravement le
bloc-piles.
2. Le chargeur et le bloc-piles peuvent devenir chauds au toucher pendant la charge. Il
s’agit d’un état normal et cela n’indique pas un problème. Pour faciliter le
refroidissement du bloc-piles après son utilisation, éviter de mettre le chargeur ou le
bloc-piles dans un endroit chaud comme dans une remise métallique ou une
remorque non isolée.
3. Si le bloc-piles ne se charge pas adéquatement, on doit :
90517816 FS18AL 4/2/07 1:38 PM Page 18
Page 19

19
a. vérifier le courant à la prise en branchant une lampe ou un autre appareil électrique;
b. vérifier si la prise est reliée à un interrupteur de lumière qui la met hors tension
lorsque vous éteignez les lumières;
c. déplacer le chargeur et le bloc-piles à un endroit où la température ambiante est
entre 18 et 24 °C (65 et 75 °F);
d. si le problème persiste, apporter ou envoyer l’outil, le bloc-piles et le chargeur au
centre de réparation de votre région.
4. Le bloc-piles doit être rechargé lorsqu’il n’arrive pas à produire suffisamment de
puissance pour des travaux qui étaient facilement réalisés auparavant. NE PAS
CONTINUER à utiliser le bloc-piles dans ces conditions. Suivre les procédures de
charge. On peut également recharger en tout temps un bloc-piles partiellement
déchargé sans nuire à son fonctionnement.
5. Dans certaines circonstances, lorsque le chargeur est branché au bloc
d’alimentation, les contacts de chargement exposés à l’intérieur du chargeur peuvent
être court-circuités par des corps étrangers conducteurs tels que, mais sans s’y
limiter, la laine d’acier, le papier d’aluminium, ou toute accumulation de particules
métalliques. Ils doivent donc être maintenus à distance des ouvertures du chargeur.
Débrancher systématiquement celui-ci si aucun bloc-piles n’y est inséré. Débrancher
le chargeur avant tout nettoyage.
6. Ne pas geler ni immerger le chargeur dans l’eau ou dans tout autre liquide.
AVERTISSEMENT : éviter la pénétration de tout liquide dans le chargeur. Cela peut
provoquer des chocs électriques.
MISE EN GARDE : ne jamais ouvrir le bloc-piles pour quelque raison que ce soit. Si le
boîtier de plastique du bloc-piles est brisé ou fissuré, le retourner à un centre de
réparation pour qu’il soit recyclé.
FONCTIONNEMENT
INTERRUPTEUR (FIG. B)
Pour allumer la lampe, faire glisser l’interrupteur (1) vers la droite. Pour l’éteindre, faire
glisser l’interrupteur à sa position initiale.
MISE EN GARDE : la vision de l’utilisateur peut être altérée lorsqu’il regarde
directement la lampe fluorescente.
REMPLACEMENT DU TUBE FLUORESCENT (FIG. C)
MISE EN GARDE : risque de choc électrique. Débrancher le bloc-piles de l’outil
avant de remplacer le tube fluorescent. Ces mesures de sécurité préventives
réduisent le risque de blessures corporelles.
MISE EN GARDE : pour remplacer un tube brisé, se protéger les mains avant de
retirer le tube. Ne pas retirer des morceaux de verre ni le tube de la douille à mains nues
afin d’éviter tout risque de blessure. Remplacer le tube brisé dans un endroit bien aéré.
MISE EN GARDE : risque de brûlure. La lentille et le tube fluorescent risquent d’être
chauds immédiatement après leur utilisation.
REMARQUE : utiliser uniquement l’ampoule de rechange DC5273 ou l’ampoule de
rechange Sylvania PN CF13DS/E/841.
1. Tourner le capuchon (3) dans le sens antihoraire, à partir de sa position d’origine,
comme indiqué à la figure C. Mettre à l’écart.
2. Retirer délicatement le couvercle d’accès au tube fluorescent. Mettre à l’écart.
3. Enlever soigneusement le tube de la douille en le tirant doucement hors de la base.
S’assurer que la douille et la zone l’entourant sont exemptes de saleté, de
poussières et d’autres polluants.
4. Insérer le tube neuf dans le même sens que l’ancien et s’assurer qu’il est bien
enclenché. Remettre le couvercle d’accès au tube fluorescent retiré plus tôt.
5. Remettre le capuchon en place en le tournant.
Remplacement d’un tube brisé :
1. Tourner le capuchon (3) dans le sens antihoraire, à partir de sa position d’origine,
comme indiqué à la figure C.
2. Retirer délicatement le couvercle d’accès au tube fluorescent. Mettre à l’écart.
3. Retirer les deux vis (4) du boîtier en plastique transparent. Faire pivoter le couvercle
90517816 FS18AL 4/2/07 1:38 PM Page 19
Page 20

20
vers le haut pour permettre l’accès au tube brisé. Après avoir enfilé des gants
protecteurs, retirer le verre brisé ou le tube.
4. Remettre le boîtier en plastique transparent en position fermée et remettre les vis (4).
5. Insérer le tube neuf dans le même sens que l’ancien et s’assurer qu’il est bien
enclenché. Remettre le couvercle d’accès au tube fluorescent retiré plus tôt.
6. Remettre le capuchon en place en le tournant.
TENDEUR ÉLASTIQUE (FIG. D)
MISE EN GARDE : ne pas secouer la lampe lors de l’utilisation du tendeur élastique
(7). Des blessures corporelles ou des dommages à la propriété risquent de se produire.
MISE EN GARDE : lorsque la lampe est suspendue par le cordon, ne pas secouer la
lampe ou la fixation qui la retient. Ne pas suspendre la lampe au moyen d’un fil électrique
ou de tout objet non fixé. Des blessures corporelles ou des dommages à la propriété
risquent de se produire.
MISE EN GARDE : utiliser uniquement le tendeur élastique pour suspendre la lampe
d’éclairage de travail. Il n’est pas conçu pour supporter un poids supplémentaire. Ne rien
fixer ou suspendre en plus à la lampe pour éviter le risque de briser quoi que ce soit.
Le tendeur élastique intégré (7) se trouve dans la poignée (6). Il peut être étiré à partir de
la poignée, comme indiqué à la figure D. Il s’utilise pour suspendre la lampe. Il est
également possible de décrocher une extrémité du tendeur élastique, si cela est nécessaire.
PIVOTEMENT DU BOÎTIER DE LA LAMPE (FIG. E)
La poignée peut être déplacée en appuyant sur le dispositif coulissant pour la dégager,
comme indiqué à la figure E, puis en la faisant pivoter à l’une des six positions
verrouillables. Utiliser ces positions de poignée pour transporter la lampe ou pour appuyer
celle-ci sur sa poignée lors d’une utilisation stationnaire.
ENTRETIEN
Nettoyer l’outil au moyen d’un savon doux et d’un linge humide seulement. Ne jamais
laisser de liquide s’infiltrer à l’intérieur de l’outil ni tremper ce dernier dans un liquide
quelconque.
IMPORTANT : pour assurer la SÉCURITÉ et la FIABILITÉ de ce produit, toutes les
opérations de réparation, d’entretien et de réglage (autres que celles décrites aux
présentes) doivent être effectuées dans un centre de service autorisé ou par du
personnel qualifié; on ne doit utiliser que des pièces de rechange
identiques.
LE SCEAU SRPRC™
Le sceau SRPRC™ apposé sur le bloc-piles au nickel cadmium indique que
son coût de recyclage à la fin de sa vie utile sera payé par Black & Decker. Il
est illégal de jeter les piles au nickel cadmium épuisées dans les poubelles ou
dans le système municipal d’élimination des résidus solides. Le programme RBRC
représente donc une alternative sensibilisée à l’environnement. La SRPRC™, en
collaboration avec Black & Decker, ont établi aux États-Unis et au Canada des
programmes facilitant la cueillette des piles au nickel cadmium épuisés. Black & Decker
encourage ses utilisateurs à participer à son programme de protection de
l’environnement en retournant les piles usagées à un centre de réparation autorisé
Black & Decker. On peut également communiquer avec le centre de recyclage de la
région pour savoir où déposer les piles usées ou composer le 1-800-8-BATTERY.
ACCESSOIRES
Les accessoires recommandés pouvant être utilisés avec l’outil sont disponibles auprès
de votre distributeur local ou centre de réparation autorisé. Pour tout renseignement
concernant les accessoires, composer le : 1 800 544-6986.
AVERTISSEMENT : l’utilisation de tout accessoire non recommandé avec cet outil
pourrait s’avérer dangereuse.
DÉPANNAGE
PROBLÈME
CAUSE POSSIBLE SOLUTION POSSIBLE
• La lampe ne fonctionne • Mauvaise installation • Vérifier l’installation
pas. de la pile. de la pile.
• Pile non chargée. • Vérifier les exigences de charge
de la pile.
• L’ampoule de la lampe • Remplacer l’ampoule
doit être remplacée. comme décrit dans le
présent mode d’emploi.
90517816 FS18AL 4/2/07 1:38 PM Page 20
Page 21

21
• La pile ne se charge • La pile n’est pas insérée • Insérer la pile dans le
pas. dans le chargeur. chargeur jusqu’à l’illumination de
la DEL rouge.
• Chargeur non branché. • Brancher le chargeur dans
une prise qui fonctionne. Se
reporter à « Remarques
importantes pour le
chargement » pour plus de
renseignements.
Pour obtenir de l’aide concernant le produit, consulter notre site Web www.blackanddecker.com
pour l’emplacement du centre de réparation le plus près ou communiquer avec l’assistance
BLACK & DECKER au 1-800-544-6986.
INFORMATION SUR LES RÉPARATIONS
Tous les centres de réparation Black & Decker sont dotés de personnel qualifié en
matière d’outillage électrique; ils sont donc en mesure d’offrir à leur clientèle un service
efficace et fiable. Que ce soit pour un avis technique, une réparation ou des pièces de
rechange authentiques installées en usine, communiquer avec l’établissement Black &
Decker le plus près de chez vous. Pour trouver l’établissement de réparation de votre
région, consulter le répertoire des Pages jaunes à la rubrique « Outils électriques » ou
composer le numéro suivant : 1-800-544-6986 ou consulter le site www.blackanddecker.com
GARANTIE COMPLÈTE DE DEUX ANS POUR UNE UTILISATION DOMESTIQUE
Black & Decker (É.-U.) Inc. garantit ce produit pour une durée de deux ans contre tout
défaut de matériau ou de fabrication. Le produit défectueux sera remplacé ou réparé
sans frais de l’une des deux façons suivantes :
La première façon consiste en un simple échange chez le détaillant qui l’a vendu
(pourvu qu’il s’agisse d’un détaillant participant). Tout retour doit se faire durant la
période correspondant à la politique d’échange du détaillant (habituellement, de 30 à 90
jours après l’achat). Une preuve d’achat peut être requise. Vérifier auprès du détaillant
pour connaître sa politique concernant les retours hors de la période définie pour les
échanges.
La deuxième option est d’apporter ou d’envoyer le produit (transport payé d’avance) à
un centre de réparation autorisé ou à un centre de réparation de Black & Decker pour
faire réparer ou échanger le produit, à notre discrétion. Une preuve d’achat peut être
requise. Les centres Black & Decker et les centres de service autorisés sont répertoriés
dans les pages jaunes, sous la rubrique « Outils électriques ».
Cette garantie ne s’applique pas aux accessoires. Cette garantie vous accorde des
droits légaux spécifiques et vous pourriez avoir d’autres droits qui varient d’un État ou
d’une province à l’autre. Pour toute question, communiquer avec le directeur du centre
de réparation Black & Decker le plus près de chez vous. Ce produit n’est pas destiné à
un usage commercial.
REMPLACEMENT GRATUIT DES ÉTIQUETTES D’AVERTISSEMENT : si les
étiquettes d’avertissement deviennent illisibles ou sont manquantes, composer le
1-800-544-6986 pour en obtenir le remplacement gratuit.
REMARQUE À L’INTENTION DES ENTREPRENEURS
CONCERNANT LA GARANTIE SPÉCIALE
Les produits de marque FIRESTORMMCsont des outils hauts de gamme destinés aux
consommateurs et comportent une GARANTIE POUR USAGE RÉSIDENTIEL. Ces
outils sont conçus, fabriqués et mis à l’essai en vue de répondre aux besoins du
bricoleur, ou de les dépasser, lorsque ce dernier réalise des projets ou effectue des
réparations à l’intérieur ou à l’extérieur de sa résidence. Utilisés correctement, ces
outils procurent à l’utilisateur un rendement et une puissance supérieurs qui excèdent
de loin la période de garantie de deux ans. Par contre, tout outil utilisé à des fins
commerciales ou tout produit de marque FIRESTORM
MC
ou tout autre produit
Black & Decker destiné aux consommateurs et réservé à un usage résidentiel, utilisé
dans le cadre d’une ACTIVITÉ RELIÉE AU TRAVAIL, N’EST PAS COUVERT PAR LA
PRÉSENTE GARANTIE.
Imported by / Importé par
Black & Decker Canada Inc.
100 Central Ave.
Brockville (Ontario) K6V 5W6
Voir la rubrique “Outils électriques”
des Pages Jaunes
pour le service et les ventes.
90517816 FS18AL 4/2/07 1:38 PM Page 21
Page 22

22
LLLLUUUUZZZZ ZZZZOOOONNNNAAAALLLL DDDDEEEE 11118888 VVVVOOOOLLLLTTTTIIIIOOOOSS
SS
MANUAL DE INSTRUCCIONES
CONSERVE ESTE MANUAL PARA FUTURAS CONSULTAS.
ANTES DE DEVOLVER ESTE PRODUCTO POR
CUALQUIER MOTIVO, LLAME AL
(55)5326-7100
ANTES DE LLAMAR, TENGA ELNÚMERO DE CATÁLOGO Y ELCÓDIGO DE FECHA PREPARADOS. EN
LA MAYORÍA DE LOS CASOS, UN REPRESENTANTE DE BLACK & DECKER PUEDE RESOLVER EL
PROBLEMA POR TELÉFONO. SI DESEAREALIZAR UNA SUGERENCIA O COMENTARIO, LLÁMENOS.
SU OPINIÓN ES FUNDAMENTALPARA BLACK & DECKER.
¡G
¡G
RACIAS
RACIAS
POR
POR
ELEGIR
ELEGIR
F
F
IREST
IREST
ORM
ORM
!
!
V
V
AAYYAAA
A
WWW
WWW
.F
.F
IREST
IREST
ORMT
ORMT
OOLS
OOLS
.
.
COM
COM
/P
/P
RODUCT
RODUCT
R
R
EGISTRA
EGISTRA
TION
TION
PPARA
ARA
REGISTRAR
REGISTRARSUSU
NUEVO
NUEVO
PRODUCT
PRODUCTOO
.
.
Catálogo N°
FS18AL
90517816 FS18AL 4/2/07 1:38 PM Page 22
Page 23

23
INSTRUCCIONES DE SEGURIDAD GENERALES
ADVERTENCIA: Lea todas las instrucciones. El incumplimiento de las
instrucciones enumeradas debajo puede provocar descarga eléctrica, incendio o
lesiones graves. El término “herramienta eléctrica” incluido en todas las advertencias
enumeradas a continuación hace referencia a su herramienta eléctrica operada con
corriente (alámbrica) o a su herramienta eléctrica operada con baterías (inalámbrica).
GUARDE ESTE MANUAL PARA FUTURAS CONSULTAS
1) Seguridad en el área de trabajo
a) Mantenga el área de trabajo limpia y bien iluminada.
Las áreas abarrotadas y
oscuras propician accidentes.
b) No opere herramientas eléctricas en atmósferas explosivas, como
ambientes donde se encuentran líquidos, gases o polvo inflamables.
Las
herramientas eléctricas originan chispas que pueden encender el polvo o los
vapores.
c) Mantenga a los niños y espectadores alejados de la herramienta eléctrica en
funcionamiento.
Las distracciones pueden provocar la pérdida de control.
2) Seguridad eléctrica
a) Los enchufes de la herramienta eléctrica deben adaptarse al tomacorriente.
Nunca modifique el enchufe de ninguna manera. No utilice ningún enchufe
adaptador con herramientas eléctricas con conexión a tierra.
Los enchufes no
modificados y que se adaptan a los tomacorrientes reducirán el riesgo de
descarga eléctrica.
b) Evite el contacto corporal con superficies puestas a tierra, como por
ejemplo tuberías, radiadores, rangos y refrigeradores.
Existe mayor riesgo de
descarga eléctrica si su cuerpo está puesto a tierra.
c) No exponga las herramientas eléctricas a la lluvia o a condiciones de
humedad.
Si ingresa agua a una herramienta eléctrica, aumentará el riesgo de
descarga eléctrica.
d) No maltrate al cable. Nunca utilice el cable para transportar, tirar o
desenchufar la herramienta eléctrica. Mantenga el cable lejos del calor,
aceite, bordes afilados o piezas móviles.
Los cables dañados o enredados
aumentan el riesgo de descarga eléctrica.
e)
Cuando opere una máquina herramienta a la intemperie, use un alargador
diseñado para uso a la intemperie.
El uso de un alargador diseñado para uso a
la intemperie reduce el riesgo de descarga eléctrica. Cuando use un alargador,
asegúrese de usar uno de un calibre suficiente como para cargar con la corriente
que requerirá su producto. Un alargador de menor calibre causará una caída en el
voltaje de la línea lo que resultará en pérdida de potencia y sobrecalentamiento. El
siguiente cuadro muestra el tamaño correcto a utilizar, dependiendo del largo del
cable y el amperaje nominal. En caso de duda, utilice el de mayor calibre.
Mientras menor el número del calibre, mayor la capacidad del cable.
Tamaño mínimo recomendado del conductor
para los cables de extensión
Longitud total del cable
25 pies 50 pies 75 pies 100 pies 125 pies 150 pies 175 pies
7.6 m 15.2 m 22.9 m 30.5 m 38.1 m 45.7 m 53.3 m
Tamaño AWG del conductor
18 18 16 16 14 14 12
3) Seguridad personal
a) Permanezca alerta, controle lo que está haciendo y utilice el sentido común
cuando emplee una herramienta eléctrica. No utilice una herramienta
eléctrica si está cansado o bajo el efecto de drogas, alcohol o
medicamentos.
Un momento de descuido mientras se opera una herramienta
eléctrica podría provocar daños personales graves.
b) Use equipo de seguridad. Siempre utilice protección para los ojos.
El equipo
de seguridad, como las máscaras para polvo, el calzado de seguridad
90517816 FS18AL 4/2/07 1:38 PM Page 23
Page 24

24
antideslizante, los cascos o la protección auditiva utilizados para condiciones
adecuadas reducirán las lesiones personales.
c) Evite el encendido por accidente. Asegúrese de que el interruptor esté en la
posición de apagado antes de enchufar la herramienta.
Transportar
herramientas eléctricas con su dedo apoyado sobre el interruptor o enchufar
herramientas eléctricas con el interruptor en posición de encendido puede propiciar
accidentes.
d) Retire las clavijas de ajuste o llaves de tuercas antes de encender la
herramienta eléctrica
. Una llave de tuercas o una clavija de ajuste que se deje
conectada a una pieza giratoria de la herramienta eléctrica pueden provocar
lesiones personales.
e) No se estire. Conserve el equilibrio adecuado y manténgase parado
correctamente en todo momento.
Esto permite un mejor control de la
herramienta eléctrica en situaciones inesperadas.
f) Vístase apropiadamente. No use ropas holgadas ni joyas. Mantenga el
cabello, las ropas y los guantes alejados de las piezas móviles. Las ropas
holgadas, las joyas o el cabello largo pueden quedar atrapados en las piezas
móviles.
Los orificios de ventilación suelen cubrir piezas móviles, por lo que también
se deben evitar.
g) Si se suministran dispositivos para la conexión de accesorios para la
recolección y extracción de polvo, asegúrese de que estén conectados y se
utilicen correctamente.
El uso de estos dispositivos puede reducir los peligros
relacionados con el polvo.
4) Uso y mantenimiento de la herramienta eléctrica
a) No fuerce la herramienta eléctrica. Utilice la herramienta eléctrica correcta
para el trabajo que realizará.
La herramienta eléctrica correcta hará el trabajo
mejor y más seguro a la velocidad para la que fue diseñada.
b) No utilice la herramienta eléctrica si no puede encenderla o apagarla con el
interruptor.
Toda herramienta eléctrica que no puede ser controlada mediante el
interruptor es peligrosa y debe ser reparada.
c) Desconecte el enchufe de la fuente de energía y/o el paquete de baterías de la
herramienta eléctrica antes de realizar ajustes, cambiar accesorios o
almacenar herramientas eléctricas.
Estas medidas de seguridad preventivas
reducen el riesgo de encender la herramienta eléctrica en forma accidental.
d) Guarde las herramientas eléctricas que no están en uso fuera del alcance de
los niños y no permite que otras personas no familiarizadas con ella o con
estas instrucciones operen la herramienta.
Las herramientas eléctricas son
peligrosas en las manos de usuarios no entrenados.
e) Mantenimiento de las herramientas eléctricas. Controle que no haya piezas
móviles mal alineadas o trabadas, piezas rotas y toda otra situación que
pueda afectar el funcionamiento de las herramientas eléctricas. Si encuentra
daños, haga reparar la herramienta eléctrica antes de utilizarla.
Se producen
muchos accidentes a causa de las herramientas eléctricas que carecen de un
mantenimiento adecuado.
f) Mantenga las herramientas de corte afiladas y limpias.
Las herramientas de
corte con mantenimiento adecuado, con los bordes de corte afilados son menos
propensas a trabarse y son más fáciles de controlar.
g) Utilice la herramienta eléctrica, los accesorios y las brocas de la herramienta,
etc. de acuerdo con estas instrucciones y de la forma prevista para el tipo de
herramienta eléctrica en particular, teniendo en cuanta las condiciones de
trabajo y el trabajo que debe realizarse.
El uso de la herramienta eléctrica para
operaciones diferentes de aquéllas para las que fue diseñada puede provocar una
situación peligrosa.
5) Uso y mantenimiento de la herramienta con baterías
a) Asegúrese de que el interruptor esté en la posición de apagado antes de
insertar el paquete de baterías. Insertar el paquete de baterías en las herramientas
eléctricas con el interruptor encendido puede provocar accidentes.
b) Recargue solamente con el cargador especificado por el fabricante.
Un cargador
adecuado para un tipo de paquete de baterías puede originar riesgo de incendio si se
utiliza con otro paquete de baterías.
90517816 FS18AL 4/2/07 1:38 PM Page 24
Page 25

25
c) Utilice herramientas eléctricas sólo con paquetes de baterías específicamente
diseñados.
El uso de cualquier otro paquete de baterías puede producir riesgo de
incendio y lesiones.
d) Cuando no utilice el paquete de baterías, manténgalo lejos de otros objetos
metálicos como sujetapapeles, monedas, llaves, clavos, tornillos u otros
objetos metálicos pequeños que puedan realizar una conexión desde un
terminal al otro.
Los cortocircuitos en los terminales de la batería pueden provocar
quemaduras o incendio.
e) En condiciones abusivas, el líquido puede ser expulsado de la batería. Evite
su contacto. Si entra en contacto accidentalmente, enjuague con agua. Si el
líquido entra en contacto con sus ojos, busque atención médica.
El líquido
expulsado de la batería puede provocar irritación o quemaduras.
6) Mantenimiento
a) Haga que una persona de reparaciones calificada realice el mantenimiento
de su herramienta eléctrica y utilice piezas de repuesto idénticas solamente.
Esto garantizará la seguridad de la herramienta eléctrica.
INSTRUCCIONES DE SEGURIDAD IMPORTANTES PARA
LUCES ZONALES FLUORESCENTES
ADVERTENCIA: Peligro de quemaduras.
No utilice la linterna o el cargador cerca
de líquidos inflamables o en atmósferas gaseosas o explosivas. Las chispas internas
podrían encender los vapores y provocar lesiones personales.
ADVERTENCIA: Riesgo de descarga eléctrica. Siempre retire la batería antes
de reemplazar la lámpara. Reemplace la bombilla con el mismo tipo calificado
en 13 vatios.
Estas medidas de seguridad preventivas reducen el riesgo de lesiones
personales.
ADVERTENCIA:
Durante el uso, las lentes se calientan en gran medida. Para
reducir el riesgo de quemaduras, no toque las lentes calientes. Para reducir el riesgo
de incendios, mantenga la herramienta lejos de materiales combustibles cuando esté
en funcionamiento.
•
Para reducir el riesgo de lesiones, debe supervisar atentamente cualquier aparato
cuando se utilice cerca de niños.
•
Sólo utilice accesorios recomendados o vendidos por el fabricante.
•
Para reducir el riesgo de descarga eléctrica, no sumerja la luz en agua ni en ningún
otro líquido. No coloque ni almacene el aparato en un lugar del que se pueda caer,
especialmente una tina o un fregadero.
•
Para realizar una recarga utilice sólo el cargador provisto por el fabricante.
•
Durante o inmediatamente después de la utilización, no se debe apoyar de forma
plana la superficie de la lente de la luz zonal.
•
Reemplace las bombillas rotas en un área bien ventilada.
•
No toque la superficie de la lente cuando el tubo esté encendido o inmediatamente
después de usarse.
•
Manipule la luz con cuidado cerca de cualquier superficie inflamable.
•
Si se ha encendido un tubo fluorescente, permita que se enfríe durante algunos
minutos antes de cambiar el tubo.
•
Mirar directamente la luz fluorescente podría afectar la visión.
•
No exponga la luz o el cargador a lugares mojados o húmedos. No exponga la luz o
el cargador a la lluvia o a la nieve.
•
No lave la luz o el cargador con agua ni permita que el agua se introduzca en los mismos.
•
Mientras la luz esté en uso, no la cubra con paños u otros materiales inflamables
debido a un mayor riesgo de incendio.
•
No utilice la luz si el montaje de la cubierta de la lente no está adosado.
•
Únicamente para uso en interiores.
•
No cuelgue la unidad en ningún objeto que pudiera tener corriente.
PRECAUCIÓN: Cuando no utilice la herramienta, colóquela de costado en una
superficie estable donde no provocará tropezones ni caídas. Algunas herramientas
90517816 FS18AL 4/2/07 1:38 PM Page 25
Page 26

26
con paquetes de baterías grandes permanecerán en forma vertical sobre el paquete de
baterías, pero pueden ser derribadas fácilmente.
ADVERTENCIA DE ACUERDO CON LA PROPUESTA 65: Este producto contiene
productos químicos reconocidos por el Estado de California como causantes de
cáncer, defectos congénitos y otros problemas reproductivos.
Recicle o elimine la bombilla de luz de acuerdo con las regulaciones estatales
pertinentes. Si la bombilla de luz se rompe, lávese las manos minuciosamente y lave
toda otra superficie que haya entrado en contacto.
PAUTAS DE SEGURIDAD/DEFINICIONES
Es importante que lea y comprenda este manual. La información que contiene se
relaciona con la protección de SU SEGURIDAD y la PREVENCIÓN DE PROBLEMAS.
Los símbolos que siguen se utilizan para ayudarlo a reconocer esta información.
PELIGRO: indica una situación de peligro inminente que, si no se evita, provocará la
muerte o lesiones graves.
ADVERTENCIA: indica una situación de peligro potencial que, si no se evita, provocará
la muerte o lesiones graves.
PRECAUCIÓN: indica una situación de peligro potencial que, si no se evita, provocará
lesiones leves o moderadas.
PRECAUCIÓN: utilizado sin el símbolo de alerta de seguridad indica una situación de
peligro potencial que, si no se evita, puede provocar daños en la propiedad.
La etiqueta de su herramienta puede incluir los siguientes símbolos. Los símbolos y sus
definiciones son los siguientes:
V ..............voltios A ............amperios
Hz ............hertz W ............vatios
min............minutos ..........corriente alterna
..........corriente continua
n
o............no velocidad sin carga
..............
Construcción de clase II
........
terminal a tierra
............
símbolo de alerta de .../min ......revoluciones o reciprocidad por minuto
seguridad
INFORMACIÓN ACERCA DEL PROTECTOR DE LA BATERÍA
Se han incluido protectores para el almacenaje y transporte de la batería. Estos deben
ser usados cuando la batería no esté conectada a la herramienta ni en el cargador.
Recuerde quitar el protector antes de poner la batería en el cargador o conectarla a la
herramienta.
ADVERTENCIA: No guarde ni lleve baterías, unidades de alimentación o pilas en un
lugar donde sus terminales pudieran entrar en contacto con algún objeto metálico. Por
ejemplo, no ponga baterías, unidades de alimentación o pilas dentro de un delantal o
bolsillo, una caja de herramientas o de almacenamiento del producto, un cajón, etc.,
junto con clavos sueltos, tornillos, llaves, etc. si no están debidamente protegidas. El
transporte de baterías, unidades de alimentación o pilas puede causar un incendio si
sus terminales entran en contacto sin querer con materiales conductores como llaves,
monedas, herramientas de mano y otros por el estilo. De hecho, el reglamento sobre
materiales peligrosos (HMR) del Ministerio de Transporte de los Estados Unidos
prohibe el transporte de baterías, unidades de alimentación o pilas en cualquier tipo de
transporte terrestre o aéreo (es decir, embaladas en maletas y maletines de mano) A
NO SER que estén debidamente protegidas de hacer cortocircuito. Por lo tanto,
cuando transporte baterías, unidades de alimentación o pilas individuales, asegúrese
que sus terminales estén protegidos y debidamente aislados de materiales que
pudieran entrar en contacto con ellos y causar un cortocircuito.
90517816 FS18AL 4/2/07 1:38 PM Page 26
Page 27

27
INSTRUCCIONES DE SEGURIDAD IMPORTANTES PARA LOS
PAQUETES DE BATERÍAS
El paquete de baterías incluido en la caja no está completamente cargado. Antes de
utilizar el paquete de baterías y el cargador, lea las instrucciones de seguridad a
continuación. Luego siga los procedimientos de carga descriptos.
LEA TODAS LAS INSTRUCCIONES
• No incinere el paquete de baterías, aun si tiene daños importantes o está
completamente desgastado. El paquete de baterías puede explotar en el fuego.
• Una pequeña pérdida de líquido de las celdas del paquete de baterías puede
presentarse en condiciones de uso o temperatura extremas. Esto no indica una
falla. Sin embargo, si el sello externo está roto y esta pérdida toca su piel:
a. Lave rápidamente con agua y jabón.
b. Neutralice con un ácido suave como jugo de limón o vinagre.
c. Si el líquido de la batería entra en contacto con sus ojos, lávelos con agua limpia
durante 10 minutos como mínimo y busque atención médica inmediata. (Nota
médica: El líquido es una solución de hidróxido de potasio al 25%-35%).
• Cargue los paquetes de baterías solamente en cargadores Black & Decker.
• NO salpique o sumerja en agua u otros líquidos.
• No almacene ni utilice la herramienta y el paquete de baterías en lugares en los
que la temperatura puede llegar a o superar los 40 °C (105 °F) (como en toldos
al aire libre o construcciones de metal en verano).
PELIGRO: Riesgo de electrocución.
Nunca intente abrir el paquete de baterías por
ningún motivo.
Si la caja del paquete de baterías está agrietada o dañada, no la introduzca en el
cargador. Podría provocar una descarga eléctrica o electrocución. Los paquetes de
baterías dañados deben devolverse al centro de mantenimiento para su reciclado.
El FS18AL acepta cualquiera de las baterías y los cargadores en paquete deslizante de
18 V que se muestran en el cuadro a continuación. Consulte los manuales individuales
de los cargadores para conocer todas las instrucciones de seguridad y operación.
Baterías en paquete deslizante
de 18 V
Batería de 18 V Firestorm
Batería de 18 V FSXtreme
Batería de 18 V FSXtreme Serie Silver
Batería de 18 V FSXtreme
Batería de 18 V Black &
Decker
FSB18
FS180BX
FS18SBX
FS18BX
HPB18
N.º de
catálogo Descripción
Cargadores en paquete deslizante
de 18 V
Cargador de base de 18 V
Cargador de dos puertos de 18 V
Cargador de radio de 18 V
Cargador de tres puertos de 18 V
Cargador rápido de 9,6 V a
18 V
Cargador de una hora de 9,6 V a
24 V
Cargador de una hora de dos
puertos de 9,6 V a 24 V
FS18C
FS180DC
FS18RC
5104211-00
FSMVC
FS240FC
FS2400DC
N.º de
catálogo Descripción
DESCRIPCIÓN DE LAS FUNCIONES
Figura A
1. Interruptor de encendido/apagado
2. Tubo fluorescente
3. Tapa desmontable
4. Tornillos de acceso al tubo fluorescente
5. Botón de liberación del mango
6. Mango móvil
7. Sujetador con cuerda elástica
8. Batería (no incluida)
90517816 FS18AL 4/2/07 1:38 PM Page 27
Page 28

28
INSTRUCCIONES DE SEGURIDAD IMPORTANTES PARA
LOS CARGADORES DE BATERÍAS
CONSERVE ESTAS INSTRUCCIONES: Este manual contiene instrucciones de
seguridad importantes para los cargadores de baterías.
• Antes de utilizar el cargador, lea todas las instrucciones y las prevenciones en el
cargador, en el paquete de baterías y en el producto que utiliza el paquete de baterías.
PELIGRO: Riesgo de electrocución. Hay 120 voltios en los terminales de carga. No
realice pruebas con objetos conductores. Esto puede provocar descargas eléctricas o
electrocución.
ADVERTENCIA: Riesgo de descarga eléctrica.
No permita que ningún líquido
entre en el cargador. Podría provocar descargas eléctricas.
PRECAUCIÓN: Riesgo de quemadura.
Para reducir el riesgo de lesiones, cargue
sólo baterías recargables de níquel-cadmio Black & Decker. Otros tipos de baterías
pueden estallar y provocar daños personales y materiales.
PRECAUCIÓN:
En determinadas circunstancias, con el cargador enchufado en el
tomacorriente, algunos materiales extraños pueden provocar un cortocircuito en los
contactos de carga expuestos dentro del cargador. Se deben mantener lejos de las
cavidades del cargador los materiales extraños de naturaleza conductora, entre los que
se incluyen la lana de acero, el papel de aluminio o cualquier acumulación de partículas
metálicas. Éstos son sólo algunos ejemplos y no constituyen una lista taxativa. Siempre
desenchufe el cargador del tomacorriente cuando no haya un paquete de baterías en la
cavidad. Desenchufe el cargador antes de intentar limpiarlo.
• NO intente cargar el paquete de baterías con cargadores distintos de aquéllos
mencionados en este manual.
El cargador y el paquete de baterías están
específicamente diseñados para funcionar en conjunto.
• Estos cargadores no están diseñados para otro uso que no sea la carga de
baterías recargables Black & Decker.
Otros usos pueden provocar riesgo de
incendio, descarga eléctrica o electrocución.
• No exponga el cargador a la lluvia ni a la nieve.
• Tire del enchufe en lugar del cable al desconectar el cargador.
Esto reducirá el
riesgo de dañar el enchufe y el cable.
• Asegúrese de que el cable esté ubicado de manera que no lo pise ni se tropiece
con él y que no esté expuesto a daños o tensiones de otro tipo.
• No utilice un cable prolongador a menos que sea absolutamente necesario.
El
uso de un cable prolongador incorrecto puede provocar riesgo de incendio, descarga
eléctrica o electrocución.
• No coloque objetos en la parte superior del cargador ni coloque el cargador en
una superficie blanda que pueda bloquear las ranuras de ventilación y provocar
un calor interno excesivo.
Coloque el cargador en una posición alejada de
cualquier fuente de calor. El cargador se ventila a través de ranuras en la parte
superior e inferior de la unidad.
• No opere el cargador con un cable o enchufe dañados:
reemplácelos de inmediato.
• No opere el cargador si éste ha recibido un golpe fuerte, se cayó o presenta
algún daño.
Llévelo a un centro de mantenimiento autorizado.
• No desarme el cargador; cuando deba realizar un mantenimiento o
reparaciones, llévelo a un centro de mantenimiento autorizado.
El armado
incorrecto puede implicar un riesgo de descarga eléctrica, electrocución o incendio.
• Antes de limpiarlo, desconecte el cargador del tomacorriente. Esto reducirá el
riesgo de descarga eléctrica.
Quitar el paquete de baterías no reducirá este riesgo.
• NUNCA
intente conectar 2 cargadores juntos.
• El cargador está diseñado para funcionar con corriente eléctrica doméstica
estándar (120 voltios). No intente utilizarlo con otro voltaje.
Esto no se aplica al
cargador vehicular.
CONSERVE LAS INSTRUCCIONES PARA VOLVER A CONSULTAR
EN EL FUTURO.
90517816 FS18AL 4/2/07 1:38 PM Page 28
Page 29

29
NOTAS IMPORTANTES SOBRE LA CARGA
1. Obtendrá una duración más prolongada y un mejor rendimiento si el paquete de
baterías se carga cuando la temperatura ambiental está entre 18 °C y 24 °C
(65 °F y 75 °F). NO cargue el paquete de batería con una temperatura ambiental por
debajo de +4,5 °C (+40 °F) o por encima de +40,5 °C (+105 °F). Esto es importante
y evitará daños graves en el paquete de baterías.
2. El cargador y el paquete de baterías pueden estar calientes al tacto durante la
carga. Esto es una condición normal y no indica un problema. Para facilitar el
enfriado del paquete de baterías después de su uso, evite colocar el cargador o el
paquete de baterías en un ambiente cálido, como debajo de un toldo de metal o en
un remolque sin aislamiento.
3. Si el paquete de baterías no se carga adecuadamente:
a. Revise el tomacorriente enchufando una lámpara u otro aparato
b. Verifique si el tomacorriente está conectado a un interruptor que corta la energía
cuando usted apaga la luz.
c. Mueva el cargador y el paquete de baterías a un lugar donde la temperatura
ambiental sea de aproximadamente 18 °C a 24 °C (65 °F a 75 °F).
d. Si los problemas de carga persisten, lleve la herramienta, el paquete de baterías
y el cargador al centro de mantenimiento local.
4. Se debe recargar el paquete de baterías cuando no produce energía suficiente para
tareas que previamente realizaba con facilidad. NO CONTINÚE utilizando la
herramienta en estas condiciones. Siga el procedimiento de carga. También se
puede cargar un paquete de baterías parcialmente usado cuando se desee, sin
ningún efecto negativo sobre éstas.
5. En determinadas condiciones, estando el cargador enchufado en el tomacorriente,
algunos materiales extraños pueden provocar un cortocircuito en los contactos de
carga expuestos dentro del cargador. Se deben mantener lejos de las cavidades del
cargador los materiales extraños de naturaleza conductora, entre los que se incluyen
la lana de acero, el papel de aluminio o cualquier acumulación de partículas
metálicas. Éstos son sólo algunos ejemplos y no constituyen una lista taxativa.
Siempre desenchufe el cargador del tomacorriente cuando no haya un paquete de
baterías en la cavidad. Desenchufe el cargador antes de intentar limpiarlo.
6. No congele ni sumerja el cargador en agua ni en ningún otro líquido.
ADVERTENCIA: No permita que ningún líquido entre en el cargador. Podría
provocar descargas eléctricas.
PRECAUCIÓN: Nunca intente abrir el paquete de baterías por ningún motivo. Si la
caja protectora de plástico del paquete de baterías se rompe o agrieta, devuélvala a un
centro de mantenimiento para su reciclado.
INSTRUCCIONES DE OPERACIÓN
INTERRUPTOR (FIG. B)
Para encender la luz, deslice el interruptor (1) hacia la derecha. Para apagarla, deslice el
interruptor hacia atrás.
PRECAUCIÓN: Mirar directamente la luz fluorescente podría afectar la visión.
REEMPLAZO DEL TUBO FLUORESCENTE (FIG. C)
ADVERTENCIA: Riesgo de descarga eléctrica. Desconecte el paquete de
baterías de la herramienta antes de reemplazar el tubo fluorescente. SEstas
medidas de seguridad preventivas reducen el riesgo de lesiones personales.
PRECAUCIÓN: Cuando reemplace un tubo roto, proteja sus manos antes de intentar
retirar el tubo. No quite ningún pedazo de vidrio o tubo roto de la zona del portalámpara
con las manos sin protección; si lo hiciera, podría recibir lesiones personales.
Reemplace las bombillas rotas en un área bien ventilada.
PRECAUCIÓN: Riesgo de quemadura. La lente o el tubo fluorescente pueden estar
calientes inmediatamente después del uso.
90517816 FS18AL 4/2/07 1:38 PM Page 29
Page 30

30
NOTA: Utilice solamente bombillas de repuesto DC5273 o Sylvania PN CF13DS/E/841.
1. Gire la tapa (3) en sentido contrario a las agujas del reloj desde su posición original,
como se muestra en la Fig. C. Déjelo a un lado.
2. Extraiga cuidadosamente la cubierta de acceso al tubo fluorescente de la abertura.
Déjela a un lado.
3. Extraiga cuidadosamente el tubo del portalámpara con un suave tirón desde la base.
Asegúrese de que tanto el portalámpara como el área a su alrededor no contengan
suciedad, polvo u otros contaminantes.
4. Inserte el tubo nuevo con la misma orientación que el tubo viejo y asegúrese de que
esté bien colocado. Vuelva a colocar la cubierta de acceso al tubo fluorescente que
apartó anteriormente.
5. Enrosque la tapa nuevamente.
Para reemplazar un tubo roto:
1. Gire la tapa (3) en sentido contrario a las agujas del reloj desde su posición original,
como se muestra en la Fig. C.
2. Extraiga cuidadosamente la cubierta de acceso al tubo fluorescente de la abertura.
Déjela a un lado.
3. Retire los dos tornillos (4) de la caja protectora de plástico transparente. Gire la
cubierta hacia arriba para tener acceso al tubo roto. Con las manos cubiertas con
guantes protectores, retire el vidrio o el tubo roto.
4. Mueva la caja protectora de plástico transparente nuevamente a la posición cerrada y
vuelva a colocar los tornillos (4).
5. Inserte el tubo nuevo con la misma orientación que el tubo viejo y asegúrese de que
esté bien colocado. Vuelva a colocar la cubierta de acceso al tubo fluorescente que
apartó anteriormente.
6. Enrosque la tapa nuevamente.
CUERDA ELÁSTICA (FIG. D)
PRECAUCIÓN: No sacuda la luz cuando utilice la cuerda elástica (7). Esto podría
provocar lesiones o daños a la propiedad.
PRECAUCIÓN: Cuando la luz esté colgada por la cuerda, no sacuda la luz ni el objeto
del que está colgando. No cuelgue la luz de ningún cable eléctrico o de ningún otro
elemento que no sea seguro. Esto podría provocar lesiones o daños a la propiedad.
PRECAUCIÓN: Utilice solamente la cuerda elástica para colgar la luz zonal. La
cuerda elástica no está diseñada para soportar peso adicional. No conecte ni cuelgue
ningún elemento adicional a la luz, si lo hace podría provocar daños.
La cuerda elástica incorporada (7) se almacena en el mango (6). Esta cuerda puede
extenderse fuera del mango, como se muestra en la Fig. D, y utilizarse para colgar la
luz. De ser necesario, la cuerda también puede desmontarse de un extremo.
ROTACIÓN DE LA CAJA PROTECTORA DE LA LUZ (FIG. E)
El mango puede moverse al presionar el interruptor de liberación deslizante que se
muestra en la Fig. E y girar el mango hacia una de las seis posiciones fijas. Estas
diferentes posiciones del mango sirven para transportar la luz o para inclinarla
nuevamente sobre el mango a fin de usarla de manera fija.
MANTENIMIENTO
Utilice únicamente jabón suave y un trapo húmedo para limpiar la herramienta. Nunca
permita que se introduzcan líquidos en la herramienta; nunca sumerja ninguna parte de
la herramienta en ningún líquido. IMPORTANTE: Para garantizar l SEGURIDAD y la
CONFIABILIDAD del producto, la reparaciones, el mantenimiento y los ajustes deberán
efectuarse en centros de servicio autorizado u otras organizaciones de servicio
calificado, que utilicen siempre refacciones idénticas.
EL SELLO RBRC™
El sello RBRC™ en las baterías de níquel-cadmio indica que
Black & Decker participa voluntariamente en un programa industrial para
recolectar y reciclar estas baterías al término de su vida útil, cuando se
retiran de servicio dentro de los Estados Unidos. El programa RBRC™
proporciona una conveniente alternativa para el depósito en los lotes de basura
90517816 FS18AL 4/2/07 1:38 PM Page 30
Page 31

31
municipales de las baterías de níquel-cadmio desgastadas, hecho que es ilegal en
algunas regiones.
Los pagos de Black & Decker a RBRC™ hacen más sencillo para usted deshacerse
de sus baterías desgastadas con los distribuidores de baterías de níquel-cadmio de su
localidad, o en los centros de servicio autorizado Black & Decker. También puede
comunicarse al centro de reciclaje de su localidad para que le informen de los lugares
a los que puede regresar las baterías desgastadas. La entrada de Black & Decker a
este programa es parte de su compromiso para proteger nuestro medio ambiente y
conservar los recursos naturales.
ACCESORIOS
Los accesorios que se recomiendan para la herramienta están disponibles en su
distribuidor local o en el centro de mantenimiento autorizado. Si necesita ayuda con
respecto a los accesorios, llame al: (55)5326-7100
ADVERTENCIA: El uso de accesorios no recomendados para utilizar con esta
herramienta puede resultar peligroso.
DETECCIÓN DE PROBLEMAS
PROBLEMA
CAUSA POSIBLE SOLUCIÓN POSIBLE
• La luz no ilumina. • La batería no está bien • Verifique la
instalada. iinstalación de la batería.
• La batería no está cargada. • Verifique los
requisitos de carga de la
batería.
• La bombilla de luz debe • Reemplace
reemplazarse. la bombilla como se
indica en este manual.
• La batería no carga. • La batería no está insertada • Inserte la batería en
en el cargador hasta que el cargador.
aparezca el indicador LED rojo.
• El cargador no está enchufado. • Enchufe el cargador
en un tomacorriente que
funcione. Para conocer
más detalles, consulte
"Notas importantes
sobre la carga".
Para recibir asistencia con su producto, visite nuestro sitio Web www.blackanddecker.com
para obtener la ubicación del centro de mantenimiento más cercano o llame a la línea de
ayuda de BLACK & DECKER 1-800-544-6986.
INFORMACIÓN DE MANTENIMIENTO
Todos los Centros de mantenimiento de Black & Decker cuentan con personal altamente
capacitado dispuesto a brindar a todos los clientes un servicio eficiente y confiable en la
reparación de herramientas eléctricas. Si necesita consejo técnico, reparaciones o
piezas de repuesto originales de fábrica, póngase en contacto con el centro de
mantenimiento de Black & Decker más cercano a su domicilio. Para ubicar su centro de
servicio local, consulte la sección “Herramientas eléctricas” (Tools-Electric) de las
páginas amarillas, llame al (55)5326-7100 o visite nuestro sitio www.blackanddecker.com.
GARANTÍA COMPLETA DE DOS AÑOS PARA USO EN EL HOGAR
Black & Decker (Estados Unidos) Inc. ofrece una garantía de dos años por cualquier
defecto del material o de fabricación de este producto. El producto defectuoso se
reparará o reemplazará sin costo alguno de dos maneras.
La primera opción, el reemplazo, es devolver el producto al comercio donde se lo
adquirió (siempre y cuando se trate de un comercio participante). Las devoluciones
deben realizarse conforme a la política de devolución del comercio (generalmente, entre
30 y 90 días posteriores a la venta). Le pueden solicitar comprobante de compra.
Consulte en el comercio acerca de la política especial sobre devoluciones una vez
excedido el plazo establecido.
La segunda opción es llevar o enviar el producto (con flete pago) a un Centro de
mantenimiento propio o autorizado de Black & Decker para su reparación o reemplazo
90517816 FS18AL 4/2/07 1:38 PM Page 31
Page 32

CULIACAN, SIN
Av. Nicolás Bravo #1063 Sur
(667) 7 12 42 11
Col. Industrial Bravo
GUADALAJARA, JAL
Av. La Paz #1779
(33) 3825 6978
Col. Americana Sector Juarez
MEXICO, D.F.
Eje Central Lázaro Cardenas
No. 18
(55) 5588 9377
Local D, Col. Obrera
MERIDA, YUC
Calle 63 #459-A
(999) 928 5038
Col. Centro
MONTERREY, N.L.
Av. Francisco I. Madero
No.831
(81) 8375 2313
Col. Centro
PUEBLA, PUE
17 Norte #205
(222) 246 3714
Col. Centro
QUERETARO, QRO
Av. Madero 139 Pte.
(442) 214 1660
Col. Centro
SAN LUIS POTOSI, SLP
Av. Universidad 1525
(444) 814 2383
Col. San Luis
TORREON, COAH
Blvd. Independencia, 96 Pte.
(871) 716 5265
Col. Centro
VERACRUZ, VER
Prolongación Díaz Mirón #4280
(229)921 7016
Col. Remes
VILLAHERMOSA, TAB
Constitución 516-A
(993) 312 5111
Col. Centro
PARA OTRAS LOCALIDADES LLAME AL: (55) 5326 7100
Para reparación y servicio de sus herramientas eléctricas, favor de
dirigirse al Centro de Servicio más cercano:
BLACK & DECKER S.A. DE C.V.
BOSQUES DE CIDROS ACCESO RADIATAS NO. 42
COL. BOSQUES DE LAS LOMAS.
05120 MÉXICO, D.F
TEL. 55-5326-7100
SECCI N
AMARILLA
Si funciona…
y funciona muy bien.
Vea “Herramientas
eléctricas (Tools-Electric)”
– Páginas amarillas –
para Servicio y ventas
ESPECIFICACIONES
Cargador: 120 V, 60Hz, Salida: 21,75 V DC 210mA
Cat.No. FS18AL Form No. 90517816 APR. ‘07
Copyright©2007 Black & Decker Printed in China
32
según nuestro criterio. Le pueden solicitar el comprobante de compra. Los Centros de
mantenimiento autorizados y de propiedad de Black & Decker se detallan en la sección
“Herramientas eléctricas” (Tools-Electric) de las páginas amarillas de la guía telefónica.
Esta garantía no se extiende a los accesorios. Esta garantía le concede derechos
legales específicos; usted puede tener otros derechos que pueden variar según el
estado o la provincia. Si tiene alguna pregunta, comuníquese con el gerente del Centro
de mantenimiento de Black & Decker de su zona. Este producto no está diseñado para
uso comercial.
REEMPLAZO GRATUITO DE LAS ETIQUETAS DE ADVERTENCIAS: si sus etiquetas
de advertencia se tornan ilegibles o faltan, llame al (55)5326-7100 para que se le
reemplacen gratuitamente.
Nota especial de GARANTÍA para Contratistas:
Los productos de marca FIRESTORMMCse ofrecen como herramientas de calidad
superior para uso doméstico y llevan una GARANTÍA PARA USO DOMÉSTICO.
Estas herramientas son diseñadas, fabricadas y probadas para satisfacer o sobrepasar
las necesidades del bricolero en la ejecución de proyectos y reparaciones en su casa y
sus alrededores. El uso apropiado de esta herramienta le dará al dueño de casa una
potencia y un desempeño superiores que durarán mucho más que la garantía de dos
años. Sin embargo, si utiliza herramientas para su trabajo y usa productos de marca
FIRESTORM
MC
o cualquiera de las herramientas para uso doméstico Black & Decker
EN SU LUGAR DE TRABAJO, debería saber que NO PODRÁ SER CUBIERTO BAJO
NUESTRA GARANTÍA.
90517816 FS18AL 4/2/07 1:38 PM Page 32
 Loading...