

Page 1
Please Read and Save this Use and C are document.
IMPORTANT SAFEGUARDS
When using electrical appliances, basic safety precautions should always be followed to reduce the risk of fire, electric shock, and/or injury to persons, including
the following:
• Read all instructions.
• Do not touch hot surfaces.
• To protect against electric shock, do not place cord, plug or appliance in water
or other liquids.
• Close supervision is necessary when any appliance is used near children.
• Unplug from outlet when not in use and before cleaning. Allow to cool before
putting on or taking off parts and before cleaning the appliance.
• Do not operate any appliance with a damaged cord or plug or after the appliance
malfunctions or is dropped or damaged in any manner. Contact consumer support or
call the appropriate toll-free number listed on the cover.
• The use of an accessory not evaluated for use with this appliance may cause injuries.
• Do not use outdoors.
• Do not let cord hang over the edge of table or counter, or touch hot surfaces.
• Do not place on or near a hot gas or electric burner or in a heated oven.
• Do not use this appliance for other than intended use.
• To disconnect, turn any control to OFF then remove plug from wall outlet.
• Scalding may occur if the lid is removed during the brewing cycle.
• This appliance is not intended for use by persons (including children) with
reduced physical, sensory or mental capabilities, or lack of experience and
knowledge, unless they have been given supervision or instruction concerning
use of the appliance by a person responsible for their safety.
• Children should be supervised to ensure that they do not play with the appliance.
SAVE THESE INSTRUCTIONS.
This product is for household use only.
POLARIZED PL UG (120V MODELS ONLY)
This appliance has a polarized plug (one blade is wider than the o ther). To reduce the risk of
electric shock, this plug is intended to fi t into a polarized outlet only one way. If the plug does not
fit fully into the outlet, reverse th e plug. If it still does not fit, contact a qualified elec trician. Do not
attempt to modify the plug in any way.
TAMPER-RESISTANT SCREW
Warning: This appliance is e quipped with a tamper-resis tant screw to prevent removal of
the outer cover. To reduce the risk o f fire or electric shock, do not a ttempt to remove the
outer cover. There are no us er-serviceable parts in side. Repair should be done only by
authorized service personnel.
ELECTRICAL CORD
1. A short power cord (OR DETACHA BLE POWER CORD) is pr ovided to reduce the risk resulting
from becoming entangled in or tripping over a longer cor d.
2. Longer detachable power cords or extension cords are ava ilable and may be used if care is
exercised in their use.
3. If a long detachable power cord or extension cord is used,
a) The marked electrical rating o f the detachable power cord or extension cord should be at
least as great as the electric al rating of the appliance.
b) If the appliance is of the grounded type, t he extension cord should be a grounding-type
3-wire cord.
c) The longer cord should be arranged so tha t it will not drape over the countertop or tabletop
where it can be pulled on by children or tripped over.
Note: If the power cord is damaged, it should be r eplaced by qualified personnel or in Latin
America by an authorized servi ce center.
HOW TO USE
This product is for household use only.
GETTING STARTED
1. Wash removable parts as instructed in the C ARE AND CLEA NING instructions prior to use.
2. Plug the power cord into a standard electrical ou tlet.
3. Brew water through as instructed in BRE WING COFFEE, but do no t add coffee grounds or soft
pods. When finished, discard the water f rom your mug.
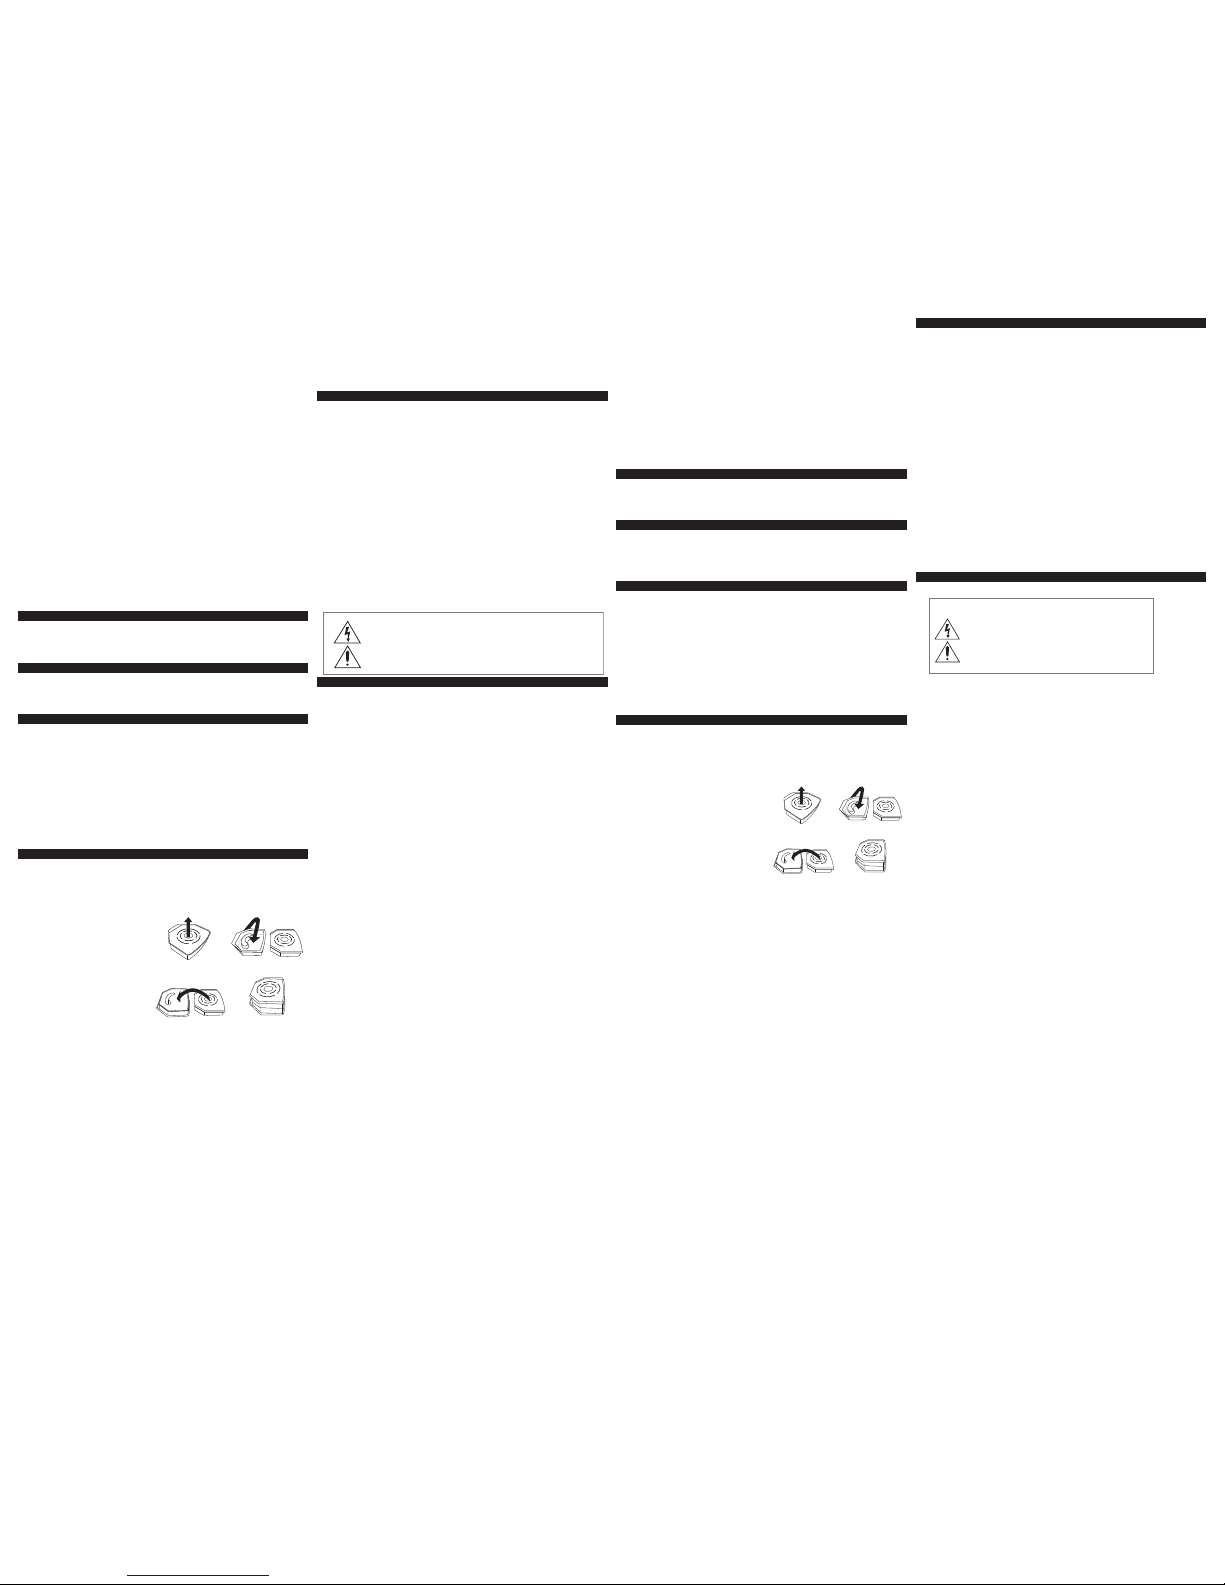
ADJUSTING THE MUG TRAY
The mug tray can accommodate a travel
mug in the nested position (A) or a
regular mug in the stacked position ( D).
• A djust the mug tray to the position that
best accommodates your mug and
ensure the mug tray is securely in place
before brewing.
• F or an exceptionally tall travel mug, the
mug tray can be removed entirely.
BREWING COFFEE
1. Fill the mug you wish to use with cold
water. If desired, leave room for sweetener, cream or milk.
2. Lift cover. Pour the cold water from your mug into the water reservoir. Do not fill past t he
Max fill line in the water reservoir.
3. If desired, add sweetener, cream or milk to your mug. Place the mug on the adjustable mug tray.
4. Place the washable brew basket into the holder. Ensure the handle is to the lef t and the back
center notch is resting securely in place.
5. Place the permanent filter into the filter basket with th e handle to the right so that it rests
securely in the washable brew basket.
6. Add coffee; then close the cover.
a. If using ground coffee: For a r egular mug (8 fl oz), place approximately 1 ½ tablespoons into
the permanent filter. For a travel mug (16 fl oz), use approximately 3 tablespoon s.
b. If using soft pods: This unit accep ts 70mm soft pods. For a regular mug (8 fl oz), place one
soft pod into the washable brew b asket between filter and basket. For a travel mug (16 fl oz),
place an additional soft pod in the pe rmanent filter.
7. Press the ON|OFF button. The blue light w ill illuminate and brewing will begin. (It is not required
to set the clock first).
NOTE: Do not remove your mug while coffee is brewing.
NOTE: Your coffeemaker can also be used to b rew hot water for tea, hot chocolate, instant
oatmeal, soup, etc. Remove the permanent filter and wa sh basket to avoid coffee flavor and follow
the brewing directions without adding cof fee grounds or soft pods.
Caution: Be careful when opening the cover after brew ing as this area is hot and steamy. Use the
lift tab located on the fr ont of the cover.
SETTING THE CLOCK
1. Press the HOU R button until the correct hour appears on t he display. The blue dot in the
corner of the display indicates P.M.
2. Press the MIN bu tton until the correct time appears on the display.
3. Follow these instruc tions at any time to adjust the clock time.
Note: The time will need to be reset if the unit is unplug ged or power is interrupted.
SETTING THE AU TO BREW TIME
1. Press the PROG|AUTO bu tton. The blue light above the button will flash.
2. Use t he HOUR and MIN buttons to program the des ired Auto Brew time. The blue dot in
the corner of the display indicates P.M. – to select an A.M. A uto Brew time, ensure the
dot is not illuminated.
3. Once the desired Auto Brew time is displayed, press and hold the PROG| AUTO button until
the light above the button stop s flashing and stays illuminated. This indicates the Auto
Brew time is set.
4. Prepare the coffeemaker by following steps 1 through 6 in the B REWING COFF EE directions (do
not press the ON|OFF bu tton).
5. To adjust the Auto Brew time after it has been set, press the P ROG|AUTO button, then pr ess the
HOUR and MIN but tons to adjust the set time.
Note: Once the Auto Brew time is se t, use the PROG|AUTO but ton to display the Auto Brew time
and toggle the Auto Brew feature on an d off. The light above the button illuminates when Auto
Brew is activated. Check the light to ensure you have no t unintentionally activated or deactivated
Auto Brew after you check the A uto Brew time.
CARE AND CLEANING
This appliance contains no user ser viceable parts. Contact Cons umer Support for assistance.
CLEANING
1. Unplug the unit and ensure it has cooled before cleaning.
2. To clean the permanent filter and washable brew basket: open the cover, remove the
permanent filter and brew basket, disca rd grounds or soft pods, and place in the dishwasher on
the top rack or clean in warm, soapy water.
3. To clean the 16-oz. insulated travel mug: place in the dishwasher on the top rack only or cle an
in warm, soapy water.
4. The coffeemaker exterior may be cleaned with a sof t damp cloth.
Important: Do no t use abrasive cleansers or scour ing pads. Never immerse the
coffeemaker in water.
CLEANING WITH VINEGAR
Mineral deposits left by hard w ater can clog your coffeemaker. Cleaning is recommended once a
month. Excessive steaming or a prolon ged brewing cycle is a sign that a cleaning is needed.
1. Combine 8 oun ces of white vinegar and 8 ounces of water. Pour this solution into the
water reservoir.
2. Place a 16 ounce mug (travel mug) on the mug tray.
3. Press the ON|OFF button. A llow the unit to complete a brew cycle.
4. Repeat with new vinegar and water – do not reuse the first s olution.
5. Repeat with cold water only to flush out any remaining solution. You may have to repeat this
step to remove any remaining vinegar taste.
6. Wash and dry the permanent filter and brew basket as inst ructed in CLEANIN G.
NEED HELP?
For service, repair or any questio ns regarding your appliance, call the appropriate 800 number on
this sheet. Please DO NOT ret urn the product to the place of purchase. Also, please DO N OT mail
product back to manufacturer, nor bring it to a ser vice center. You may also want to consult the
website listed on the cover of this manual.
TWO-YEAR LIMITED WARRANTY
(Applies only in the United St ates and Canada)
What does it cover?
• A ny defect in material or workmanship provided; however, Applica’s liability will not exceed the
purchase price of product.
For how long?
• Two years fr om the date of original purchase with proof of such purchase.
What will we do to help you?
• P rovide you with a reasonably similar replacement product that is eit her new or factory
refurbished.
How do you get servic e?
• S ave your receipt as proof of date of sale.
• V isit the online service website at www.prodprotec t.com/applica, or call
toll-free 1-800-231-9786, for general warranty service.
• I f you need parts or accessories, please ca ll 1-800-738-0245.
What does your warran ty not cover?
• D amage from commercial use
• D amage from misuse, abuse or neglect
• P roducts that have been modified in any way
• P roducts used or serviced outside the coun try of purchase
• G lass parts and other accessor y items that are packed with the unit
• S hipping and handling costs associated with the replacement of t he unit
• Conse quential or incidental damages (Please note, however, that some states do not allow
the exclusion or limitation of consequential or inciden tal damages, so this limitation may
not apply to you.)
How does state law re late to this warranty?
• T his warranty gives you specific legal rights. You may also have other ri ghts that vary from state
to state or province to province.
Por favor lea este inst ructivo antes de usar el producto
INSTRUCCIONES IMPORTANTES
DE SEGURIDAD.
Cuando se utilizan aparatos eléctricos, siempre se debe respetar ciertas medidas
de seguridad a fin de reducir el riesgo de un incendio, un choque eléctrico y lol
lesiones a las personas, incluyendo las siguientes:
• Lea todas las instrucciones.
• No toque las superficies calientes.
• Para protegerse contra una descarga eléctrica, no coloque el cable, el enchufe
o el aparato en agua u otros líquidos.
• Se requiere supervisión cuando cualquier aparato es utilizado por o cerca de niños.
• Desenchufe del tomacorriente cuando no esté en uso y antes de limpiarlo. Deje
que se enfríe antes de colocar o quitar piezas y antes de limpiarlo.
• No opere ningún aparato con un cable o enchufe dañado, después de un mal
funcionamiento, o si se ha dañado de alguna manera. Devuelva el aparato al
centro de servicio autorizado más cercano para su revisión, reparación o ajuste.
• El uso de un accesorio no evaluado para ser utilizado con este aparato podría
ocasionar lesiones.
• No lo use al aire libre.
• No permita que el cable cuelgue del borde de la mesa o mostrador, ni que
toque superficies calientes.
• No lo coloque sobre o cerca de una hornilla de gas o eléctrica o en un horno caliente.
• No utilice el aparato para usos distintos del indicado.
• Para desconectar, ponga todos los controles en la posición OFF y luego retire el
enchufe del tomacorriente.
• Pueden ocurrir quemaduras si se retira la tapa durante el ciclo de preparación.
• Este aparato no está diseñado para ser usado por personas (incluído niños)
con capacidad limitada física, mental o sensoriales disminuidas y falta de
experiencia o conocimiento que les impida utilizar el aparato con toda seguridad
sin supervisión o instrucción.
• Se debe asegurar la supervisión de los niños para evitar que usen el aparato
como juguete.
CONSERVE ESTAS INSTRUCCIONES.
Este aparato electrico es para uso domestico unicamente.
ENCHUFE POL ARIZADO (SOLAMENTE PA RA LOS MODELOS DE 120V)
Este aparato cuenta con un enc hufe polarizado (un contacto es más ancho que el otro). A fin de
reducir el riesgo de un choque eléctrico, este en chufe encaja en un tomacorriente polarizada
en un solo sentido. Si el enchufe no entra en le tomac orriente, inviértalo y si aun así no encaja,
consulte con un electricista . Por favor no trate de alterar esta medida de seguridad.
TORNILLO DE SEGURIDAD
Advertencia: Es te aparato cuenta con un torni llo de seguridad para evitar la remo ción de
la cubierta ext erior del mismo. A fin de reducir el rie sgo de incendio o de choque eléct rico,
por favor no trate de re mover la cubierta exterior. Est e producto no contiene pieza s
reparables por el consumidor. Toda reparación se debe llevar a cabo únicamente por
personal de servicio autorizado.
CABLE ELÉCTRICO
1. El producto se debe de proporcionar con un cable eléctr ico corto (o uno separable), a fin de
reducir el riesgo de tropezar o de enredars e en un cable más largo.
2. Existen cables eléctricos más largos y s eparables o cables de extensión que uno puede utilizar
si toma el cuidado debido.
3. Si se utiliza un cable separable o de extensión,
a) El régimen nominal del cable separable o del cable de exte nsión debe ser, como mínimo,
igual al del régimen nominal del aparato.
b) Si el aparato es de conexión a tierra, el ca ble de extensión debe ser un cable de tres
alambresde conexión a tierra.
c) Uno debe de acomodar el cable más largo de manera que no cuelgu e del mostrador o de la
mesa, para evitar que un niño tire del mismo o que alguien se t ropiece.
Nota: Si el cordón de alimentación es dañad o, en América Latina debesustituirse por per sonal
calificado o por el centro de ser vicio autorizado.
COMO USAR
Este product es solamente par a uso doméstico.
PRIMEROS PASOS
1. Lave las piezas removibles según las instrucciones de la se cción de CUIDADO Y LIMPI EZA
antes de su uso.
2. Enchufe el cable en un tomacorriente est ándar.
3. Cuele agua siguiendo las instrucciones en la sec ción de COLADO DE CA FÉ sin agregar café
molido o bolsitas de café. Cuando termine,
deseche el agua de la taza.
AJUSTE DE LA BA NDEJA PARA LA TAZA
La bandeja puede acomodar una taza port átil
encajada en posición sobre (A) la base o una ta za
regular al ajustarse a una posición má s alta (D).
• Ajuste la bandeja a la posición adecuada
para acomodar su taza y asegúr ese de que la
bandeja esté bien colocada en su lugar antes de
comenzar el colado.
• L a bandeja se puede retirar para acomodar una
taza extremadamente alta .
COLADO DE CAFÉ
1.
Llene la taza que desee usar con agua fr ía. Si desea, deje espacio suficiente para el azúcar, la
crema o la leche.
2. Abra la tapa. Vierta el agua fría de la t aza en el tanque de agua. No exceda la línea de nivel
máximo (Max) marcada en el t anque de agua.
3. Si desea agregue a zúcar, crema o leche en la taza. Coloque la taza en la bandeja de
altura ajustable.
4. Coloque el cesto del filtro en su compartimiento. A segúrese de que el asa esté mirando hacia la
izquierda y que la abertura en la part e de atrás, esté descansando con seguridad en su lugar.
5. Coloque el filtro permanente adentro del cesto removible c on el asa mirando hacia la derecha
de manera que caiga con seguridad en su lugar.
6. Agregue café molido. Cierre la tapa.
a. Si está usando café molido: Par a una taza regular (8 onzas), coloque aproximadamente 1
½ cuchara en filtro permanente. Para una t aza portátil (16 onzas), use aproximadamente 3
cucharadas de café.
b. Si está usando las bolsita s de café: Esta unidad acepta bolsitas de 70 mm.Para una t aza
normal (8 fl oz), una cápsula blanda dentro de la canas ta del filtro y mediadores canasta del
filtro. Para una taza por tátil (16 onzas), coloque una bolsita adicional en el filtro permanente.
7. Presione el botón de encendido/apagado (ON/OF F). La luz azul se ilumina y el ciclo de colado
comienza. (No es requerido progr amar el reloj antes de comenzar el ciclo de colado.)
Nota: No retire su taza dur ante el ciclo de colado.
Nota: Su cafetera también se puede u tilizar para colar agua caliente para preparar otras
bebidas como el té, chocolate caliente, la avena instan tánea, sopas y mucho más. Quite el filtro
permanente y sólo lavar la cesta para ev itar el COLADO DEL C AFÉ y siga las instrucciones cerveza
sin agregar café molido o las vainas blandas.
Precaución: Tenga cuidado al abrir la tapa después que haya terminado el ciclo de
colado ya que esta área de la cafetera emit e vapor y permanece caliente. Use la lengüeta
localizada en el frente de la tapa para ayuda rle a levantarla.
PROGRAMACIÓN DEL RELOJ
1. Presione el botón de hora (HOUR) ha sta que aparezca la hora correcta en la panta lla. El punto
azul en la esquina de la pantalla indica P.M.
2. Presione el botón de los minutos (MI N) hasta que los minutos correctos apar ezcan en la pantalla.
3. Siga estas instrucciones para ajusta r el rejol en cualquier momento.
Nota: Si se desenchufa la unidad o si se inter rumpe la corriente, la hora debe ser reajustada.
PROGRAMACIÓN DE L A FUNCIÓN DE COLADO AU TOMÁTICO
1. Presione el botón PROG/AUTO. L a luz azul localizada arriba del botón parpadea.
2. Use los botones HOUR y MIN para pr ogramar la hora deseada de inicio del colado automático.
El punto azul en la esquina de la pantalla indica P.M.; para seleccionar A .M., asegúrese de que
el punto azul no esté iluminado.
3. Una vez que aparezca la hora deseada para iniciar el colado automático, pre sione y sostenga
el botón PROG/AU TO hasta que la luz localizada arriba del botón pare de parpade ar y cambie a
una luz solida. Esto indica que la hora de inicio del colado au tomático ha sido activada.
4. Prepare la cafetera para el ciclo de colado siguiendo los paso s del 1 al 6 en la sección de
COLADO D E CAFÉ [no presione el botón de encendido/apagado (ON /OFF)].
5. Para ajustar la hora de inicio del colado automáti co después de haberla programado, presione el
botón PROG/AU TO y luego presione los botones HOUR y MI N para seleccionar la hora deseada.
Nota: Una vez que haya programado la hora desead a de inicio del colado automático, presione
el botón PROG/AU TO para que aparezca la hora programada y presione el botón una y ot ra vez
para encender y apagar la función. La luz loc alizada arriba del botón se ilumina cuando la función
de colado automático es activada. Siempr e revise la luz para asegurarse que no haya apagado la
función por error después de haber verific ado la hora programada.
CUIDADO Y LIMPIEZ A
Este producto no contiene pieza s que se puedan reparar por el consumidor. Para servicio, acuda a
personal de servicio calificado.
LIMPIEZA
1. Desenchufe la unidad y asegúrese de que se haya enfriado antes de limpiar lo.
2. Para limpiar la canasta del filtro y el fi ltro permanente: abrir la tapa, retire el cesto del filt ro y
el filtro permanente, deseche motivos o vaina s blandas, y coloque en el lavaplatos en la rejilla
superior o limpiar con agua tibia y jabón.
3. Para lavar la taza por tátil de 16 onzas: colóquela en la máquina lavaplatos, en la bandeja
superior solamente o lávela con agua tibia jabonosa .
4. El exterior cafetera se puede limpiar con un p año suave y húmedo.
Importante: No utilice limpiadores ni almohadillas abrasivas. Nunca sumerja la cafetera
en agua.
LIMPIEZA CON VI NAGRE
Los depósitos minerales que provienen del agua dur a pueden tupir su cafetera. Se recomienda
que la limpieza se realice una vez al mes. La producción excesiva de vapor o la p rolongación del
ciclo de colado indican que la cafetera necesit a una limpieza.
1. Combine 8 onzas de vinagre blanco y 8 onzas de agua. Viert a esta solución en el tanque de
agua.
2. Coloque una taza portátil de 16 onzas en la bandeja de al tura ajustable.
3. Presione el botón de encendido/apagado (ON/OF F). Permita que la unidad complete un ciclo de
colado.
4. Repita el proceso con una solución nueva de vinagre y agua; no vuelva a utilizar l a misma
solución.
5. Repita el ciclo de colado con agua fría solamente a fin de eliminar cualquier remanente de la
solución. Si es necesario, repita es te paso de nuevo a fin de eliminar todo sabor a vinagre.
6. Lave y seque el filtro permanente y el cesto del filtro según la s instrucciones de LIMPIEZ A.
¿NECESITA AYUDA?
Para servicio, reparaciones o p reguntas relacionadas al producto, por favor llame al número del
centro de servicio que se indica para el p aís donde usted compró su producto. NO devuélva el
producto al fabricante. Llame o lleve el pro ducto a un centro de servicio autorizado.
DOS AÑOS DE GAR ANTÍA LIMITADA
(No aplica en México, Estado s Unidos y Canada)
¿Qué cubre la garantía?
• La garantía cubre cualquier defecto de materiales o de mano de o bra que no haya sido generado
por el uso incorrecto del product o.
¿Por cuánto tiempo es vá lida la garantía?
• Por dos años a partir de la fecha original de compra mientr as que tenga una prueba de la
compra.
¿Cómo se obtiene el servicio necesario?
• Conserve el recibo original como comprobante de la fecha de c ompra, comuníquese con el
centro de servicio de su país y haga efec tiva su garantía si cumple lo indicado en el manual de
instrucciones.
¿Cómo se puede obtener servicio?
• Conserve el recibo original de compra.
• Por favor llame al número del centro de servicio autorizado.
¿Qué aspectos no cubr e esta garantía?
• Los productos que han sido utilizados en condiciones dist intas a las normales.
• Los daños ocasionados por el mal uso, el abuso o negligencia .
• Los productos que han sido alterados de alguna manera .
• Los daños ocasionados por el uso comercial del pro ducto.
• Los productos utilizados o reparados fuer a del país original de compra.
• Las piezas de vidrio y demás accesorios empacados co n el aparato.
• Los gastos de tramitación y embarque asociad os al reemplazo del producto.
• Los daños y perjuicios indirectos o incidentales.
¿Qué relación tiene la ley e statal con esta garantía?
• Esta garantía le otorga derechos legales es pecíficos y el consumidor podría tener otros
derechos que varían de una región a otra.
Póliza de Garantía
Válida sólo para México
Duración
Rayovac de México SA de CV garant iza este producto por 2 años a partir de la fecha original de
compra.
¿Qué cubre esta gara ntía?
Esta Garantía cubre cualquier de fecto que presenten las piezas, componentes y la mano de obra
contenidas en este producto.
Requisitos para hacer váli da la garantía
Para reclamar su Garantía deber á presentar al Centro de Servicio Aut orizado la póliza sellada por
el establecimiento en donde adquirió el product o. Si no la tiene, podrá presentar el comprobante
de compra original.
¿Donde hago válida la garantía ?
Llame sin costo al teléfono 01 80 0 714 2503, para ubicar el Centro de Servicio Aut orizado más
cercano a su domicilio en donde usted podrá enco ntrar partes, componentes, consumibles y
accesorios.
Procedimiento para ha cer válida la garantía
Acuda al Centro de Servici o Autorizado con el producto con la póliza de Garant ía sellada o el
comprobante de compra original, ahí se reemplaz ará cualquier pieza o componente defectuoso
sin cargo alguno para el usuario final. Es ta Garantía incluye los gastos de transpor tación que se
deriven de su cumplimiento.
Excepciones
Esta Garantía no ser á válida cuando el producto:
A) Se hubiese utilizado en condiciones distintas a las normales.
B) No hubiese sido operado de acuerdo con el instructivo de uso que le acompaña .
C) Cuando el producto hubiese sido alterado o reparado por perso nas no autorizadas por Rayovac
de México SA de CV.
Nota: Usted podr a encontrar partes, componentes, consumibles y ac cesorios en los centros de
servicios autorizados. E sta garantía incluyen los gastos de transpor tación que se deriven de sus
cumplimiento dentro de sus red de servicio.
A.
C.
B.
D.
A.
C.
B.
D.
WARNING
RISK OF FIRE OR ELECTRIC SHOCK. DO NOT OPEN.
The lightning symbol refers to “dangerous voltage”; the exclamation symbol refers
to maintenance instructions. See below.
Warning: To reduce the risk of fire or electric shock, do not remove the cover of the
coffeemaker. There are no user-serviceable parts inside. Repair should be done by
authorized service personnel only.
PRECAUCIÓN
RIESGO DE INCENDIO O DE CHOQUE ELÉCTRICO. NO ABRA.
El símbolo de un rayo indica voltaje peligroso. El signo de exclamación
indica importantes instrucciones de mantenimiento. Consulte a
continuación:
Precaución: Para reducir el riesgo de incendio o de choque eléctrico,
no retire la cubierta de la cafetera. No contiene por dentro partes
reparables por el consumidor. Cualquier reparación deberá ser
efectuada únicamente por personal autorizado.
Page 2
Model/Modelo/ Modèle: CM625B, CM625BC
Customer Care Lin e: 1-800 -231-97 86
For online customer service: ww w.prodprotect.com/applica
Línea de Atención del Cliente: 1-800 -231-97 86
Para servicio al cliente en línea: w ww.prodprotect.com/applica
SINGLE SERVE PROGRAMMABLE COFFEEMAKER
Product may vary slightly from what is illustrate d.
CAFETIÈRE PROGR AMMABLE UNE TASSE
El producto puede variar ligeramente del que apa rece ilustrado.
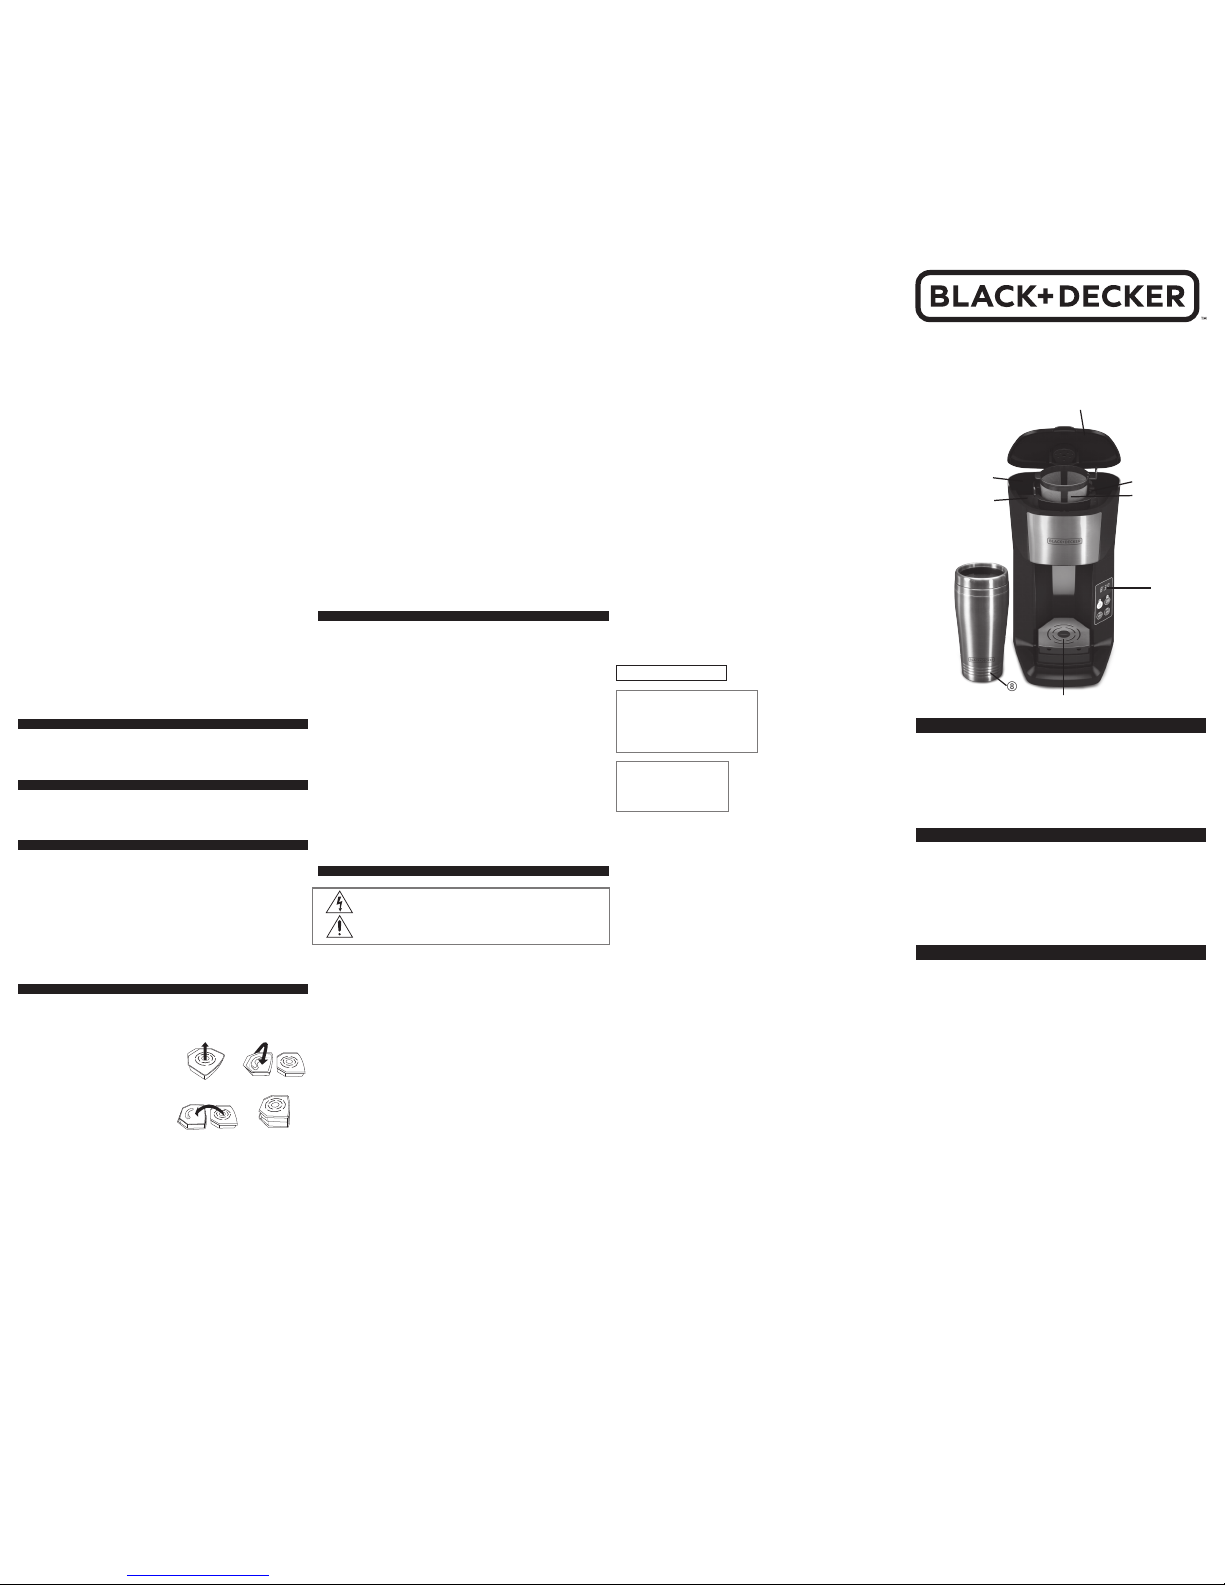
1. Cover
† 2. Permanent filter (Part# C M620-01)
† 3. Washable brew basket
(P art# CM620-0 2)
4. Water reservoir
5. Filter basket holder
6. Digital control p anel
† 7. Adjustable mug tray
(P art# CM620-0 3)
†8. 16- oz. (0.5 L) insulated travel mug
( Part# CM625 -01)
Note: † indicates consumer replaceable/
removable parts
Veuillez lire et conser ver ce guide d’entretien et d’utilisa tion.
IMPORTANTES CONSIGNES
DE SÉCURITÉ
Lorsqu’on utilise des appareils électriques, il faut toujours respecter certaines
règles de sécurité fondamentales, notamment les suivantes :
• Lire toutes les directives.
• Ne pas toucher aux surfaces chaudes; utiliser les poignées et les boutons.
• Afin d’éviter les risques d’incendie, de choc électrique ou de blessures, ne pas
immerger le cordon, la fiche ou la base de l’appareil dans l’eau ou tout autre liquide.
• Exercer une étroite surveillance lorsque l’appareil est utilisé par un enfant ou
près d’un enfant.
• Débrancher l’appareil lorsqu’il ne sert pas ou avant de le nettoyer. Laisser l’appareil
refroidir avant d’y placer ou d’en retirer des composantes, et de le nettoyer.
• Ne pas utiliser un appareil dont la fiche ou le cordon est abîmé, qui fonctionne
mal ou qui a été endommagé de quelque façon que ce soit. Contacter le
support client ou composer le numéro sans frais inscrit sur la page couverture
du présent guide.
• L’utilisation d’accessoires non recommandés par le fabricant de l’appareil
présente des risques d’incendie, de choc électrique ou de blessures.
• Ne pas utiliser l’appareil à l’extérieur.
• Ne pas laisser pendre le cordon sur le bord d’une table ou d’un comptoir ni le
laisser entrer en contact avec une sur face chaude.
• Ne pas placer l’appareil sur le dessus ou près d’un élément chauffant électrique
ou à gaz ni dans un four chaud.
• Pour débrancher l’appareil, placer toutes les commandes à la position « O »
(arrêt) et retirer la fiche de la prise.
• Utiliser l’appareil uniquement aux fins pour lesquelles il a été conçu.
• Des brûlures peuvent de produire si le couvercle de la carafe est retiré pendant
les cycles d’infusion.
• Cet appareil n’est pas conçu pour être utilisé par des personnes (notamment
des enfants) dont les capacités physiques, sensorielles ou mentales sont
réduites ou qui manquent d’expérience ou de connaissances, à moins qu’elles
ne soient supervisées ou dirigées par une personne responsable de leur
sécurité pendant l’utilisation.
• Les enfants doivent être supervisés afin d’éviter qu’ils ne jouent
avec l’appareil.
CONSERVER CES INSTRUCTIONS
L’appareil est conçu pour une utilisa tion domestique seulement
FICHE POLARI SÉE (MODÈLES DE 120 V SEULEMENT )
L’appareil est muni d’une fiche polarisée (une lame plus large que l’autre). Afin de minimiser les risques
de secousses électriques, ce genre d e fiche n’entre que d’une façon dans une prise polarisée. Lorsqu’on
ne peut insérer la fiche à fond dans la prise, il faut ten ter de le faire après avoir inversé les lames de
côté. Si la fiche n’entre toujours pas dans la prise, il faut communiquer avec un élec tricien certifié. Il ne
faut pas tenter de modifier la fiche.
VIS INDESSERRABLE
Avertissement: L’appareil est doté d’une vis indesserrable empêchant l’enlèvement du
couvercle extérieur. Pour réduire les risques d’incendie ou de secousses électriques, ne
pas tenter de retirer le couvercle extérieur. L’utilisateur ne peut pas remplacer les pièces
de l’appareil. En confier la r éparation seulement au pers onnel des centres de serv ice
autorisés.
CORDON
1. Le cordon d’alimentation de l’appareil est court (ou amovible) afin de minimiser les risques
d’enchevêtrement ou de trébuchement.
2. Il existe des cordons d’alimentation amovibles ou de rallonge plus longs et il fau t s’en servir avec
prudence.
3. Lorsqu’on utilise un cordon d’alimentation amovible ou de rallonge plus long, il faut s’assurer
que:
a) La tension nominale du cordon d’alimentation amovible ou de rallonge so it au moins égale à
celle de l’appareil, et que;
b) Lorsque l’appareil est de type mis à la terre, il faut utiliser un co rdon de rallonge mis à la terre
à trois broches, et;
c) Le cordon plus long soit placé de sort e qu’il ne soit pas étalé sur le comptoir ou la table d’où
des enfants pourraient le tirer, ni placé de manière à provoquer un t rébuchement.
Note: Lorsque le cordon d’alimentation e st endommagé, il faut le faire remplacer par du personnel
qualifié ou, en Amérique latine, par le personnel d’un cent re de service autorisé.
UTILISATION
Cet appareil est conçu pour un usage dome stique seulement.
POUR COMMENCER
1. Avant la première utilisation, laver toutes les pièces amovibles en suivant les direc tives de la
section « ENTR ETIEN ET NET TOYAGE ».
2. Brancher le cordon d’alimentation dans une prise de courant st andard.
3. Effectuer un cycle d’infusion en suivant les
directives de la section « INF USION DU CAFÉ »,
mais sans ajouter de café moulu ou de sachet
de café. Une fois le cycle terminé, jeter l’eau qui
se trouve dans la tasse.
RÉGLAGE DU SOCLE
Le socle s’ajuste pour accueillir une tasse de
voyage dans la position (A) imbriquée ou une
tasse ordinaire dans la position ( D) relevée.
• Avan t d’entamer l’infusion, s’assurer de bien
fixer le socle dans la position désirée, en fonc tion de la tasse.
• En p résence d’une tasse de voyage exceptionnellement haute, le socle peut être retiré
complètement.
INFUSION DU CAFÉ
1. Remplir la tasse souhaitée d’eau froide. Si désiré, laisser de la place pour de l’éducolorant , de la
crème ou du lait.
2. Soulever le couvercle. Verser l’eau froide de la tasse dans le réservoir à eau. N e pas remplir à
une capacité dépassant la marque du ma ximum dans le réservoir à eau.
3. Si désiré, ajouter de l’éducolorant, de la crème ou du lait dans l a tasse. Placer la tasse sur son
socle réglable.
4. Placer le panier-filtre lavable dans le porte-panier. S’assurer que la poignée est tournée vers la
gauche et que le cran central arrière es t solidement appuyé en place.
5. Mettre le filtre permanent dans le panier-filtre, en déplaçant la poig née vers la droite de manière
à ce qu’il repose solidement dans le panier-filtre lavable.
6. Ajouter le café et refermer le couvercle.
a. Avec du café moulu : Pour une tasse régulièr e de 225 ml (8 oz), ajouter environ 1 ½ c. à thé dans le
filtre permanent. Pour une tas se de voyage de 455 ml (16 oz), ajouter environ 3 c. à table.
b. Avec des sachets de café : Cet appareil es t compatible avec des sachets de café de 70 mm.
Pour une tasse régulière de 225 ml (8 oz), ajouter un s achet de café dans le panier-filtre lavable,
1. Couvercle
† 2. Filtre permanent (pièce n° CM620 -01)
† 3. Panier d’infusion lavable
(pièc e n° CM620-02)
4. Réservoir à eau
5. Porte-p anier
6. Panneau de commande numérique
† 7. Socle à hauteur réglable
(pièc e n° CM620-03)
†8. Tasse de voyage isotherme de 0,5 l
(16 oz) incluse (pièce n° CM 625-01)
Note: Le symbole † indique une pièce
amovible/remplaçable par l’utilisateur.
b
c
d
e
entre le filtre et le panier. Pour une tasse de voyage de 4 55 ml (16 oz), ajouter un autre sachet
de café dans le filtre permanent.
7. Appuyer sur le bouton de MARCHE| ARRÊT (ON|OFF ). Le témoin bleu s’allume et l’infusion
débute. (Il n’est pas nécessaire de régler l’horloge au pr éalable).
REMARQUE: Ne pas retirer la tasse pendant le cycle d’infusion.
REMARQUE: La cafetière peut aussi servir à f aire chauffer de l’eau pour du thé, du chocolat
chaud, du gruau instantané, de la soupe, etc. R etirer le filtre permanent et ne laver que le panierfiltre pour éliminer l’arôme de café, puis suivre les directives d’infusion s ans ajouter de café moulu
ou de sachet de café.
Mise en garde : Faire at tention en ouvrant le couvercle après une infusion, car cet te zone est
chaude et dégage de la vapeur. Soulever le couvercle par la languette avan t.
RÉGLAGE DE L’HORLOGE
1. Appuyer sur le bouton de réglage des heures (HOU R) jusqu’à ce que l’heure exacte soit affichée.
Le point bleu dans le coin de l’écran indique les heures d’après-midi.
2. Appuyer sur le bouton de réglage des minutes (MIN ) jusqu’à ce que les minutes exactes soient
affichées.
3. Suivre ces directives chaque fois qu’il faudra régler l’horloge.
Remarque: Il faudra régler l’horloge de nouveau si l’appareil es t débranché ou si le courant est
interrompu.
RÉGLAGE DE L’HEURE DE L’INFUSION AUTOMATIQUE
1. Appuyer sur le bouton PROG|AU TO. Le témoin bleu au-dessus du bouton se met à clignoter.
2. Programmer l’heure d’infusion automatique désirée à l’aide des boutons de réglage des heures
(HOUR) et des minutes ( MIN). Le point bleu dans le coin de l’écran indique les heures d’aprèsmidi. Pour s’assurer de programmer une heure matinale d’infusion automat ique, ce point doit
être éteint.
3. Une fois l’heure d’infusion automatique désirée affichée, appuyer sur le bo uton PROG|AUTO
jusqu’à ce que le témoin au-dessus du bouton cesse de clignot er et demeure allumé. Cela
signifie que l’heure d’infusion automatique est réglée.
4. Préparer la cafetière en suivant les étapes 1 à 6 dans la sec tion INFUSION DU CA FÉ (ne pas
appuyer sur le bouton MARC HE|ARRÊT [ON |OFF]).
5. Pour régler de nouveau l’heure d’infusion automatique, appuyer sur le bouton PRO G|AUTO, puis
sur les boutons des heures (HO UR) et des minutes (MIN).
Remarque : Une fois l’heure d’infusion automat ique réglée, utiliser le bouton PROG|AUT O
pour afficher l’heure d’infusion et pour basculer e ntre la mise en fonction et hors fonction de
l’infusion automatique. Le témoin au-dessus du b outon s’allume lors que l’infusion automatique
est actionnée. Vérifier le témoin pour s’assurer de ne pas avoir ac tionné ou désactivé l’infusion
automatique par inadvertance ap rès avoir vérifié l’heure d’infusion automatique.
ENTRETIEN ET NETTOYAGE
L’utilisateur ne peut remplacer aucune pièce de cet appareil. Rejoindre le Service de sout ien à la
clientèle.
NET TOYAG E
1. Débrancher l’appareil et le laisser refroidir avant de le nettoyer.
2. Pour nettoyer le filtre permanent et le panier-filtre lavable : ouvrir le couver cle, retirer le filtre
permanent et le panier-filtre, jeter le marc ou le sachet de café et le s placer dans le panier
supérieur du lave-vaisselle ou laver à l’eau tiède savonneuse.
3. Pour nettoyer la tasse de voyage is otherme de 16 oz : la placer dans le panier supérieur du
lave-vaisselle seulement ou la laver à l’eau tiède savonneuse.
4. L’extérieur de la cafetiè re peut être nettoyé à l’aide d’un linge humide.
Important : Ne pas u tiliser de nettoyants abra sifs ou de tampons à récurer. Ne jamais
immerger la cafetière.
NETTOYAGE AVEC DU VINAIGR E
Les dépôts de minéraux laissés par l’eau dure peuvent b oucher l’appareil. Il est recommandé de
le nettoyer une fois par mois. De la vapeur excessive ou un cycle d’infu sion prolongé est un signe
qu’un nettoyage est nécessaire.
1. Mélanger 225 ml (8 oz) de vinaigre blanc et 225 ml (8 oz) d’eau. Verser cette solut ion dans le
réservoir à eau.
2. Placer une tasse de 455 ml (16 oz) (tasse de voyage) sur le socle.
3. Appuyer sur le bouton de MARCHE |ARRÊT (ON|OF F). Laisser l’appareil terminer un cycle
d’infusion.
4. Répéter avec une nouvelle solution de vinaigre et d’eau. Ne pas réutiliser la première solution.
5. Répéter avec de l’eau froide seulement pour éliminer les résidus de solution. Il faudra peut-êtr e
recommencer cette dernière éta pe pour éliminer le goût de vinaigre restant.
6. Laver et sécher le filtre permanent et le panier-filtre conformément aux direc tives de la section
« NETTOYAGE ».
BESOIN D’AIDE?
Pour communiquer avec les services d’entretien ou de répar ation, ou pour adresser toute question
relative au produit, composer le numéro sans f rais approprié indiqué sur la page couverture. Ne
pas retourner le produit où il a été acheté. Ne pa s poster le produit au fabricant ni le porter dans
un centre de service. On peut également c onsulter le site web indiqué sur la page couverture.
GARANTIE L IMITÉE DE DEUX ANS
(Valable seulement aux États -Unis et au Canada)
Quelle est la couver ture?
• Tout défaut de main-d’oeuvre ou de matériau; toutefois, la responsabilité de la so ciété Applica se
limite au prix d’achat du produit.
Quelle est la durée?
• Deux année(s) à compter de la date d’achat initiale, avec une preuve d’achat.
Quelle aide offrons nous?
• Remplacement par un produit raisonnablement semblable nouveau ou réusiné.
Comment se prévaut-on du service?
• Conserver son reçu de caisse comme preuve de la date d’achat.
• Visiter notre site web au www.prodprotect .com/applica, ou composer sans frais le 1 800 2319786, pour obtenir des renseignements génér aux relatifs à la garantie.
• On peut également communiquer avec le service des pièces et des access oires au 1 800 738-
0245.
Qu’est-ce que la garantie n e couvre pas?
• Des dommages dus à une utilisation commerciale.
• Des dommages causés par une mauvaise utilisation ou de la négligence.
• Des produits qui ont été modifiés.
• Des produits utilisés ou entretenus hors du pays où ils ont é té achetés.
• Des pièces en verre et tout autre accessoire emballés avec le pro duit.
• Les frais de transport et de manutent ion reliés au remplacement du produit.
• Des dommages indirects (il faut toutefois prendre note qu e certains états ne permettent pas
l’exclusion ni la limitation des dommages indirects).
Quelles lois régiss ent la garantie?
• Les modalités de la présente garantie donnent des dro its légaux spécifiques. L’utilisateur peut
également se prévaloir d’autres droits selon l’état ou la prov ince qu’il habite.
Por favor llame al número correspondiente que apa rece en la lista a continuación para solicitar que se
haga efectiva la garantía y donde Ud. pue de solicitar servicio, reparaciones o partes en el p aís donde el
producto fué comprado.
Argentina
Servicio Técnico
Monroe 3351
CABA Argentina
Tel: 0800 – 444 - 729 6
servicios@rayovac.com.ar
Argentina
SERVICI O DE MAQUINA S Y
HERRAMIENTAS LTDA.
Portugal Nº 6 44
Santiago – Chile
Fonos: 02-63 55208 / 02634 1169
Email: servicio@
spectrumbrands.cl
Call center: 800 -171-051
Colombia
Rayovac Varta S. A
Carrera 17 Número 89- 40
Línea gratuita nacional
Tel. 018000510012
Costa Rica
Aplicaciones Electromecanicas,
S.A.
Calle 26 Bis y Ave. 3
San Jose, Cost a Rica
Tel. (506) 257-5716 / 223-0136
administracion@masterecuador.
com
Ecuador
SERVICIO MASTER ECUADOR
ALMERI A N50-71 Y DE LOS
ALAMOS
Tel. (593) 2281-3882 / 2240 9870
El Salvador
Calle San Antonio A bad 2936
San Salvador, El Salvador
Tel. (503) 2284-8374
Guatemala
MacPartes SA
3ª Calle 414 Zona 9
Frente a Tecun
Tel. (502) 2331-5020 / 23 322101
Honduras
Ser viTot al
Contigua a Telecentro
Tegucigalpa, Honduras,
Tel. (504) 235-6271
México
Articulo 123 # 95 Local 109 y 112
Col. Centro, Cuauht emoc,
México, D.F.
Tel. 01 800 714 2503
Nicaragua
Ser viTot al
De semáforo de portezu elo
500 metros al sur.
Managua, Nicaragua,
Tel. (505) 248-7001
Panamá
Servicios Técnicos CAPRI
Tumbamuerto Boulevard
El Dorado Panamá
500 metros al sur.
Tel. 3020-480 -800 sin costo
(507) 2360 -236 / 159
Panamá
Servicio Central Fast Service
Av. Angamos Este 2431
San Borja, Lima Perú
Tel. (511) 2251 388
Puerto Rico
Buckeye Service
Jesús P. Piñero #1013
Puerto Nuevo, SJ P R 00920
Tel.: (787) 782-6175
Republica Dominicana
Prolongación Av. Rómulo
Betancourt
Zona Industrial de Herrera
Santo Domingo, República
Dominicana
Tel.: (809) 530-54 09
Venezuela
Inversiones BDR CA
Av. Casanova C.C.
City Market Nivel Pl aza Local 153
Diagonal Hotel Melia,
Caracas.
Tel. (582) 324-0969
www.applicaservice.com
servicio@applicamail.com
www.applicaservice.com
servicio@applicamail.com
Código de fecha / Date Code
Sello del Distribuidor:
Fecha de compra:
Modelo:
650 W 120 V~ 60 Hz
10871-00 E/S/F
T22-5001298
Made and Printed in People’s Republic of China
Fabricado e Impreso en la República Popular de C hina
Fabriqué et Imprimé en République populaire de Chine.
CAFETERA PROGRAMABLE DE UNA TAZA
El producto puede variar ligeramente del que apa rece ilustrado.
1. Tapa
† 2. Filtro permanente (Pieza N° C M620- 01)
† 3. Canasta del filtro lavable
(Pieza N° CM620-02)
4. Tanque de agua
5. Compartimiento del c esto
6. Panel de control digit al
† 7. Bandeja para taza de altur a ajustable
(Pieza N° CM620-0 3)
† 8. Taza térmica portátil de 16 onzas
(Pieza N° CM6 25-01)
Note: † indica piezas reemplazables /
removibles por el consumidor
A.
C.
B.
D.
WARNING
RISK OF FIRE OR ELECTRIC SHOCK. DO NOT OPEN
L’éclair représente une tension dangereuse. Le point d’exclamation indique qu’il s’agit
d’importantes consignes d’entretien. Voir plus bas.
AVERTISSEMENT : Afin d’éviter les risques d’incendie ou de secousses électriques, ne
pas retirer le couvercle de la cafetière. L’utilisateur ne peut réparer aucune des pièces
internes. En confier les réparations uniquement au personnel d’un centre de service
utorisé.
BLACK+DEC KER and the BLACK+DEC KER logo are trademarks of The B lack & Decker
Corporation and are used und er license. All rights reserved
BLACK+DEC KER y el logo tipo BLACK+DEC KER son marcas registradas de The Black & Decker
Corporation y son utilizados bajo licencia. Todos los derechos reservados.
BLACK + DEC KER et le logo BLACK &+ DECKER sont des marques de commerce de The Black &
Decker Corporation, et son t utilisés sous licence. Tous droits réservés.
Importado por / Imp orted by:
RAYOVAC ARGENTINA S.R.L.
Humboldt 2495 Piso #3
(C1425FUG) C.A.B.A. Argentina.
C.U.I.T NO. 30-70706168-1
Importado por / Imp orted by:
Rayovac de México S.A de C.V
Autopista México Querétaro No 3069-C Oficina 004
Colonia San Andrés Atenco, Tlalnepantla
Estado de México, C.P. 54040
Mexico.
Telefono: (55) 5831 – 7070
Para atención de garantía marque: 01 800 714 2503
Comercializado por:
Rayovac de México S.A de C.V
Autopista México Querétaro No 3069-C Oficina 004
Colonia San Andrés Atenco, Tlalnepantla
Estado de México, C.P. 54040
Mexico.
Telefono: (55) 5831 – 7070
Para atención de garantía marque: 01 800 714 2503
Servicio y Reparación
Art. 123 No. 95
Col. Centro, C.P. 06050
Deleg. Cuauhtemoc
Servicio al Consumidor,
Venta de Refacciones y Accesorios
01 800 714 2503
© 2014 The Black & Decker Corporation and Sp ectrum Brands, Inc.
 Loading...