

Page 1

Additional features
PLEASE READ THE LEGAL NOTICES SET OUT AT THE END OF
THIS DOCUMENT.
This document outlines the features that are available with your RIM
handheld with Interactive Messaging PLUS Service or your
BlackBerry handheld with XpressMail Service. For more information
on the handheld’s features, refer to the online Handheld User Guide.
Contents
• Composing and sending messages
• Sending messages
• Setting current message options
• Setting message options
• Sending handheld-to-handheld messages
• Creating a response list
• Customizing the auto signature
• Sending an auto reply message
• Receiving and reading messages
• Receiving long messages
• Forwarding long messages
• Replying to a message containing a response list
• Using the Address Book
• Address Book fields
• Customizing your handheld options
• Message Services
• User Profile
Page 2
Composing and sending messages
With a RIM handheld with Interactive Messaging PLUS Service or BlackBerry
handheld with XpressMail Service, you can send messages using a variety of services,
set delivery confirmation for the current message, and send messages containing
response lists.
Sending messages
After you activate your handheld, you can begin to send and receive messages. When
you send messages, choose from the following send methods:
•Email: Select the contact’s email address.
• Phone: Select the contact’s phone number. If you have a phone number entered in
more than one of the Home, Mobile, or Wor k fields, you are prompted to select
which phone number to use.
• Fax #: Select the contact’s fax number.
•1-way Pager: Select the contact’s pager number.
• Interactive Handheld: Select the contact’s interactive handheld address.
•PIN: Select the contact’s personal identification number (PIN).
To send a message
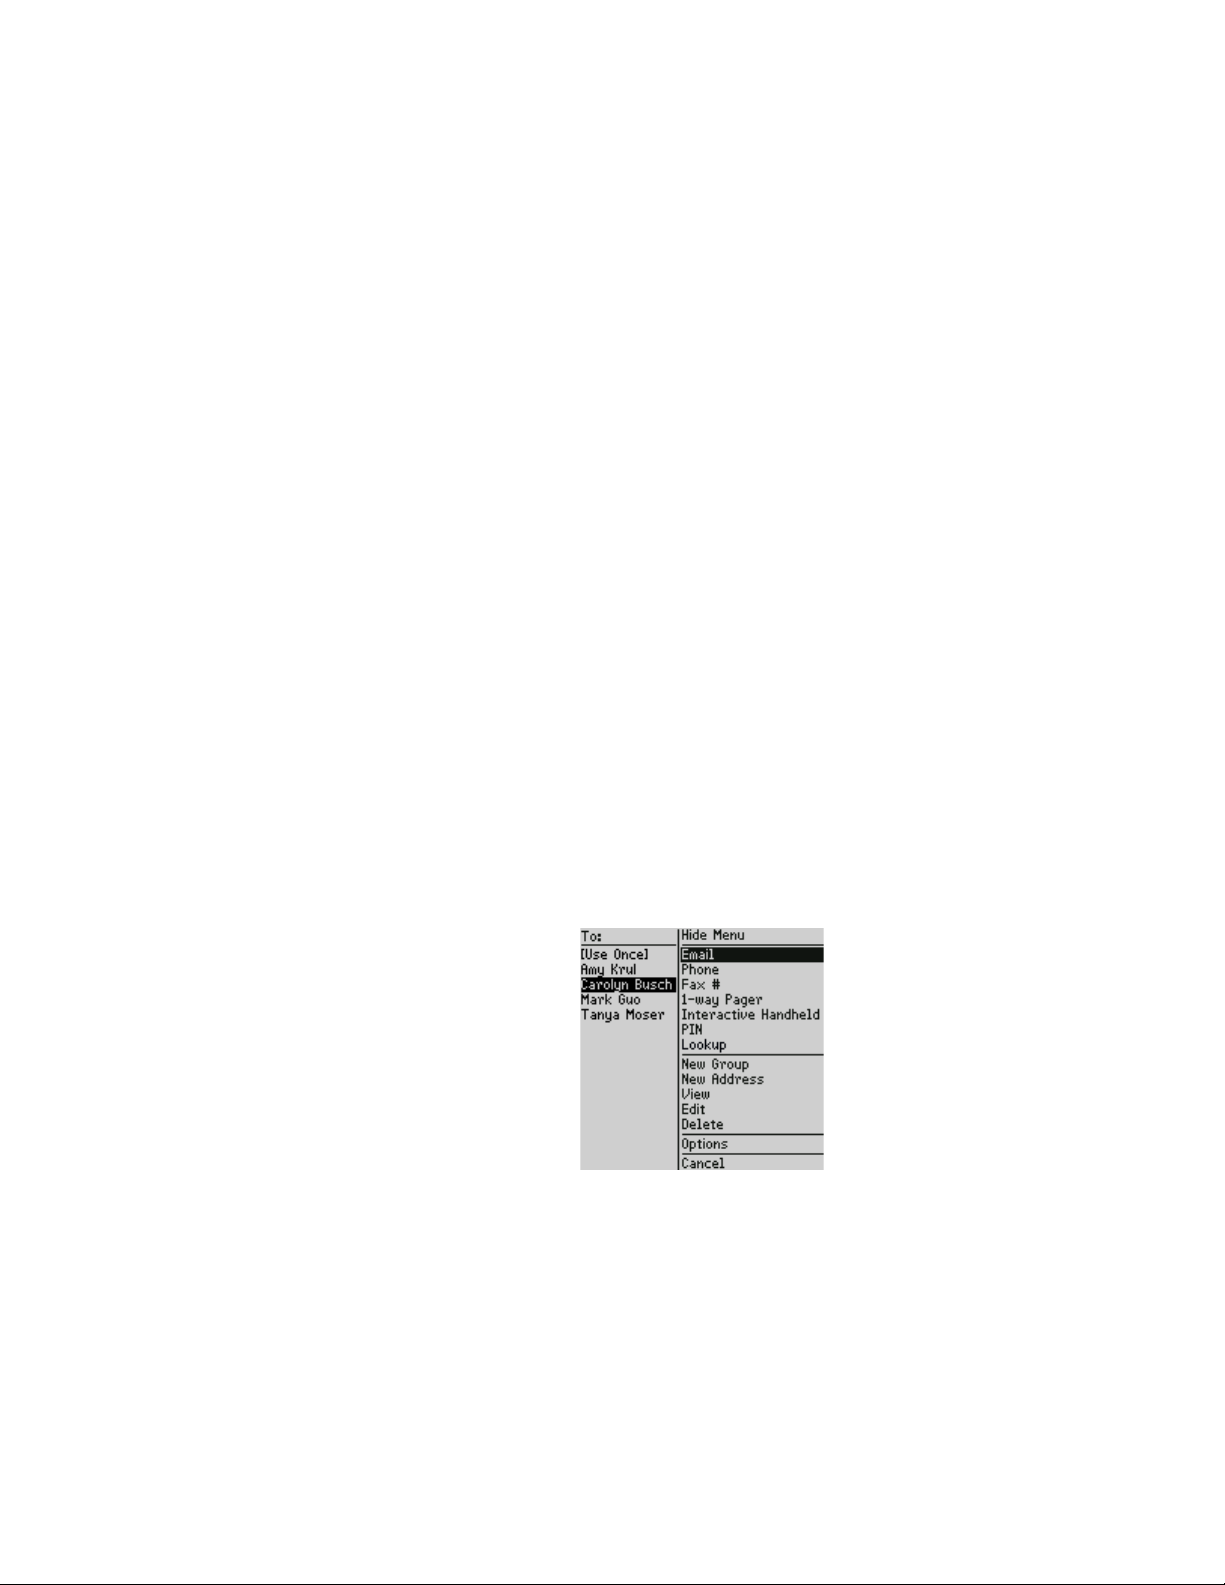
1. On the Home screen, click the Compose icon. The To screen appears.
2. Select a contact for whom you have saved an email address and click the
trackwheel to view the menu. Click Email.
To screen - Email item
3. In the Subject field, type a subject and press the Enter key. Type your message.
4. Click the trackwheel to view the menu. Click Send. You return to the Messages
screen.
If you are in an area of wireless coverage that is sufficient for sending email messages,
a check mark appears beside the message within a short period of time. This icon
indicates that your message was transmitted successfully.
2 Additional features
Page 3
If you are not in an area of sufficient wireless coverage, you do not need to cancel
sending your message. Your handheld sends the message automatically when you
return to an area with sufficient wireless coverage.
Setting current message options
You can set current message options to receive delivery confirmation or confirmation
that the message has been read.
Note: The Confirm Delivery and Confirm Read features are only available if you use the
Interactive service. The options appear on the Current Message Options screen for all services,
but you are only able to use them with the Interactive service.
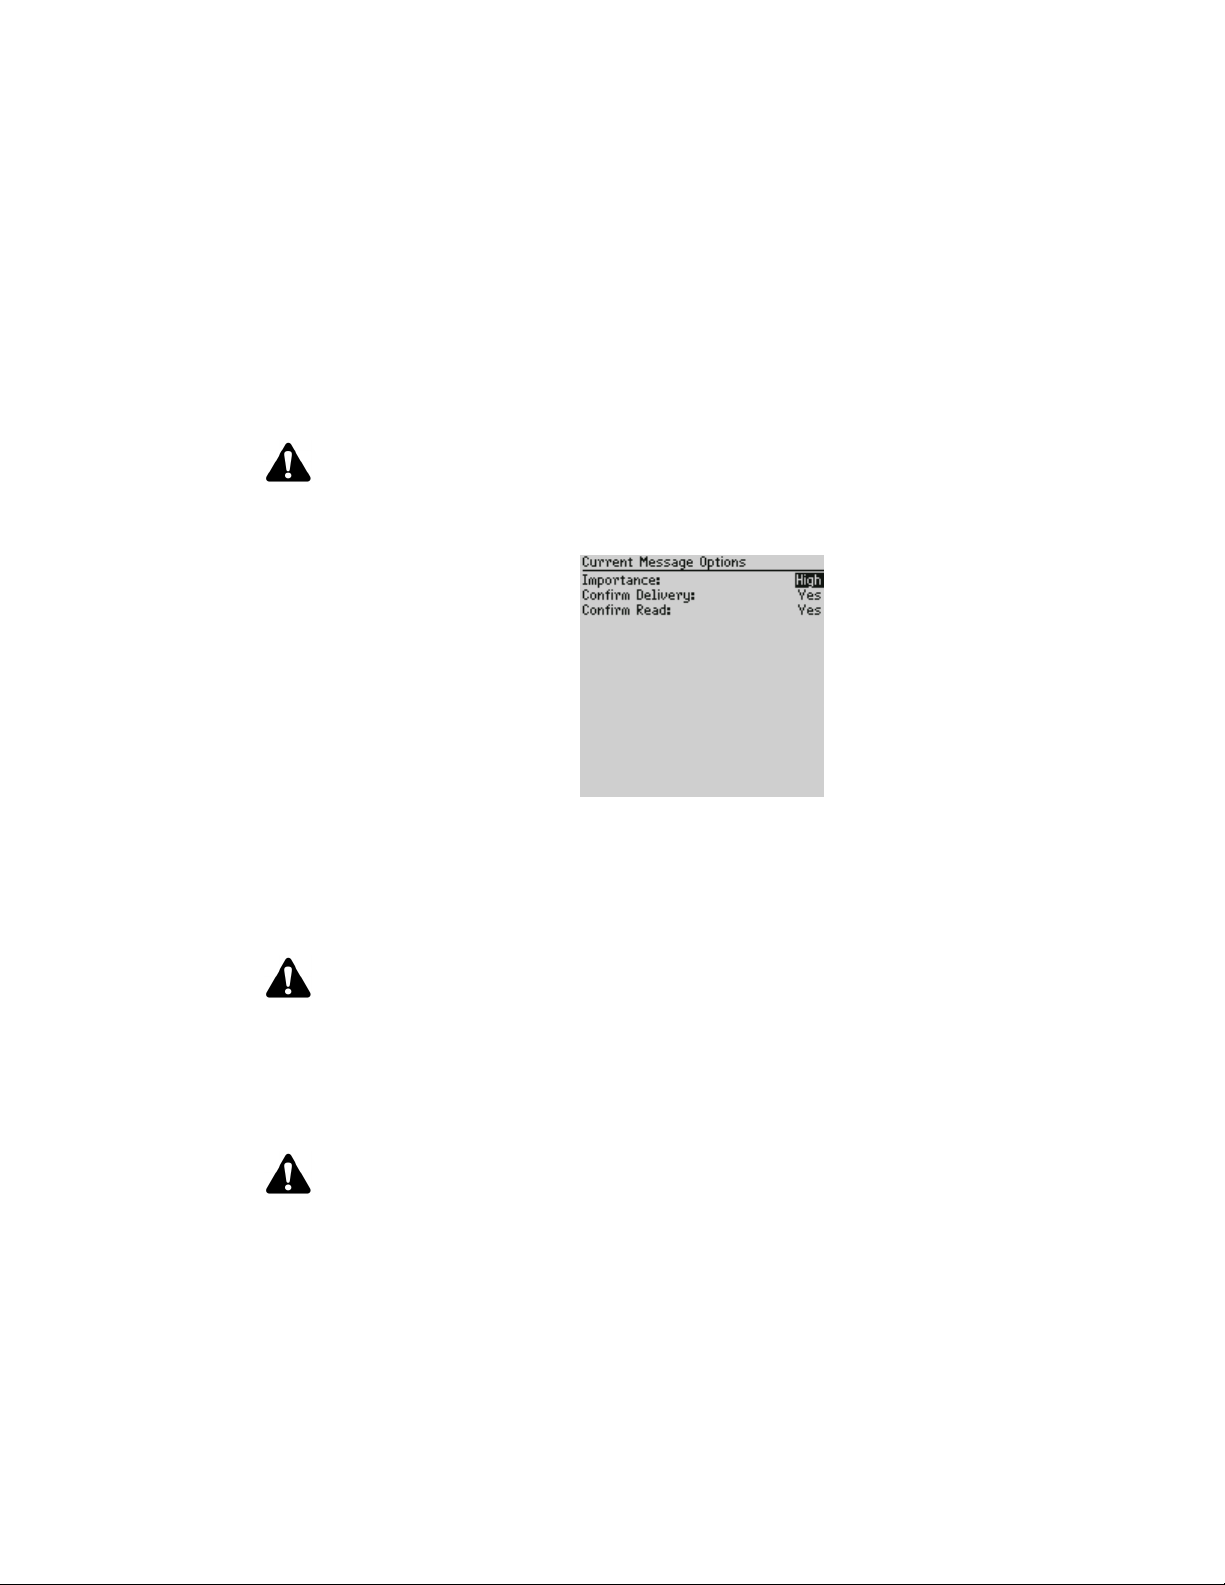
Current Message Options screen
Confirm Delivery: Set whether you want to be notified when the message is
successfully delivered to the recipient(s). If you set this field to Yes, you receive
notification when you are using one of the following send methods: Interactive
Handheld, 1-way Pager, Fax #, or Phone. The default is Yes.
Note: If this field is set to Yes, the check mark beside your sent message changes to a D when
the message is delivered to the recipient(s).
Confirm Read: Set whether you want to be notified when the message is read by the
recipient(s). If you set this field to Yes , you receive notification when you are using
one of the following send methods: Interactive Handheld, 1-way Pager, Fax #, or
Phone. The default is Yes.
Note: If this field is set to Yes, the check mark beside your sent message changes to a D when
the message is delivered to the recipient(s). The D changes to an R when the message is read
by the recipient(s).
Additional features 3
Page 4
Setting message options
You can set the message options for all messages to specify how long they remain
open before being marked as read. You can also specify how messages should be
deleted for each service that is activated on your handheld.
Note: The AutoRead and AutoRead Timer fields only appear if you have the Interactive service
on your handheld. If the fields appear on your handheld, you can set them for all messages,
regardless of the service you are using.
AutoRead: Set whether you want messages to open automatically when you remove
your handheld from the holster. The default is Ye s.
AutoRead Timer: When you receive a new message and remove your handheld from
the holster, the message is marked as read after a set length of time. The default is 3
seconds. If you select Off, you must close the message before it is marked as read.
Sending handheld-to-handheld messages
You can select Interactive Handheld as your send method to send messages to other
handhelds and receive confirmation that the recipient has received and read your
message. To use Interactive Handheld as a send method, one of the following items
must be entered in the Interactive Handheld field of your contact’s Address Book
entry:
• recipient’s user name, which is a unique, alphanumeric identification tag assigned
to each subscriber
• PIN that is assigned to the subscriber for use with the Automated Response
Center
• PIN that is assigned to the subscriber’s handheld
To send a handheld-to-handheld message
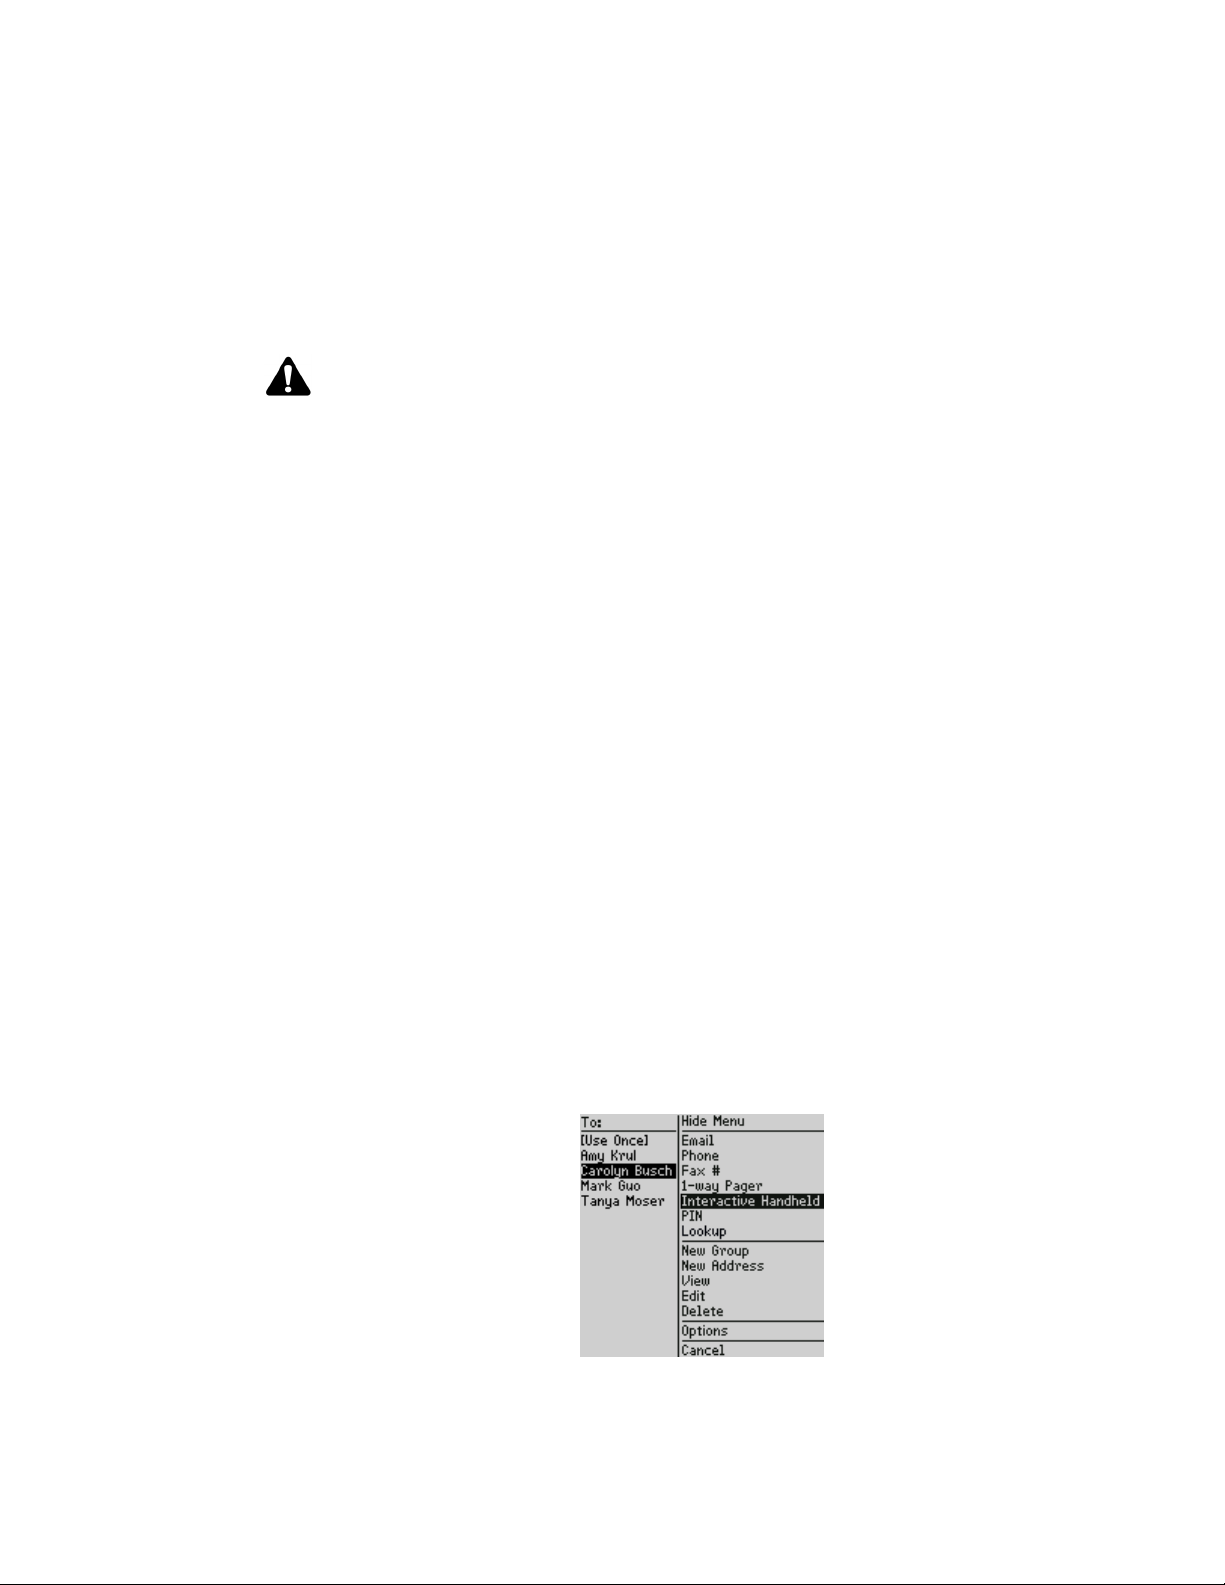
1. On the Home screen, click the Compose icon. The To screen appears.
2. Select a contact for whom you have saved an Interactive Handheld number and
click the trackwheel to view the menu. Click Interactive Handheld.
To screen - Interactive Handheld item
4 Additional features
Page 5

3. In the Subject field, type a subject and press the Enter key. Type your message.
4. Click the trackwheel to view the menu. Click Send. You return to the Messages
screen.
A check mark appears beside the message within a short period of time to indicate
that your message was transmitted successfully. Depending on how you configured
the current message options for the sent message, the check mark changes to a D
when the message is delivered to the recipient(s), and the D changes to an R when the
message is read by the recipient(s). Refer to "Setting current message options" on page
3 for more information.
Note: If you use a BlackBerry handheld with XpressMail Service, you can send a
handheld-to-handheld message in two ways. If you use the Interactive service for your
messages, you can use the Interactive Handheld send method. If your default email service is
Desktop, you can use the PIN send method. Refer to the online Handheld User Guide for more
information on using the PIN send method.
Creating a response list
You can compose a message that contains a list of responses. When you send a
message with a response list to other handheld users, they can choose to use one of
the list items as a reply.
To create a response list
1. On the Home screen, click the Compose icon. The To screen appears.
2. Select a contact and click the trackwheel to view the menu. Click a send method.
For this example, click Email.
3. In the Subject field, type a subject and press the Enter key.
4. Type a question that requires a response. Press the Enter key.
5. Type Responses: and press the Enter key.
6. Type the first response option and press the Enter key. Continue to create your
list of responses and press the Enter key after each response option.
Composing a message - Creating a response list
7. Press the Enter key to insert a blank line after the last response.
Additional features 5
Page 6

8. Click the trackwheel to view the menu. Click Send. You return to the Messages
screen.
Refer to "Replying to a message containing a response list" on page 8 for more
information.
Note: You must type Responses: exactly as shown. Type each choice in your list of responses
on a separate line and leave a blank line at the end of your message.
Customizing the auto signature
You can specify an auto signature that is appended to all email messages that you
send from your handheld. The auto signature can include your name, company name,
contact information, or any other information that you want recipients to see at the
end of your messages.
Note: The auto signature does not appear on your handheld when you compose an email
message; it is appended to your message when you send it.
You can only use your handheld to specify an auto signature if you use the Interactive service.
To enable the auto signature
1. On the Home screen, click the Options icon. The Device Options screen appears.
2. Click User Profile. The User Profile screen appears.
3. In the Auto Signature Enabled field, press the Space key to set this field to Yes .
4. In the Auto Signature field, customize your auto signature.
5. Click the trackwheel to view the menu. Click Save Options.
User Profile screen - Enabling the auto signature
To disable the auto signature
1. On the Home screen, click the Options icon. The Device Options screen appears.
2. Click User Profile. The User Profile screen appears.
3. In the Auto Signature Enabled field, press the Space key to set this field to No.
4. Click the trackwheel to view the menu. Click Save Options.
6 Additional features
Page 7

Sending an auto reply message
You can configure your handheld to send an auto reply message whenever you
receive a message.
Note: The auto reply feature is only available if you are using the Interactive service.
To enable an auto reply message
1. On the Home screen, click the Options icon. The Device Options screen appears.
2. Click User Profile. The User Profile screen appears.
3. In the Auto Reply Enabled field, press the Space key to set this field to Ye s.
4. In the Auto Reply field, type the text that you want to set as your auto reply
message.
5. Click the trackwheel to view the menu. Click Save Options.
User Profile screen - Enabling an auto reply
Receiving and reading messages
You can set how much more of a message to receive, forward long messages to
another email address automatically, and respond to messages containing a response
list.
Receiving long messages
If you are using the Interactive service, the amount of additional data that is sent to
your handheld when you request more of a message depends on the amount set in the
MORE Segment Size field in your User Profile. Refer to "User Profile" on page 9 for
more information.
You can also choose to receive the rest of the message at once (up to the limit set in the
Forward Msgs Over field of your User Profile). In an open message, click the
trackwheel to view the menu. Click More (All).
Additional features 7
Page 8

Forwarding long messages
You can configure the handheld so that messages over a specific number of bytes are
forwarded to another email address. By default, the handheld is set to receive
complete messages of up to 16,000 bytes (approximately 16,000 characters).
Note: The auto forward feature is only available if you use the Interactive service.
To forward long messages
1. On the Home screen, click the Options icon. The Device Options screen appears.
2. Click User Profile. The User Profile screen appears.
3. In the Fwd Address field, type the email address to which you want to forward
messages that are larger than the size that you specify in the Fwd Messages Over
field.
4. In the Fwd Messages Over field, press the Space key until the preferred option
appears.
5. Click the trackwheel to view the menu. Click Save Options.
User Profile screen - Adding a forward address
Replying to a message containing a response list
Another handheld user can send you a message that contains a response list. You can
reply by choosing one of the responses.
To reply to a message containing a response list
1. On the Home screen, click the Messages icon. The Messages screen appears.
2. Open a message that contains a response list.
3. Click the trackwheel to view the menu. Click Reply (or Reply with Text). A
dialog box appears with a list of responses from which you can choose.
4. Click a response. A dialog box appears.
8 Additional features
Page 9

5. Add any additional comments and click the trackwheel. You return to the
Messages screen.
Note: If there is more than one recipient, you can send your response to the sender and all
recipients by selecting Reply To All or Reply To All With Text from the menu.
Using the Address Book
There are some additional fields in your Address Book for your RIM handheld with
Interactive Messaging PLUS Service or BlackBerry handheld with XpressMail Service.
Address Book fields
The following fields have been added or changed.
Interactive Handheld: Type your contact’s user name. A user name is a unique,
alphanumeric identification tag that is assigned to each subscriber.
1-way Pager: The Pager field is labeled 1-way Pager.
Customizing your handheld options
With the Interactive service, additional options have been added to the handheld.
Message Services
In addition to Email Service, any additional services to which you have access are
listed on this screen. New messages are sent to the selected message service.
Phone Service: Choose the default phone service to use for phone messages.
Fax Service: Choose the default fax service to use for fax messages.
Paging Service: Choose the default paging service to use for pager messages.
Handheld Service: Choose the default handheld service to use for interactive
messages.
User Profile
On the User Profile screen, you can configure how the handheld manages your
incoming messages.
Note: The features configured through the User Profile are only available if you use the
Interactive service.
Handheld Address: This field indicates the user name that is assigned to your
handheld. You cannot edit this field. When you make changes to the User Profile and
save them, the changes are sent to the gateway to which your handheld is assigned.
Additional features 9
Page 10

Depending on the gateway, you might receive a confirmation message indicating that
your User Profile is updated. If you receive this confirmation message, the Handheld
Address field does not contain a value. If you do not receive a confirmation message,
the gateway updates all the fields on your handheld, including the Handheld
Address field.
Gateway MAN: This field indicates system information. This information cannot be
edited.
CC Handheld on AutoFwd: Set whether you want to receive a notification copy of
messages that are sent to the address specified in the AutoFwd Address field. The
default is No.
AutoFwd Address: Type the email address or user name to which the service
automatically forwards your messages.
Fwd Address: Type the email address or user name to which you want to forward
messages that are larger than the size that you specify in the Fwd Messages Over
field. The default is 4000.
Forward Msgs Over: Set the size of messages that your handheld should
automatically forward to the address that you specify in the Fwd Address field.
Messages smaller than the size you specify are delivered to your handheld. The range
is 1000 to 16000 bytes in 1000 byte increments. The default is 16000.
MORE Segment Size: Set the maximum number of characters that should be sent to
your handheld when you request more of a long message. The range is 1000 to 16000
bytes in 1000 byte increments. The default is 2000.
Auto Reply Enabled: Set whether you want to send an automatic reply to the sender.
The default is No.
Auto Reply: Type the information that you want recipients to see whenever an
automatic reply is sent. With the Auto Reply enabled, an automatic reply is sent to
each sender, one time each day.
Auto Signature Enabled: Set whether every message that you send contains an
automatic signature. The default is No.
Auto Signature: Type the information that you want to include with every message
that you send.
10 Additional features
Page 11

Note: This document is provided for informational purposes only, and does not constitute a binding legal
document. RIM assumes no responsibility for any typographical, technical or other inaccuracies in this
document, and makes no warranties, express or implied, with respect to the content of this document. RIM
reserves the right to periodically change information that is contained in this document; however, RIM
makes no commitment to provide any such changes, updates, enhancements or other additions to this
document to you in a timely manner or at all. IN NO EVENT SHALL RIM BE LIABLE TO ANY PARTY
FOR ANY DIRECT, INDIRECT, SPECIAL OR CONSEQUENTIAL DAMAGES FOR ANY USE OF THIS
DOCUMENT, INCLUDING WITHOUT LIMITATION, RELIANCE ON THE INFORMATION
PRESENTED, LOST PROFITS OR BUSINESS INTERRUPTION, EVEN IF RIM WAS EXPRESSLY ADVISED
OF THE POSSIBILITY OF SUCH DAMAGES.
Any software that is provided with this document will be governed by the terms and conditions of the RIM
software license provided to you with your RIM wireless handheld, the RIM BlackBerry Enterprise Server
Software, or any upgrade to your desktop, handheld, or BlackBerry Enterprise Server Software, as
applicable, and, by using the software provided with this document, you agree to be bound by such terms.
Warning: This document is for the use of licensed users only. Any unauthorized copying, distribution or
disclosure of information is a violation of copyright laws. No reproduction in whole or in part of this
document may be made without express written consent of RIM.
© 2003 Research In Motion Limited. All rights reserved. The BlackBerry and RIM families of related marks,
images and symbols are the exclusive properties of Research In Motion Limited. RIM, Research In Motion,
'Always On, Always Connected', the “envelope in motion” symbol and the BlackBerry logo are registered
with the U.S. Patent and Trademark Office and may be pending or registered in other countries. All other
brands, product names, company names, trademarks and service marks are the properties of their
respective owners. The handheld and/or associated software are protected by copyright, international
treaties and various patents, including one or more of the following U.S. patents: 6,278,442; 6,271,605;
6,219,694; 6,075,470; 6,073,318; D,445,428; D,433,460; D,416,256. Other patents are registered or pending in
various countries around the world. Please visit www.rim.com/patents.shtml for a current listing of
applicable patents. Published in Canada.
Part No: PDF-03507-002
Additional features 11
 Loading...