

Bionime GM232B Users Manual
101-3GM232-001
EN(US)
Manufacturer:
BIONIME CORPORATION
No. 100, Sec. 2, Daqing St., South Dist.,
Taichung City 40242, Taiwan (R.O.C)
Made in Taiwan
USA Service Center: BIONIME USA CORPORATION
1450 E. Spruce Street, Bldg. #B,
Ontario, CA 91761, USA
Tel: 888-481-8485
www.gediabetes.com
Rightest blood glucose
monitoring system GM232B
User’s Manual
150x70mm


Thank you for selecting the Rightest Blood Glucose Monitoring System GM232B. This manual provides all the
information you need to operate this product for accurate test results. Please read this entire manual before you
start any testing.
For people living with diabetes, it is important to regularly monitor blood glucose levels to effectively reduce
complications from the disease. The easy-to-use Rightest Blood Glucose Monitoring System GM232B provides
accurate, reliable test results to help you better manage your diabetes.
The Rightest Blood Glucose Monitoring System GM232B is designed for in vitro diagnostic use only (for self-testing by
a single user outside the body). Testing requires only a small amount of fresh capillary whole blood from either the
fingertip, palm or forearm.
The Rightest Blood Glucose Monitoring System GM232B is manufactured and supported by Bionime Corporation. If
you have any questions or concerns, please contact the Bionime Customer Service toll free at 888-481-8485. We will
make every effort to assist you.
1
Preface
Copyright © 2014 Bionime Corporation. All Rights Reserved Worldwide

- Before using the Rightest Blood Glucose Monitoring System GM232B to test your blood glucose, please read all of
the instructions and conduct all of the tests including the quality control test (Refer to page 38).
- Please perform the quality control test regularly to make sure the test results are accurate.
- The Rightest Blood Glucose Meter can only be used with Rightest Blood Glucose Test Strips GM232B. Other brands’
test strips should not be used under any circumstances. The use of other brands’ strips may give inaccurate
results.
- The Rightest Blood Glucose Monitoring System GM232B is intended for in vitro diagnostic use only. The Rightest
Blood Glucose test results using fresh capillary whole blood samples from the fingertip, palm and forearm are
calibrated to be the equivalent to that of plasma testing.
- The Rightest Blood Glucose Monitoring System GM232B is intended for self-testing. It should not be used to screen
for or diagnose diabetes mellitus.
- If the Rightest Blood Glucose Meter GM232B and Test Strips are exposed to a substantial change in temperature,
please wait 45 minutes before measurement.
- Follow all environmental protection regulations when disposing of batteries.
- The Rightest Blood Glucose Meter GM232B will be set as mg/dL by default when sold in United States. If meter
display shows “mmol/L” during setting or test, please contact GE Diabetes Customer Support Center. Use of the
wrong unit of measurement may cause incorrect treatment.
The Blood Glucose Monitoring System GM232B is a personal blood glucose monitoring system to be used
for self-testing only. The glucose meter and lancing device are for single patient use. Do not use on multiple patients.
Do not share meter or lancing device with anyone including other family members.
A healthcare professional should be contacted when Customer Service is not available.
Please forward your warranty card to Bionime customer service.
Bionime customer service
1450 E. Spruce Street, Bldg. #B,
Ontario, CA 91761, USA
Rightest
Preface
3
2
Caution
Caution
5
4
Caution
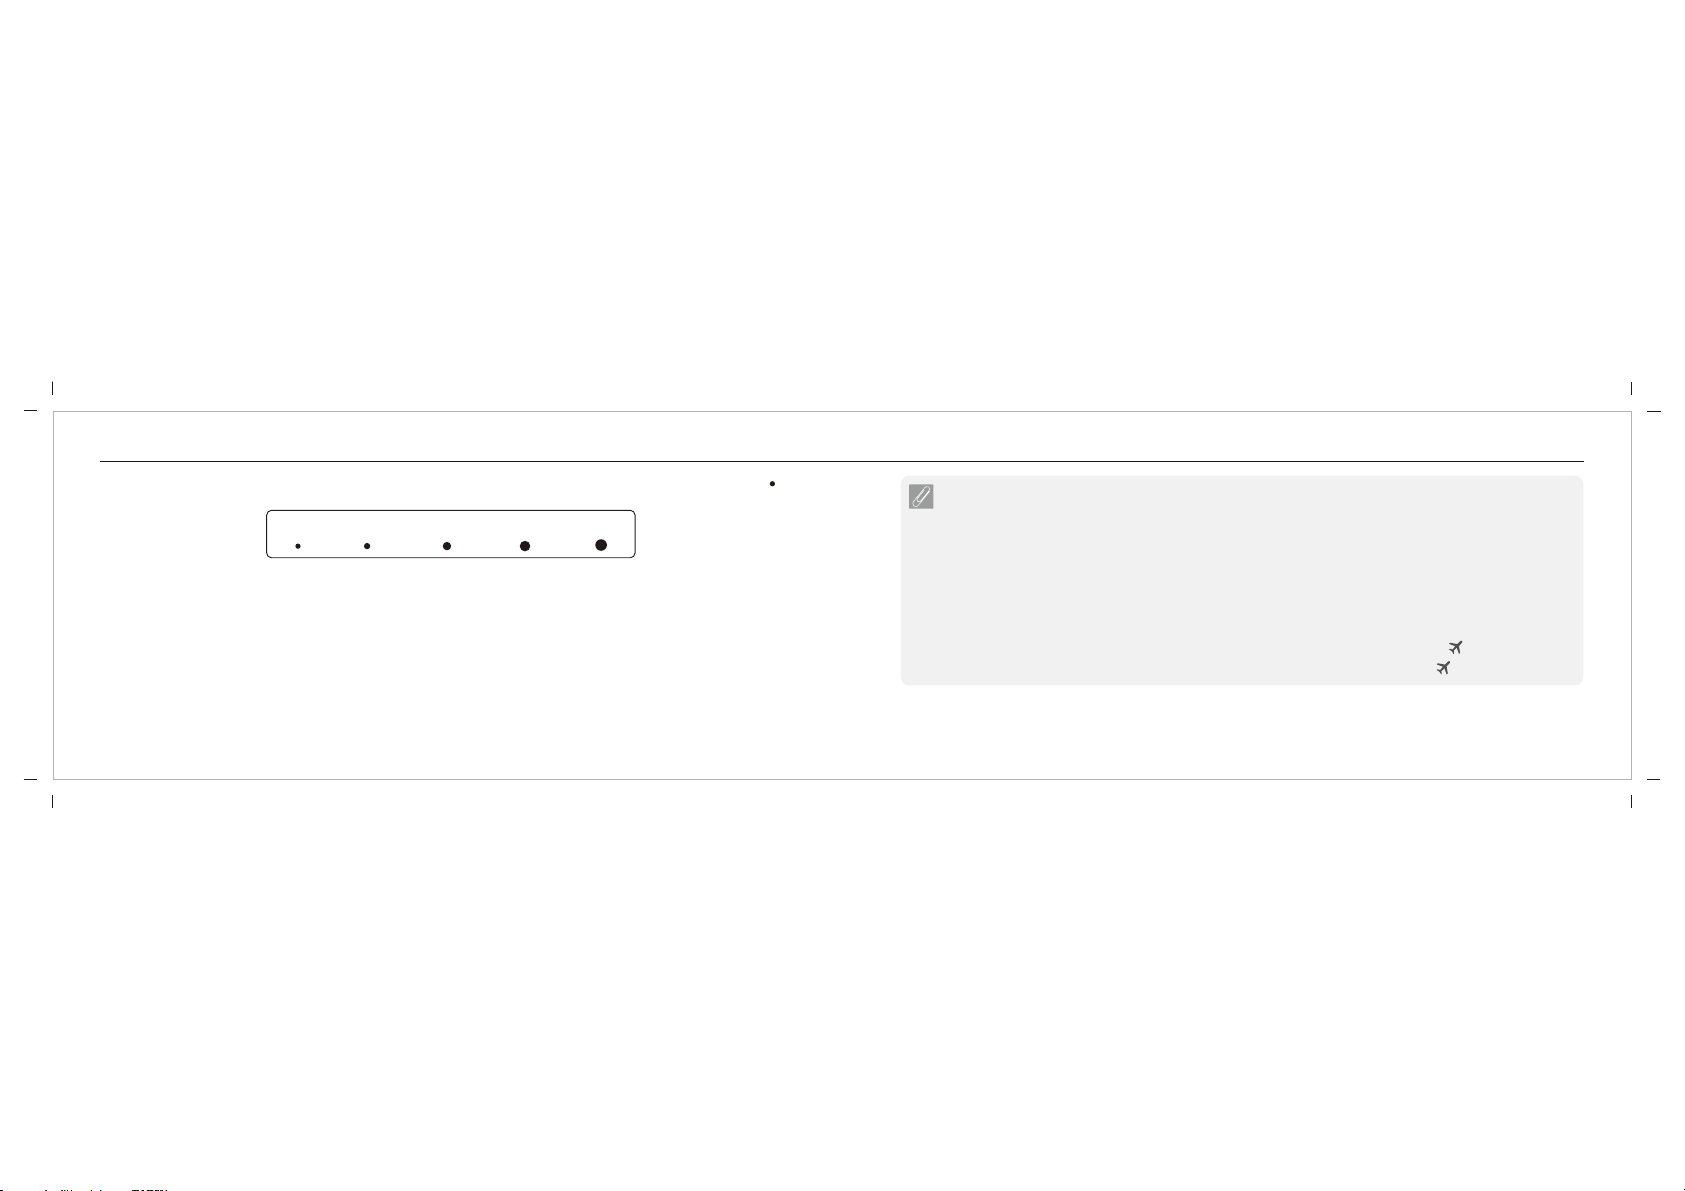
- The minimum blood sample size to test using theBlood Glucose Monitoring System GM232B is 0.75µL: ( ) Rightest
Blood sample size above 3.0µL might contaminate the test strip port and the meter.
Blood sample size below 0.75µL may cause an inaccurate result or may prevent a meter reading. An Er4 reading will
be displayed if the sample size is too small. In this case, repeat the test with a new test strip.
Sample Size Example
0.75µL 1.0 1.5µL 2.0µLµL 3.0µL
Important Safety Notes:
- TheBlood Glucose Meter GM232B and Lancing Device are for single patient use. Do not share
them with anyone including other family members.
- All parts of the kit are considered biohazardous and can potentially transmit infectious diseases, even
after following the cleaning and disinfecting procedures.
- Users should wash their hands thoroughly with soap and water before and after handling the meter,
lancing device, or test strips.
Rightest
Please refer to the section "Cleaning and
Disinfecting Procedures" on page 48.
- User should turn off meter or meter’s Bluetooth connection to keep it in flight mode “ ” while traveling
in flight. User can still perform blood glucose testing while meter is in flight mode “ ” .

Table of Contents
7
6
Table of Contents
About theBlood Glucose Monitoring System GM232B
The Blood Glucose Monitoring System GM232B...................................................
The Blood Glucose Meter GM232B...........................................................................................................
The Blood Glucose Test Strip GM232B...................................................................................................
Before Testing
Meter Activation and Battery Change.....................................................................................................................................
Setting Up Your Meter - Setting the Date, Time and Volume........................................................................................
Turning On/Off the Meter...............................................................................................................................................................
Turning On/Off the Bluetooth......................................................................................................................................................
Handling the GE006 Blood Glucose Test Strip........................................................................................................
Testing Procedure
Getting Ready for Testing..............................................................................................................................................................
Performing a Blood Glucose Test...........................................................................................................................................
Setting Markers...............
Alternative Site Testing...................................................................................................................................................................
View Window Appearance..........................................................................................................................................................
Understanding Test Results and Messages..........................................................................................................................
Rightest
Rightest ..........................................................................................
Rightest .............................................................
Rightest ..............................................................
................................................
................................................
................................................
................................................
.............................................................
................................................
...................................................
...................................................................................................................................................................................................................
................................................
.................................................
................................................
Quality Control
About Quality Control Testing......................................................................................................................................................................................................
Performing a Quality Control Test........................................................................................................................................
Understanding Control Test Results.....................................................................................................................................
Test Memory
Recalling Test Results.................................................................................................................................................................
Recalling Average Test Results...............................................................................................................................................
Caring for Your Meter.................................................................................................................................................................
Cleaning and Disinfecting Procedures...............................................................................................................................
Error Messages and Troubleshooting................................................................................................................................
Limitations...........................................................................................................................................................................................
Specifications....................................................................................................................................................................................
Warranty..............................................................................................................................................................................................
Customer Service............................................................................................................................................................................
Expected Blood Glucose Values Without Diabetes..........................................................................................................
Component Manufacturer Information.................................................................................................................................
Log Book.............................................................................................................................................................................................
Warranty Card..................................................................................................................................................................................
Emergency Card...............................................................................................................................................................................
.....................................................
.....................................................
.....................................................
.....................................................
.....................................................
.....................................................
......................................................
..................................................
Real Time Synchronize....................................................................................................................................................................................................................
FEDERAL COMMUNICATIONS COMMISION (FCC) STATEMENT........................................................................................................................................
..................................................
..................................................
..................................................
.................................................
.................................................
..................................................
..................................................
..................................................
8
10
14
16
18
22
23
24
26
27
32
33
35
36
38
41
43
44
46
47
48
52
56
57
59
61
63
64
65
66
67
83
85
9
8
The Rightest Blood Glucose Monitoring System GM232B
Contents
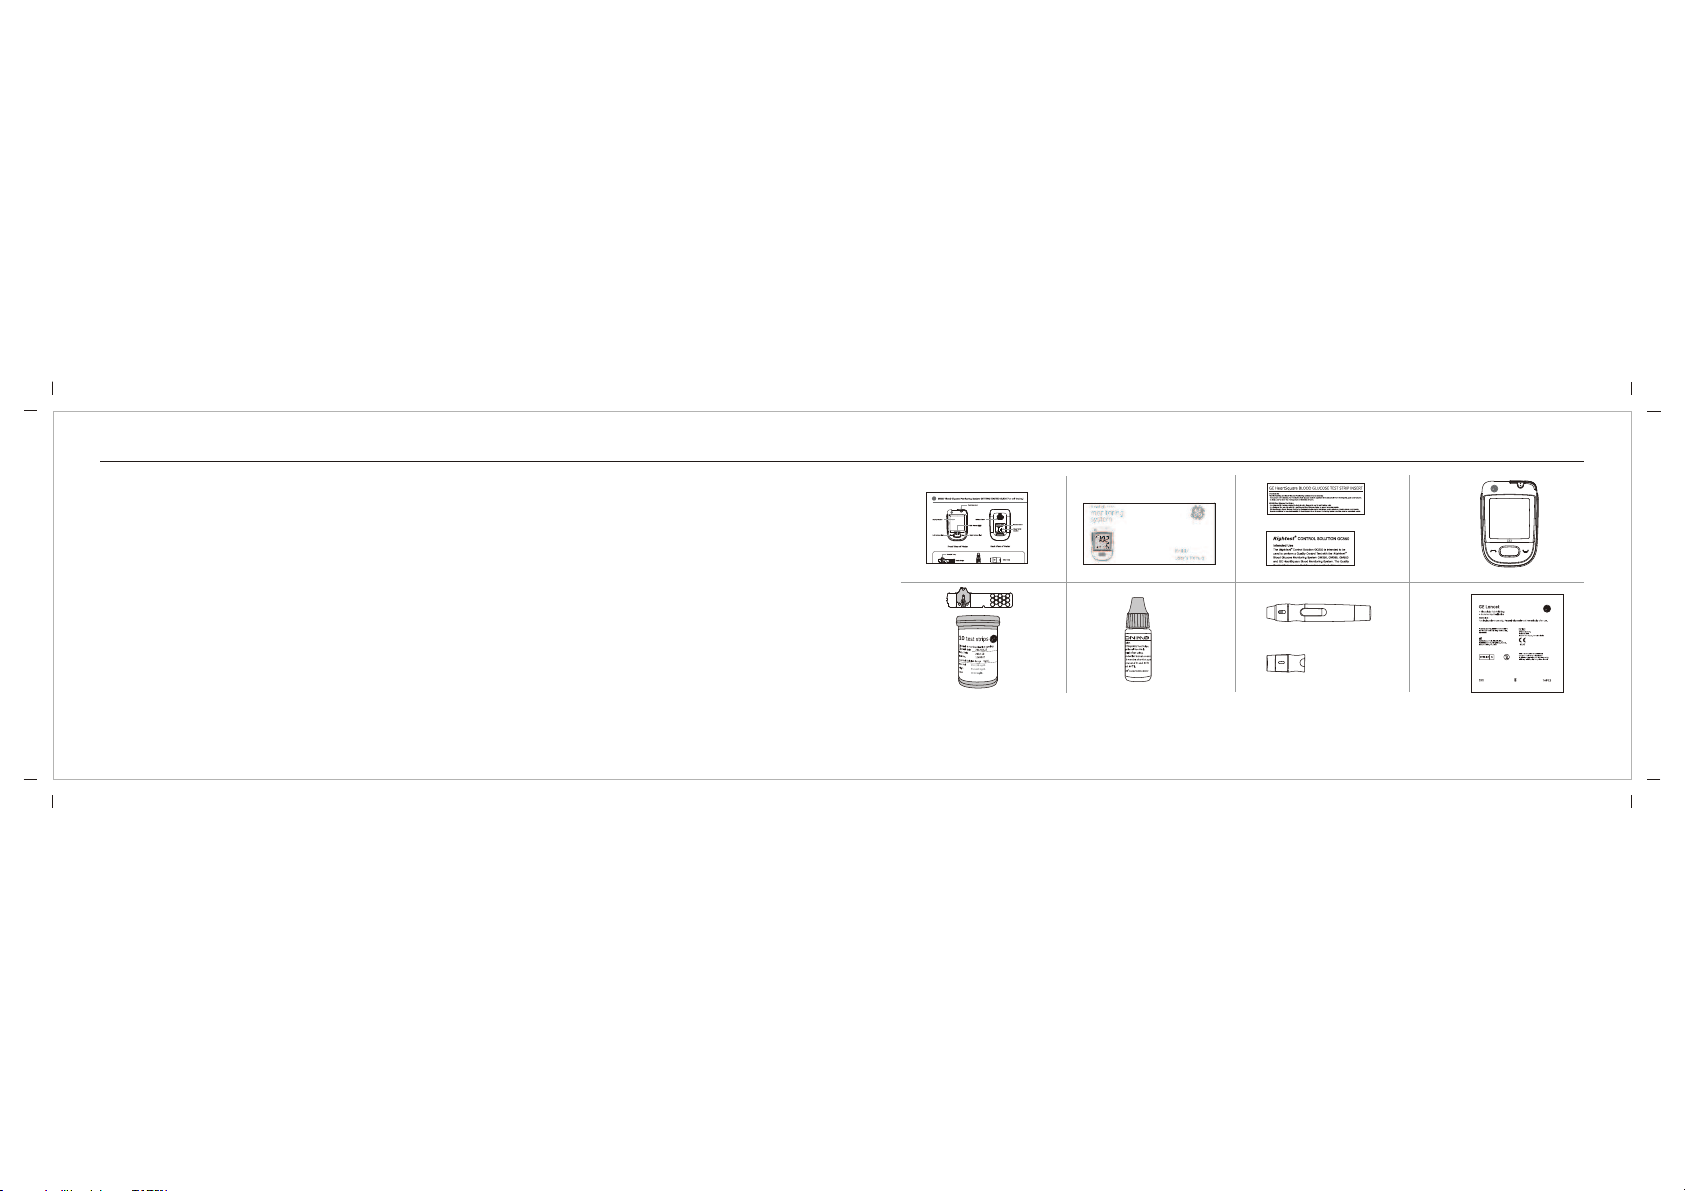
Your Rightest Blood Glucose Monitoring System GM232B consists of several items. Please identify each item, learn its
name and how it is used.
Below are the items included in your Blood Glucose Monitoring System GM232B:
1. Getting Started Guide
2. User's Manual (includes Log Book, Warranty Card, Emergency Card )
3. Blood Glucose Test Strip GM232B Package Insert *
4. Rightest Control Solution GC550 Package Insert *
5. Blood Glucose Meter GM232B ( with 2 AAA batteries installed )
6. Blood Glucose Test strips GM232B ( 10/25 pcs )*
7. *
8. Lancing Device *
9. Clear Cap *
10. Disposable Sterile Lancets ( 10 pcs ) *
11. Carrying Case ( not shown )*
12. Instruction for the lancing device ( not shown )*
(* Different packages have different bundled items. Some of packages might not include * items.)
Rightest
*
*
Rightest
Rightest Control Solution GC550
Rightest GD500
Rightest
Rightest
10*
53 *
2
6 *
1
4 *
7 *
8 *
9 *
If you want to purchase optional items, please contact Bionime customer service at 888-481-8485.
The Rightest Blood Glucose Monitoring System GM232B
11
10
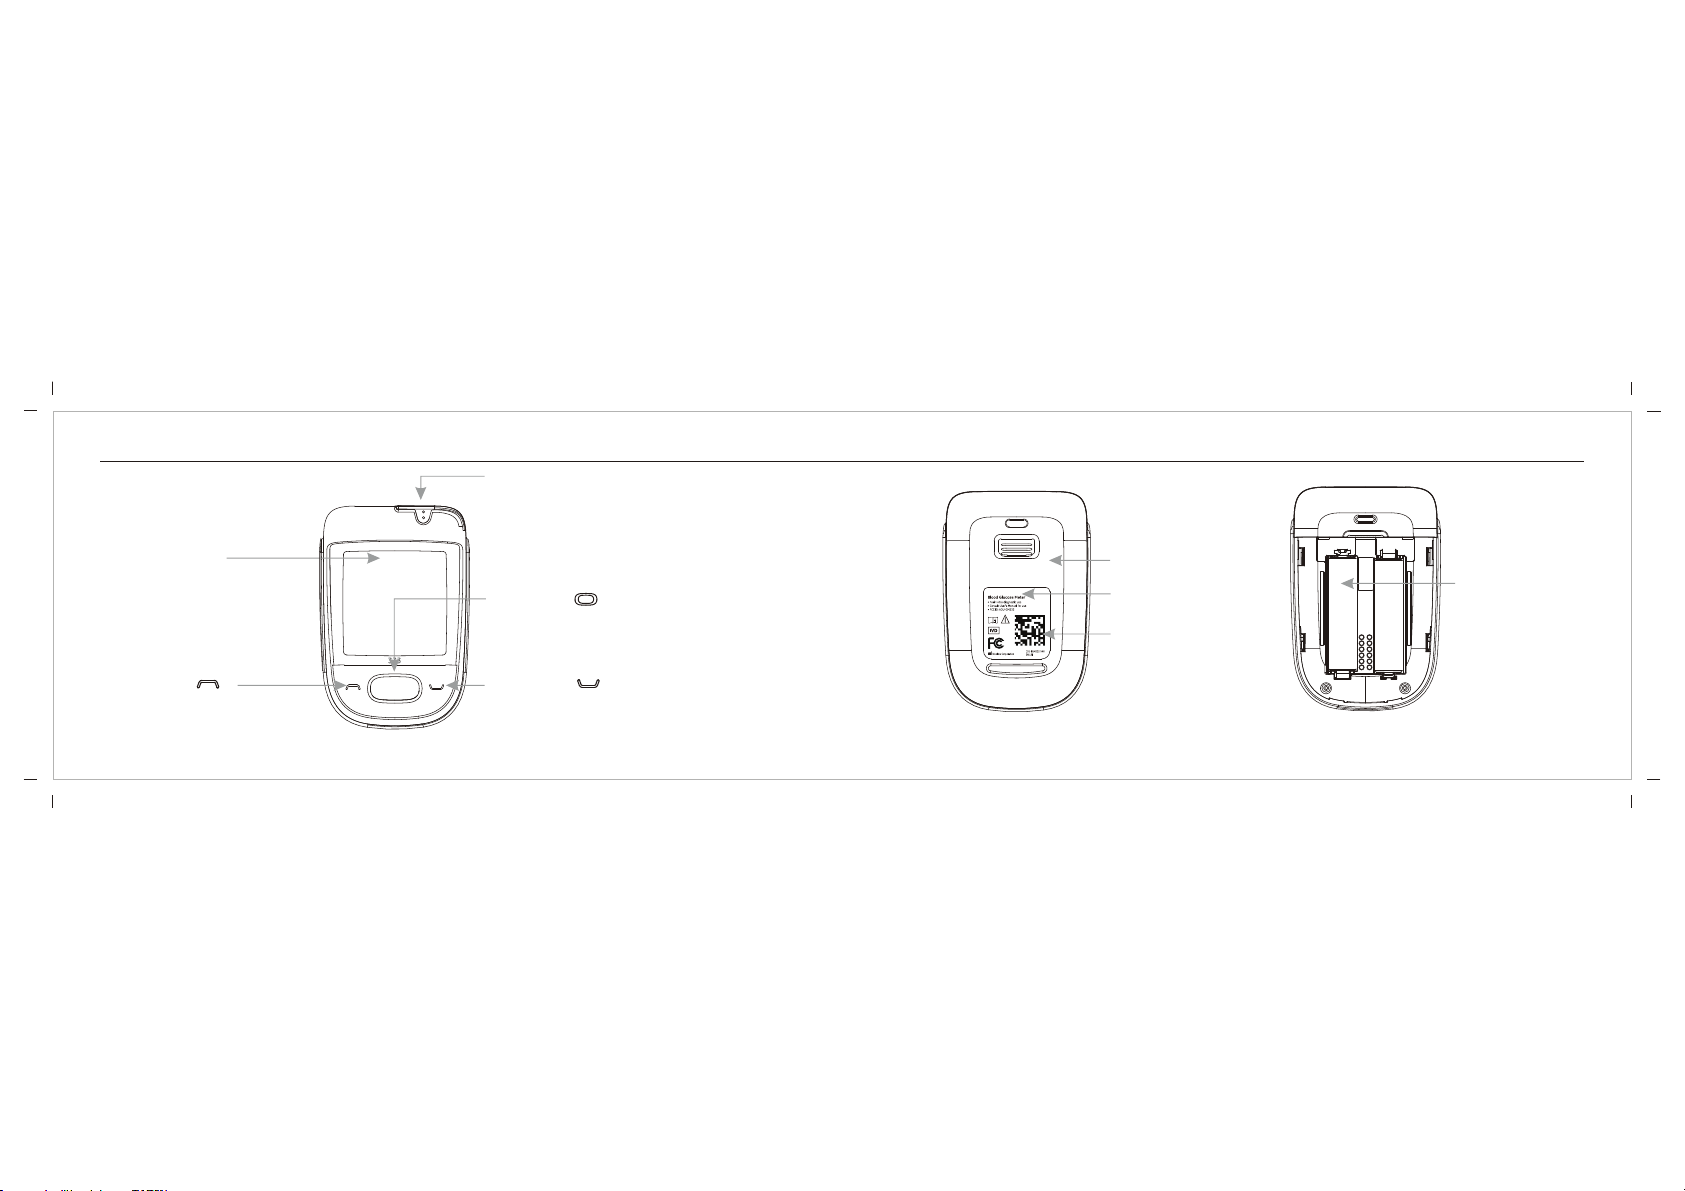
Left Button ( )
Main Button ( )
Display Window
Test Strip Port
Right Button ( )
Product name
Battery Cover
Meter Serial Number
Meter Battery
The Rightest Blood Glucose Meter GM232BThe Rightest Blood Glucose Meter GM232B
Rightest GM232B
13
12
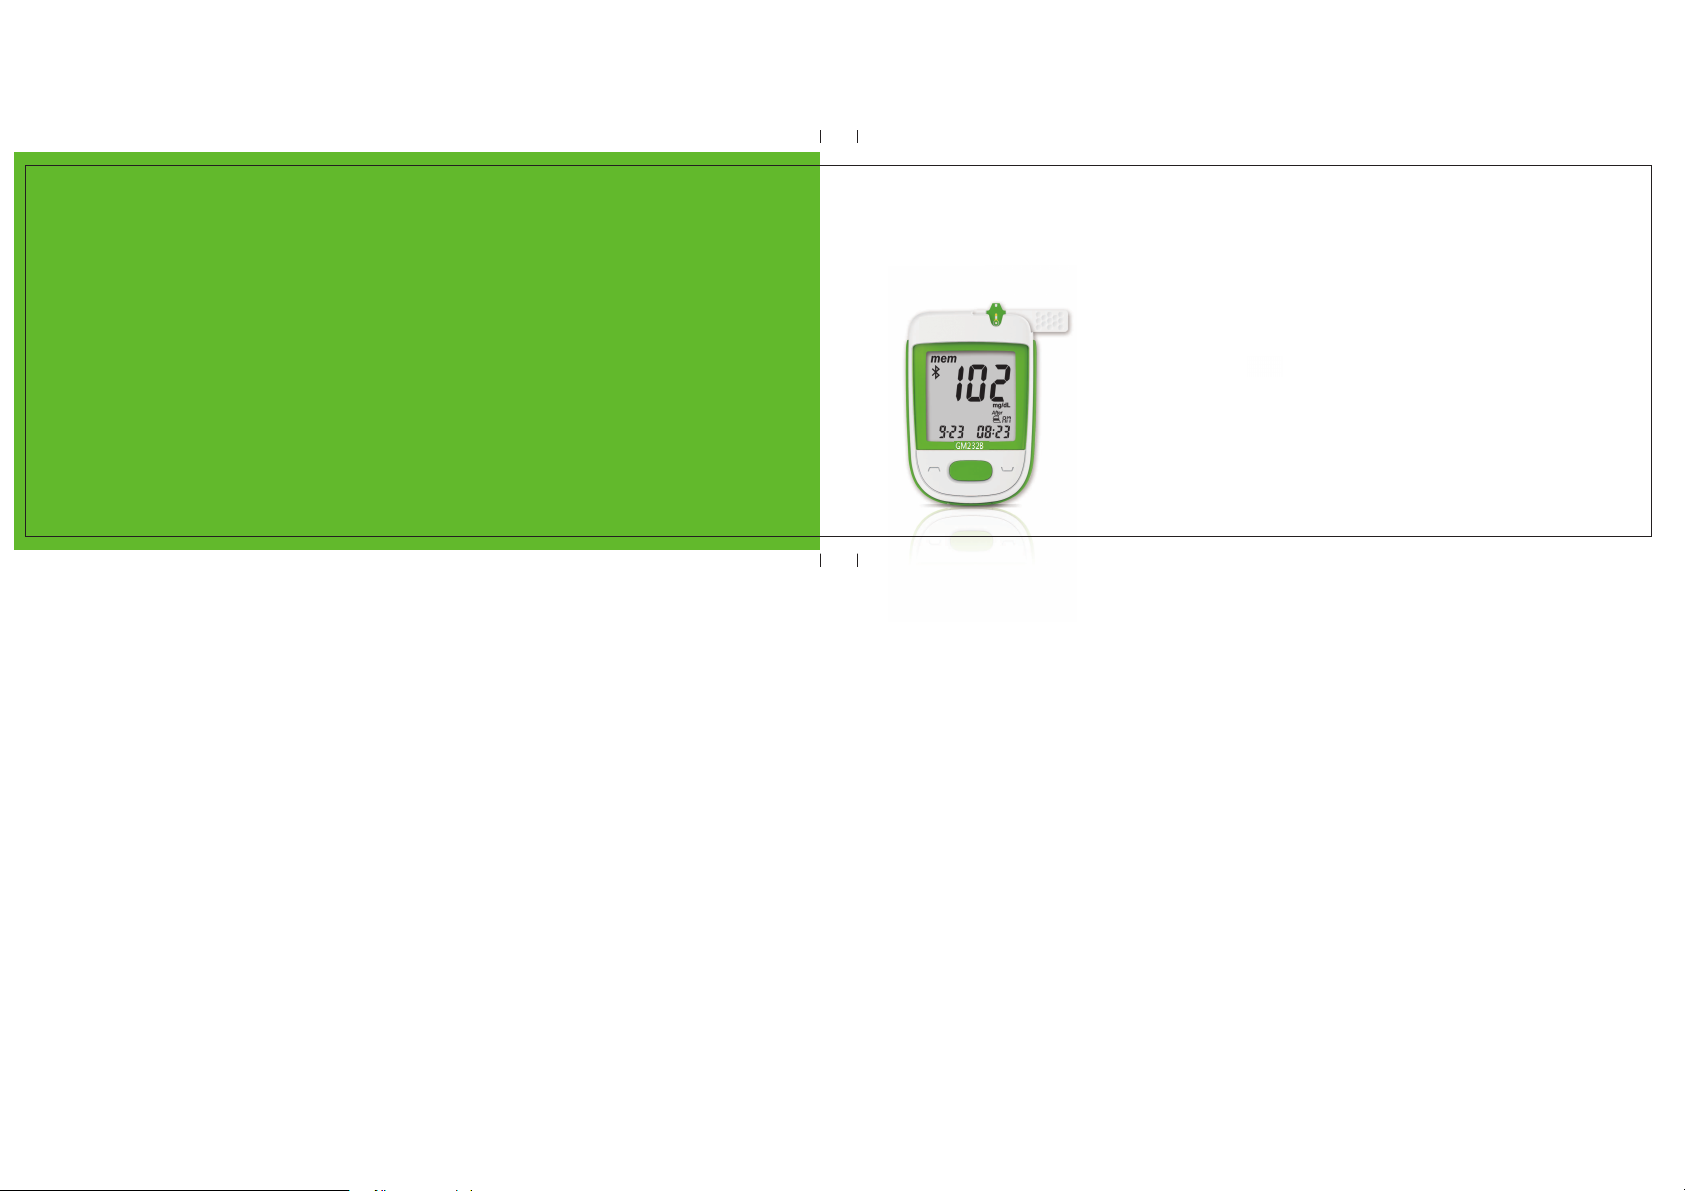
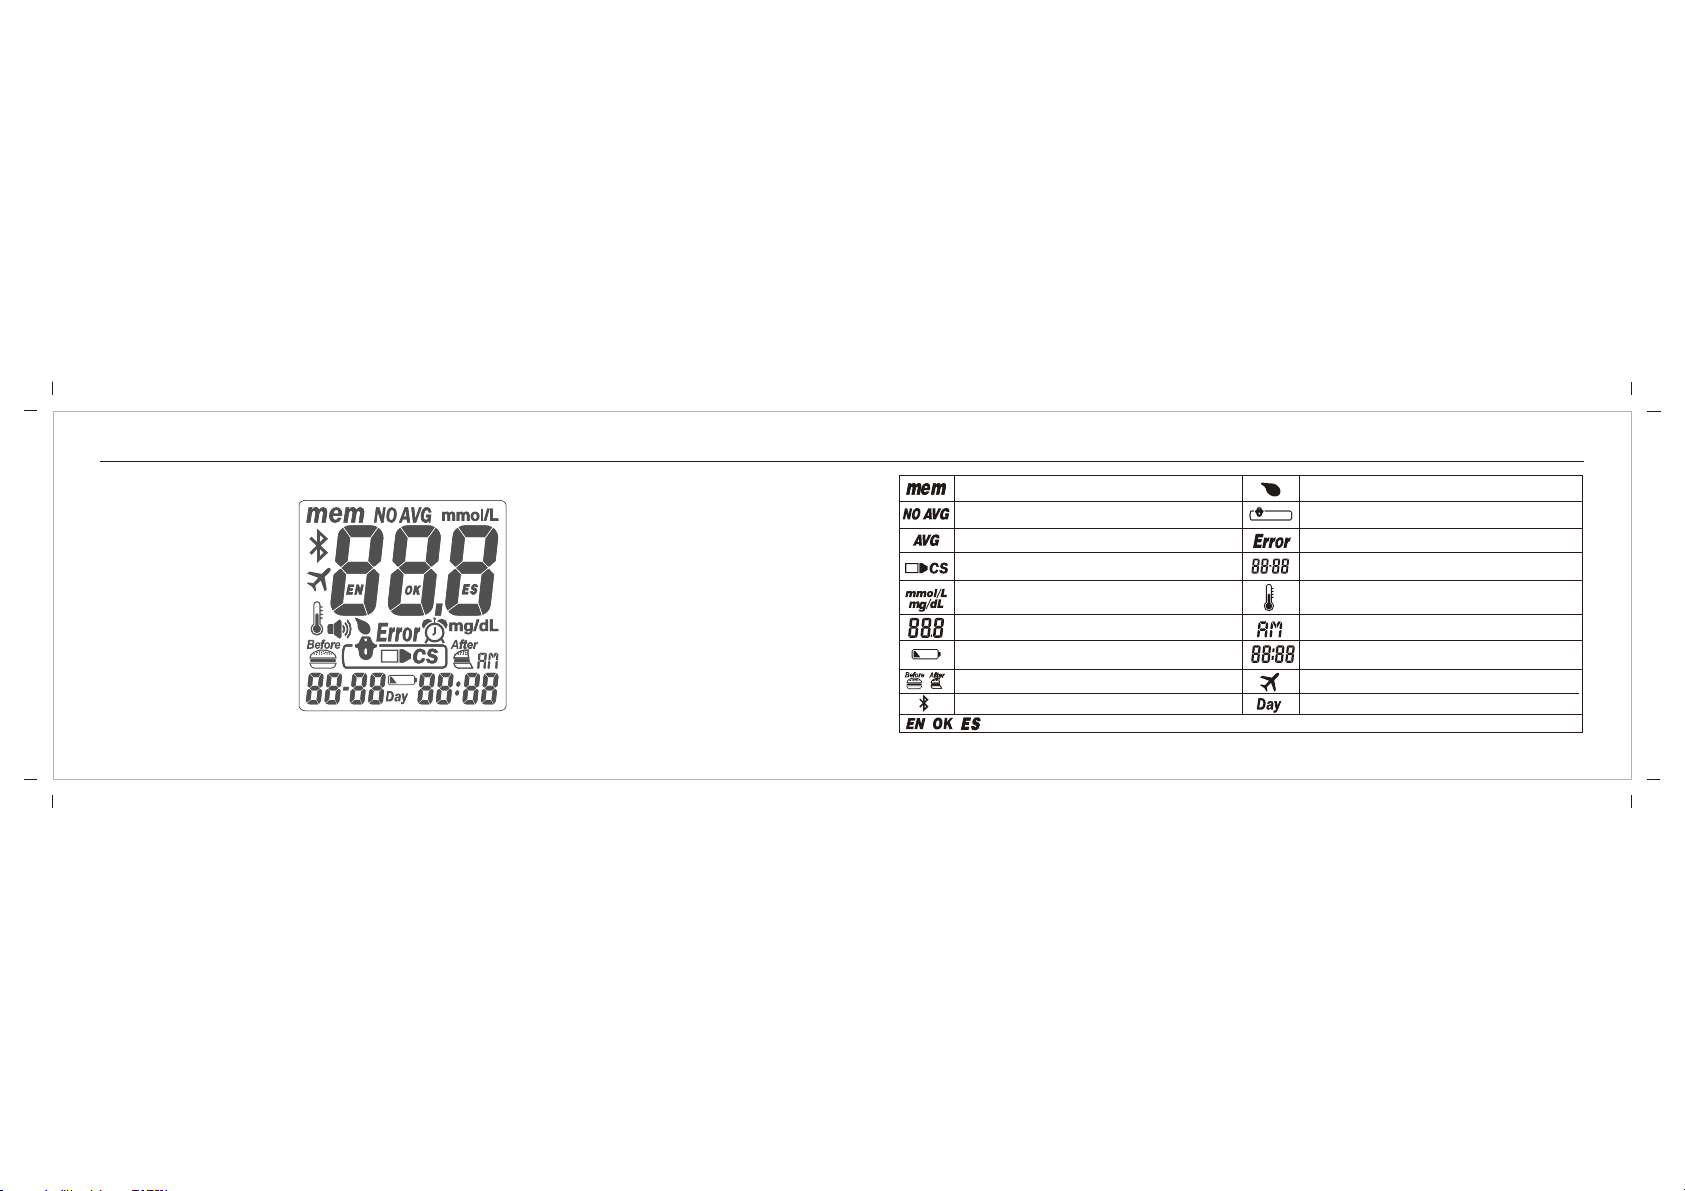
Indicates a test result stored in memory
Indicates a test result not included into the average result
of the meter
Indicates the average result
Indicates a control solution test result
Unit of test result
Test result
Warns when the batteries are low or must be replaced
Indicate when to apply the blood sample
Appears after you insert test strip into meter
Appears when an error occurs
Current date under time mode or testing date under
memory mode
Warns when the operational temperature limit is
exceeded during testing
Indicates the time in 12H format
Displays current time under time mode or testing time
under memory mode
Manufacturing use only
Indicates a meal marker with test result
Indicates that the Bluetooth is turned on
Indicates that the Bluetooth is turned off
Indicates the time period of test results
The Rightest Blood Glucose Meter GM232BThe Rightest Blood Glucose Meter GM232B
15
14
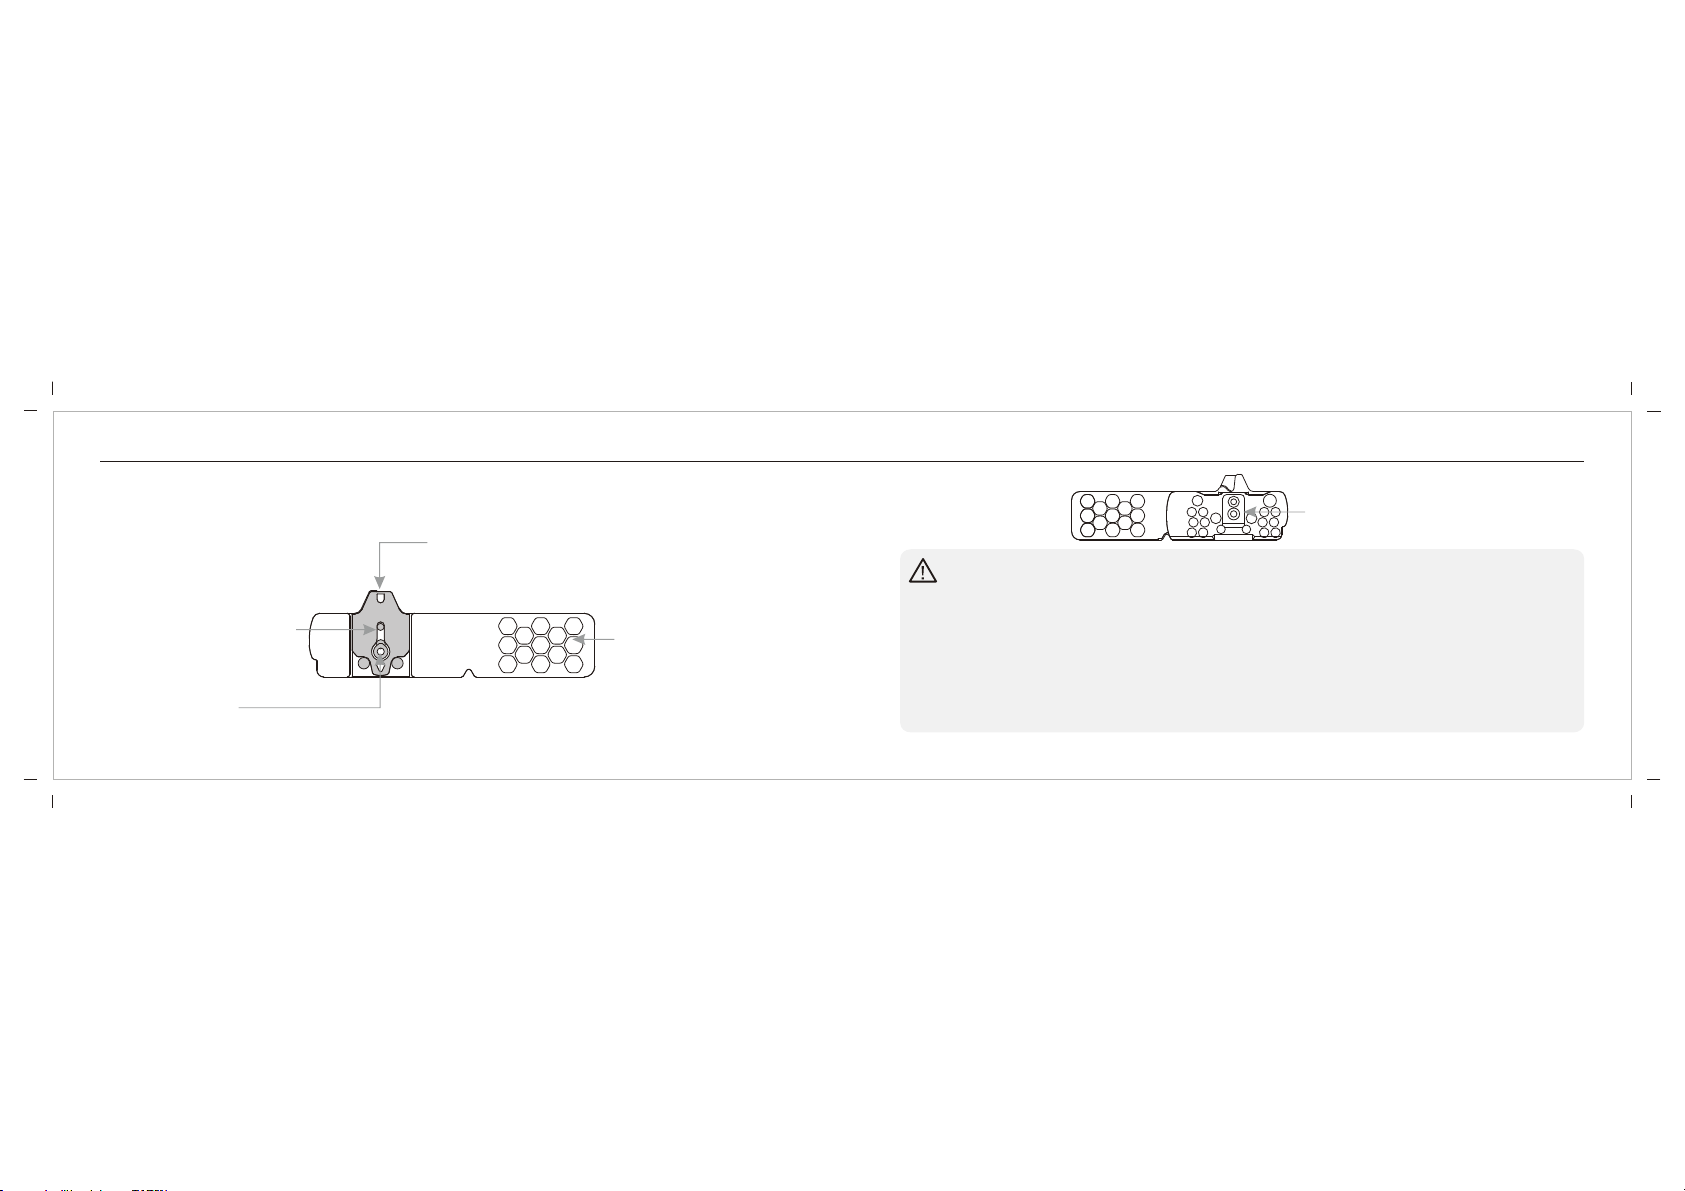
The Rightest Blood Glucose Meter GM232B can only be used withBlood Glucose Test Strips GM232B and
Rightest Control Solution GC550. The use of other test strips or control solutions can lead to incorrect results.
Rightest
Hold here to
insert test strip
into meter.
Sample Port
Apply blood/control solution here.
Noble Metal Electrodes
Electrochemical sensor
View WIndow
PRECAUTION
- Close the Rightest Blood Glucose Test Strip GM232B vial immediately after removing a test strip.
- Do not reus Blood Glucose Test Strips .
- Do not use expired Blood Glucose Test Strips .
- When you open a new vial of Blood Glucose Test Strips , record the date on the vial.
Discard the vial of test strips after 3 months from opening.
- Store the Blood Glucose Test Strip between 39-86°F ( or 4-30°C) and in a location (10-
90% relative humidity). Do not expose to direct sunlight or heat.
- If the Blood Glucose Meter and Test Strips are exposed to a substantial change in
temperature, please wait 45 minutes before measurement.
- For detailed information, please refer to the Blood Glucose Test Strip Package Insert.
e Rightest
Rightest
Rightest
Rightest
Rightest
GM232B
Rightest GM232B
GM232B
GM232B
GM232B
GM232B
Electrode Contacts
The Rightest Blood Glucose Test Strip GM232B
The Rightest Blood Glucose Test Strip GM232B
17
16
Meter Activation and Battery Change
Meter Activation and Battery Change
YourBlood Glucose Meter comes with two AAA, batteries installed. Two new batteries will provide
power to perform approximately 800 tests under normal use with one data transfer. Press the main button or insert a
strip to activate your meter.
Rightest GM232B
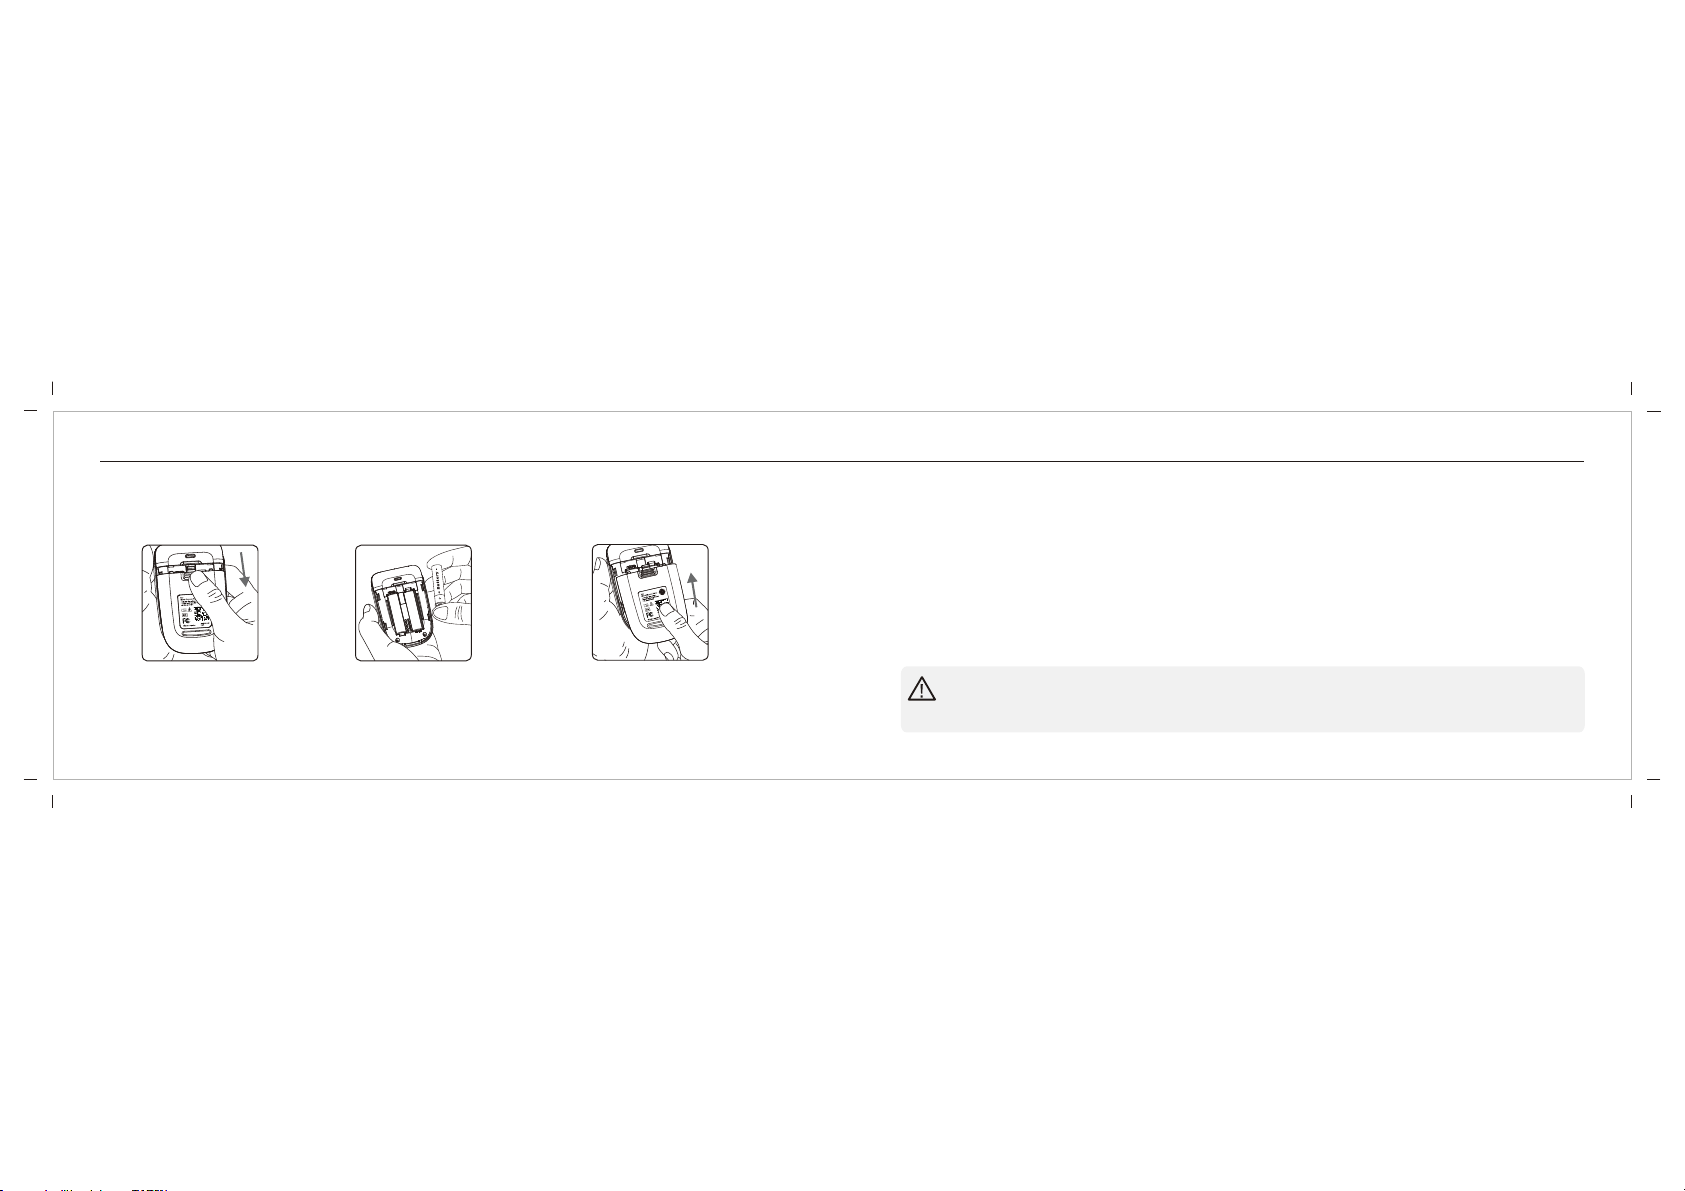
1. Turn the
over.
Press and slide the battery
cover to open.
Rightest Blood
Glucose Meter GM232B
CAUTION
- Please follow the local regulation to properly discard a used battery.
- Risk of explosion if battery is replaced by an incorrect type.
4. TheBlood Glucose Meter
5. Press any button to exit the self-test and enter Setting Mode.
Rightest
(all symbols will appear on the screen).
6. You must set the time and date when replacing the battery. See Chapter “Setting Up Your Meter - Setting the Date,
Time, and Volume" on page 18. Test results are still stored in the memory.
GM232B will enter Self-Testing Mode automatically when replacing the battery
3. Slide the battery cover back until
it snaps into place.
2. Install the batteries. Be sure to
put the batteries in the correct
direction.
19
18
Setting Up Your Meter - Setting the Date, Time and Volume
Setting Up Your Meter - Setting the Date, Time and Volume
2)
3)
1)
NOTE
- Use the Left and Right buttons to select your setting data and press the main button to confirm each
selection. After confirming all of the settings, you will return to the Time Mode.
You can enter the Setting Mode two ways.
1. Replace the Battery
2. With Battery Inserted
After removing the battery, press the main button several times until there is no signal on screen, then follow the
battery installation steps to replace battery. The Rightest Blood Glucose Meter will perform a self-test.
Press the main button to exit the self-test and enter the Setting Mode.
Press the main button to turn on the Rightest Blood Glucose Meter . Hold down the main button for 7
seconds. During this time the screen will go blank until you hear a beep. After the beep, the meter will turn on into
the Setting Mode. The display screen will show setting data.
GM232B
GM232B
1. Year setting
, press the Left or Right button until you see the current year. Press
the Main button to confirm.
2. Month setting
With the month blinking, press the Left or Right button until you see the current month. Press
the Main button to confirm.
With the year format blinking
Once the year is confirmed, the Month Setting will appear.
Once the month is confirmed, the Day Setting will appear.
Once the day is confirmed, the Time Setting will appear.
3. Day setting
With the day blinking, press the Left or Right button until you see the current day. Press the
Main button to confirm.
21
20
Setting Up Your Meter - Setting the Date, Time and Volume
Setting Up Your Meter - Setting the Date, Time and Volume
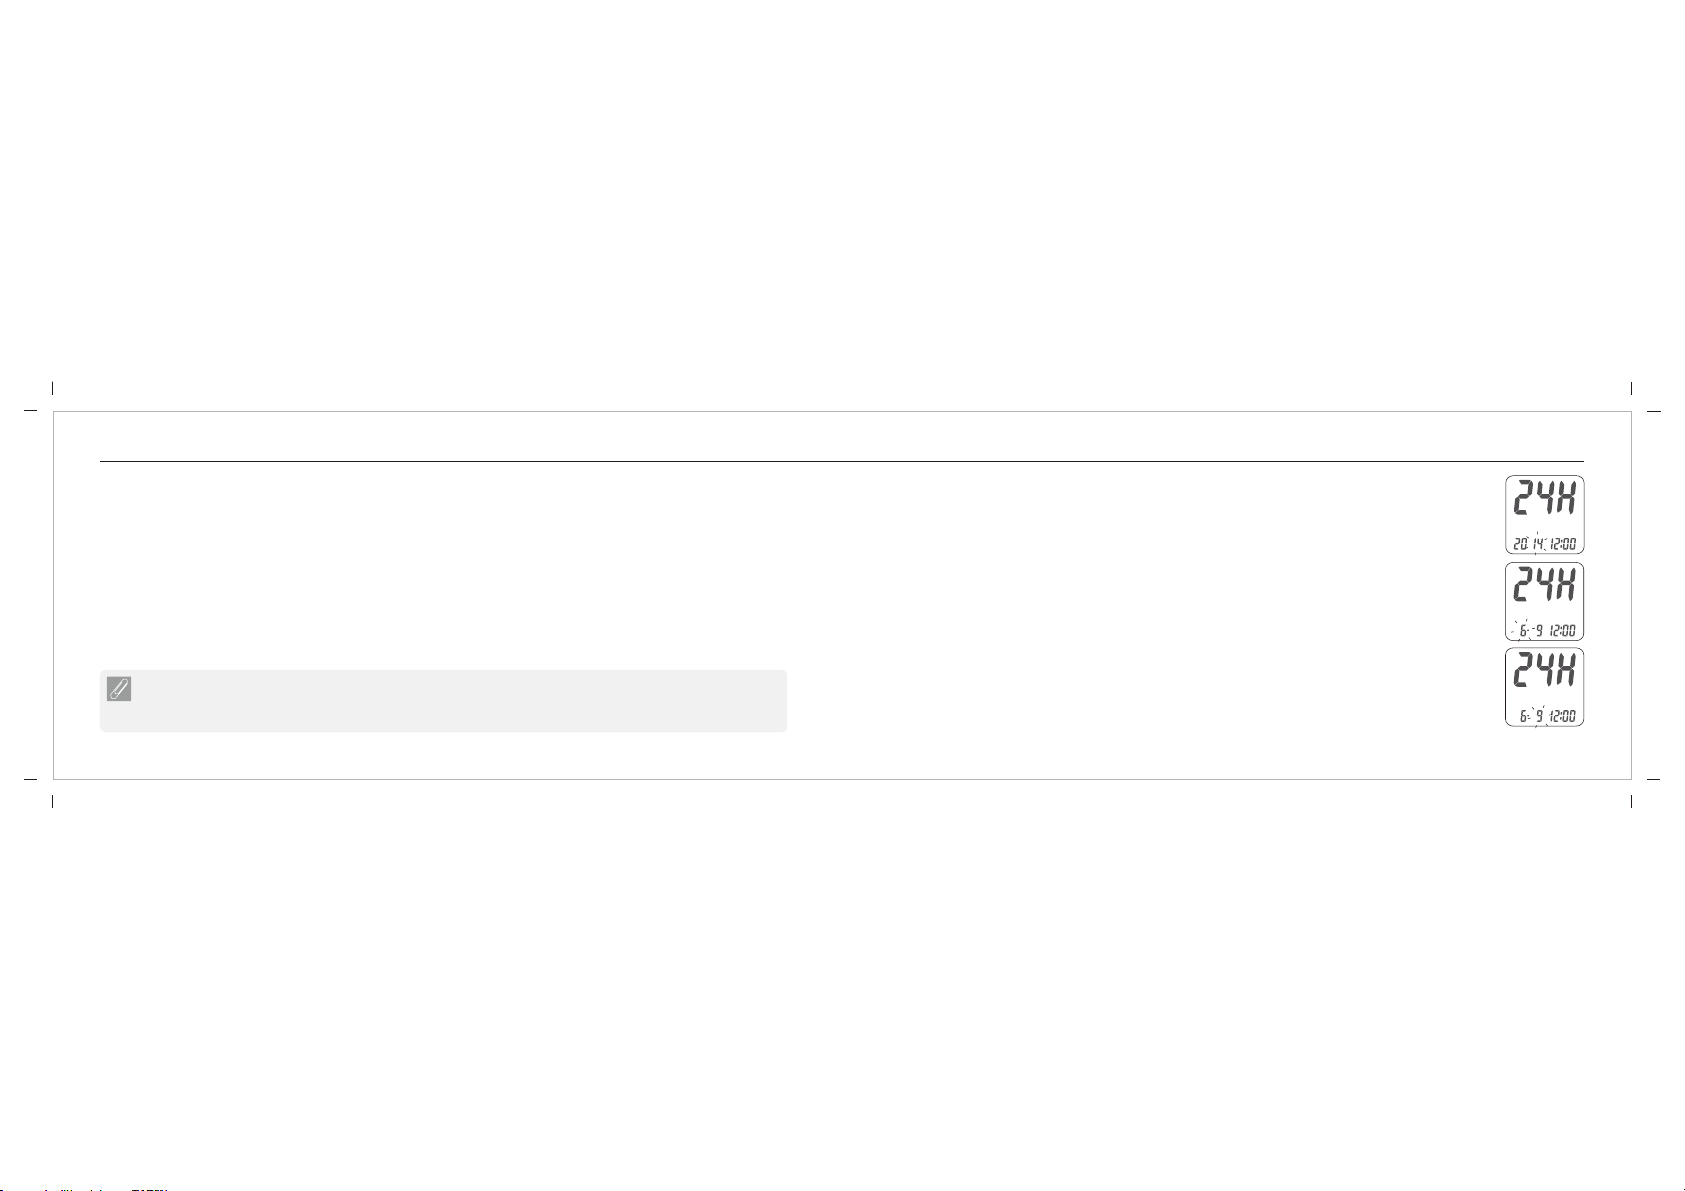
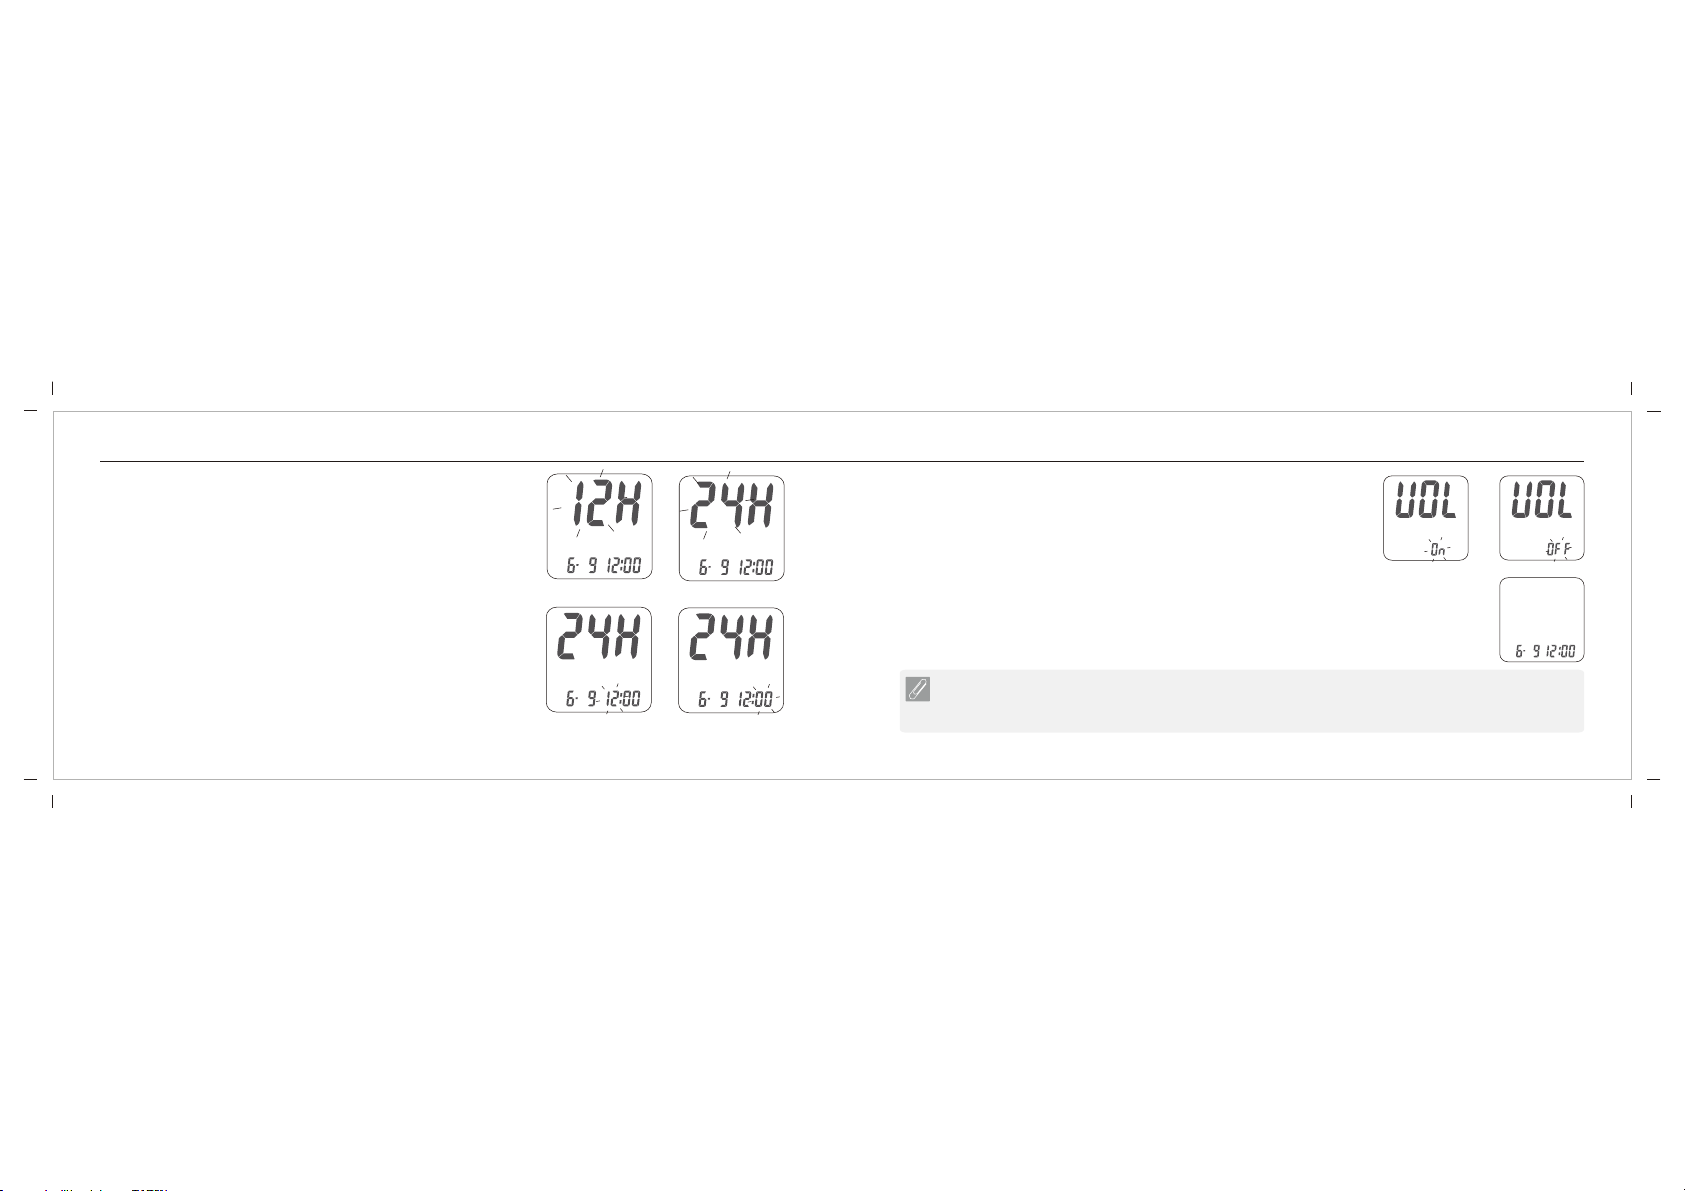
4. Time format 12/24H selection
With the time format blinking, press the Left or Right button to switch
between 12H and 24H. Press the Main button to confirm.
5. Hour setting
With the hour blinking, press the Left or Right button until you see the
current hour. Press the Main button to confirm.
6. Minute setting
With the minutes blinking, press the Left or Right button until you see
the current minute. Press the Main button to confirm.
Once
confirmed, the Hour Setting will appear.
Once the hour is
confirmed, the Minute Setting will appear.
Once the minute
is confirmed, the Volume Setting will appear.
5)
6)
4a)
4b)
NOTE
- If you do not change any settings during Meter Set-up for over 2 minutes, the Blood Glucose Meter
will leave setting mode and power off automatically.
Rightest
GM232B
7a)
7b)
7. Volume Setting
With the volume blinking, press the Left or Right button to turn the volume
on or off. Press the Main button to confirm and finish the settings.
8. Ending Setting
After volume setting, for confirmation you will hear a beep (if volume is
turned on). All the settings are saved and completed and will return to
time screen.
8)
23
22
Turning On / Off the Meter
Turning On/Off the Bluetooth
1. How to turn on the Rightest Blood Glucose Meter
Press the Main button or Insert a test strip.
2. Manual Power off
To power off the Rightest Blood Glucose Meter , press and hold the Main button for 4 seconds.
3. Auto Power off
GM232B
GM232B
GM232B The Blood Glucose Meter will power off automatically after 2 minutes if no buttons are pressed
or no strip is inserted.
Rightest
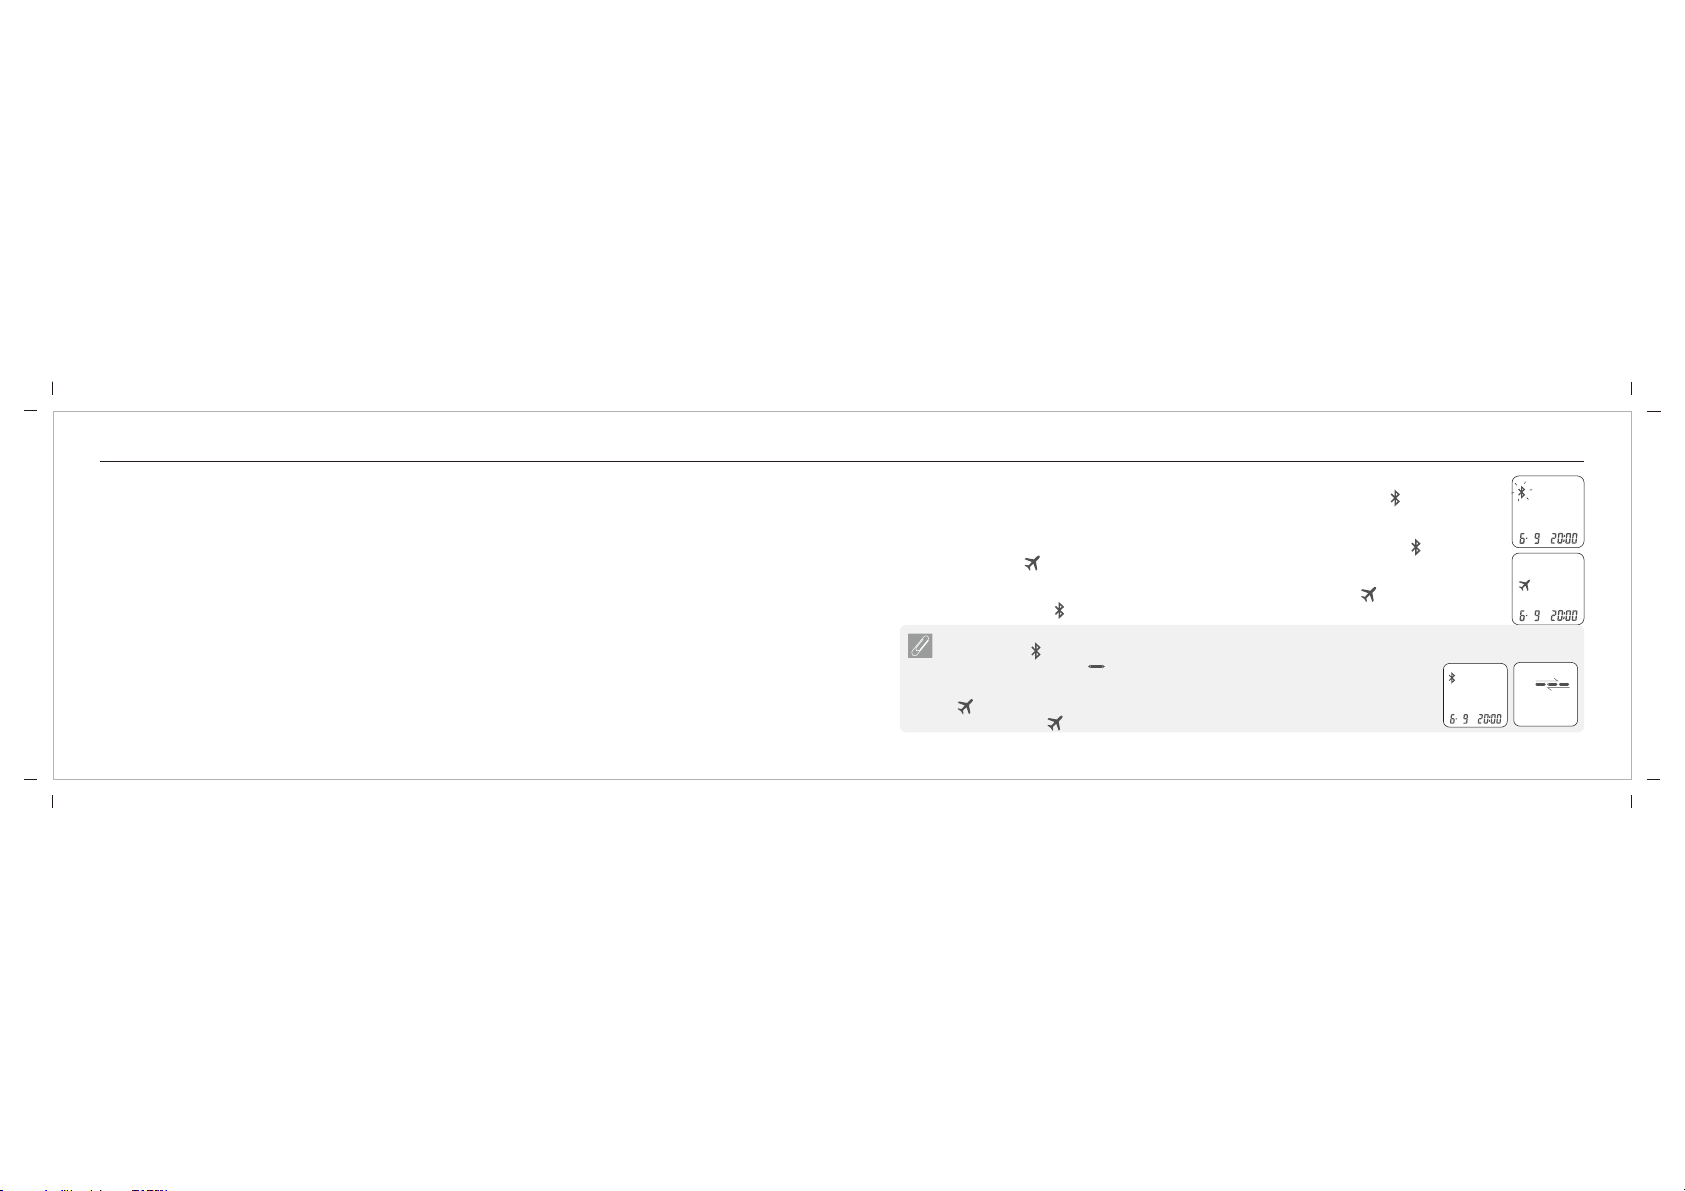
1. Auto turn on the Bluetooth
After leaving the Setting mode, the Bluetooth will turn on automatically and the symbol
blinks on the screen.
2. Turn off the Bluetooth
In Time mode, press and hold the Right or Left button for two seconds. The blinking symbol
will switch to the “ “ symbol with a beep (If Volume is turned on).
3. Manual turn on the Bluetooth
In Time mode, press and hold the Right or Left button for two seconds. The “ “ symbol will
switch to the blinking “ “ symbol with a beep (If Volume is turned on).
“ “
“ “
NOTE
1.The blinking symbol should turn to steady immediately when the Bluetooth connection is established.
2. Blinking back and forth “ “ symbol on the screen means the meter is transferring
data.
“ “
3. User should turn off meter or meter’s Bluetooth connection to keep it in flight mode
“ ” while traveling in flight. User can still perform blood glucose testing while meter
is in flight mode “ ” .
1)
2)
1
2
 Loading...