

Binatone MR150 User Manual
CALL button
- Press to send a
ringing tone to other
PMR units.
PTT (PUSH to
TALK) button
- Press and hold
to transmit.
MR150
USER GUIDE
Private mobile radio
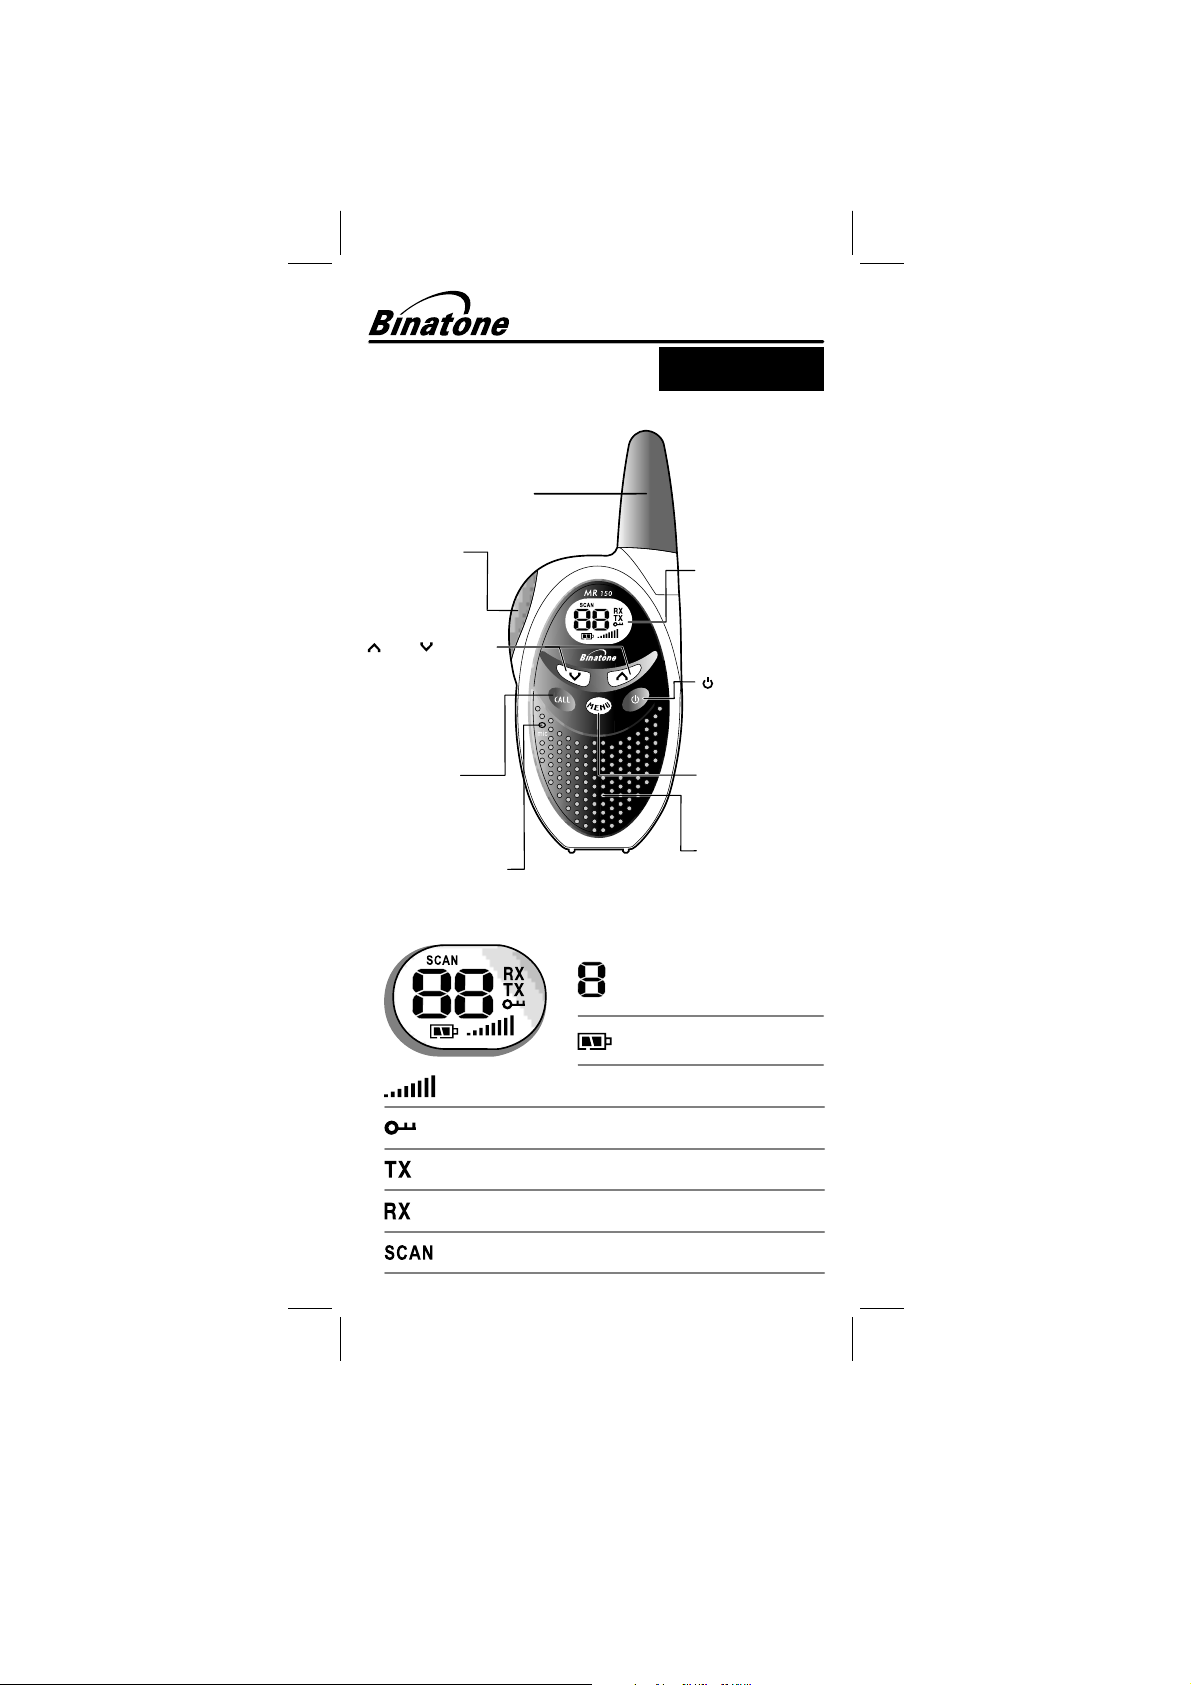
1. LCD Screen
Channel Number. Changes
from 1 to 8 as selected by the
user.
Displays the current Battery
charge level.
Antenna
LCD Screen
-Displays the
current channel
selection and other
radio symbols.
MENU Button
-Press to program
the PMR settings.
(UP)/ (DOWN)
buttons - Press to
change channels,
volume, and to
select settings
during programming.
(Power) button
- Press and hold to
turn the PMR unit
ON or OFF.
Mic (Microphone)
Speaker
Displayed when the Key Lock feature is activated.
Displays the current Speaker volume level.
Blinks when the Scan feature is turned ON.
Displayed when transmitting a signal.
Displayed when receiving a signal.
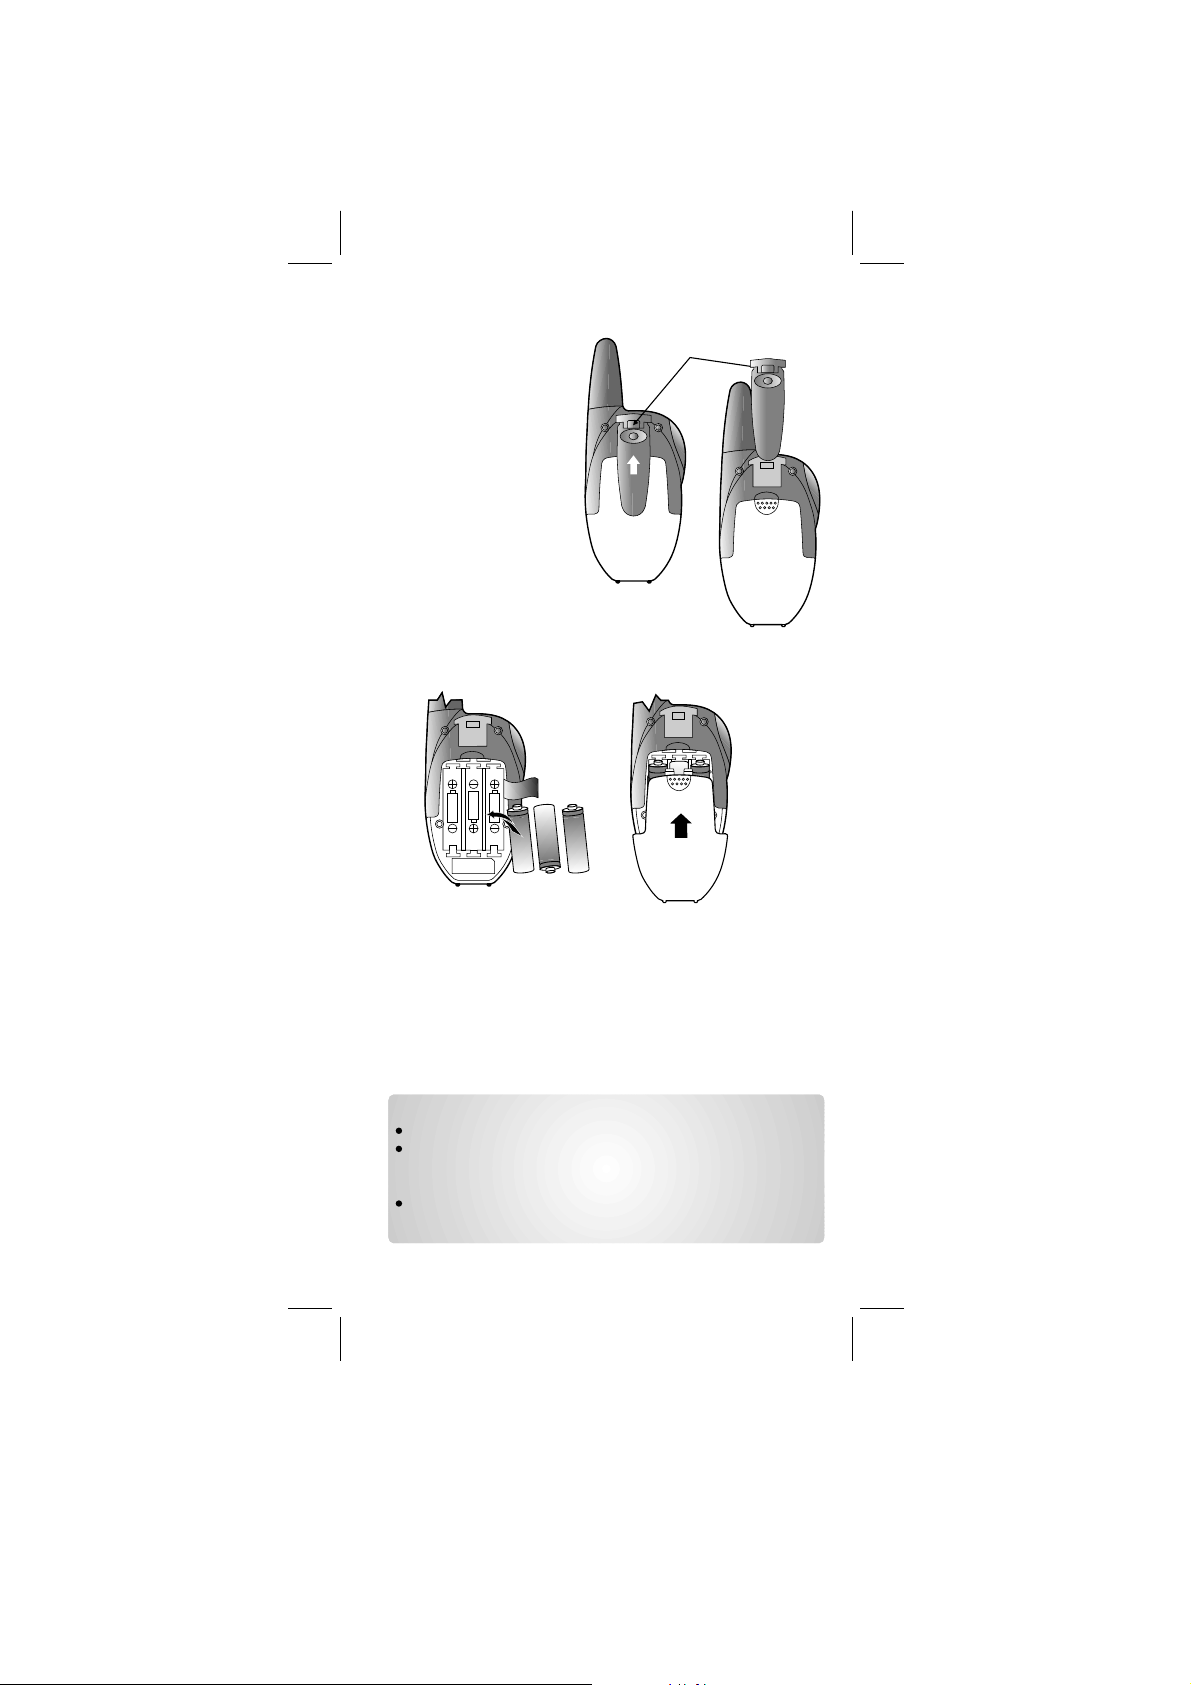
2. Installation
2.1 Removing the Belt Clip
a. Pull the Belt Clip Latch
away from the PMR.
b. While pulling the Belt
Clip Latch, push up
the Belt Clip as
shown in Figure 1.
Figure 1
Figure 2
Belt clip
latch
2.2 Installing the Belt
Clip
a. Slide the Belt Clip into
the slot as shown in
Figure 2.
b. A “click” indicates the
Belt Clip is locked into
position.
a. Slide down the Battery Compartment Cover.
b. Insert 3 “AAA” size batteries (not included) by following the
polarity marking inside the Battery Compartment as shown in
Figure 3.
c. Replace the Battery Compartment Cover. See Figure 4.
Figure 3
Figure 4
Notes:
Use only same type and make of batteries on the PMR units.
The PMR units have a built-in Power Saver (PS) for maximum
battery life, but when not in use, turn the units OFF to
conserve battery power.
Remove the batteries if the units will not be used for a long
period of time.
2.3 Installing the Batteries
Caution: Observe the proper battery polarity orientation when
installing batteries. Incorrect positioning can damage both the
batteries and the unit.
Binatone Help Line - 0845 345 9677
AAA
AAA
AAA
AAA
AAA
AAA

3. Operation
3.1 Turning the Unit ON/OFF
3.2 Adjusting the Speaker volume
There are 8 volume levels, the current speaker volume
level is displayed on the LCD Screen.
To adjust the speaker volume level, press the (UP)
button to increase, or press the (DOWN) button to
decrease. The LCD Screen will display the speaker volume
icon bars ascending, or descending respectively.
3.3 Receiving a Call
The unit is continuously in Receive mode when the
unit is turned ON and not transmitting. When a signal is
received on the current channel, the receive signal icon
“RX” will be displayed on the LCD Screen.
3.4 Transmitting (sending)
Press and hold the PTT (Push to Talk) button to transmit
your voice. The transmit signal icon “TX” will display on
the LCD Screen.
Hold the unit in a vertical position with the Mic
(Microphone) 5 cm away from the mouth. While holding
the PTT button, speak into the mic (microphone) in a
normal tone of voice.
Release the PTT button when you have finished
transmitting.
To Turn ON;
a. Press and hold the (Power) button. A special “beep"
sound will be heard. The LCD Screen will be illuminated by
an orange light for several seconds, and will display the
current channel.
To switch OFF;
b. Press and hold the (Power) button. A special “beep"
sound will be heard and the LCD Screen will turn blank.
a.
b.
c.
Important:
In order for other people to receive your transmission, they must
also be on the same channel that you are currently using. Refer
to the "Changing Channel" section for more information.
When the PTT and/or CALL buttons are continuously pressed,
your PMR cannot receive any transmissions.
3.5 Roger Beep
The Roger Beep is a tone which is automatically transmitted
whenever the PTT button is released. This alerts the
receiving party that you have ended the transmission, and
you are now in receive mode.
3.6 Changing Channels
The PMR has 8 available channels. To change channels, in
normal mode;
a. Press the MENU button, the Channel icon “ ” on the LCD
Screen will start blinking.
 Loading...